Easy Wallpaper Print Art
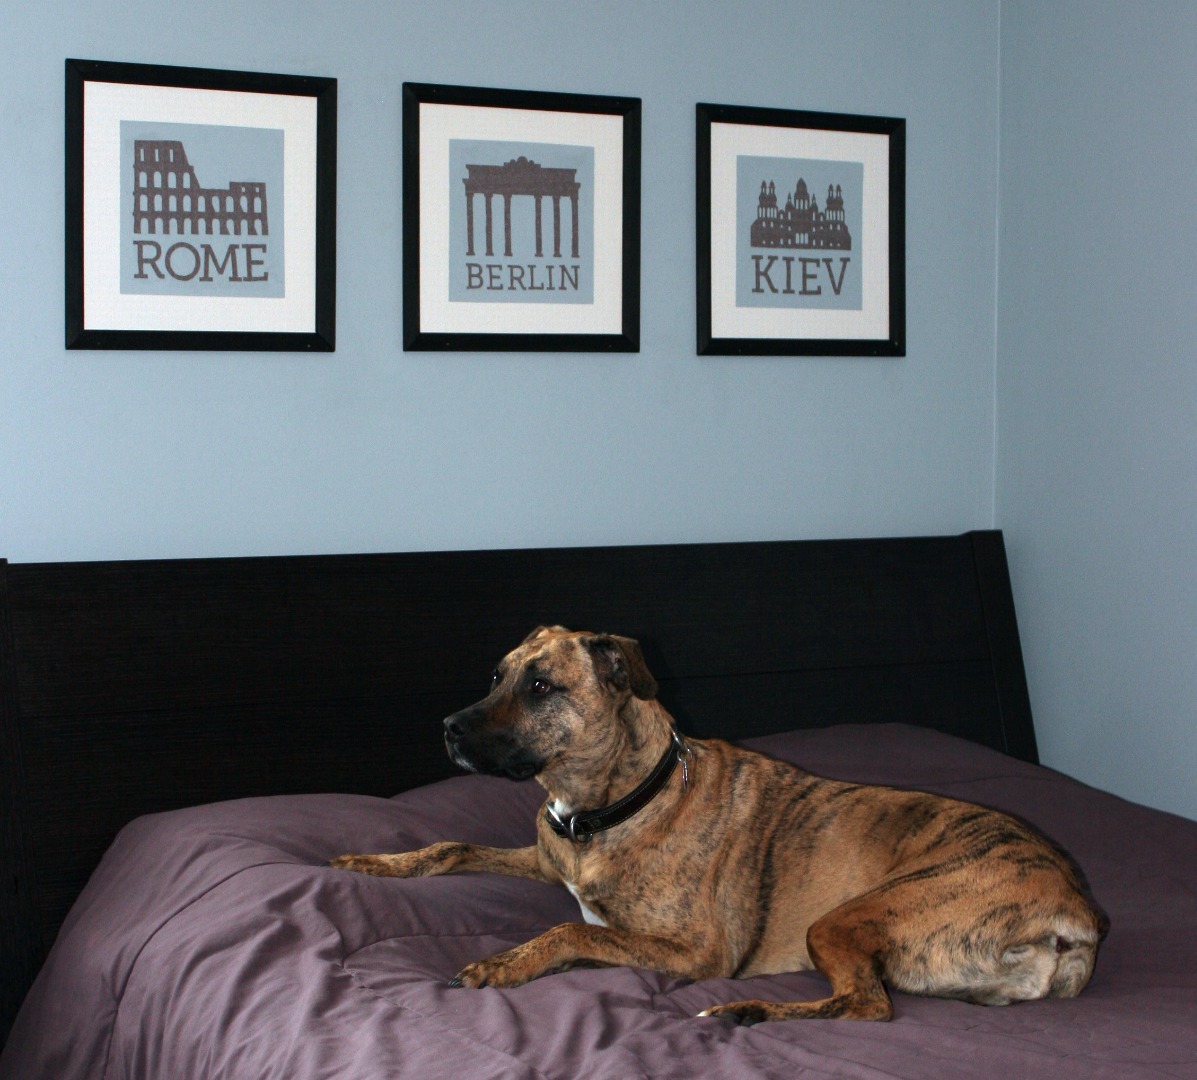
Last year we bought our first home. Until recently, our guest room was rather drab. I wanted to spice up that room, but on a budget. I've always had this obsession with wallpaper and I wanted to see if I could make something elegant but modern with it for that space.
Materials:
- White textured wallpaper
- Another colour of wallpaper
- Baseboard
- Wallpaper Paste
Tools:
- Illustrator (or similar vector based program)
- Printer
- X-Acto Knife
- Tape Ruler / Measuring Tape
- Square/ Mitre Box
- String Pencil
- Putty Knife
- Rag
- Nails (I used 7/8 finishing nails)
- Hammer
- Staple Gun
Mark Out Canvas in Illustrator


I'm using Illustrator CS5, but these steps work for pretty much all versions.
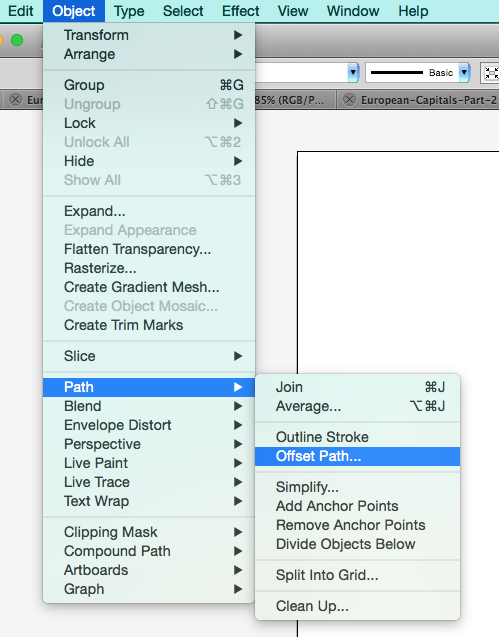
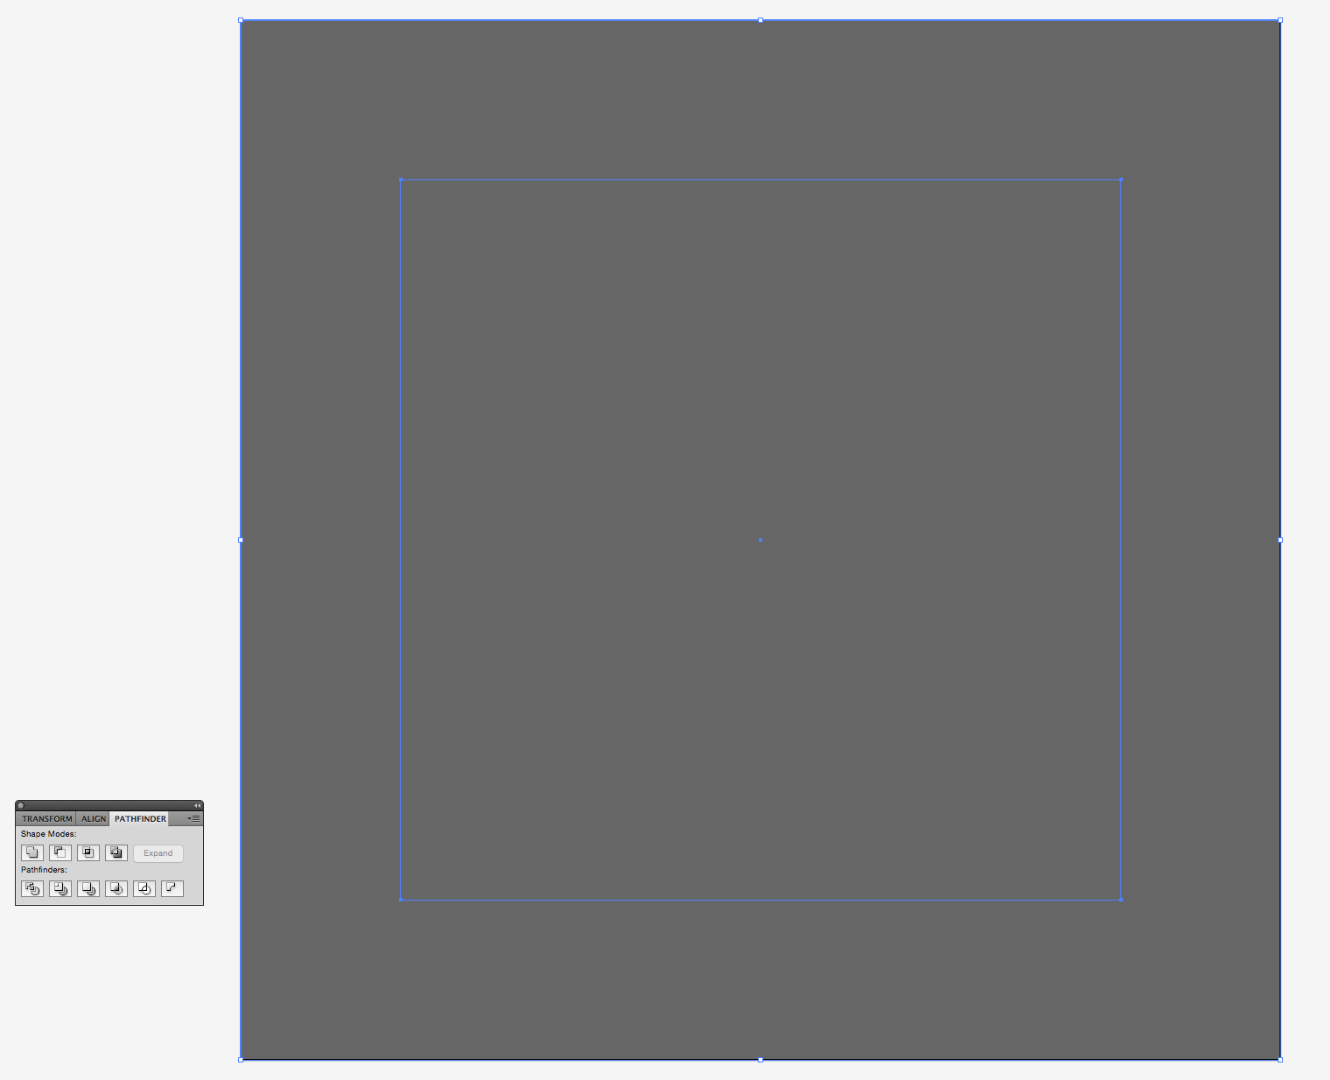
I made my canvas 13x13 inches. To get a better idea of the space I will be working with, I’m boxing in where my white matting is going to go. To do this, click the rectangle tool and enter the dimensions of your canvas. While your rectangle is selected, go Object > Path > Offset Path and in the offset box enter -2in. If your pathfinder window isn’t already open it, go to Window > Pathfinder. Now select both rectangles and select the divide option in the pathfinder window. Select the middle square using your direct selection tool (A) and delete your middle square. Now you have your matting.
Assemble/Design Your Graphic
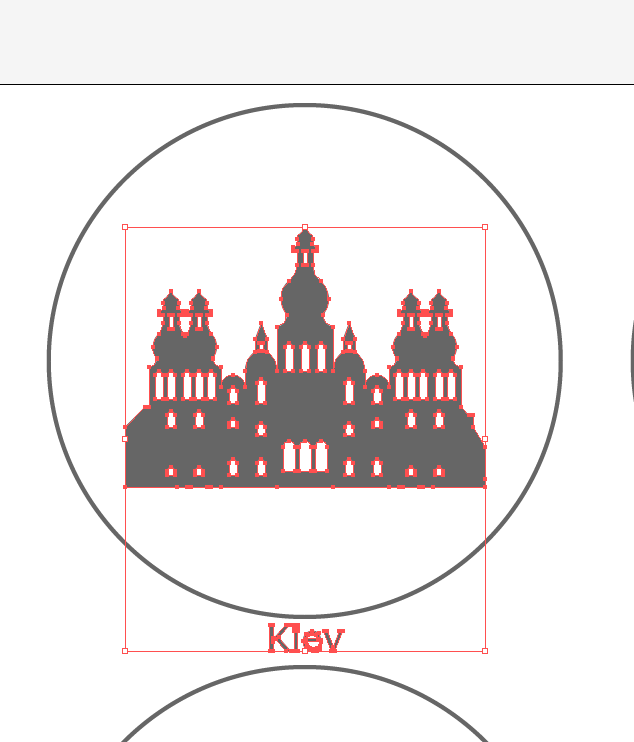
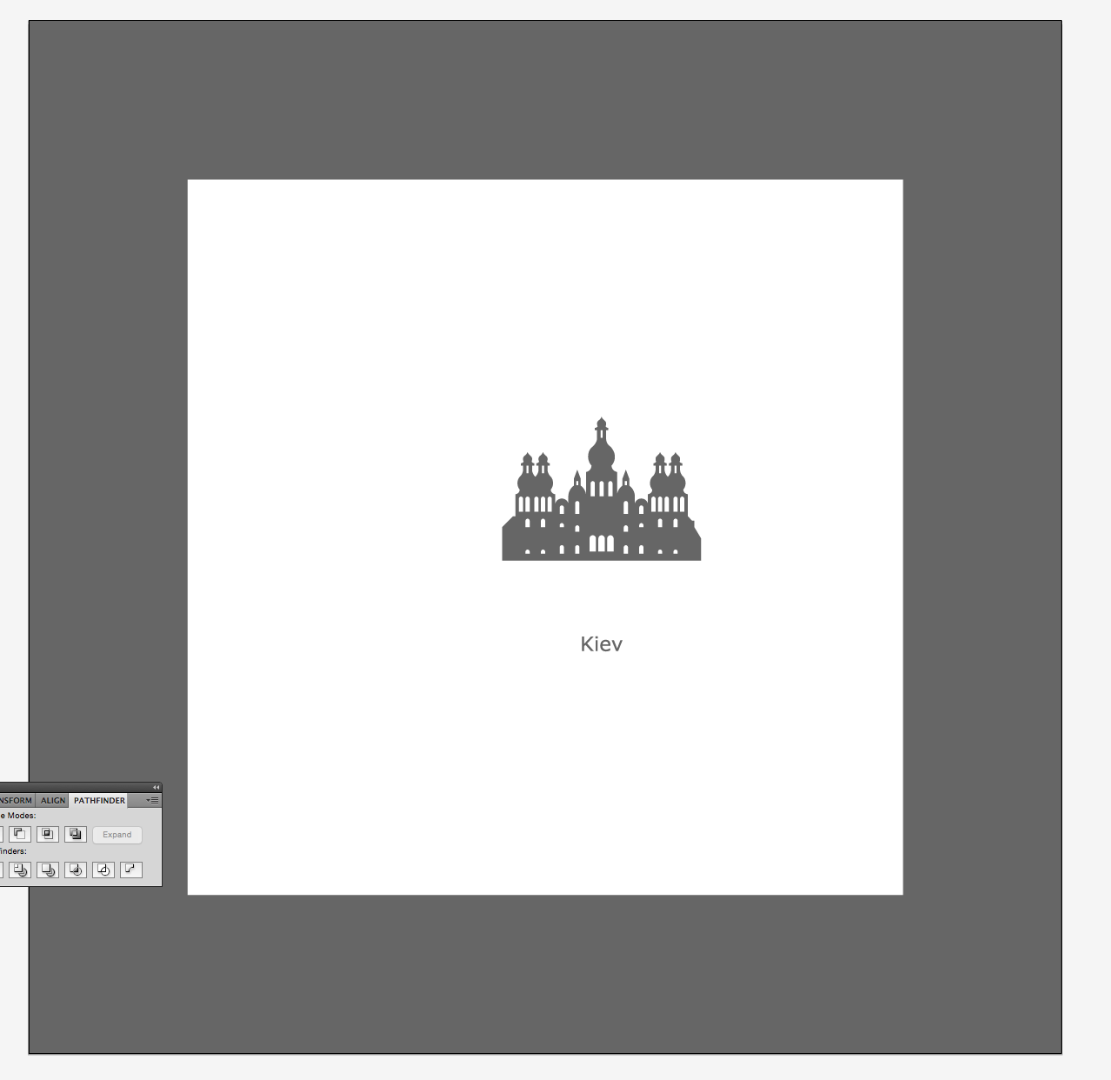

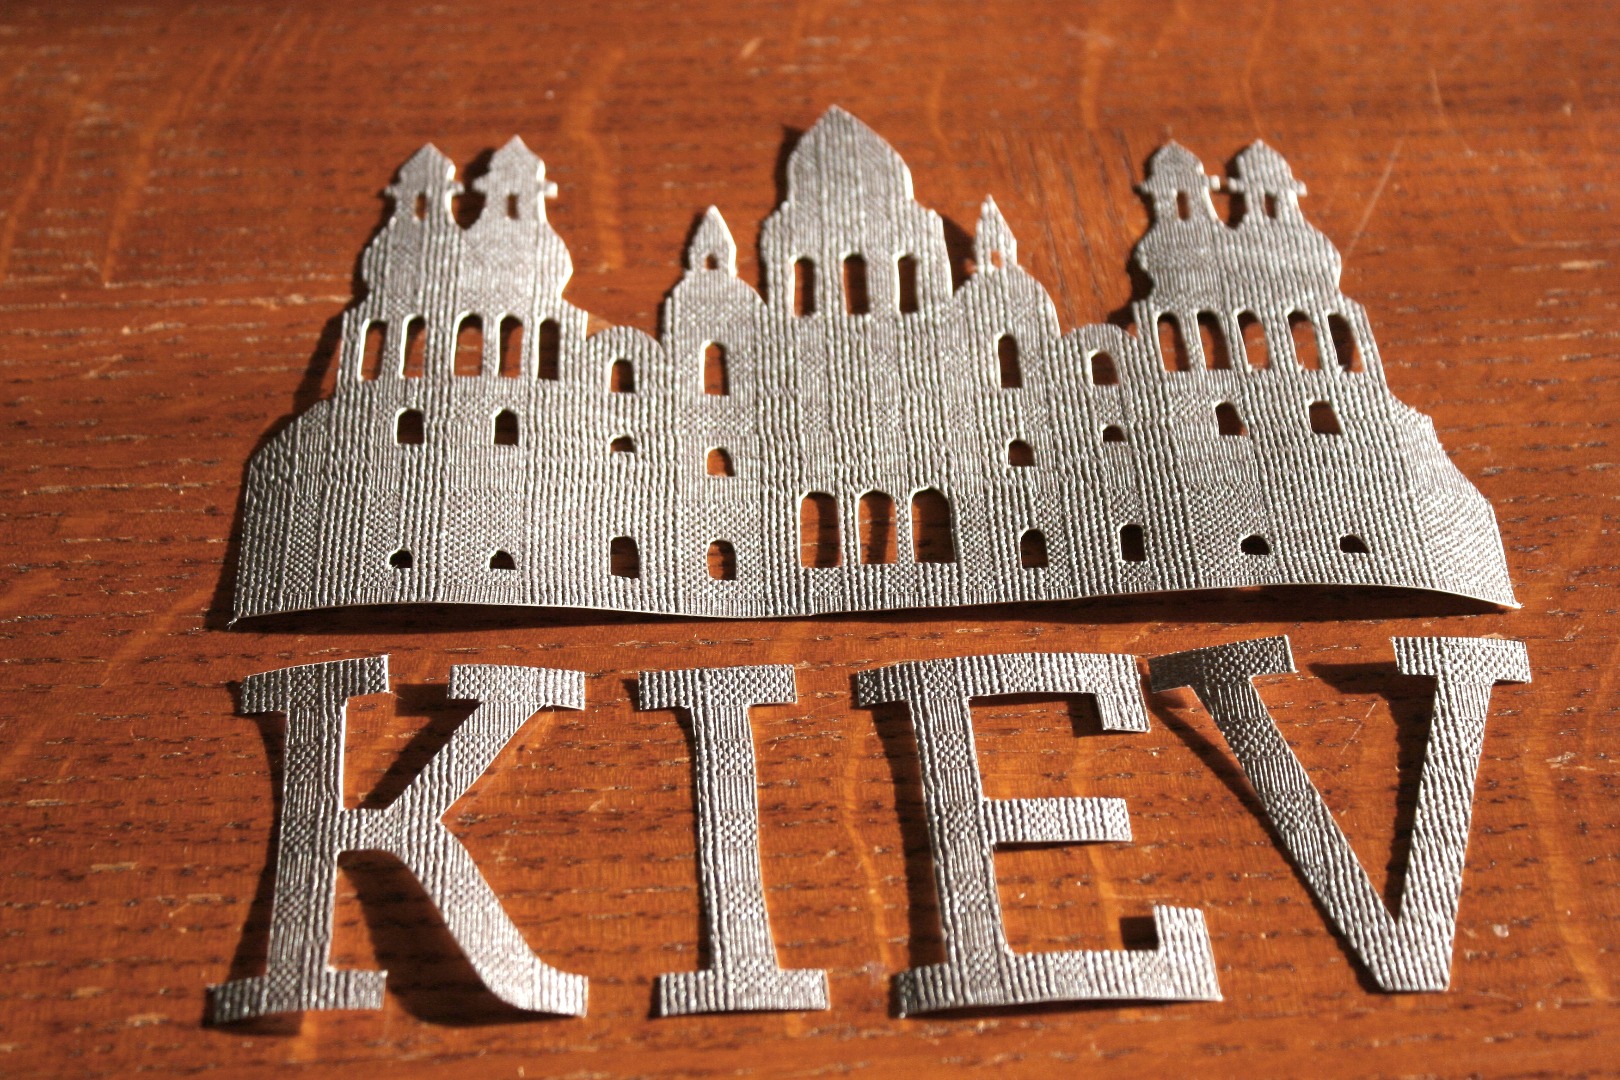
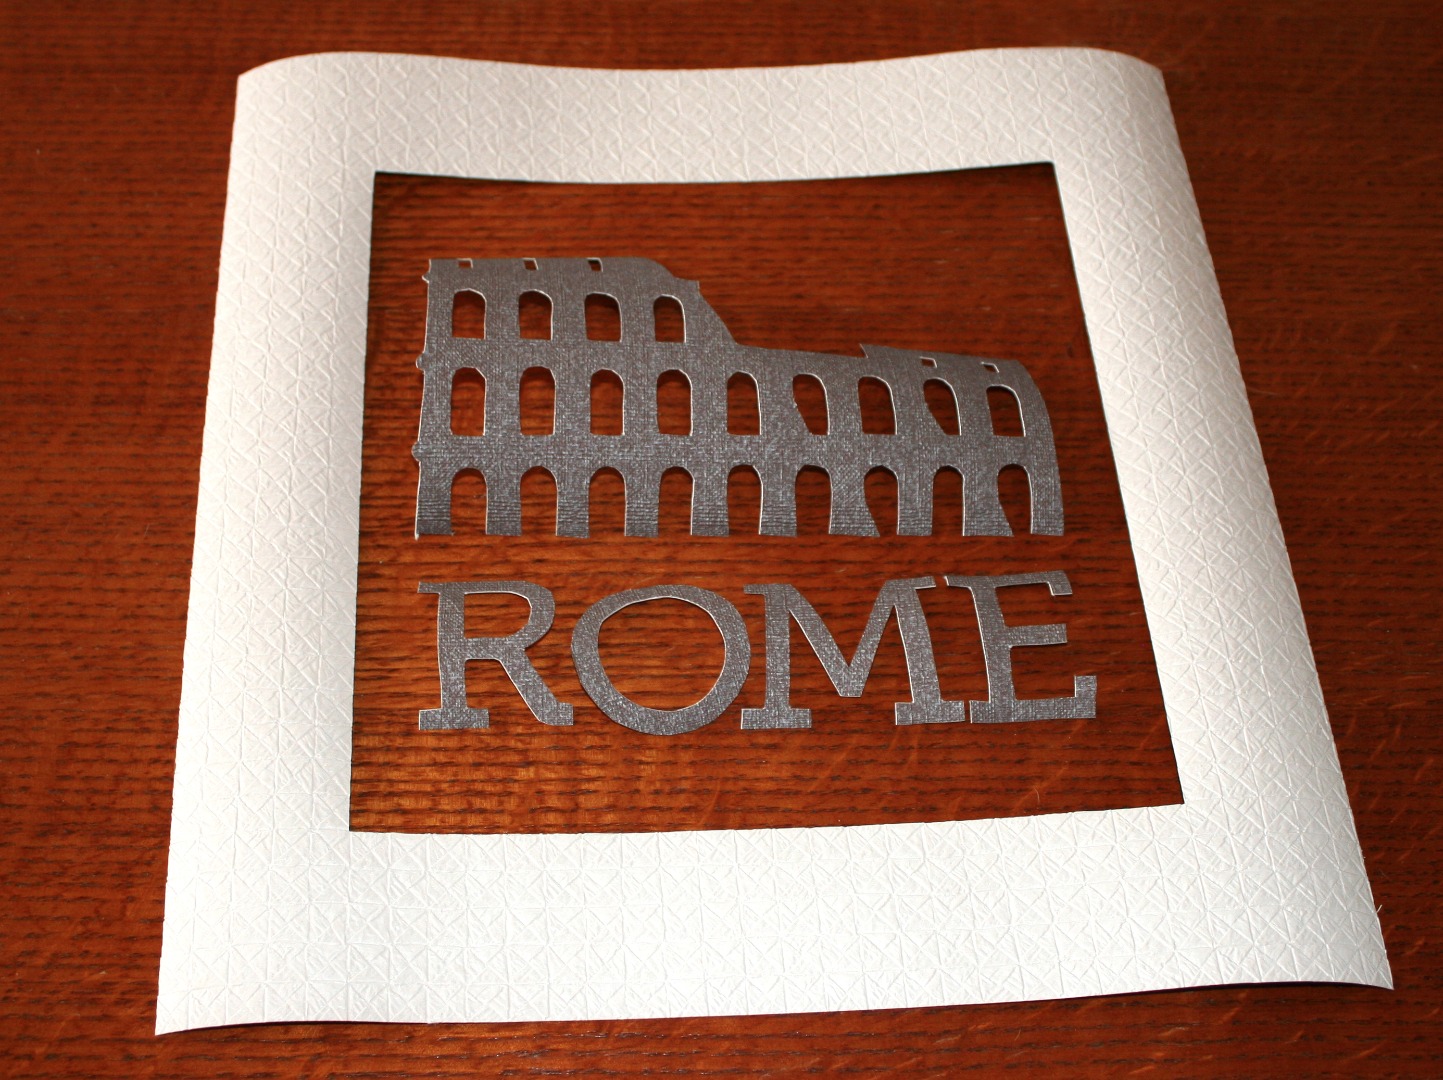
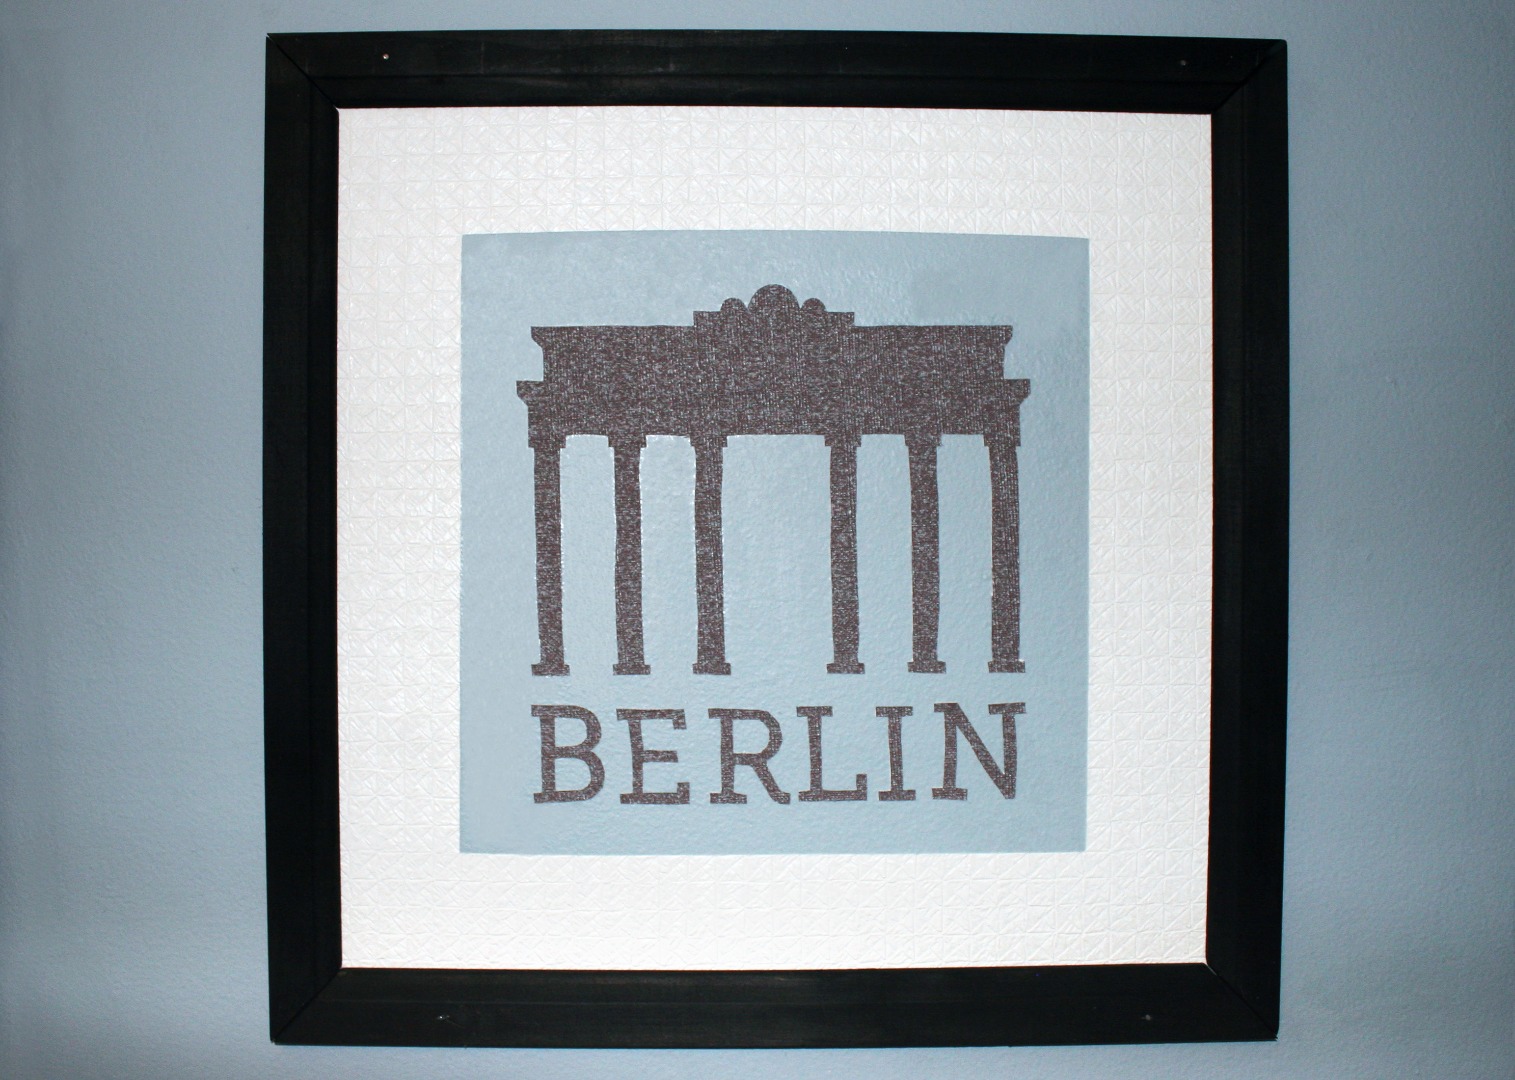
Download the European-Capital Assets from Creative Market. Choose a capital building that you want to work with. Copy and paste it into your working document. To size it, select the silhouette and while holding shift, drag the corners until it’s your desired size.
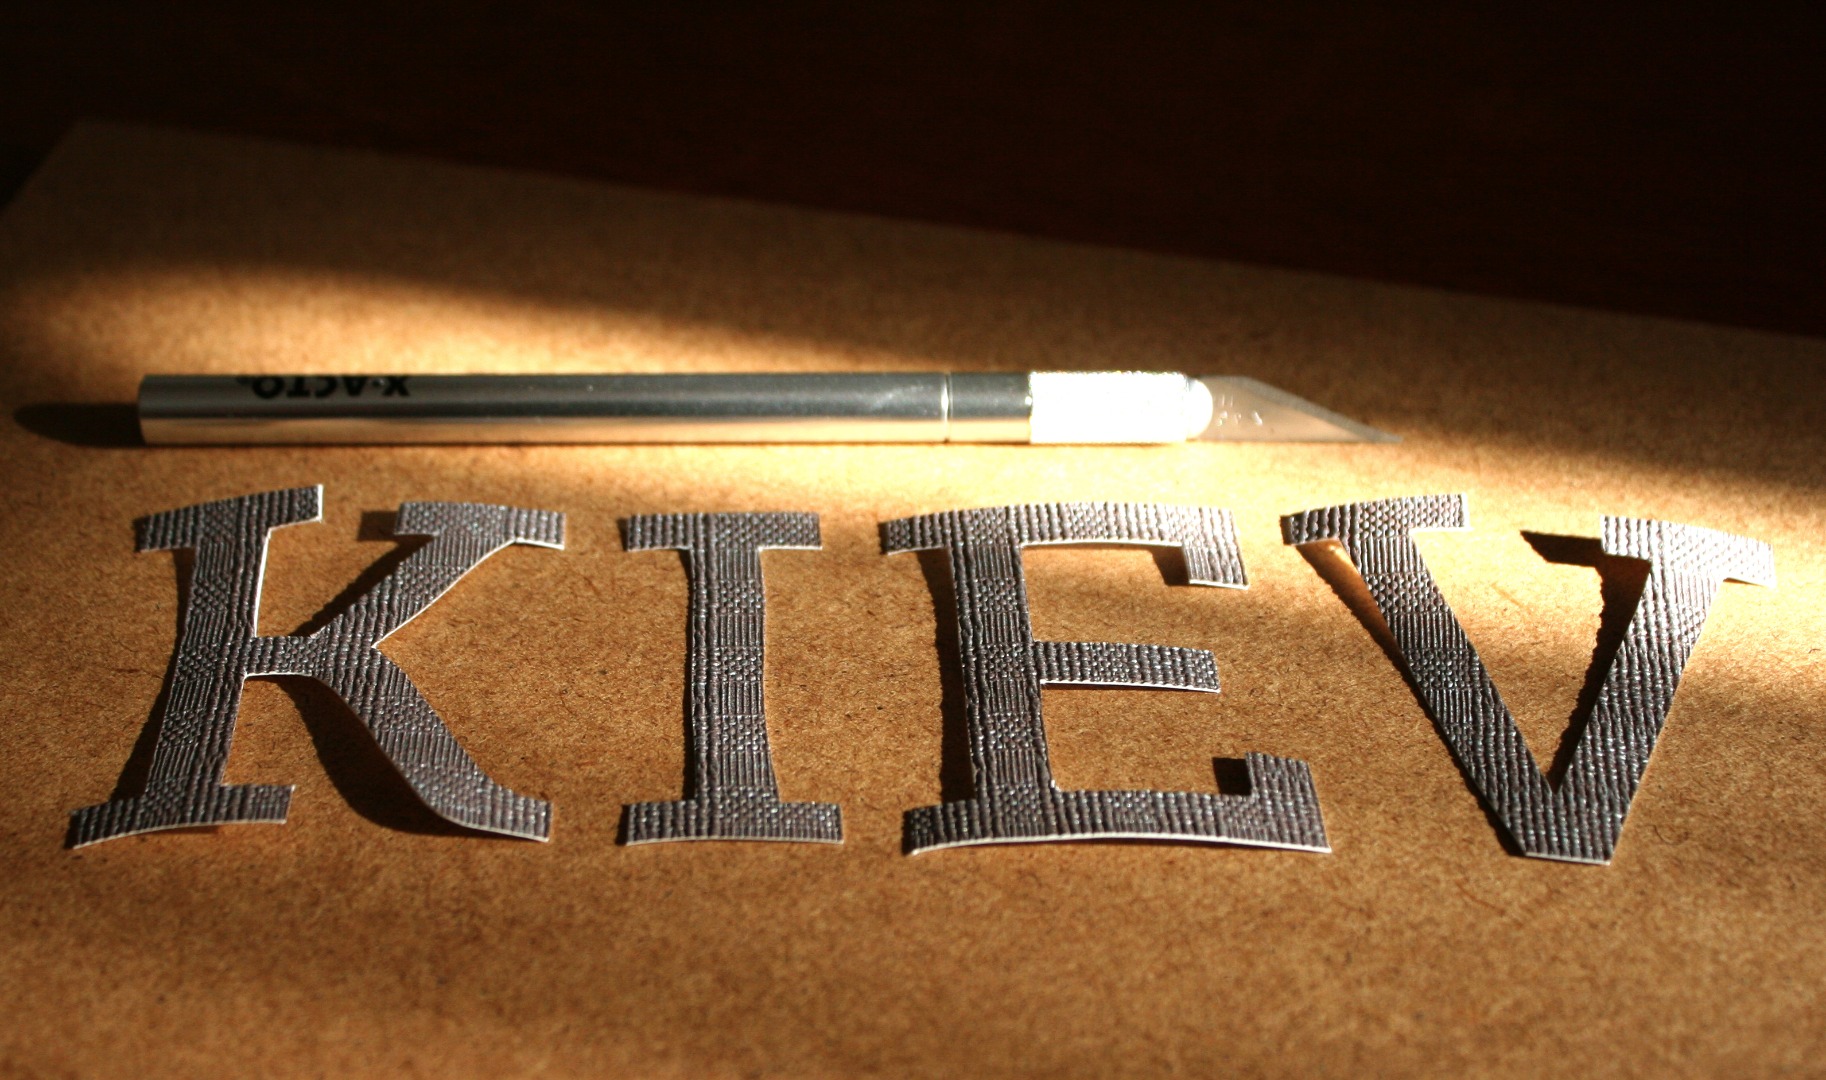
I wanted to add some text elements to my overall design. I typed out “KIEV” and changed the font to Museo Slab which can be found here. You may have the urge to be ambitious and choose a gorgeous script font, but keep in mind you have to cut out these letters by hand. I choose a slab serif because it has nice straight edges (much easier to cut out). It also visually suits the capital building graphics I chose to incorporate.
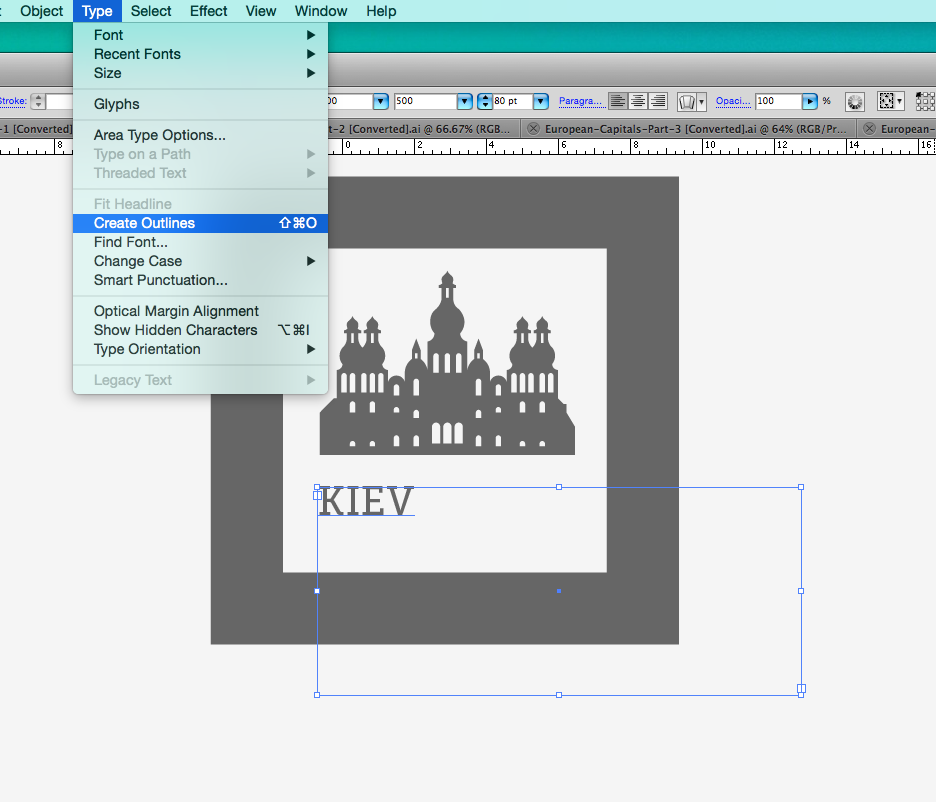
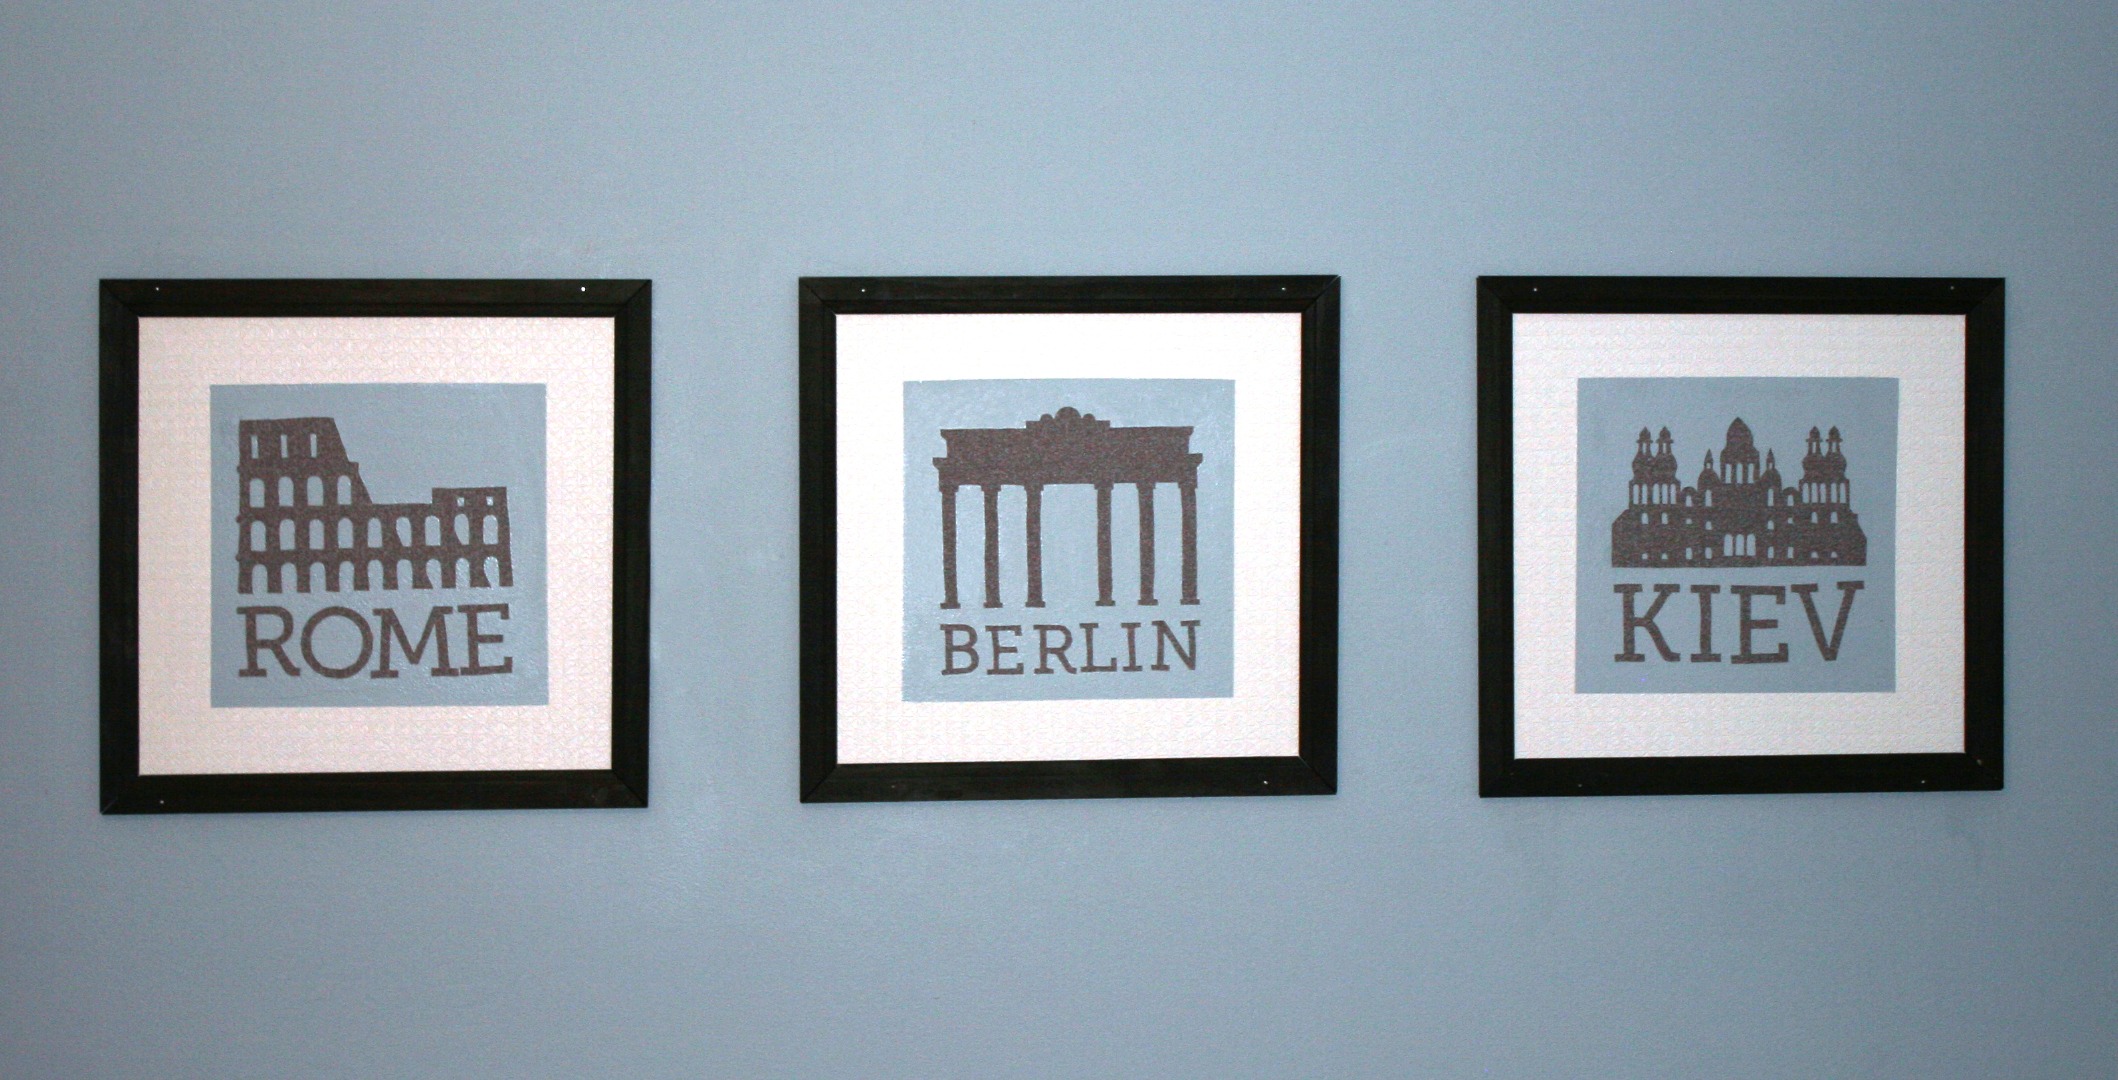
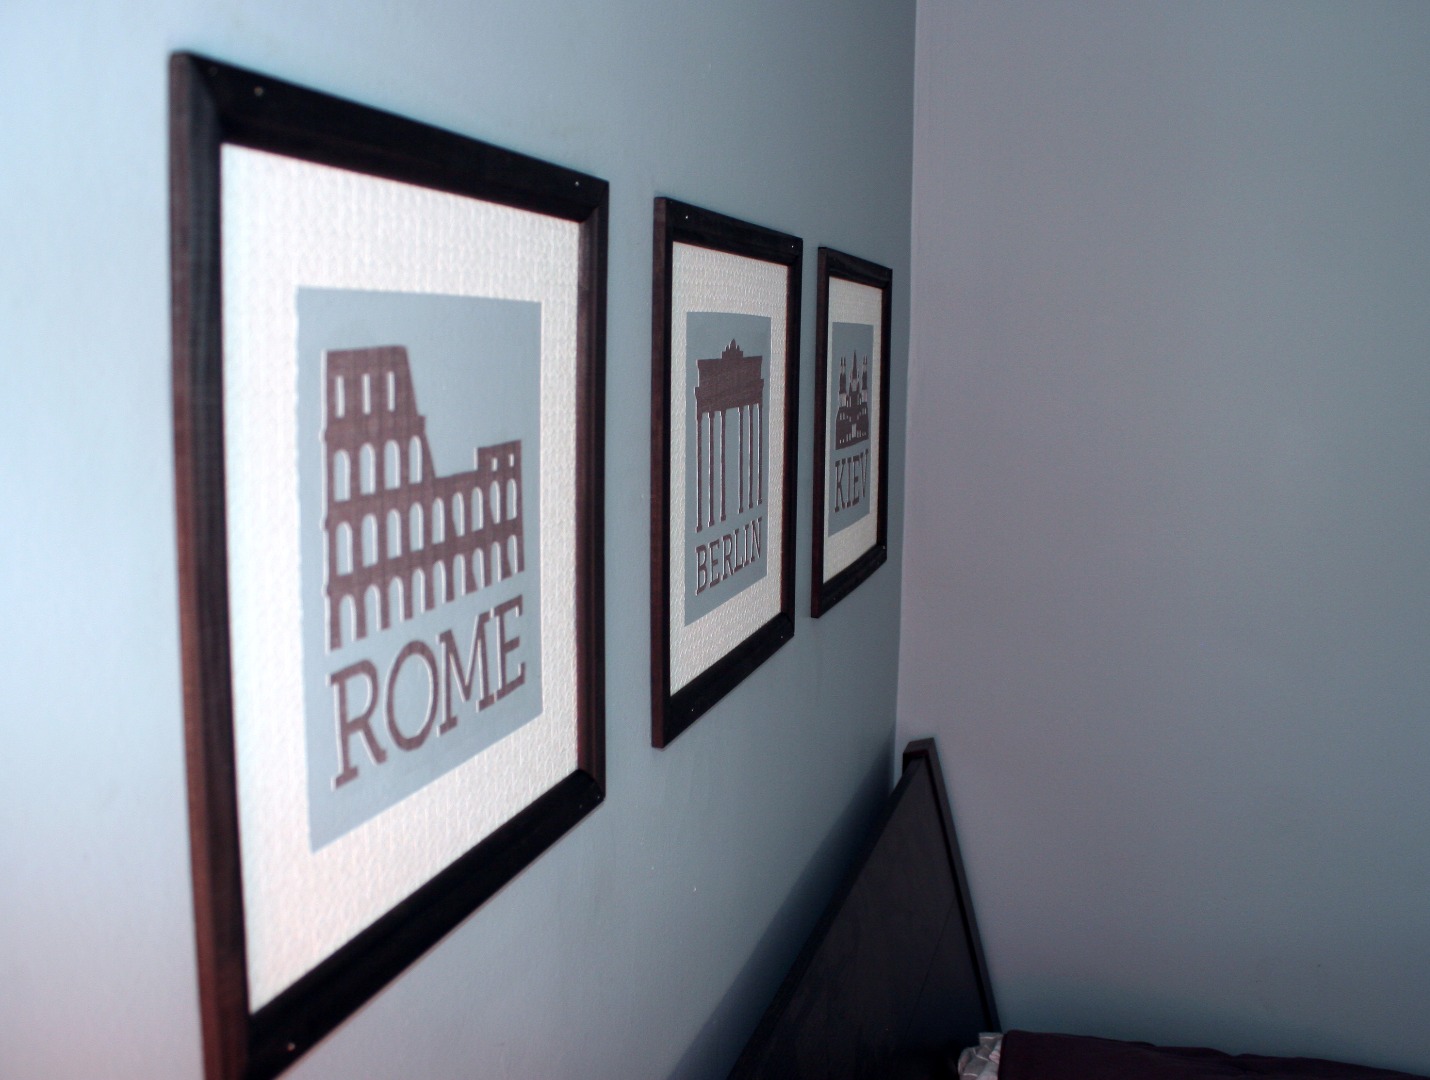
I converted my text to outlines by going to Type > Convert to Outlines. Then I sized my type so that it’s the same width as the building silhouette. Again, hold shift while you transform your text so you don’t end up skewing it. For the sake of balance, I used ROME to balance it out on the right. I used Berlin in the middle because it has 6 letters vs 4. Here is my final design I will be working with.
Tip: Always read the font license to make sure the work you generate is legal. I like using Font Squirrel because everything is free for commercial use. Still…read the fine print just to be safe.
Print Design


I created a new Illustrator document which was 8.5 x 11 inches with 3 artboards and placed my designs (minus the matting) in the centre. Then I just saved that document as a PDF and printed it.
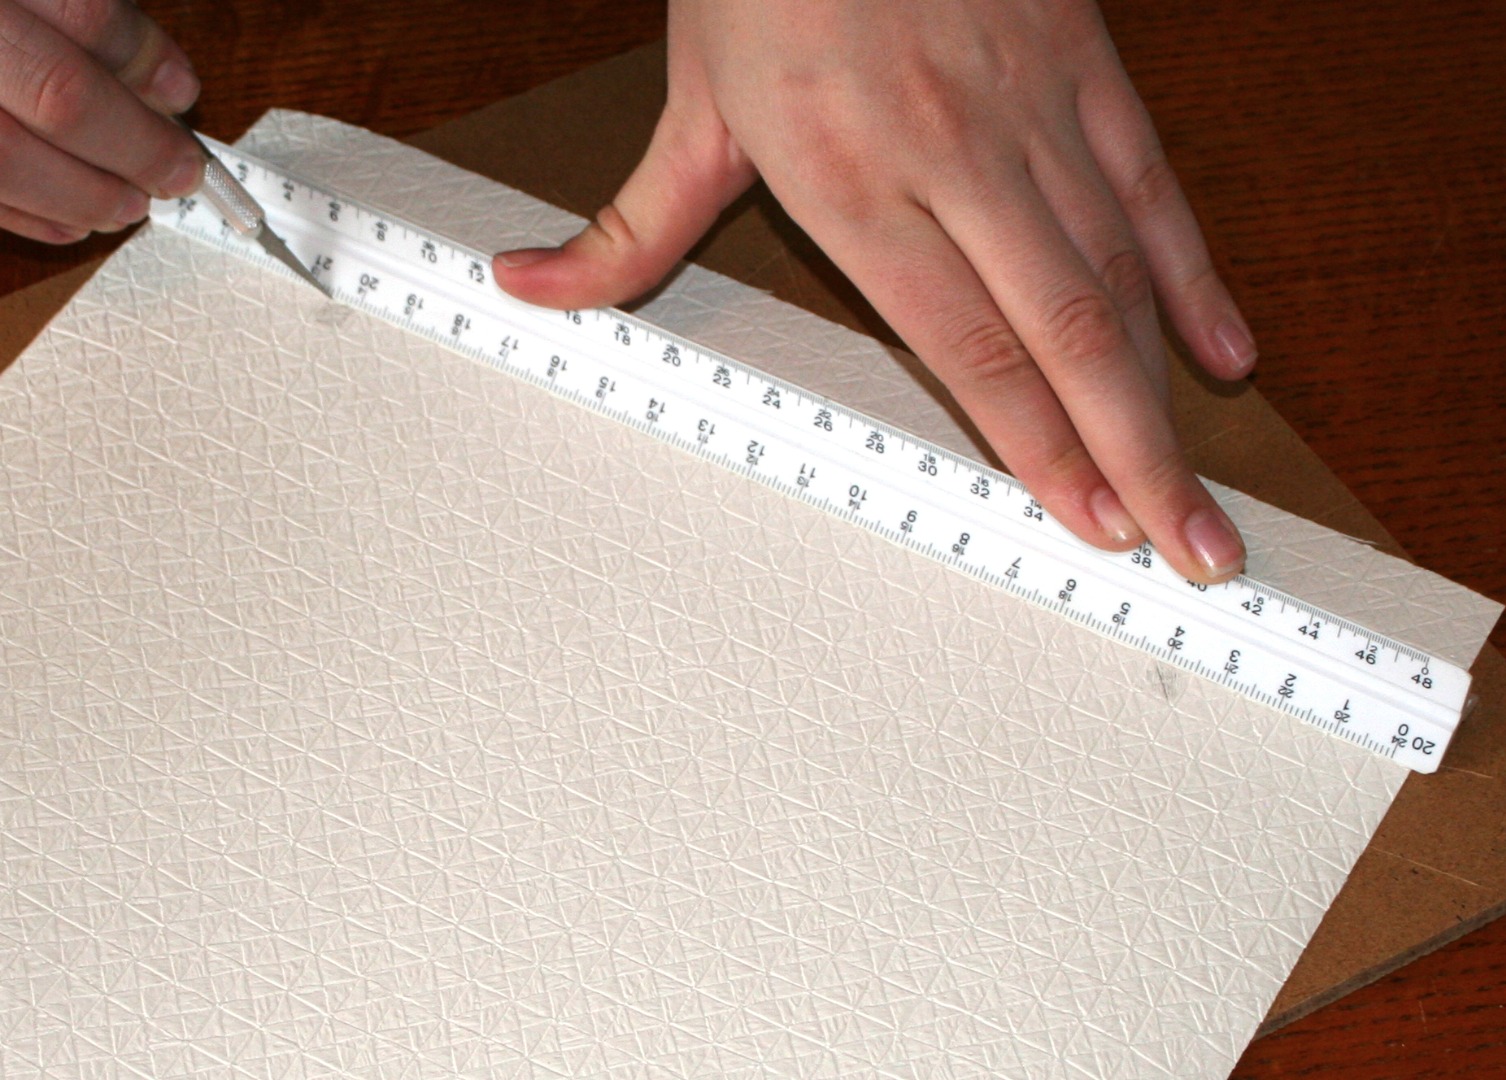
Cut Out Your Wallpaper Design
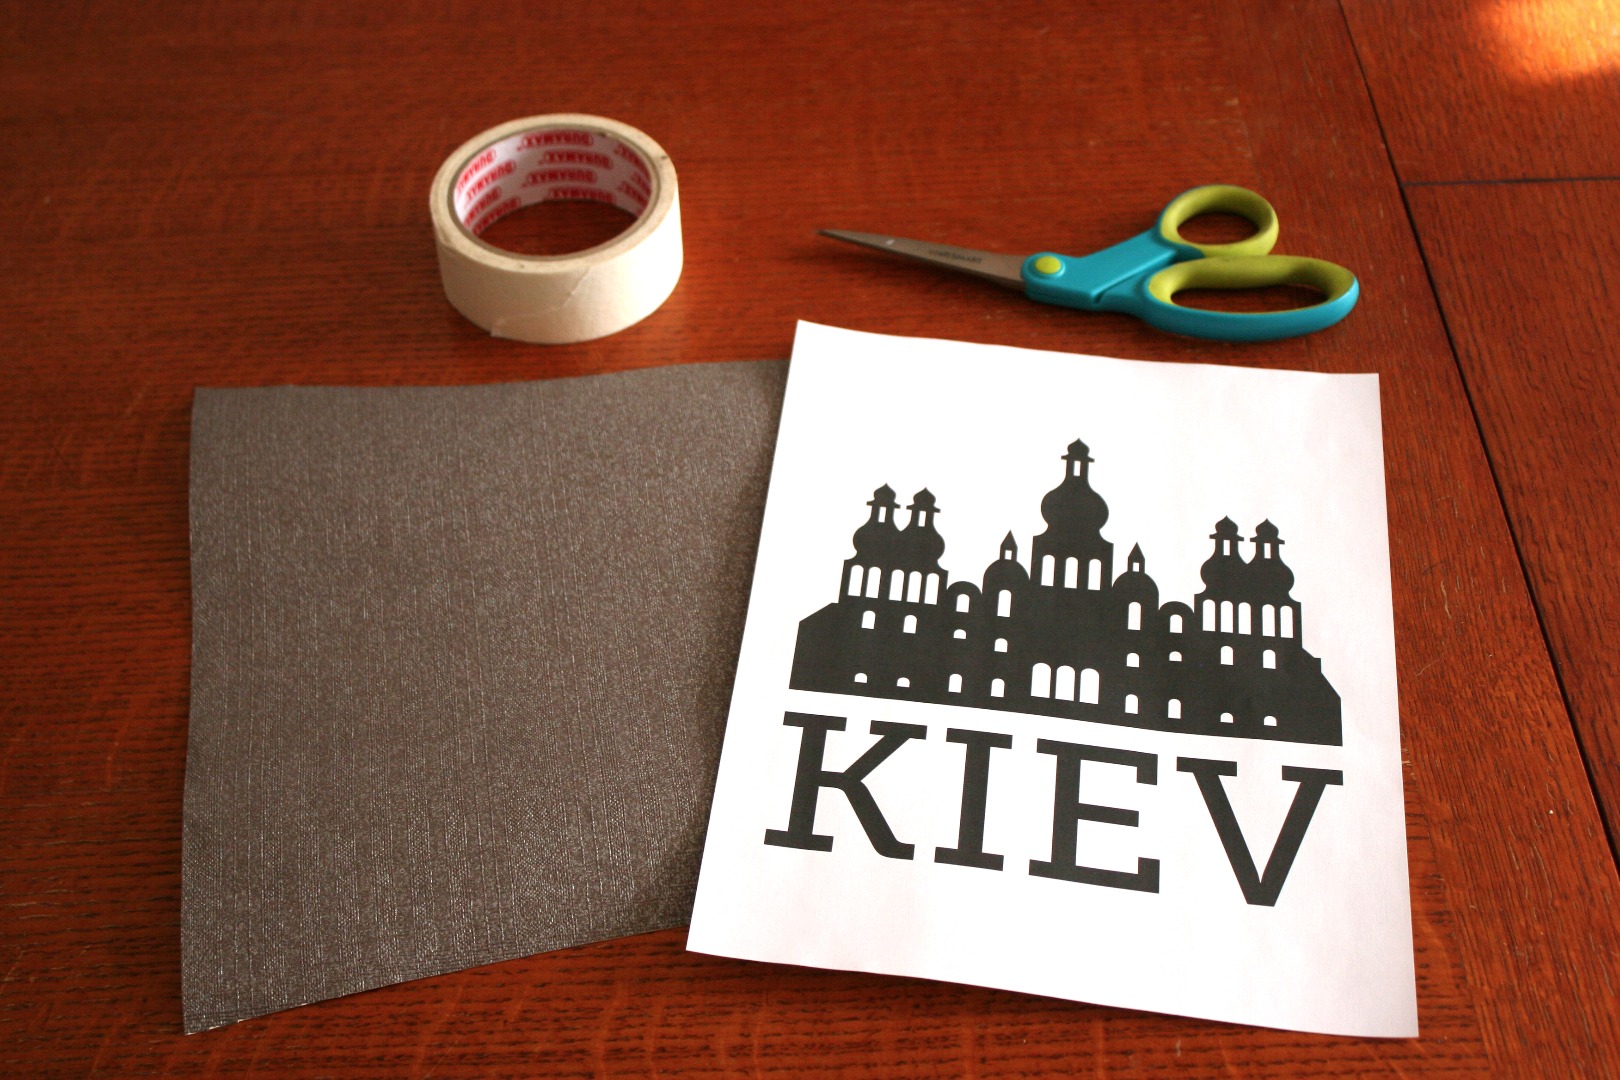

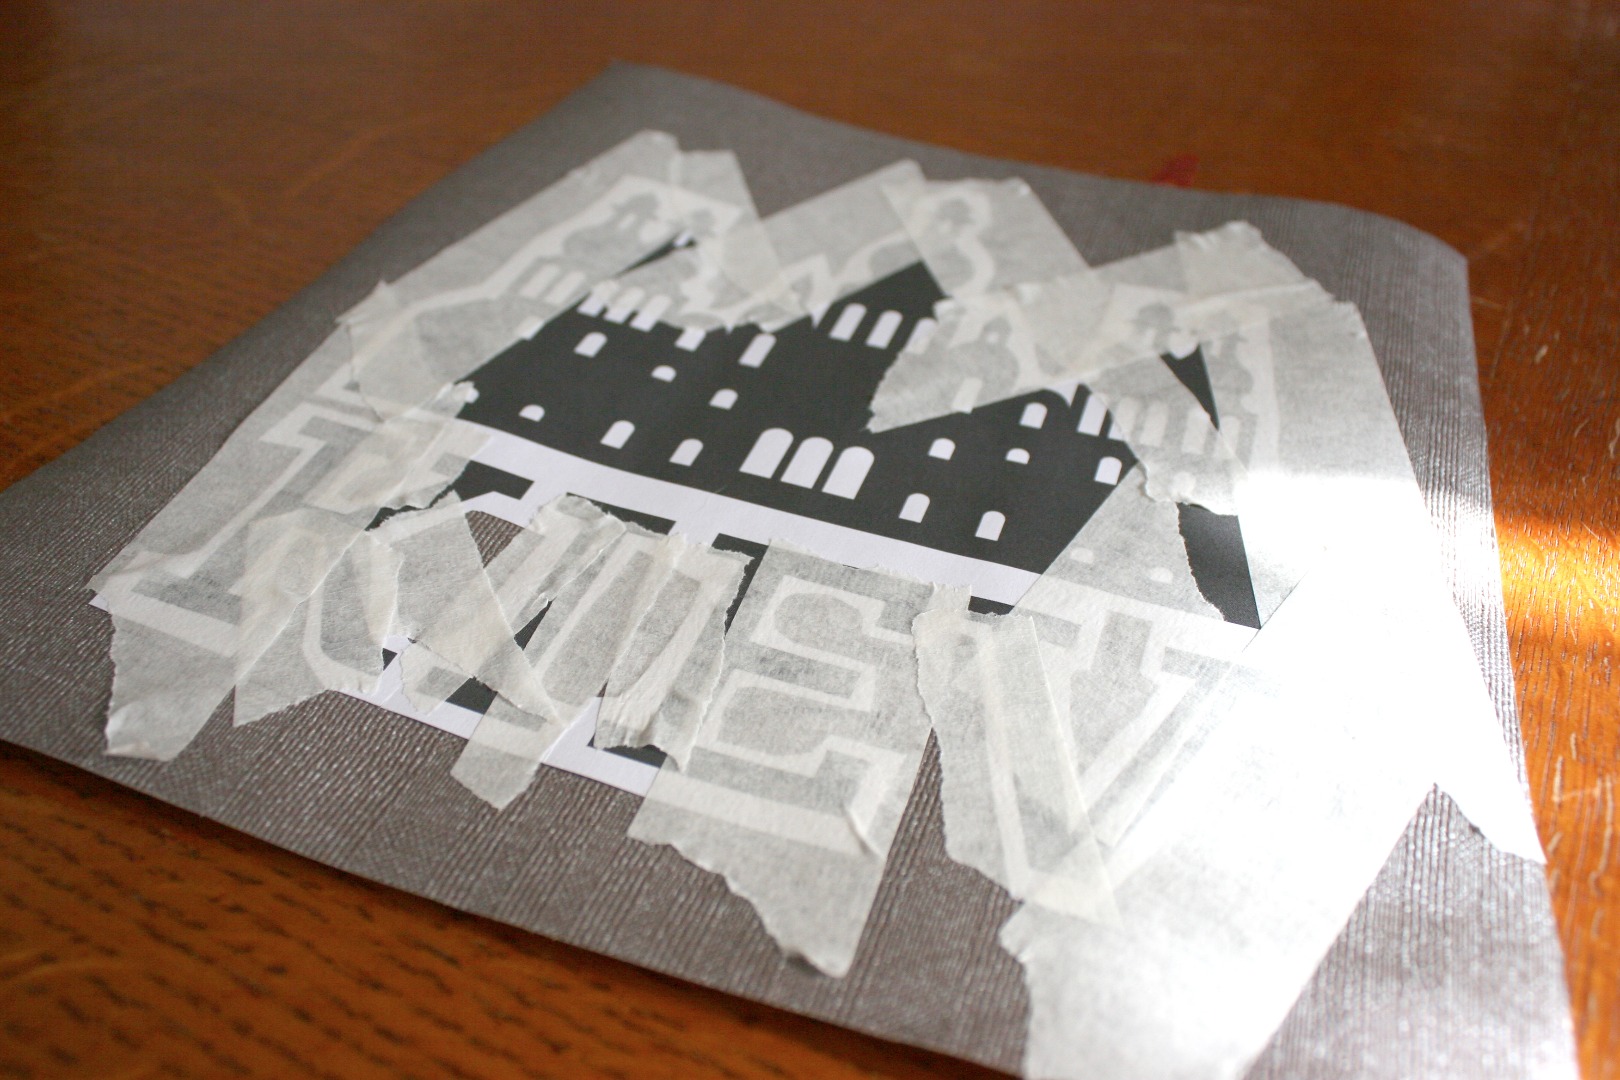
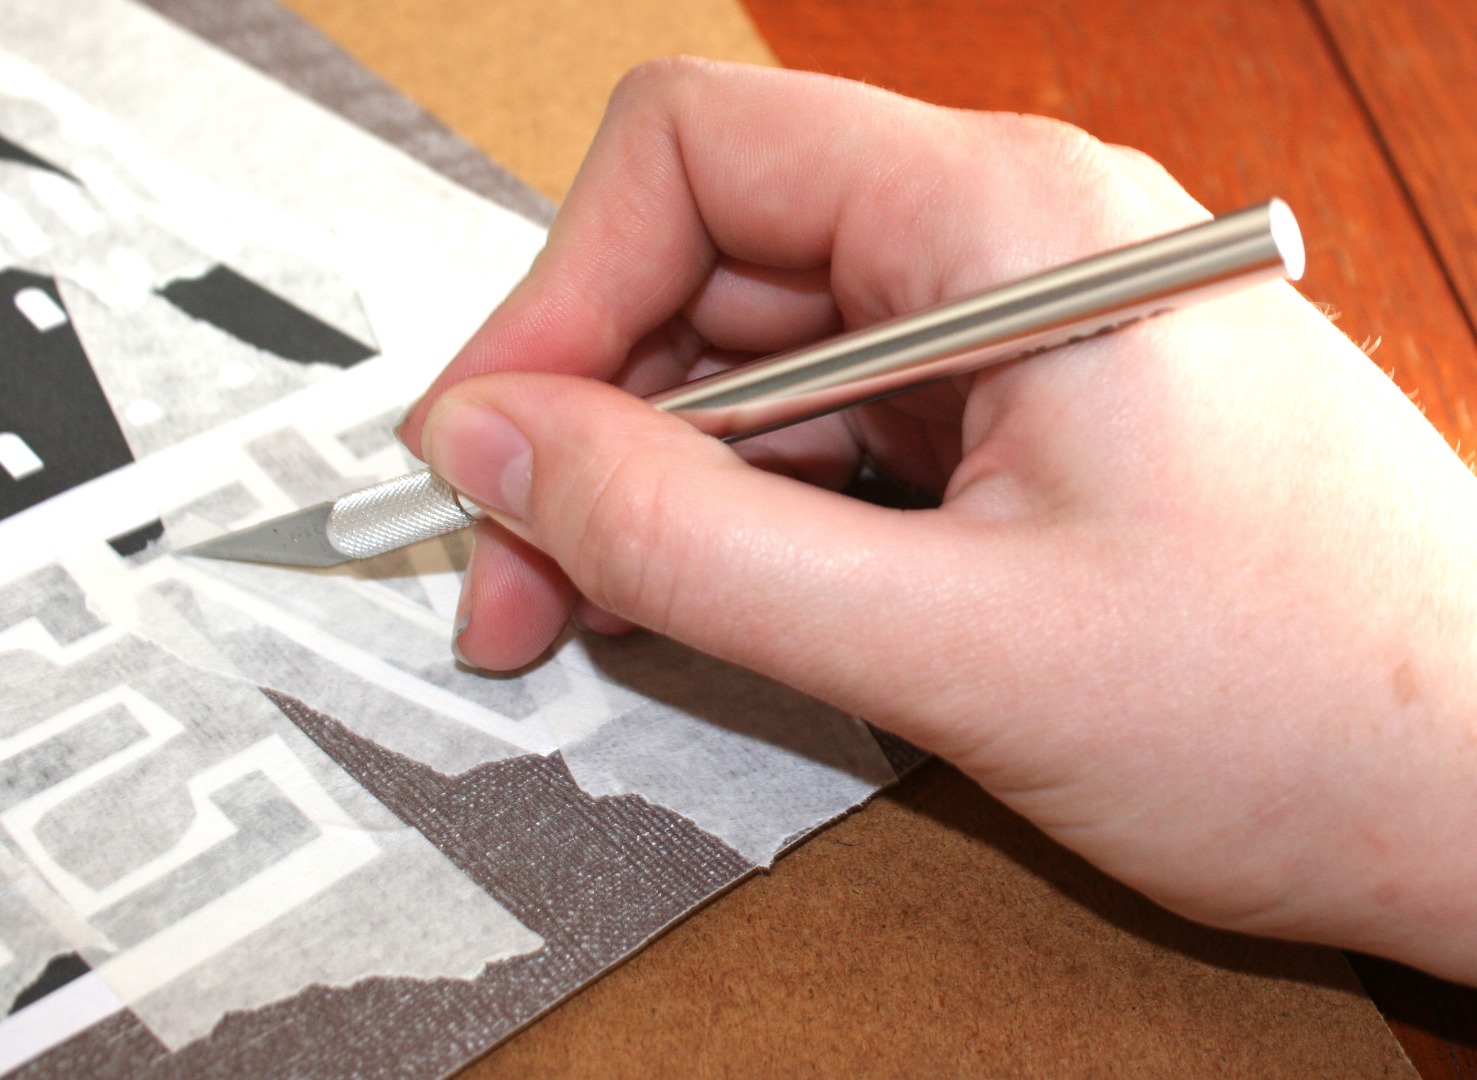
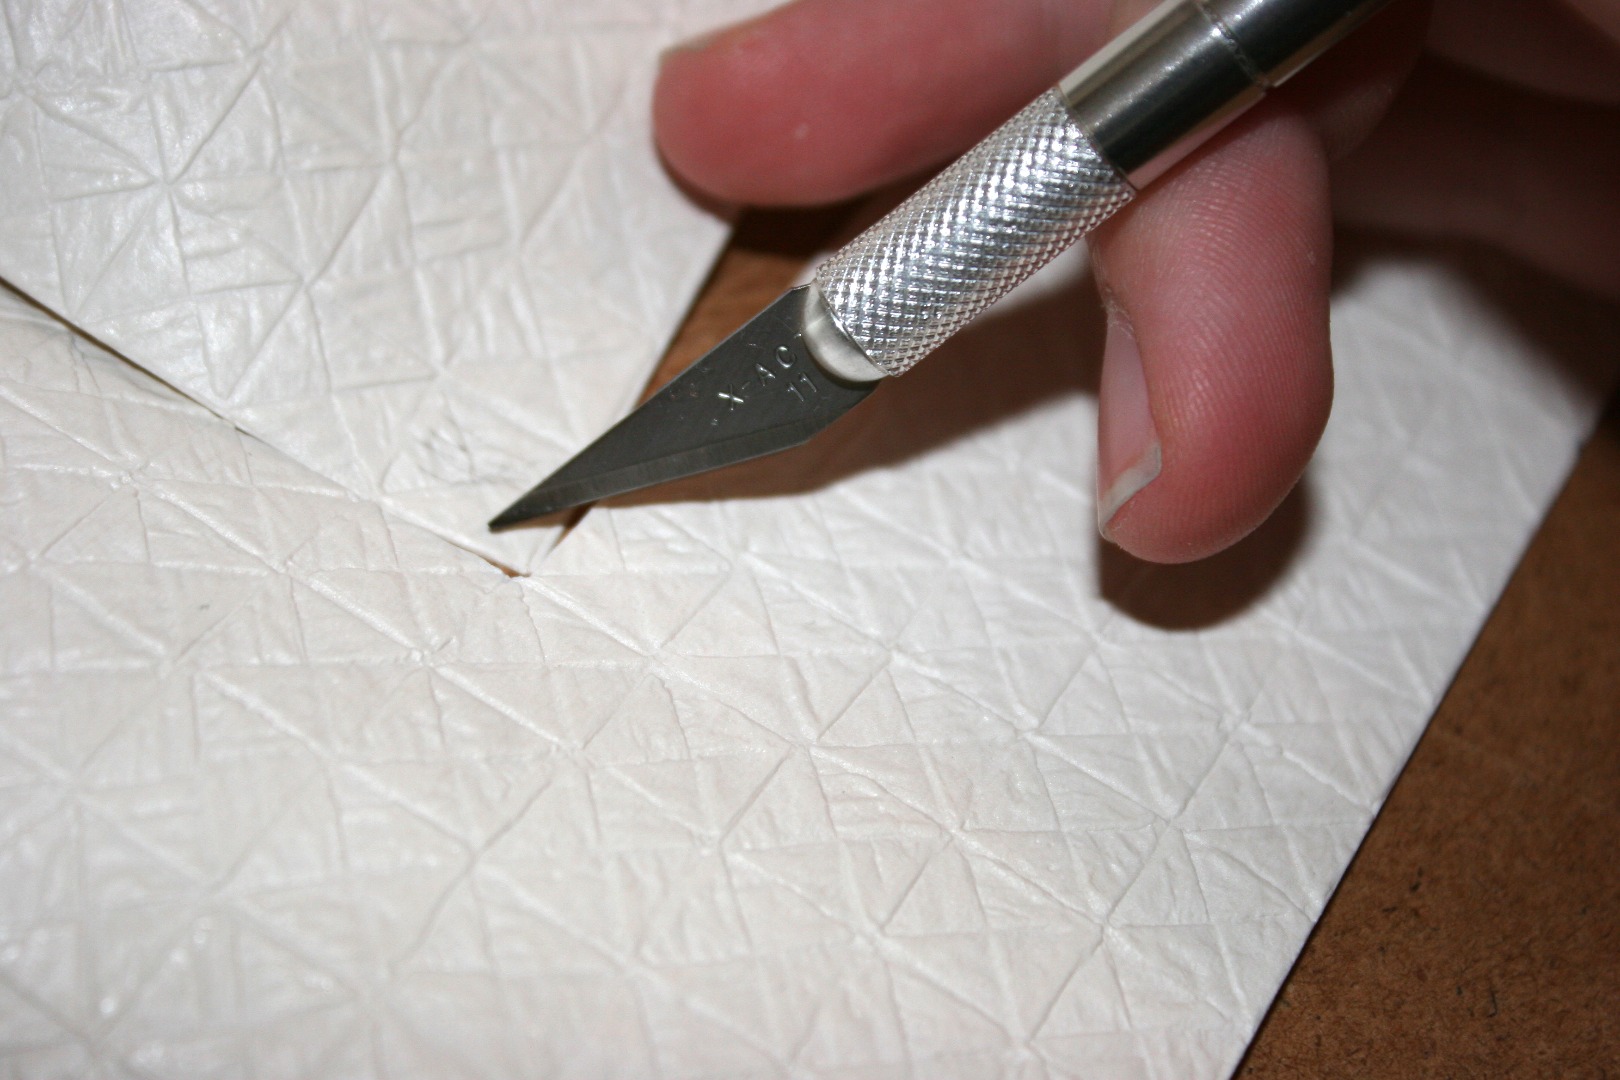
Cut out the design you printed with about 1/8” excess paper around your design edges. Then tape your design to your wallpaper. You’ll want to use a tape that has some transparency. You’ll also want to pay attention to the directionality of the wallpaper design you’re using for the design.
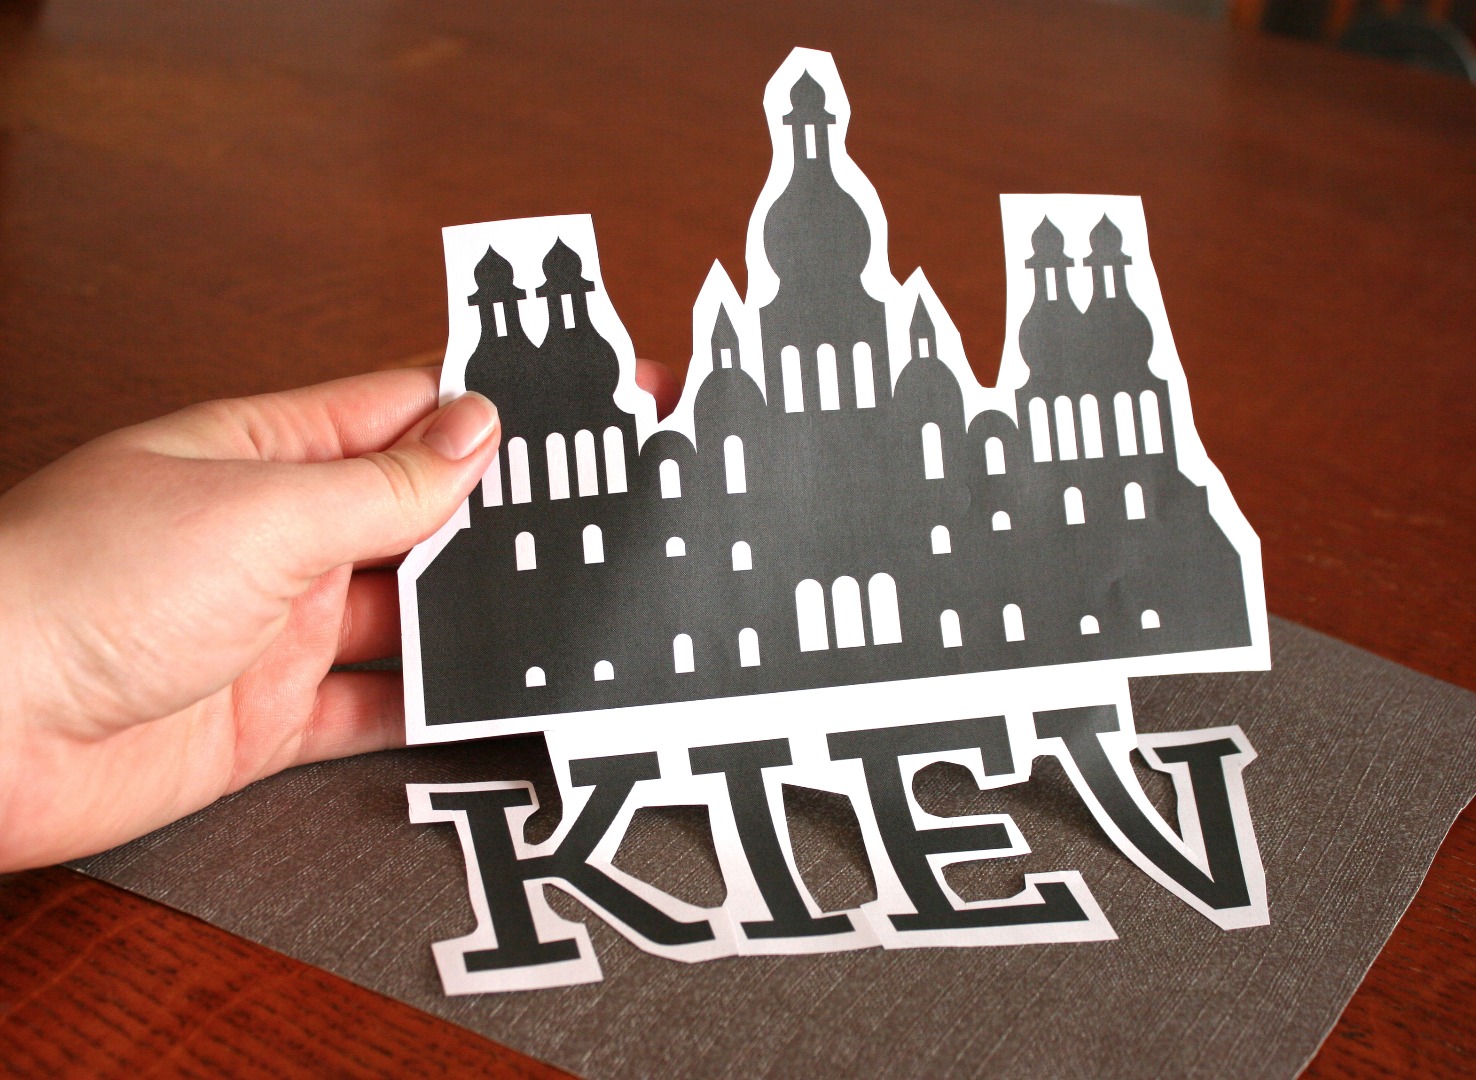
All you have to now is cut it out with an X-Acto knife (I’m using a #11 blade). I would strongly advice to take your time at this step. It took me an hour to cut out each silhouette with the corresponding text. It’s a tedious job so I would even suggest spreading it out over a few days.
Cut Out Your Matting
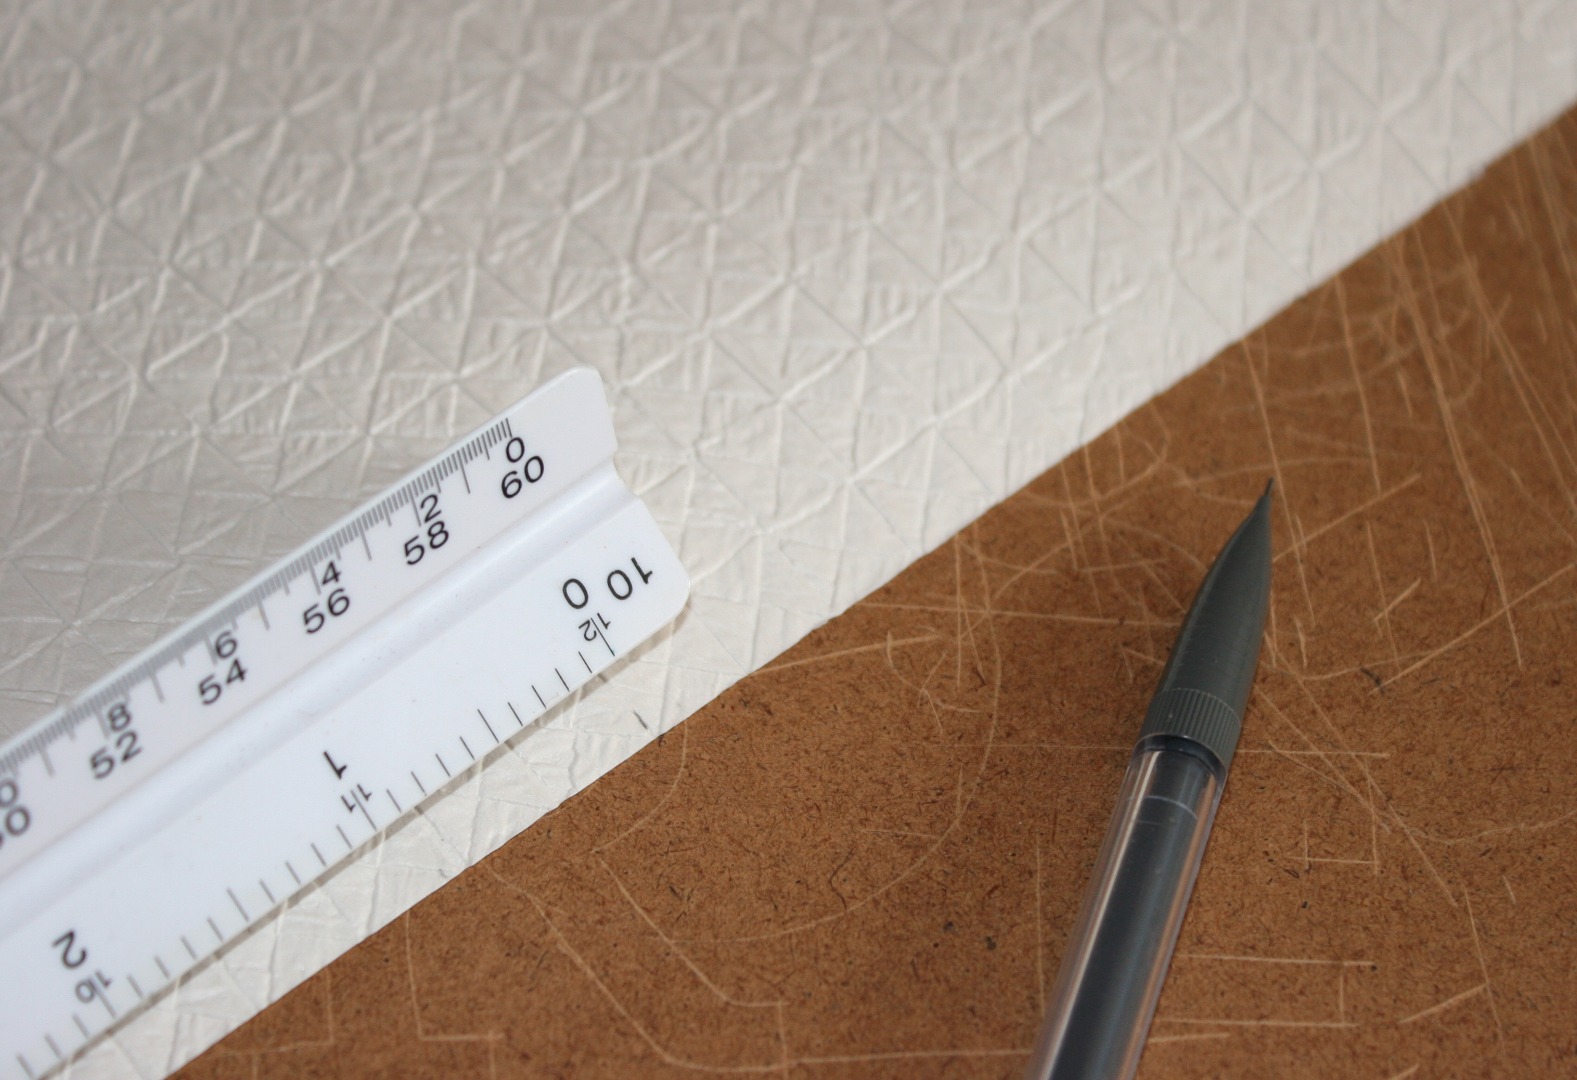
Each matted area is 14”x14”-ish (because I plan to overlap it with the frame from the next step) with a 9”x9”-ish square in the middle for the image area. My measurements aren’t exact because the wallpaper I used for my matting had a series of tiny squares on it and I didn’t want to crop the pattern at an awkward place. Instead, I used the tiny squares in my pattern as a reference where to cut (I did 5 squares up and across for the centre square). This decision created a tiny hiccup in my plan down the line, which I will explain in the next step.
Create Your Frame
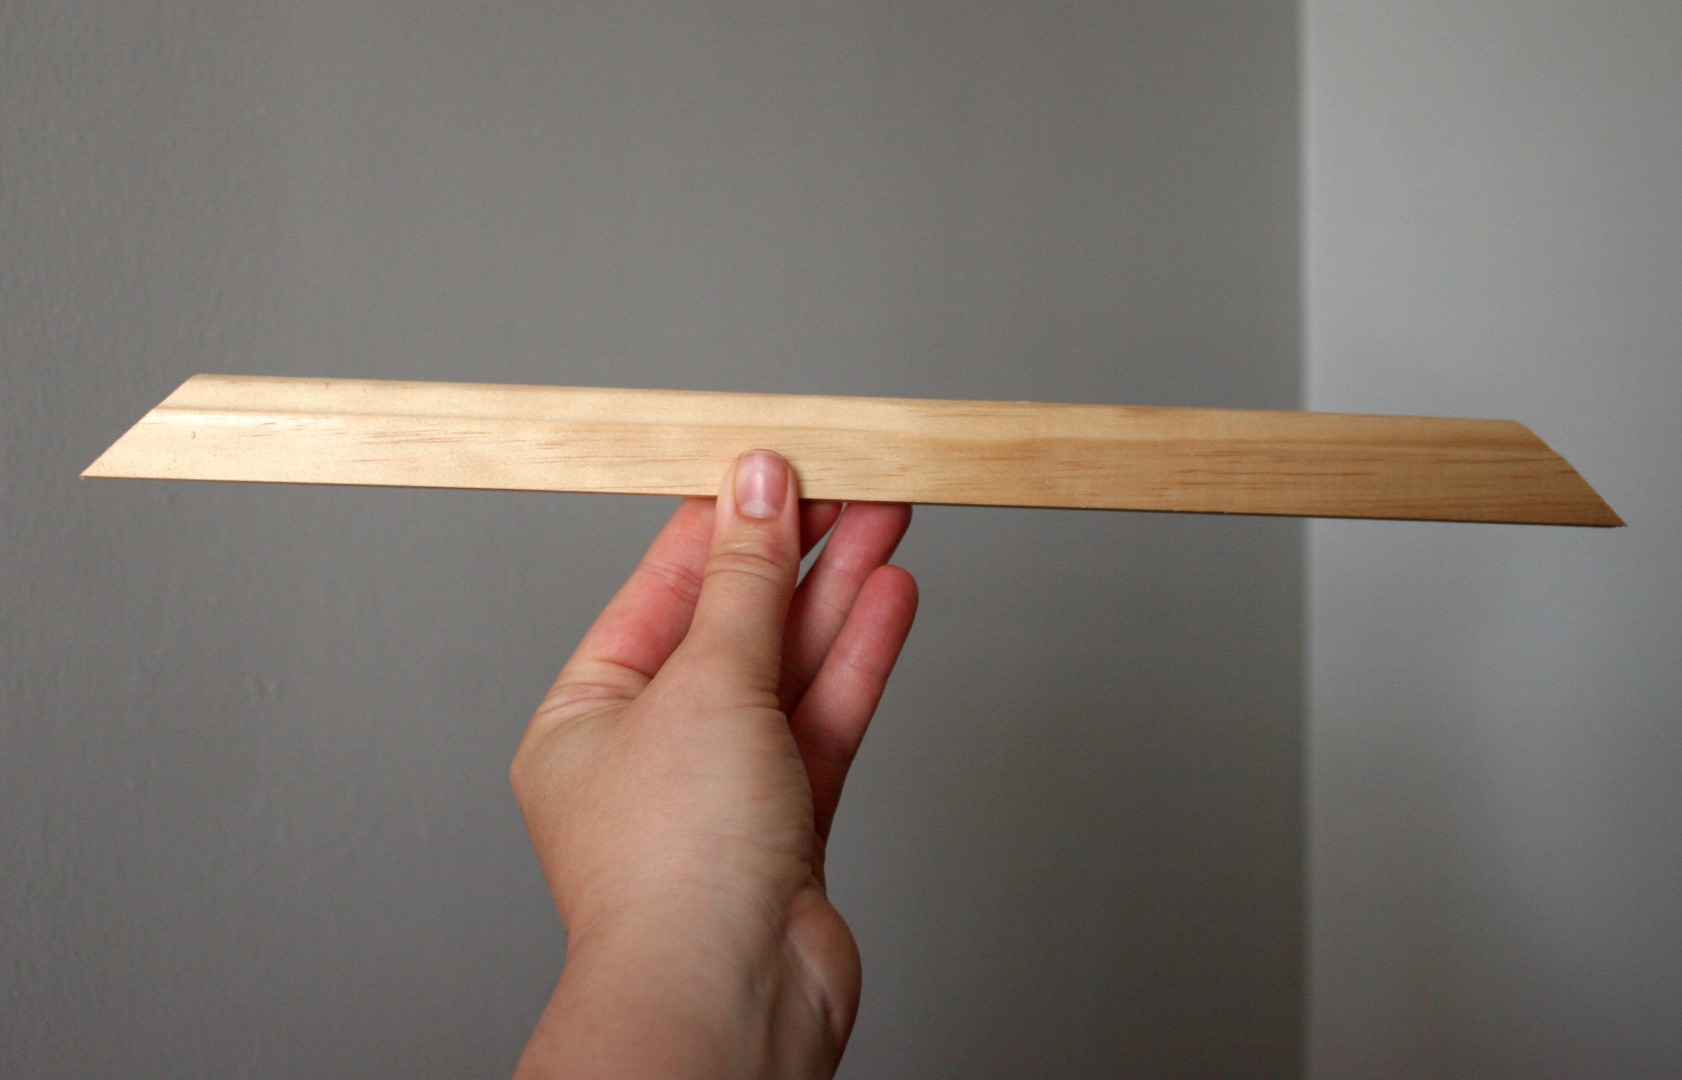
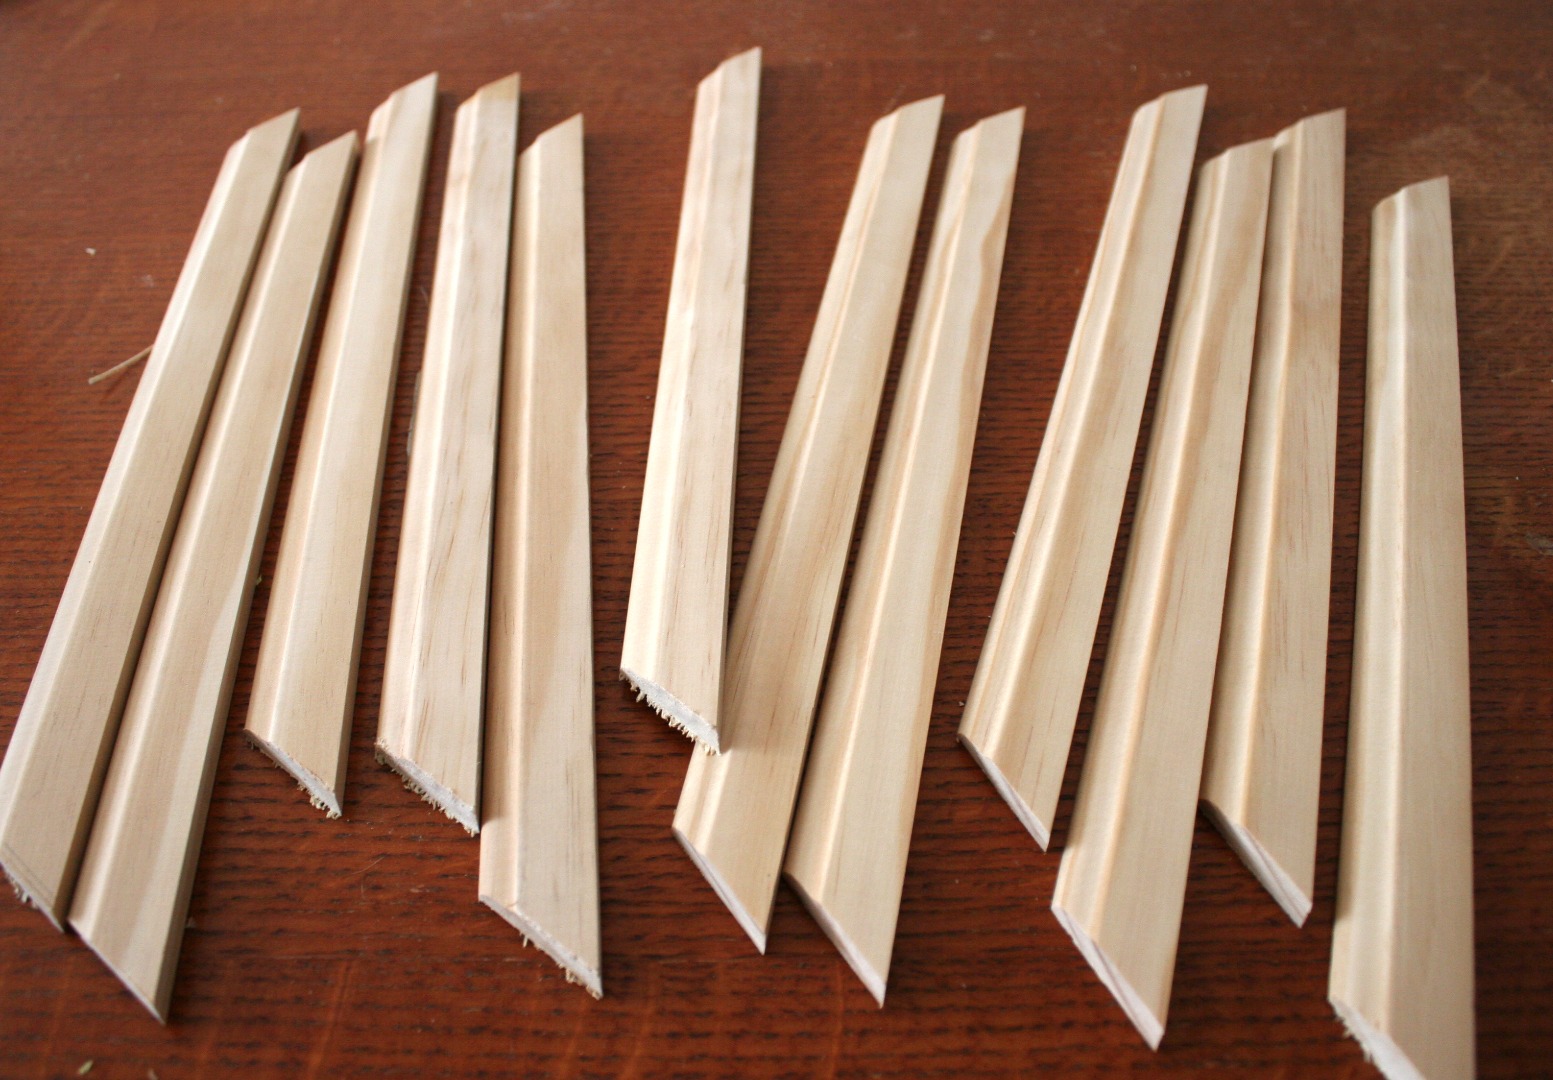
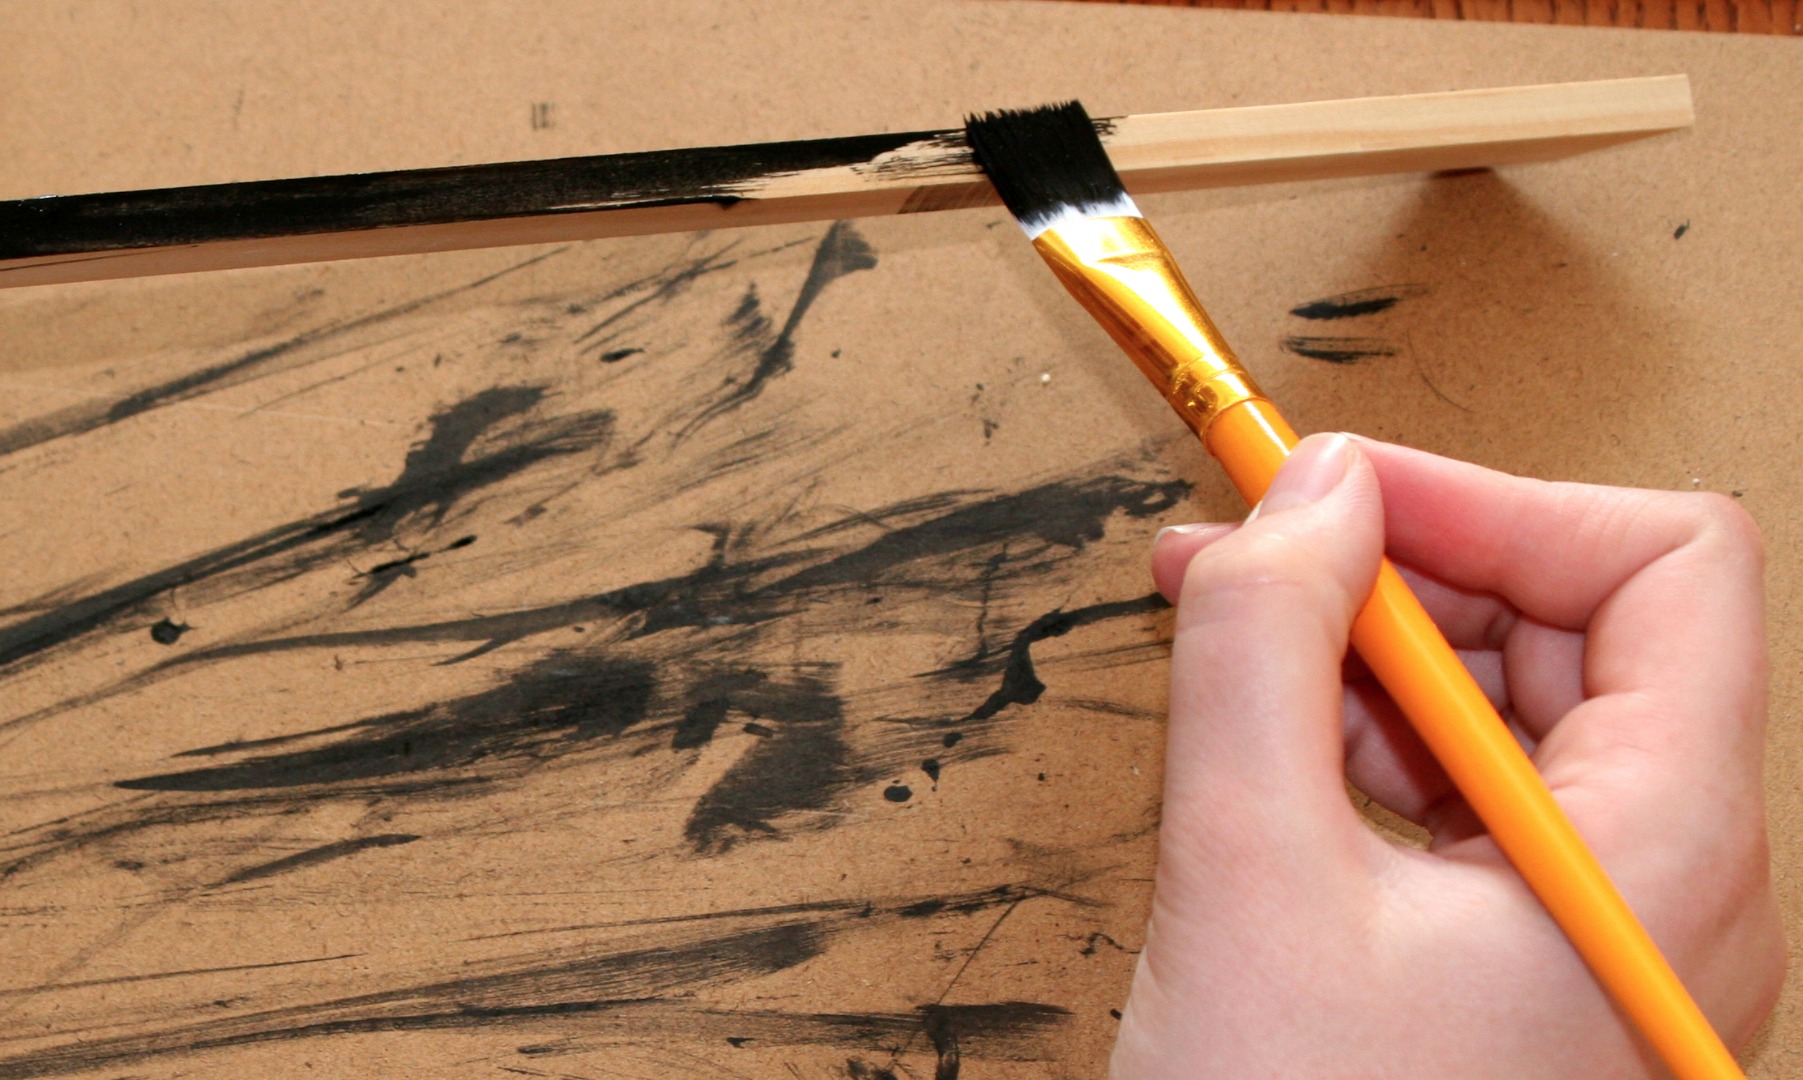
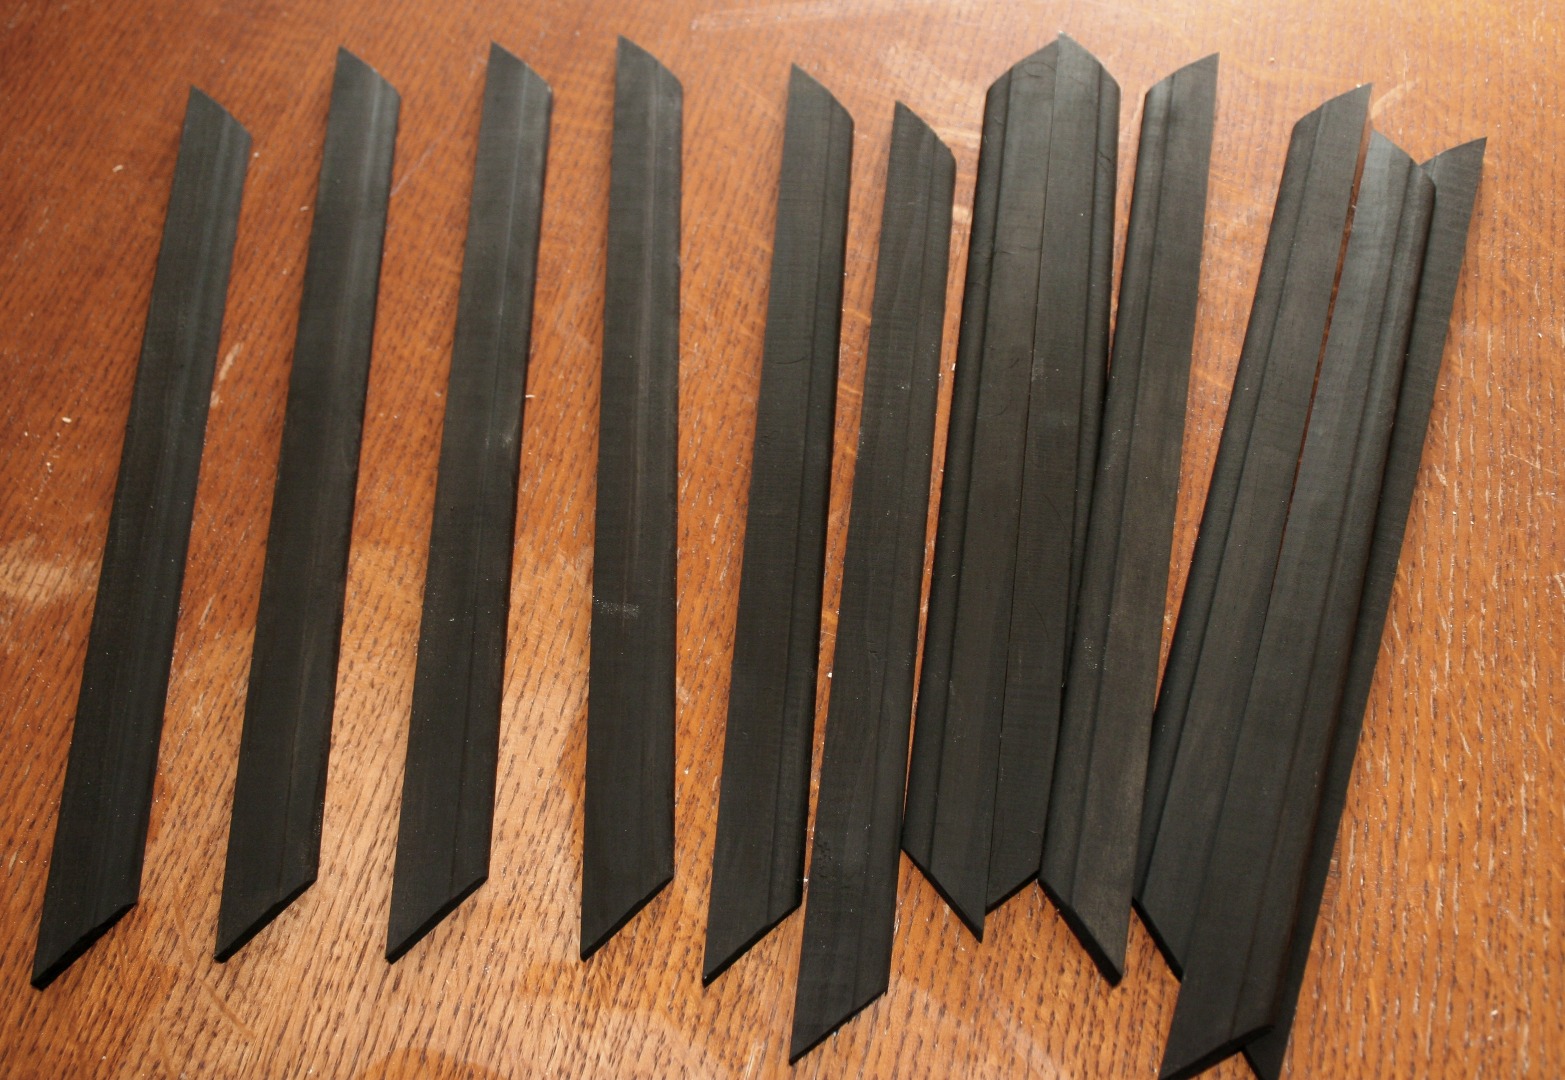
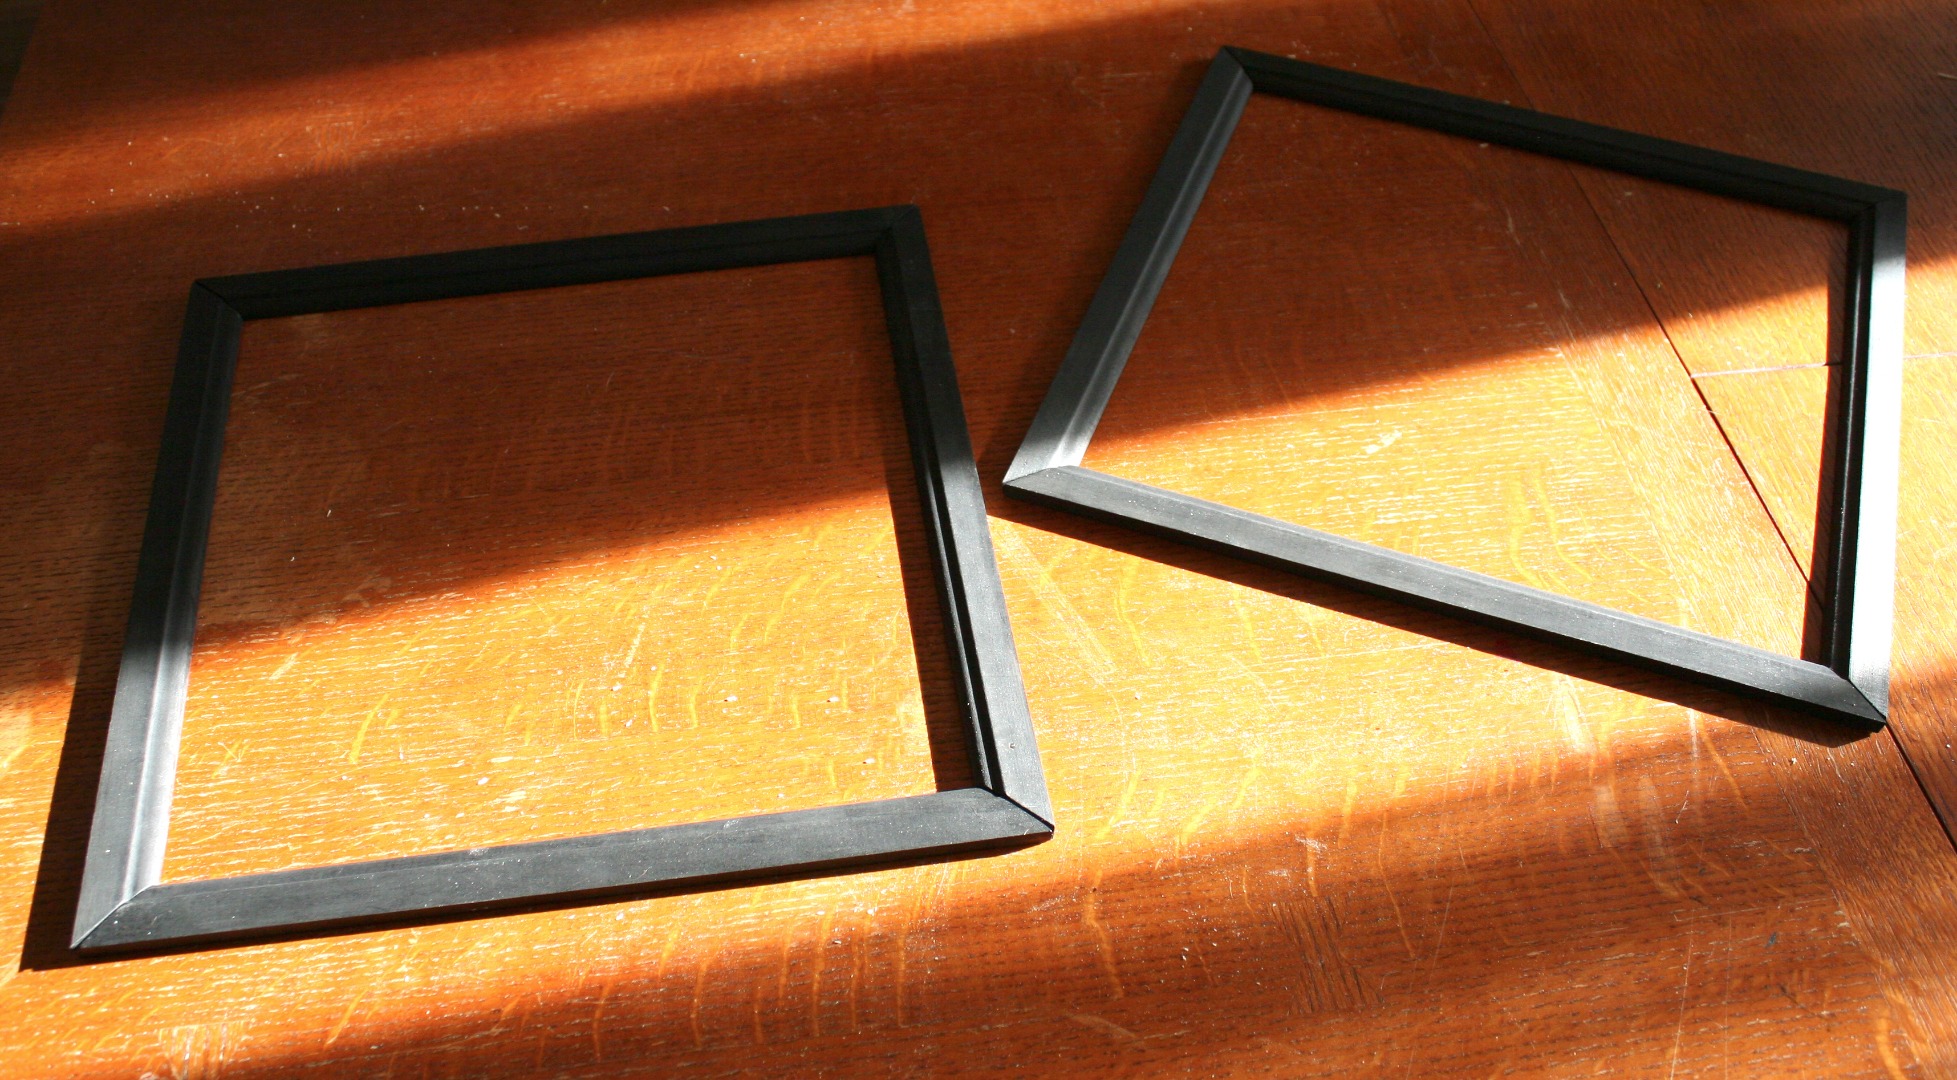
It turned out the squares in my pattern were actually tiny rectangles. So my finished matt size was 14”x 14-1/2”. I went to my local Lowes and picked up some pine baseboard to use for the frames. This is a nice cheap option since you get a 7’ piece for around $6.
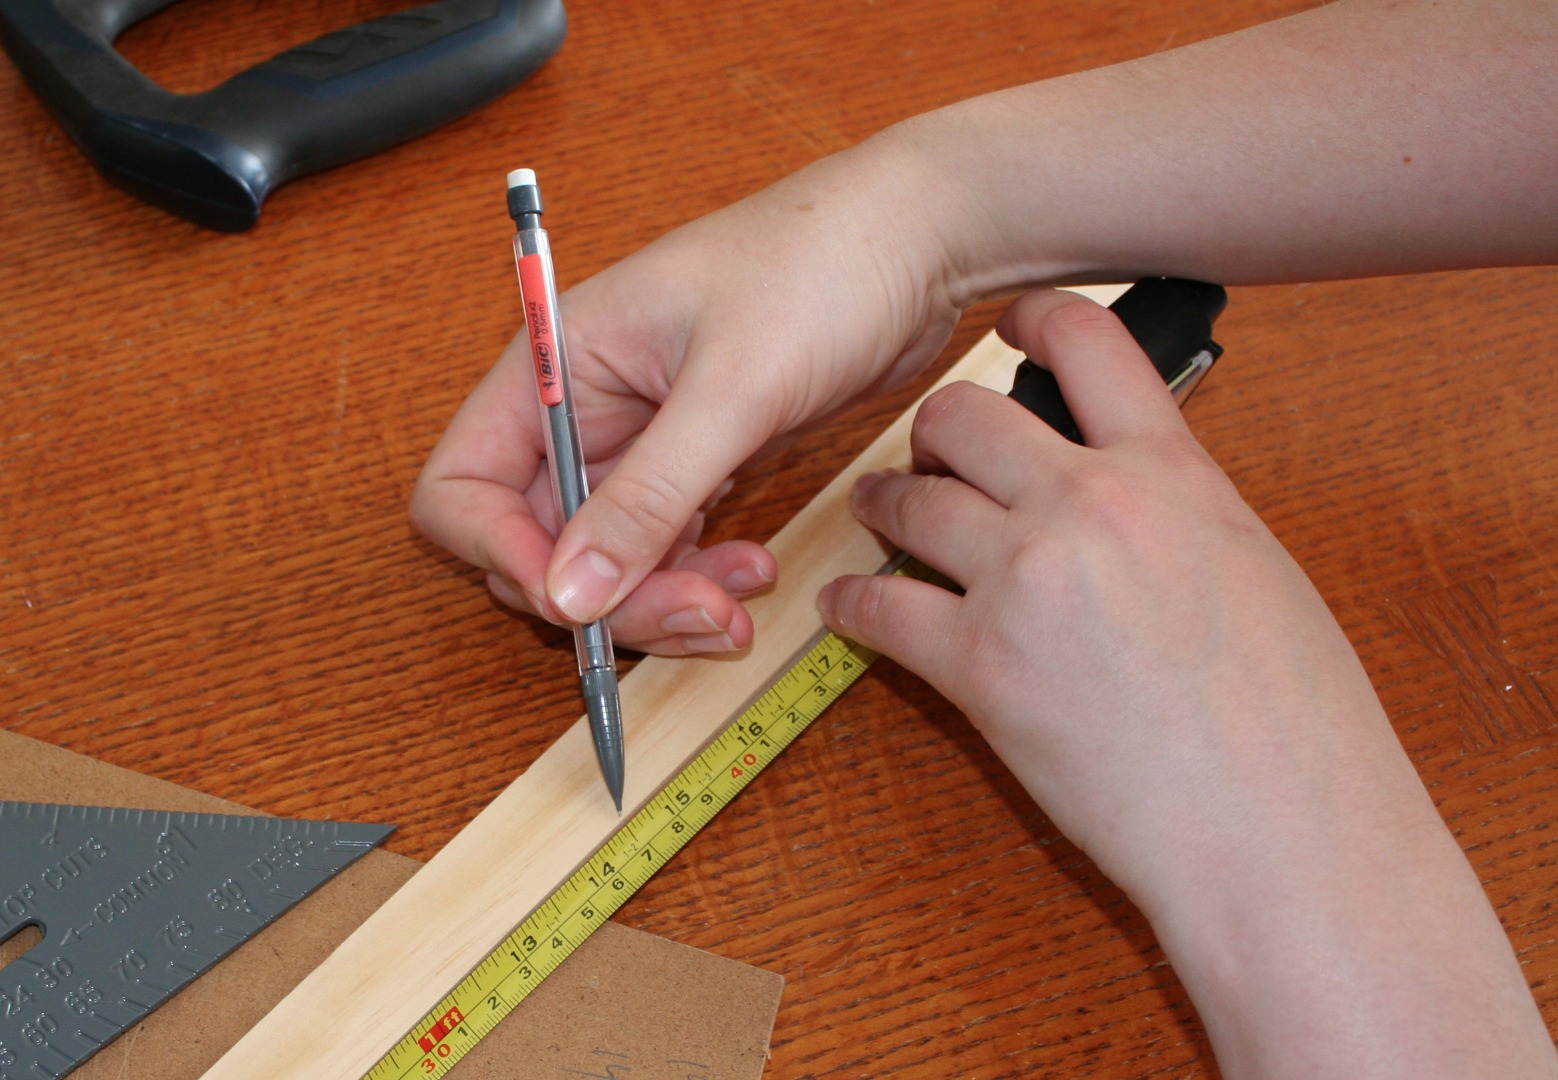
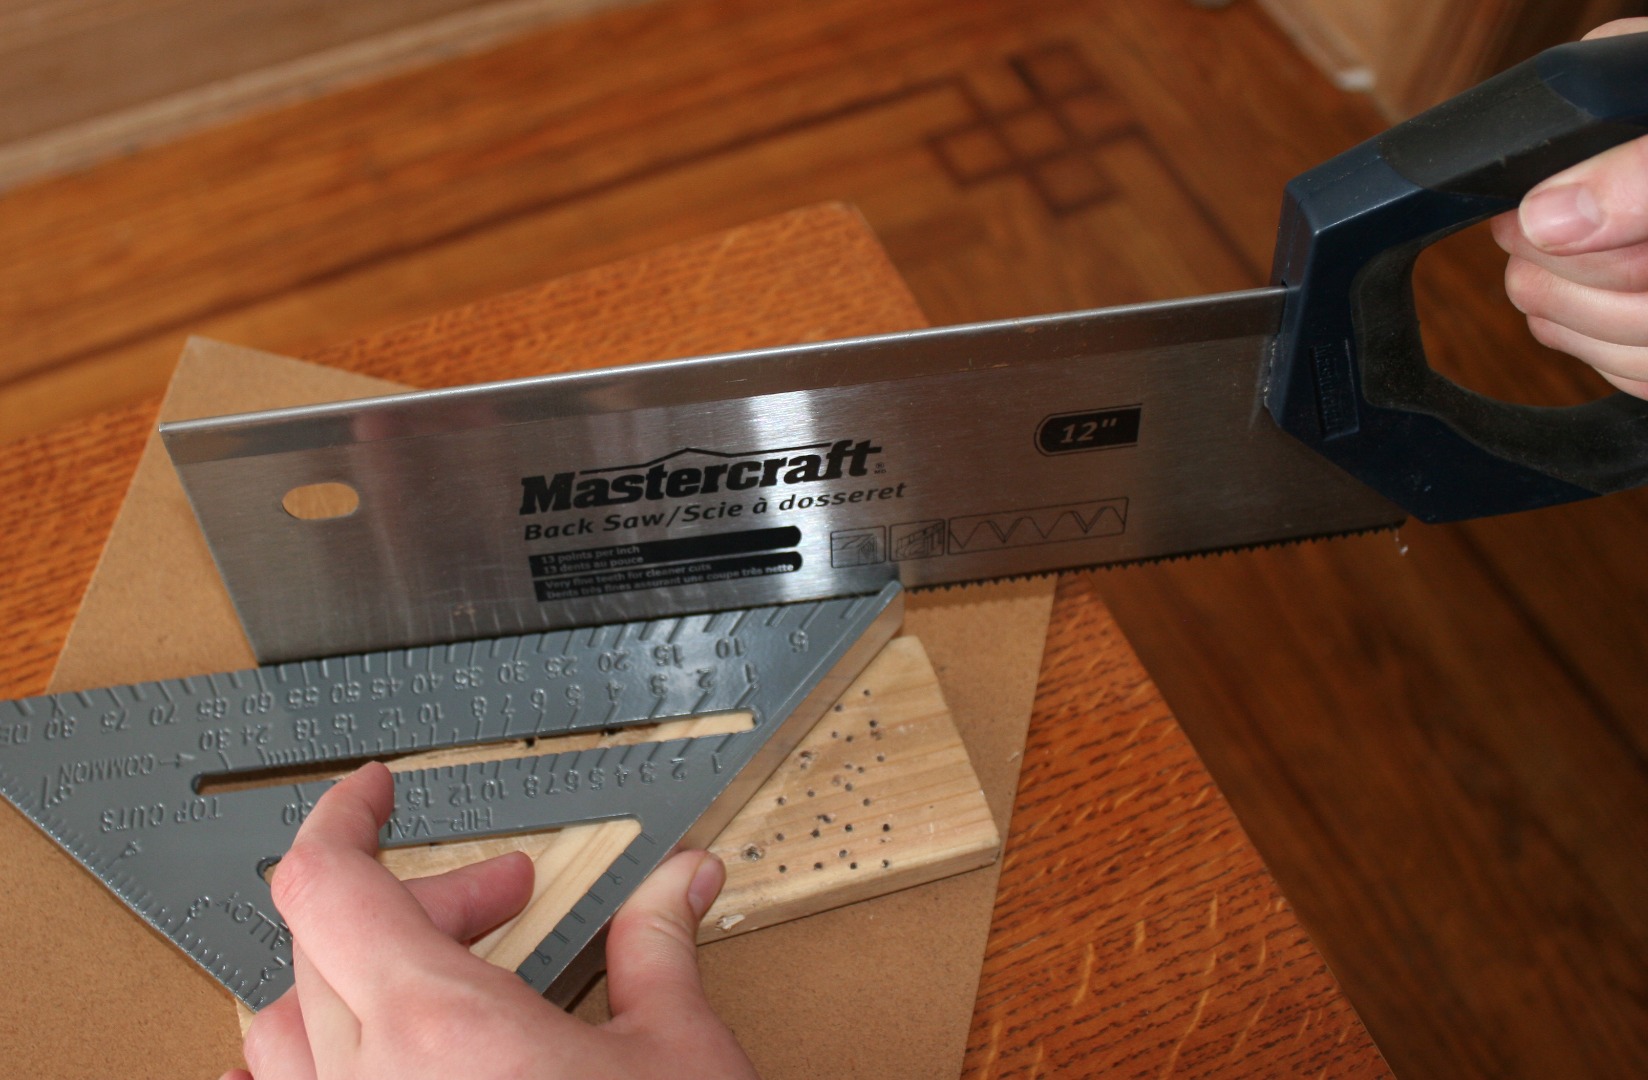
Cut your first 45° angle and measure from the tip. I had to cut 2 different lengths, 6 at 14” and 6 at 14-1/2”. You now can paint your frames or leave them natural. I’m painting my frames black because it will match the bed frame in our spare bedroom. I just used some acrylic black ink I had lying around.
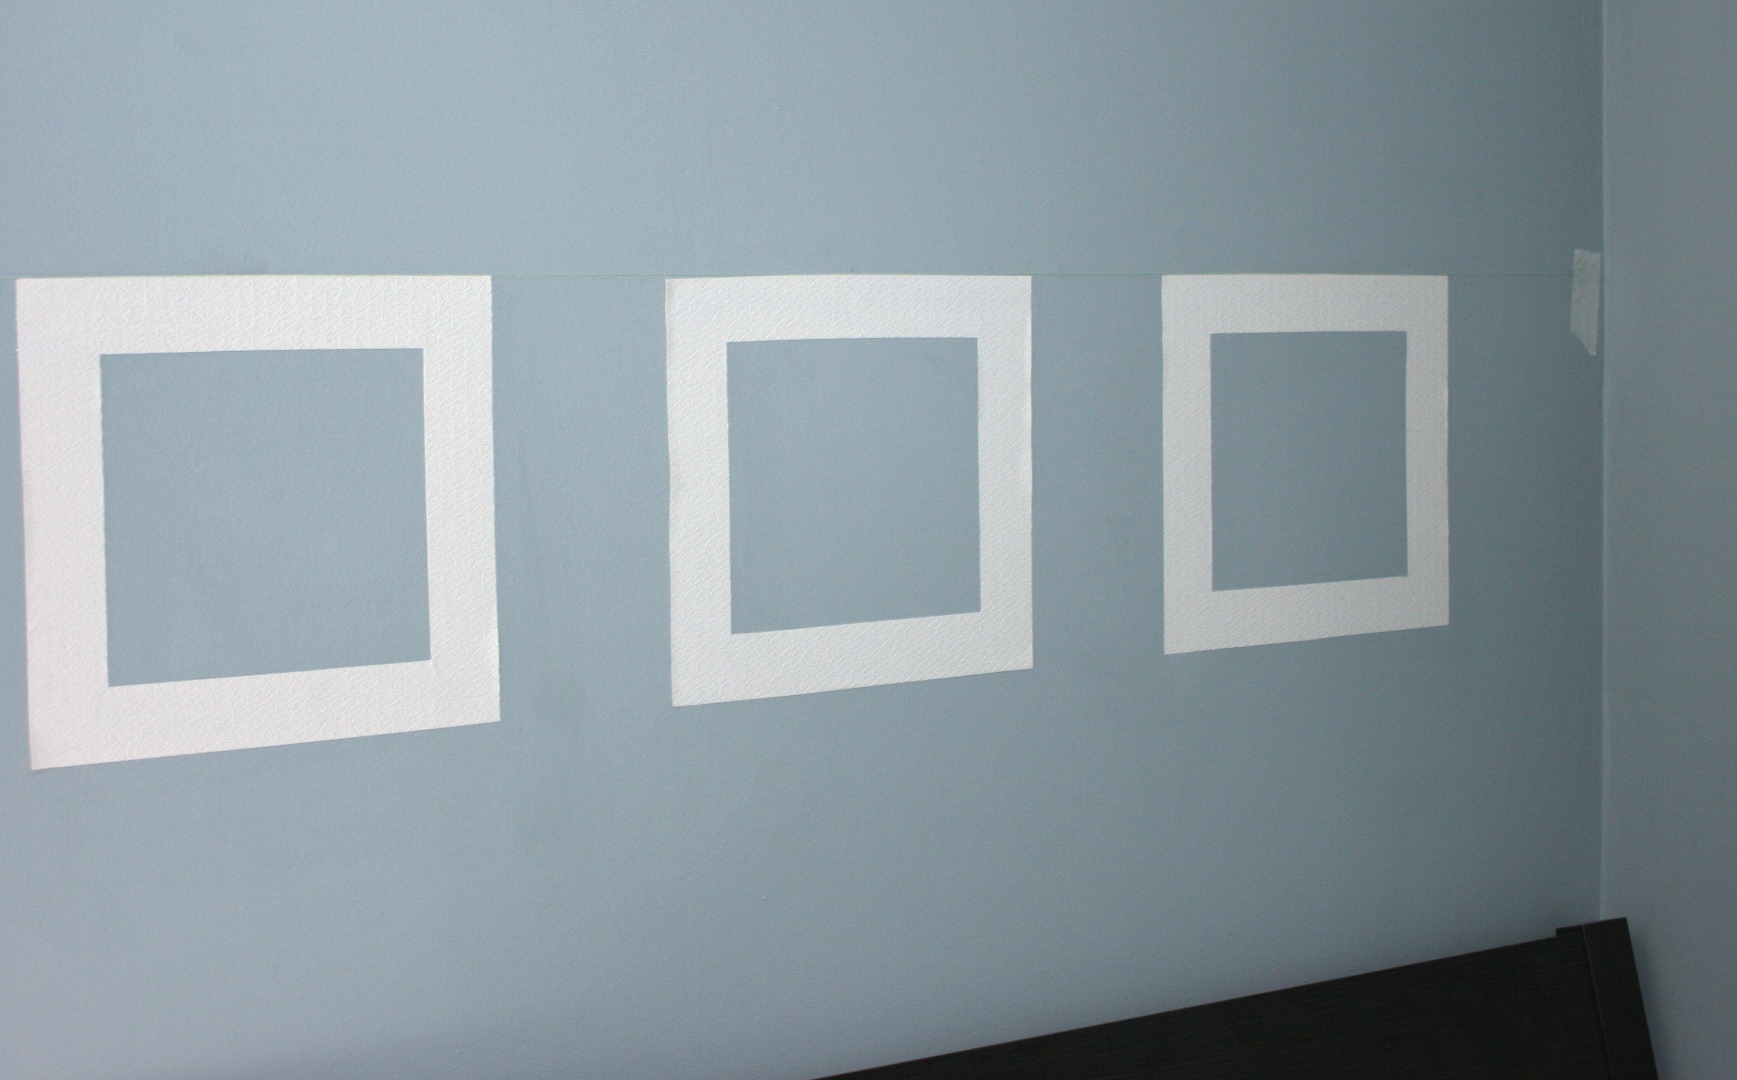
Measure and Mark the Wall
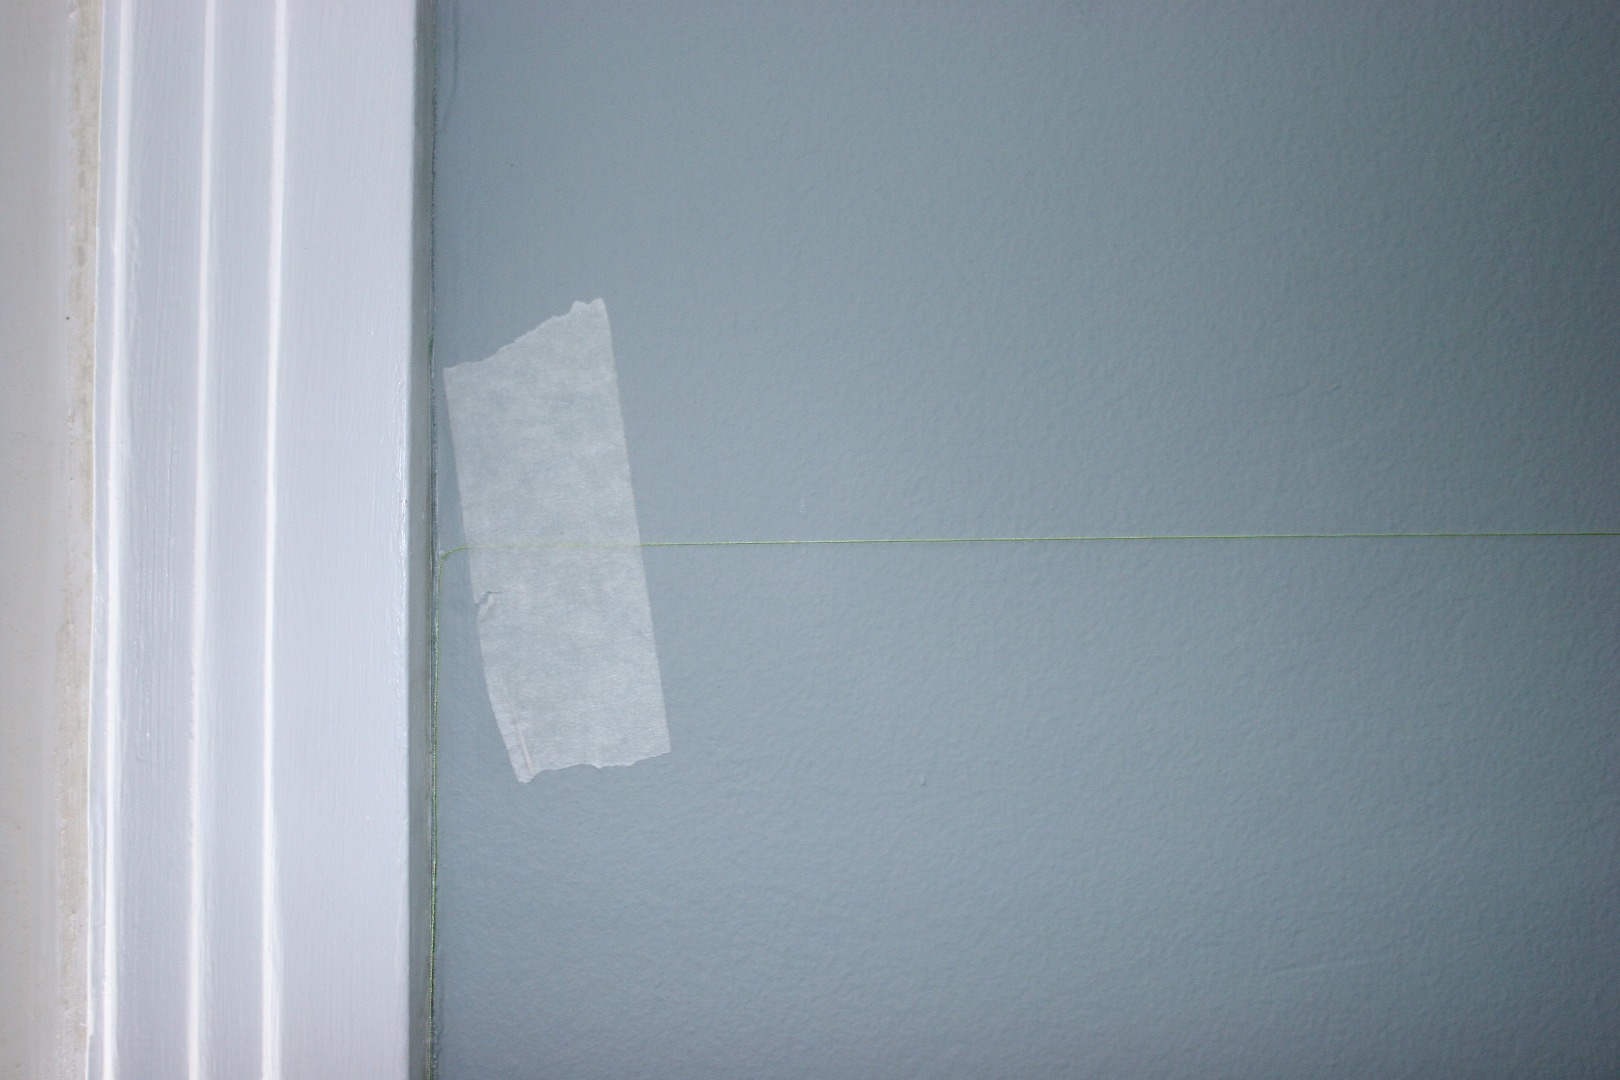
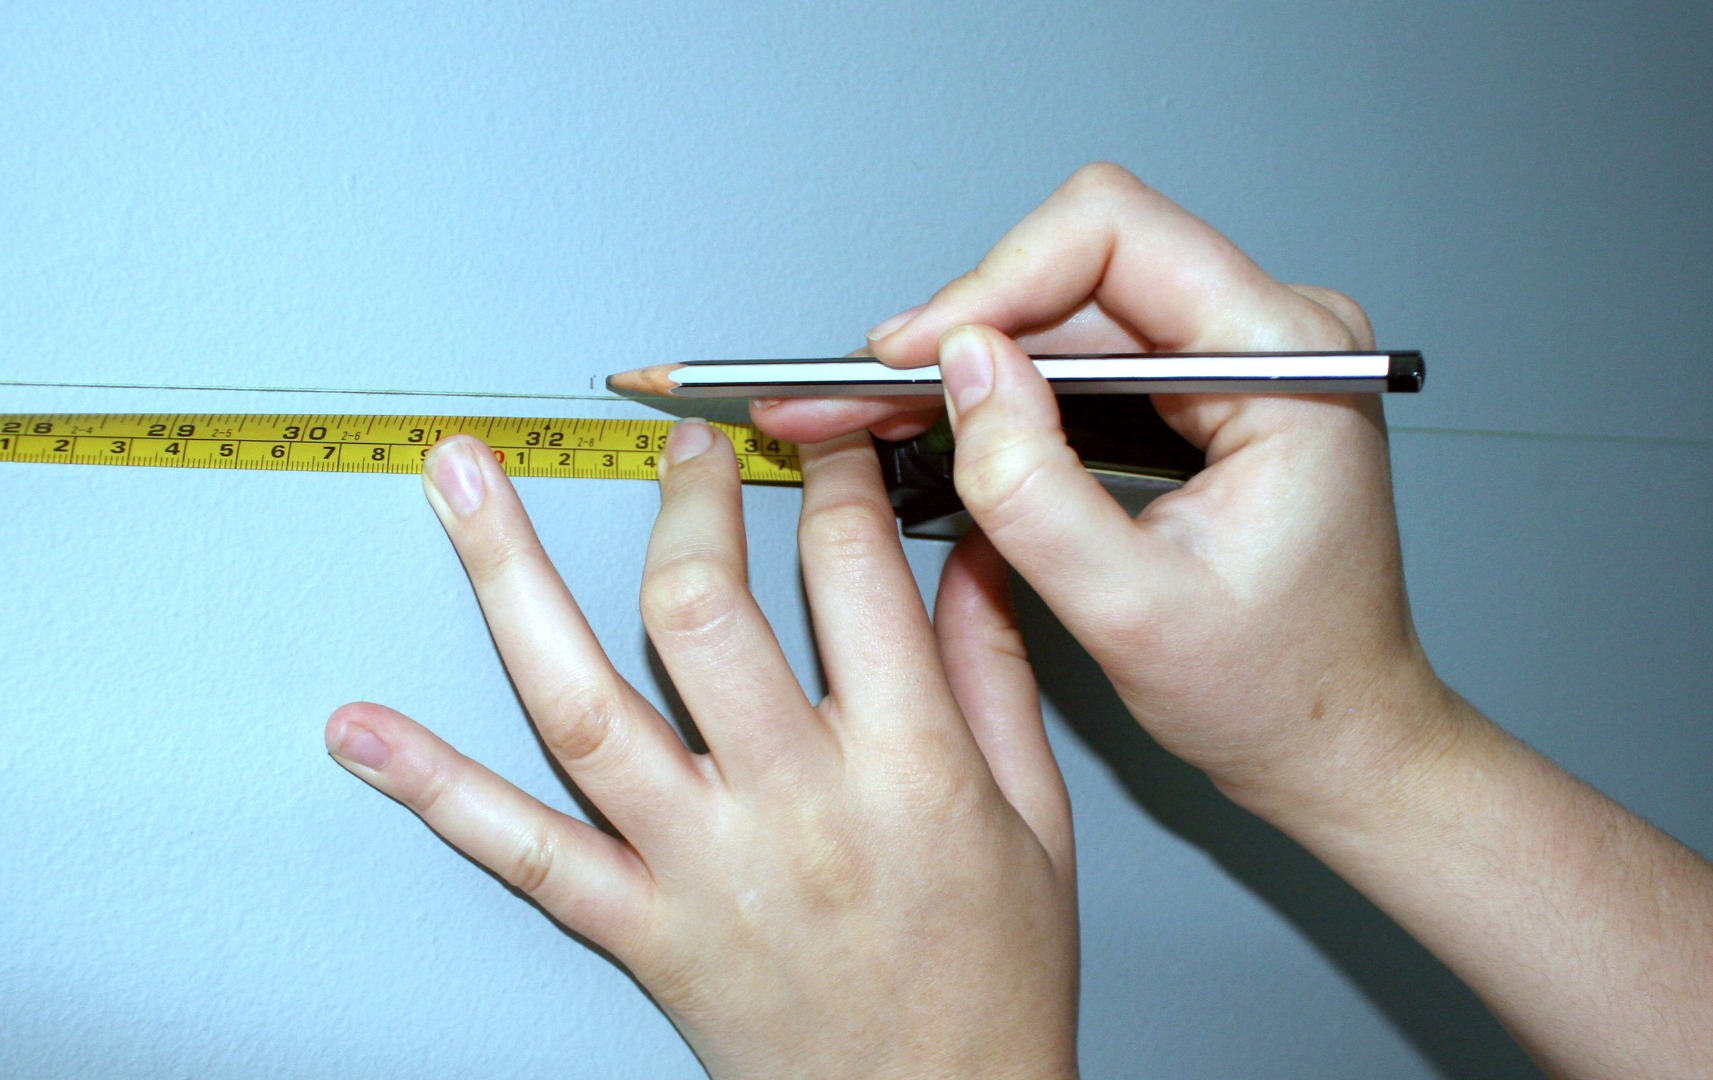
I want all 3 of my wallpaper graphics to align. An easy trick (if you don’t have a chalk line) is to measure the height at both ends of the wall and tape a string at that point.
Now that you have your string up, find your centre point on the wall and mark it. Next, find the centre points of where you want your left and right images to go.
Stick Wallpaper to Wall
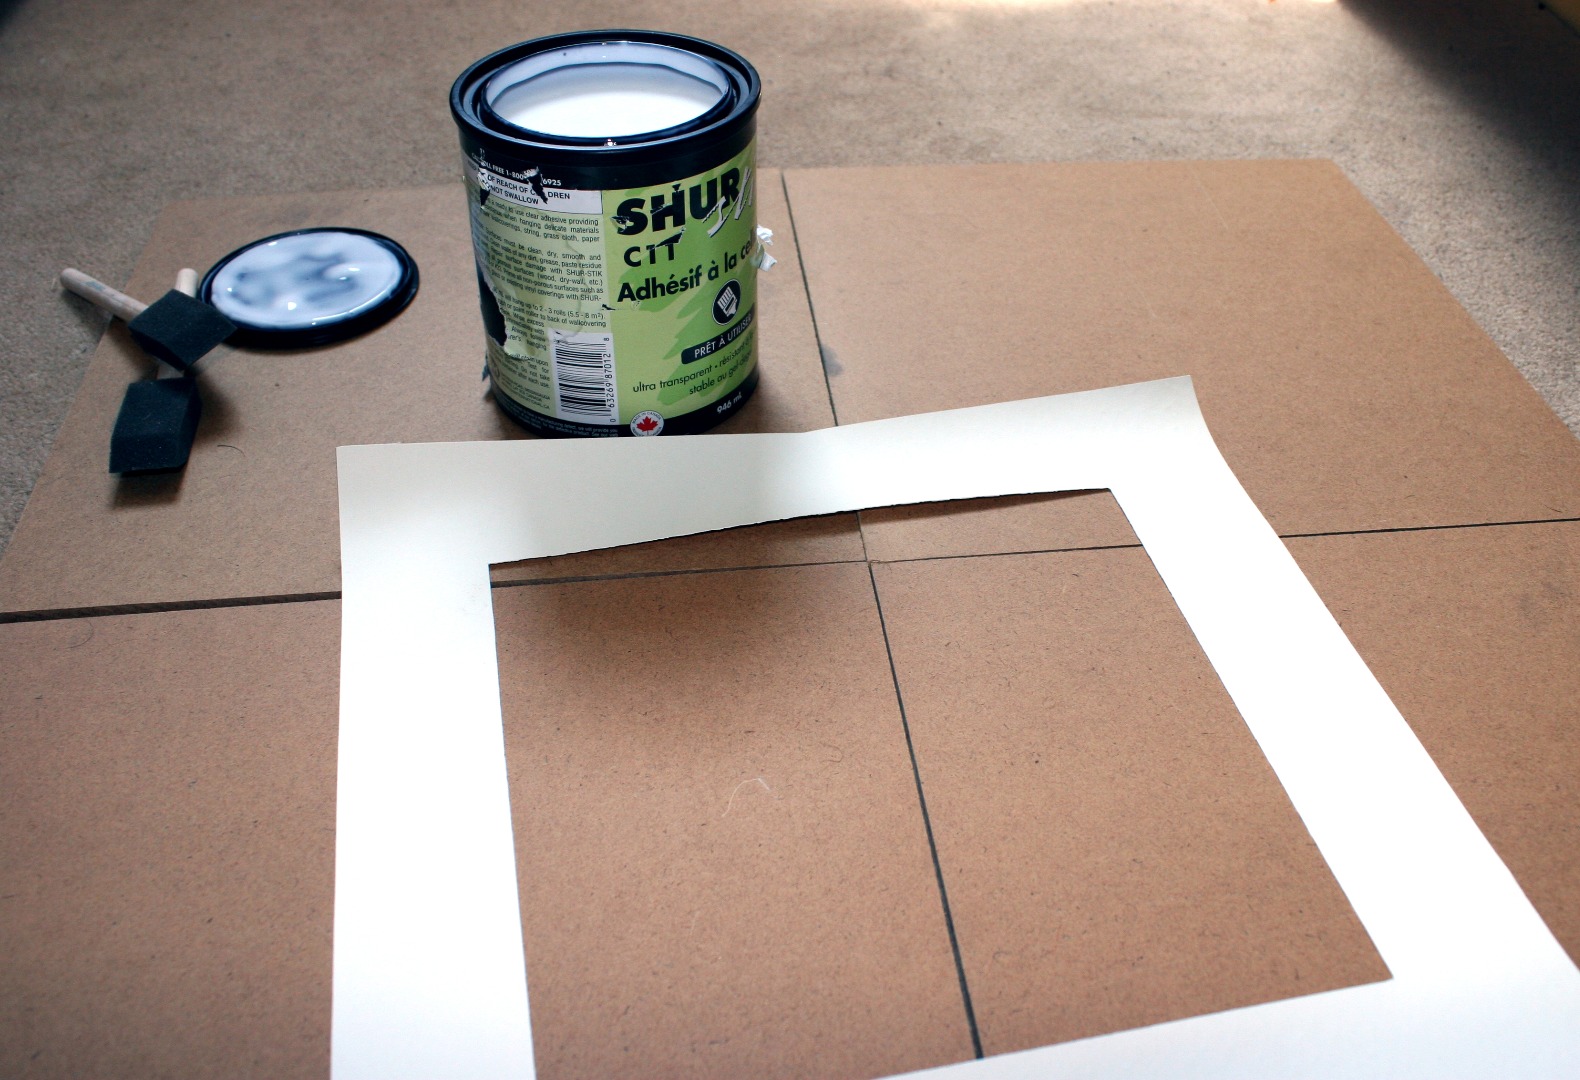
There are a couple kinds of wallpaper, one kind already has glue on the back so all you need to do is get it wet and stick it on the wall. The other kind needs you to add glue. I got the kind that needs you to add the glue/paste.
At this stage it’s also good to find the centre point on your wallpaper matting before you start. Just mark that point with a pencil on the back of the wallpaper.
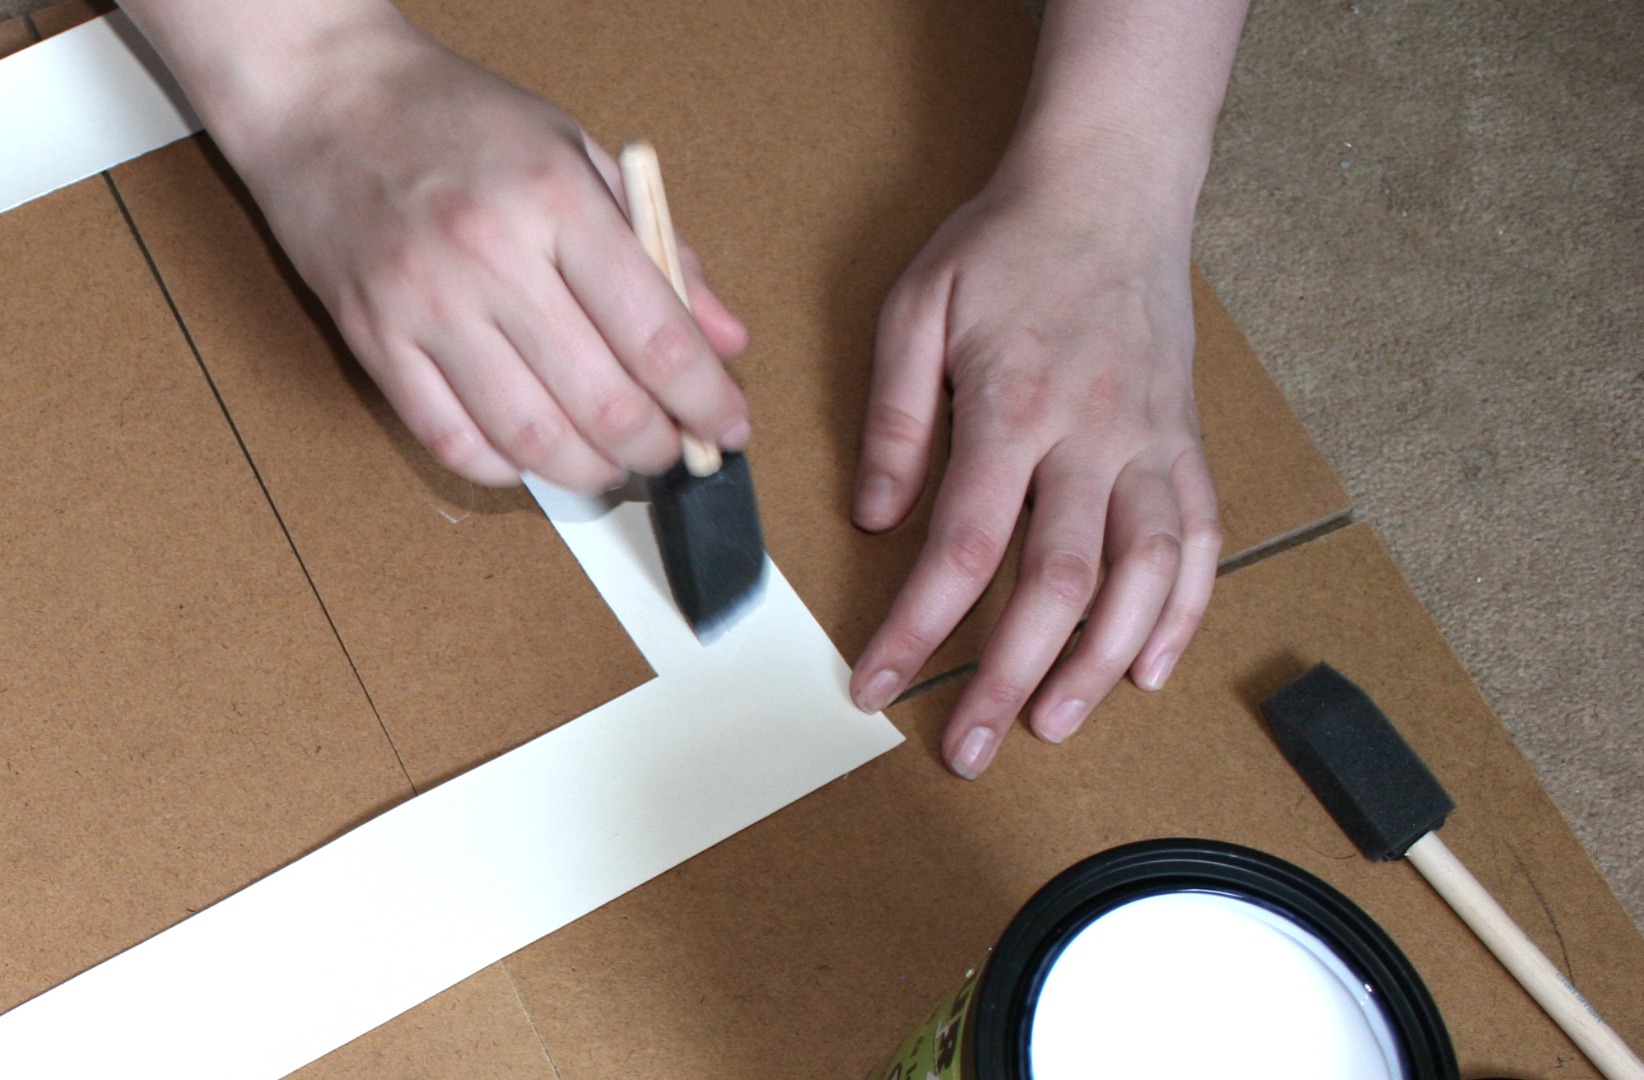
This step goes easiest with 2 people. Get everything ready before you start. You need to have your wallpaper cutouts, a sponge brush, wallpaper paste, a damp cloth, and a putty knife at the ready.
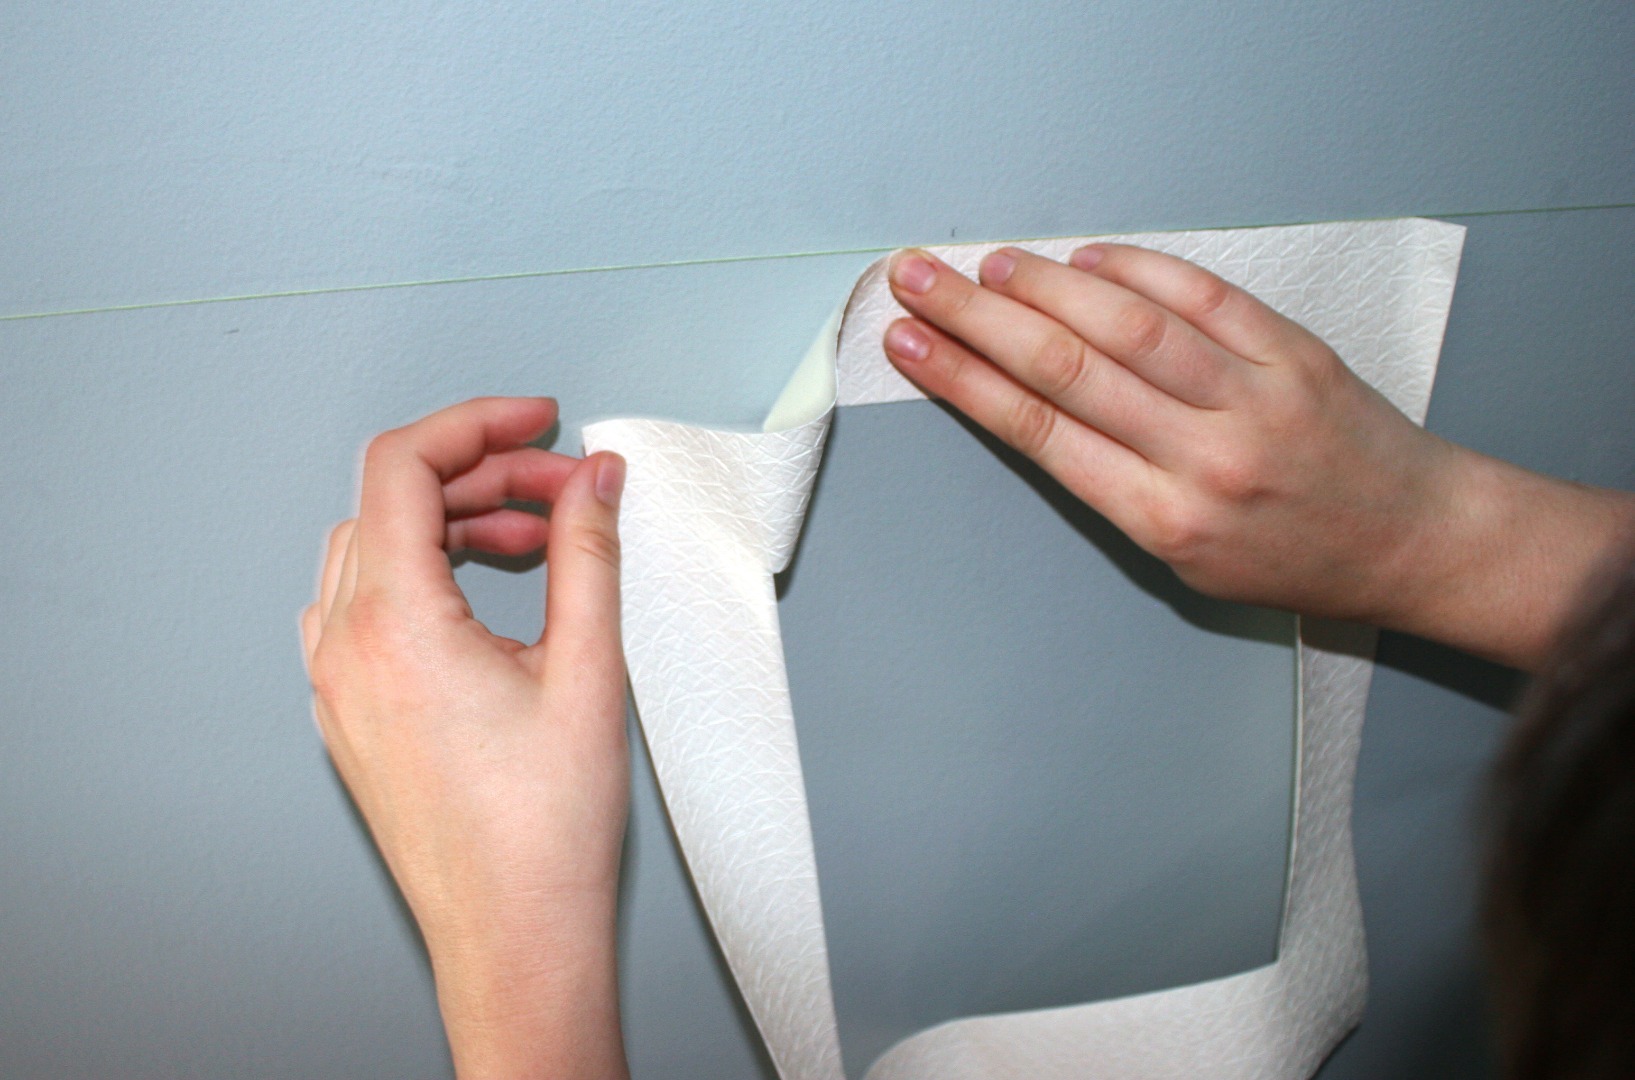
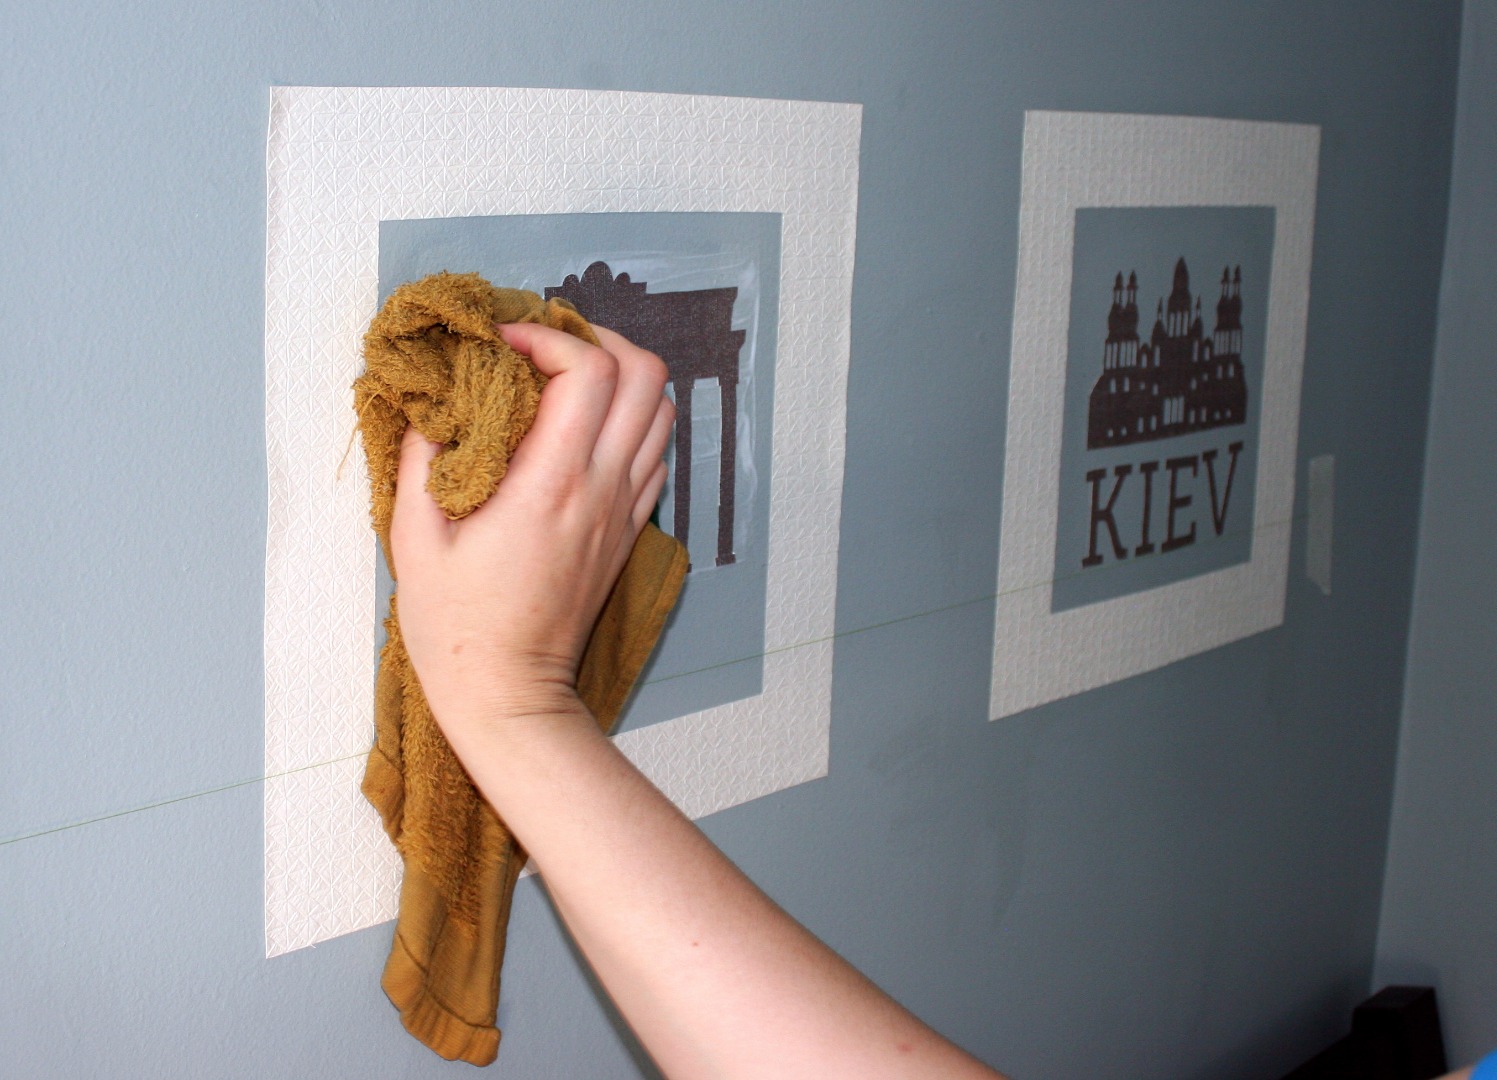
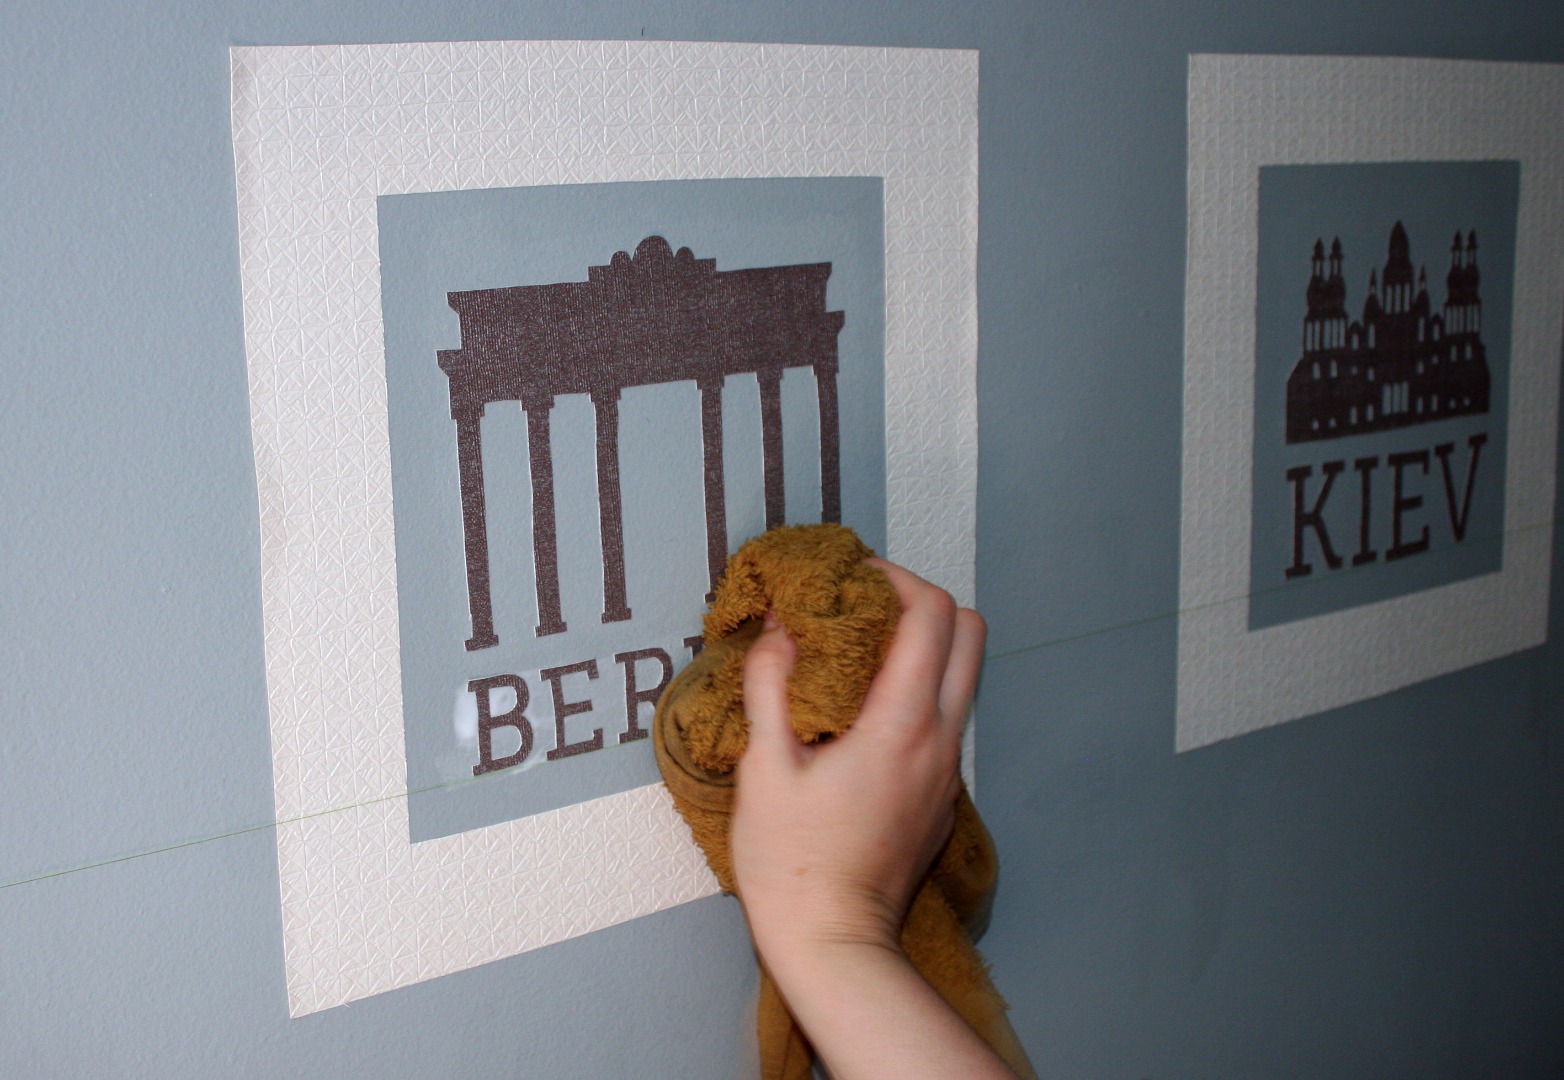
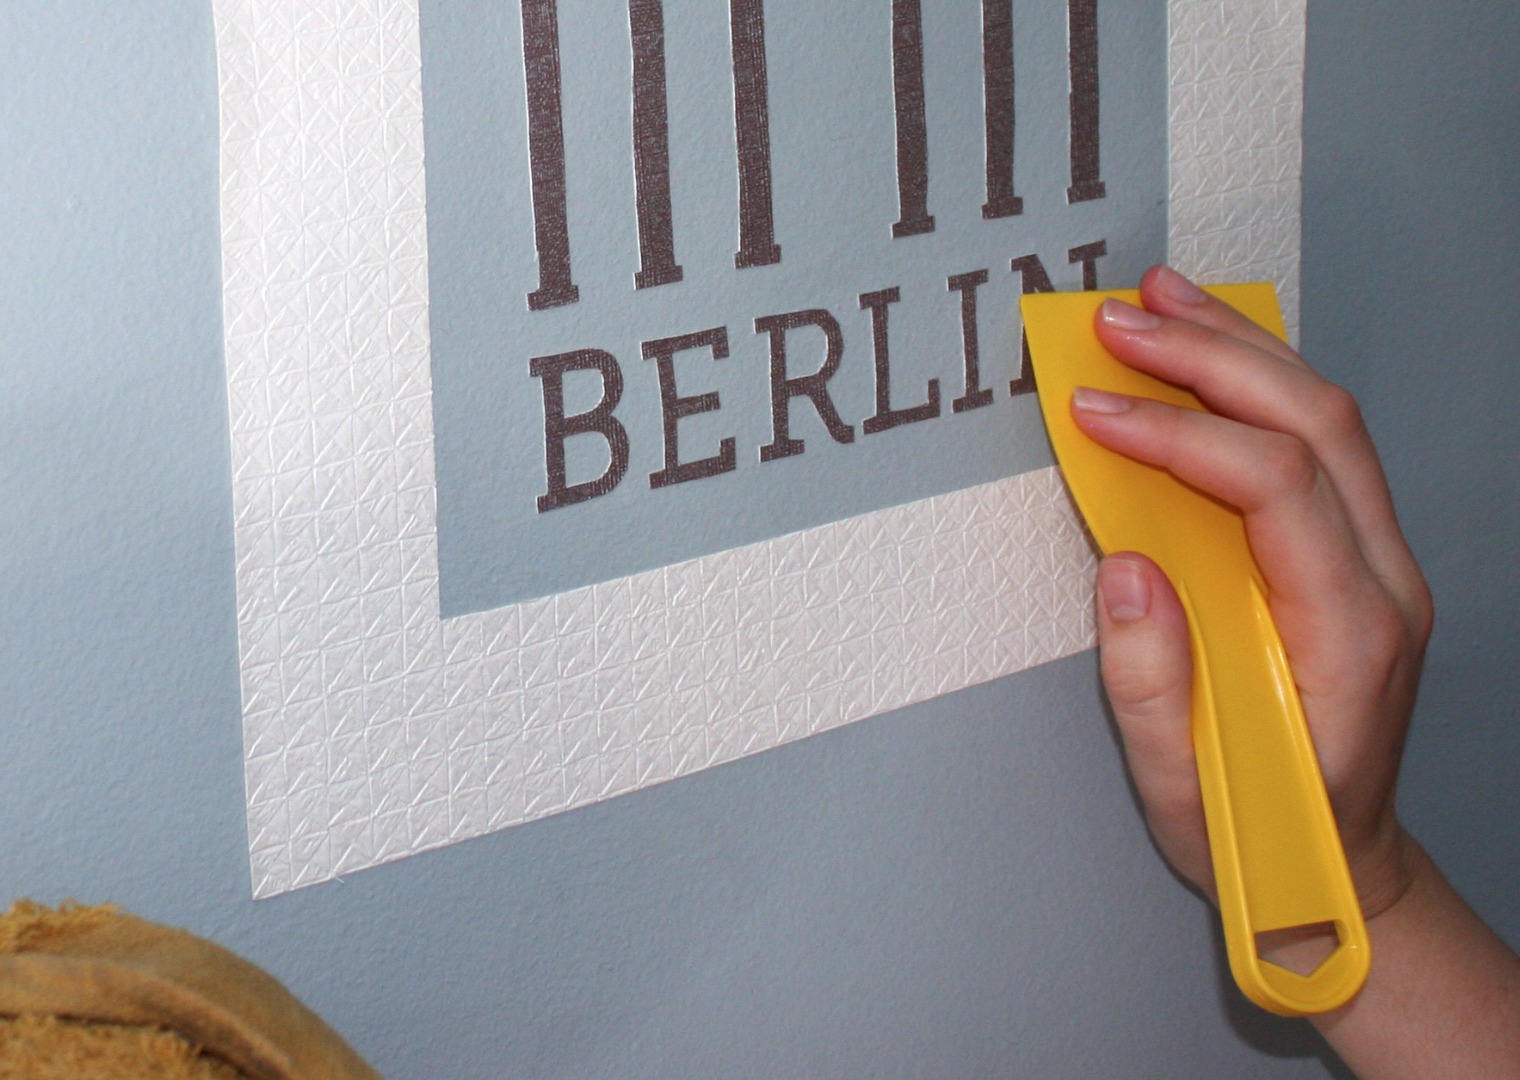
Once you add the paste to the back you need to get it on the wall fairly quickly. Align the top of the matting level with the string and centred on your mark. Smooth out the matting.
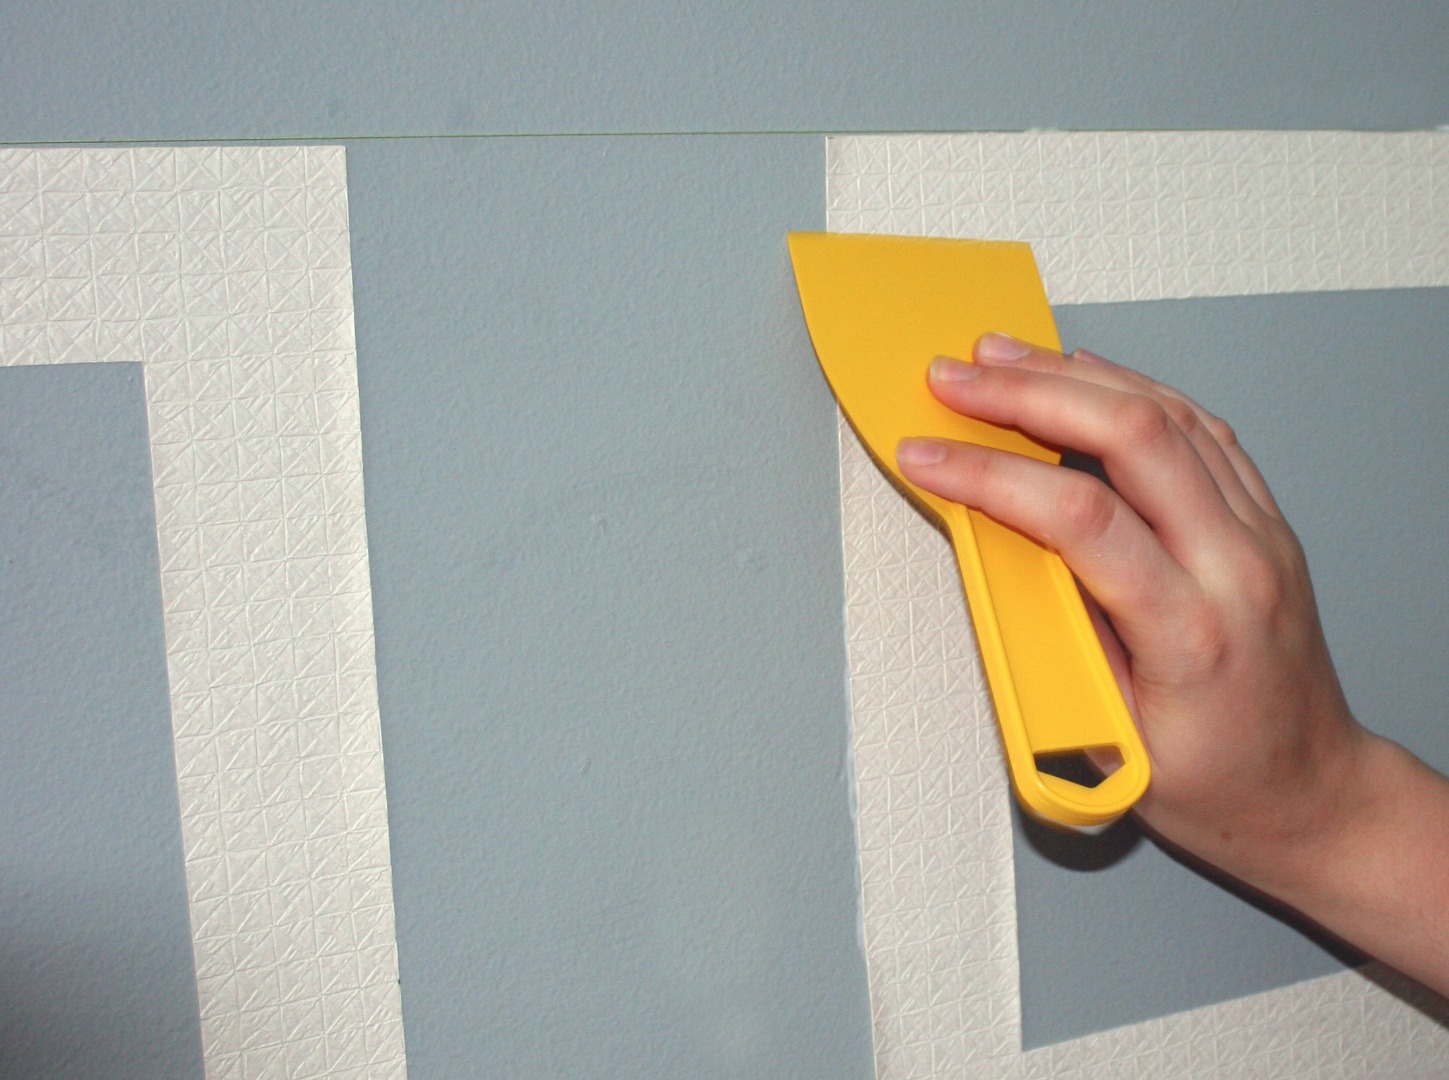
When you’re happy with the alignment, interchange between using a damp cloth to blot away excess paste, and smoothing the wallpaper with your putty knife.
Do the same with the next 2 wallpaper mattings.
Tip: On my first attempt I didn’t use enough paste so the wallpaper didn’t stick to the wall. Use slightly more paste than you think you need.
Add Your Artwork Inside the Matting
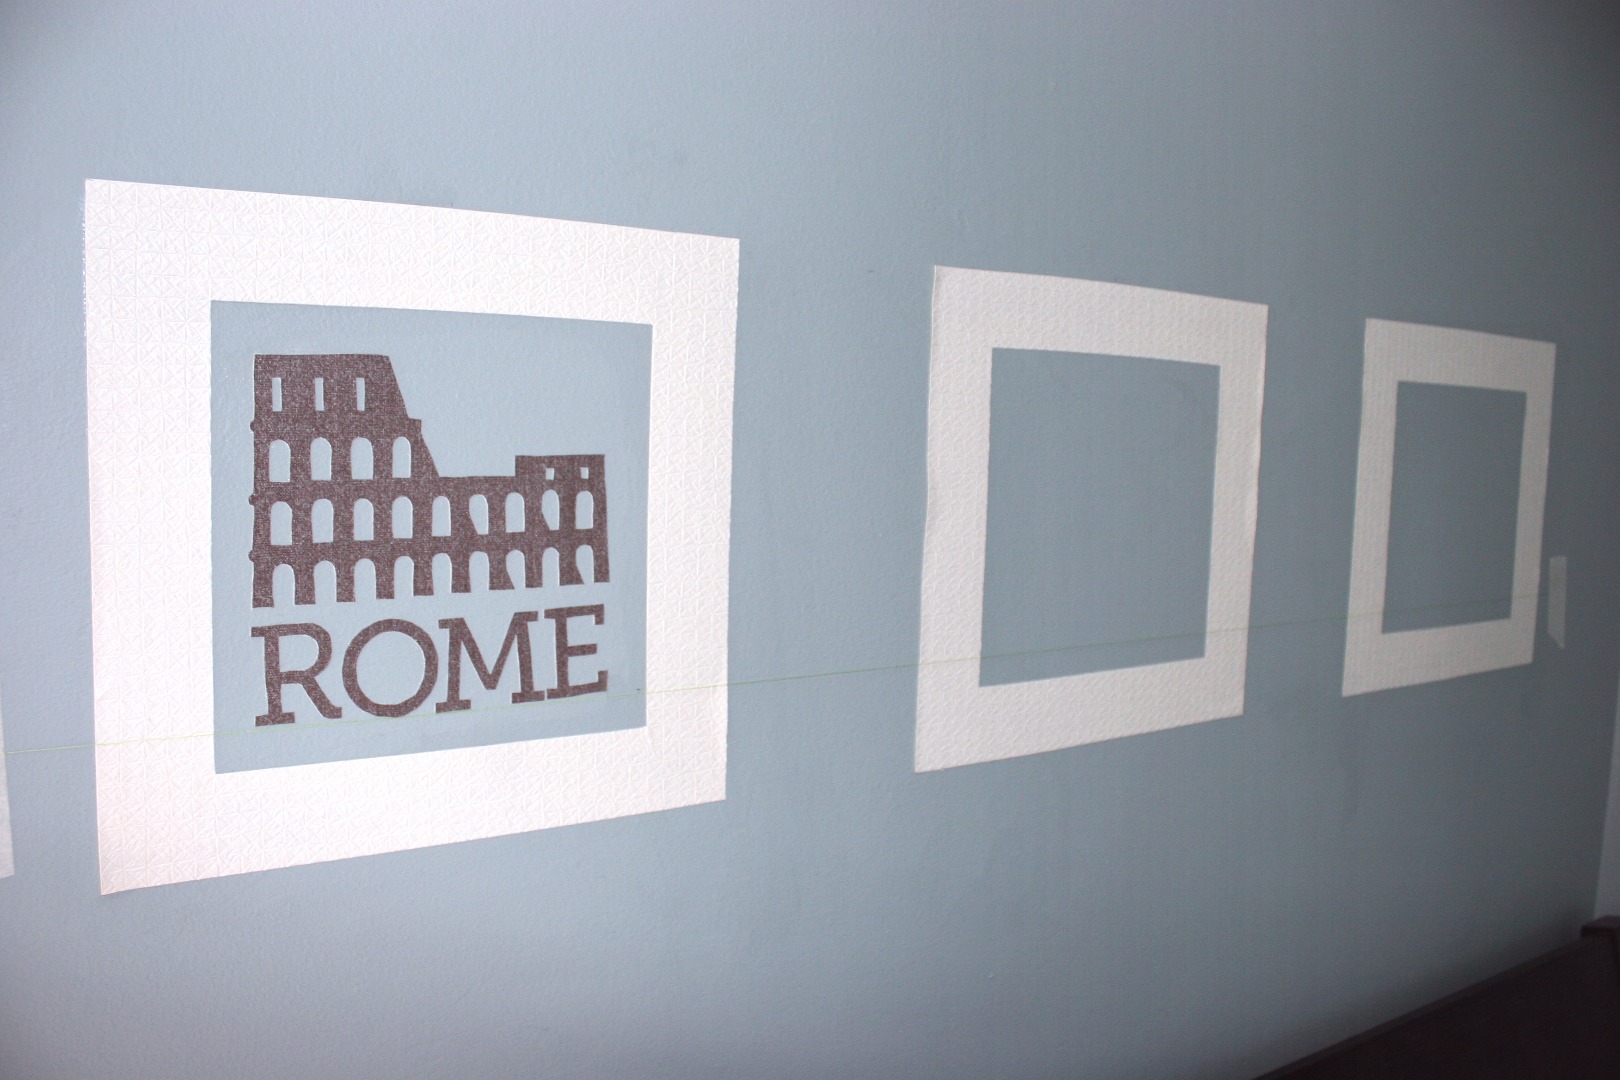
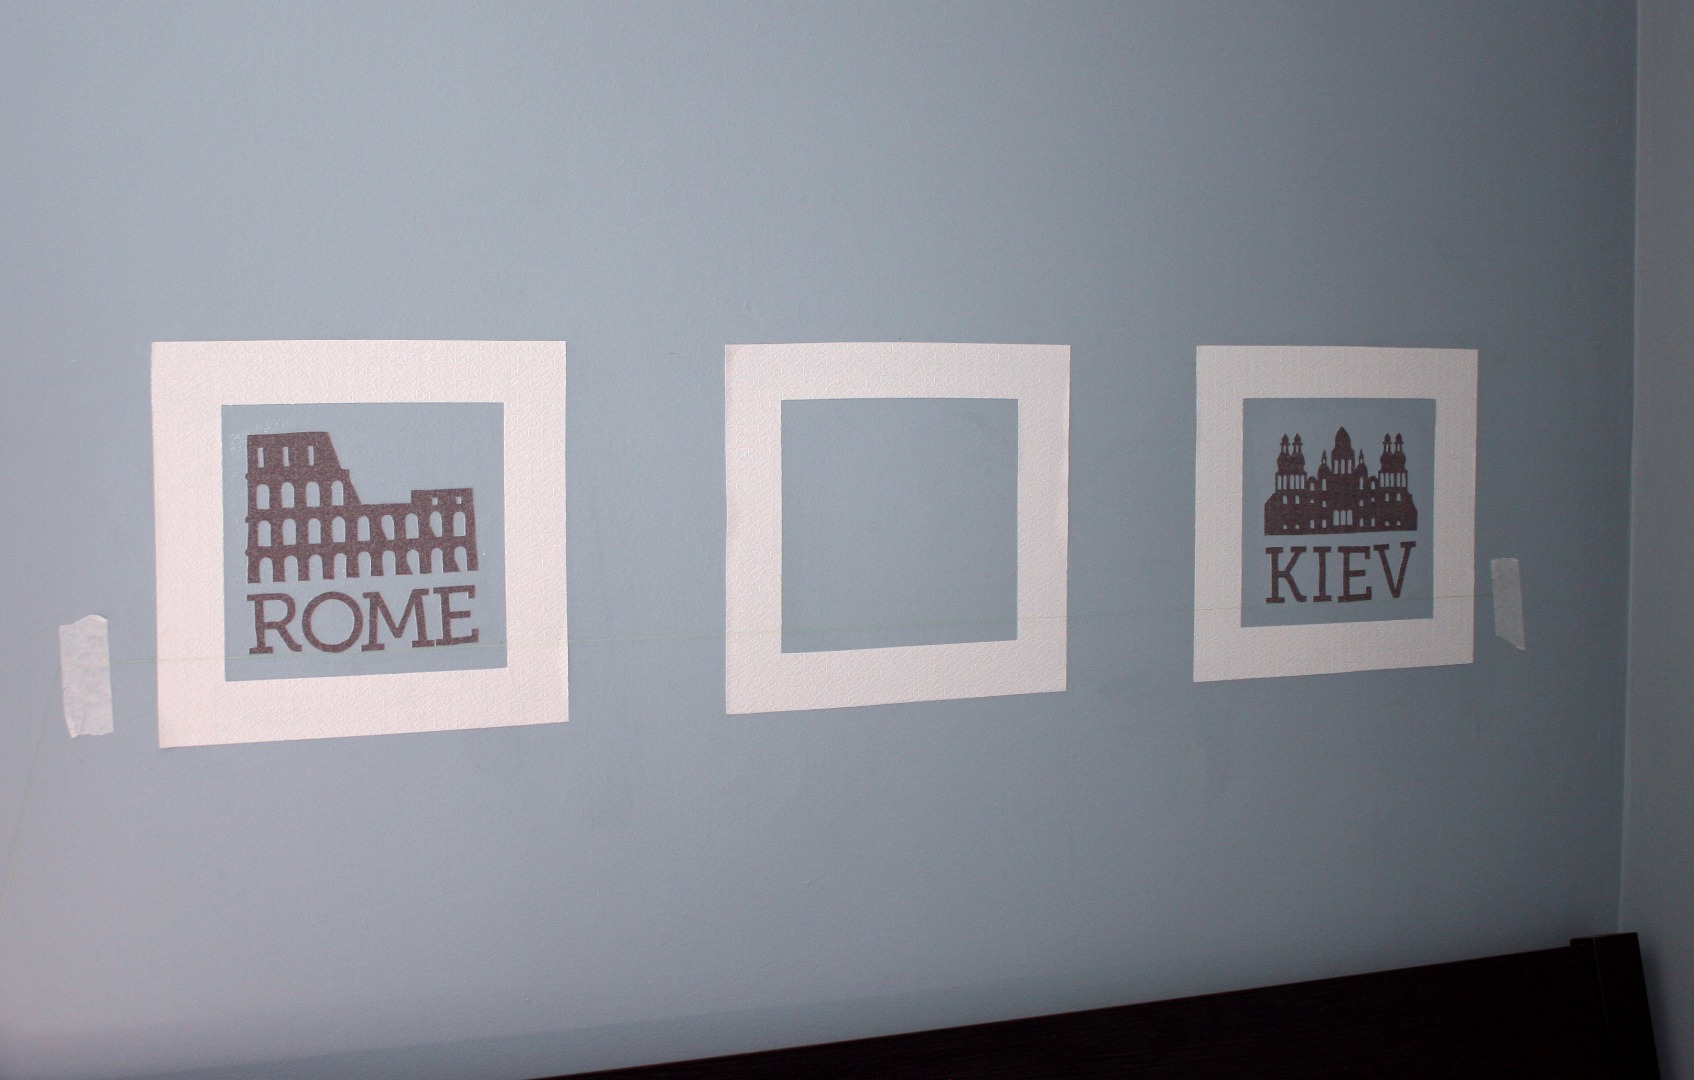
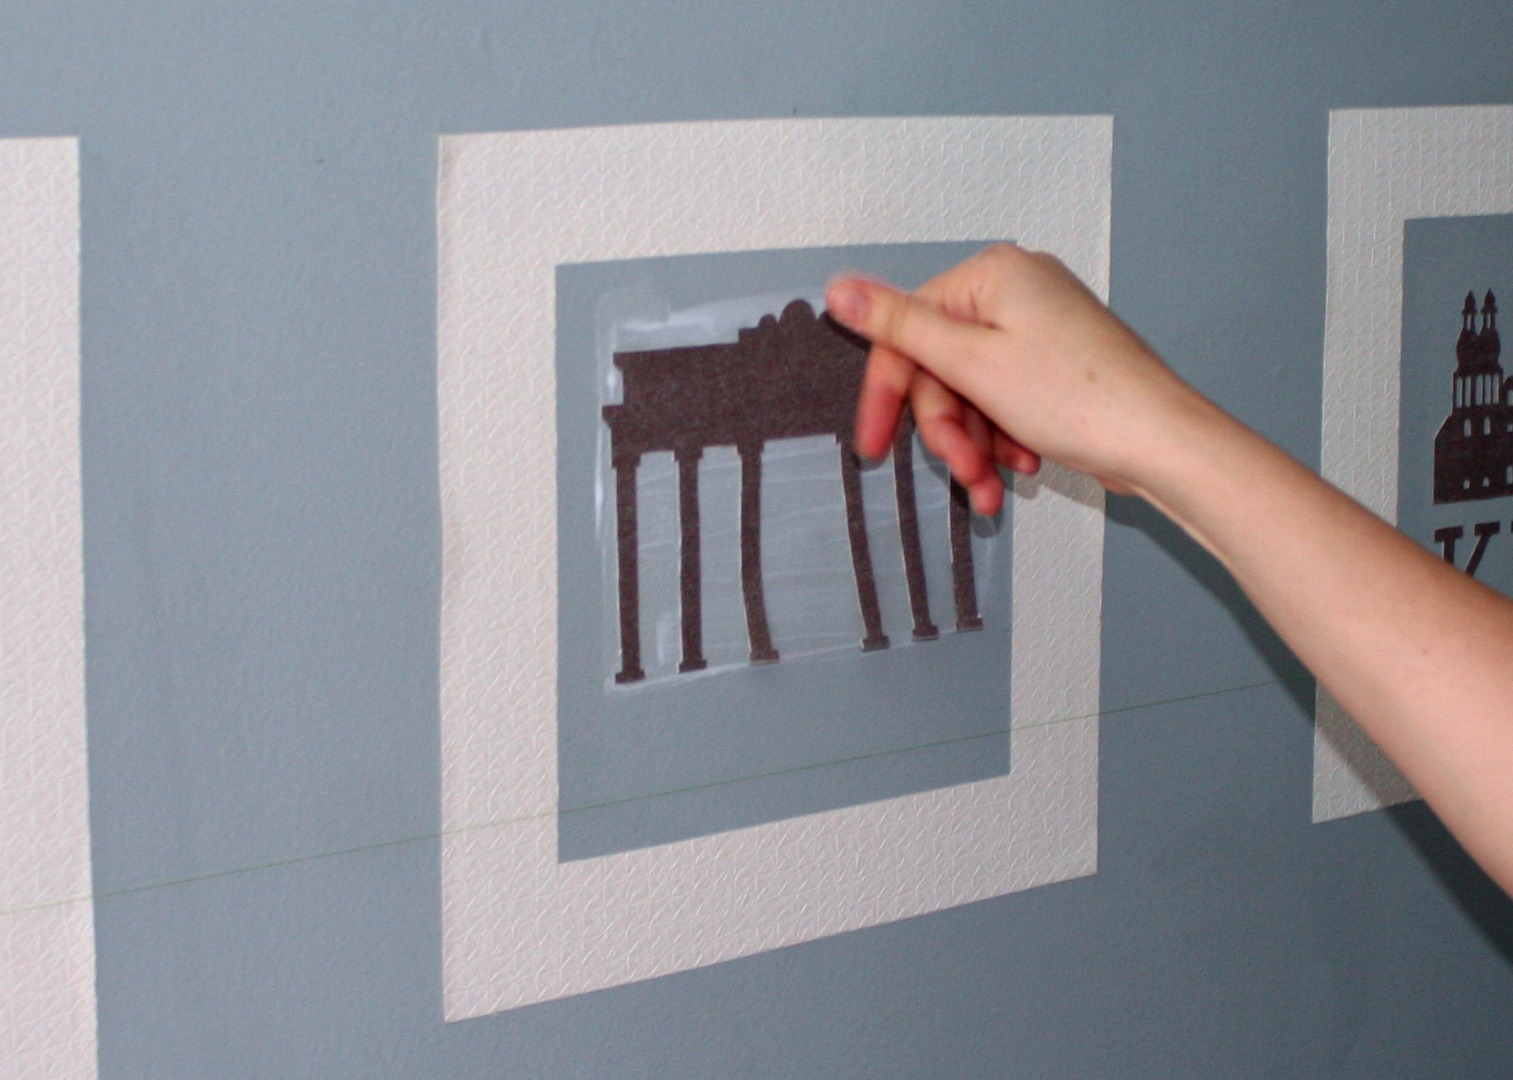
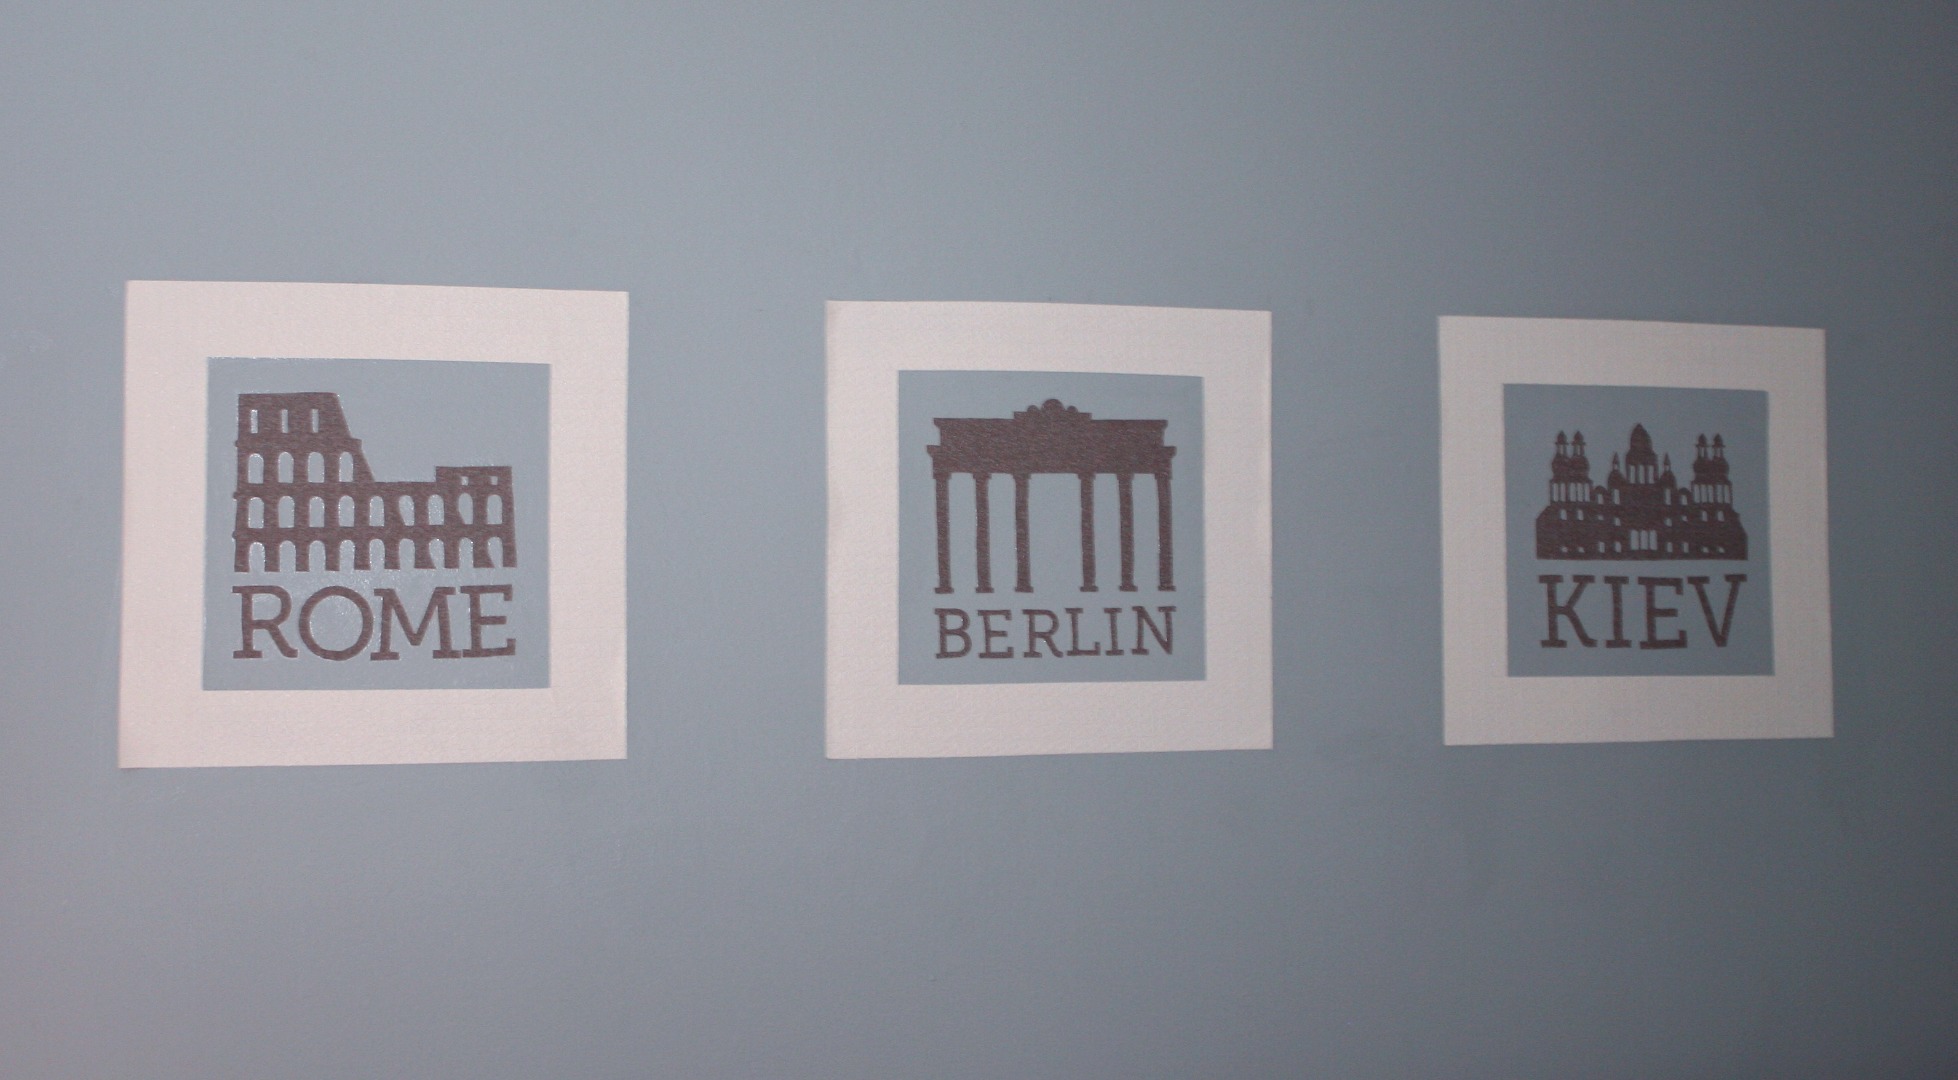
First, I used my string to mark out where the baseline of my text was going to go. This was to make sure that my text would all be aligned.
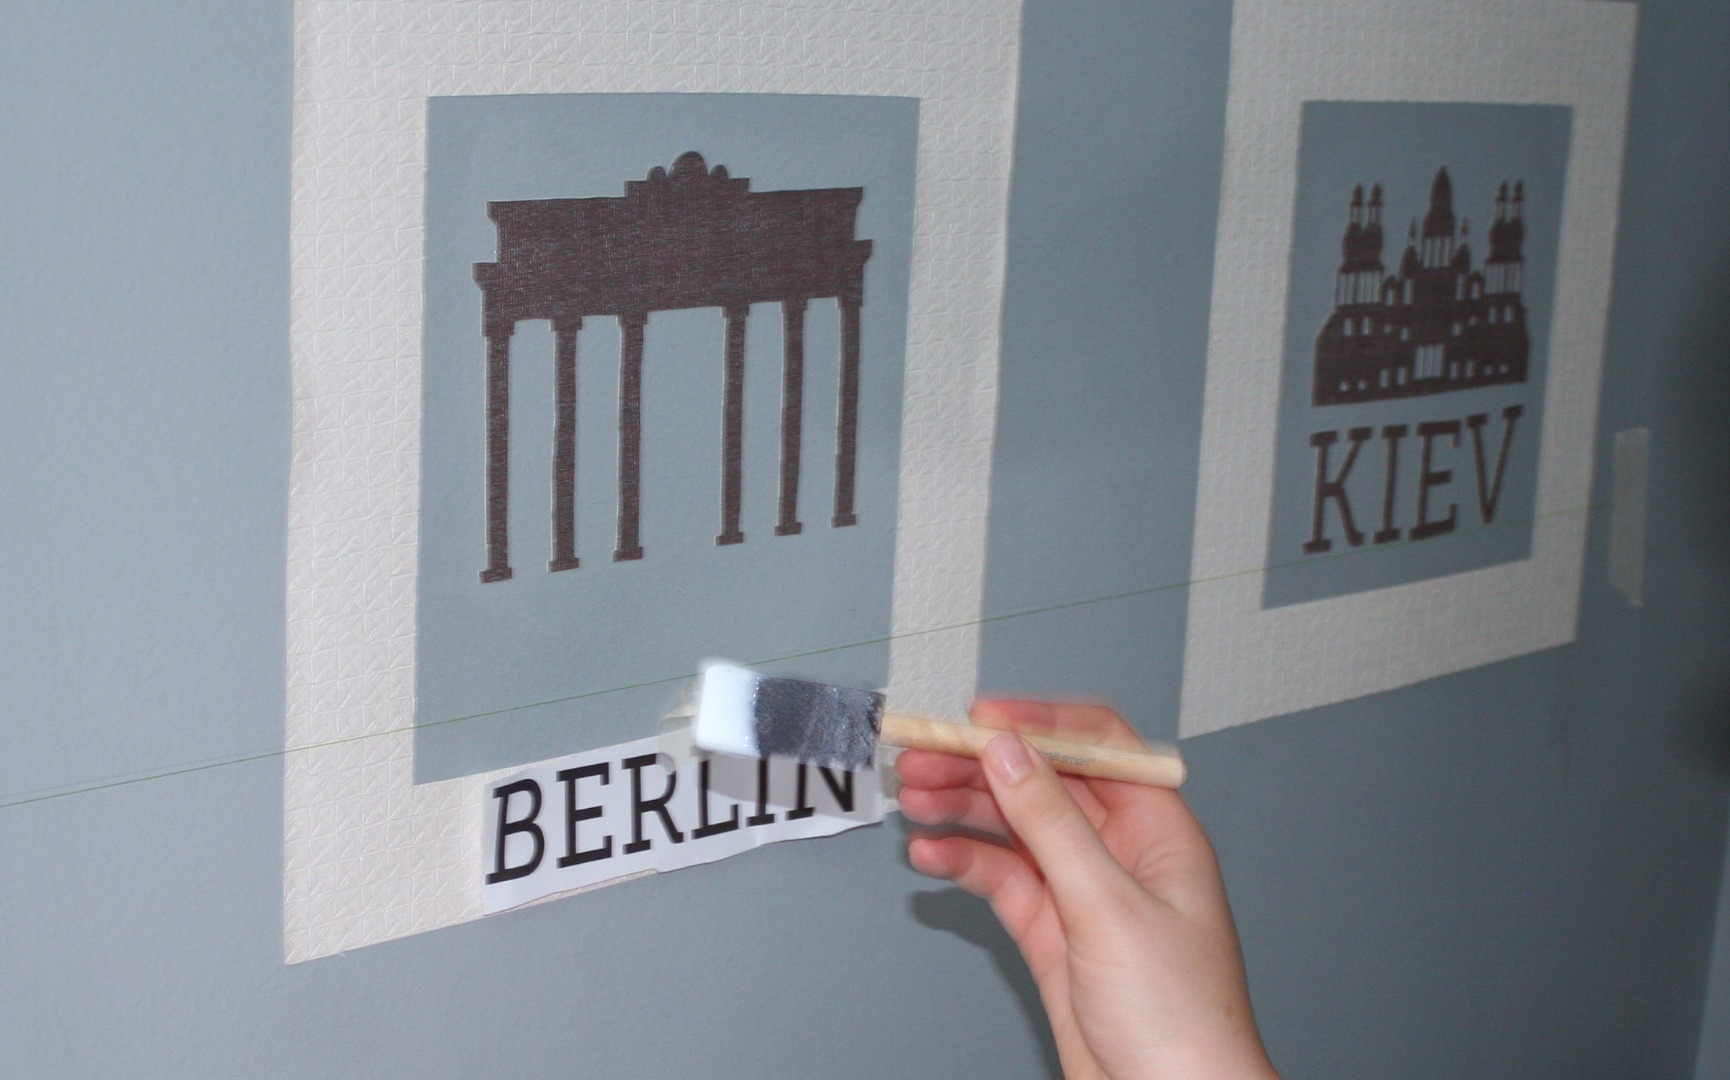
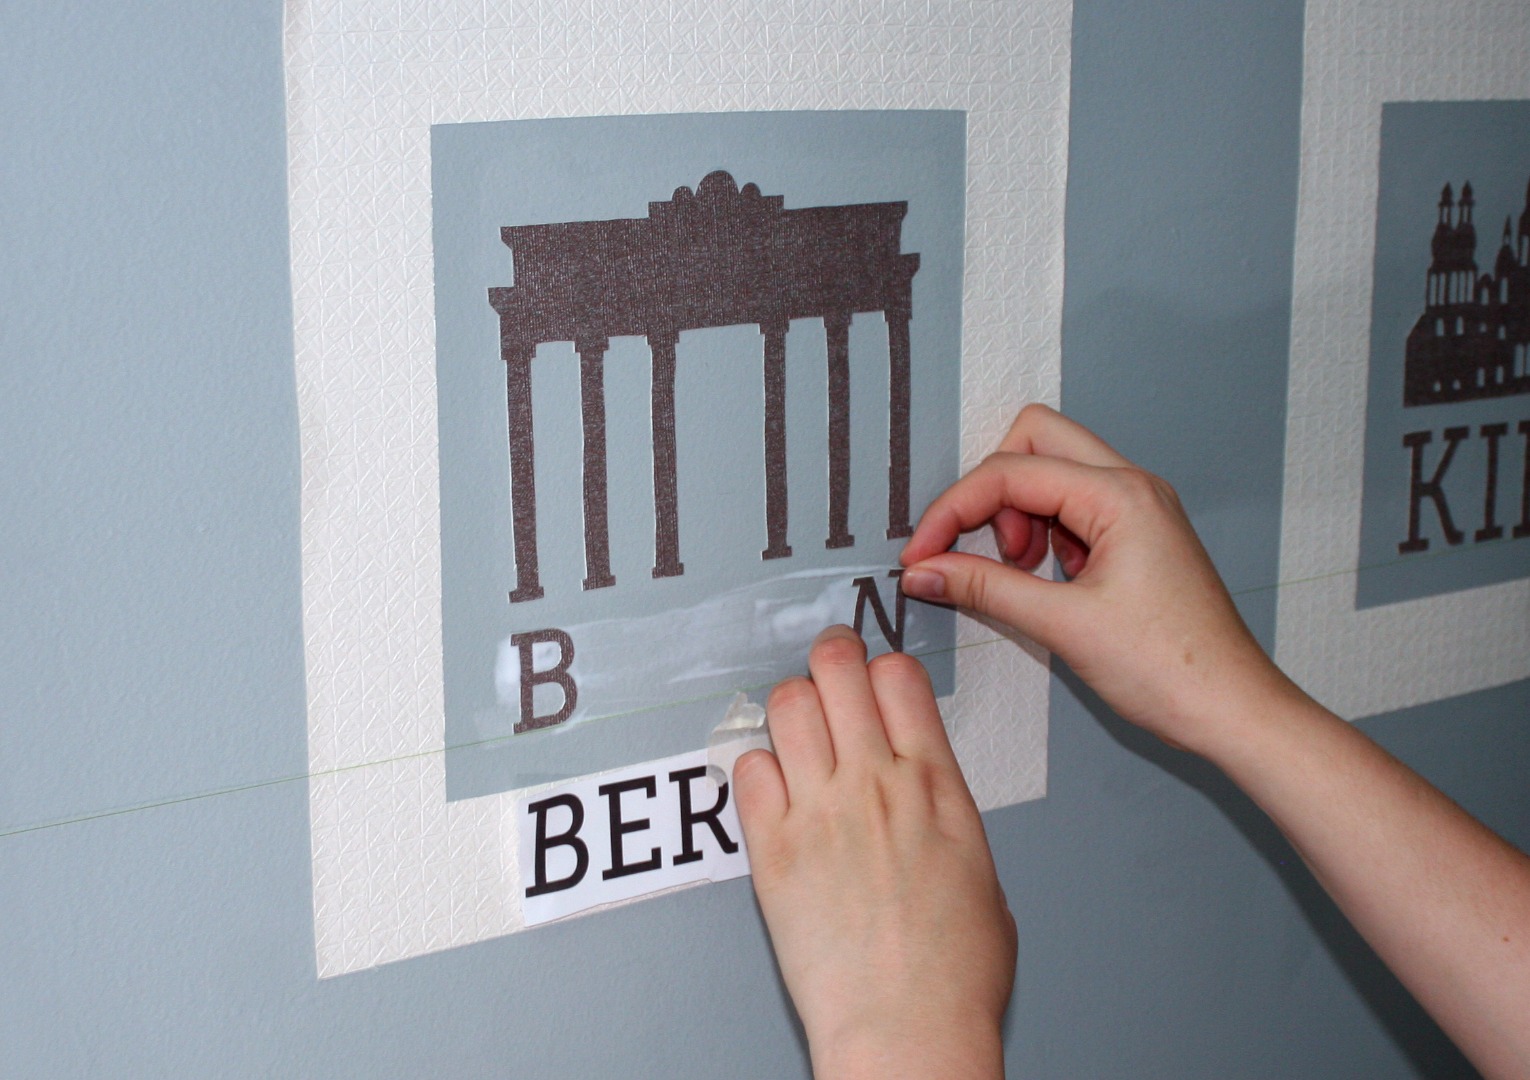
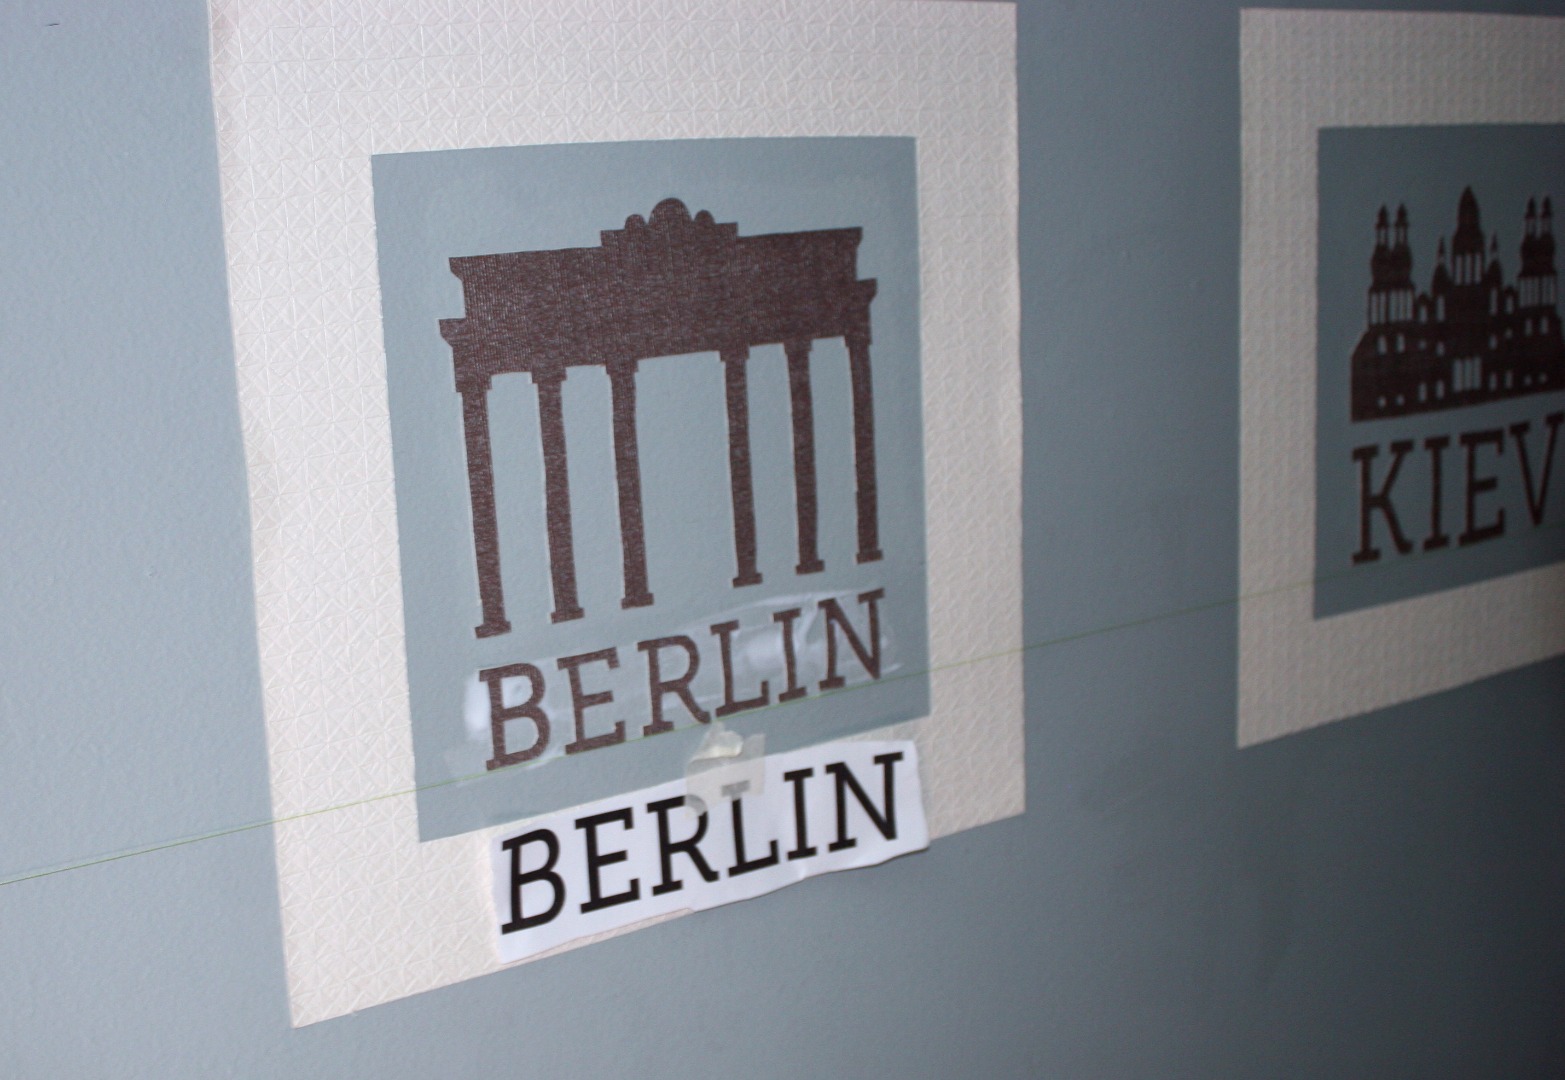
What I found worked best was to apply the paste in the top 2/3 of the image area directly on the wall (where my capital silhouette is going). Then I stuck the silhouette where I wanted it to go and repeated the smoothing and blotting process from step 8.
Now add your paste to the bottom 2/3 of the image area. You can print off another copy of your design from step 3 for a letter spacing guide. Again, you’re going to blot the excess paste away with your rag and smooth out your letters with the putty knife.
Tip: Stick the first and last letter of the city name first. This makes it easier to estimate the spacing in between for the rest of your letters.
Assemble and Add Frame
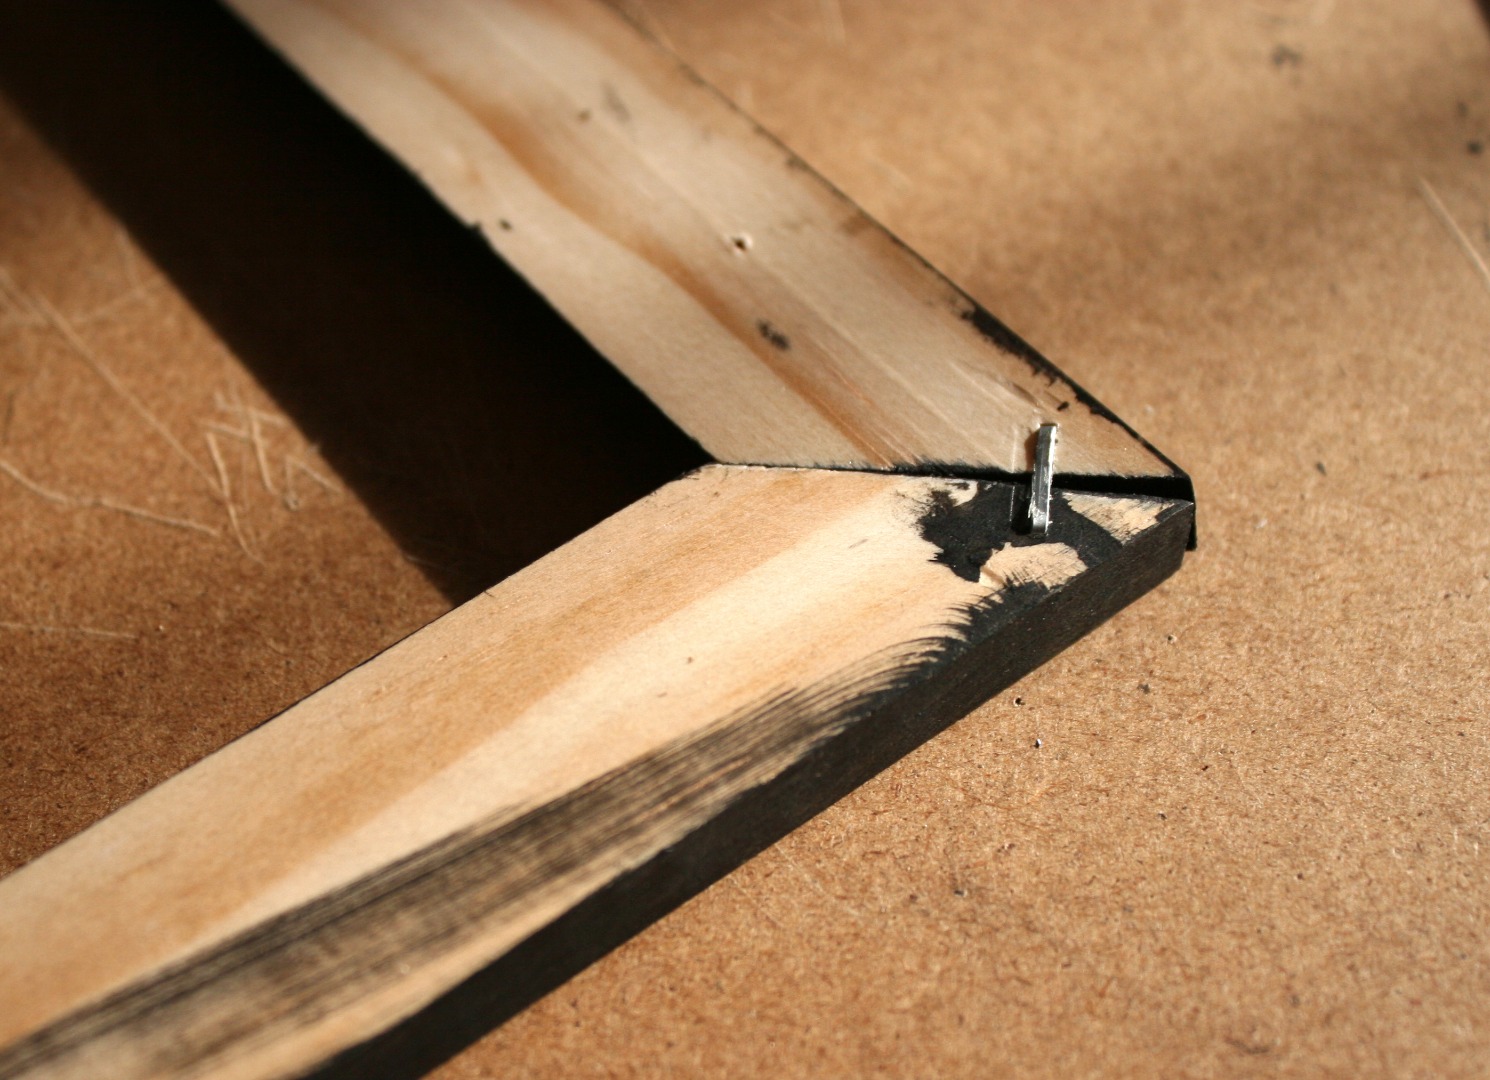
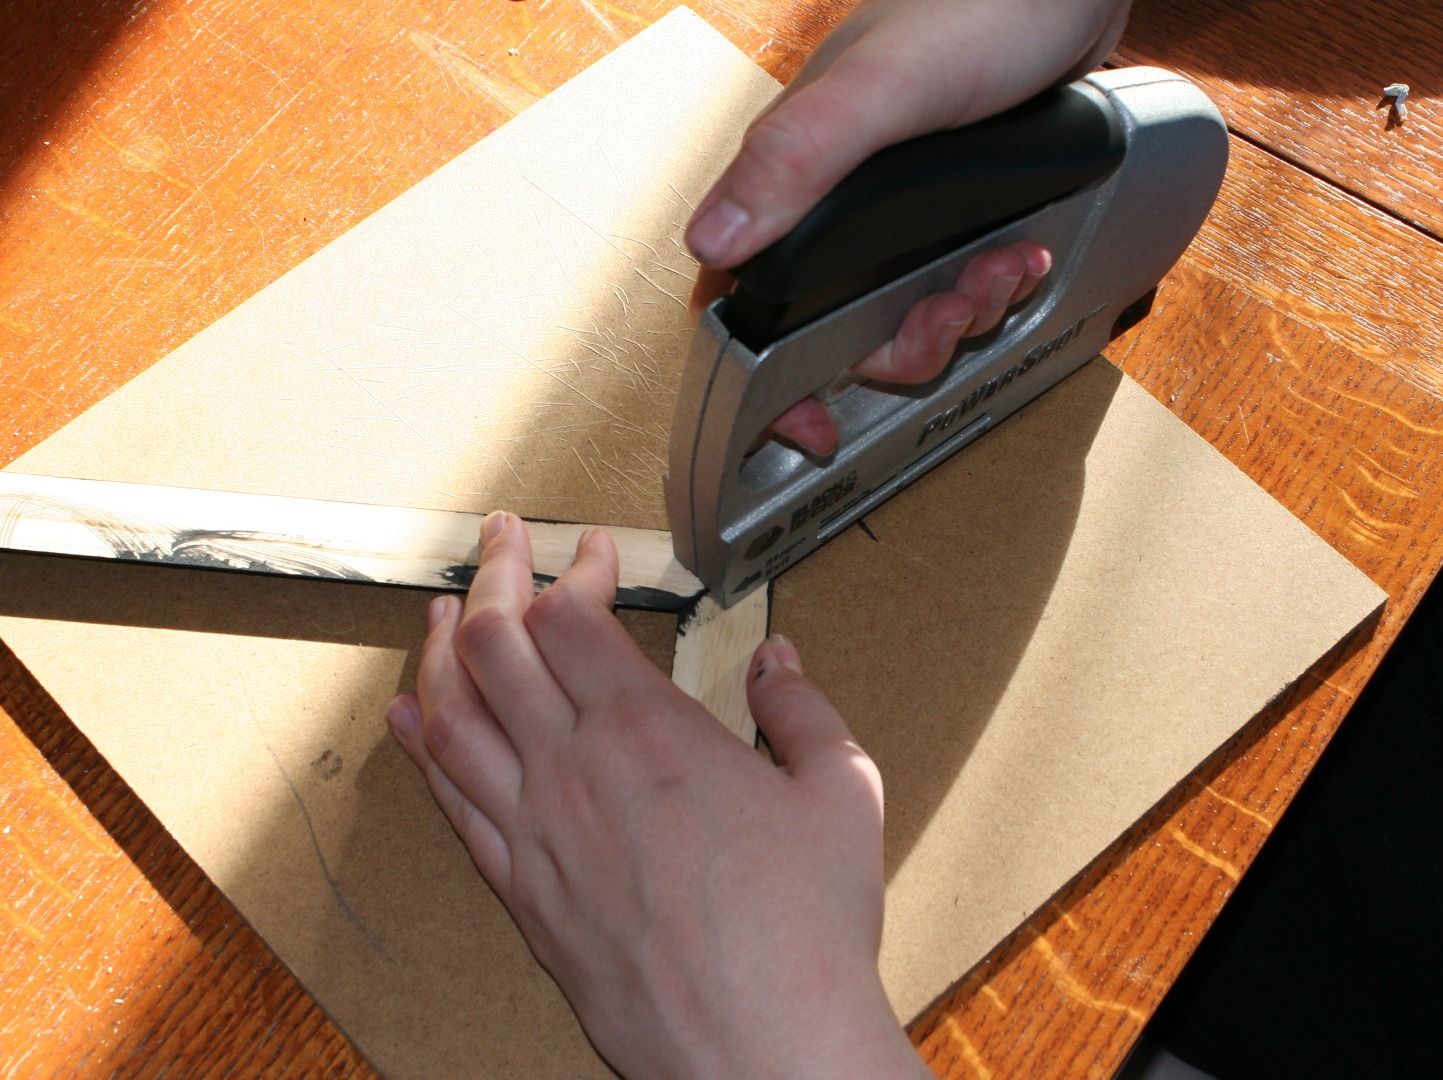
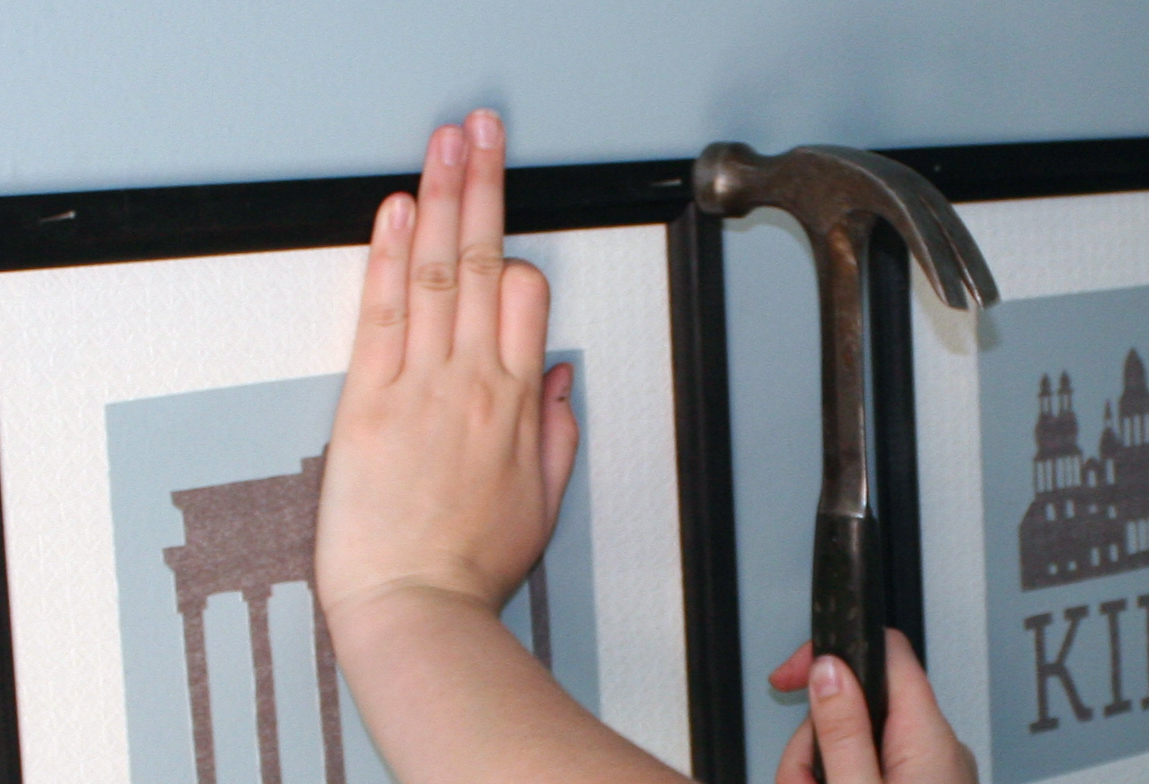
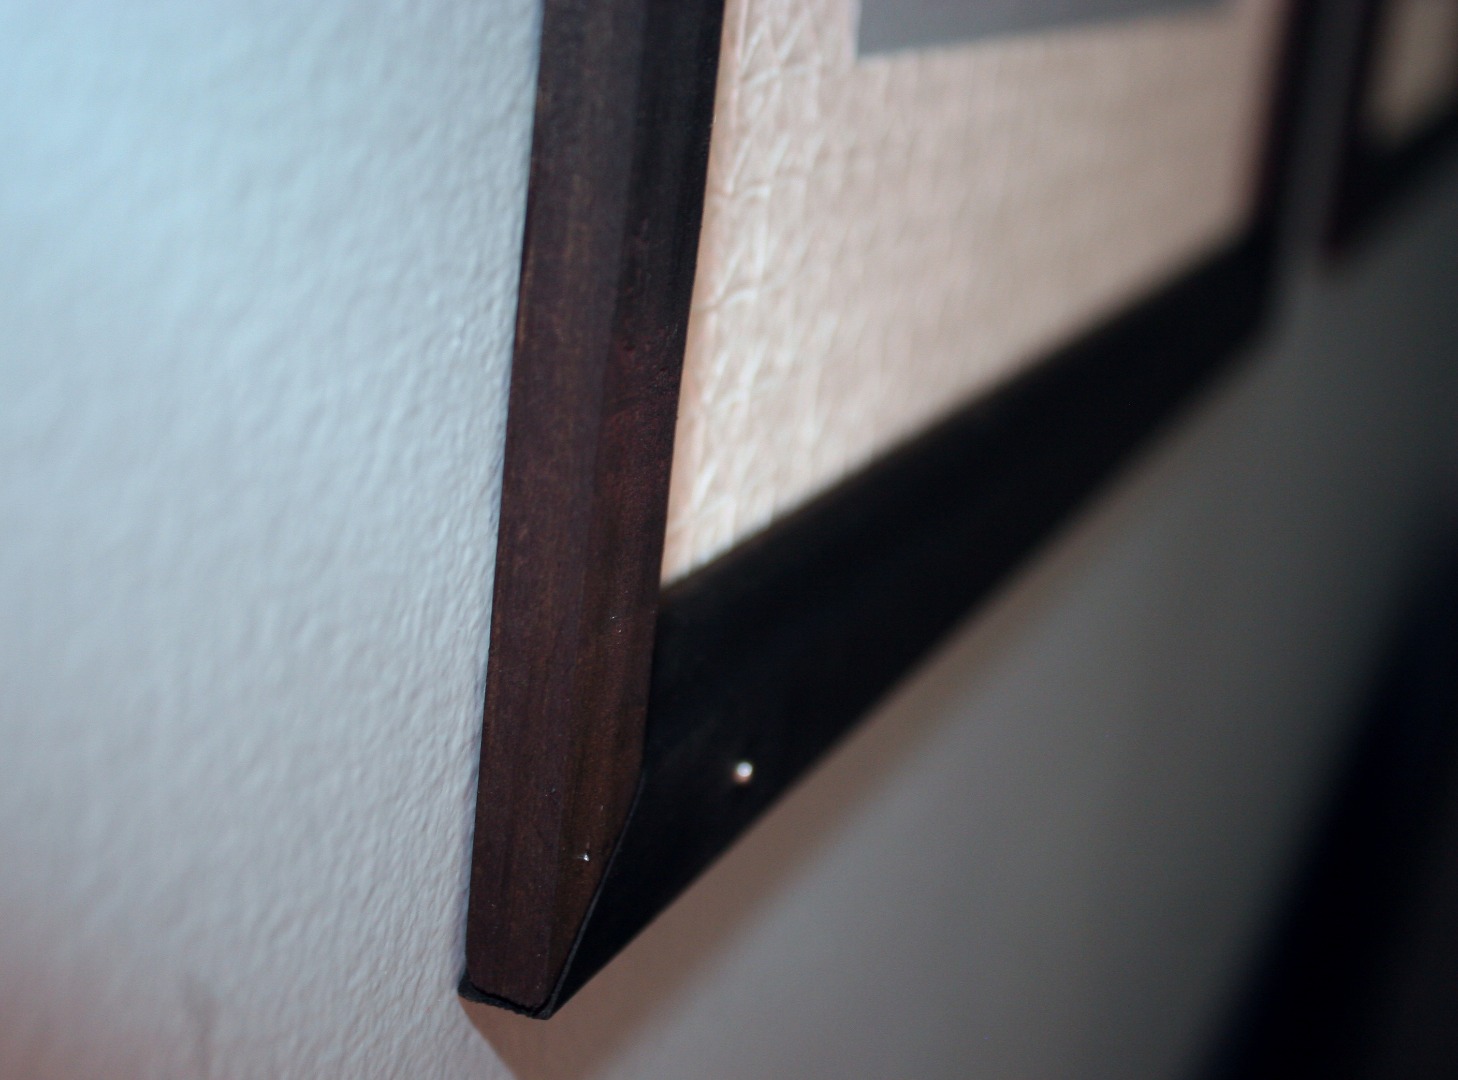
Use a staple gun to staple the frame pieces together. Your frame will be a little wobbly, but that’s okay. Once your frames are assembled take them to your wallpaper art. I used 7/8" finishing nails l to secure the frame in place. I put 2 nails at the top of each frame and 2 nails at the bottom.
The 7/8" nails I used weren't long enough to penetrate both frame and drywall, so my electrical was never in danger. If you're using a longer nail, I would recommend using a stud finder to be safe.
You’re Finished!
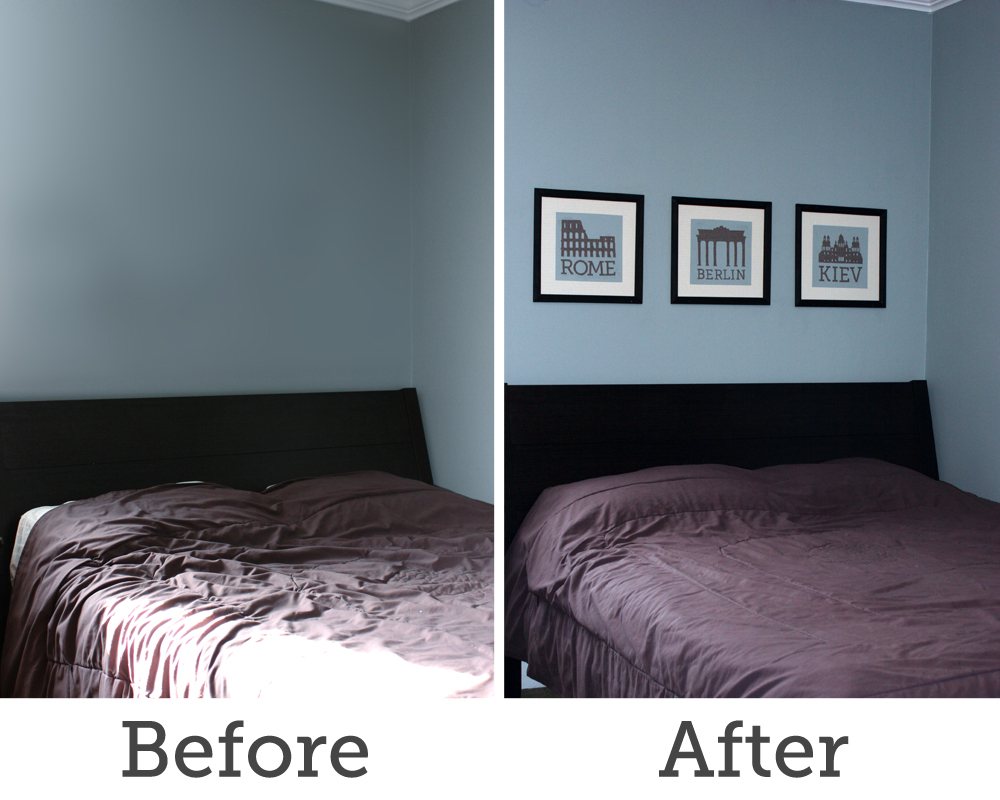

I’m fairly happy how it turned out. The nice thing about this project is that many wallpaper stores will give you free samples, which are usually large enough for this project. If you can’t squeeze a free sample you can also hunt the wallpaper bargain bins. I got my wallpaper for free, but I had to pay for the paste.
One thing I would change would be figuring out the final frame size beforehand to maximize the pine baseboard. Each piece was 7’ long, so if each frame length was 13.5” long instead of the 14” and 14.5” lengths, I would only need to purchase 2 pieces of the baseboard. Because of my poor planning I had to purchase 3 of the pine baseboard, and I only got 1 length out of the last.
Feel free to leave a suggestion or question in the comment section. I still have left over wallpaper, so if you have a smarter/better/faster way of doing something, I want to hear about it!