Easy Machine Learning & Object Detection With Teachable Machine
by mjdargen in Design > Software
21528 Views, 44 Favorites, 0 Comments
Easy Machine Learning & Object Detection With Teachable Machine
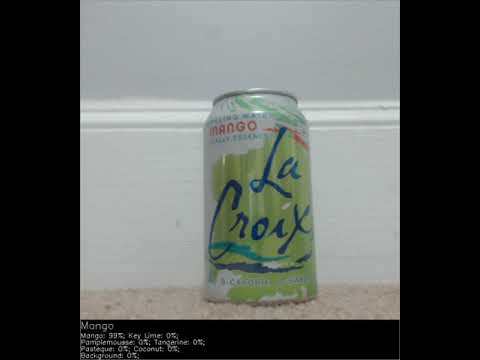
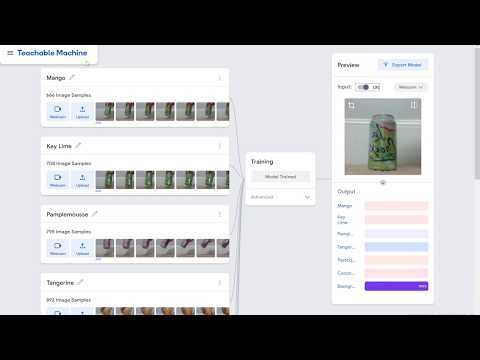
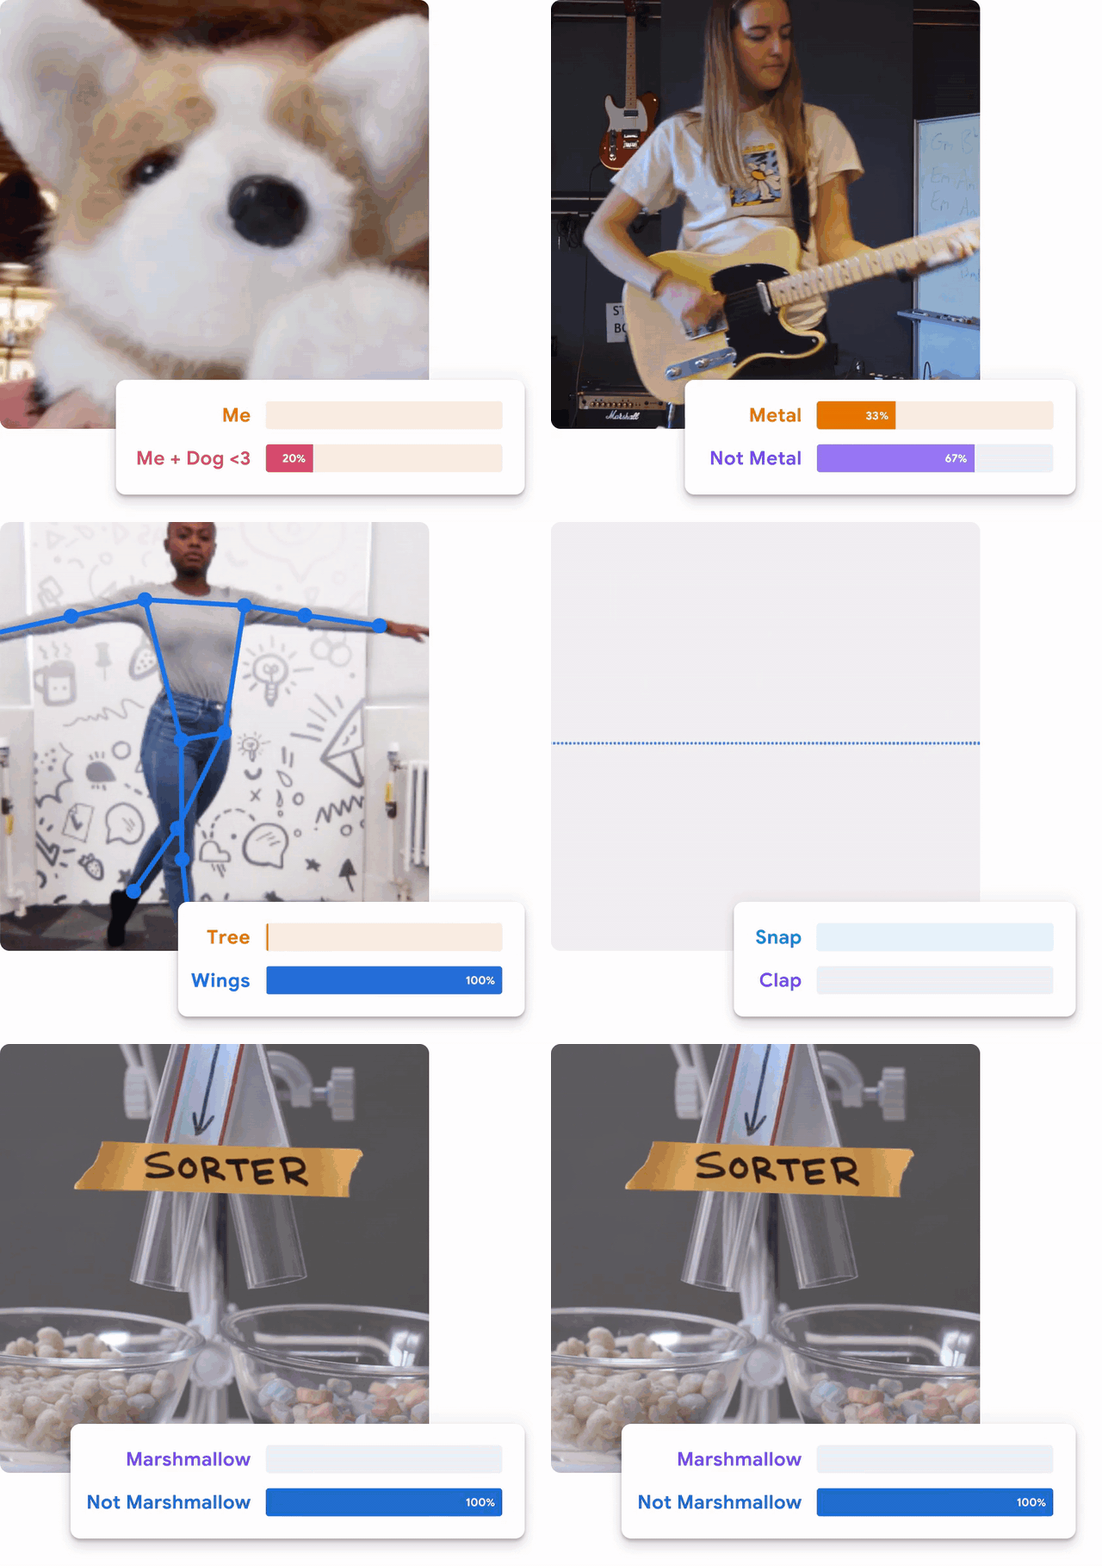
Teachable Machine is an easy, but powerful tool to create machine learning models. It allows for easy data capture to create training data sets and uses state of the art algorithms to train machine learning models right in your browser. It is done in a very intuitive web interface. You can generate image, sound, or pose detection models. In this project, I will provide you with a step-by-step guide for setting up an OpenCV/TensorFlow Python development environment and a Python script framework to easily incorporate Teachable Machine image models into your projects.
The goal of this project is to greatly reduce the barrier to entry to use machine learning. This Instructable should give you the tools you need to make some exciting machine learning projects. I hope to make some more interesting tutorials and demos in the future that use this development environment and framework.
You can follow along and generate your own model or you can use the Teachable Machine model I generated. The model I provided detects what flavor La Croix you have.
Github repository for the project: https://github.com/mjdargen/Teachable-Machine-Object-Detection
EDIT: I have now created a version that sets up the same environment on the Raspberry Pi: https://www.instructables.com/id/La-Croix-Flavor-Detector-Easy-Object-Detection-on-/
Supplies
- Computer (tested in Windows 10, Ubuntu 18.04, MacOS High Sierra 10.13)
- Python 3 (tested Python 3.6 & Python 3.7, Python 3.8 does not work)
- Webcam
Generating a Model With Teachable Machine
Setting up the Project
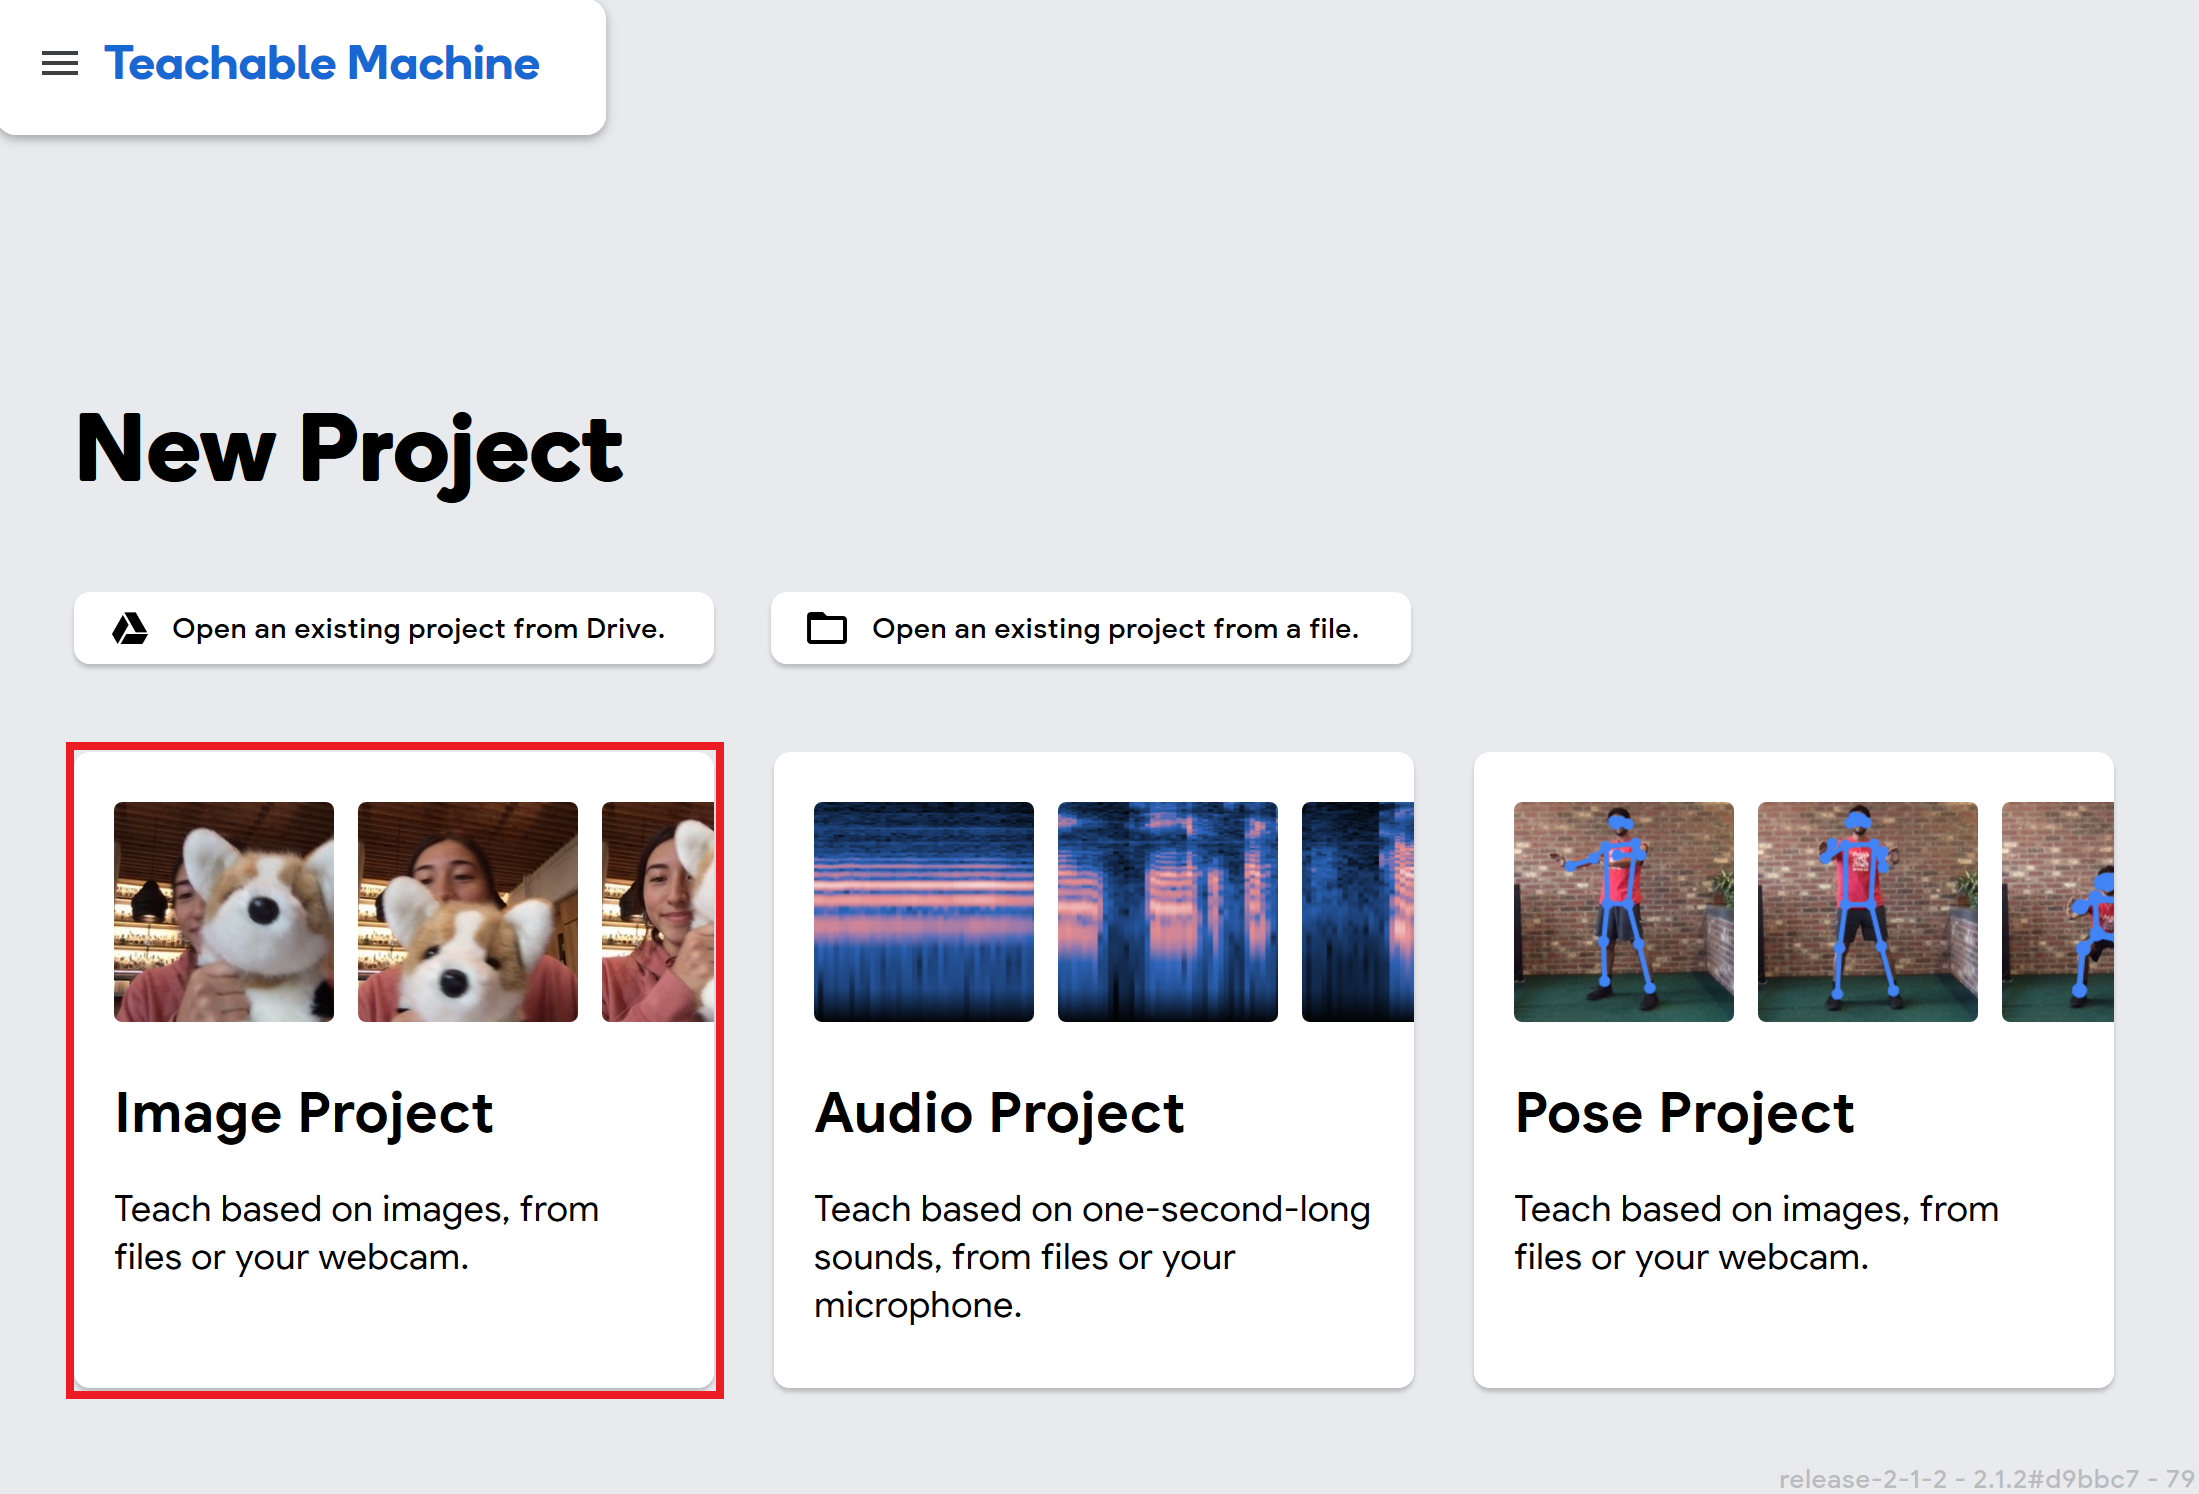
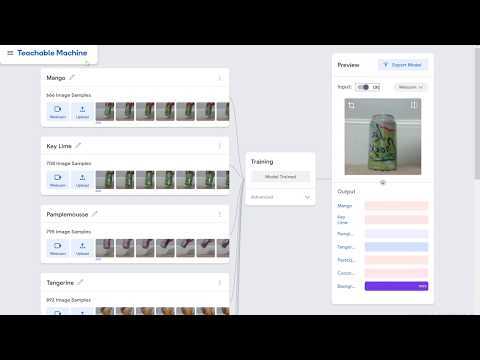
Teachable Machine is a fairly easy-to-use tool with a very intuitive interface. For this project, we will be working with image detection. Go to https://teachablemachine.withgoogle.com/ and click on Get Started. Now select Image Project. This will open up the image model training window.
Creating the Dataset
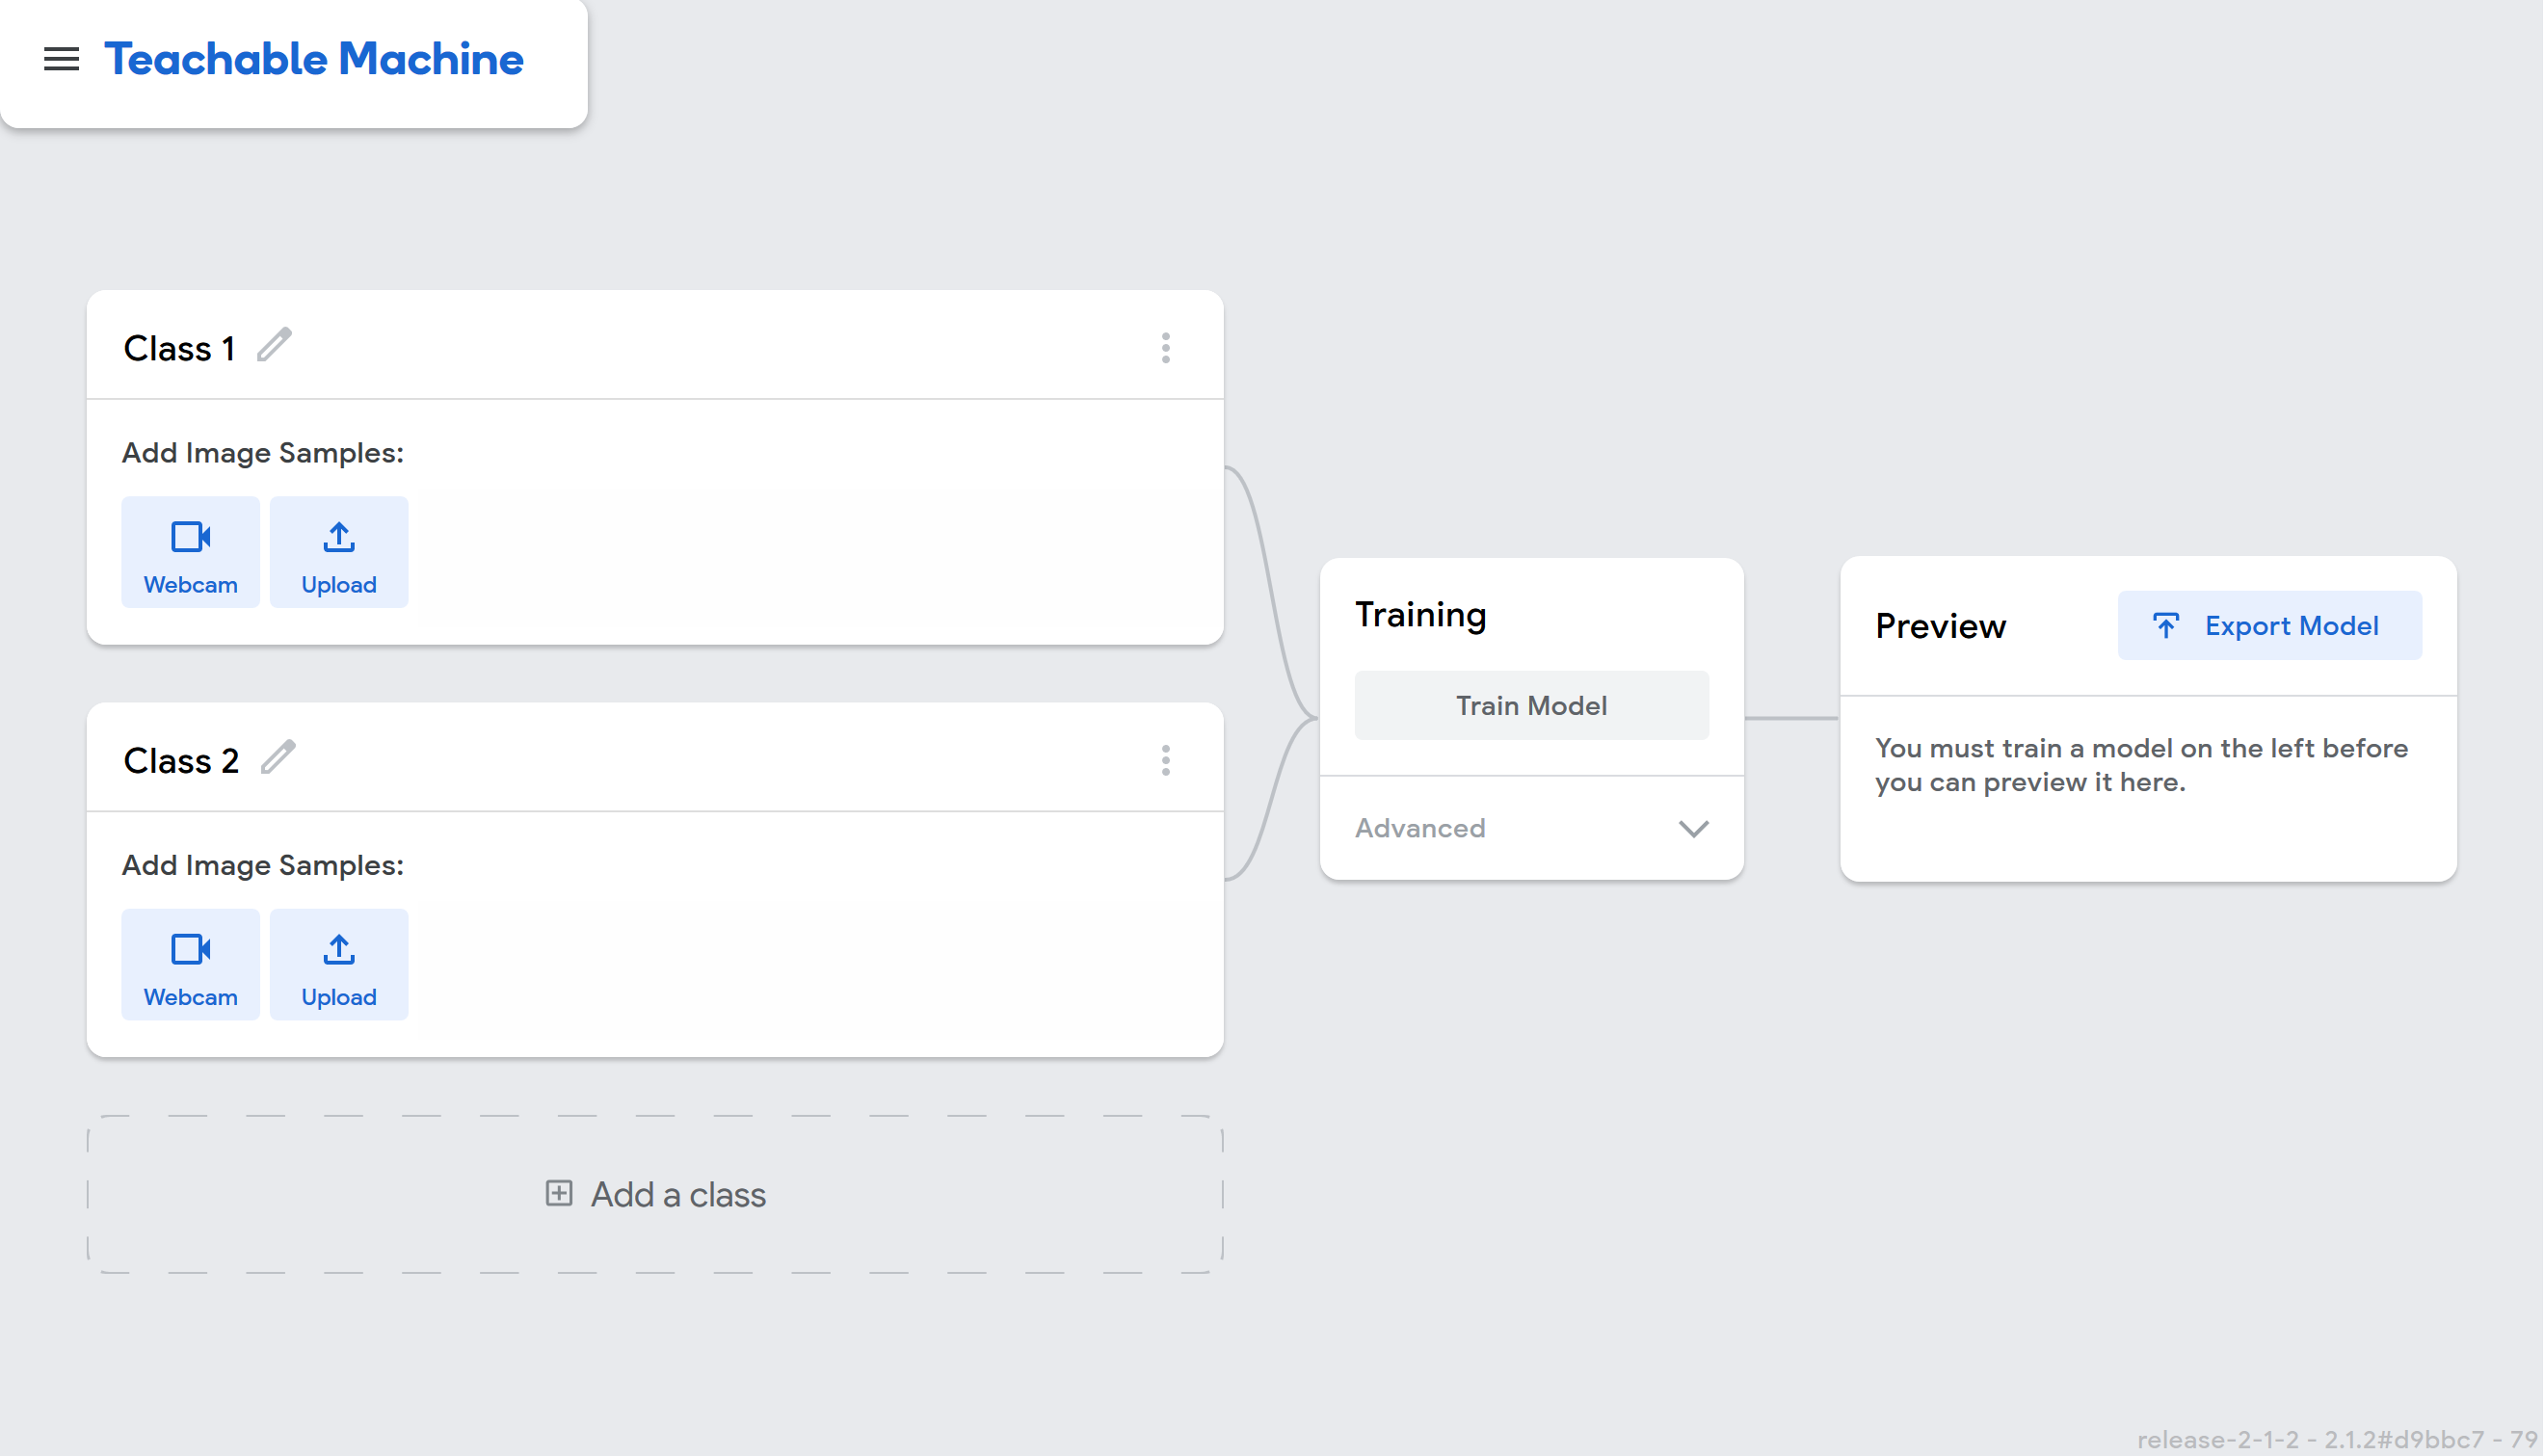
You will add and name the classes (i.e. objects) you want to train the model to detect. Name the classes well with an intuitive name. The name of the classes is what the later program will call out when that object appears in the frame.
It is a good idea to make a "Background" class. This can help train the model to not attribute details from the background with one of the other classes. If you name this class "Background", the final program, which uses text-to-speech to say the name of the object in the frame, will ignore the background class and not call out "background" every time it is solely the background in frame.
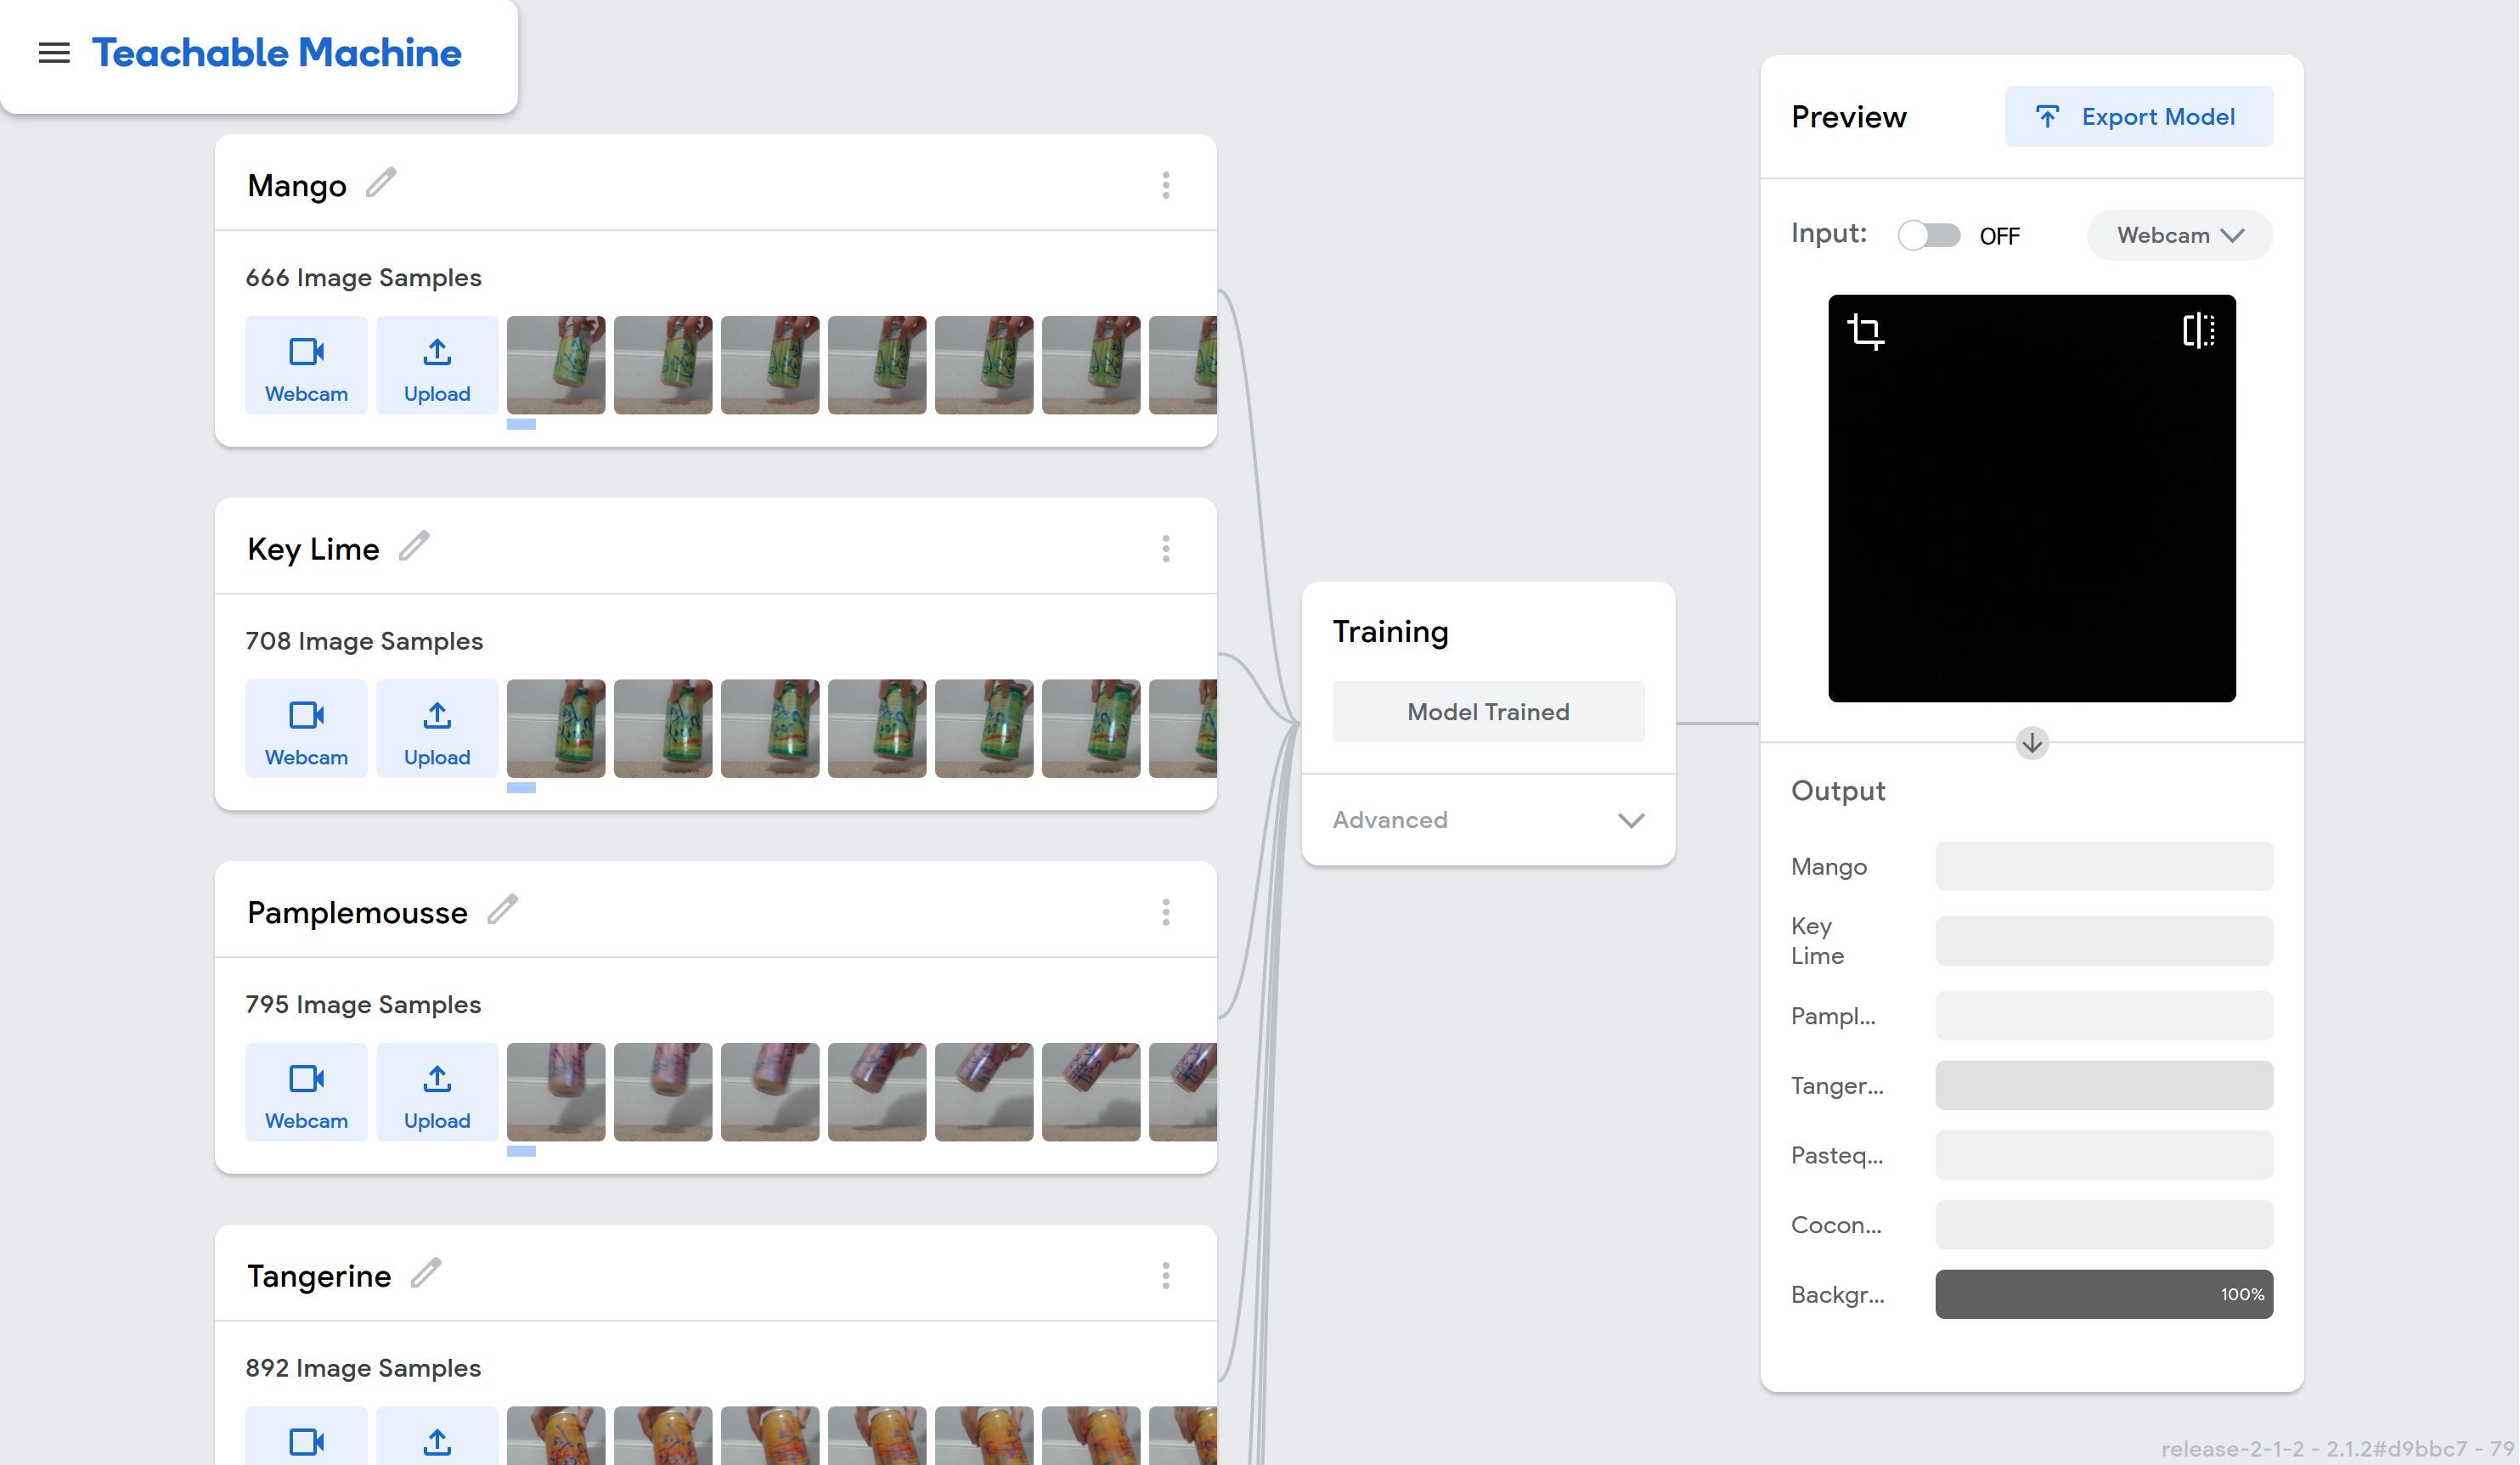
To add image samples to a class, you can either use your webcam to capture images in Teachable Machine or upload images from another source. In order to produce a model, you want a lot of high-quality data. You can see in my example of the "La Croix Flavor Detector Model", I had no less than 600 samples for each class. I used the webcam to quickly capture many different samples. I made sure to capture the object from every angle in different lighting situations with a variety of backgrounds to generate an accurate model.
Training the Model
Once you have set up all of your classes and are happy with your datasets, it is time to train the model! Click the "Train Model" button. In order to train the model, you must leave the tab open in your browser. Training the model can take a while. In this project where I had 7 classes with >600 samples, it took about ~20 minutes to train. Your browser may occasionally complain that the Teachable Machine tab is slowing down your browser. Just acknowledge notification and say it's fine so your browser does not cancel the training (different browsers word this notification differently). Once it's complete, it's time to test out your model!
Previewing the Model
Now it's time to test out your trained model and see how well it does! Go to the Preview pane and turn the input on. Present the various objects to the webcam and see if the model accurately guesses what object is in the frame. Remember, the model cannot detect more than one object unless you made a single class for when two objects are present. If it's not performing well, try providing more photos to the model. If you're happy, it's time to export the model!
Exporting the Model
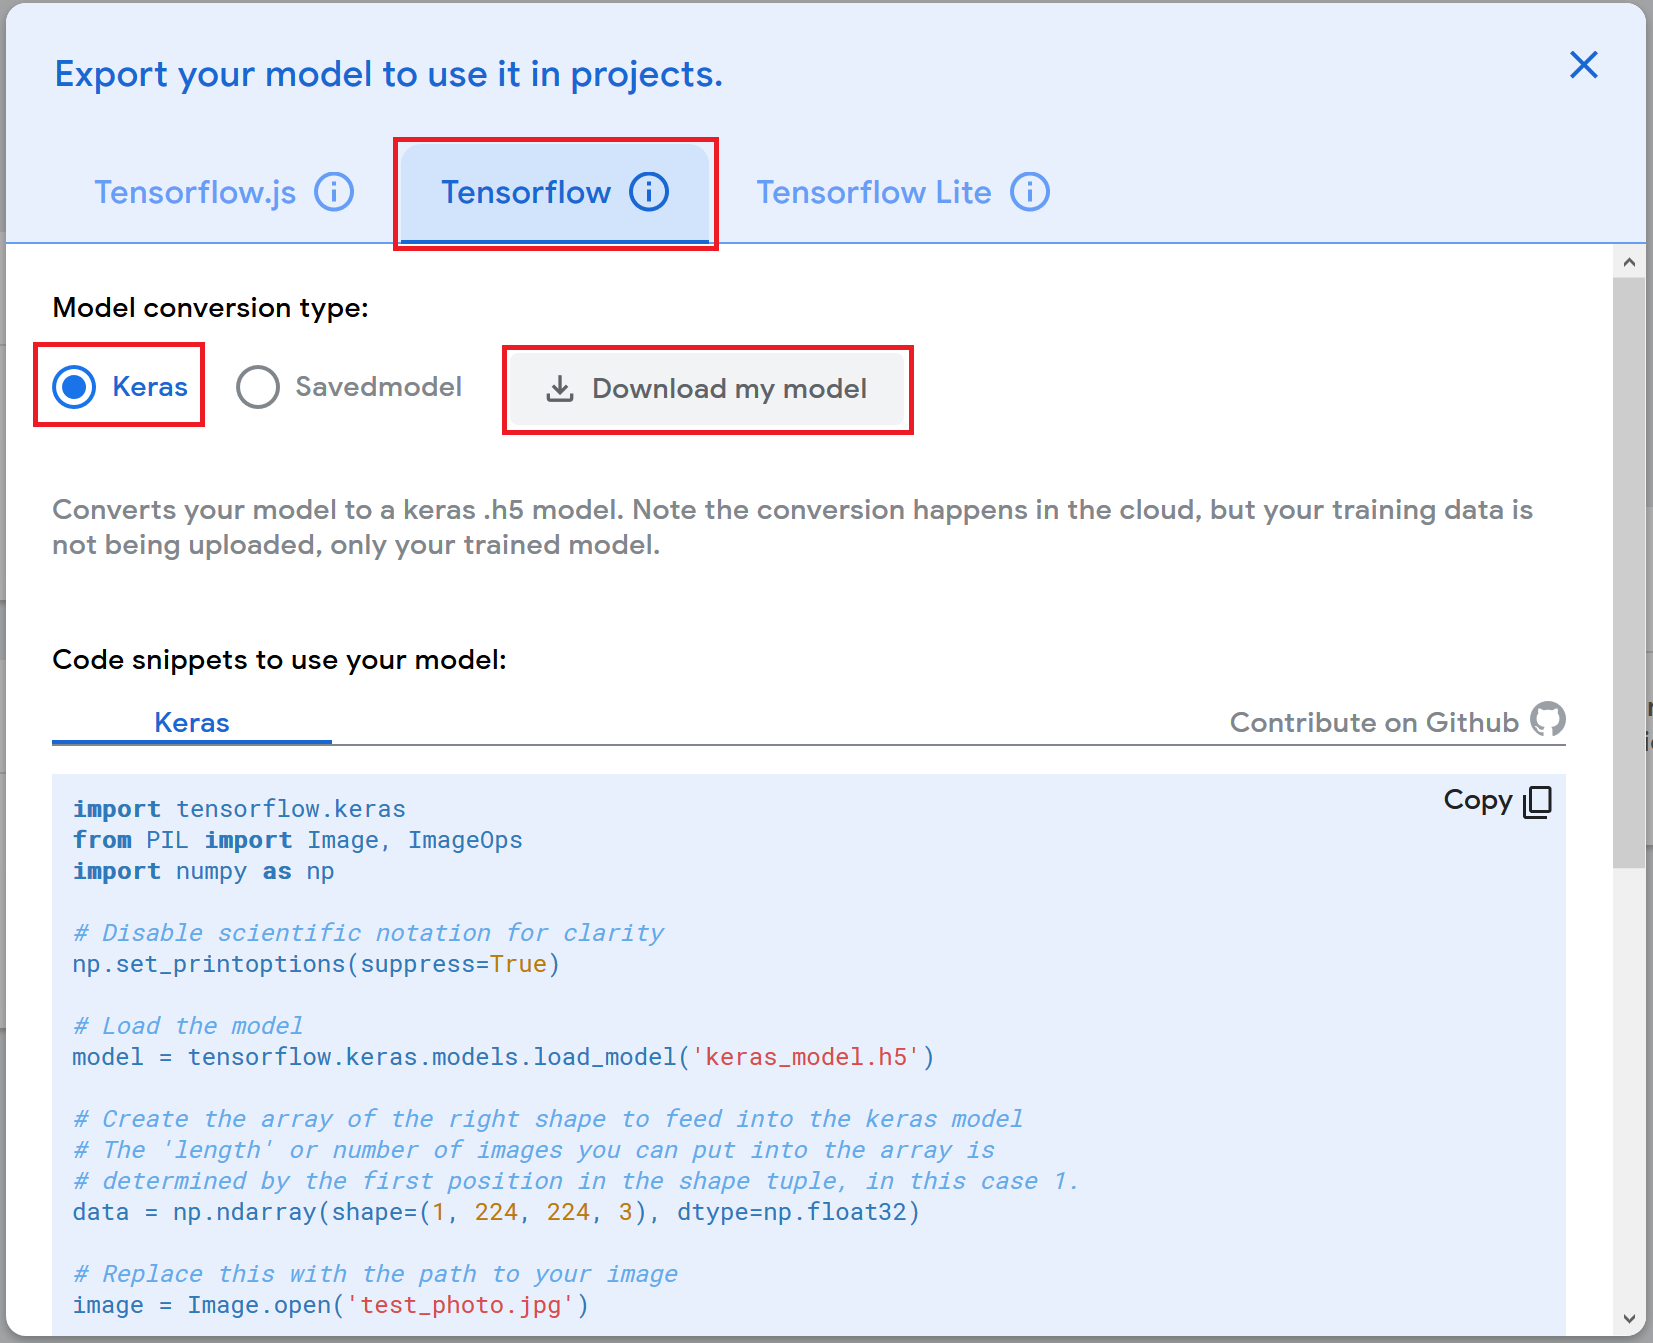
To export the model, click the "Export Model" button. A new window will pop up. Click the "Tensorflow" tab and select the "Keras" model conversion type. Now click "Download my model". It can take about a minute or so to compress the model and prepare it for download. You should get a pop-up window asking you to save a zip file. Save the file and unzip it. You should see a "keras_model.h5" file and a "labels.txt" file. Hang onto these and we will use them once you have your Python environment set up on your computer!
Installing Python 3 & Git

Python 3 Installation & Set-up
The first thing you will need to do is install Python 3 if it is not already installed on your machine. Go to https://www.python.org/downloads/ and download and run the correct installation for your operating system. I have tested this development environment in Python 3.6 and Python 3.7 and everything seemed to work appropriately. However, Python 3.8 did not seem to fully support some of these libraries fully yet. I would recommend installing the latest version of Python 3.7 for your environment. During installation, make sure you check the box to add Python to Path.
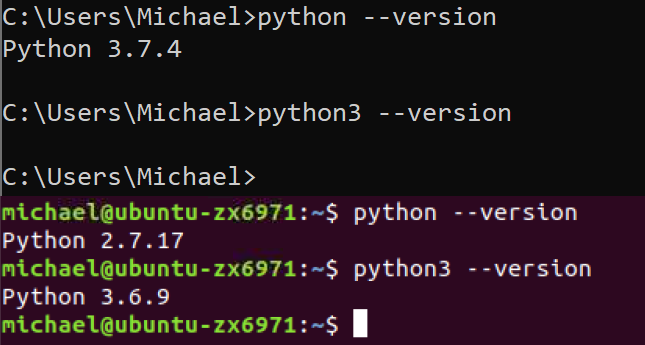
Once you have fully installed Python and added Python to Path, open up your terminal or command prompt and type "python --version" and then "python3 --version". This is important because we want to know whether "python" or "python3" command maps to your Python 3 installation. You will need to know this moving forward to run your Python scripts, install new Python packages, etc. If no executable is mapped to python or python3, look up adding environment variables to Path for your operating system.
In the first example in the image above, you can see "python" invokes Python 3 and "python3" invokes nothing. In the second example in the image, "python3" invokes your Python 3 installation. This is because there is a Python 2 installation that maps to the "python" command in the second example.
Git Project Files
Now you will need to retrieve the installation files, machine learning models, and the demo Python program from my Github repository. You can either install a git client and clone the repository or you can download a zip file of the repository from your browser.
https://github.com/mjdargen/Teachable-Machine-Obj...
git clone https://github.com/mjdargen/RPi-La-Croix-Flavor-Detector
Setting Up Python Environment: OpenCV and TensorFlow

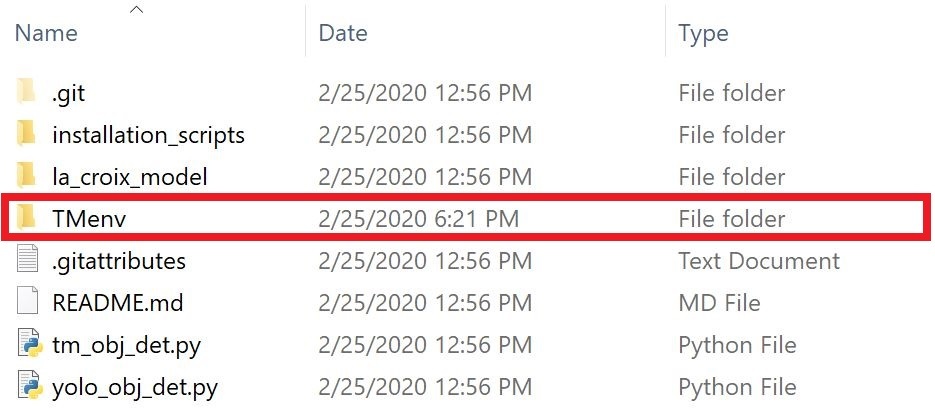
I have written installation scripts to simplify the installation process for this development environment. The installation scripts are listed above. Just select the appropriate script for your operating system.
I have now created a version that sets up the same environment on the Raspberry Pi here: https://www.instructables.com/id/La-Croix-Flavor-...
Windows Install
- Assumes you have Python 3 installed.
- Assumes that your Python 3 executable is invoked with "python". If that is not the case, you will need to edit the batch script and replace every instance of the "python" command with "python3".
- Run the batch script from Powershell: "./installation_scripts/windows_install.bat" (don't run as administrator).
- Can take ~30 minutes or more depending upon your system and internet connection.
Mac Install
- Assumes you have Python 3 installed.
- Assumes that your Python 3 executable is invoked with "python3". If that is not the case, you will need to edit the shell script and replace every instance of the "python3" command with "python".
- Navigate to the folder of the repository in your terminal.
- You will need to make the script executable by running the following command: "sudo chmod +x ./installation_scripts/mac_install.sh"
- Run the shell script with the command: "./installation_scripts/mac_install.sh".
- This installation script also installs the Homebrew package manager.
- Can take ~30 minutes or more depending upon your system and internet connection.
Linux Install
- Assumes you have Python 3 installed.
- Assumes that your Python 3 executable is invoked with "python3". If that is not the case, you will need to edit the shell script and replace every instance of the "python3" command with "python".
- Navigate to the folder of the repository in your terminal.
- You will need to make the script executable by running the following command: "sudo chmod +x ./installation_scripts/linux_install.sh"
- Run the shell script with the command: "./installation_scripts/inux_install.sh".
- Can take ~30 minutes or more depending upon your system and internet connection.
Using Python Virtual Environments
If the installation script executed successfully, you have now installed all necessary dependencies to run OpenCV and Tensorflow in a Python virtual environment on your machine. The virtual environment is called TMenv and is located in the top-level directory of the cloned repository entitled "Teachable-Machine-Object-Detection".
The Python packages were installed in a virtual environment so as not to disrupt your packages associated with your main installation of Python in case you had other programs that depended upon a specific version of a package.
To use the packages you installed to run the demos, you will need to activate your virtual environment.
- Mac/Linux: "source TMenv\bin\activate"
- Windows: "TMenv\Scripts\activate"
Once you have activated your environment, it will show the name of your virtual environment in parenthesis before the prompt in your terminal. Anything you do related to Python at this point will only affect your TMenv virtual environment. You can now run Python scripts in your virtual environment. To exit your virtual environment, just run the command "deactivate".
OpenCV Common Object Detection Test
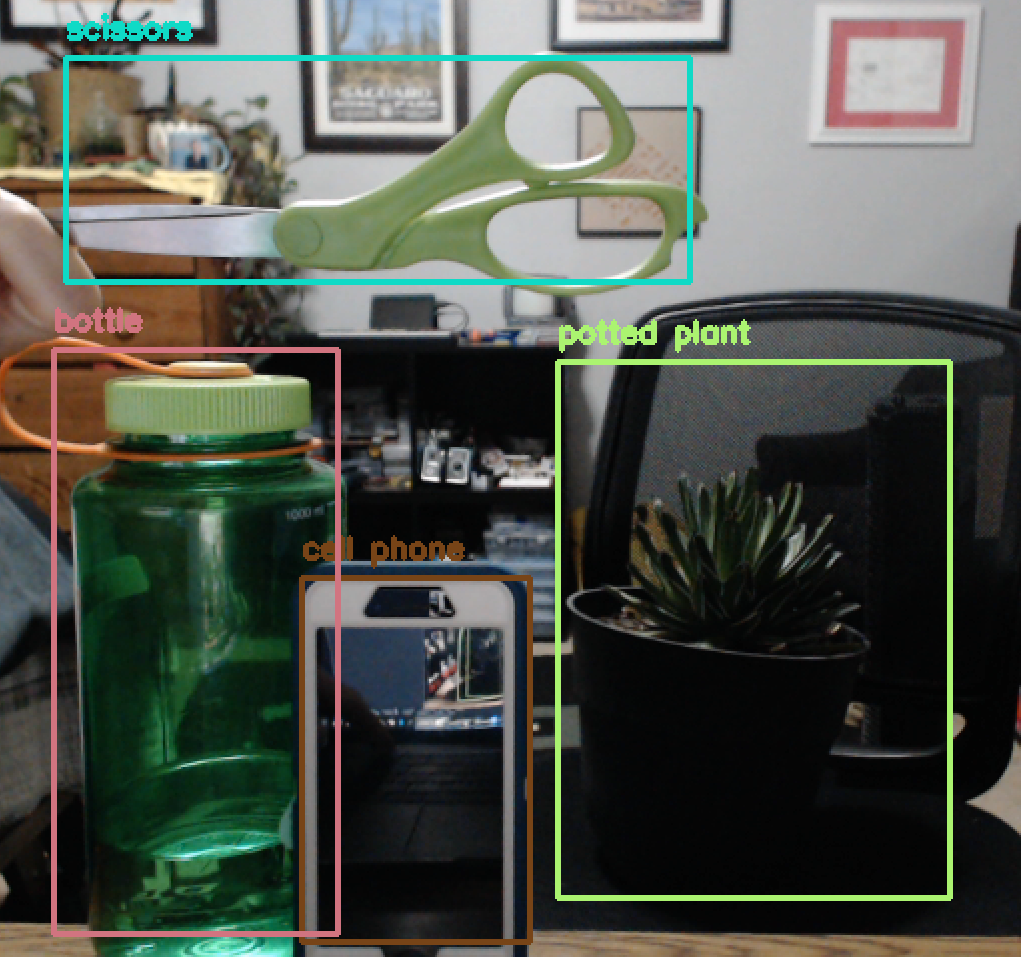
To make sure we set everything up correctly, we will run this OpenCV Object Detection model that Arun Ponnusamy developed. His source code and description of the project is below. We will use a script I wrote that uses the cvlib detect_common_objects() wrapper. It uses your webcam and will detect, label, and say the name of the detected objects. It can detect 80 of the most common objects.
https://github.com/arunponnusamy/object-detection-opencv
https://www.arunponnusamy.com/yolo-object-detectio...
To run the code, navigate to the directory where you cloned the Github repository. Proceed with the following commands.
cd ~/Documents/Teachable-Machine-Object-Detection     	# change directory to cloned repo
source TMenv/bin/activate  		# activate venv for Mac/Linux OR
TMenv/Scripts/activate			# activate venv for Windows
python yolo_obj_det.py			# executes script, press ctrl+c to quit
deactivate				# to exit the virtual environment
Note: the Python script will run forever until you hit ctrl+c to close the program.
Setting Up Source Code
Now that we have our OpenCV/Tensorflow development environment setup and we have tested it to make sure it works, it's time to move on to running a Teachable Machine model. You can either use the sample model I provided or one that you created and exported.
Once you have successfully exported the model as described in the first step, you will need to unzip the model to extract both the .h5 file and the labels.txt. You will need to update the "model_path" and "labels_path" variables to point to these files in tm_obj_det.py. You will need to determine the width and height of your webcam's video feed in pixels and update the "frameWidth" and "frameHeight" variables. You may also need to mirror the video feed for your webcam depending upon your setup. To do this, uncomment the line "frame = cv2.flip(frame, 1)".
Next, you will need to set your confidence threshold (conf_threshold). This variable is a percentage value of how certain you want the model to be before it labels the image and speaks the prediction. By default, the confidence threshold is 90%.
Finally, if you have any issues with the video showing up properly, you can use the matplotlib implementation. You will need to comment out the "cv2.imshow" and "cv2.waitKey" lines. Then you will need to uncomment "import matplotlib" as well as the plt lines of code towards the end.
That's it, your code is ready to run!
Run!
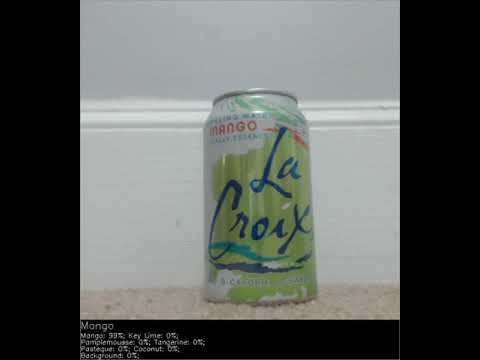
Now your code should be all set up to run. Navigate to the directory, activate your virtual environment, and run the code! After about 10 seconds, it should load a video feed. The program will label what object it recognizes and will use text-to-speech to say the name of the object.
cd ~/Documents/Teachable-Machine-Object-Detection     	# change directory to cloned repo
source TMenv/bin/activate  		# activate venv for Mac/Linux OR
TMenv/Scripts/activate			# activate venv for Windows
python tm_obj_det.py			# executes script, press ctrl+c to quit
deactivate				# to exit the virtual environment
Note: the Python script will run forever until you hit ctrl+c to close the program.
Remix!
These packages installed in your virtual environment and the scripts I provided should hopefully give you a useful framework to develop lots of exciting things. You can now easily incorporate object detection into all of your projects! I hope to continue doing more projects in this space to make some more fun projects that use image detection and leverage this framework.
Here are some project ideas. Feel free to take them and run with them or come up with your own!
- A program to recognize your friends and greet them by name as they come to your house.
- A program to detect when you are leaving the house and ask you to present your phone, keys, wallet, etc. to make sure you have everything when you leave the house.
- Build a sorter that uses a motor to divert objects in a particular direction based on which objects they are.
- A program that will detect letters in sign language and write these out to a text file.
More Projects
For more projects, visit these links:
Source Code
To view the source code, visit this Github repository or see the code below.