Easy Bust Modeling
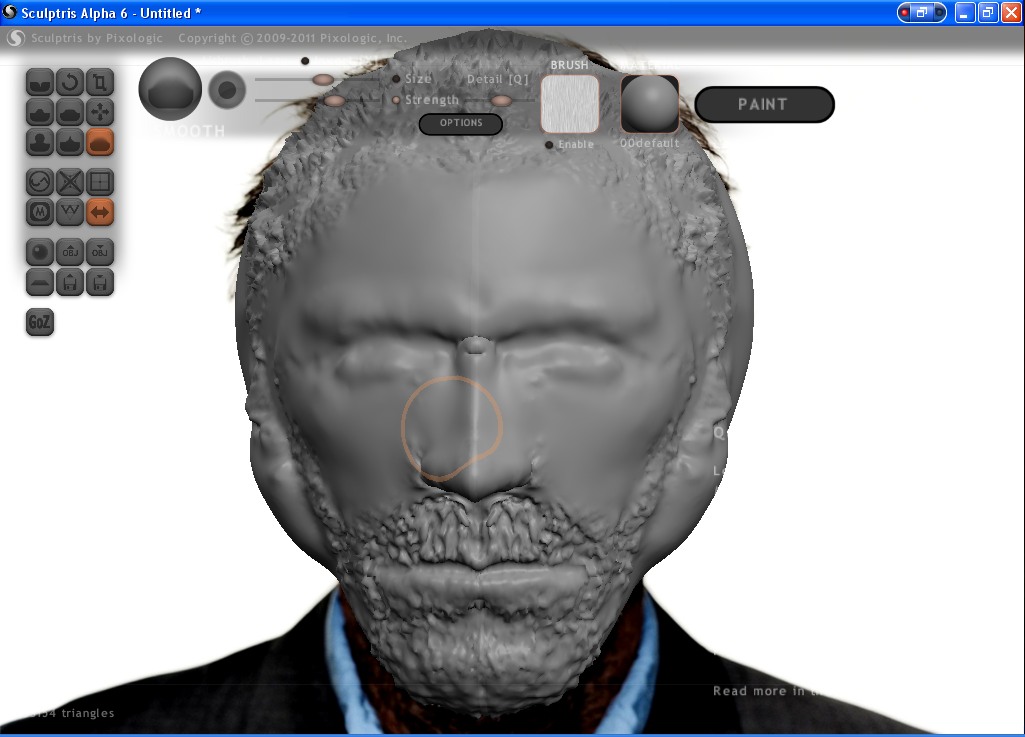
I've been working on my character sculpting, and I found a method to quickly and easily make 3D busts from an image.
What you'll need:
Sculptris: Free
Blender: Free
Get a Good Image
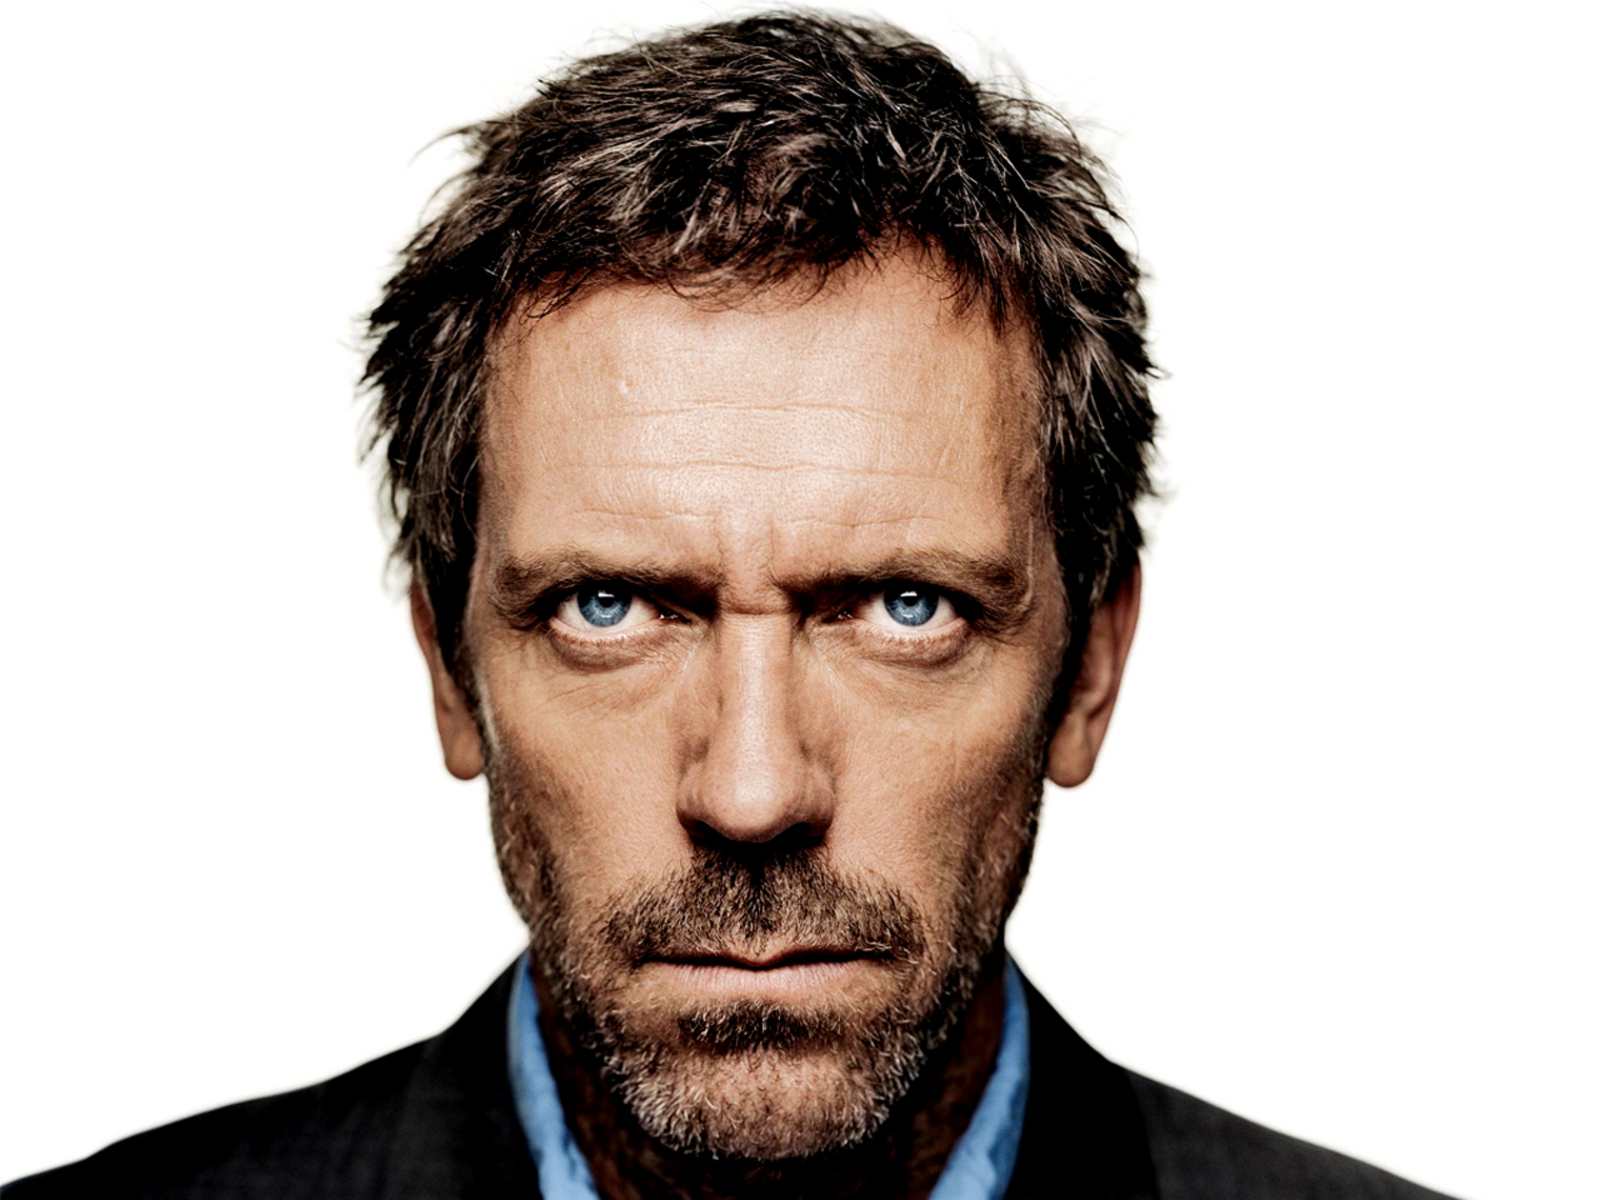
You'll want an image of the front of the persons face. Some of the shoulders is good for a base, but you can kind of fake that if needed. For this instructable I image searched for a face and saw Dr. House. So I downloaded him for this. You'll want your image square (equal length and width)
Set Up in Sculptris
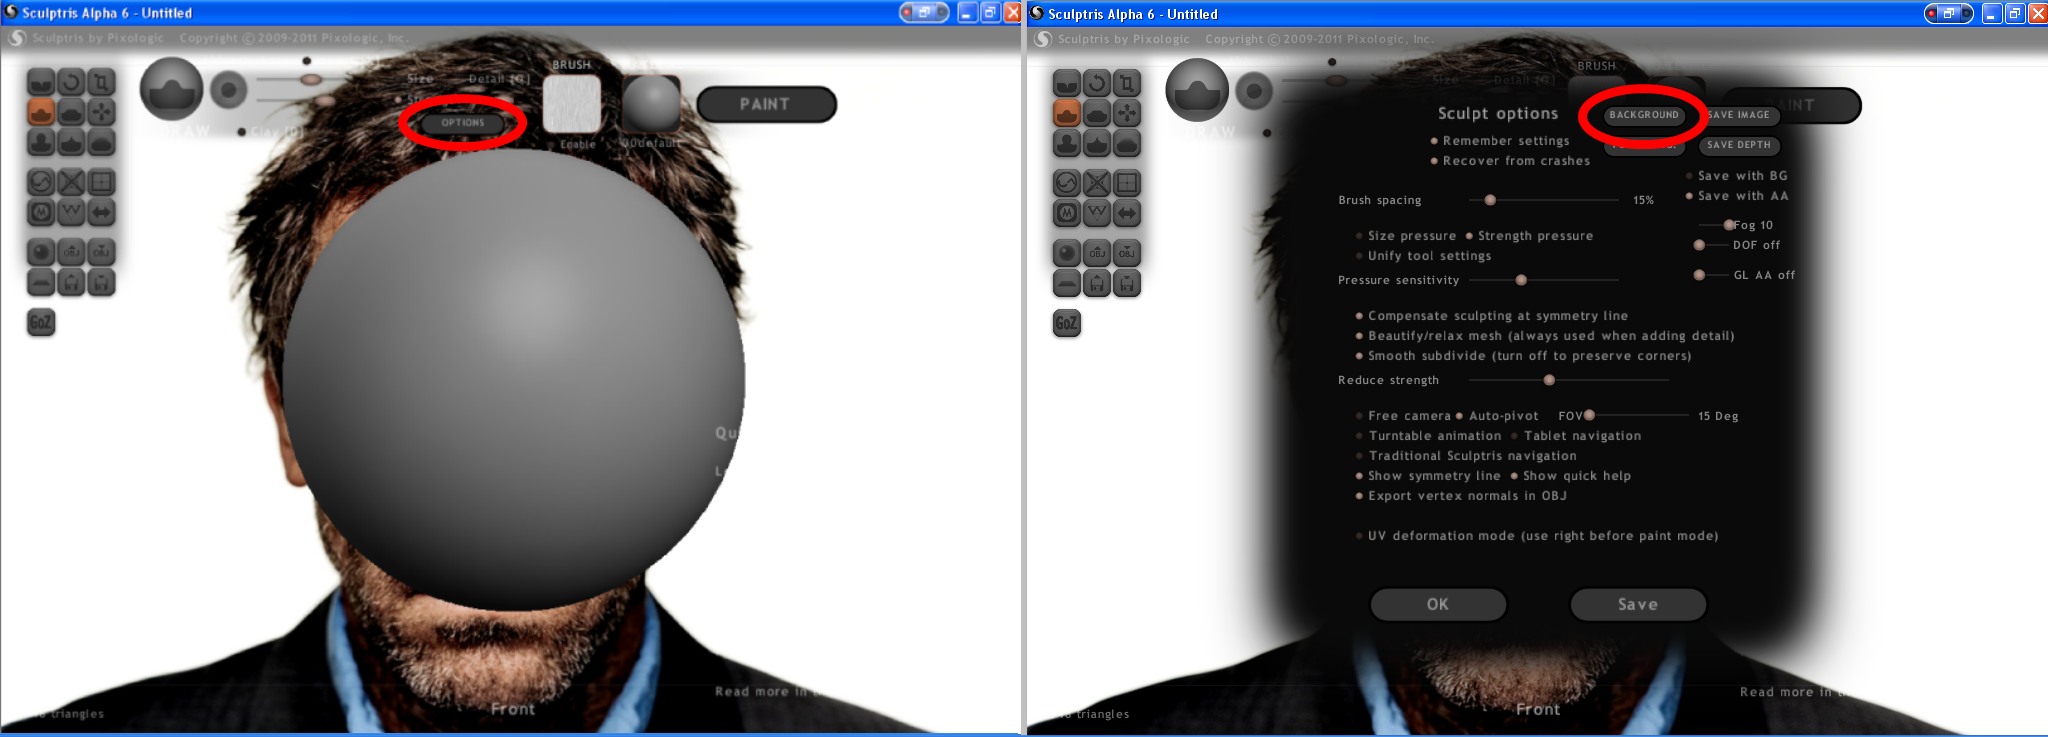
Set your image as the background for Sculptris. Click options, then click background and select your image.
Basic Sculpt
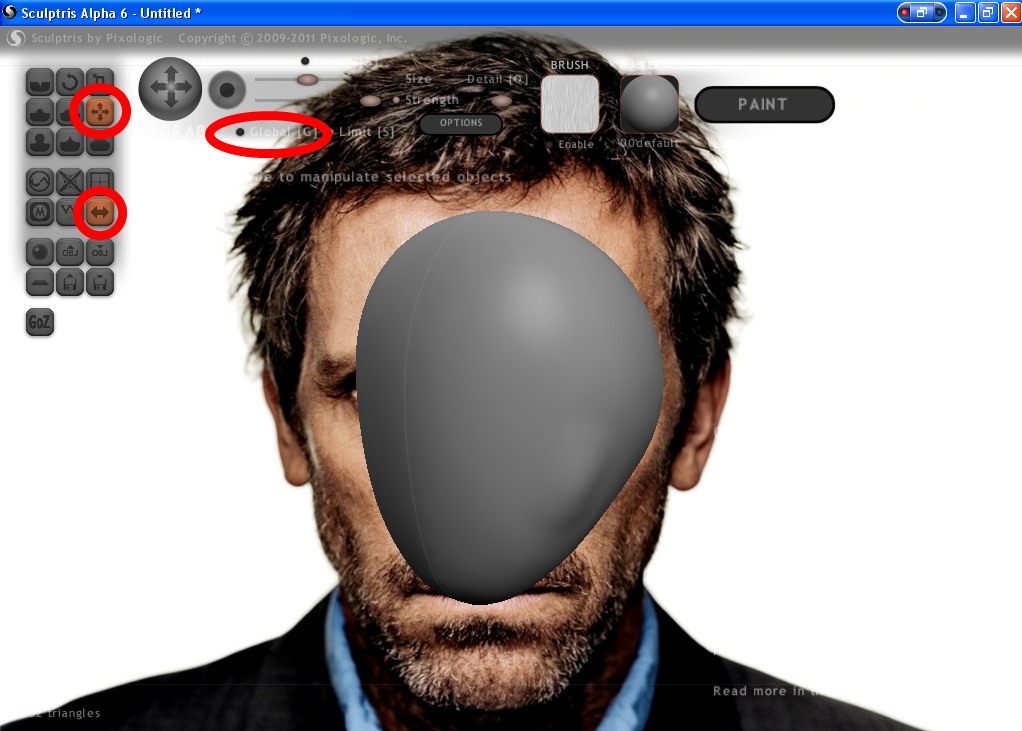
Sculpt out the basic shape. Made sure symmetry is on (double arrow button). Then use the grab tool (quad arrows) to pull basic features, like the overall shape of the head. Be sure that global is turned off so that you can pull areas of the sphere. You can adjust the size of the area you are pulling and the strength at the top of the screen. Because of the white background in my image, you can't see the triangle count in the lower left corner. Bump this number up using the subdivide tool (square sectioned into for pieces above the symmetry tool). The more triangles, the more detail you'll get in the next step, but you don't "need" a whole lot. I like to be around 250k, but you probably only need around 100k.
Take Your File Into Blender
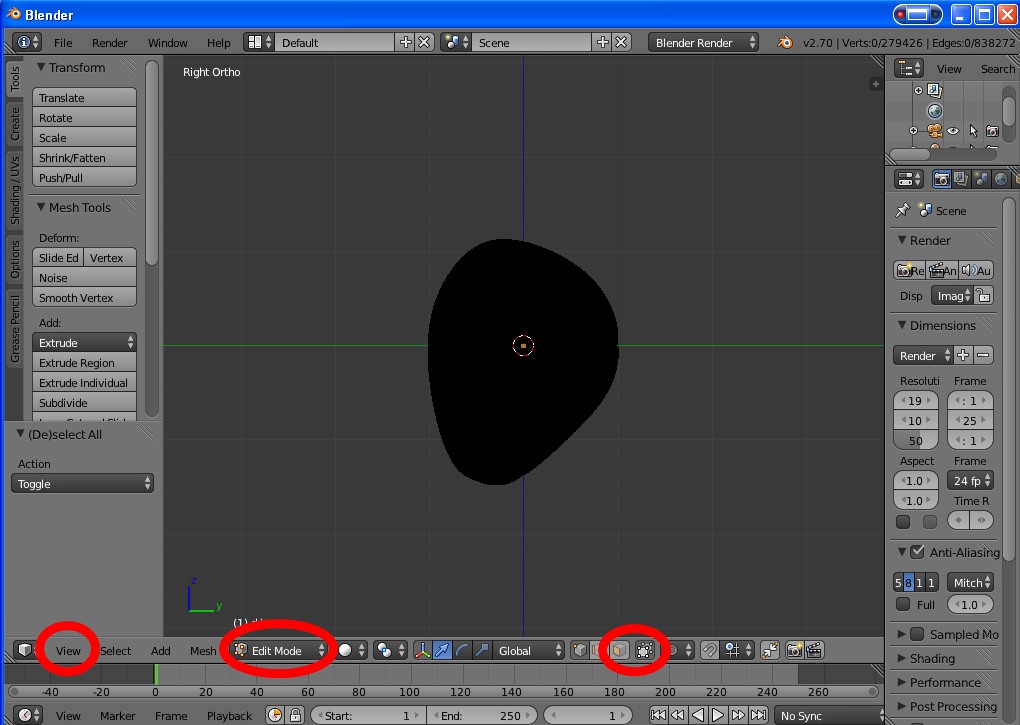
Export your file from Sculptris (obj with a down arrow icon), and import that obj into Blender (File>Import>OBJ). If you're new to Blender, delete the startup cube first by having your mouse over the work area, hit delete, then click delete on the little popup. Right click your sculpt, and switch to Edit mode (circled in my image). Click view and switch to right. If your model is orange at all (selected triangles) hit a on your keyboard to deselect everything (should be all black). Now turn on face select mode (cube with an orange face in the red circle to the right) and turn off Limit selection to visible (cube with points in the corner in the same circle). Now hit b on your keyboard to activate box select. Left click and hold start your box, and release to end your box. Use this to select just the face of your sculpt. Click view again, this time selecting front view. Click U on your keyboard and select Project from view (bounds).
Mapping the Texture
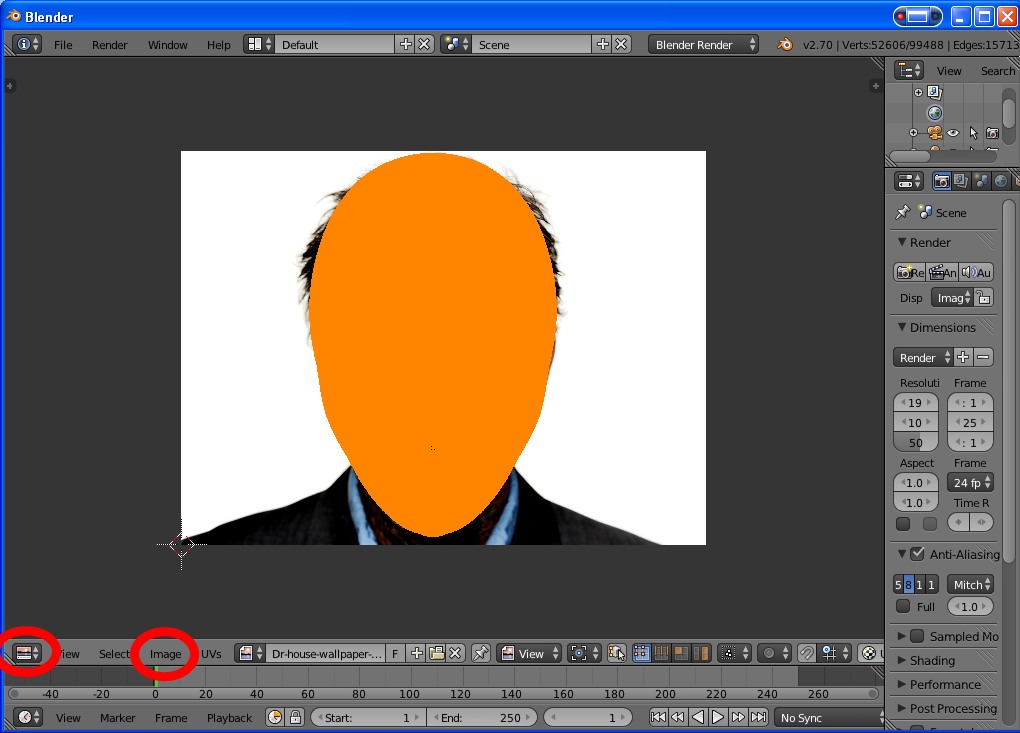
Switch to UV/Image editor (the cube in the red circle on the left, click to switch). Import your image (click image>open). Scale your model to the image. You do this by hitting S on your keyboard. Your model may be skewed because we use the scale to bounds option. You can fix this by scaling only along the horizontal (Hit S then hit X) or vertical (hit S then hit Y). You can also center your model on the image by hitting G and moving it into position.
Displacement
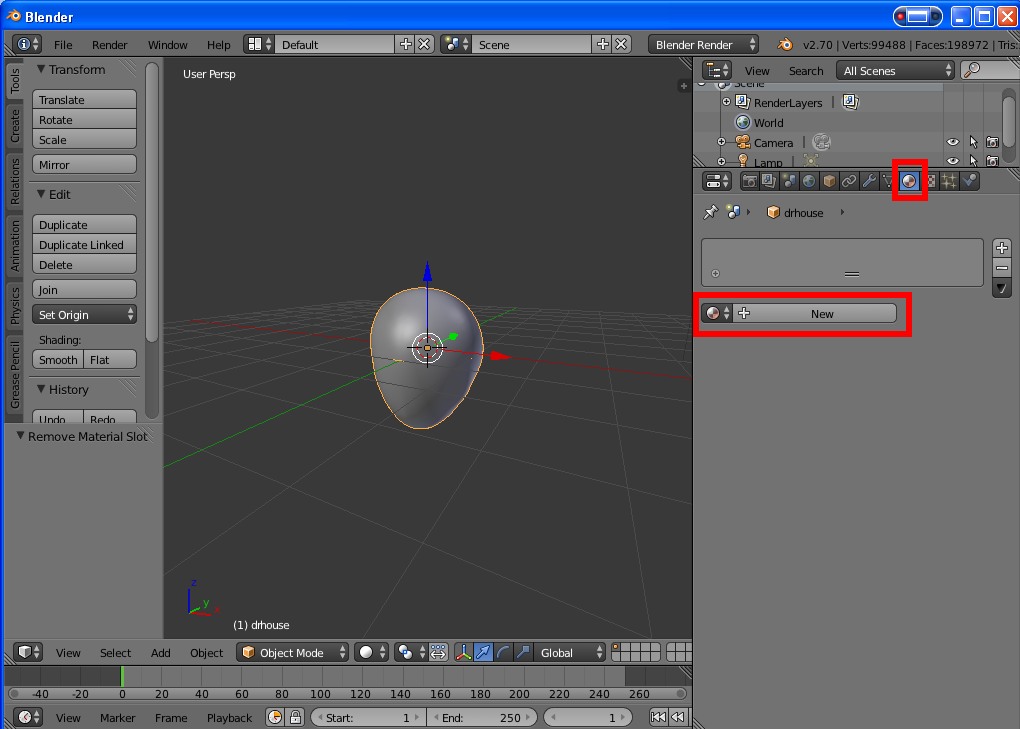
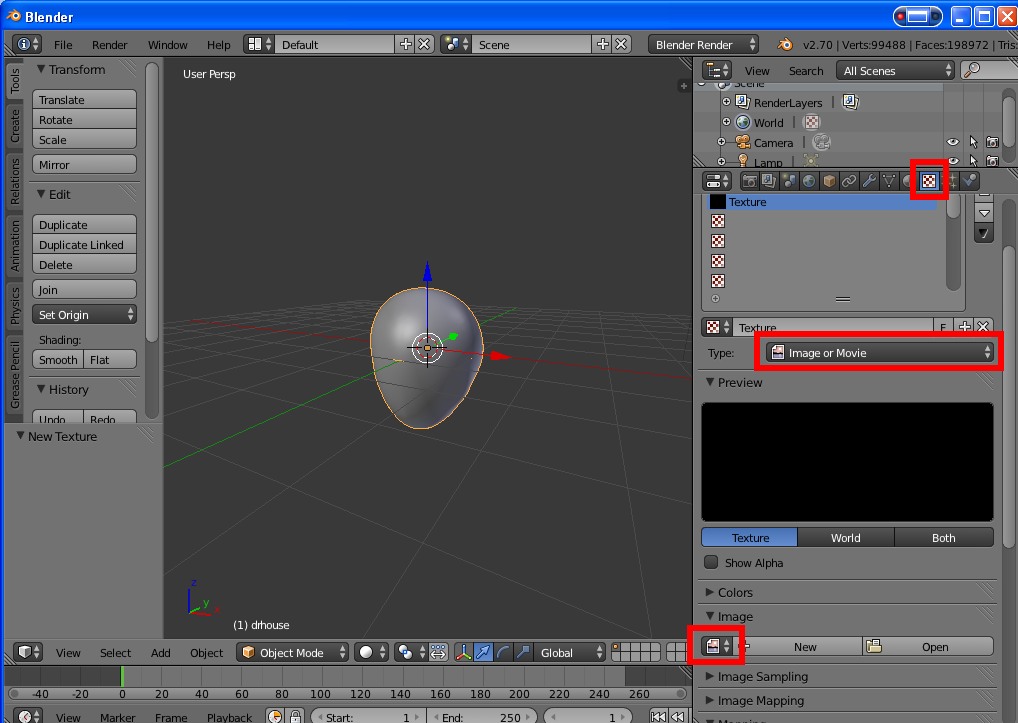
Switch back to 3D View from UV/Image editor. Switch back to Object mode from Edit mode. Click on the sphere indicated in the image. This is your parts material settings. If there isn't already one set (if your screen looks like my image) click new. Click the checkered icon next to the sphere. This is your texture. Click new. Where it says clouds, click that and switch to image or movie. Down lower you'll see New and Open. Click to the left of new, and you'll be able to select your image that you loaded in UV/Image editor.
A Face
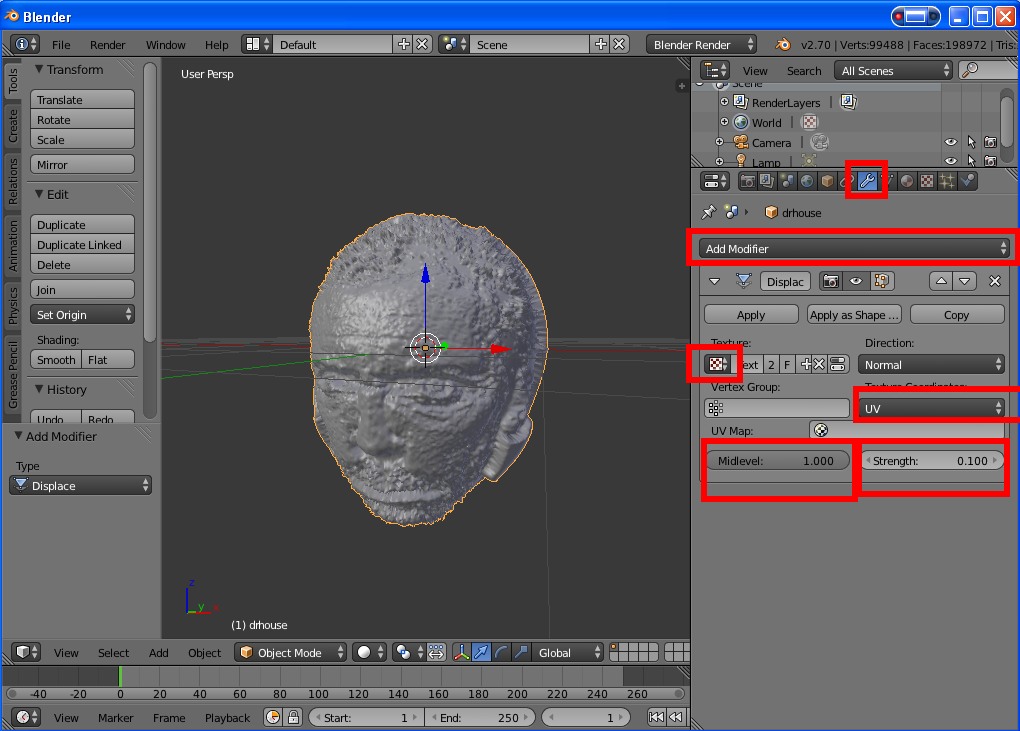
Now we are all set for out displacement. Click the little wrench for modifiers. Select Displacement from the Add Modifier box. Again you can select your texture from the little icon under texture. Switch to UV mapping, turn down the strength, usually either .1 or .2. And set your mid level to 1. Click apply and you have a very ugly face. But Everything is where you need it to be to sculpt! File>export>OBJ and open the OBJ back in Sculptris.
Sculpting
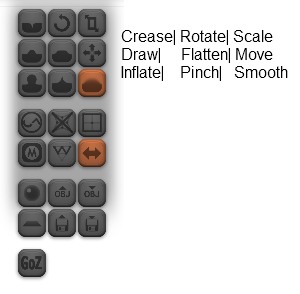
Now to use our displaced head to make our sculpt. Import your OBJ into sculptris and turn symmetry on again. If your face isn't symmetrical, we'll address that later, but faces a asymmetrical so we can knock out a lot more faster with symmetry on. You can hold shift and use your middle mouse button to move your sculpt around so you can see your background better. Step one, smooth the skin. Don't smooth details you want to keep too much by turning down the strength. I mostly use the move tool to push and pull things where I want them. I'll also use inflate for things like the bridge of the nose, and the brow. Play with the tools and use them the way that works for you. The first one may take you a while, but I made this one in 2 hours while writing this instructable.