Easy 3D Printed Braille to Add to Everything!
by katzcreates in Workshop > 3D Printing
14967 Views, 105 Favorites, 0 Comments
Easy 3D Printed Braille to Add to Everything!
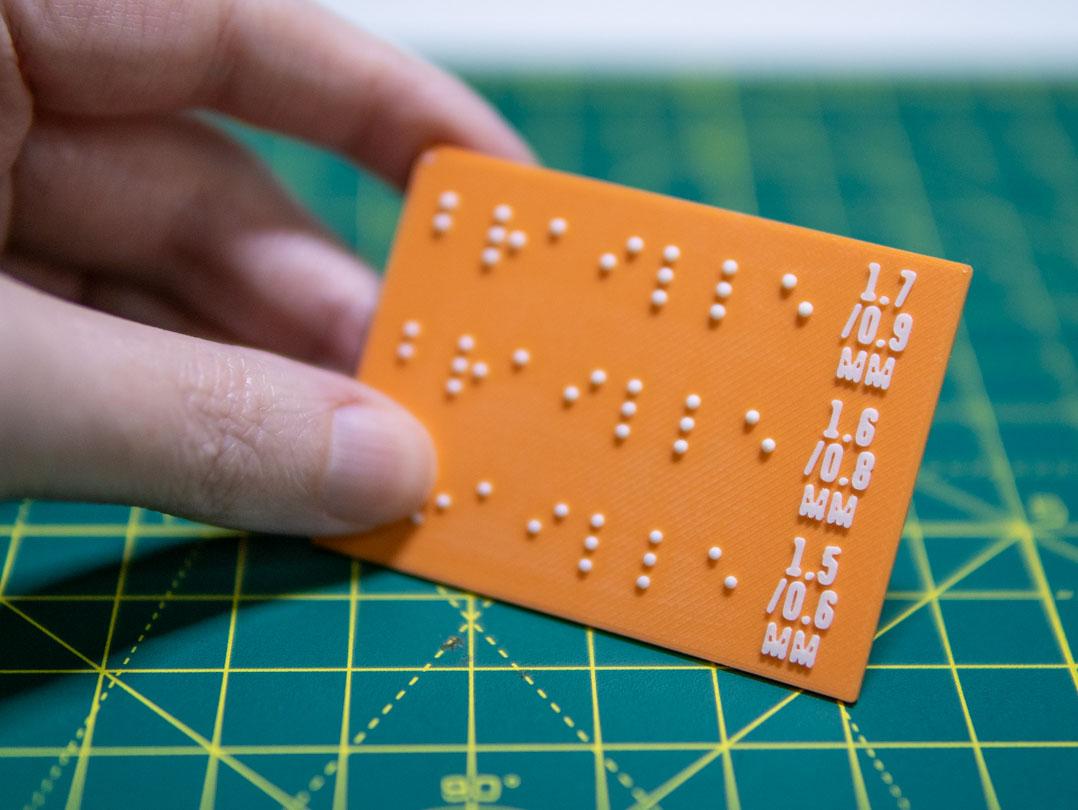
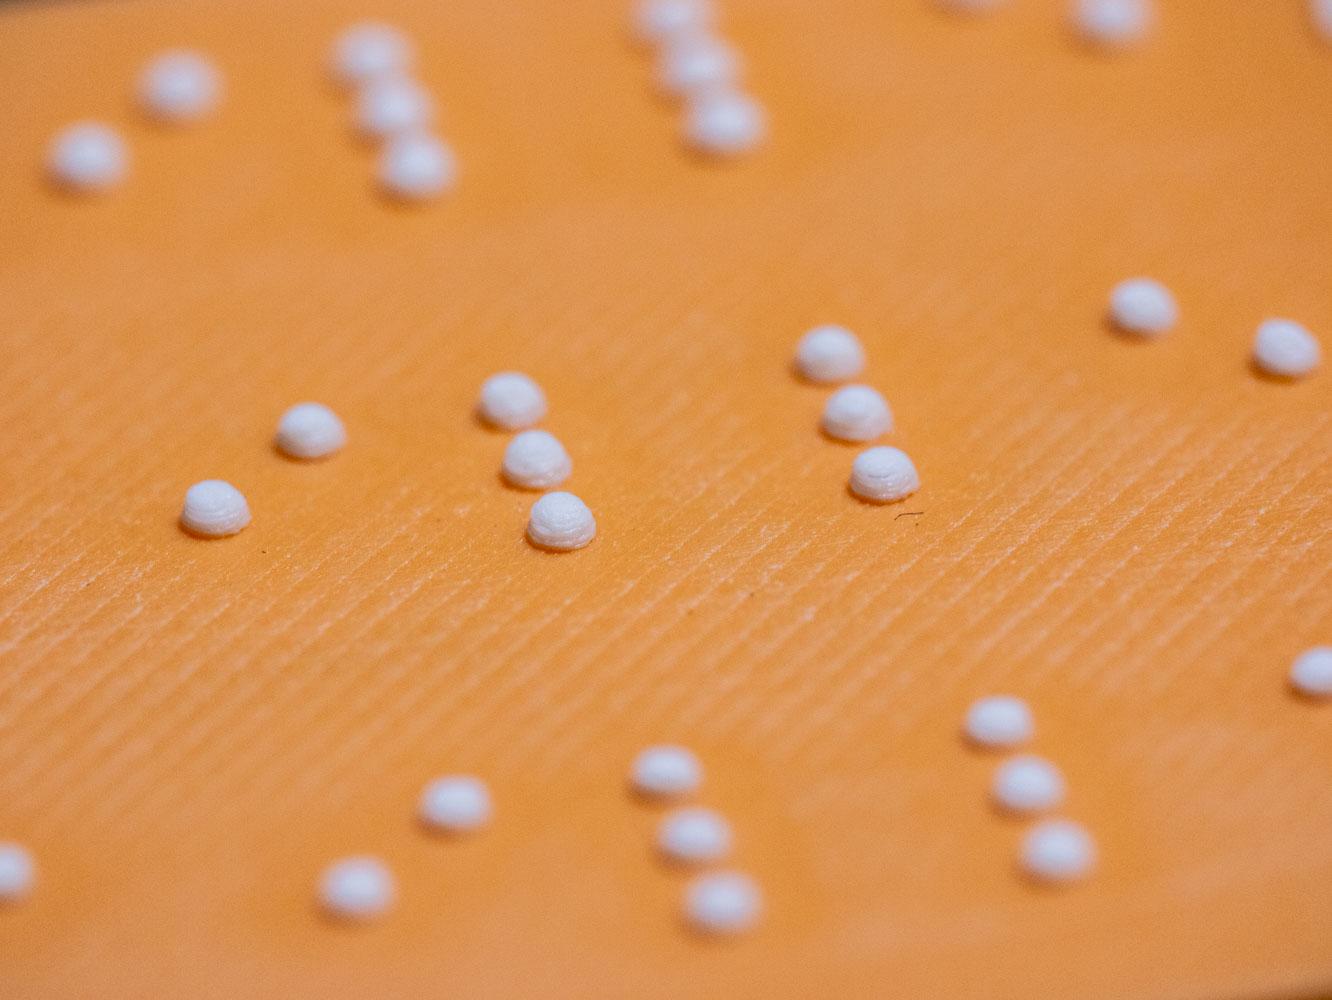
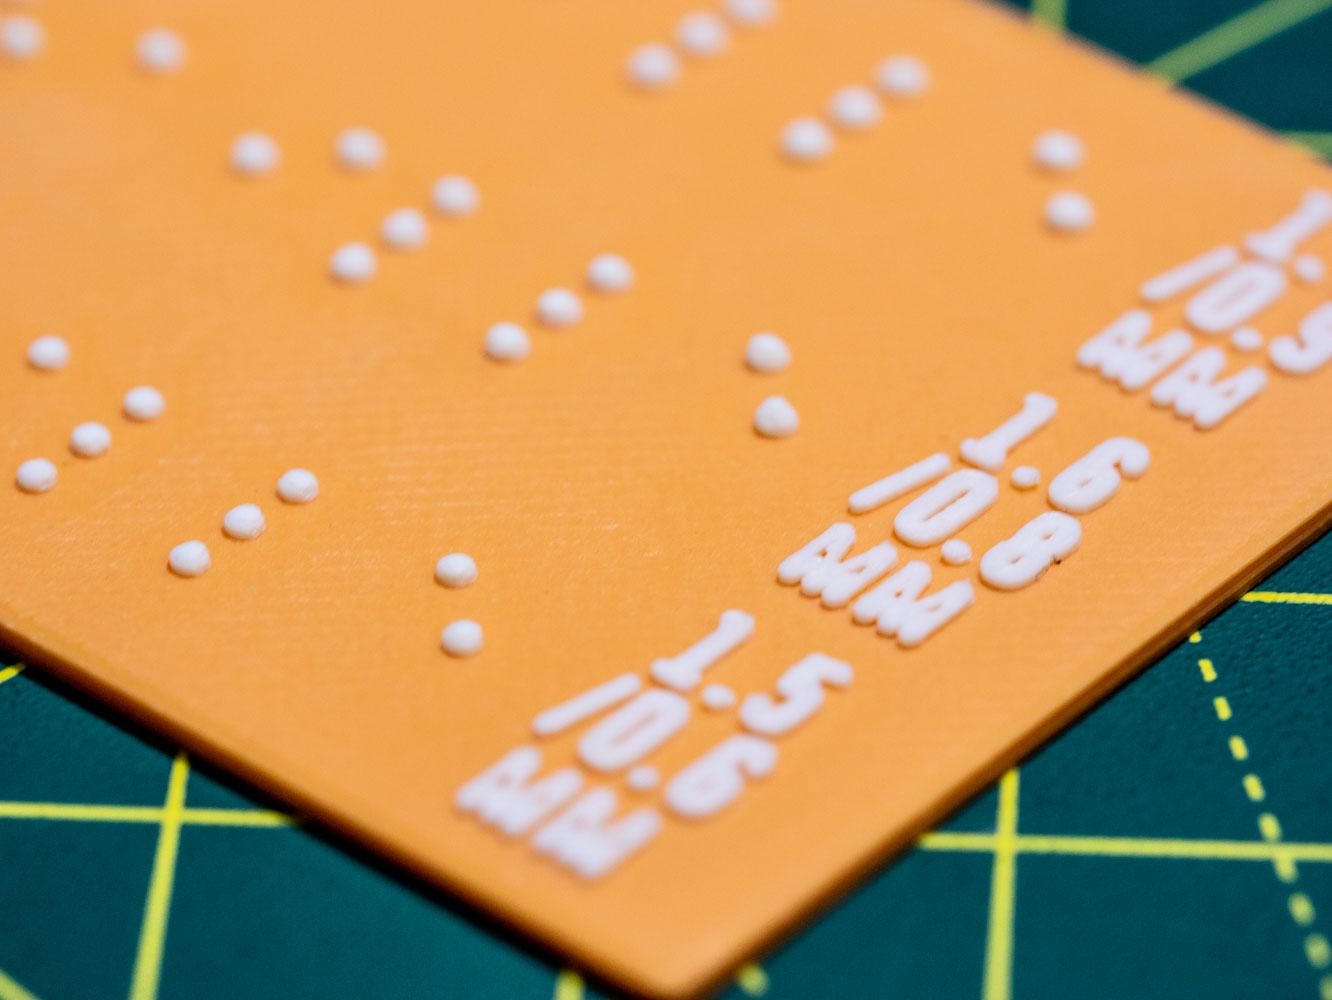
Over 43 million people worldwide are considered completely blind, and yet most of us remain woefully undereducated about braille and don't know how to include it in the signage we create! Braille may seem complicated, but I've broken it's creation down into easy to follow steps, complete with official reference materials to make sure that your braille is fully regulation!
If you have a 3D printer and want to learn how to add beautiful, easy to read and regulation friendly braille to your project, check out the video above, or read on!
Supplies
- An FDM/FFF 3D printer with a 0.4mm nozzle or smaller
- Two different colours of filament (if you want visually contrasting braille)
- A range of fine grit sandpaper (400, 800, and 1000 work great)
- A computer with CAD design software of your choice (I'll be using Fusion 360 for this tutorial)
Learn Your Local Regulations
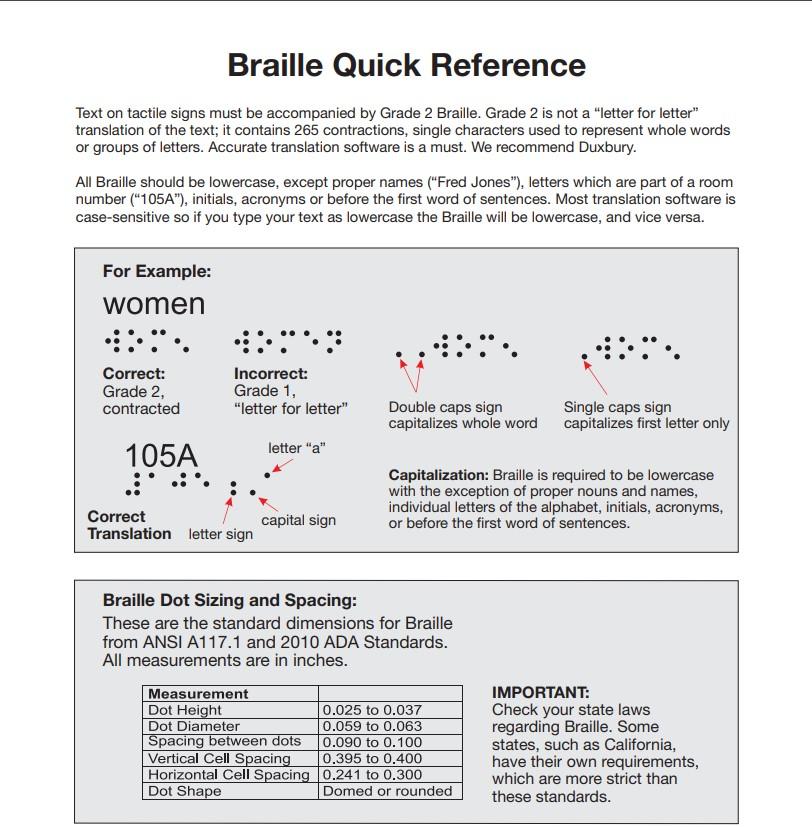
It may not sound terribly exciting, but the very first step to making great 3D printed braille is going to be preparing your text for the project! After all, if you don't know what you're saying, how are you going to say it??
Braille regulations are dependant on what country you're in, so the very first step is to figure out the regulations for where you are. Here are some references for most major English speaking countries:
Most don't tend to differ greatly, but it's important to note whether you want Contracted or Uncontracted Braille, and the acceptable size range for the dots. Jot this down somewhere or keep the tab open!
Prepare Your Text
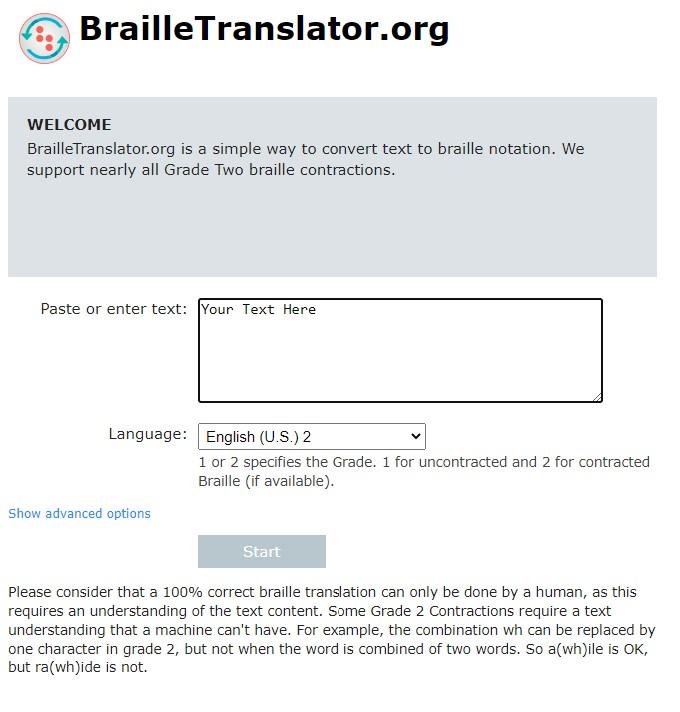
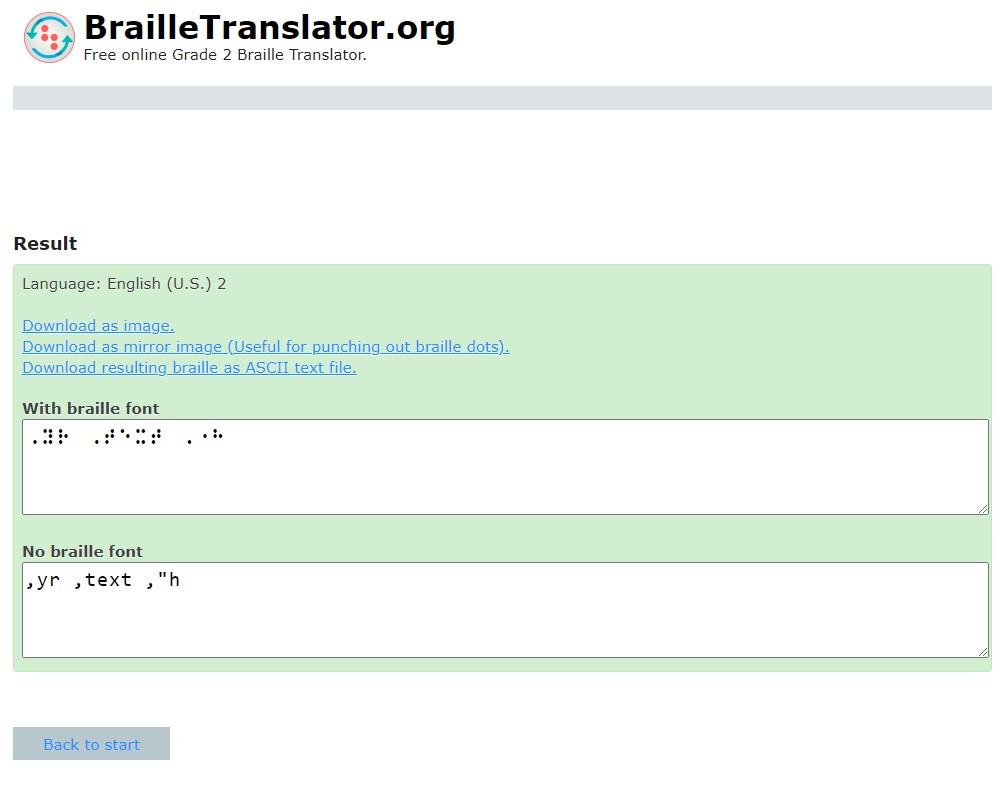
Once you know what you want your braille to say and whether you need Contracted (Grade 2) or Uncontracted (Grade 1) Braille, head on over to BrailleTranslator.Org to get a translation of your text into the braille type that you need. There is a great range of options to choose from, and should satisfy most braille translation needs! Type in what you want your text to say and hit Start. It will provide you with a translation on the next page. Save that out as an image, or an ASCII if you prefer.
NOTE:
As stated on the website, perfect Grade 2 or Contracted Braille requires a human translation, and it should be understood that translation provided by the site may have errors. There is a high degree of accuracy, but mistakes can occur!
Make It 3D - Option 1, Part 1: Generate the Model
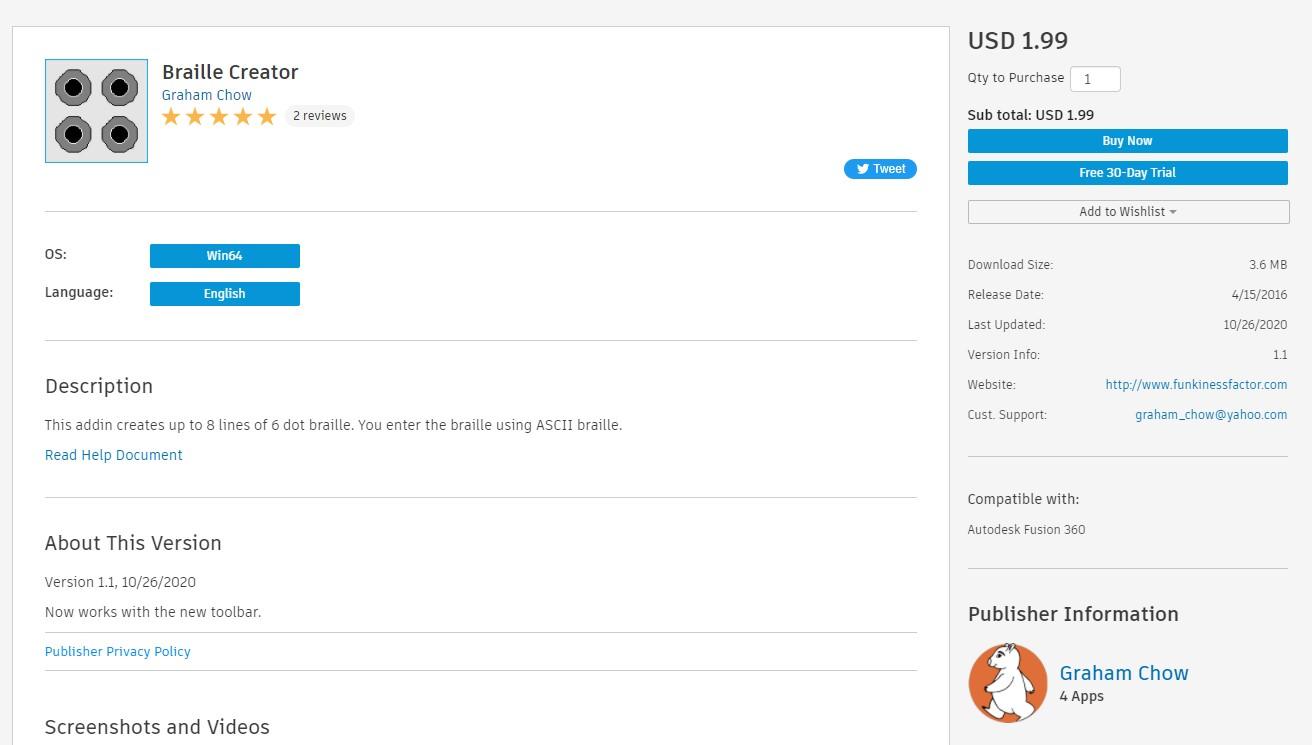
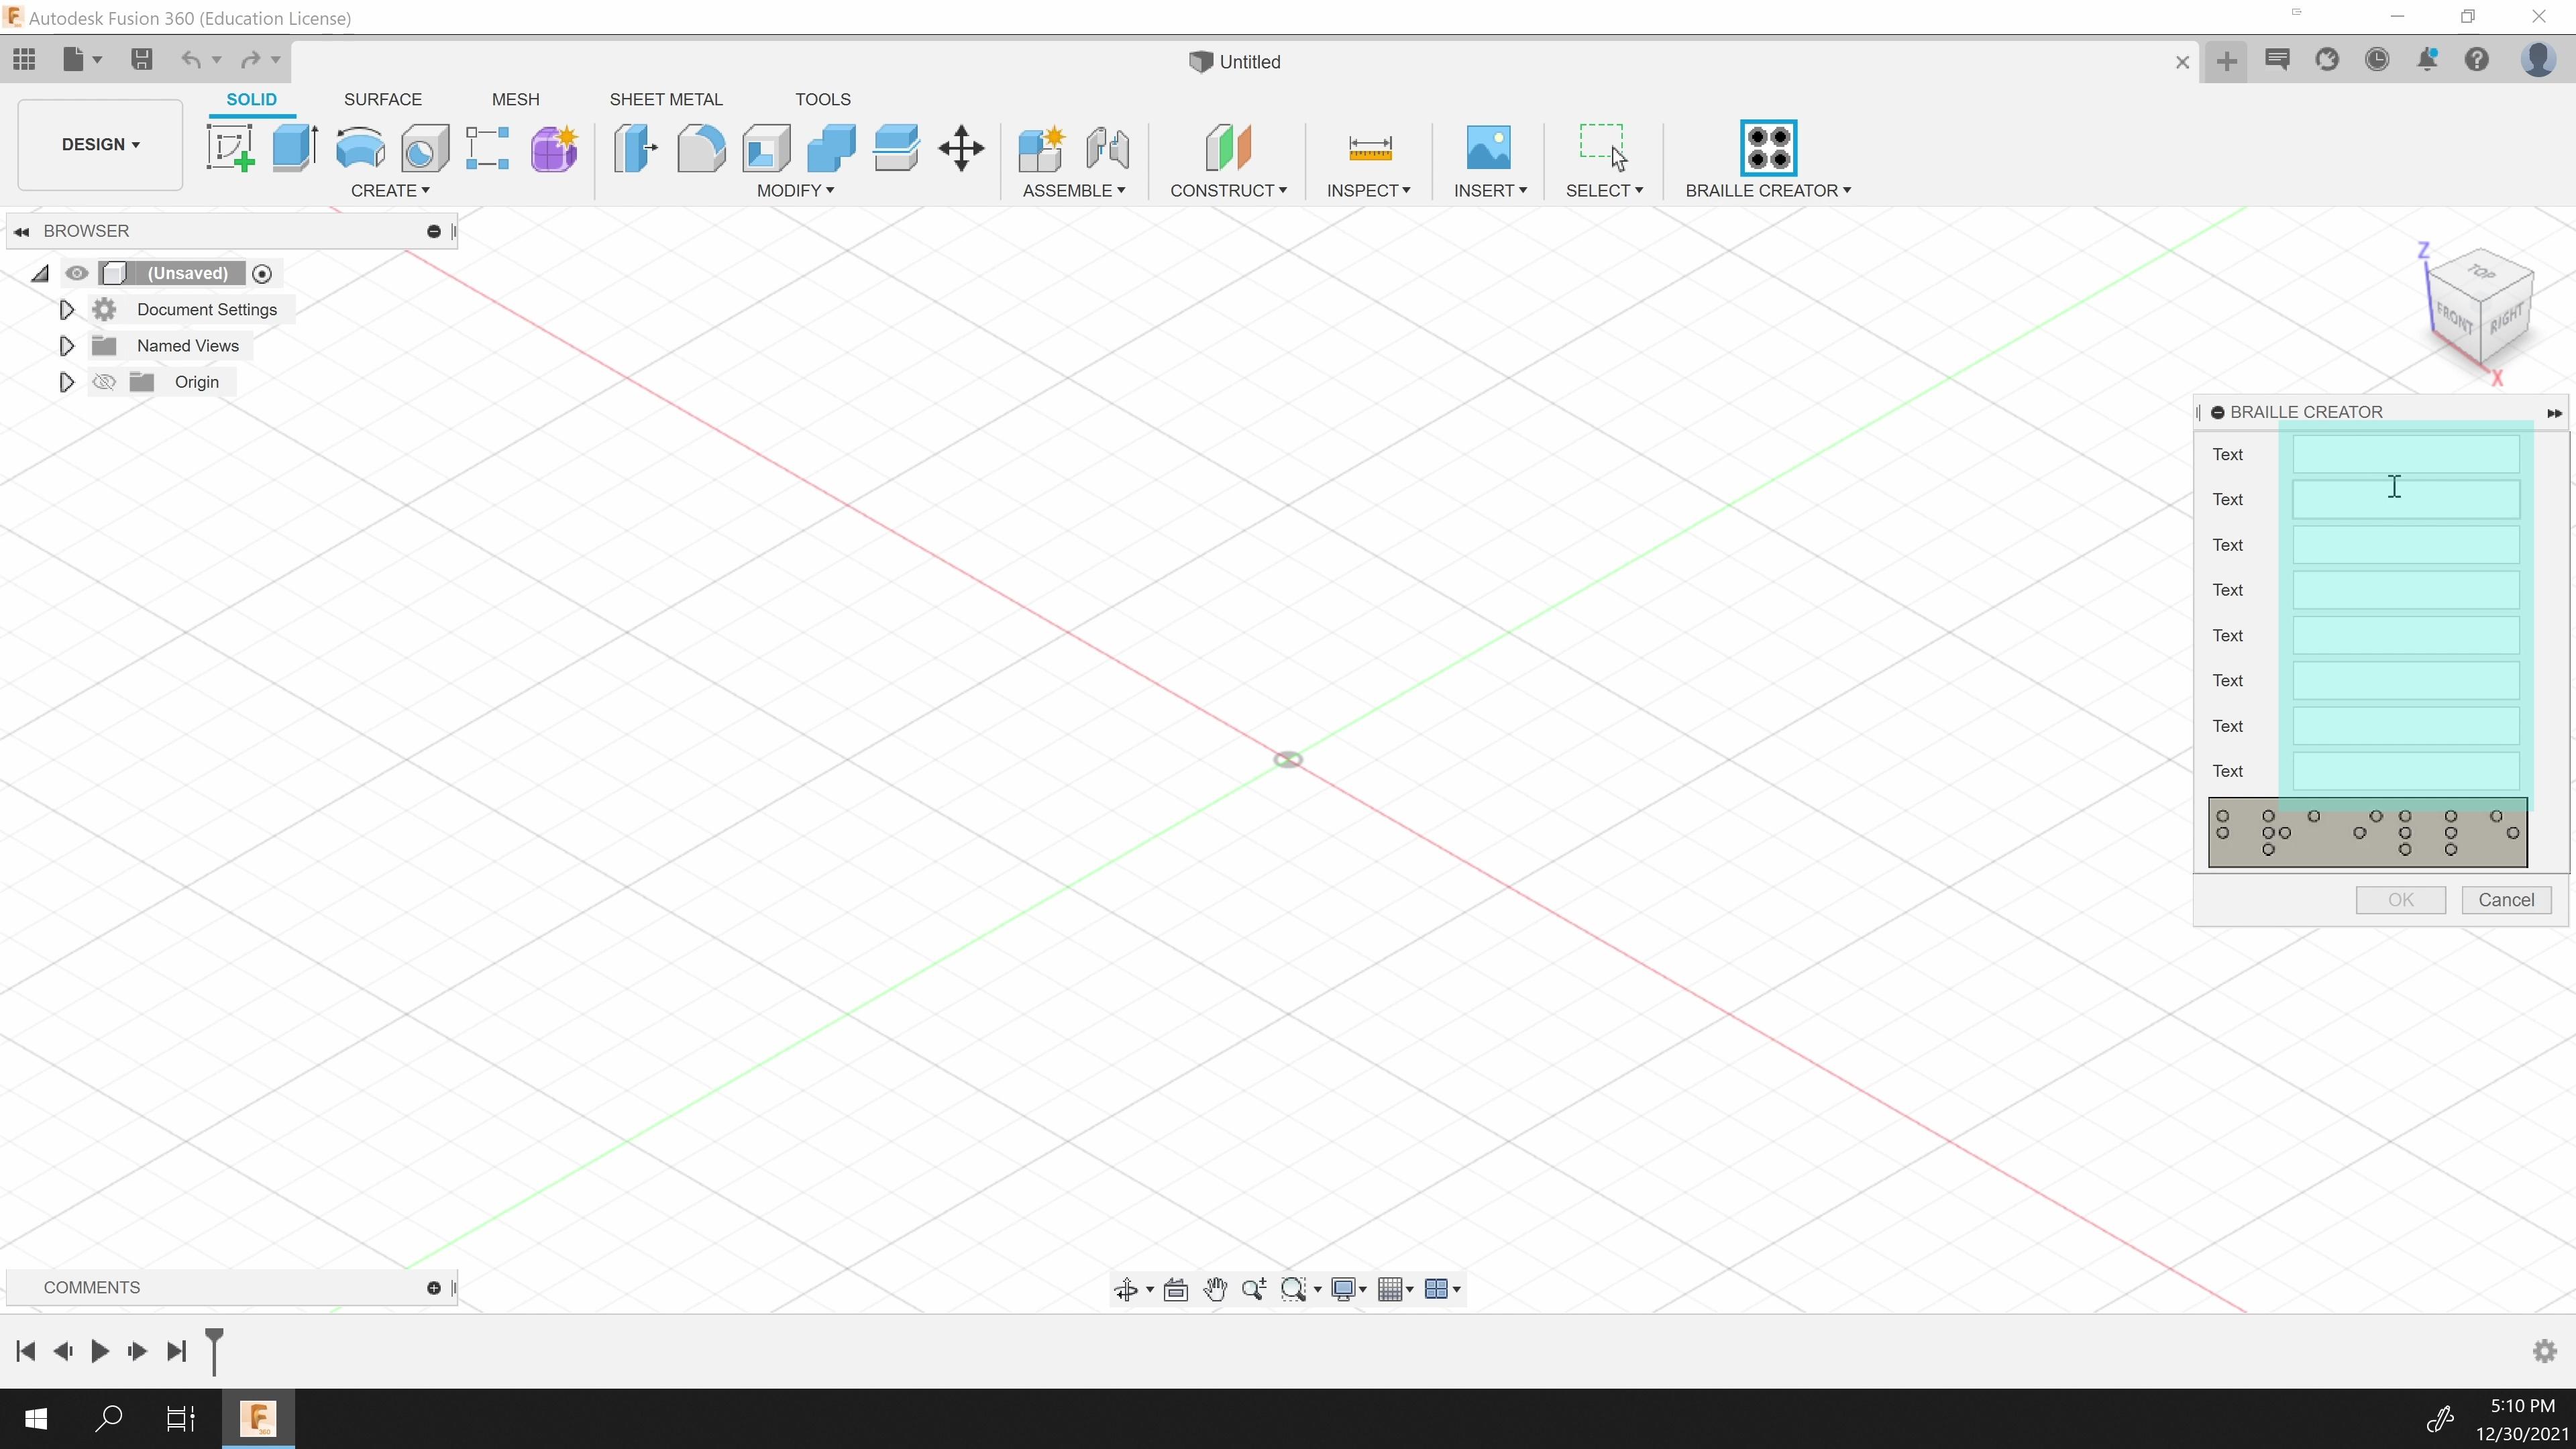
If you're using Uncontracted Braille and Fusion 360 to create your 3D model, then you're in the prime position to try out Graham Chow's Braille Creator Plugin for Fusion 360. It does cost $1.99, but is well worth it to speed up the design process! Download it and boot up Fusion 360.
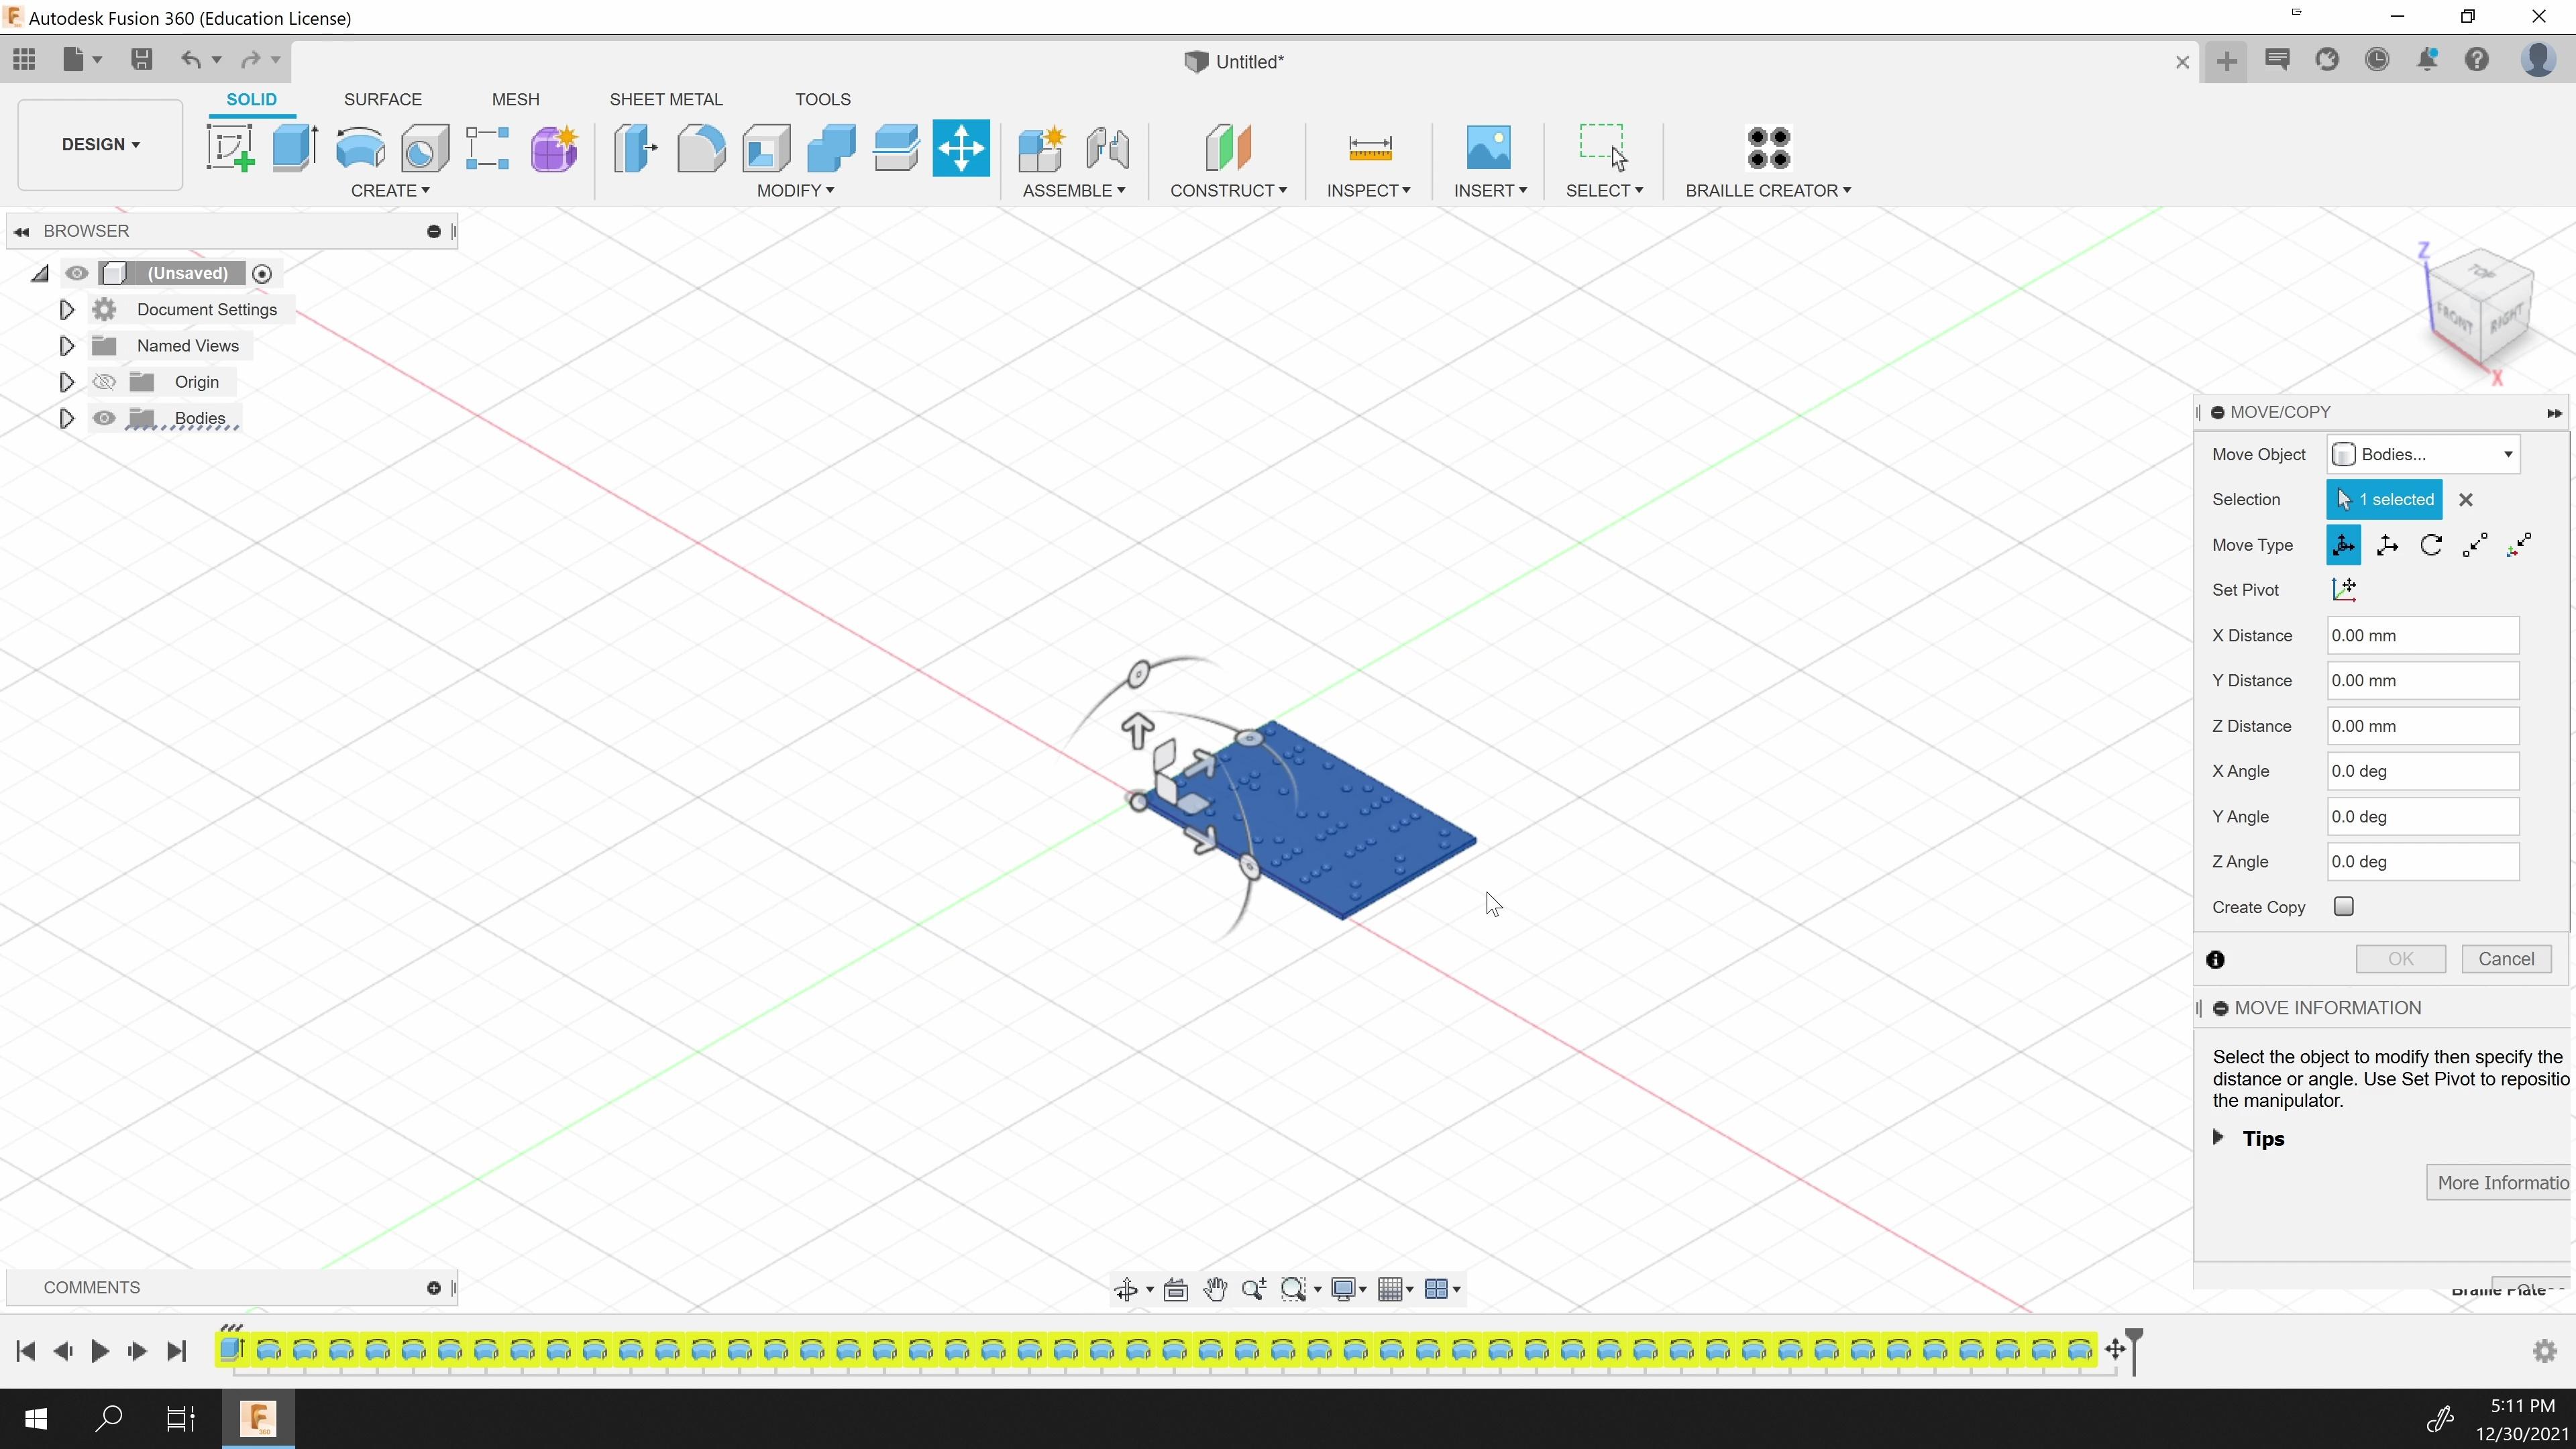
Once you've got a new file open in Fusion 360, open up the Braille Creator window. The shortcut for me appeared on the far right of the tool bar. Type your text in the provided boxes; each line will create a new line of braille, so keep that in mind as you input your text. Hit okay and the plugin will process and create a model.
Don't worry if this takes a while! It's a lot of processing and if your computer isn't super speedy, this may take a bit.
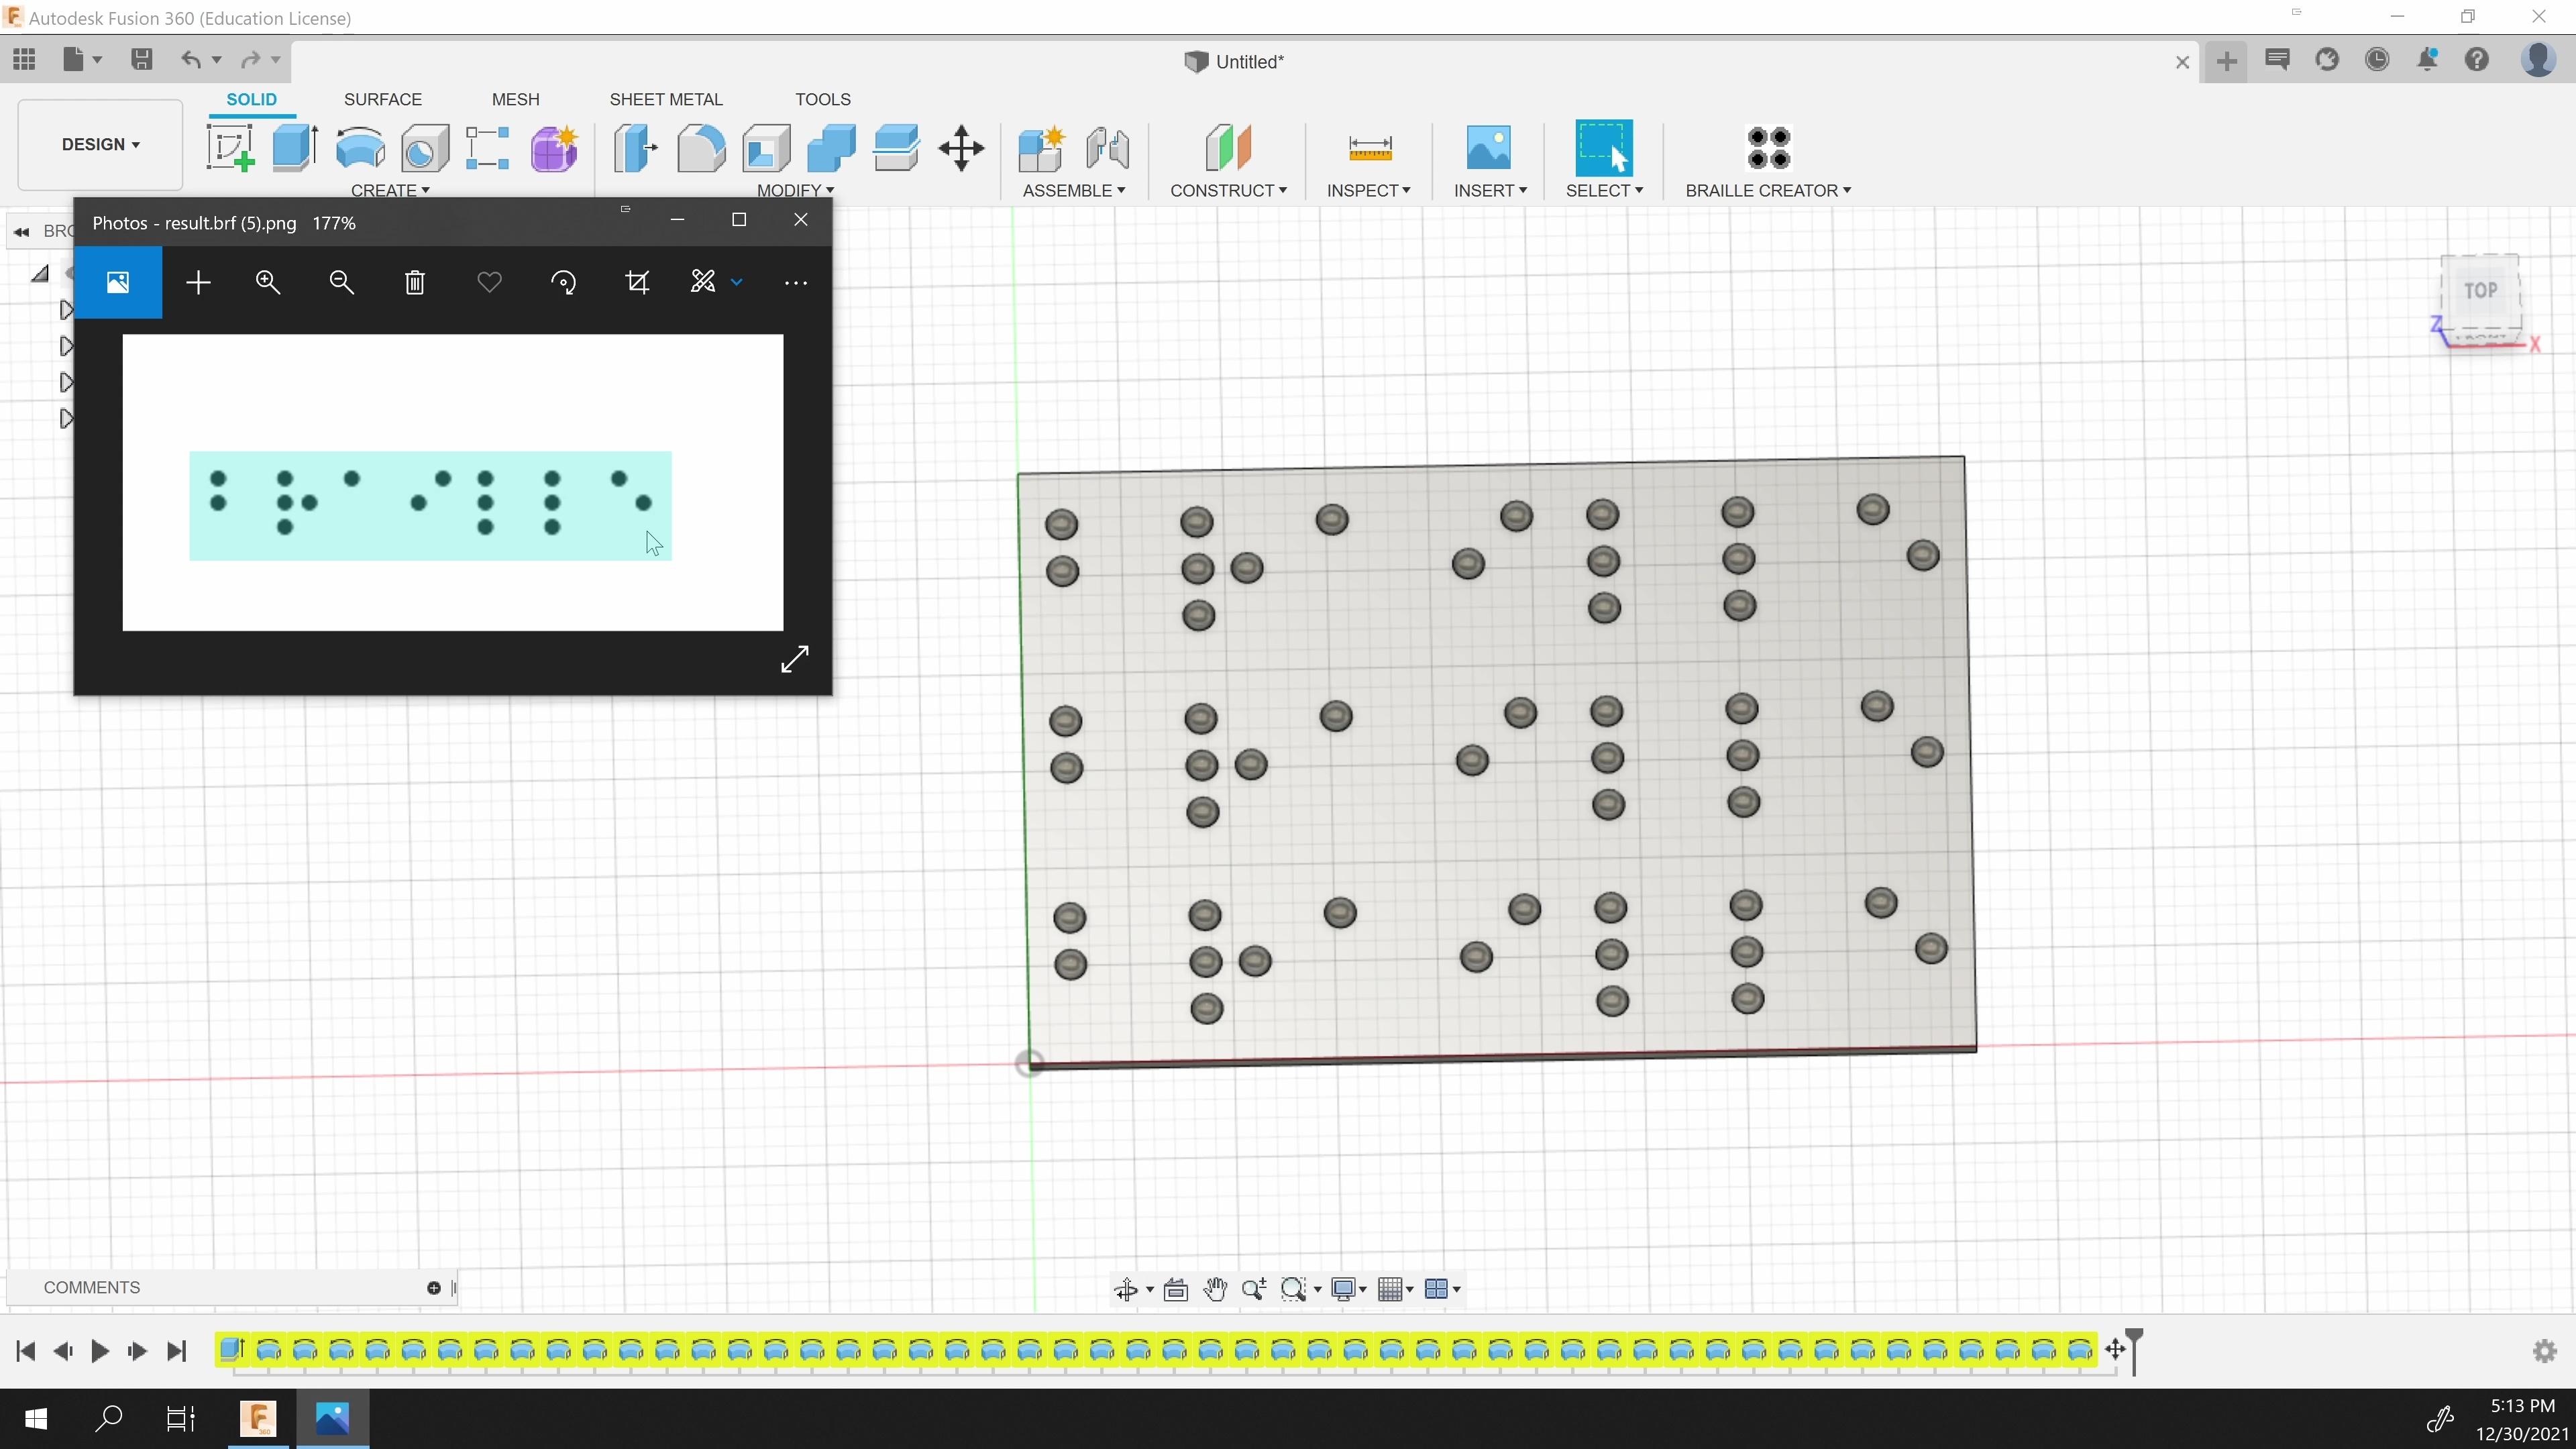
Once the model has loaded, pull up the image you saved from the translate and check that the plugin generated the right braille text.
Make It 3D - Option 1, Part 2: Create Editable Braille Sketch
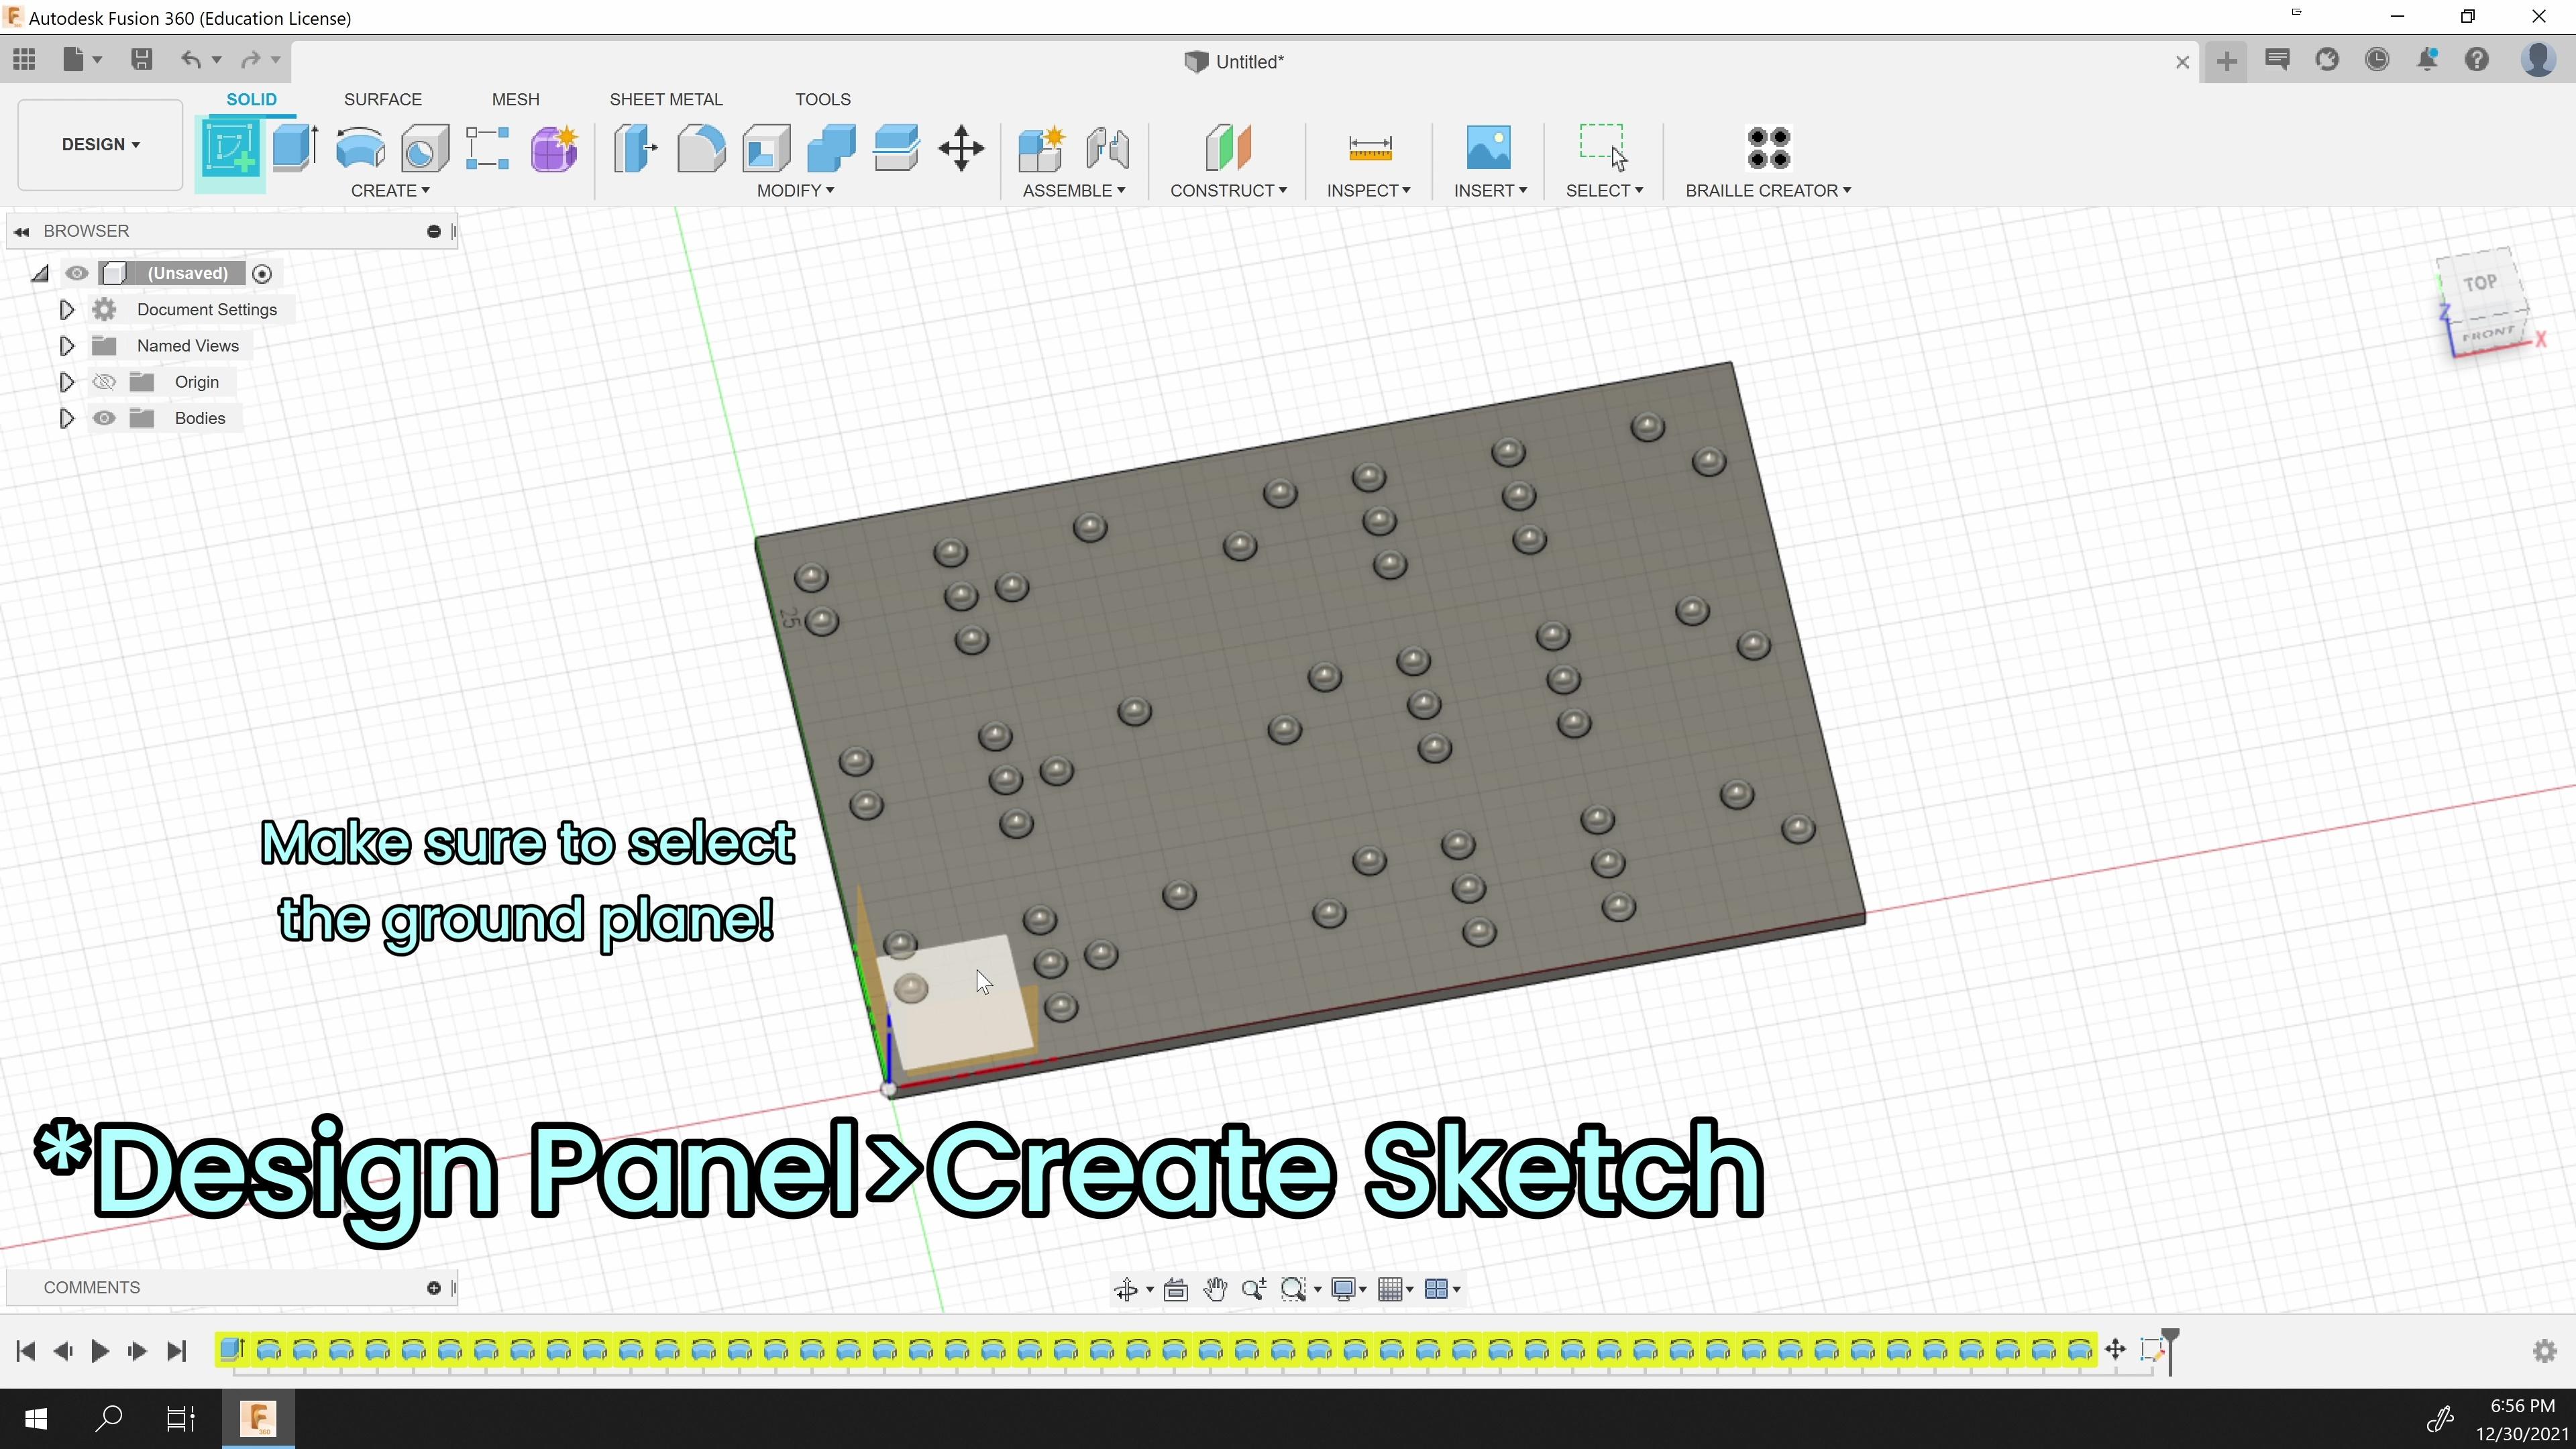
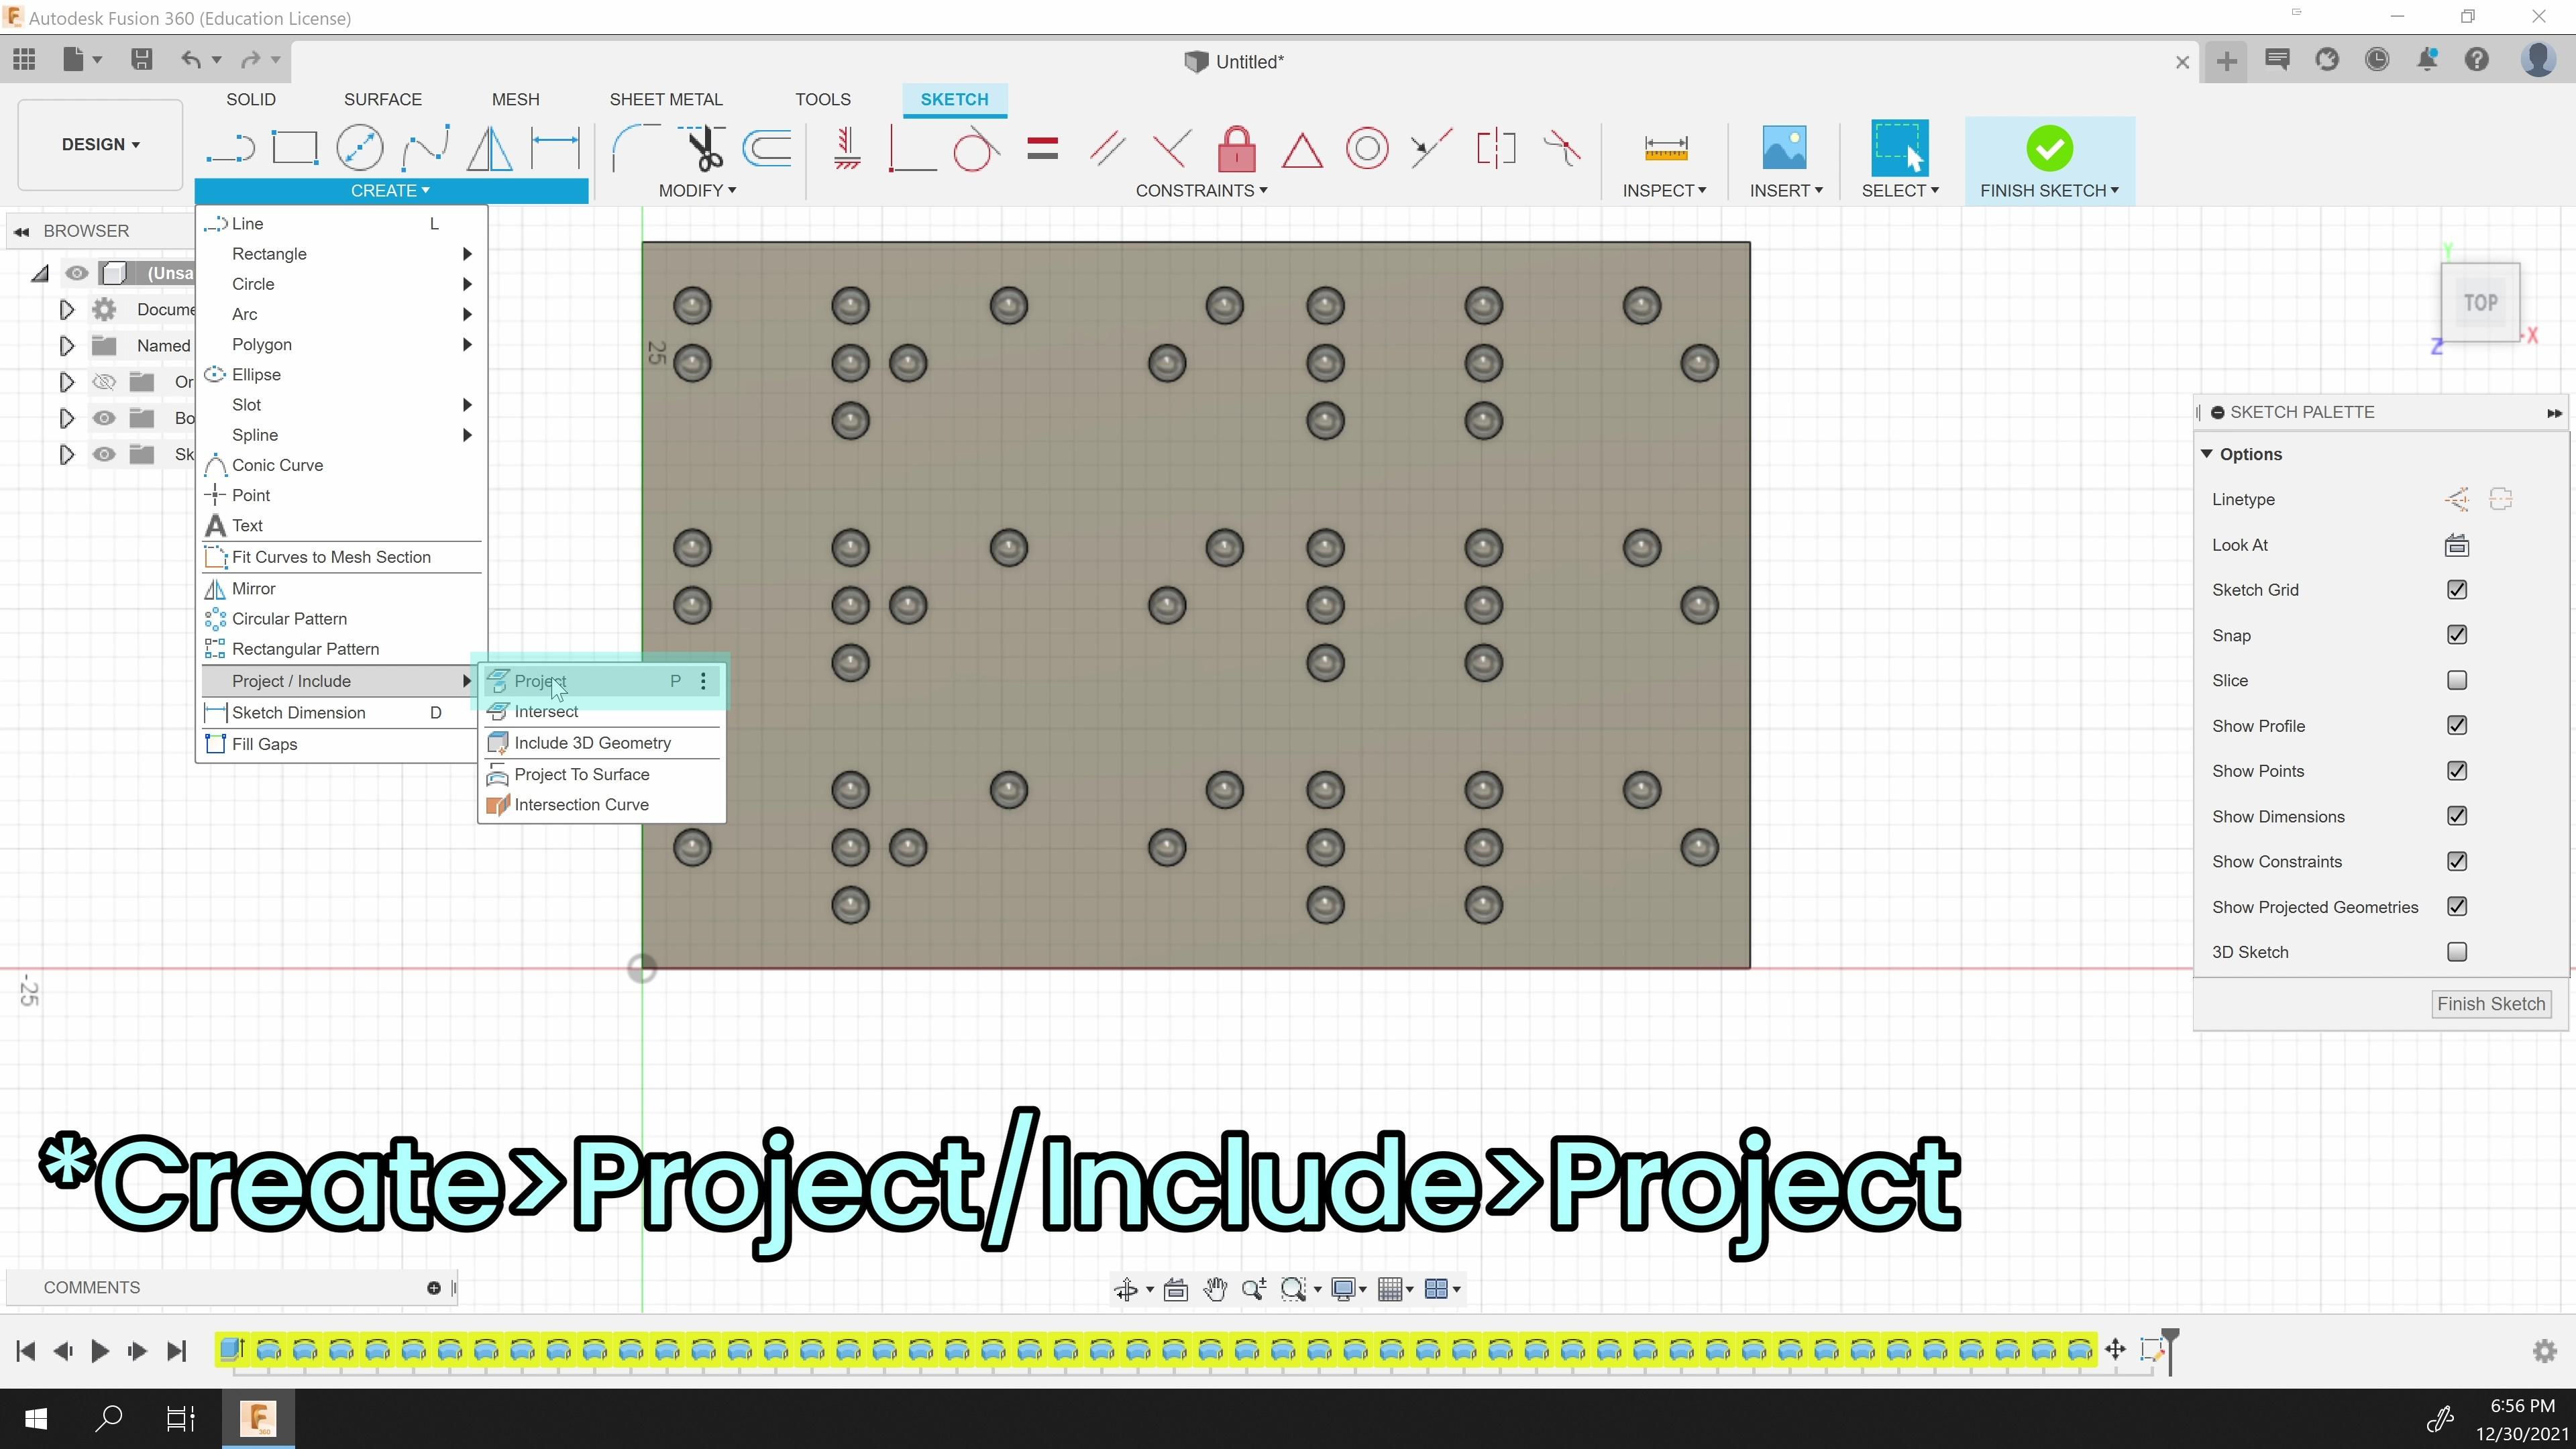
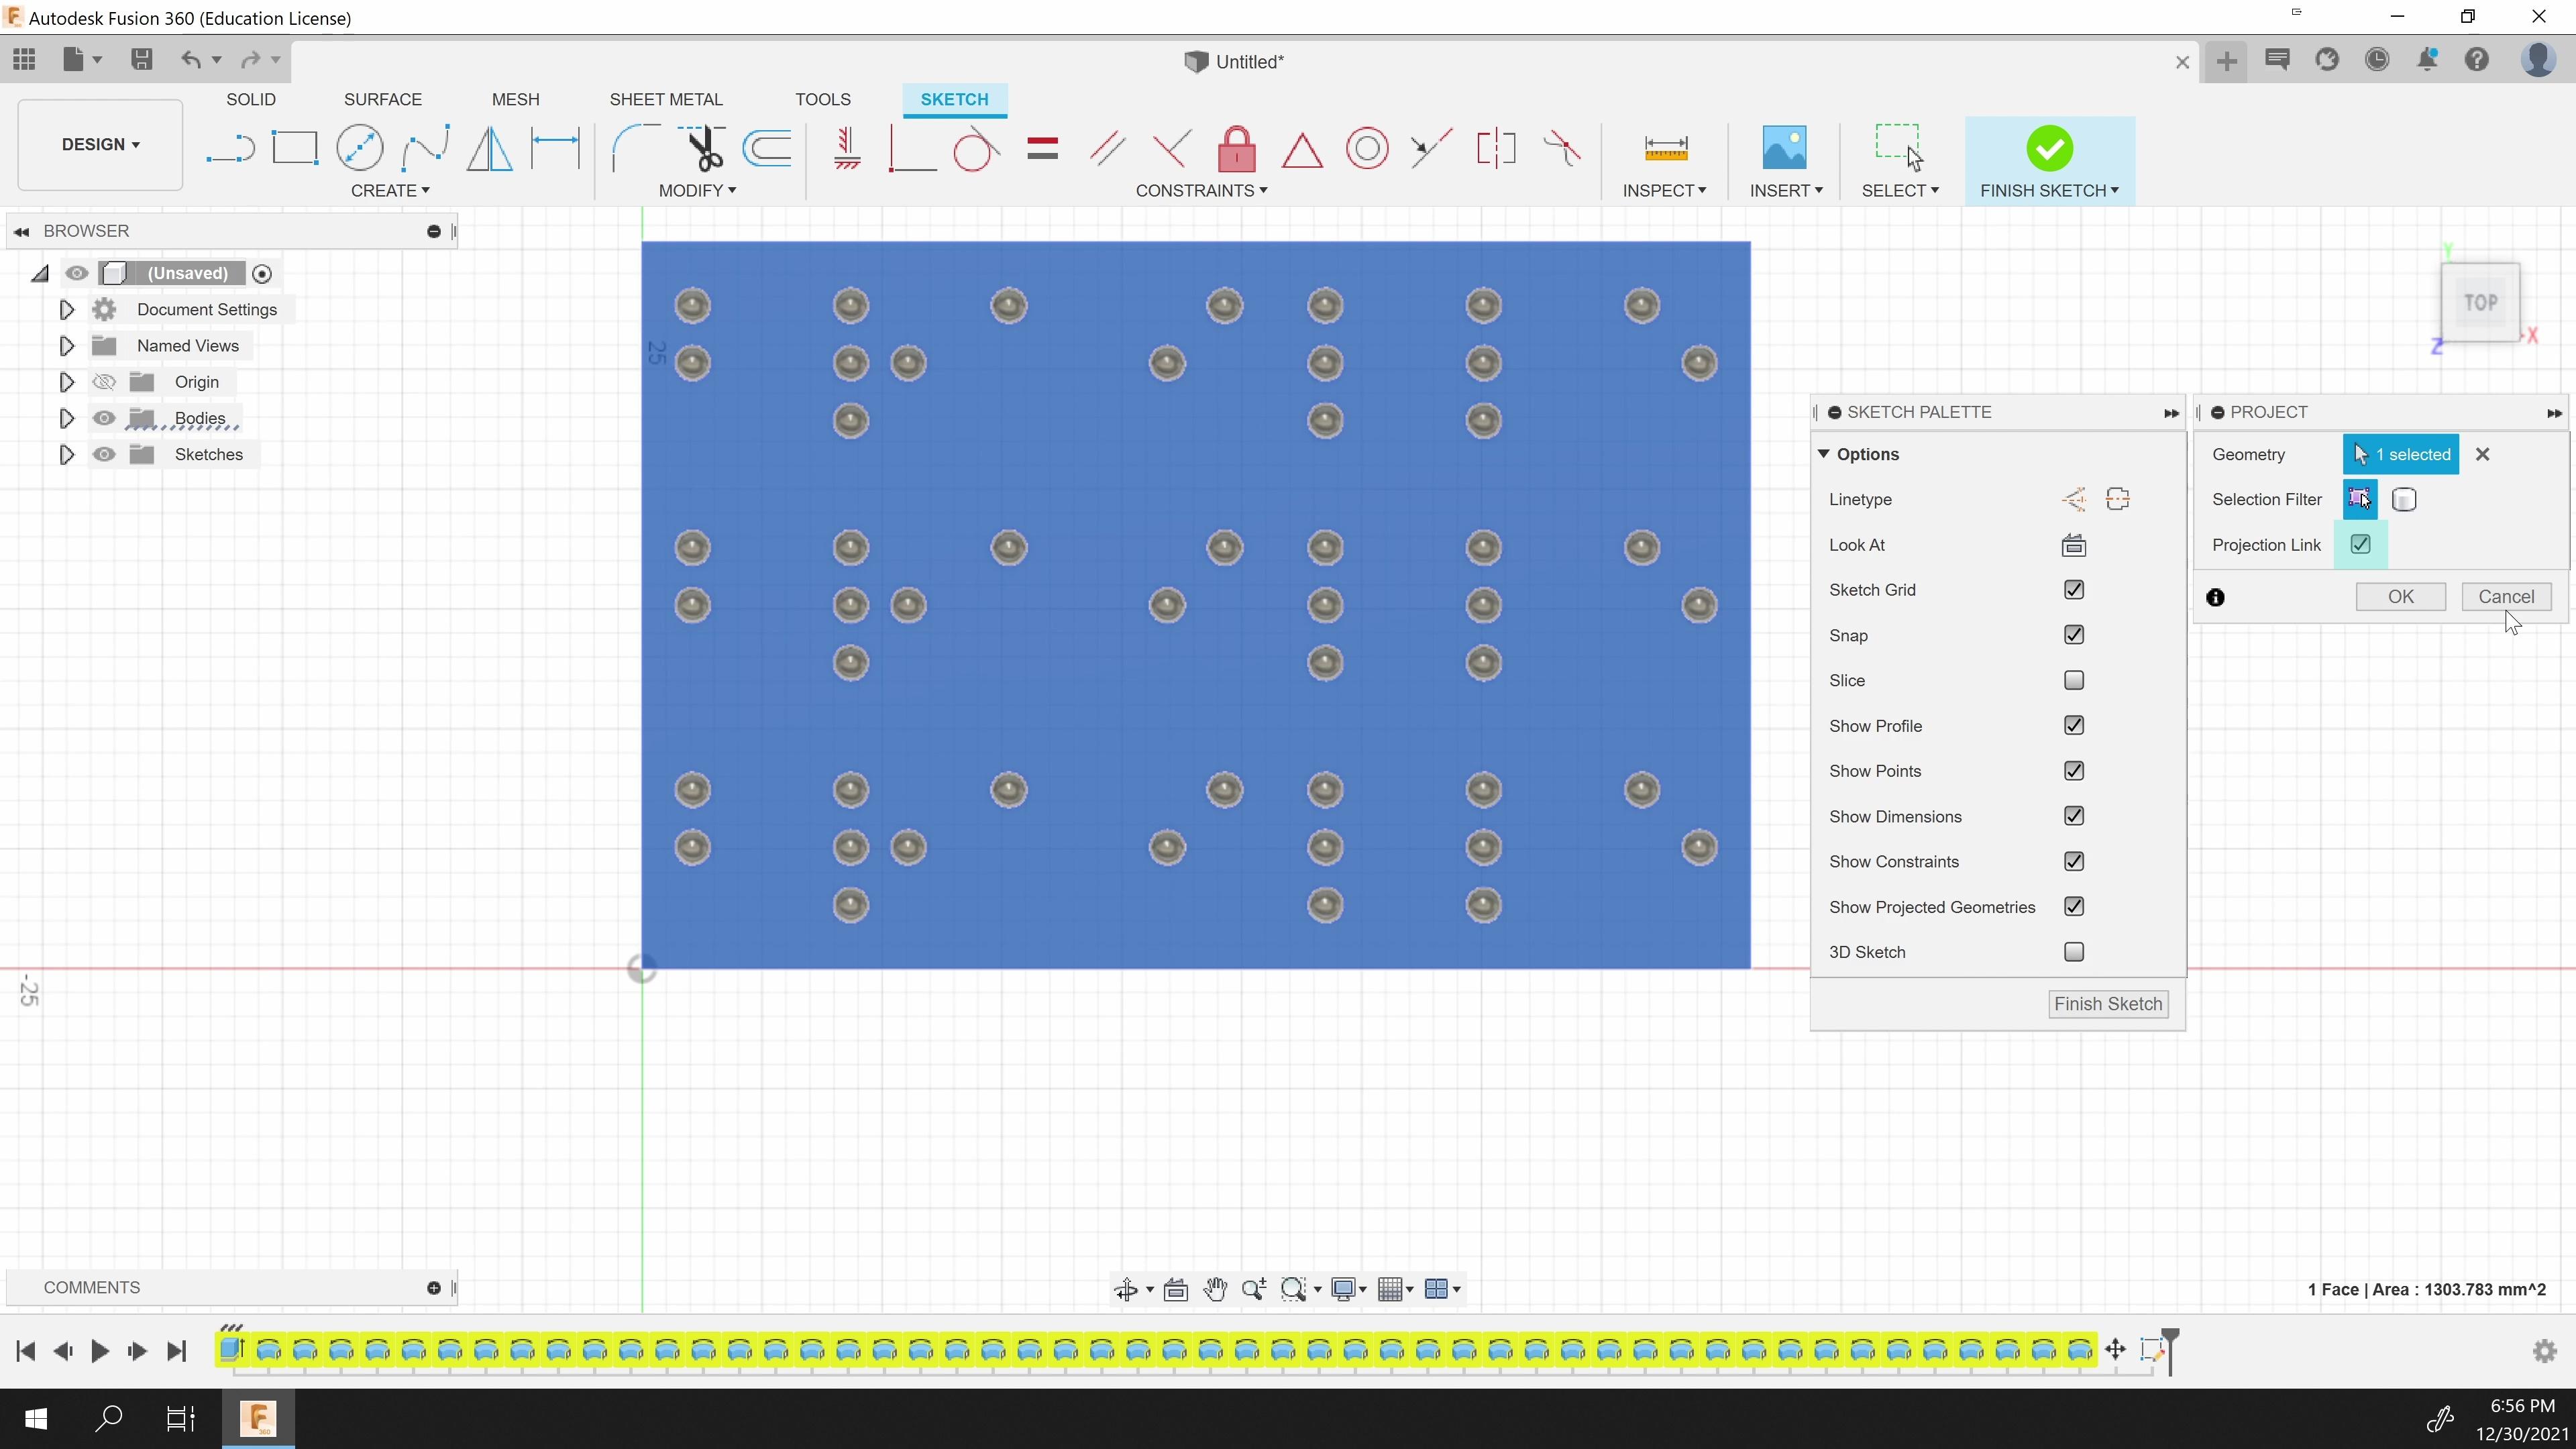
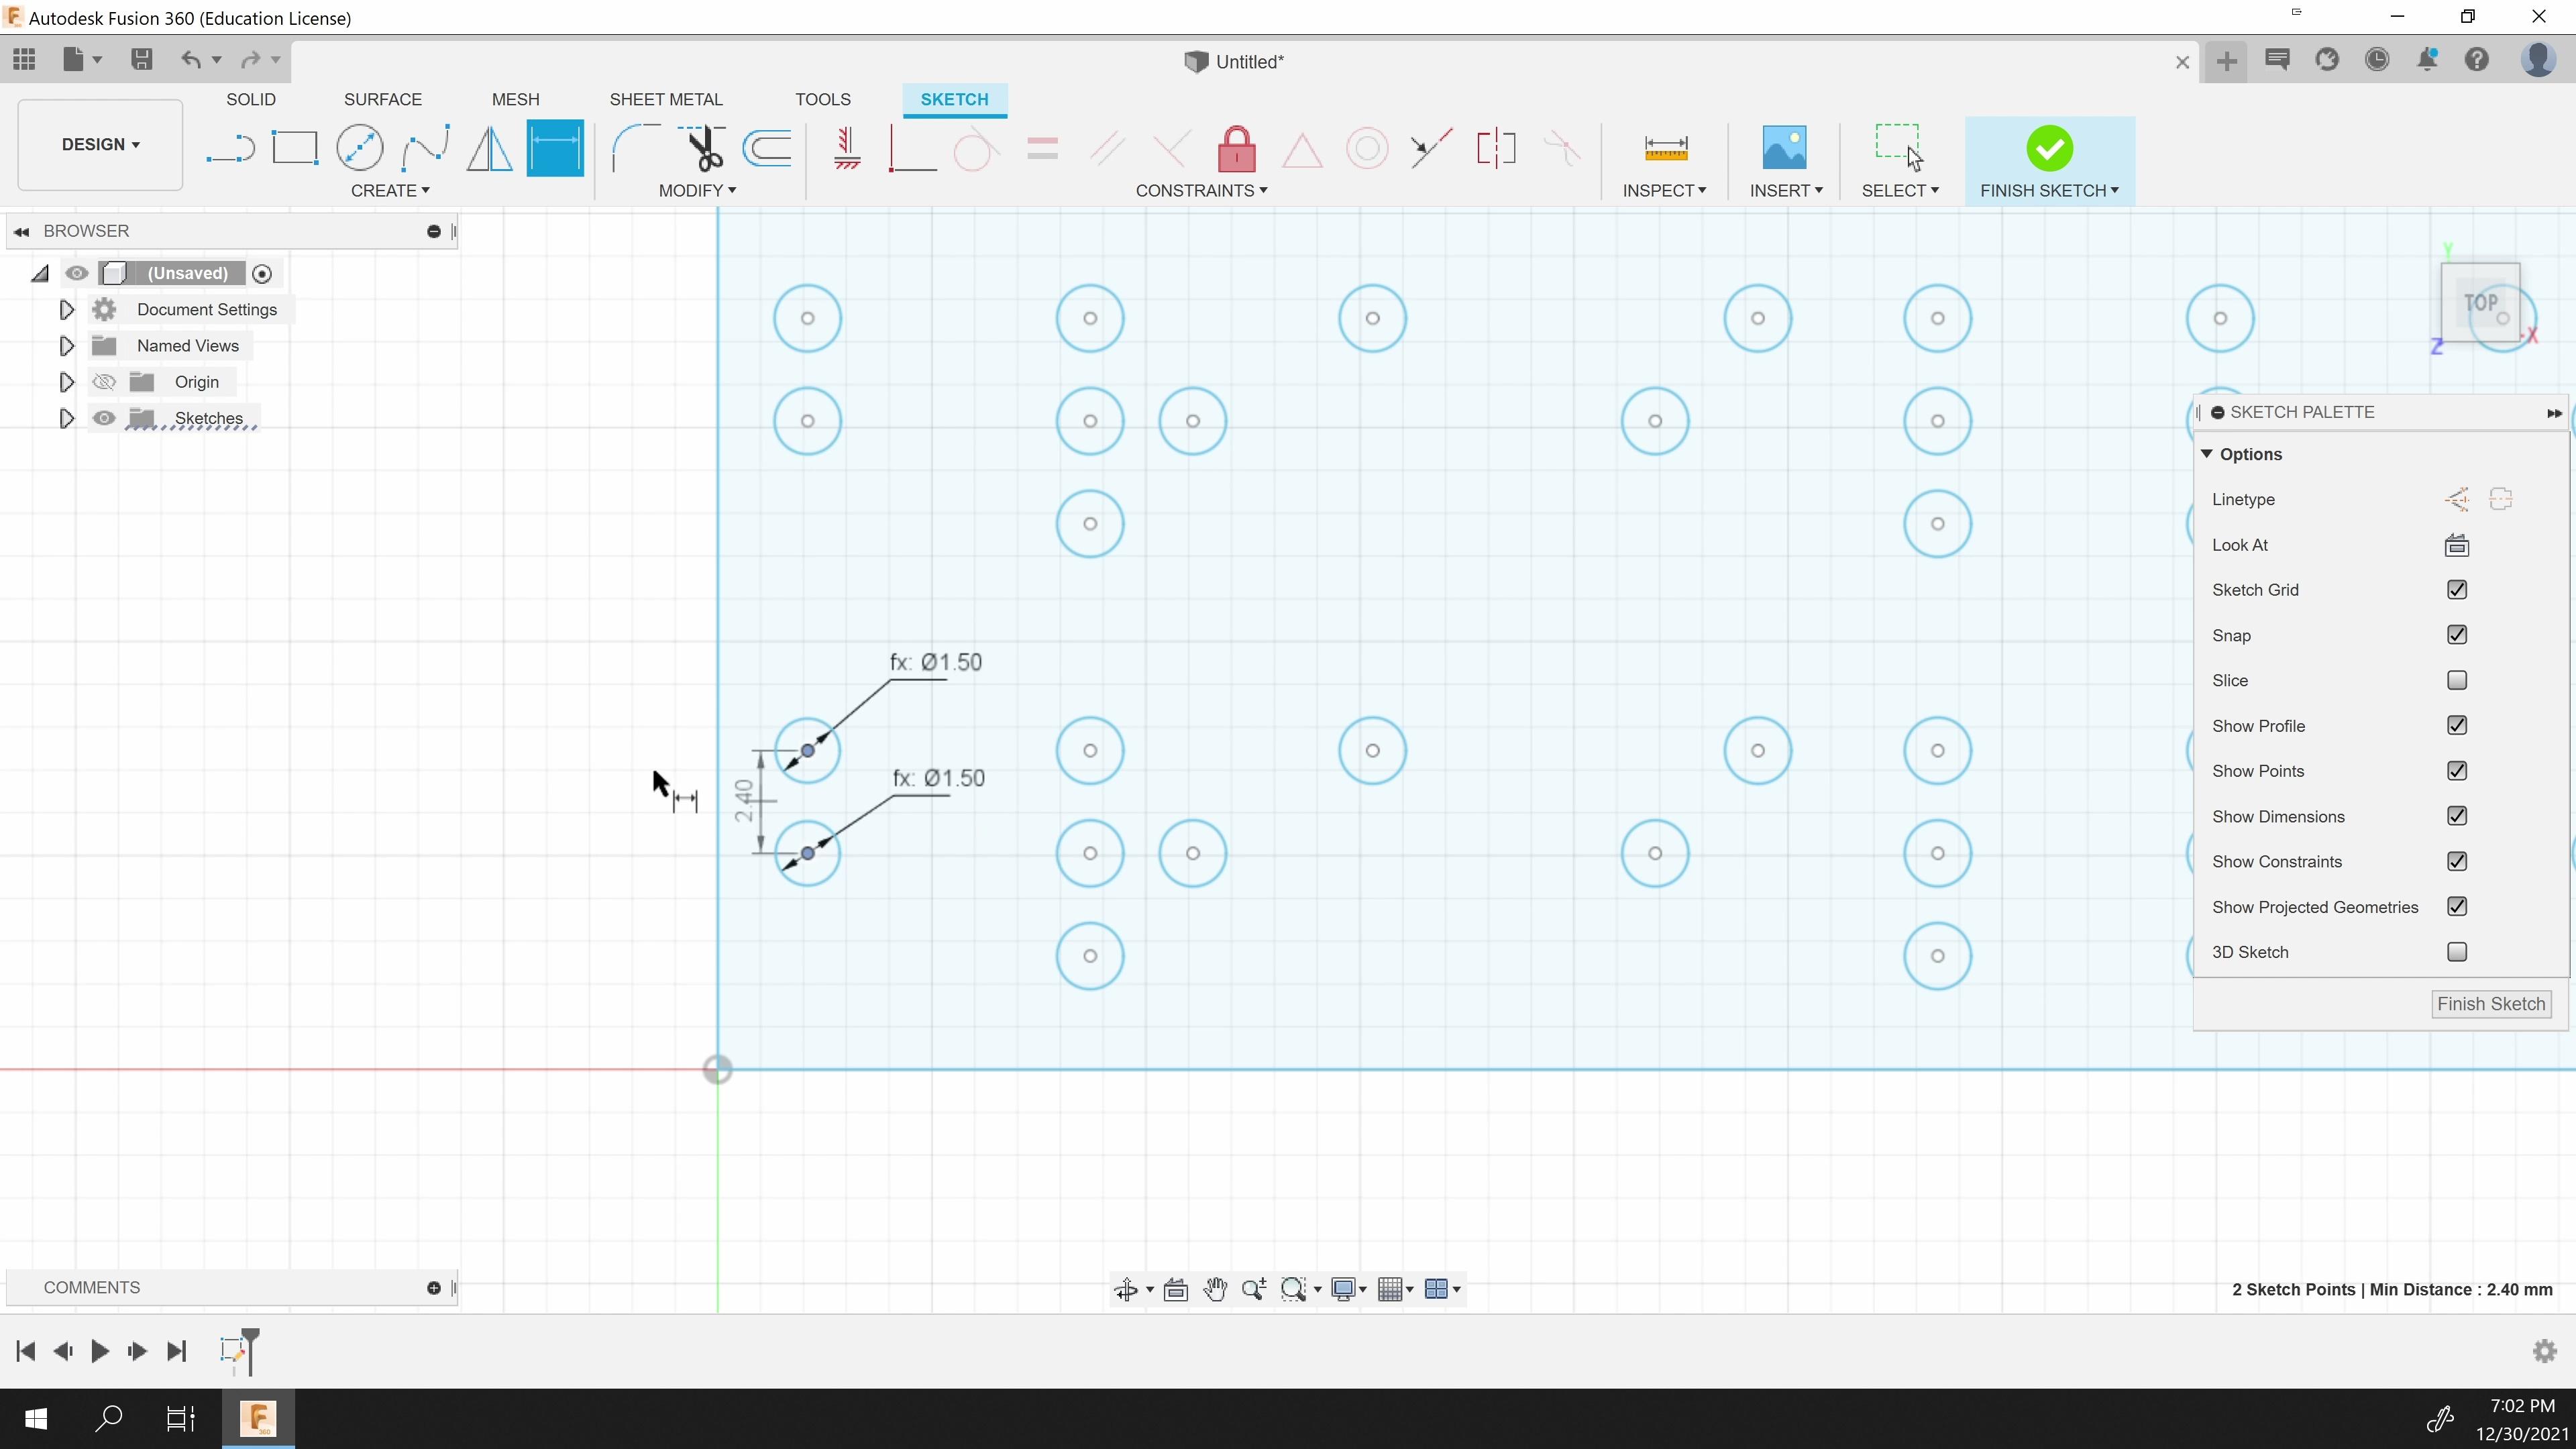
To be able to use this braille in a more complex model, or to change the sizing requirements, you'll need to translate this model into a sketch. To do so, create a new sketch, selecting the ground plane to base it on, NOT the face of the model.
From there, select Project under the Create menu, and select the face of your model. Make sure to UNCHECK Projection Link before you hit okay!
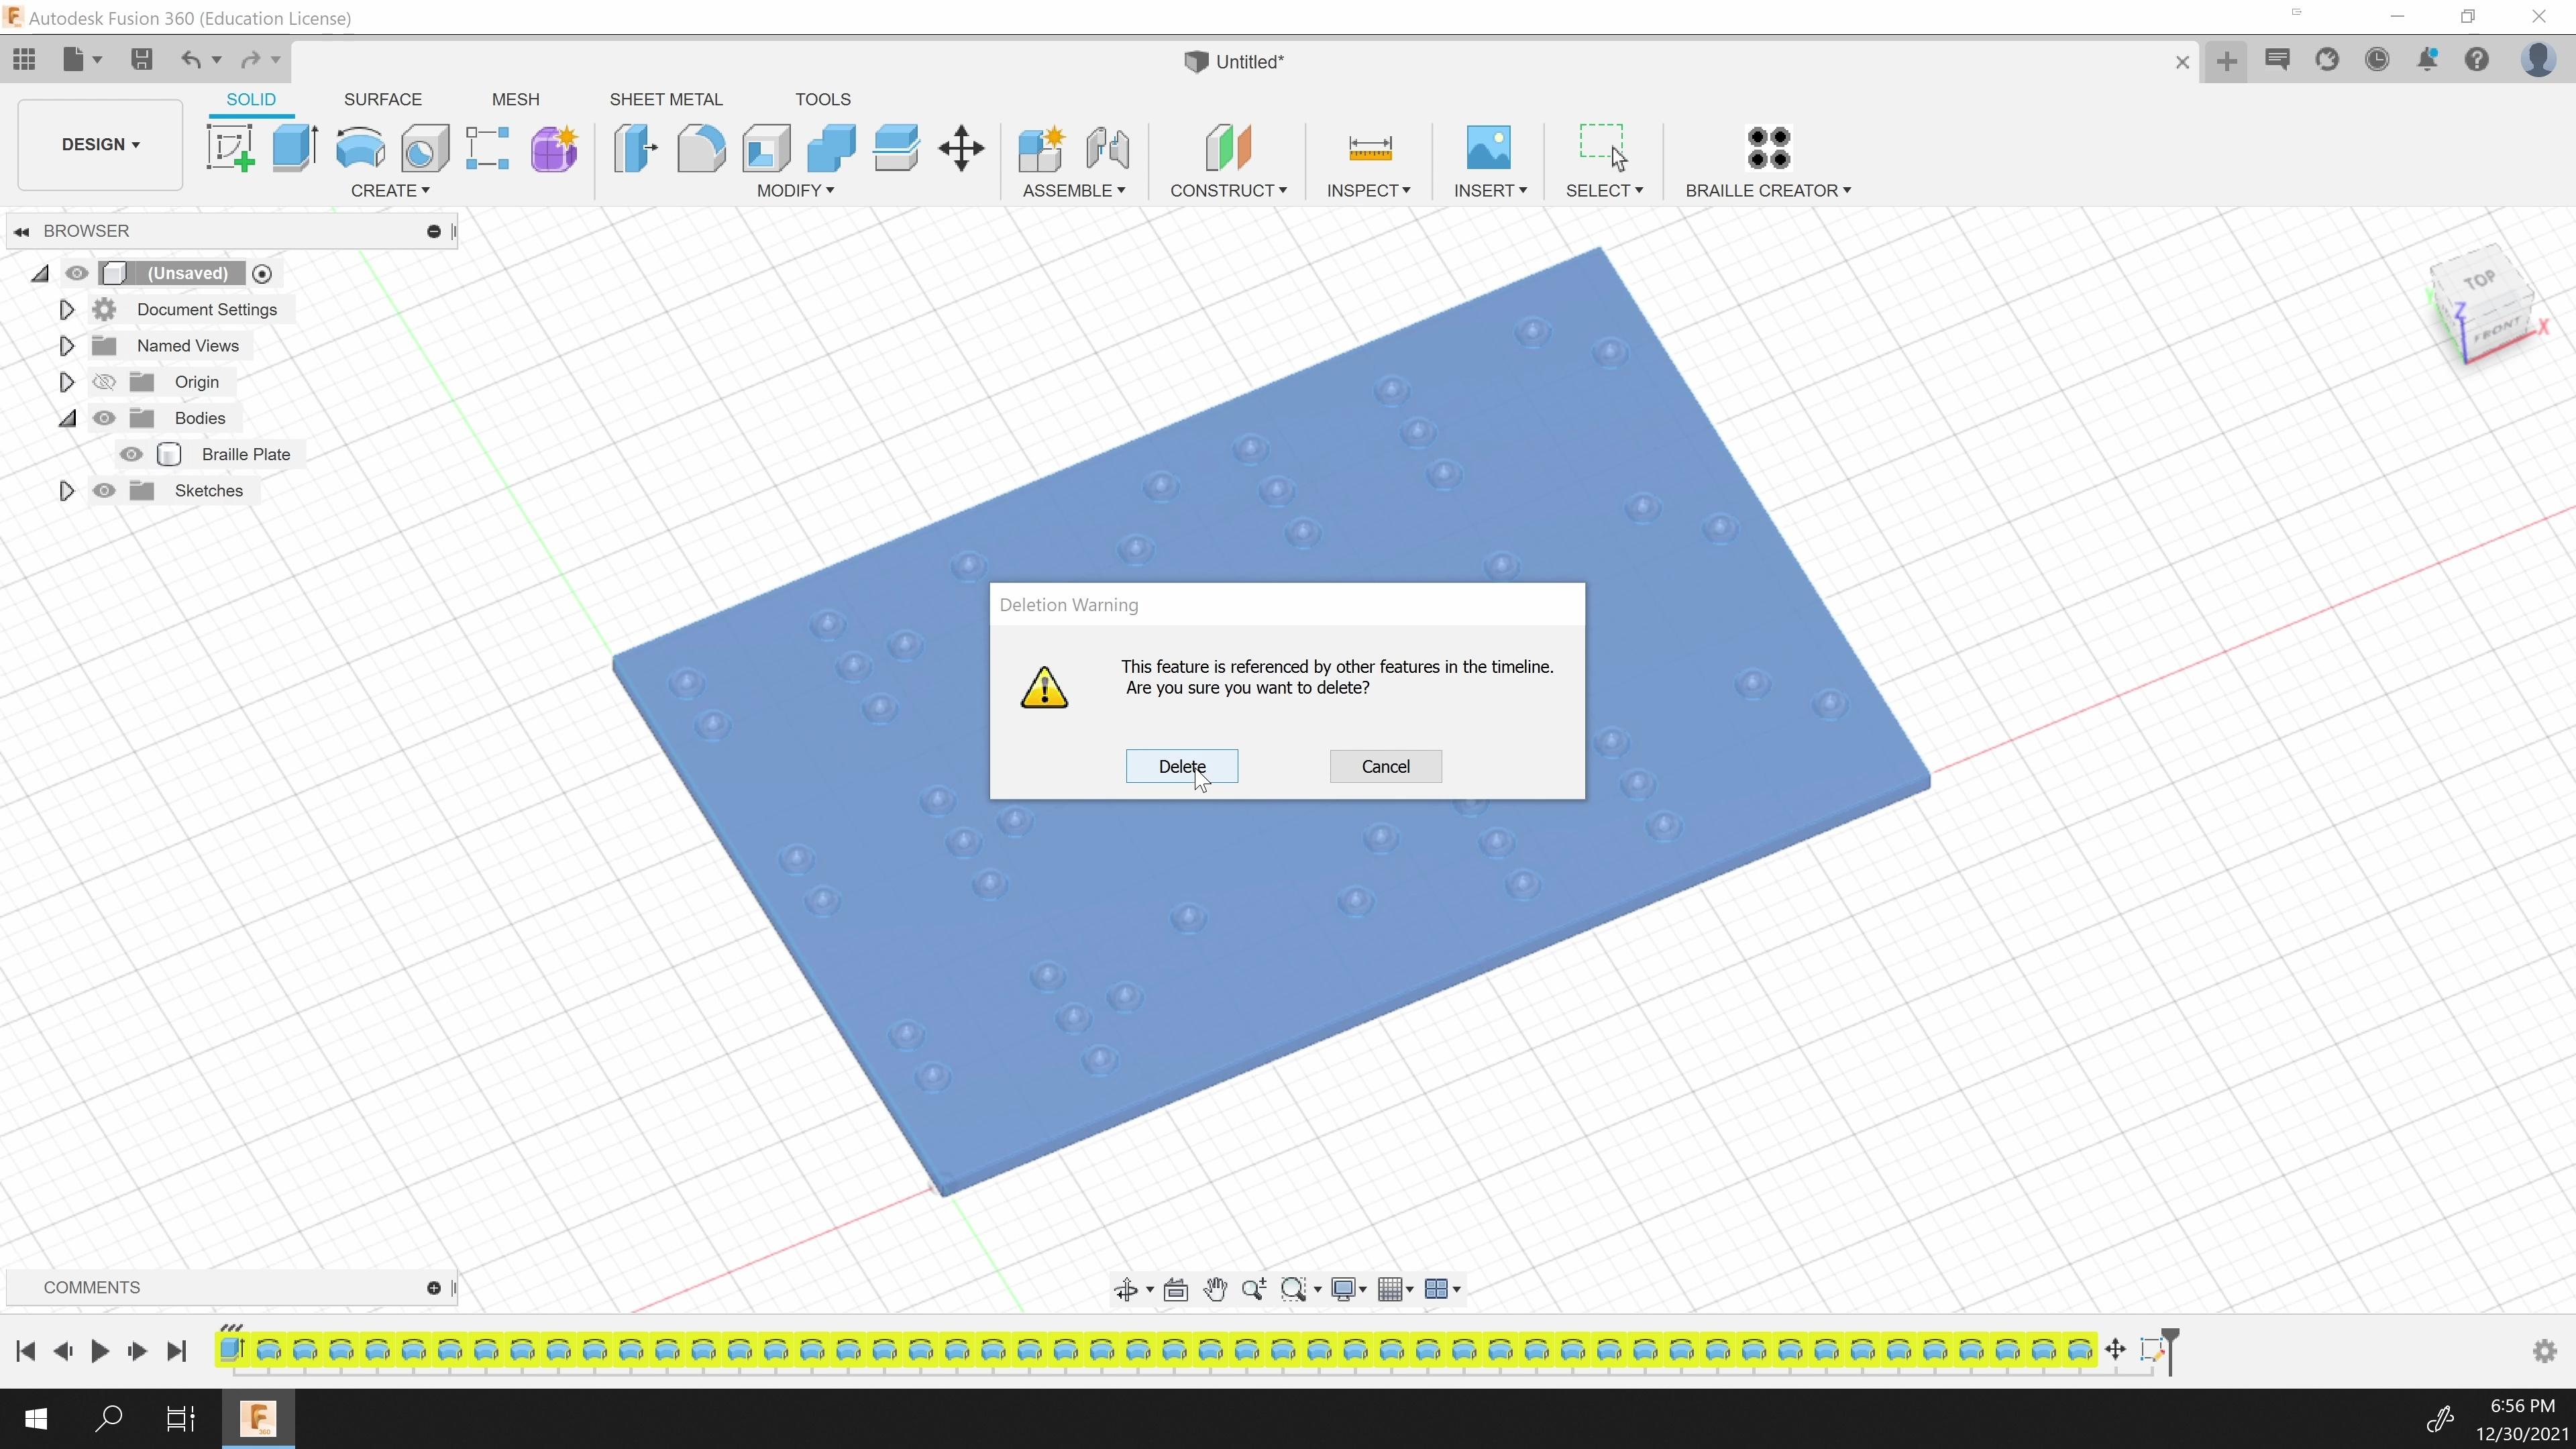
From there you can delete the generated model.
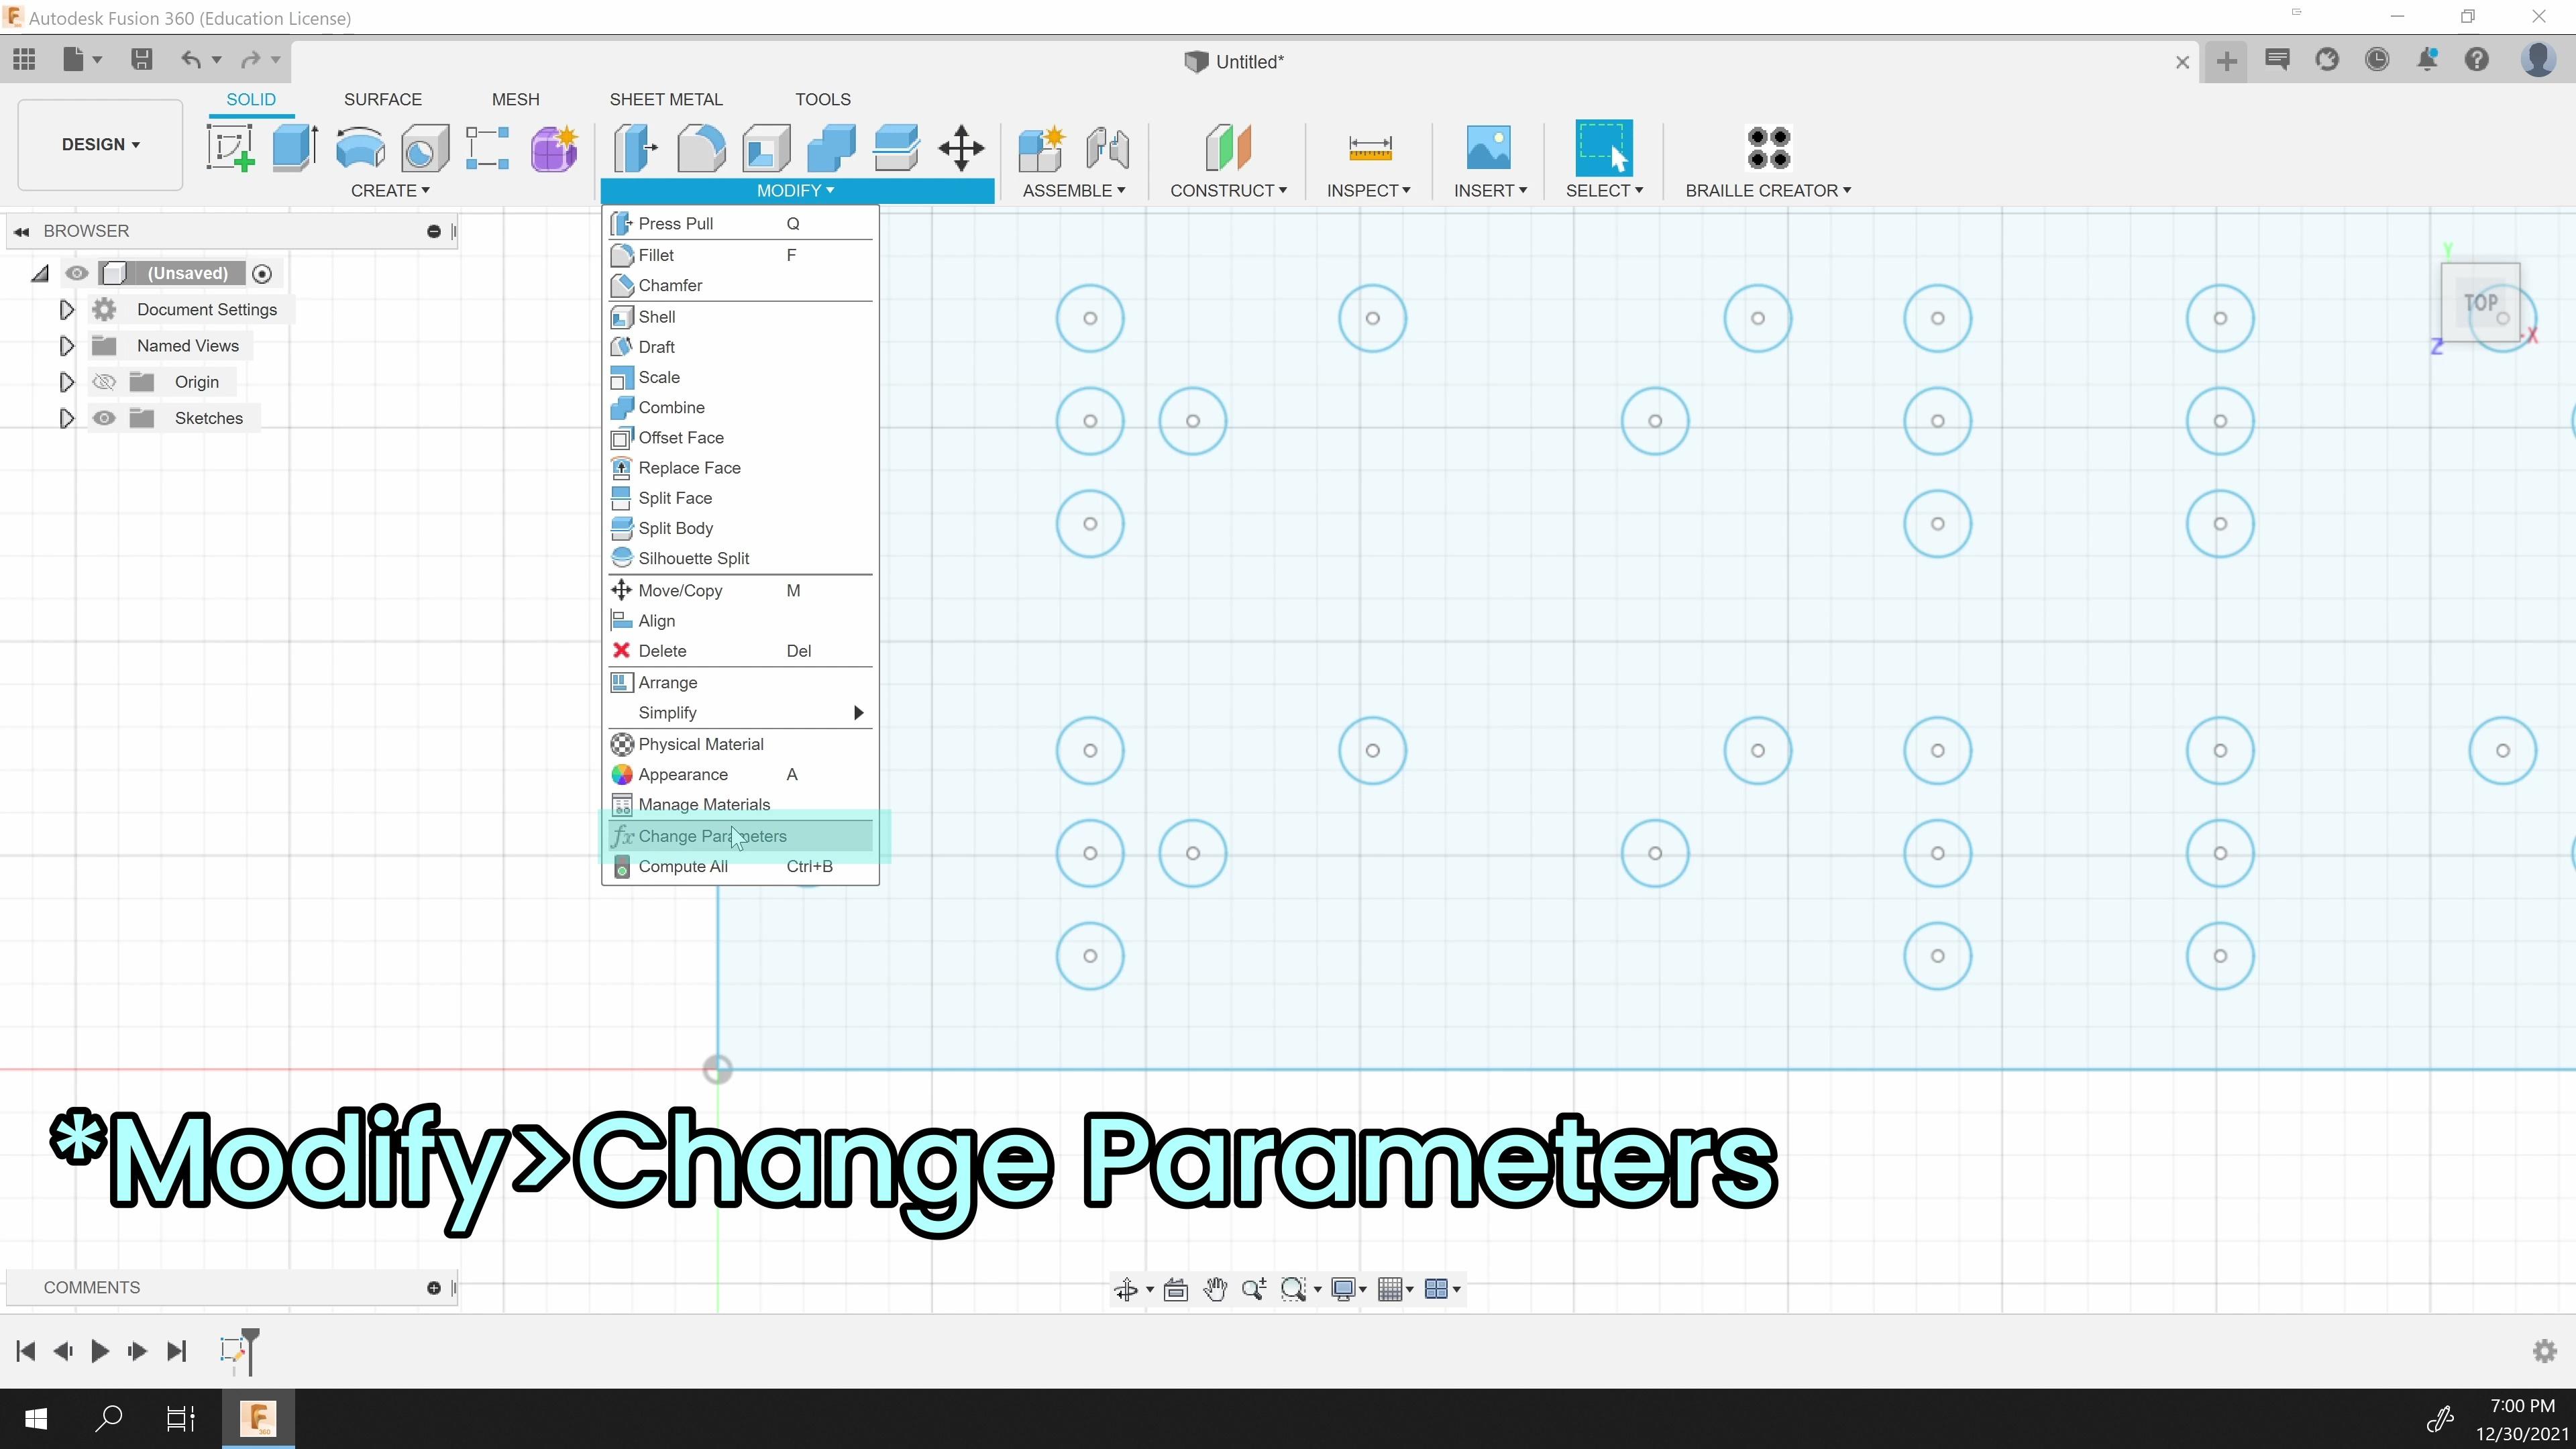
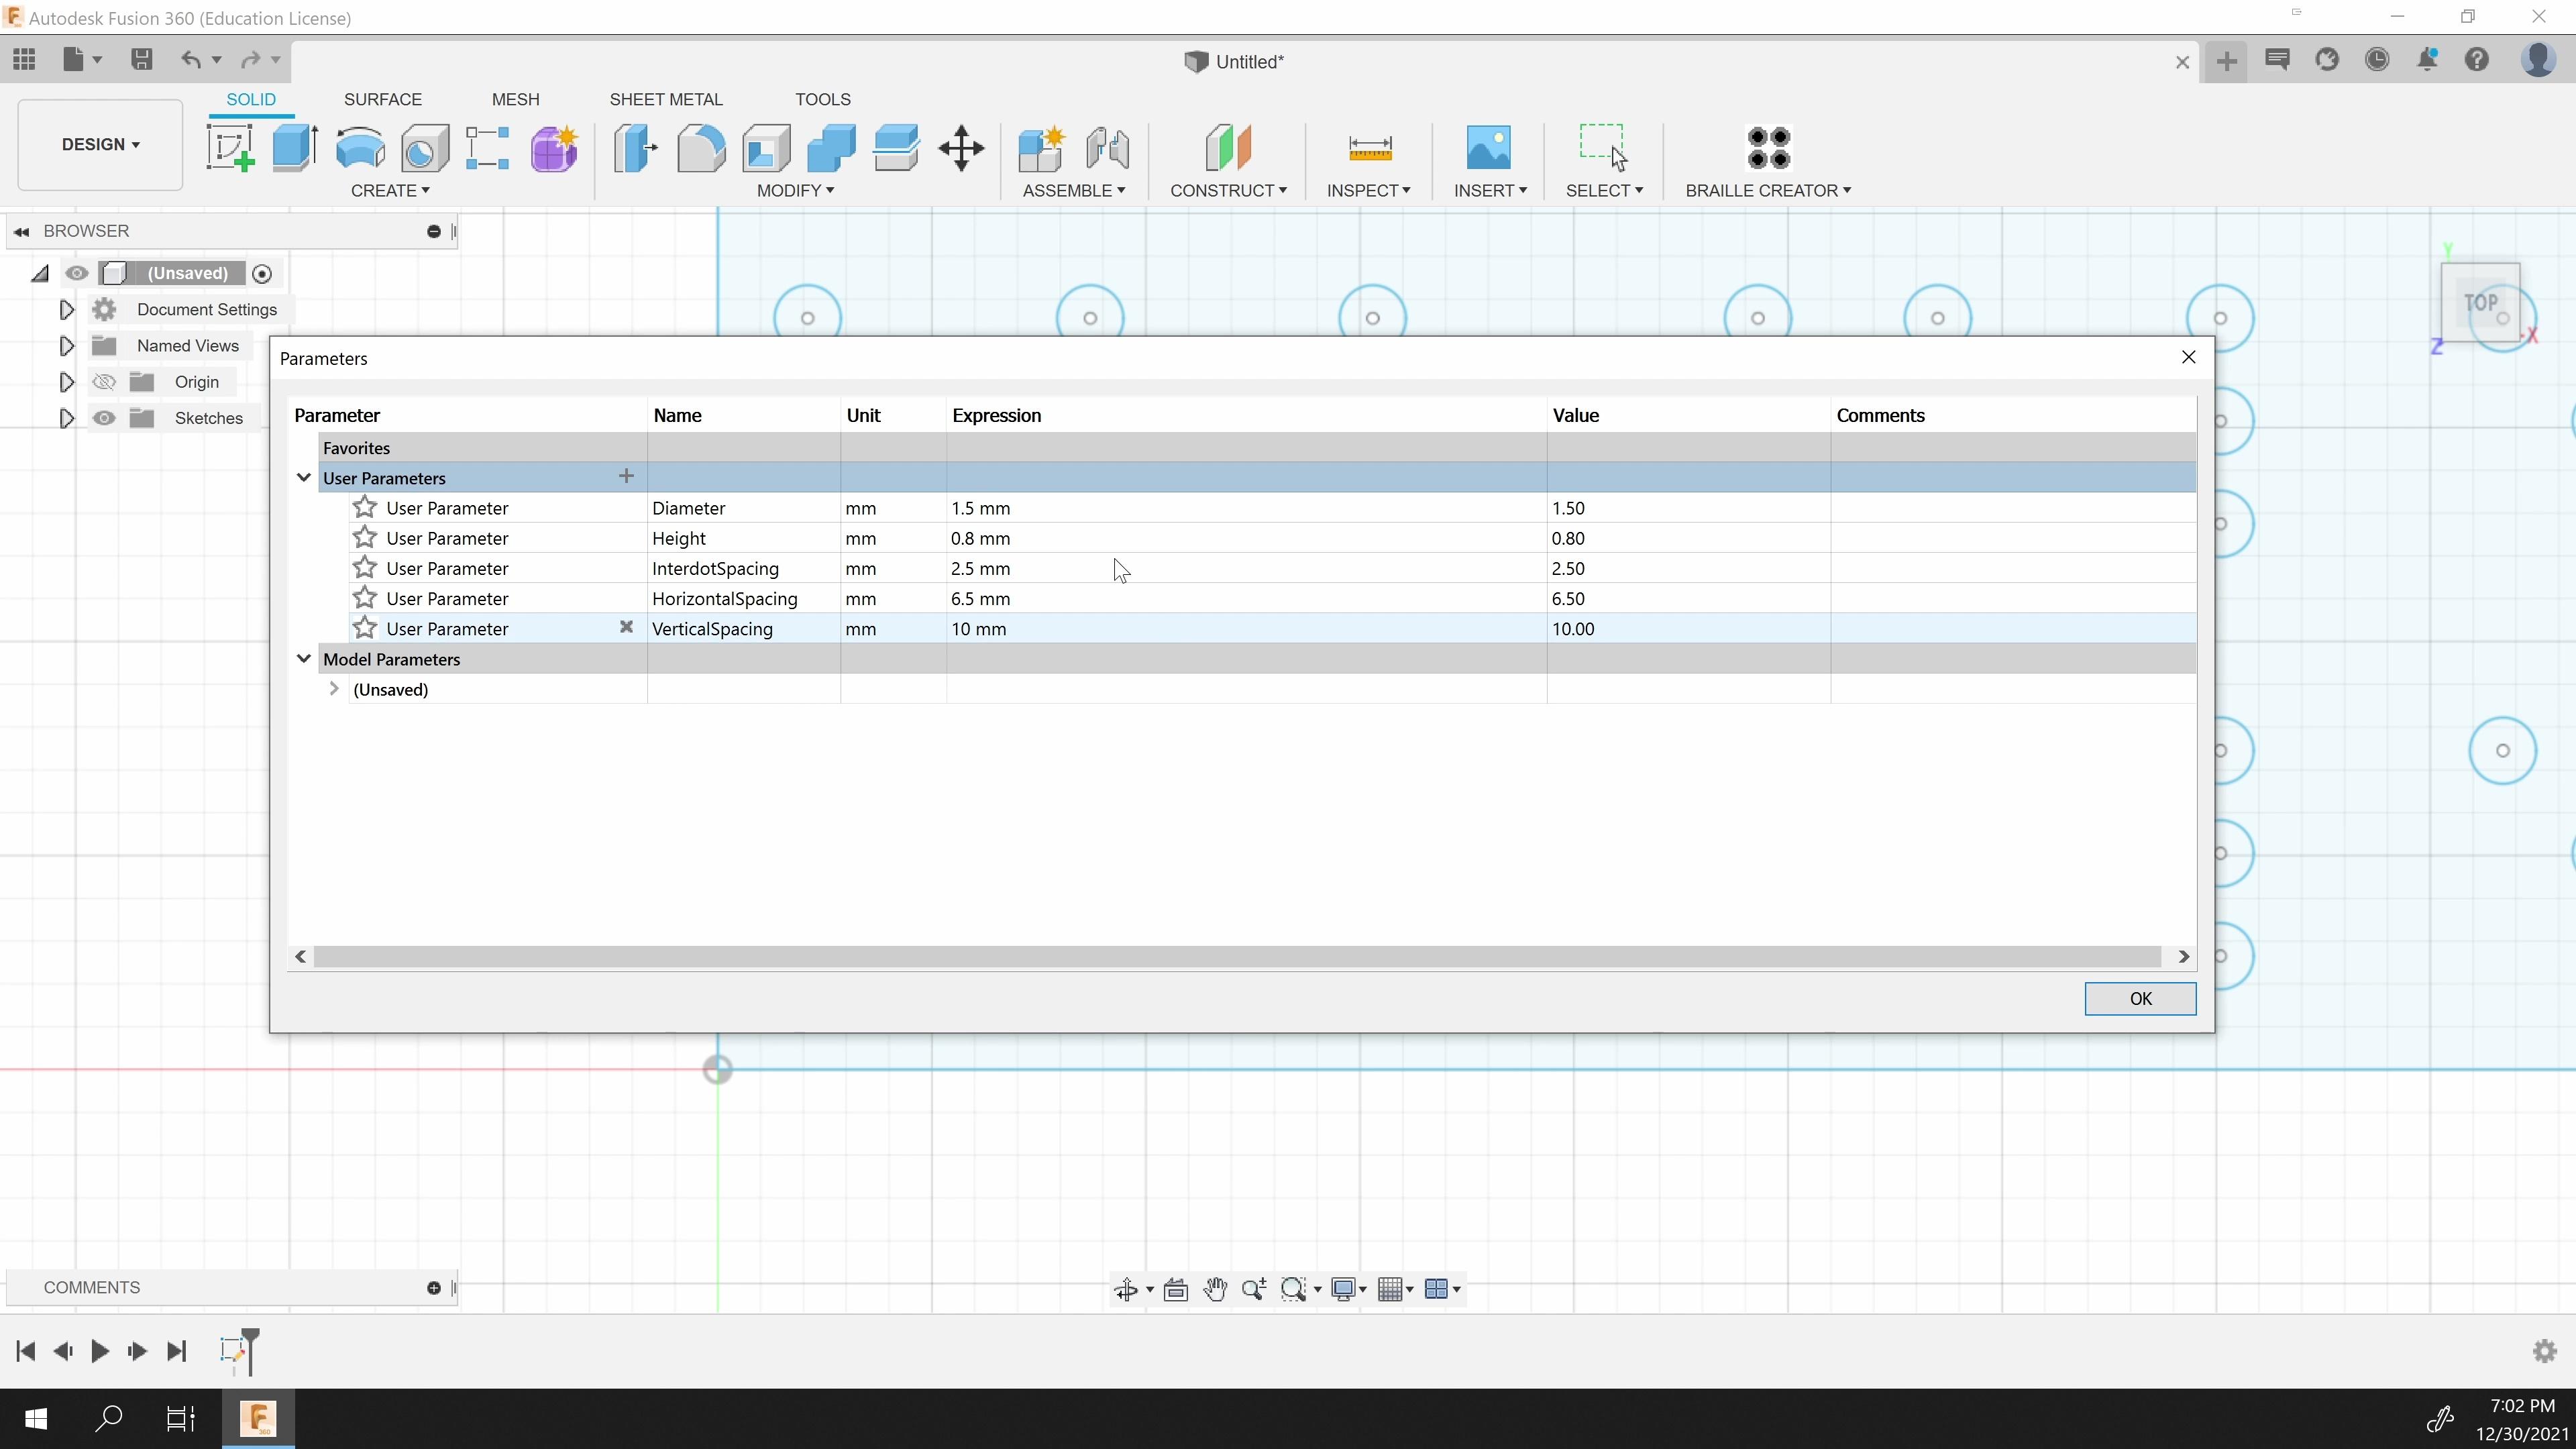
Once you've got the sketch, you can create easily editable Parameters for the size requirements so you can come back and change your braille sizing in one fell swoop. Open up the Change Parameters window from within the Modify menu and add in User Parameters for Dot Diameter, Height, Interdot Spacing, Horizontal Spacing, and Vertical Spacing. Refer to the regional regulations you looked up earlier to get an idea of what sizes to use. Don't worry too much about the exact numbers you put in right now; the whole idea of using Parameters is that you can easily change them later!
Once you have your User Parameters set, you can go into the sketch and add dimensions until it is completely constrained.
Make It 3D - Option 2, Part 1:
If you require Contracted Braille, or simply don't have access to the Braille Creator plugin, then this method will be the one for you.
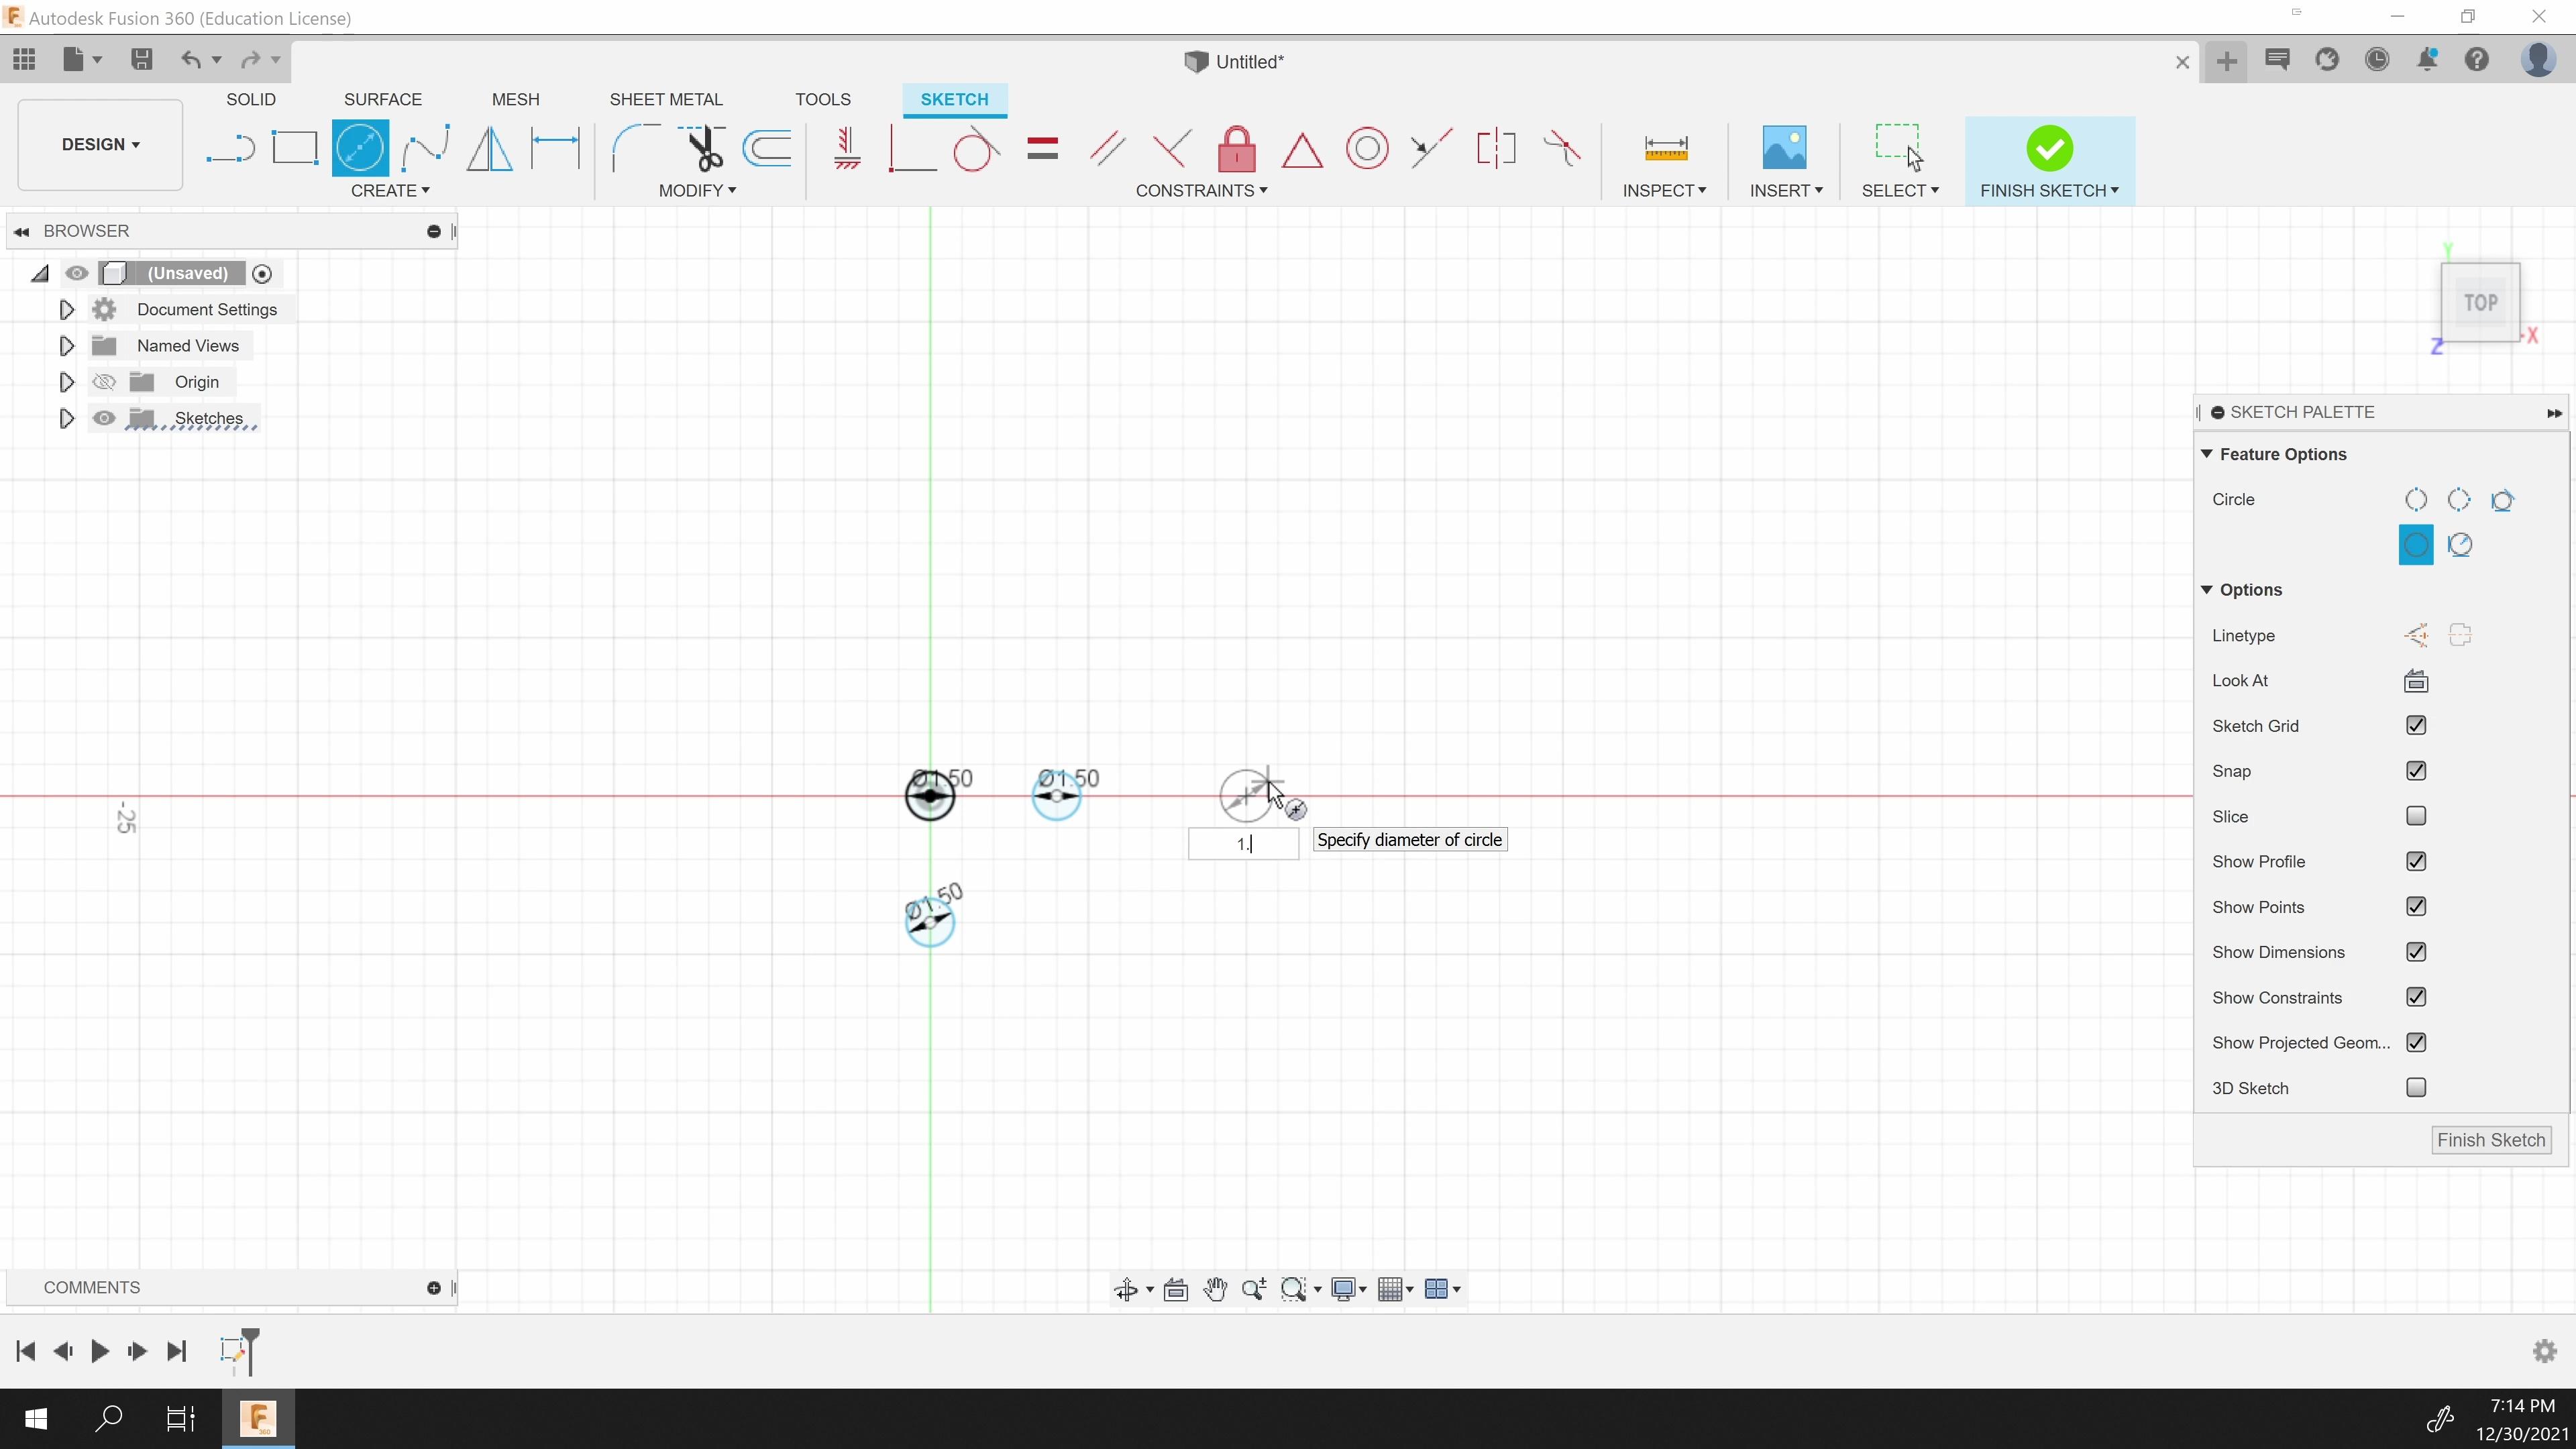
To orient your reference image, start by creating a sketch on the ground plane and placing a few small circles, including one directly on the origin. Before you start constraining them, open up the Change Parameters window and set your User Parameters like previously mentioned, identifying your dot diameter, height, and appropriate spacing between dots and cells. Once you've got that, head back to your sketch and properly dimension your circles. They won't spell anything out just yet; these are just for placement.
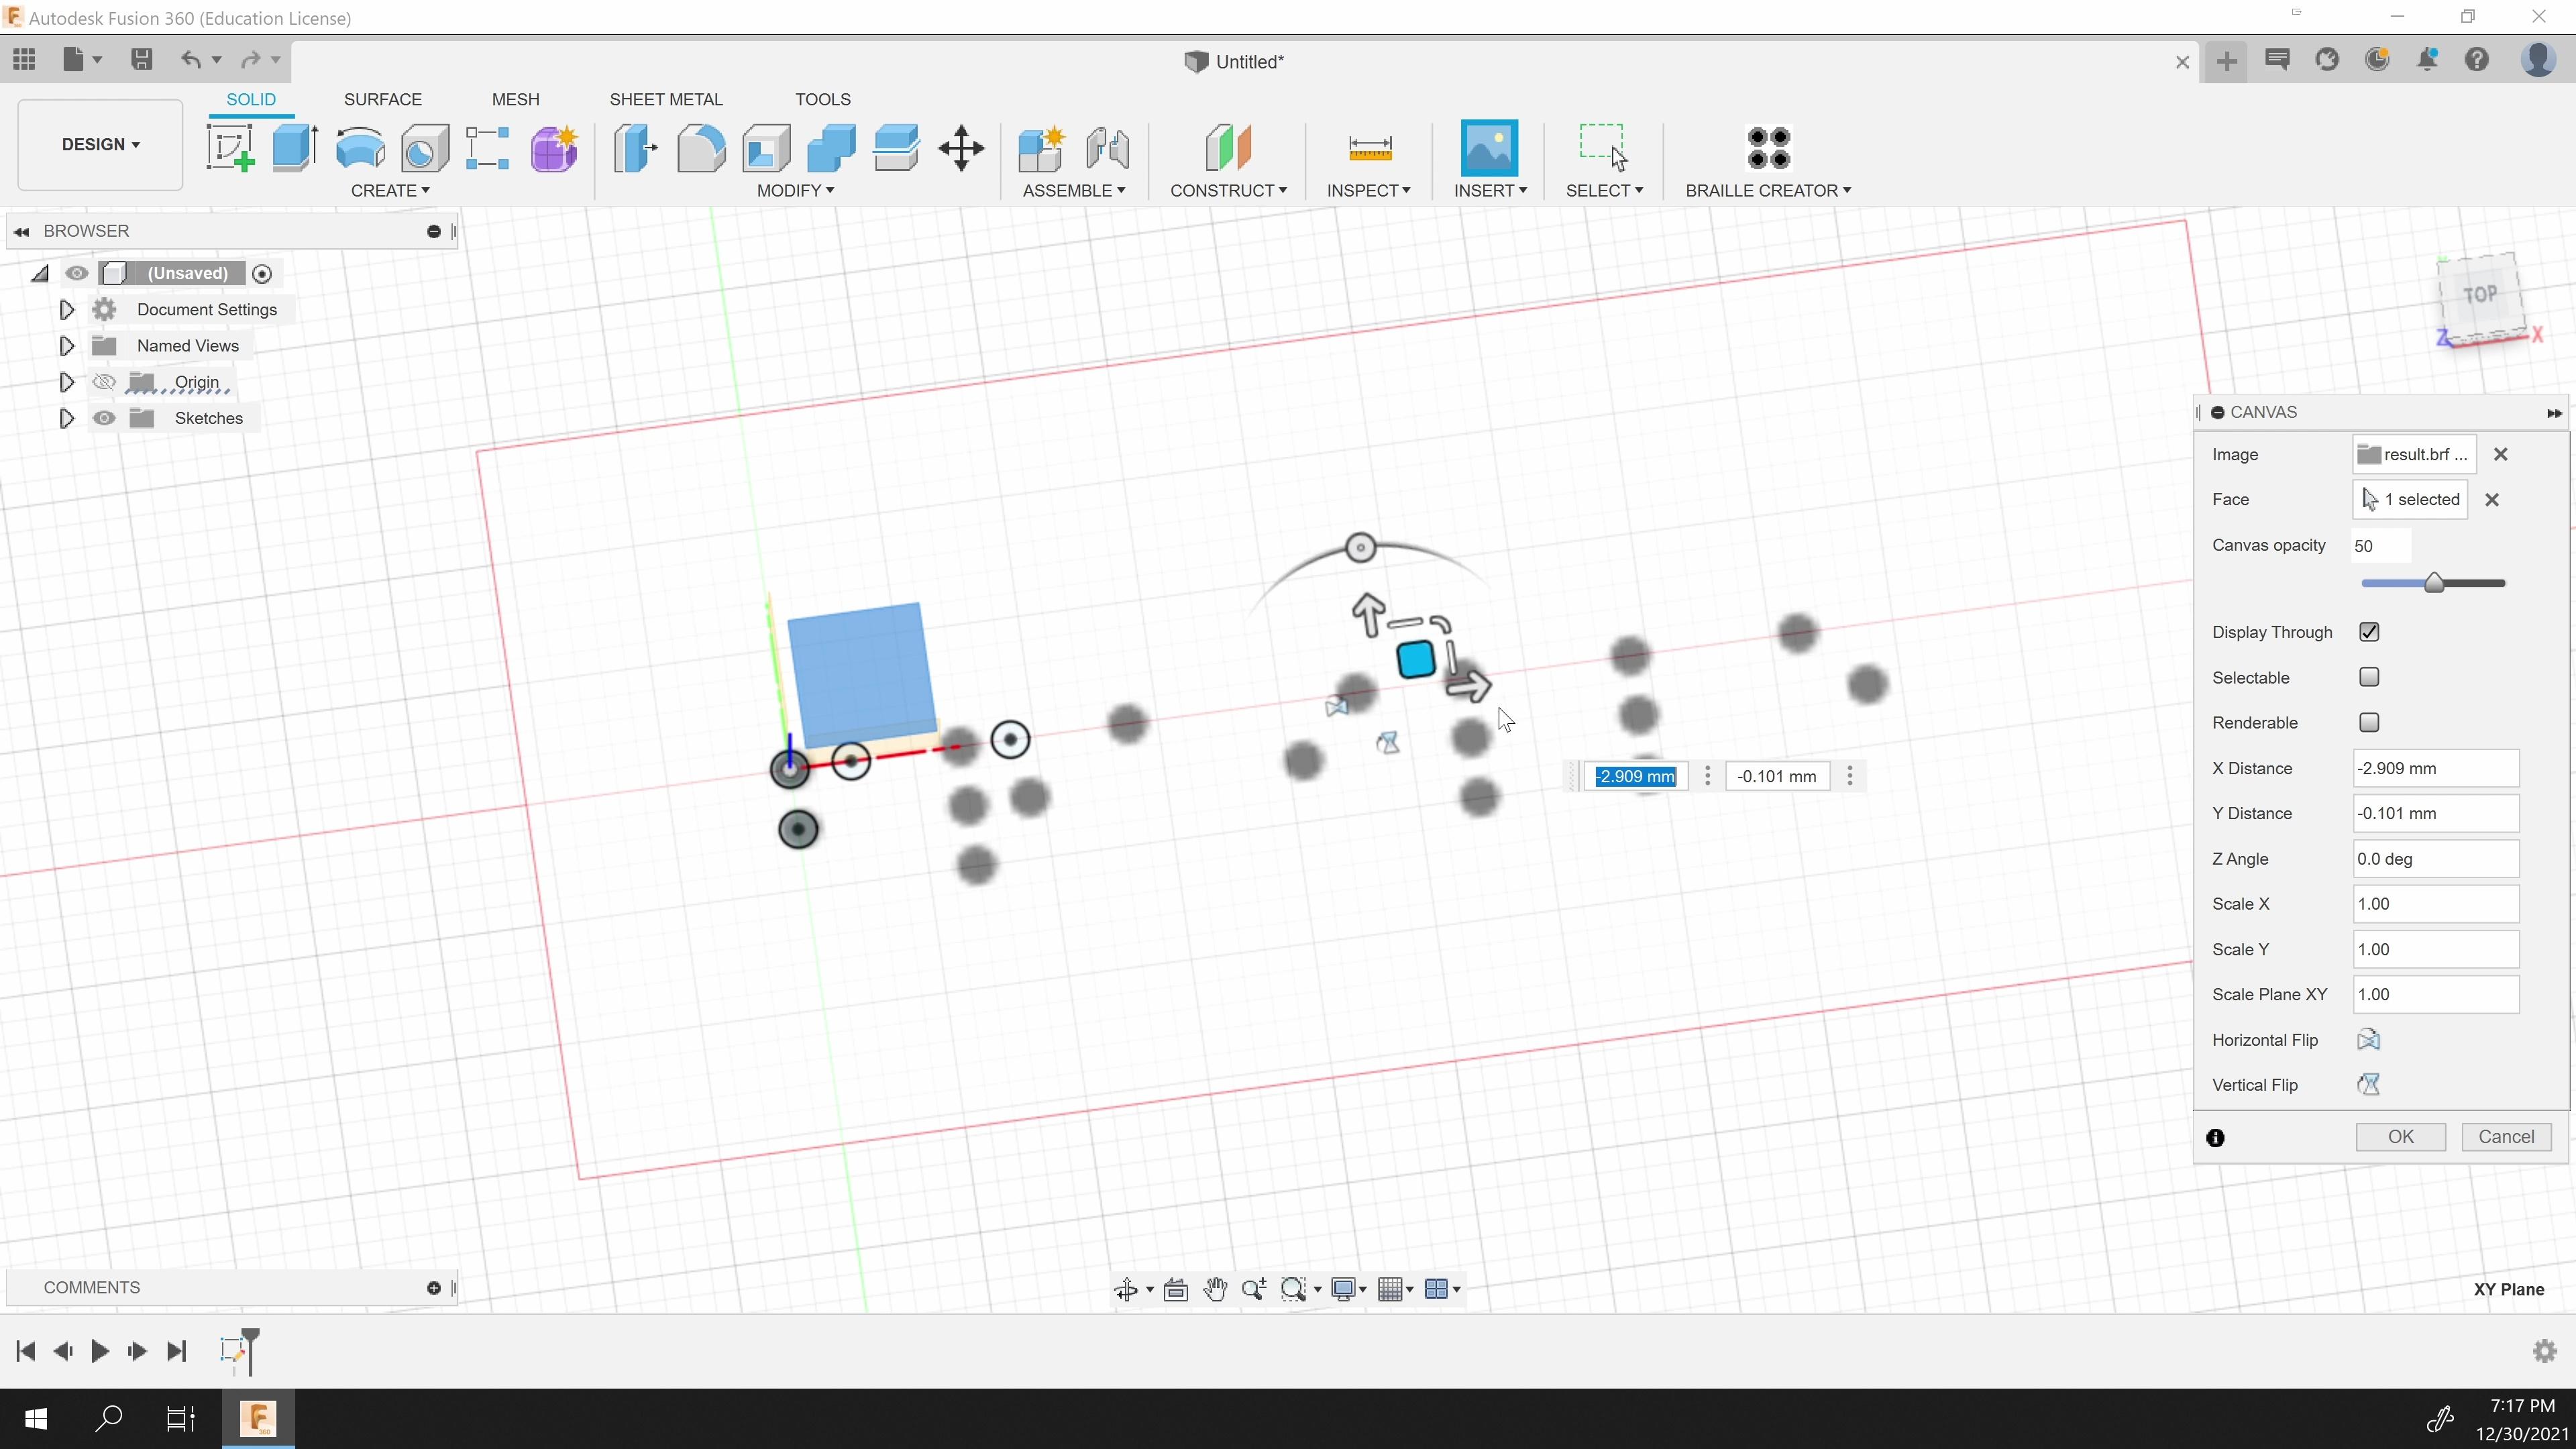
Go to the Insert button up at the top and insert an image as a canvas, selecting your braille translation image. It's likely to come in at completely the wrong size, so this is where your orientation dots will come into handy. Resize the image until it more or less lines up with your placement sketch. Don't worry if it's not quite perfect, as long as it's close it'll be fine! You're only using it to effectively copy the words accurately; you'll want to rely on your sketch dimensions to maintain sizing accuracy!
Once you have the image placed, you can trace out your text and then accurately constrain it with the User Parameters you set previously. You can delete the image plane when you're finished.
Final Modelling Tips
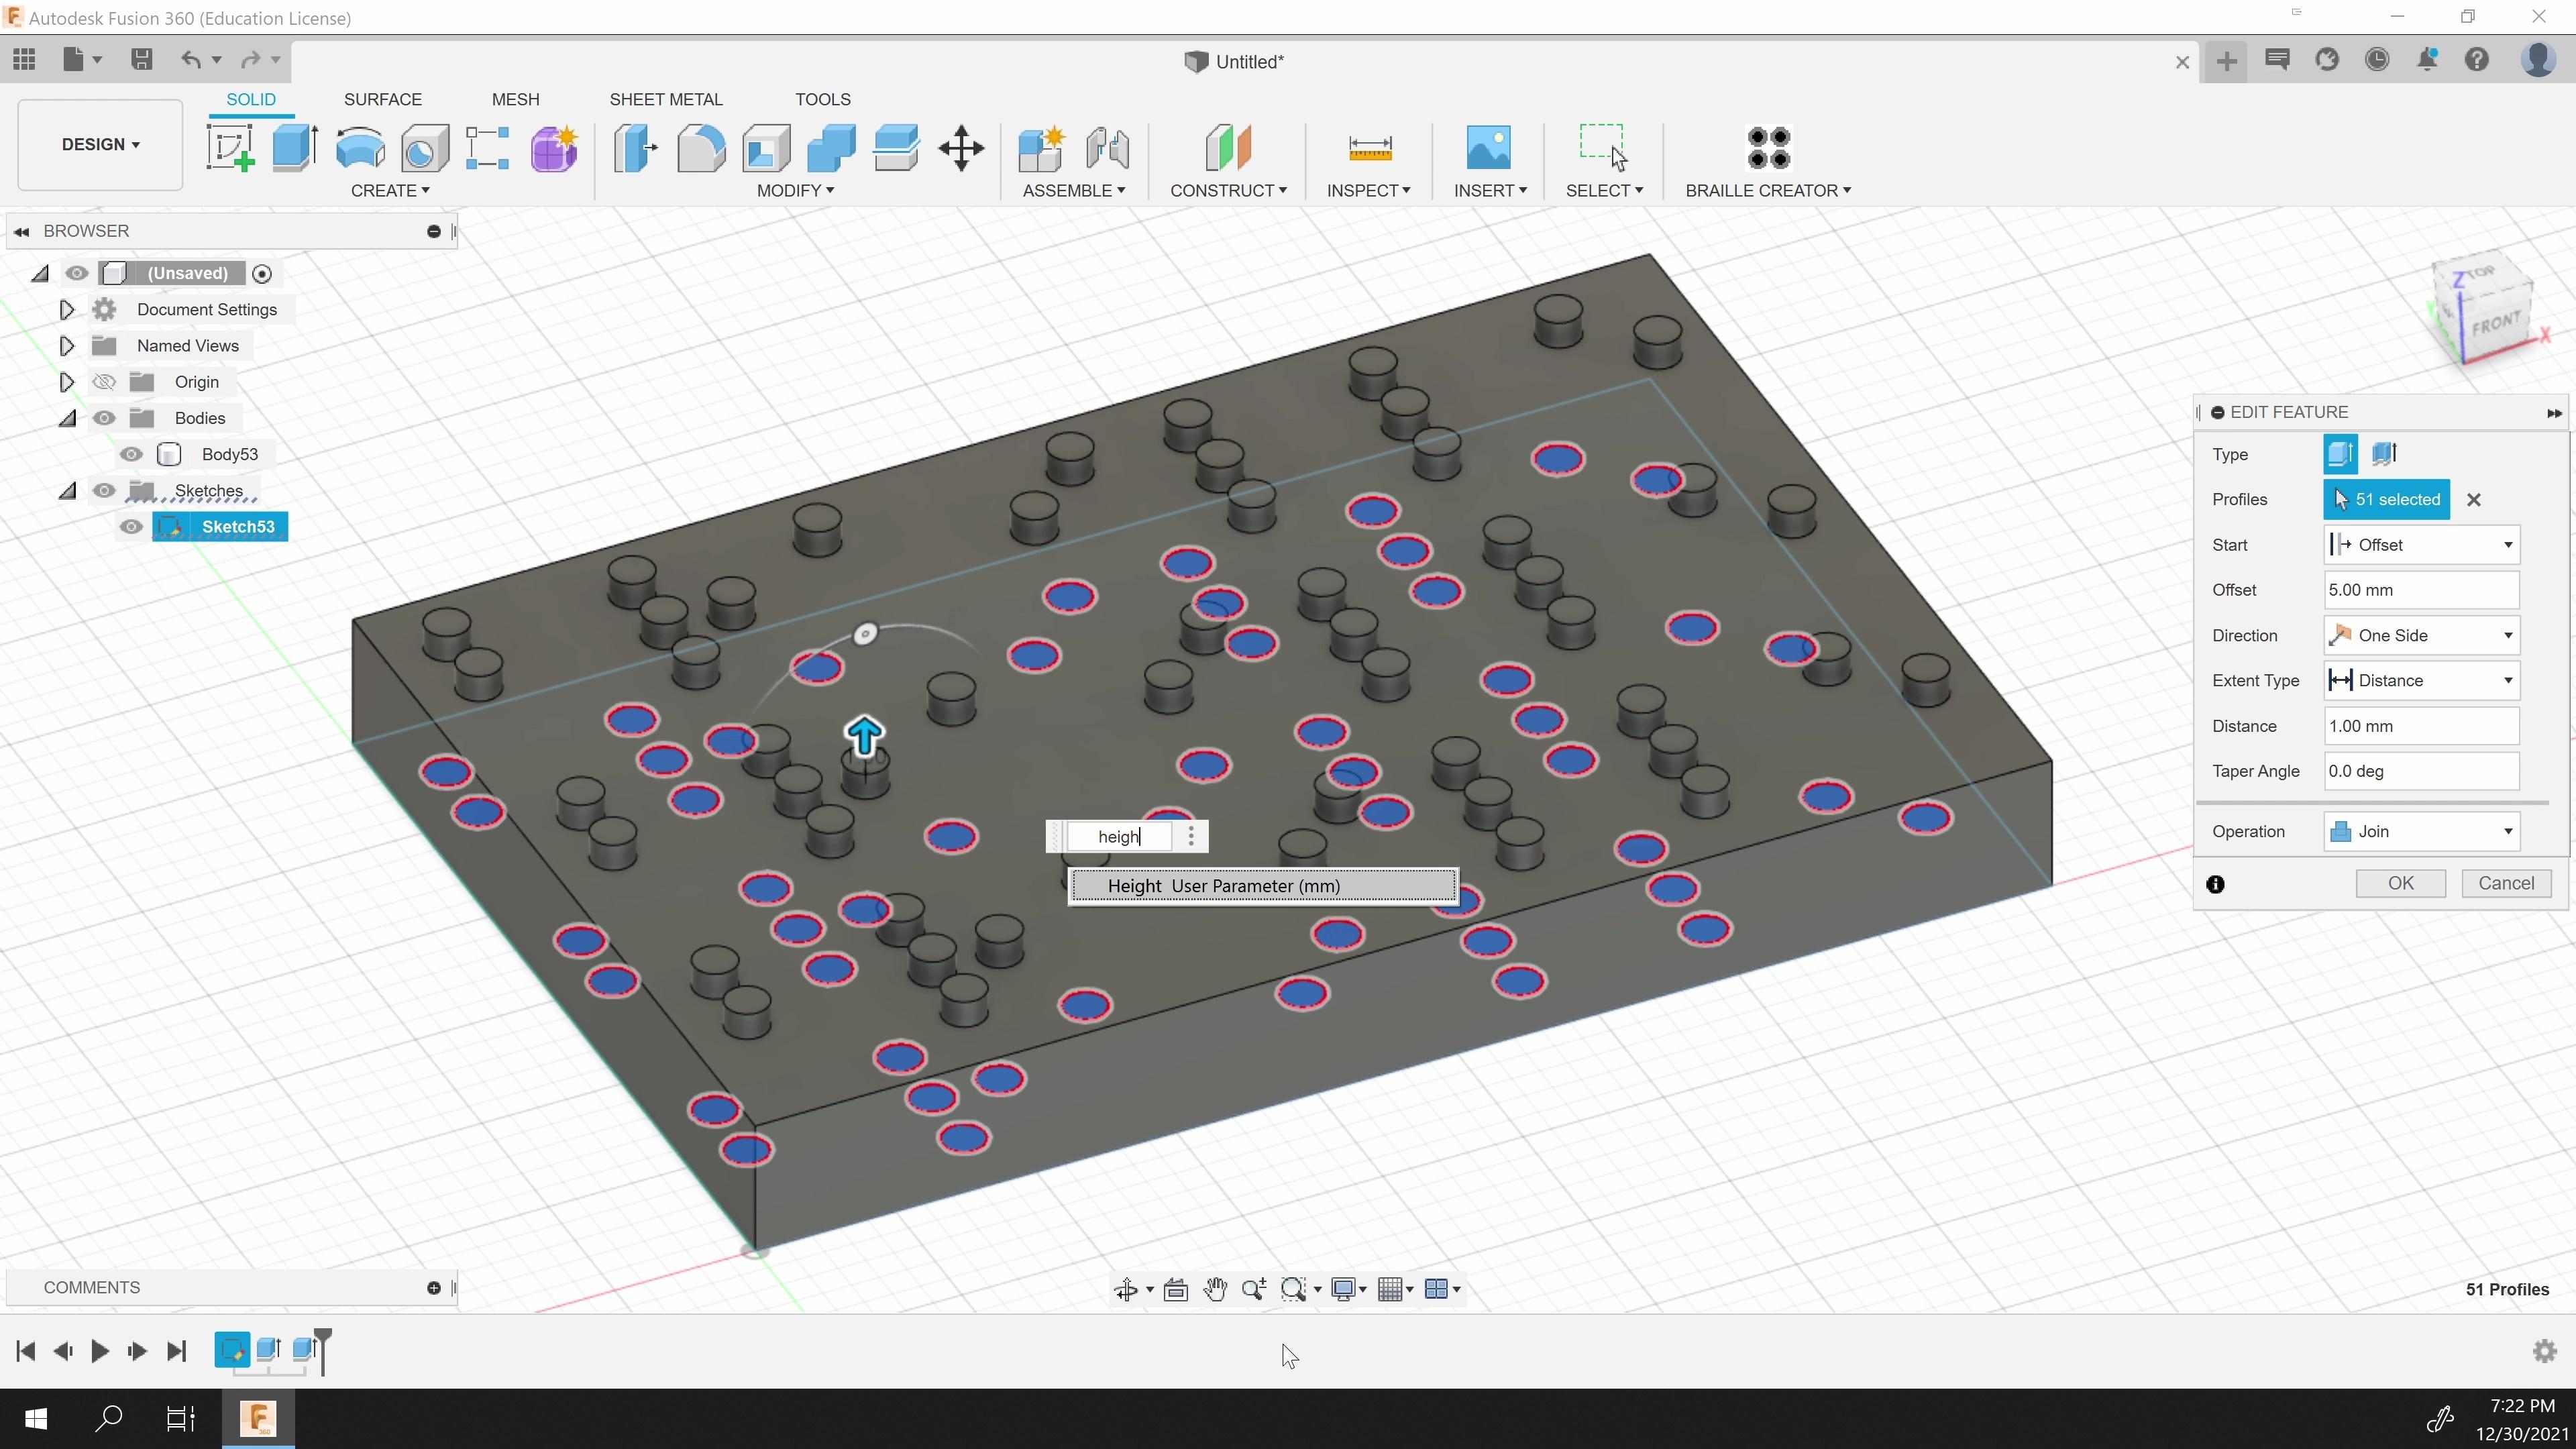
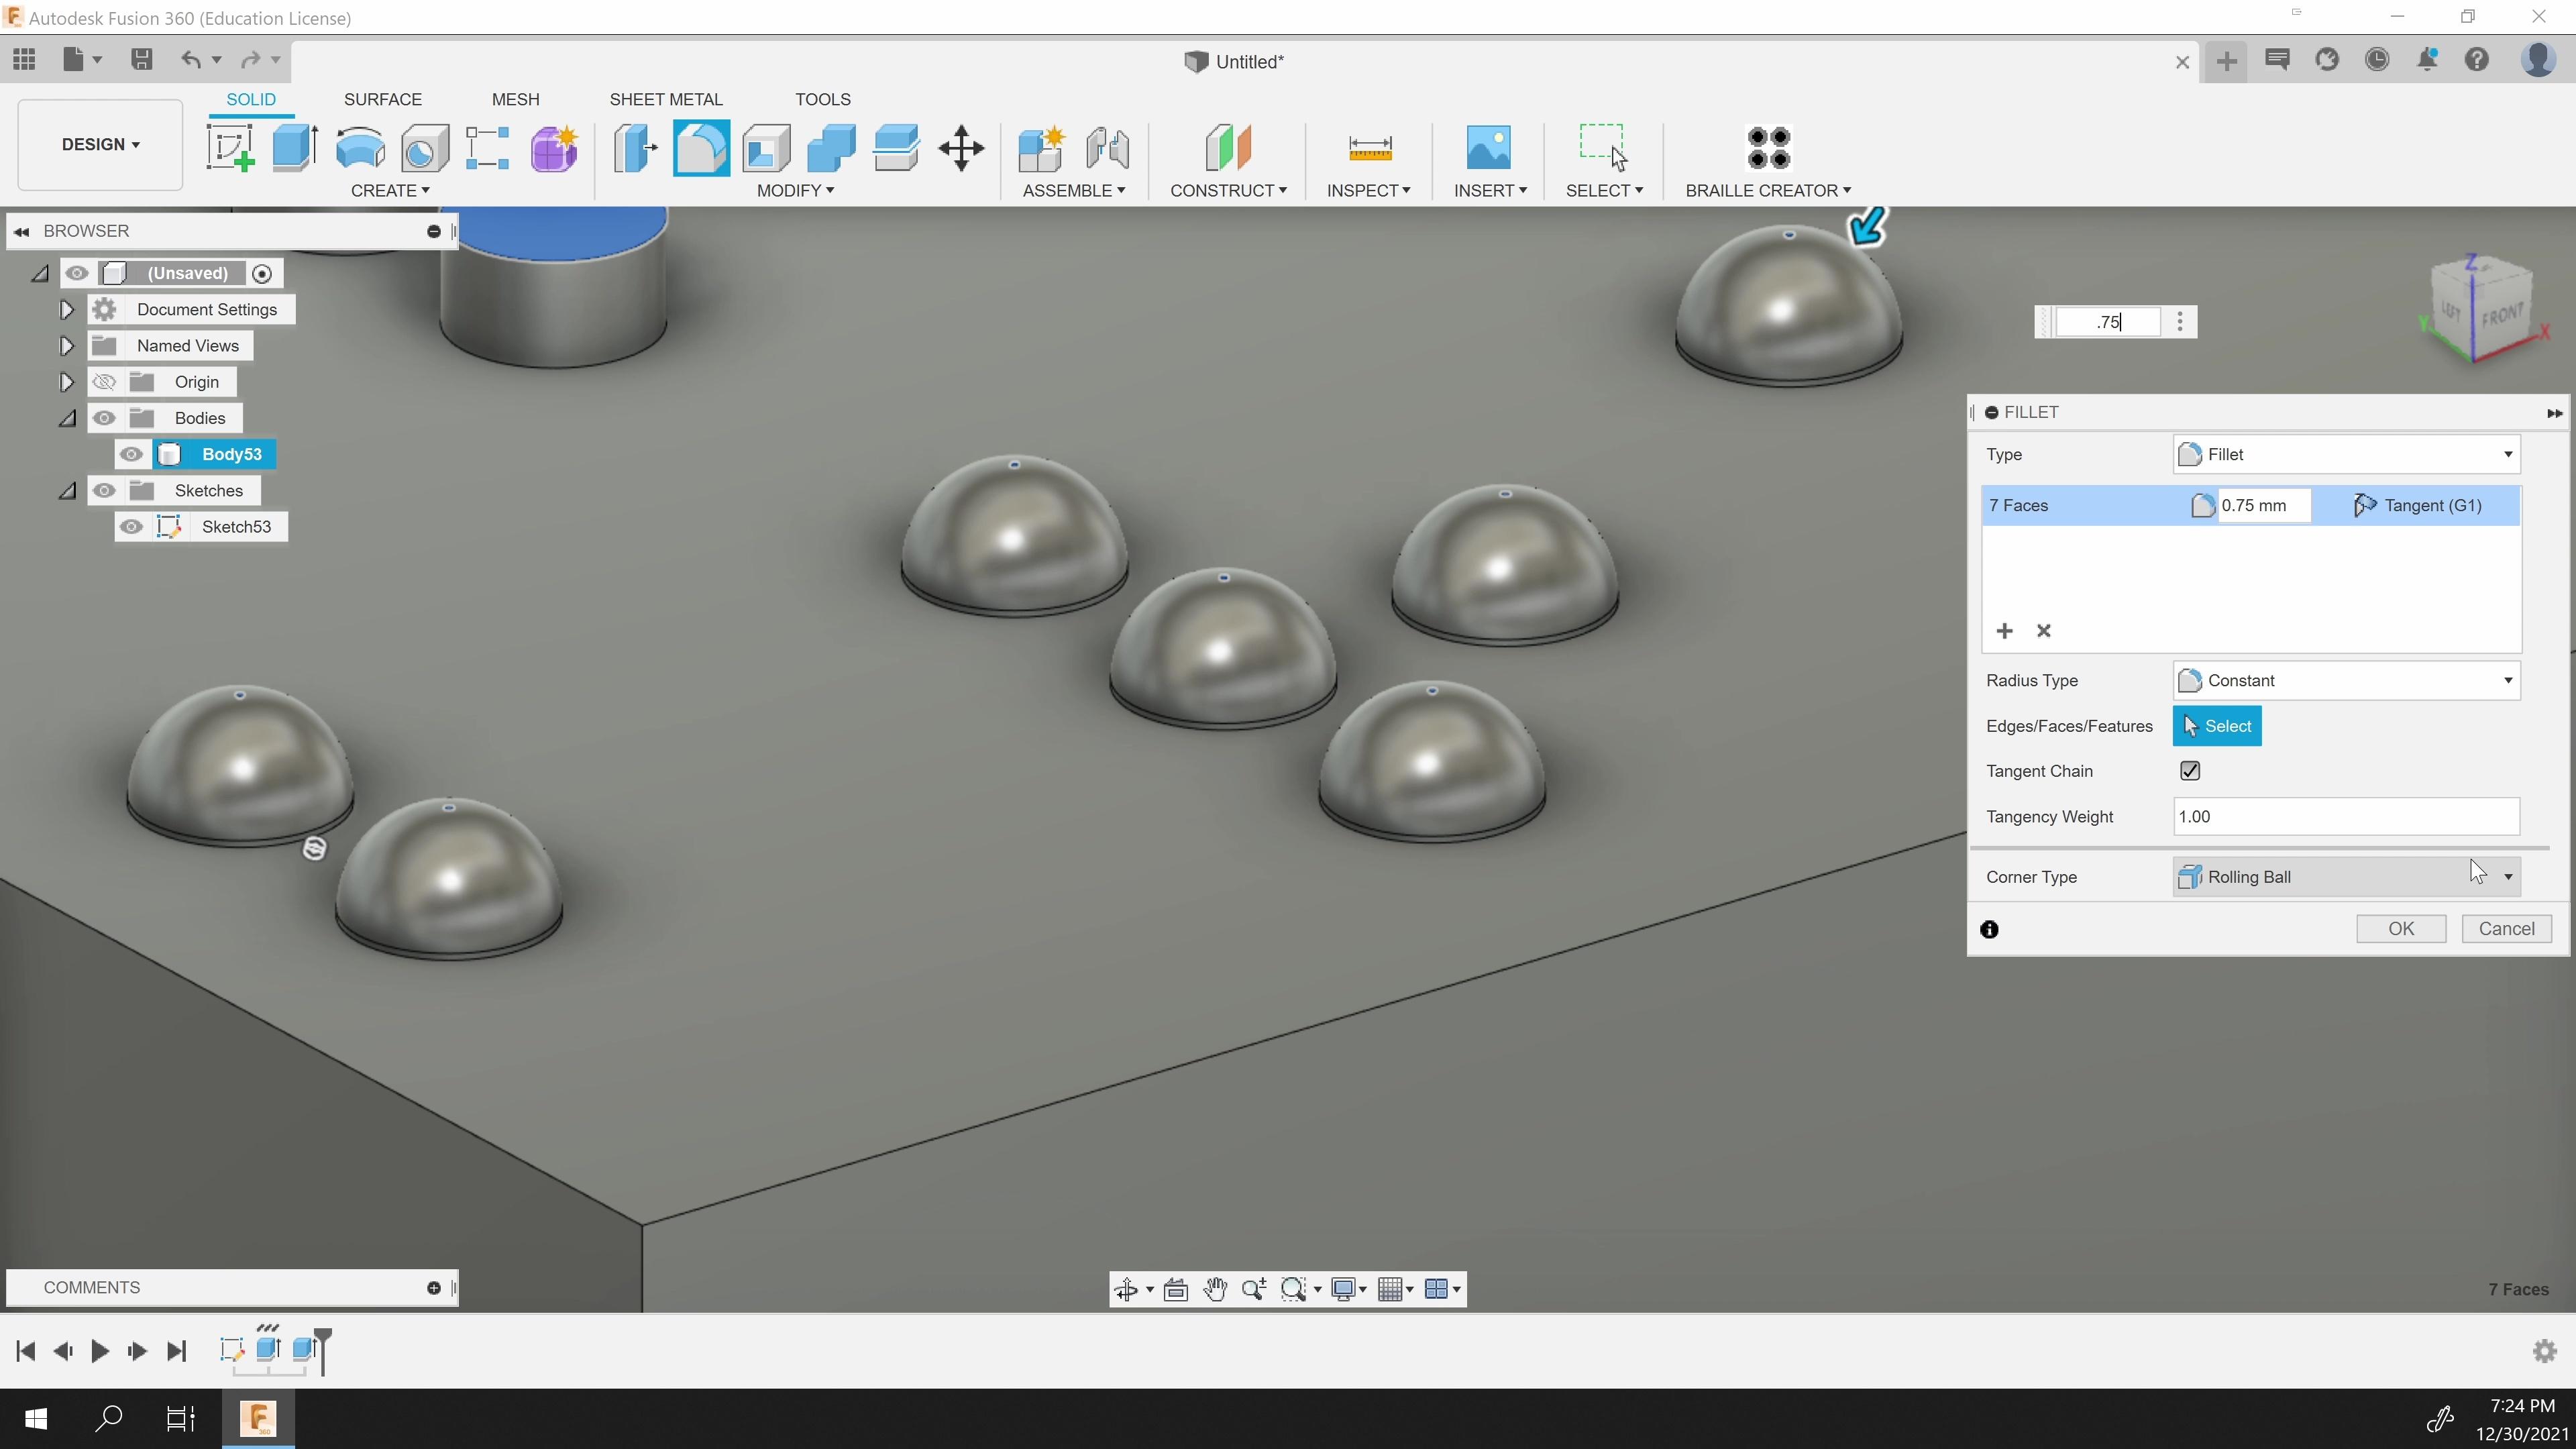
When it comes time to create the final 3D model for your braille, make sure that you remember to use the Dot Height setting for your extrusion height to keep the size of the dots accurate!
You also want to make sure to use the maximum amount of Fillet on your dots to make them as round and smooth as possible when they print.
From here you are able to model and create anything you like with braille on it!
Printing the Braille Calibration Test Print
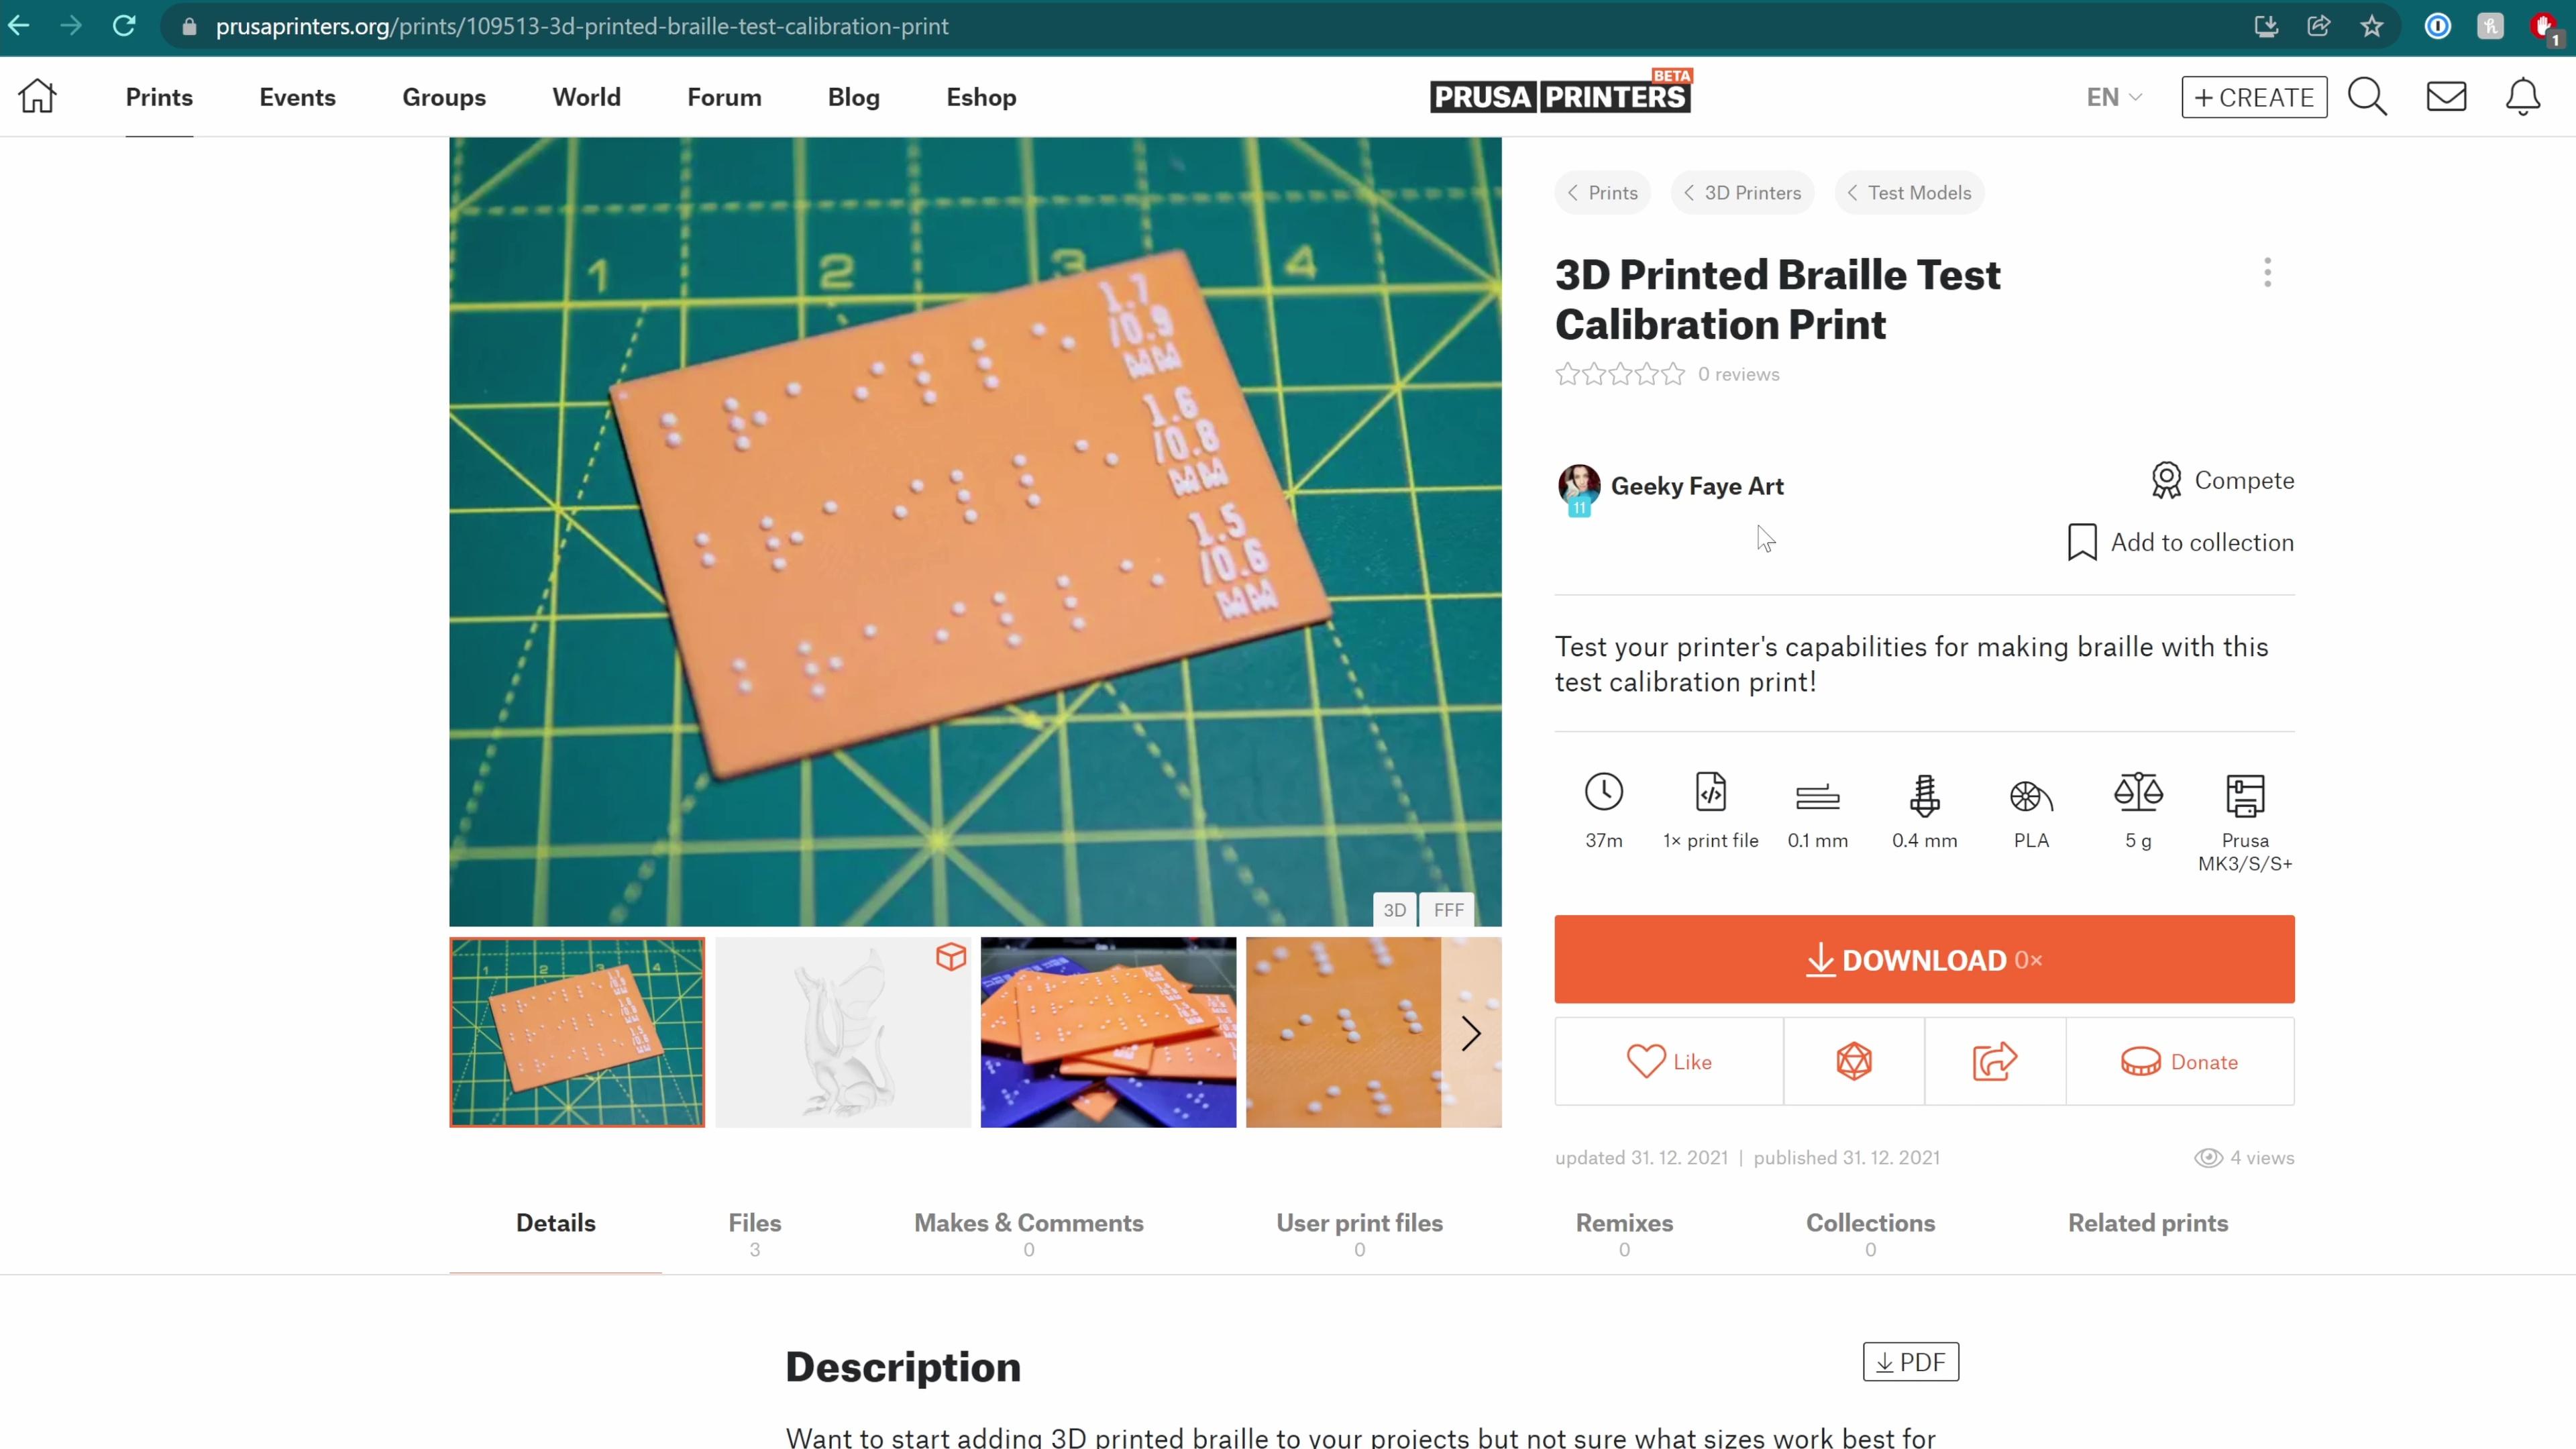
Before you print your own design, it is a good idea to get an idea of what your 3D printer is capable, as no two are exactly alike. For this I have created the 3D Printed Braille Test Calibration Print so you can easily find out which braille sizes look best on your printer. You can download it for free on PrusaPrinters.org!
Download the Braille Test print and get it loaded up into your slicer of choice. I use PrusaSlicer, so that's what I'll be using to show slicer settings, but most if not all of these settings should translate to other slicers as well.
In my research I found that there was a small range of braille sizing that satisfies the requirements of most countries, so I created three different sets of braille, going from the small end of the range to the largest. The reason for trying all three sizes is because what ends out looking best with your printer may not be the same as the next person, even with ideal slicer settings, and getting clean results is far more important than using a specific size. As long as it's within the appropriate range, it's good to go!
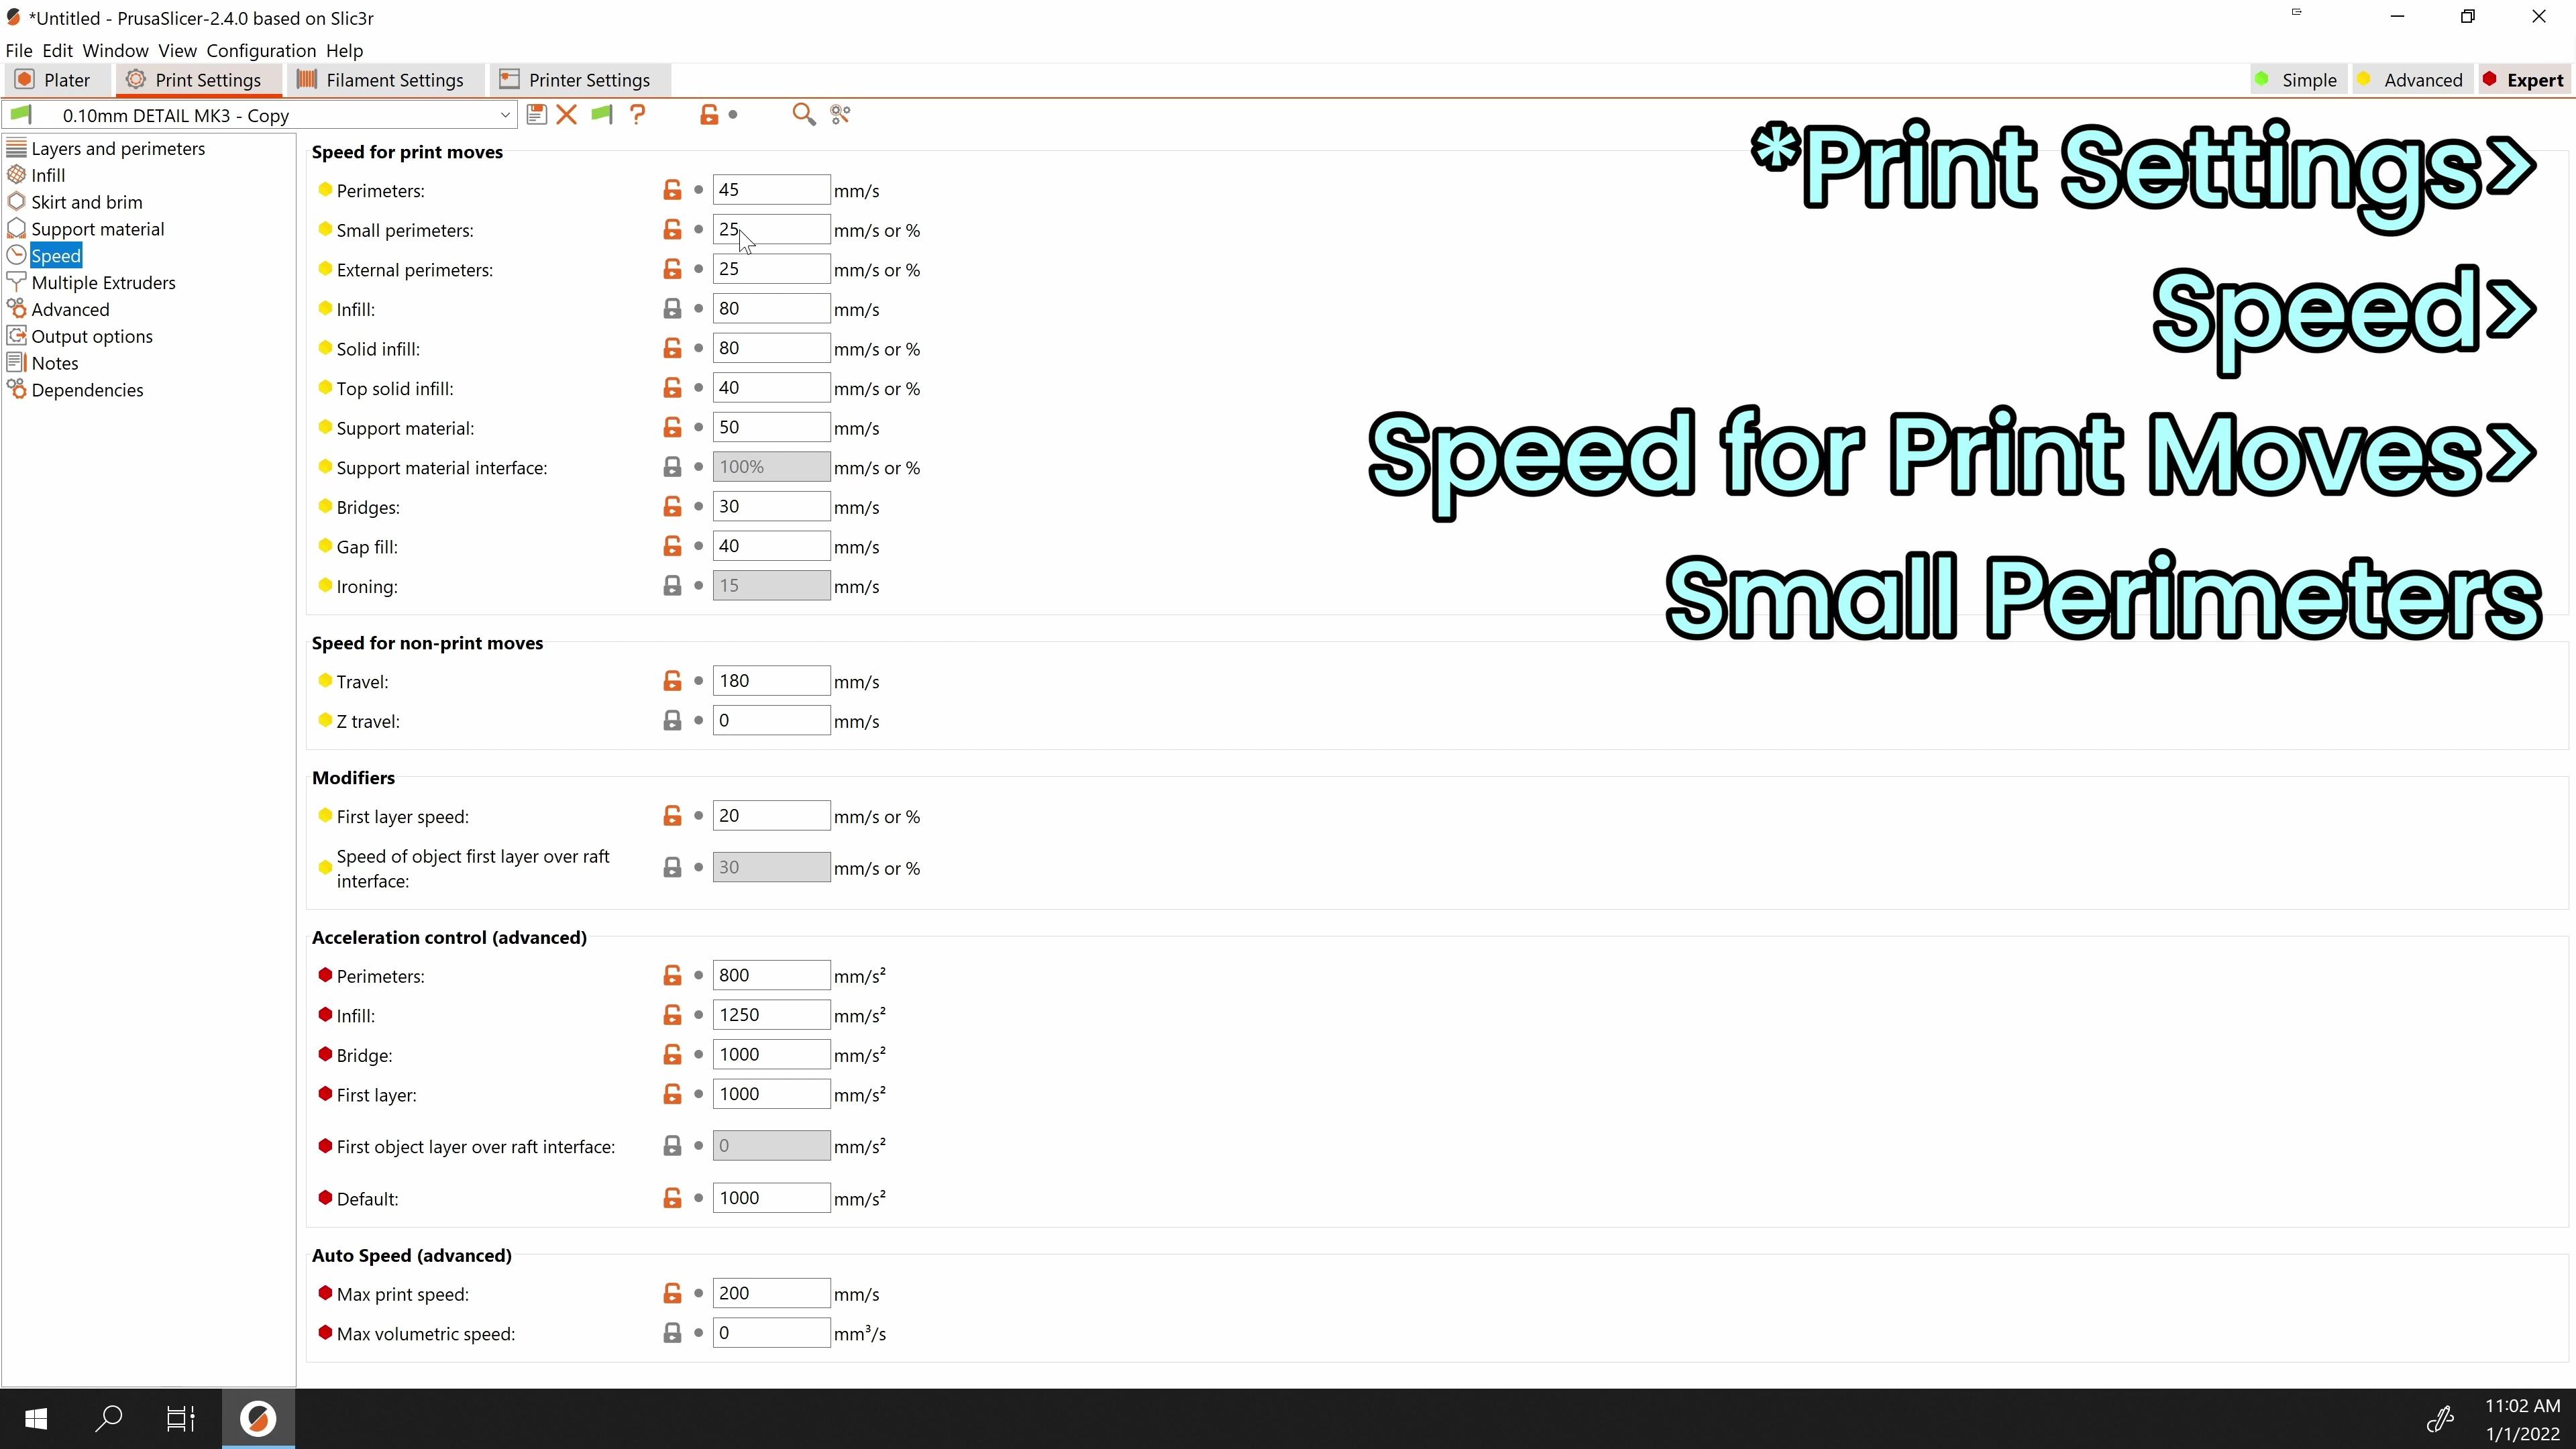
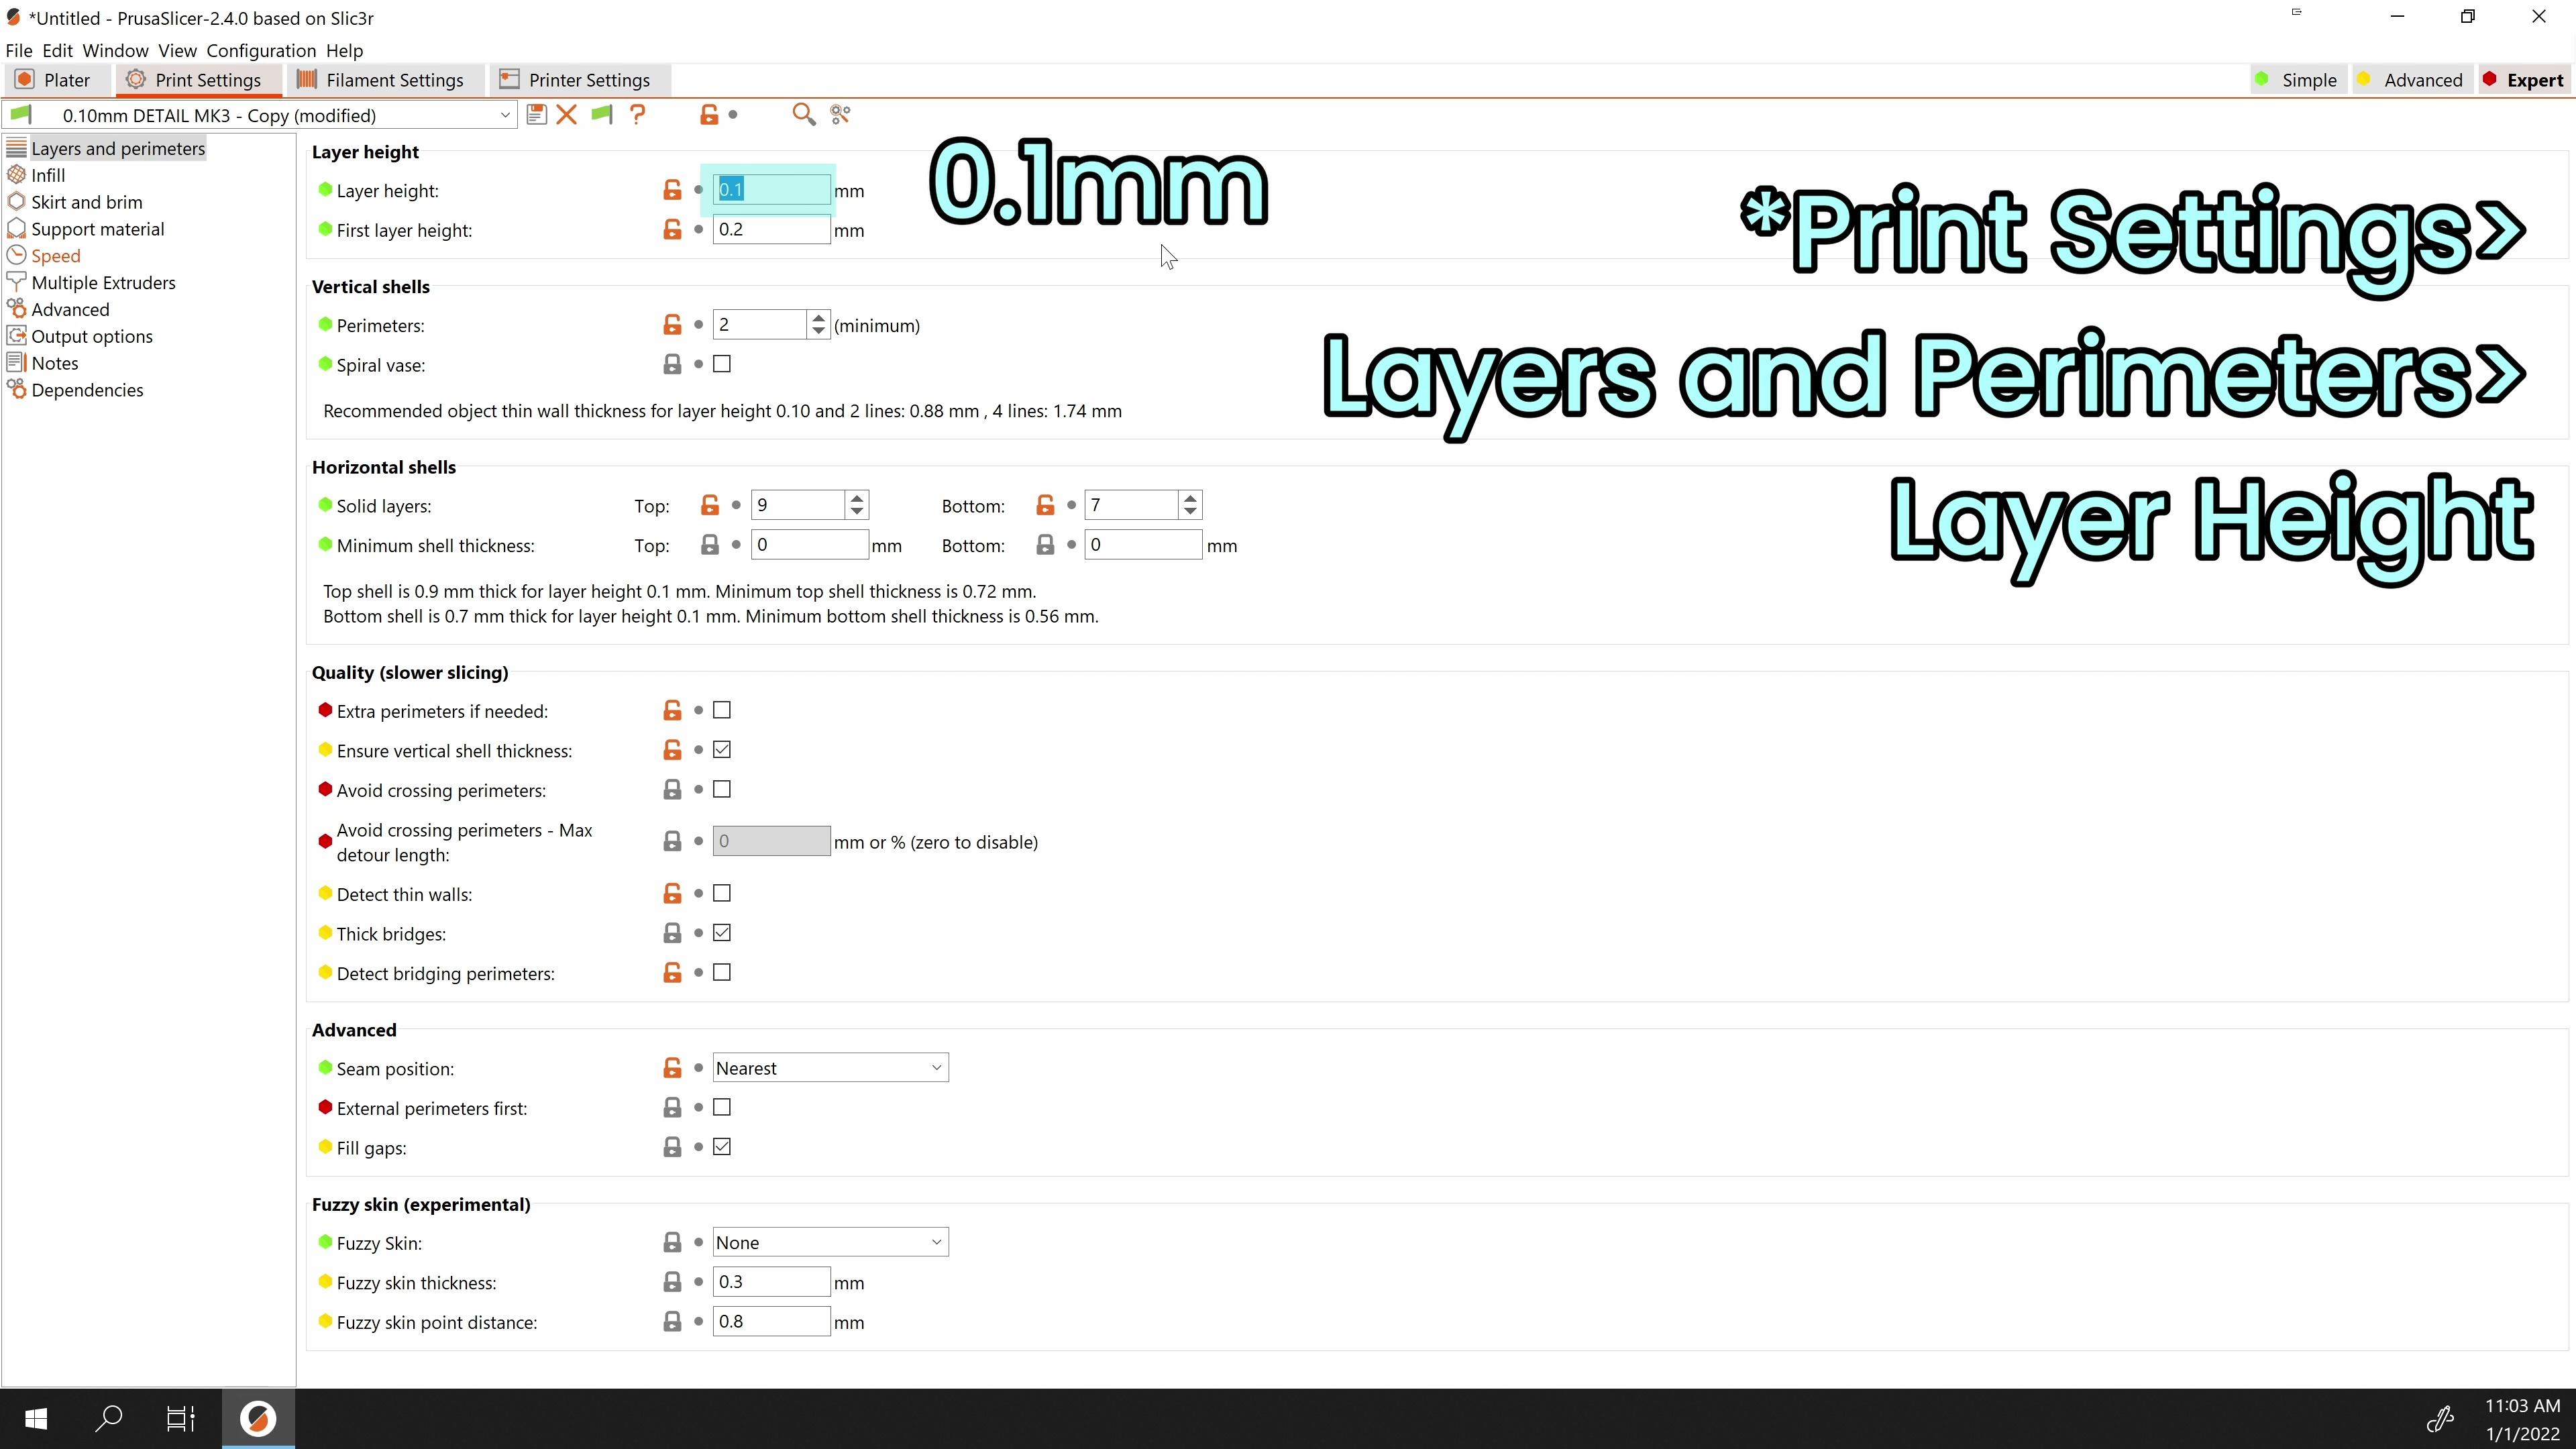
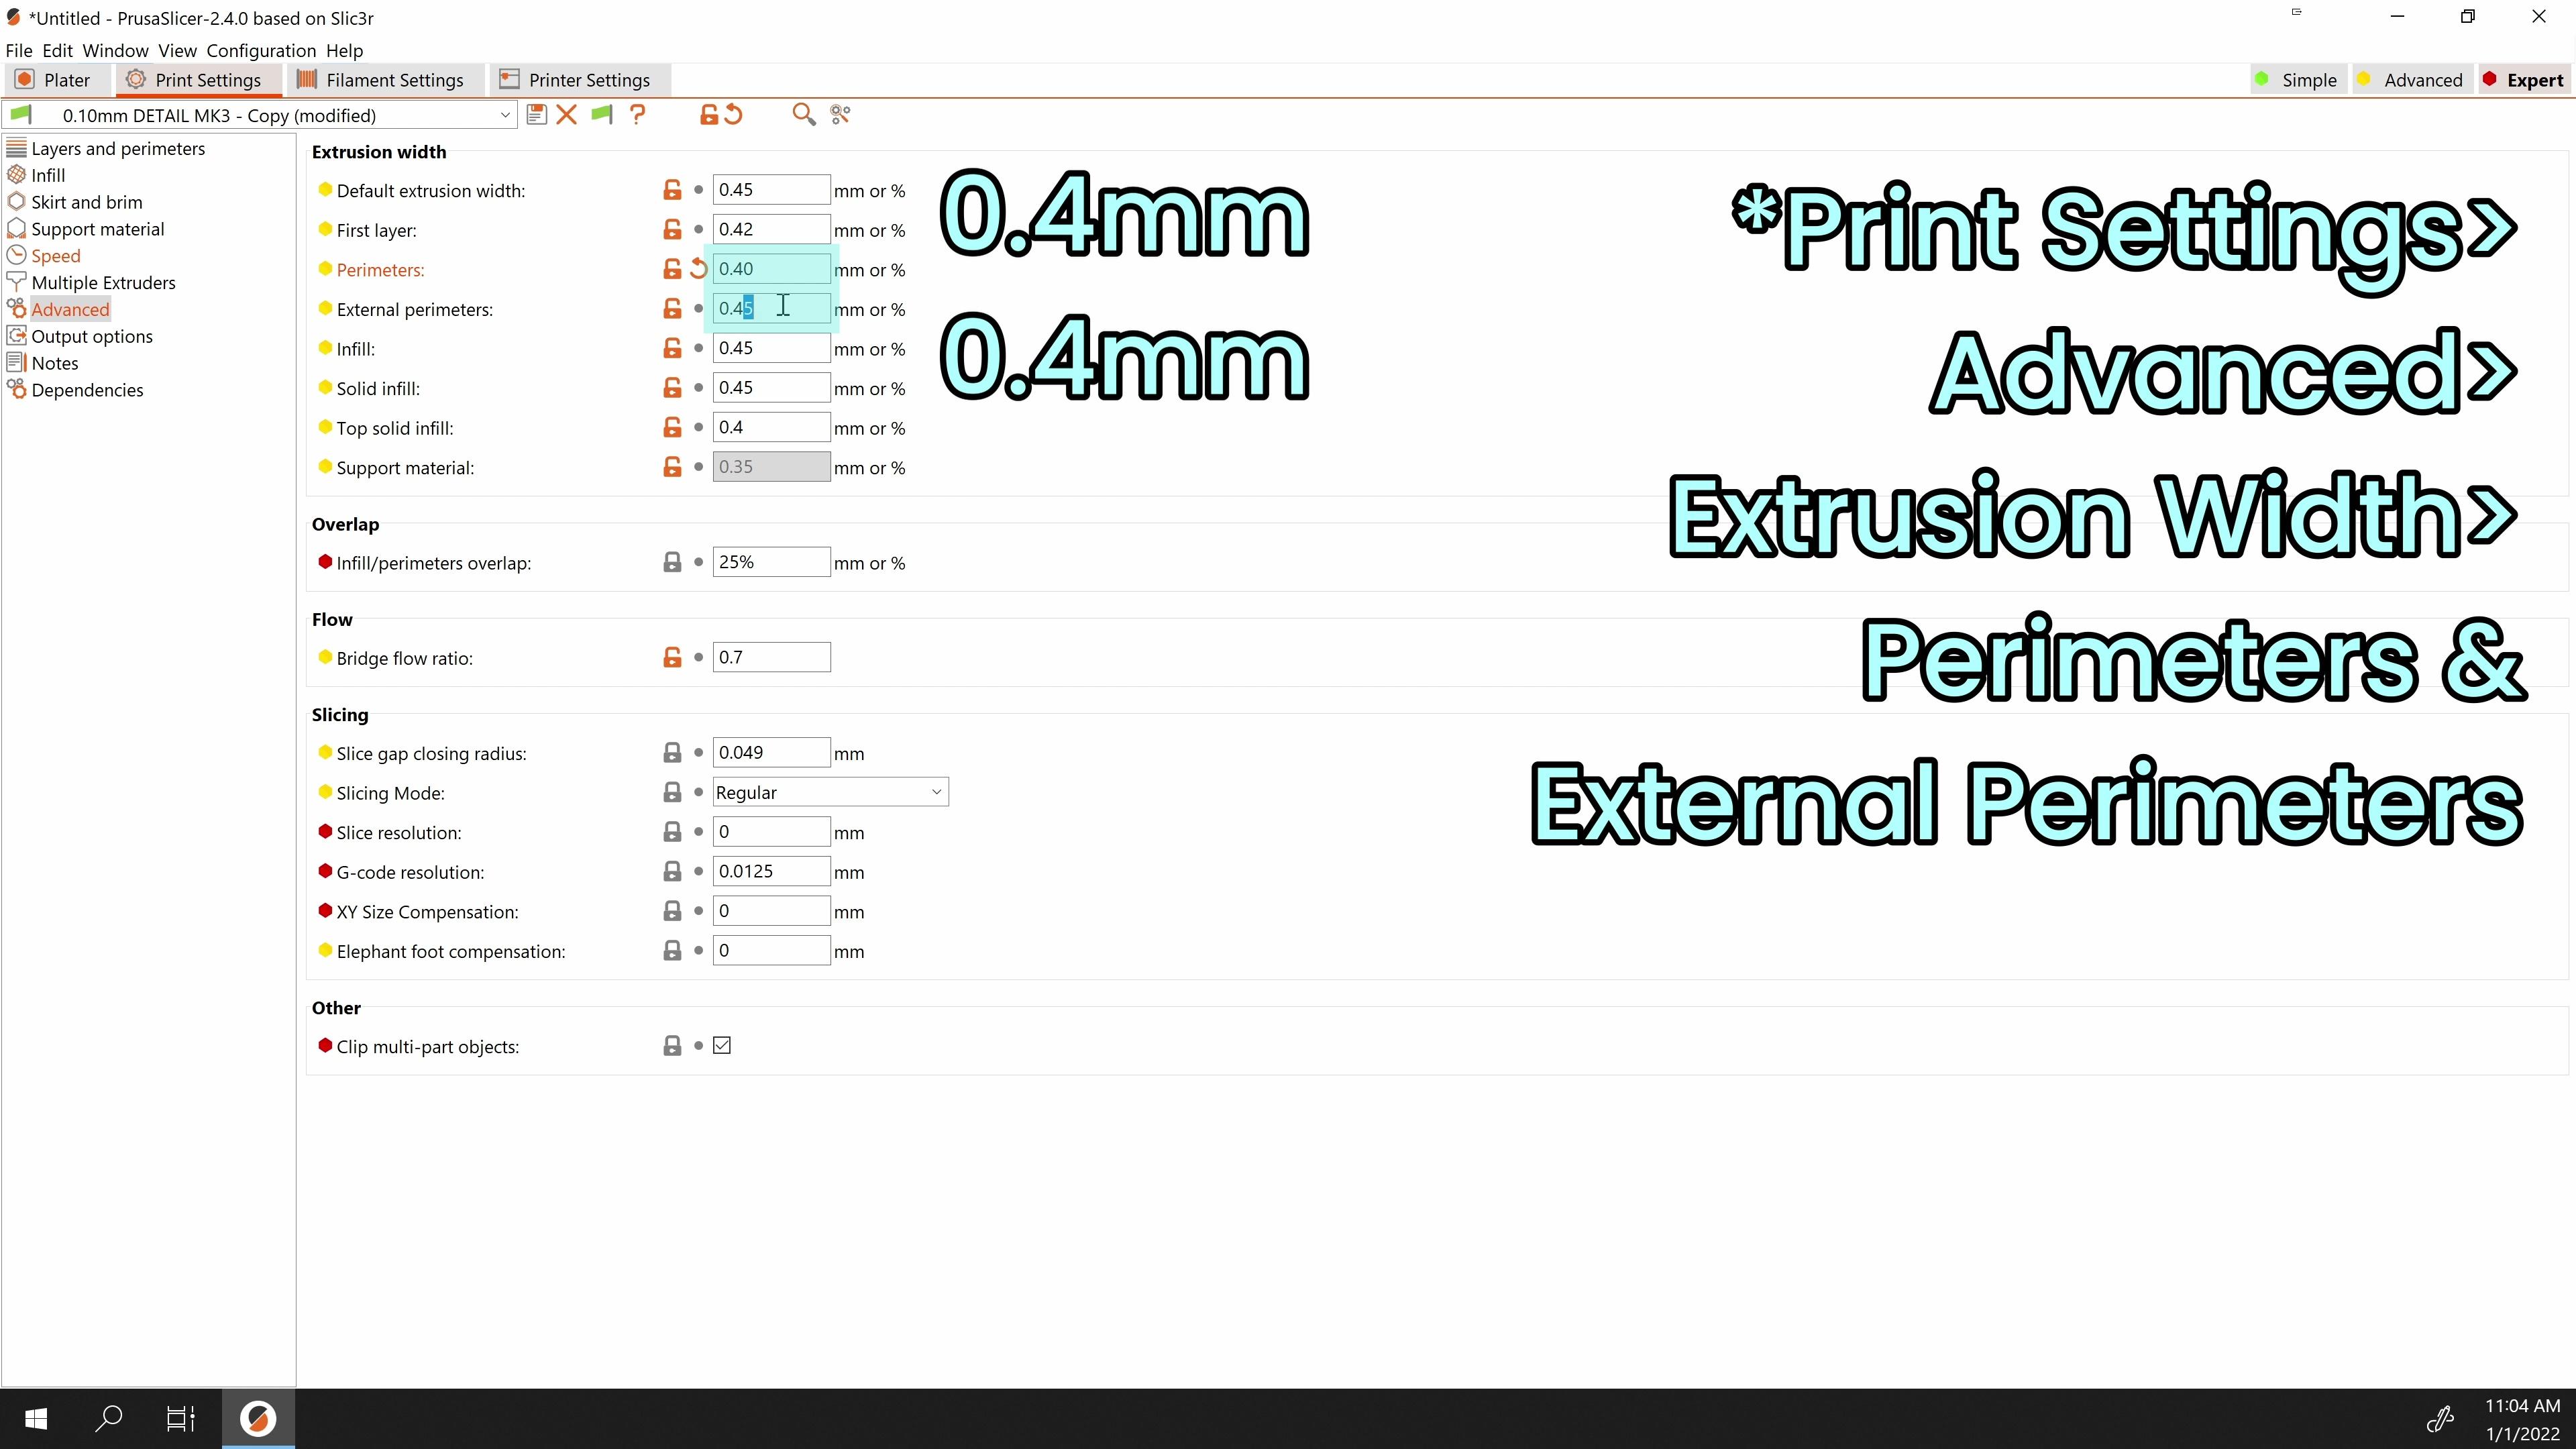
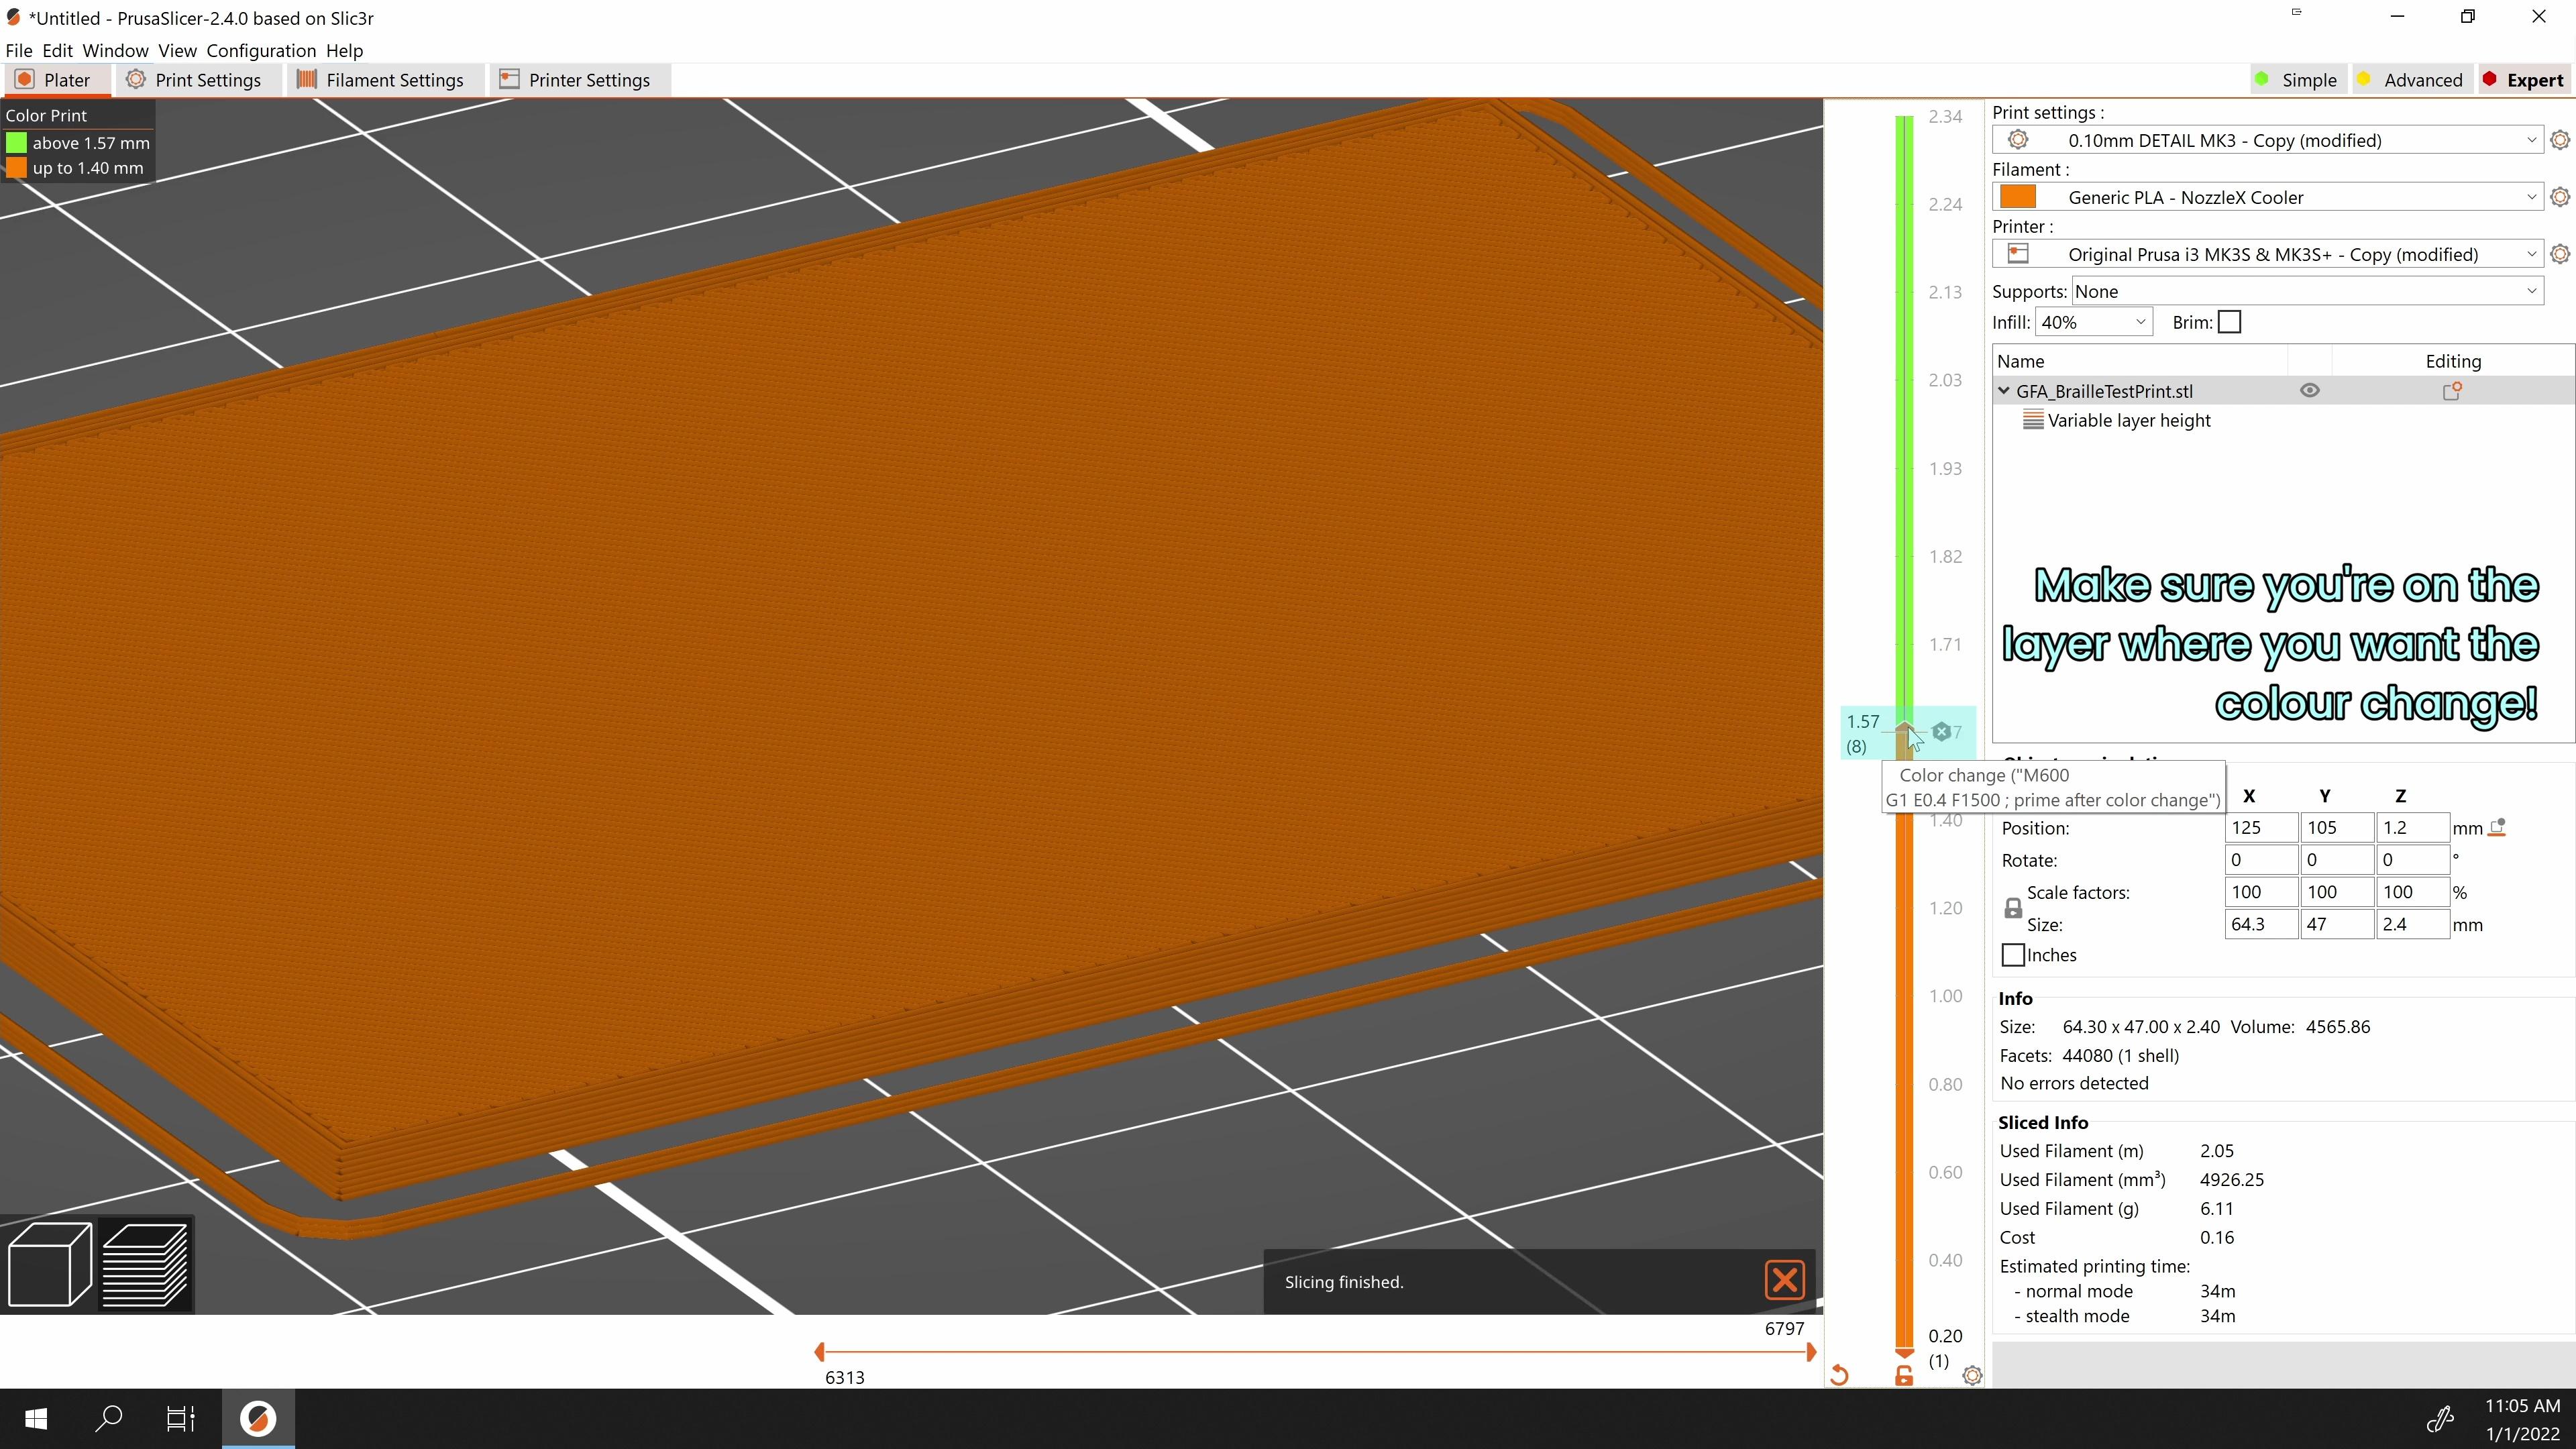
For the first test, start with your typical slicer profile for small prints or fine layers. Slow down your Small Perimeters speed to 5 millimeters a second, unless you're very confident in the stability of your printer! Set the Layer Height of the whole model to 0.1mm, or, use the variable layer height function to make only the layers above the flat surface 0.1mm and set the other layers to whatever you fancy. Also make sure to turn your Extrusion Width for perimeters down to 0.4mm, if they were higher. Lastly, if you wish to have your braille be more visually striking and your printer firmware can use the M600 command, set a colour change in the slicer so you can swap our your filament for another colour when the braille starts. Export your Gcode, and get printing!
Fine Tuning & Troubleshooting Slicer Settings
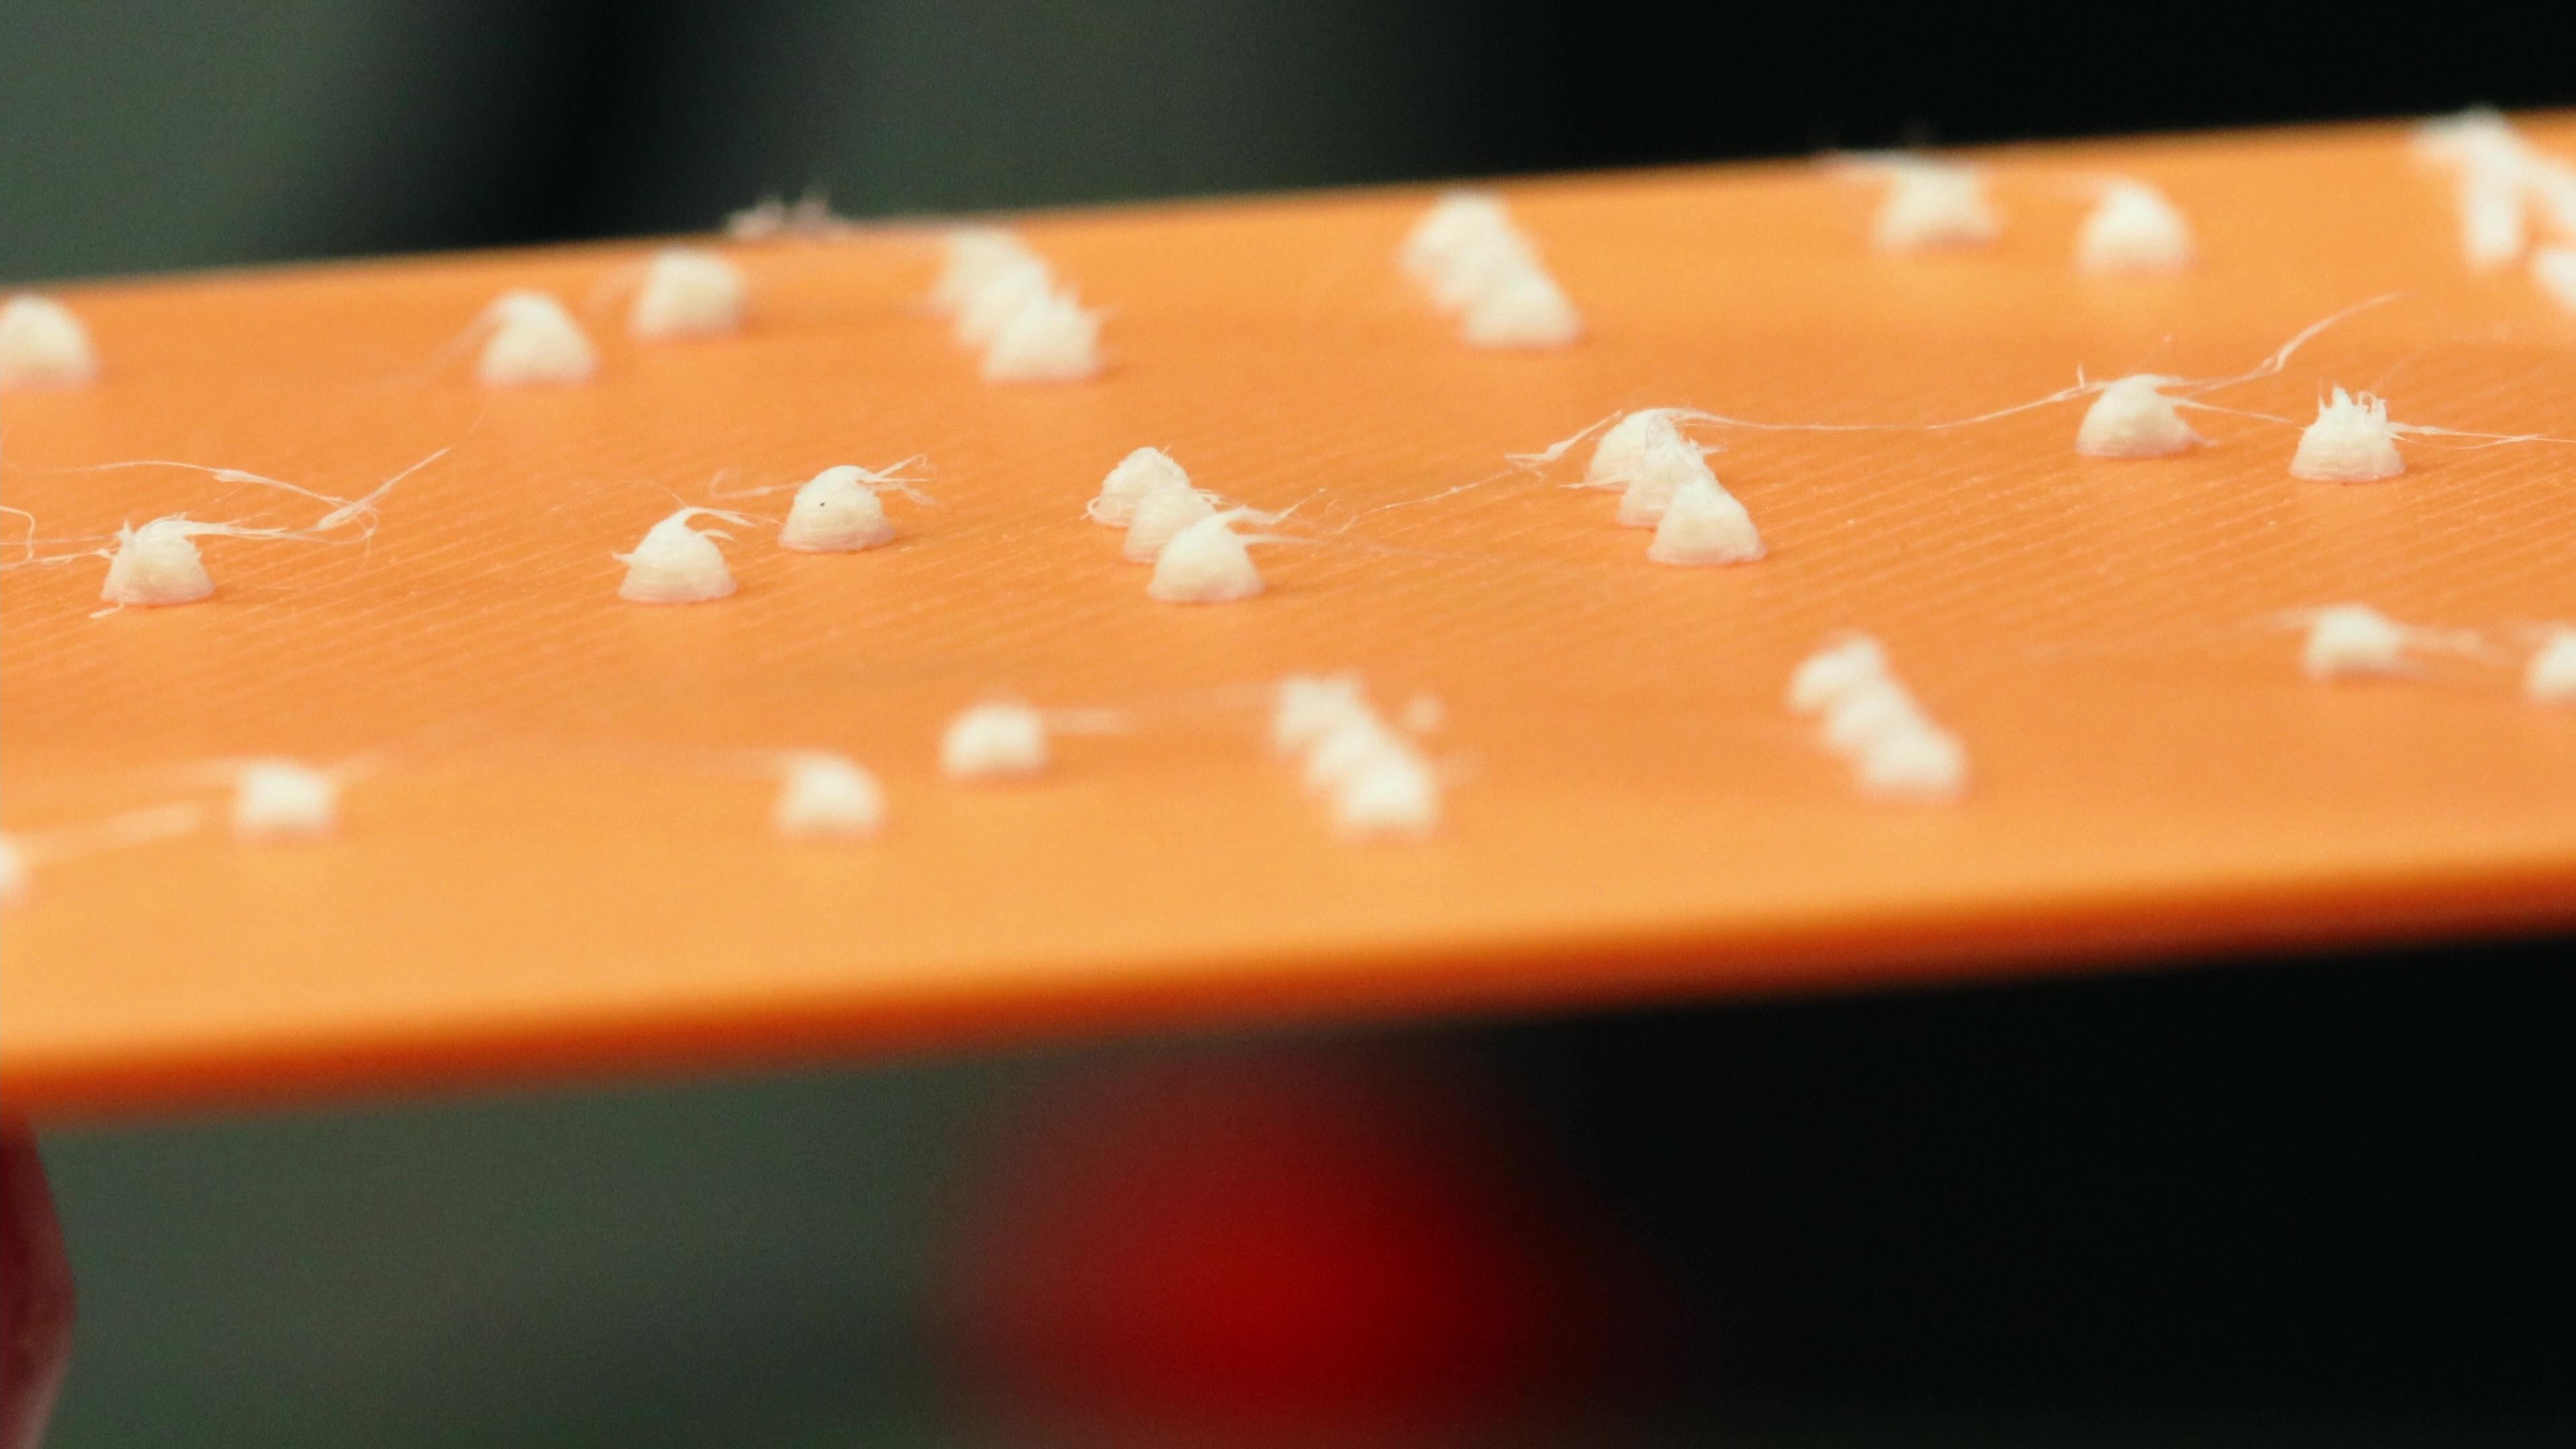
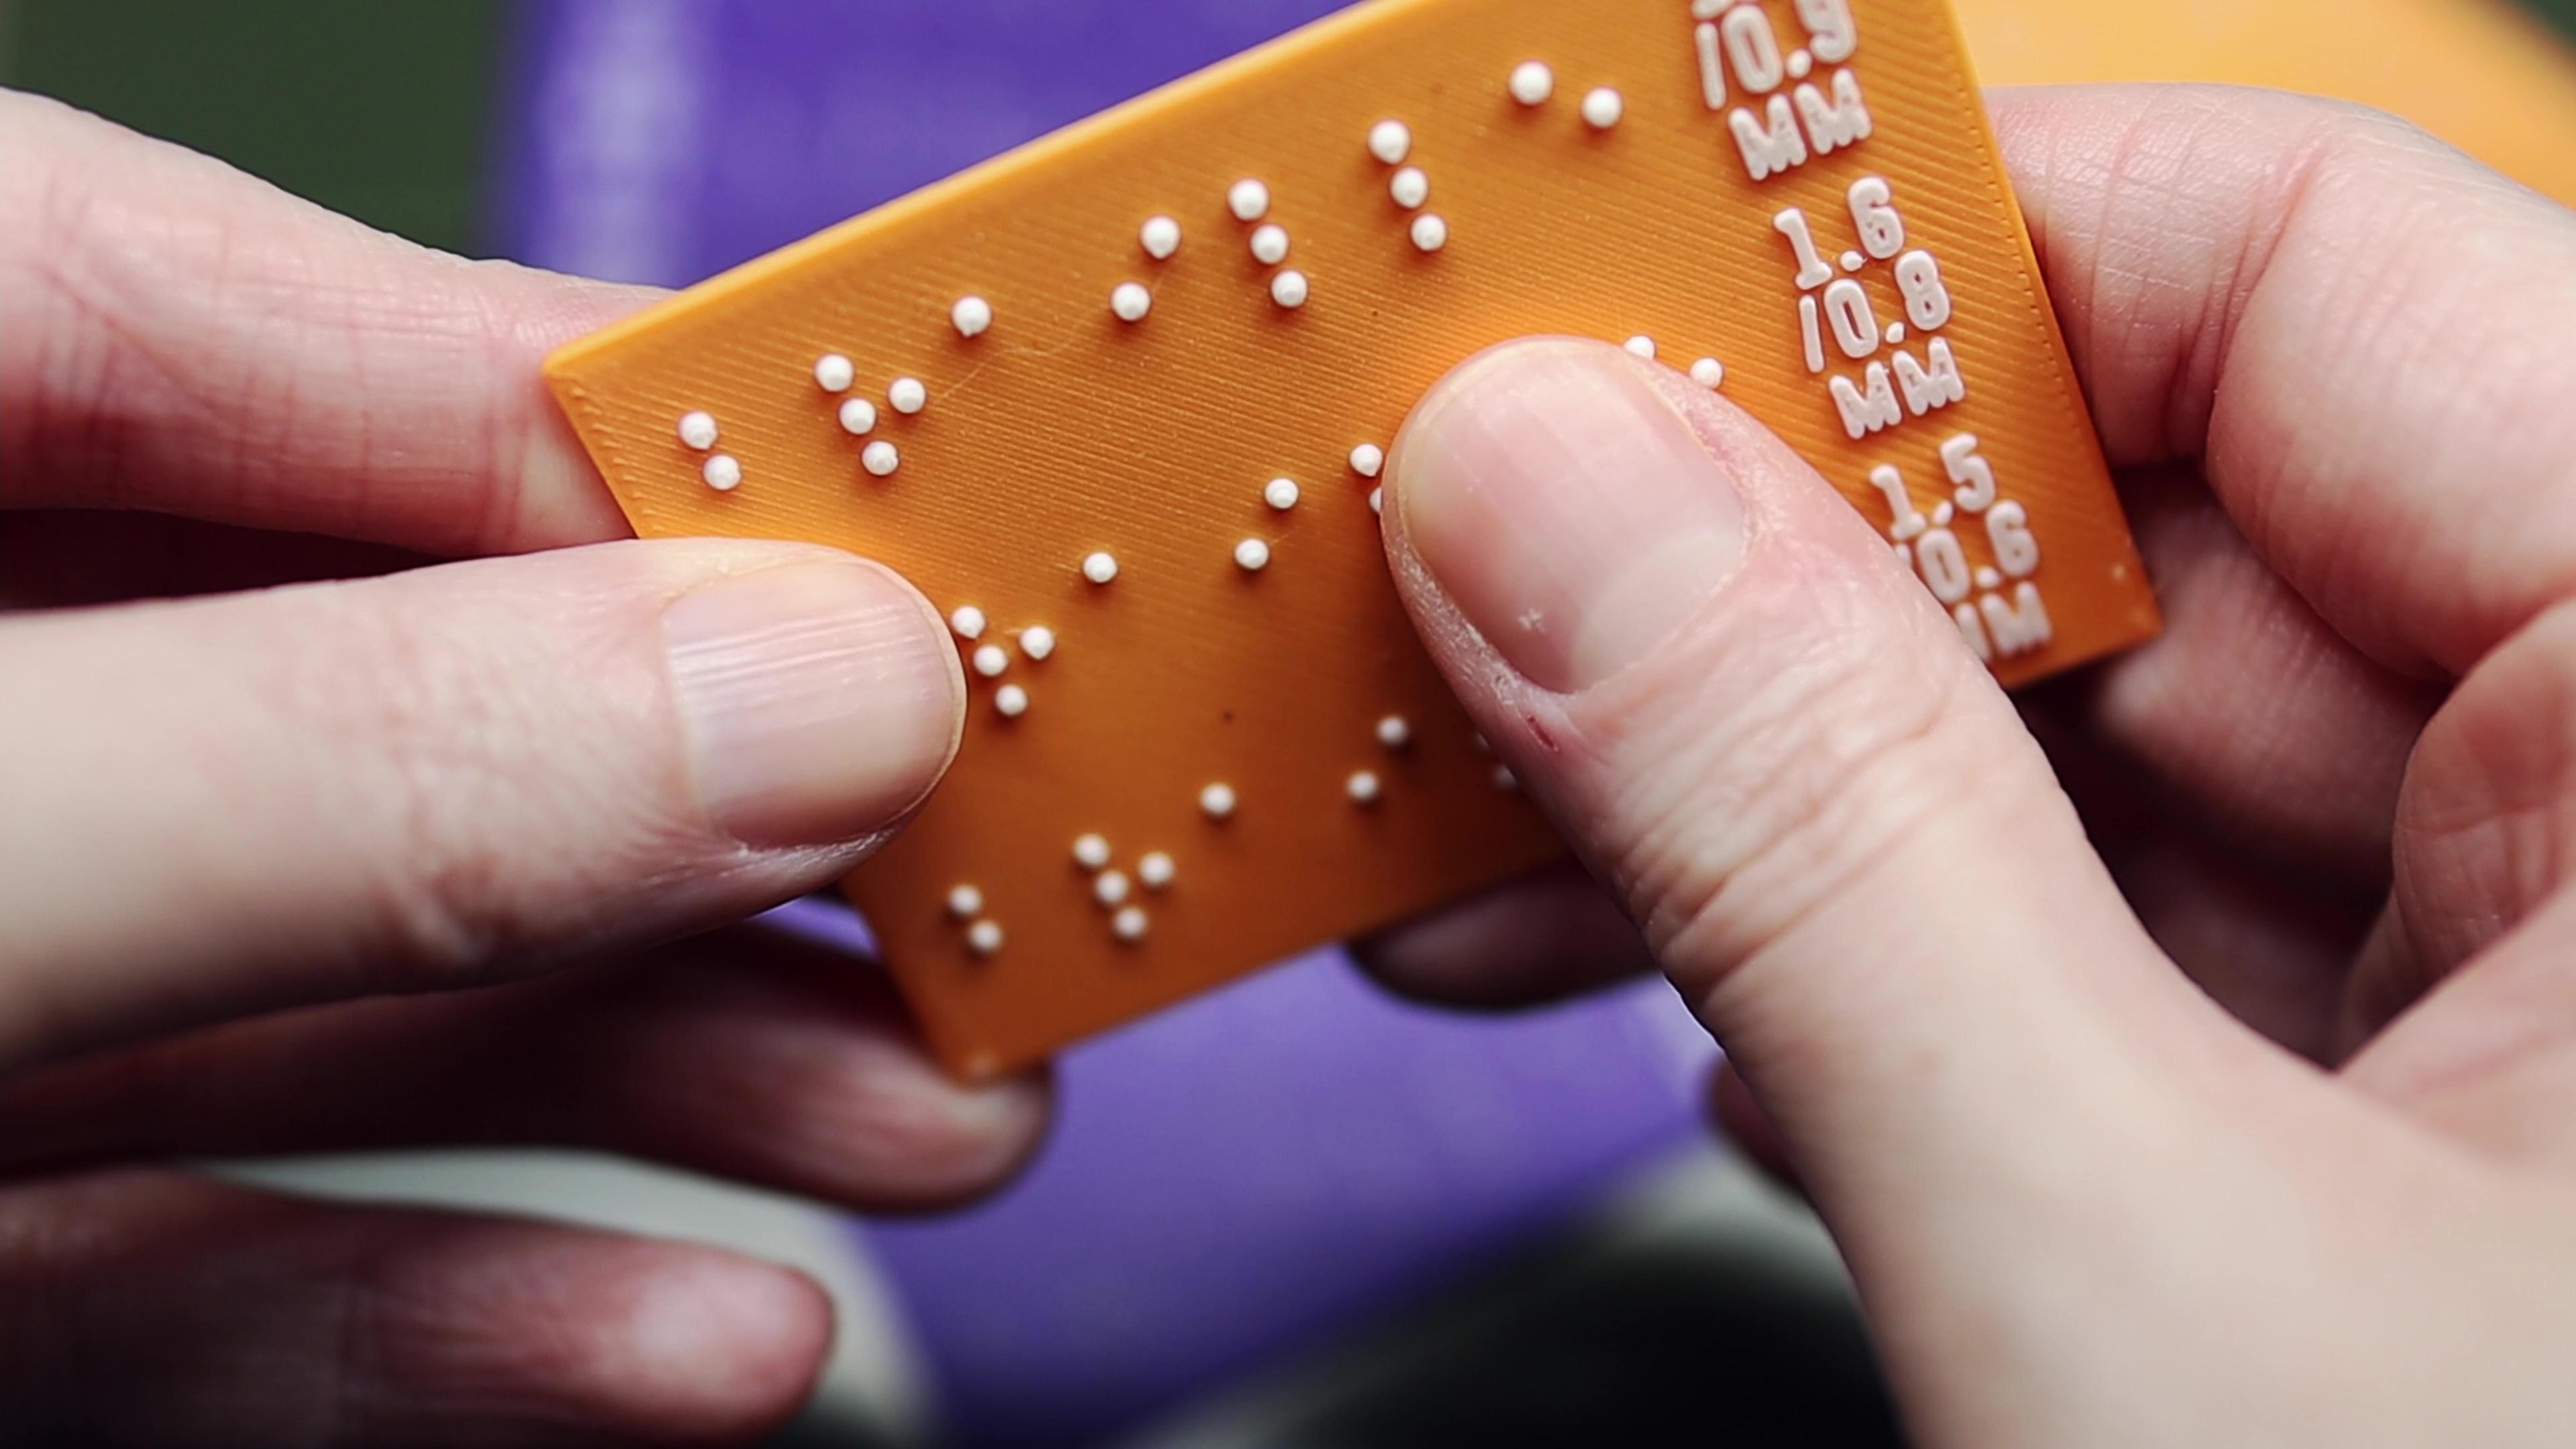
Take a good look at your test print! Examine the curvature of each line and look for things like over extrusion, under extrusion, or other things that may be affecting the size or shape of the dot.
If you're struggling with stringing between the dots, then head to the retraction settings and turn off the Z-Lift completely. If that doesn't sort the stringing, increase the retraction speed a bit as well. Don't stress too much if you can't remove it completely, we'll take care of it later.
If you find all three lines to be uneven and over extruded, try reducing your extrusion multiplier a little bit at a time until it comes out a bit more cleanly without compromising quality on the rest of the print. If the dots are broken and under extruded, try increasing the extrusion width back up to your default, and slowing down your small perimeters even more.
It may take a few attempts to get it looking pretty good, but once you've got settings you like you can save a printer profile explicitly for designs with braille in them, and you won't have to worry about it again!
How do you know you've got it right? Well, your braille dots should look quite even going down the line, and feel distinct to your finger tips! You want to go with the size that looks and feels best and use that size in your design. Don't worry if it feels a bit rough right off the print bed, post processing will take you the rest of the way.
Smoothing the Printed Braille
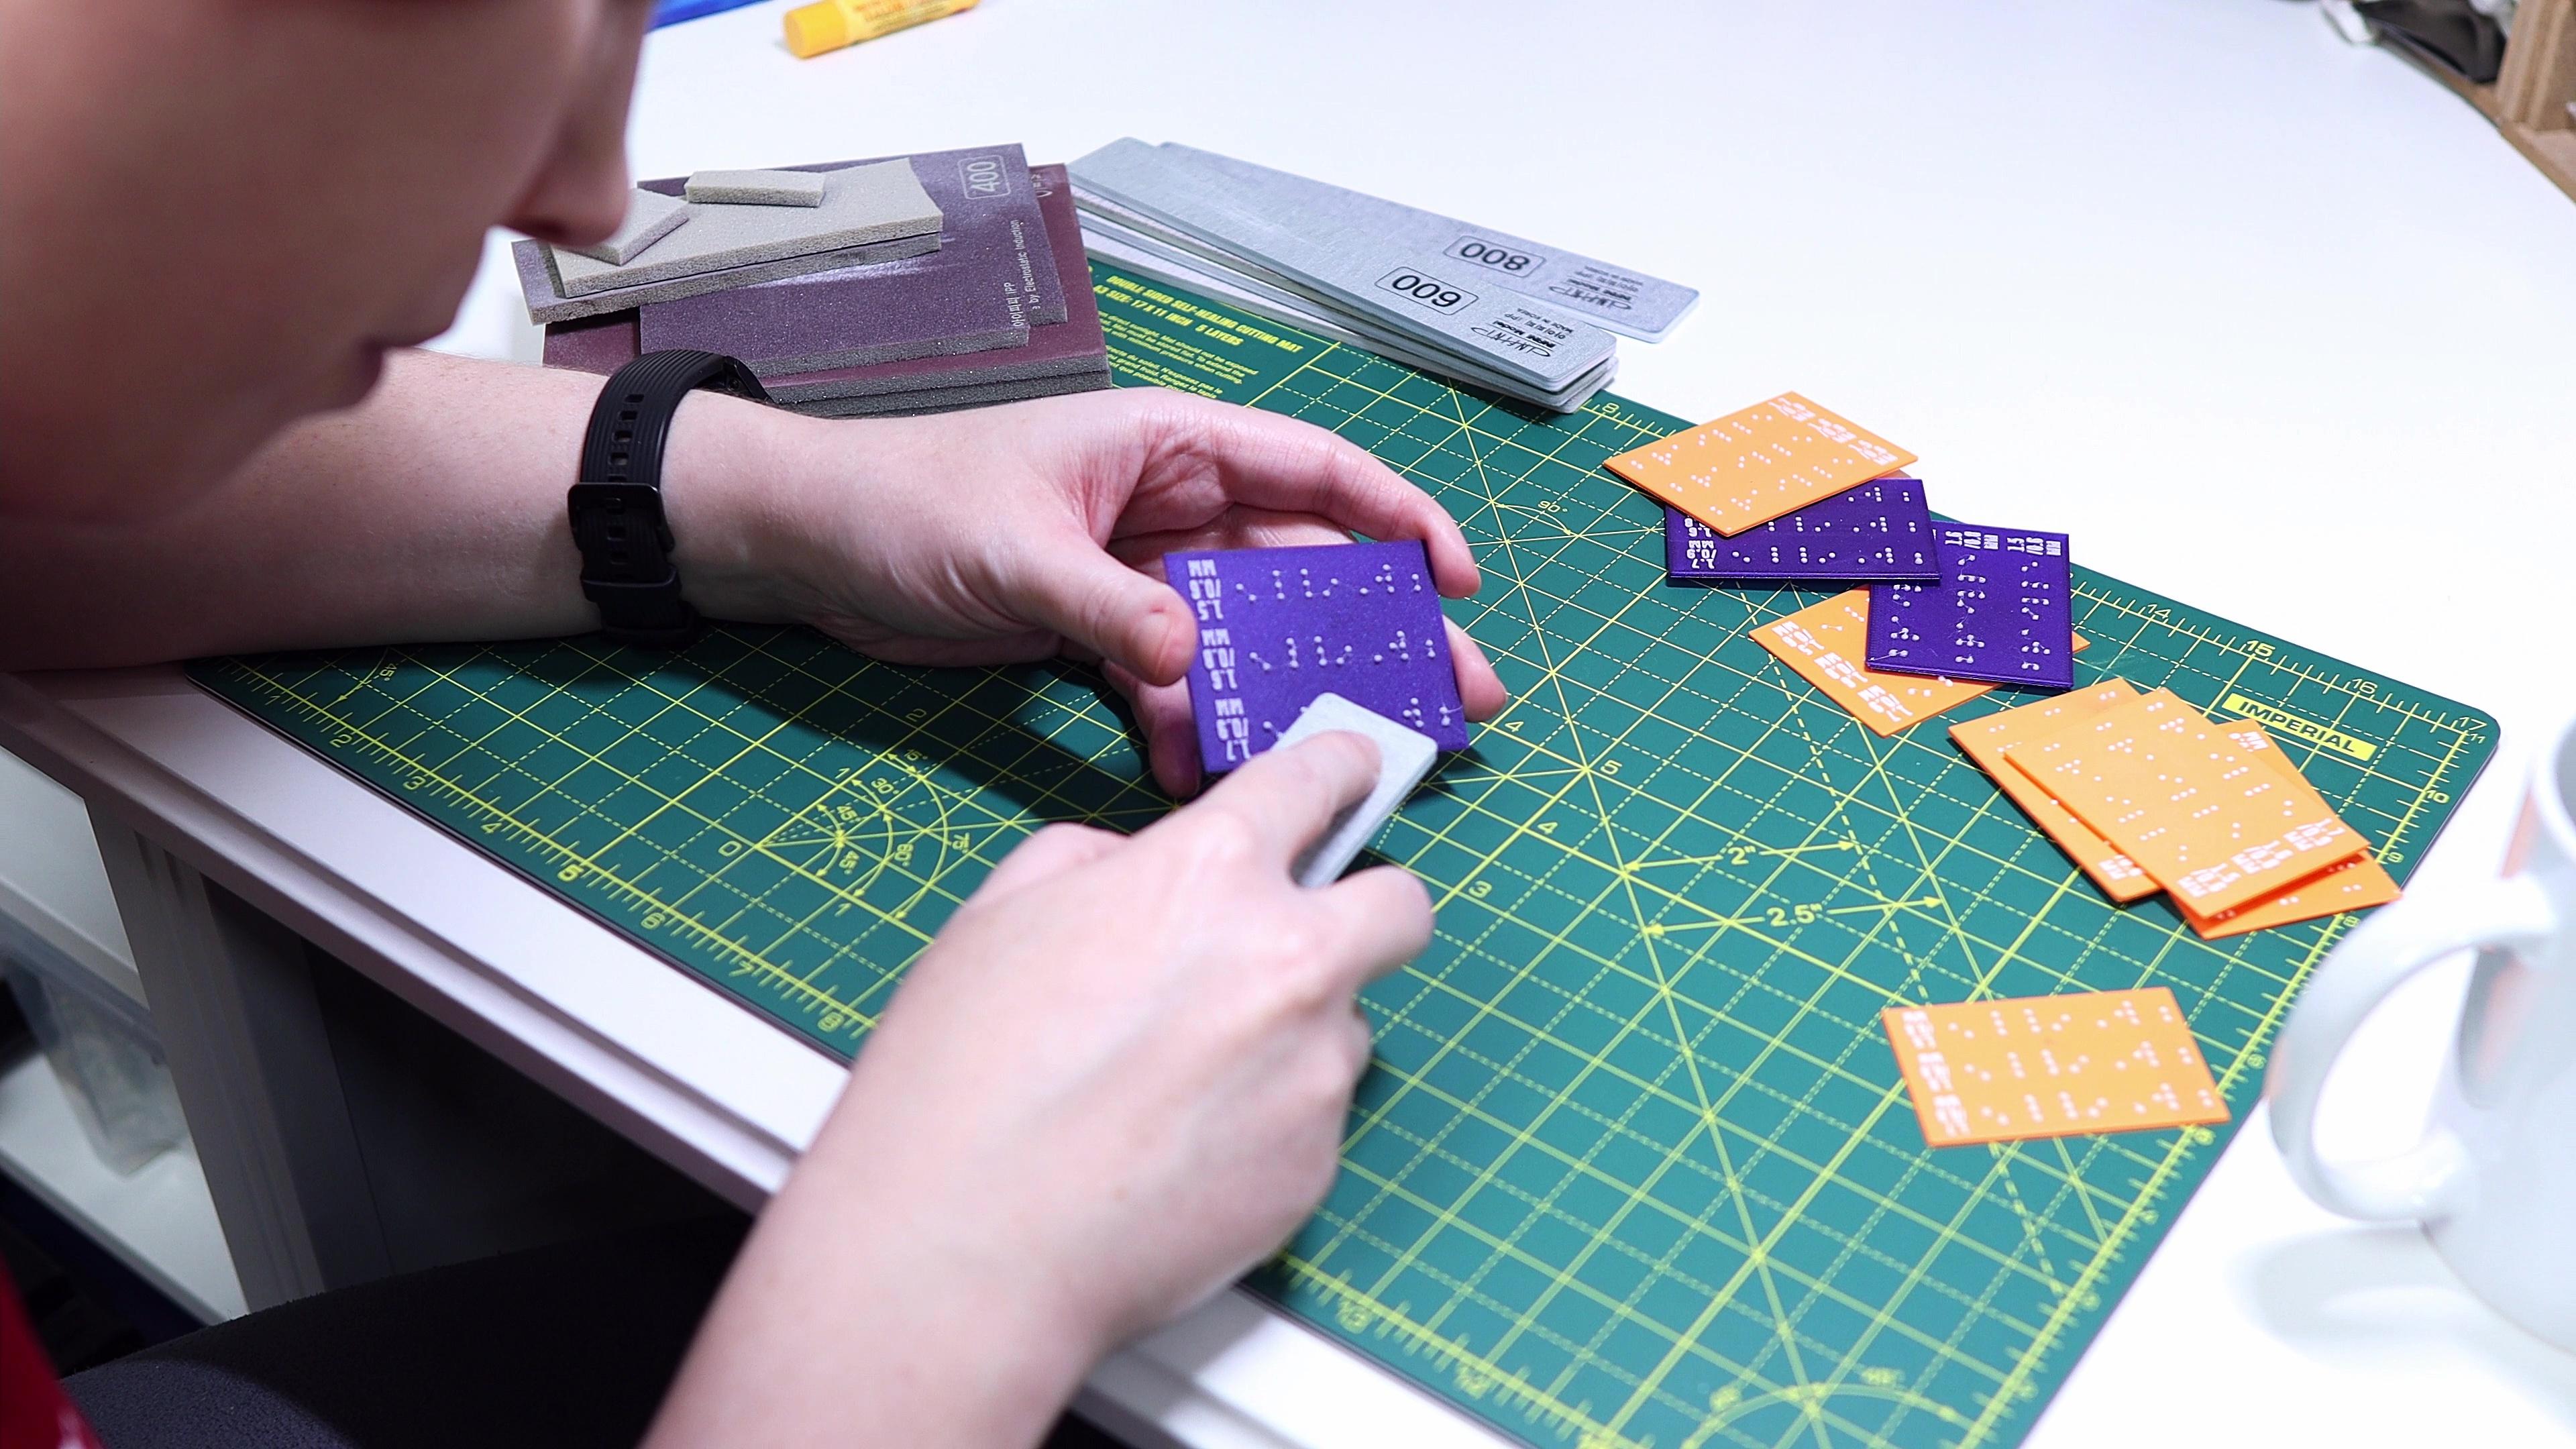
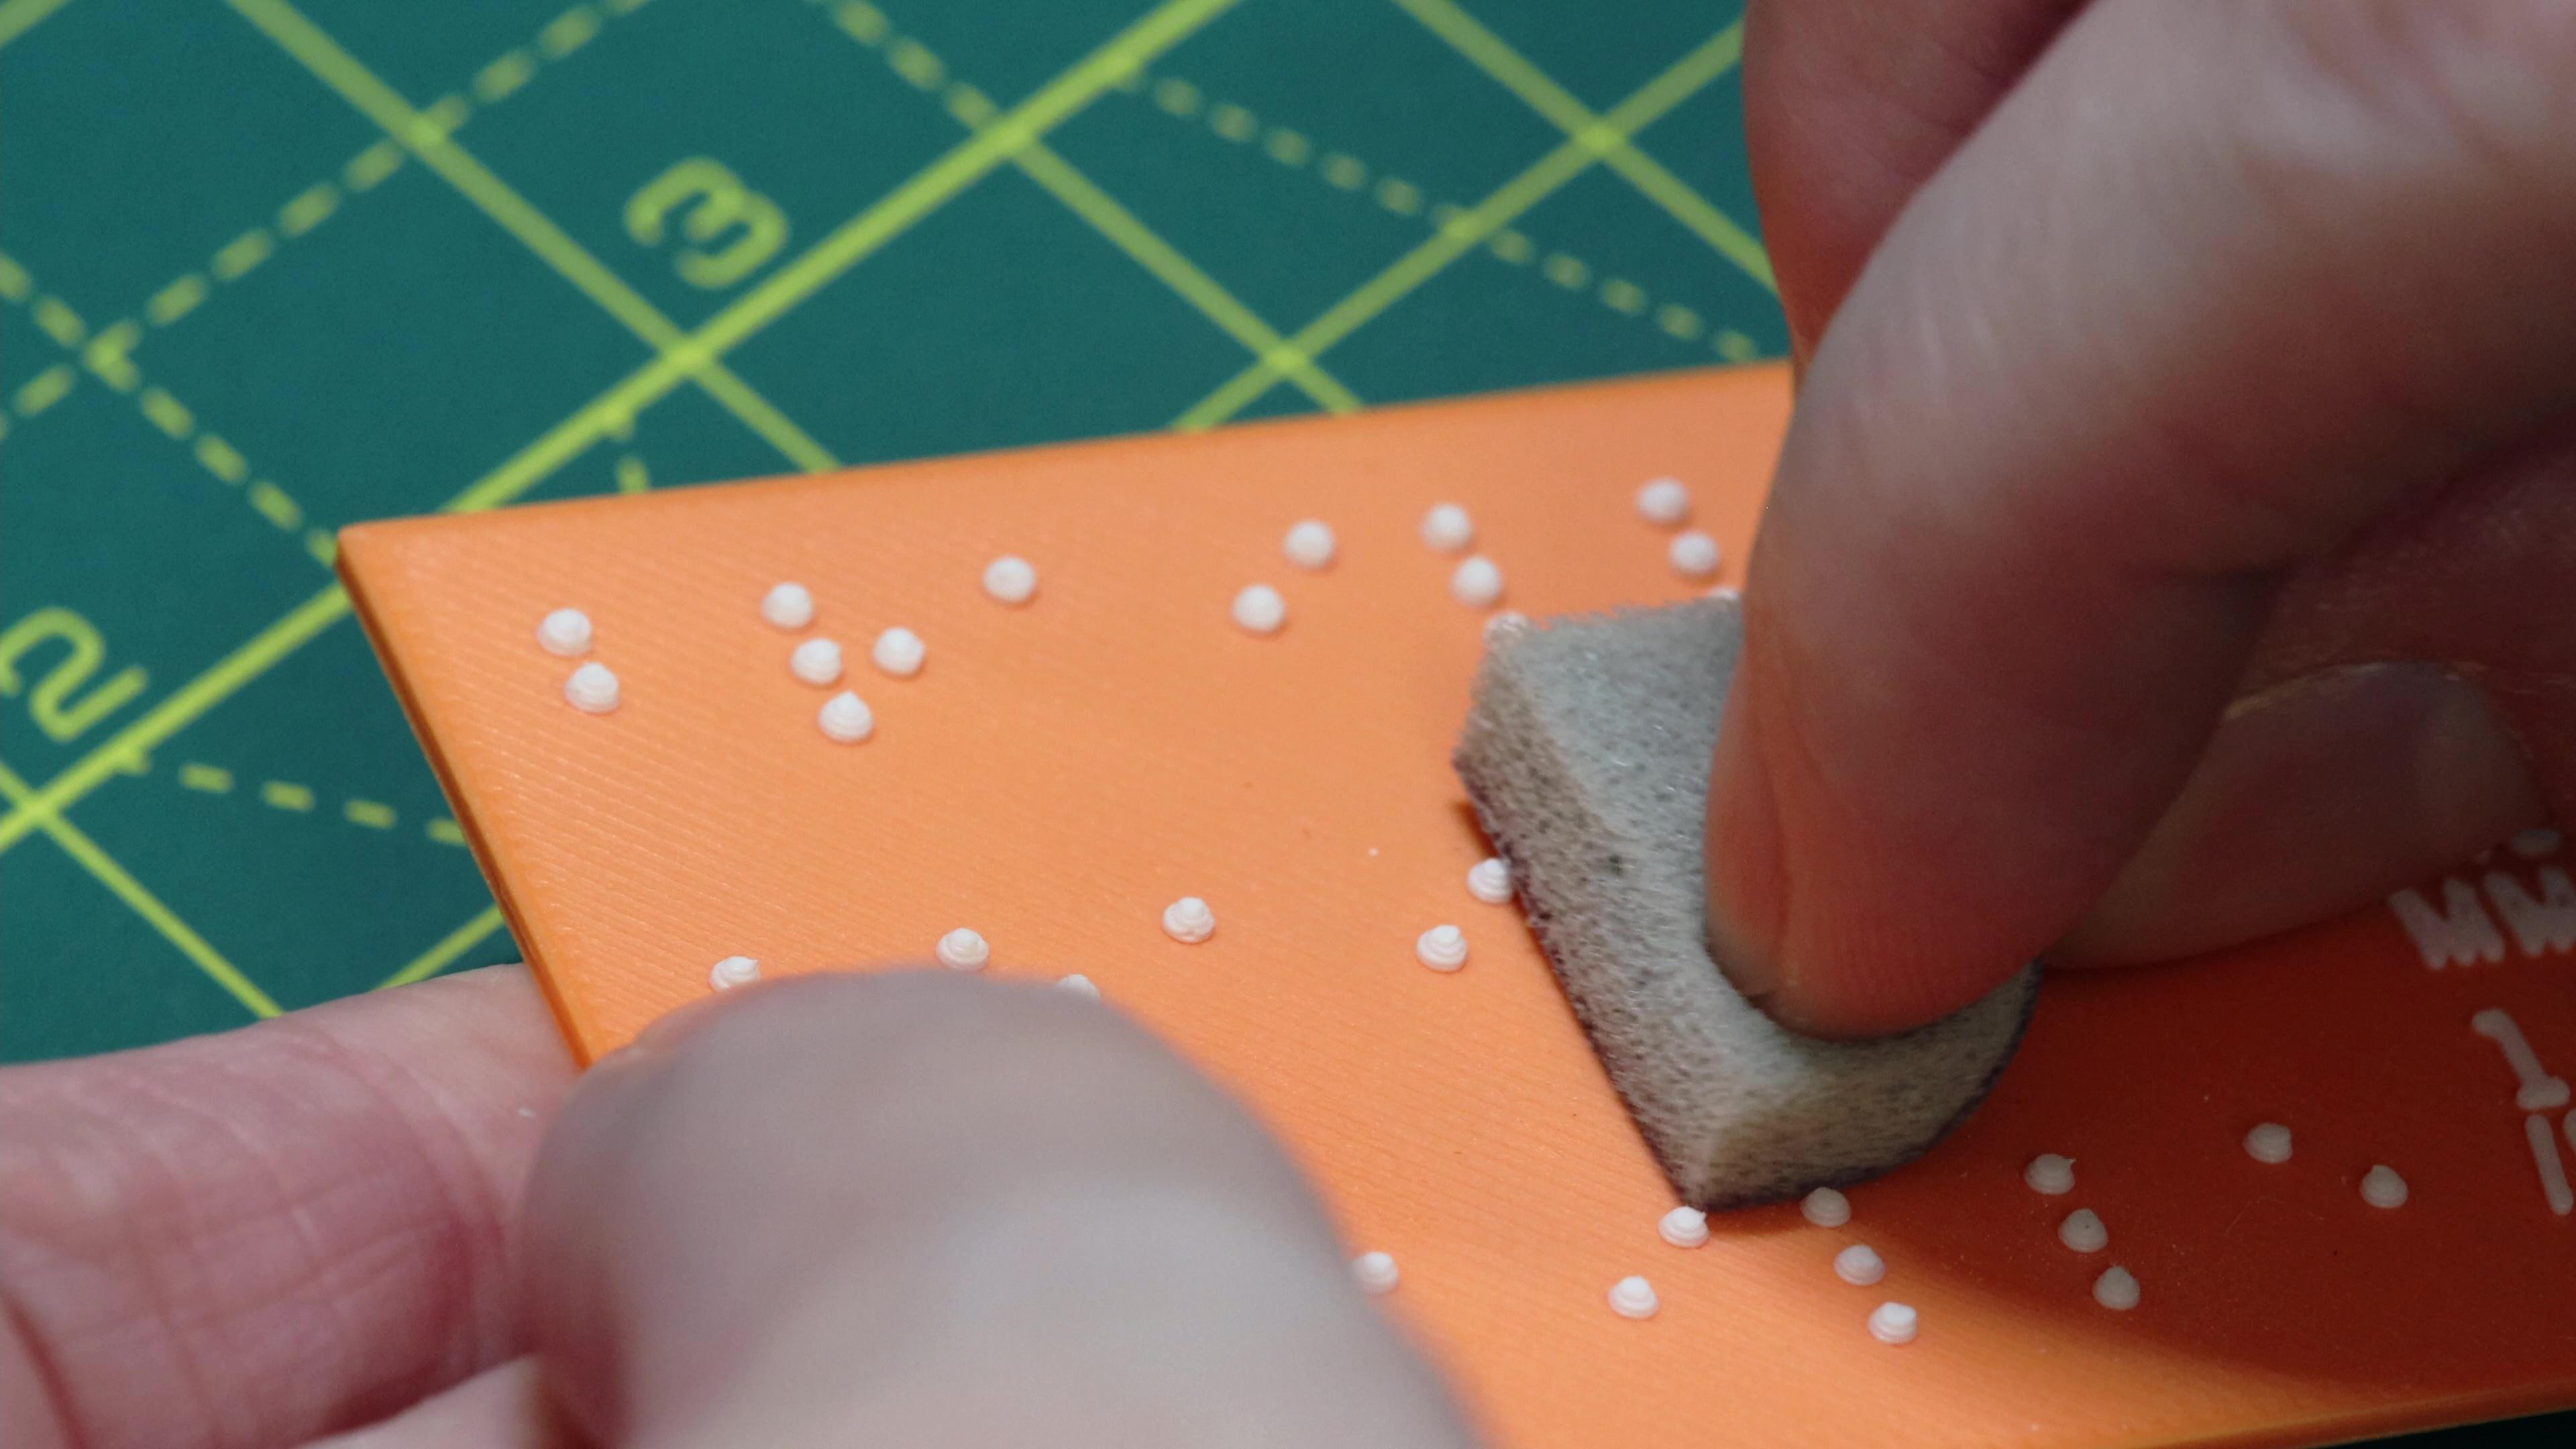
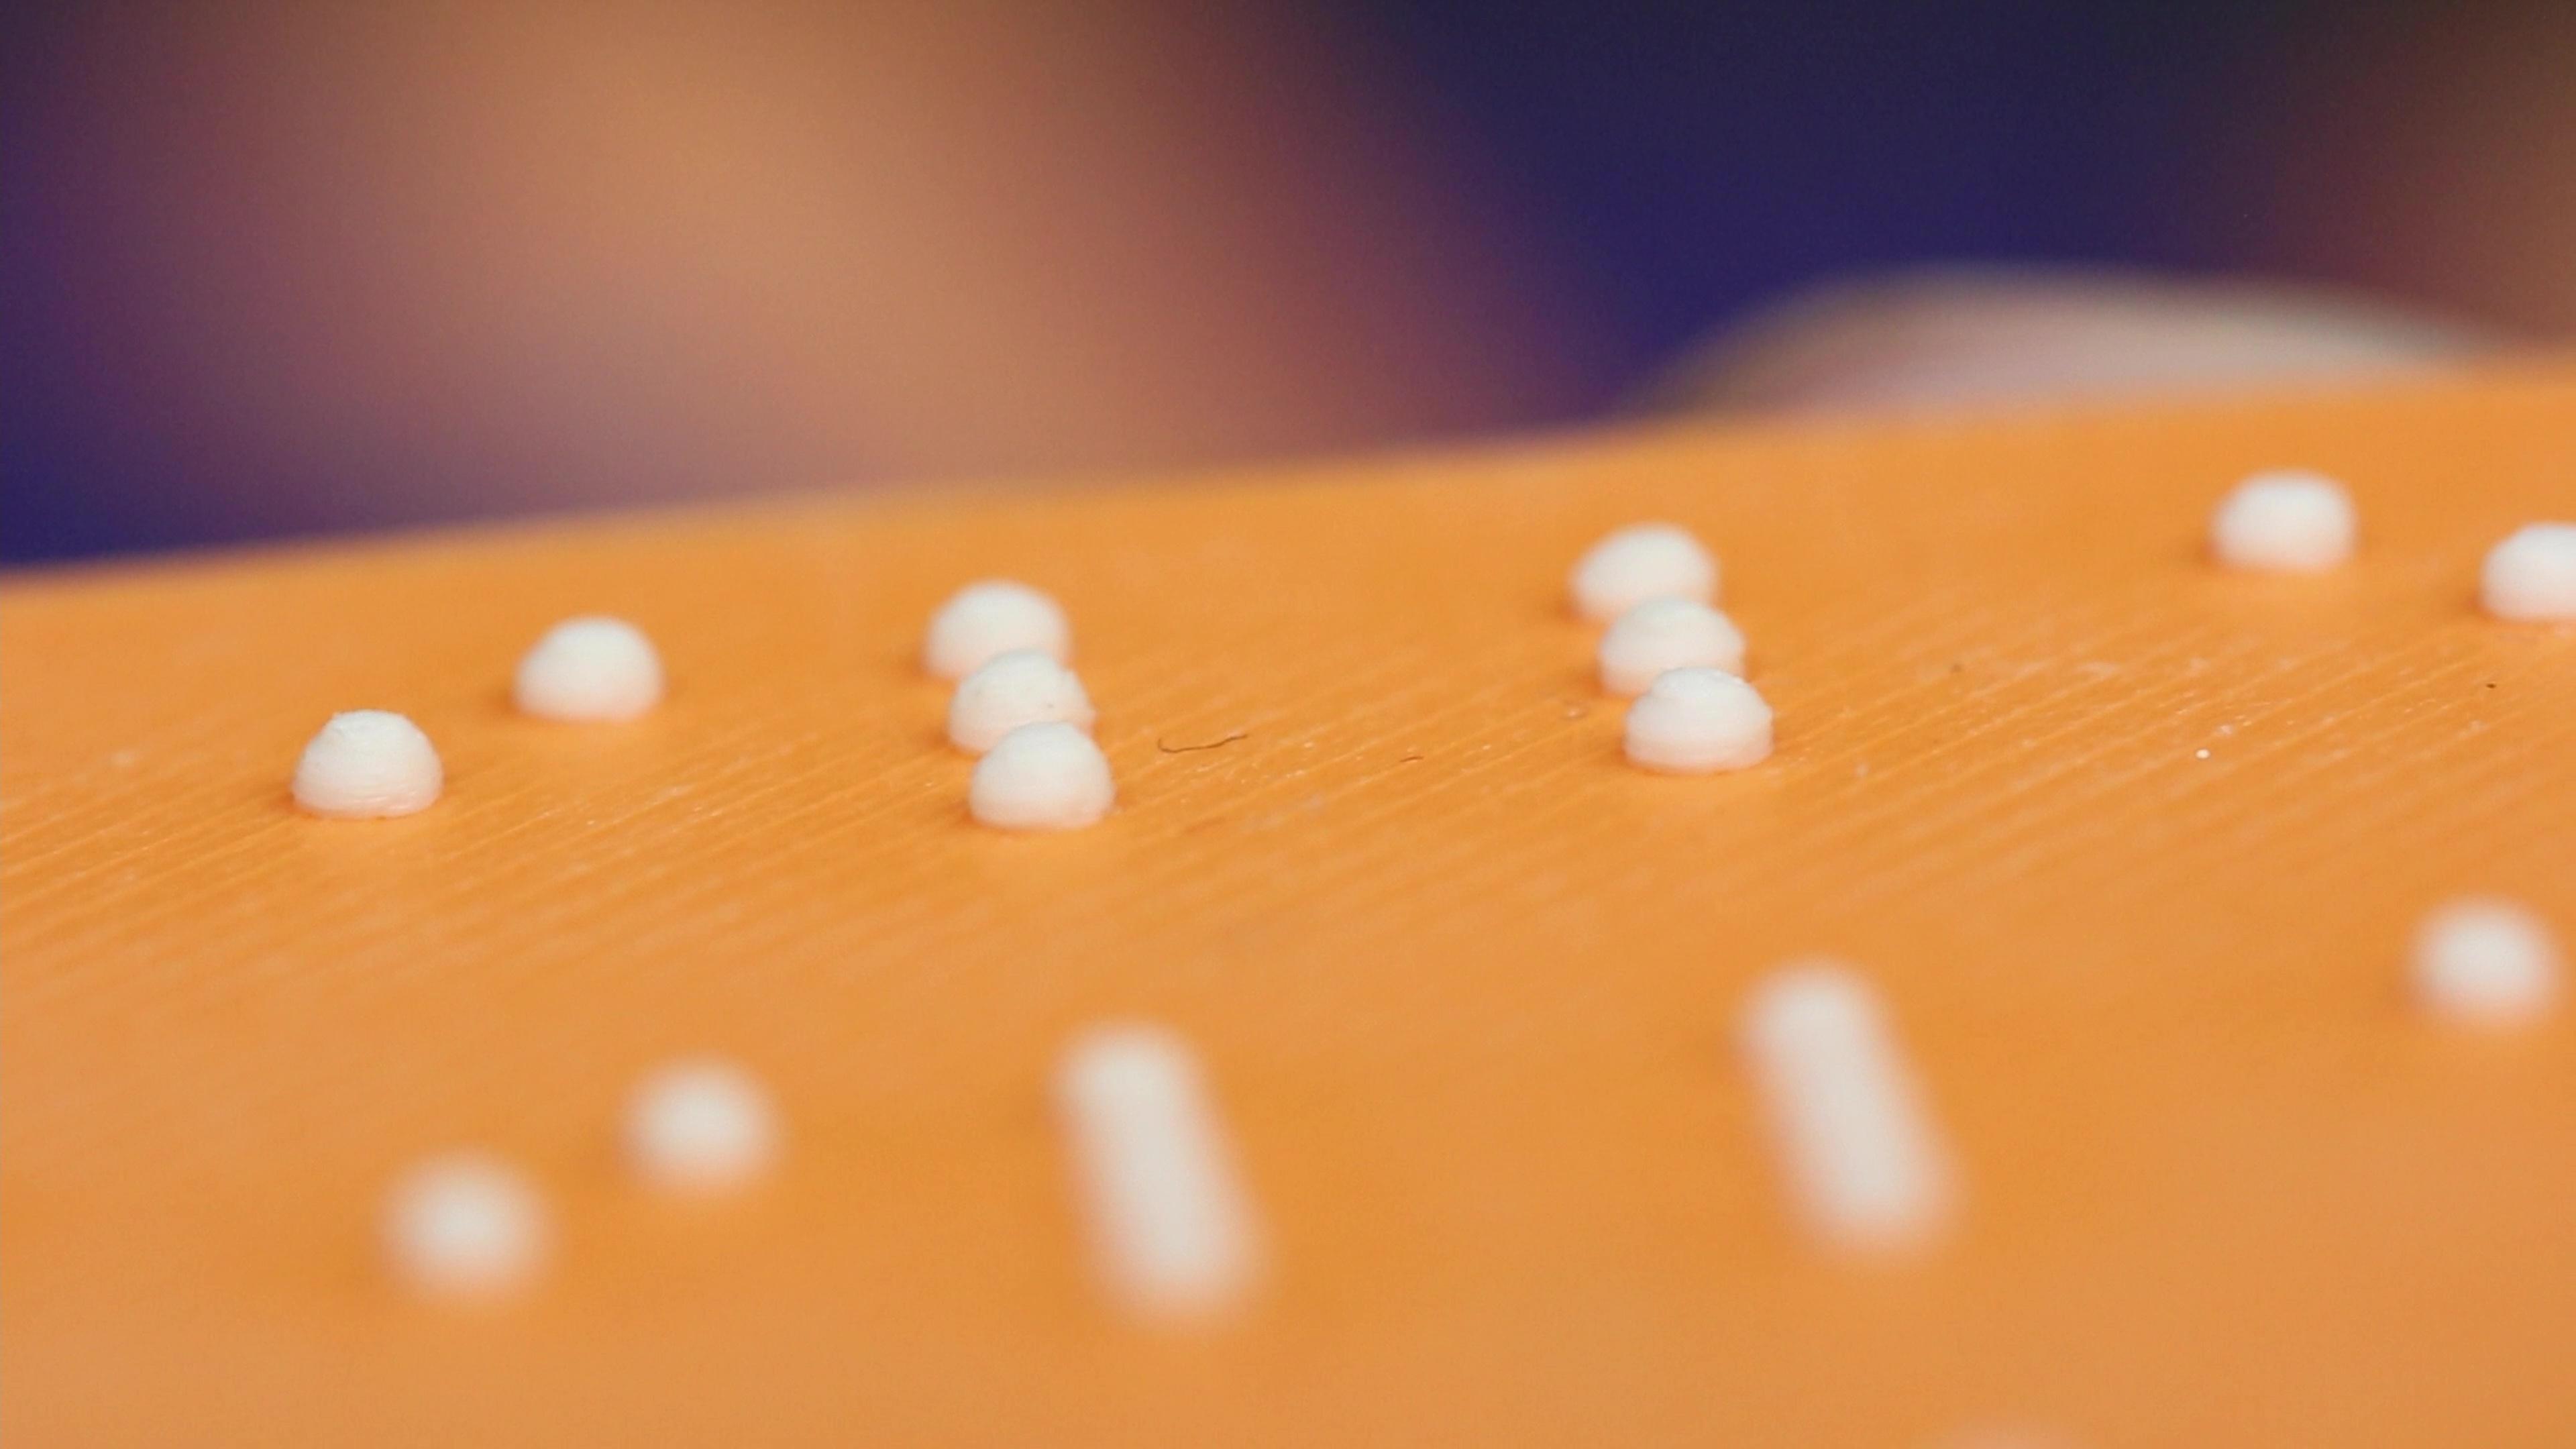
Once you've got your ideal braille size and printer settings, you'll likely still need to do some post processing to the print. You can use any kind of fine grit sandpaper for this, though I recommend soft sponge sandpaper for the fine detail work.
If you have any larger lumps and bumps you can't take care of with clippers, gently smooth those away with your 400 grit sandpaper. This may sound very fine but trust me when I say you don't really want to go much rougher than this; the braille dots are VERY tiny and very easy to sand away if you aren't careful! I found 400 sufficient for the big bumps.
To smooth out the layer lines and any remaining roughness on the dots, VERY GENTLY sand the tops with 800 or 1000 grit sandpaper. This does not require very much pressure at all, so work slowly and carefully until you have a finish that feels good. Practice might be required to figure out just how much pressure to use.
You'll know you're done when the braille feels smooth and well defined to the finger tips. You don't need to be able to read braille to be able to tell that it is readable!
Final Tips
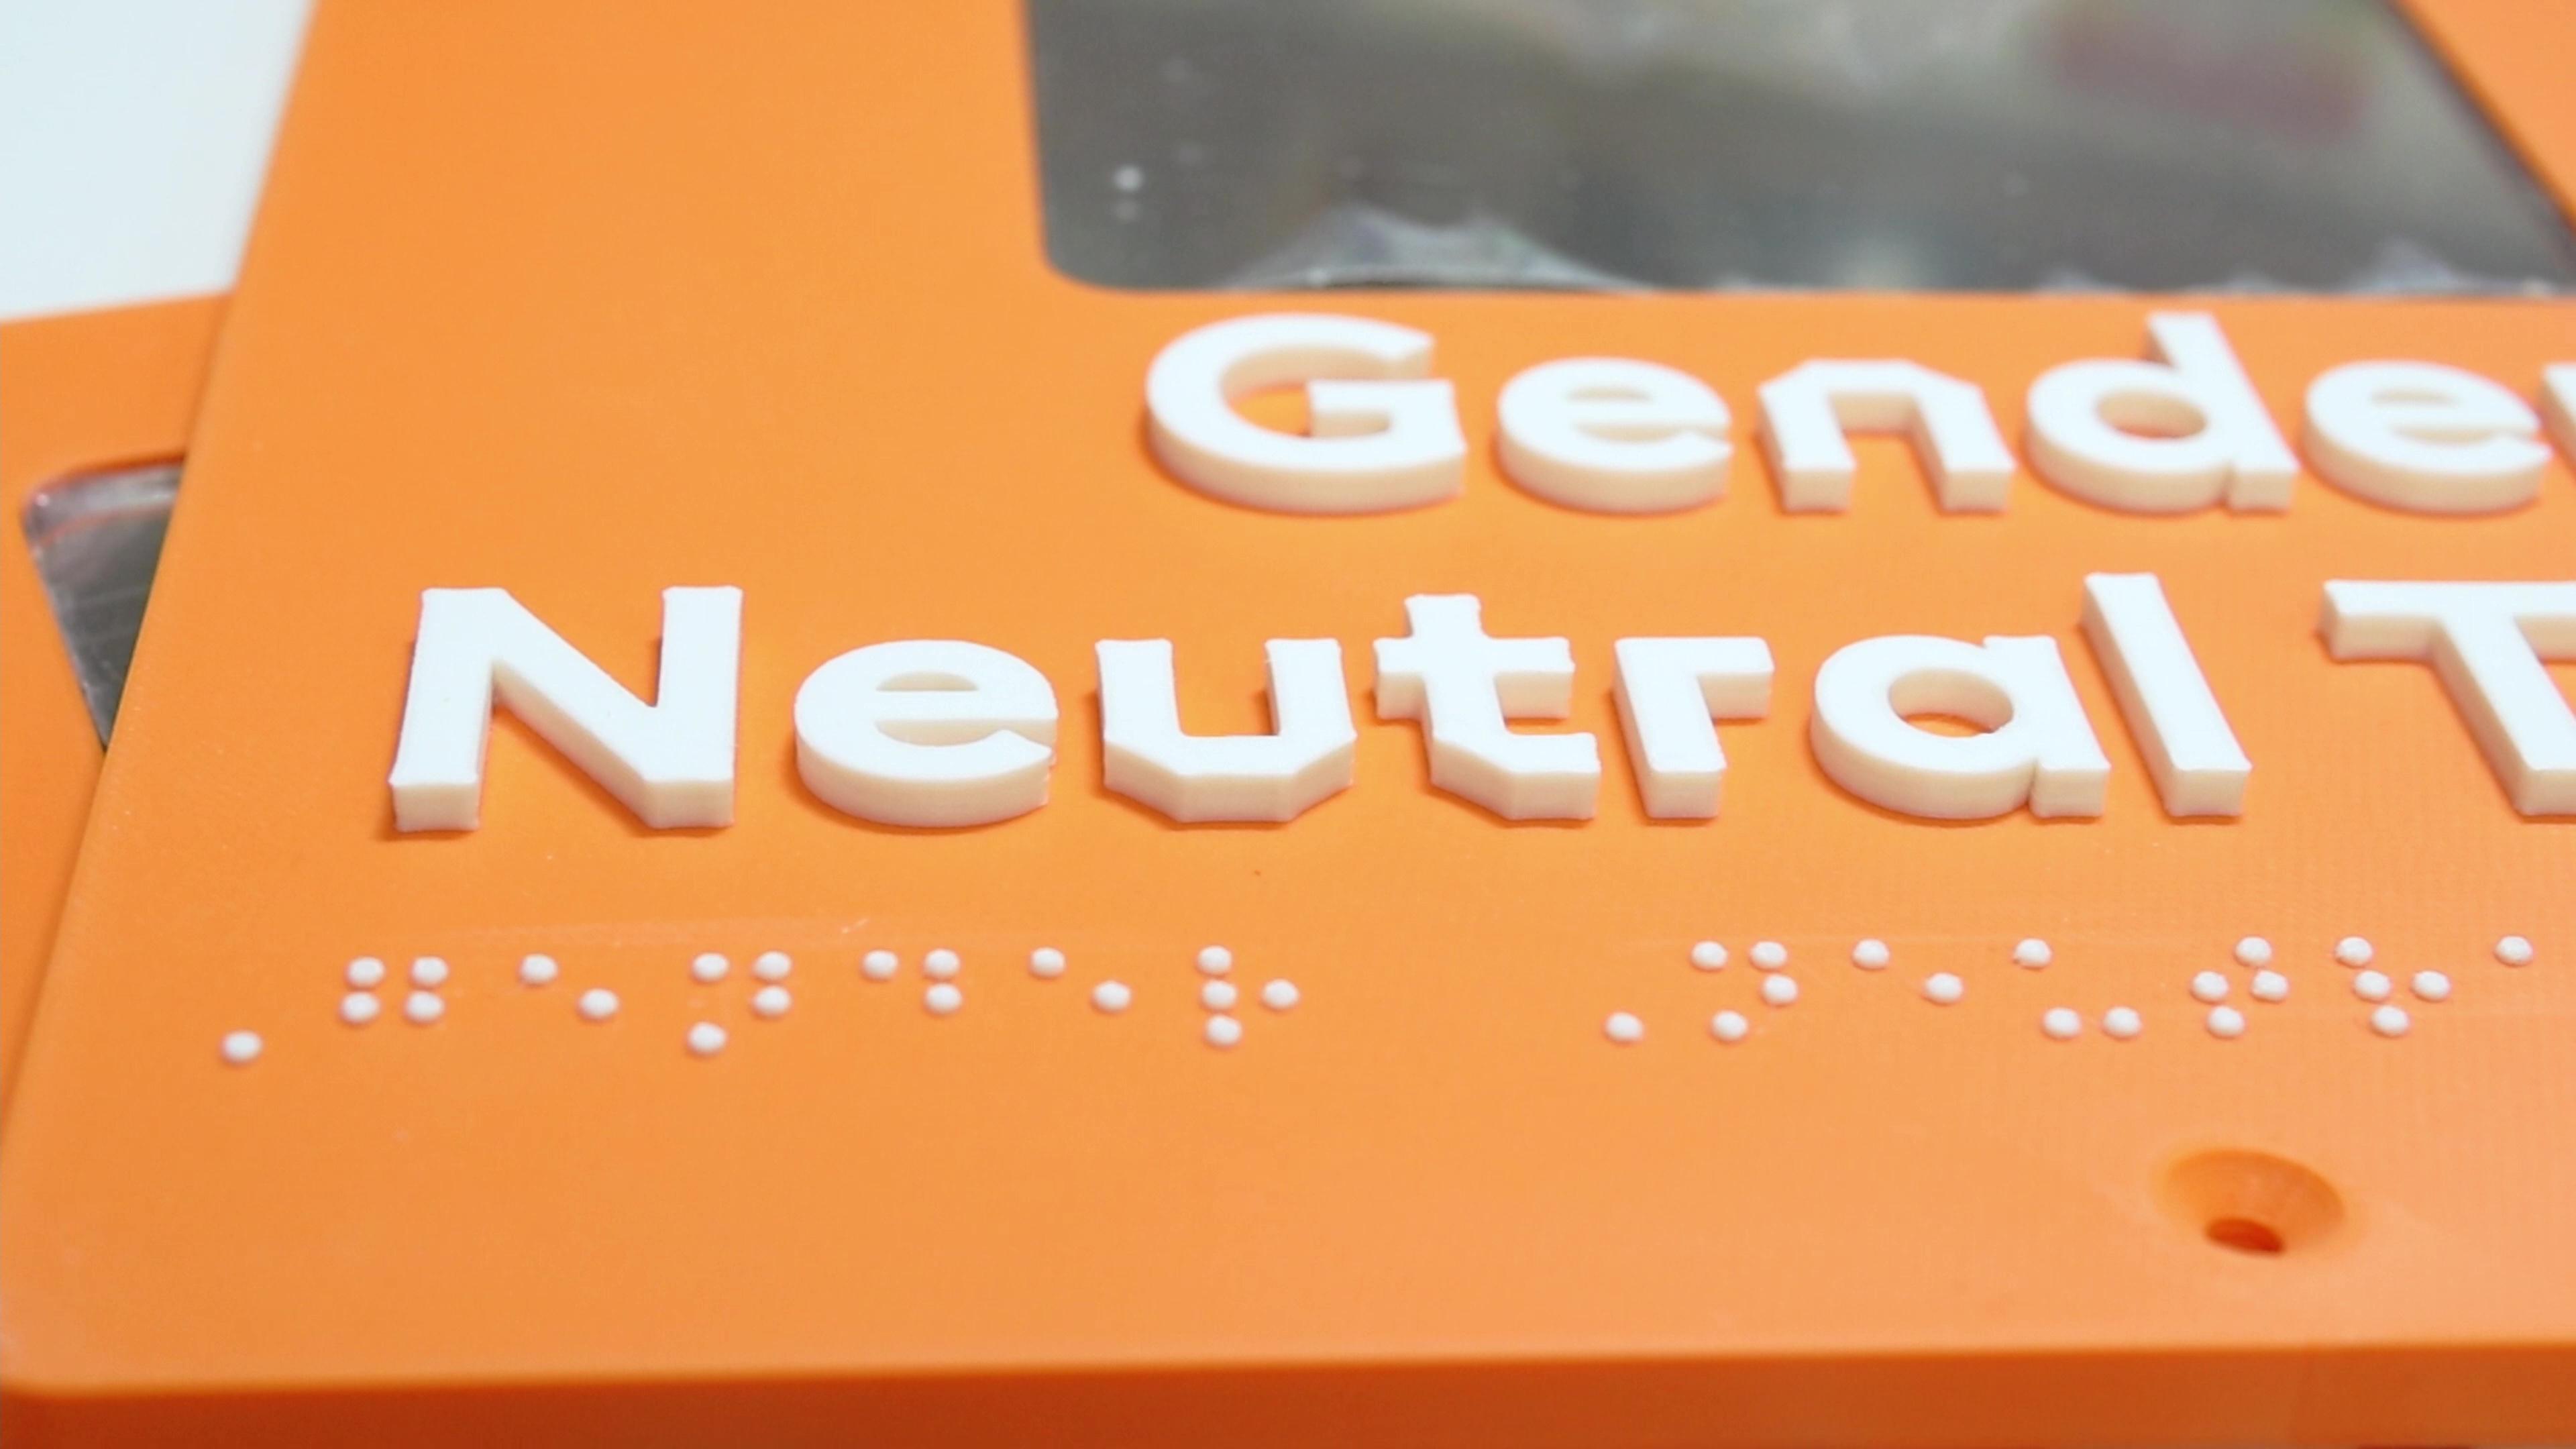
- If you can, use a matte filament for your sign, as not only are shiny filaments harder to read for sighted folk, but it'll get scratched up when you're smoothing off the braille!
- Consider making your text raised as well! Lots of low sighted people can touch read words as well as braille, and it looks so much cooler with the colour change!
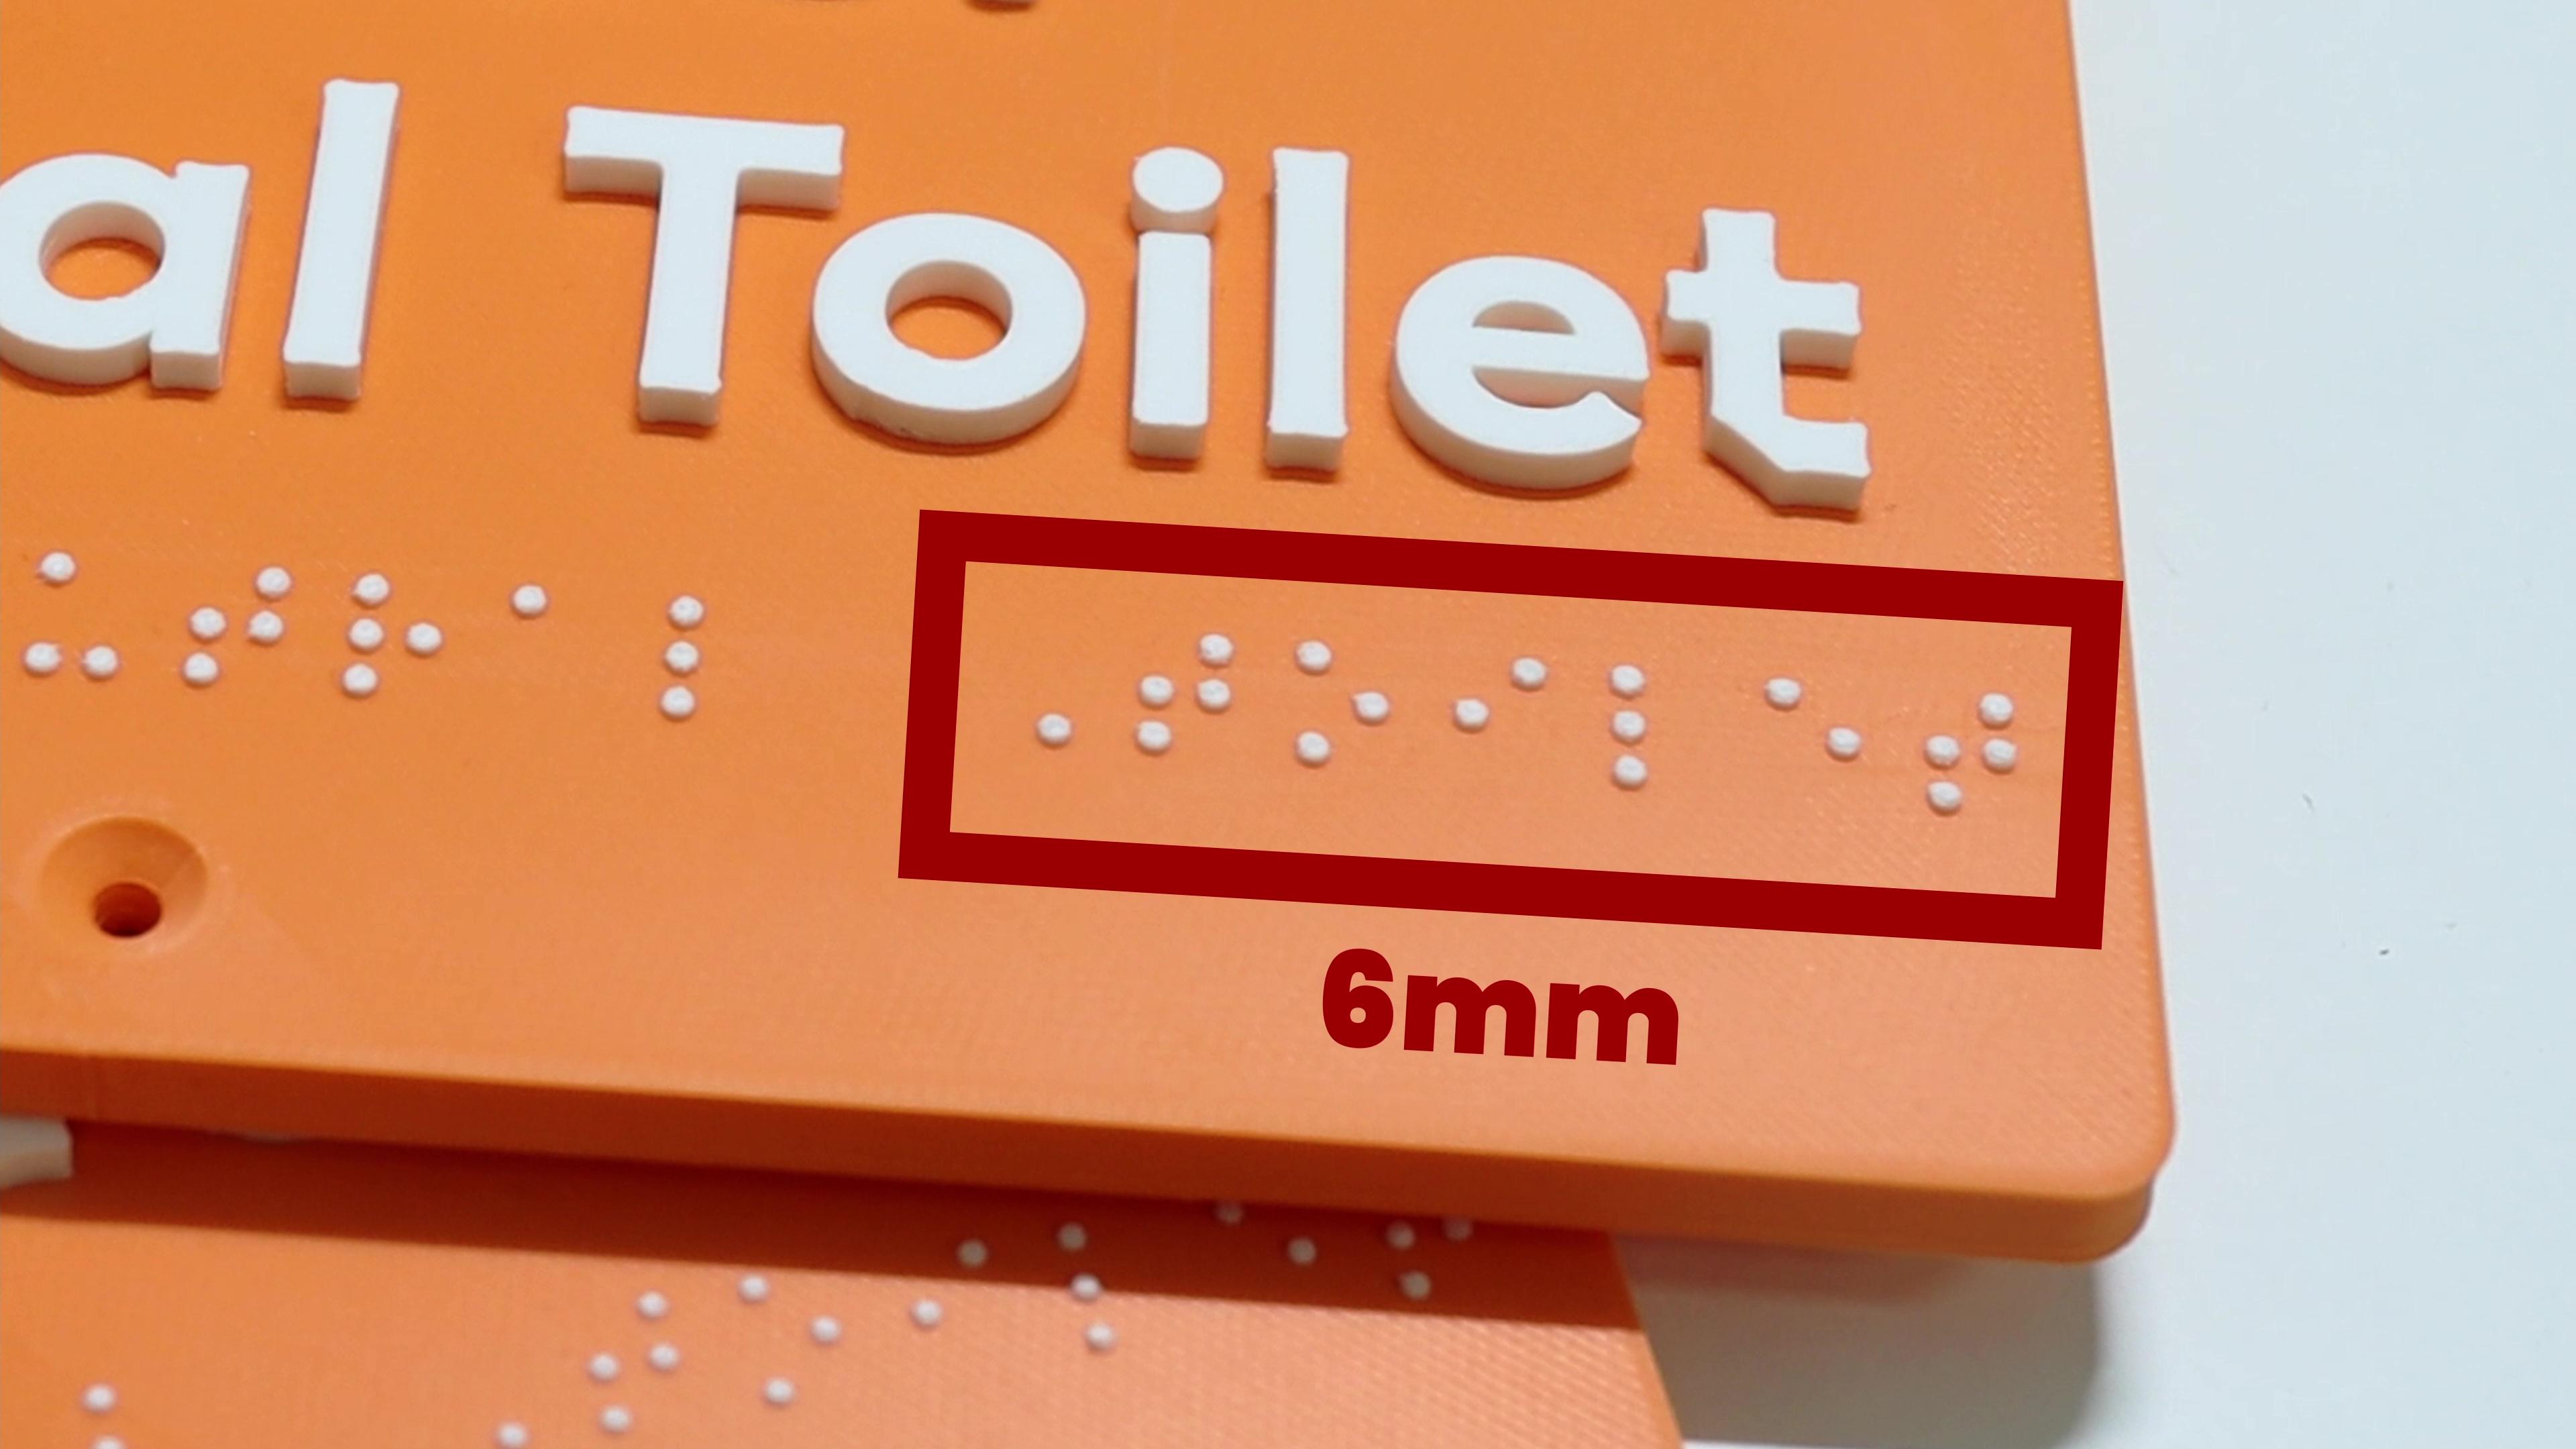
- Make sure to keep enough space between words and braille in your design! A good rule of thumb is to keep an exclusion zone of at least 6mm around all braille.
- Most importantly, don't stress too much about the exact preciseness of everything! Unless you are hanging a sign in a public building where meeting these regulations is absolutely a requirement, it will be okay if things are a little imperfect. Getting close enough is always better than not doing it at all.
And that's it! You should now be able to add braille to any 3D printed project you can dream of. I hope you found this tutorial helpful and have much success making the world a more accessible place!