Exposure Bracketing for Spectacular Panoramas
by andrea biffi in Circuits > Cameras
45861 Views, 180 Favorites, 0 Comments
Exposure Bracketing for Spectacular Panoramas
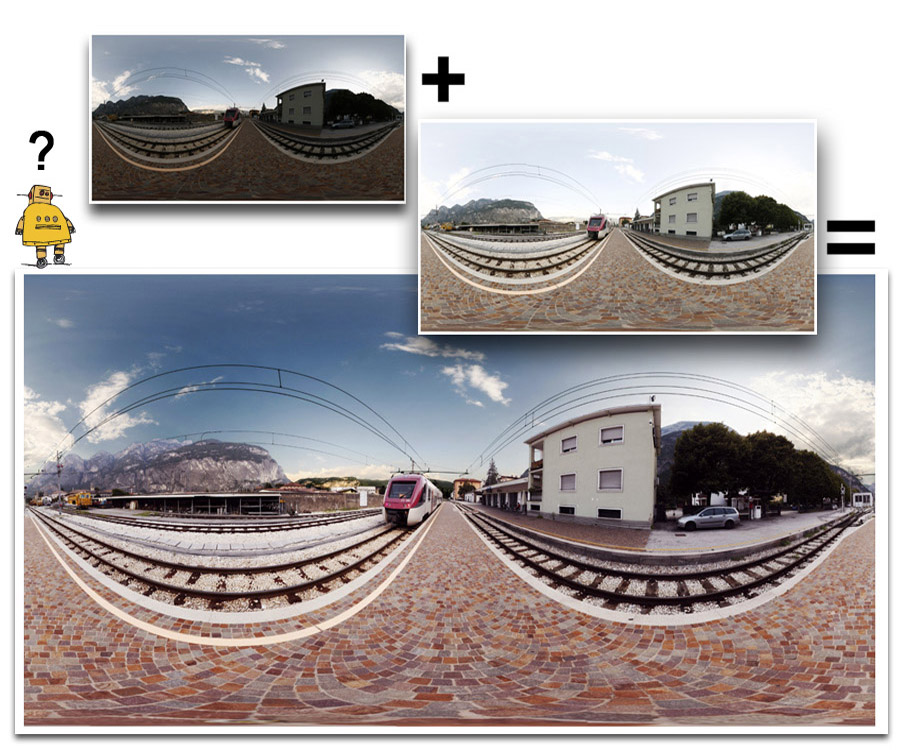
After thousands of panoramas taken in all these years coming from the old manual Exacta film camera, then the Canon A-1, passing throught the full automatic EOS1, arriving to digital stuff and still improving myself, I think I came at a moment at which it should be a great satisfaction to share my tecnique and my knowhow.
So let's begin, in this instructable I'll show you a powerful way to improve your panorama style (..all right, your style could be already better than mine... let's say it's for anybody loves my panoramas!).
[UPDATE: for a full hand-book about making 360° pictures see here: the-Ultimate-Guide-for-easy-awesome-VR-panoramas]
Bracketing?!
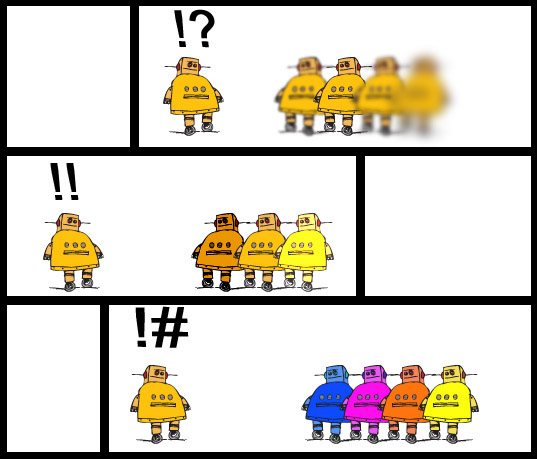
The bracketing tecnique consists in simple worlds to take, of the same subject, a series of shots equal in everything but a single parameter. This parameter is usually exposure, and in this case we name it "exposure bracketing", but a lot of bracketing types exist.
Exposure bracketing is essential in photography to save a wide range of details, each one in different light conditions, at least until someone will invent a sensor with a very wide dynamic range... but that's another story.
Exposure bracketing is essential in photography to save a wide range of details, each one in different light conditions, at least until someone will invent a sensor with a very wide dynamic range... but that's another story.
Shot the Serie
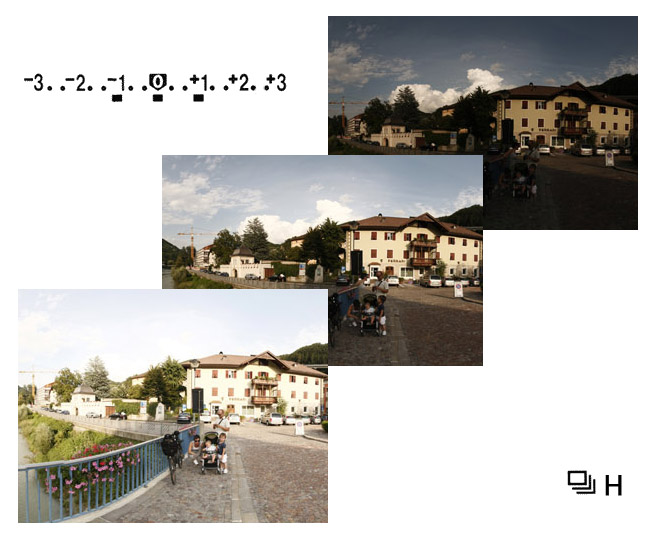
Modern cameras will automatically shot a bracketing serie, usually three photos, and you can choose the gap between them. I suggest 2/3 stop, or 1 stop if you think there is a large luminosity difference between shadows and highlights.
With the bracketing function the three photos will be taken in a very fast interval, so in my opinion you can take them hand-held (obviously only in daylight), but you'll need in that case to align them in post processing. If you use a tripod your work will be faster and more precise. For best result set the continuous drive mode H (the faster you have) and the bracketing function, turn on the lens stabilization (if you've it and if you shot hand-held, if you use a tripod set the 2 sec delay), and take your shots. Use RAW for best quality.
With the bracketing function the three photos will be taken in a very fast interval, so in my opinion you can take them hand-held (obviously only in daylight), but you'll need in that case to align them in post processing. If you use a tripod your work will be faster and more precise. For best result set the continuous drive mode H (the faster you have) and the bracketing function, turn on the lens stabilization (if you've it and if you shot hand-held, if you use a tripod set the 2 sec delay), and take your shots. Use RAW for best quality.
Exposure Parameters
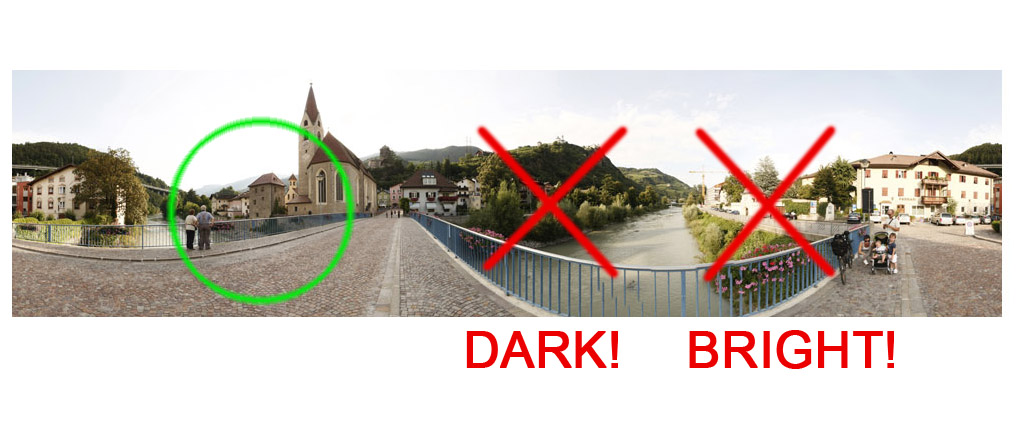
If you have to merge your pictures together to create a wide (maybe 360°) panorama, as I mostly do, it's better you keep the same exposure parameters for all the sets of photos. This means that the starting aperture-shutter time couple has to be set in manual mode. Then the camera will provide to change it for the lighter and the darker images.
To decide the best couple of parameters you can let the camera decide in P mode, or set manually them to center the exposure meter. Pay attention to misure those parameters in a direction which is about corresponding to the medium luminosity of the full scene.
To decide the best couple of parameters you can let the camera decide in P mode, or set manually them to center the exposure meter. Pay attention to misure those parameters in a direction which is about corresponding to the medium luminosity of the full scene.
Group Images
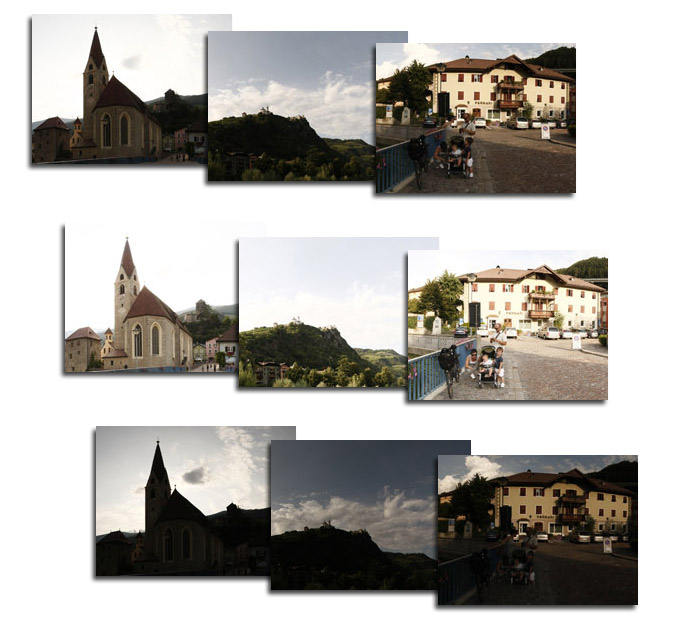
Now you've three sets of pictures, you can group them in Lightroom or CameraRAW so that photos with the same exposure are together.
You need to process your raw file to keep out the best details quality you can, and this has to be done for each group. The underexposed photos will be necessary to show details of the lighter area of the scene (usually the sky and the clouds), and overexposed pictures will be for the shadows and dark areas, so focus on those zones to check each group quality.
You need to process your raw file to keep out the best details quality you can, and this has to be done for each group. The underexposed photos will be necessary to show details of the lighter area of the scene (usually the sky and the clouds), and overexposed pictures will be for the shadows and dark areas, so focus on those zones to check each group quality.
Improve Details
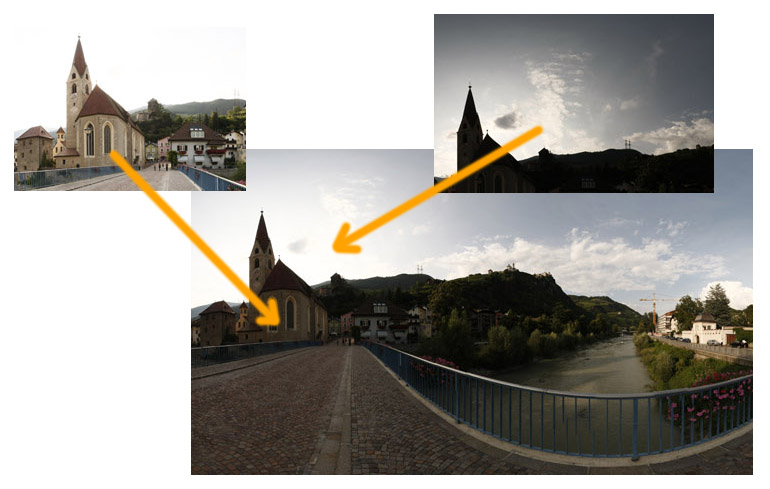
I leave the processing in Lightroom or CameraRAW to your style, and maybe someone much qualified could explain that in detail, but keep in mind that photography is much more art than tecnique, so I incite you to make a lot of trials to reach the style you like, not the style someone says it's the only good.
Only a few recommendations:
The corresponding pictures of the three sets will be merged together, so try to use same style for the three groups (you can syncronize all of them) and vary only a little the exposure, the contrast, the black level, and other parameters due to reveal details of the image, but keep e.g. the same white balance. You can also darker the blue channel to make the clouds more visible, and vary the levels to make same clouds much detailed.
Align the Frames
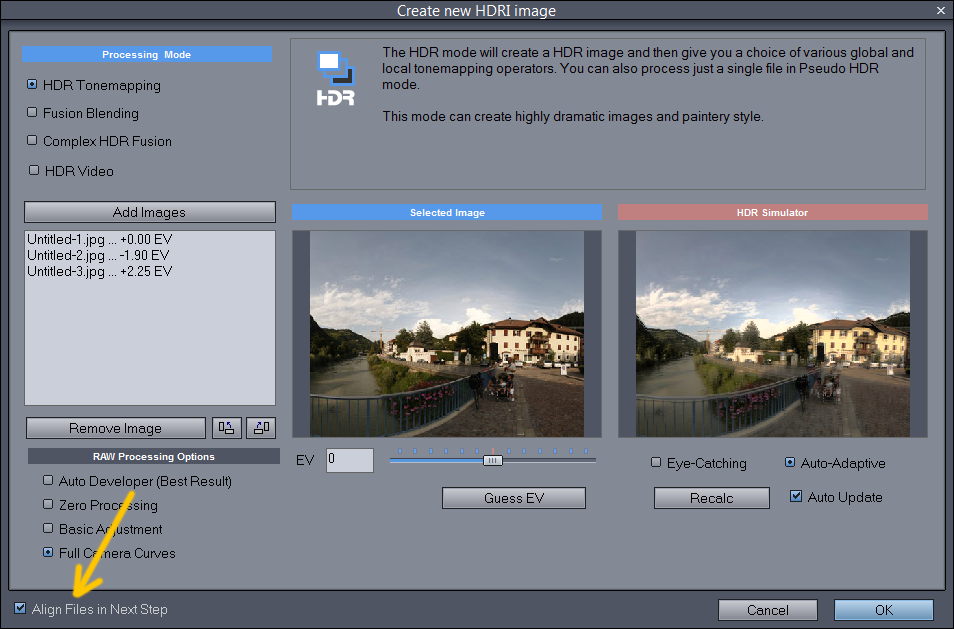
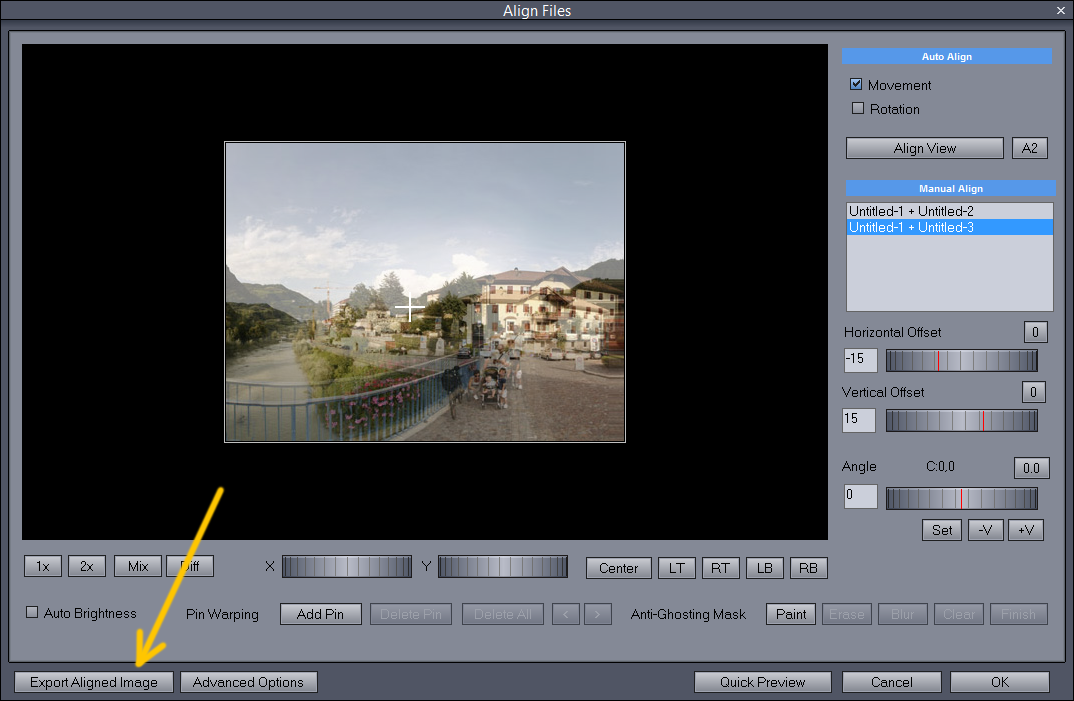
If you've shoot pictures hand-held so you'll certainly need to align them. To do that you can use Photoshop or also an HDR software as DinamicPhotoHDR.
With Photoshop load your three images as layers, go to: Edit > Auto-Align Layers > Auto, and save them with the new orientation.
if you notice that a little irregular frame has appeared, you also have to crop them a bit, use the same crop dimensions for all the pictures.
With DynamicPhoto you can use the auto-aligning feature or manually do it, then check the "export aligned images" box it will save the selected picture, do it for both (you don't need to modify the middle one). Using this program maybe you would put back all the three sets in same folder, because it's faster load them into the program.
Set Up the Cheat
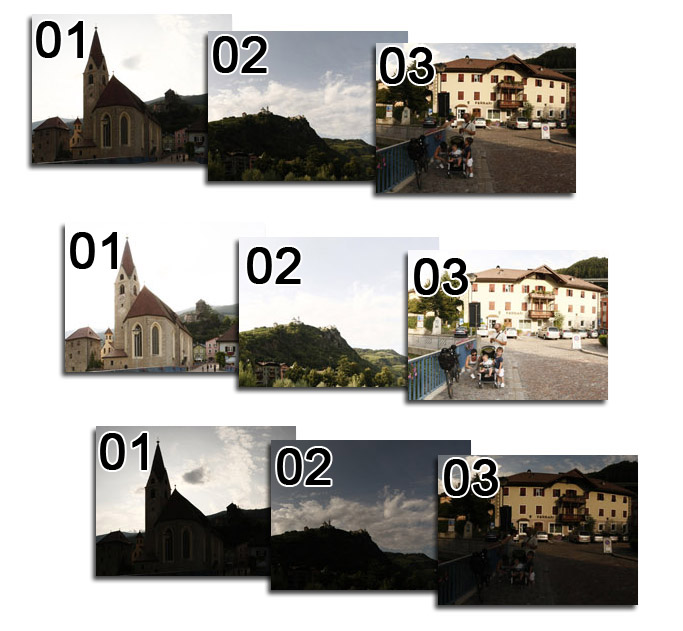
Regroup the pictures with exposure again, and rename all the picture of any folder, so that you'll have three folders containing the same list of pictures (e.g. all with numbers 01,02,03,04,etc.). You'll need this after, to keep the same panorama parameters for all the three renders.
You're now ready to create your panorama from the first group with Hugin, Autopano, or other softwares. The method I use to perfectly align the three panoramas works with these two software, but you can try that with any other.
You're now ready to create your panorama from the first group with Hugin, Autopano, or other softwares. The method I use to perfectly align the three panoramas works with these two software, but you can try that with any other.
First Panorama
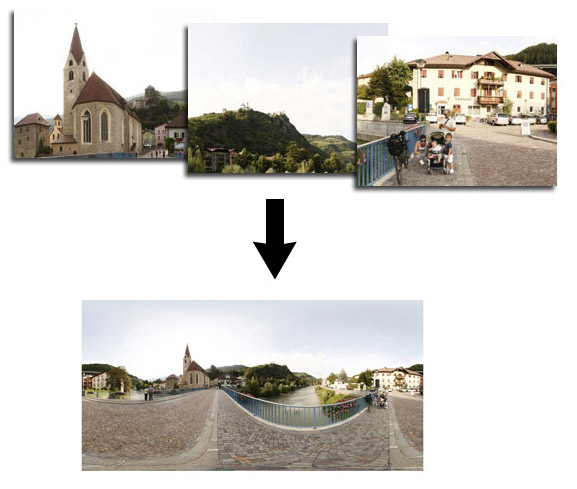
Choose the best exposed set, usually it's the lighter one, also because moving clouds have always been an obstacle to good stitching, and in overexposed pictures clouds are usually totally white, so you don't have to worry about them.
Make your panorama with your favorite tecnique. This is not a tutorial about stitching methods, anyway i can suggest you to use Autopano if you want to make it faster and simpler, or Hugin if you're meticulous and want to be more precise.
When you're satisfied with your panorama position (don't look light and colour for now), render it and save the project.
Let's Cheat the Machine
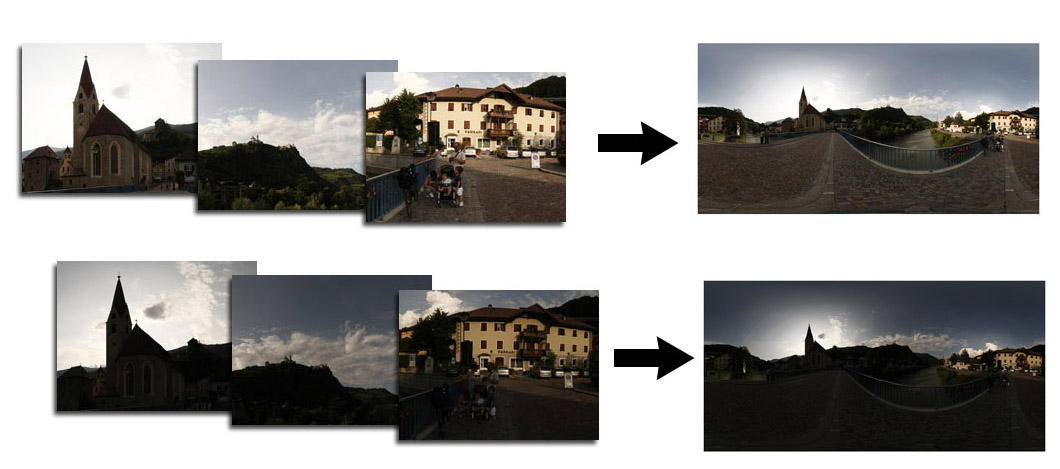
You now have the first image, but you still need the other two. if you only load the other photos into the stitching program it will certainly make a different panorama, and you'll never be able to blend it exactly with the others.
So, I fell back to a trick, cheating the program making it believe to elaborating again the first pictures, but substituting them with the new ones.
So, I fell back to a trick, cheating the program making it believe to elaborating again the first pictures, but substituting them with the new ones.
Perfectly Aligned
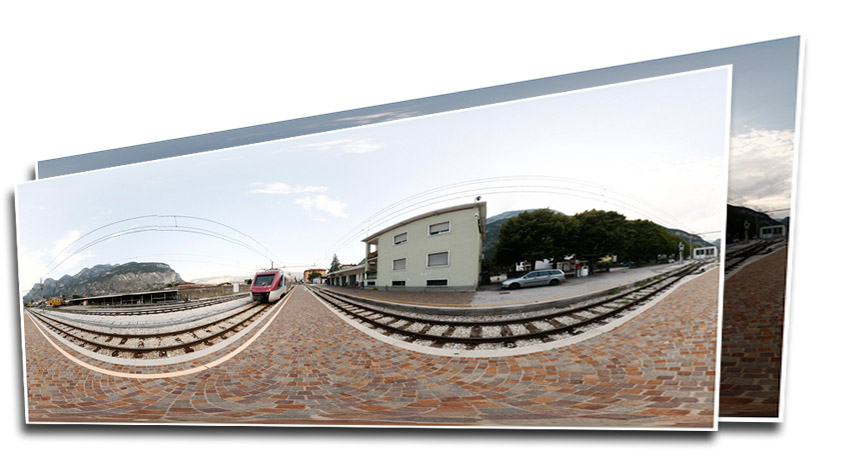
In practice you have to render the first group, then change the folder name of the second group giving it the previous group name, copy inside it the panorama file, open it and start the rendering. Make the same with the last group. This has usually worked for me, and I could render the normal and underexposed panoramas. Sometimes you don't need the three expositions, as with this panorama of the train under Dolomiti mountains, I only used the normal ad brighter one.
Masking
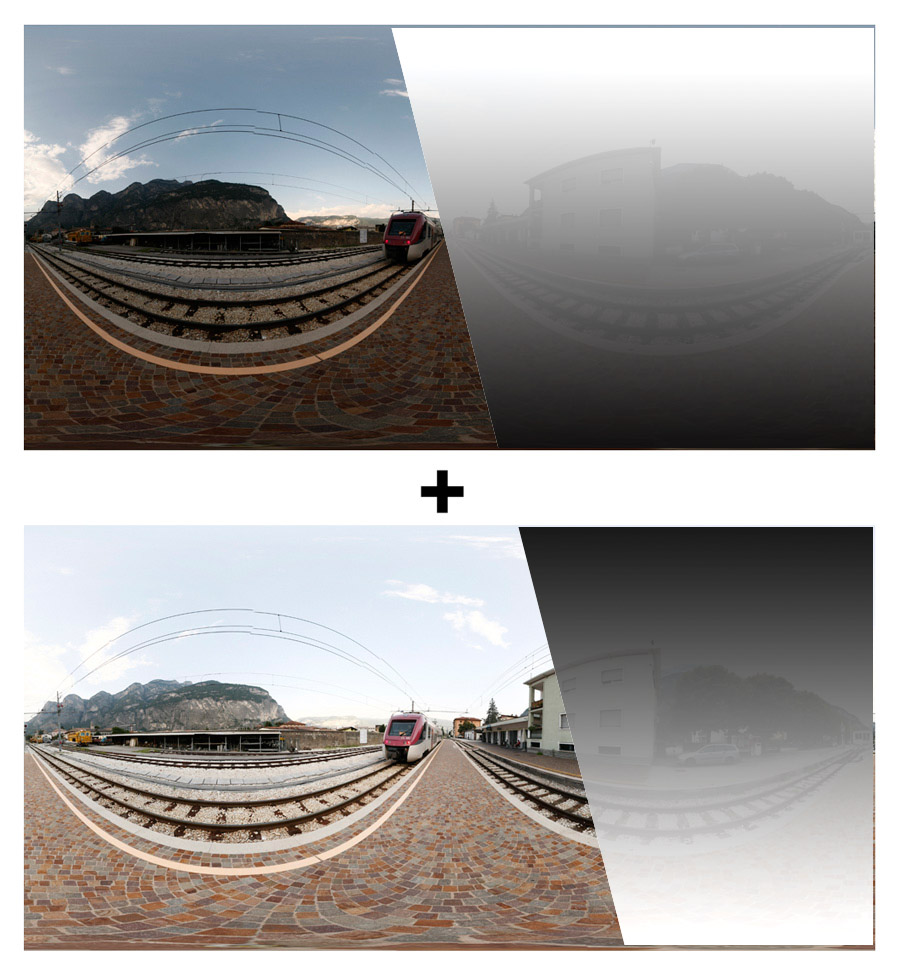
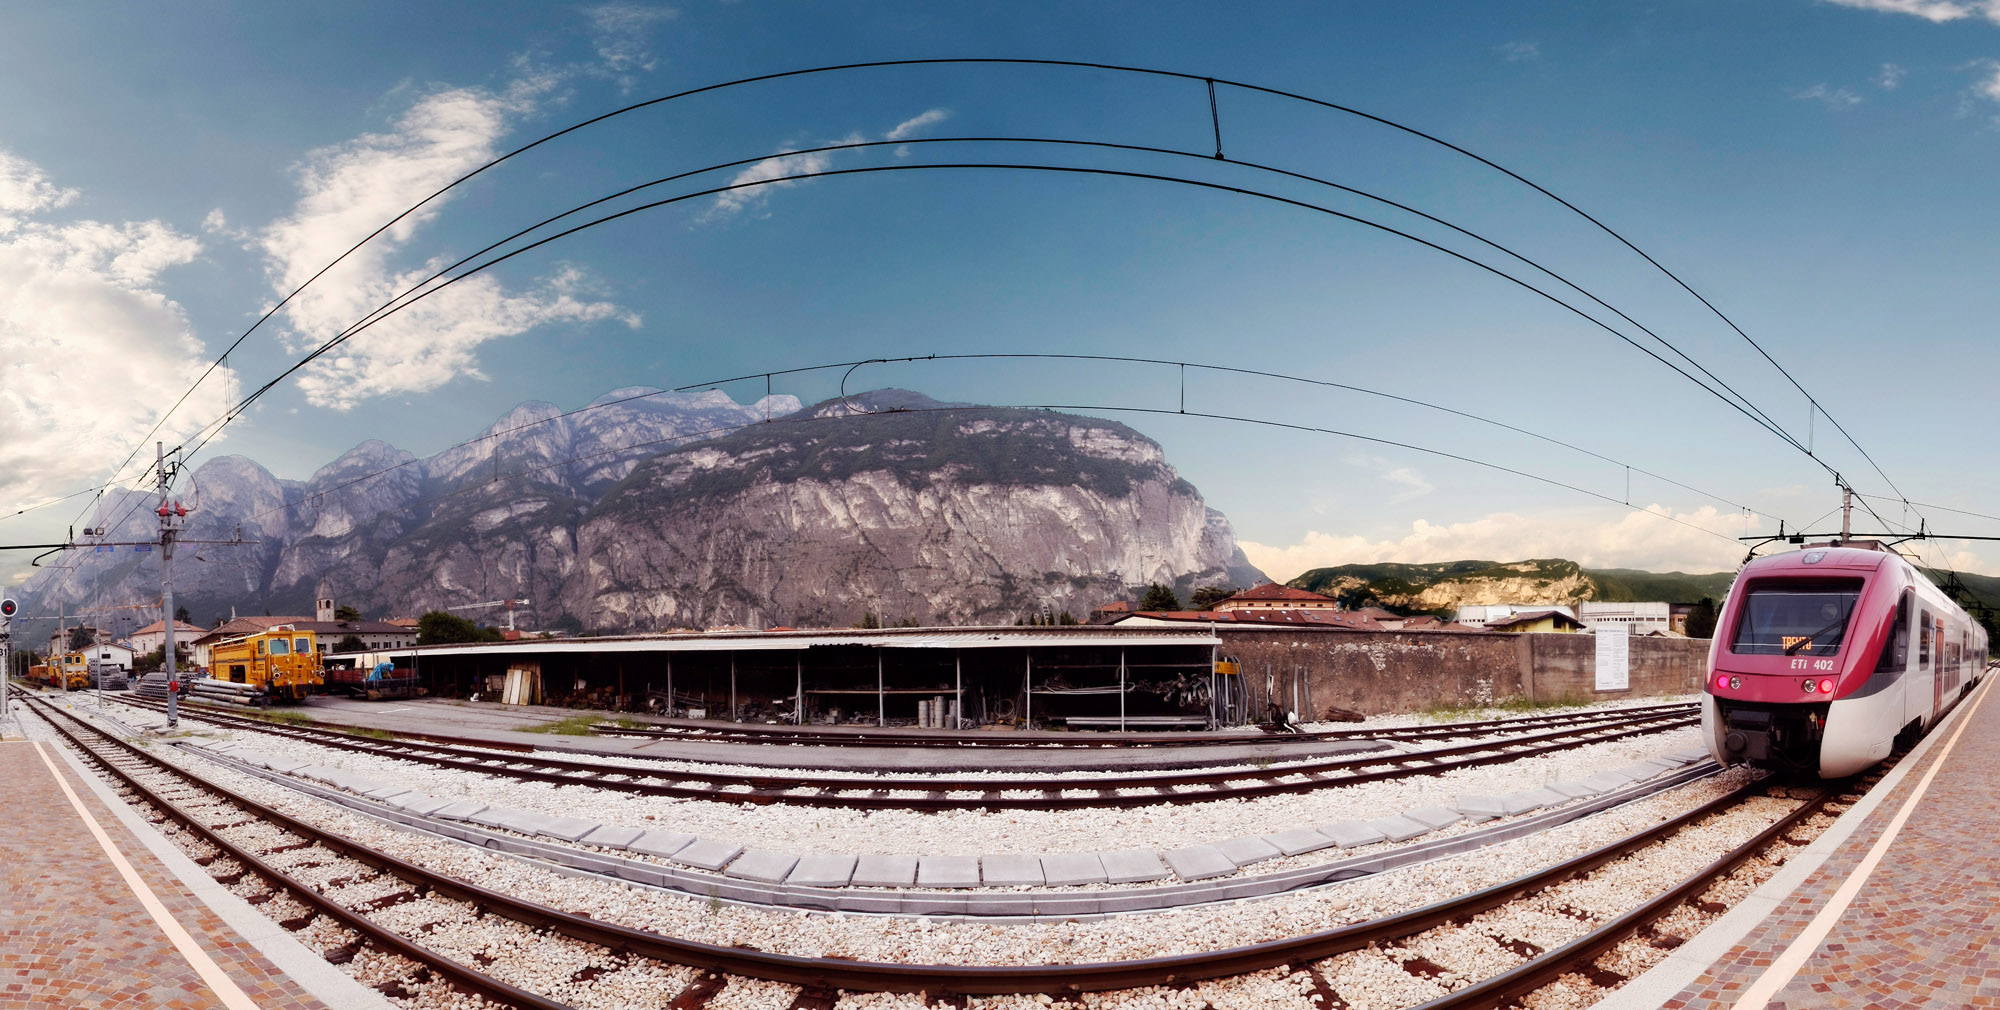
As final postprocessing you have to load the three panoramas as layers into Photoshop or Gimp. Here add a gradient mask to underexposed and overexposed layer (depending of the layers order), and also paint the mask with soft brush to reveal darker areas or lighter ones over the original image, try to refine image over trees, palaces, mountains, which are taller than the horizon.
That's Another World
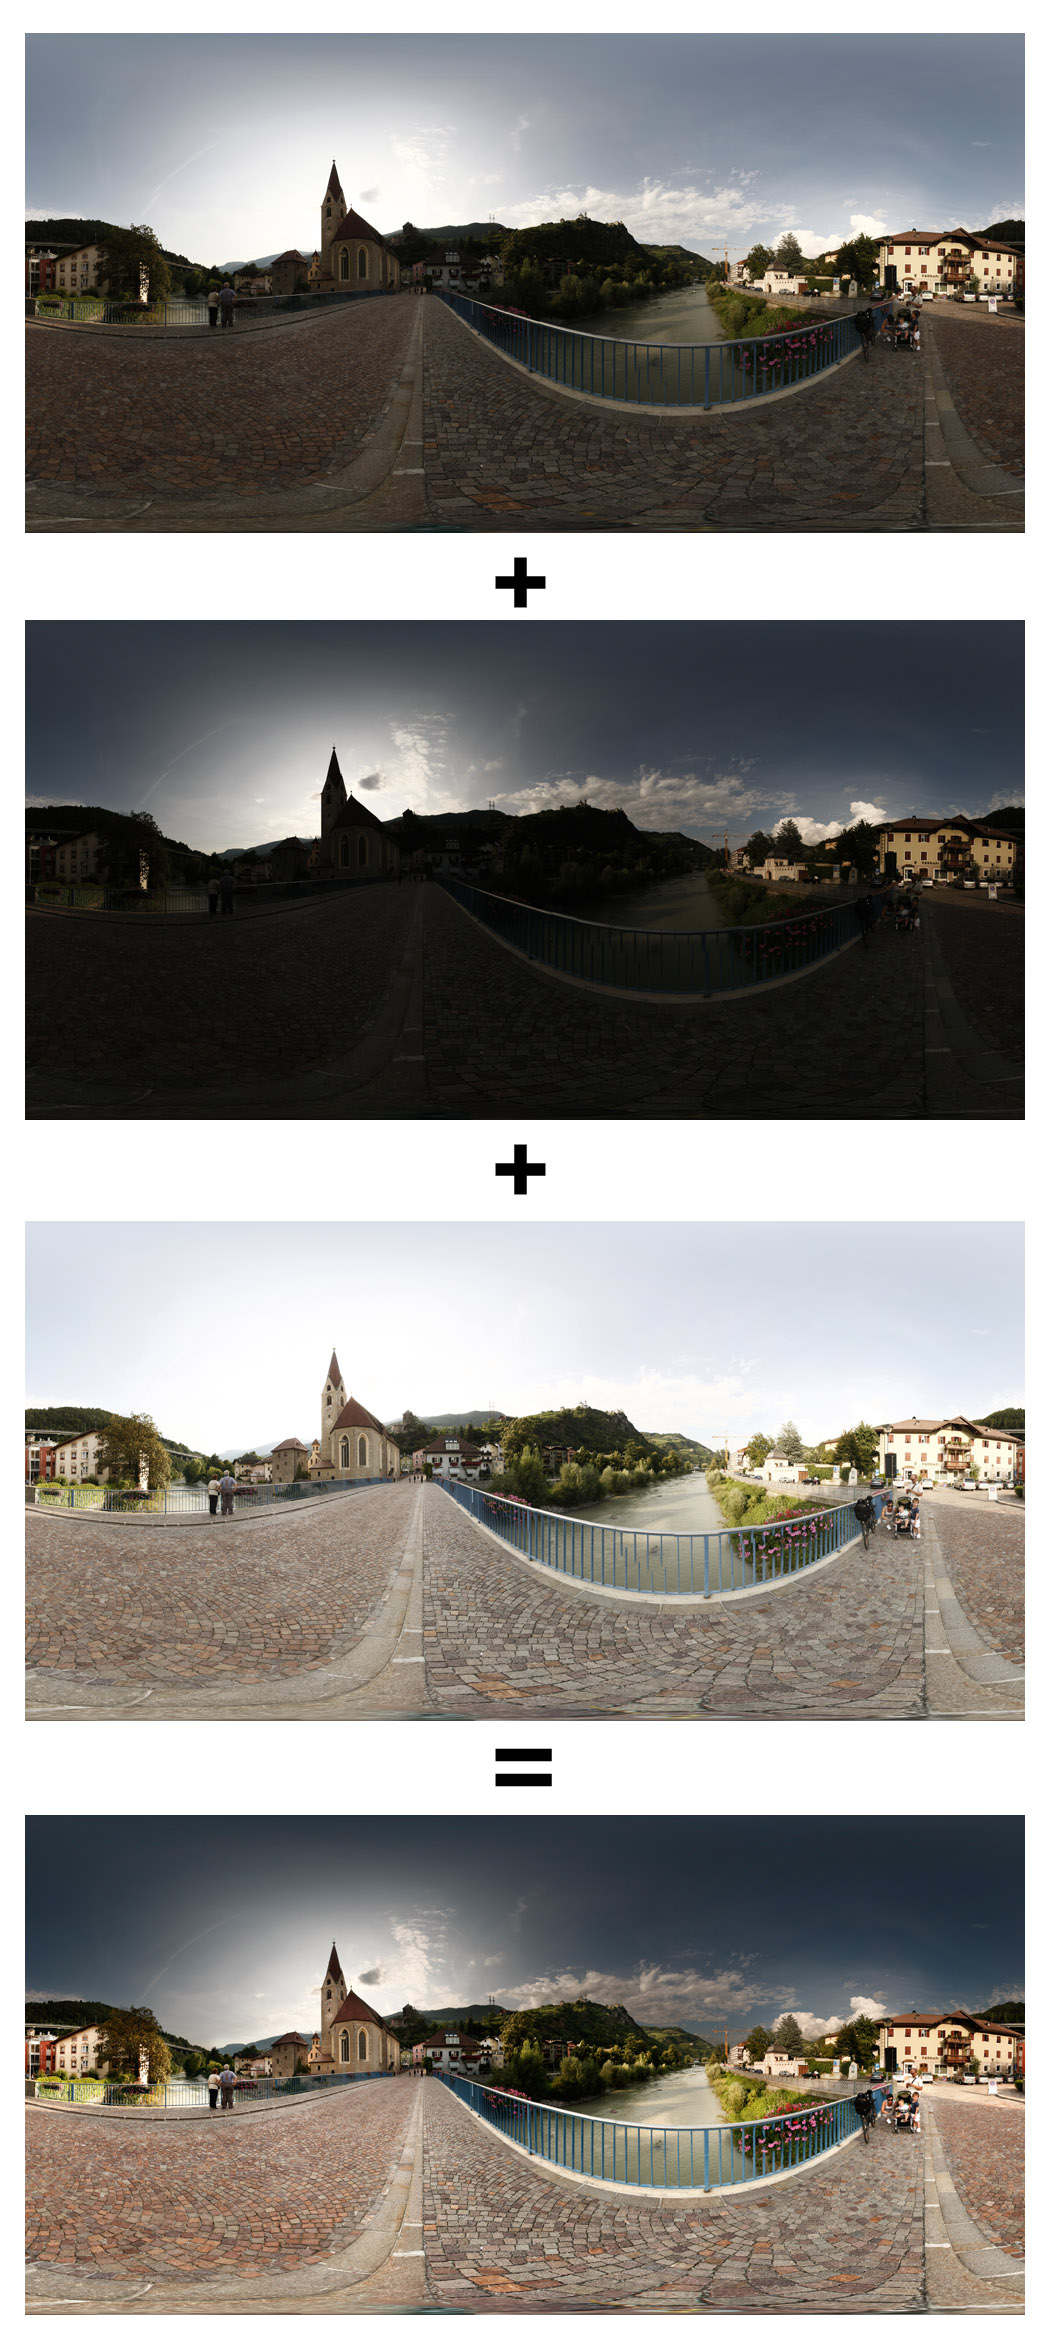
All right, you can now adjust levels and colours for any layers and also after merged them.
The two pictures of this instructables are for now the only about which I've kept the process steps, I'll add some much detailed steps next time I'll shot a bracketed panorama. Hope it will be useful, ask for any doubt.
The two pictures of this instructables are for now the only about which I've kept the process steps, I'll add some much detailed steps next time I'll shot a bracketed panorama. Hope it will be useful, ask for any doubt.