ESP8266/ESP-01 Arduino Powered MQTT Leak Detector & Remote Alarm Receiver
by johnnyfrx in Circuits > Microcontrollers
4903 Views, 28 Favorites, 0 Comments
ESP8266/ESP-01 Arduino Powered MQTT Leak Detector & Remote Alarm Receiver


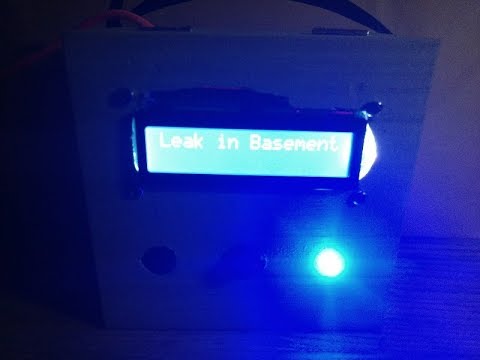
NO ONE enjoys water/liquid of any kind leaking into places that it just doesn't belong. The worst part of that scenario is that it tends to happen where you currently 'happen not to be'...your basement, a utility closet, maybe even your attic or garage. Setting up a WiFi connected sensor in a potential 'leak-zone', and a remote alarm nearer to you waiting for meaningful alarm messages sent from that sensor might be a GREAT IDEA!
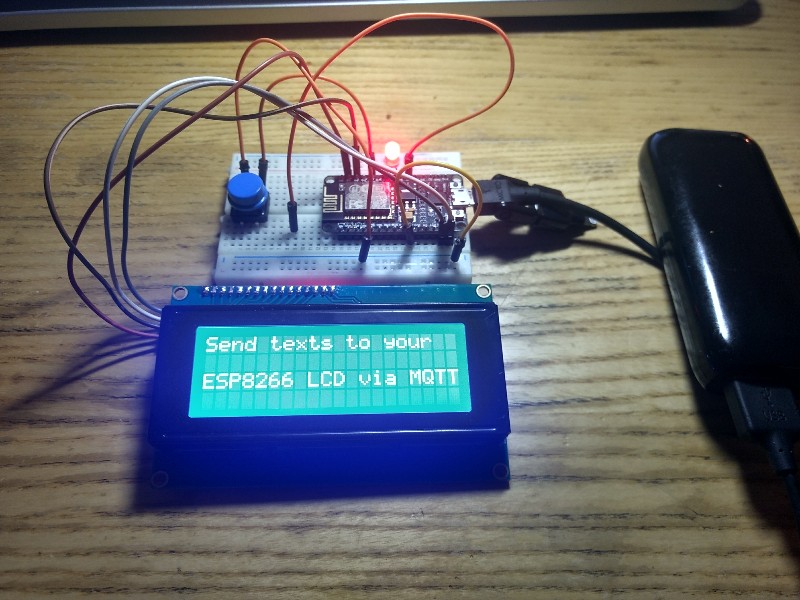
MQTT is the key to this project, just as it was in the ESP8266Arduino-MQTT-Memo-Minder project. The only difference is that instead of sending MQTT text messages from an App on your phone, the MQTT messages will be sent from the re-configured code on the ESP8266ESP-01-Arduino-Powered-Leak-Detector.
This Instructable merges 2 previous projects, resulting in a VERY useful and adaptable device as such.
The versatility of this project is appreciable in that it can be used for just about ANY type of sensor's alert you might want/need to be notified of. Opening/Closing Doors, Rain, Motion, Sound etc...Endless...IMAGINATION!!
In addition, the Alarm Receiver will receive all messages that are Published to your set Topic. In other words, you could have 10,20,30 WiFi Arduino/ESP sensors, all set to Publish to your Topic, and the Alarm Receiver will alert you for each one. If you're new to MQTT or just need a refresher, check this site out...it will help!
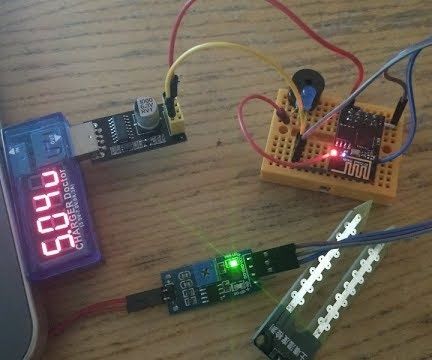
Soooo...to get started, check out those 2 Instructables shown below...only one of which will need to be slightly modified for this project...the ESP8266ESP-01-Arduino-Powered-Leak-Detector
Software - Configure Leak Detector for MQTT Publishing


Assumptions:
- Working knowledge of the Arduino IDE/Libraries and knowledge of one of the methods of loading code to the ESP01. (Hopefully you have one of the Adapters mentioned in this Instructable...MUCH easier)
- Your MQTT Broker is HiveMQ (Other MQTT Brokers will work for this project, the current code is just specific to HiveMQ.
What you'll need:
- Arduino IDE
- ESP8266WiFi.h library
- PubSubClient.h library (available here)
- Attached Arduino Sketch
Arduino Sketch Changes (Only 6 lines...not too painful):
- Open the attached Arduino sketch. (ESP8266_ESP01_LeakDetector_MQTT_SHARE_10Dec17.ino)
- All modifications below are also called out in the attached sketch. Look for the *****CHANGE ME******
- Your network SSID
- Your SSID Password
-
String clientId - Pick a name...any name. It will not be passed to a variable, etc... Is just a unique ID.
-
client.subscribe - This is the unique TOPIC name that MQTT will use. If you've built the previous Instructable ESP8266Arduino-MQTT-Memo-Minder, use the same TOPIC as was used for it.
-
String msg = - This is the message that will be sent to the Alarm Receiver...AKA...The ESP8266Arduino-MQTT-Memo-Minder. That said, keep in mind the number of characters your LCD can display. eg LCD1602 can display 16 characters, LCD2004 20 characters.
-
client.publish - This is the unique TOPIC name that MQTT will use. Same Topic name as in Step 4.
- Your network SSID
-
NOTES: The 'local alarms' for the Piezo and LED attached to the ESP-01 have been removed in this version. Feel free to add them back to this sketch for added audible alerting.
Hardware - You're in the Home Stretch!


This is hopefully the easiest Hardware step EVER!
- If you've already managed to build the 2 previous projects as mentioned in the beginning of this Instructable:
- Power up the Detector and the Receiver. Confirm both are connected to WiFi.
-
Go ahead and drop that leak detector into a bowl of water. (This is the preferred method over actually starting a flood. Haaaaaa)
-
Watch/Listen to your receiver. If it worked and you're like me, throw your hands up with a 'Hell Yeahhh!'. (Wifey and Kids now know that when I do that, one of my projects has done something REALLY COOL!)
-
Press the momentary switch button to clear alarm, similarly as in the ESP8266Arduino-MQTT-Memo-Minder.
- Troubleshooting (Hopefully not necessary):
- Test the receiver with a text message from the ESP8266Arduino-MQTT-Memo-Minder project.
- Open the HiveMQ site and watch the scrolling Recently used topics window. If your leak detector is publishing correctly, your Topic will appear here. Be patient, it may take a few window refreshes to appear. This is a quick Vid showing my MQTT Topic...HartFridge2018. Don't ask...just don't. Haaaaaa
- Confirm that the leak detector is functioning and is tripping a local alarm when active.