ESP8266 Automation With Web Interface and DDNS
by Fernando Koyanagi in Circuits > Microcontrollers
16714 Views, 9 Favorites, 0 Comments
ESP8266 Automation With Web Interface and DDNS

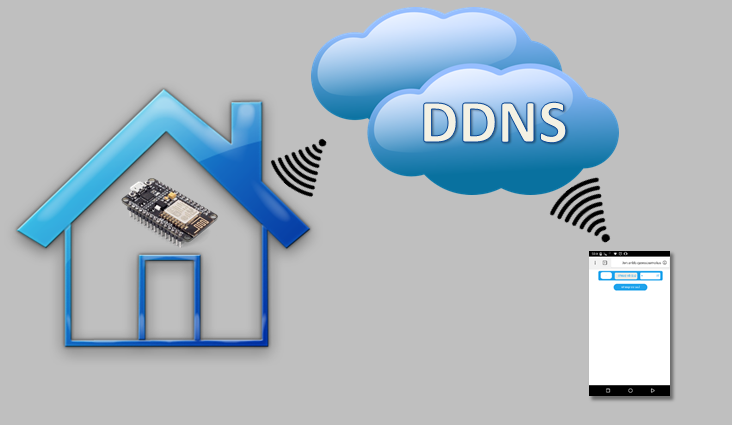
In today's article, we will show an automation, which can be residential, using the DDNS (Dynamic Domain Name System) feature. You will understand how to configure the application that you will place on ESP8266, on the NodeMCU. Also, we will see how to configure the DDNS to control the devices of your house from your smartphone.
Basically, the scheme works as follows: your smartphone will send data to the cloud with the DDNS service, which will access your ESP8266 located in your home.
In this case, the source code is large and uses the ESP feature to function as a webserver itself. Why is it advantageous? Well, you don’t need to install any applications on your smartphone. It works perfectly on iOS, computer, Android, or nearly anything else that contains a browser.
WiFi ESP8266 NodeMcu ESP-12E
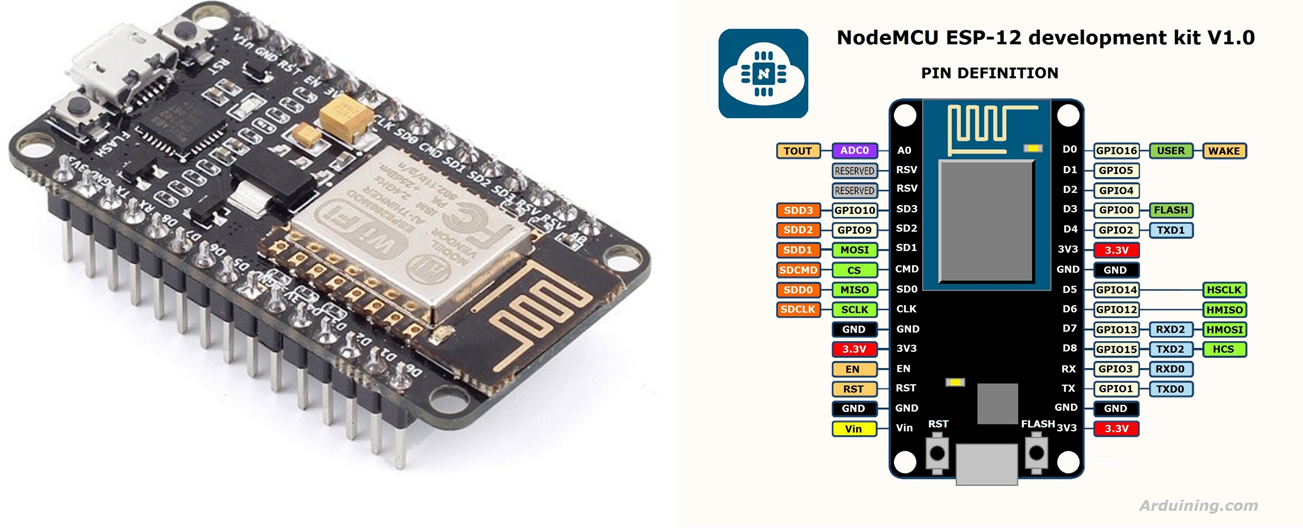
DDNS
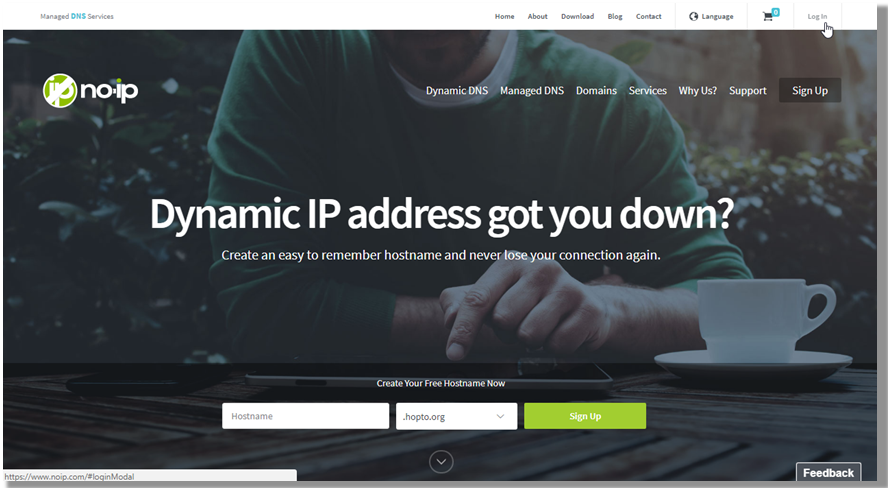
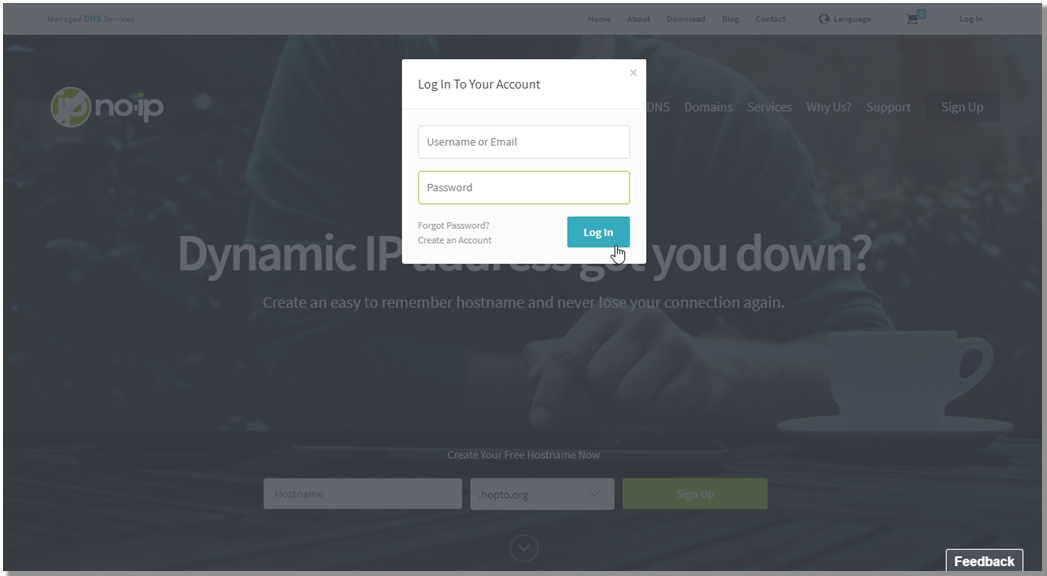
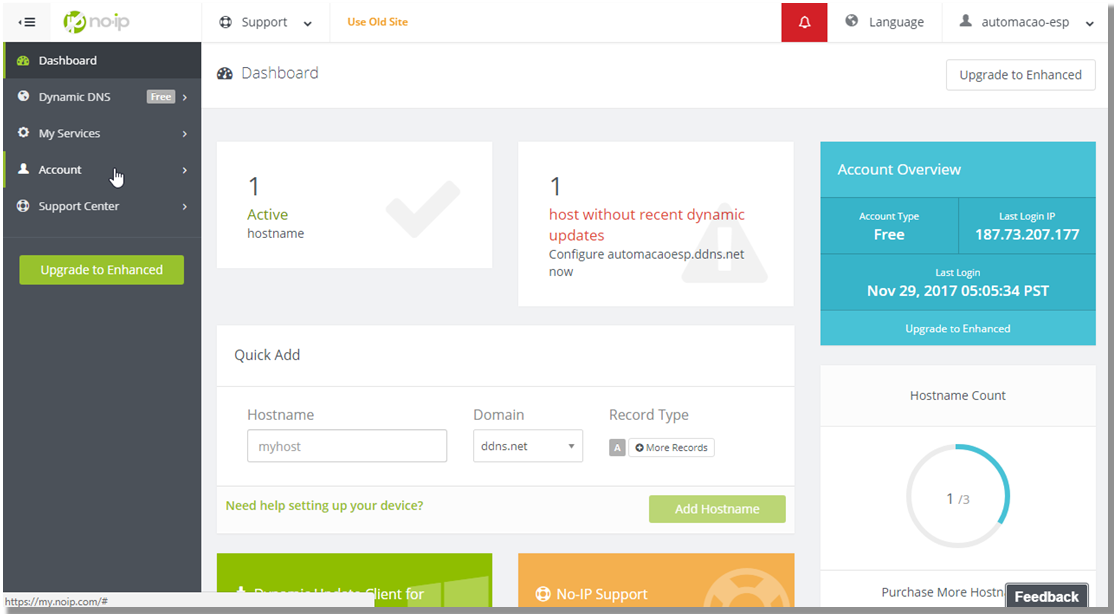
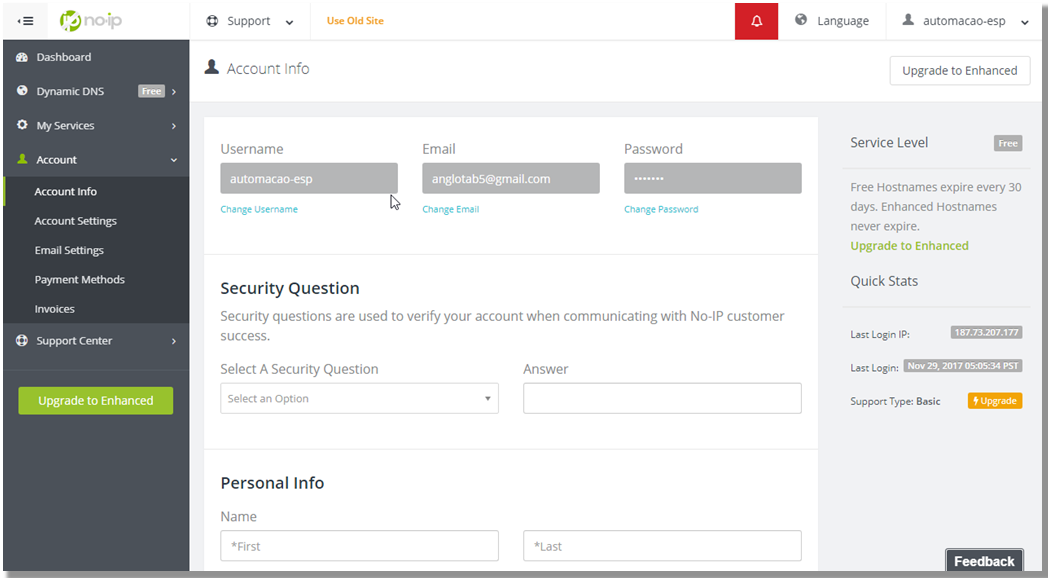
First, it is necessary to create an account on the NO-IP website, https://www.noip.com/. This is the service that we will use. After setting up the login and password, log in to your account and set the "hostname" and "Domain.” Record Type and leave it as is (A). After populating, click on "Add hostname.” Then go to the account setup by clicking on "Account.” In this case, we use "automacaoesp.ddns.net.”
Then, set "USERNAME" and save the settings.
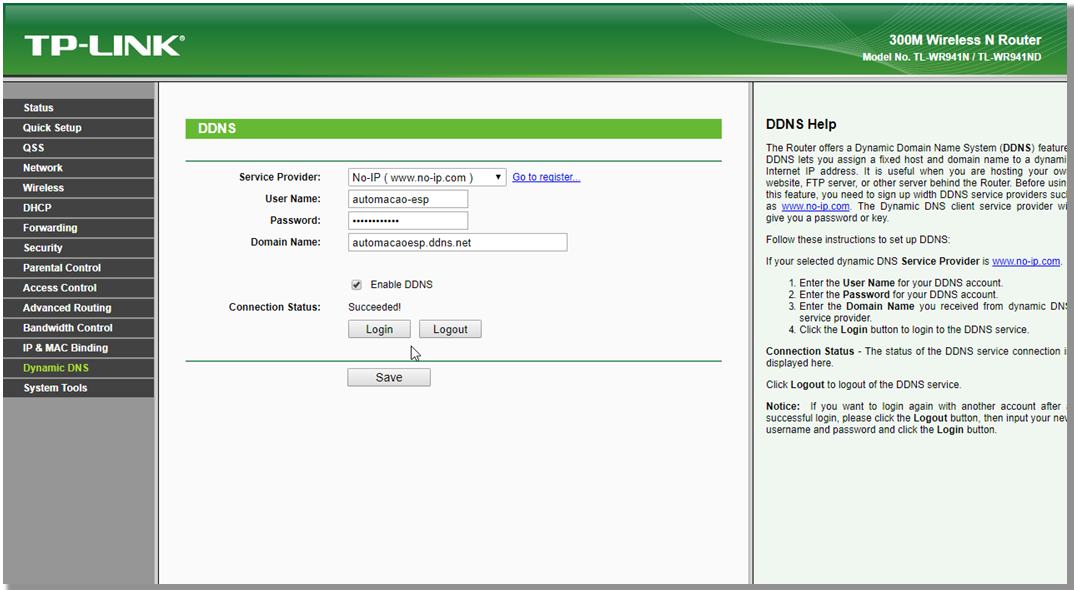
Now go to the router and click "Dynamic DNS". Fill in the fields with the username you defined in the account configuration, the password, and the Domain Name, which in this case was "automacaoesp.ddns.net". Enable the "Enable DDNS" option and click save. Now, it will give the message "Succeeded!" if it worked.
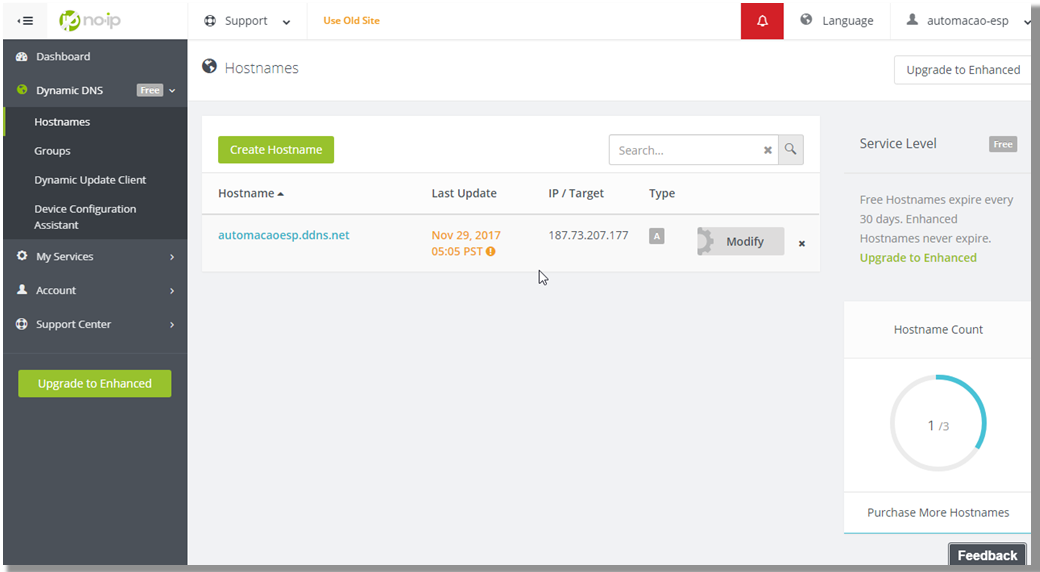
Returning to the NO-IP page, click on the "Hostnames" side menu, and check if your router's registration has appeared, as shown below. The external IP of your router should appear.
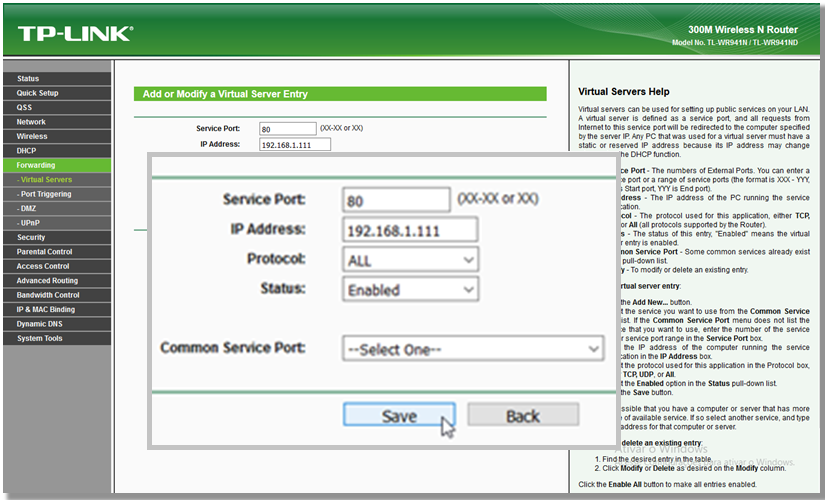
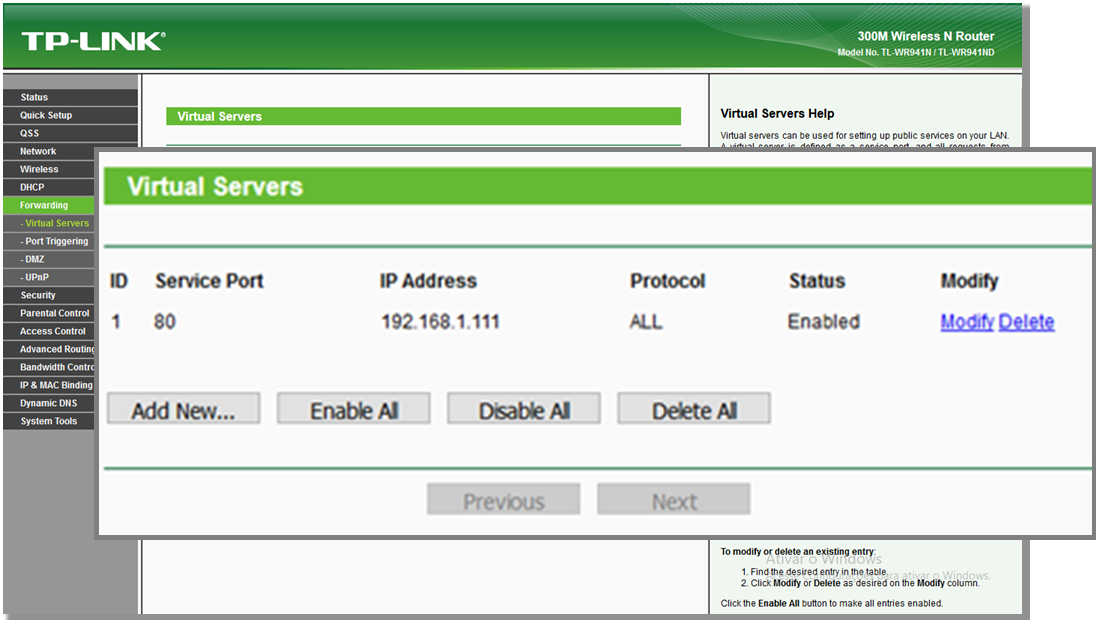
The last step is to redirect the router port to the internal network device. We define the IP of the ESP (192.168.1.111), so we will enter the "Forwarding" -> "Virtual Servers" screen of the router and click on "Add new".
Fill in the port that will redirect and the IP of the internal network device, and then protocol will show "ALL” (unless you work with only a specific one) and keep the Status as "Enabled" to be active. Save.
Diagram

Once this is done, it will be working. Regardless of the External IP address, when you access "automacaoesp.ddns.net" on the default port 80, you will fall on port 80 of the internal network device, which has an IP of 192.168.1.111.
Remember to keep this address fixed.
Modifications in the Automacao.ino File

Make the following settings change to your network settings and enter the maximum available GPIO number on your + 1 card at MAX_PIN_COUNT.
//Mude para os dados da sua rede<br>#define SSID "TesteESP"
#define SENHA "87654321"
#define IP "192.168.1.111"
#define GATEWAY "192.168.1.1"
#define SUBNET "255.255.255.0"

//Quantidade máxima de pinos, lembrando que os gpios
//geralmente começam em 0.
//Se o gpio máximo for 16, por exemplo, coloque 17
#define MAX_PIN_COUNT 17
In the file automacao.html, change in line 117 the URL to which you registered in the website of ddns no-ip.
Plugin to Write Files
You should include the plugin in the Arduino IDE to write files to the esp8266 flash. Download the plugin here. Unzip the file, and if it is in Windows, put the .jar file in:
C: \Users\\Documents\Arduino\tools\ESP8266FS\tool\esp8266fs.jar
If using Mac, put the .jar file in:
~ / Documents / Arduino / tools / ESP8266FS / tool / esp8266fs.jar
Restart the Arduino IDE. Now a new option will appear in Tools. This option, called "ESP8266 Sketch Data Upload" will record the contents of the "data" folder in the ESP8266 flash.
The "date" folder must be inside the folder of the current .ino file.
If you want to save an html file, for example:
~ / Automation / Automation
~ / Automation / data / automation.html
Save Html File
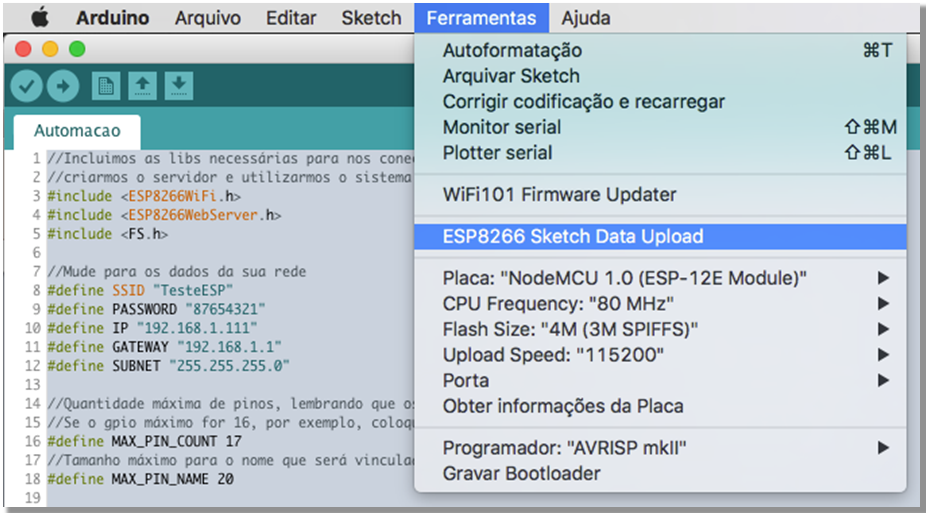
Click this option to send the automacao.html file that is in the "data" folder to the ESP file system
Testing
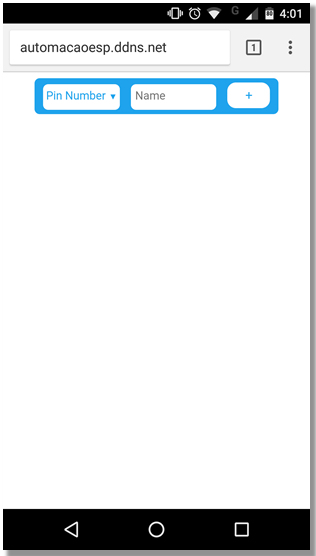
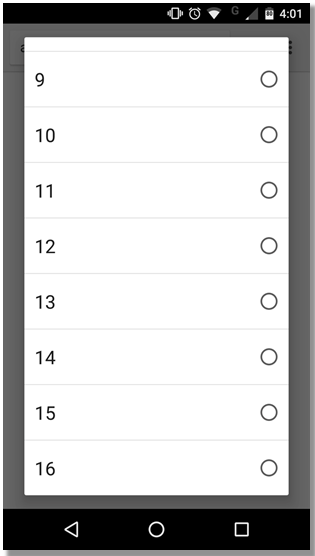
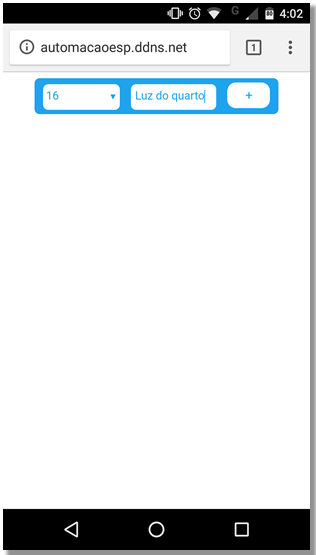
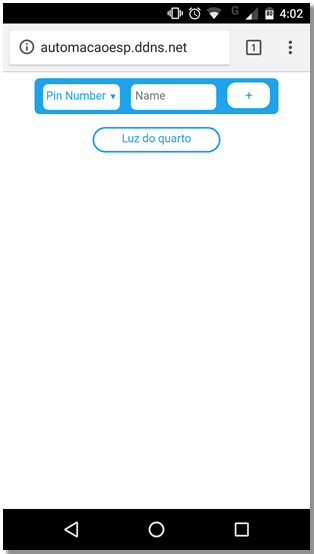
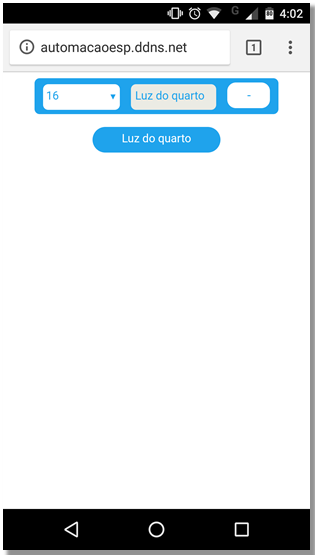
1. Still in the Arduino IDE, click the arrow to compile and send the code to the ESP. Now go to the browser and type the URL in the address bar that you registered on the no-ip site. The result should be that of the image.
2. Click "Pin Number" and choose the number of a pin from the list that appears.
3. Enter the name of the button that will match the selected pin and click "+".
4. A button with the chosen name will appear in the list.
5. When you click the button, it will turn blue and the pin with the number you have chosen will be HIGH.
6. If you want the pin to return to LOW, just click the button again. To remove the button click "-"