ESP8266 + Arduino IDE 1.6.4 Portable - Full Quick Install Guide
by TrackerJ in Circuits > Arduino
48835 Views, 170 Favorites, 0 Comments
ESP8266 + Arduino IDE 1.6.4 Portable - Full Quick Install Guide

If anybody wants to start develop new ESP8266 projects directly in Arduino IDE and needs some guidance, please find below a full comprehensive step-by-step Install Guide for a Arduino 1.6.4 IDE Portable environment that might help you for having a smooth install process. It's including also all needed ESP8266 packages and tools, making it ready for programming your ESP Boards.
As been done as a fully Portable installation you can avoid the way Arduino is installing the files all over the place on your system. All your Arduino IDE v 1.6.4 files, including ESP8266 extension, sketches, installed libraies, etc will be located only under the new created "arduino-1.6.4" folder. And yes, your install location can be in this case a Stick/SD Card or external HDD/SSD Drive so you can take your whole installed Arduino IDE and your projects everywhere, just ready for plug&coding!
Install Guide
First RUN test:
For reference: ESP8266 + Arduino IDE 1.6.4 Portable - Full Install step-by-step Guide
Step-by-Step Install
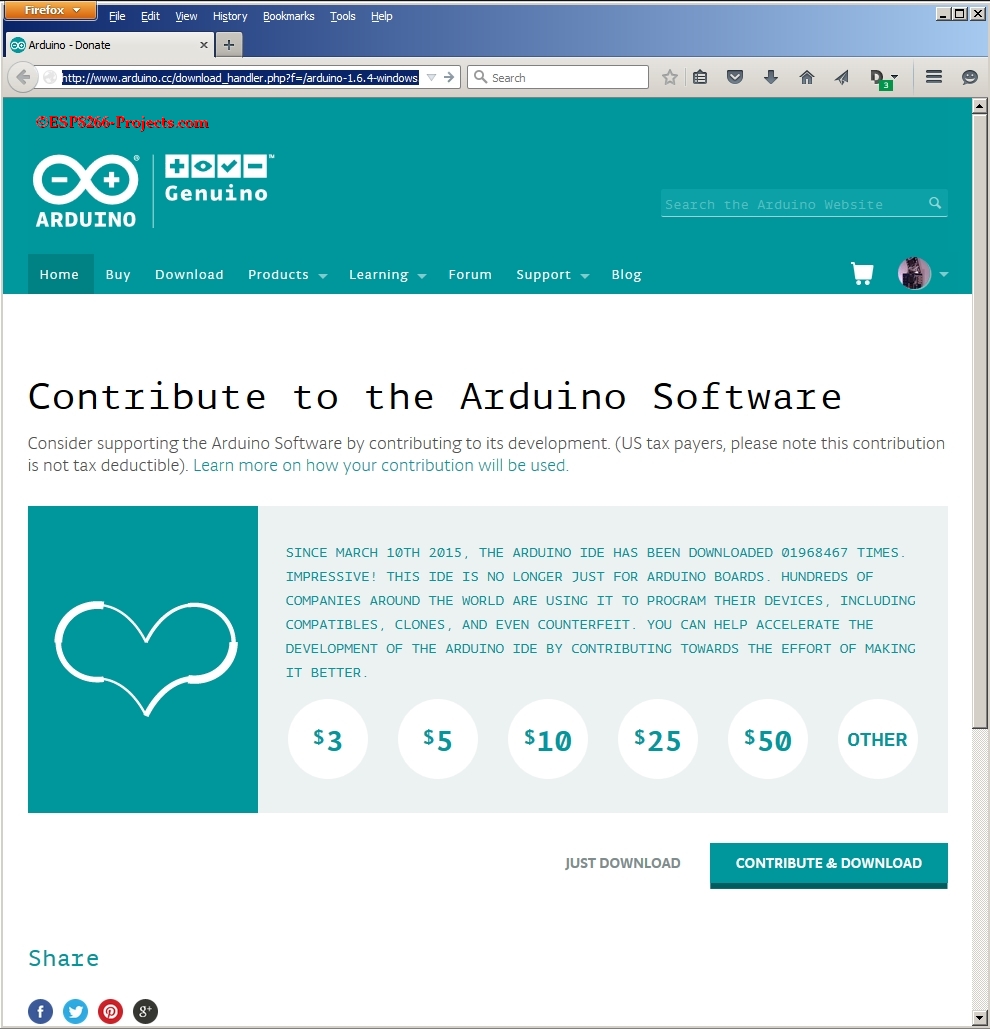
1. Download and Install Arduino IDE 1.6.4
http://www.arduino.cc/en/Main/Software
In a Windows 7/64 environment I preffer to use the ZIP file below, and install it manually, in a more compact and portable manner.
http://arduino.cc/download.php?f=/arduino-1.6.4-windows.zip
Create a New Folder where do you want your Arduino IDE installation to be (ex: E:\ESP8266_Arduino)
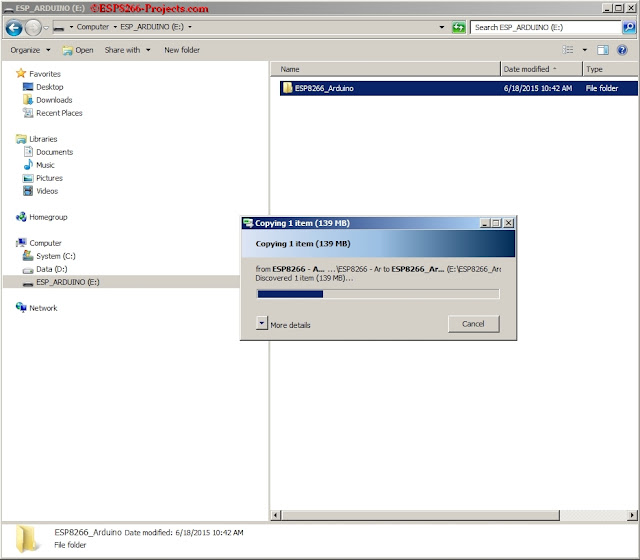
Copy and Extract arduino-1.6.4-windows.zip in the new folder created above. 7zip program is your good friend here.
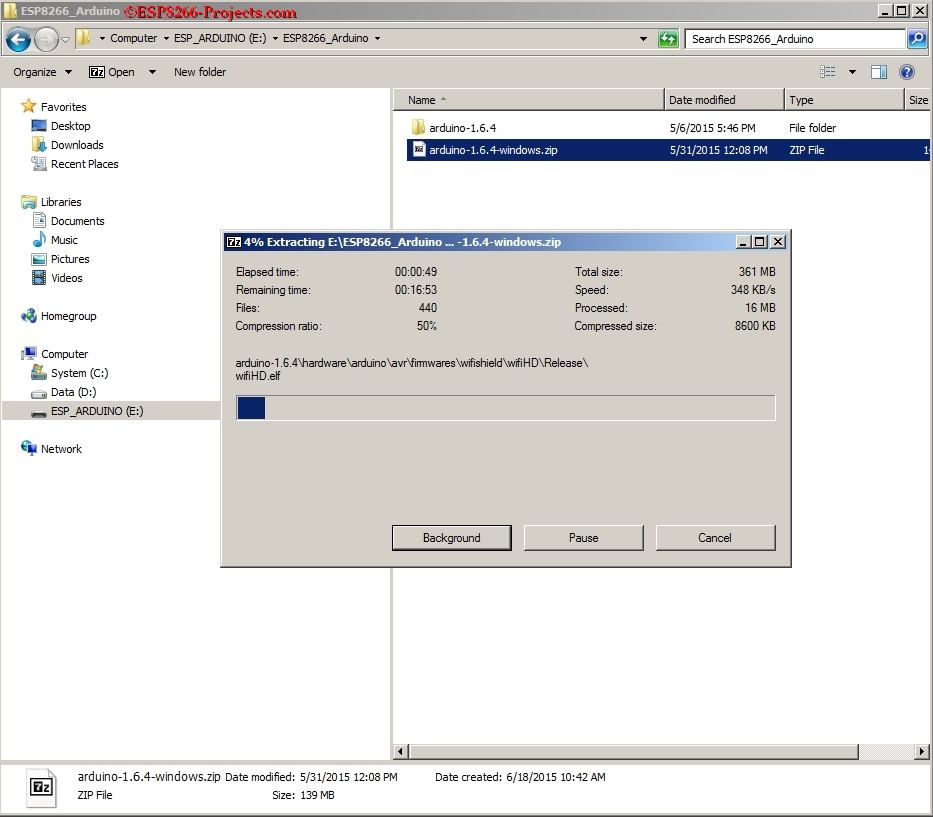
Delete arduino-1.6.4-windows.zip to free your space
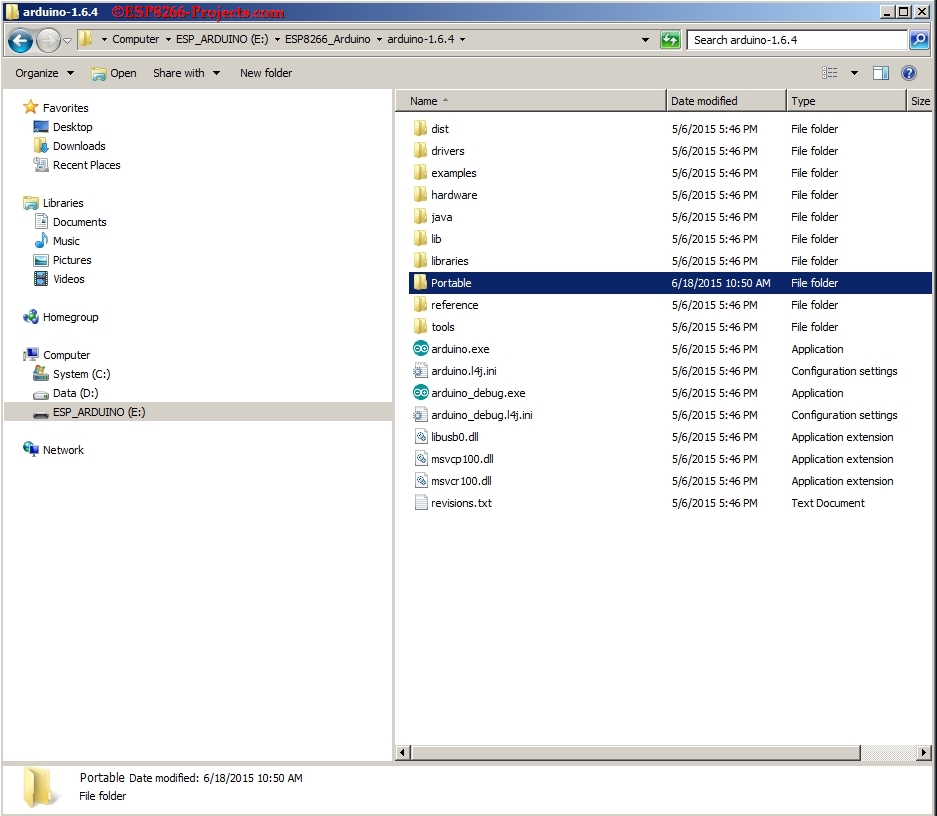
Inside the new "arduino-1.6.4" subfolder create a New Folder called "Portable"
Start and Configure the New Installed Arduino IDE
- Go to File
- Preferences - in Preferences window go to "additional boards manager URL's" where you need to paste the following link:
https://adafruit.github.io/arduino-board-index/package_adafruit_index.json

- Click OK button.
- Go to Tools
- Boards - > Boards manager, in the Boards manager window select "contributed" from the TYPE drop
- Select ESP8266 by ESP8266 community forum and version 1.6.2
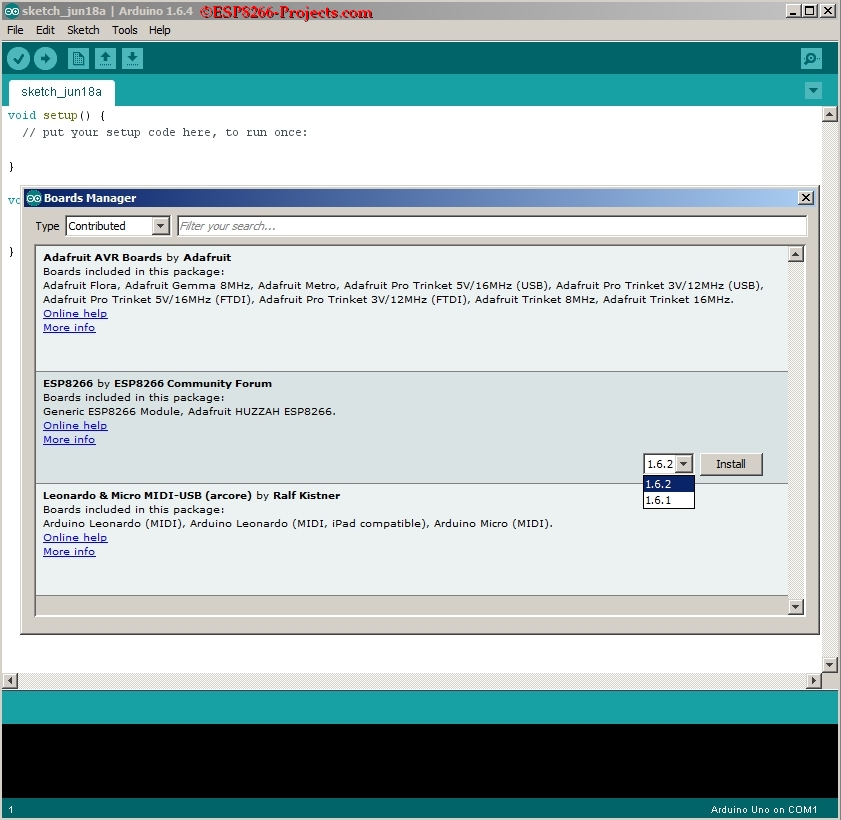
- Press Install.
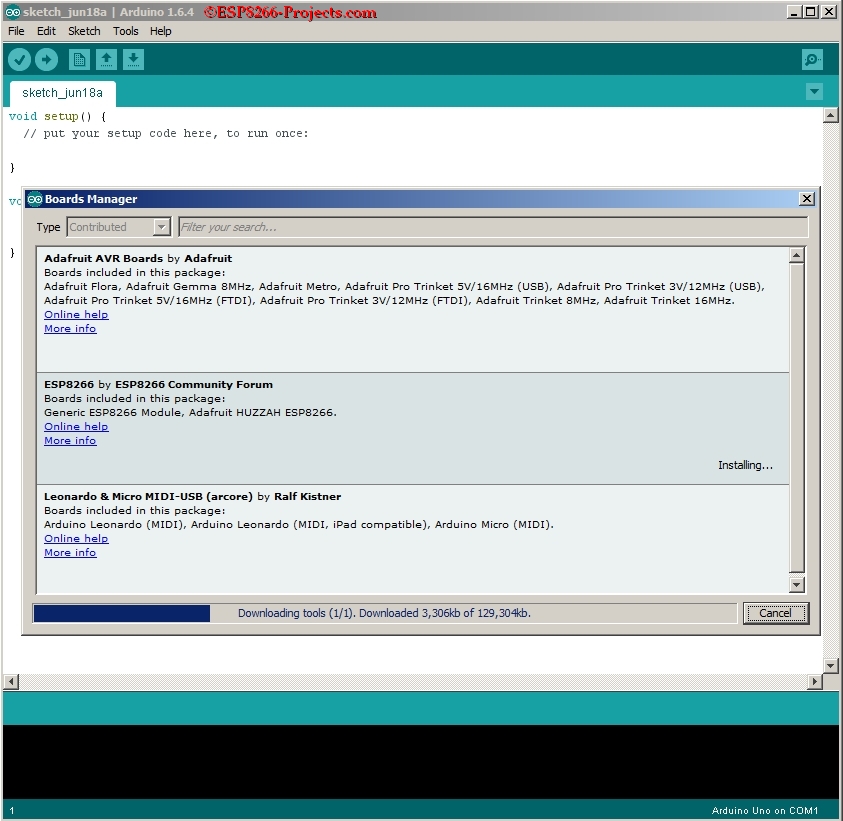
- Installation process can take a while, so please be patient! A cup of tea/coffee might work here :)
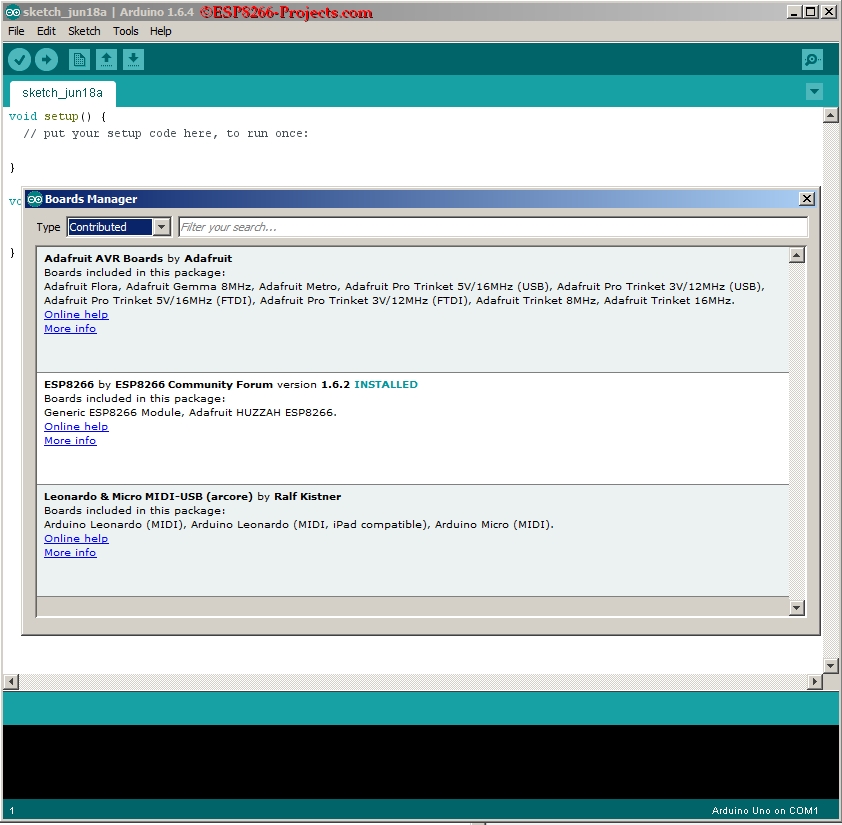
- Restart IDE
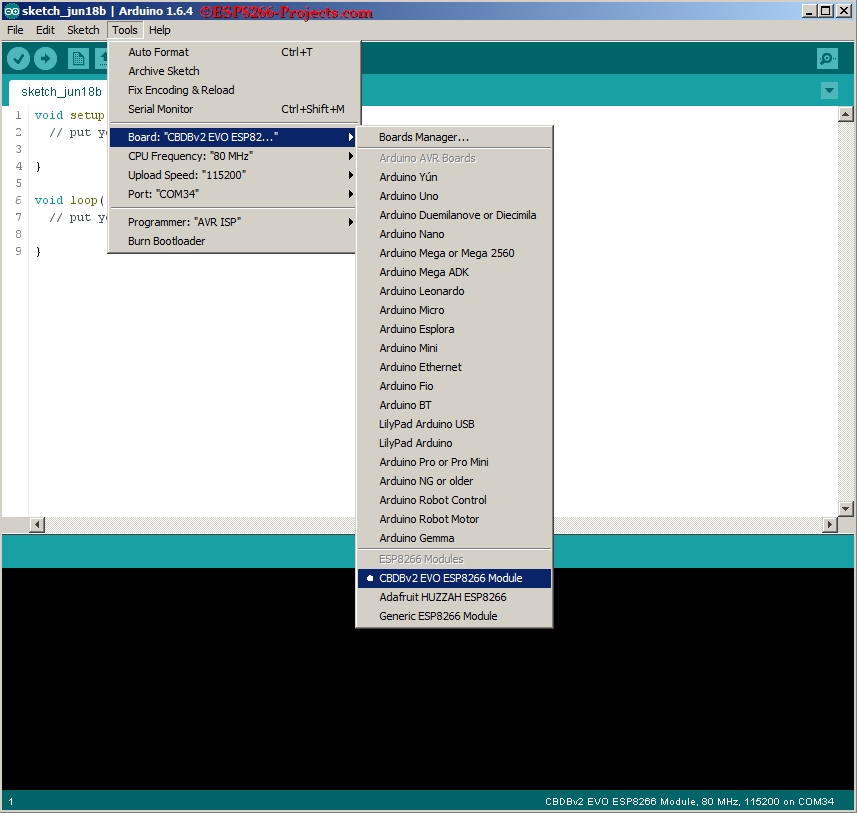
- Select your board as ADAFRUIT HUZZAH ESP8266 or GenericESP8266 Module. For CBDBv2 EVO use provided config file or GenericESP8266.
- Select CPU frequency: 80Mhz
- Select your Serial port and upload speed. Looks like it's working upto 921600 but quite unstable. Keep the usual 115200 baud for more solid upload results.
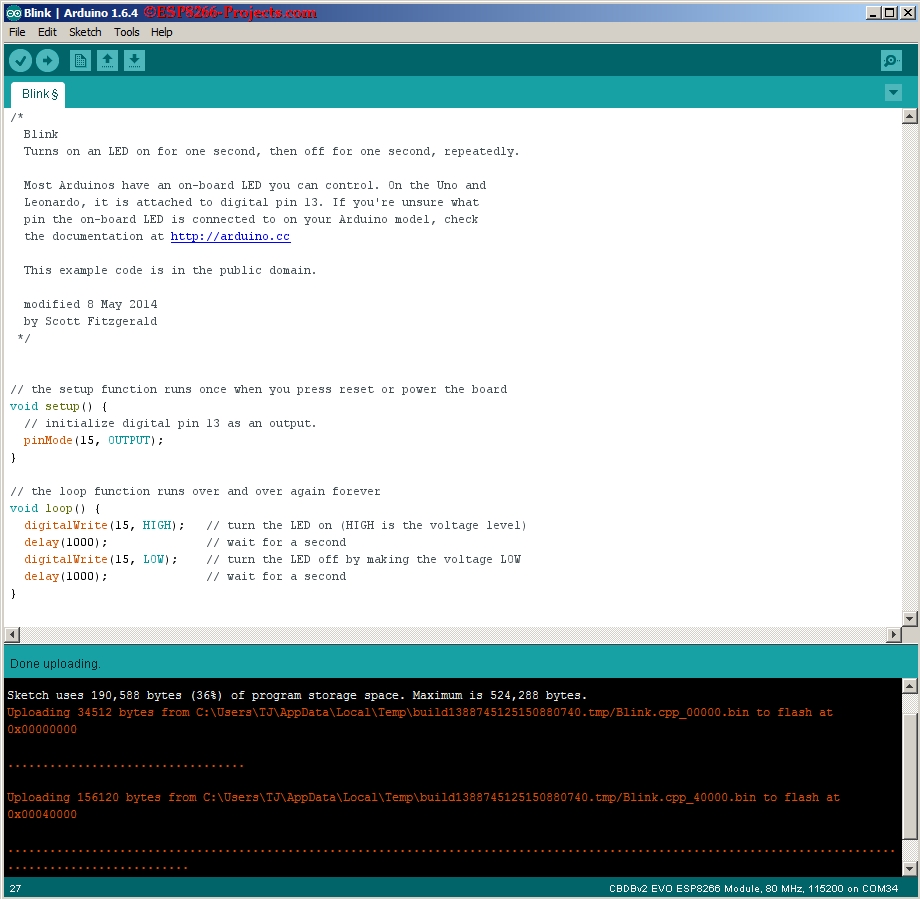
First RUN - Blinky.ino !
If all the steps before endend successfully You are ready for your first ESP8266 Program written in Arduino IDE:
/*
  Blink
  Turns on an LED on for one second, then off for one second, repeatedly.

  Most Arduinos have an on-board LED you can control. On the Uno and
  Leonardo, it is attached to digital pin 13. If you're unsure what
  pin the on-board LED is connected to on your Arduino model, check
  the documentation at  http://arduino.cc

  This example code is in the public domain.  modified 8 May 2014
  by Scott Fitzgerald
 *
/ the setup function runs once when you press reset or power the board
void setup() {
  // initialize digital pin 13 as an output.
  pinMode(15, OUTPUT);
}
// the loop function runs over and over again forever
void loop() {
digitalWrite(15, HIGH); // turn the LED on (HIGH is the voltage level)
delay(1000); // wait for a second
digitalWrite(15, LOW); // turn the LED off by making the voltage LOW
delay(1000); // wait for a second
}