ESP32 Home Automation Project Using IR Remote Control and Blynk IoT Platform
by AhmadLogs in Circuits > Arduino
1459 Views, 4 Favorites, 0 Comments
ESP32 Home Automation Project Using IR Remote Control and Blynk IoT Platform
.png)
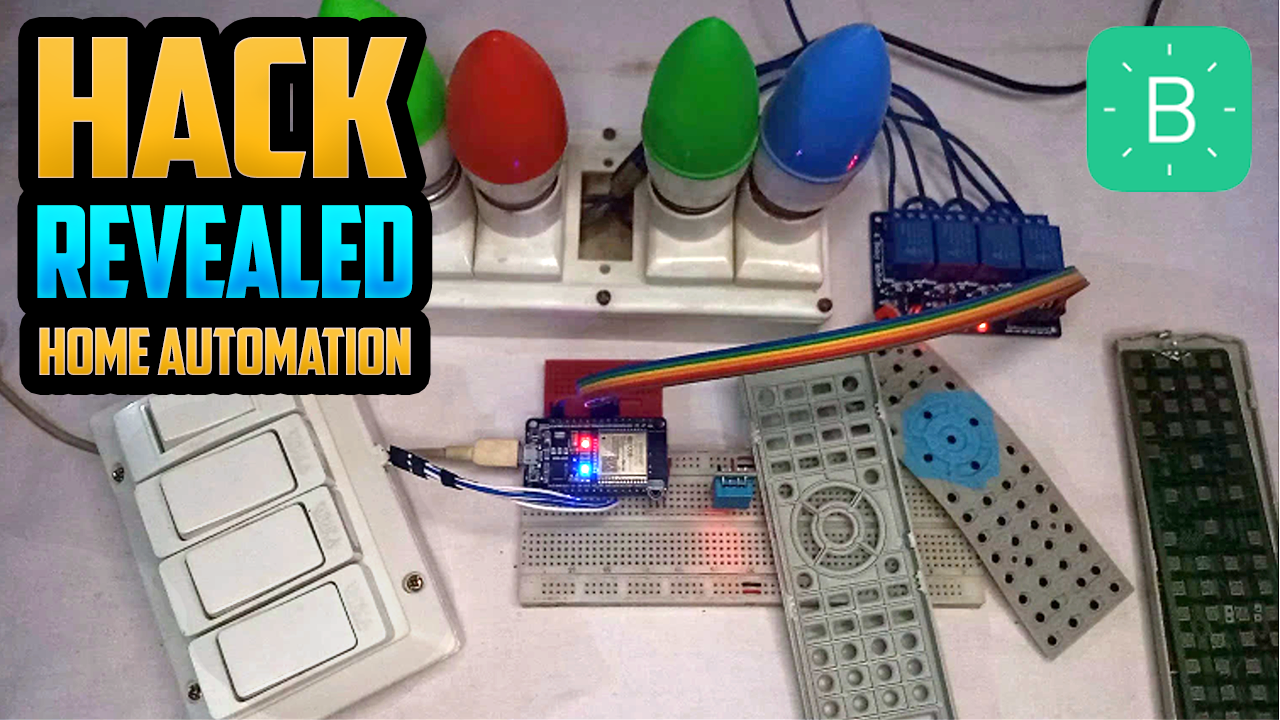
Home automation is becoming increasingly popular, and with good reason. With the use of technology, you can easily control your home appliances with the touch of a button or even with your voice. In this blog post, we will discuss a home automation project that can be controlled using an IR remote control and the Blynk IoT platform. Additionally, we will talk about the custom PCB designed for this project and how to register a new remote control.
Features of the Project.
- Register any IR Remote withou coding
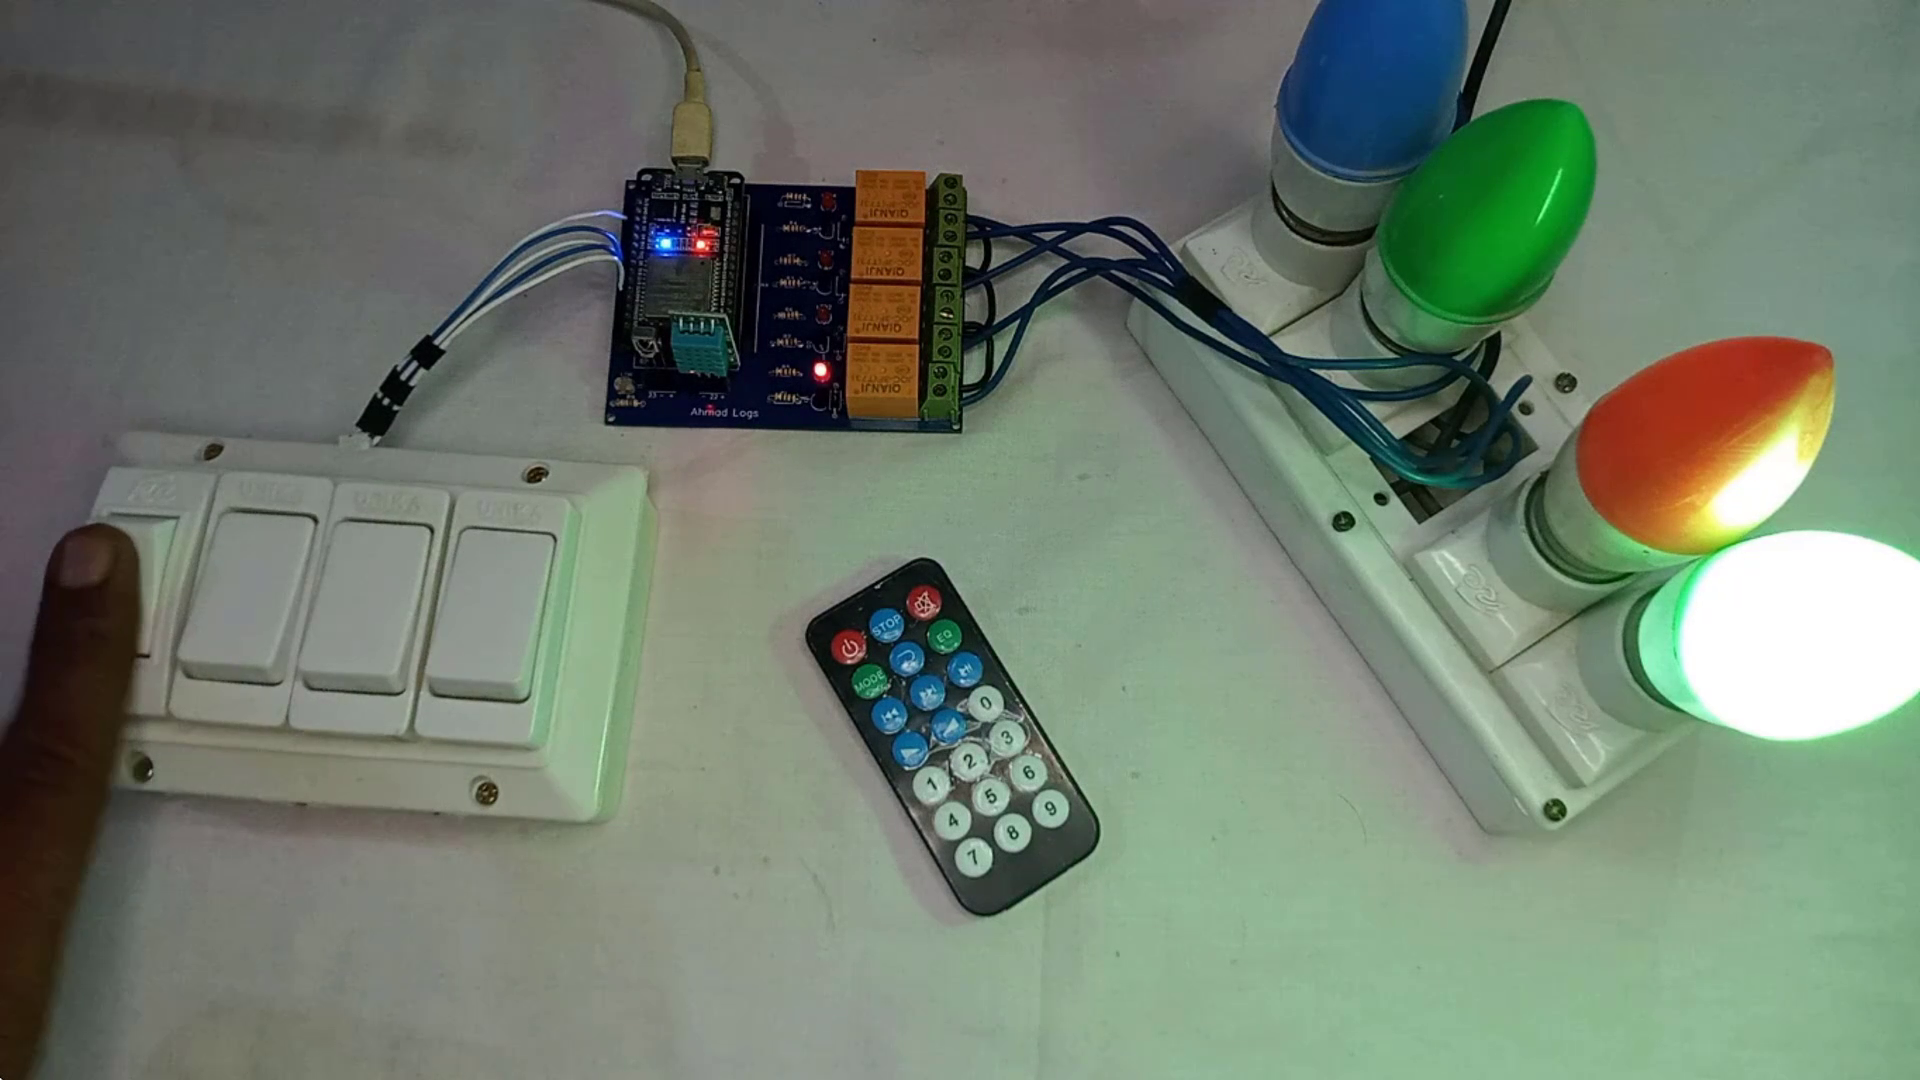
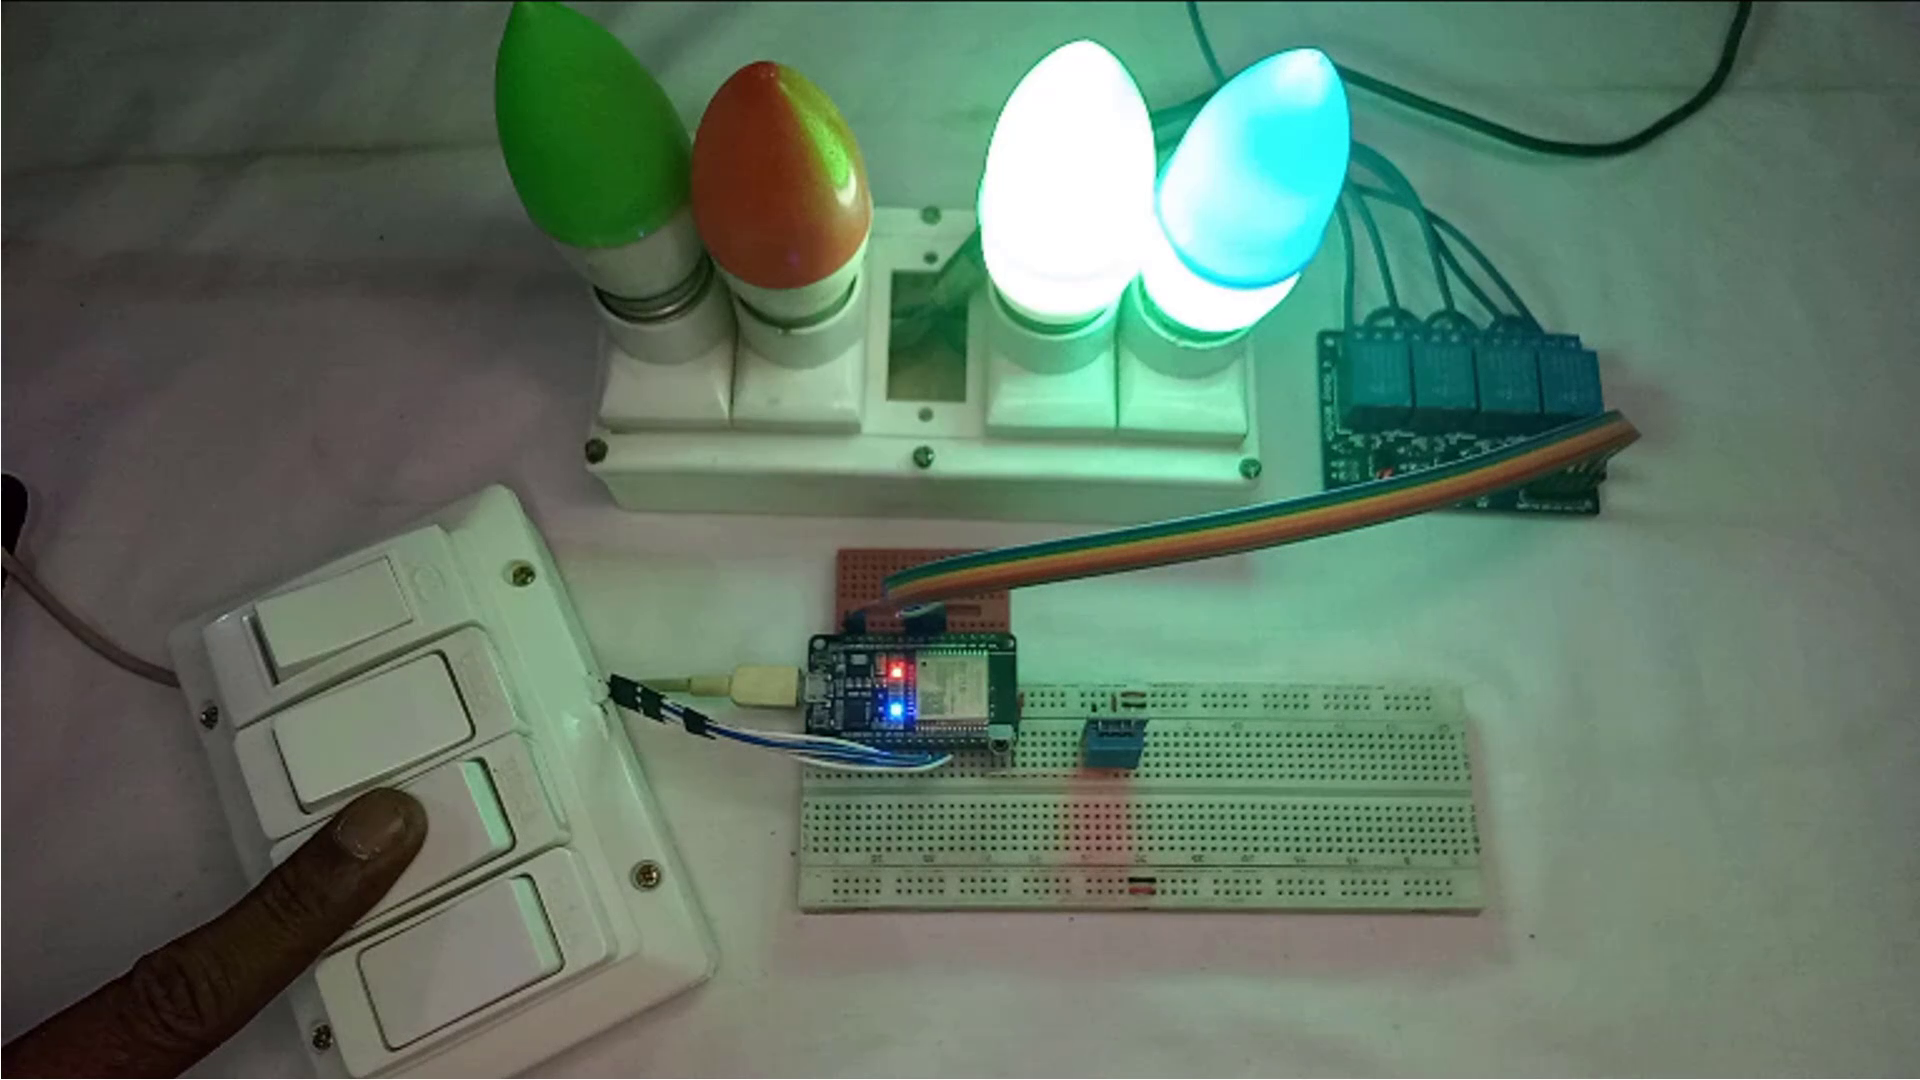
- Control relays with switch buttons
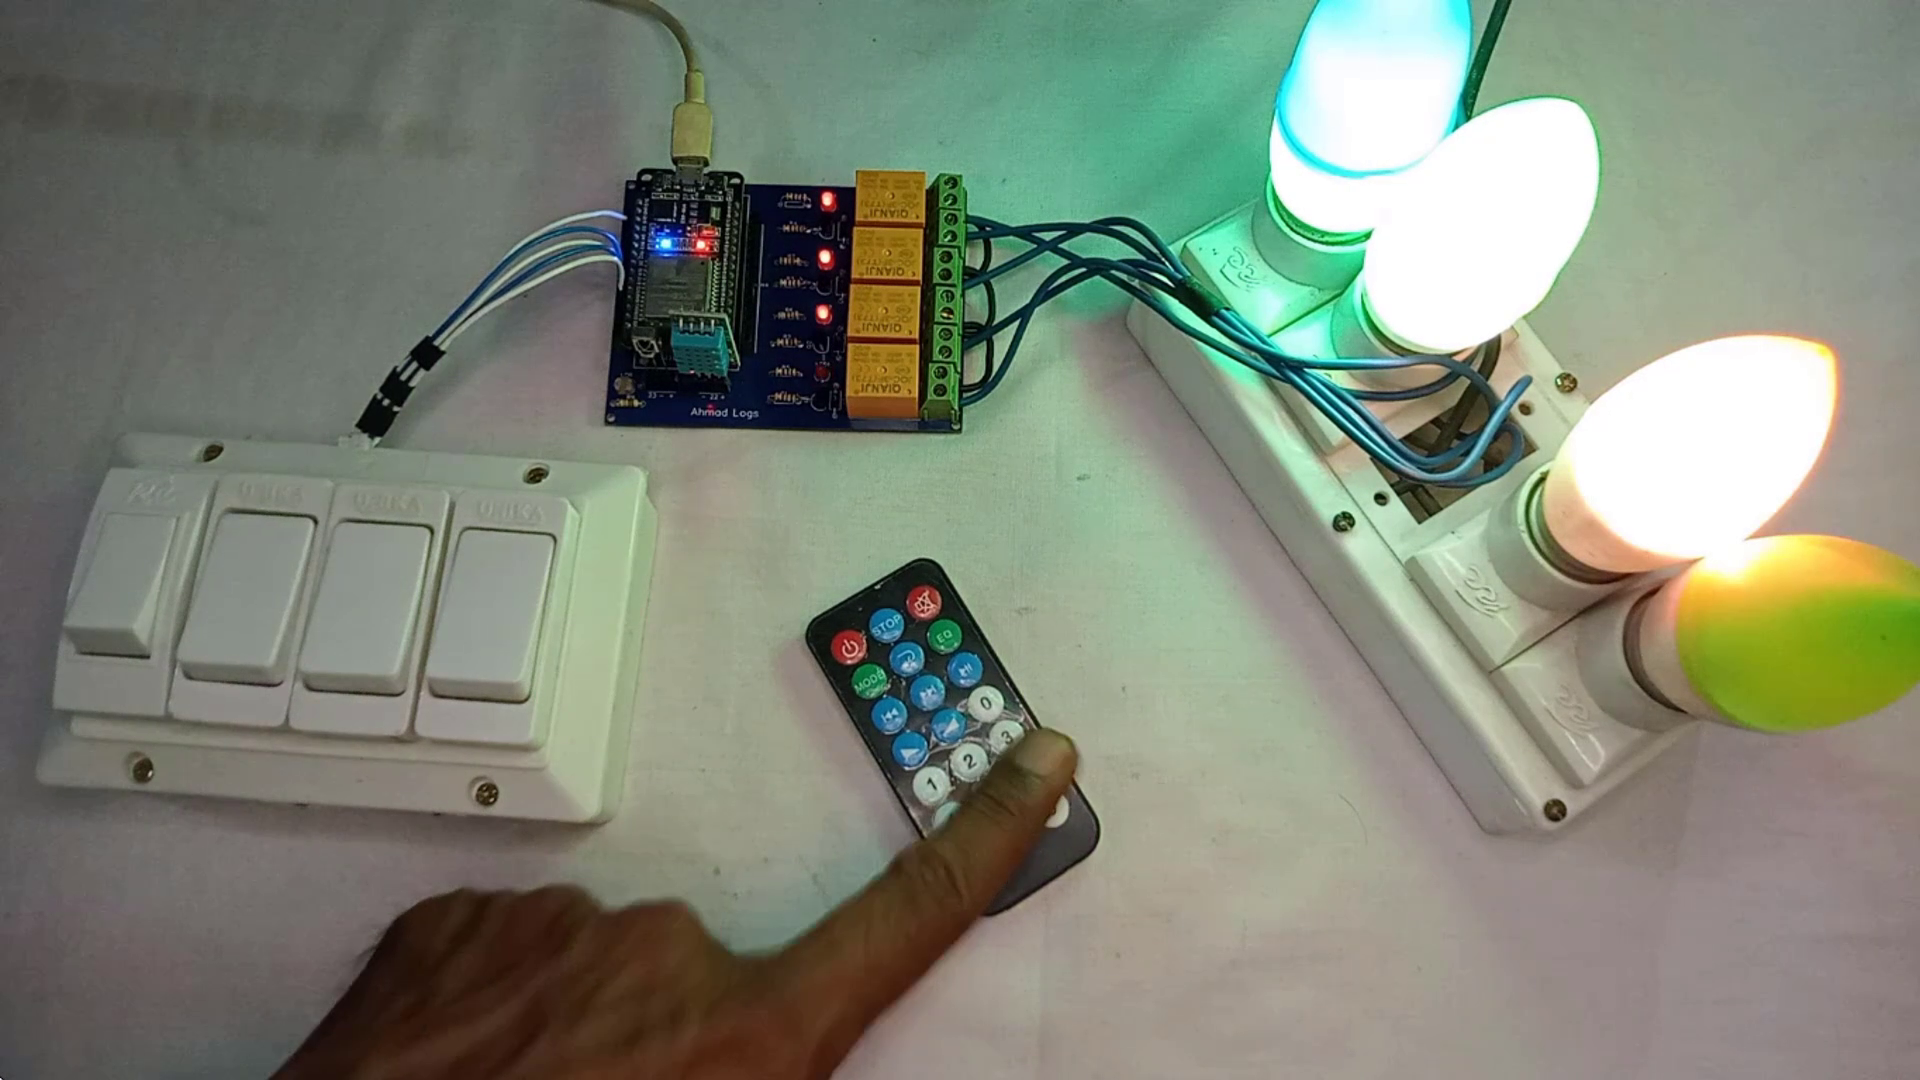
- Control relays with IR Remote
- Project works with or without the internet
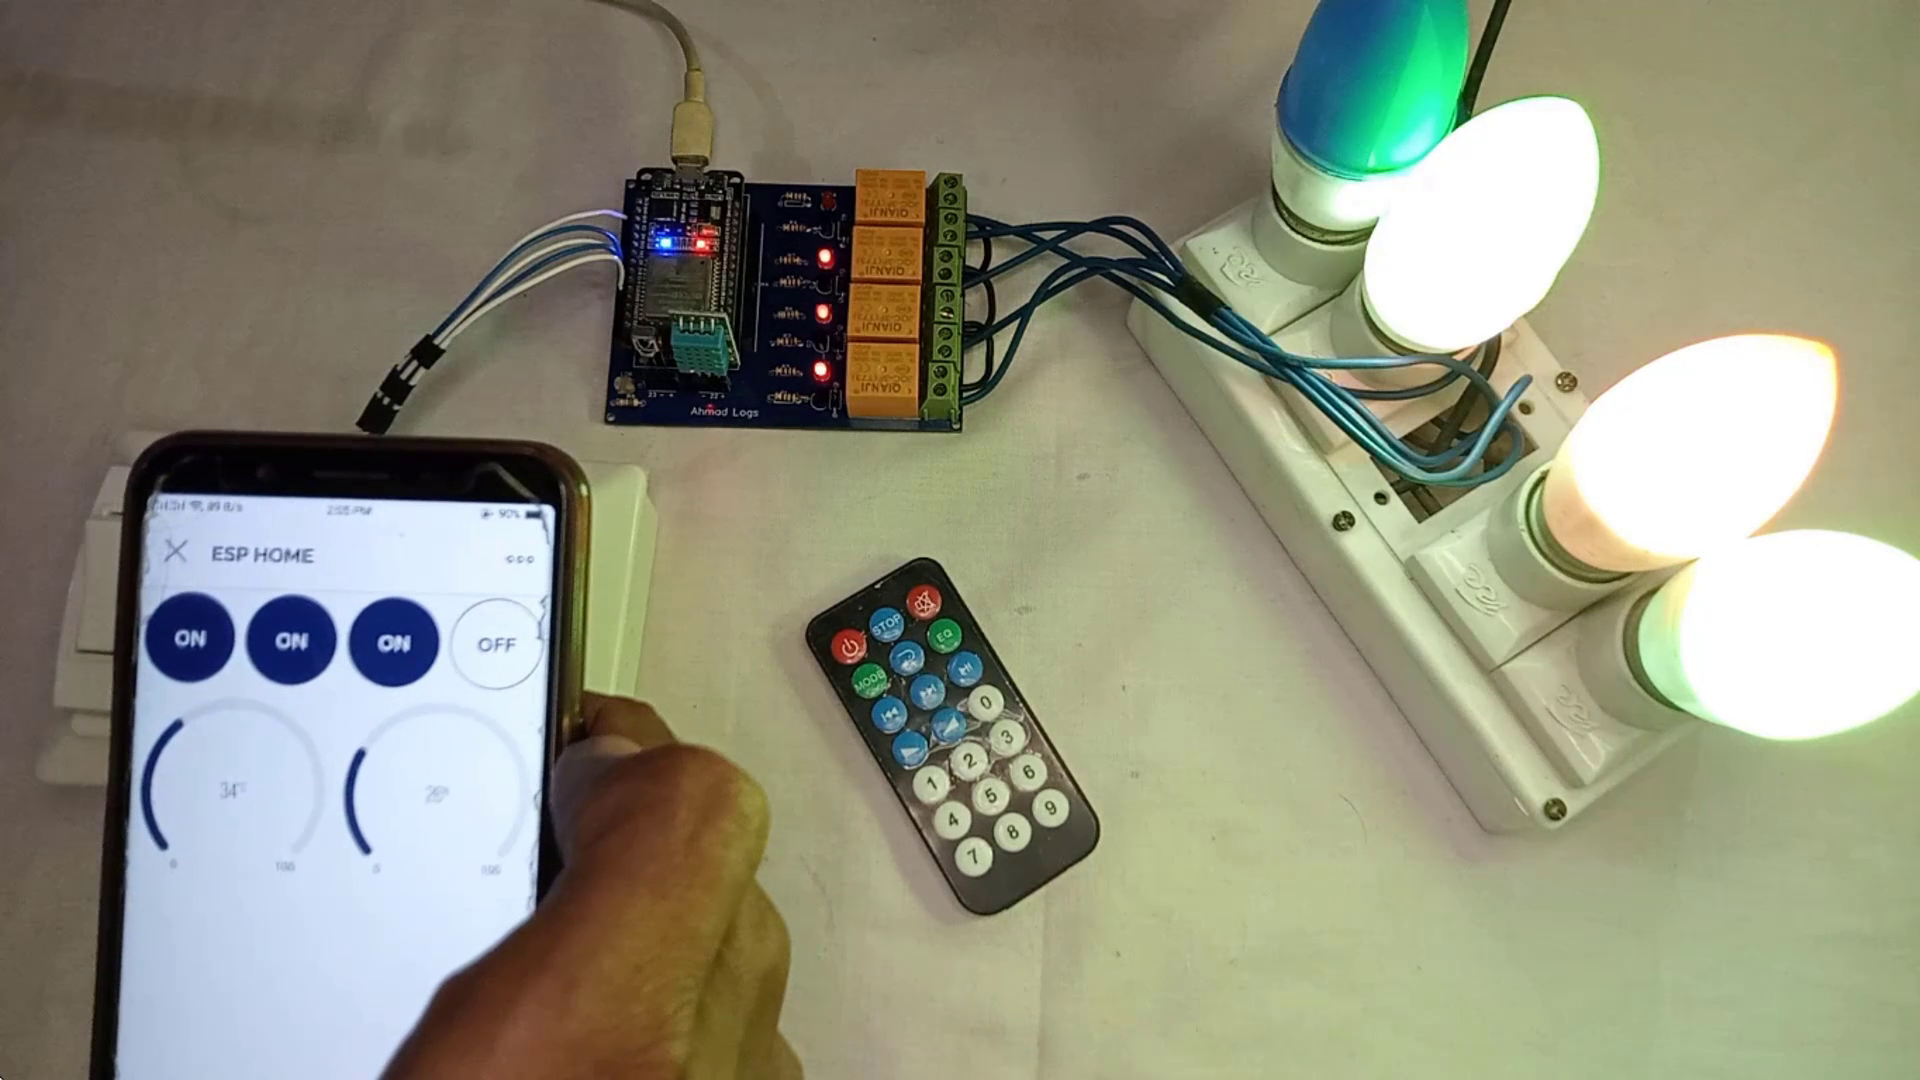
- Monitor realtime status on Blynk App
- Monitor temperature and humidity data on Blynk App
- Control upto 4 appliances
Supplies
.png)
.png)
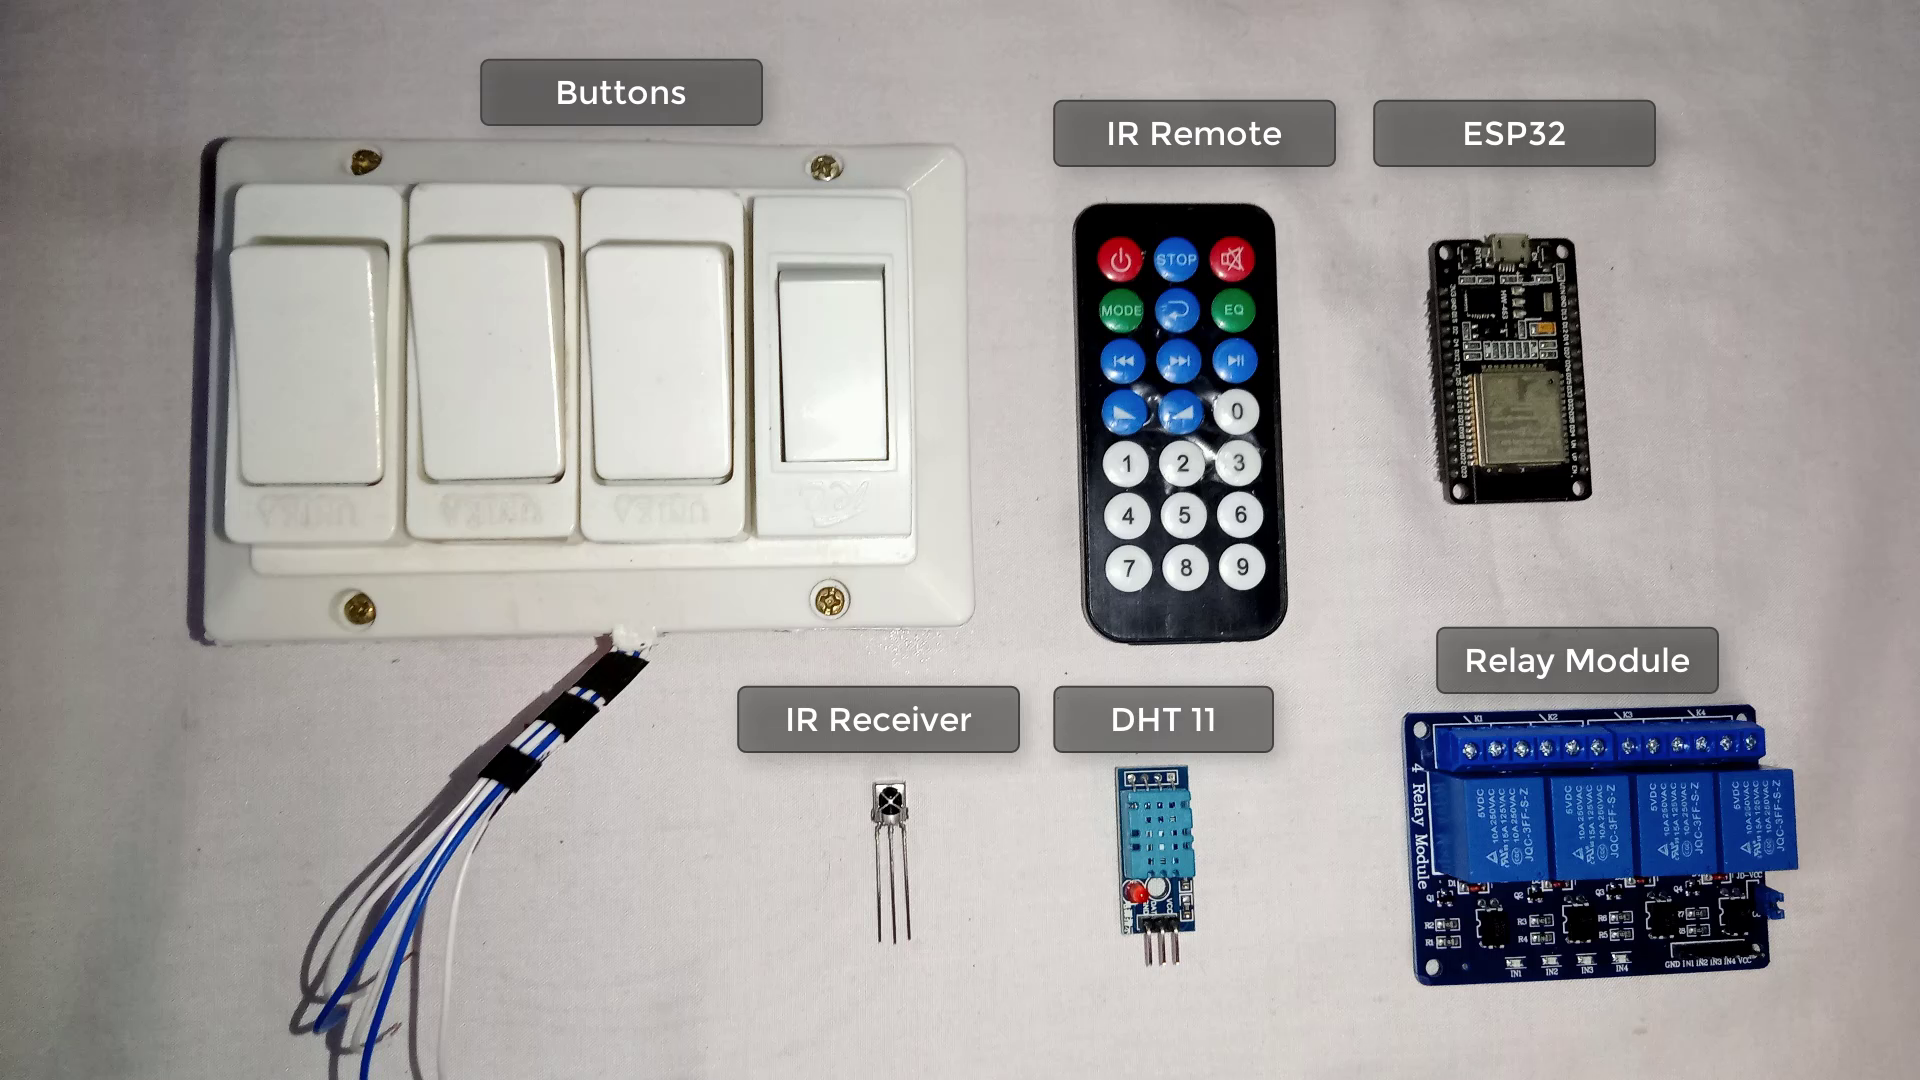
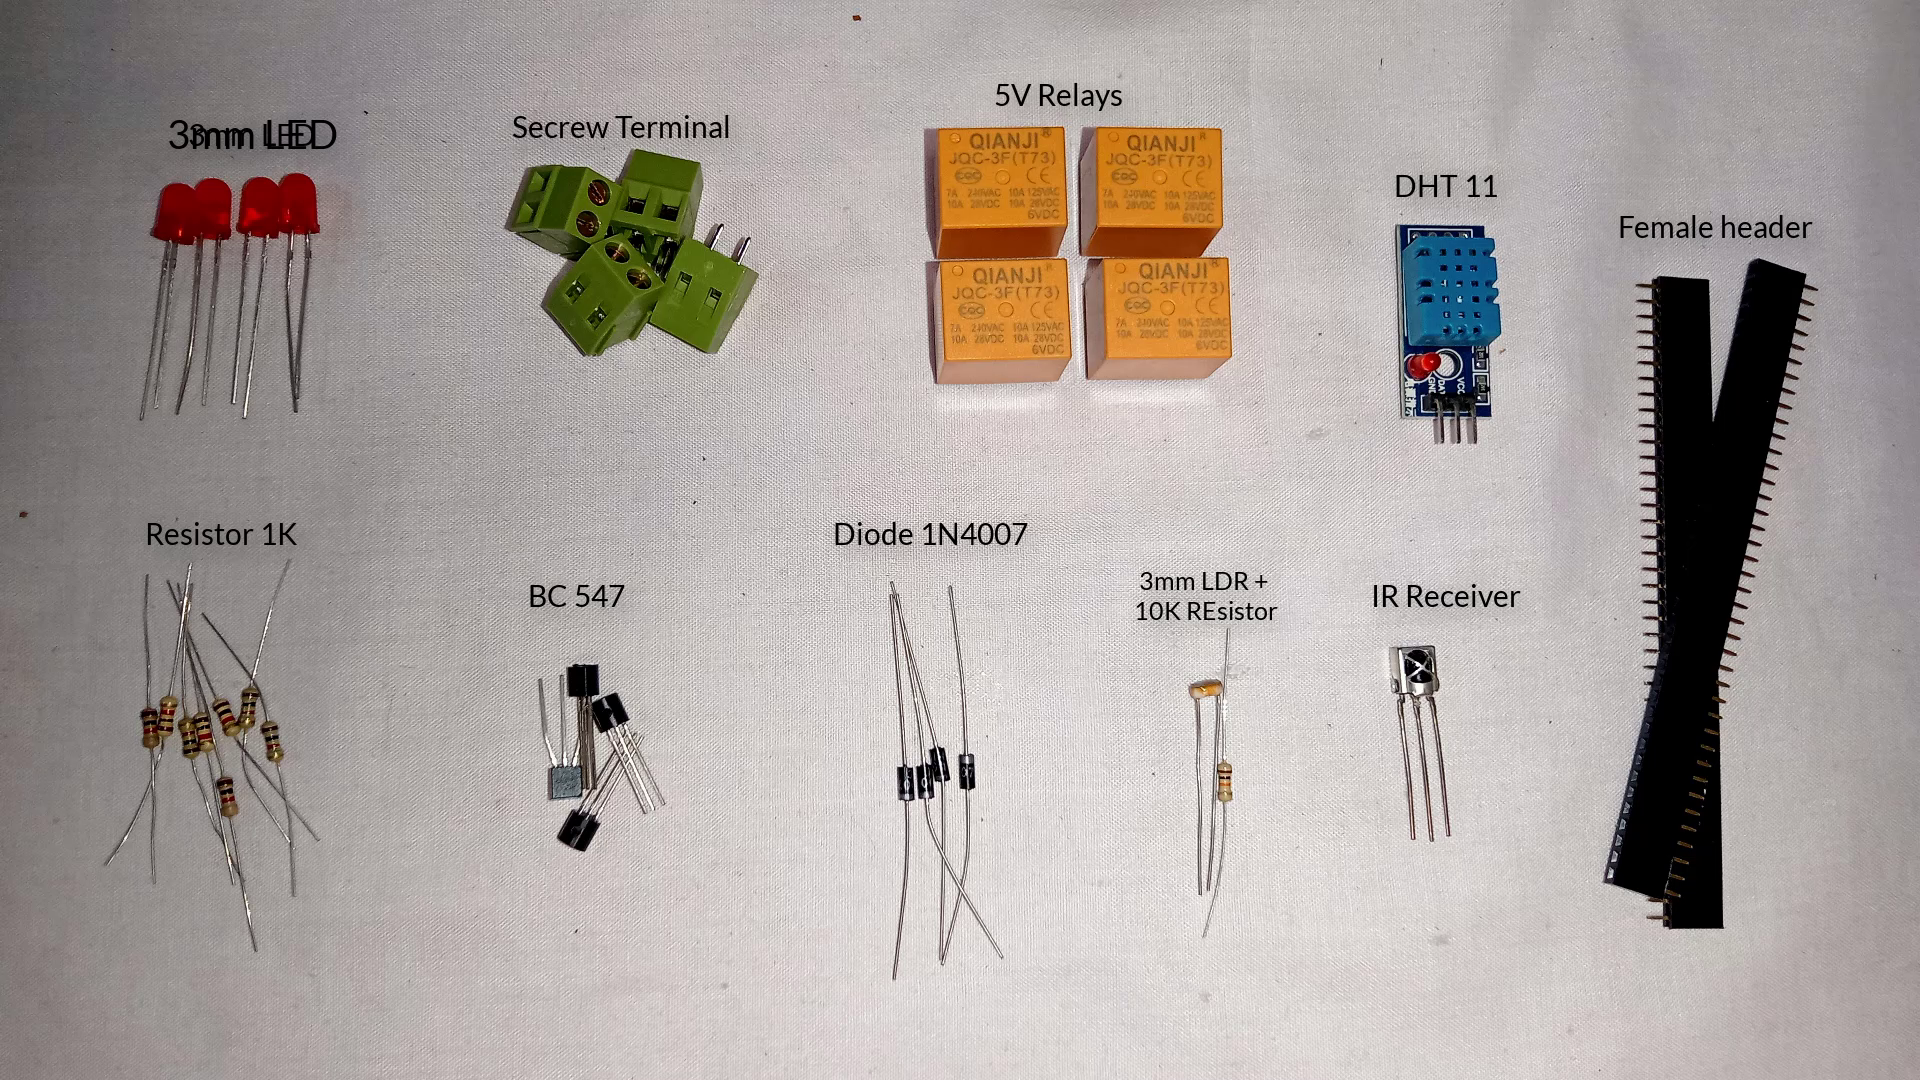
To build this project on a breadboard, you will need the following main components:
To build this project on a breadboard, you will need the following main components:
- 3mm LED X 4
- Secrew Terminal 3 pins X 4
- 5v relay X 4
- DHT11 Sensor
- 38kHz VS1838 IR Receiver
- 3mm LDR
- 10K Resistor X 1
- 1K Resistor X 8
- BC547 Transistor X 4
- Diode 1N4007 X 4
- ESP32
- Switch Buttons X 4
- 5v Supply
Modes of the Project
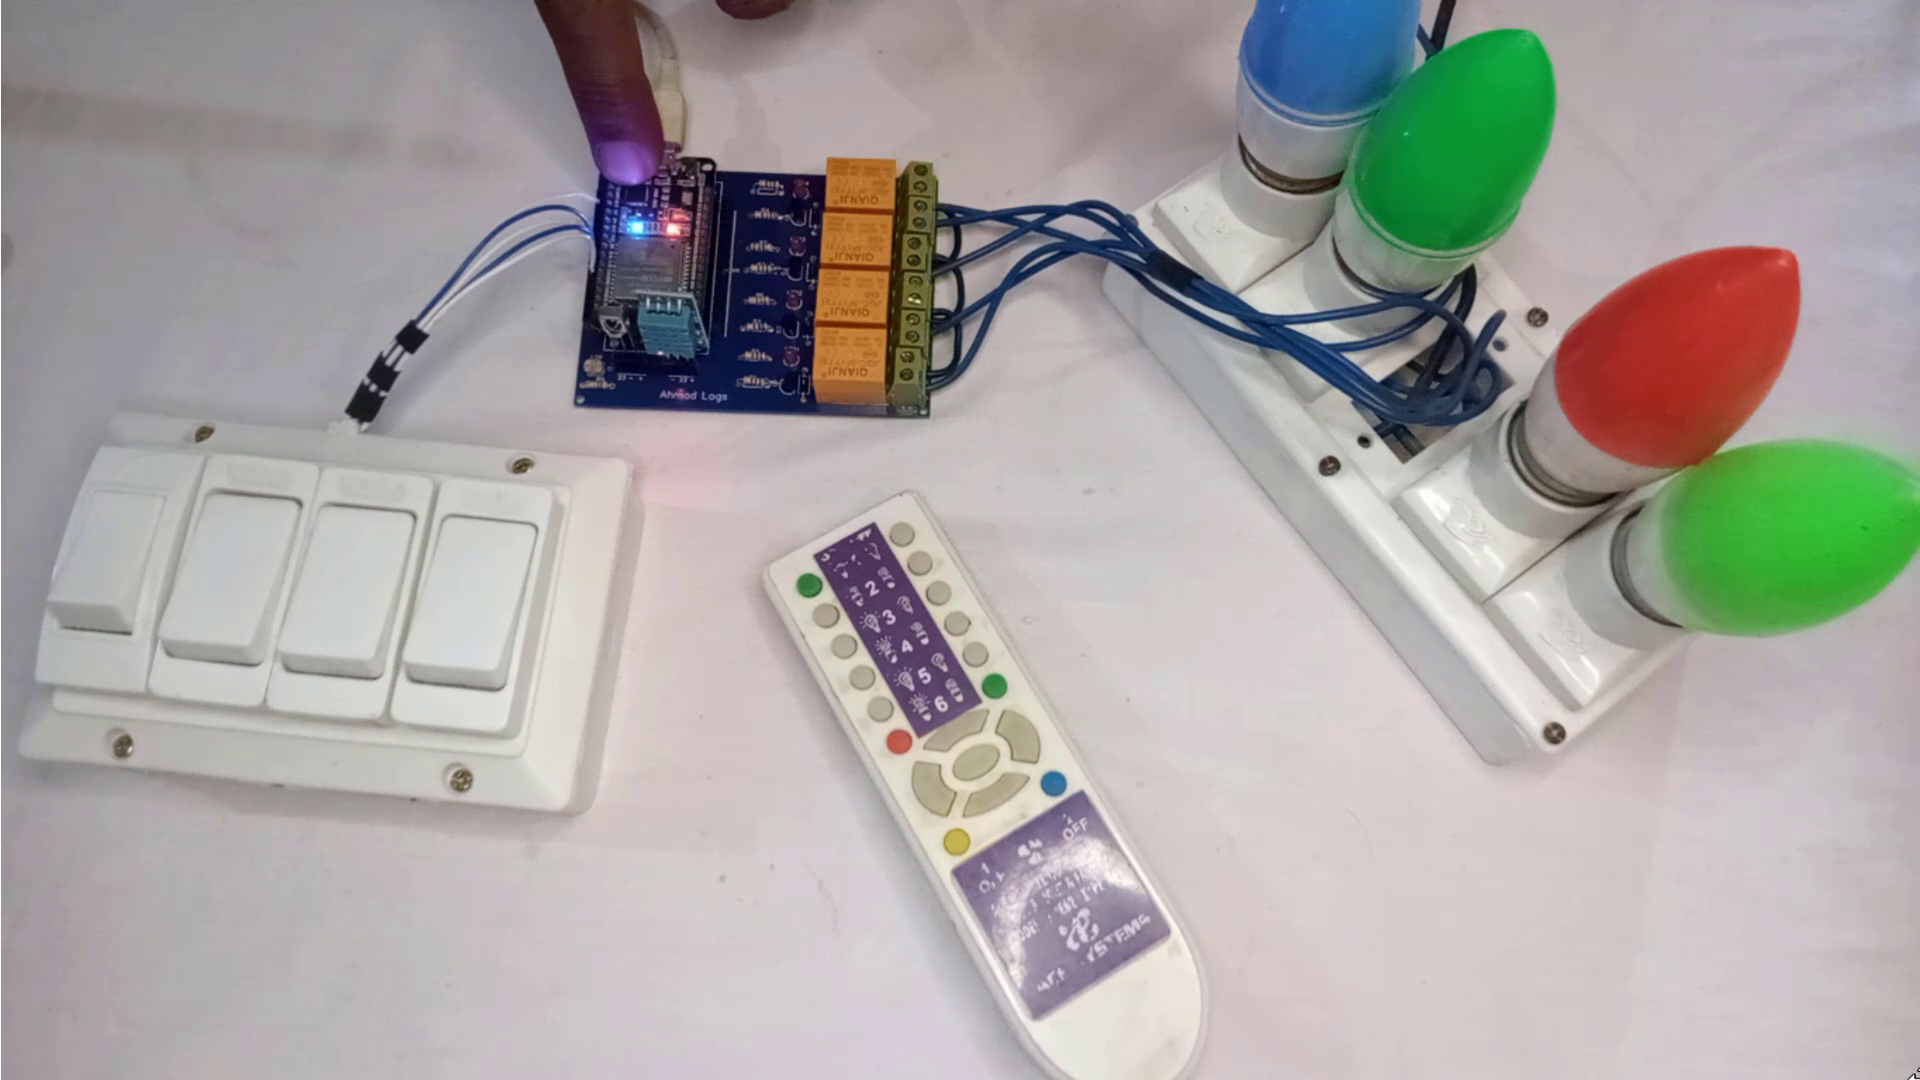
This project works on two modes.
- Normal Mode
- Config Mode
Normal Mode: In normal mode, you can control your appliances manually using IR remote, and switch buttons without the internet. Additionally, this project supports blynk IoT platform, so you can control your home appliances from anywhere in the world, while connected to the internet. You can also monitor the real time room temperature and humidity using Blynk App.
Config Mode: In config mode, you can register a new remote control without making any change in the code. To enter the Config Mode, press and hold the boot button for more than 2 seconds and then release the button. The blue LED will start blinking very fast, indicating that the project is now in Config Mode.
Wiring the Components
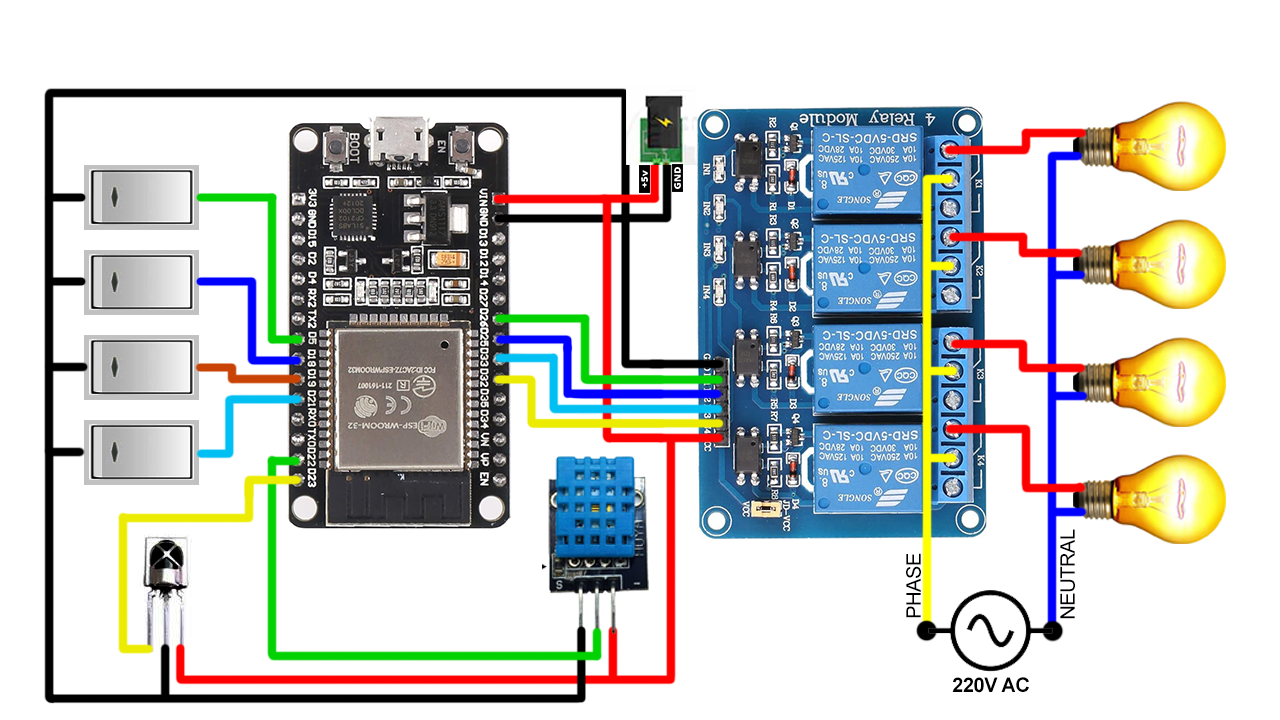
Above is the wiring diagram for this project.
Safety Precautions:
The AC bulbs are connected to the relays, which involves high voltages. Take proper precautions and ensure your safety before working with high voltages.
PCBWay PCB Prototyping
.png)
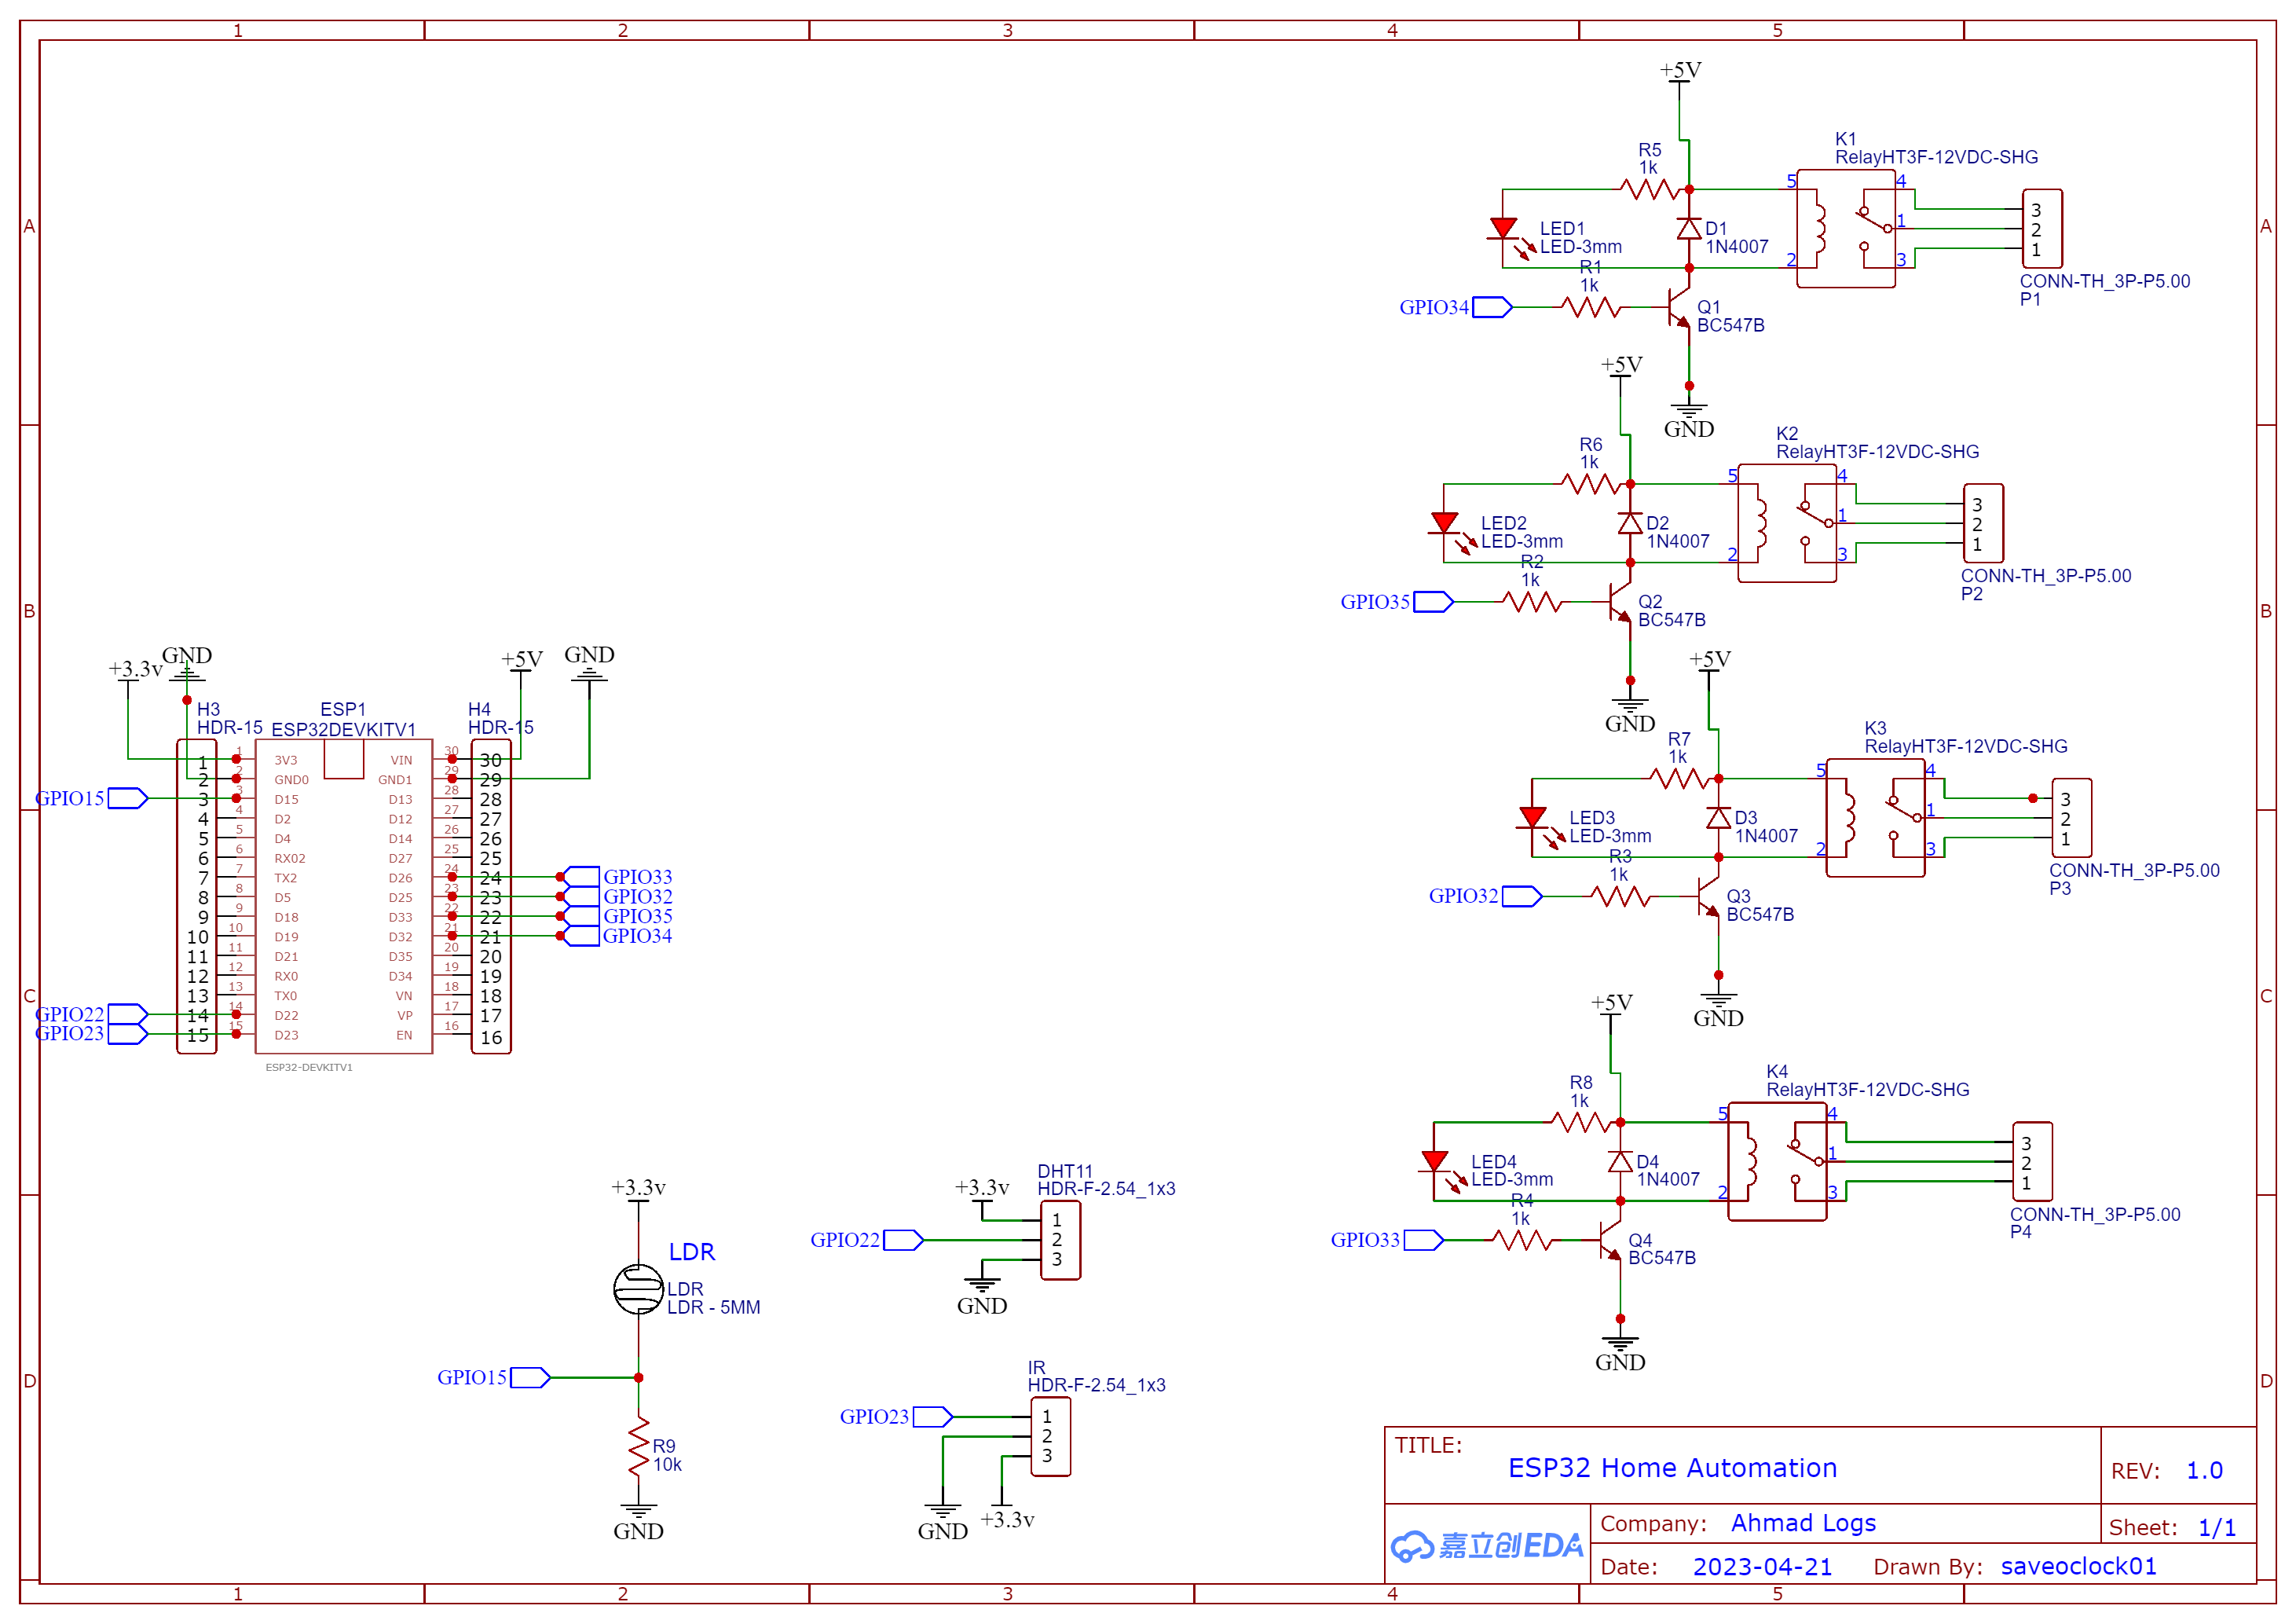
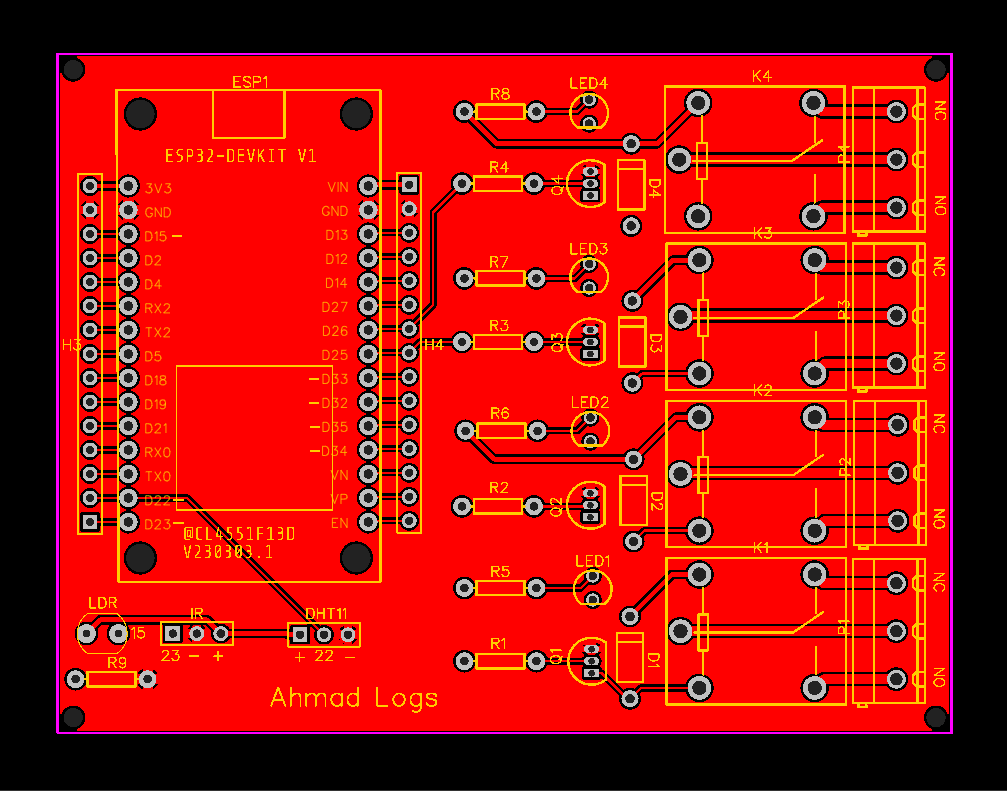
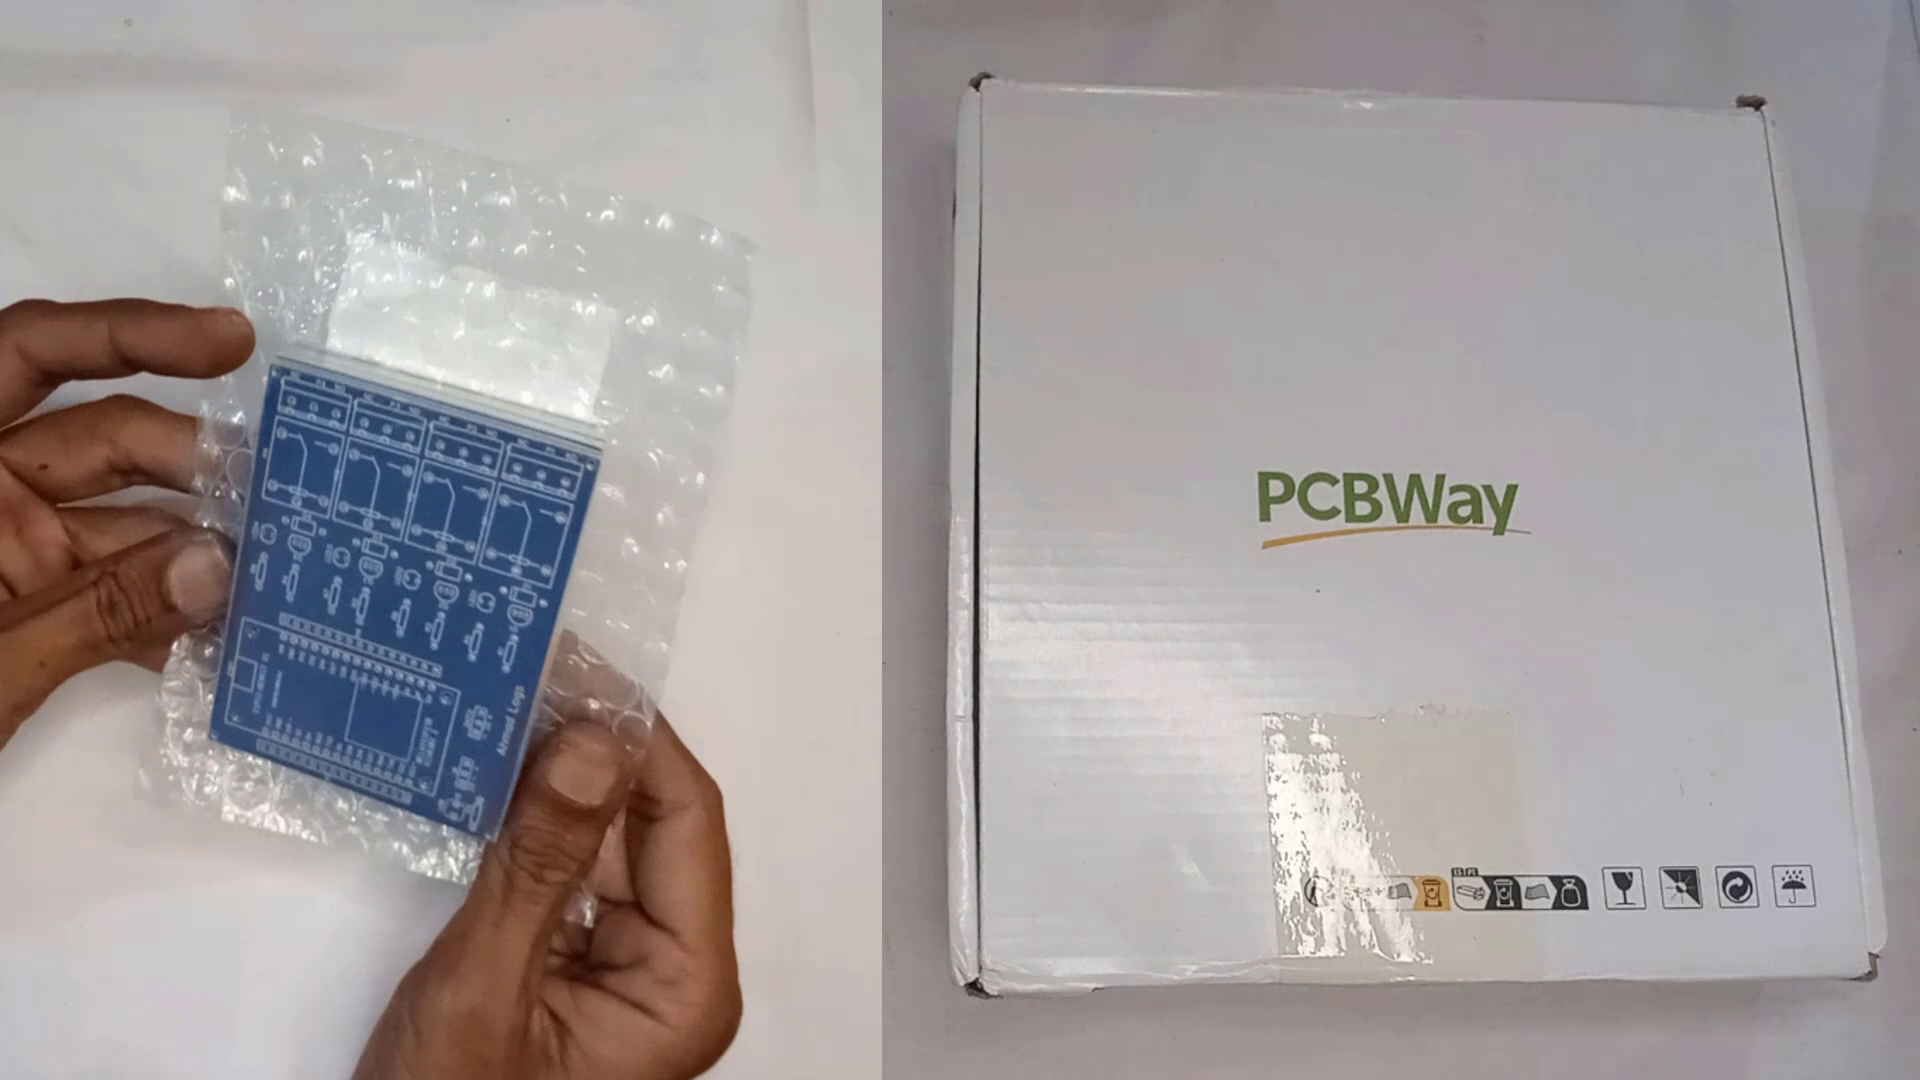
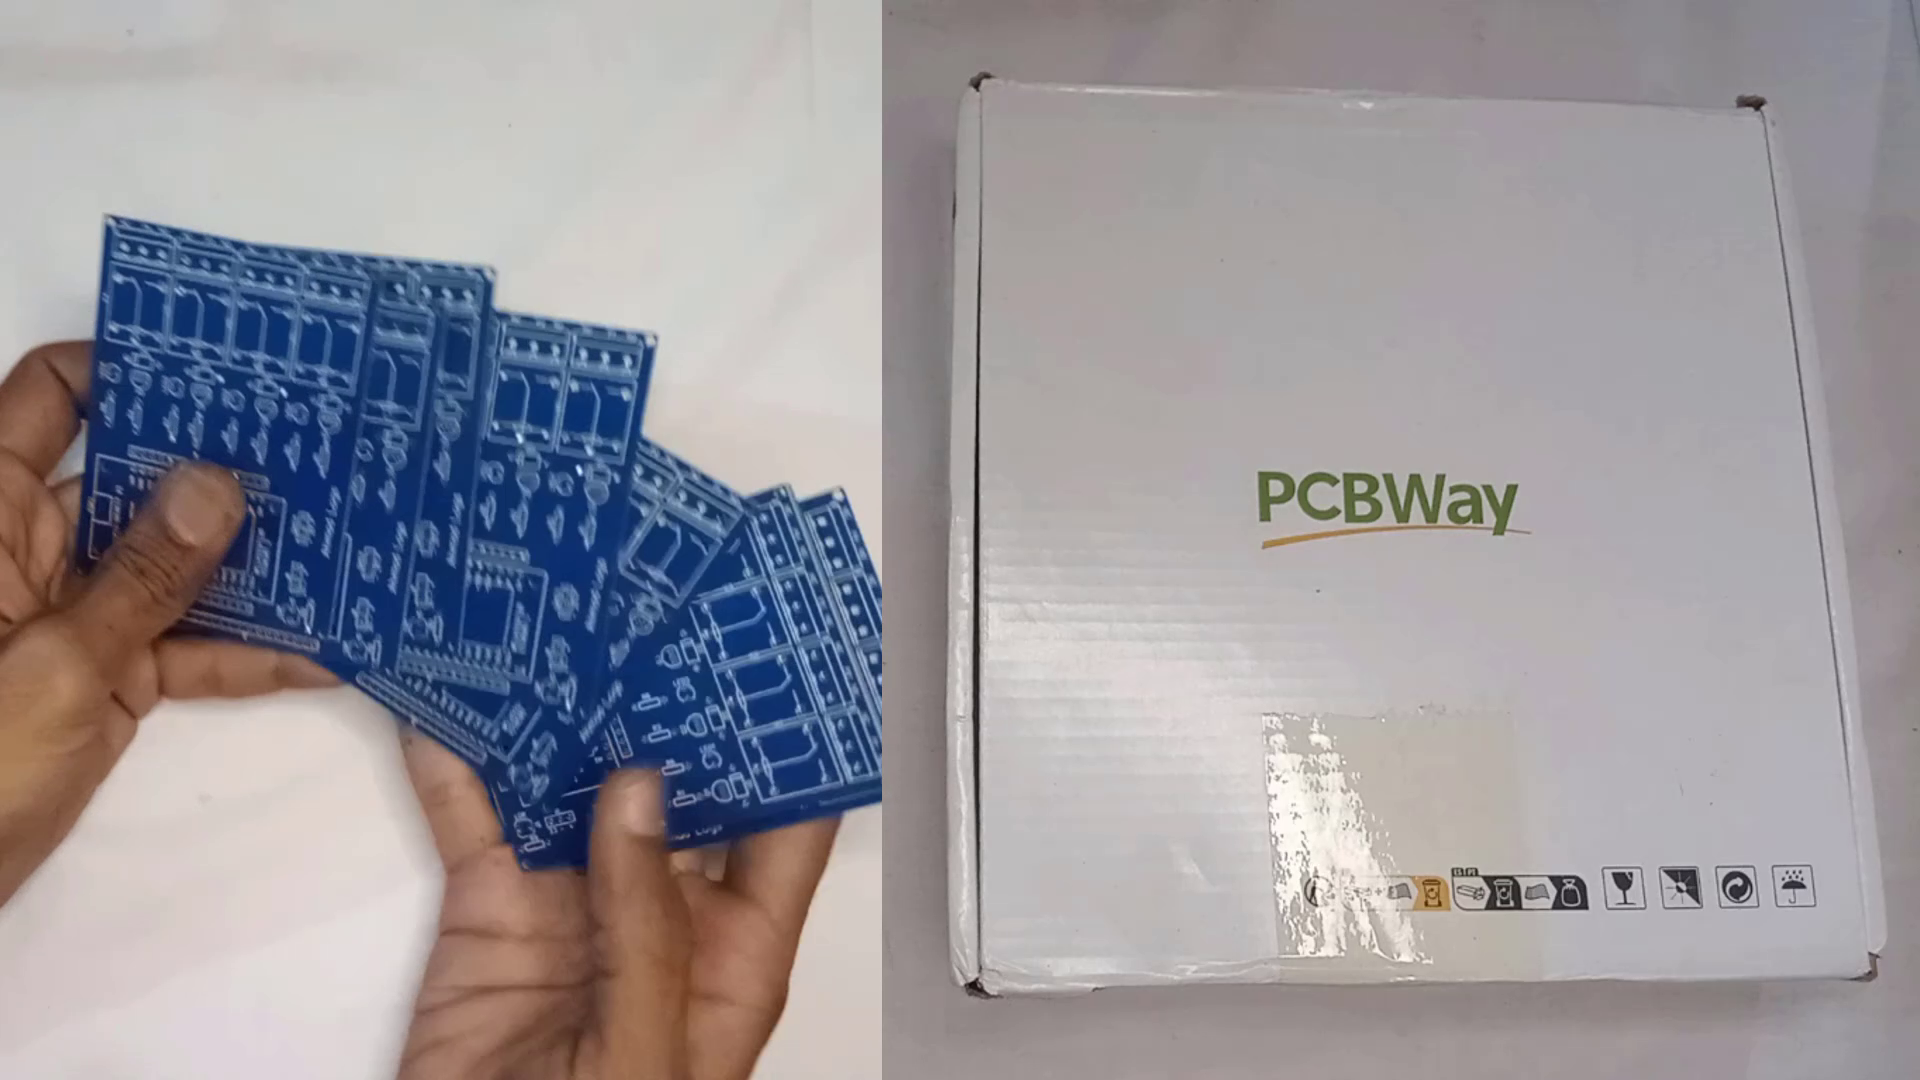
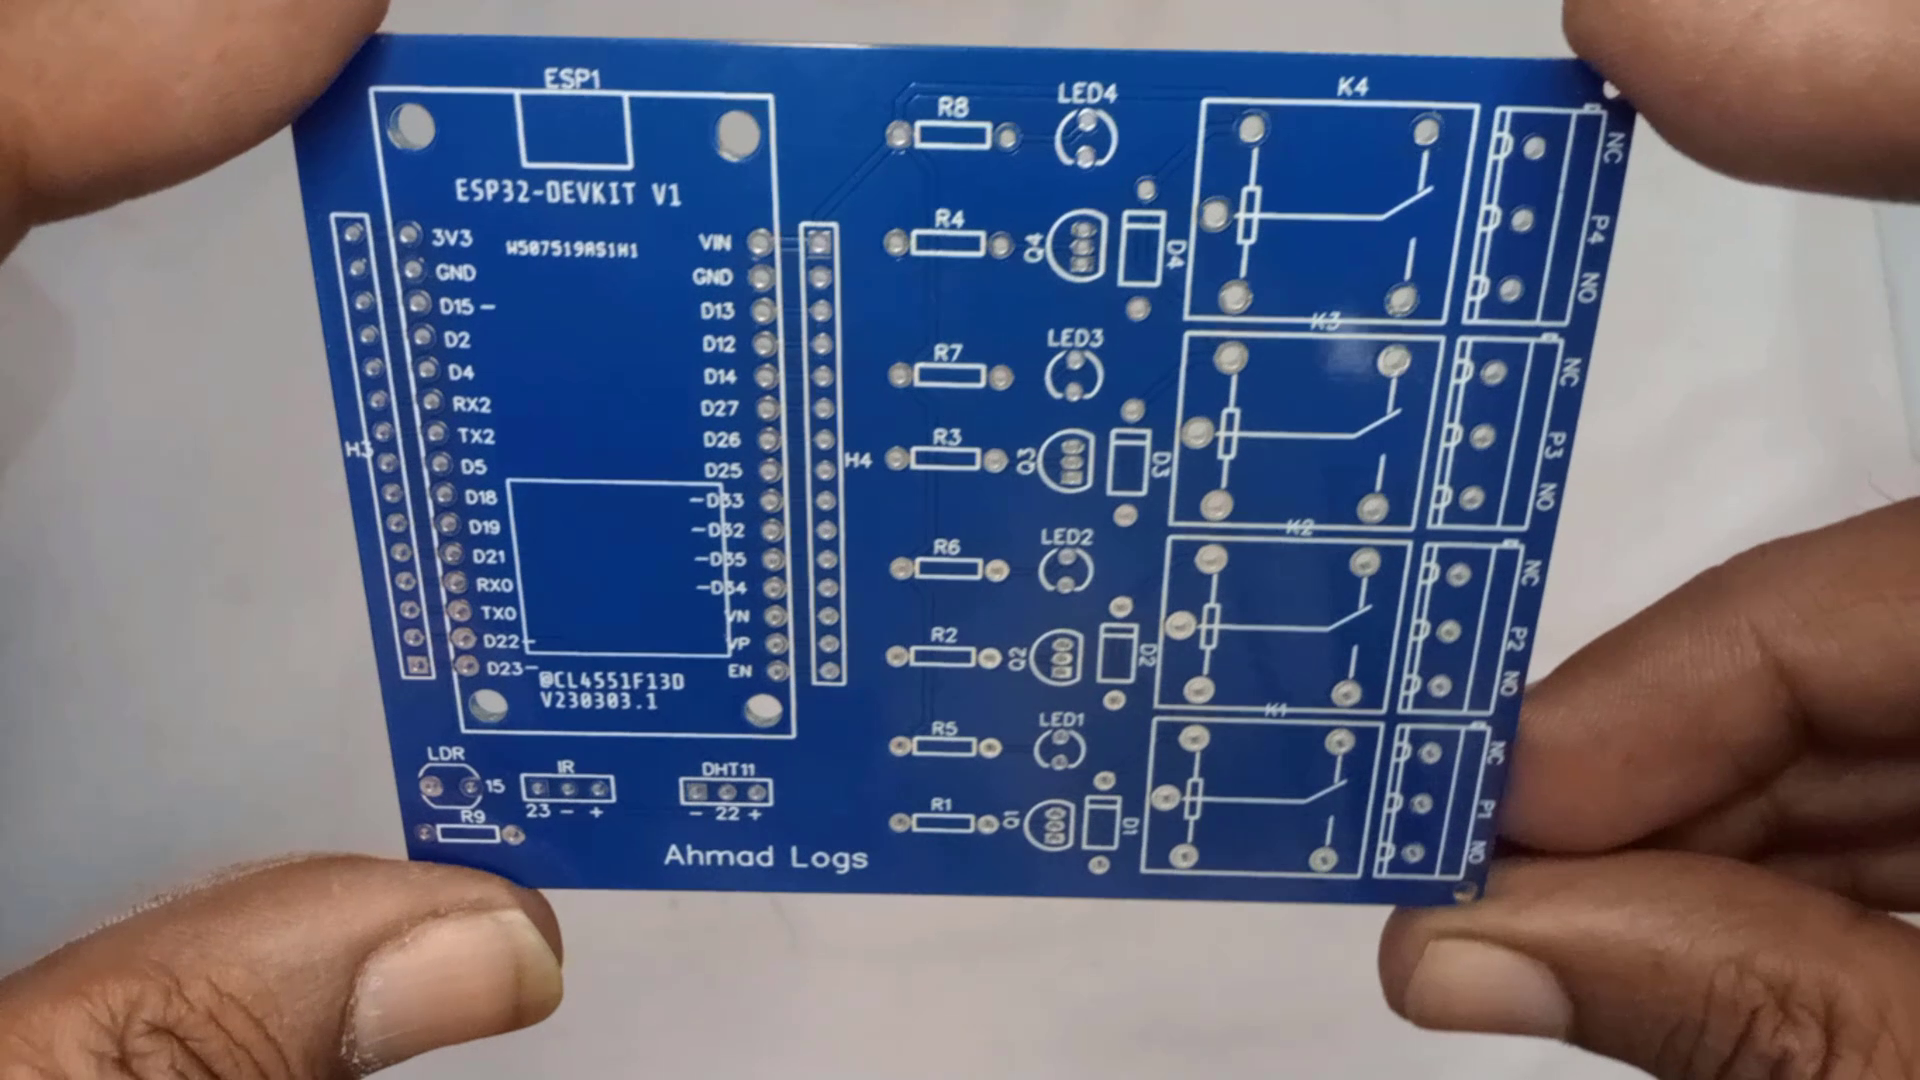
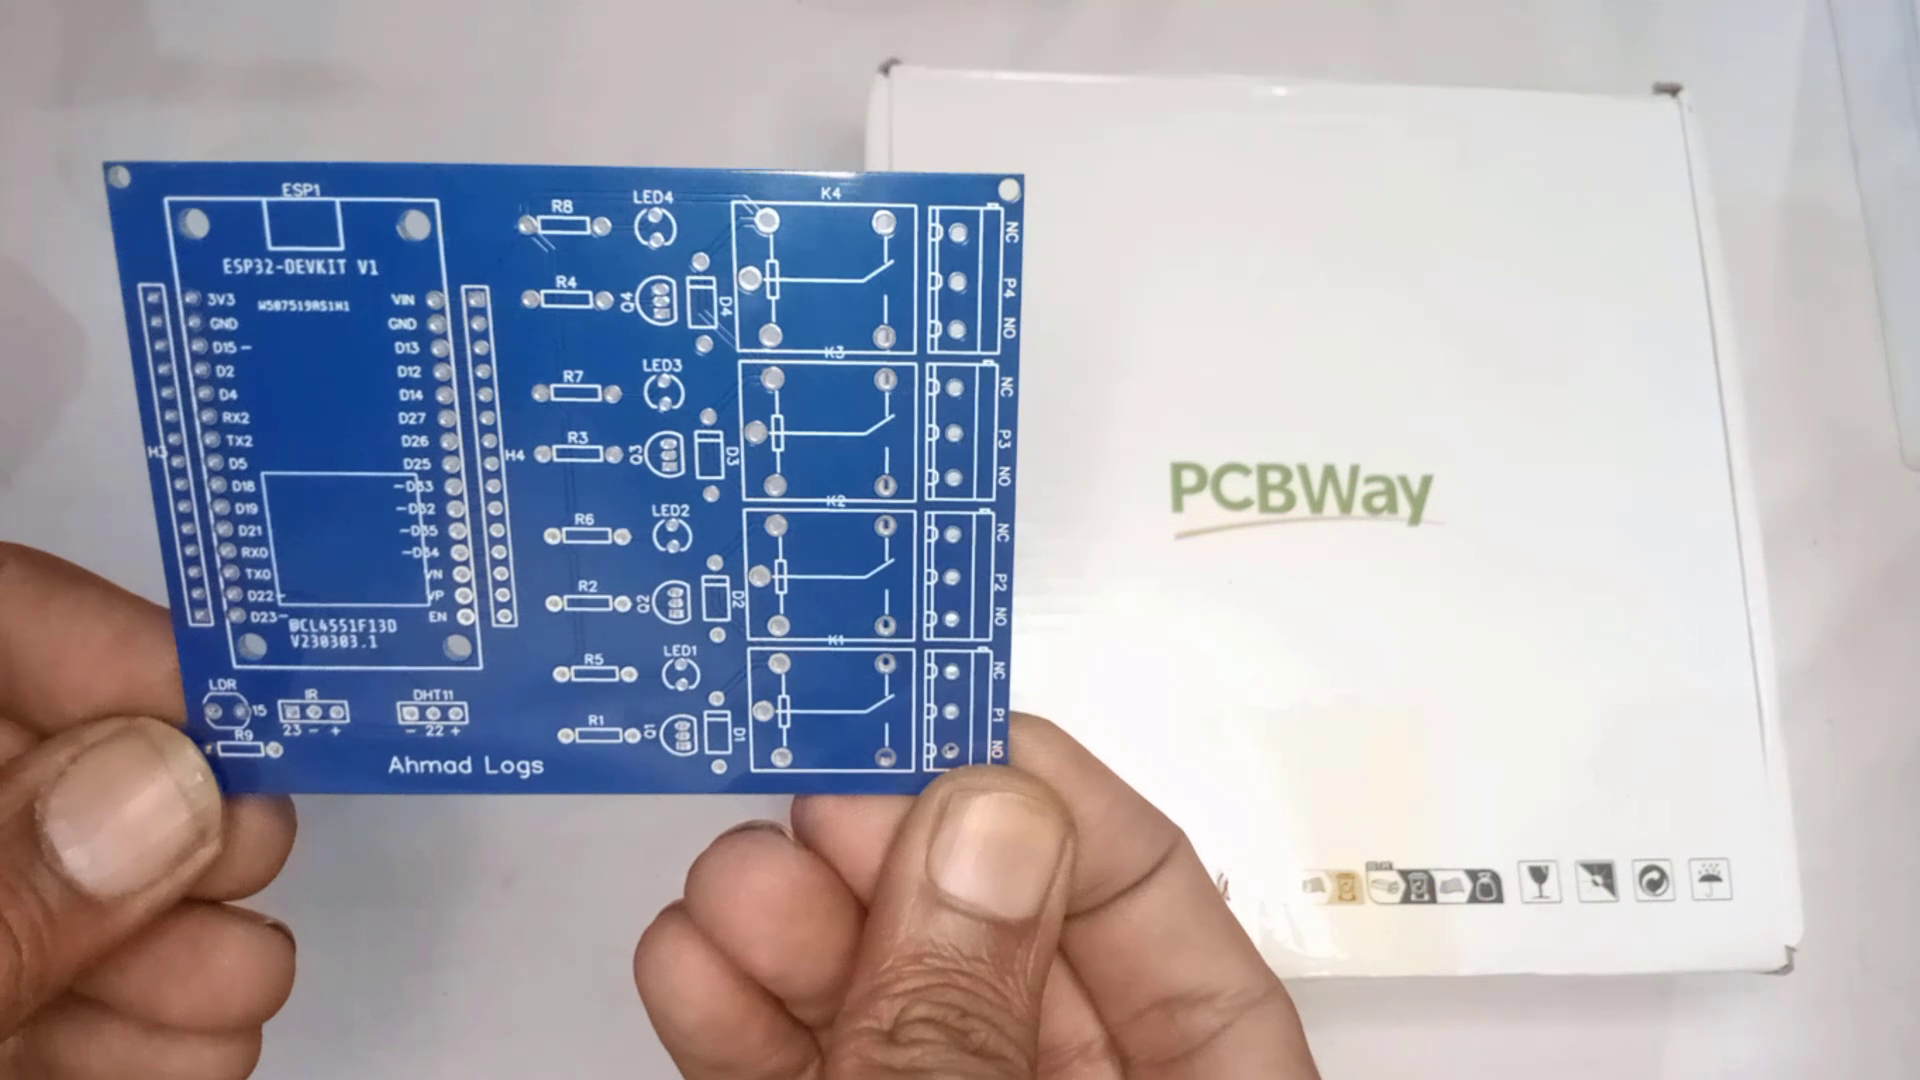
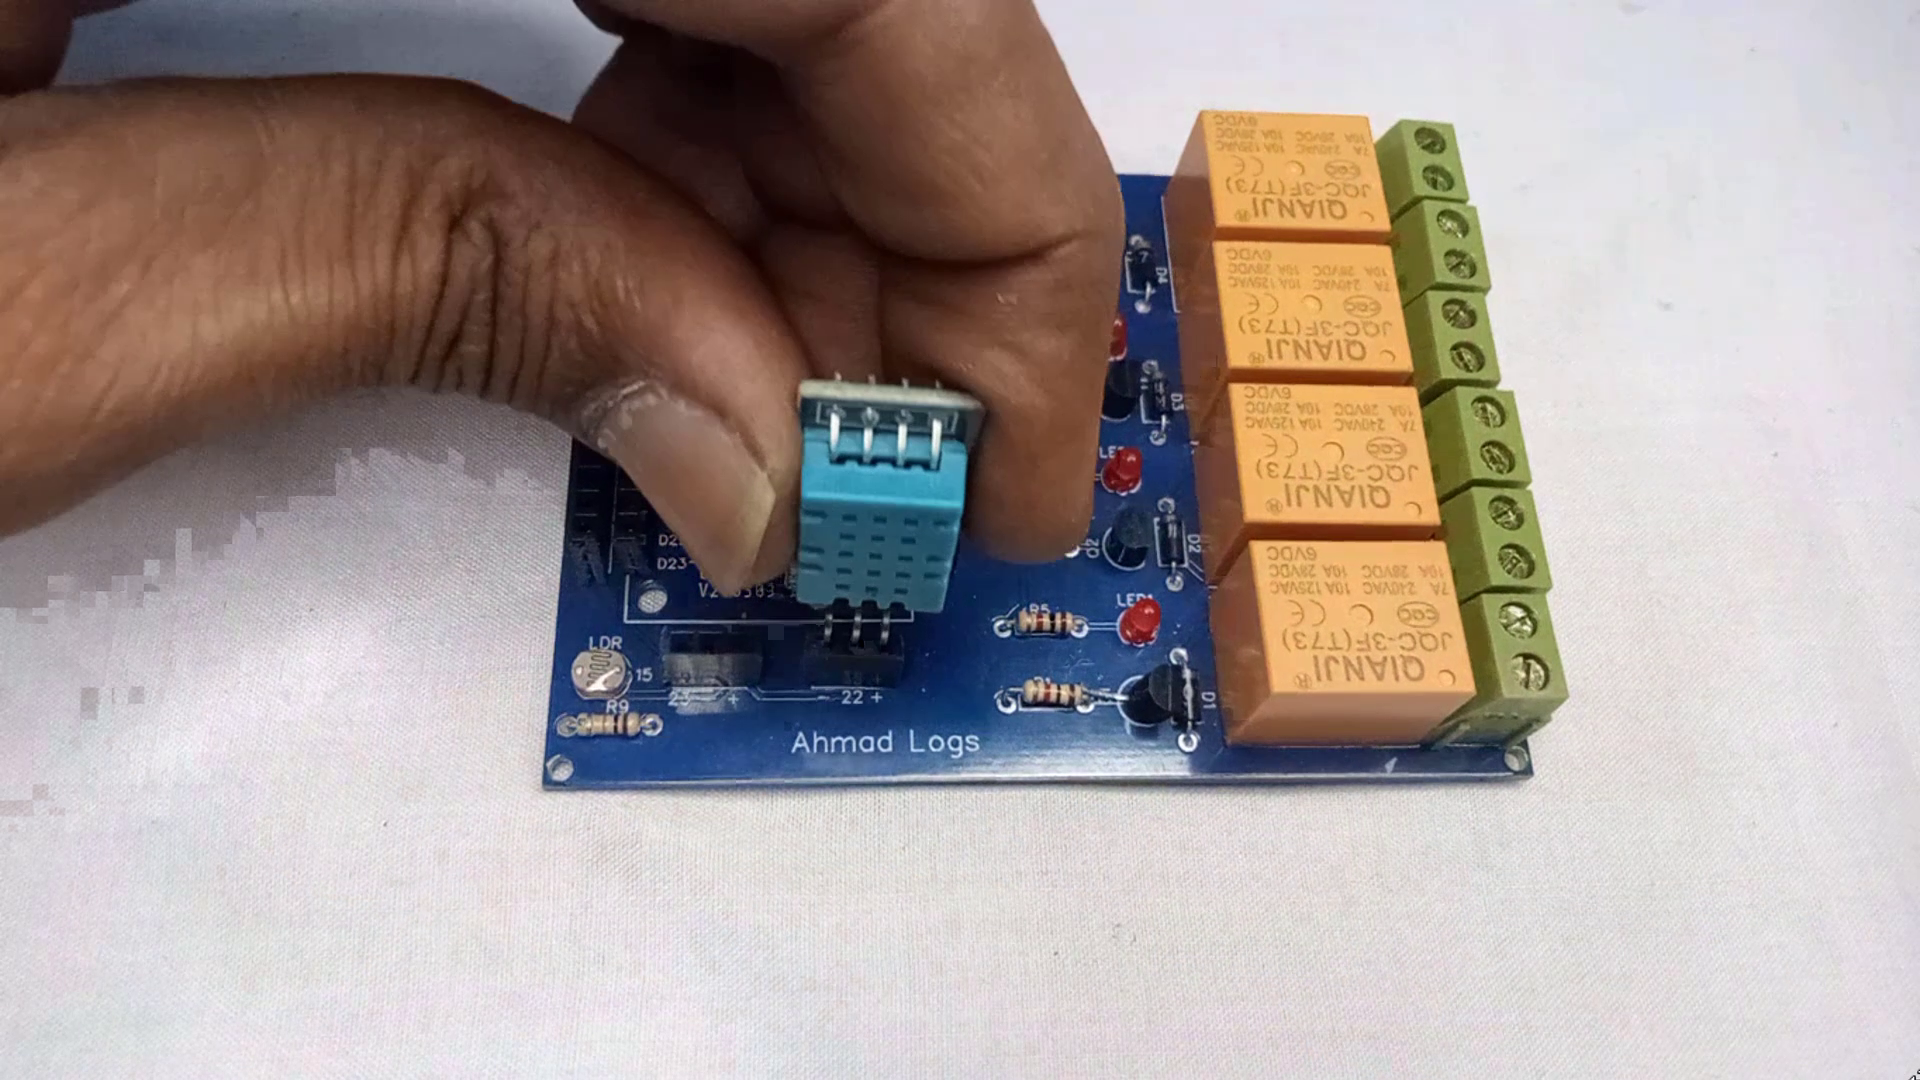
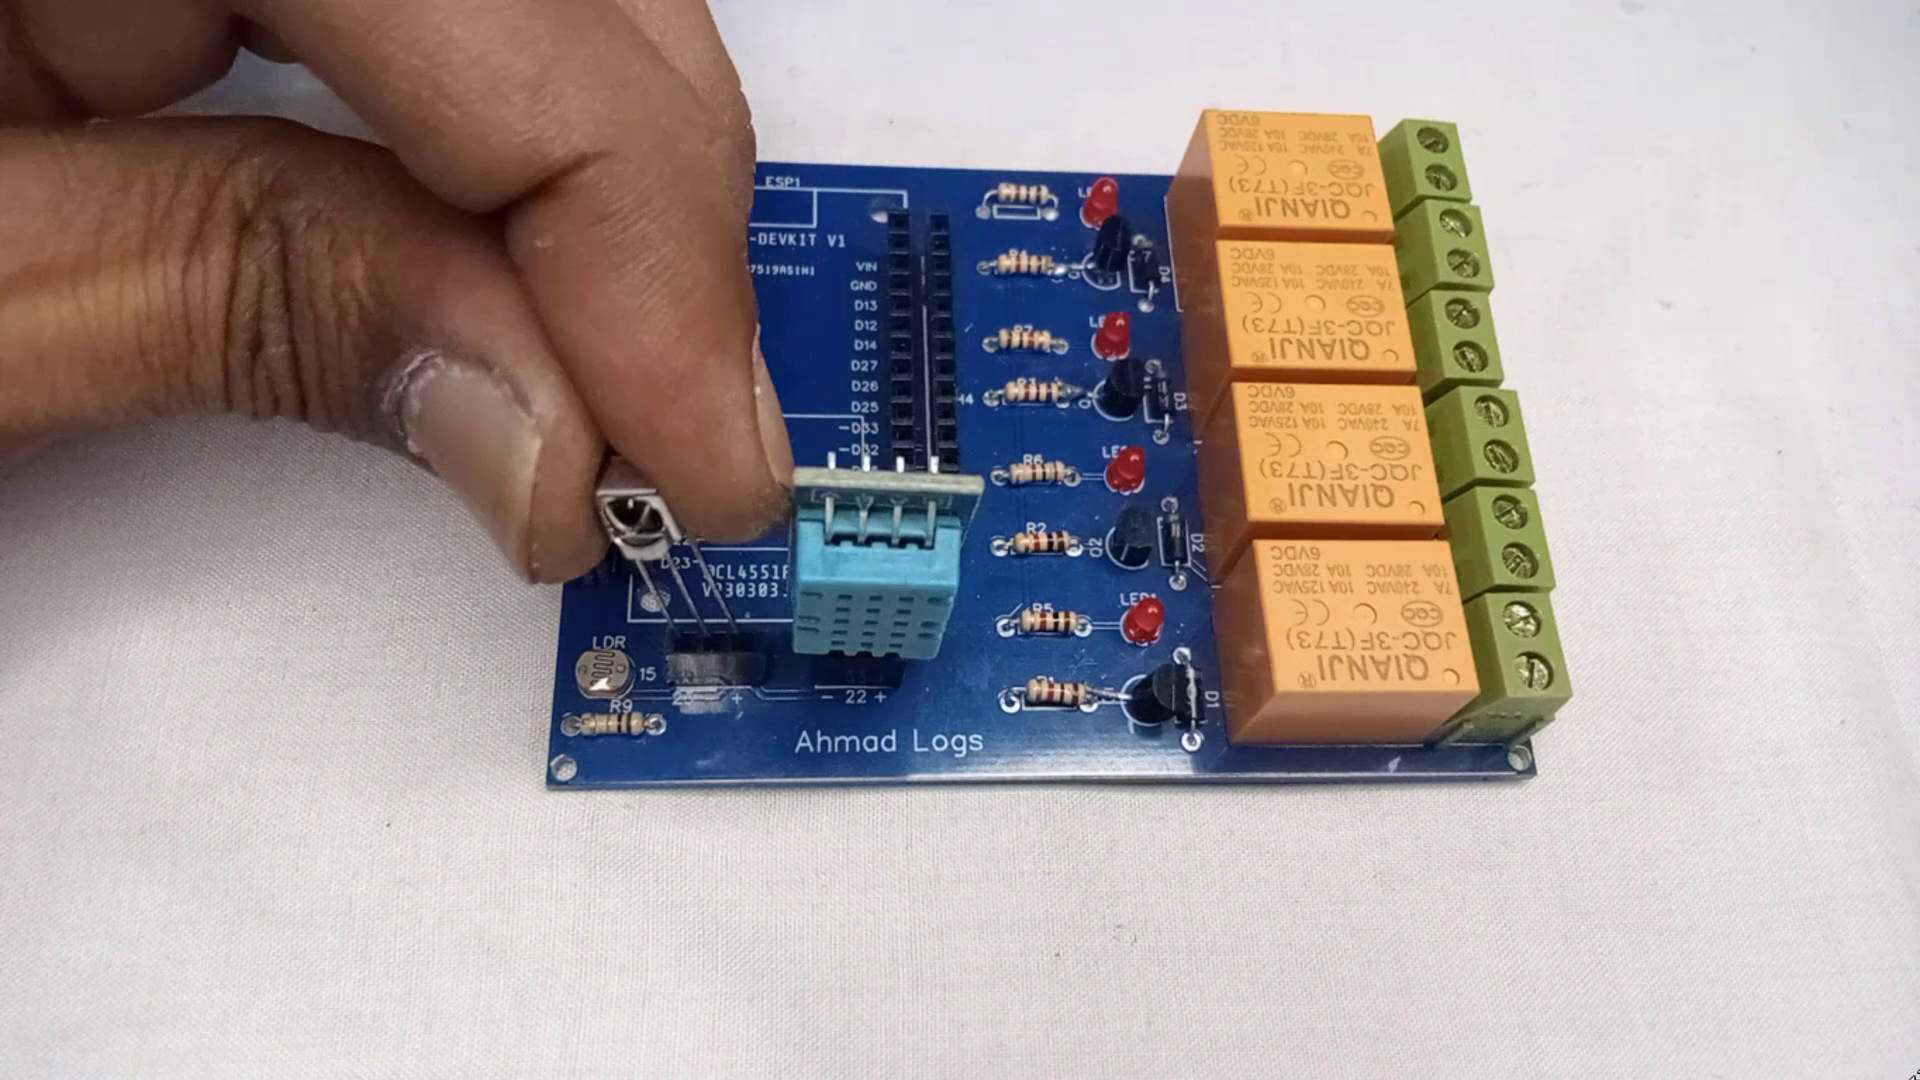
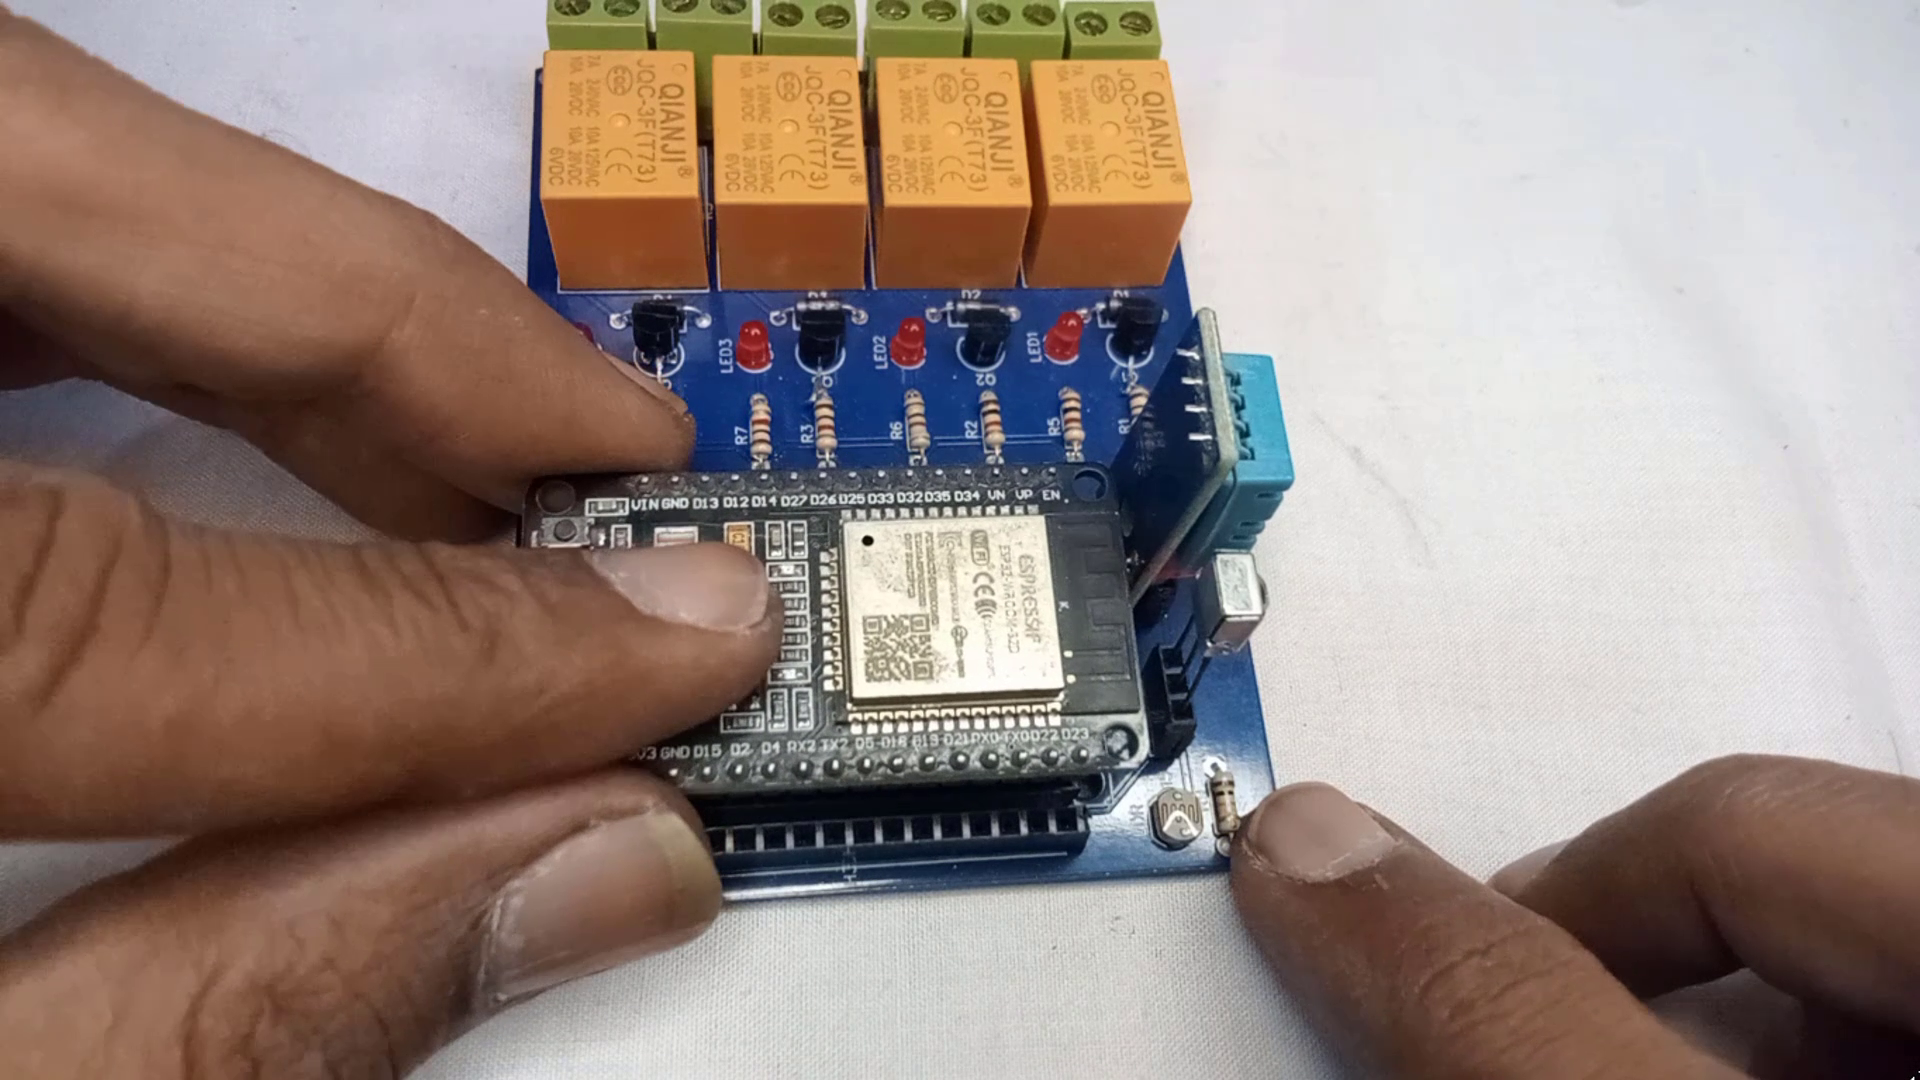
In order to make my project more compact and professional-looking, I utilized the EasyEDA free online circuit design software to create a custom PCB. The PCB was designed to be 95mm x 70mm in size, and the resulting design is both sleek and functional. I chose to utilize PCBWay's prototyping services to fabricate the PCB due to their excellent reputation as a high-quality PCB manufacturer.
PCBWay is a company that specializes in providing high-quality printed circuit board (PCB) manufacturing and assembly services. With more than a decade of experience in the industry, PCBWay offers a wide range of services including PCB prototyping, PCB assembly, and PCB design. The company prides itself on its advanced production capabilities, state-of-the-art equipment, and highly skilled workforce that allows it to produce top-quality PCBs for various industries such as automotive, medical, consumer electronics, and aerospace. PCBWay is also committed to providing excellent customer service and support, ensuring that each customer's unique needs are met with professionalism and efficiency.
Ordering PCB on PCBWay
.png)
.png)
.png)
.png)
.png)
.png)
.png)
.png)
.png)
.png)
.png)
.png)
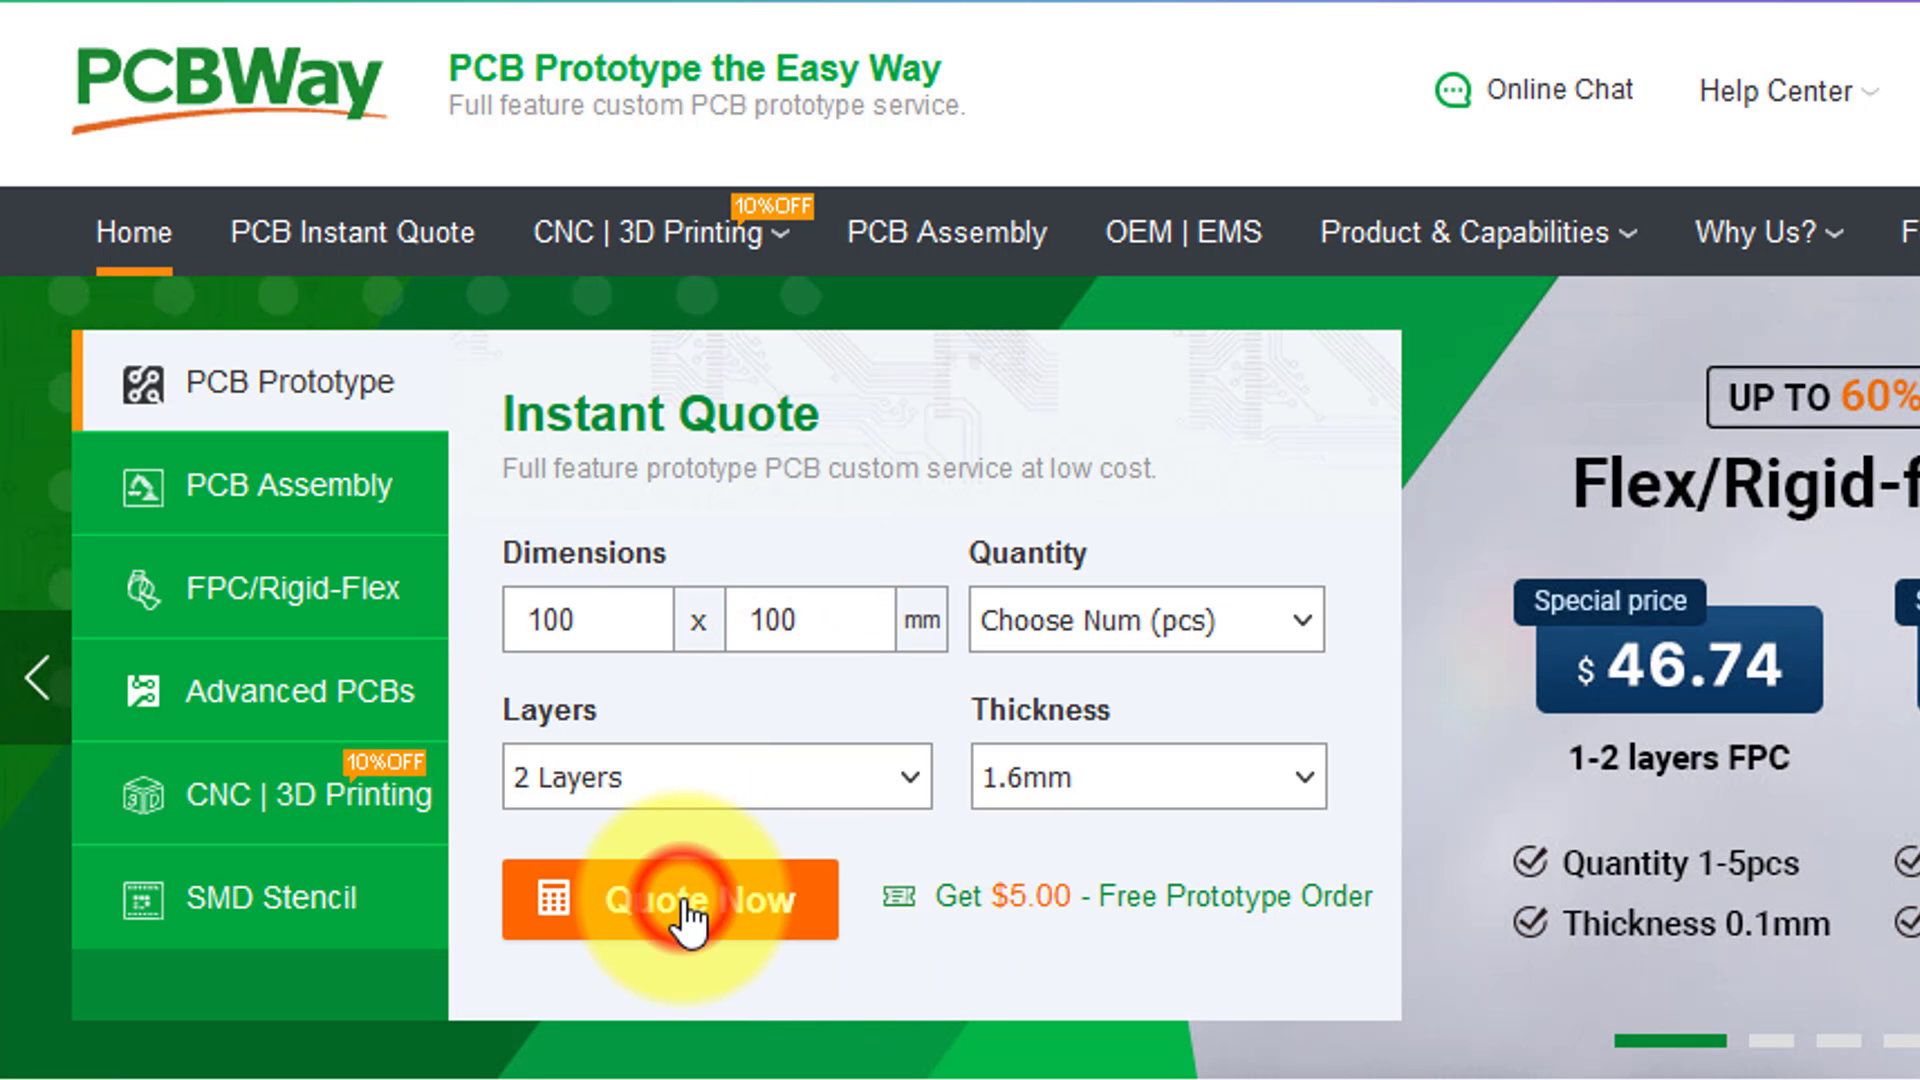
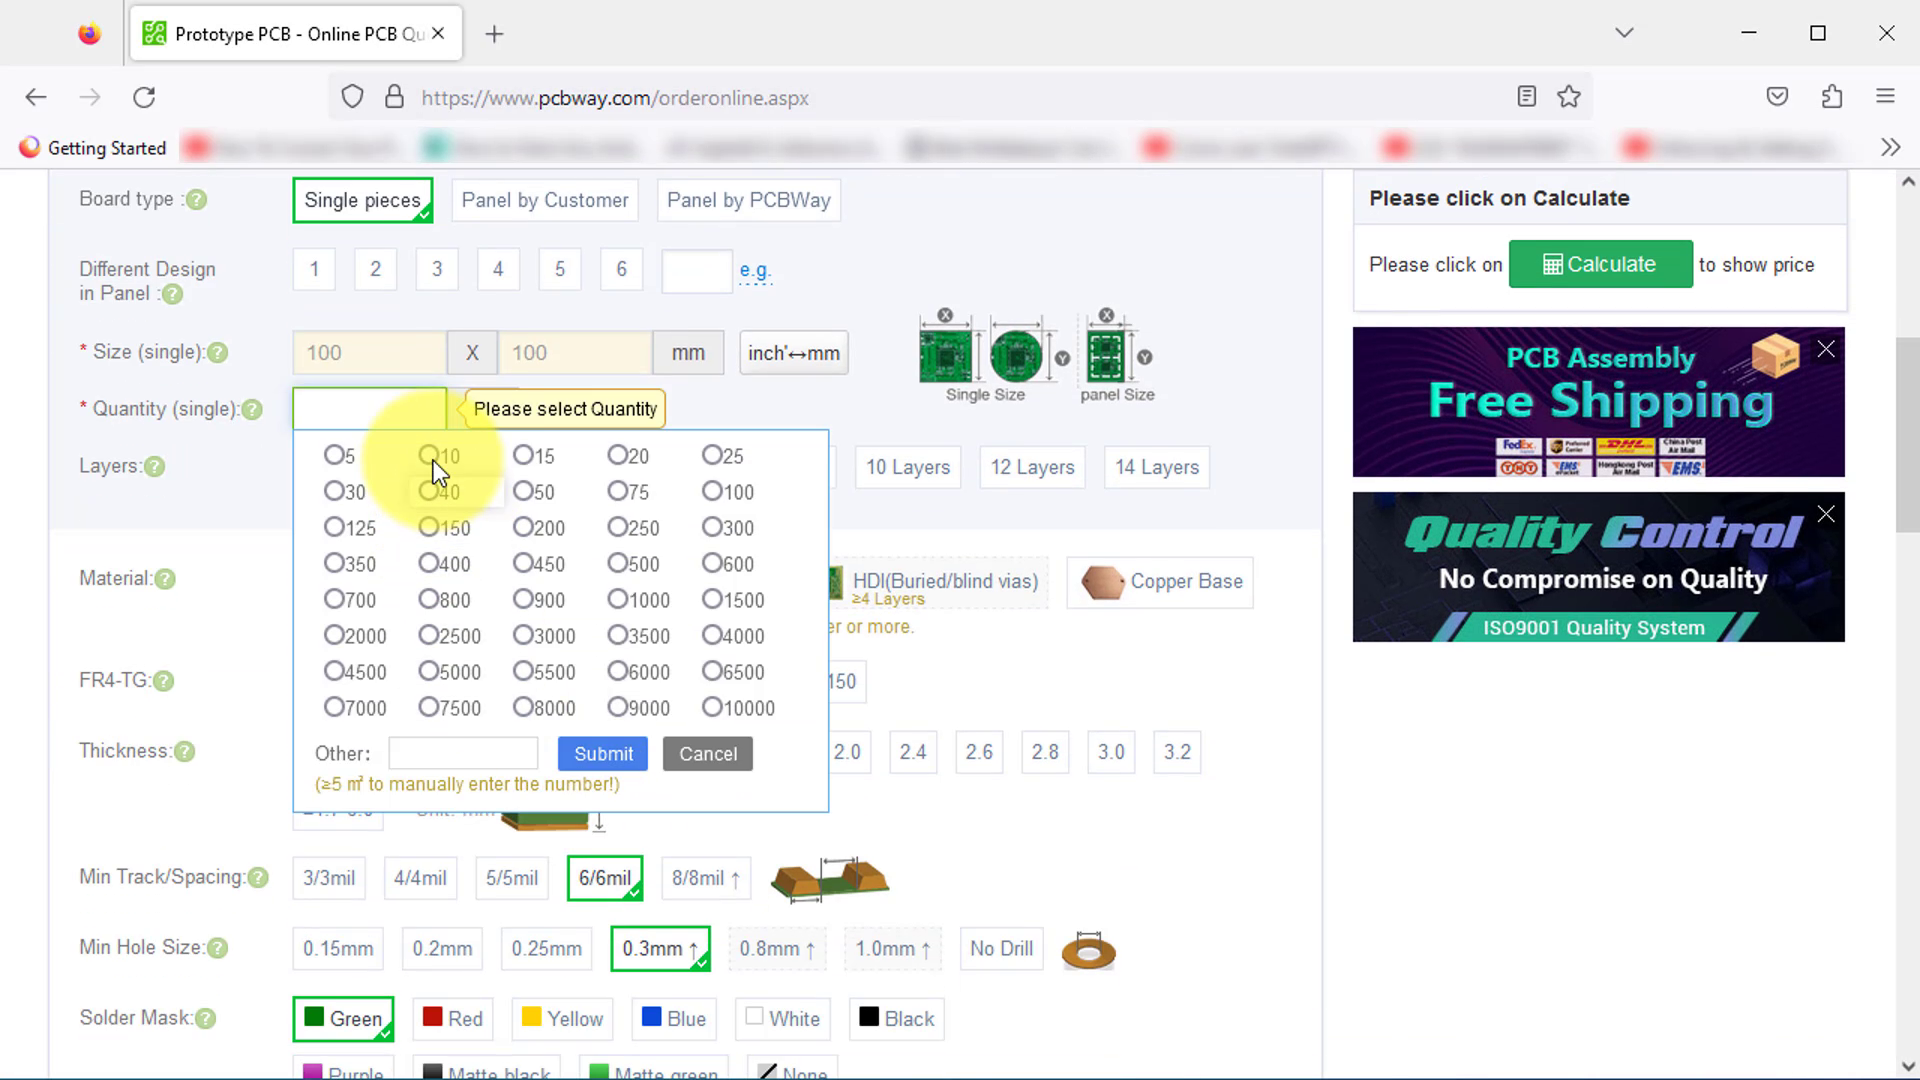
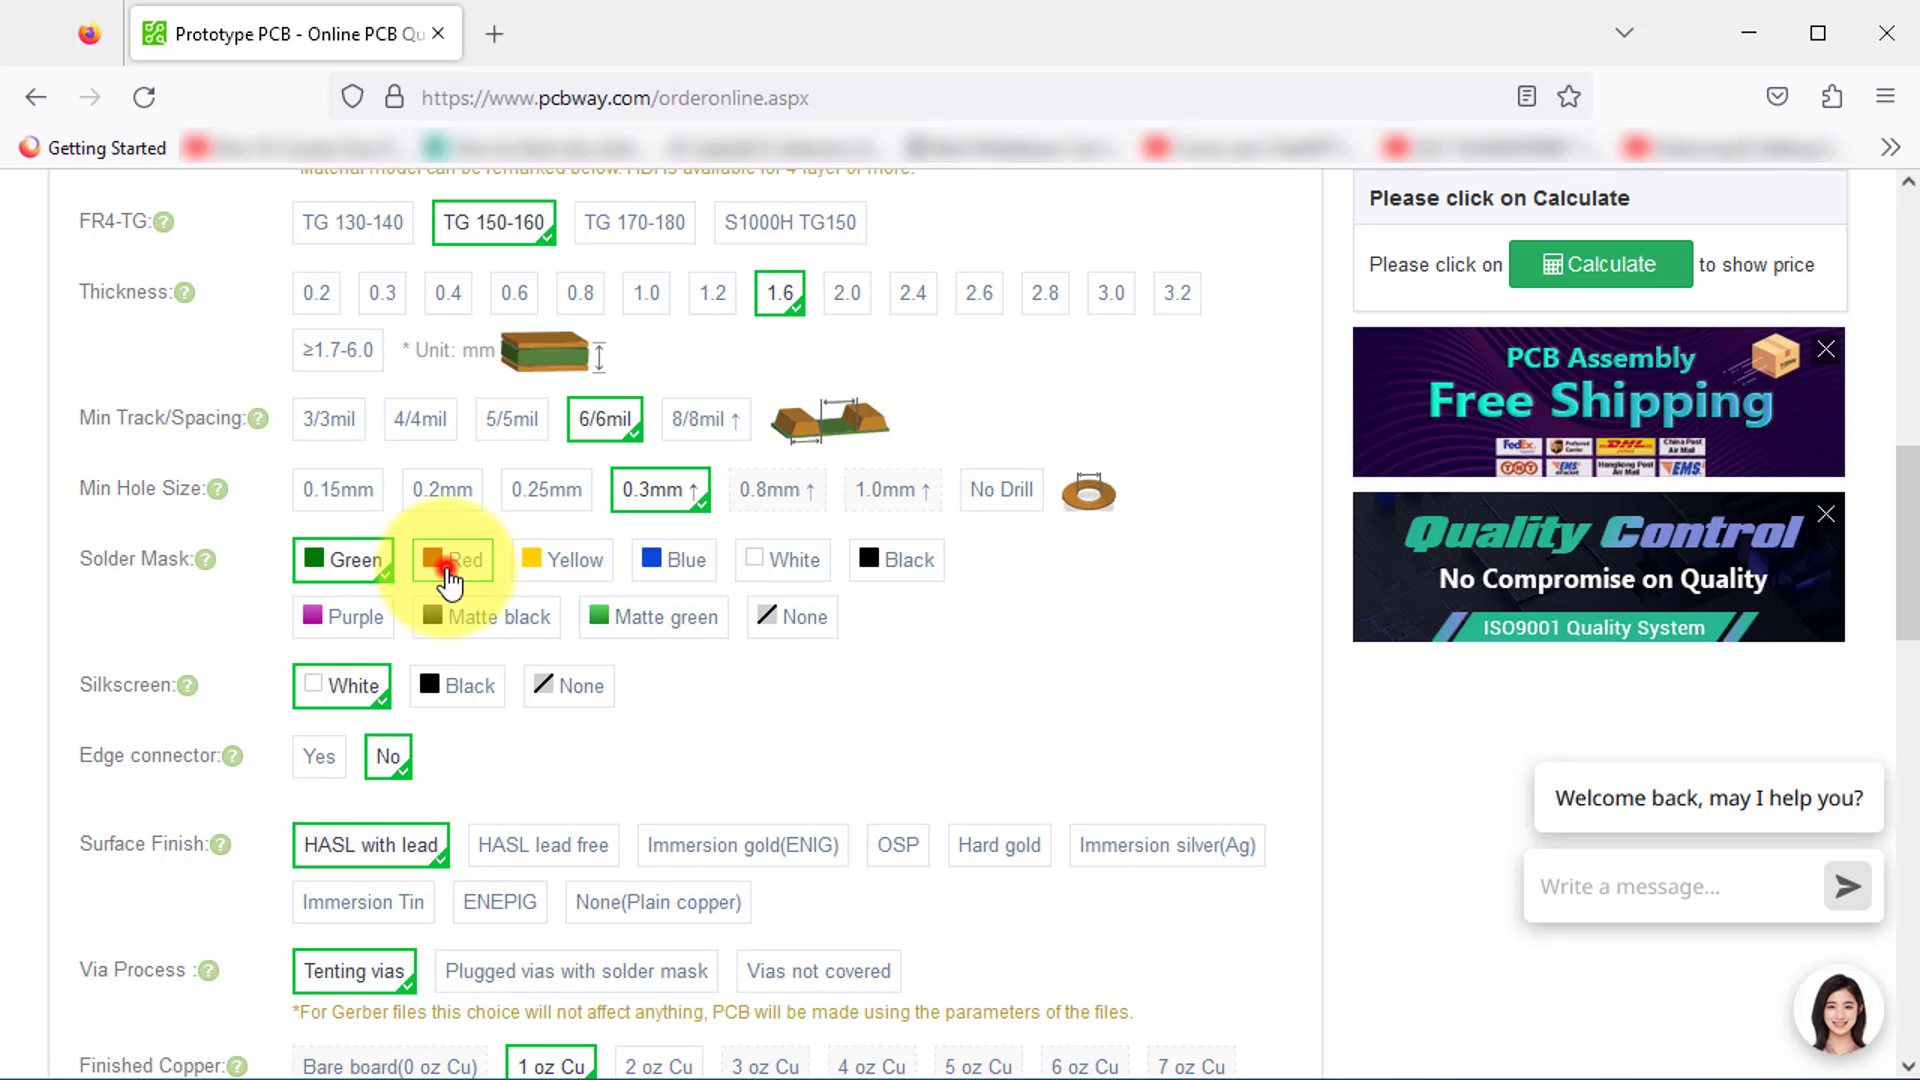
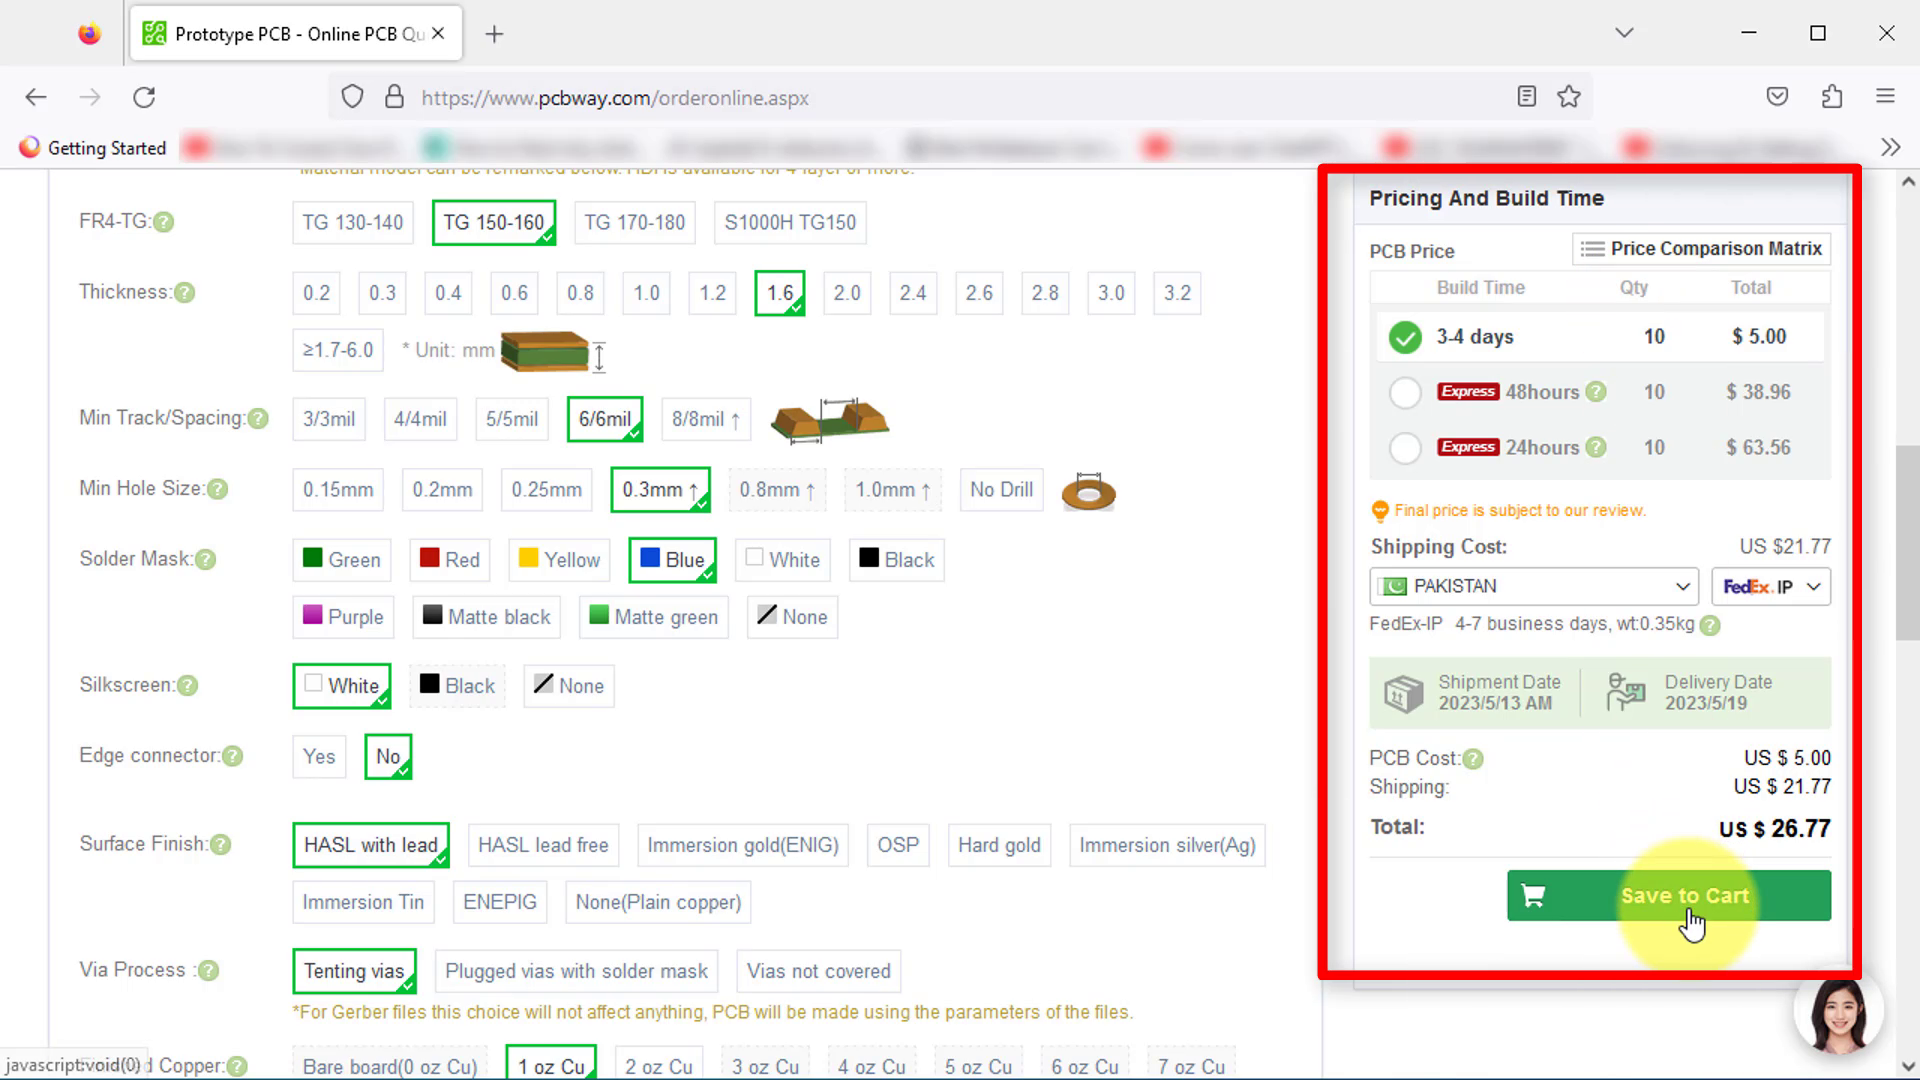
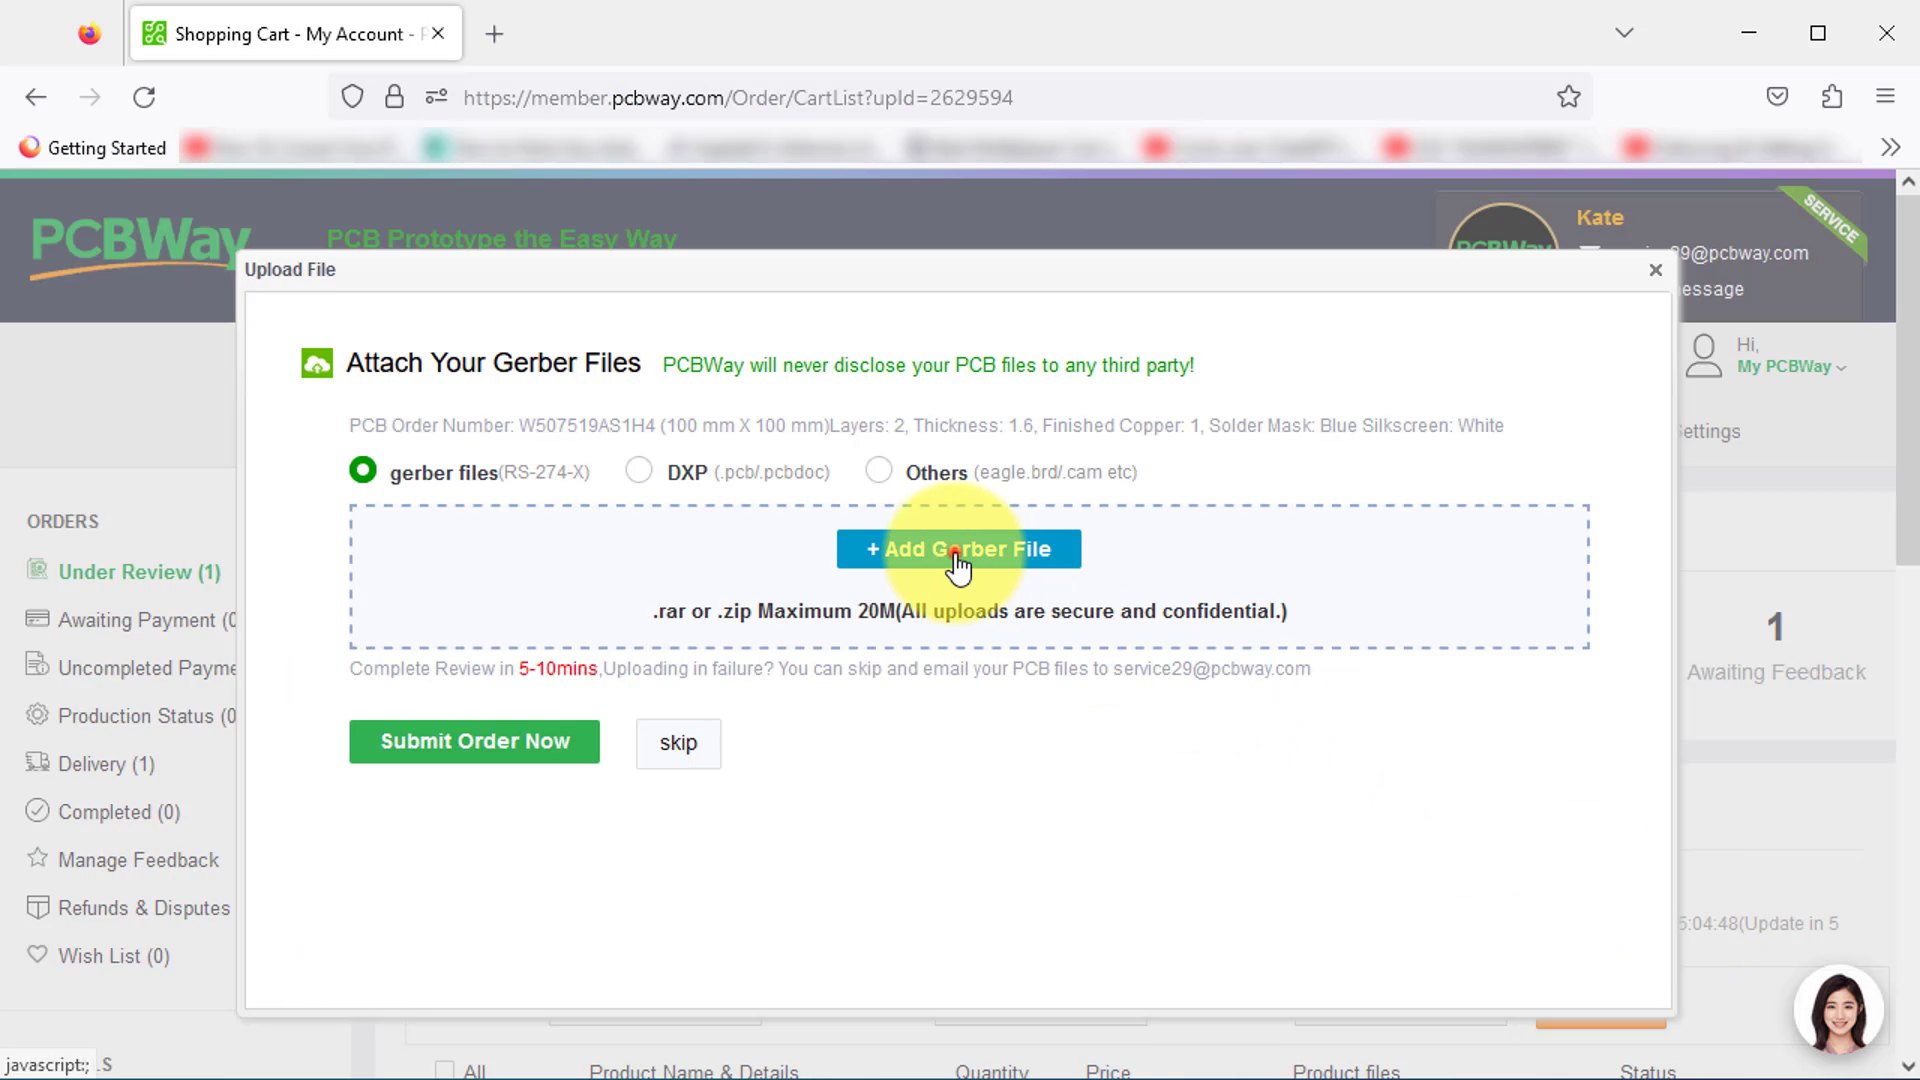
Ordering a custom PCB from them is a breeze
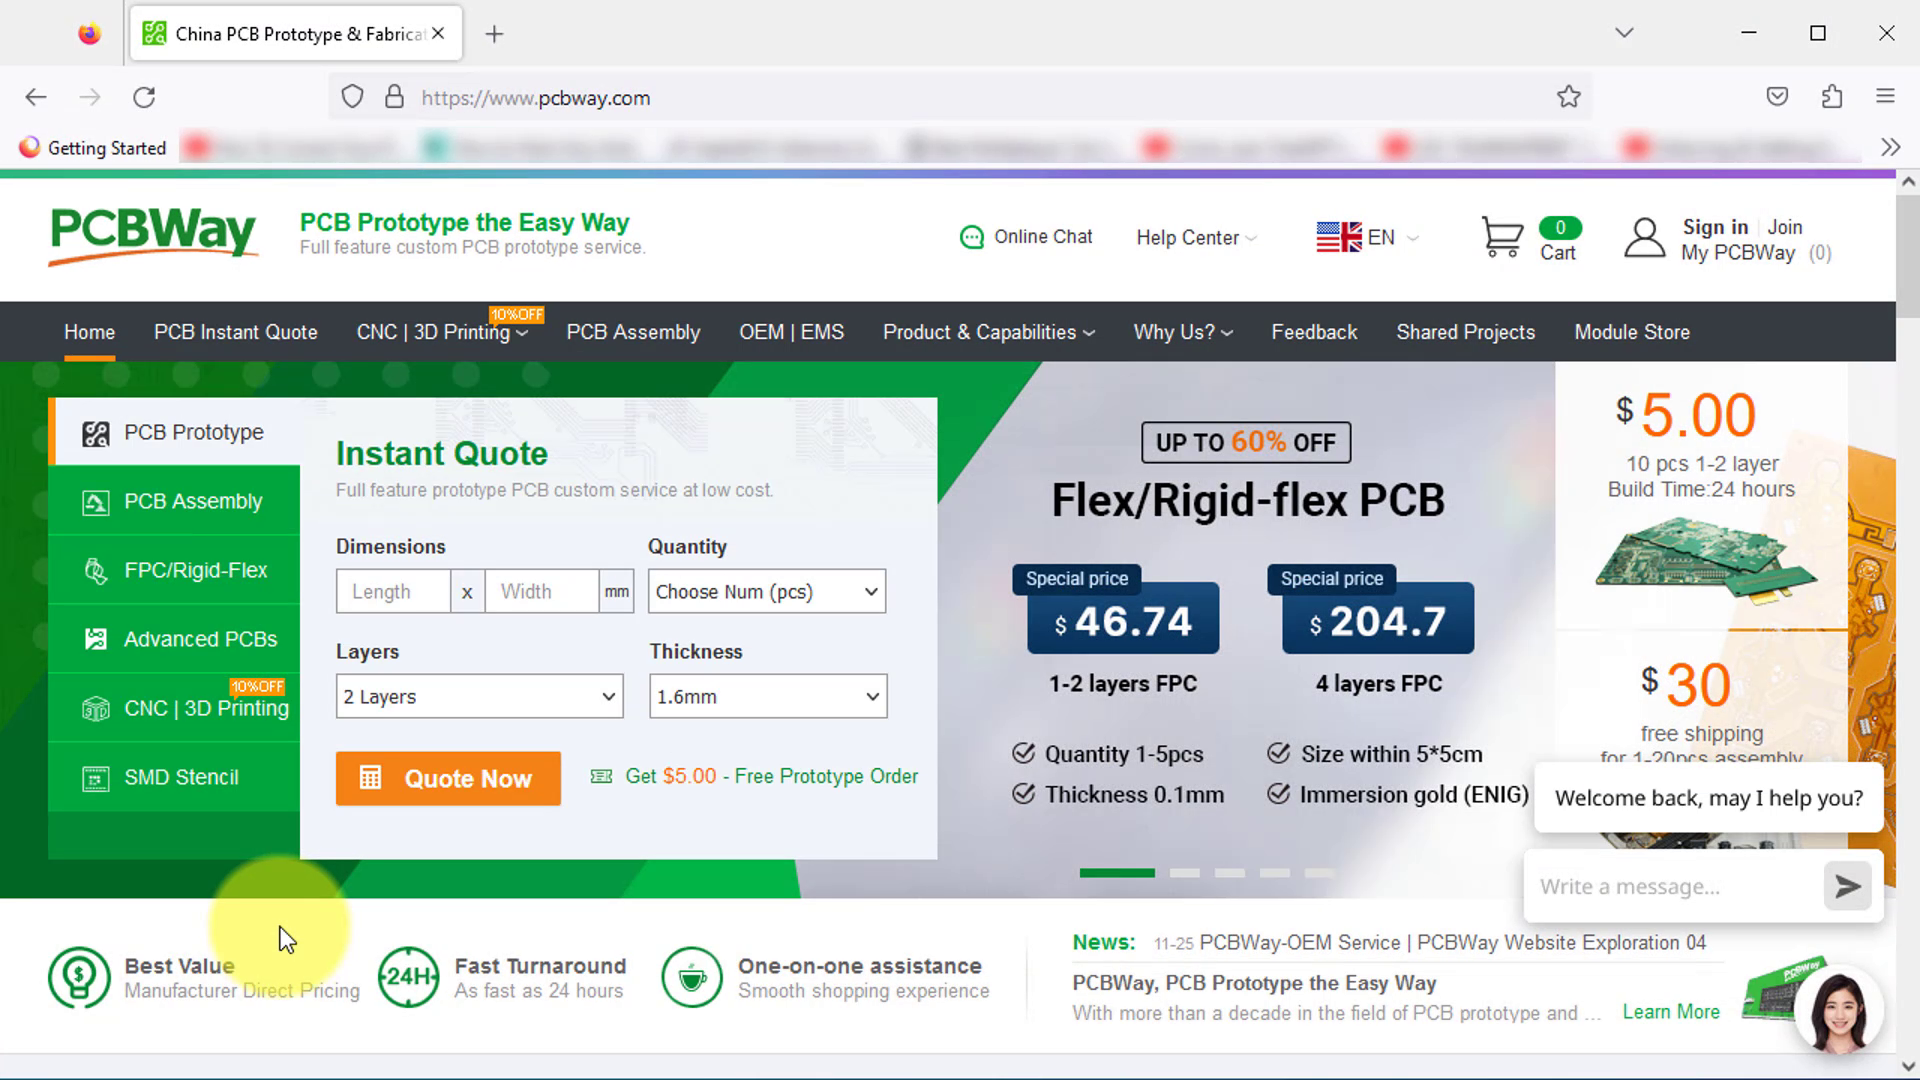
First go to the PCBWay webiste: https://www.pcbway.com/
On the website input your PCB's dimensions, select your desired quantity and color on their website, and then upload the gerber file. and you're good to go. You can acquire five to ten pieces of two-layer high-quality PCBs for as little as $5, with fast delivery times of 3 to 5 days, depending on your location and shipping preferences.
Register a New Remote Control
.png)
.png)
.png)
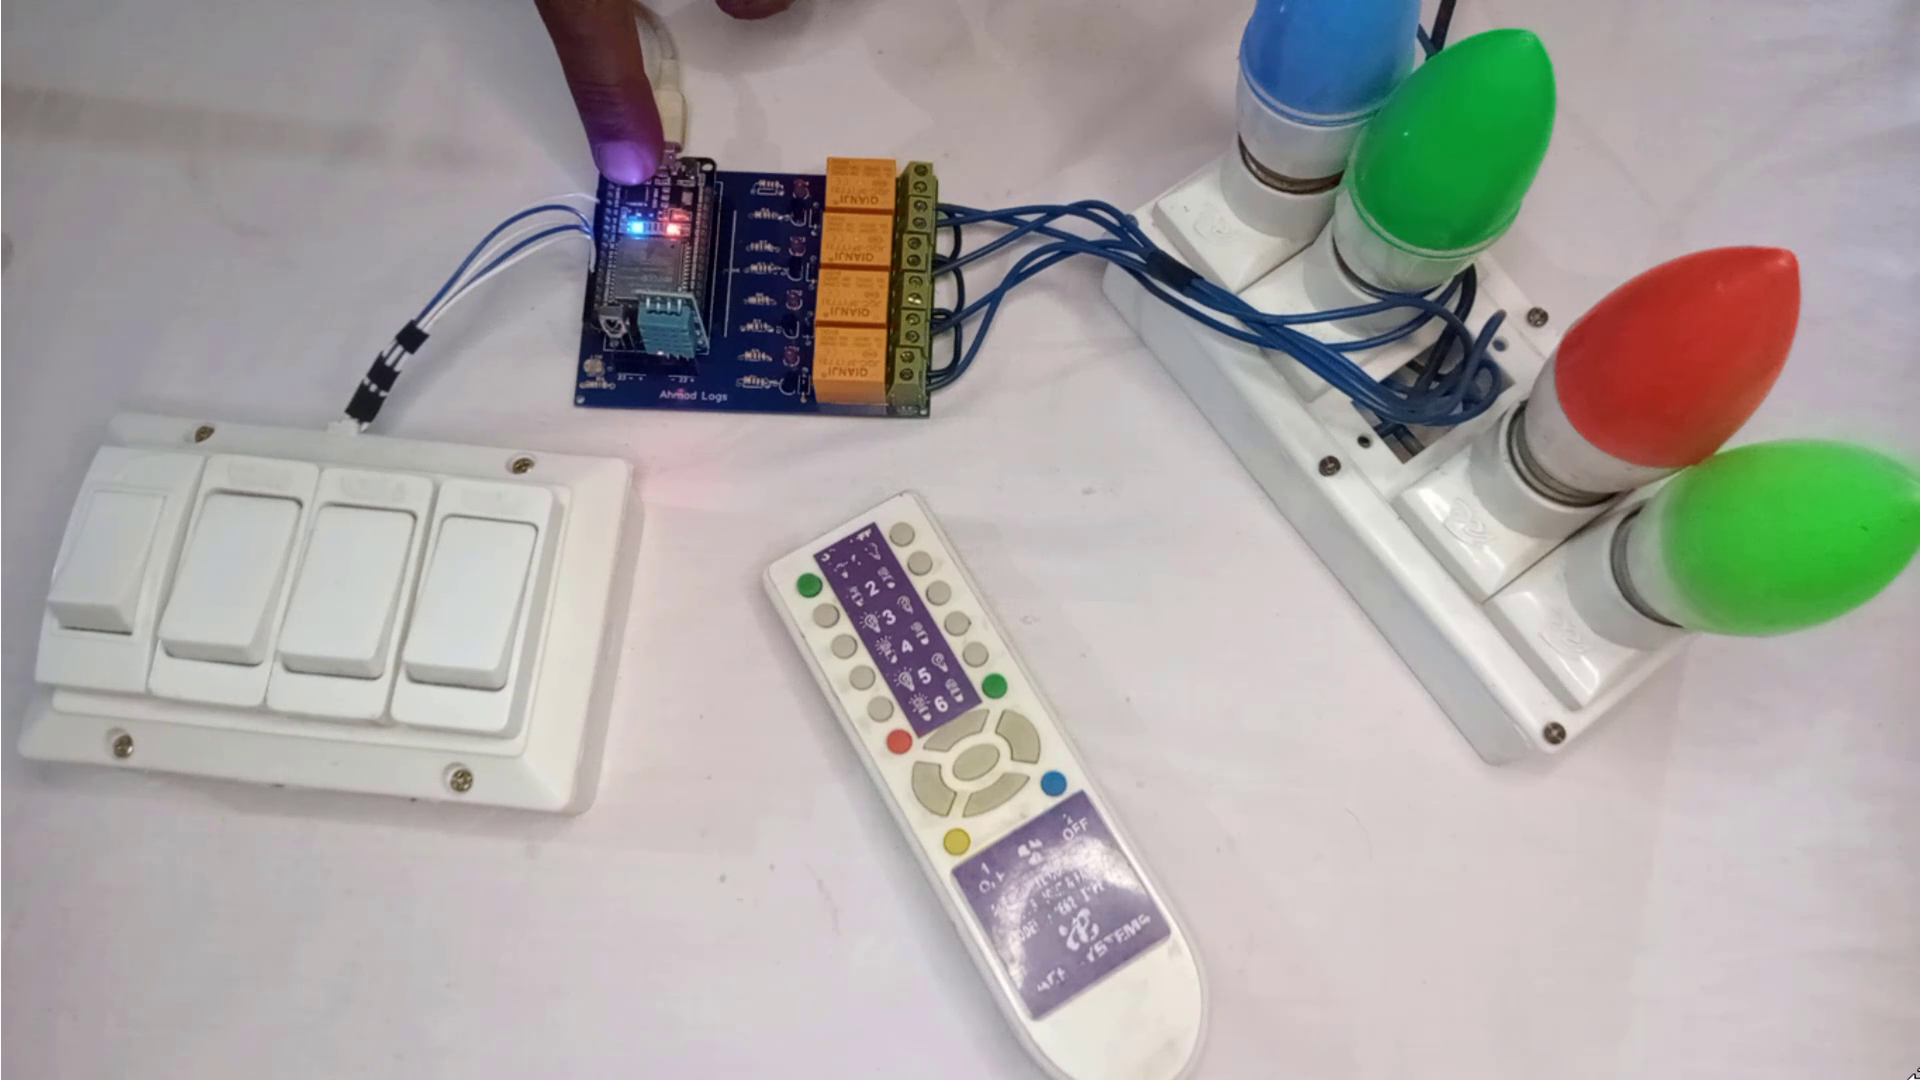
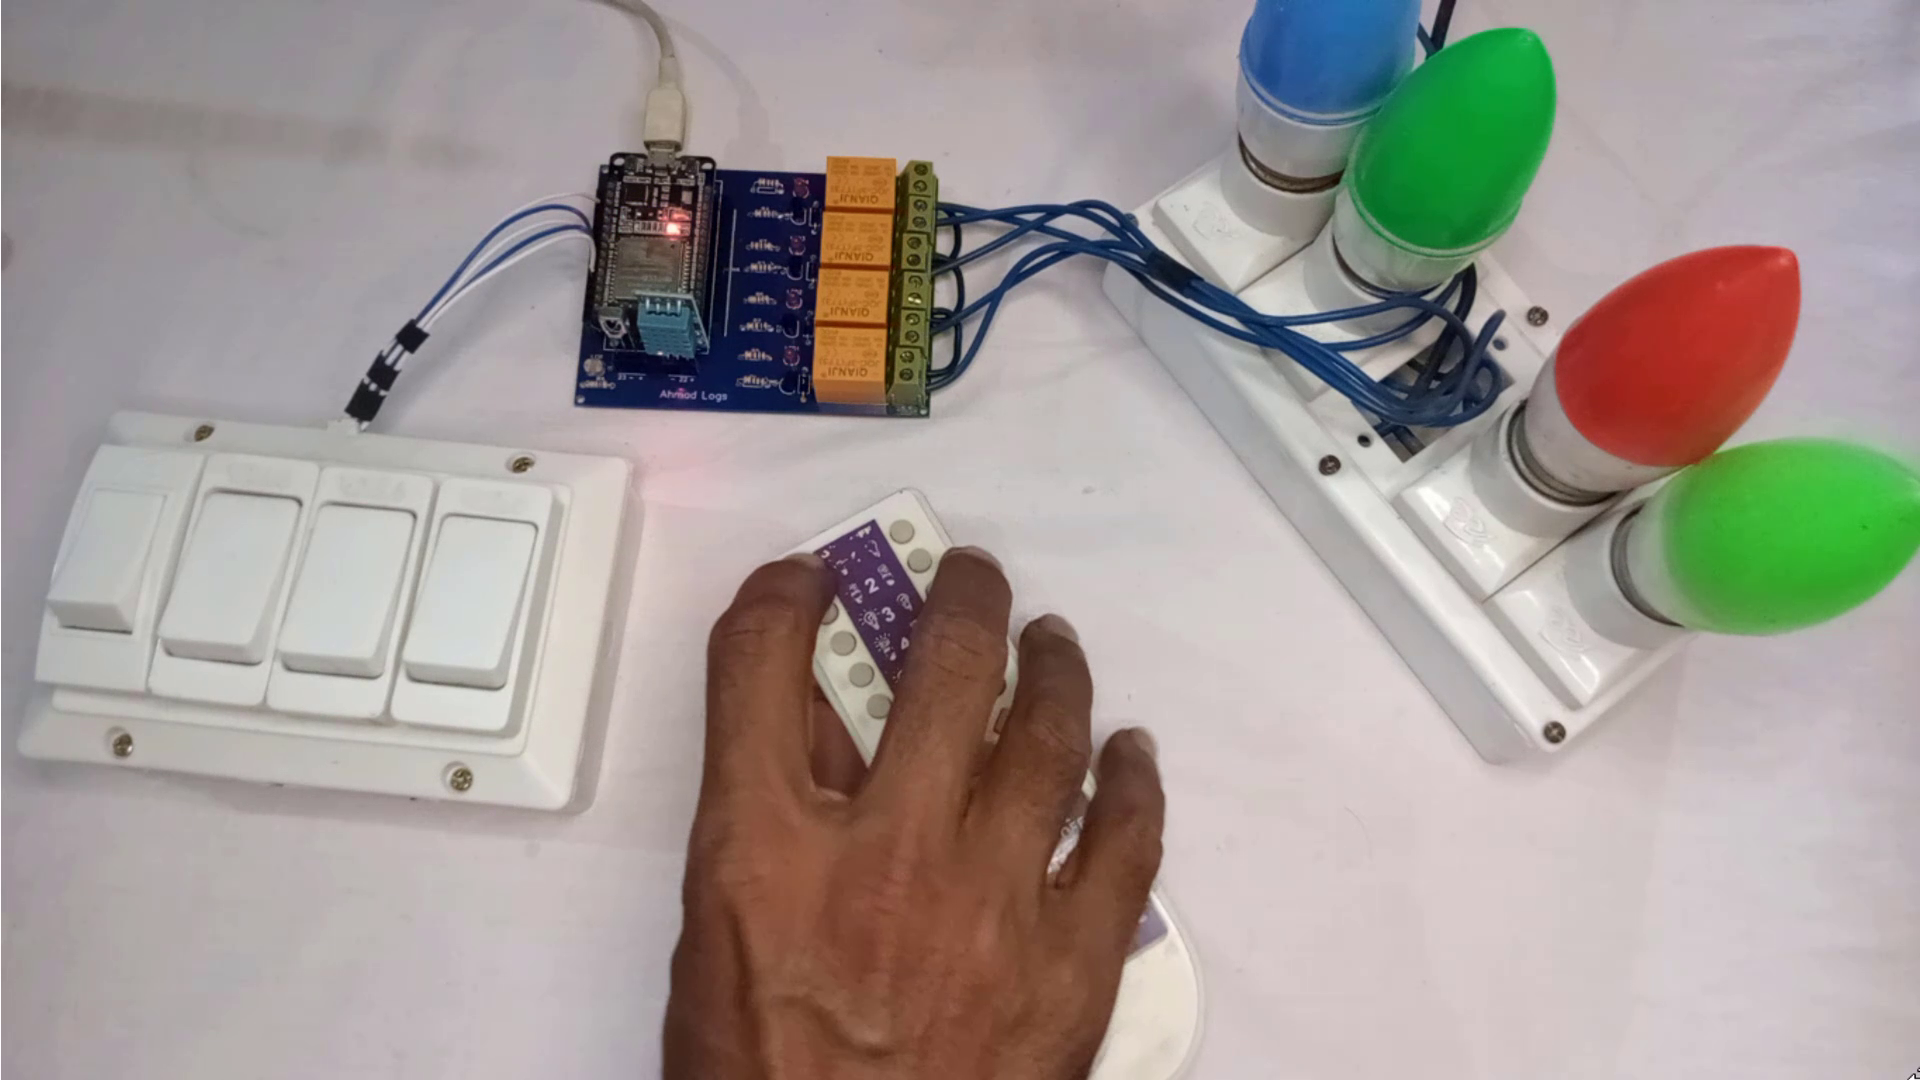
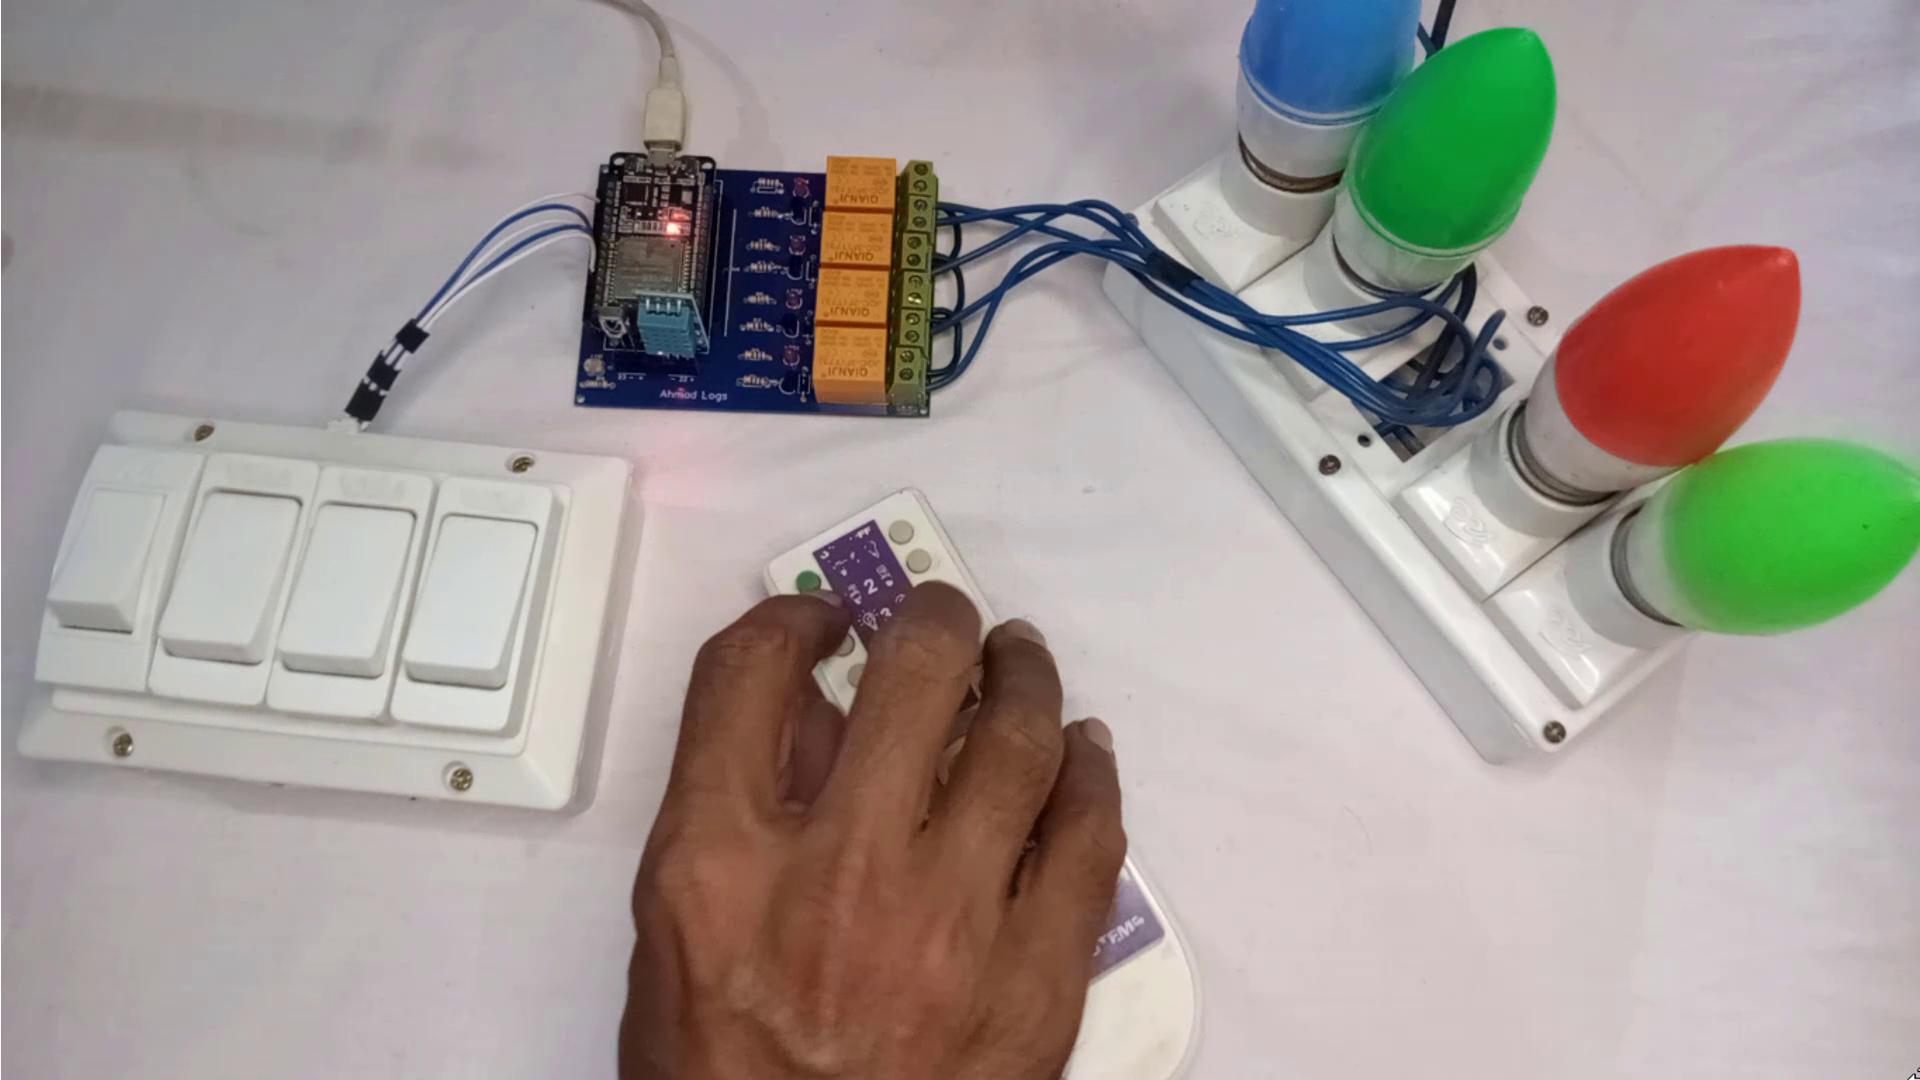
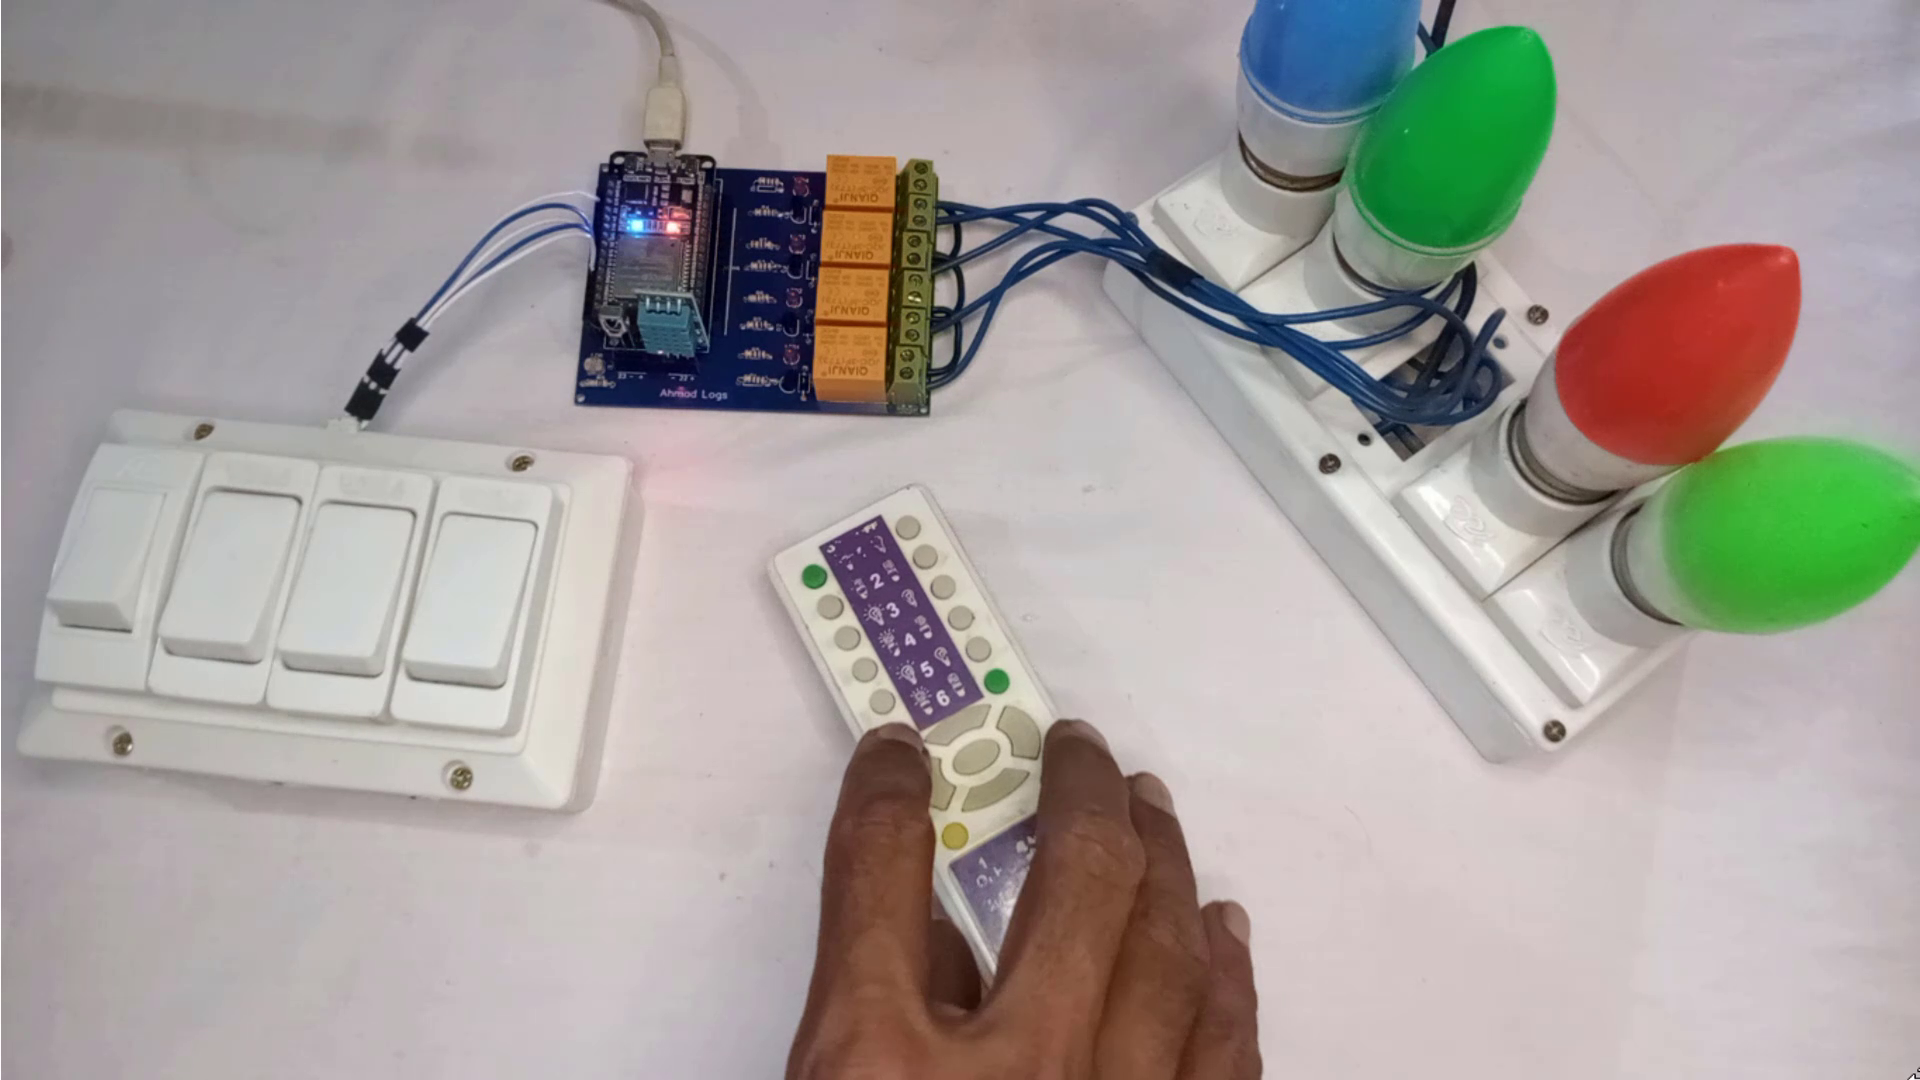
You can follow these steps to register a new remote control with the project.
- Press and hold the boot button on the project for more than 2 seconds.
- Release the button. The blue LED will start blinking very fast, indicating that the project is now in config mode and ready to register the remote control.
- Press the button on your remote that you want to register with the project.
- Look at the blue LED, which is now turned OFF. This means the first key has been registered.
- Wait for 2 seconds, and the LED will start blinking very fast again, indicating that you can now register the second key of your remote control.
- Repeat steps 3-5 until you have registered all six keys of your remote control.
- Once all keys are registered, the project will automatically enter into normal mode, and you can use your new remote control to operate your relays.
- If you want to register more than six keys, you can easily modify the code. More details on this will be discussed in the coding section later on.
Blynk 2.0 Account Setup
.png)
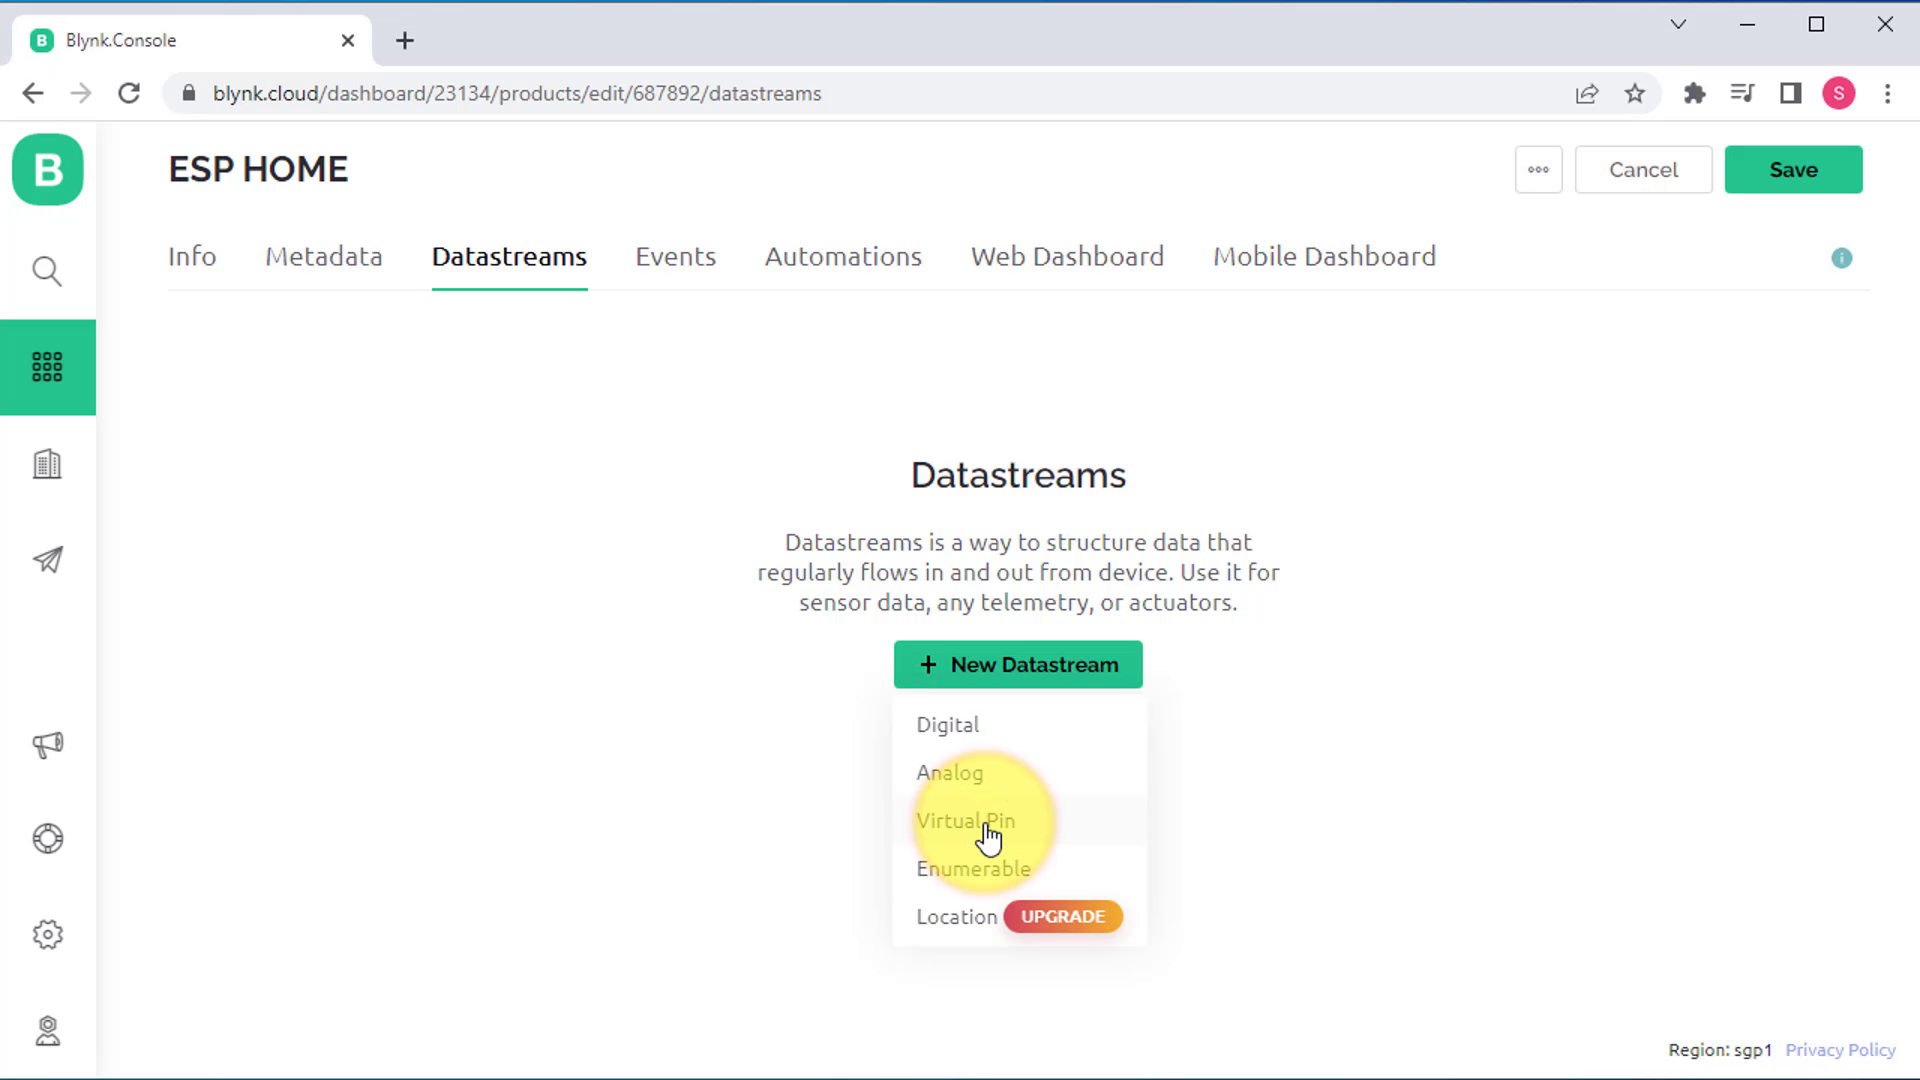
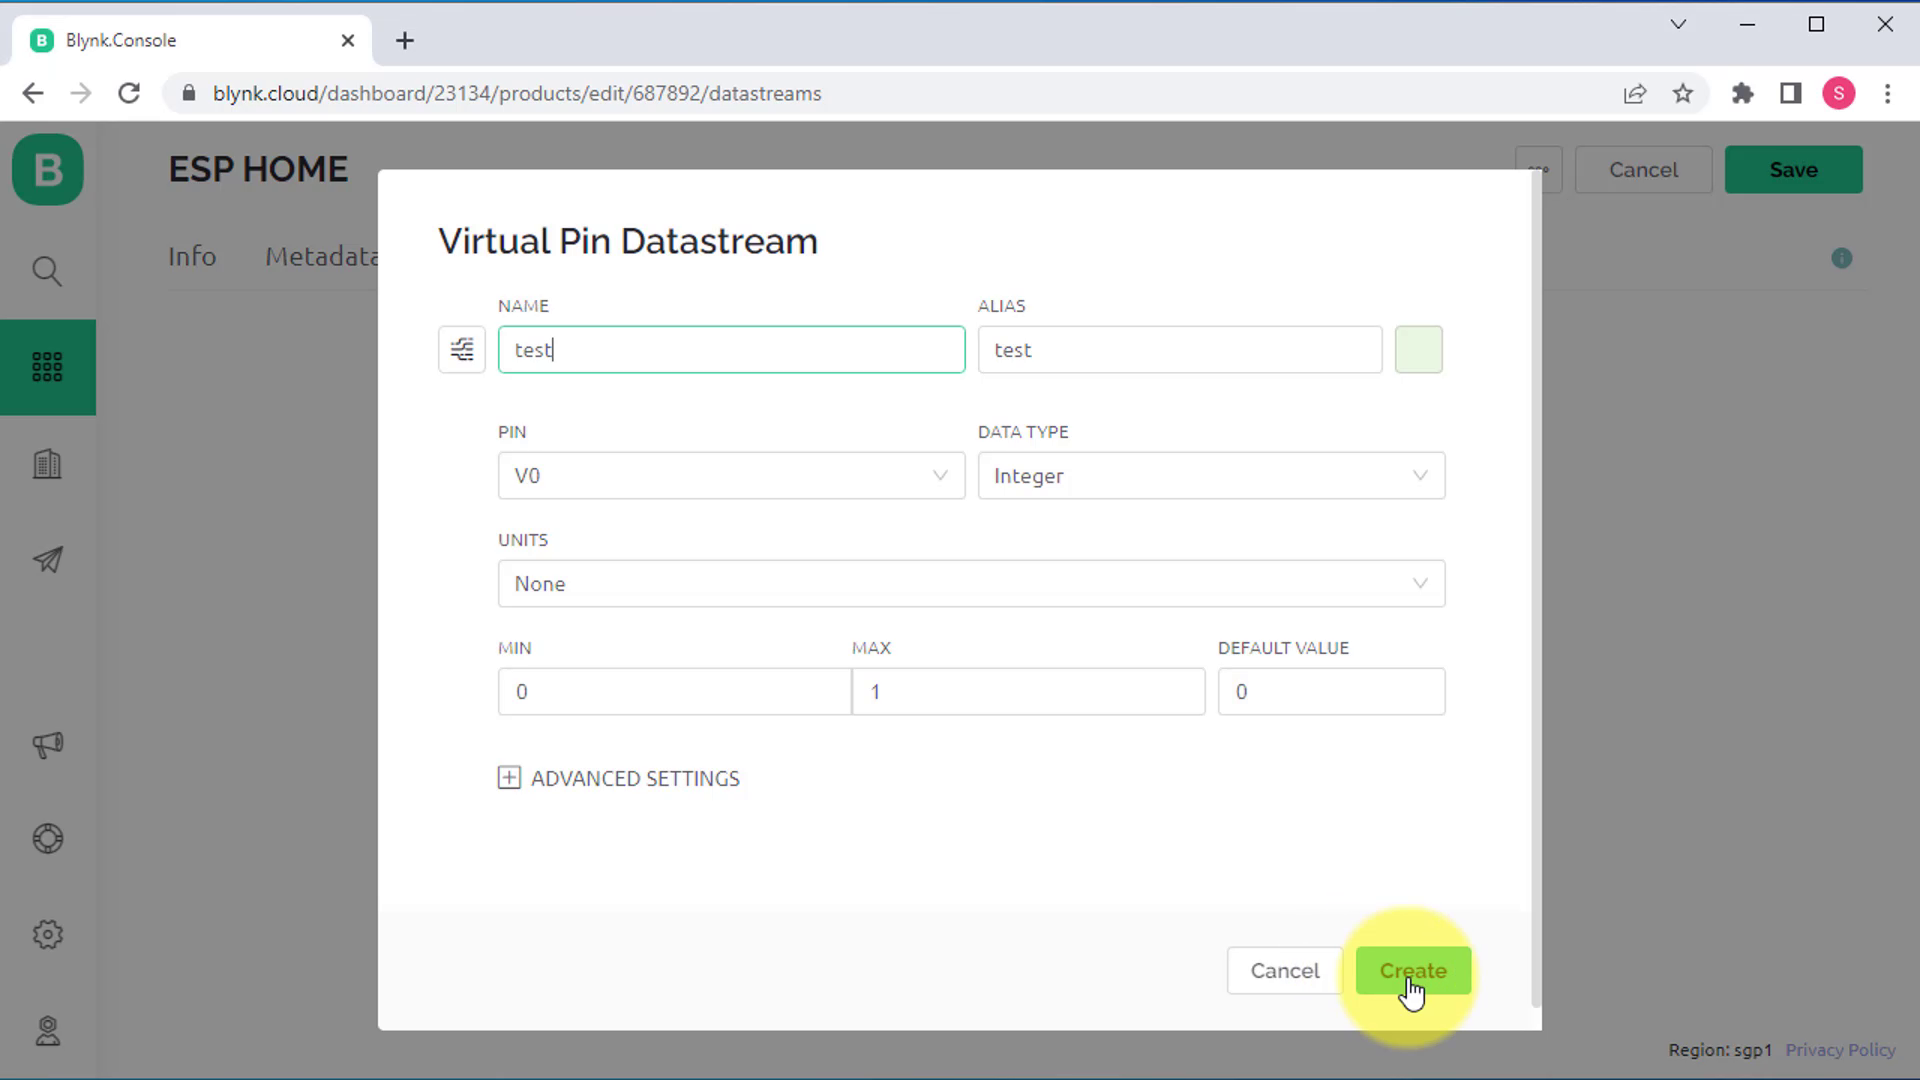
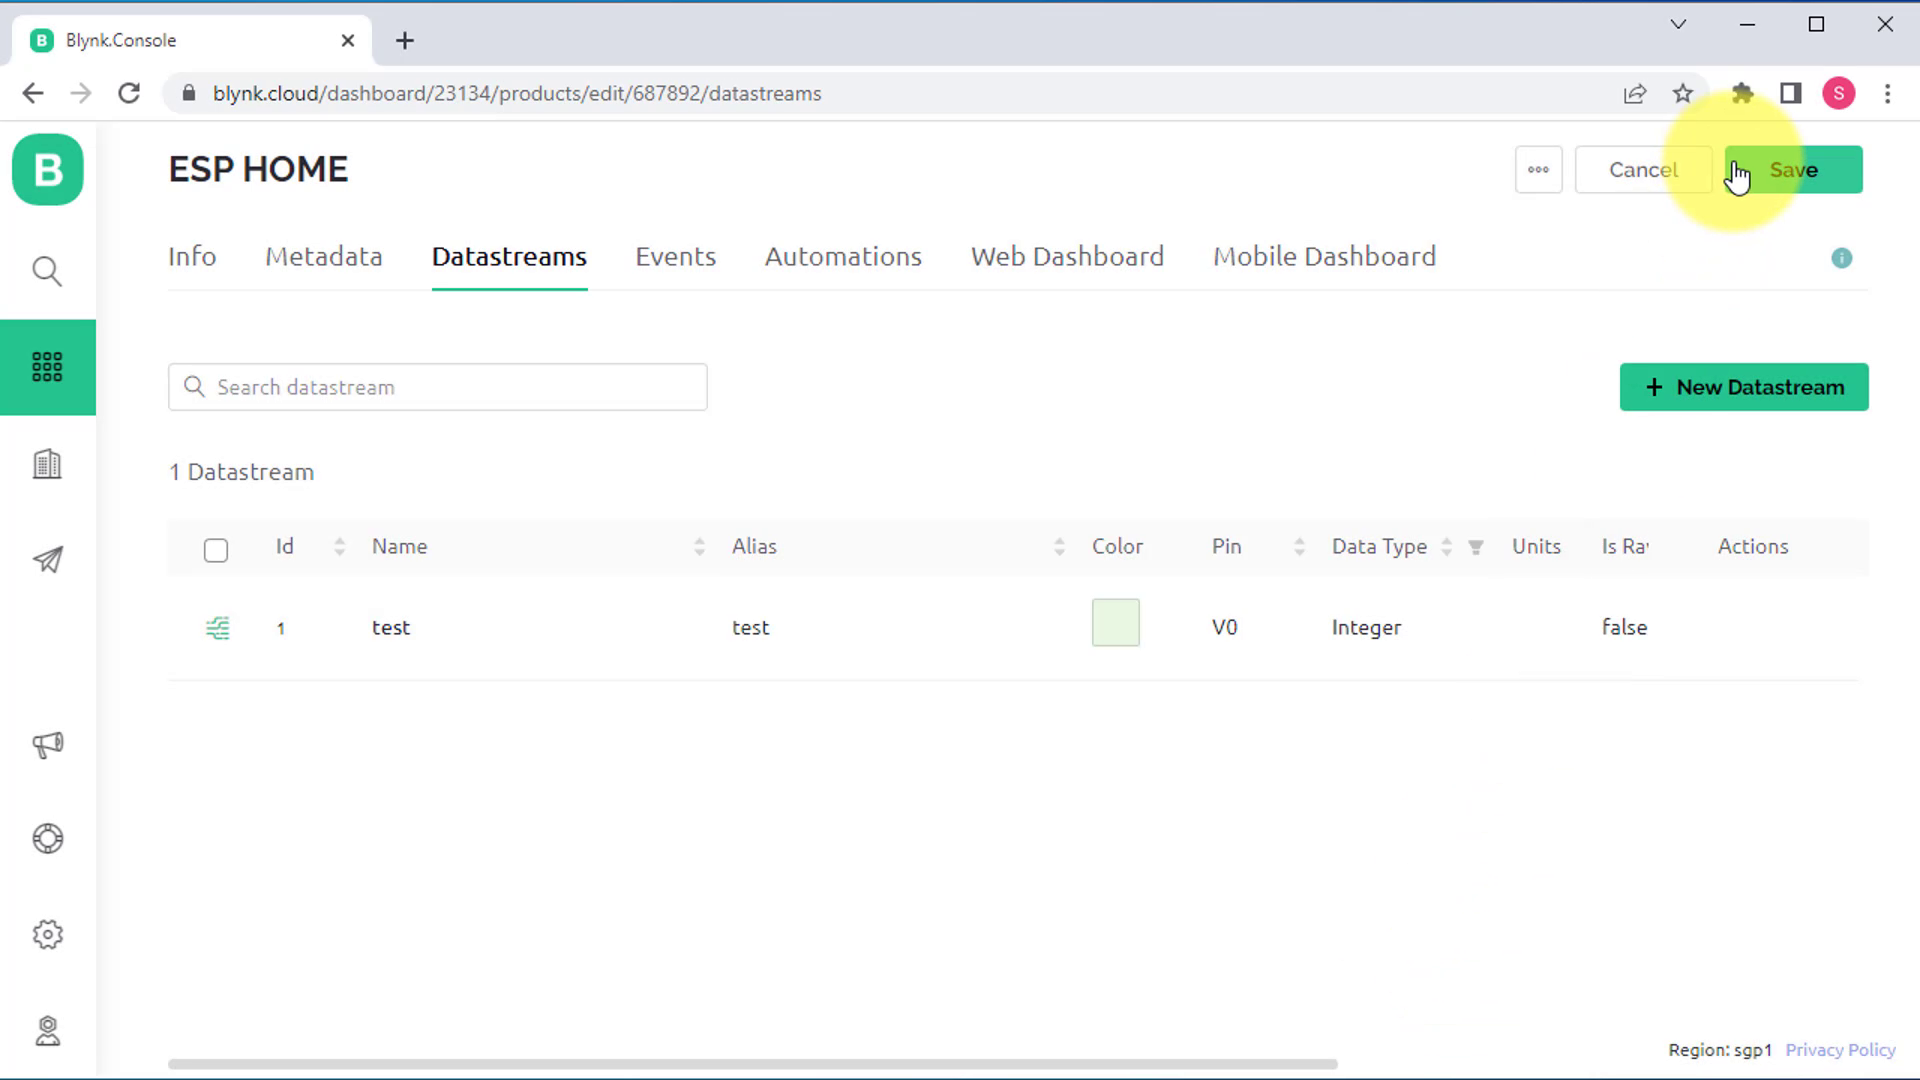
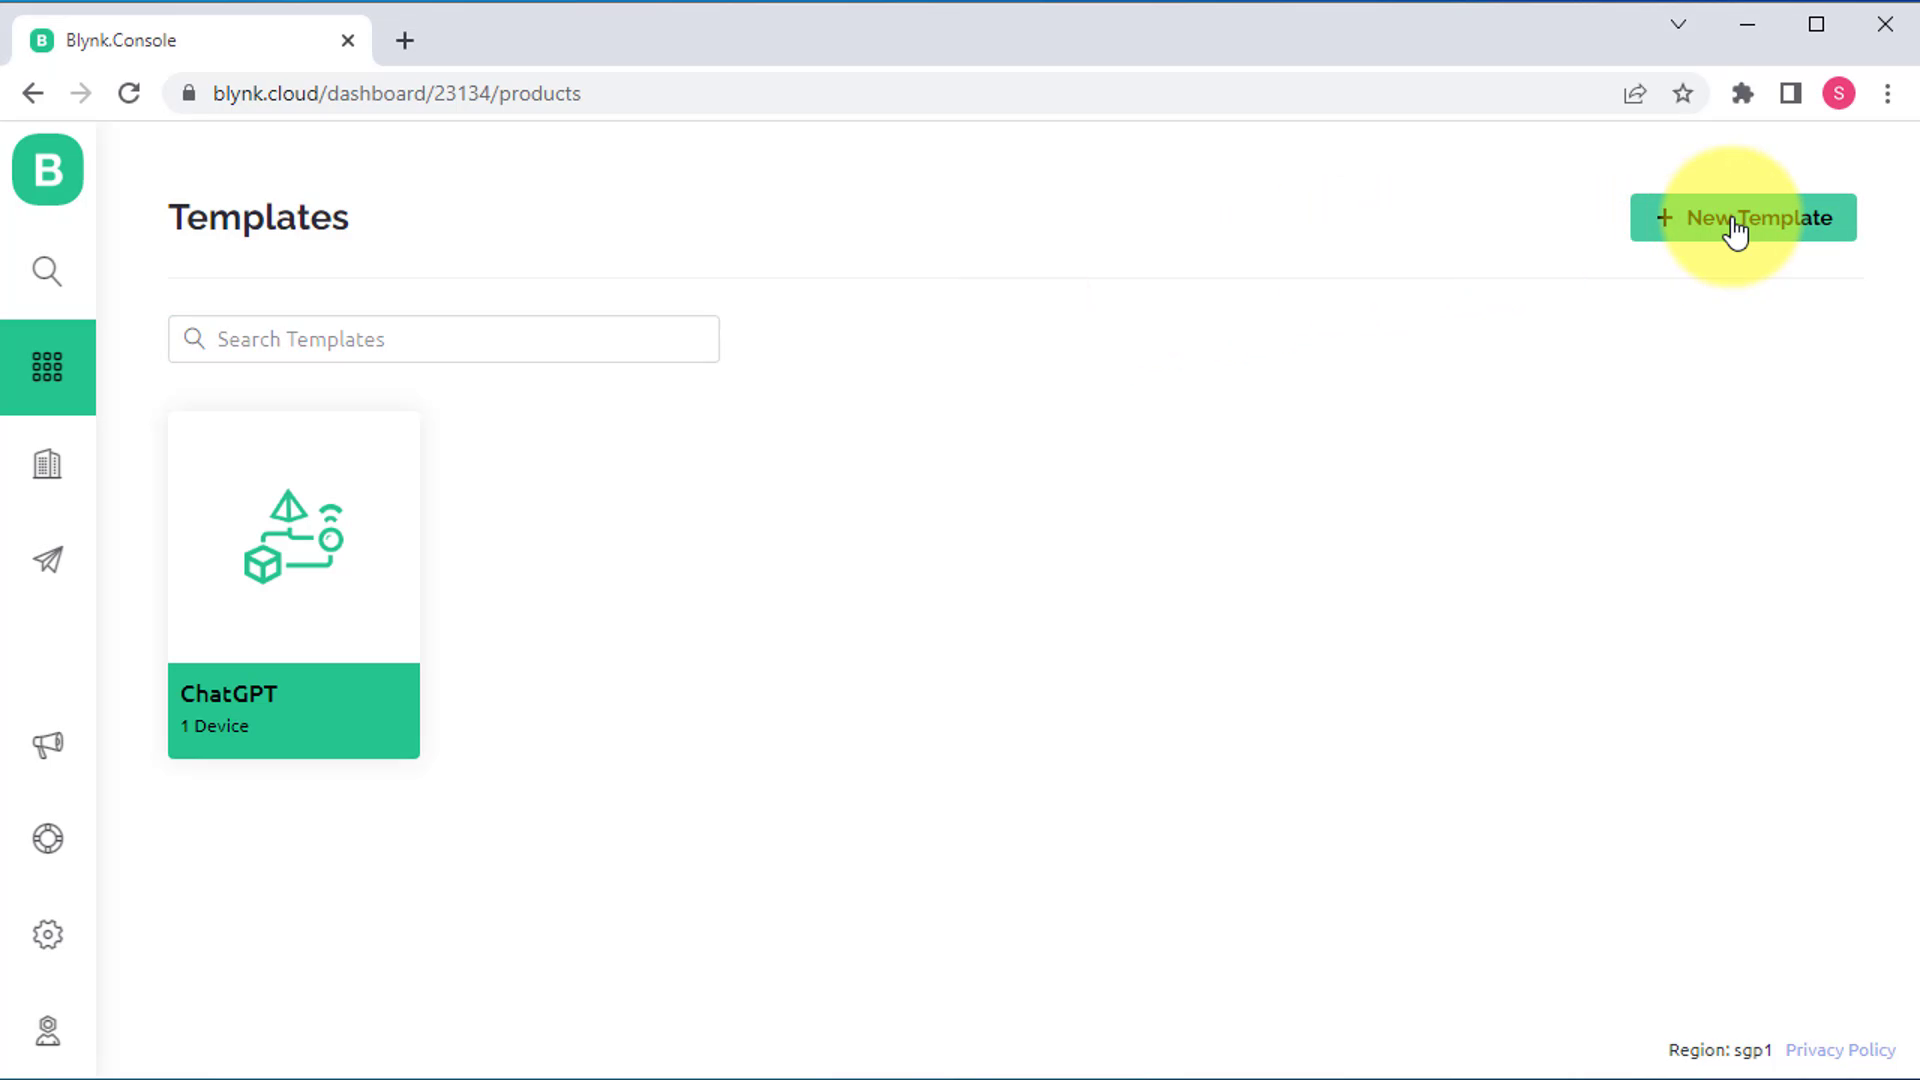
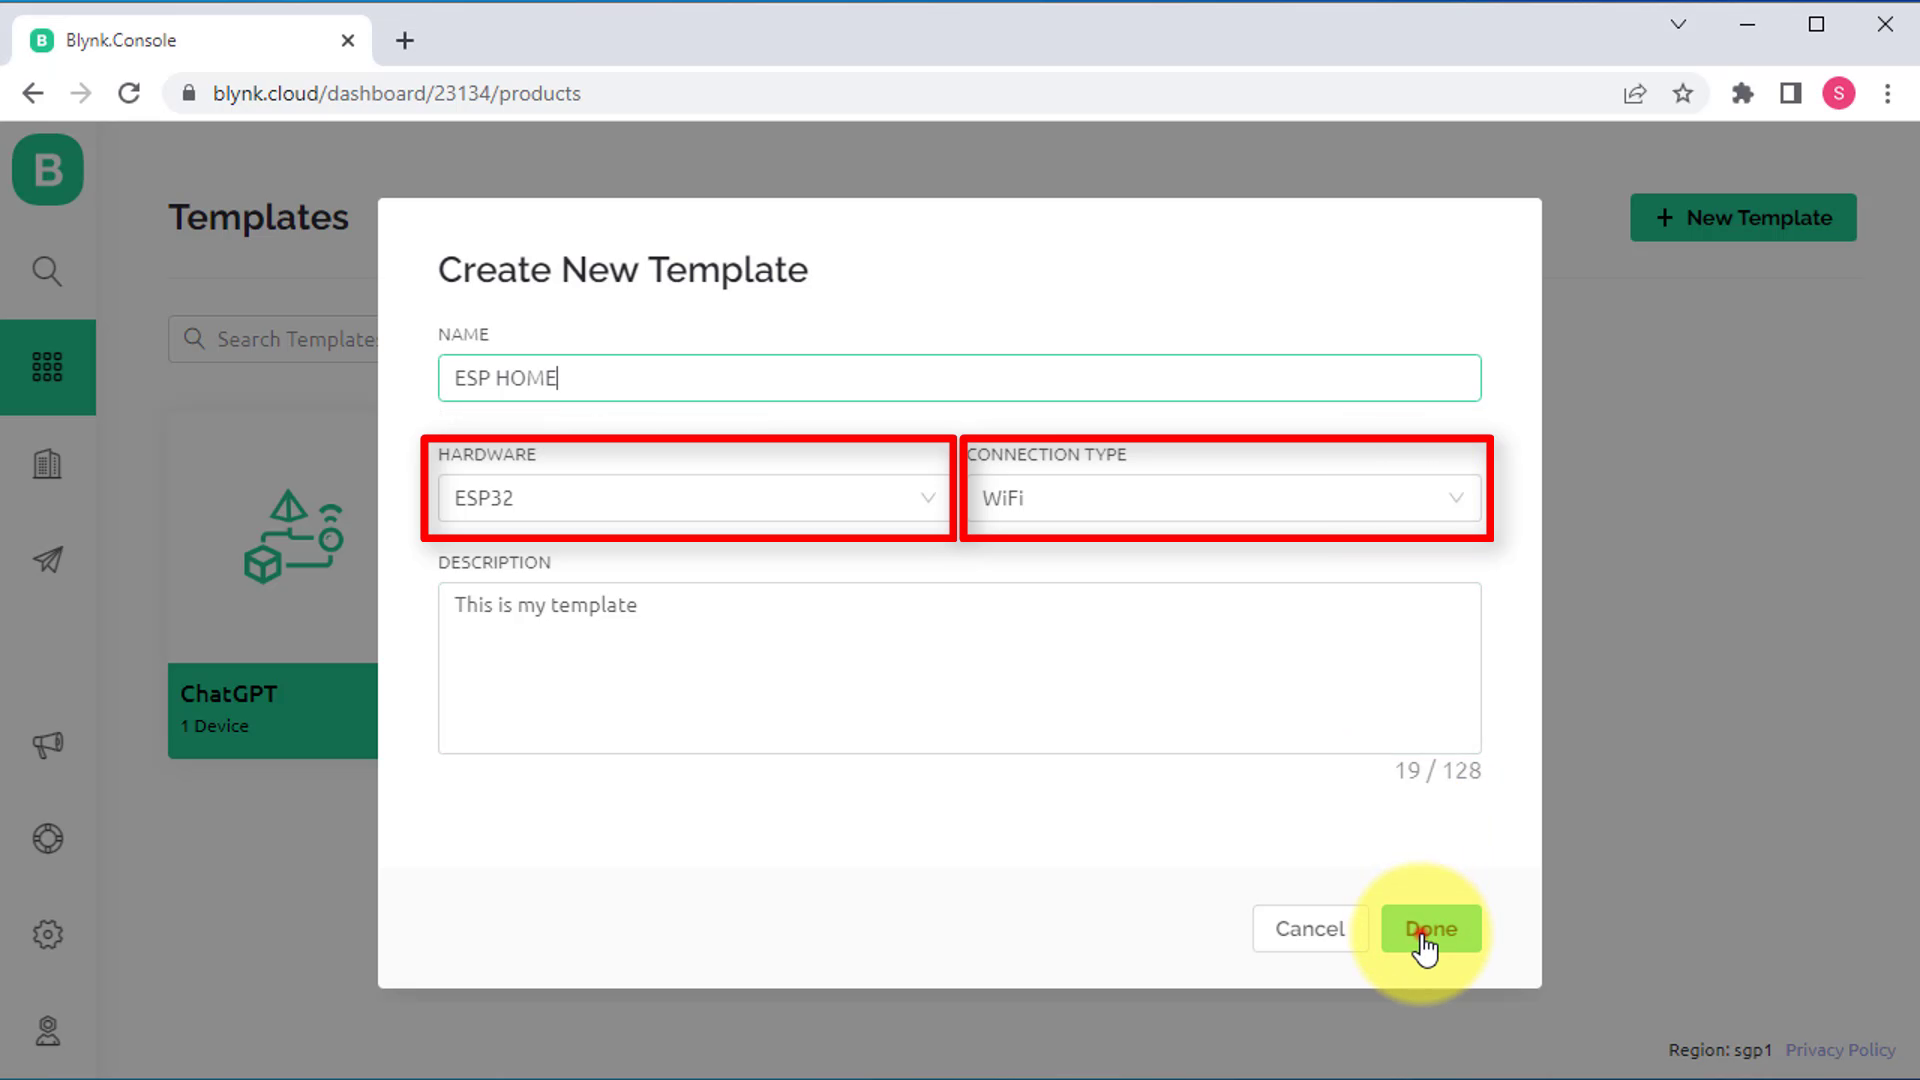
Here is the step-by-step procedure on setting up the Blynk Account on your computer or laptop:
- Log in to your Blynk account and go to the template section.
- Click on the "Create New Template" button to open the template window.
- Give your template a name, such as "esp home".
- Select the hardware as ESP32 and set the connection type to WIFI.
- Click on the "Done" button to create the template.
- Navigate to the "Datastream" tab in the template.
- Create one datastream, even though it won't be used in the project. This datastream is necessary to simplify the configuration of the Blynk app.
- Click on save button to save the template.
Setting Up Blynk App
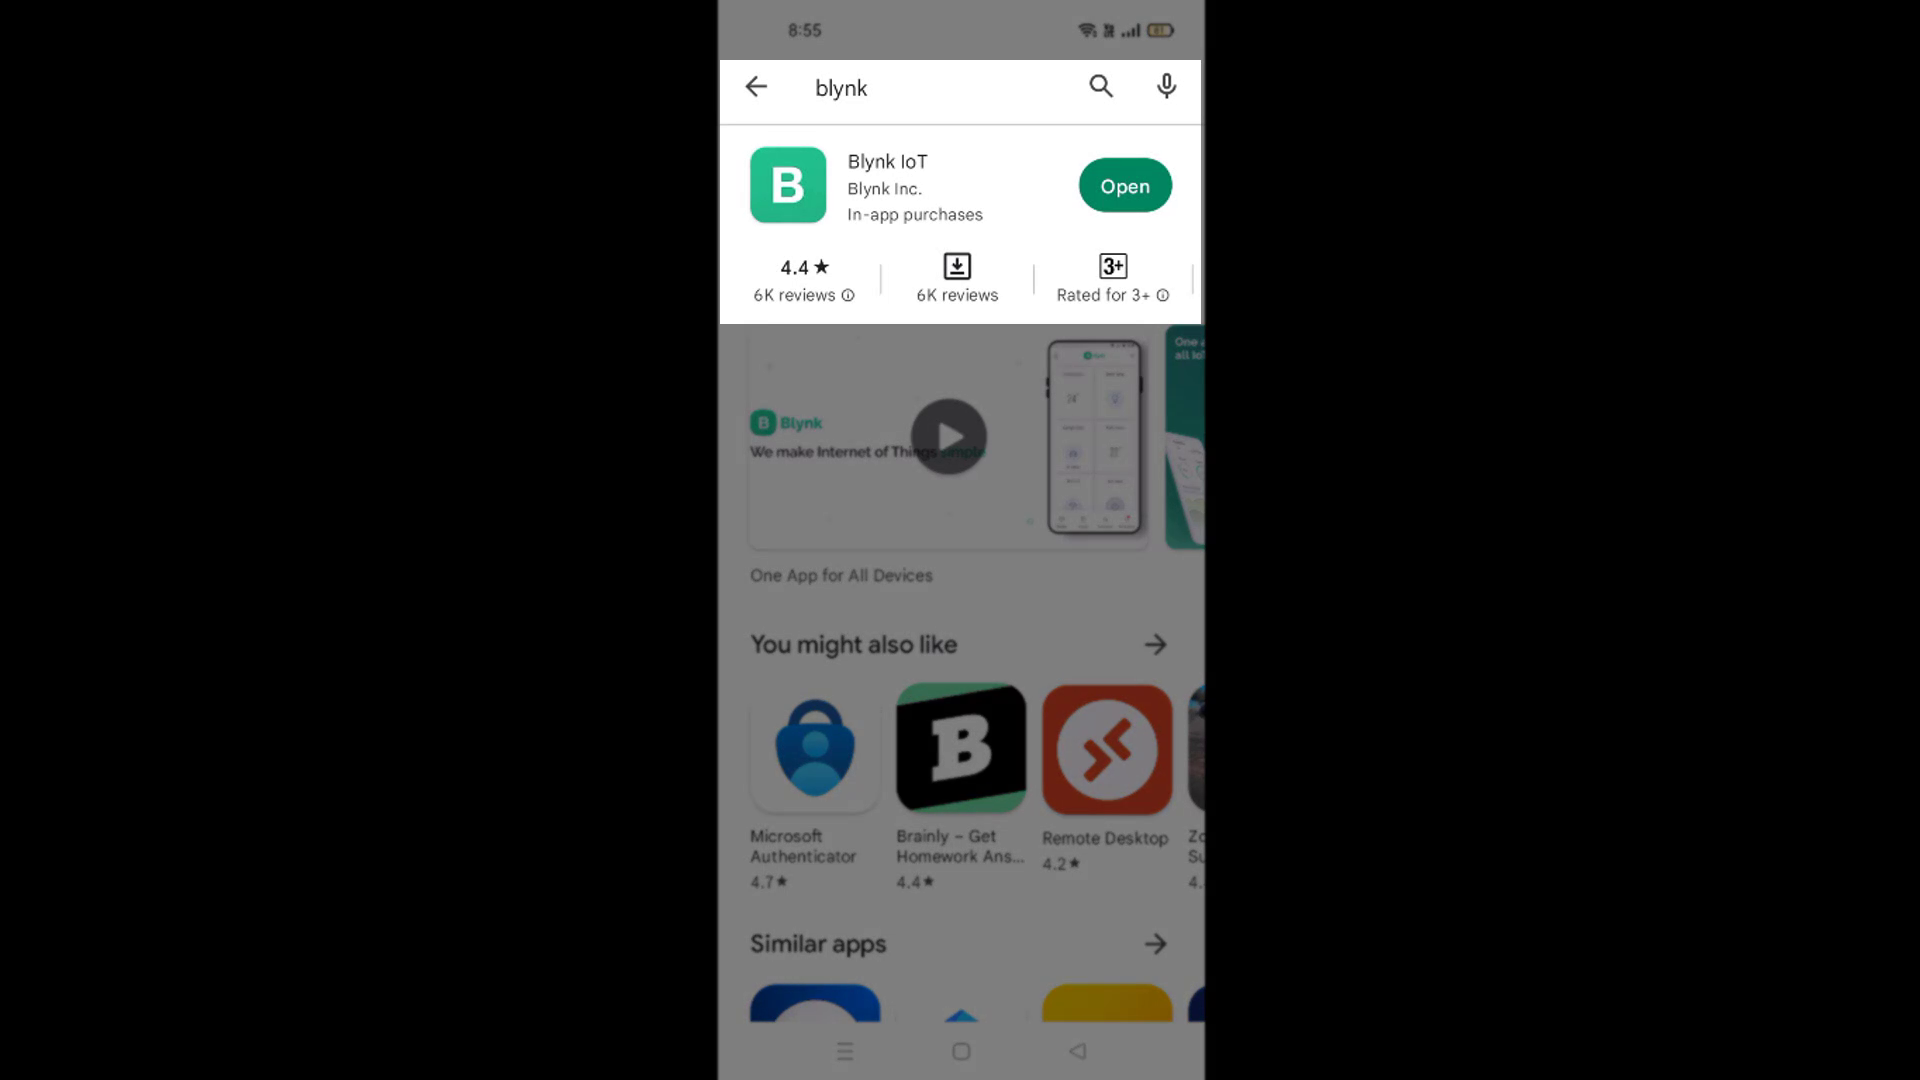
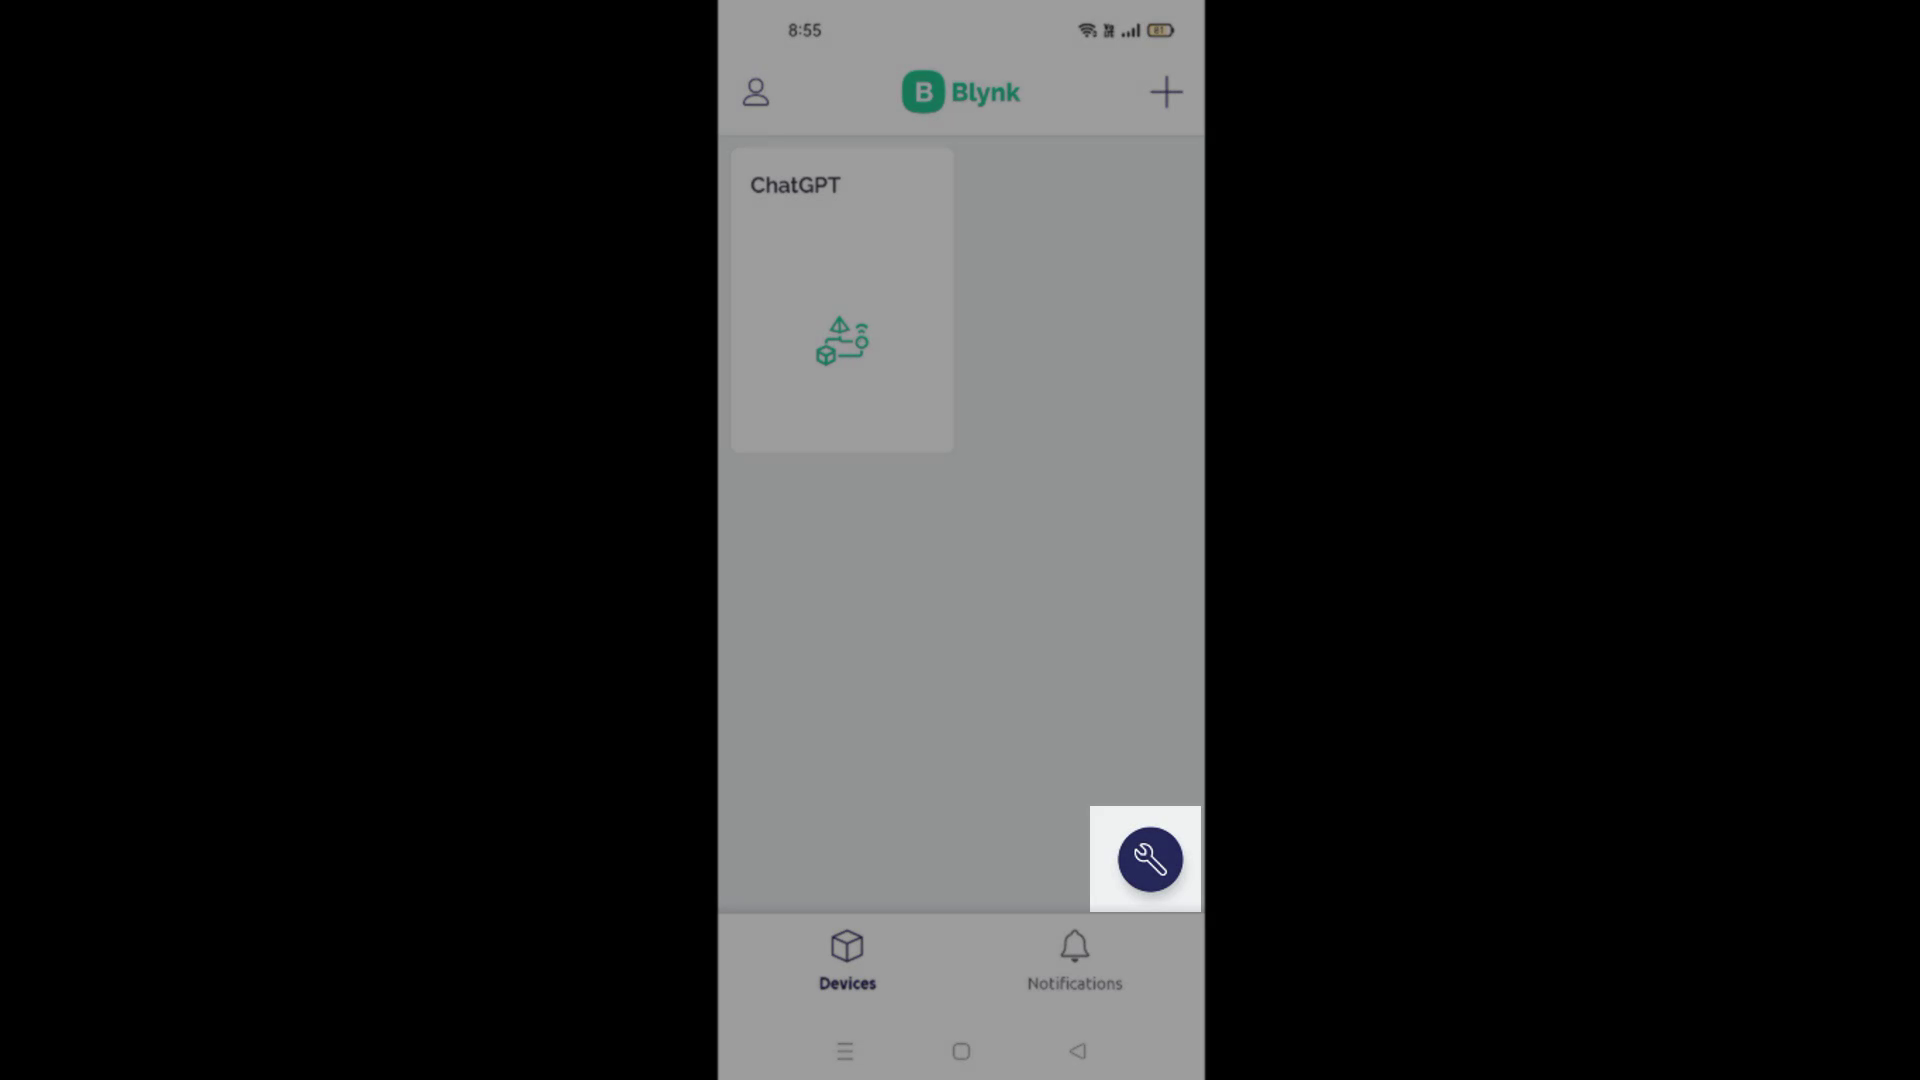
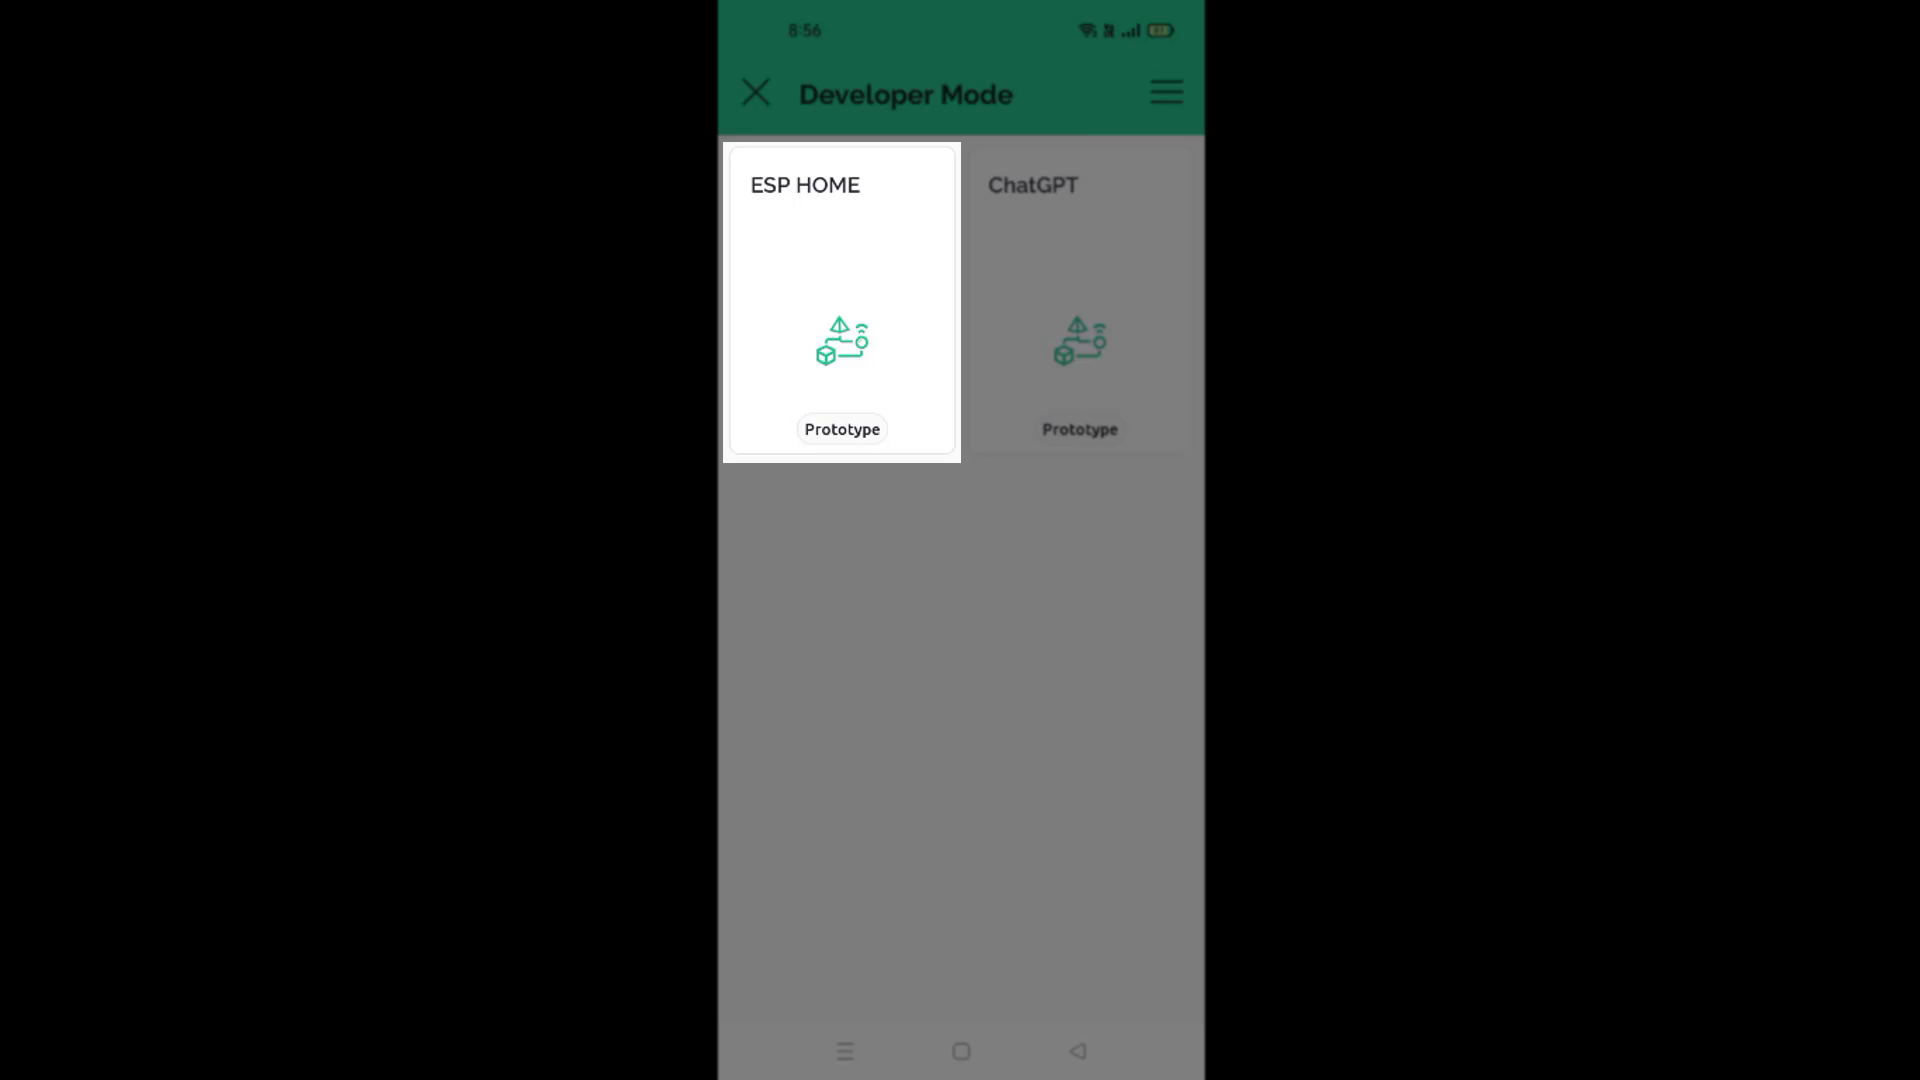
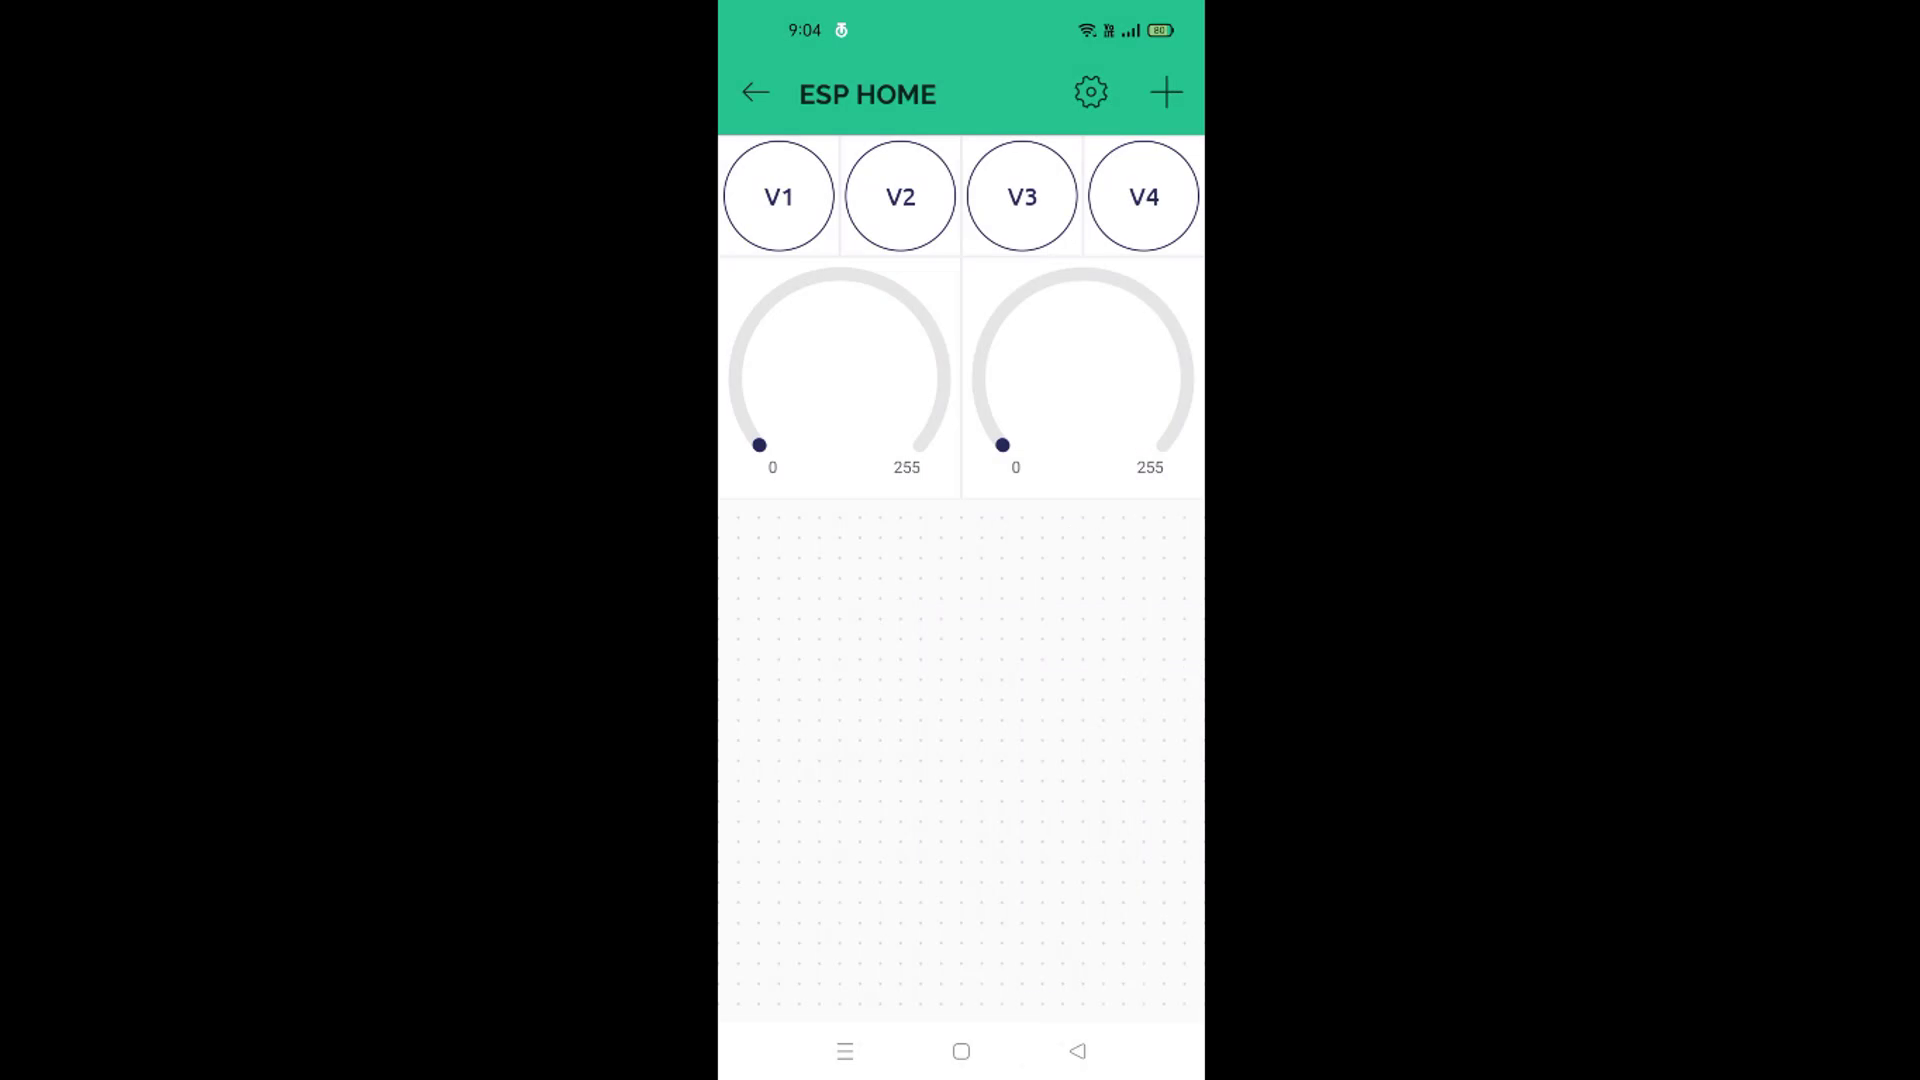
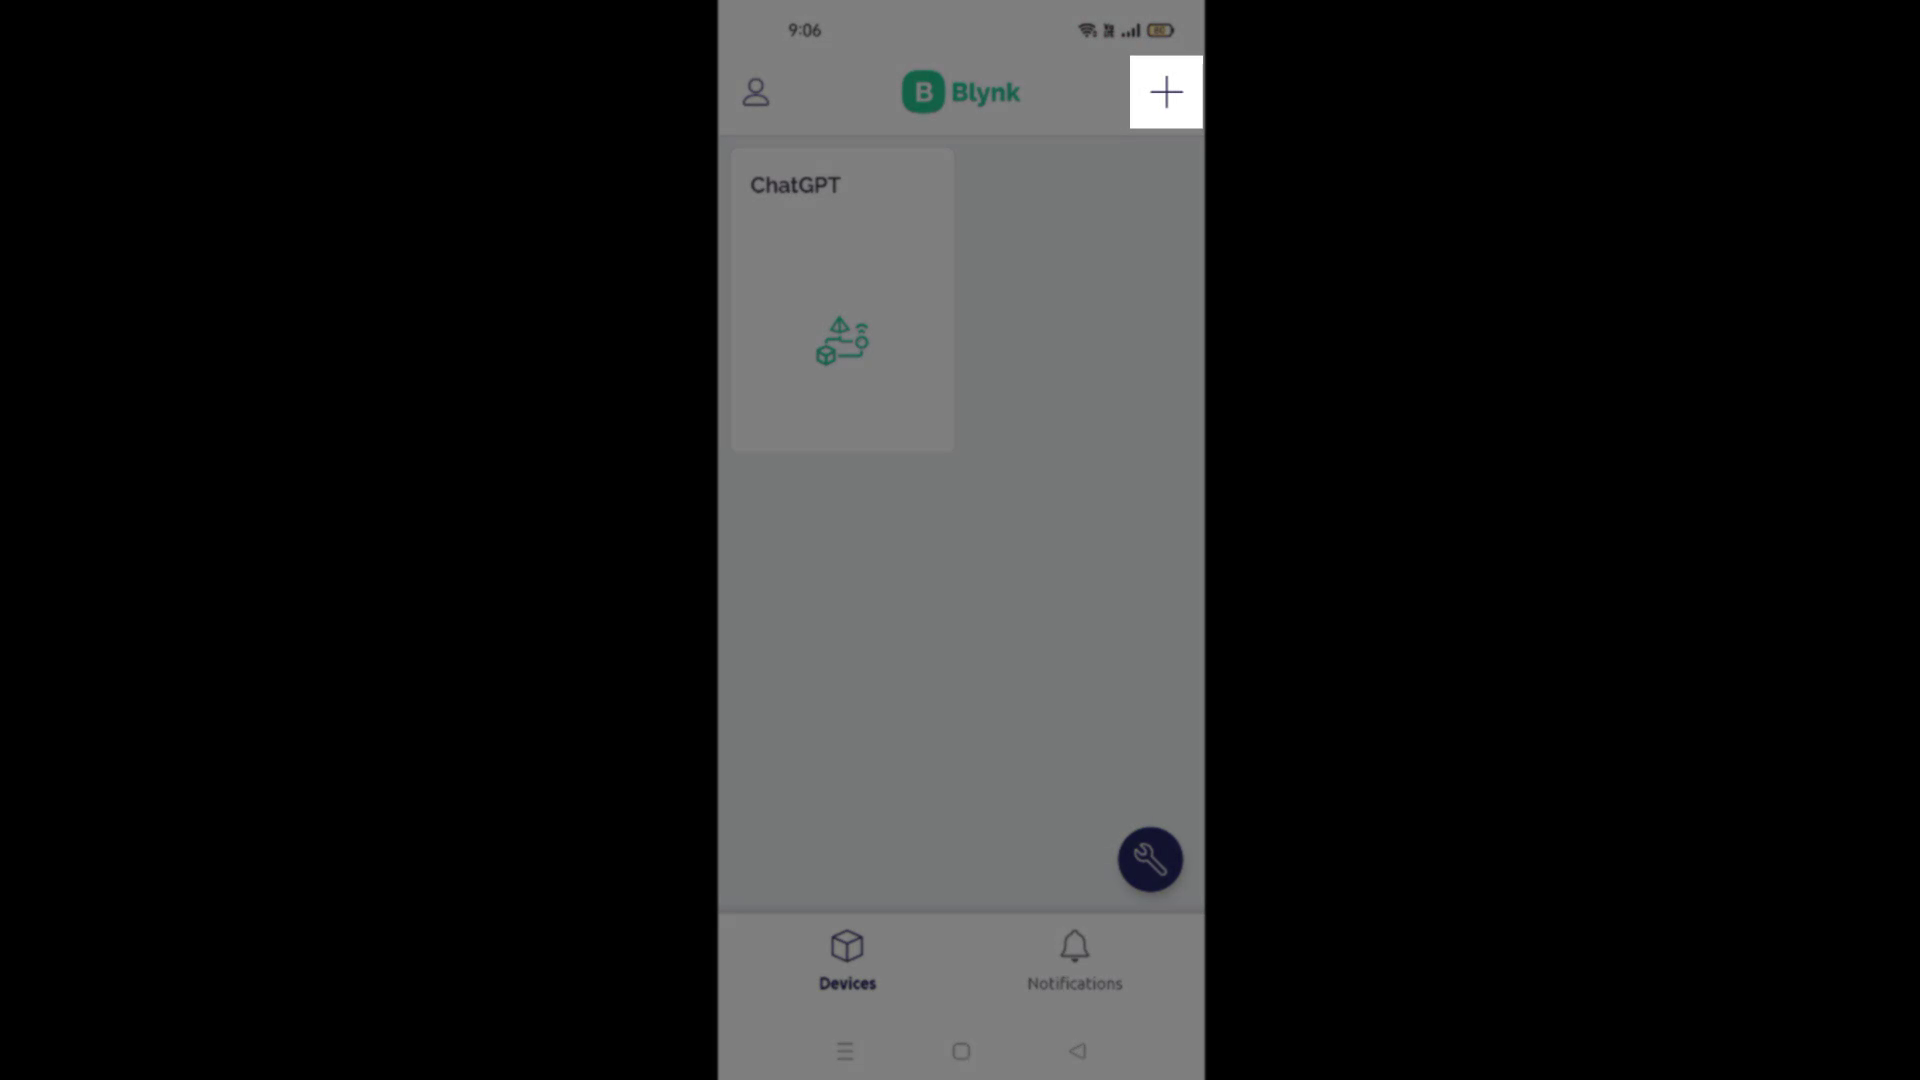
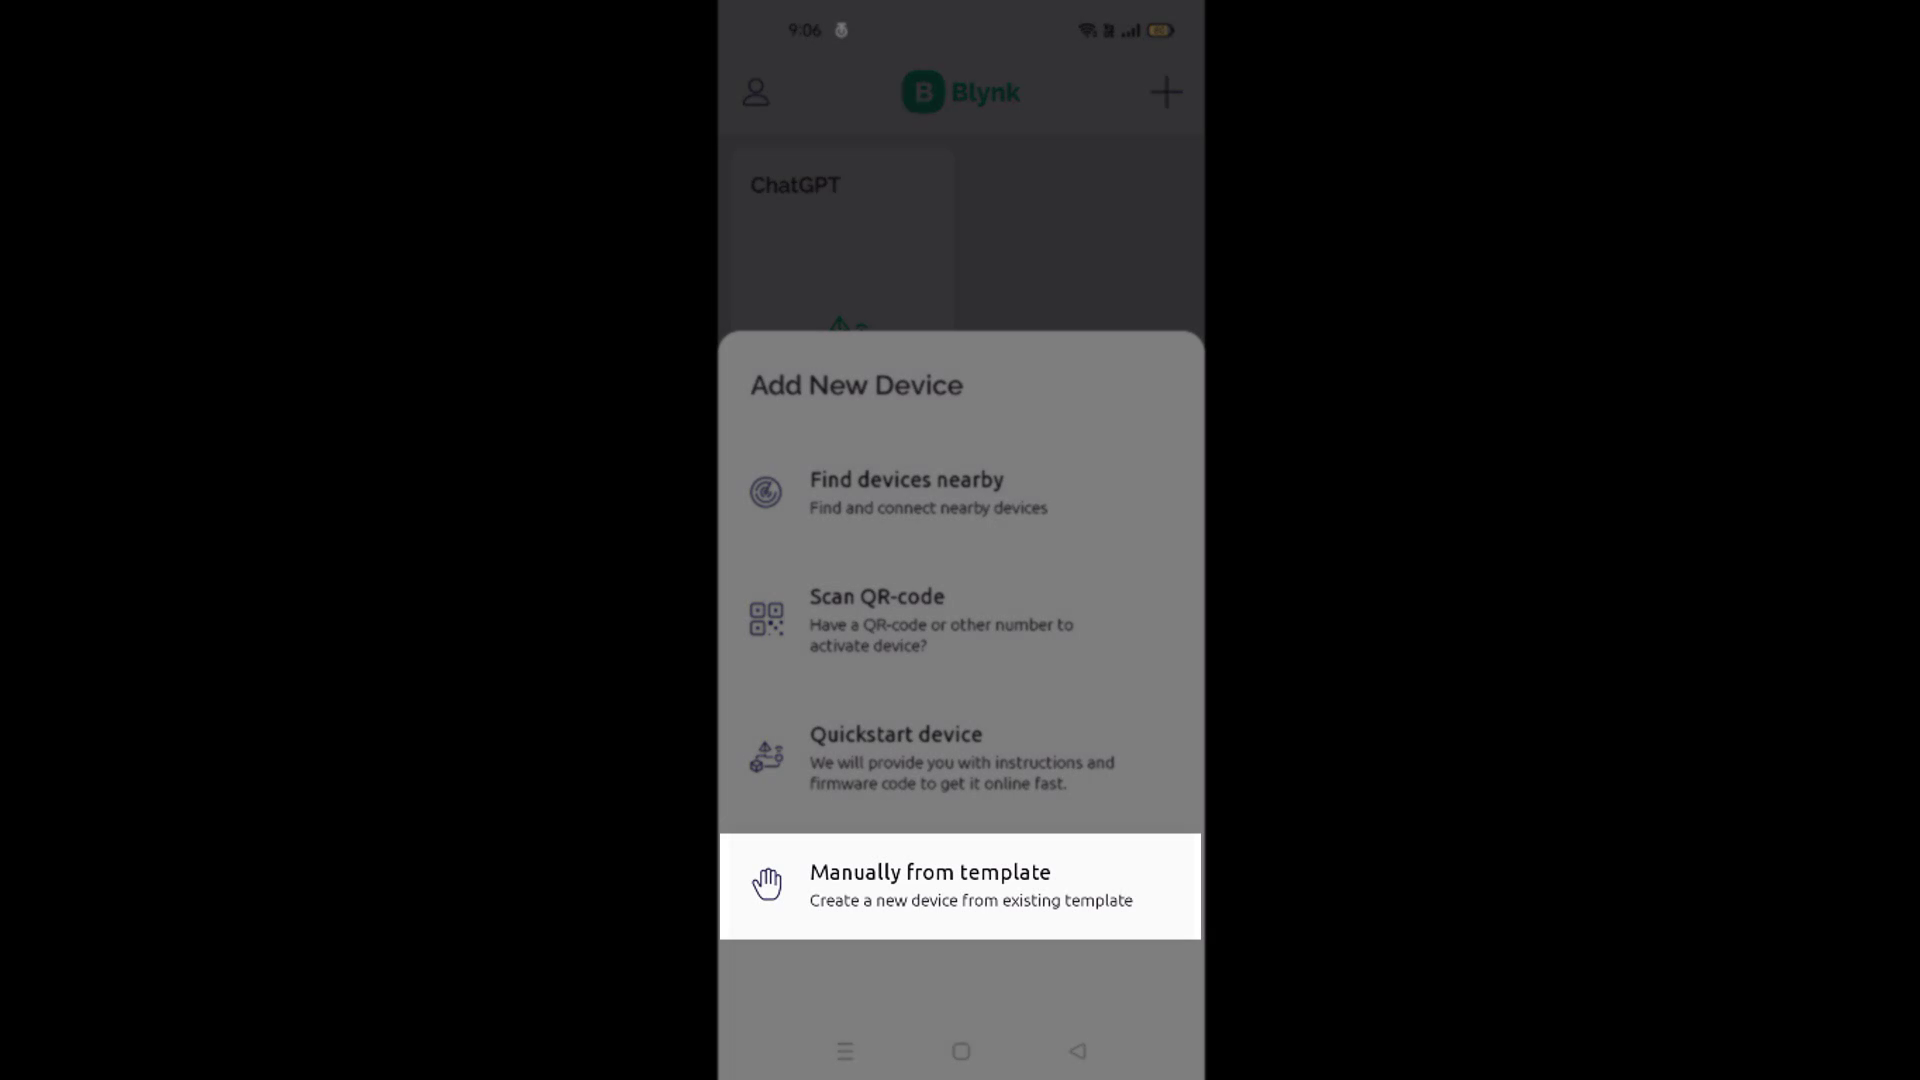
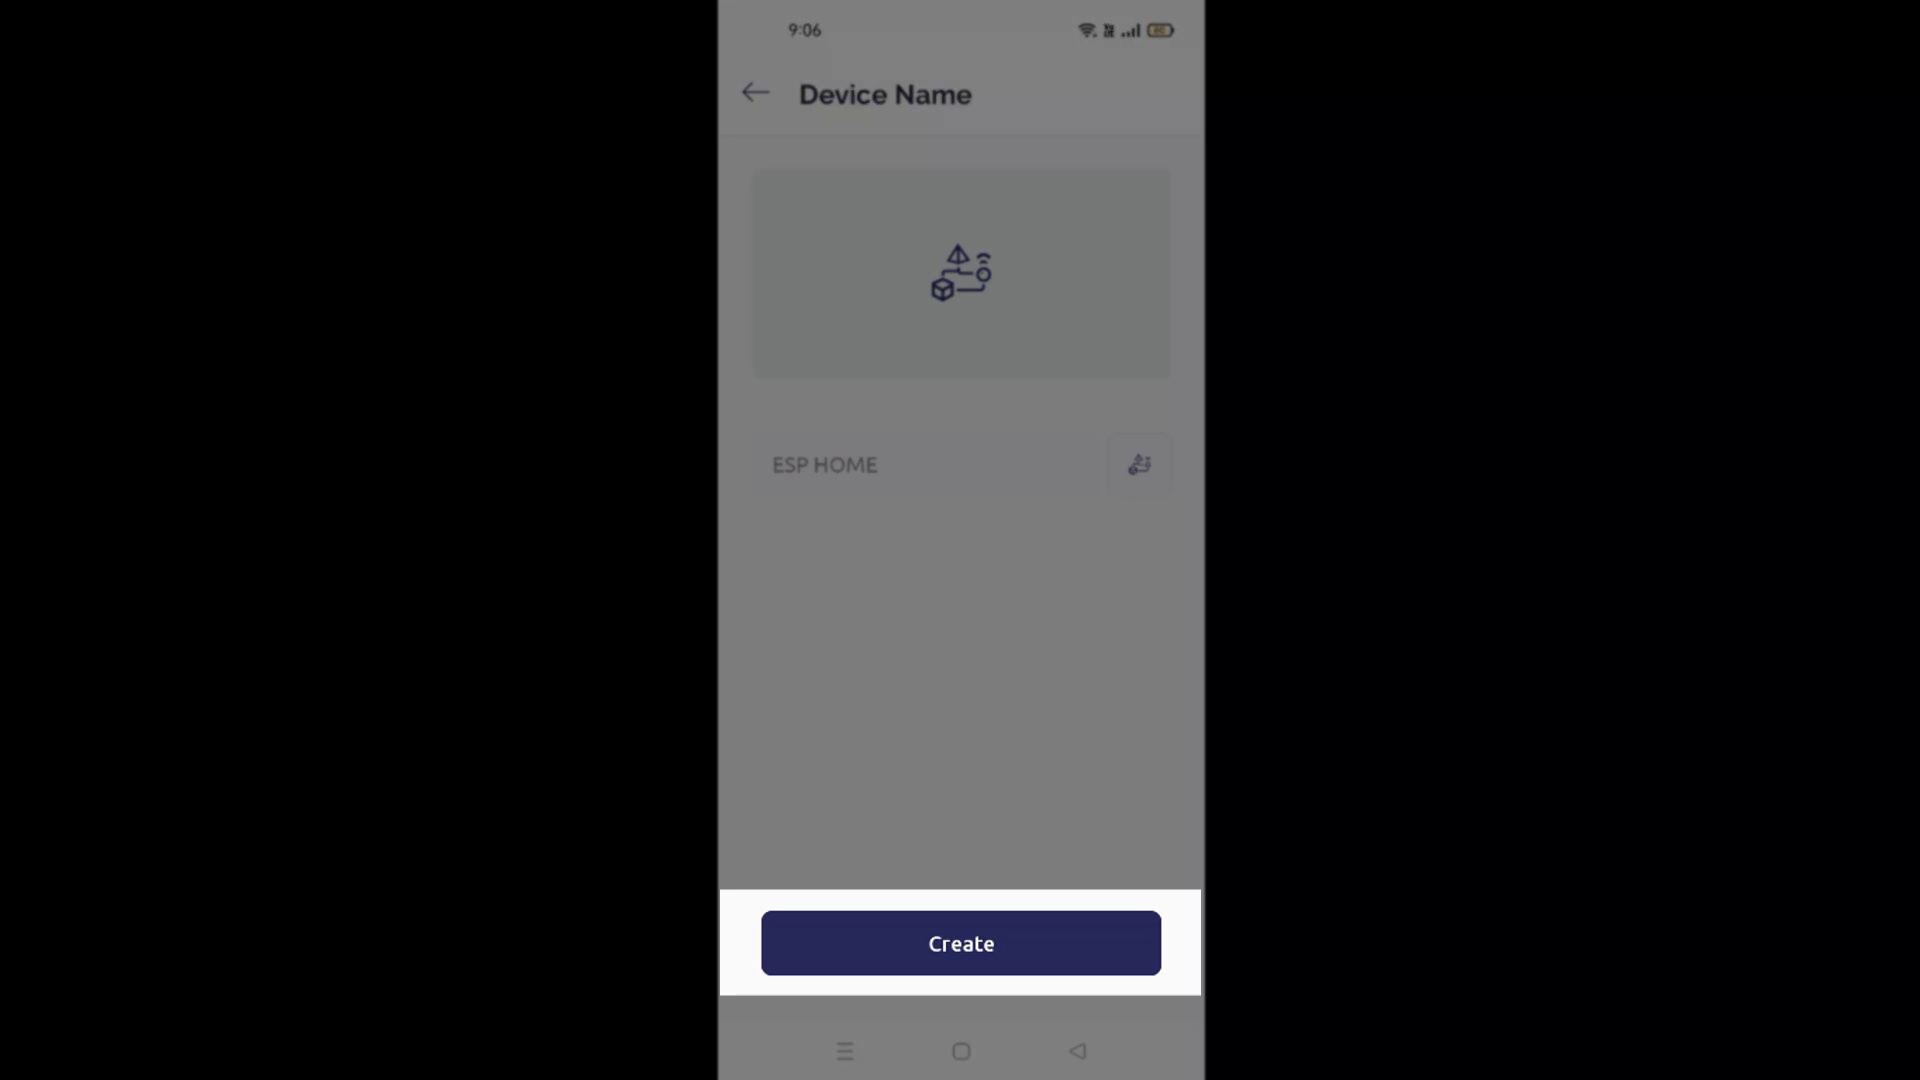
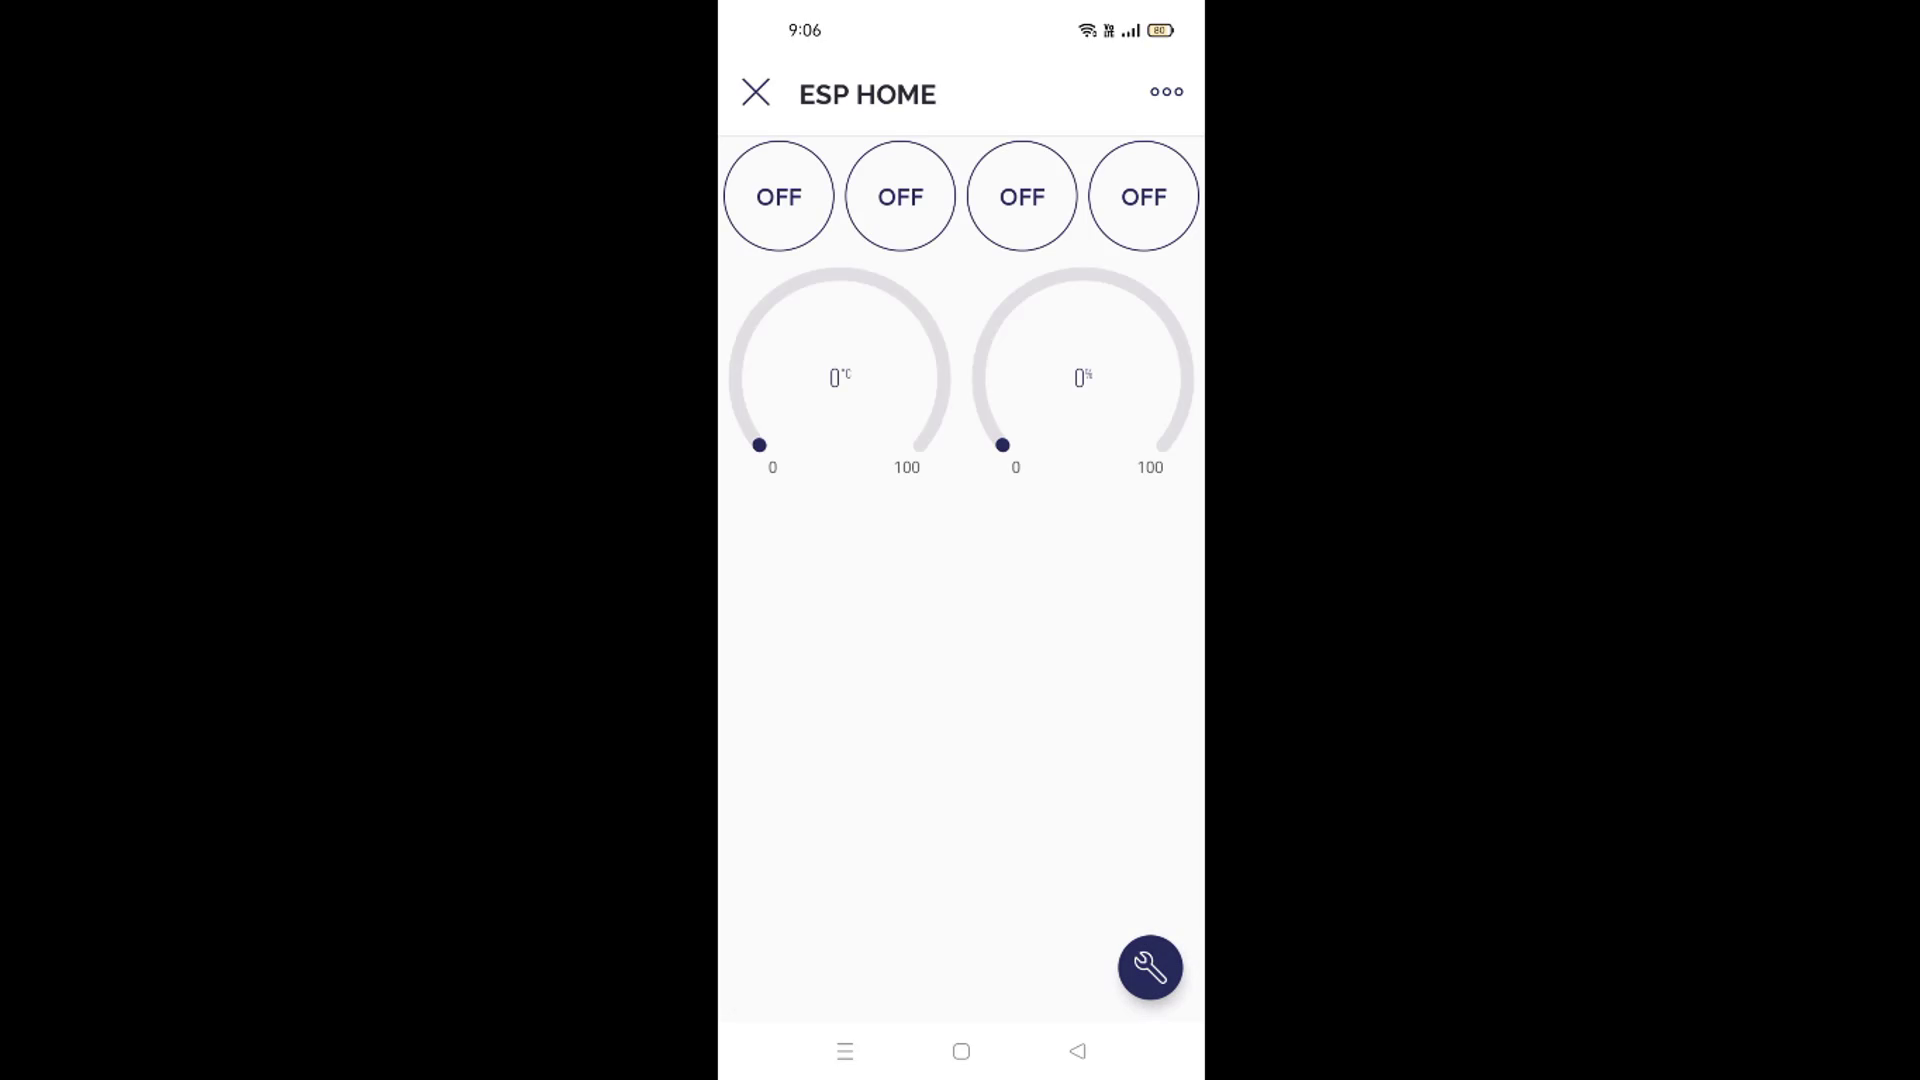
You can follow the step-by-step instructions to create a mobile dashboard for the Blynk app:
- Open the Blynk app on your phone and select "Developer Mode" option.
- Select the template "esp home" that we created earlier to create the mobile dashboard.
- Click on the Plus icon to add a new widget and select the "Button" widget.
- Tap on the newly added button to open its properties.
- Choose "Choose Datastream" option to create a new data stream and tap on "Create New".
- Set the virtual pin to V1, data type to integer, and the maximum value to 1. Then, click on the "Done" button.
- Set the mode from "Push" to "Switch" for the button.
- Repeat the same steps to add three more buttons to control the remaining three relays. Remember to change the virtual pins for each button accordingly, which are V1, V2, V3 and V4.
- Add two gauge widgets to display the temperature and humidity data.
- Tap on the first gauge widget to access its properties.
- Choose "Choose Datastream" option and create a new data stream with virtual pin V5, data type integer, and maximum value 100. Then, click on the "Done" button.
- Set the properties of the second gauge widget to display the humidity data.
- The mobile dashboard is now ready. To add a device to the template, go back to the main screen and tap on "Add New Device".
- Select "Manually from Template" and choose the template "esp home". Then, click on the "Create" button to create the new device.
- You can now use the button widgets on the mobile dashboard to turn ON and off the relays connected to the esp32.
Programming Using Arduino IDE
Install Required Libraries:
For this project you need following libraries:
- Blynk Library - version 1.2.0
- AceButton Library version 1.9.2
- IRremote Library Version 4.1.2
You can install the above libraries directly from the Arduino IDE using Tools > Manage Libraries
Install EP32 Core:
URL: Preferences--> Aditional boards Manager URLs
- Paste the above URL in File > Preferences > Aditional boards Manager URLs
- Then install the ESP32 core from Tools > Boards > Board Manager
- Install the version 2.0.4
Add Blynk Credentials in the Code
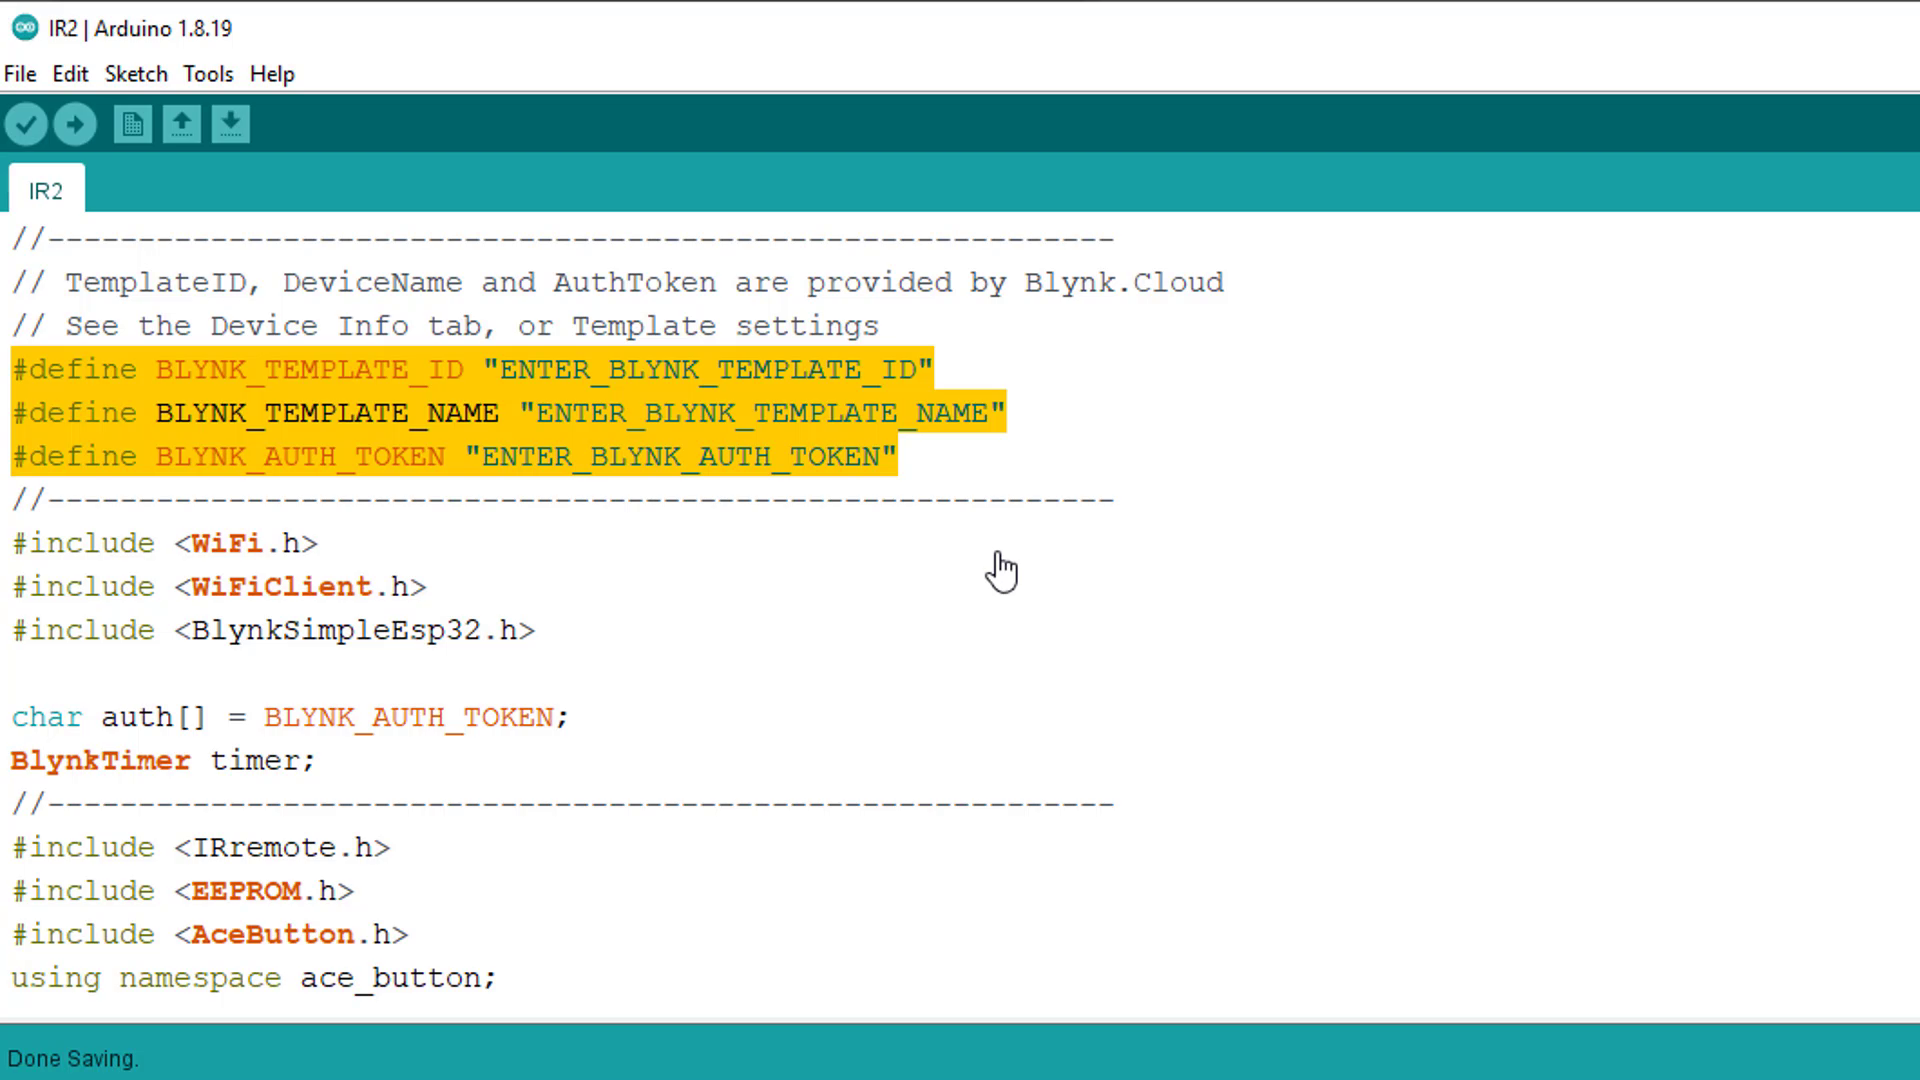
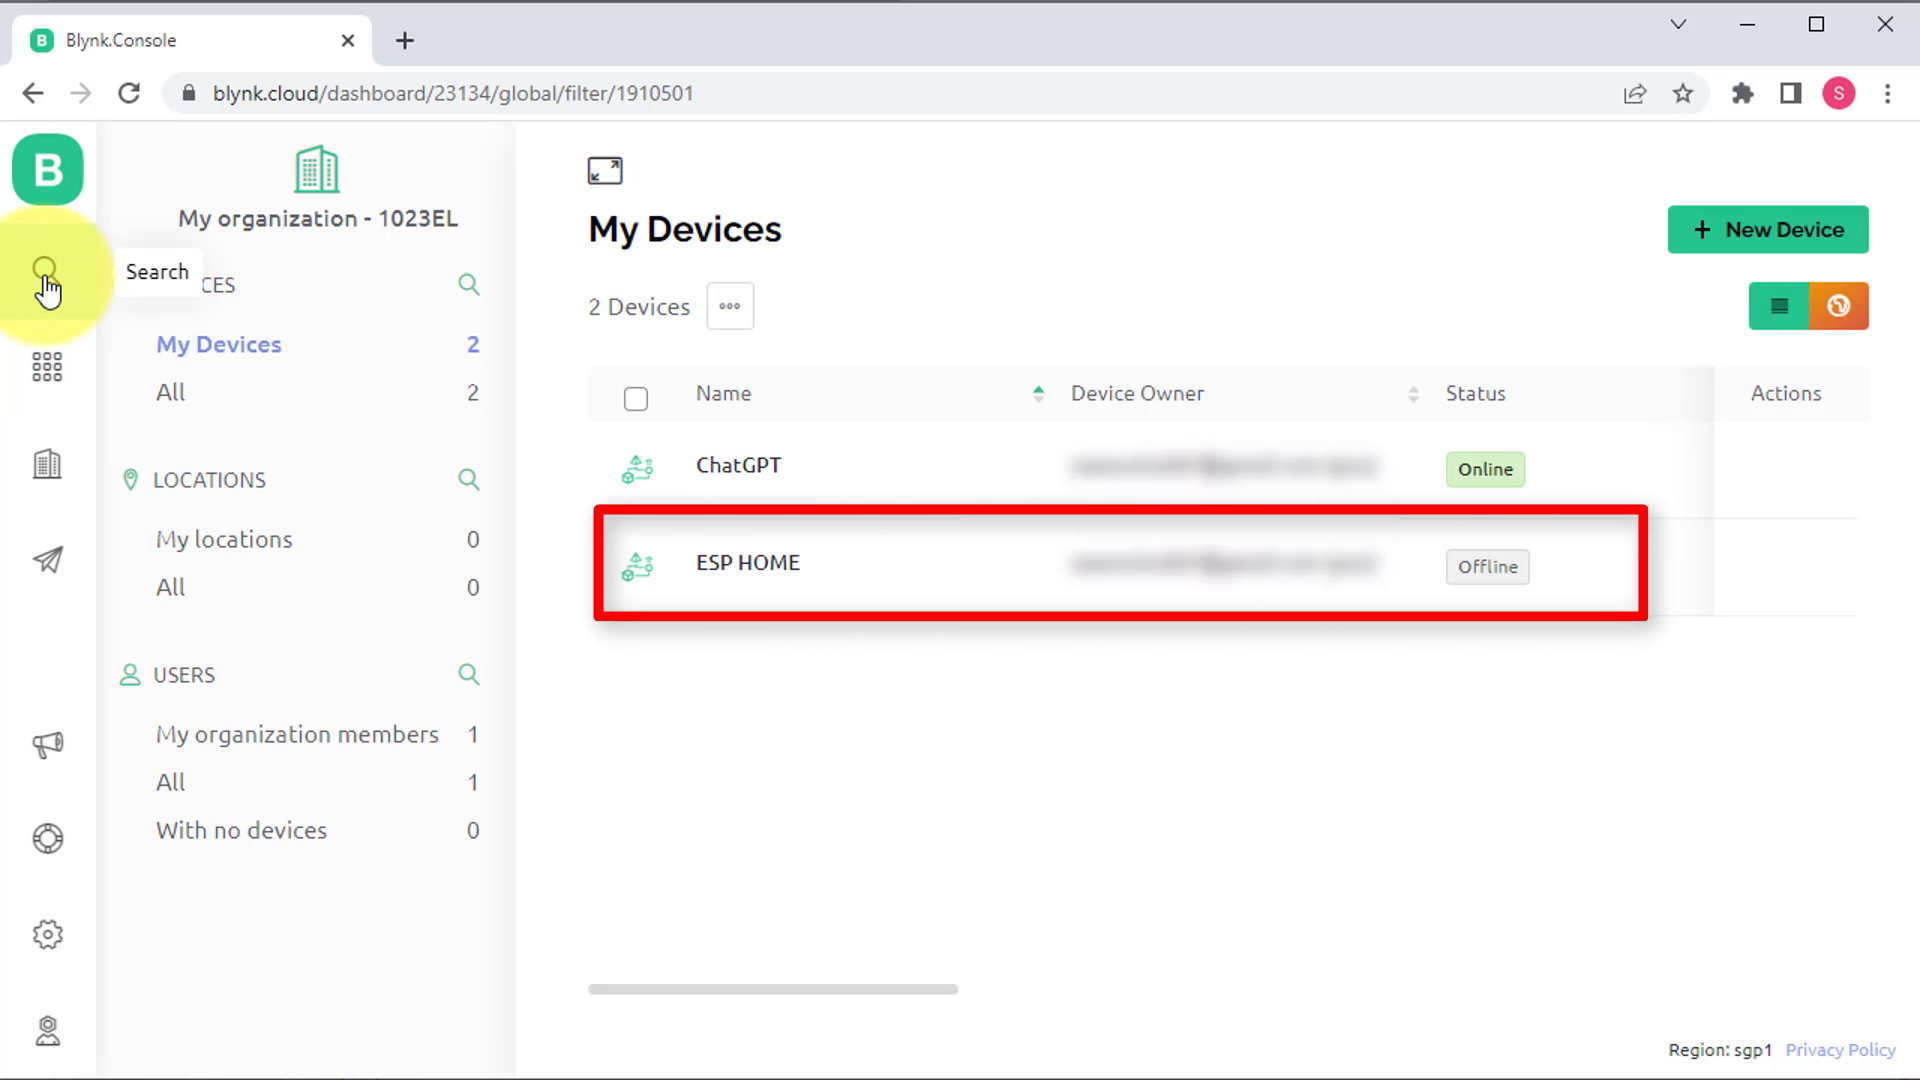
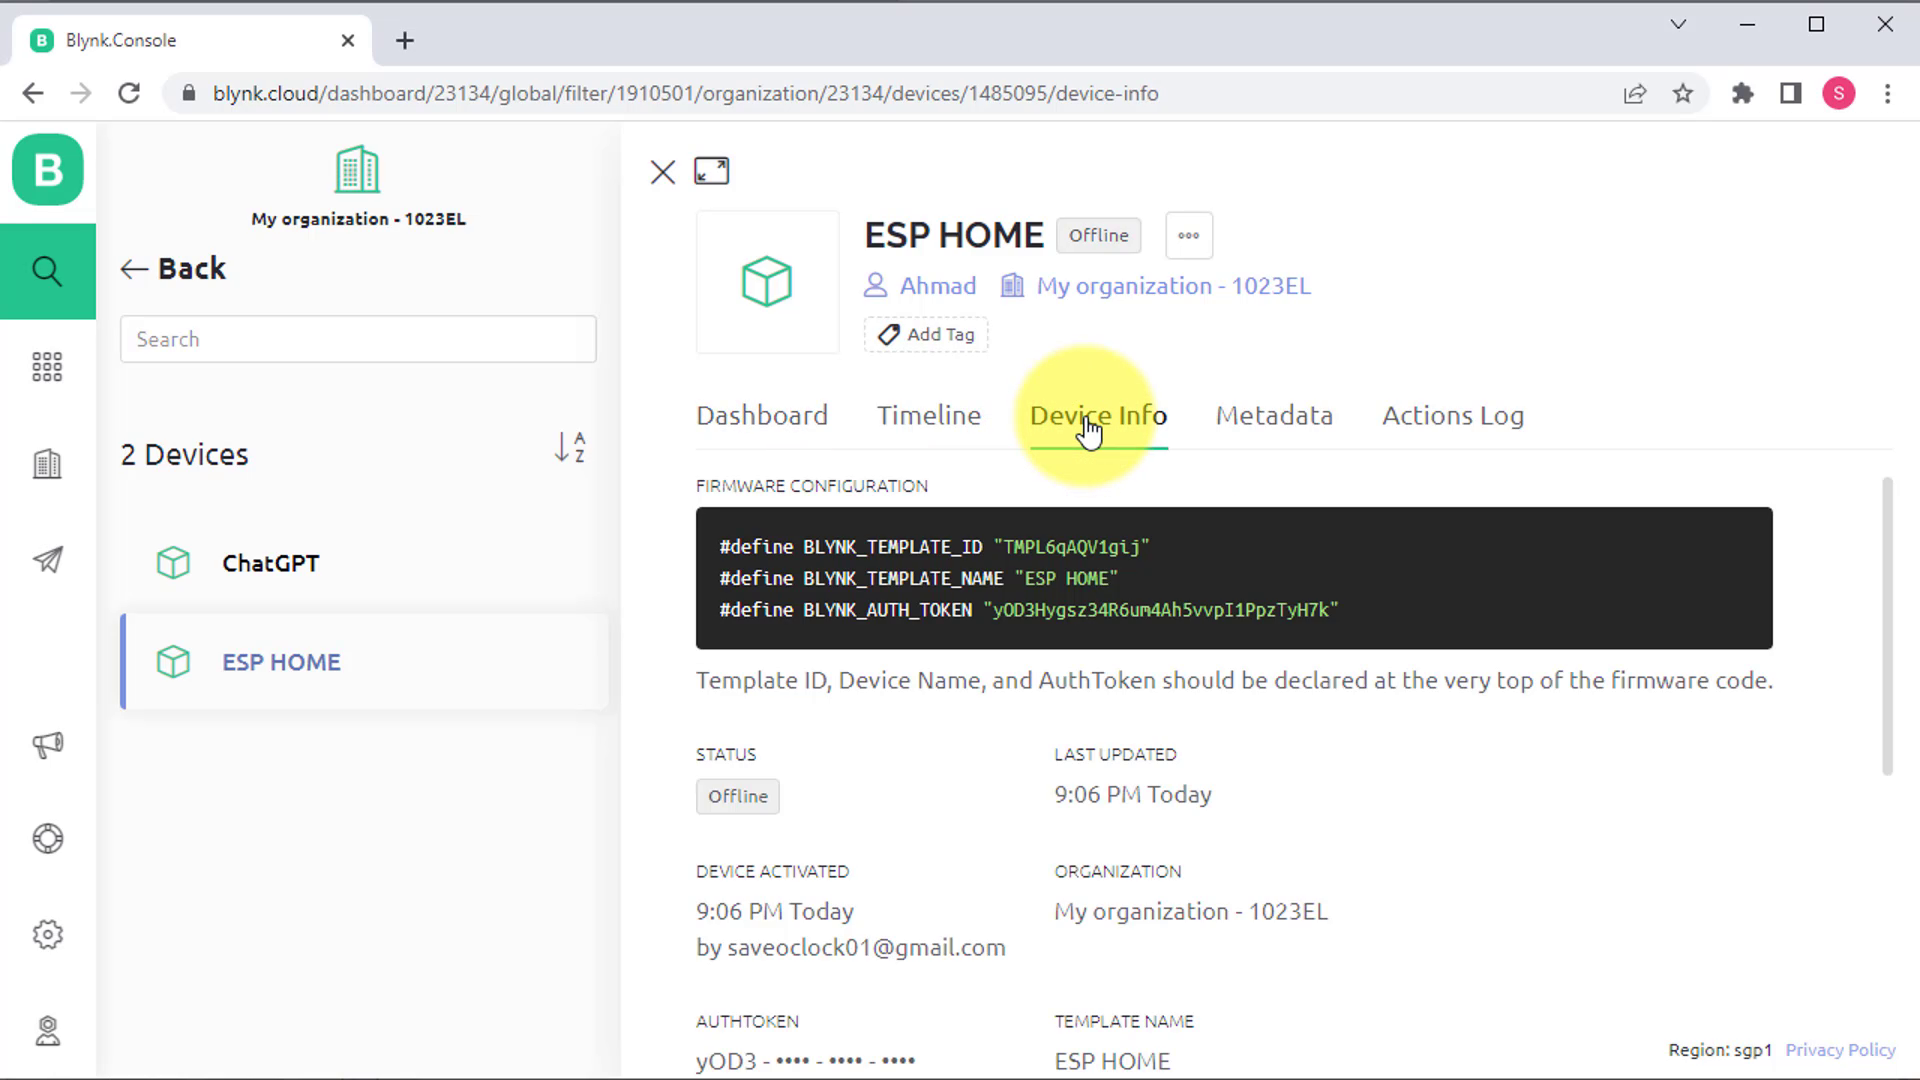
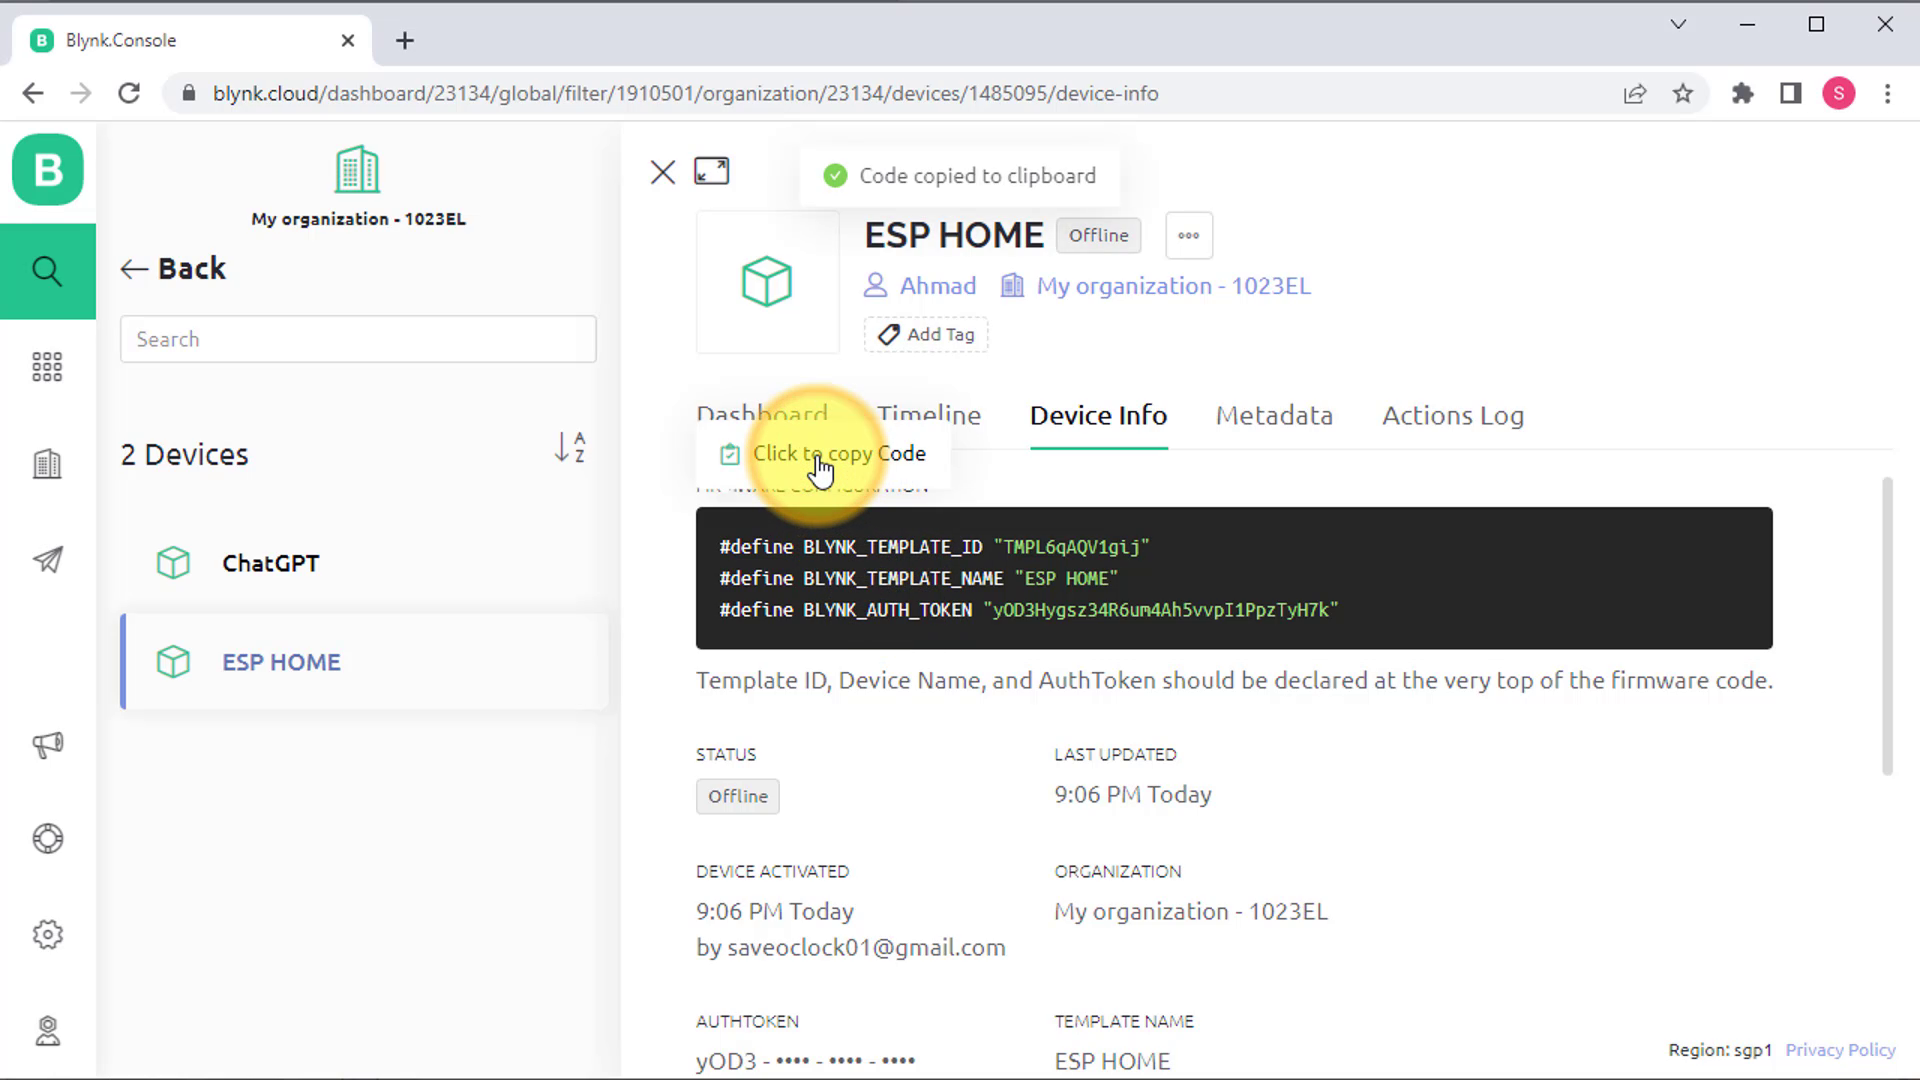
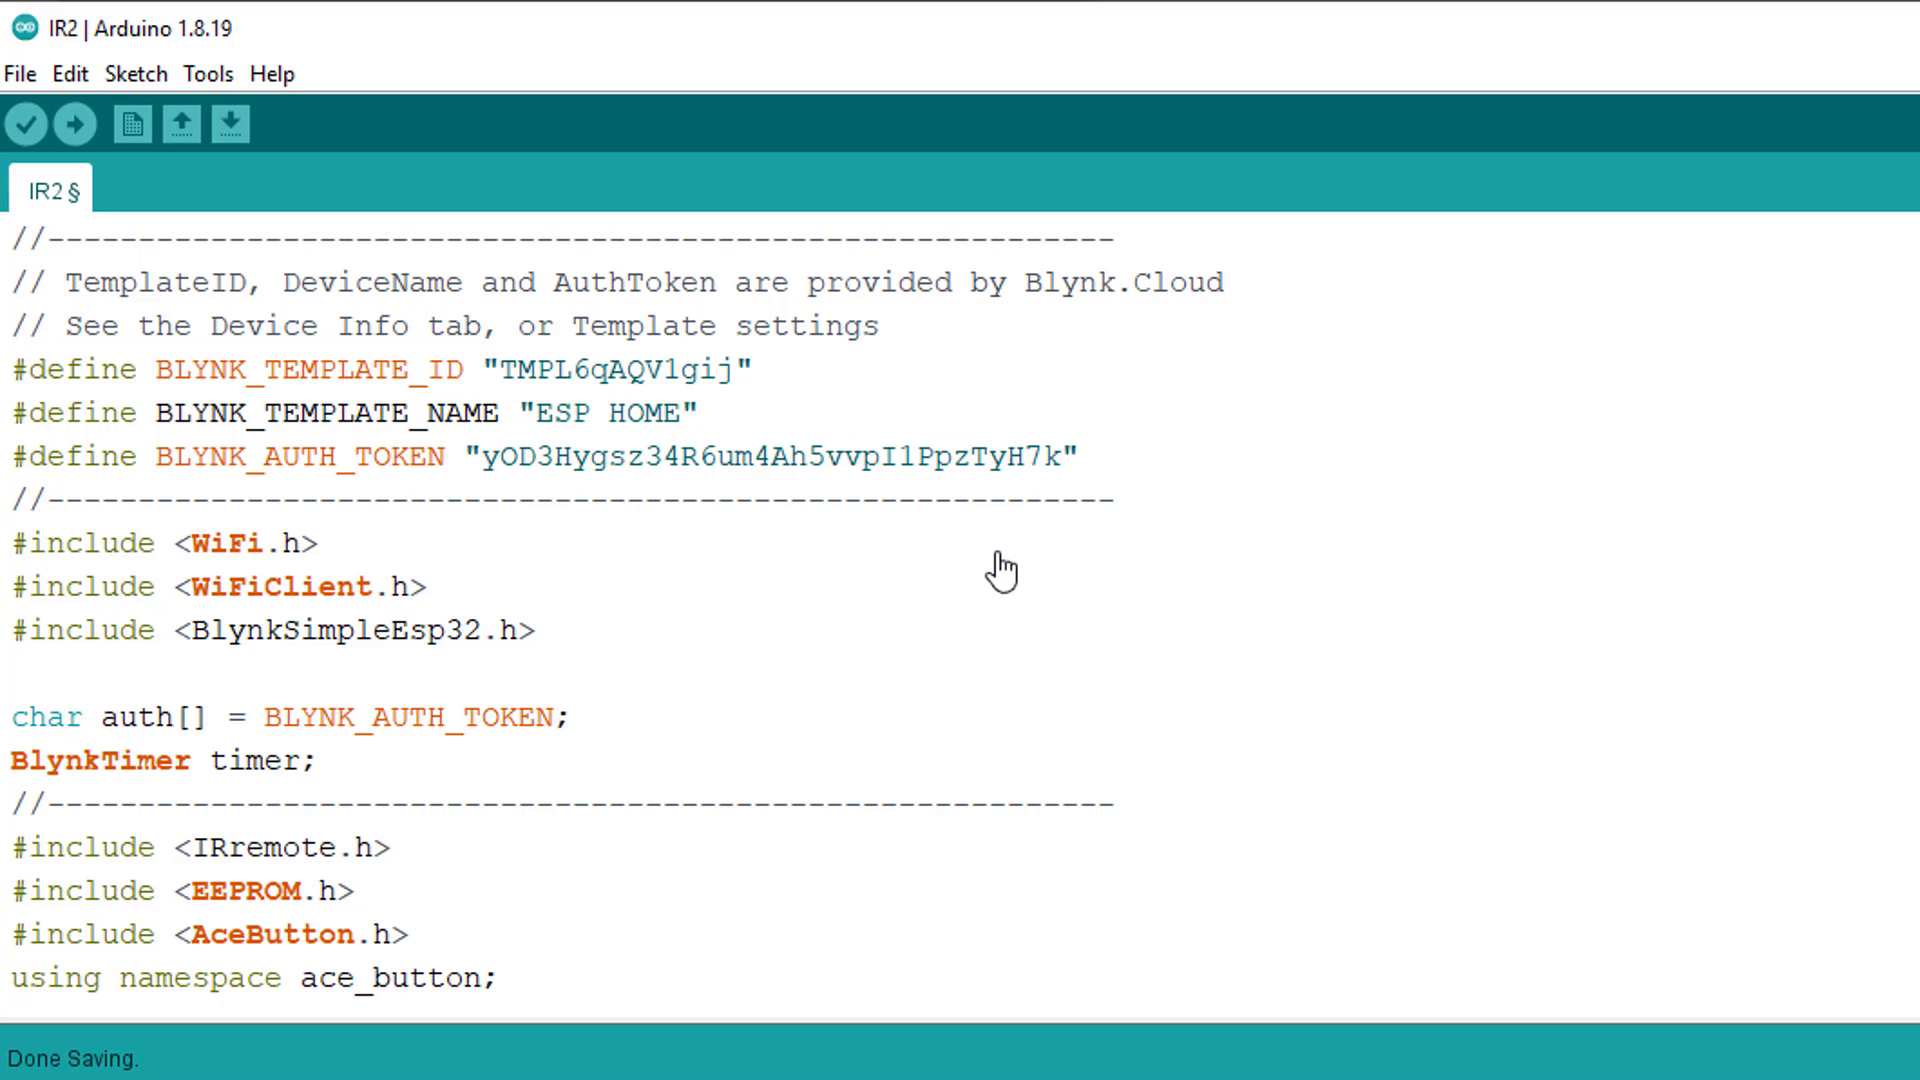
Here you need to add your Blynk account credential in the code.
#define BLYNK_TEMPLATE_ID "ENTER_BLYNK_TEMPLATE_ID"
#define BLYNK_TEMPLATE_NAME "ENTER_BLYNK_TEMPLATE_NAME"
#define BLYNK_AUTH_TOKEN "ENTER_BLYNK_AUTH_TOKEN"
Here is the step by step procedure to get the Blynk credentials.
- Go to your Blynk account and navigate to the devices section.
- Find the device that you have previously created using the Blynk App and click on it.
- Click on the Device Info tab to access your Blynk credentials.
- Copy the Blynk credentials from the Device Info tab.
- Open the Arduino IDE and open the sketch that you are working on.
- Look for the section of the sketch where Blynk credentials are required.
- Paste the copied Blynk credentials into the above fields in the sketch.
- Save your changes to the sketch.
- Upload the modified sketch to your ESP32 device.
- You are now ready to use Blynk to communicate with your ESP32 device.
#define BLYNK_TEMPLATE_ID "TMPL3cAQV1gij"
#define BLYNK_TEMPLATE_NAME "ESP HOME"
#define BLYNK_AUTH_TOKEN "yOD3Hyfsz34R6um4Ah5vvpI1PPzTyr7k"
Enter WiFi Credentials
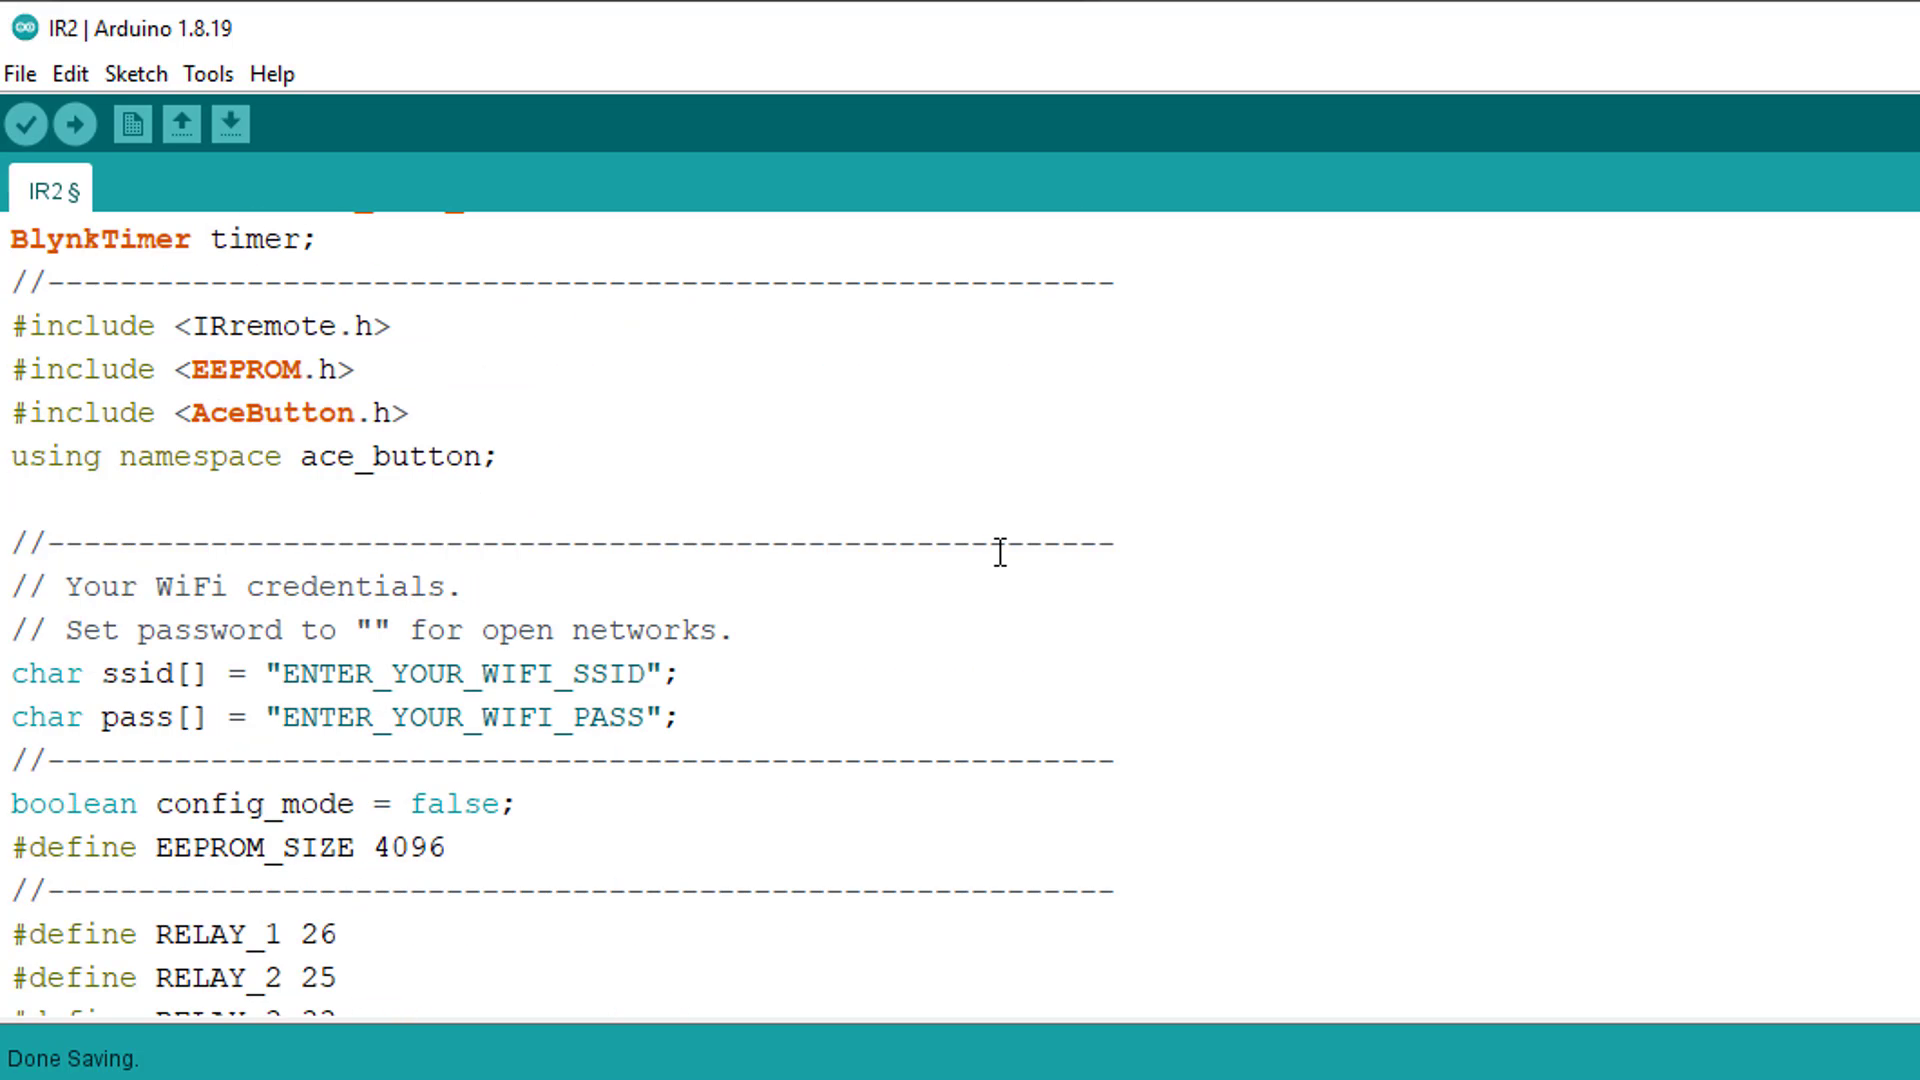
Here you need to enter your WiFi credentials
// Your WiFi credentials.
char ssid[] = "ENTER_YOUR_WIFI_SSID";
char pass[] = "ENTER_YOUR_WIFI_PASS";
Upload the Code
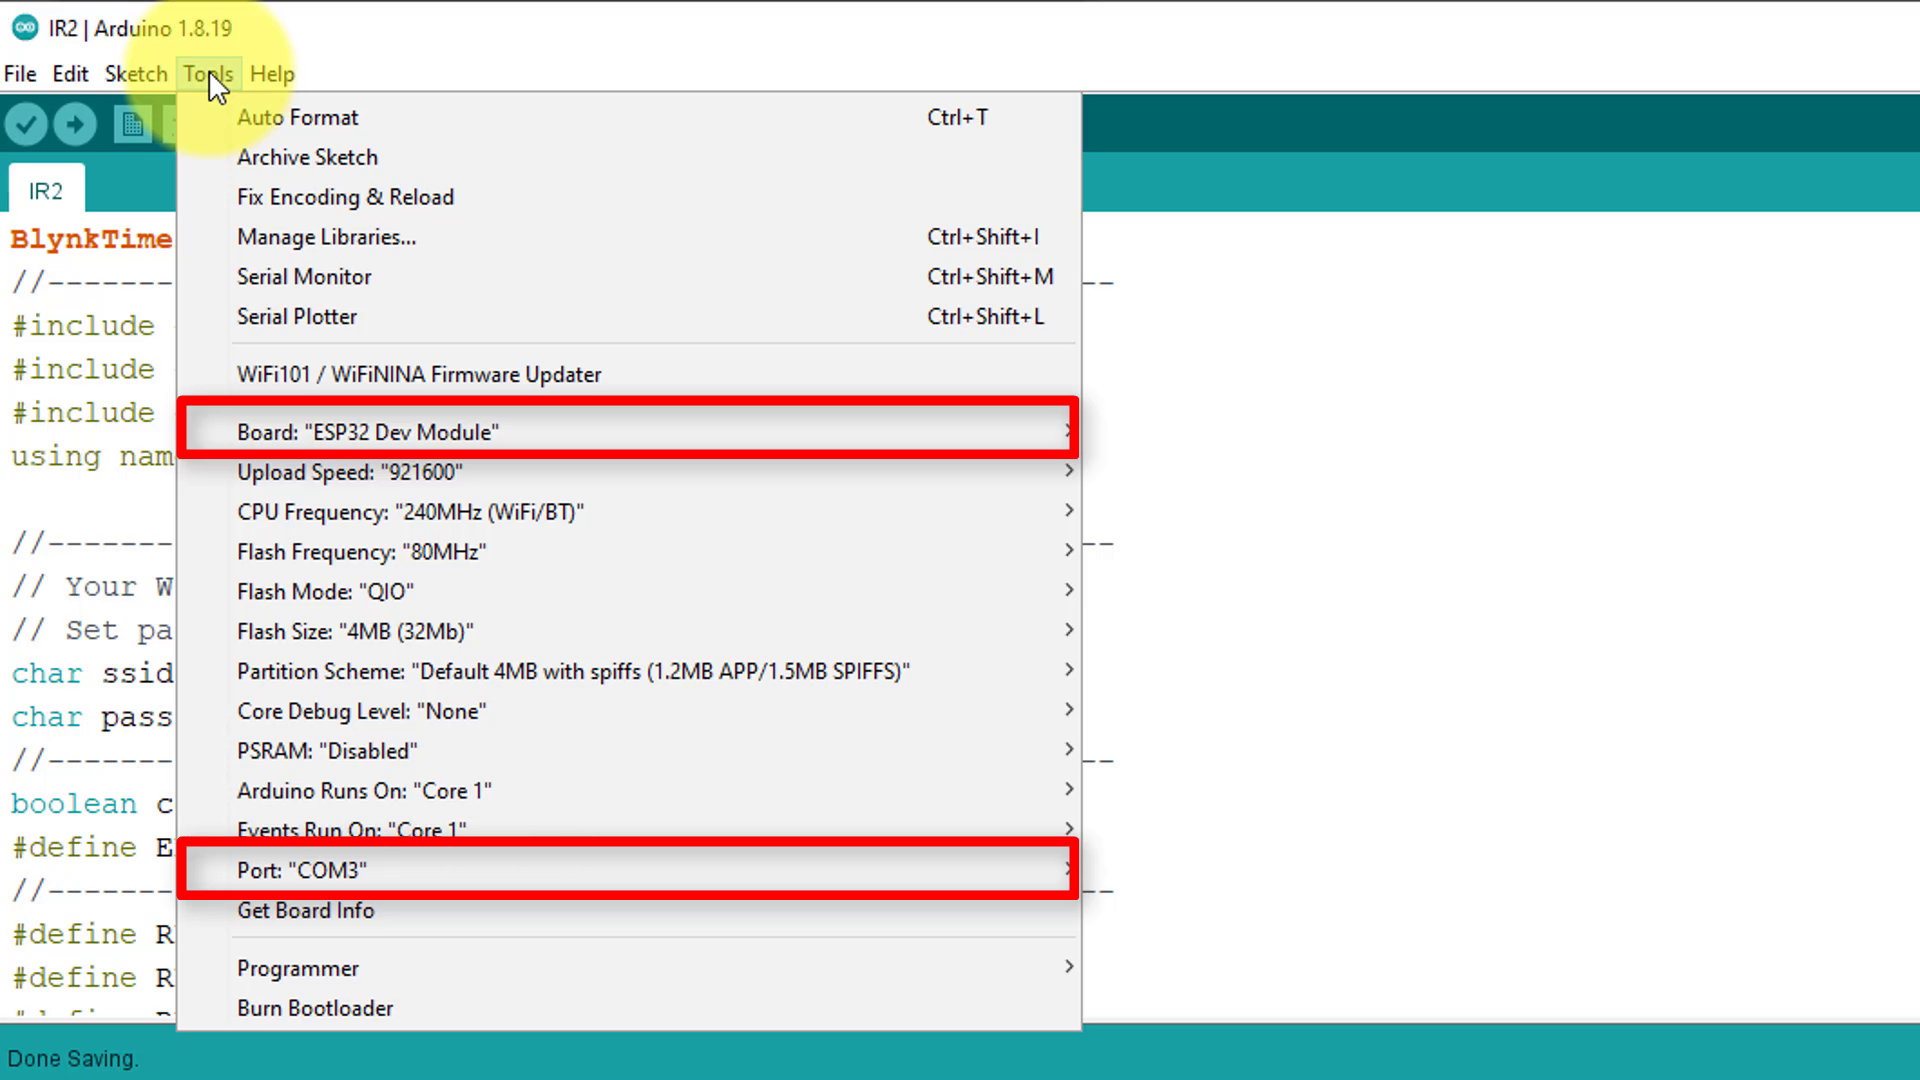
Before uploading the code, make sure you have already installed the esp32 core. Also, ensure that you have selected the correct board and the com port. Finally, click on the upload button, to upload the code onto your esp32.
You can download the complete code by clicking below
Downloads
Demo
.png)
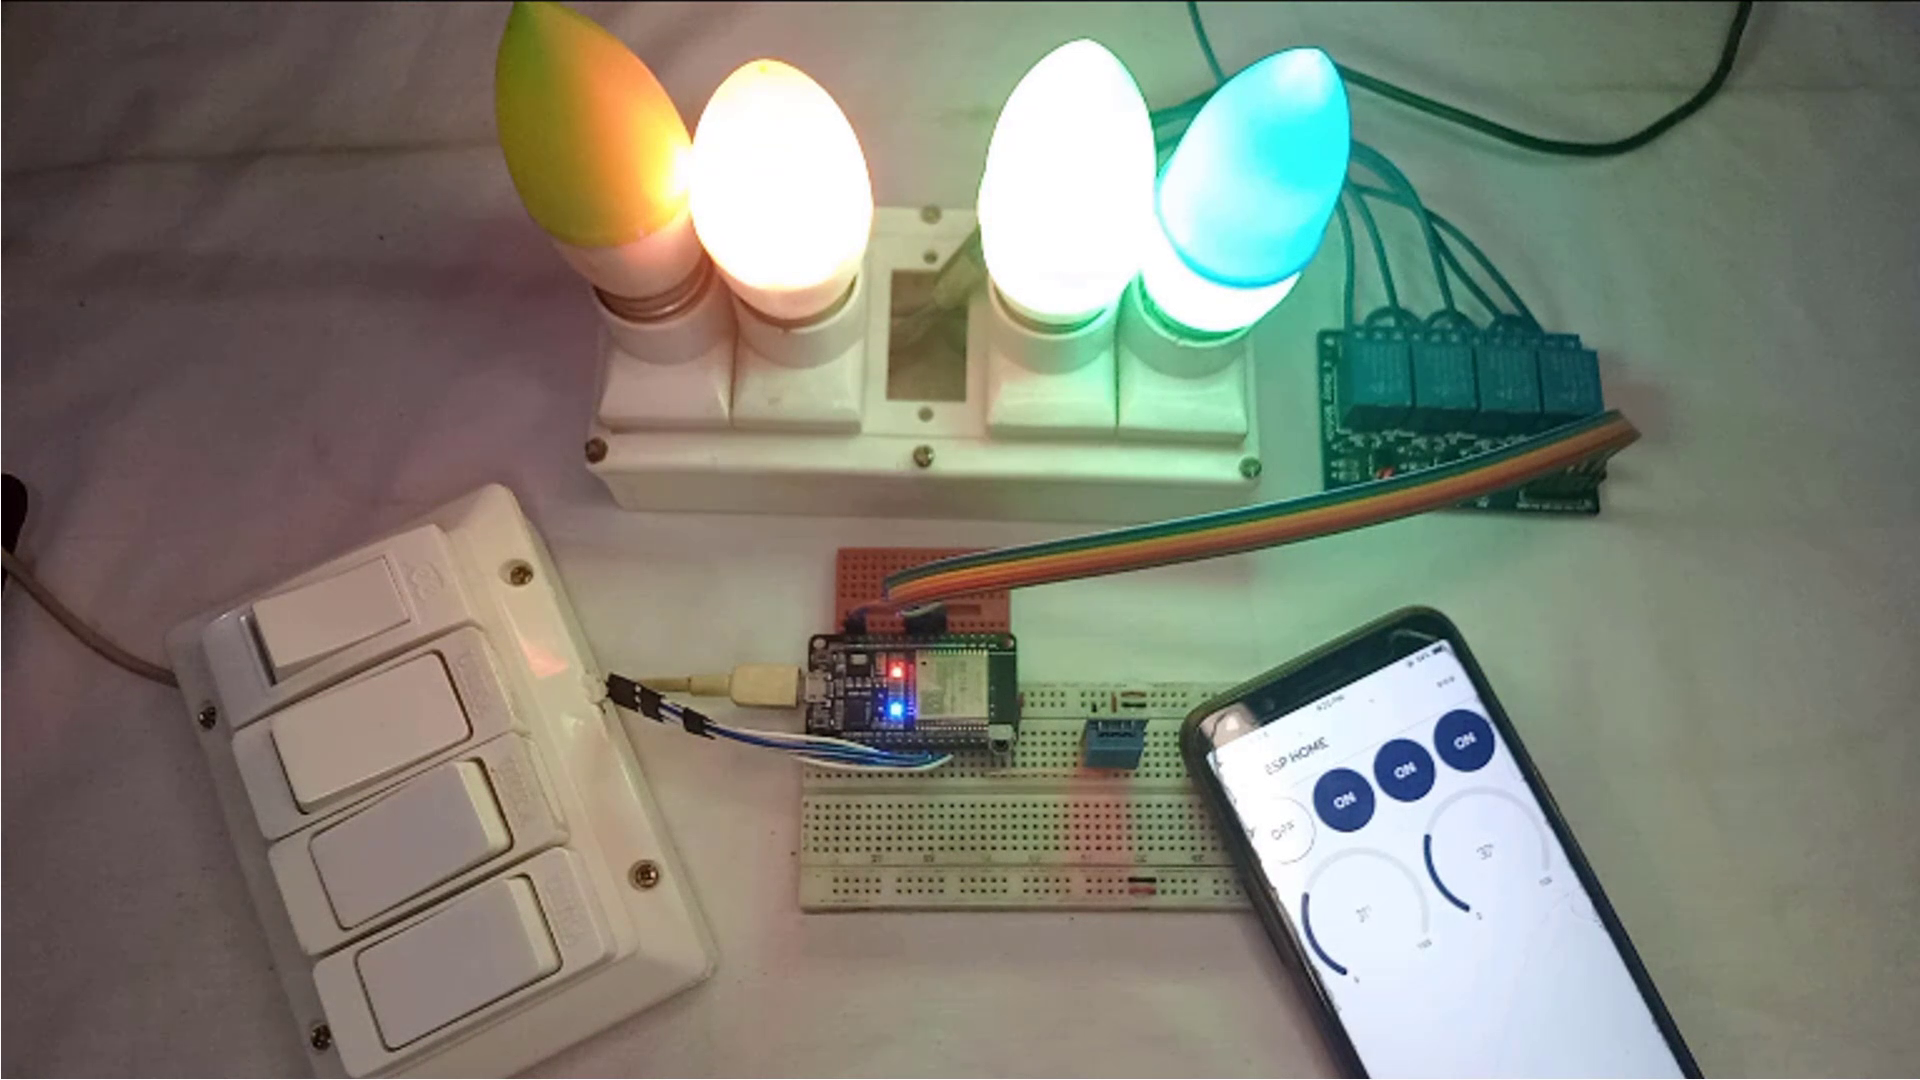
Video Tutorial
Download Code and Related Files
You can download the code and related files for this project by clicking on the link below