ELECTRIC RC CAR CHASSIS WITH ACCELERATION, STEERING, AND SUSPENSION
by henryreadjordan in Workshop > 3D Printing
2312 Views, 24 Favorites, 0 Comments
ELECTRIC RC CAR CHASSIS WITH ACCELERATION, STEERING, AND SUSPENSION
.jpeg)


This is a 3D-Printed remote control car base with working suspension and steering. It is made using purchased RC car parts and 3D-Printed plastic pieces designed on Tinkercad. The car uses an Ovonic 7.4 volt Lipo battery for power.
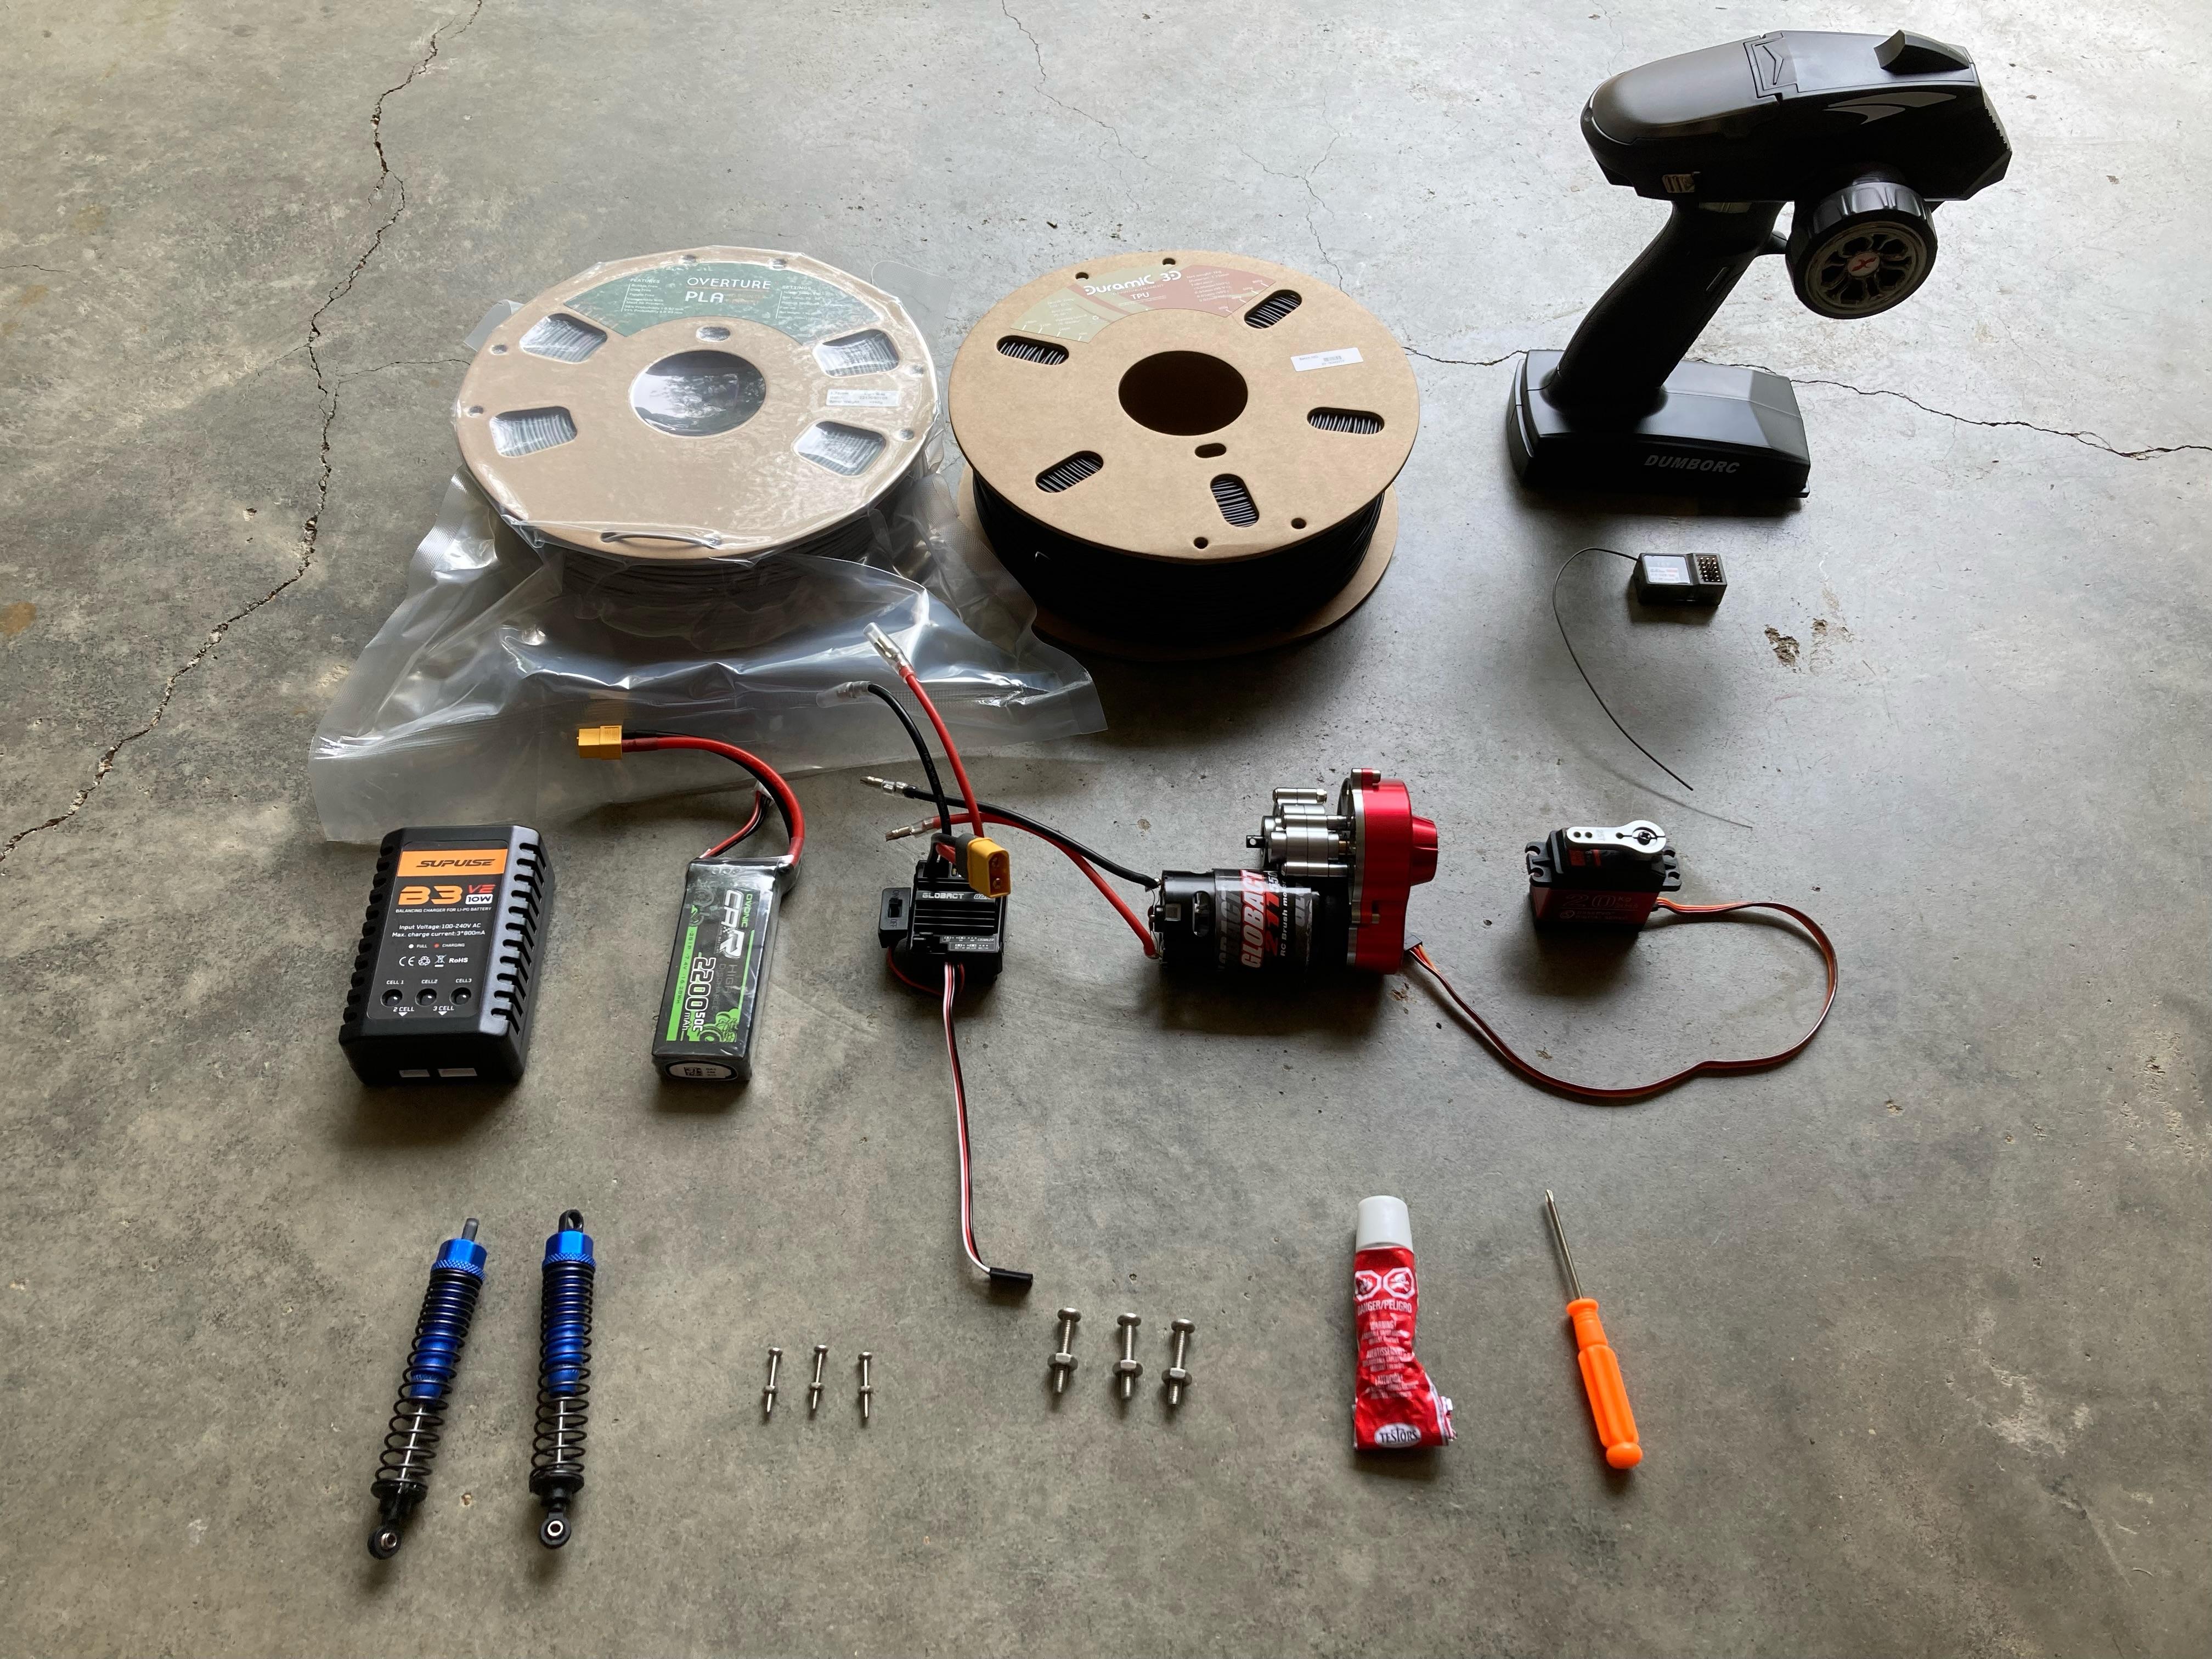
Supplies
.jpeg)
This project requires a small screwdriver along with ____ 4 mm screws and nuts, and ___ 2 mm screws and nuts. Other products and brands than the ones listed below may be compatible with the design as well.
- MOTOR- https://www.amazon.com/gp/product/B09GFD1N98/ref=ppx_yo_dt_b_asin_title_o00_s02?ie=UTF8&psc=1
- SHOCKS- https://www.amazon.com/gp/product/B07L7817V2/ref=ppx_yo_dt_b_asin_title_o00_s01?ie=UTF8&psc=1
- TRANSMITTER- https://www.amazon.com/gp/product/B07RR81GSB/ref=ppx_yo_dt_b_asin_title_o00_s03?ie=UTF8&psc=1
- TRANSMISSION- https://www.amazon.com/gp/product/B096GVN43Y/ref=ppx_yo_dt_b_asin_title_o00_s04?ie=UTF8&psc=1
- STEERING SERVO- https://www.amazon.com/gp/product/B01MU7TQV8/ref=ppx_yo_dt_b_asin_title_o01_s01?ie=UTF8&psc=1
- BATTERY- https://www.amazon.com/gp/product/B07L6BVRDG/ref=ppx_yo_dt_b_asin_title_o05_s00?ie=UTF8&psc=1
- CHARGER- https://www.amazon.com/dp/B099K8XFG6/ref=emc_b_5_t
- PLA FILAMENT- https://www.amazon.com/dp/B07PFV1CFX/ref=twister_B07ZJPCQBN?_encoding=UTF8&th=1
- TPU FILAMENT- https://www.amazon.com/dp/B095HRG913/ref=twister_B098F57L5S?_encoding=UTF8&th=1
- GLUE- https://www.amazon.com/Cement-Glue-Value-Testors-tubes/dp/B0013D53CS/ref=asc_df_B0013D53CS?tag=bngsmtphsnus-20&linkCode=df0&hvadid=80333185695369&hvnetw=s&hvqmt=e&hvbmt=be&hvdev=c&hvlocint=&hvlocphy=&hvtargid=pla-4583932713567472&psc=1
Printing
.jpeg)
Print the following files and assemble them as shown in proceeding steps. Designs listed with "TPU" require flexible filament, any design without "TPU" can be printed with most inflexible filaments such as PLA, ABS, PETG, etc. Numbers in the file names indicate the amount of each design that should be printed. All files should be printed with ~20- 50% infill with supports. The "bearing" models should be printed with the circular face horizontal over the build plate. All models will fit on a 220 x 220 mm build plate.
Downloads
Post-Processing

Remove all supports from the models except the supports printed inside the ball bearings. Paint the models if necessary. Spray WD-40 on the ball bearings for a smoother rotation.
Assembling the Rear Axle
.jpeg)


- Open the transmission casing and attach the motor gear with the transmission using the screws that come with the motor. Line up the motorstabilizer with the gear and place it in between the transmission and motor, sliding the cylindrical motor into the half cylinder created by the stabilizer. Replace the transmission casing using only two of the three screws.
- Fasten both backaxle pieces to either side of the transmission using a 2 mm, and slide the rearbearings over their corresponding sides, with the hexagonal sides facing out.
- Slide the four tires over the hubcaps, and use four 2 mm screws to attach a completed wheel to each side. Place an axlebearingconnection between the wheel and bearing of each side to stop the bearing from sliding.
- Fasten the rearmotorconnection to the rear of the transmission using the two screws attached to the bottom of the transmission .
Assembling the Front Axle and Steering
.jpeg)
.jpeg)
.jpeg)
- Attach both frontaxlehinges to either side of the steeringservobracket using 4 mm screws..
- Attach wheels to both frontbearings using 2 mm, and screw the bearings to the axlehinge on their corresponding sides using 2 mm, assuming that the angled circular points on the servo bracket are facing the front of the car.
- Fasten the steeringattaches to their corresponding bearings using 4 mm screws. Slide the steering servo into the steeringservobracket, threading the cord through the rectangular space at the back of the bracket. Screw the middlesteering on the servo arm using the third screw remaining from the transmission, and use 4 mm screws to attach the middle steering to the steering attaches. Do not screw either of these connections very tightly, instead leaving room for rotation.
Assembling the Frame
.jpeg)
.jpeg)
.jpeg)
.jpeg)
- Take one of each kind of chassiswheelwell, the onesides and twosides, and slide them together using the attachment points. Take the two car halves, created, and fix them to one another using the same method.
- Attach both outsidesuspensionholders to both ends of the car frame.
- Place the middlesuspension in the center of the frame, and slide the front and rear centersuspensionholders on either side of it, aligning the circular holes with those on the chassiswheelwells. Use 4 mm screws to attach the middle suspension and center suspension holders to the frame.
- Slide a suspensioncable over the suspension holders on both ends, and attach the cable to the holders in the center of the frame as well.
Final Assembly
.jpeg)
.jpeg)
.jpeg)
.jpeg)
.jpeg)
.jpeg)
- Slide both the axles onto either side suspensioncable, with the front end being the one with a shorter central cable holder.
- Screw all four shocks onto the top of each wheelwell using 4 mm screws, and use 2 mm screws to fasten the shocks to the ball bearings.
- Glue a suspensionflex and a boxsuspensionflex onto either end of the rearsuspensionrods and put the box suspension flex over the bottom of the ball bearing, gluing the suspension flex to the middlesuspension.
- Do the same on the front end of the car, instead using long suspensionflexes and the frontsuspensionrods.
- Glue four longsuspensionflexes onto both ends of the car, connecting the axles to the frame.
Connecting the Circuitry
.jpeg)
The products come with instructions for part of this process, and each cord can only fit in its designated space, simplifying the assembly.