E-Ink Family Calendar Using ESP32
by kristiantm in Circuits > Arduino
46837 Views, 164 Favorites, 0 Comments
E-Ink Family Calendar Using ESP32
.jpg)
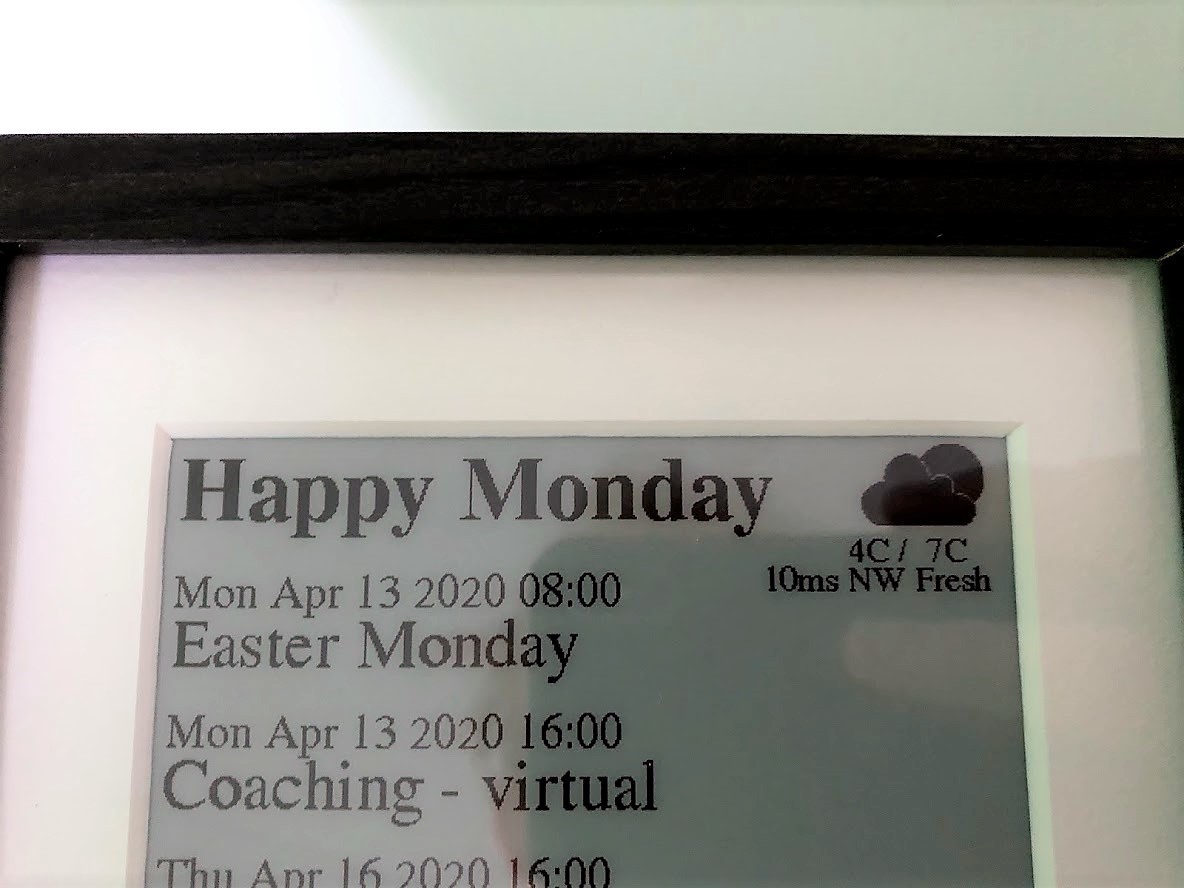
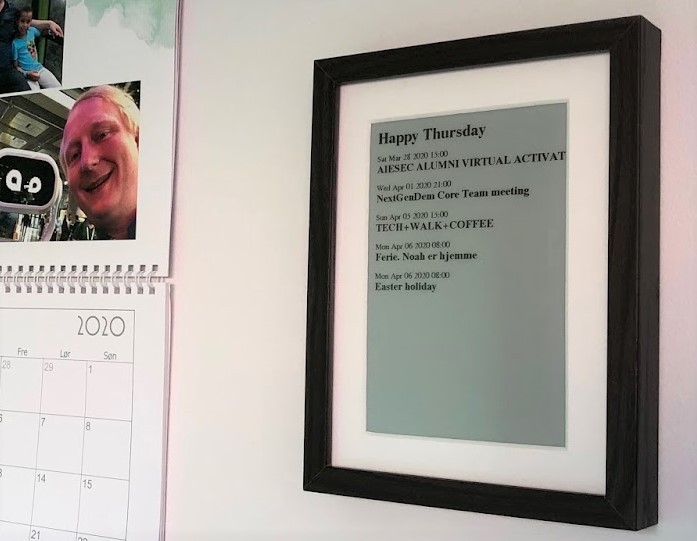
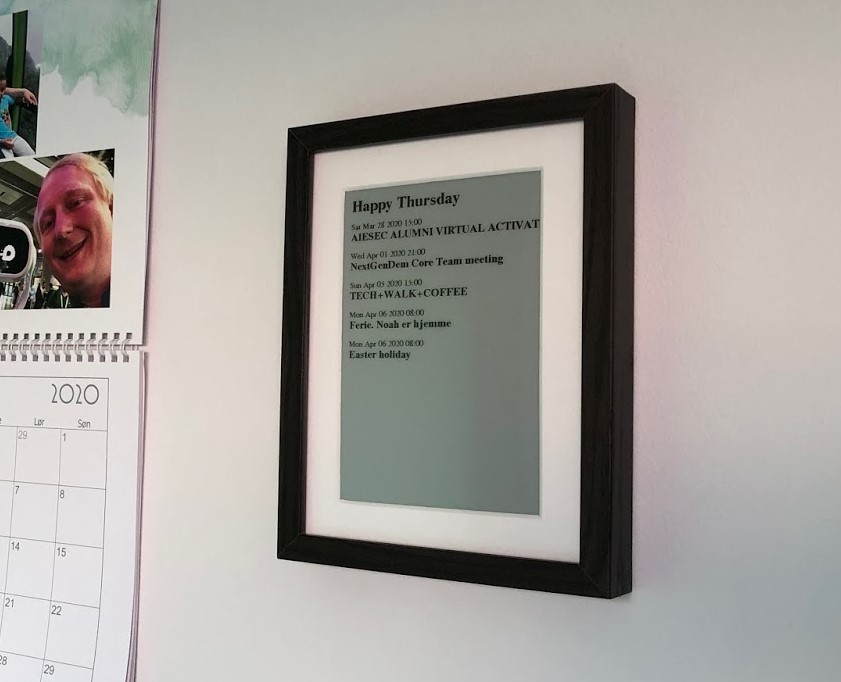
For many years I have been playing with the idea of breaking the barrier between physical and digital calendars - more specifically creating a nice looking e-ink calendar that can hang in our living room/kitchen. Now the idea has materialized in a very satisfying way, and I would love to share how I made it come true.
The calendar displays the first 9 events for all selected google calendars for a specific user. In my case I have selected that of my wife, myself and our shared family calendar. Besides the calendar, I have created a mini-weather display in the corner, showing an icon from OpenWeather Maps, as well as temperature and windspeed.
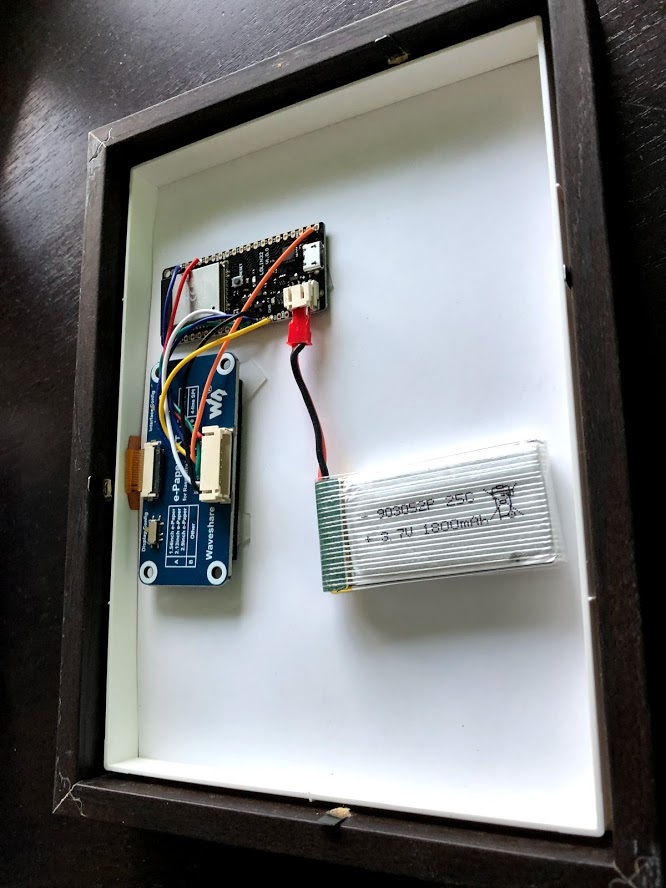
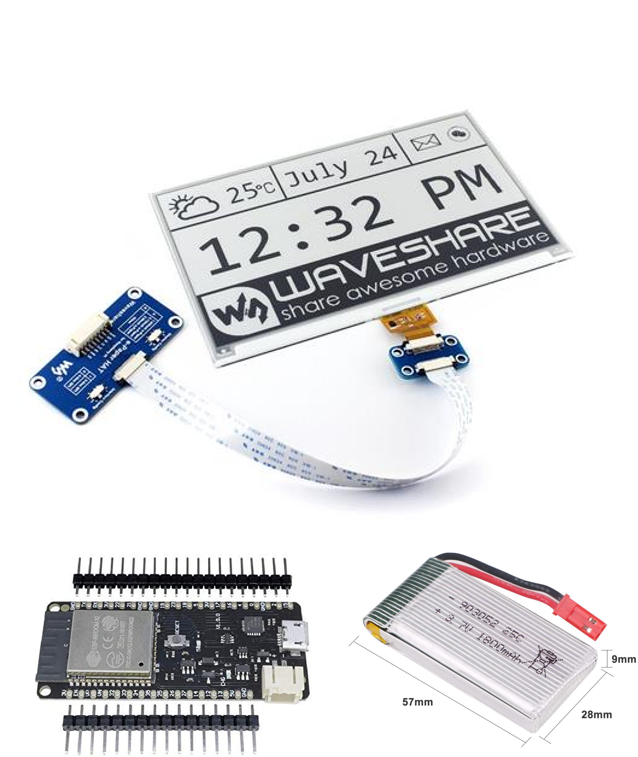
The project combine a 7.5 Waveshare e-ink screen, with an ESP32 microcontroller and a LIPO battery. It is packaged in 13x18 IKEA Ribba frame. Besides Arduino code for the microcontroller, I also had to create a google script to extract the calendar entries from google.
Credits to the ESP32 E-Ink Weather Station project on Git, from which I have learned a lot when coding the project.
Find the code for the project here: https://github.com/kristiantm/eink-family-calendar...
Thanks to Ibsendk for sparring and sanity checking of instructable and code.
Supplies
- Waveshare 7.5 inch E-ink Screen (800x600 version) ~76 EUR on Amazon.de (linked to the yellow (C) version, as I could not find the red (B) version anymore)
- LOLIN32 ESP32 ~8-9 USD on Aliexpress (I used an older version, but get the D32 or D32 Pro as it has integrated battery gauge on pin 35)
- LIPO battery with 1800 mAH ~13 EUR on Amazon.de
- IKEA Ribba 13x18 frame ~3 EUR in IKEA
Total cost: ~100 EUR
As an alternative, Waveshare is offering a custom ESP32 unit with an E-Ink port (so you avoid wiring) - however this do not come with the battery plug of LOLIN32, so you have to power it via a 5V powerbank or wire your own battery directly to the 3V and GND connectors.
Connect the Screen to the ESP32 Board
.jpg)
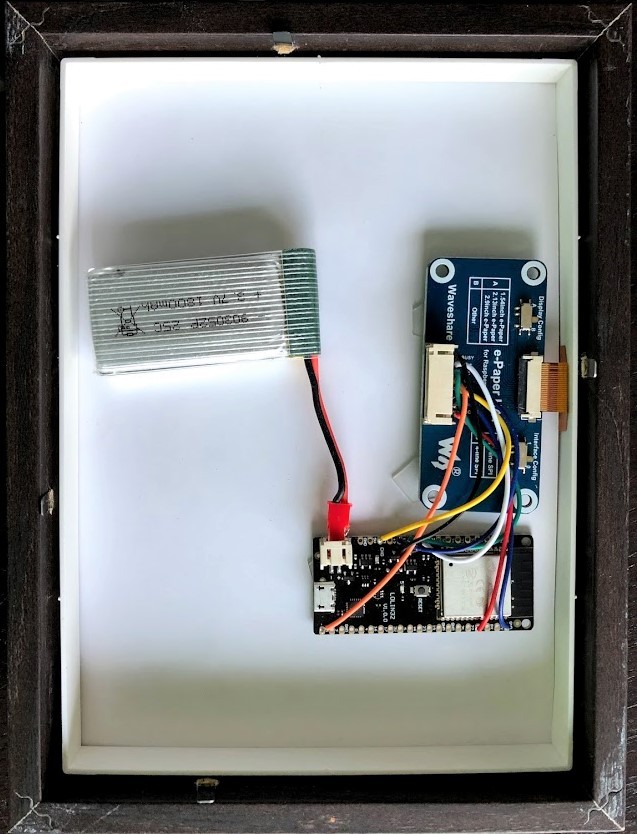
The screen comes with a connector cable, that you can connect directly to the board. However, I found that it took much too much space in the frame, so I decided to use my own wires to connect the boards.
Waveshare 7.5 ↔ LOLIN32
Vcc ↔ 3V
GND ↔ GND
DIN ↔ 14
CLK ↔13
CS ↔15
DC ↔27
RST ↔ 26
BUSY ↔25
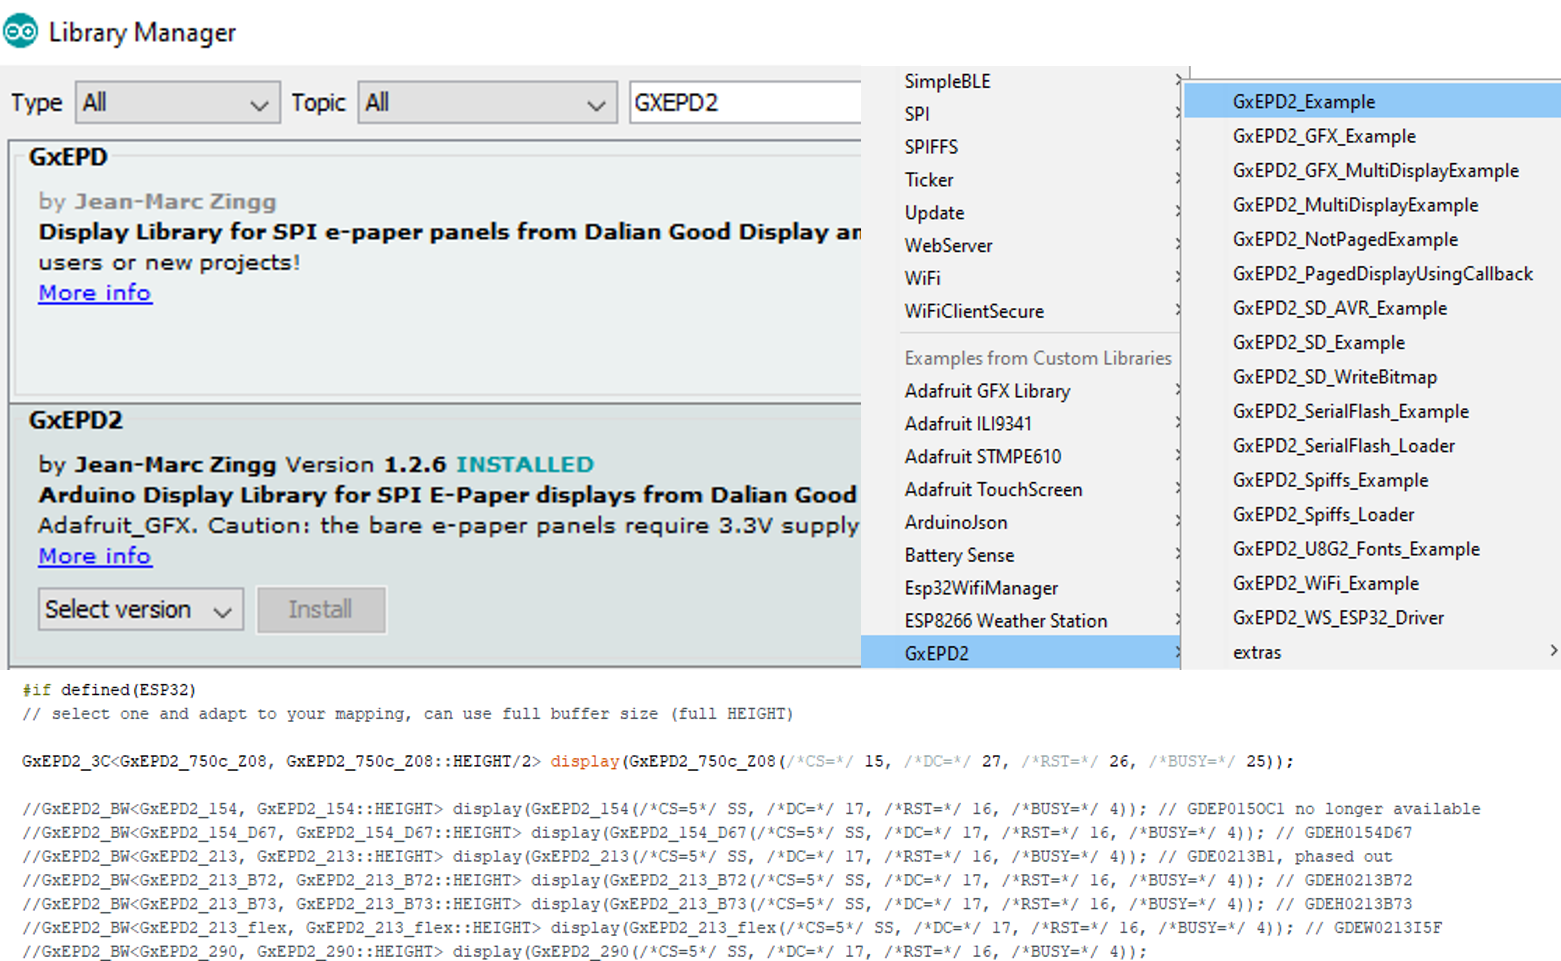
To test the wiring, I recommend to download the GxEPD2 library and test it out. You can get it both via PlatformIO if you use Visual Studio Code or via Arduino Libraries.
To initialize the display with the right pins, use the following code in the example from the library:
GxEPD2_3C display(GxEPD2_750c_Z08(/*CS=*/ 15, /*DC=*/ 27, /*RST=*/ 26, /*BUSY=*/ 25));
When you make the example work (get demo-text/graphics on the display), you can move on to the next step.
Getting Events From Google Calendar
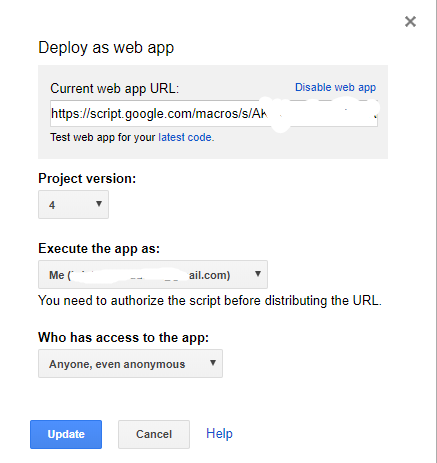
Google has made it a bit hard to integrate with the calendar, so I had to do a workaround via Google Scripts, to make the calendar entries accessible.
To get access, create a new web-app on script.google.com, and paste the following code into it.
- Go to script.google.com and select new project
- Paste the below code into it
- Save it with a good name
- Click "Publish" and select "Anyone, even anonymous" as security setting
- Copy the link "https://script.google.com/macros/s/[UNIQUE CODE]/exec" as you need it in the project
Notice: This makes calendar entries from your calendar publicly available to anyone with the link. However, the link is unique and only you have it. I would love other ideas for how to integrate - but for now this works.
To test the script, paste the URL with the unique code into your browser. You should see a list of events separated by semi-colon. Do not move to the next step, before you have seen this.
<p>function doGet(e) {</p><p>  var calendars = CalendarApp.getAllCalendars();</p><p>
  //var cal = CalendarApp.getCalendarsByName('NAME_OF_CALENDAR')[0]; // 0 is subcalendar ID, mostly "0"
  //var cal = CalendarApp.getDefaultCalendar();
  var calendars = CalendarApp.getAllCalendars();

  if (calendars == undefined) {
    Logger.log("No data");
    return ContentService.createTextOutput("no access to calendar hubba");
  }</p><p>  var calendars_selected = [];

  for (var ii = 0; ii < calendars.length; ii++) {
    if (calendars[ii].isSelected()) {
      calendars_selected.push(calendars[ii]);
      Logger.log(calendars[ii].getName());
    }
  }

  Logger.log("Old: " + calendars.length + " New: " + calendars_selected.length);</p><p>  const now = new Date();
  var start = new Date(); start.setHours(0, 0, 0);  // start at midnight
  const oneday = 24*3600000; // [msec]
  const stop = new Date(start.getTime() + 14 * oneday); //get appointments for the next 14 days

  //var events = cal.getEvents(start, stop); //pull start/stop time
  var events = mergeCalendarEvents(calendars_selected, start, stop); //pull start/stop time


  var str = '';
  for (var ii = 0; ii < events.length; ii++) {</p><p>    var event=events[ii];
    var myStatus = event.getMyStatus();


    // define valid entryStatus to populate array
    switch(myStatus) {
      case CalendarApp.GuestStatus.OWNER:
      case CalendarApp.GuestStatus.YES:
      case CalendarApp.GuestStatus.NO:
      case CalendarApp.GuestStatus.INVITED:
      case CalendarApp.GuestStatus.MAYBE:
      default:
        break;
    }

    // Show just every entry regardless of GuestStatus to also get events from shared calendars where you haven't set up the appointment on your own
    str += event.getStartTime() + ';' +
    //event.isAllDayEvent() + '\t' +
    //event.getPopupReminders()[0] + '\t' +
    event.getTitle() +';' +
    event.isAllDayEvent() + ';';
  }

  return ContentService.createTextOutput(str);
}</p><p>function mergeCalendarEvents(calendars, startTime, endTime) {</p><p>  var params = { start:startTime, end:endTime, uniqueIds:[] };</p><p>  return calendars.map(toUniqueEvents_, params)
                  .reduce(toSingleArray_)
                  .sort(byStart_);
}</p><p>function toCalendars_(id) { return CalendarApp.getCalendarById(id); }</p><p>function toUniqueEvents_ (calendar) {
  return calendar.getEvents(this.start, this.end)
                 .filter(onlyUniqueEvents_, this.uniqueIds);
}</p><p>function onlyUniqueEvents_(event) {
  var eventId = event.getId();
  var uniqueEvent = this.indexOf(eventId) < 0;
  if(uniqueEvent) this.push(eventId);
  return uniqueEvent;
}</p><p>function toSingleArray_(a, b) { return a.concat(b) }</p><p>function byStart_(a, b) {
  return a.getStartTime().getTime() - b.getStartTime().getTime();
}</p>
Enable Battery Level Measurement
To avoid the battery becoming completely discharged, you should enable the battery measurement gauge.
The code in the project, reads the current voltage of the battery, and displays a battery icon on the screen, showing either full, three quarters, half, quarter or empty. When empty the project goes into permanent deep-sleep until it is recharged again.
If you have a LOLIN D32 battery measurement is already build into the GPIO35 pin - so you just have to adjust the pin in the code "uint8_t batteryPin = 35".
If you have a normal ESP32, you need to insert a voltage divider between the battery and a selected analogue IO pin - to bring the battery's 3.7 voltage below the 3V that the board are able to measure.
In my setup, I have used a 30K and a 100K resistor setup, and read from pin 34.
It is a bit complicated to set up, but without it you might drain and damage your battery if you forget to recharge it.
Configuring the Project
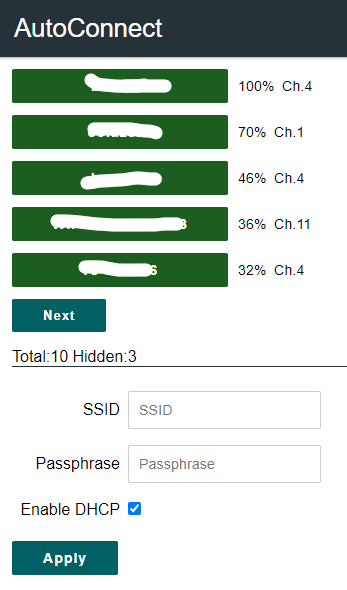
Now is the time to get the code ready for programming the ESP32 board.
To do this you can use either Visual Studio Code (with Platform IO) or Arduino.
For both platforms download the code, and place it in your project library.
Code here: https://github.com/kristiantm/eink-family-calendar-esp32
For Platform IO:
- Make sure you have Platformio installed and open the project folder as a workspace
- If configured correctly, PlatformIO) should fetch the required libraries itself. If not, you will have to go to PlatformIO / Libraries and install "GxEPD2" and "ArduinoJson"
For Arduino:
- Go to settings and paste "https://dl.espressif.com/dl/package_esp32_index.json" in "Additional Boards manager URL"
- Go to Tools/Boards/Boards Manager. Search for ESP32 and install the board package.
- Select the board WEMOS LOLIN32 (or the board you have bought)
- Go to Library manager and install "GxEPD2" and "ArduinoJson"
Now click compile, and hopefully you will not get errors. When ready connect the LOLIN32 board with a microusb cable to your computer, and program the board.
Boot up and connect to new wifi network:
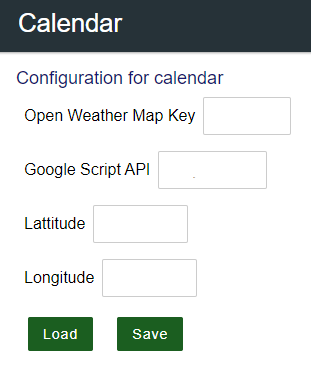
When done, you need to configure the calendar over wifi. It should appear as a separate wifi network called "espressif32". Connect to this, and you will be redirected to a configuration page.
Configure Calendar:
Before connecting to your home wifi, you should configure the google-api, the open weather api, as well as your longitude and lattitude. You can also change these values later, but by doing it first, you do not have the trouble of finding the calendars new IP on your home network.
1) Register a free account on OpenWeatherMaps.com, get an API and paste it in.
2) Change your location to get local weather - google maps is your friend for getting latitude and longitude.
3) Find the webapp API (the [UNIQUE CODE]) from script.google (from the previous step), and add it to integrate with your calendar.
In the "Configure AP"
Set your home network SSID and password. The calendar will then connect here, and the Espressif hotspot will dissapear forever.
And it works:
If all is well, you will after 20 seconds see a refresh of the Waveshare board with your next 14 days of events, as well as your local weather. If this is not the case, try to do a serial connect to the COM port presented by the LOLIN32 board (you should be able to identify the port number via the device manager in Windows).
You can use a program like PuTTY to connect to the serial port, and observe where the chain is breaking. Also you can use this to find the calendar IP adress if you need to change any settings.
The calendar will be on the wifi for 5 minutes the first time the calendar boots, after which it will start its 24 hour cycle of refreshing at 5 in the morning.
Package Your Family Calendar
.jpg)

.jpg)
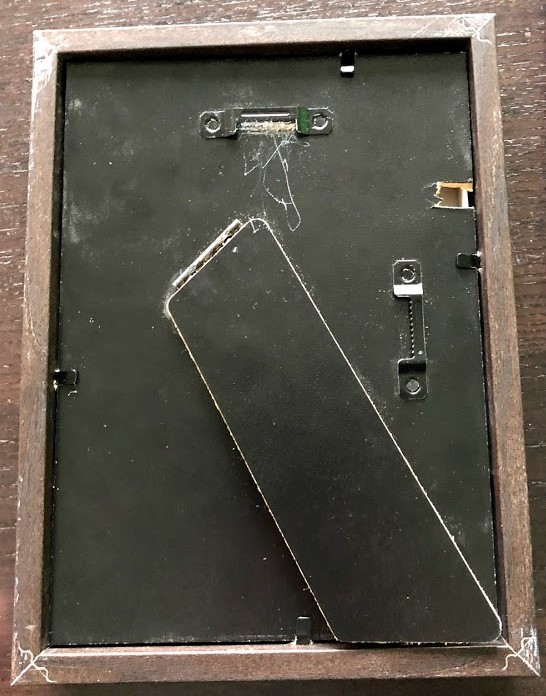
Now all you have to do, is package the calendar nicely in your new IKEA frame. The Ribba frame is perfect for IOT projects like this, as it has a big closed room between the screen and the back-plate.
First put the display on top of the white Passepartout, and fiddle it a bit fort and back until you are satisfied.
Then place the paper that came with the frame on top of the screen, but lead the screen connector slip through at the side of the frame. Fix this with the white plastic inner frame - using the broad side to apply gentle pressure on the screen.
Then glue the e-paper connecting board, the LOLIN board and the battery to the paper in a way where they hang naturally given their connections.
When you click the battery in, the board will power up and refresh the screen. Use this as an opportunity to do a final adjustment to the placement of the display.
Now put on and secure the back-cover of the frame. Consider to add a short USB cable for powering the frame (cut a hole in the back cover as demonstrated). With a recharge cycle of 2-3 months, I decided that removing the back-cover is ok for me.
You are now the proud owner, of your very own E-Ink Family Calendar.