Dymaxion Earth

In the context of the Cosmos, the Earth is a very small place. By contrast, in the context of humans, the Earth is an enormous place!
Most of us have never been to space (any astronauts out there in the Instructables community?), though we all have seen the famous "Blue Marble" picture of the Earth and globes, which show the Earth's true spherical shape. However, the most common and convenient way to illustrate the Earth is with flat maps.
The are many ways of drawing the spherical surface of the Earth on a flat piece of paper. Cartographers call these different maps projections. There are well defined mathematical ways of taking the sphere and drawing it on a flat page, but none of them are perfect. Why? Because there is no way to bend a perfectly flat piece of paper into a sphere or to unbend a sphere into a perfectly flat piece of paper without changing it in some fundamental way (mathematicians call the study of such differences "topology").
One of my favorite map projections was made by the inimitable Buckminster Fuller, who rendered the spherical Earth onto the 20 triangular surfaces of an icosahedron (or a "20 sided die" for those of you familiar with polyhedral gaming dice). This projection is often called a "Fuller projection" and the resulting globe is called a Dymaxion Globe.
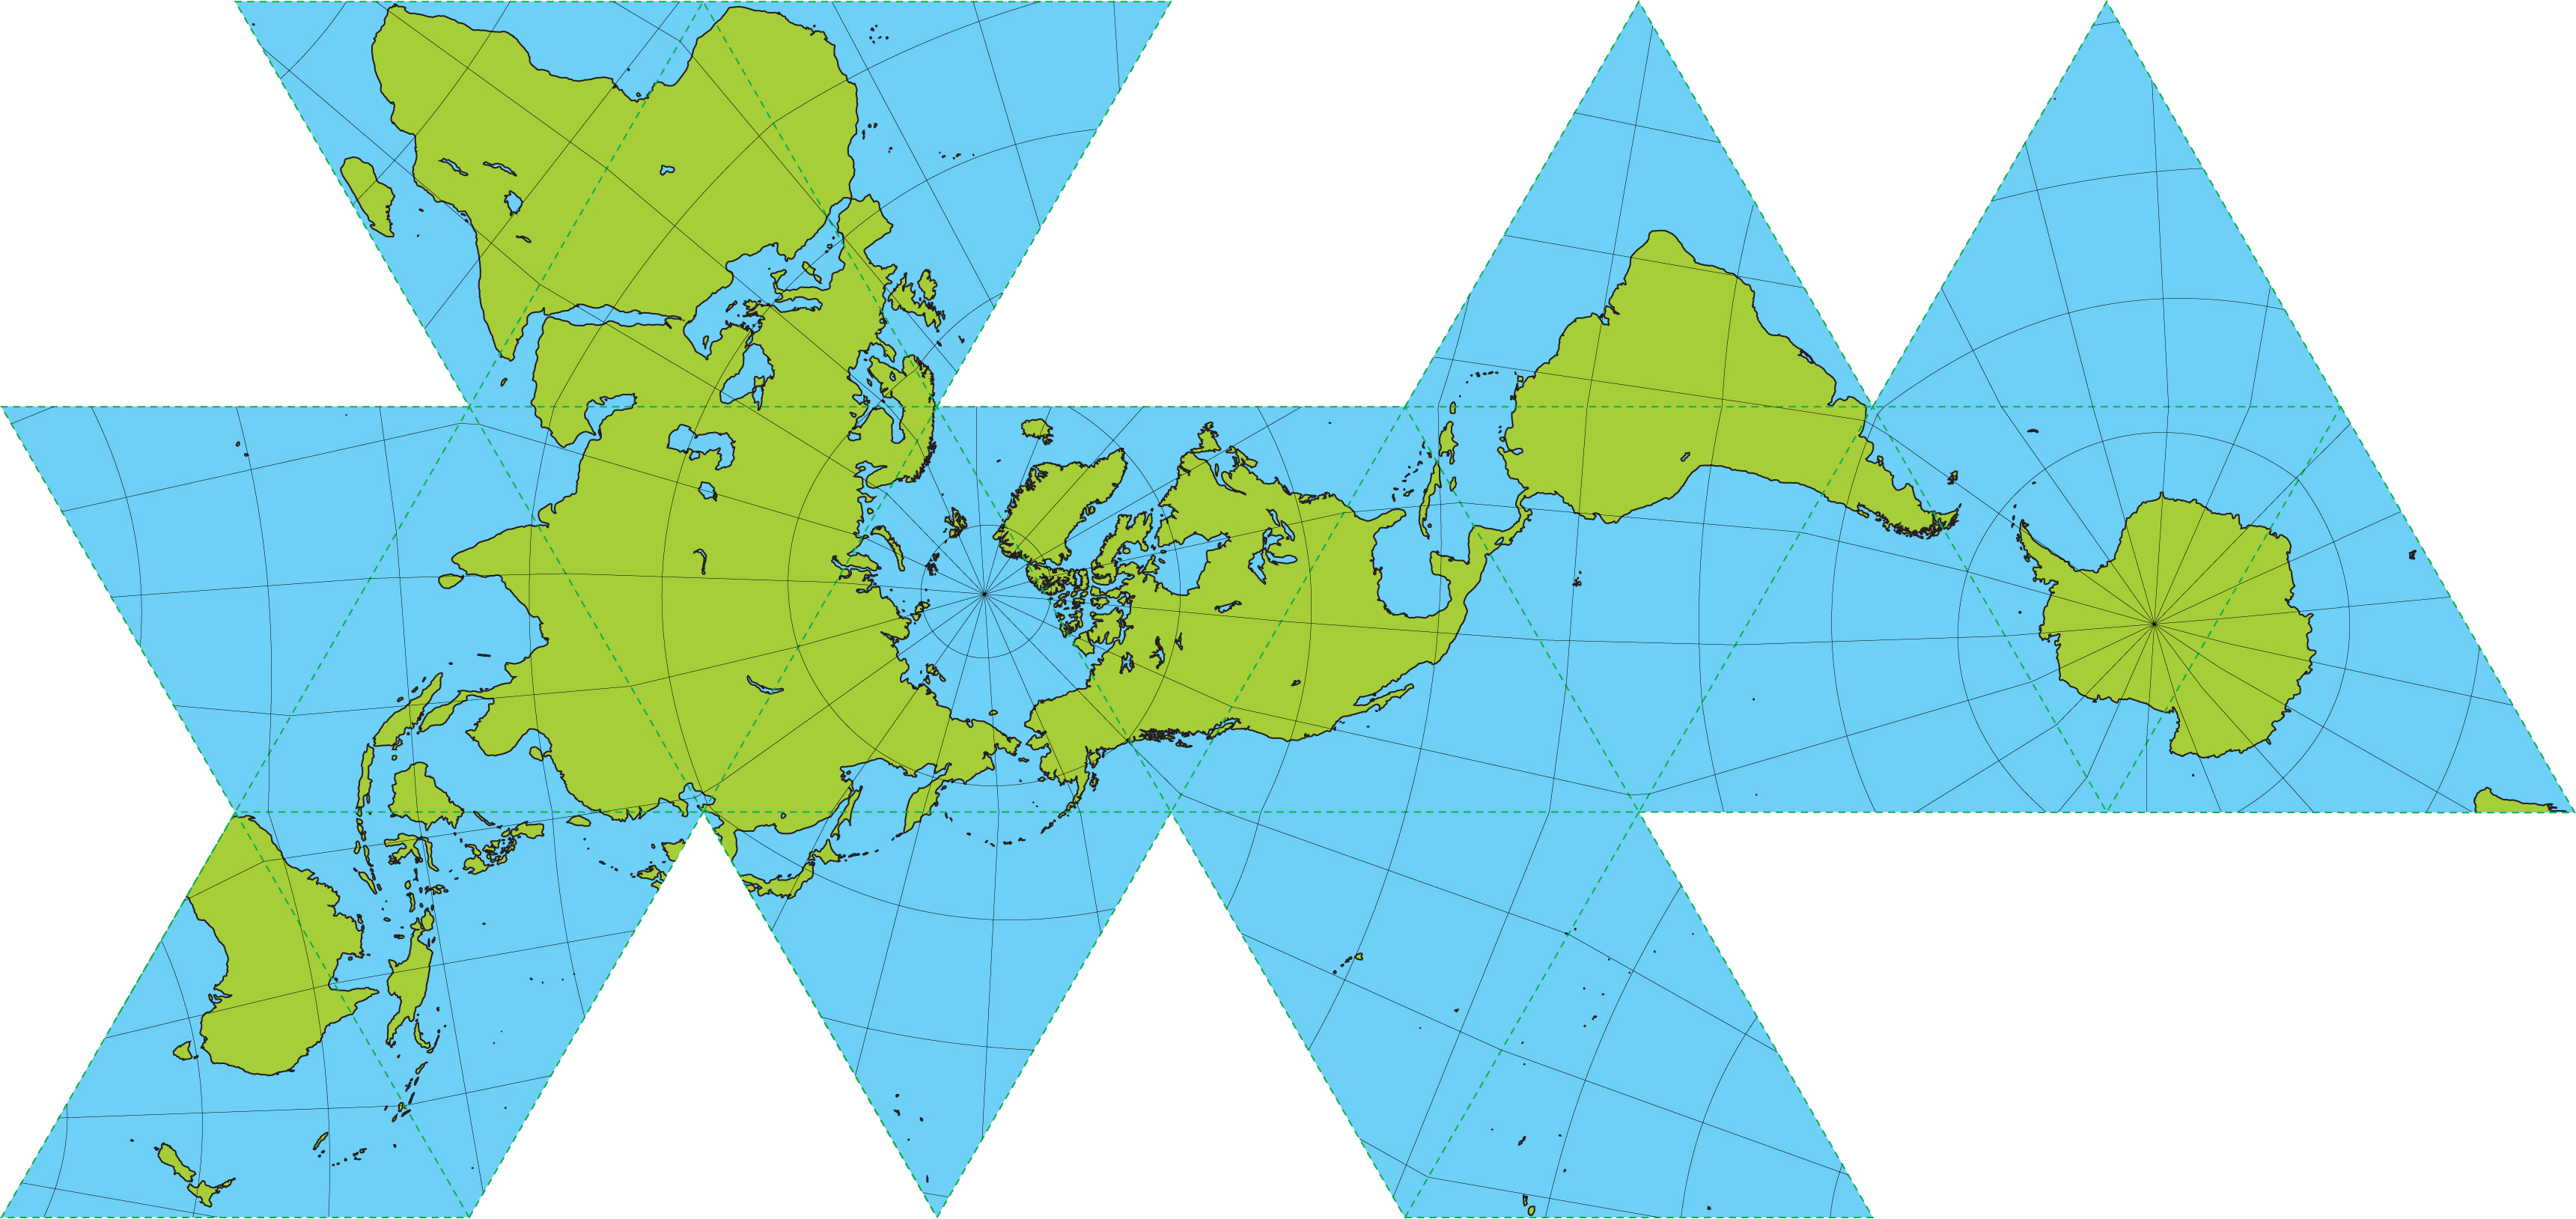
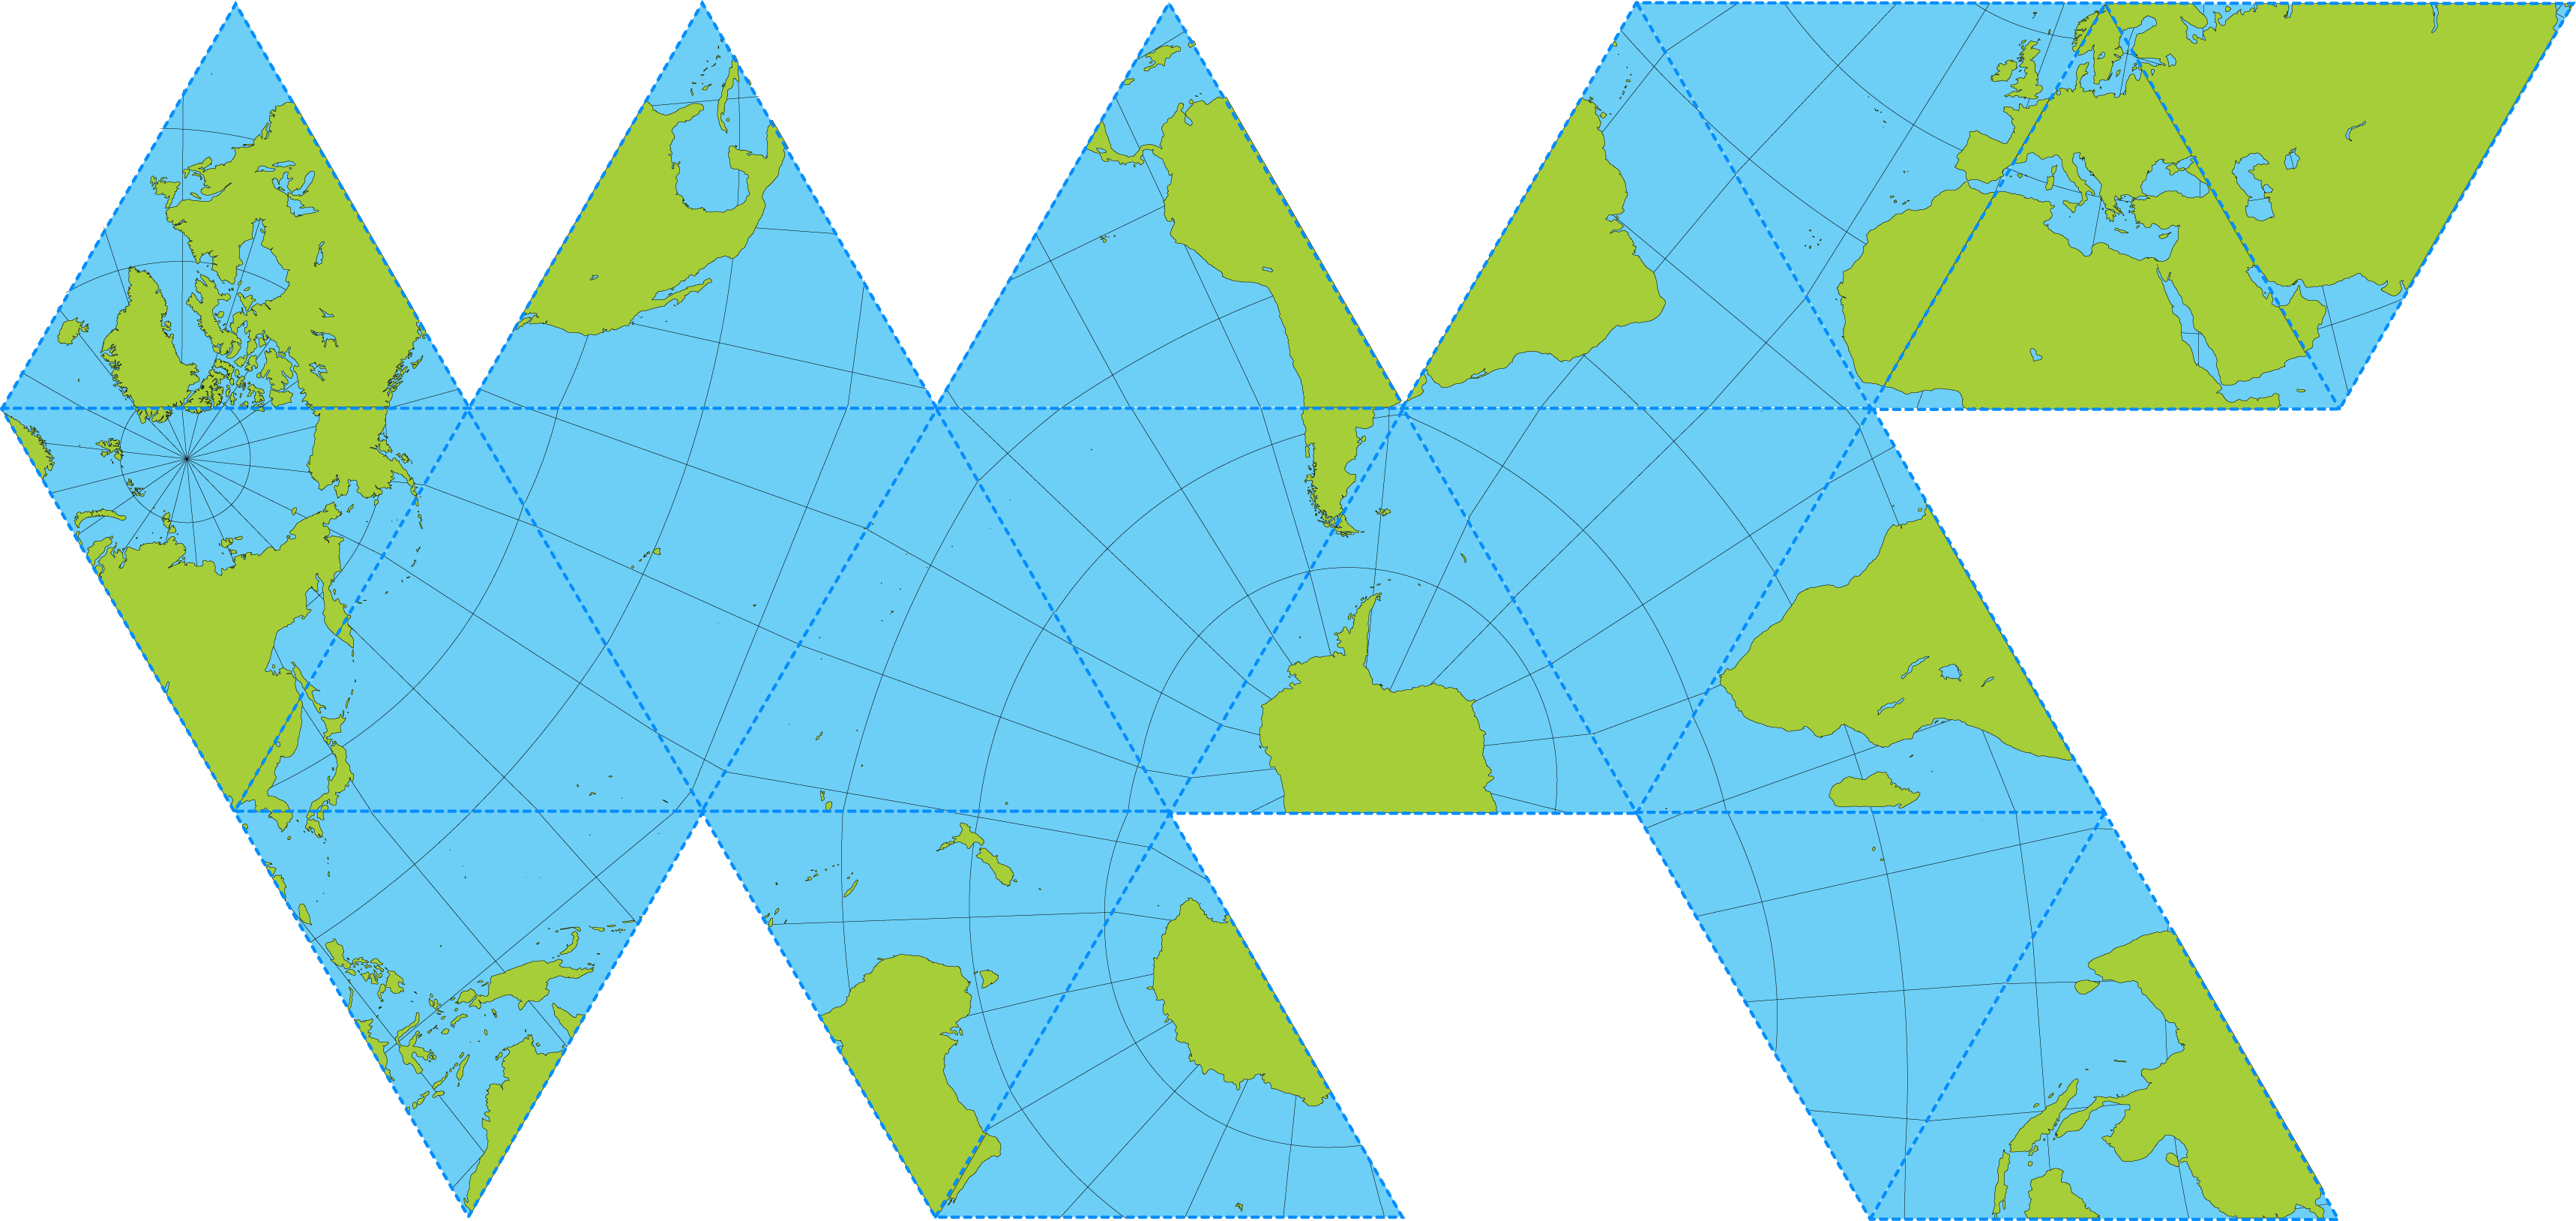
One of the special properties of an icosahedron is it can be unfolded so all the facets lay flat. This means it can be printed and folded from a single piece of paper, and also that the various triangles can be moved around and displayed in a variety of different ways. Fuller promoted the projection because you can arrange the flattened map to emphasize different aspects of the planet. One arrangement he was particularly fond of showed the "One World Island" -- the nearly contiguous arrangement of all the continental land masses. Other favored arrangments break up the landmasses and push them to the boundaries so the map is dominated by the "One World Ocean."
In this instructable, we'll make a set of tiles that are the facets of a Dymaxion globe — “Dymaxion Tiles.” The Instructable has two interleaved sets of instructions — one for making a wooden “Coffee Table” set to leave as a conversation piece on your coffee table, and a lower profile “Desk” set made out of paper and cardboard that you can make much more quickly. With a Dymaxion Tile set, you can explore the myriad ways of representing the Earth, including the One World Island and the One World Ocean.
Dymaxion Map Tiles
Most Dymaxion patterns you can find with an image search are designed to be printed out as a single image and then folded into an icosahedron. I wanted to have individual triangular tiles that can be manipulated and moved around on a table surface, rather than having a complete folding globe.
The basis for my individual tiles is a foldable icosahedron pattern, cut into a set of 20 triangular tiles with the projected Earth on them. I started with the Dymaxion projection that is in Wikimedia Commons, and imported it into Illustrator to create individual, colorized tiles.
The base map in Wikimedia Commons has two divided tiles, which is commonly done to keep small bits of Australia and Korea from being separated. I "healed" these two tiles to make whole triangles again, which is preferred for this project.
Here I provide six different PDF files that you may find useful, depending on what you want to do. The six files are:
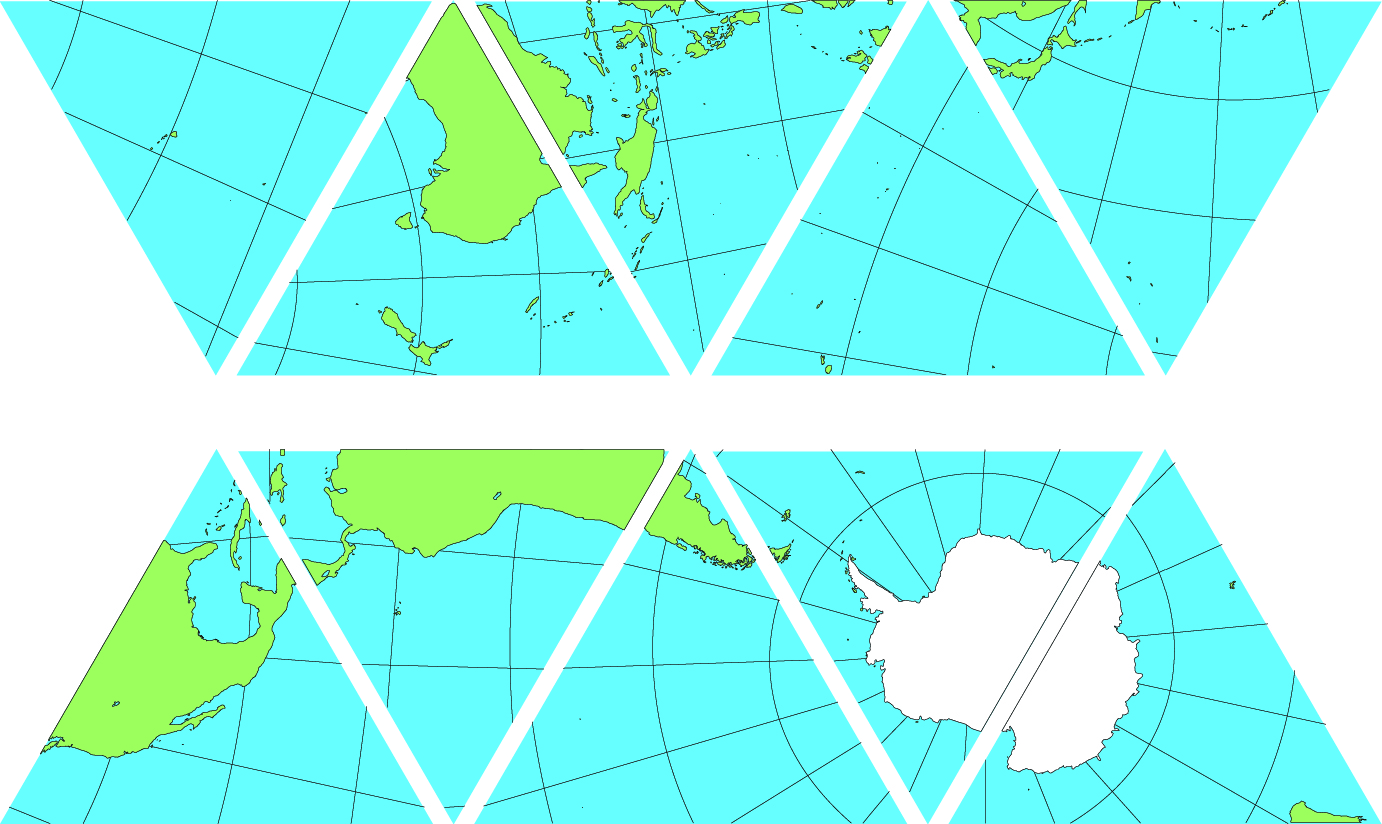
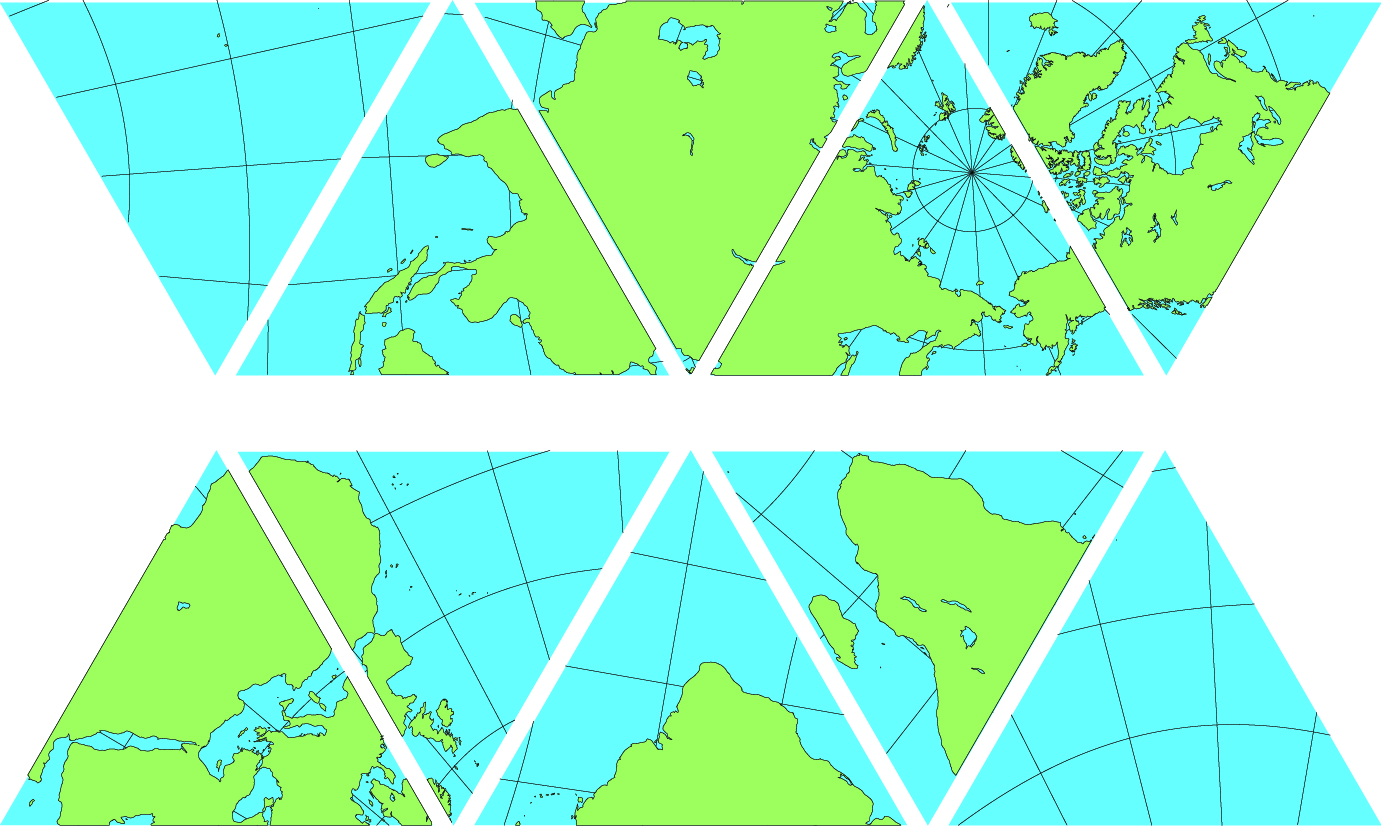
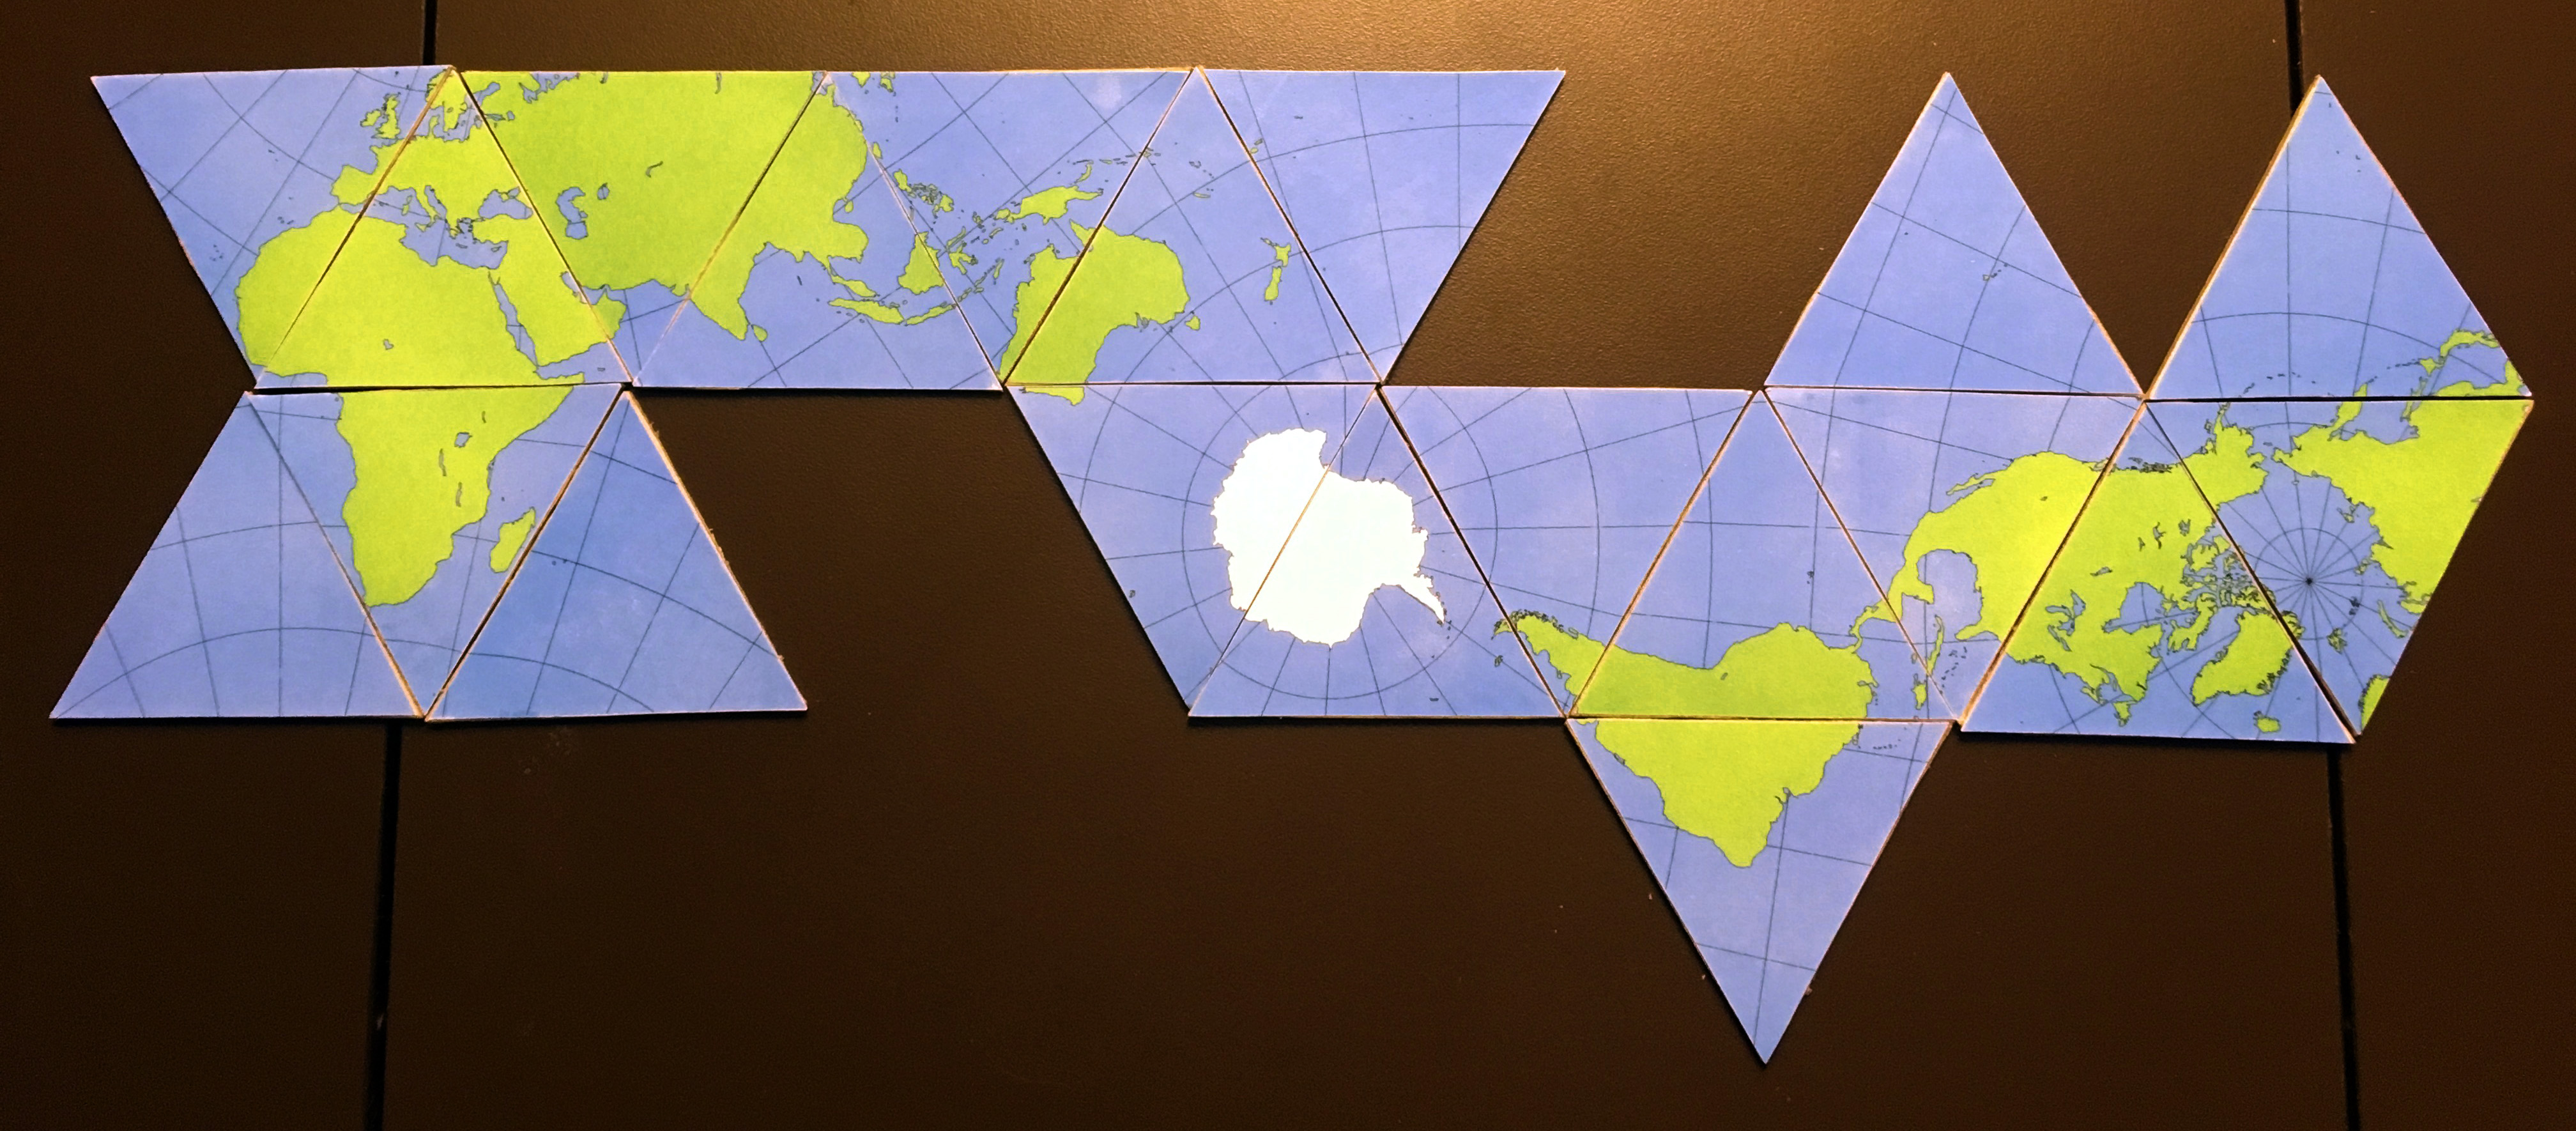
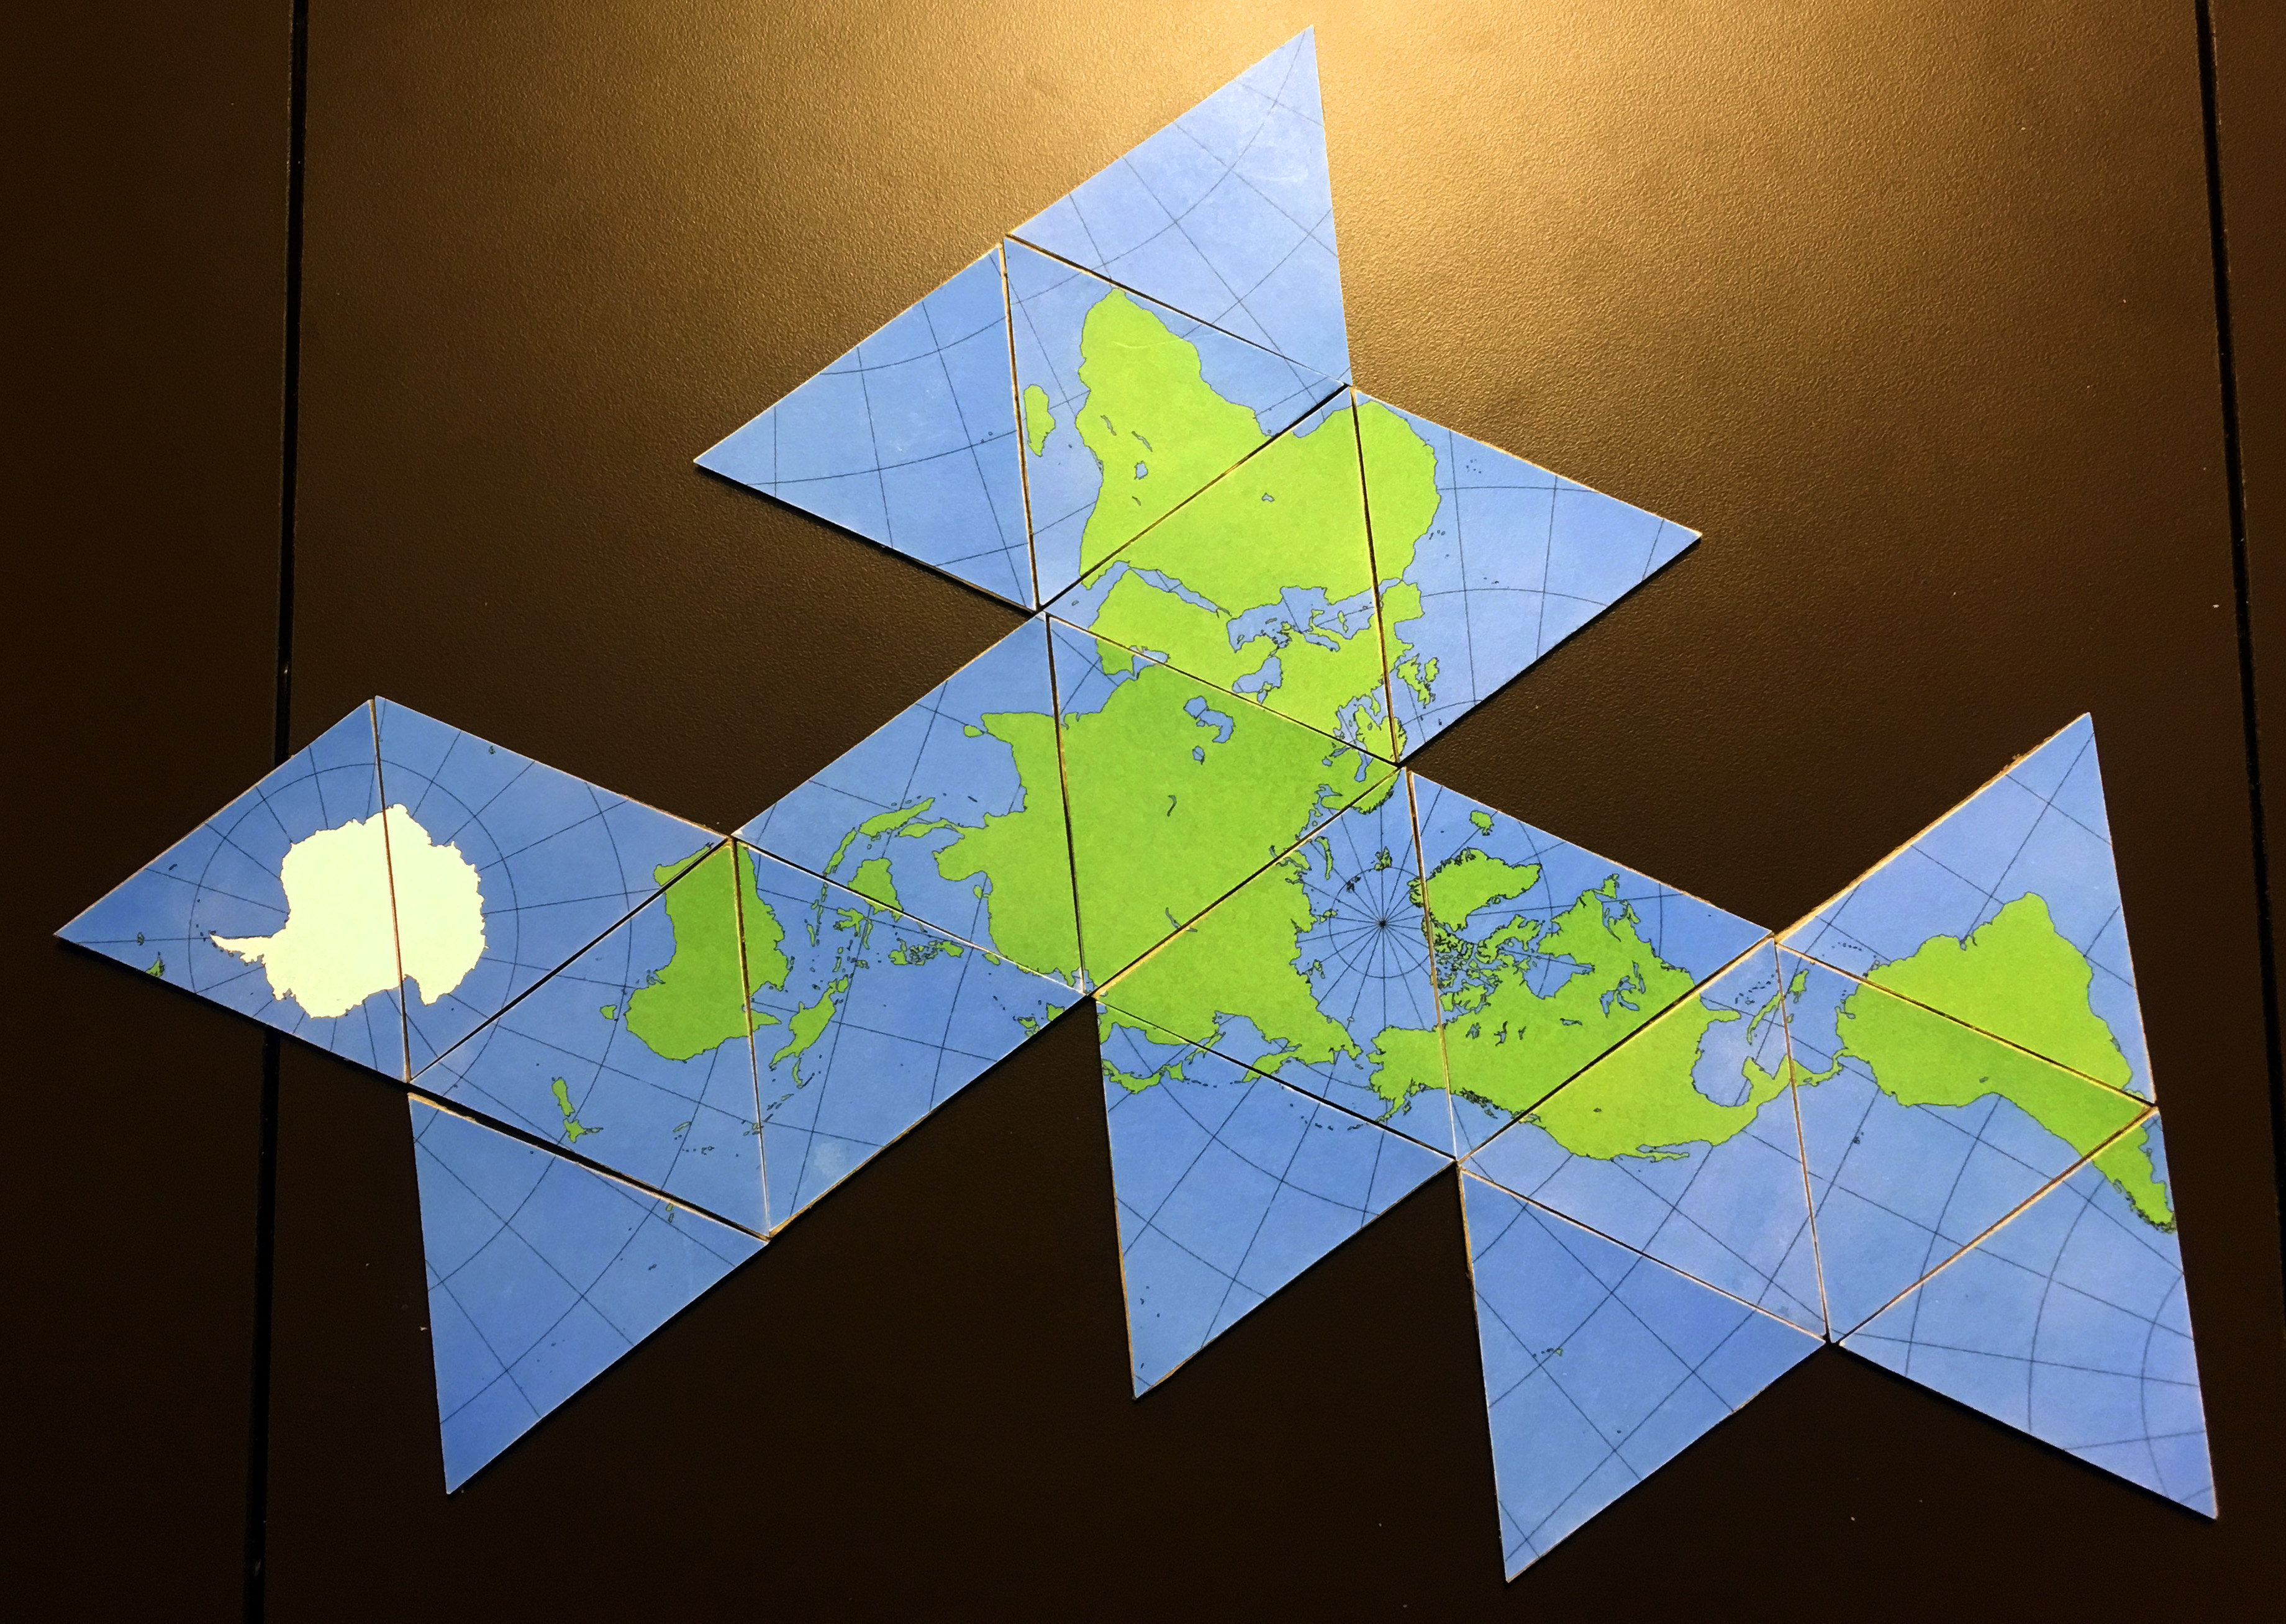
- Individual Tiles 1 & Individual Tiles 2: Together these are a complete set of 20 tiles, printable on standard 8.5x11 paper. These are suitable for making the Desk version of the tiles. Images of these files are shown above.
- Individual Tiles Reversed 1 & Individual Tiles Reversed 2: Together these are a complete set of 20 tiles, printable on standard 8.5x11 paper. The tiles have been flipped left to right. These are suitable for making the Coffee Table version of the tiles; they were reversed so they display properly after the transfer process (see Step 5 & 6).
- One World Island & One World Ocean: These are connected arrangements of the tiles, printable on standard 8.5x11 paper. These are suitable for reference, but can also be cut out and folded into proper icosahedral globes (you'll need to leave tabs around the edges for taping -- they've been left out of these files so they print as clean maps of the One World configurations). Images of these files are shown above
In Step 10 below, I provide my editable Adobe Illustrator files that you can open to change the appearance or size of the tiles to suit your own desires and needs.
Materials
The Coffee Table version of the Dymaxion Map is meant to be left on your living room table as a focal point of discussion, or just to tinker with and think about the world. For this reason, I wanted it to be substantive and tactile, so I made it out of large wooden tiles with the tile images transferred onto one side. To make these you need:
- Wood of the desired thickness, 2.5 inches wide (to match the size of the tiles in the print files)
- Print-outs of the reversed tile images
- Artists gel medium
The Desk version of the Dymaxion Map is meant to be easy to carry around or have in the drawer of your desk, and is useful in instructional settings as well (like classrooms). To make these you need:
- Heavy cardboard (I use the backs of legal pads)
- Print-outs of the standard tile images
- Glue stick
Cutting Wood Tiles (Coffee Table Version)
The first step in making your Dymaxion Map (either version) is to cut the tiles.
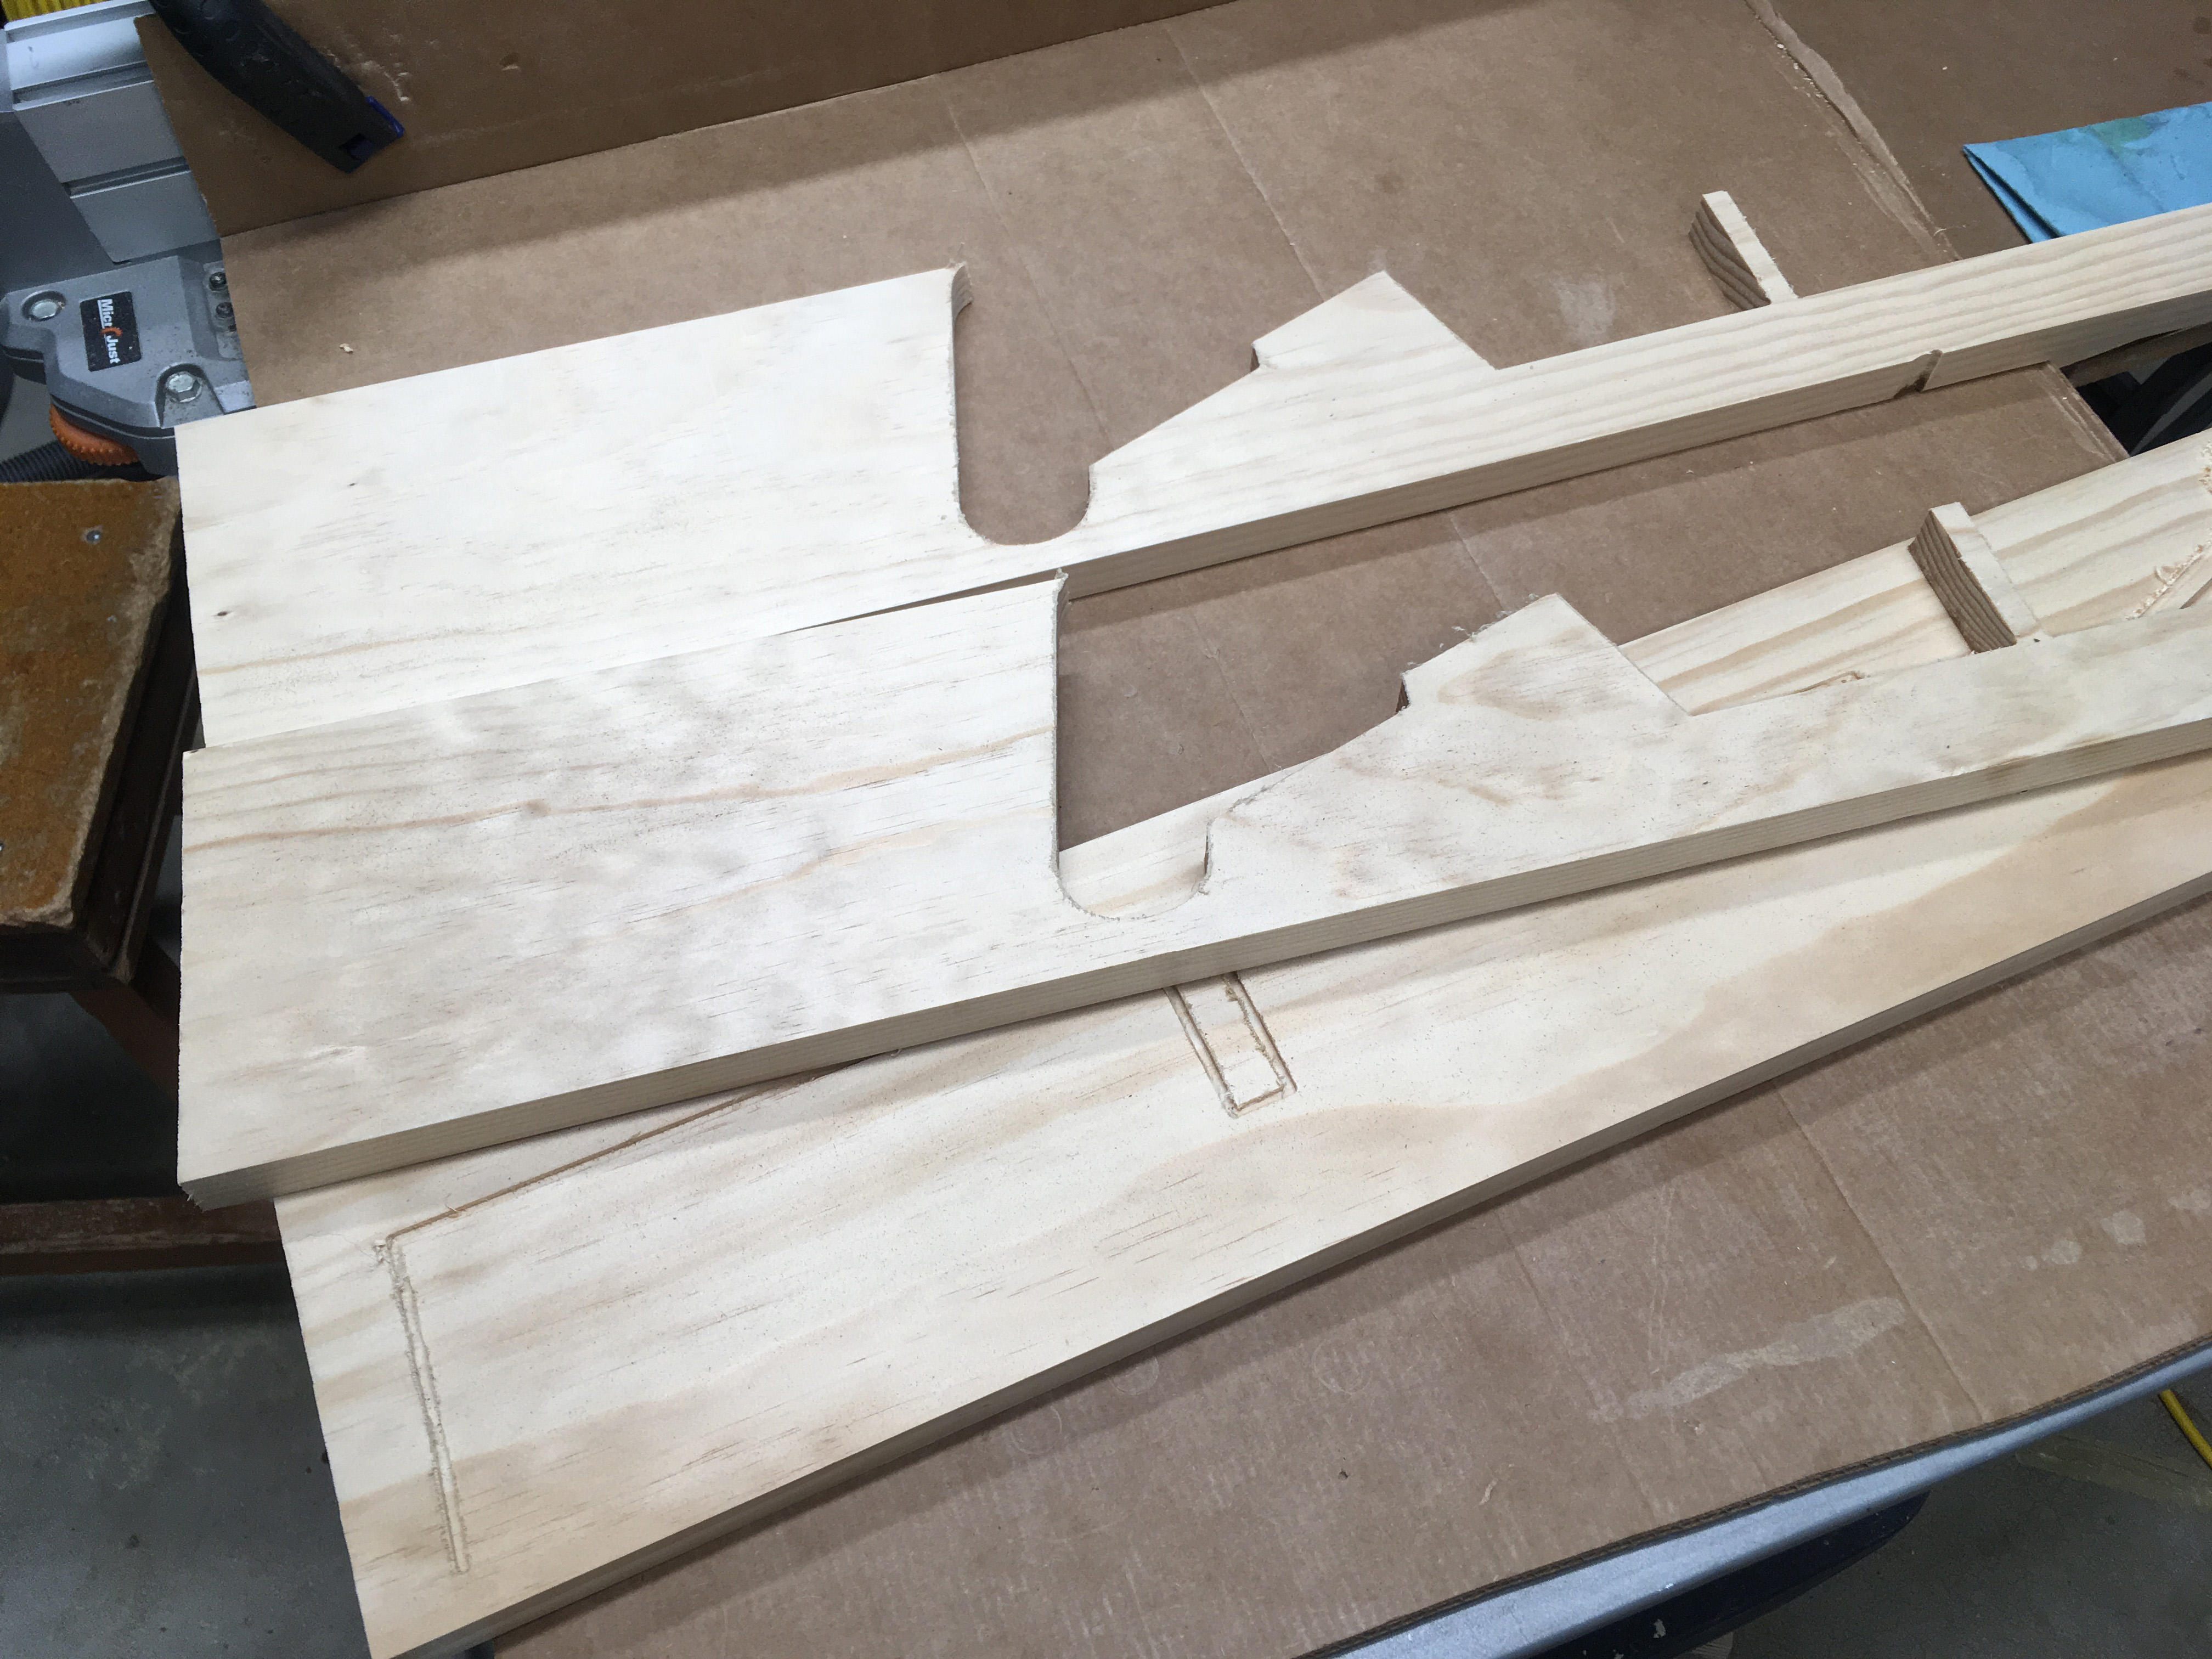
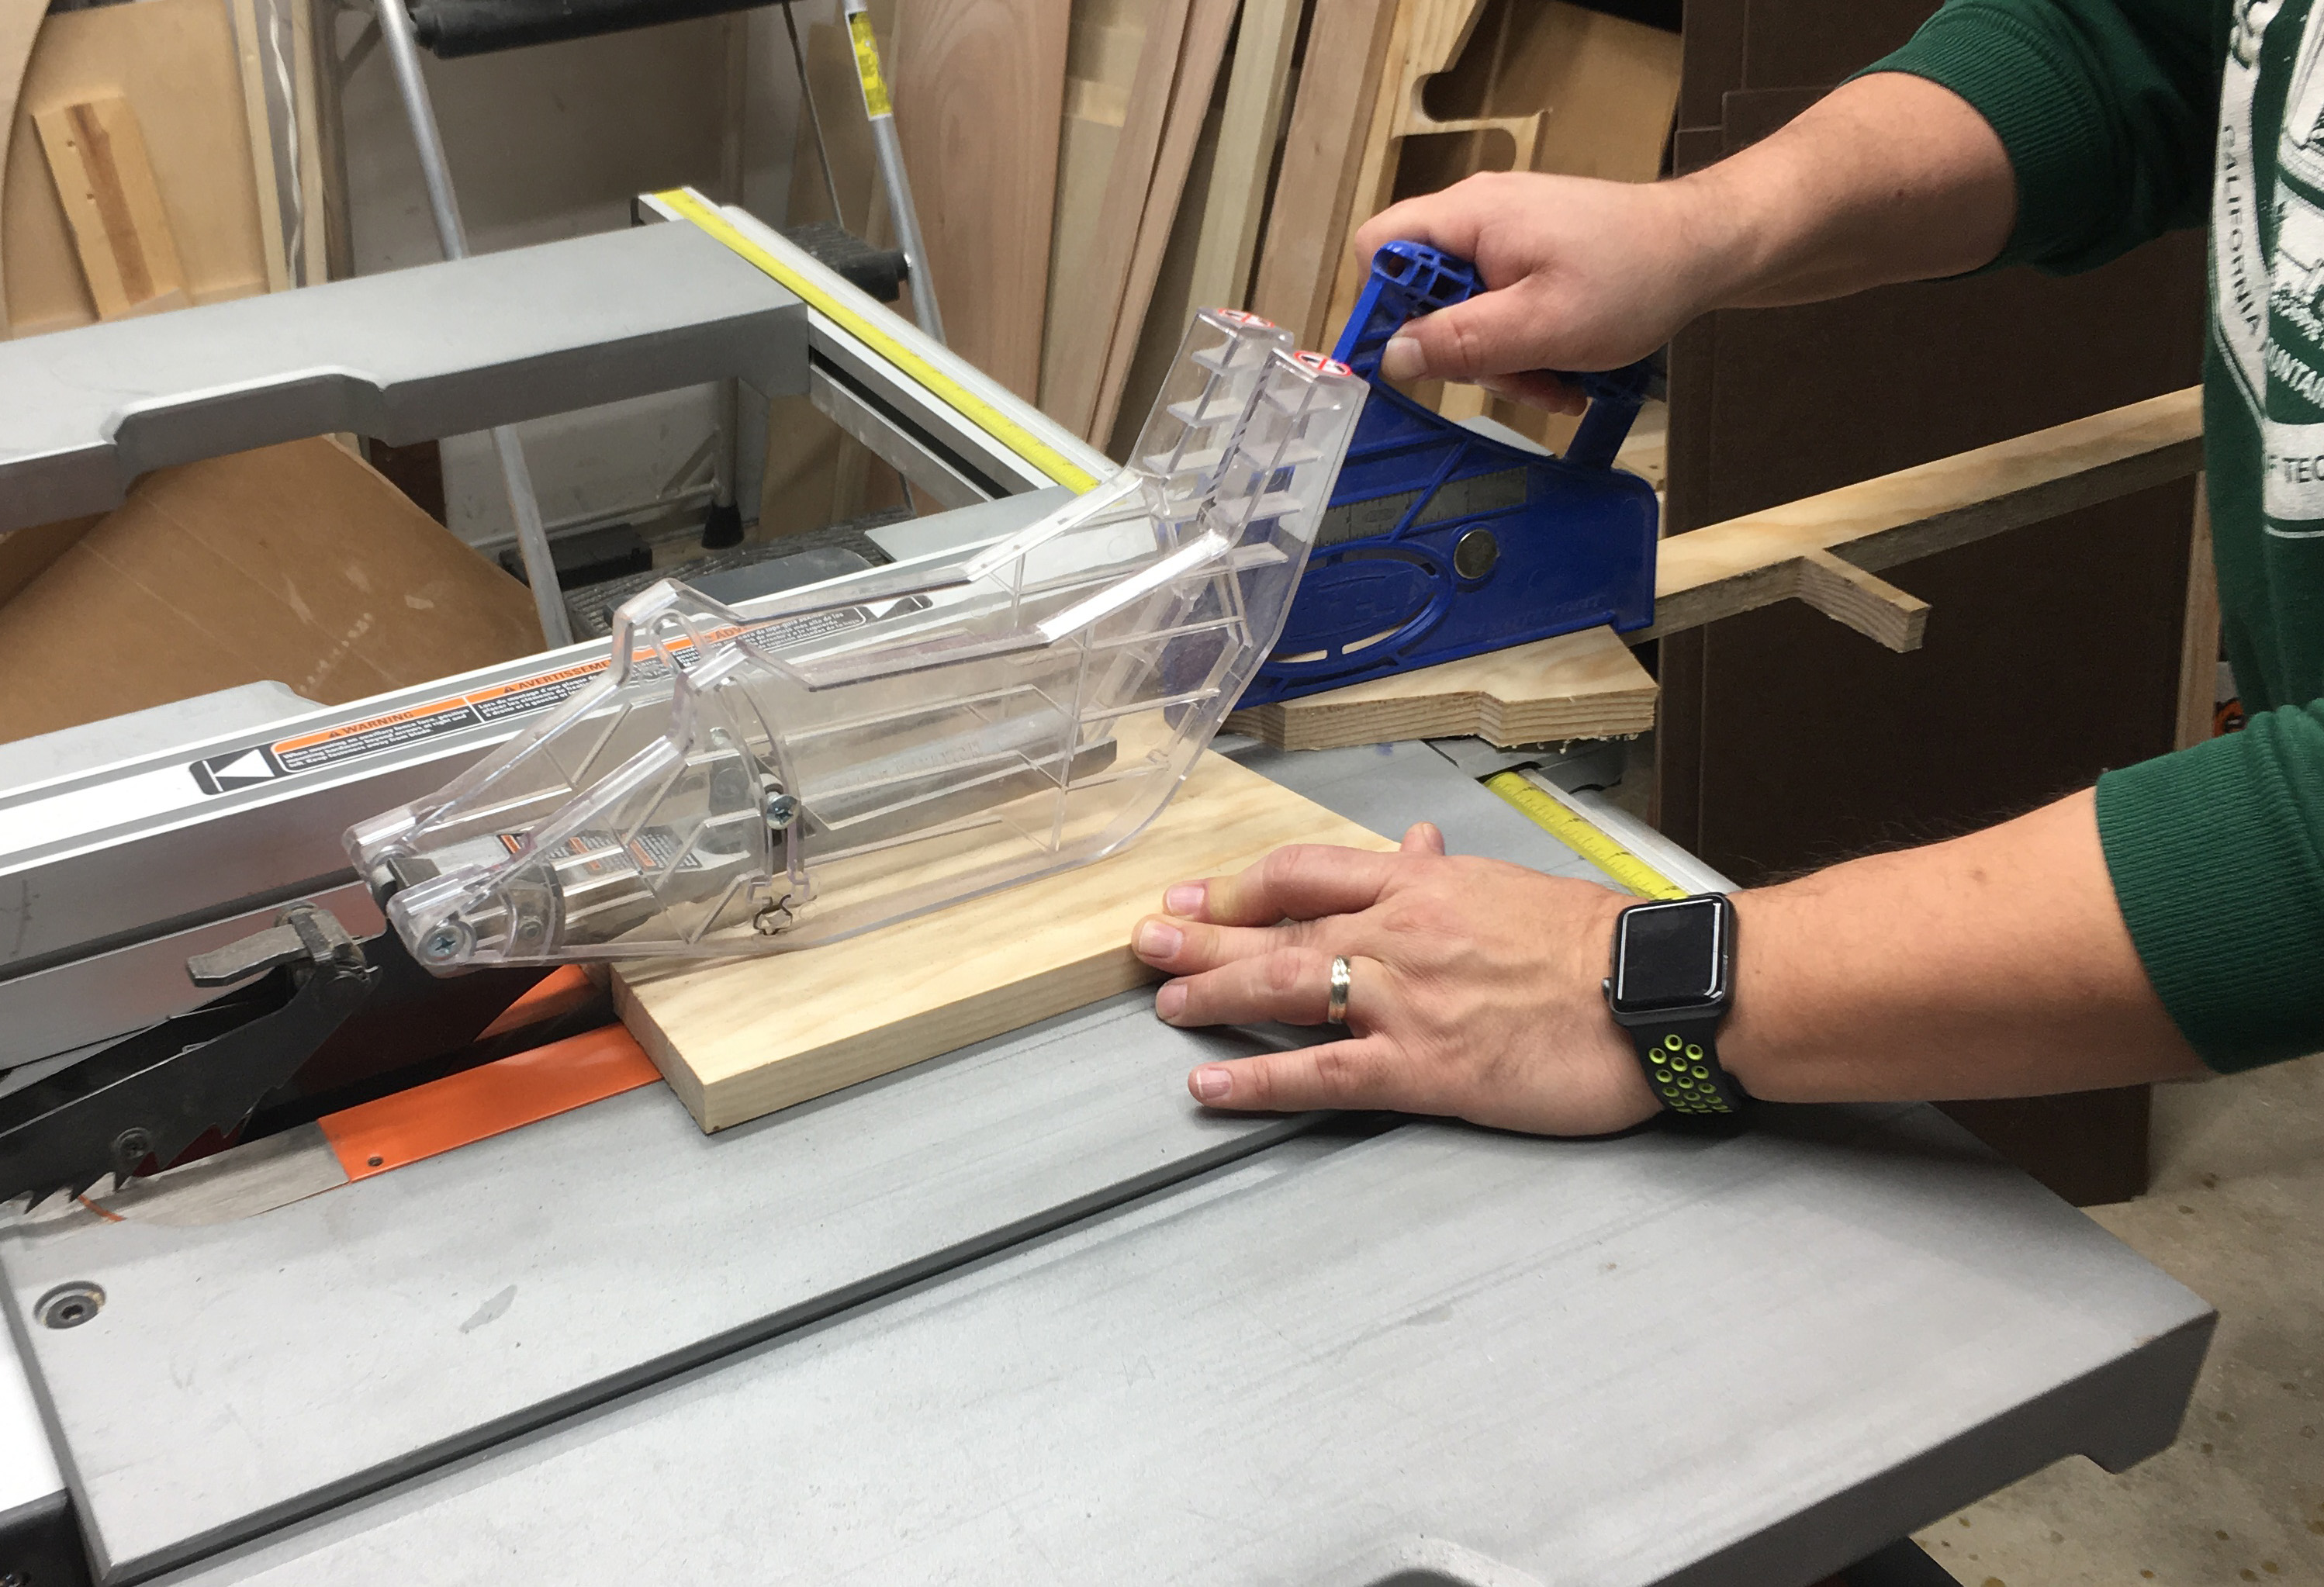
For the Coffee Table version, I started with wood from my scrap bin -- I hate to waste wood, and didn't think I needed to start with a new piece for this project. I started by finding some end pieces of pine left over from a guitar stand project, and ripping pieces on my table saw that were 2.5 inches wide.
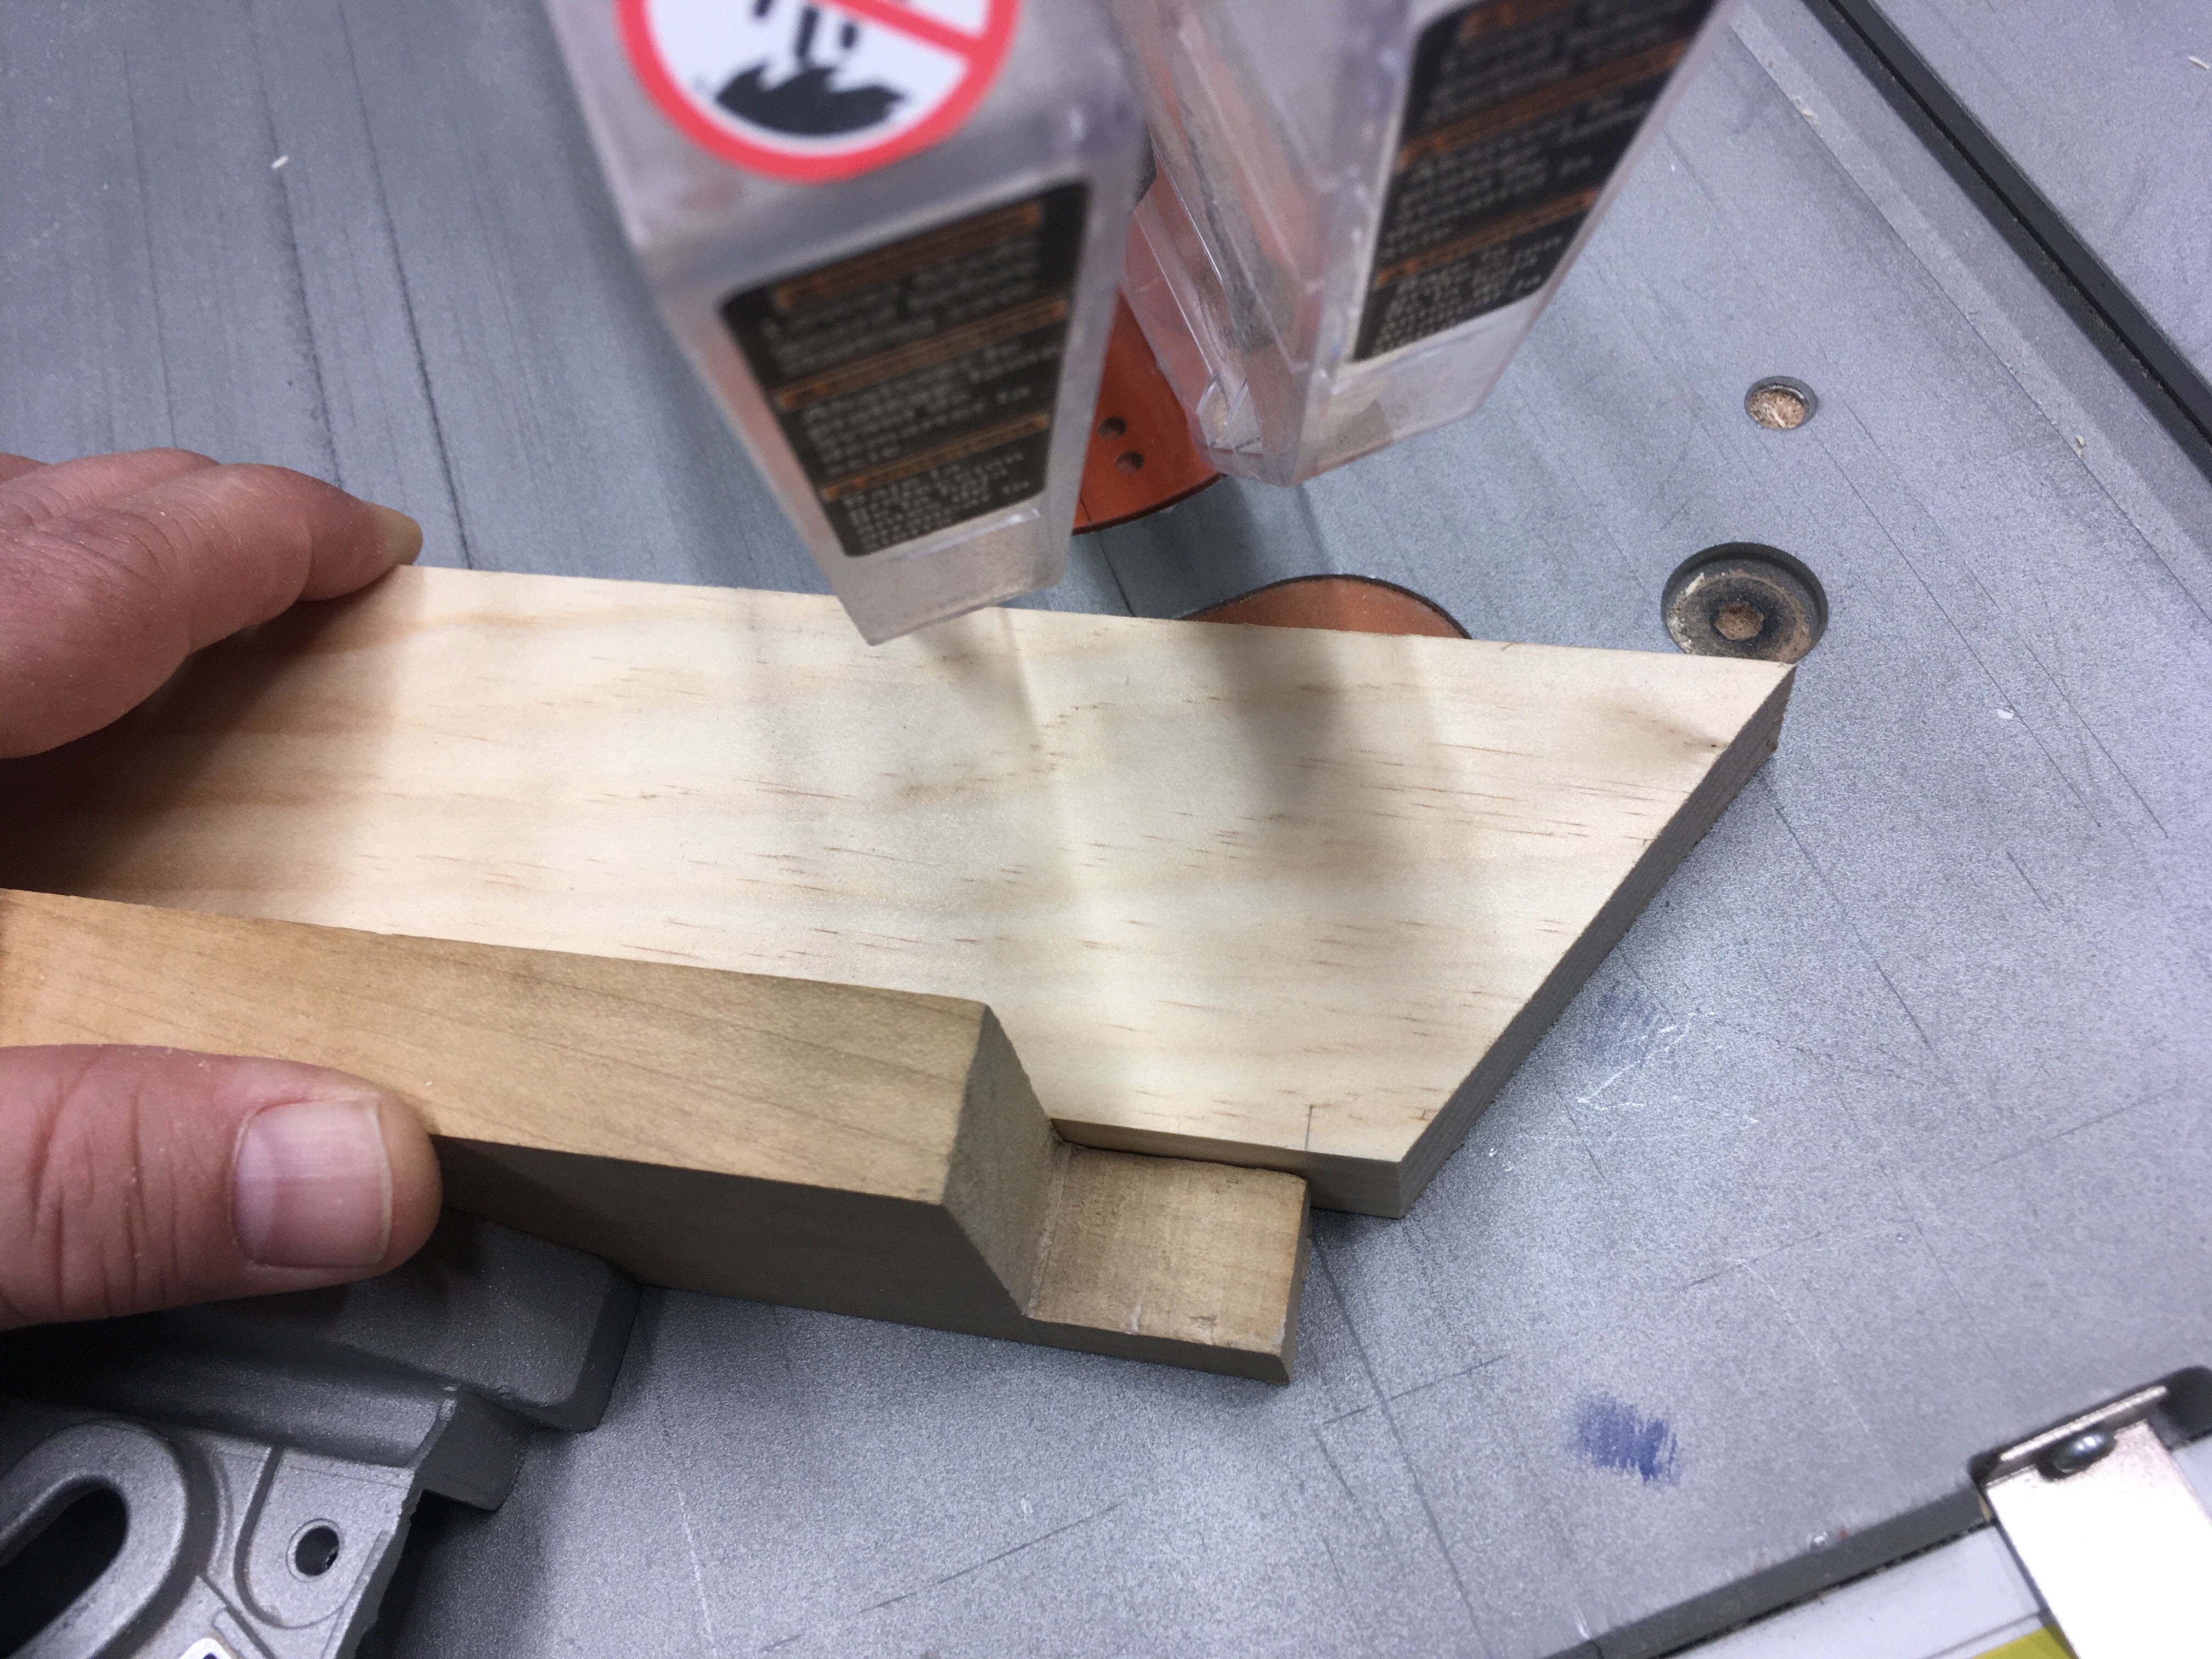
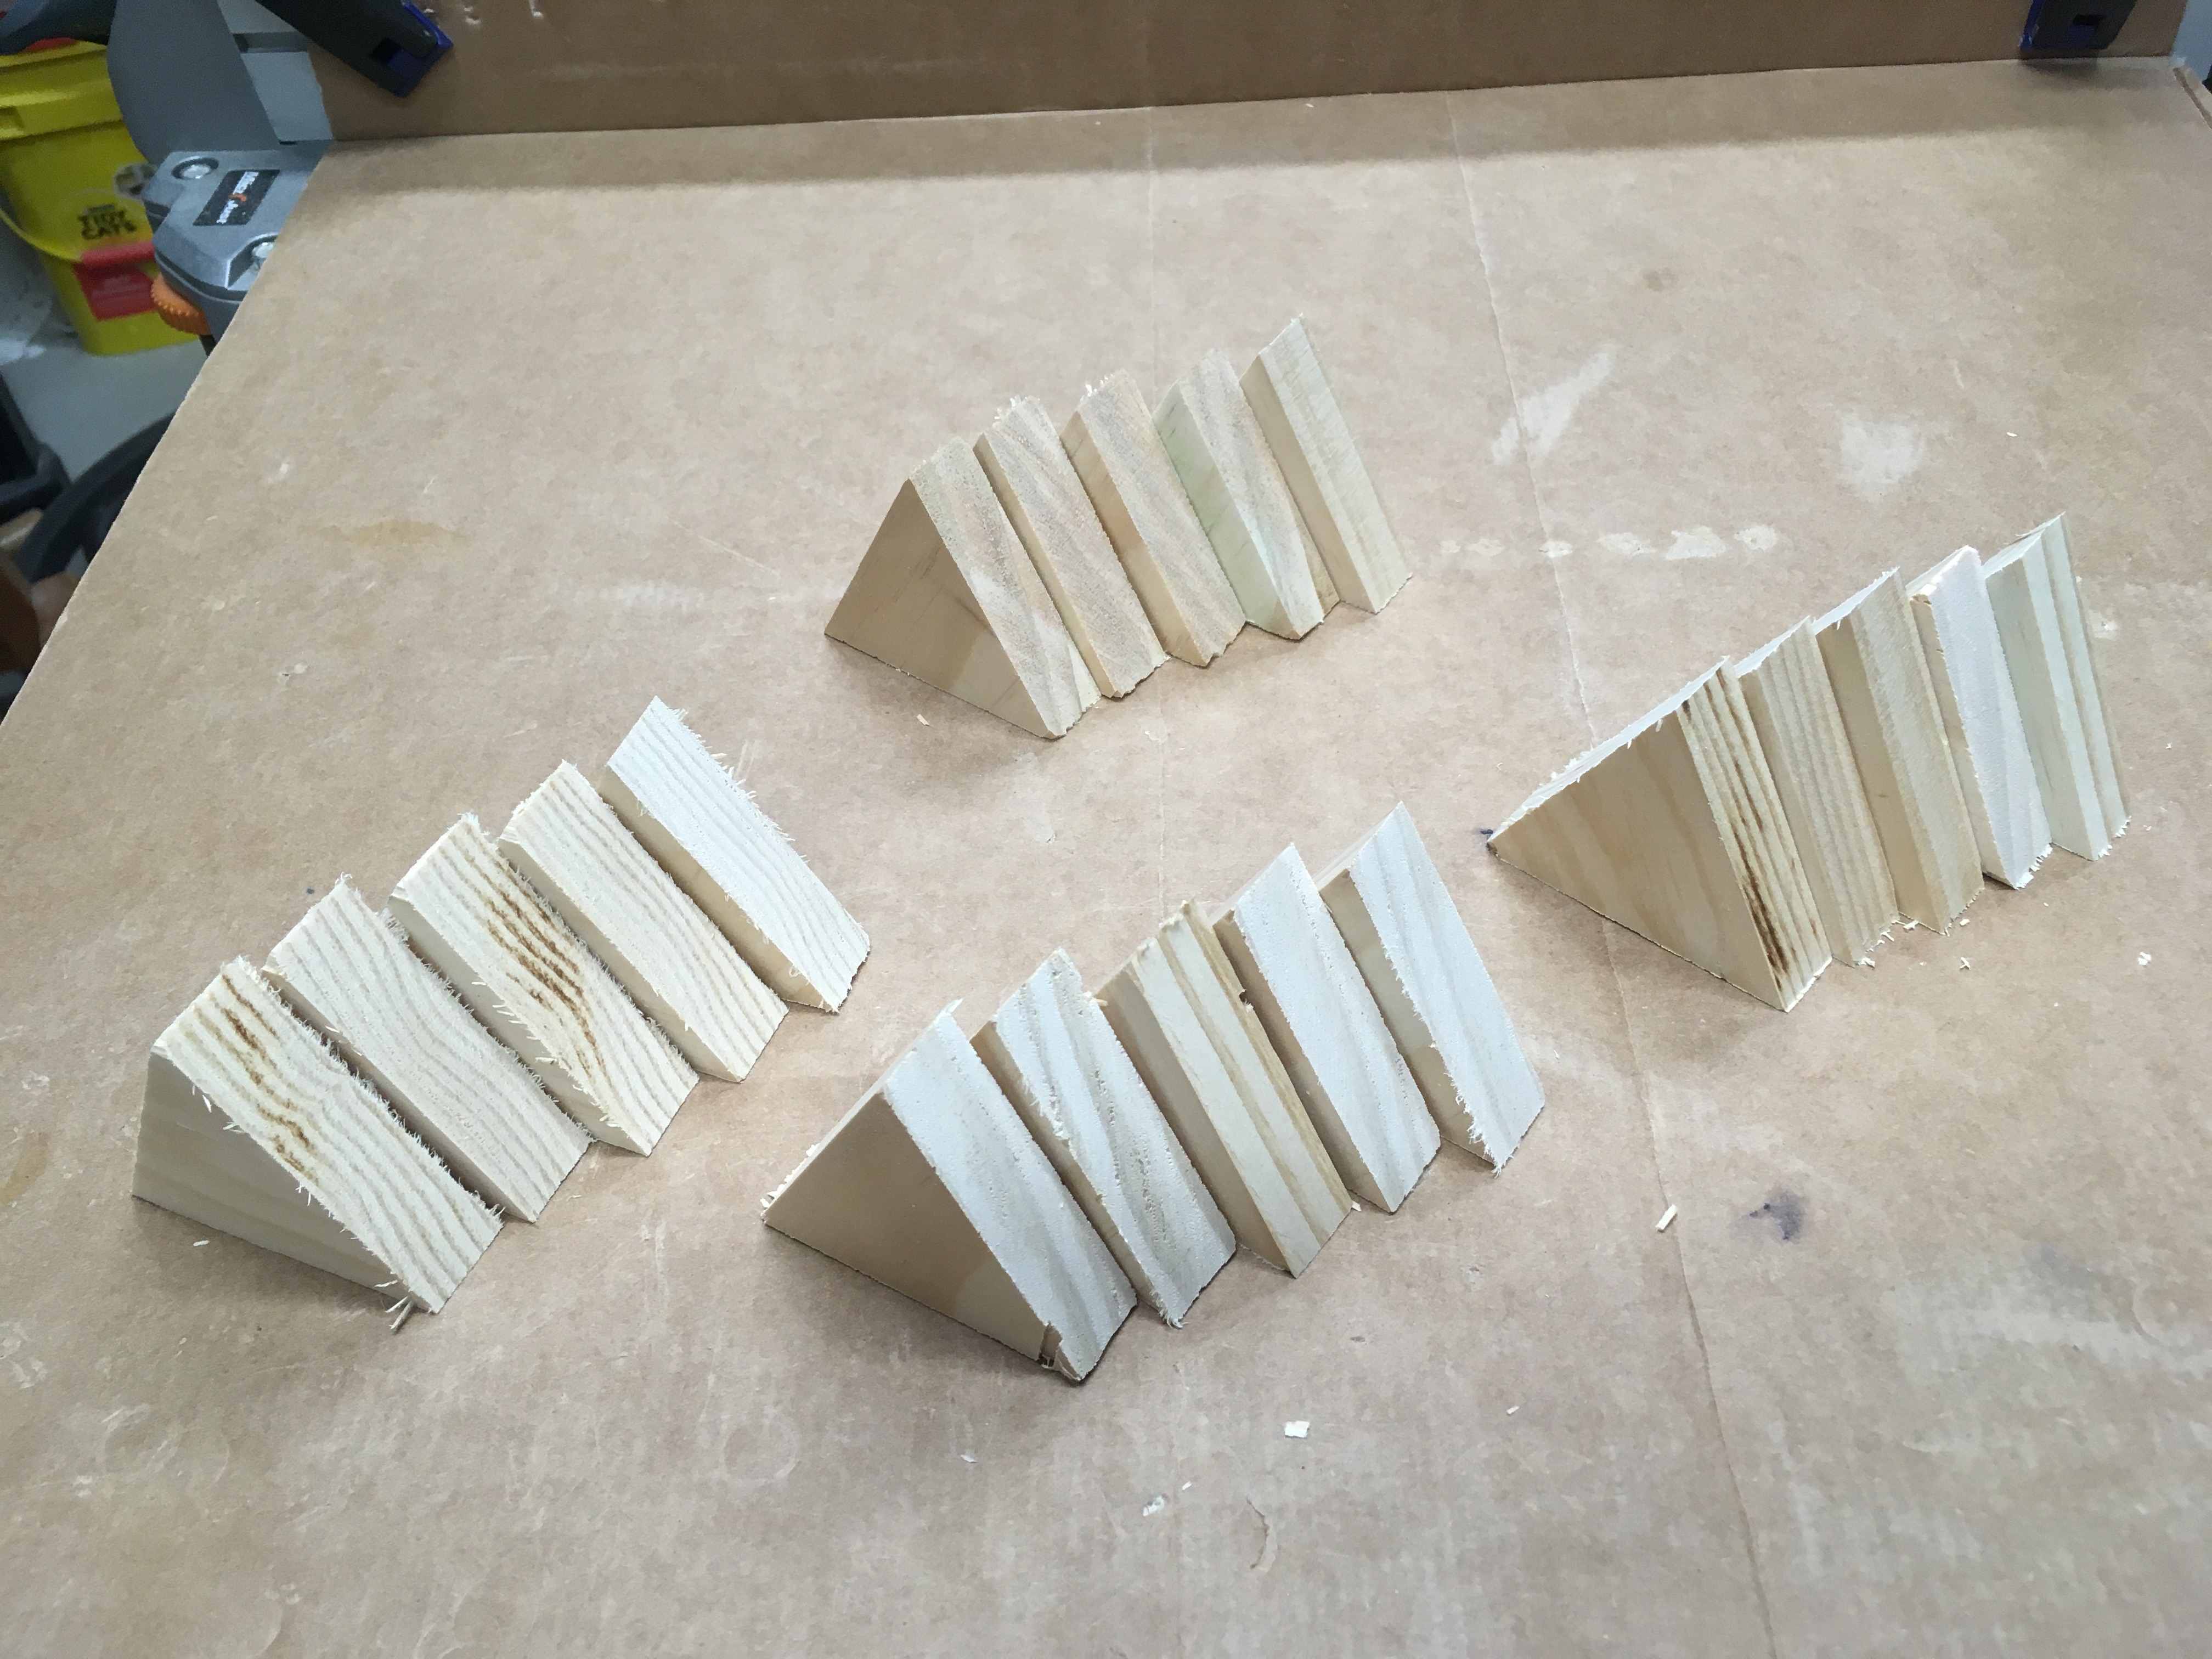
My miter head on my table saw can pivot, so I turned it 30 degrees, which holds the wood strips at an angle as I push them through the saw. After I make the first angled cut, I flip the board over, top for bottom. This leaves a "tail" hanging out beyond the end of the miter head. Lining up the saw's cut-line with the end of the last cut (see image 3 above), I push the board through the saw again. The "tail" gets cut off, and is one of your triangular tiles. I continue to flip the board, cutting off tails, until I have 20 tiles.
The saw cut ends are rough edged, so I buff them all down by hand with sandpaper until they are smooth.
Cutting Cardboard Tiles (Desk Version)
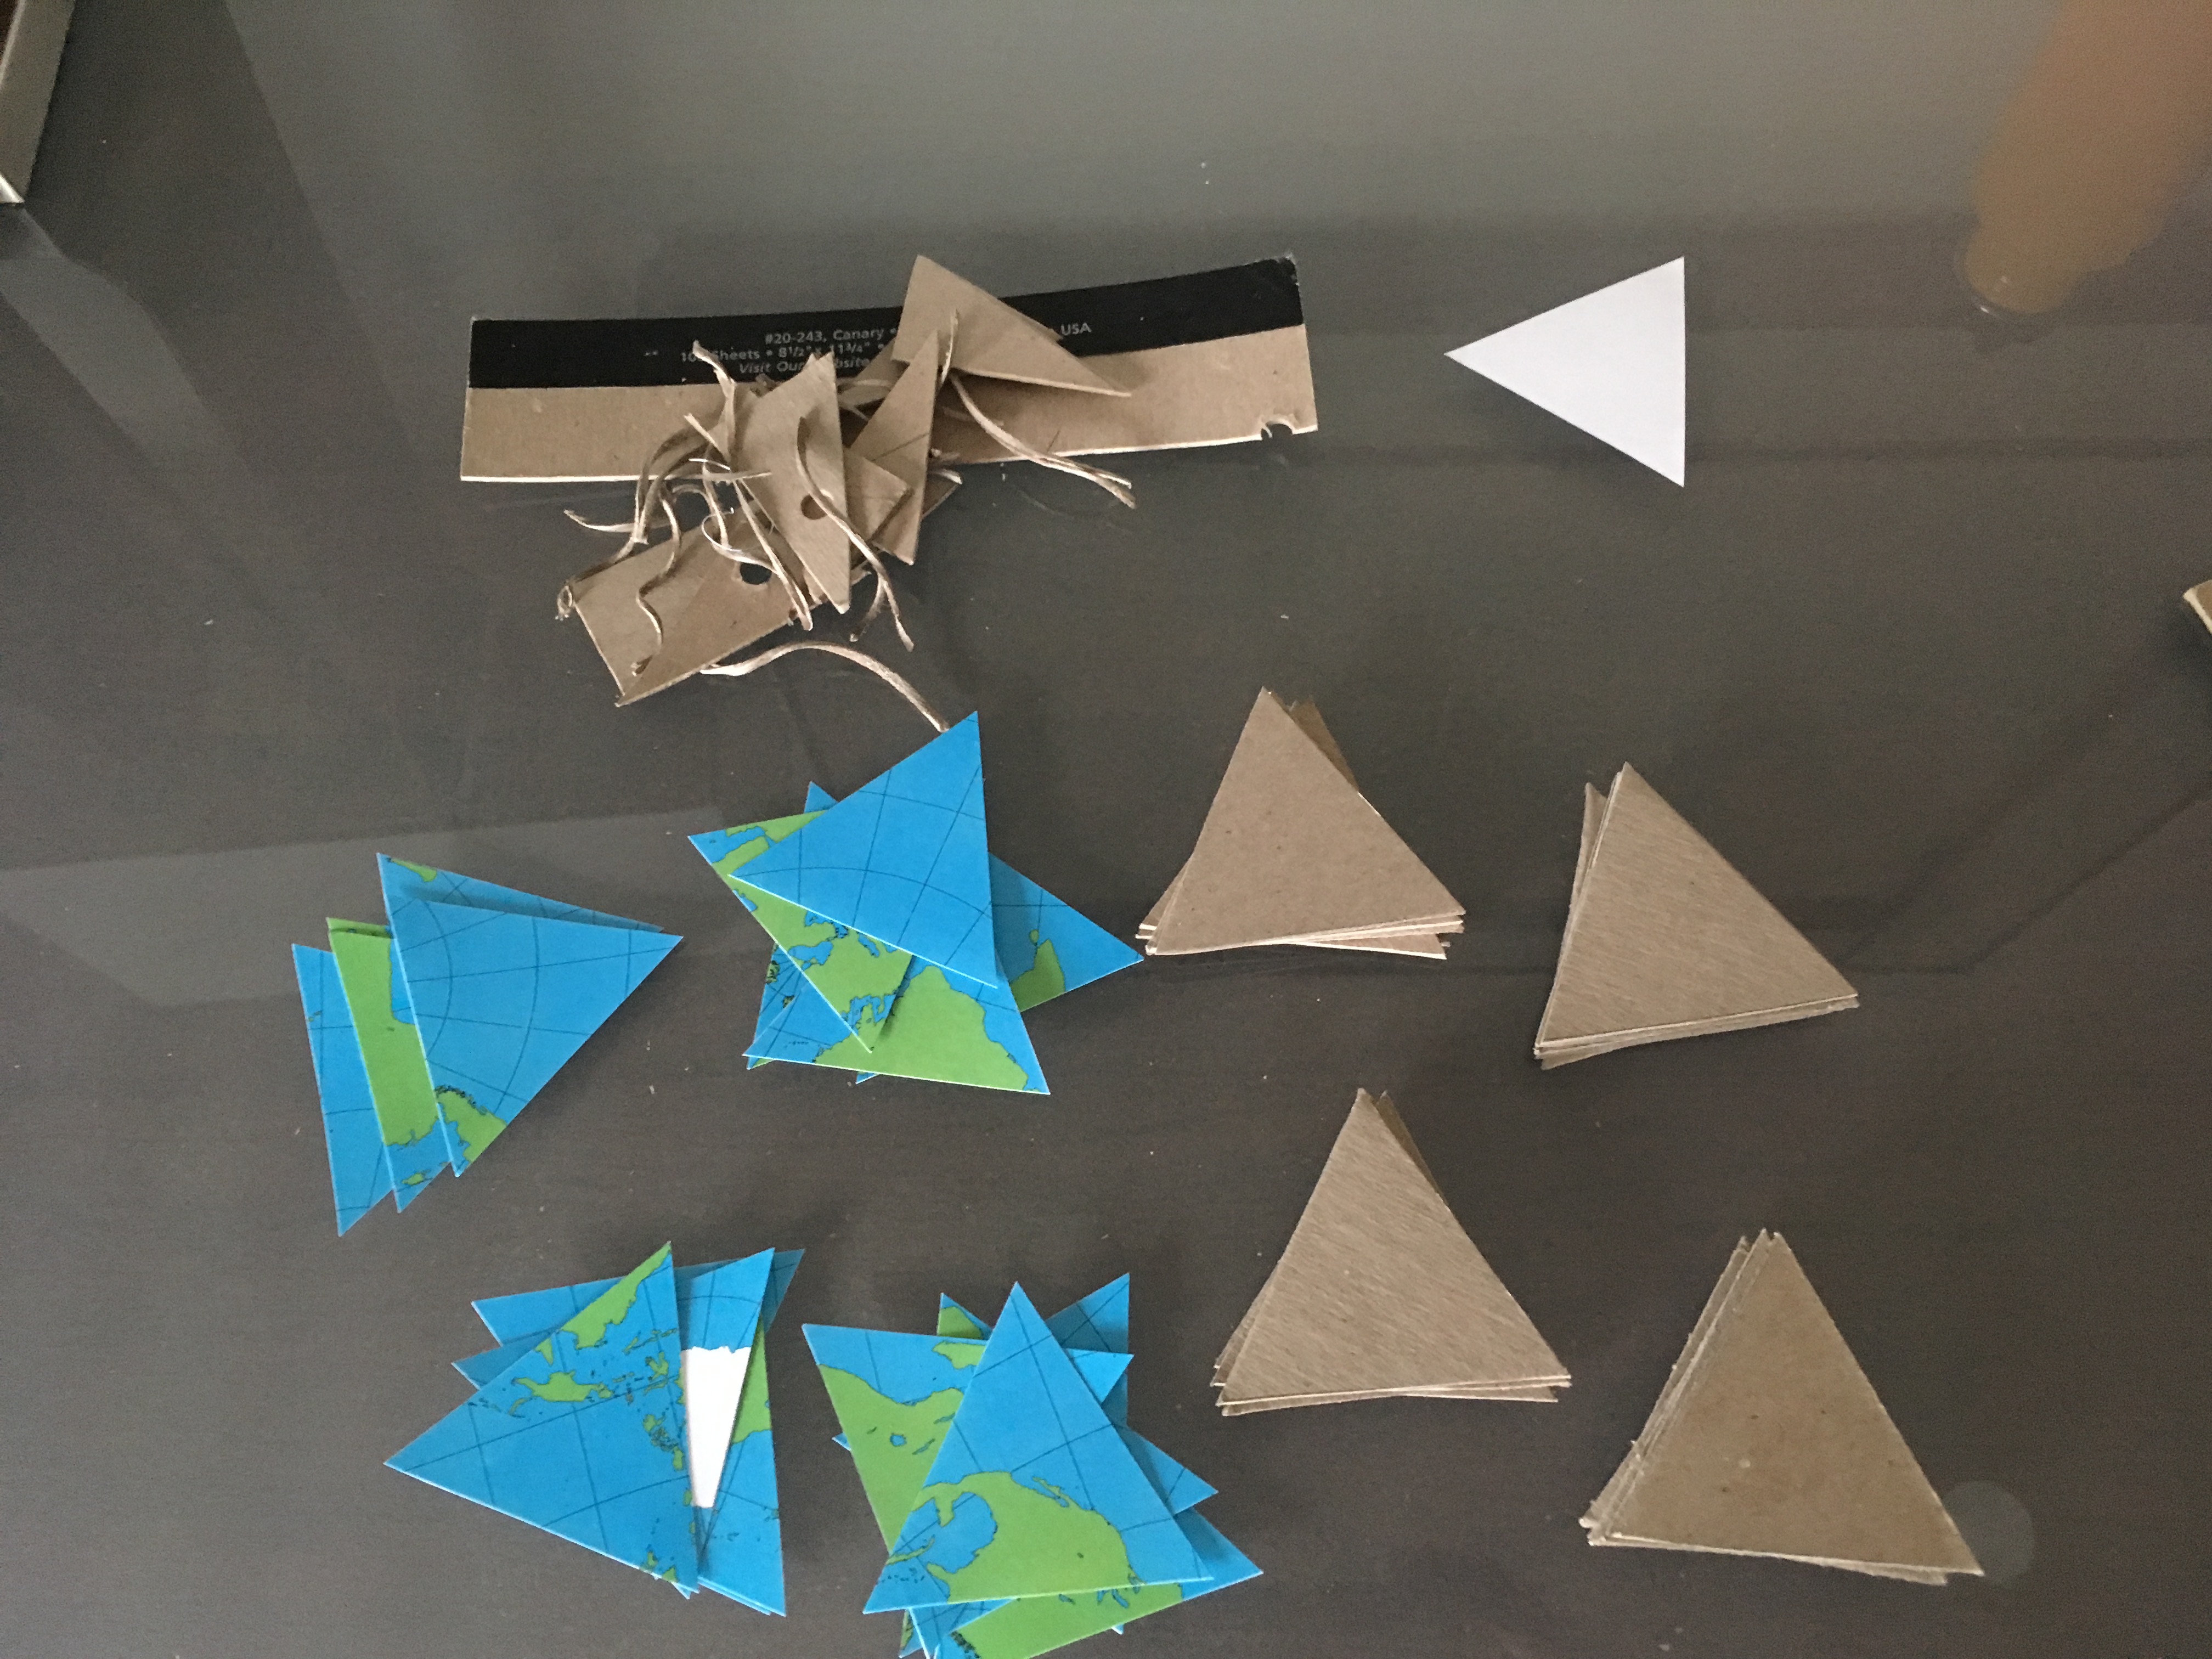
For the Dymaxion Tiles to be useable they have to have enough tactile substance that they can easily be picked up and moved. They also need to make positive contact when pressed against each other. Heavy cardboard is ideal in this regard.
I use a lot of legal pads for notes in my job (I'm a professor), and I'm fastidious about keeping the cardboard backs when a pad is used up -- I drop them in to my hobby supplies box and use them on projects like this one.
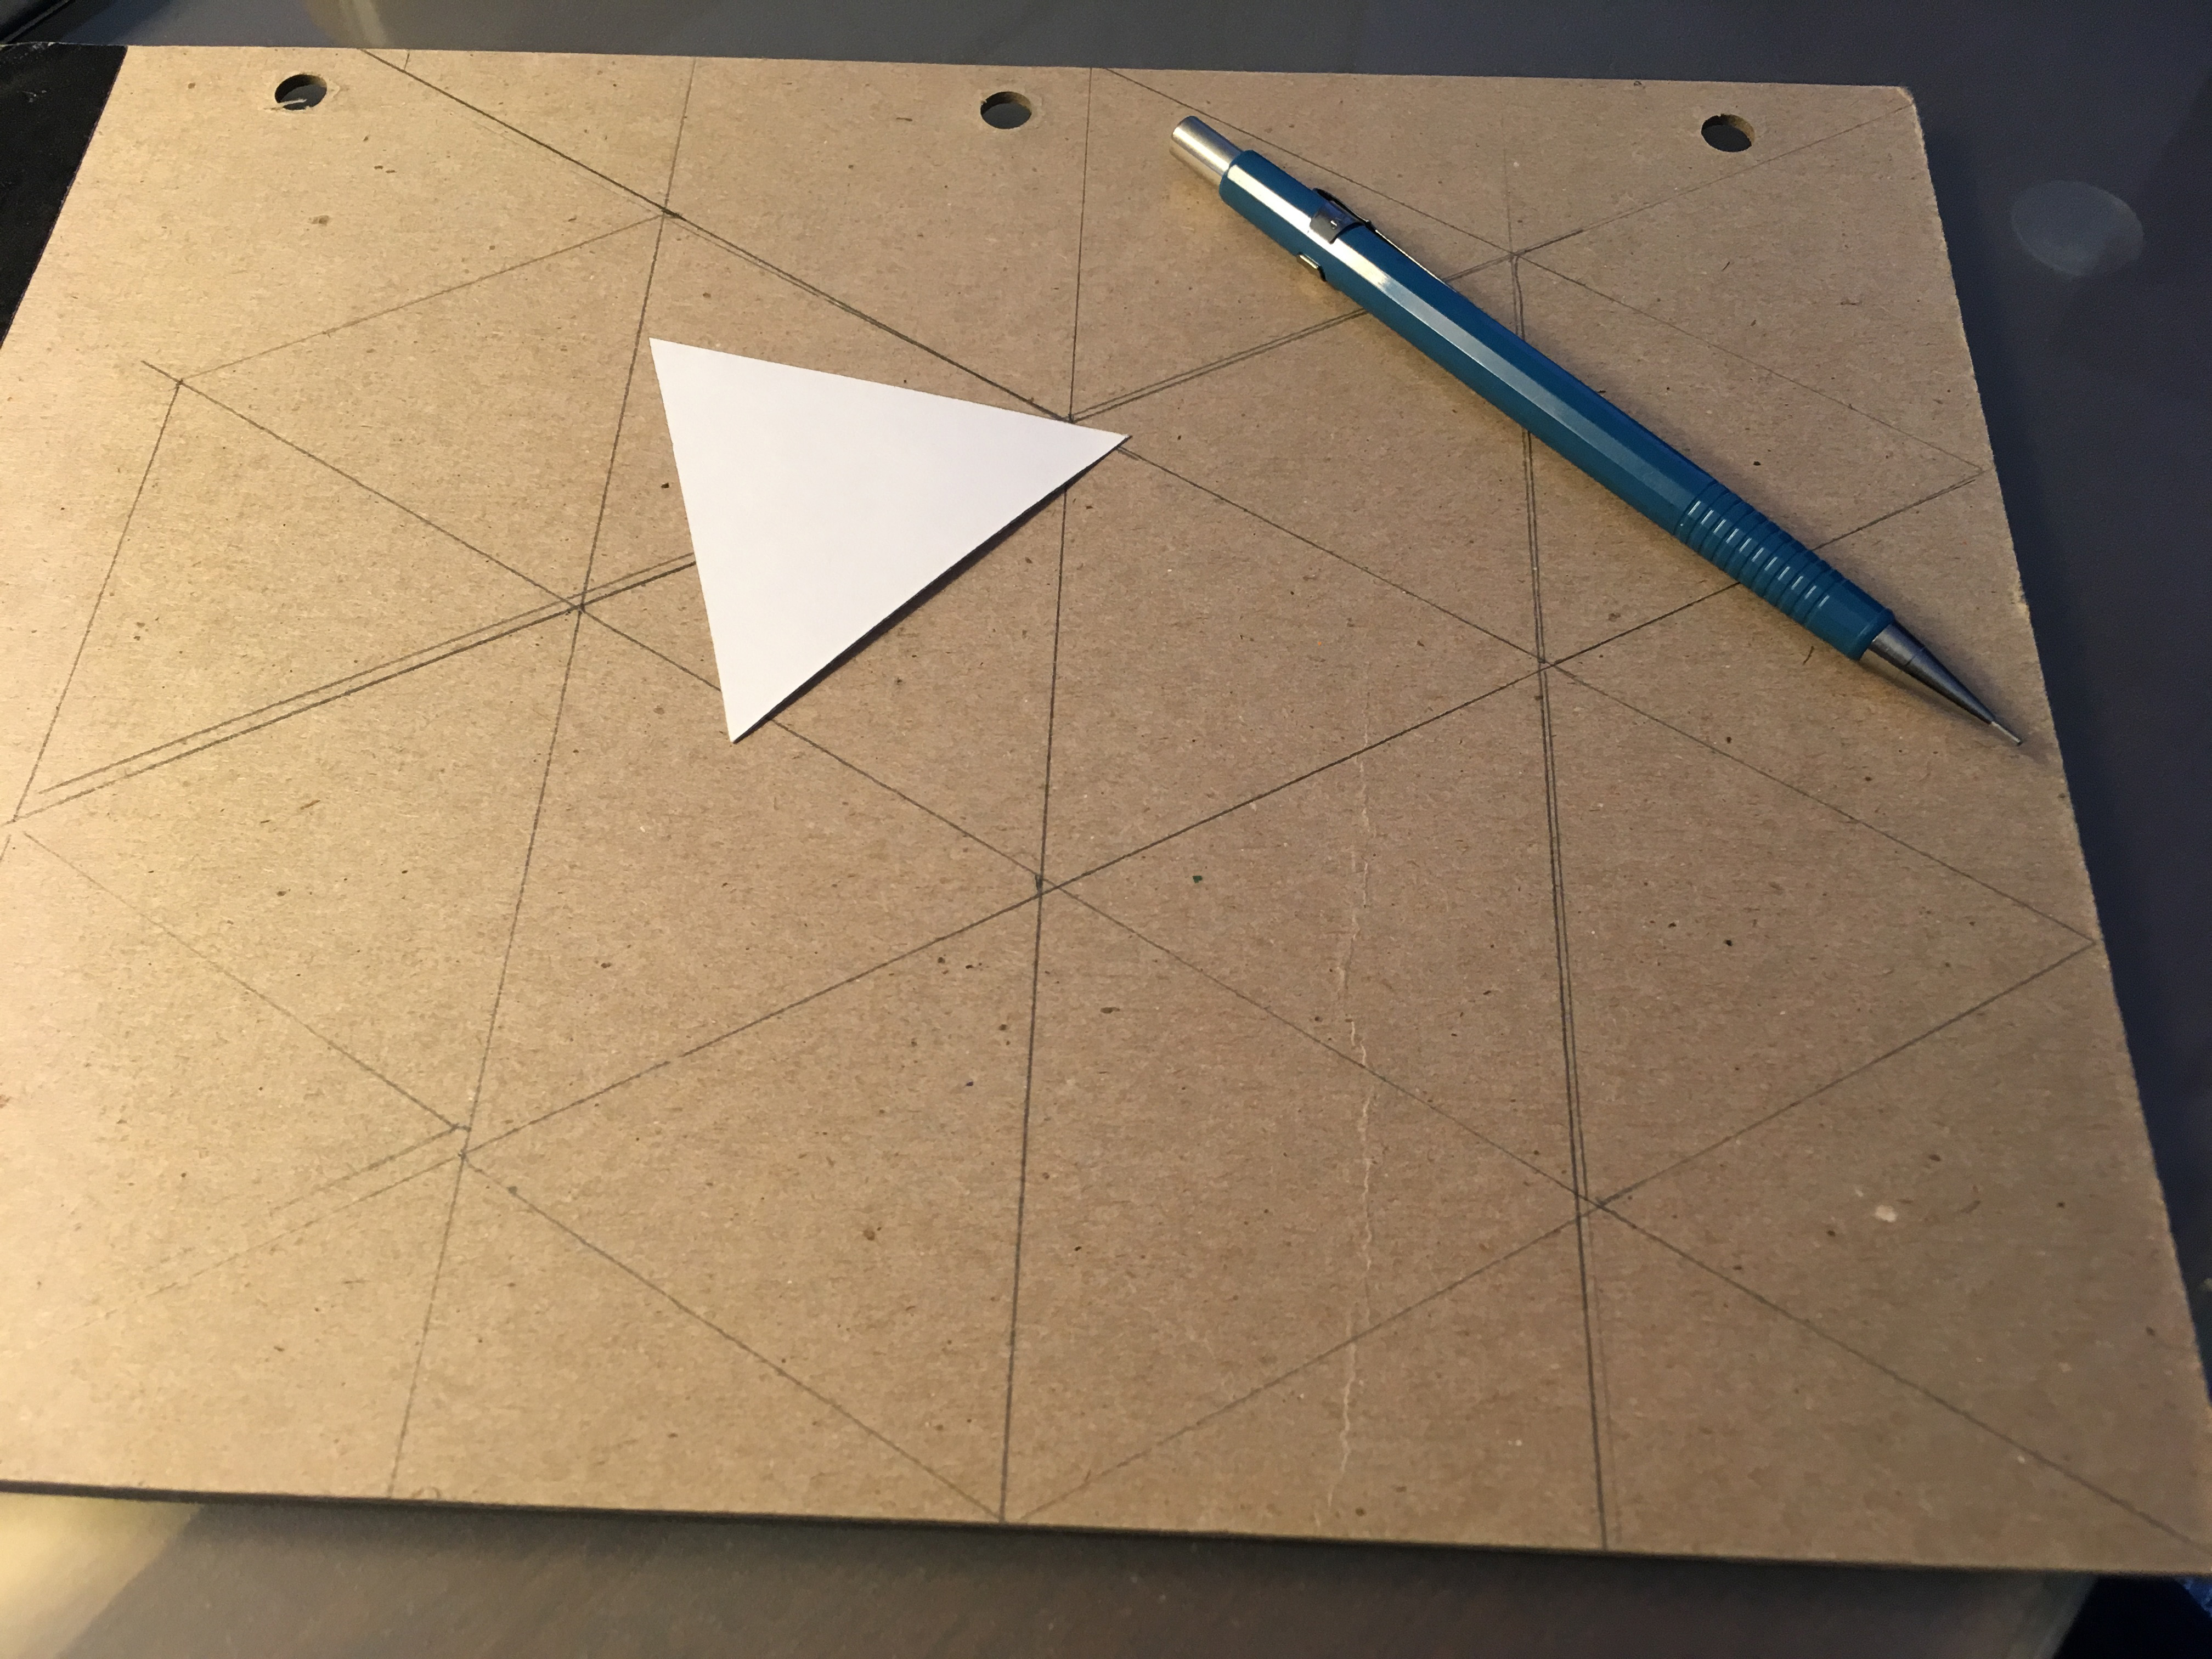
I use two pad-backs for this project. I start with a blank tile template and trace 20 copies of the tile-shape onto the cardboard backs.
The pad-backs I selected are too thick to accurately cut with scissors, so I cut each of the triangles out with an exacto knive until I had 20 tiles.
Wood Image Transfer, Part 1
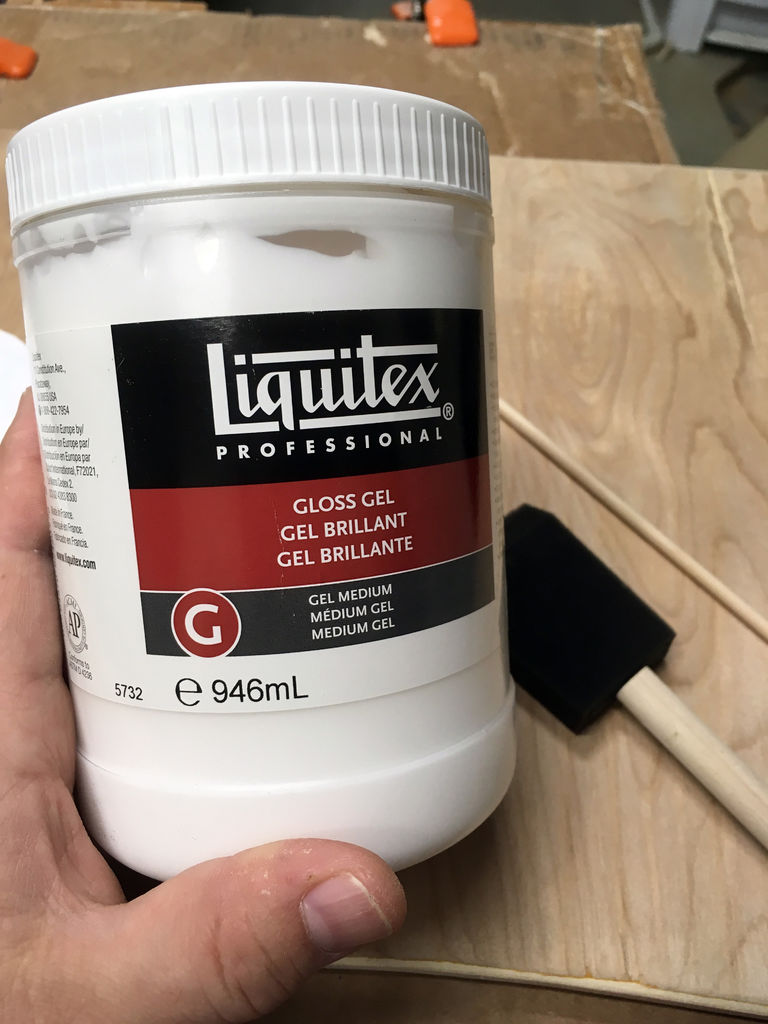
There are a variety of ways to transfer image to wood. Most of the ones I use begin with a laser print of the image you want transferred, and then the process binds the laser toner to the wood. I’ve used methods like using a clothes iron or acetone to transfer and bind the image. Those techniques were great for simple line art or text, but for full page color images I find the most effective transfer method is using artists gel medium.
Important Point 1: this method only works with toner printed images, not with images printed on an inkjet printer.
Important Point 2: the image transferred to your tile will be mirror reversed from how it appears on the printed page. To have correctly oriented map images, use the reversed image files (I have flipped the normal tile images with an image processing program for your convenience).
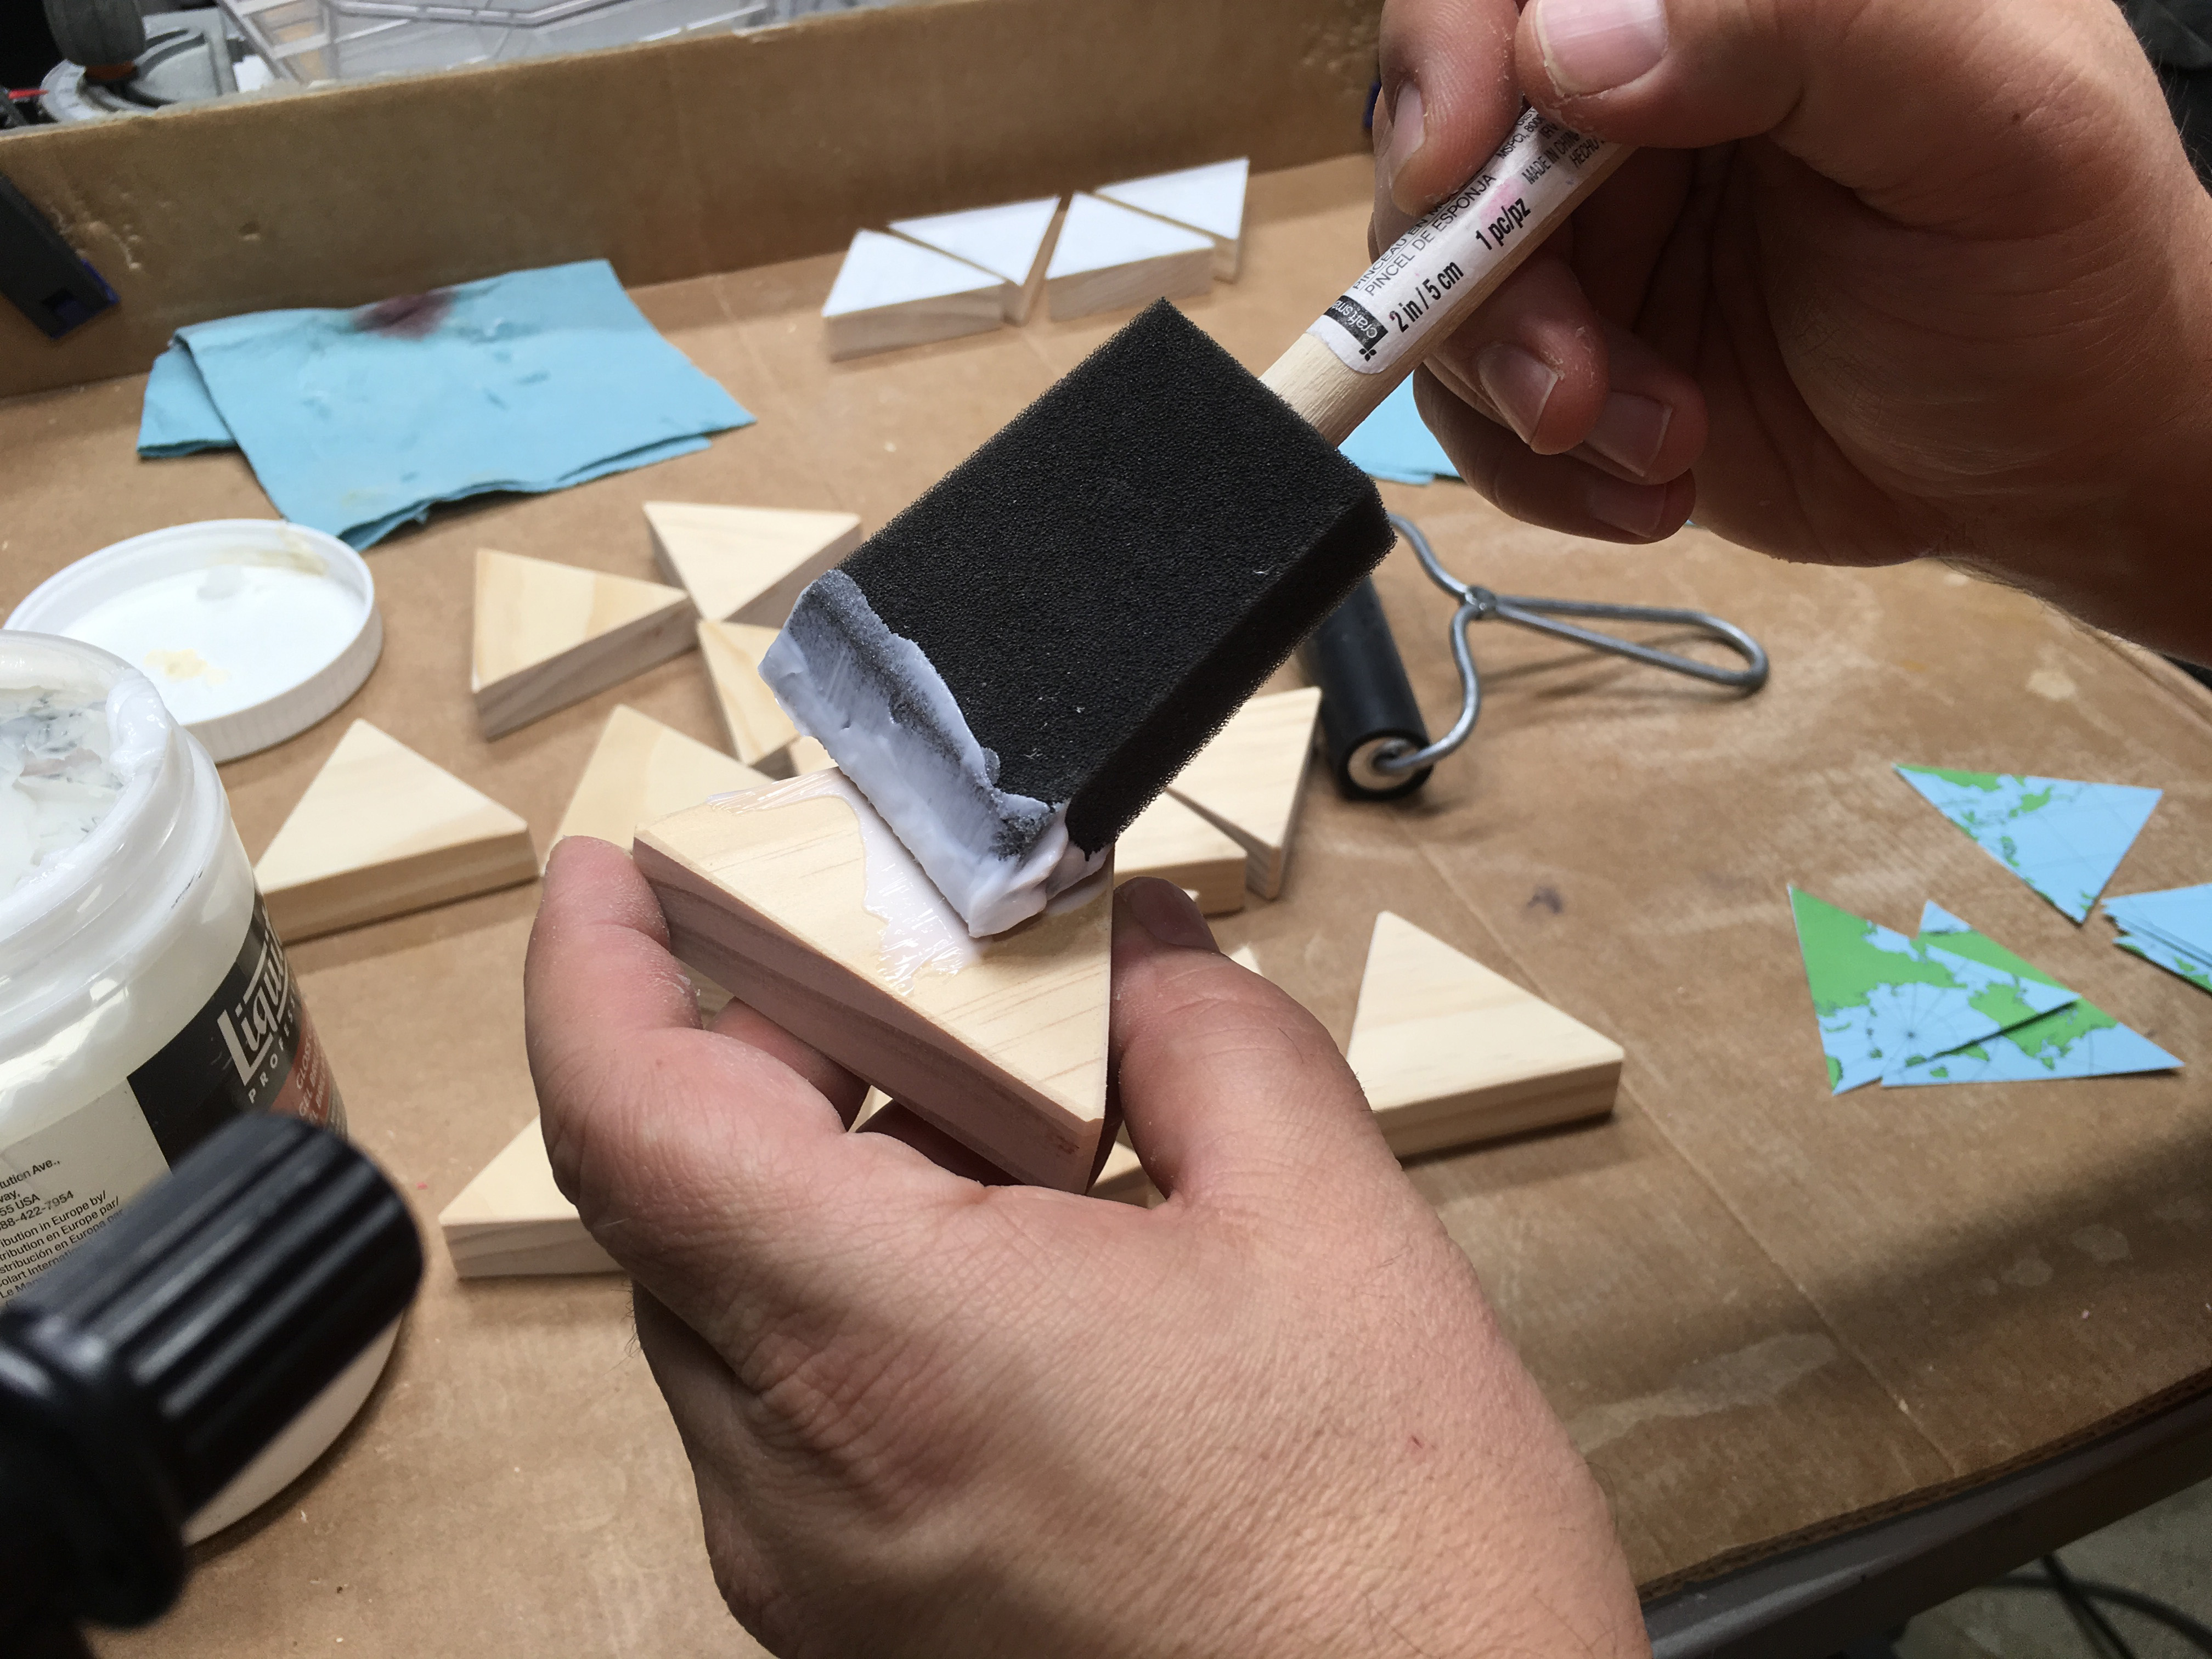
Begin with the reversed tile images, and cut each one down to the edge of the tile. Normally I would put the gel medium on the image itself, but in this case the size of the tiles makes it easiest to lay a thin layer down on one side of each wood triangle with a foam brush. There is a delicate balance you are trying to achieve here:
- Not enough gel medium, and the image will not transfer
- Too much gel medium, and it will form a thick layer when cured and the paper will not easily come off
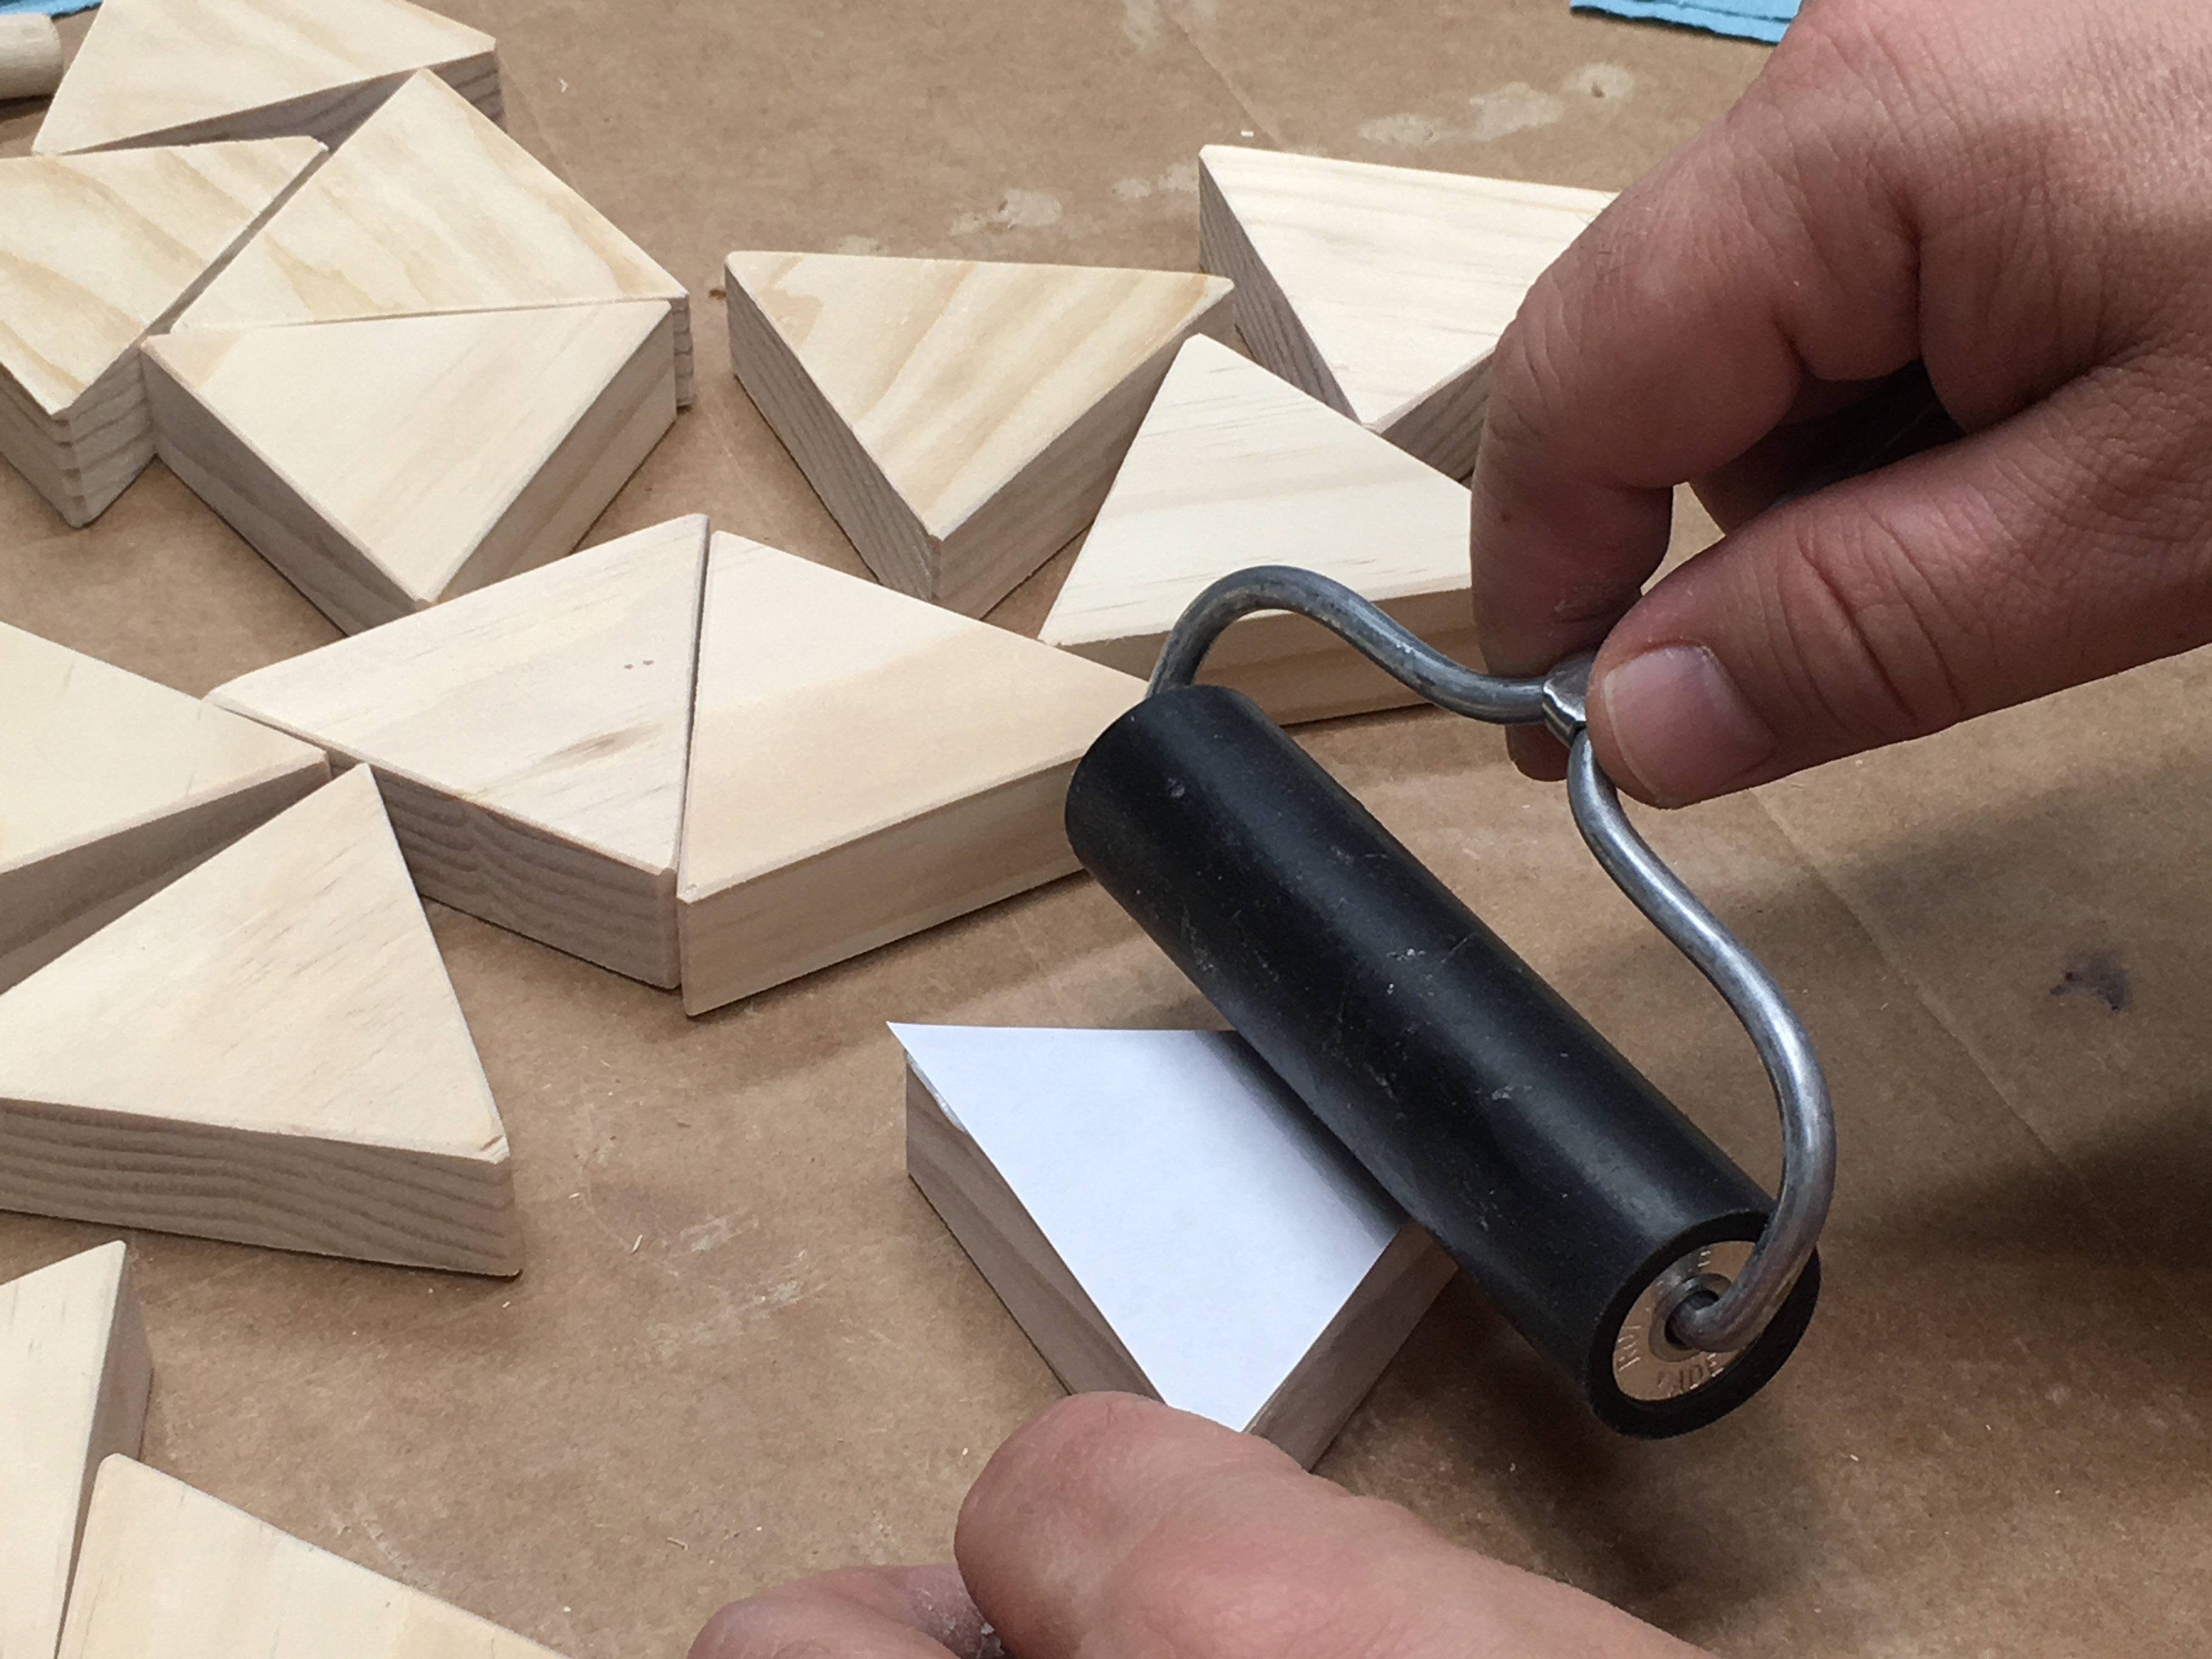
Get rid of blobby spots and make it as uniform as possible. Take your printed image tile, and flip it face down on the wet, gel medium on the tile. The printed image is face down on the tile. Press it into place; I use an artist's roller to make sure it is uniform and there are no bubbles. Be careful -- rolling it out will press excess gel medium outside the edges; wipe these off with a rag.
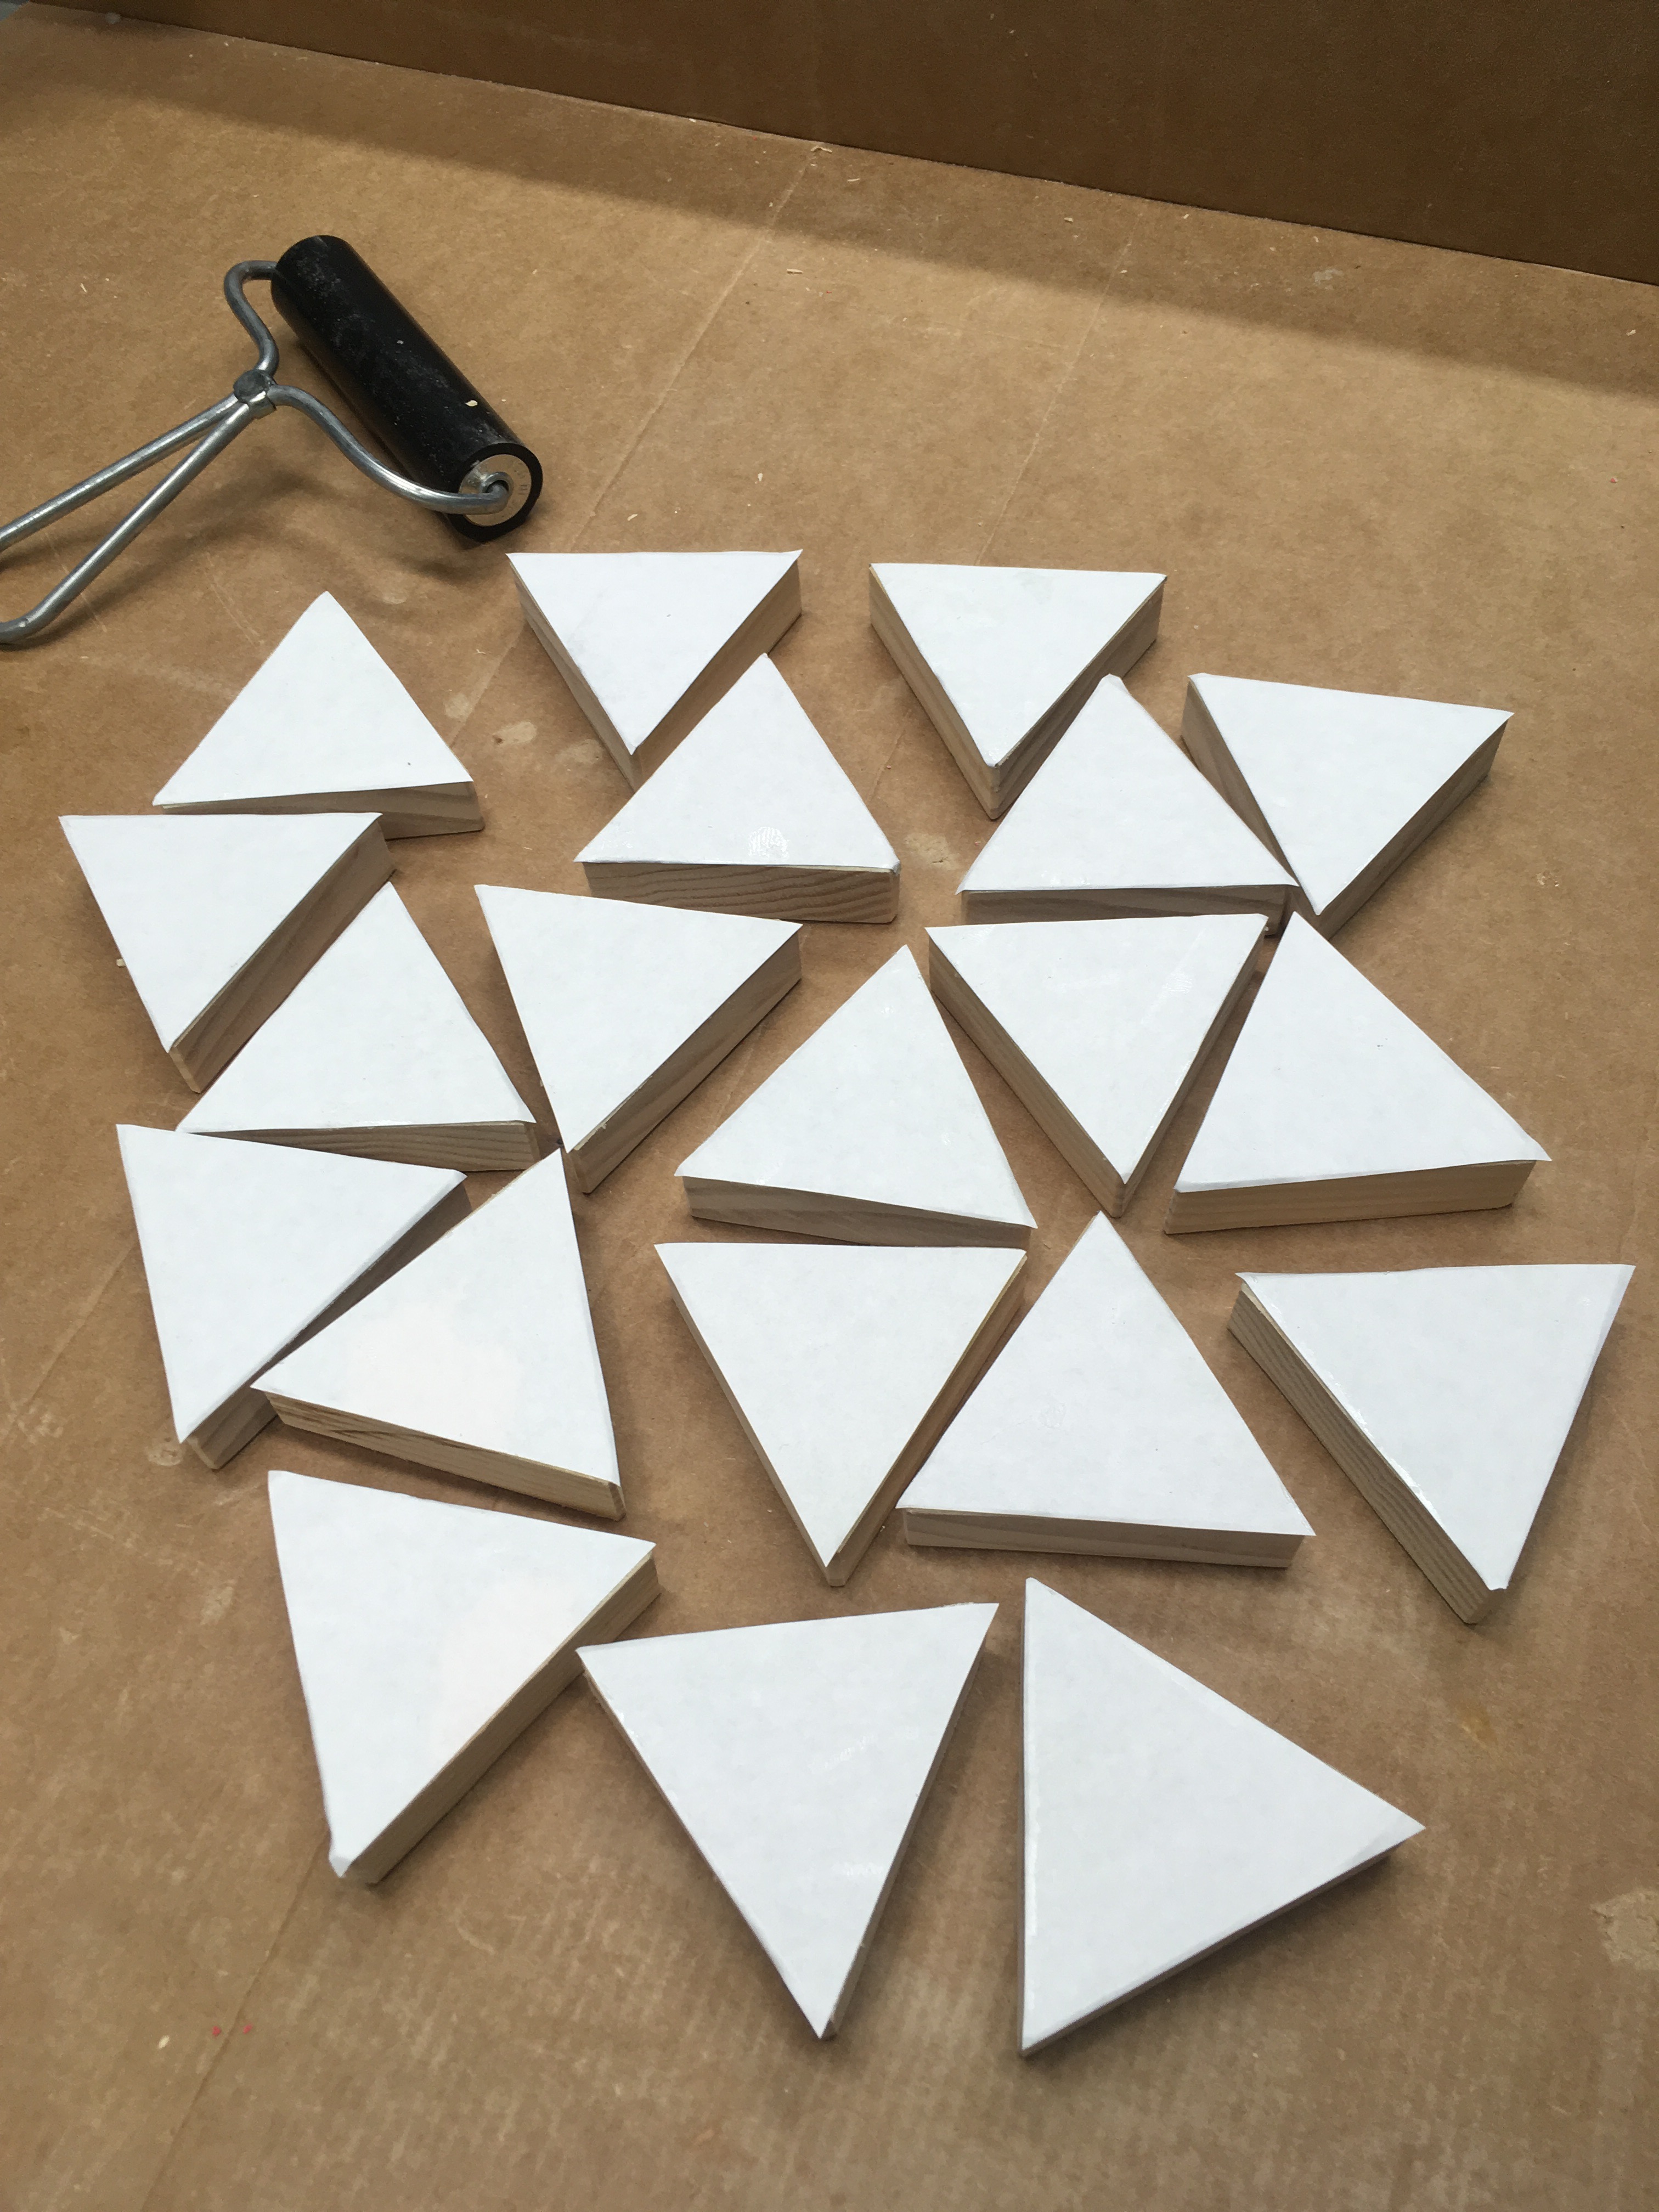
Important hard part: wait and be patient! I usually wait a full 24 hours, letting the gel medium dry out and set before I remove the paper (next step).
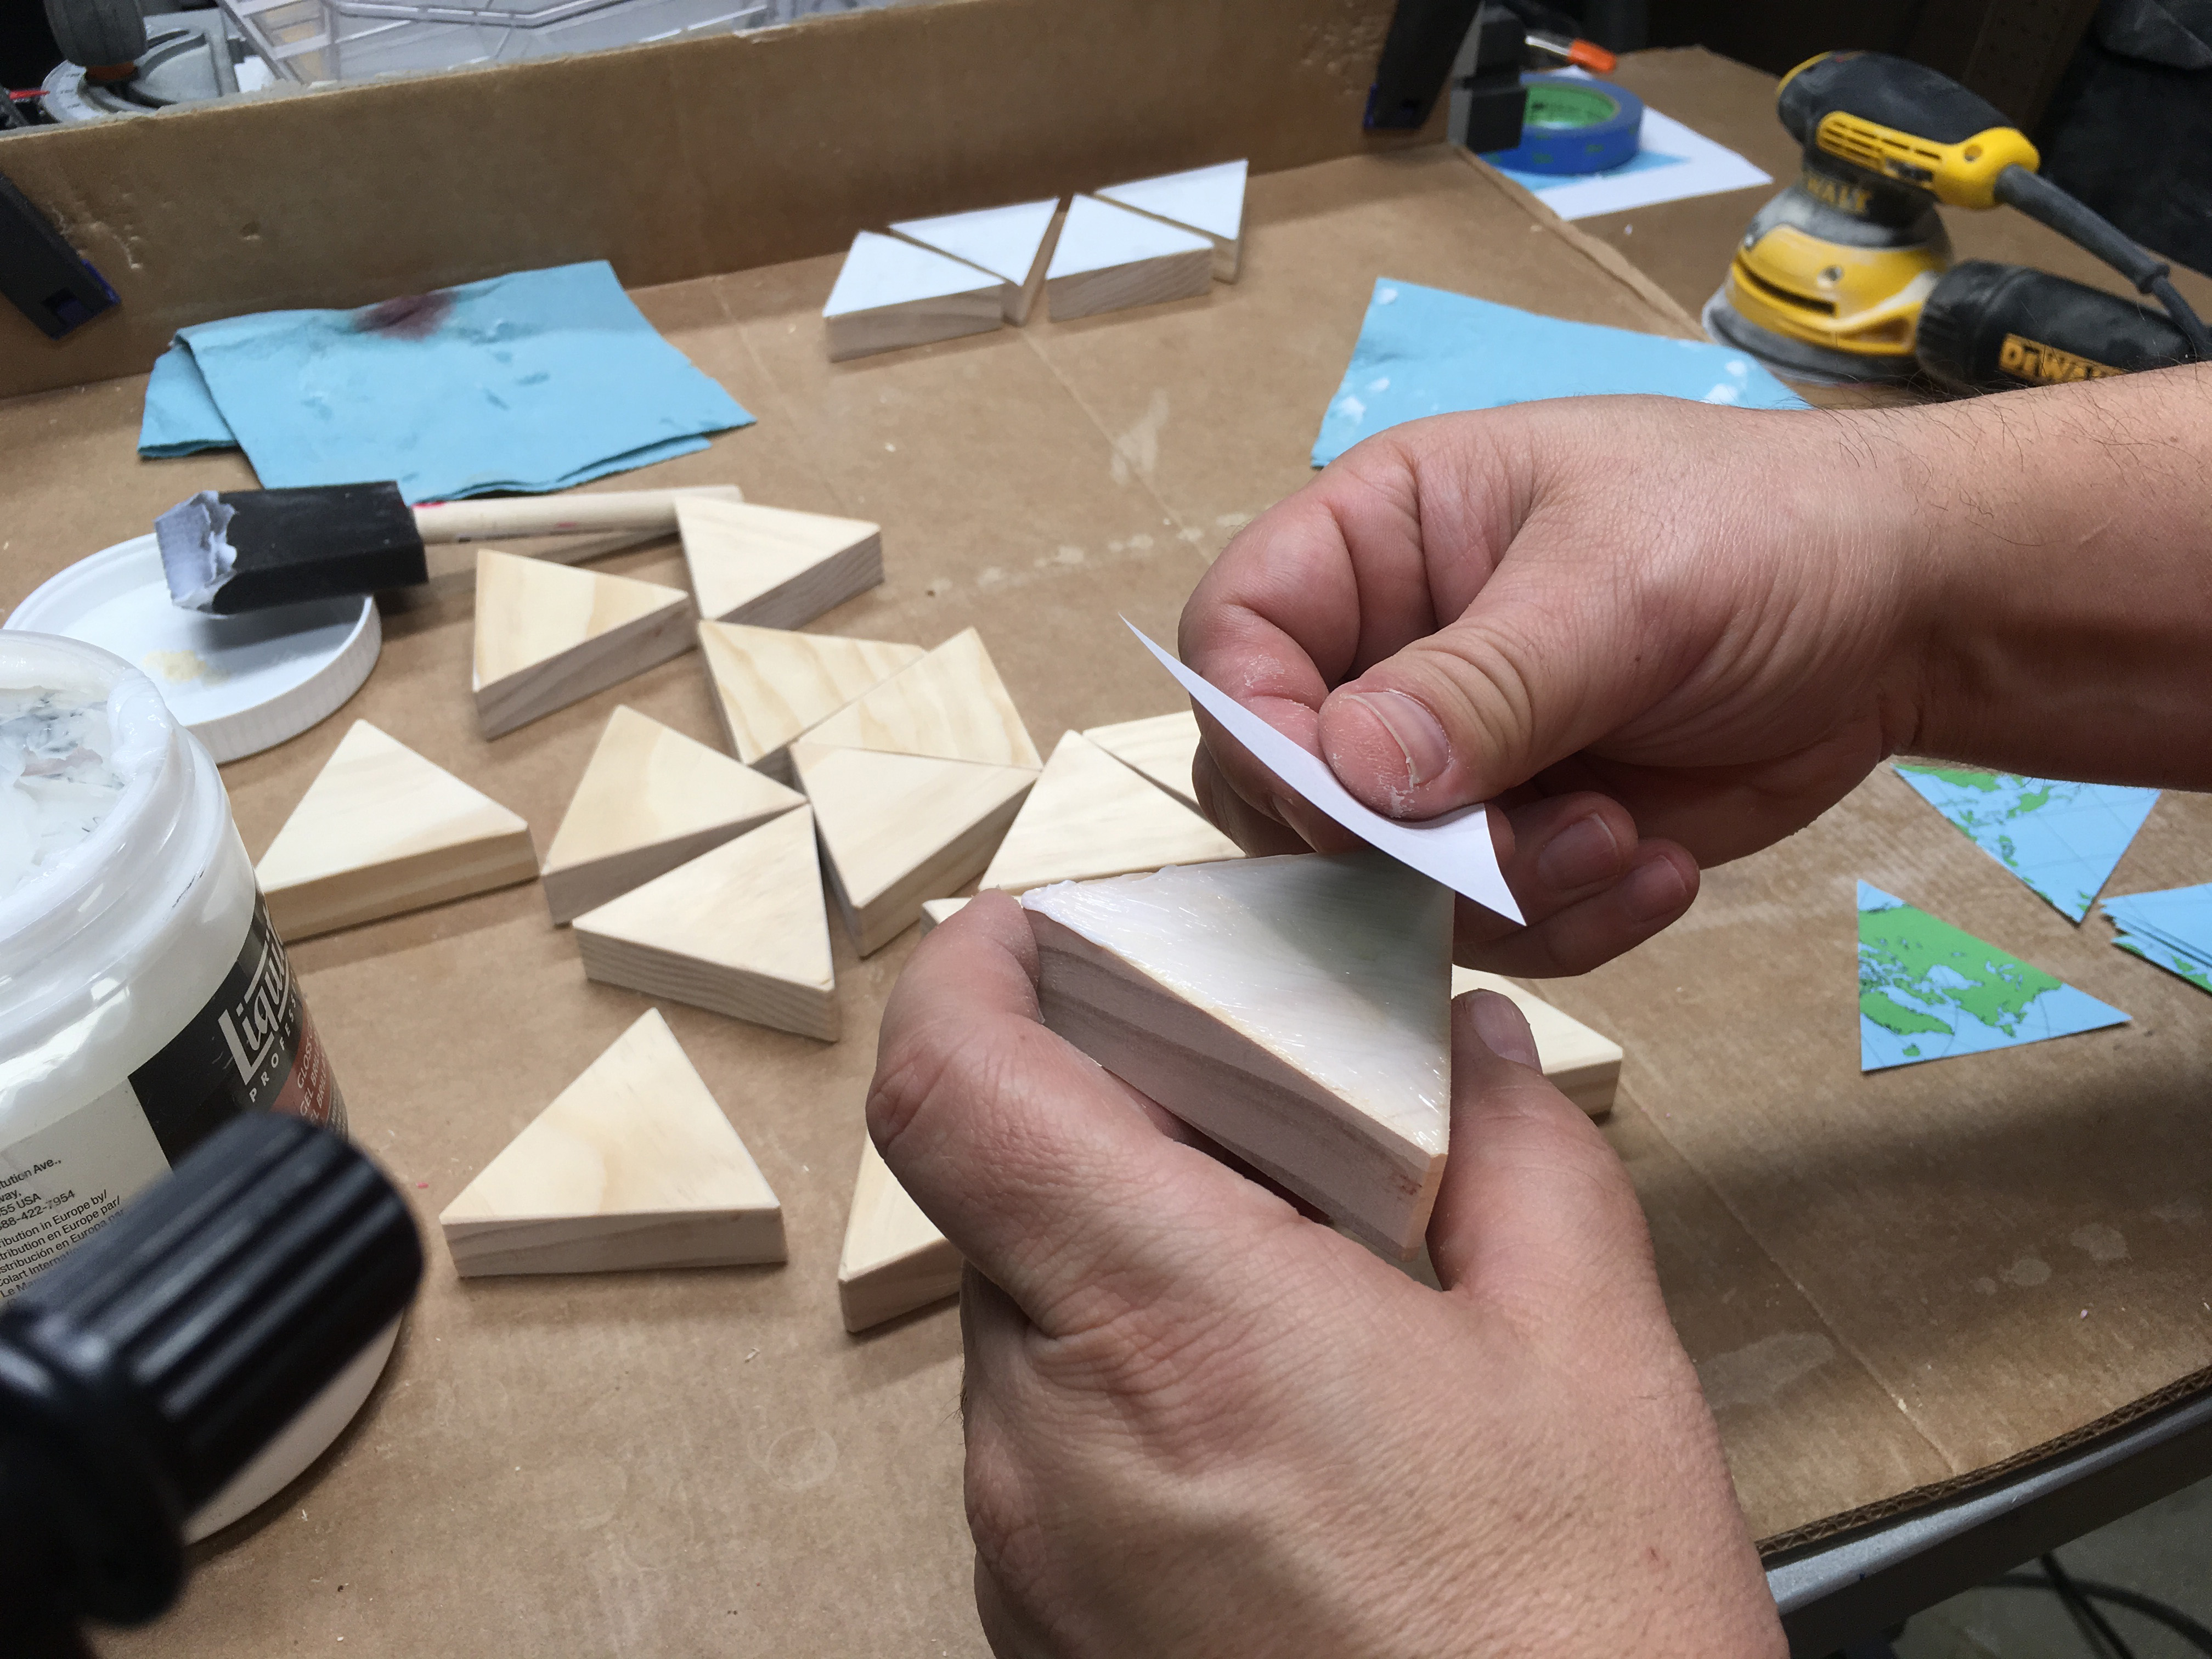
Wood Image Transfer, Part 2
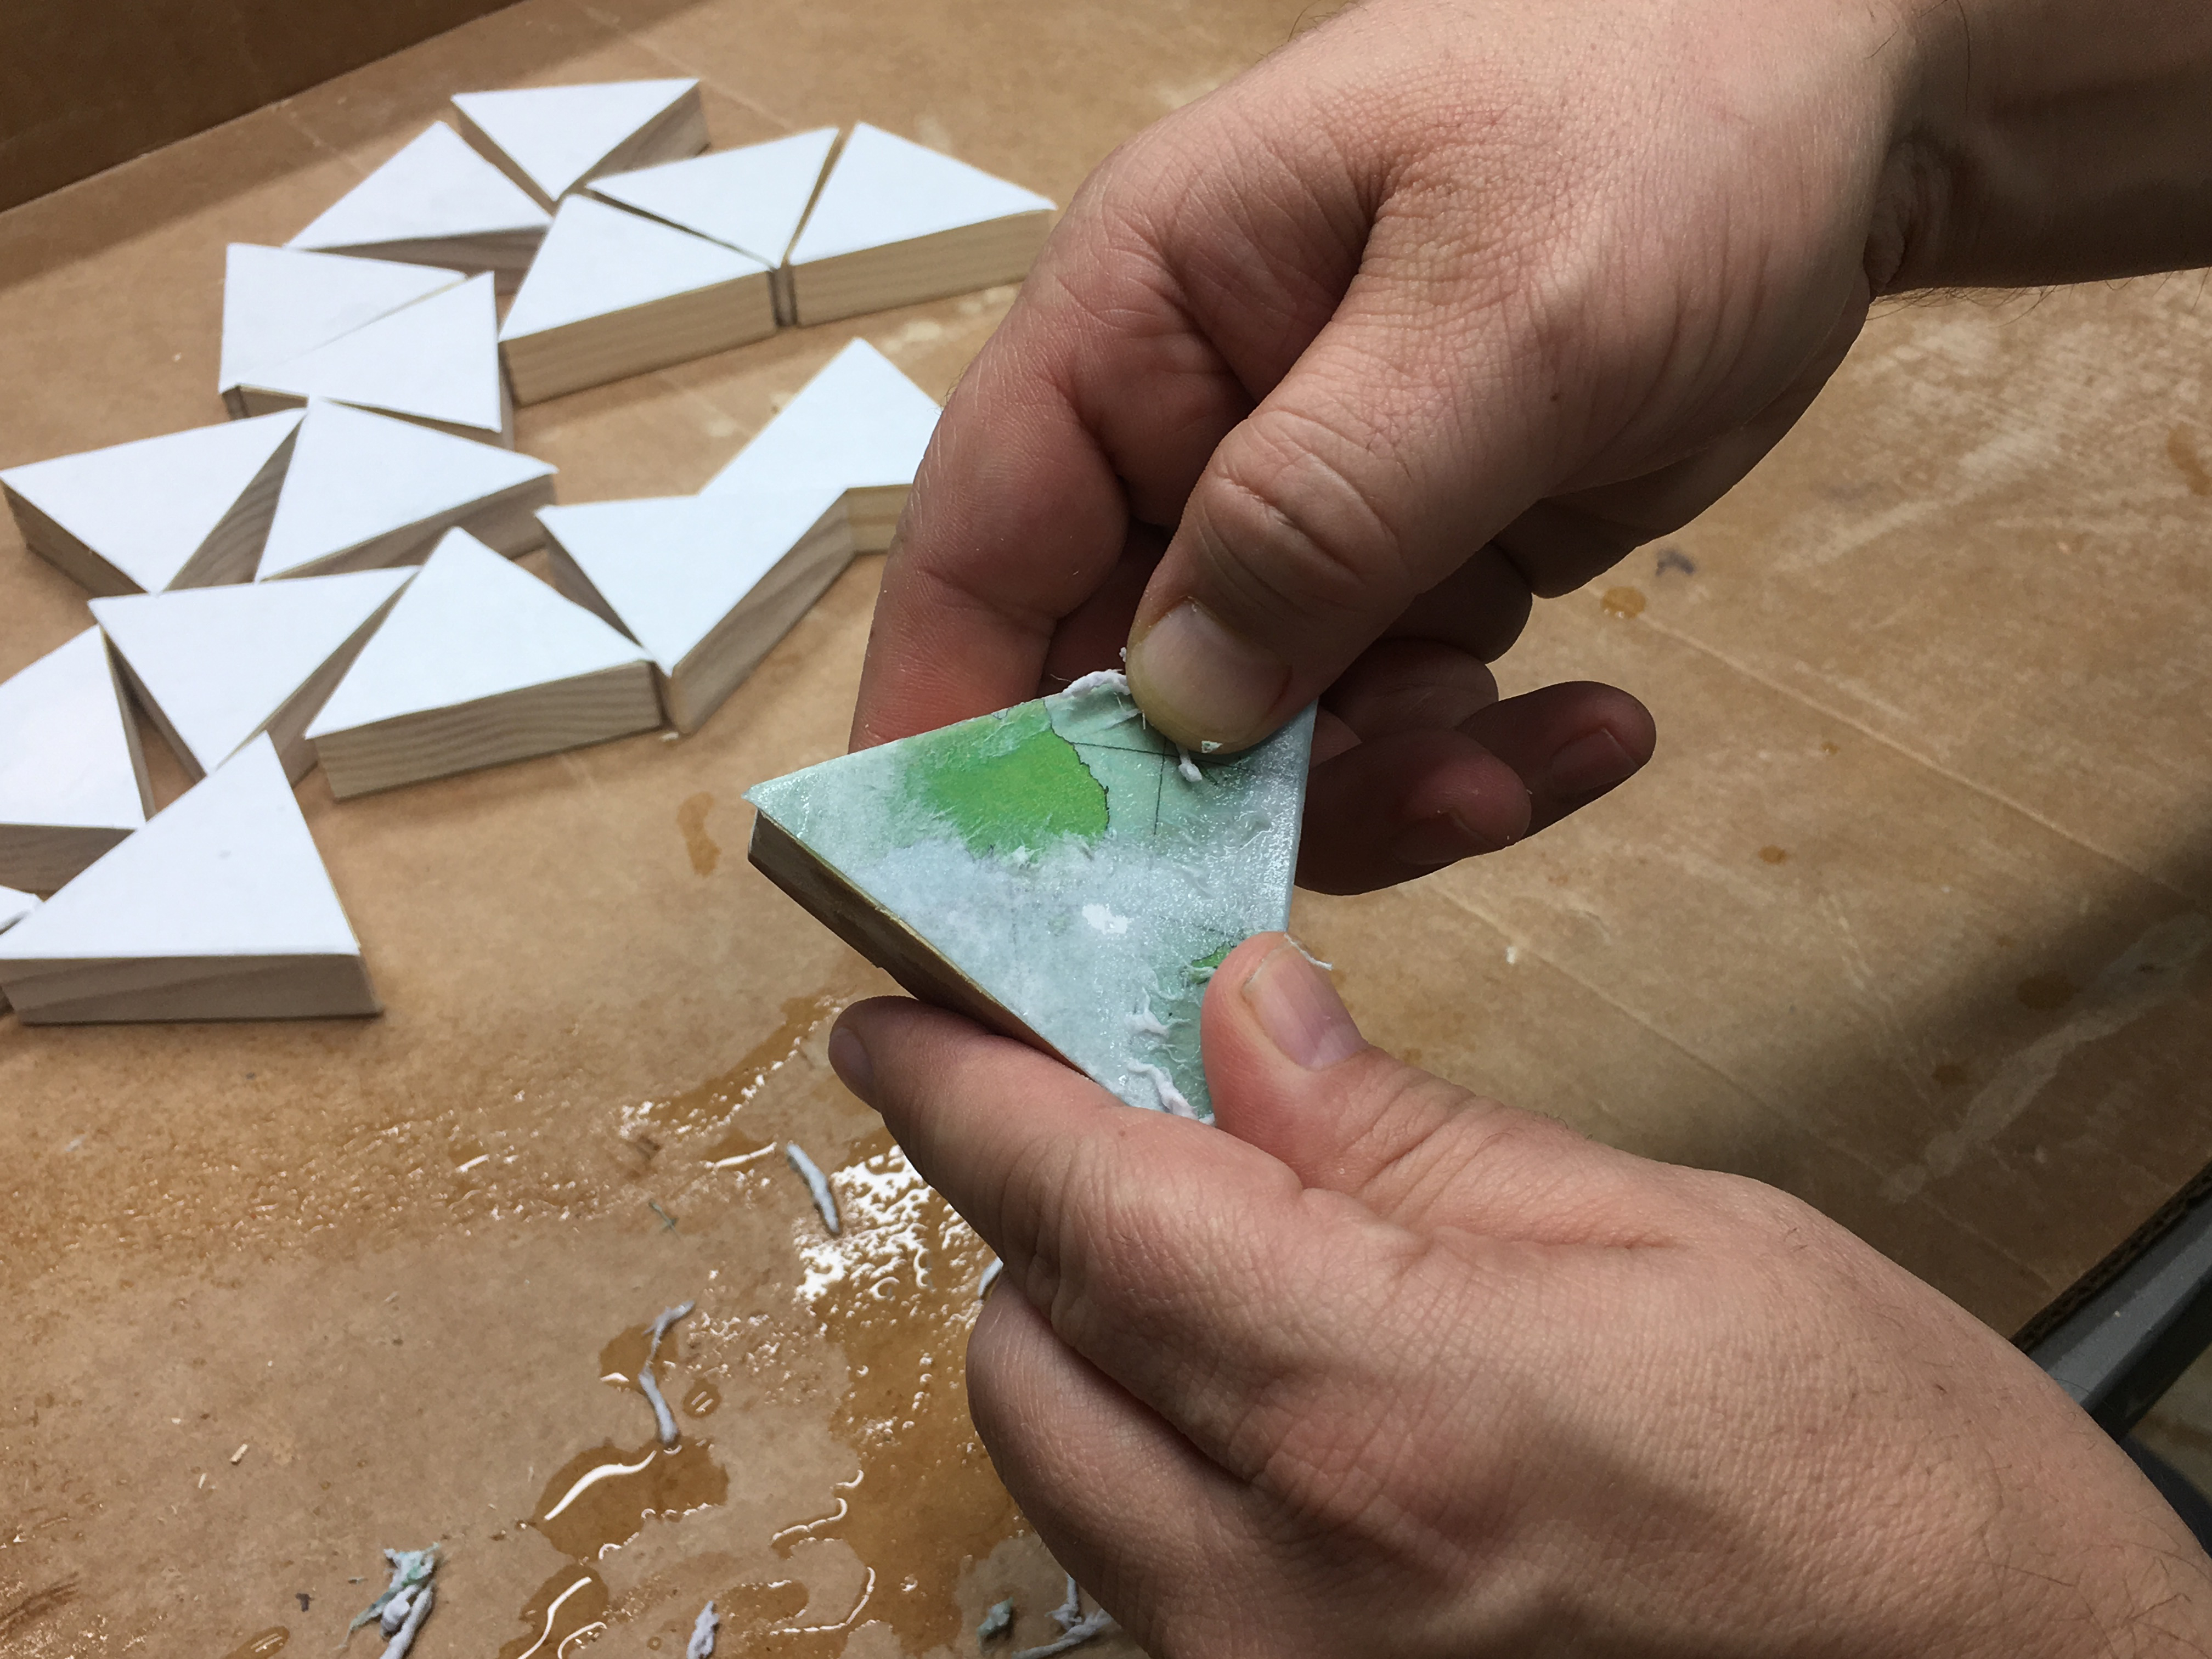
Once the gel medium has cured, you can remove the paper.
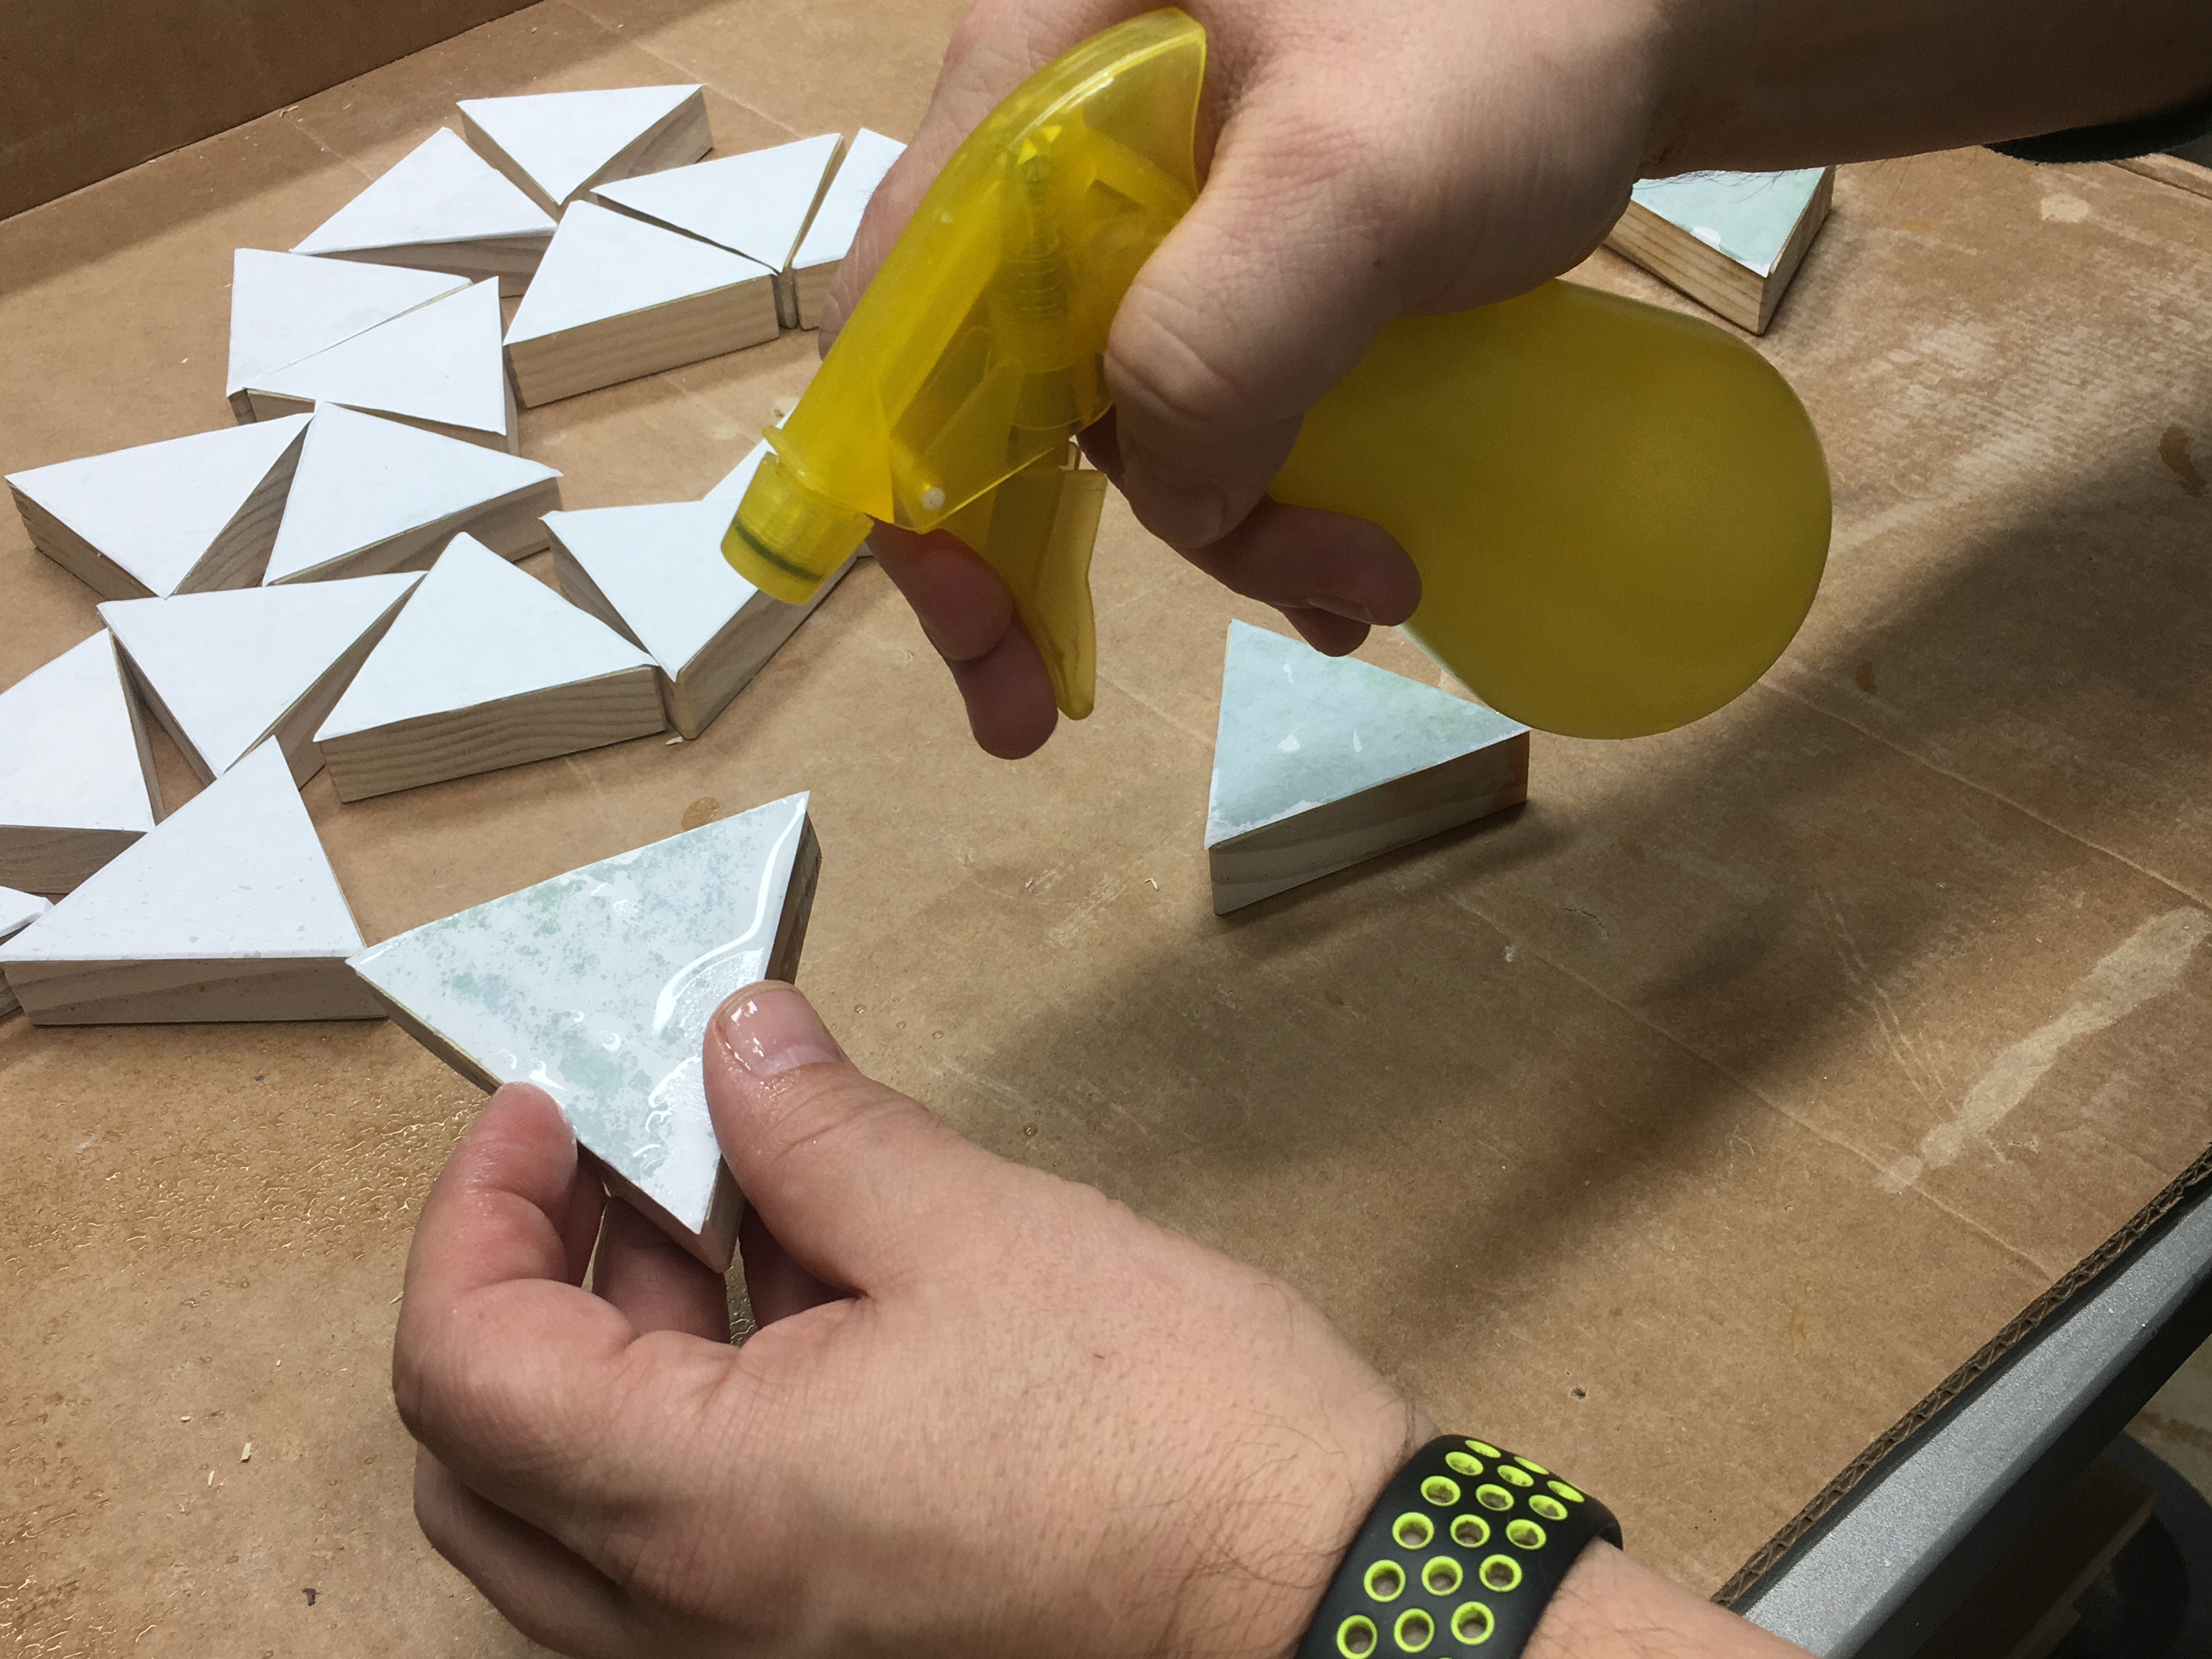
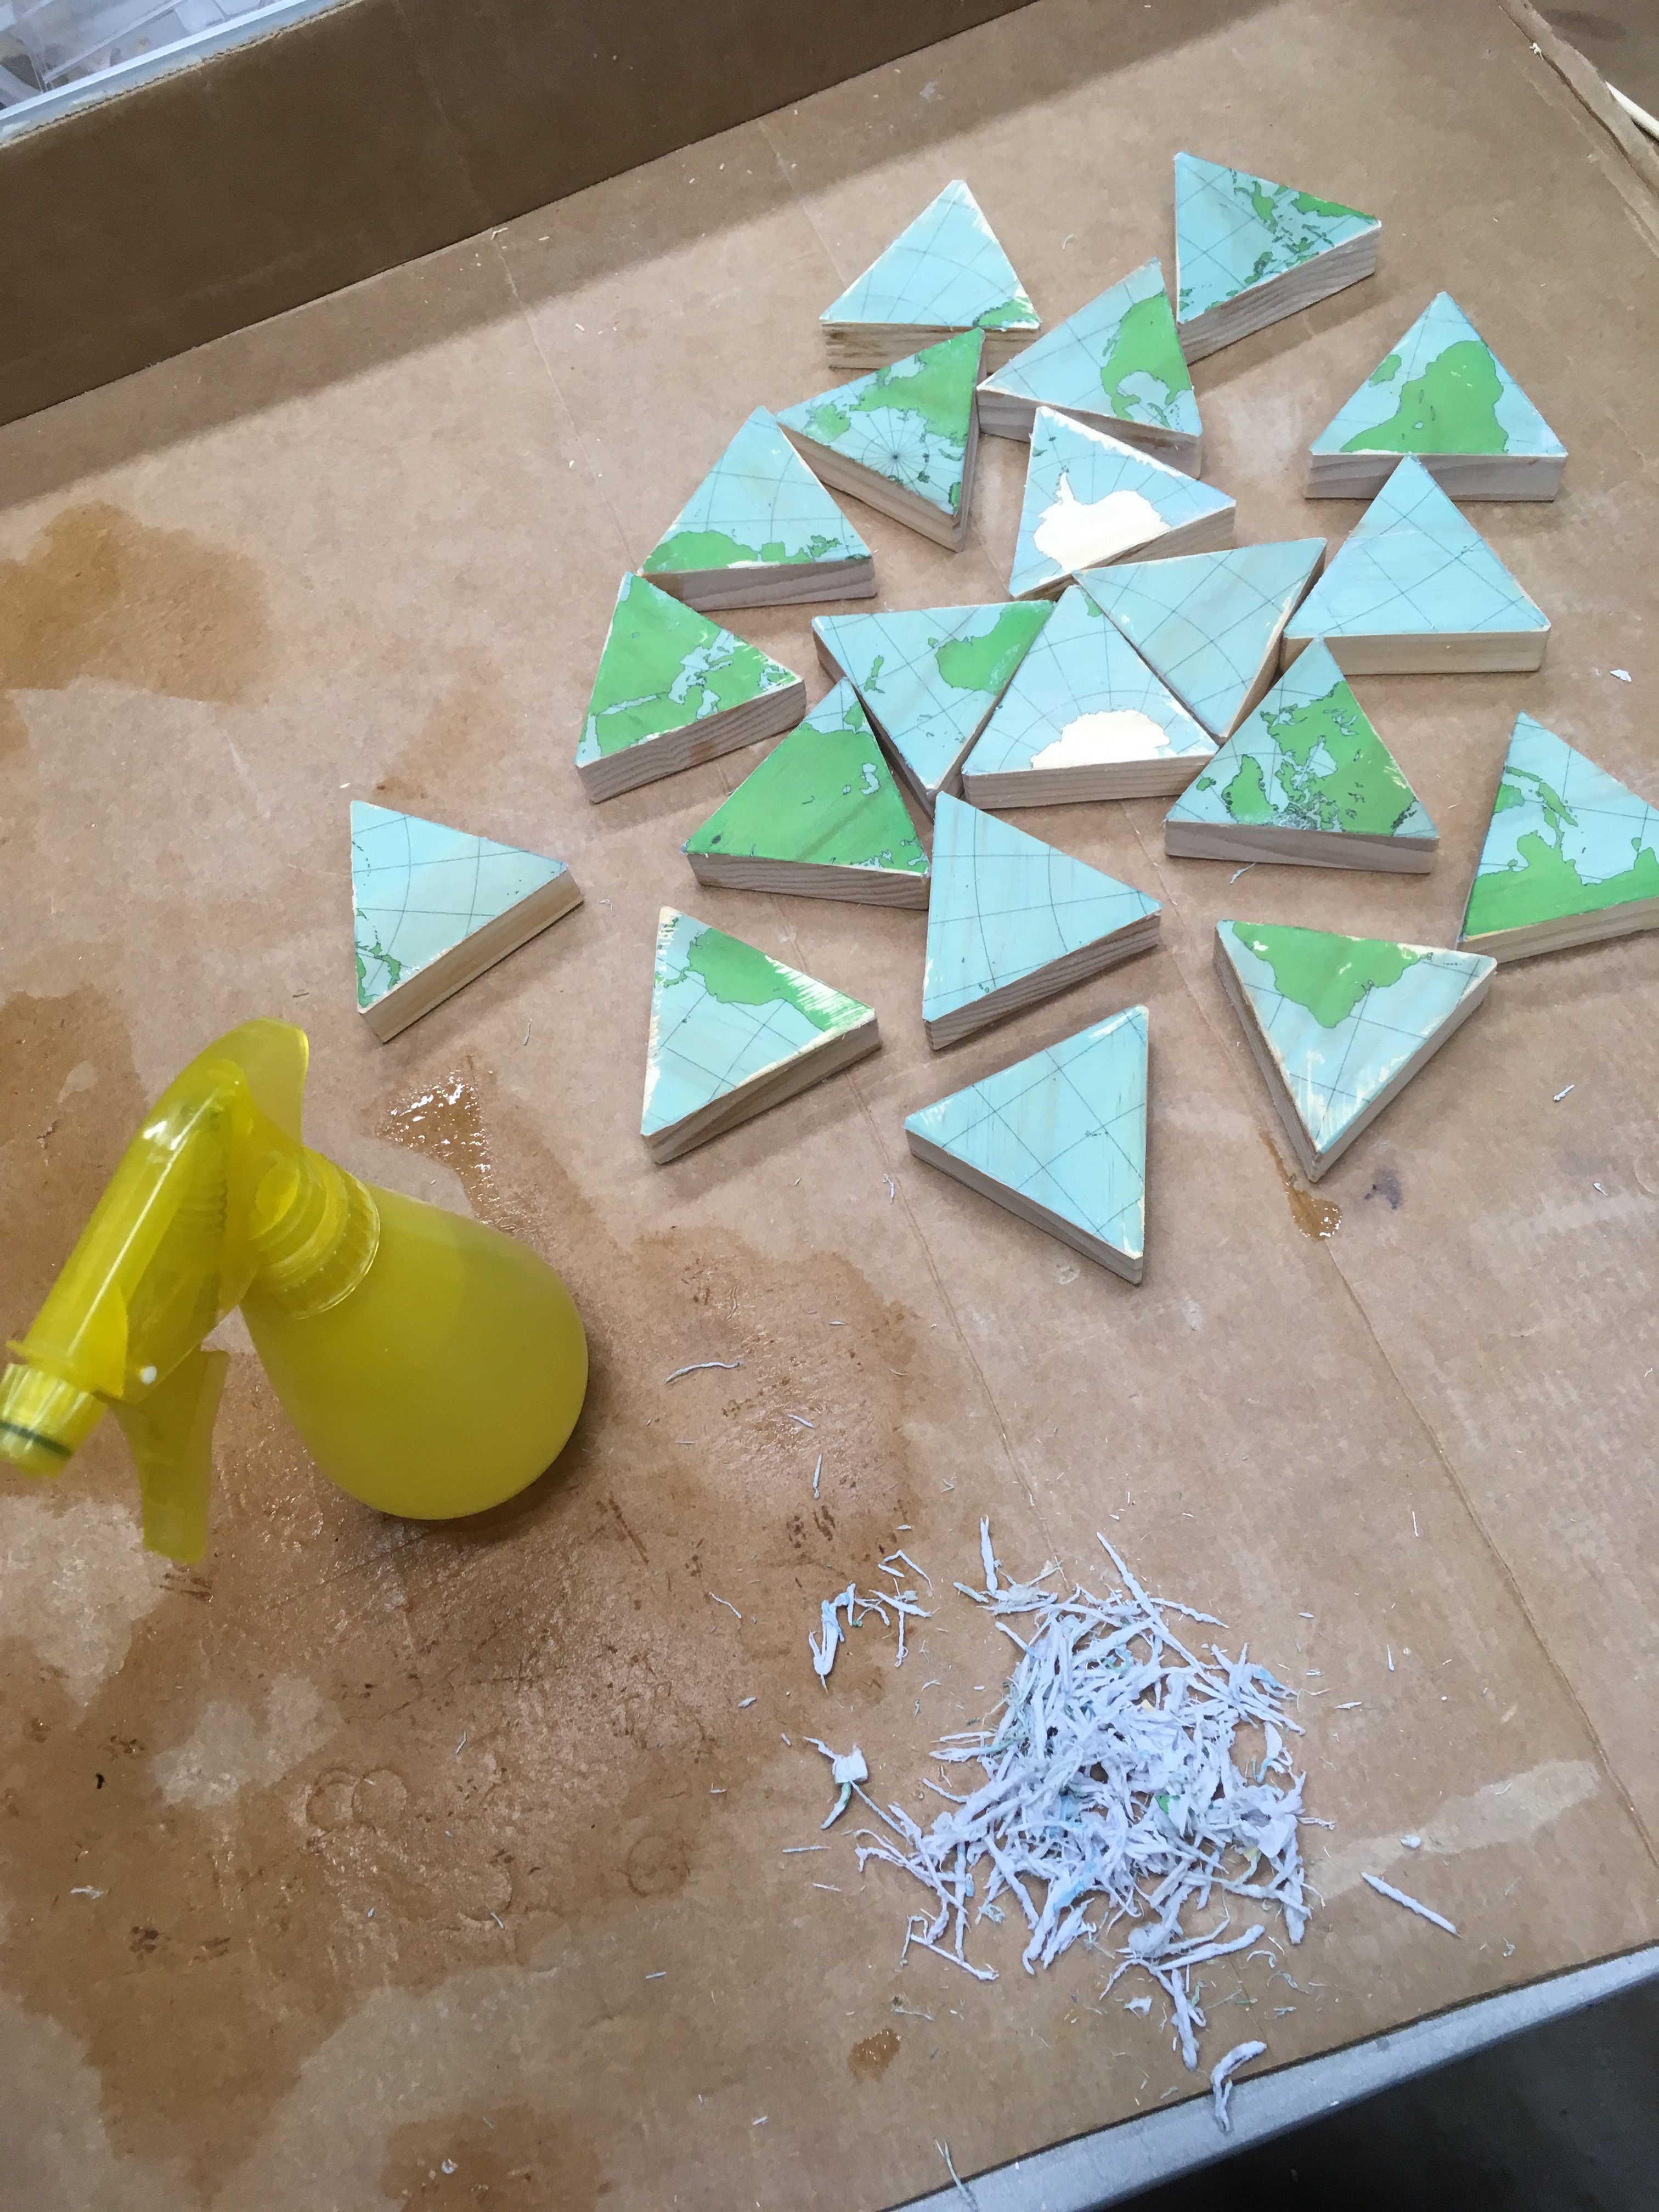
Spray the paper down with water; you'll see the map pattern as the paper becomes wet. Once the paper is wet, you can rub the excess paper away using your fingers or a rag. If the paper was pressed well against the wood, the image will completely transfer.
In reality, there are often places were the image does not perfectly transfer, but I tend to not worry about these -- the small missing bits give the maps a bit of a "distressed" look, which as a map collector I appreciate. :-)
Cardboard Tile Images

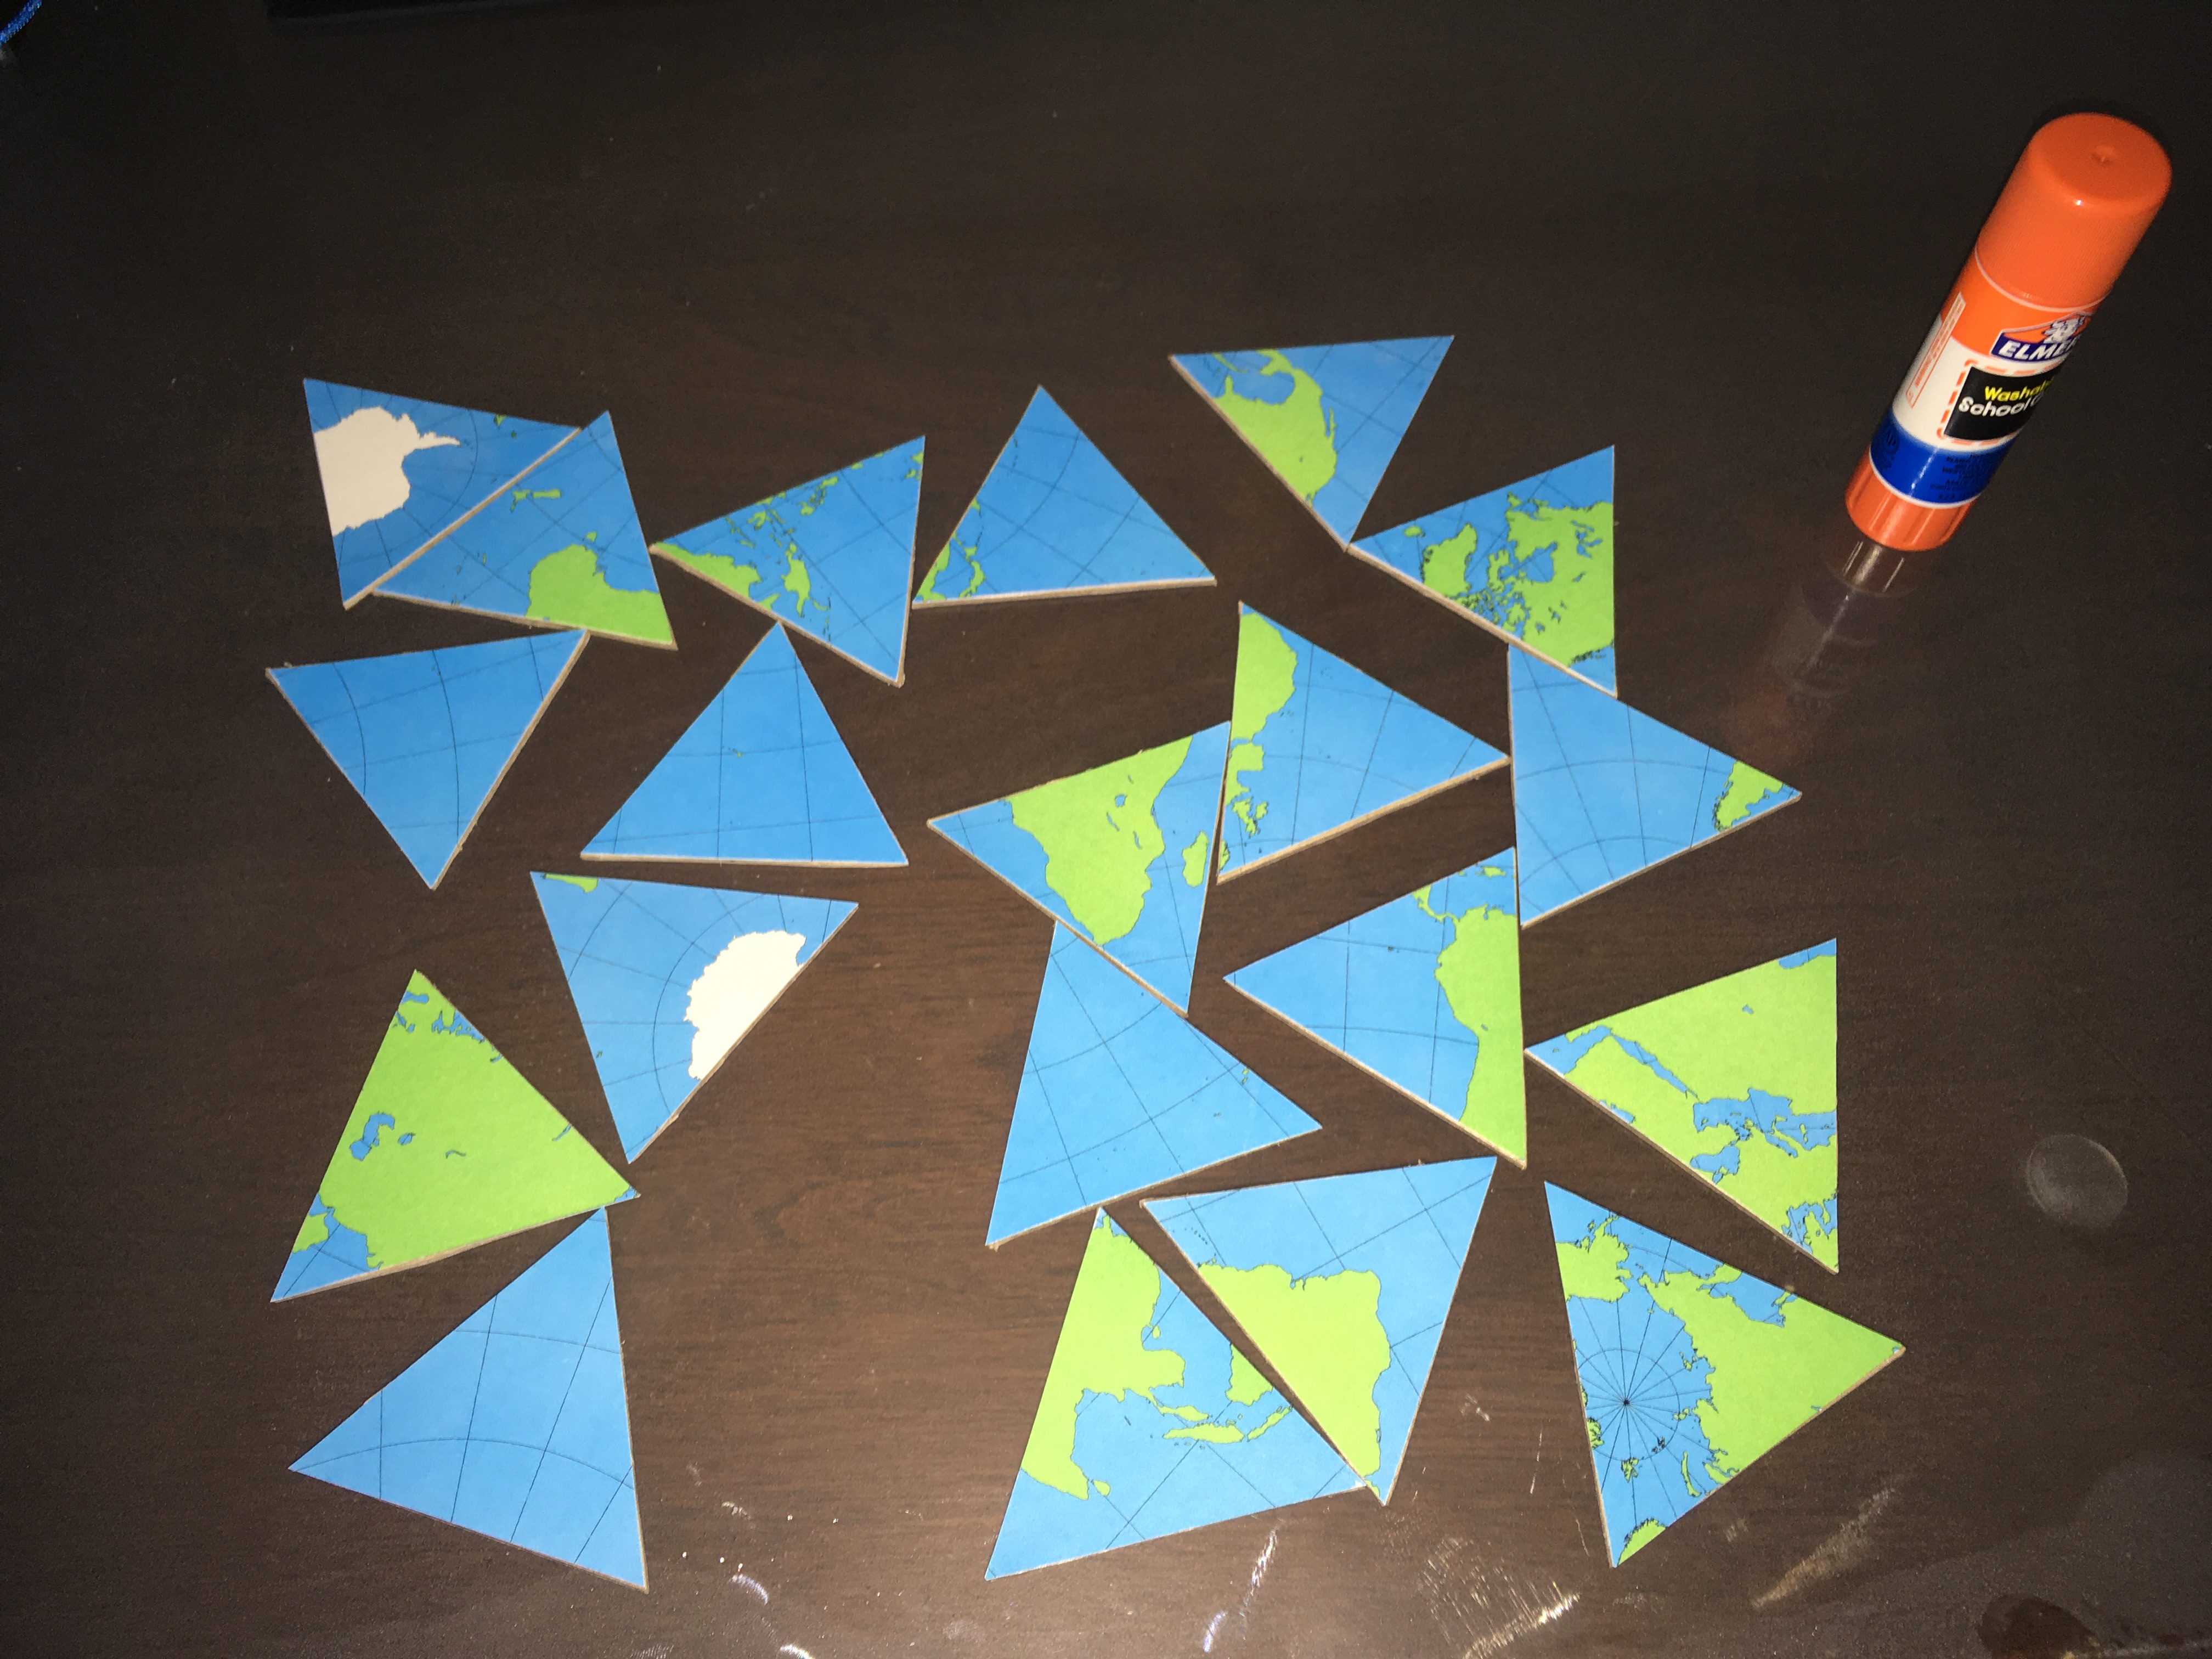
The image transfer for the Desk version of the tiles is easier and more straight-forward. Begin with a printed set of the normal tile images, and cut each one down to the edge of the tile.
Glue the printed tiles onto each of the cardboard tilebacks using a gluestick. Sit back and relax (while your gel medium on the wood tiles is spending a whole day curing!).
I think this set is the easiest to mass produce if you have need (for instance, if you’d like to use them in a classroom setting). If you need many sets, it is proably useful to conscript a group of friends to spend an afternoon with you cutting and gluing. :-)
Tile Edge Numbering
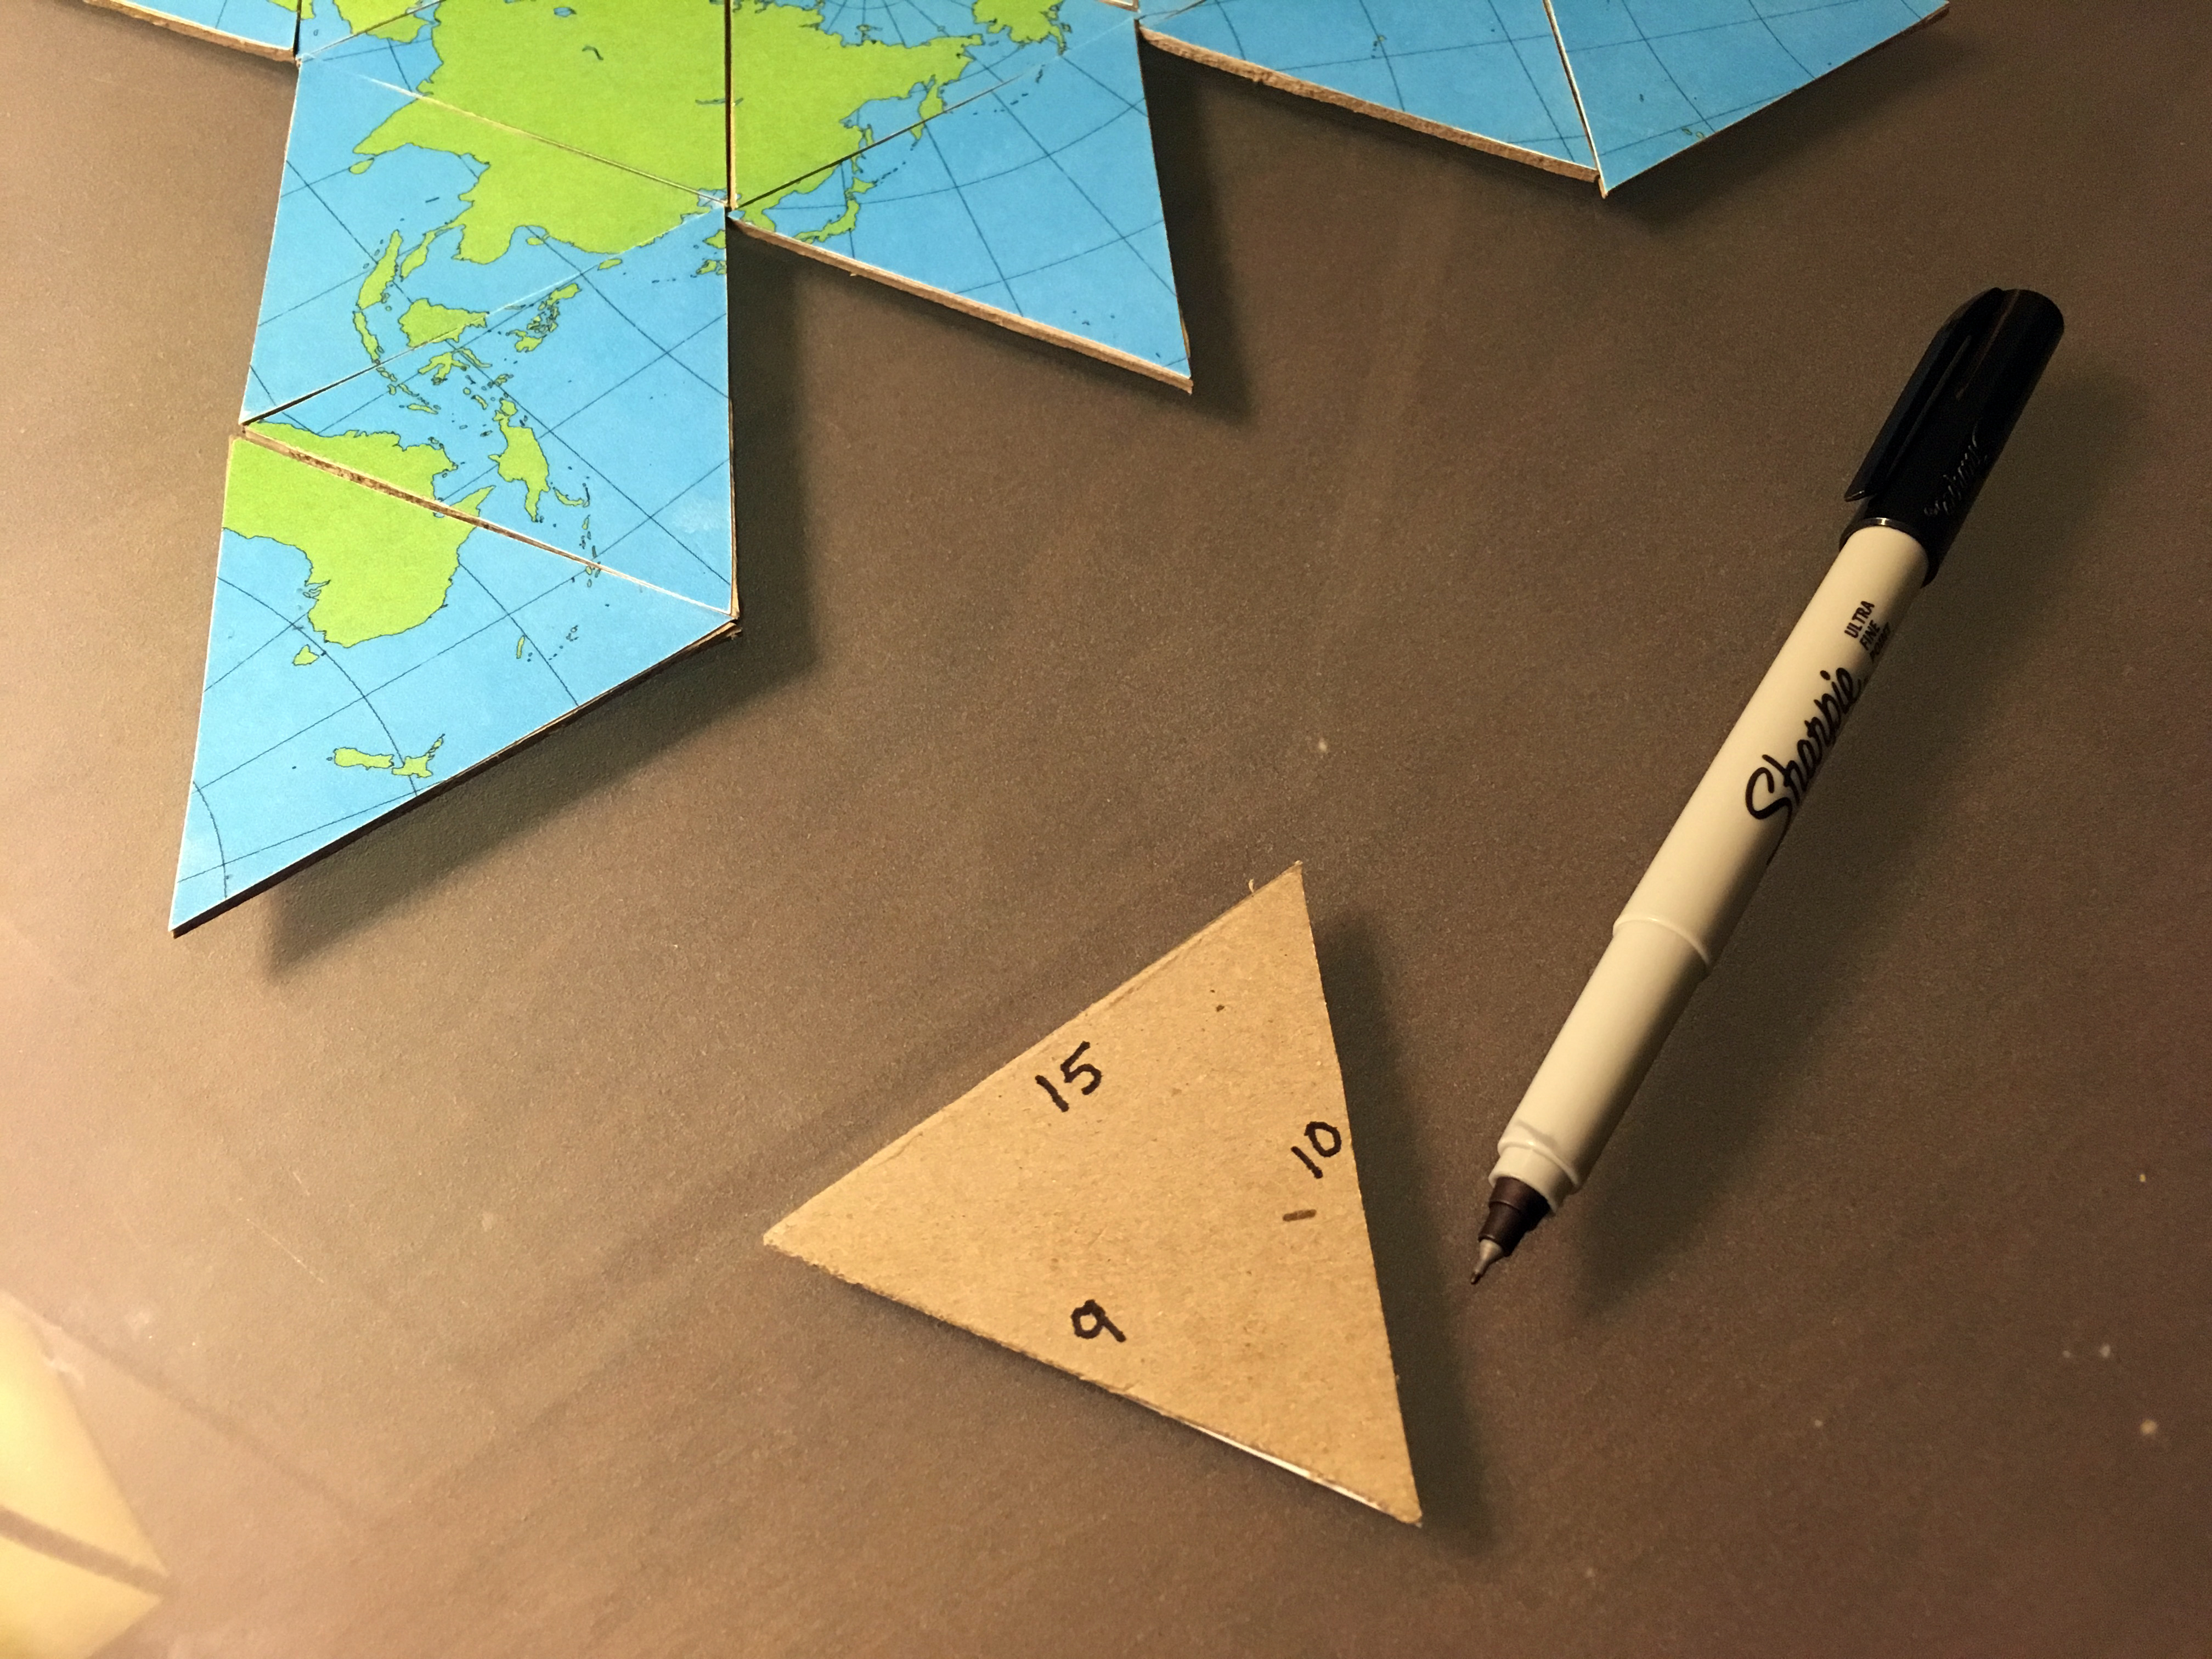
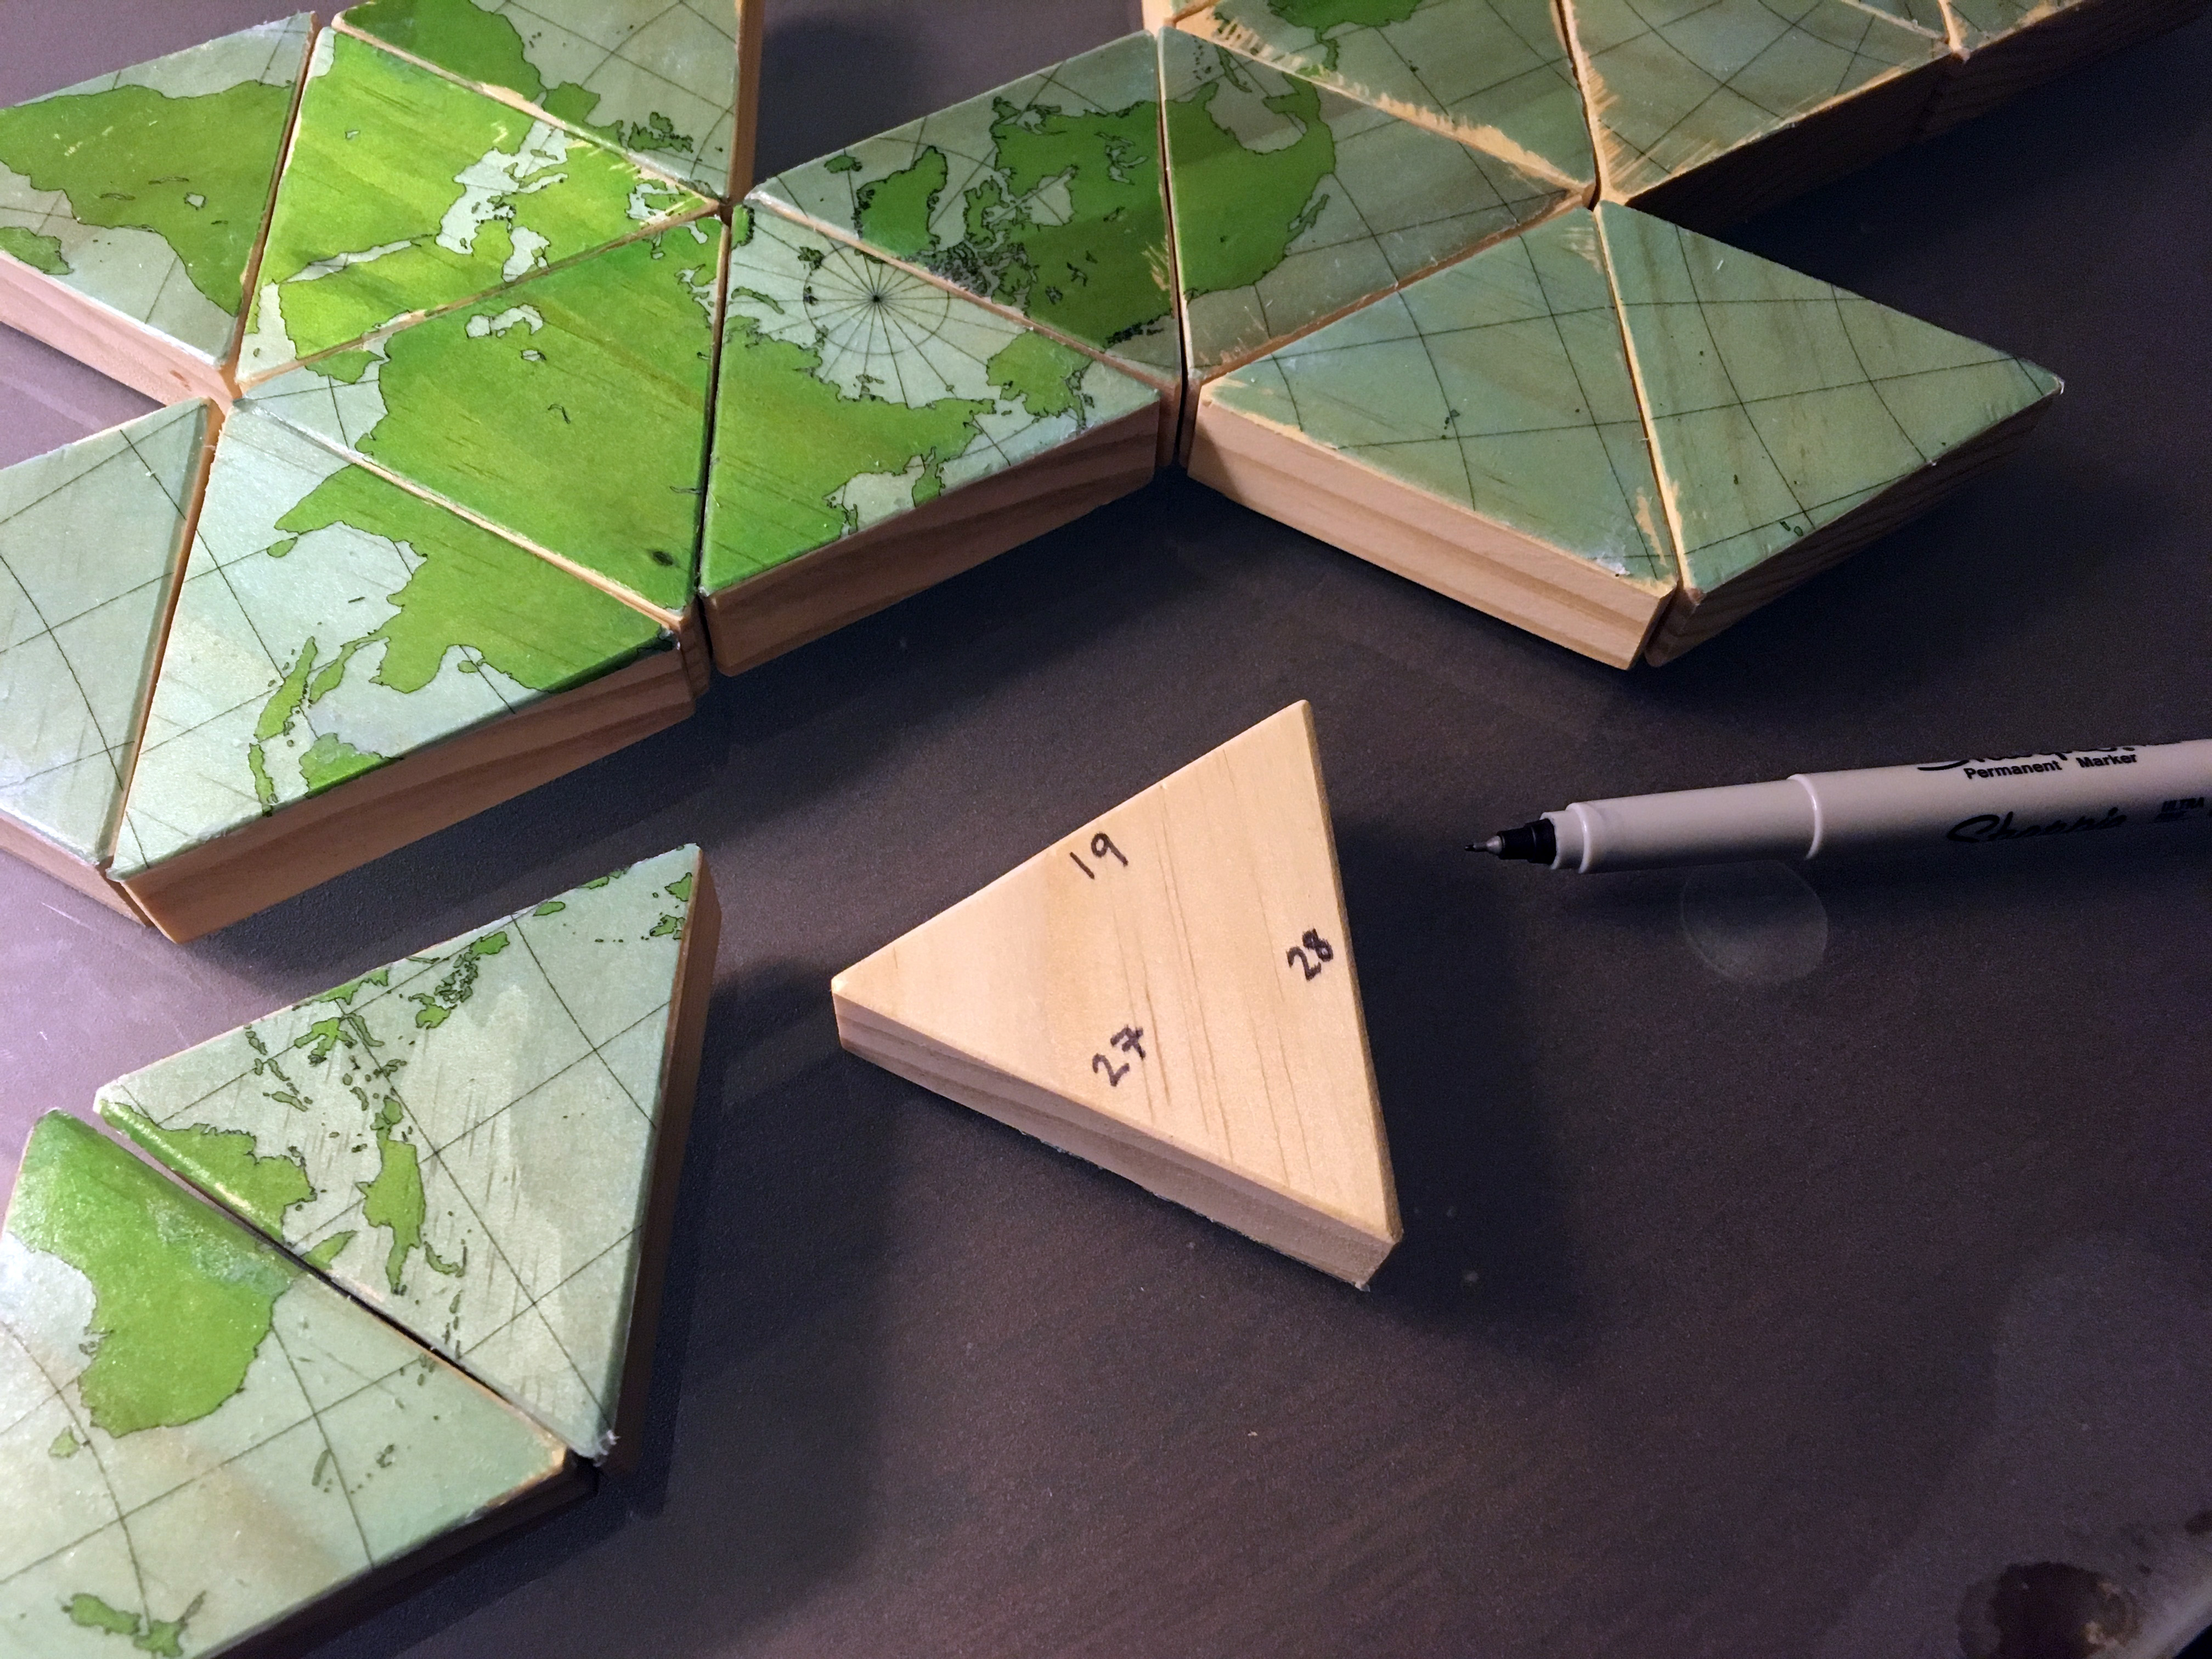
Once your tiles are done, you can begin using them to make maps of the Earth. Just looking at small triangular bits of the Earth is kind of like a puzzle. It is sometimes hard to work out which tiles go where to make a contiguous map. It is particularly difficult because there are several tiles which are almost entirely ocean, and their proper position and orientation have to be worked out from the shape of the lines of latitude and longitude.
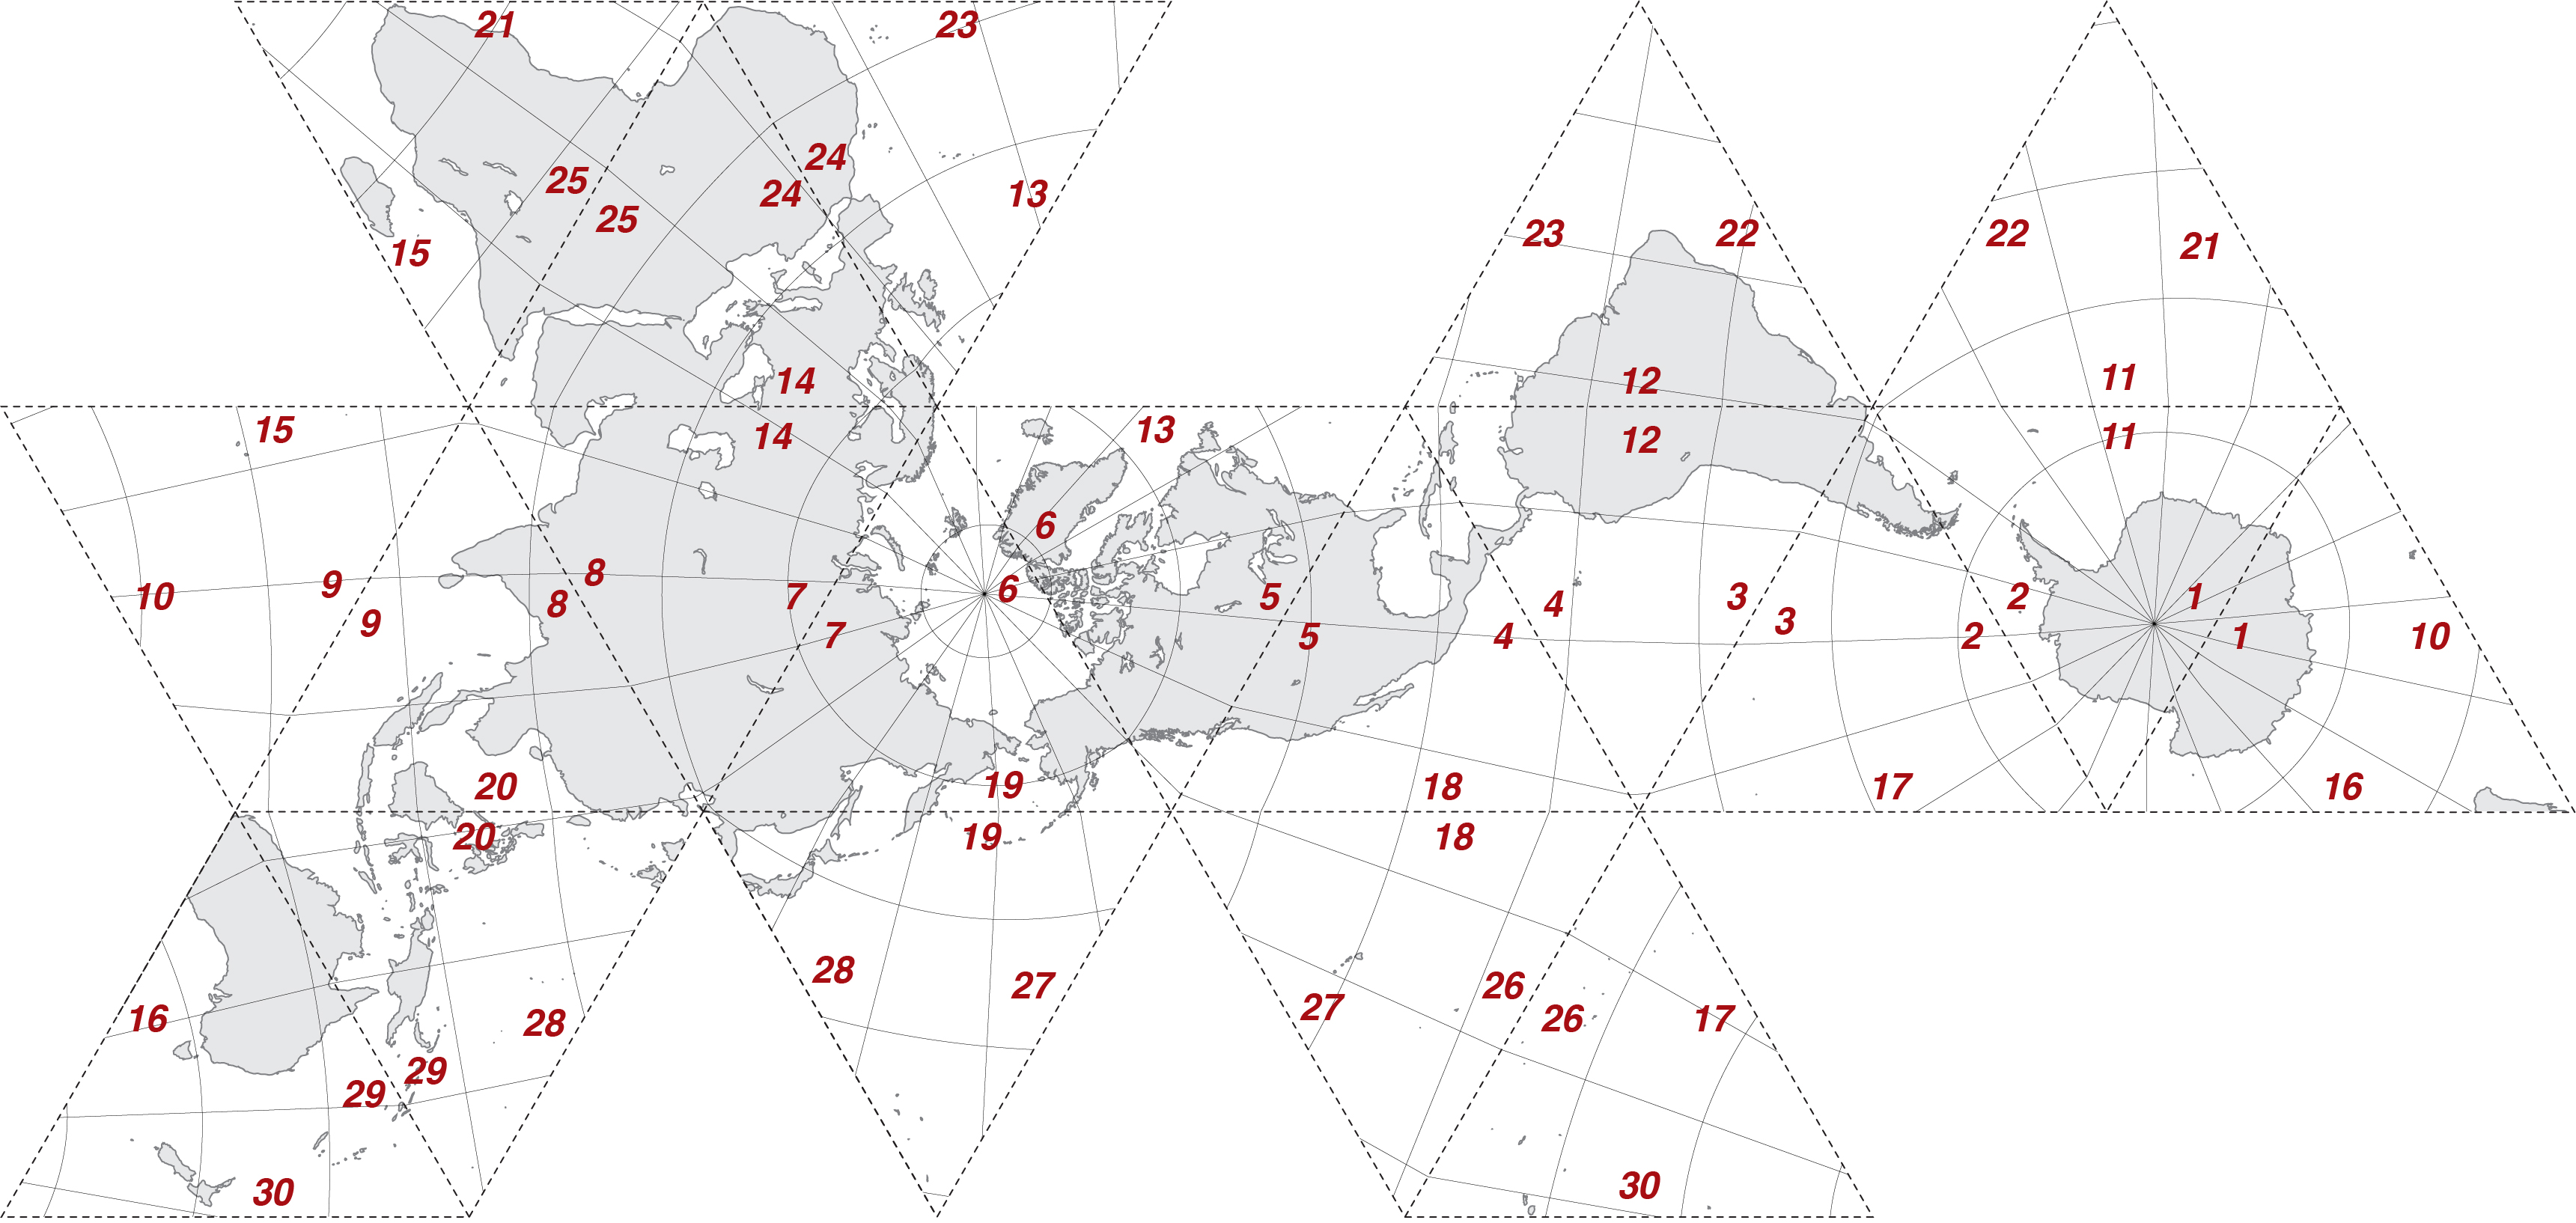
To provide a bit of guidance for mapwork, I label the sides of each tile along the edges on the bottom (table side) of each tile. Adjacent tiles have matching numbers on each edge. There are 30 edges on an icosohedron, so there are 30 pairs of numbers.
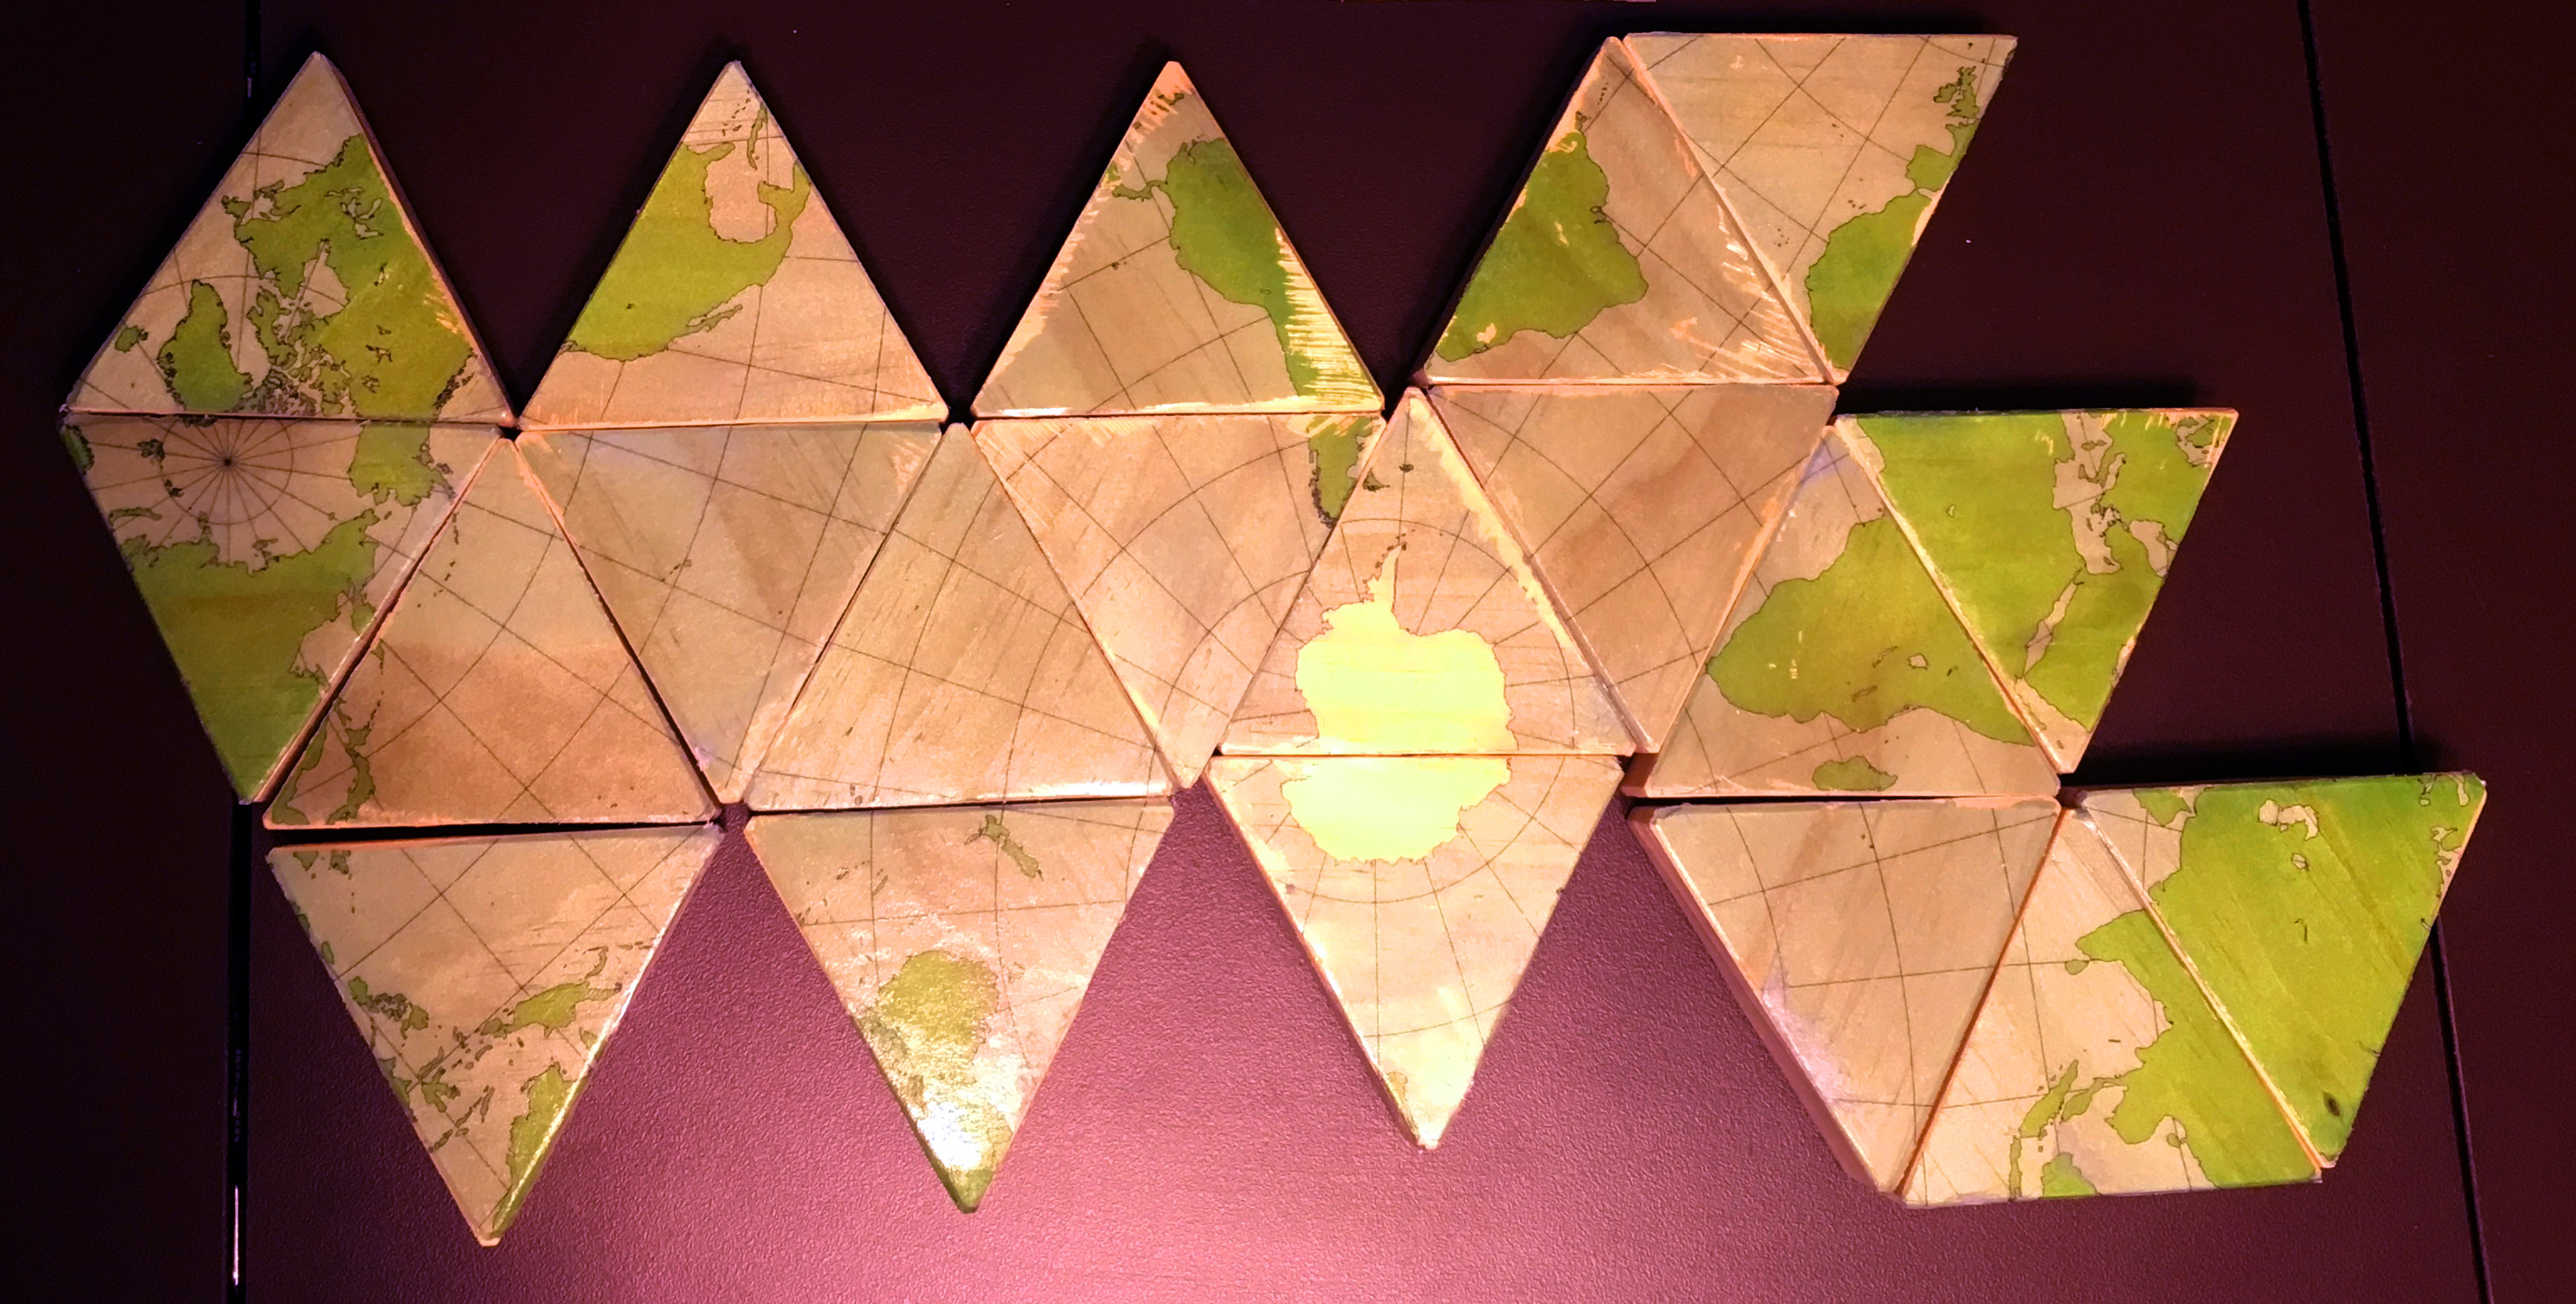
The first image above shows the One World Island, with the numbering scheme I use for my edges. There is no standard nor preferred way to do this, so do not feel constrained by my scheme outlined here!
Taking a Sharpie, I write on the underside of each tile the edge number from my diagram.
Be careful! When you flip a tile over, its edges are reversed compared to the image shown above, so be careful to mark the correct edges!
I could have put the numbers on the sides of the Coffee Table tiles, but then the marks would be visible all the time, and I wanted to have natural looking wood pieces.
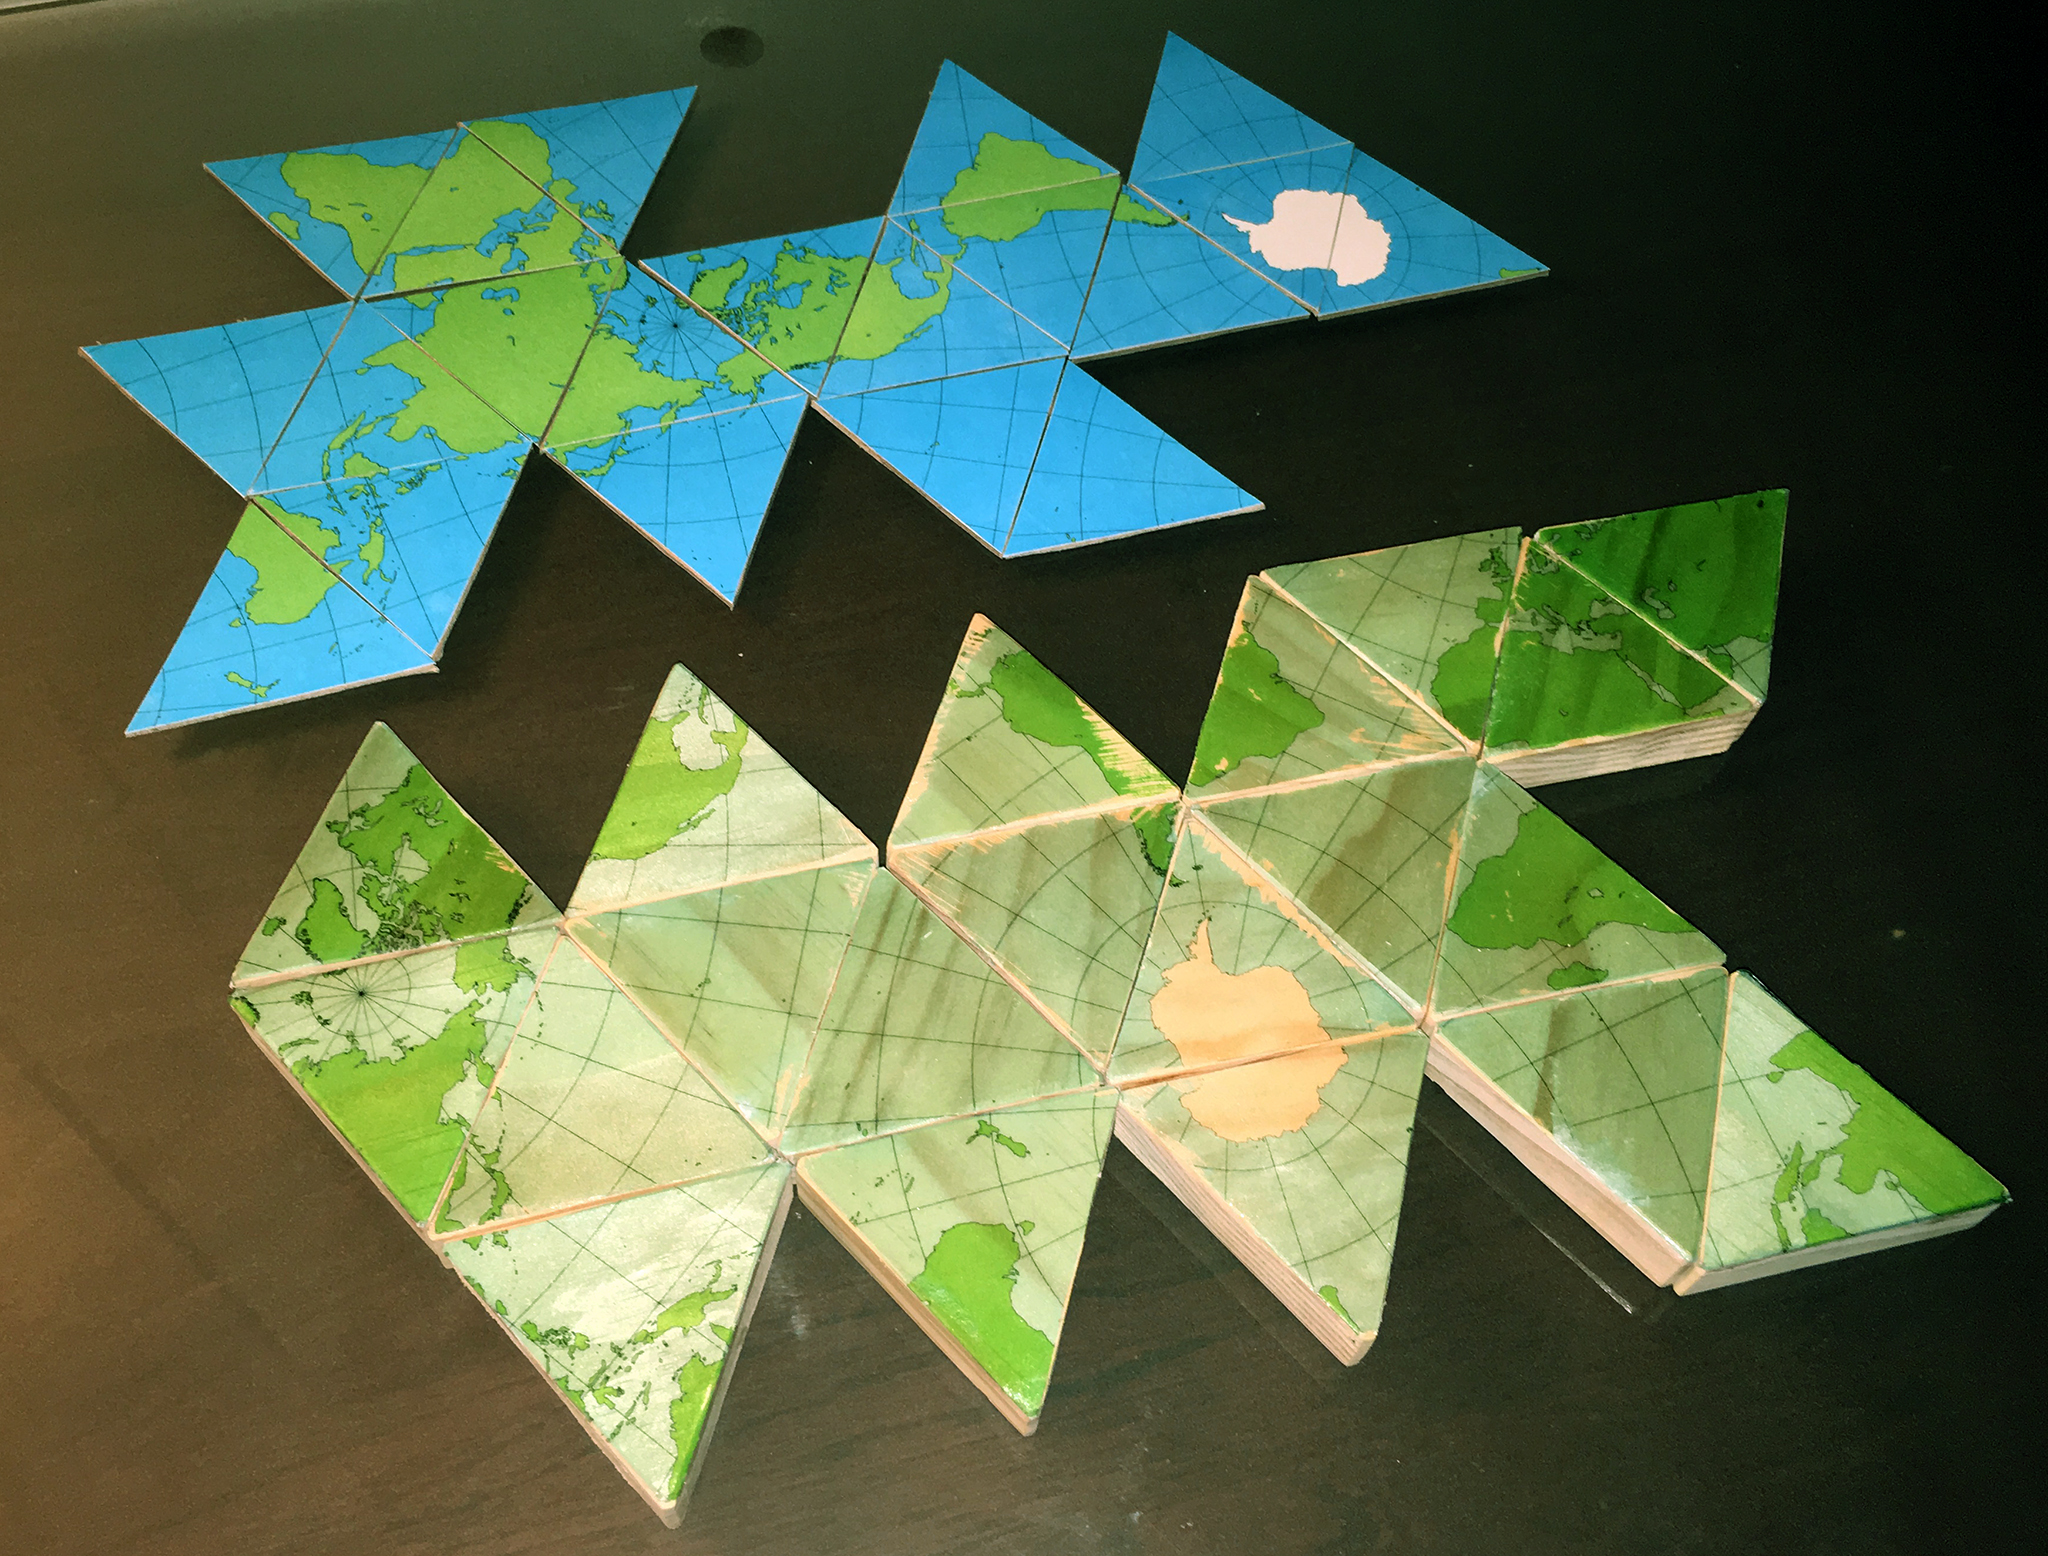
Example Tilings
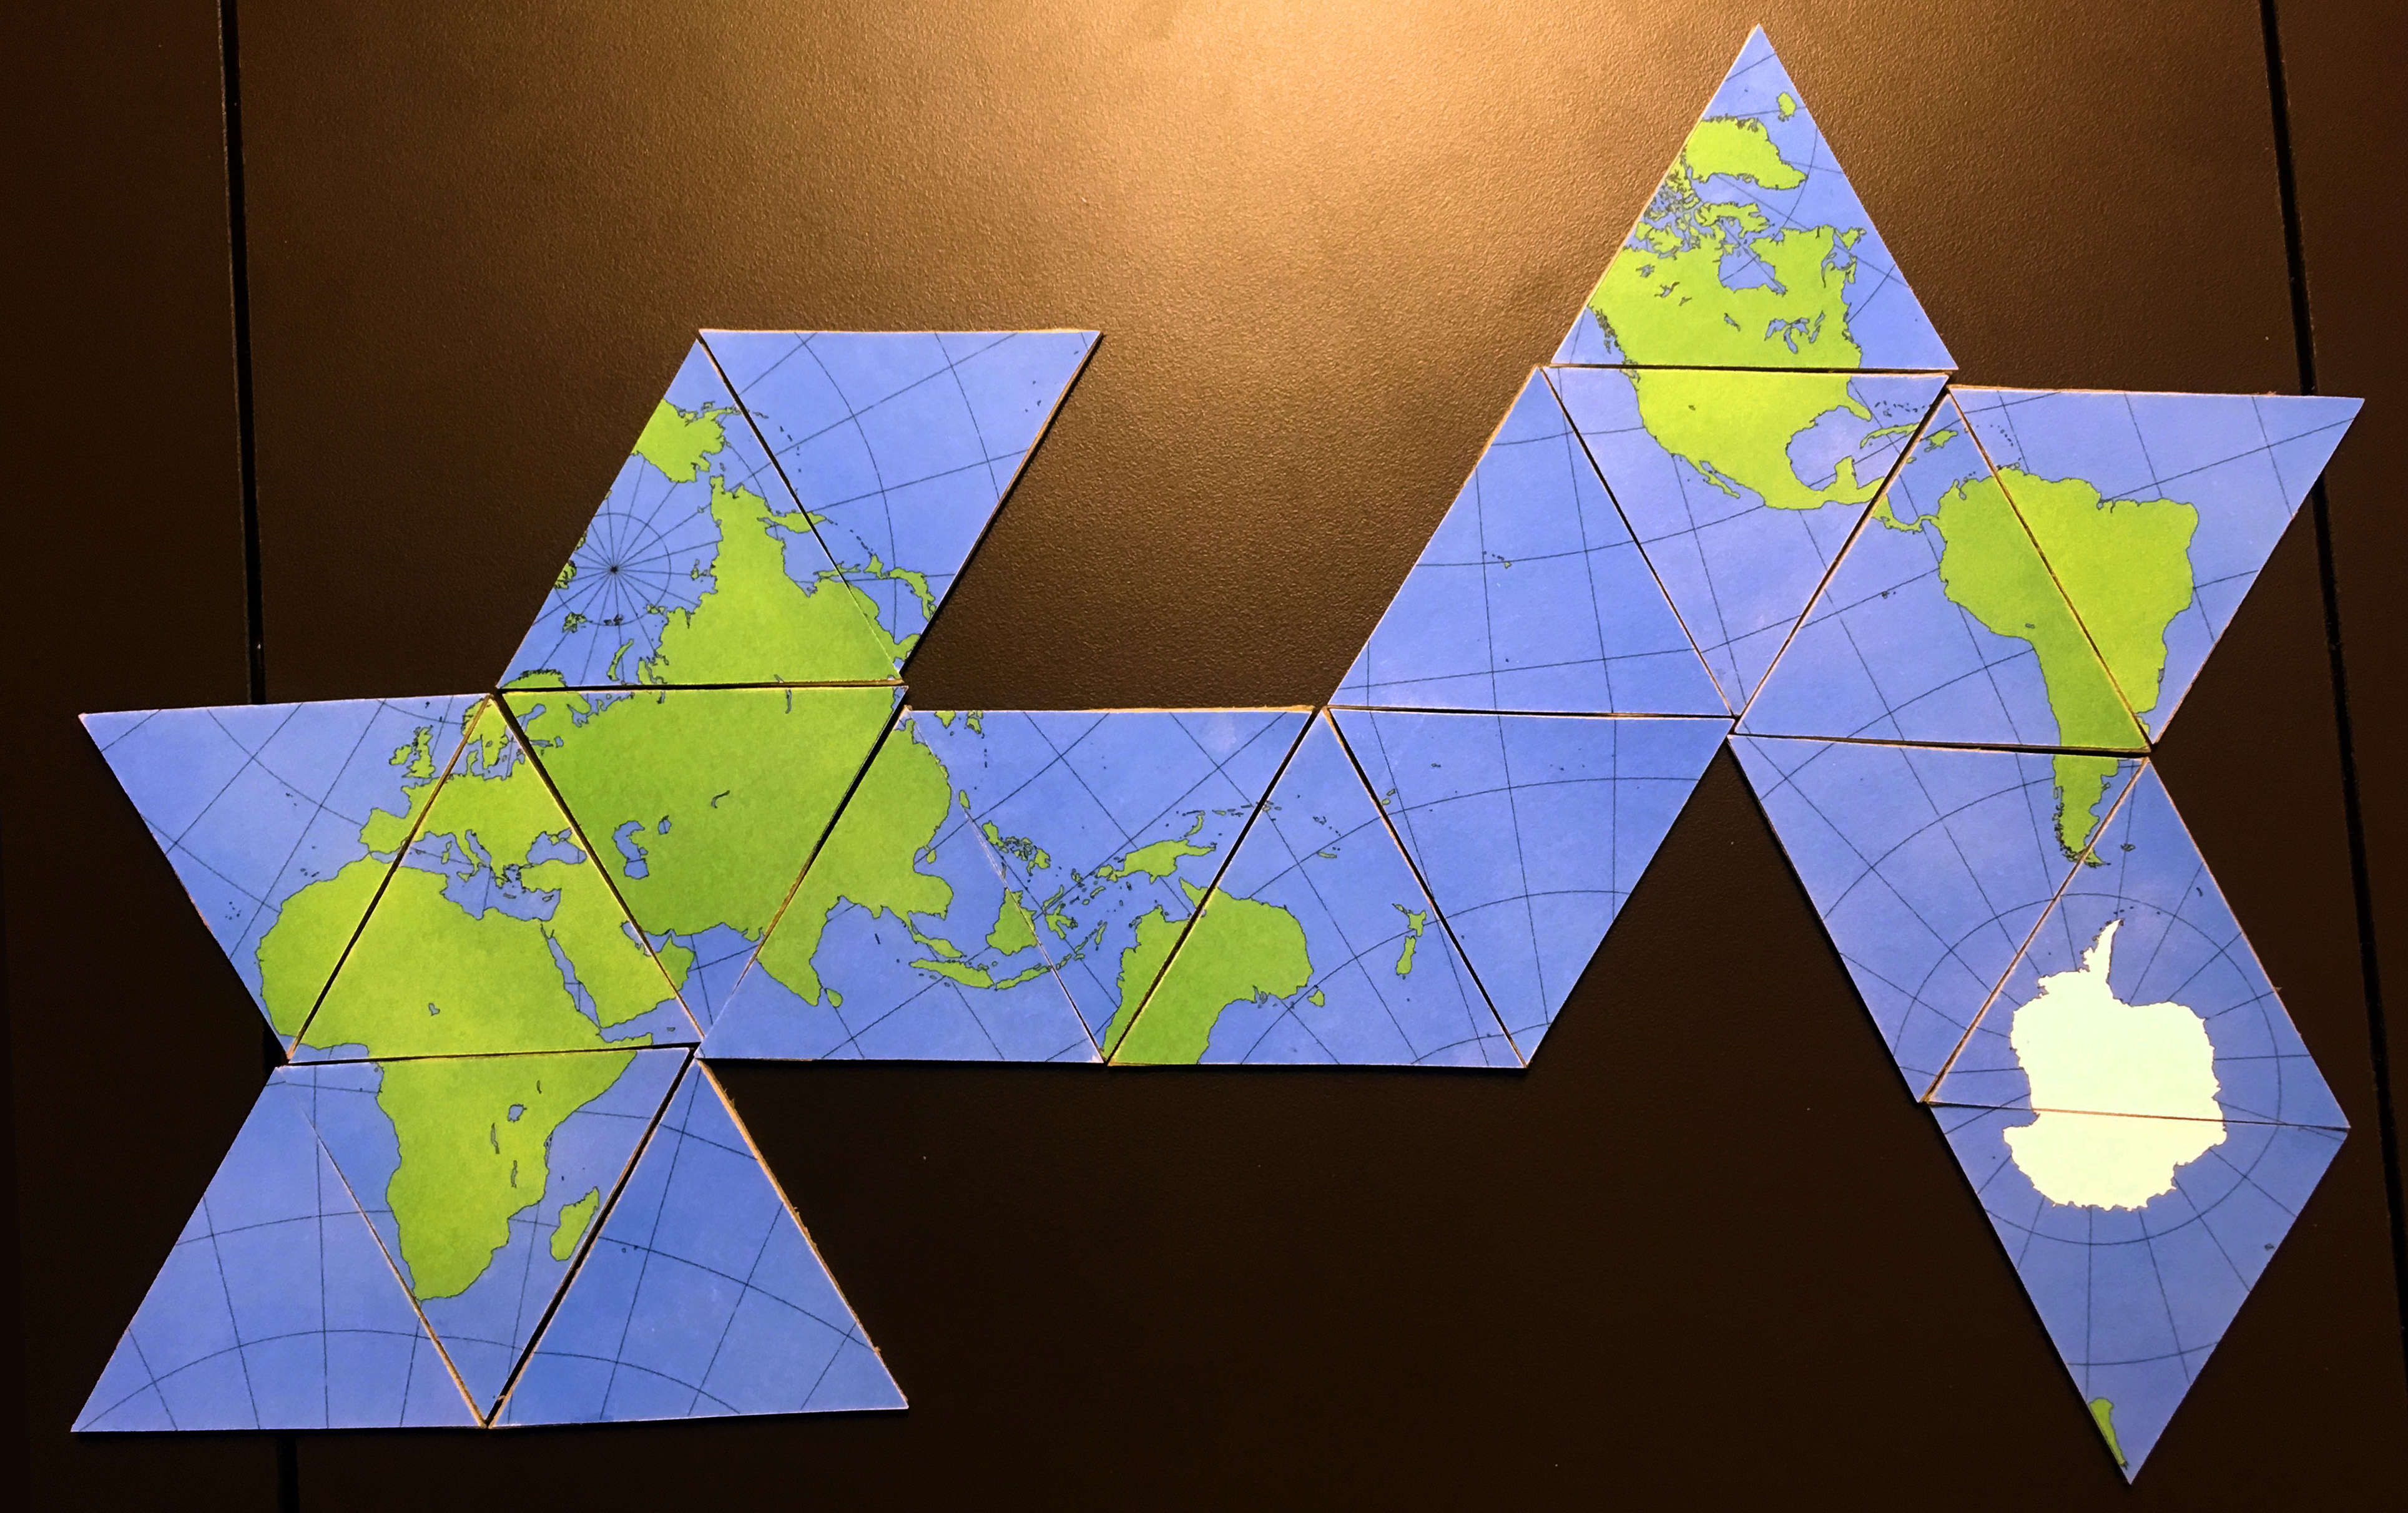
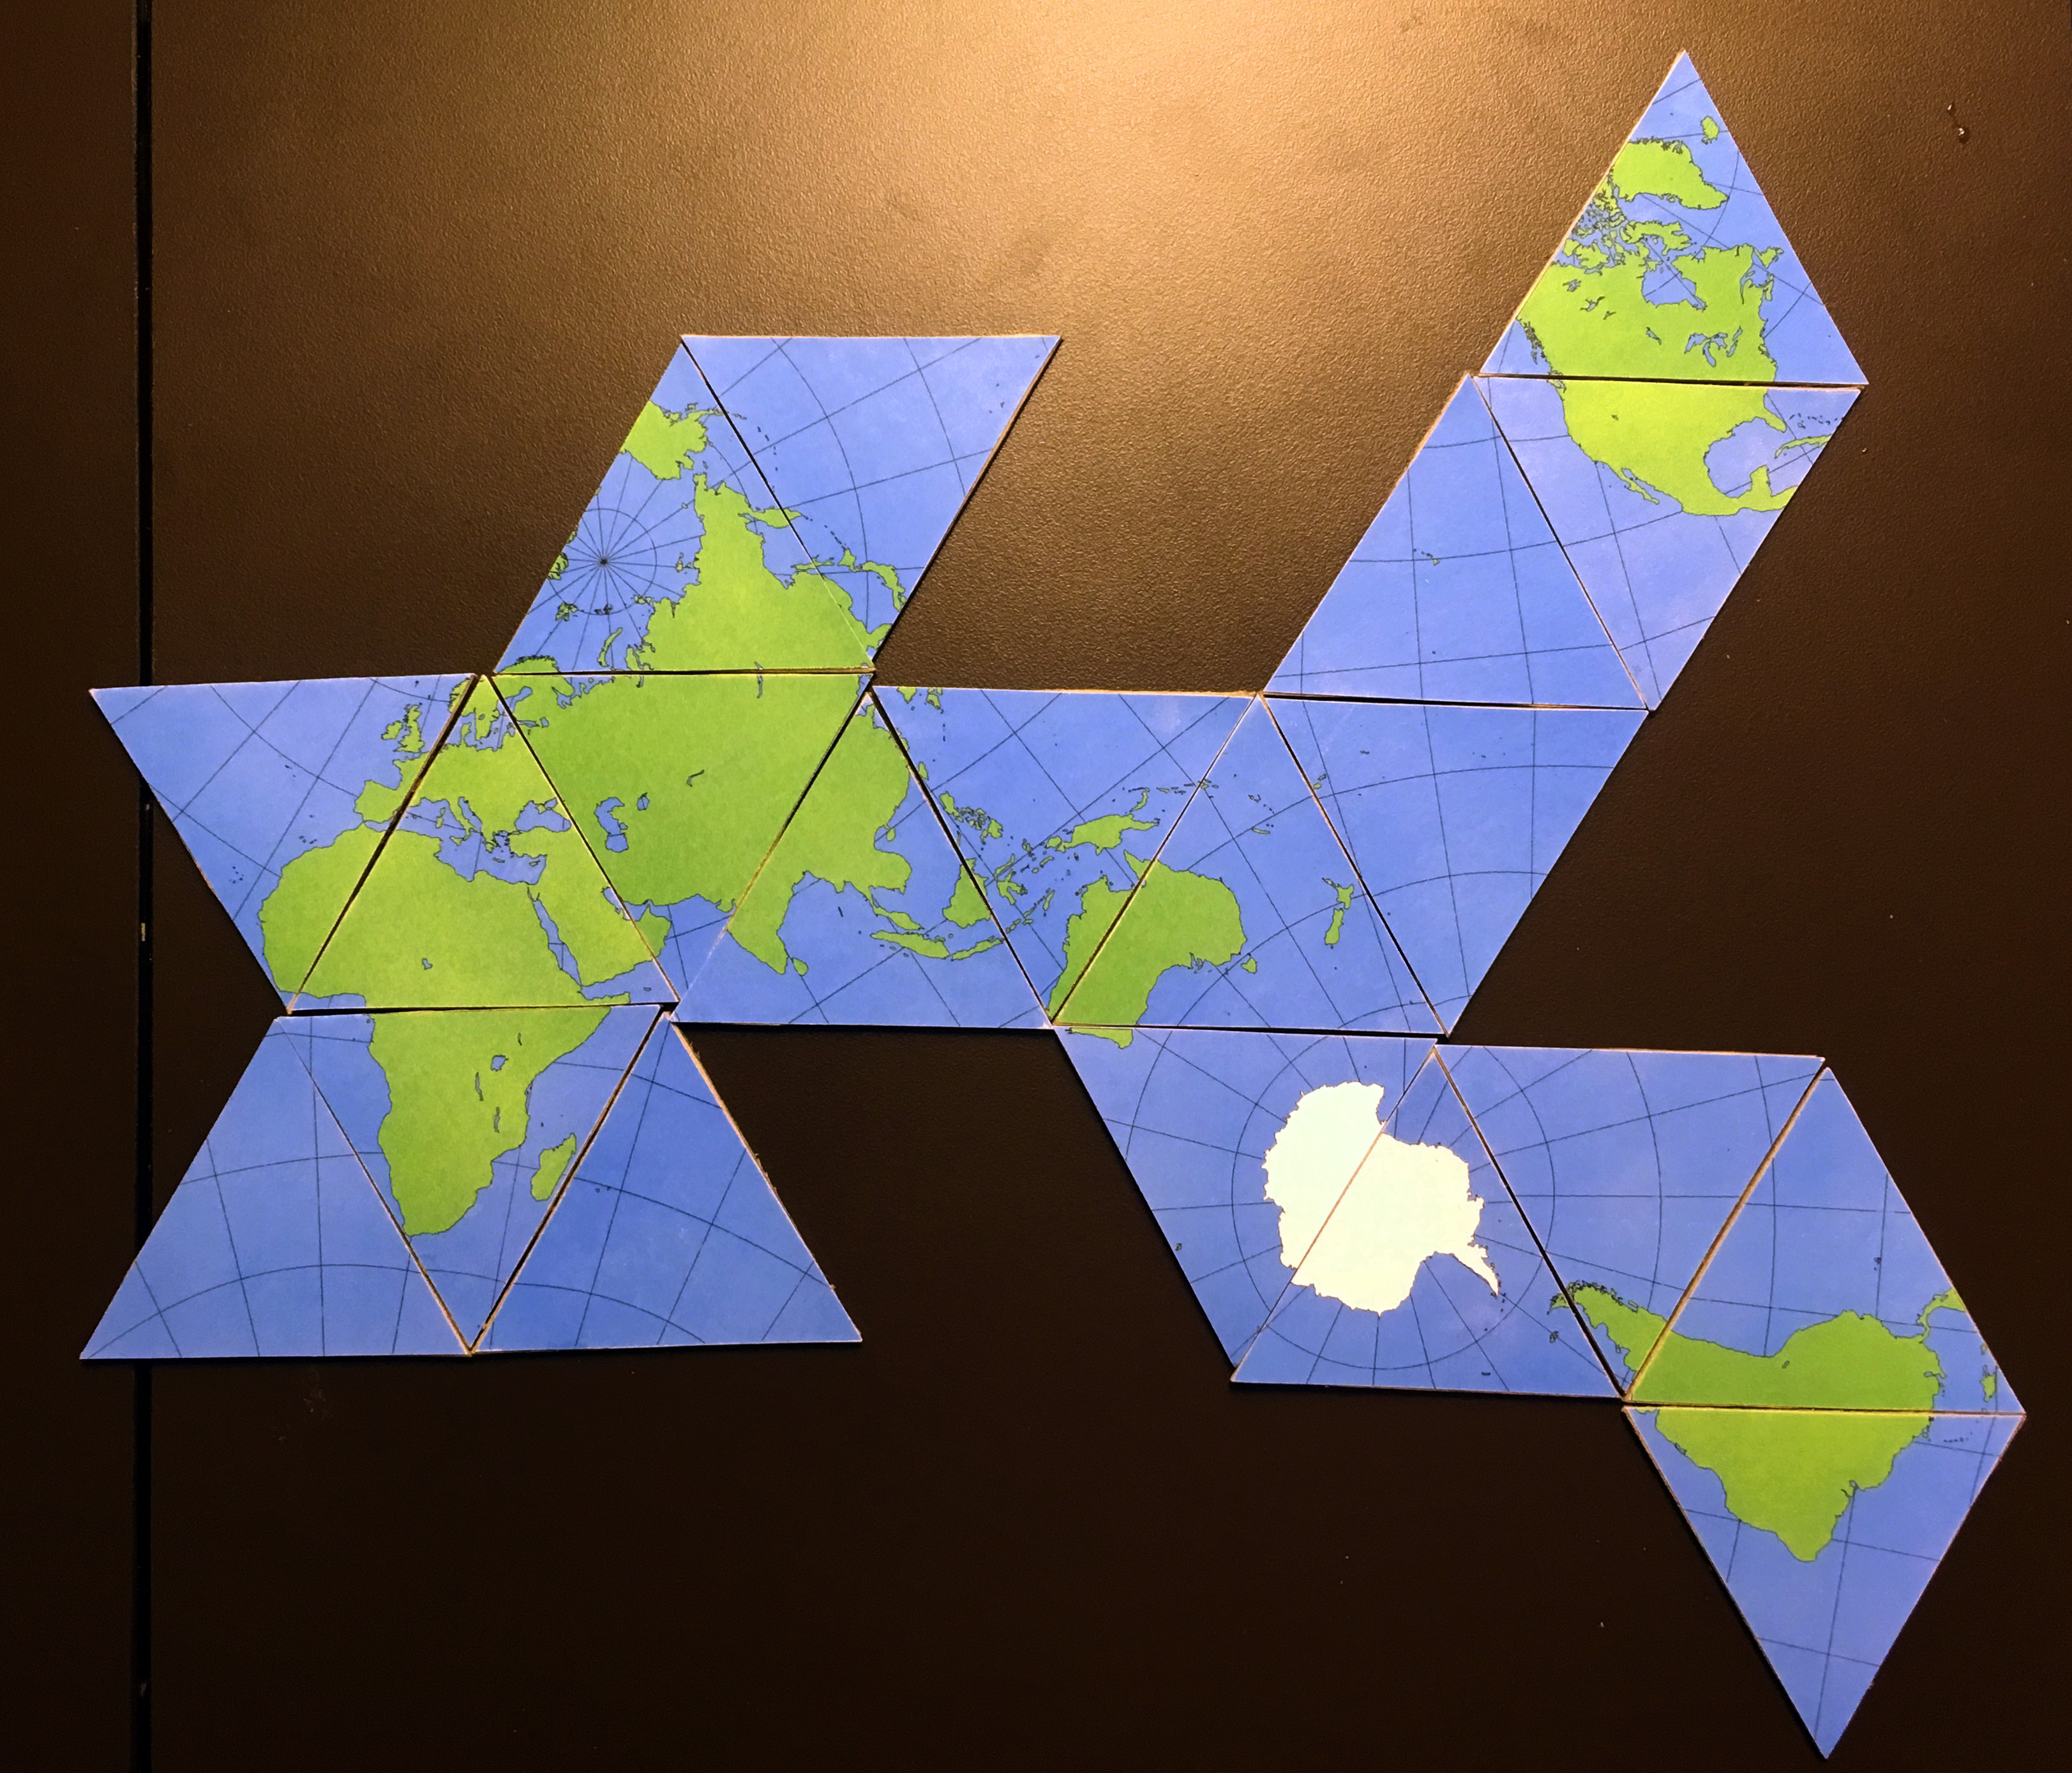

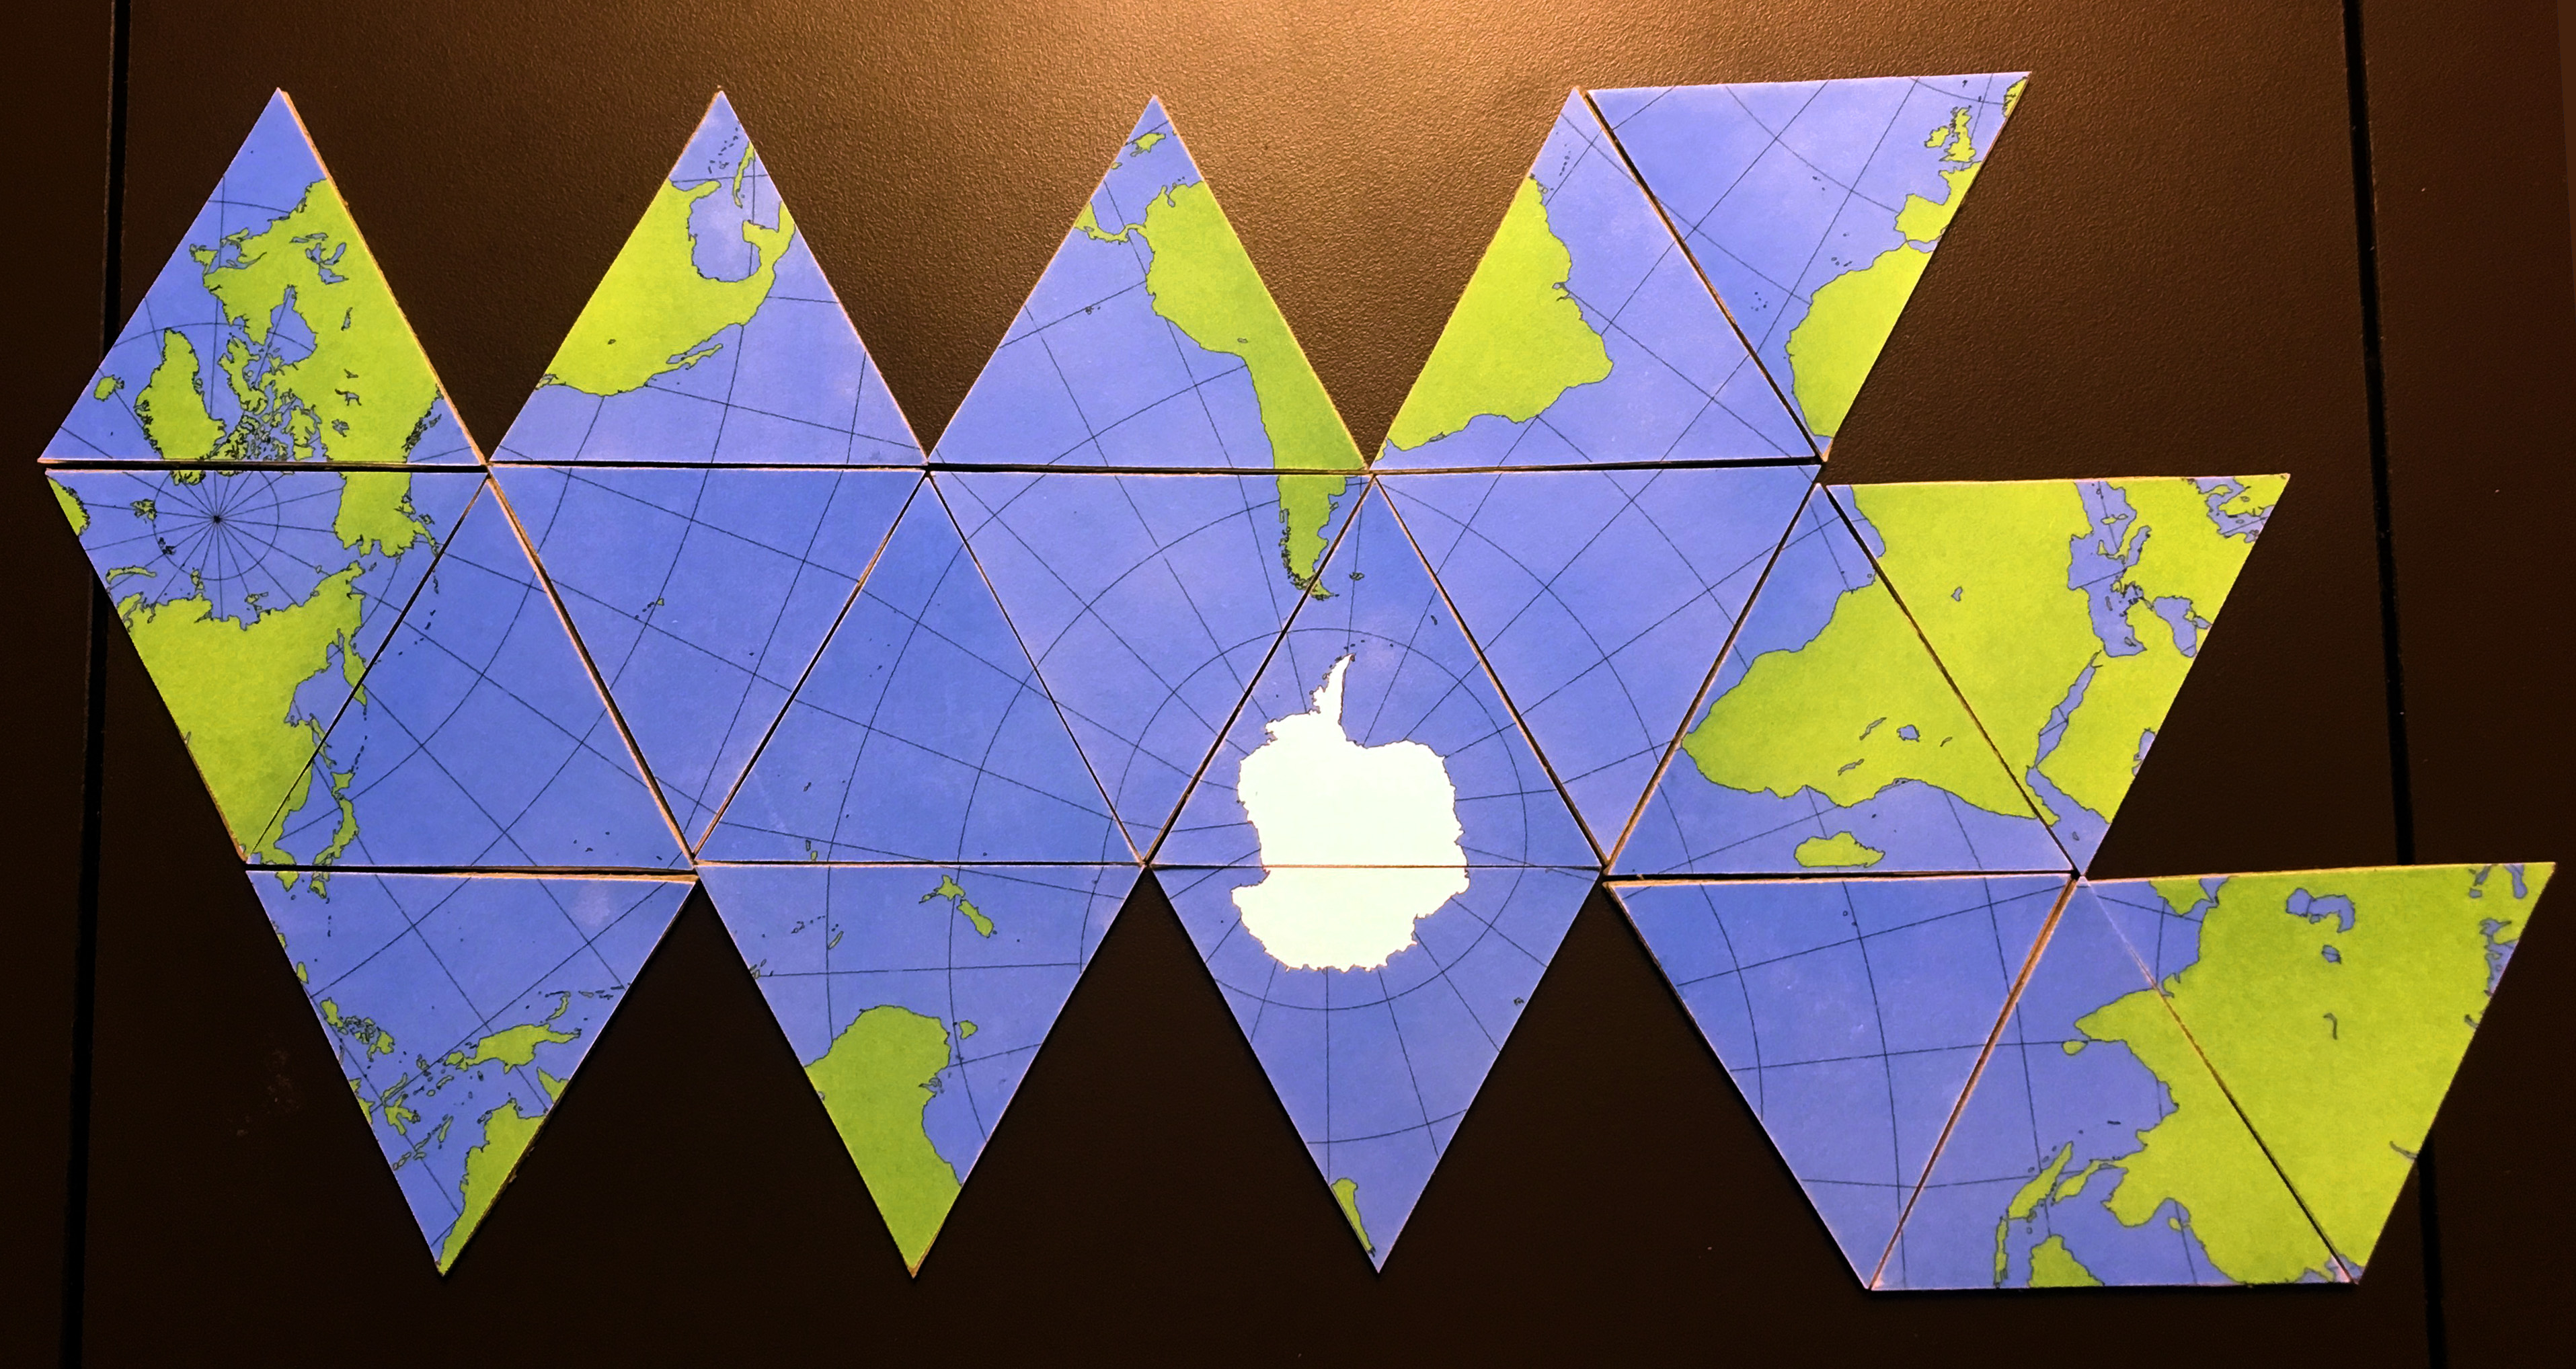
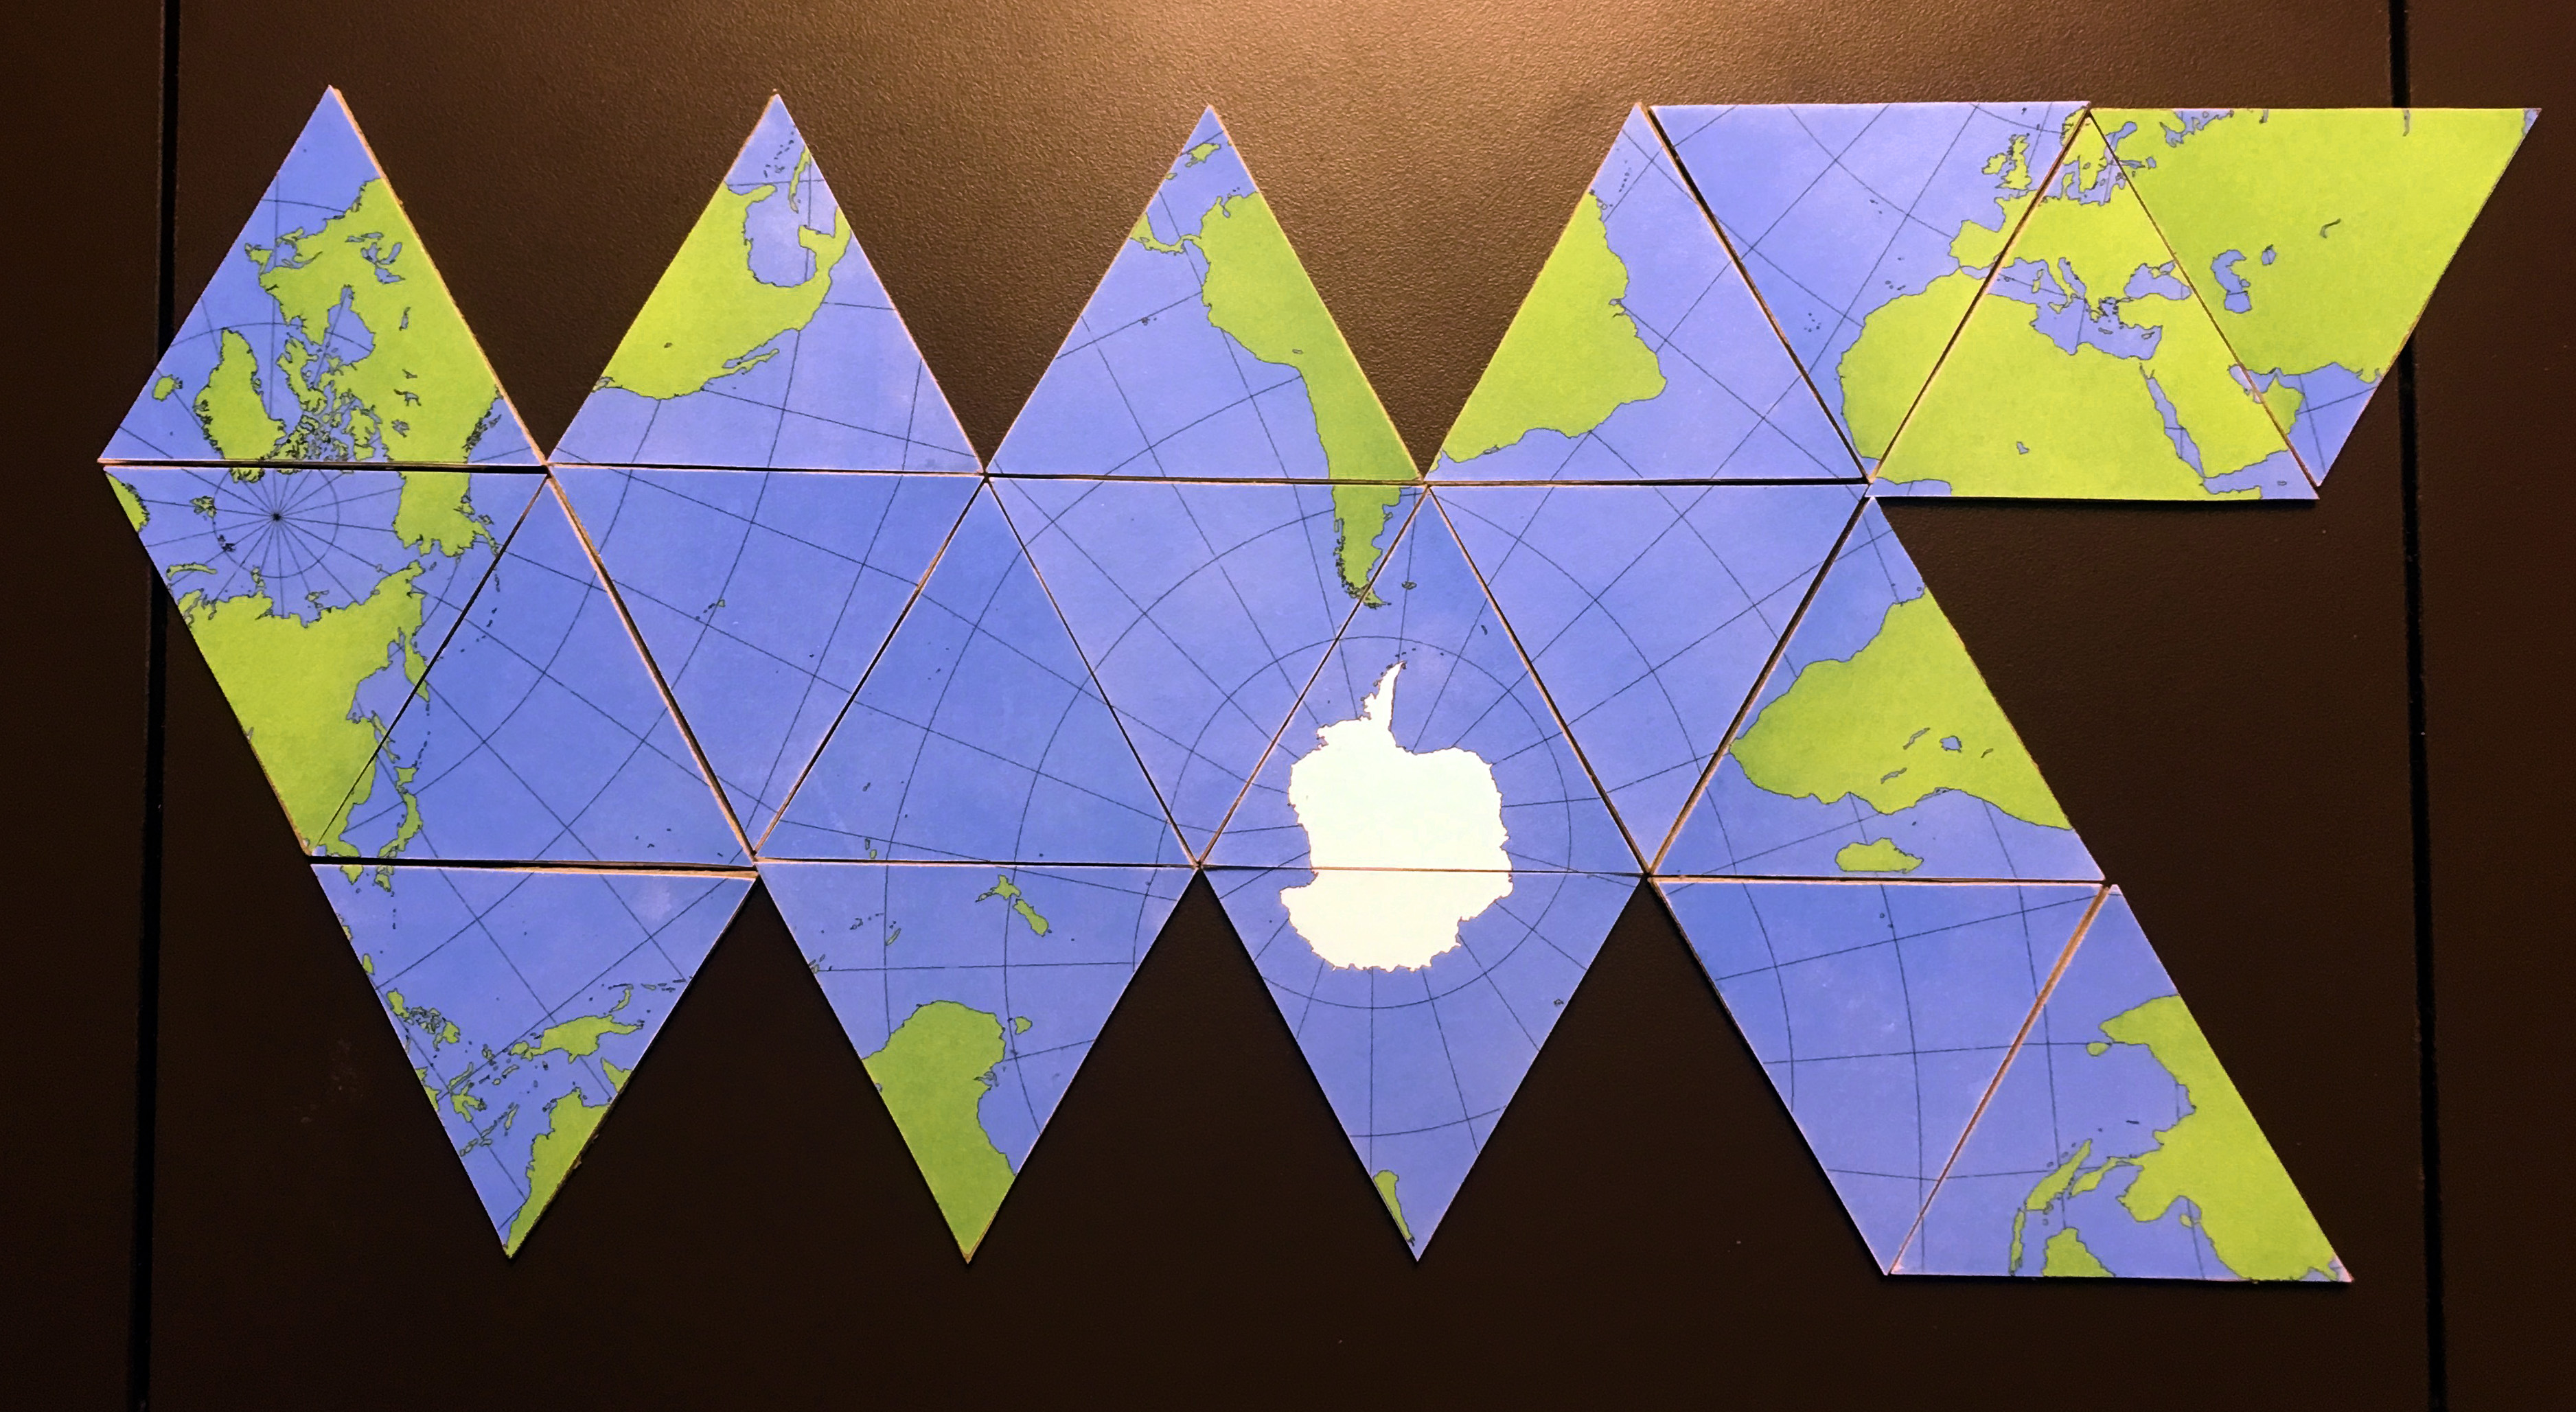
The great strength of Dymaxion tiles is the ability to push them around and change the configuration of the map, to emphasize different aspects of the planet, to amplify or deamplify relationships between different land-masses or different bodies of water.
Here are just a few examples I created sitting with the tiles for a while. They include the One World Ocean and One World Island and variants, as well as other experiments in rearranging the tiles.
Folding Globes & Making New Tiles
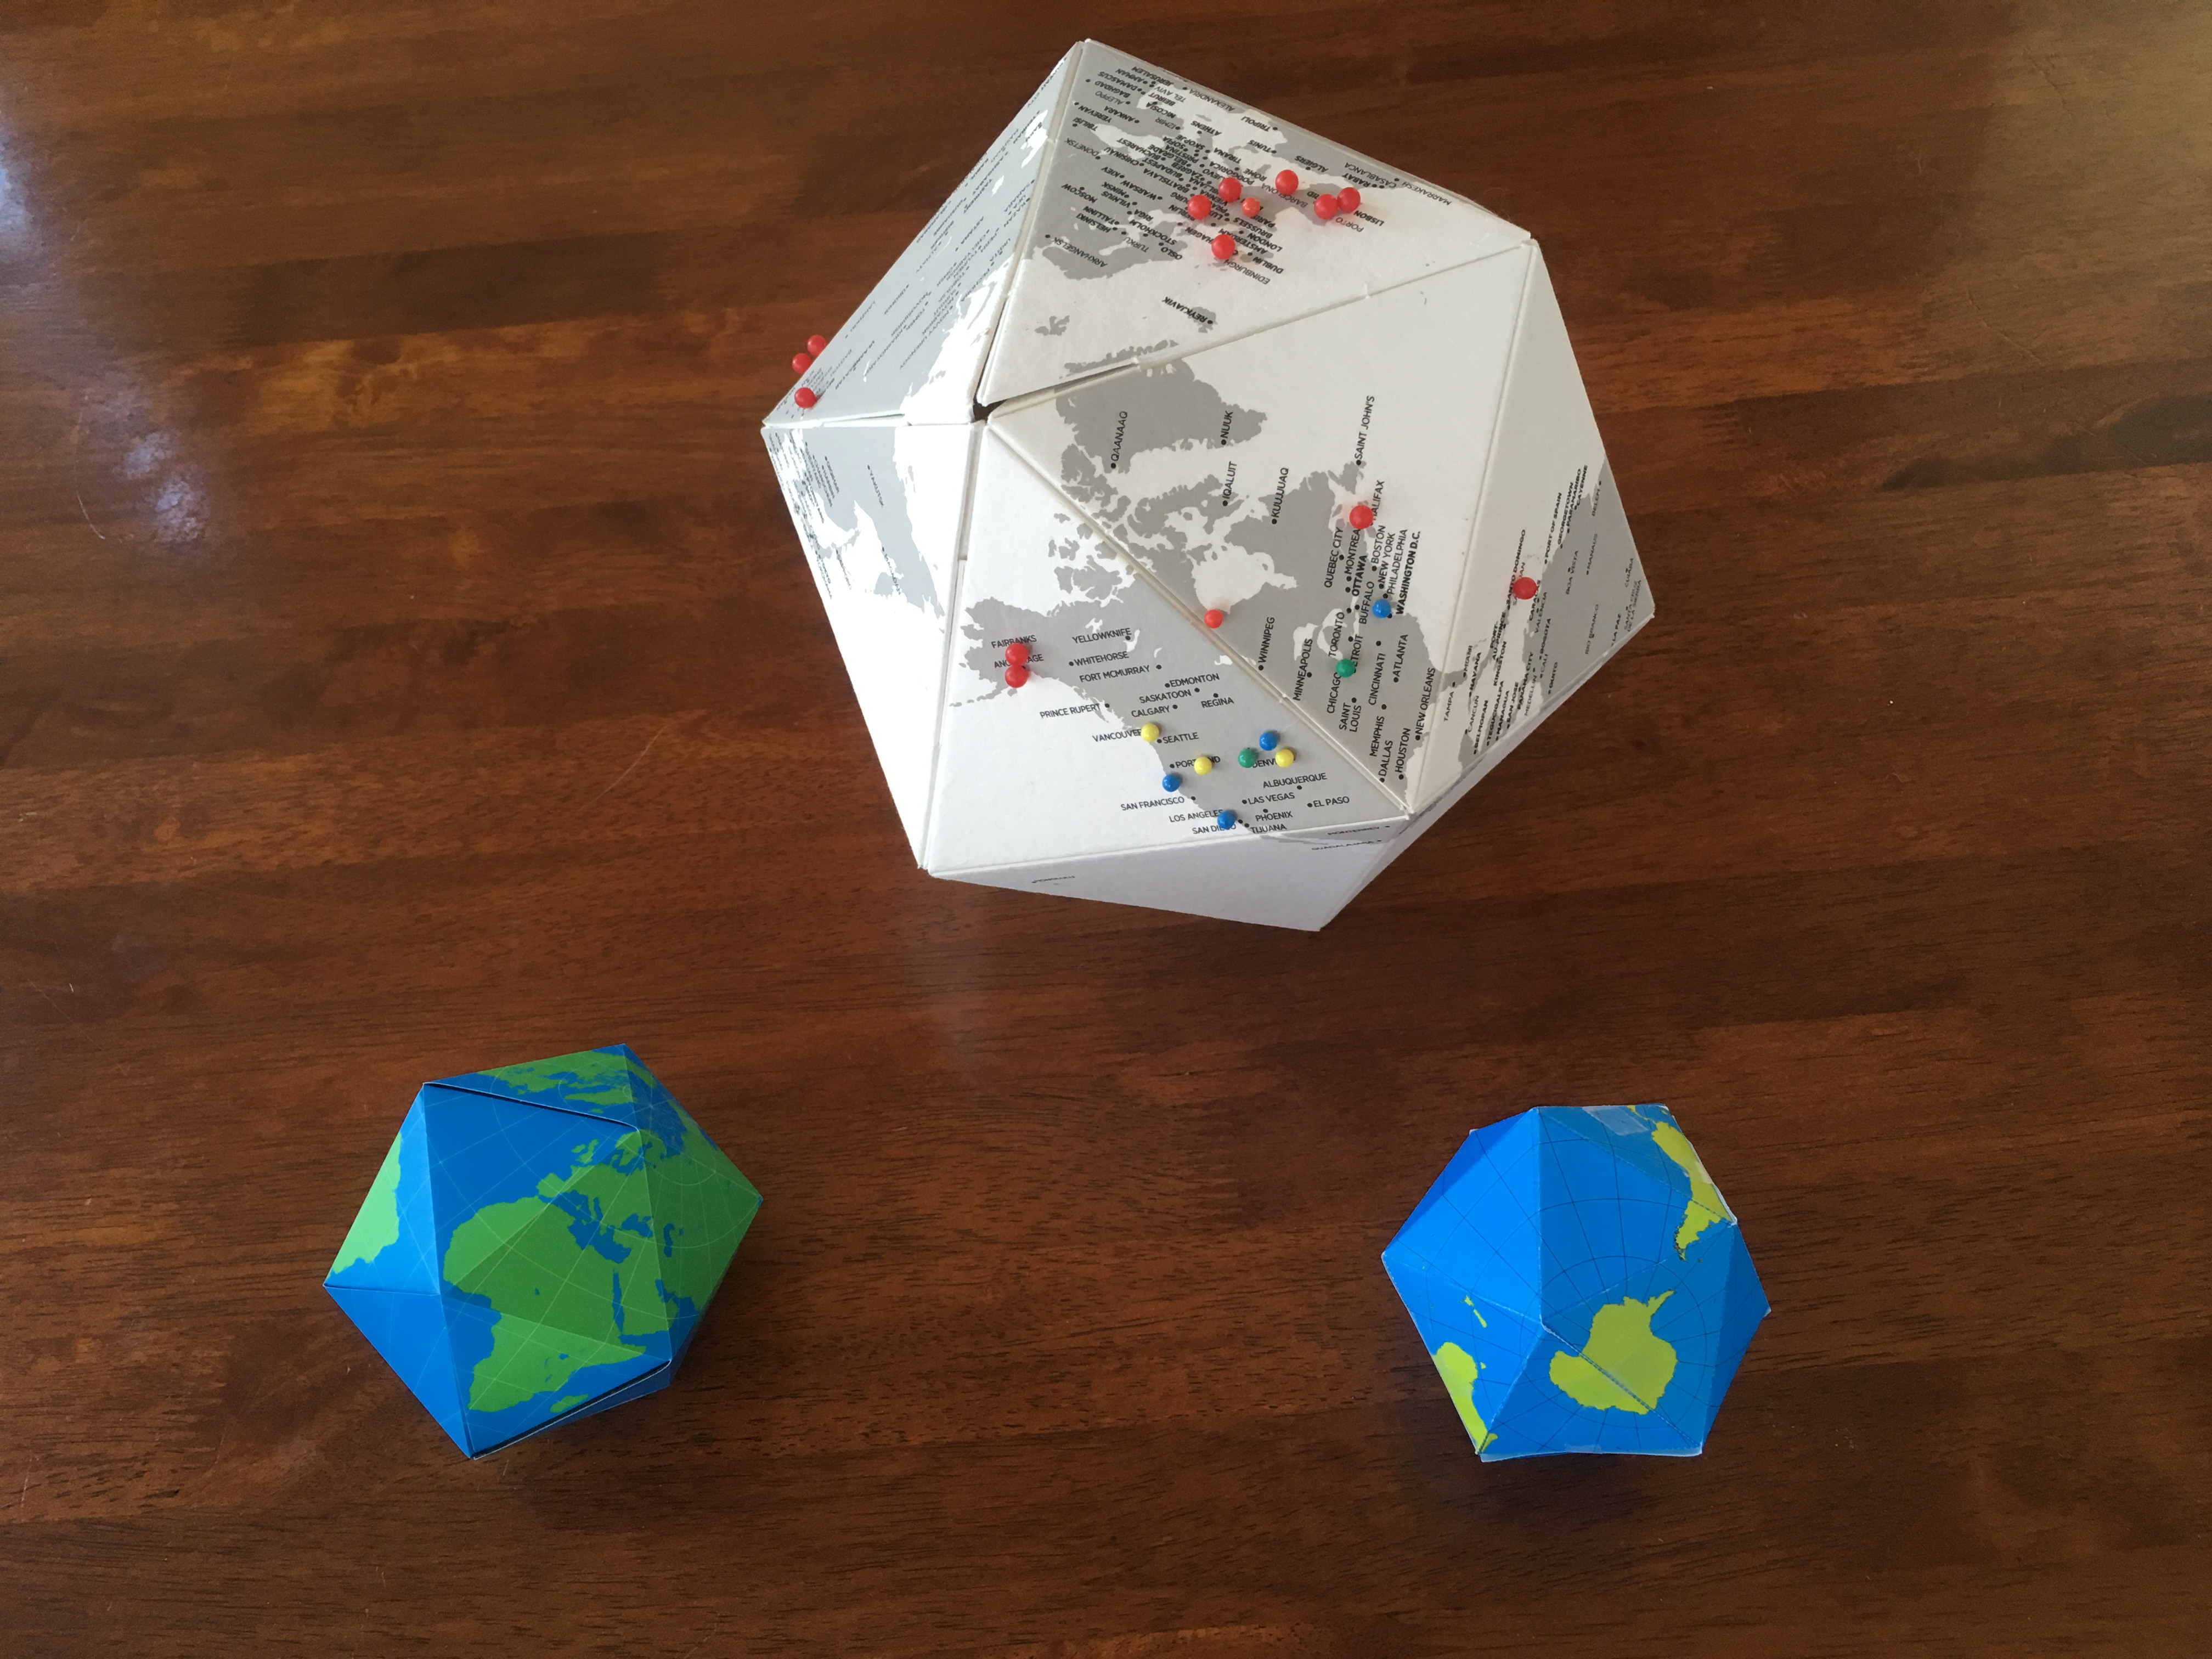
Folding Dymaxion globe patterns are not uncommon. I have a commercial one made out of foam core that is several inches across; the foam core material lets me push map pins through the surface to mark places where I have lived or travelled to. I have another, smaller one on my desk that has been printed on magetic sheeting. When folded together, the sheets magnetically attract, letting the globe hold its shape. This allows you to unfold the globe into a flat map, though the tile orientation and locations are fixed.
Using the patterns provided in Step 1, you can also fold your own globe. Printing the One World PDF files on 8.5x11 paper will make a globe roughly 3 inches in diameter.
If you would like to make your own folding pattern, or tiles of different sizes or colors, I provide the base Adobe Illustrator files here in this step. Each tile is presented as single grouped object that can be moved, scaled, or rotated per your desires. Note that any contiguous arrangement of the tiles, where tiles are properly matched with any tile they touch in the arrangement, will fold into a correct icosahedron.
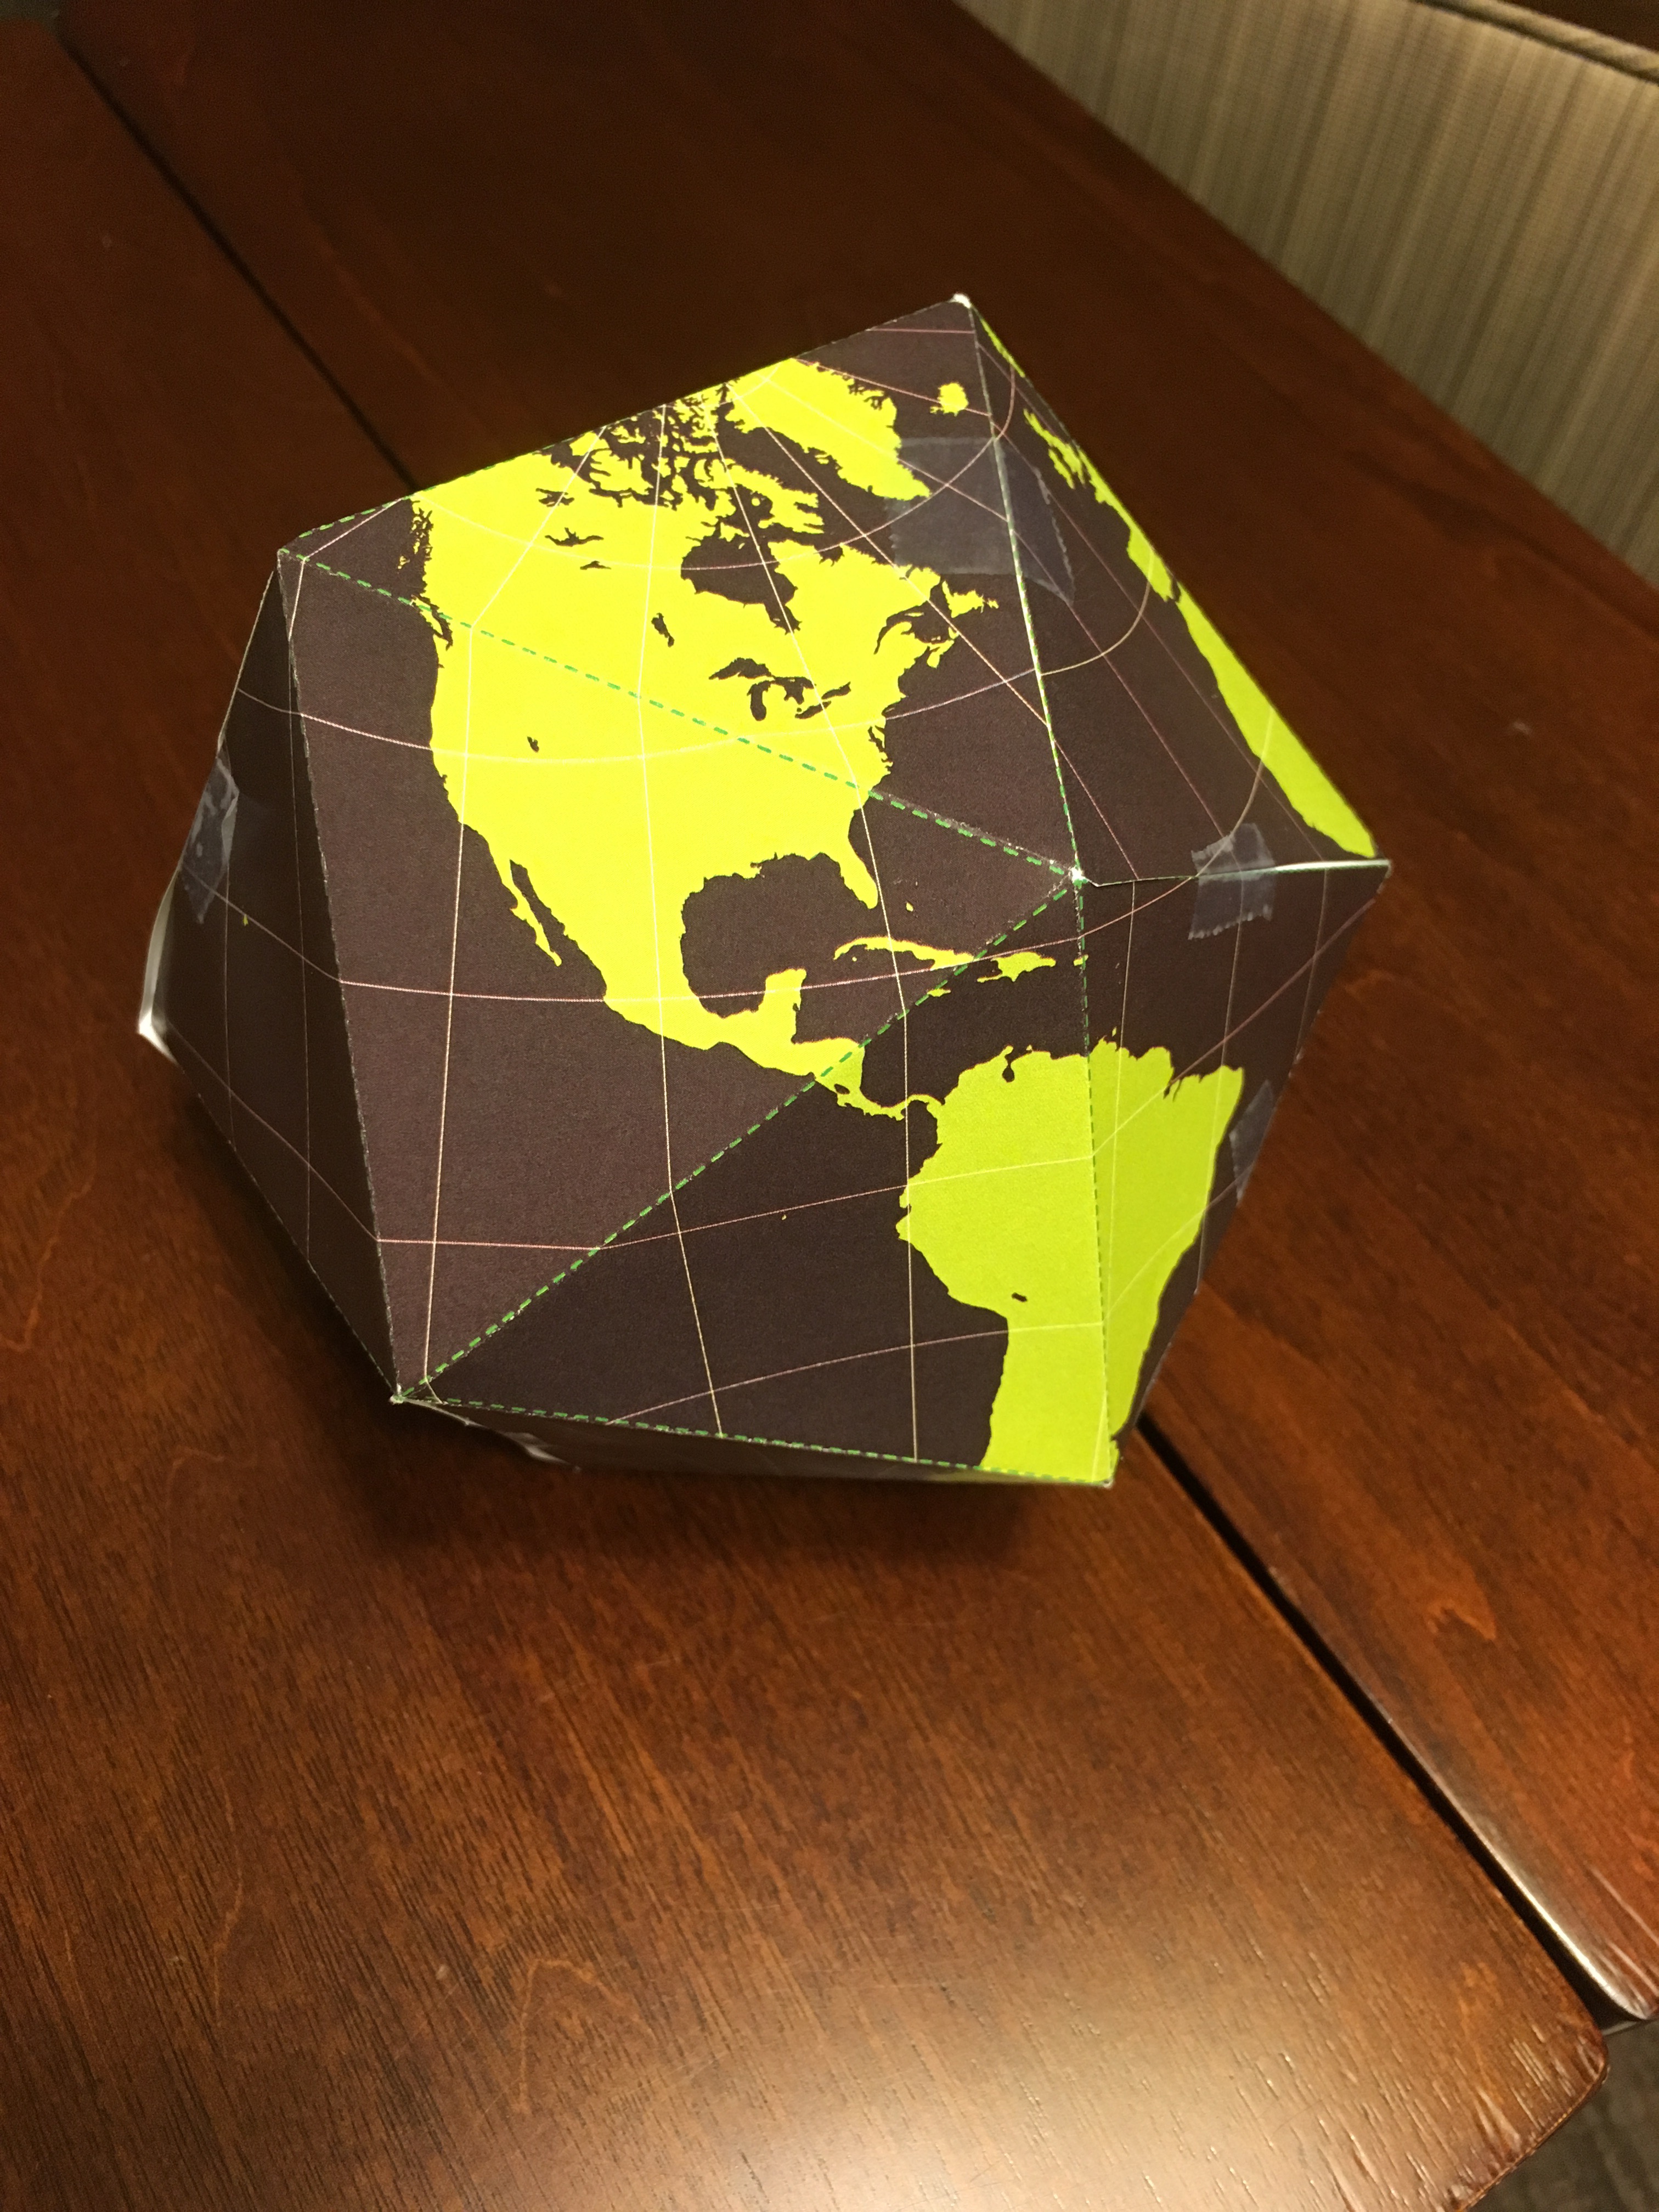
In the second image above, I used these files to make a retro globe. If you've ever seen a globe from the 1950s, before the start of the Space Age, you may have noticed they were black instead of blue. At that time, we didn't know that the oceans would look blue from space; we thought they would look black!
UPDATE: One of my friends just pointed me to a collection of foldable templates to make other planets in the Solar System. You can find them on this website! I think I need to make a MOON!
Last Thoughts
Maps and globes are representations of the Earth, in this scale (tiles a few inches across) reducing the size of the planet by a bit more than a factor of 60 million. It allows us to take the planet, the size of which is nearly impossible to comprehend in personal terms (despite the ease with which we travel around it), and show it in a way that we can wrap our minds around.
Fuller’s original goal was larger than this — to provide a way for us to look at the planet differently, to examine the conventional way that we always look at the Earth and try to change our perspective. The Dymaxion tiles provide a small amount of choice in how they are positioned relative to one another, how they are rotated, and how they are laid out to represent the entire Earth. They are an excellent way to explore Fuller’s aspirations for this representation of the small Blue Marble we call home.
I hope you’ve enjoyed this Instructable, and have fun making your own Dymaxion tiles!