Dumbell Planter
June 6 is Gardening Exercise Day!
"Everyone knows gardening is therapeutic. It's good for the mind, body, and soul. Gardening Exercise Day gives us an opportunity to go out and burn off calories and have fun doing it. National Gardening Exercise Day is intended to recognize the important physical health benefits of gardening.
In reality, gardening is exercise. Experts say the various activities and tasks of gardening ultimately uses all of the major muscle groups. In addition, strenuous gardening activities such as raking, hoeing, and digging is both aerobic and muscle strengthening.
Take time today to celebrate one of America's favorite hobbies. Go out and exercise with, and among, your plants."
- quoted from the interwebs.
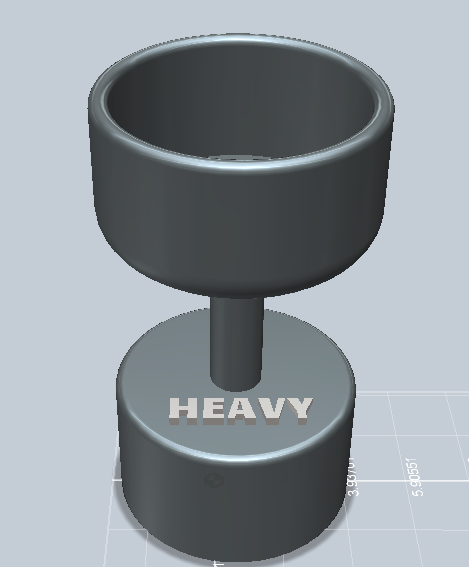
In celebration, I made a dumbell planter in 123D Design. Enjoy.
Start With the Base.
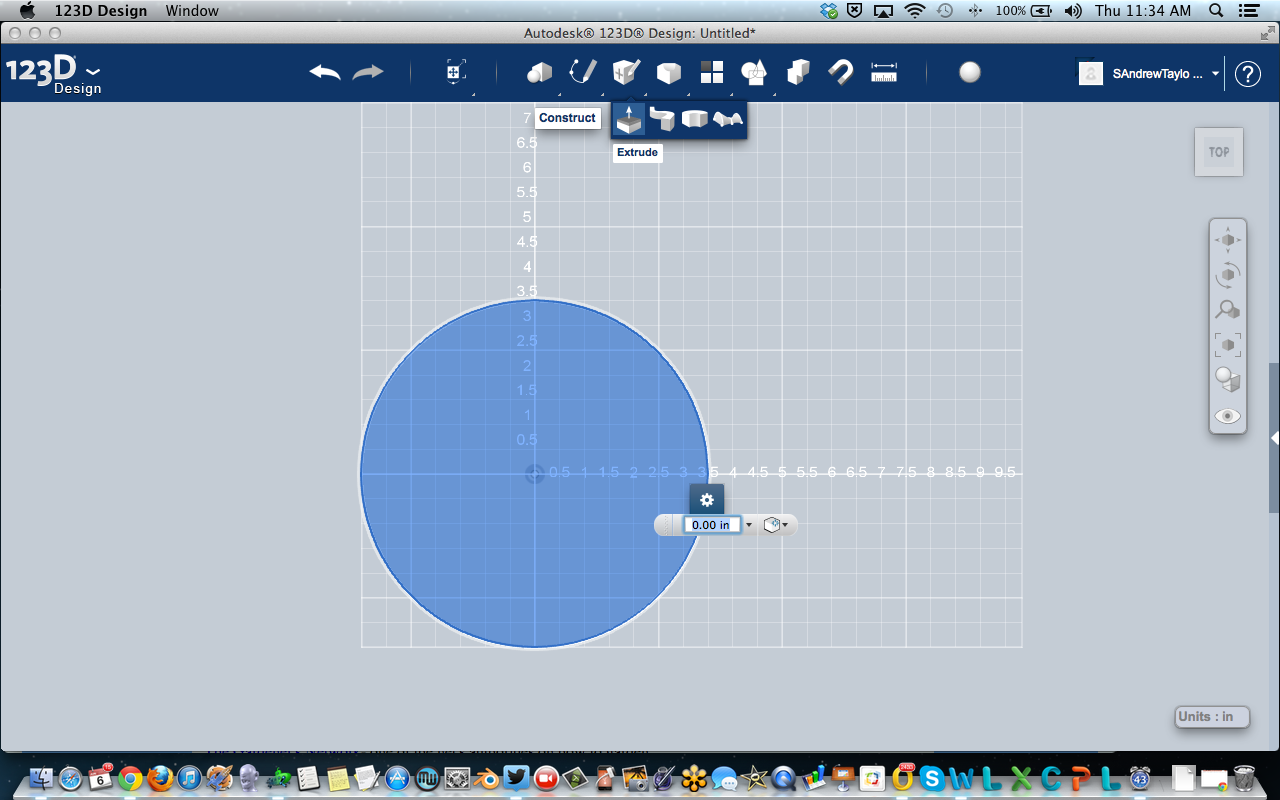
I started with a circle - 7.5" in diameter. At the top, click the little pencil (Sketch) and click the circle. Click in the drawing area and click to make the center point. Click again toset the diameter.
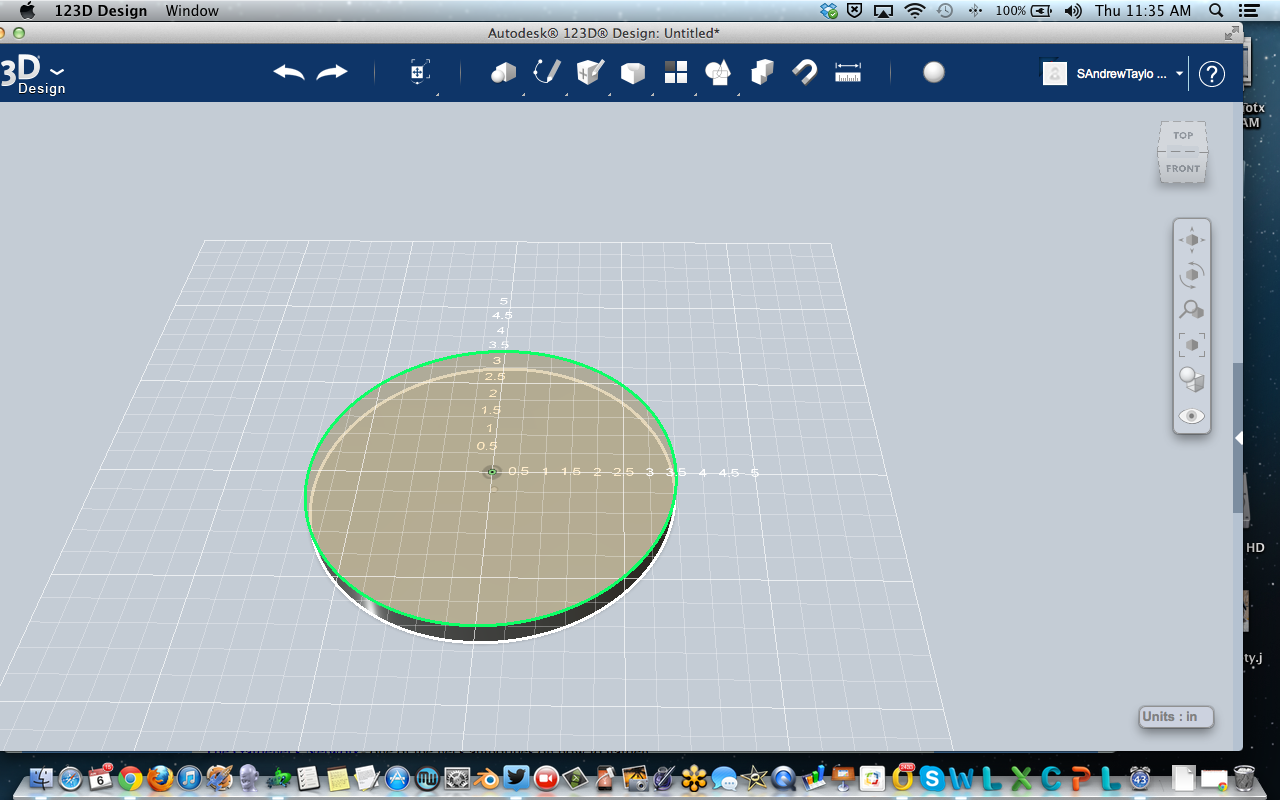
Then you can extrude it to whatever height you want. Under the Construct menu, click the first button, Extrude. Then select the circle you drew. That will allow you to give the circle some height. I chose 4.5" to give the planter some depth. And it looks heavy.
Then you can extrude it to whatever height you want. Under the Construct menu, click the first button, Extrude. Then select the circle you drew. That will allow you to give the circle some height. I chose 4.5" to give the planter some depth. And it looks heavy.
Extrude the Handle.
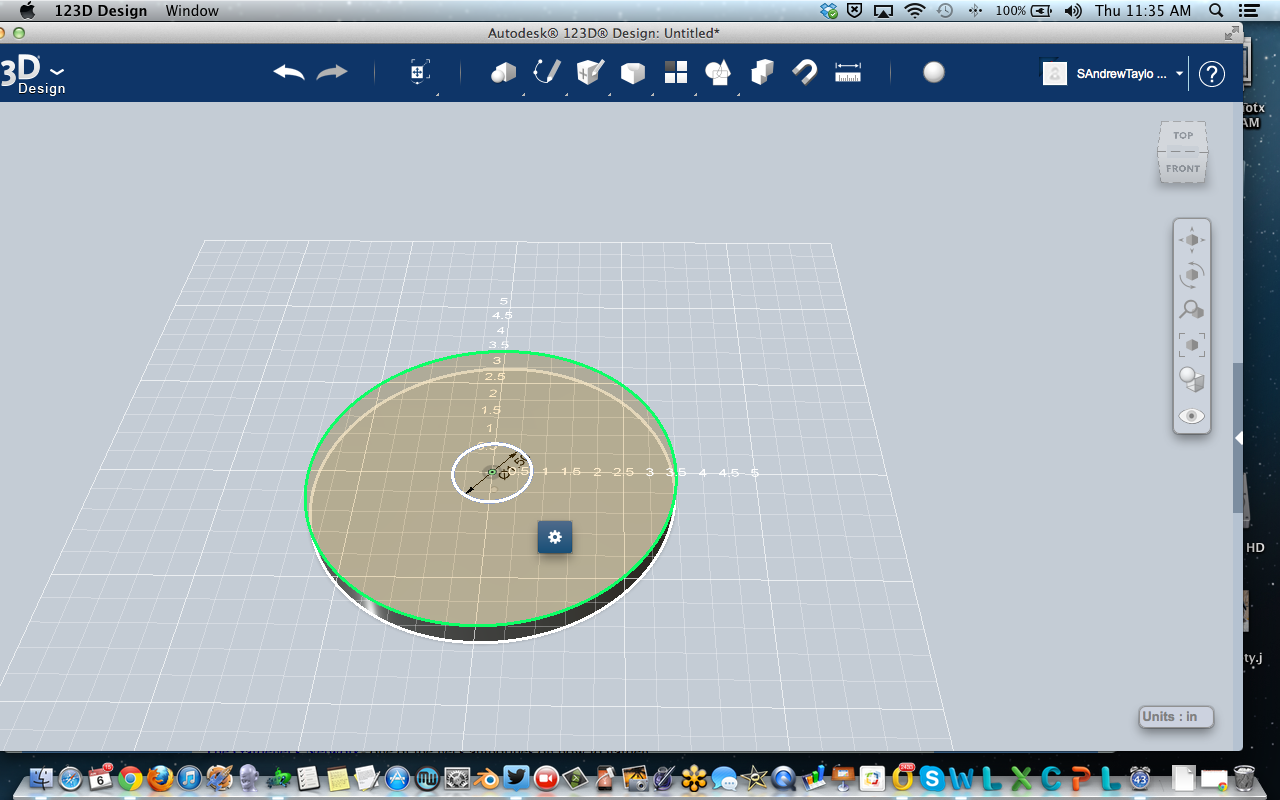
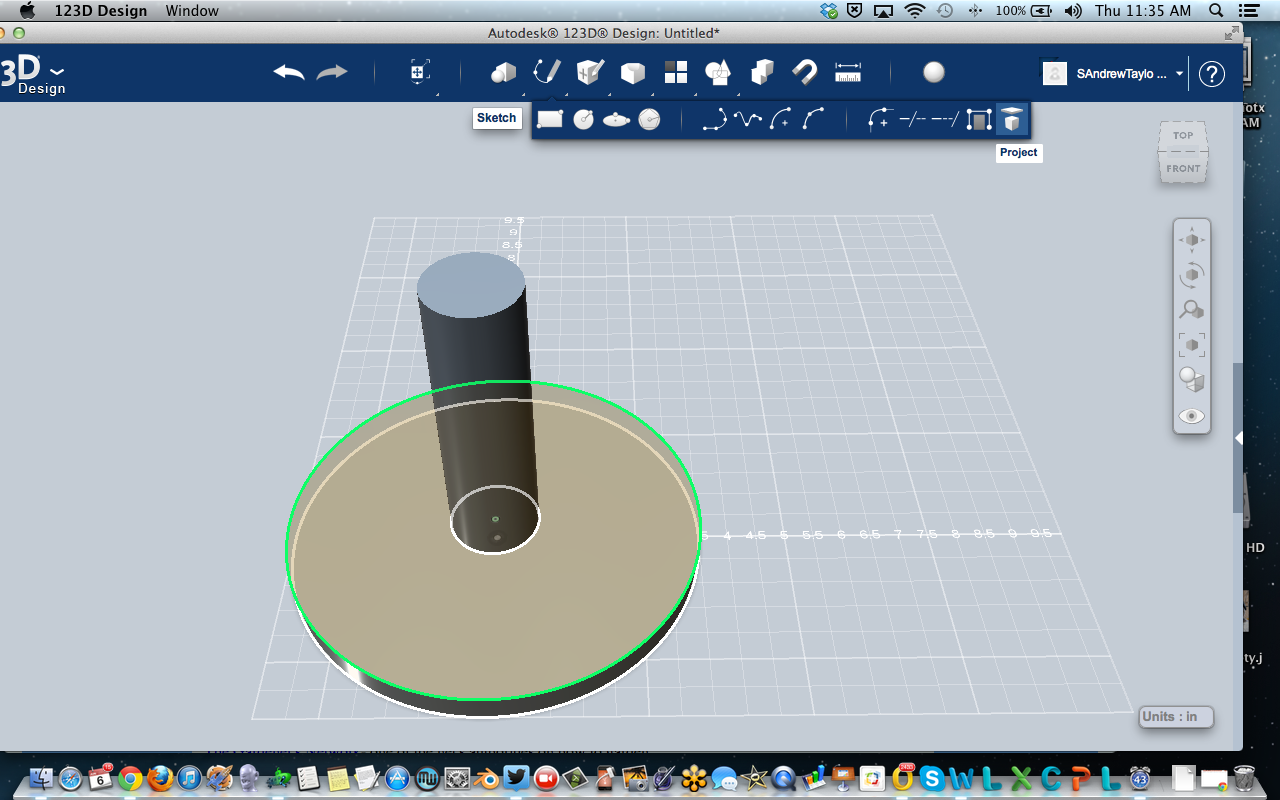
Now that we have the base, you'll want to make the handle. An easy way to do that is to make another sketch, but this time, we'll base it off the top of the cylinder you just made. In order to start a sketch on a plane of an existing object, you can use the Project feature.
Under the Sketch menu, click Project (on the far right of the drop-down). Then click the top face of the cylinder you made. That tells the app that you are going to work on that plane, and allows you to base a sketch on the existing center point, diameter, etc..
Draw another circle, using the center point of the cylinder (it should snap). I made it 1.5". Then Extrude this circle like we did the first time, this time making it a little higher - like a barbell grip.
Project Sketch and Make the Top (planter).
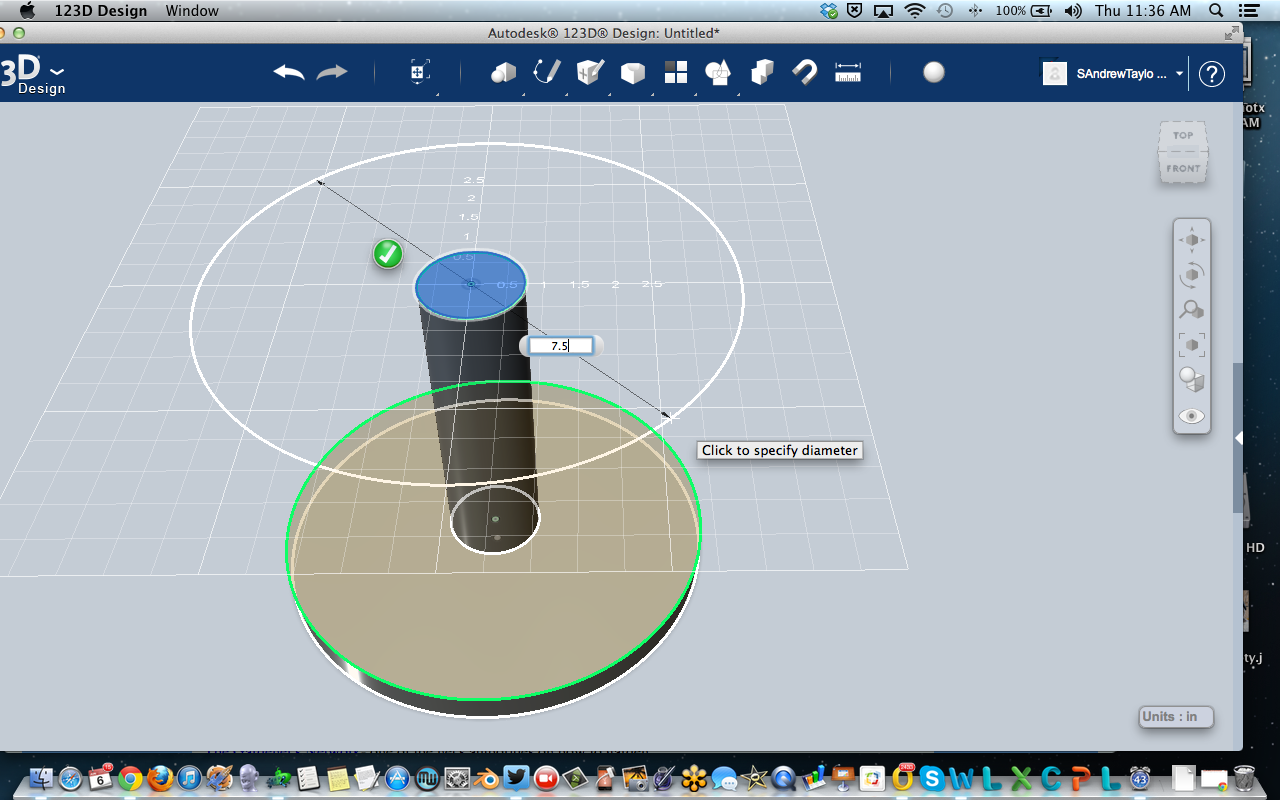
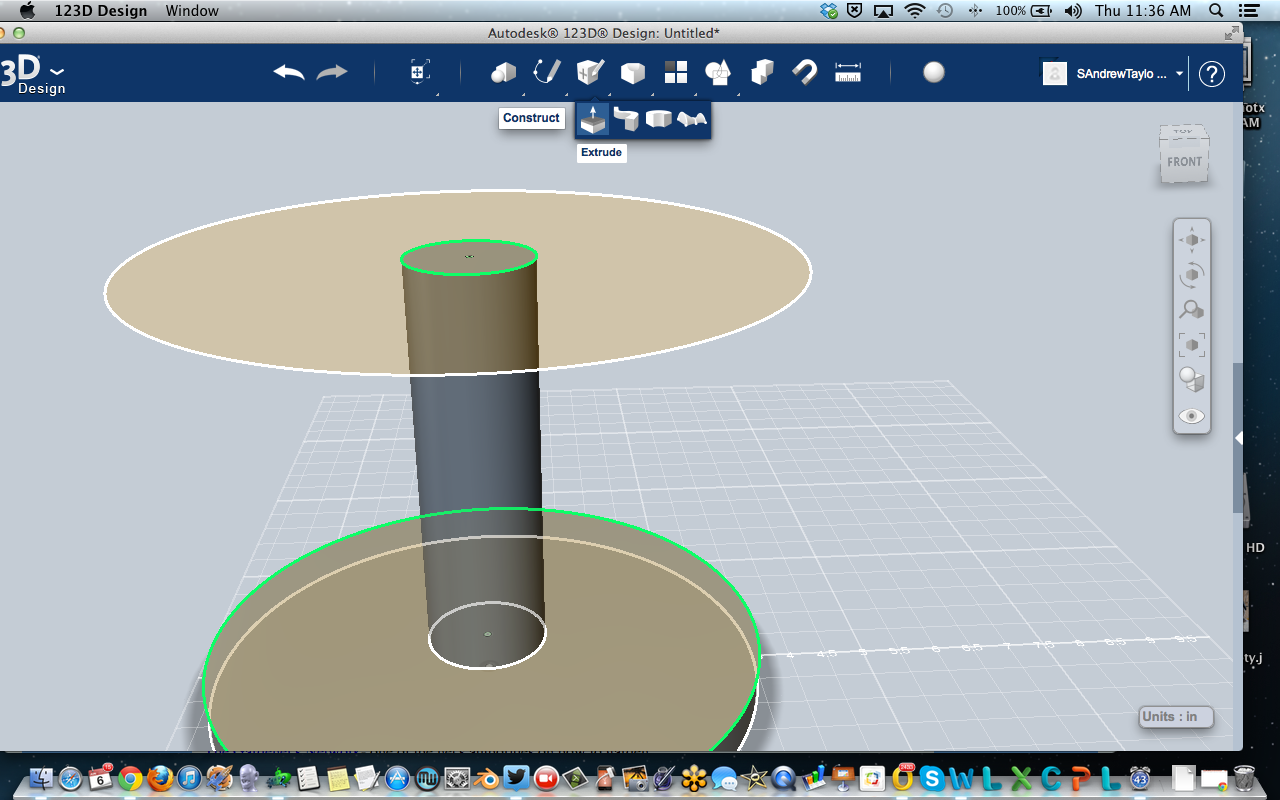
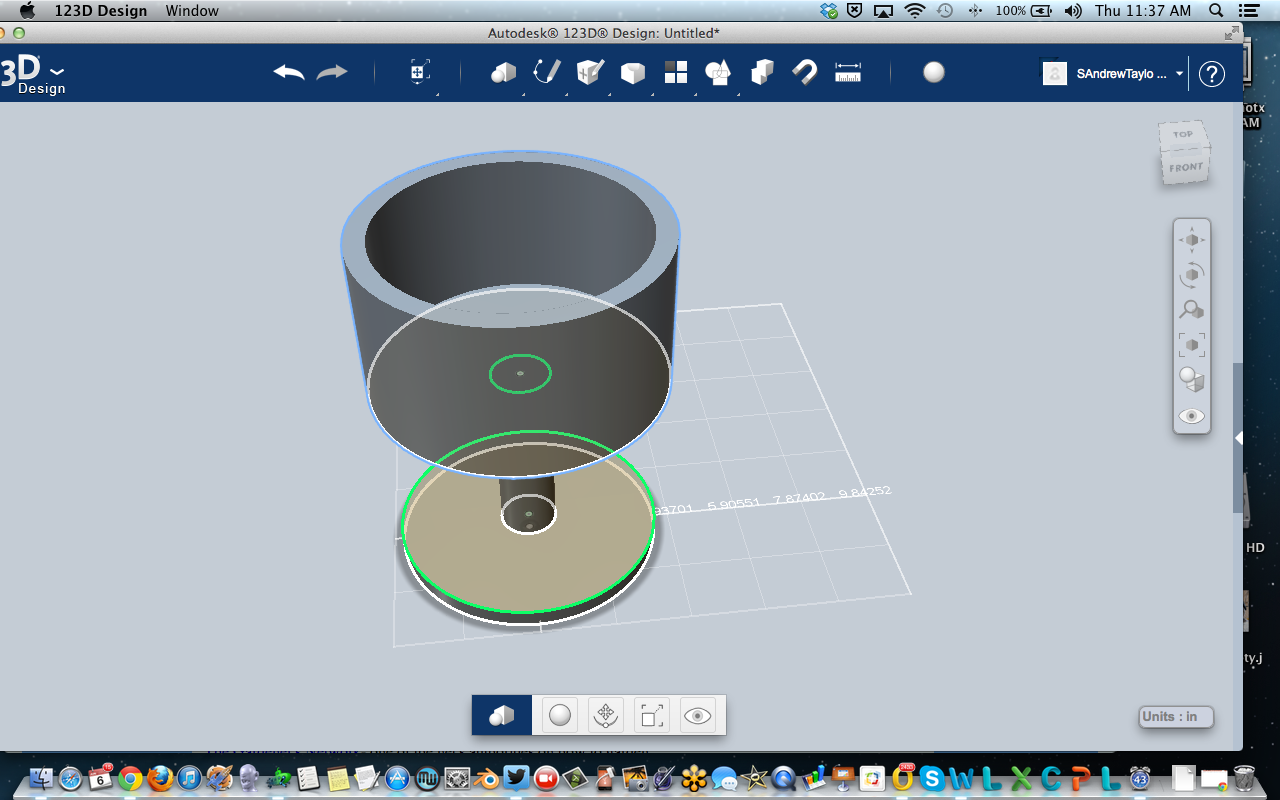
For the top of the barbell, Project the circle from the handle, like we did before. Then draw a circle that is the same diameter as the base - 7.5".
Extrude it the same as the base - 4.5" - by clicking the extrude feature and selecting BOTH circles. Now you should have a barbell. In order to make it a planter, let's hollow it out!
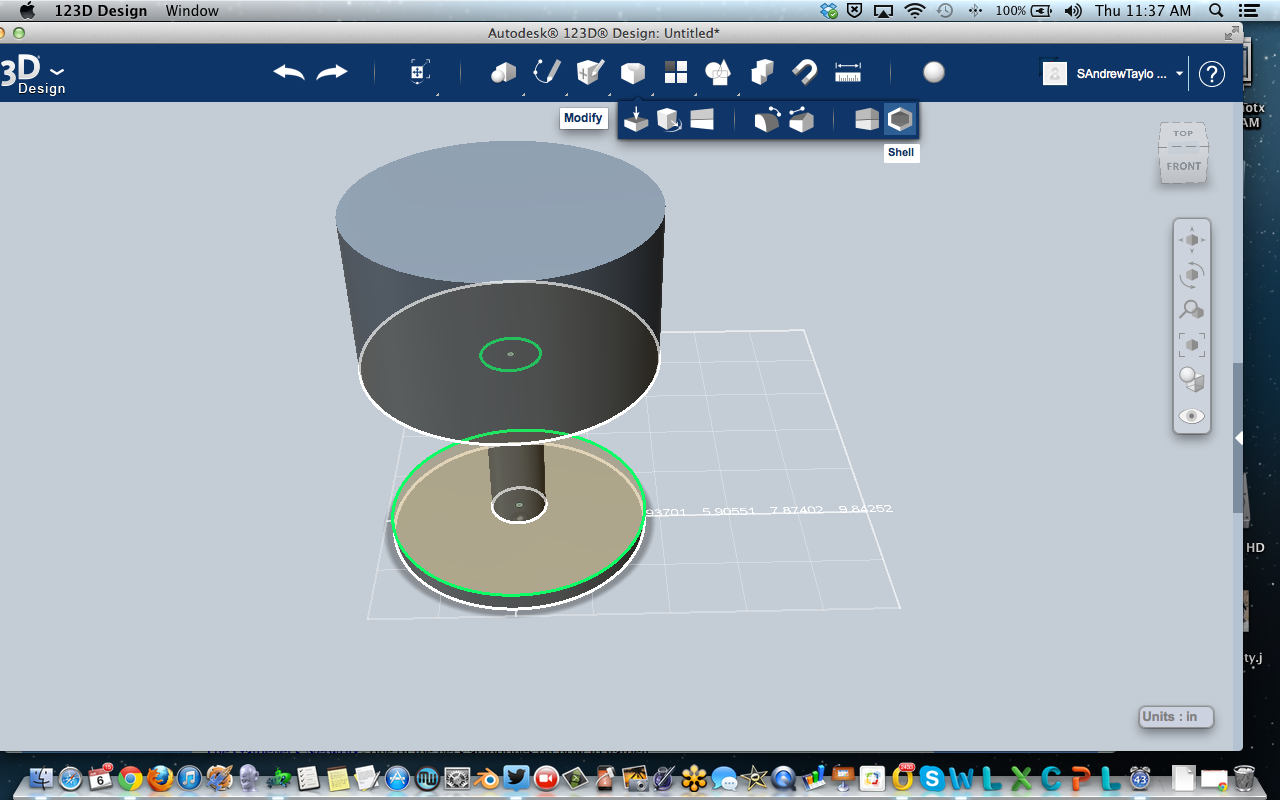
Under the Modify menu - click the Shell feature. This will allow you to define the thickness of the wall, creating a kind of bowl. Voila!
Make It Pretty.
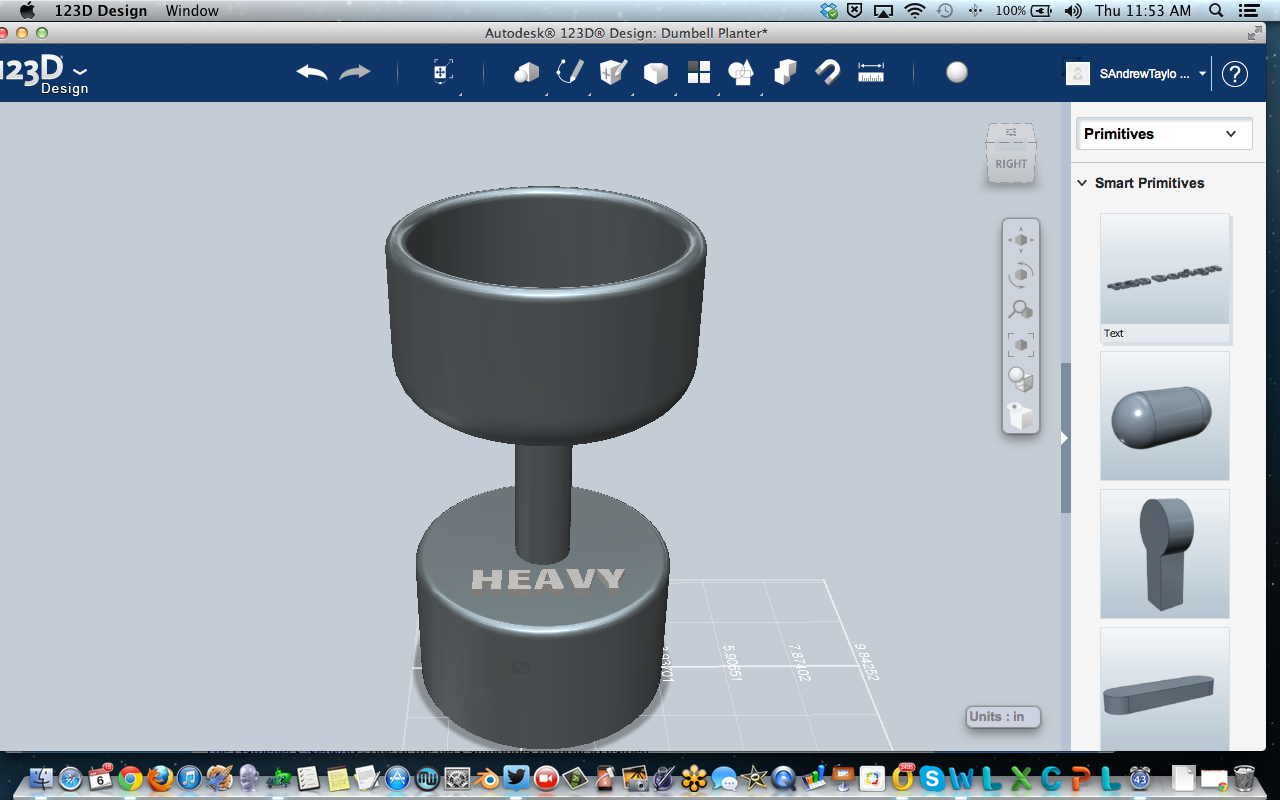

I added some text and material colors to see what it'd look like.
You can play with the material colors by clicking the little orb at the top and selecting the body you want to add color to.
The text option is on the right hand side - just click the little arrow on the right of the screen, and the Parts Bin will pop out. Click and drag the text feature into the model area and you can change the text and settings at the bottom.
From here, you can slice it up and 3D print it in parts, or you can open it in 123D Make and build it from stacked slices.
Happy Gardening Exercise Day!!