Duex5 - Use Build in 12v Switching Regulator on 24v System
by dintid in Workshop > 3D Printing
4622 Views, 12 Favorites, 0 Comments
Duex5 - Use Build in 12v Switching Regulator on 24v System
Index
Use Duex5 to get 12v
As far as I know the Duex5 (also in Duex2) is the only Controller or Expansions -board for 3D Printers with build-in 12v switching regulator, which means you can easily get 12v even if you use a higher voltage to power your machine (VIN Power - opens Duet3d Glossary) without having to resort to various step-down modules lying around in or outside your printer creating risks for shorts and other errors.
Jumper Settings
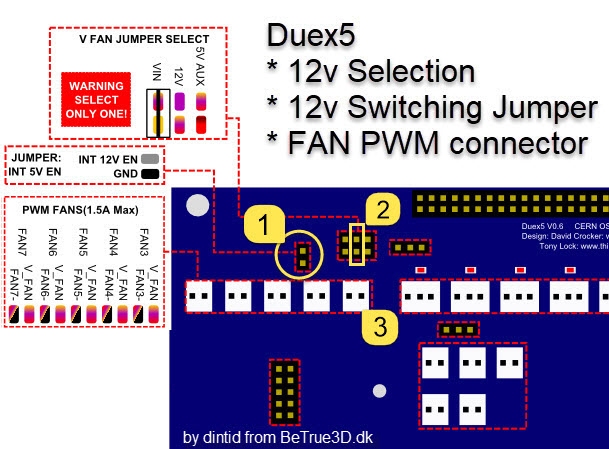
In order to activate this 12v switching we need to:
- Put a jumper on the pins marked with nr. 1
- Check the FAN jumper nr. 2 is placed on the 12v position
- I'm going to use the FAN3 Connector marked with nr. 3 for my LEDs
In case you have difficulty seeing the colors as me, being colorblind, the + wire is to the right side of the 2-pin connector, and - wire on the left side.
The diagram I've created is created from the original conenctions diagram on Duet3D wiki.
Configure Firmware and Customization Options
Configure firmware
We really just need to open the Config.g file and insert a small line under the other fans in our FAN section, like this:M106 P3 S1; Set fan 3 value for our LED to on.
It really just put FAN connector 3 on full power.
Further customization options
We can put the power to the LEDs on half (dimming it) by setting S to 0.5 instead of 1, or use the 0-255 range if that's more to your liking.
It also means you can control it using Gcodes to do different things like turning LED on when a print starts and turn it off when a print job ends or what ever you like.
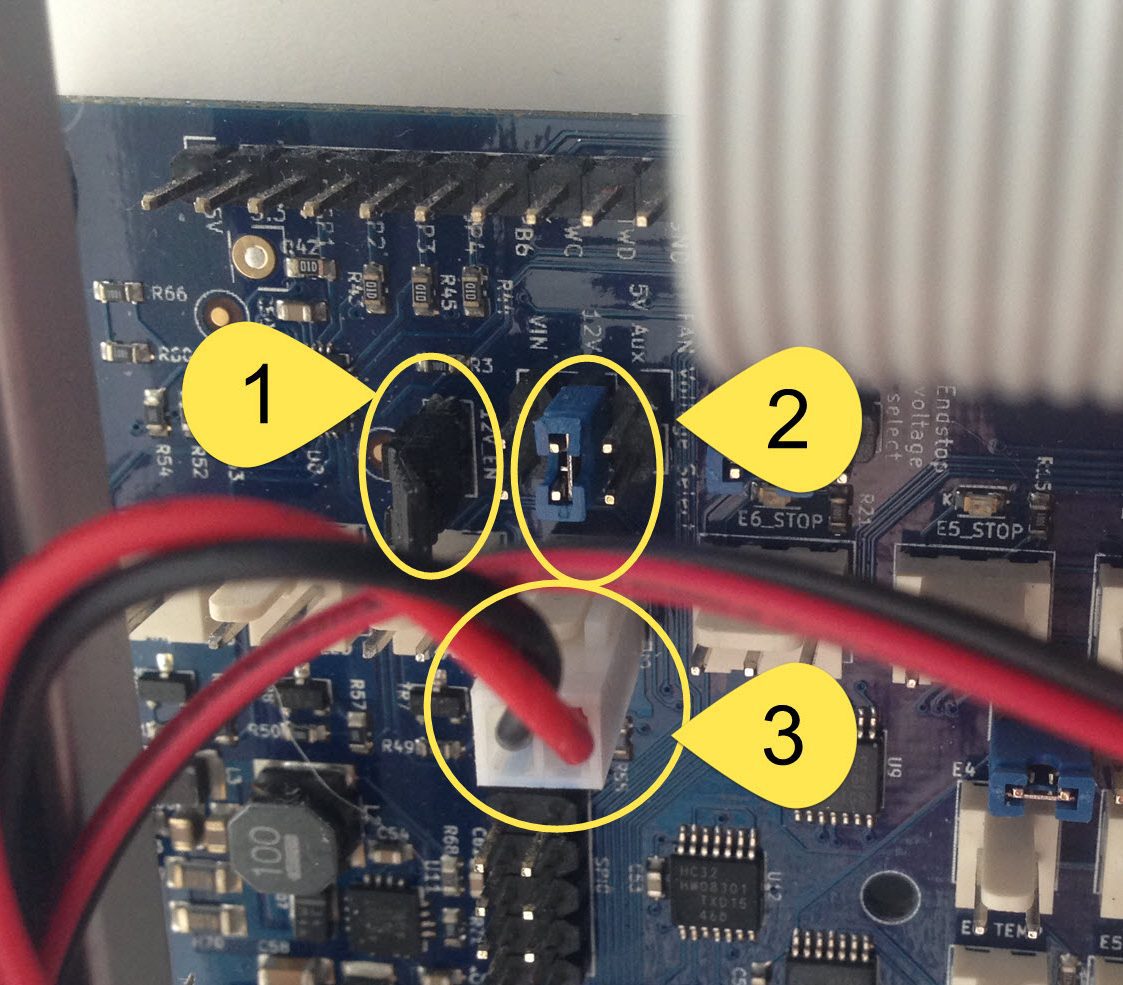
All done
Here you can see the new jumper on nr 1, set jumper on nr 2 and our LED connector on nr. 3
