Drum Beats in Audacity
by instructables_user_4783 in Circuits > Audio
304877 Views, 27 Favorites, 0 Comments
Drum Beats in Audacity

This Instructable will show you how to generate a sequence of drum beats in Audacity which can be mixed with other instruments.
What You Will Need
You will need:
A computer capable of running Audacity (Linux, Windows, or Mac)
Audacity
Audio Selection Sequencer 2 Audacity Plug-in (Download from http://wiki.audacityteam.org/wiki/Download_Nyquist_Plug-ins)
A set of drum sounds (Included as ZIP file with this Instructable)
A computer capable of running Audacity (Linux, Windows, or Mac)
Audacity
Audio Selection Sequencer 2 Audacity Plug-in (Download from http://wiki.audacityteam.org/wiki/Download_Nyquist_Plug-ins)
A set of drum sounds (Included as ZIP file with this Instructable)
Downloads
Installing
Make sure Audacity is installed. Then extract seq2.zip which you have downloaded from (http://wiki.audacityteam.org/wiki/Download_Nyquist_Plug-ins) and copy seq2.ny into /usr/share/audacity/plug-ins/ if you use Linux
OR
C:/Program Files/Audacity/Plug-Ins if you use Windows
Extract 17-29_TicTacShutUp_Studio_Drums_1.zip . It does not matter where the drum sound files are placed as long as you can remember where they are.
OR
C:/Program Files/Audacity/Plug-Ins if you use Windows
Extract 17-29_TicTacShutUp_Studio_Drums_1.zip . It does not matter where the drum sound files are placed as long as you can remember where they are.
Import Drums
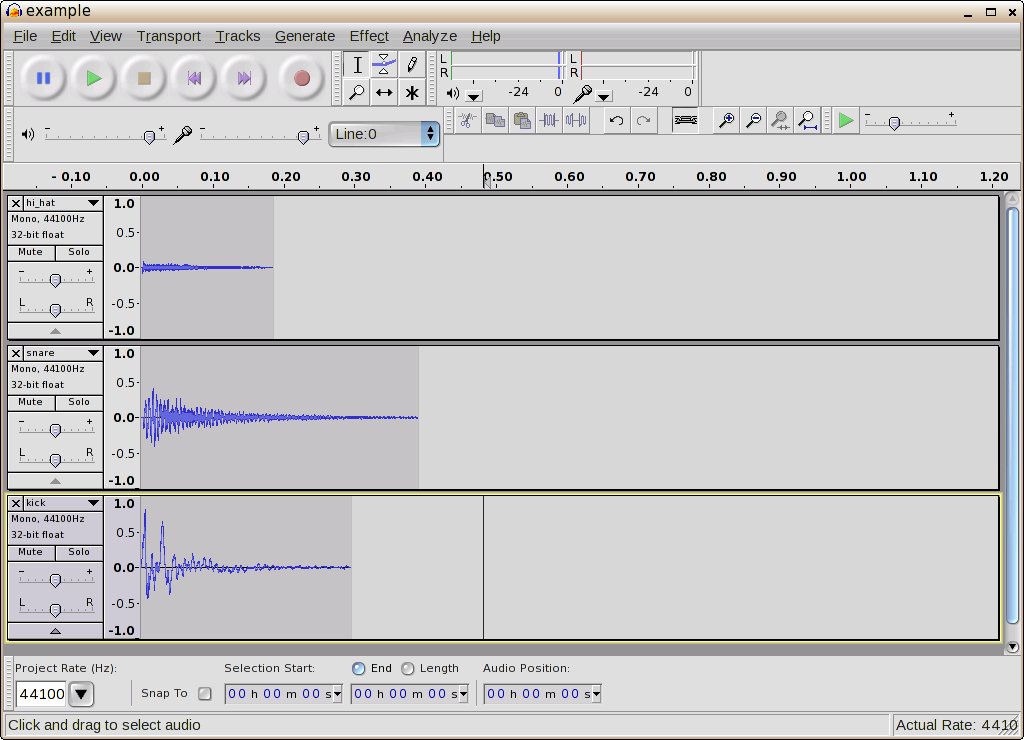
Open Audacity. Under Effect... Plugins 1 to ? "Audio Selection Sequencer Two" should appear. Next, Import the drums you would like to use by clicking on File...Import...Audio. Each drum should be a different layer/track. You may wish to label the tracks by clicking on the down arrow beside the track, then name, then type the name of the drum (eg. bass drum) All tracks should be mono. Double click the track to select it and then click Tracks...Stereo Track to mono. Do this with all the tracks. Remove any unwanted audio by highlighting and then pressing Delete but be careful not to remove too much.
TIP:Be safe, save often.
Sequence
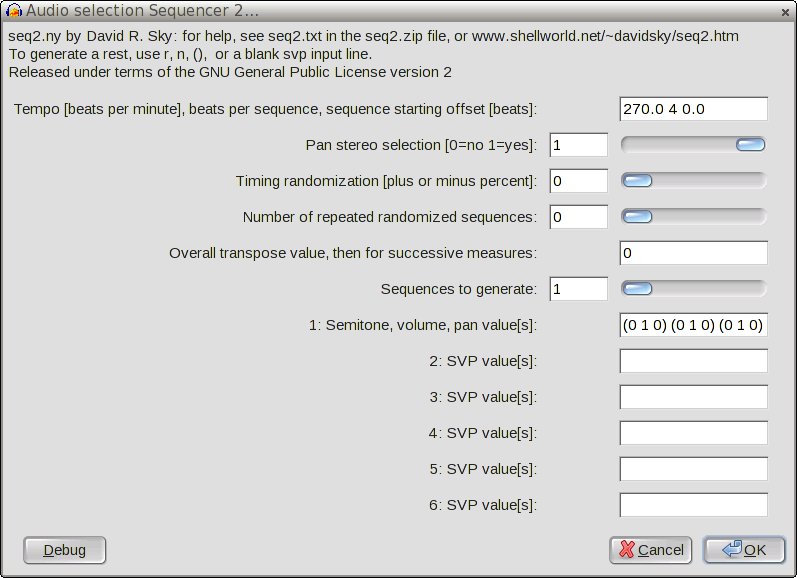

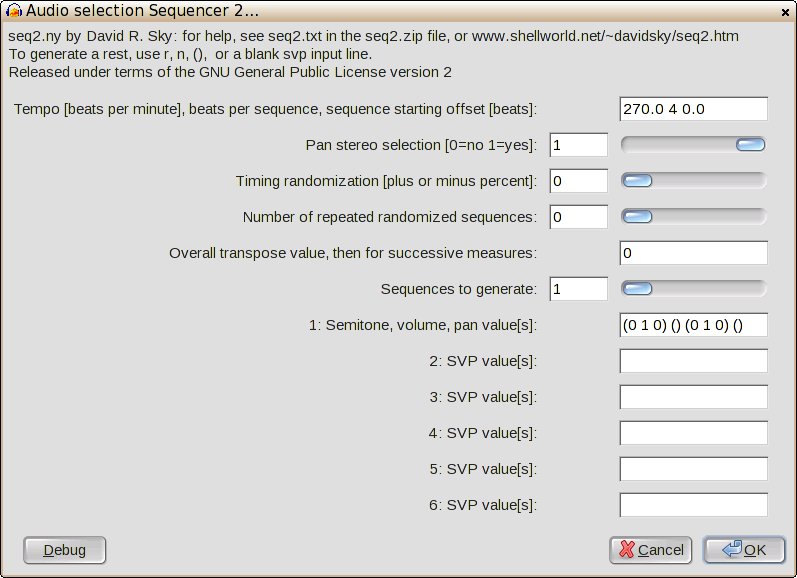
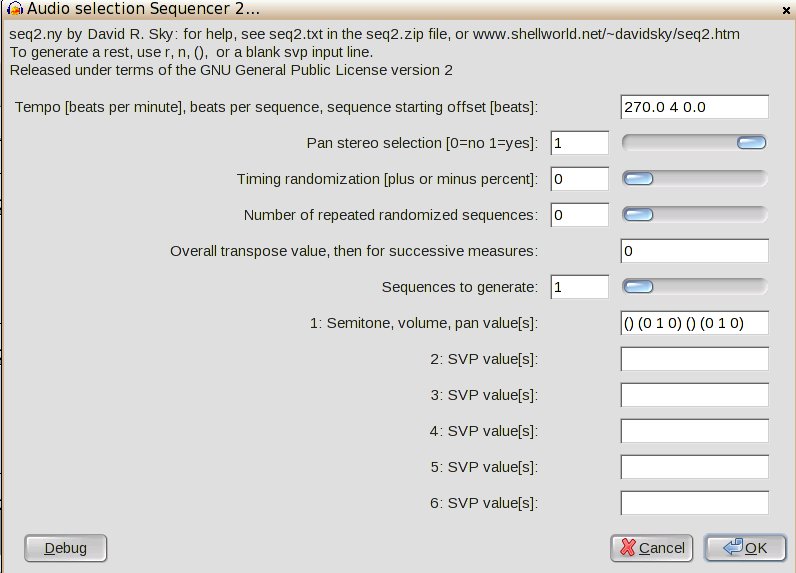
Double-click to select the first drum track. Then go to Effect... Plugins 1 to ? ...Audio Selection Sequencer Two. Enter a tempo. Beats per sequence should be "4". Overall Transpose Value, then for successive measures should be "0". Sequences to generate should be "1". Type in the semi-tone volume pan (SVP)values, these will be the drum pattern.
(0 1 0) is a hit
() is a rest
therefore "(0 1 0) (0 1 0) (0 1 0) (0 1 0)" is constant hitting
Create patterns for the other drum layers.
Finishing Up
Adjust the volume levels of the individual tracks if needed by clicking on Effect...Amplify. Negative amplification will lower volume levels. Positive amplification levels will raise volume levels. Avoid clipping. That's it, have fun!
I have attached MP3, OGG and Audacity versions of a drum sequence I have generated. The OGG version will play directly in Firefox.