Drill Counting Sensor for PCB CNC Machine
1133 Views, 3 Favorites, 0 Comments
Drill Counting Sensor for PCB CNC Machine
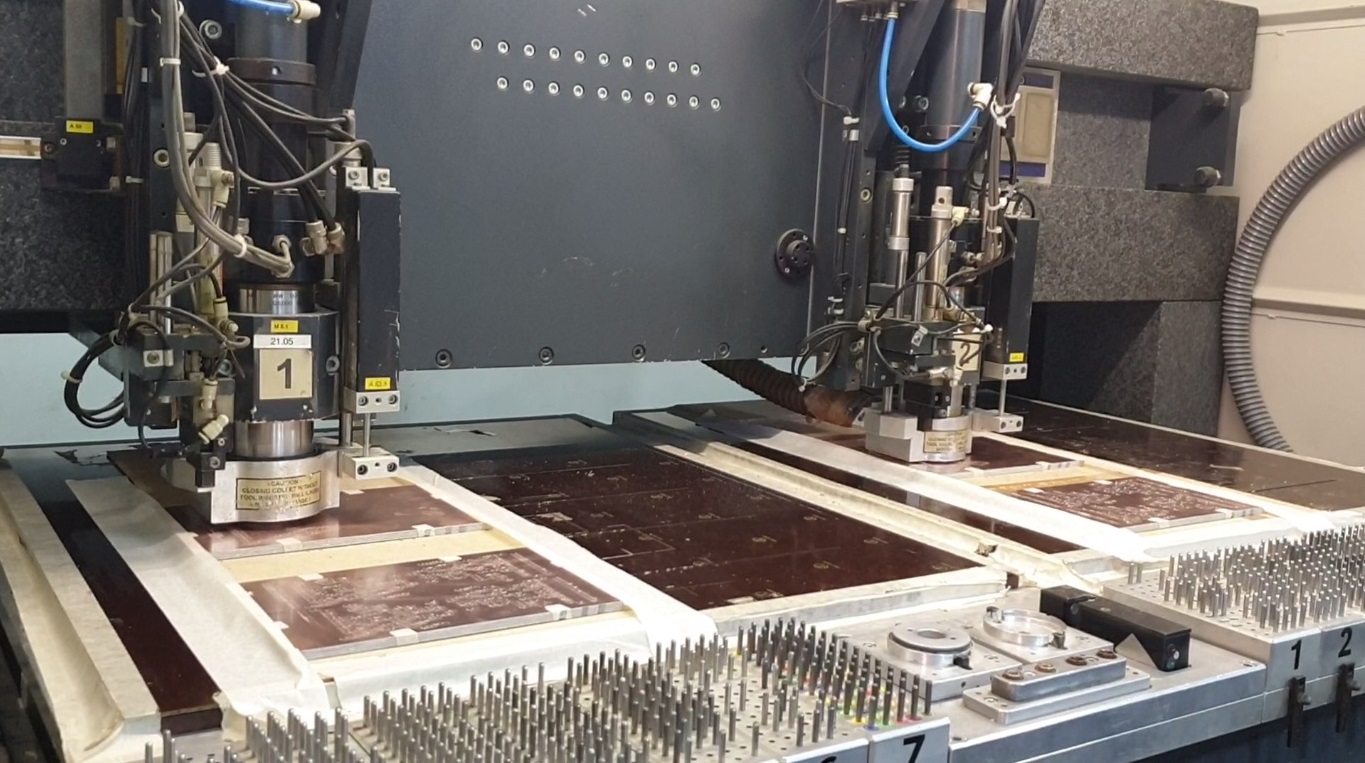
Hello guys!
Recently I got access to a CNC machine and I always wanted to work on the Drill Counter and monitor the machine online. Hence, I have prototyped a sensor and shared a step by step procedure of building an IOT based Drill Counter which is used for CNC machines. Thanks to LionCircuits for providing me low-cost proto-boards in just 5 days.
Let's get started...
Things Required
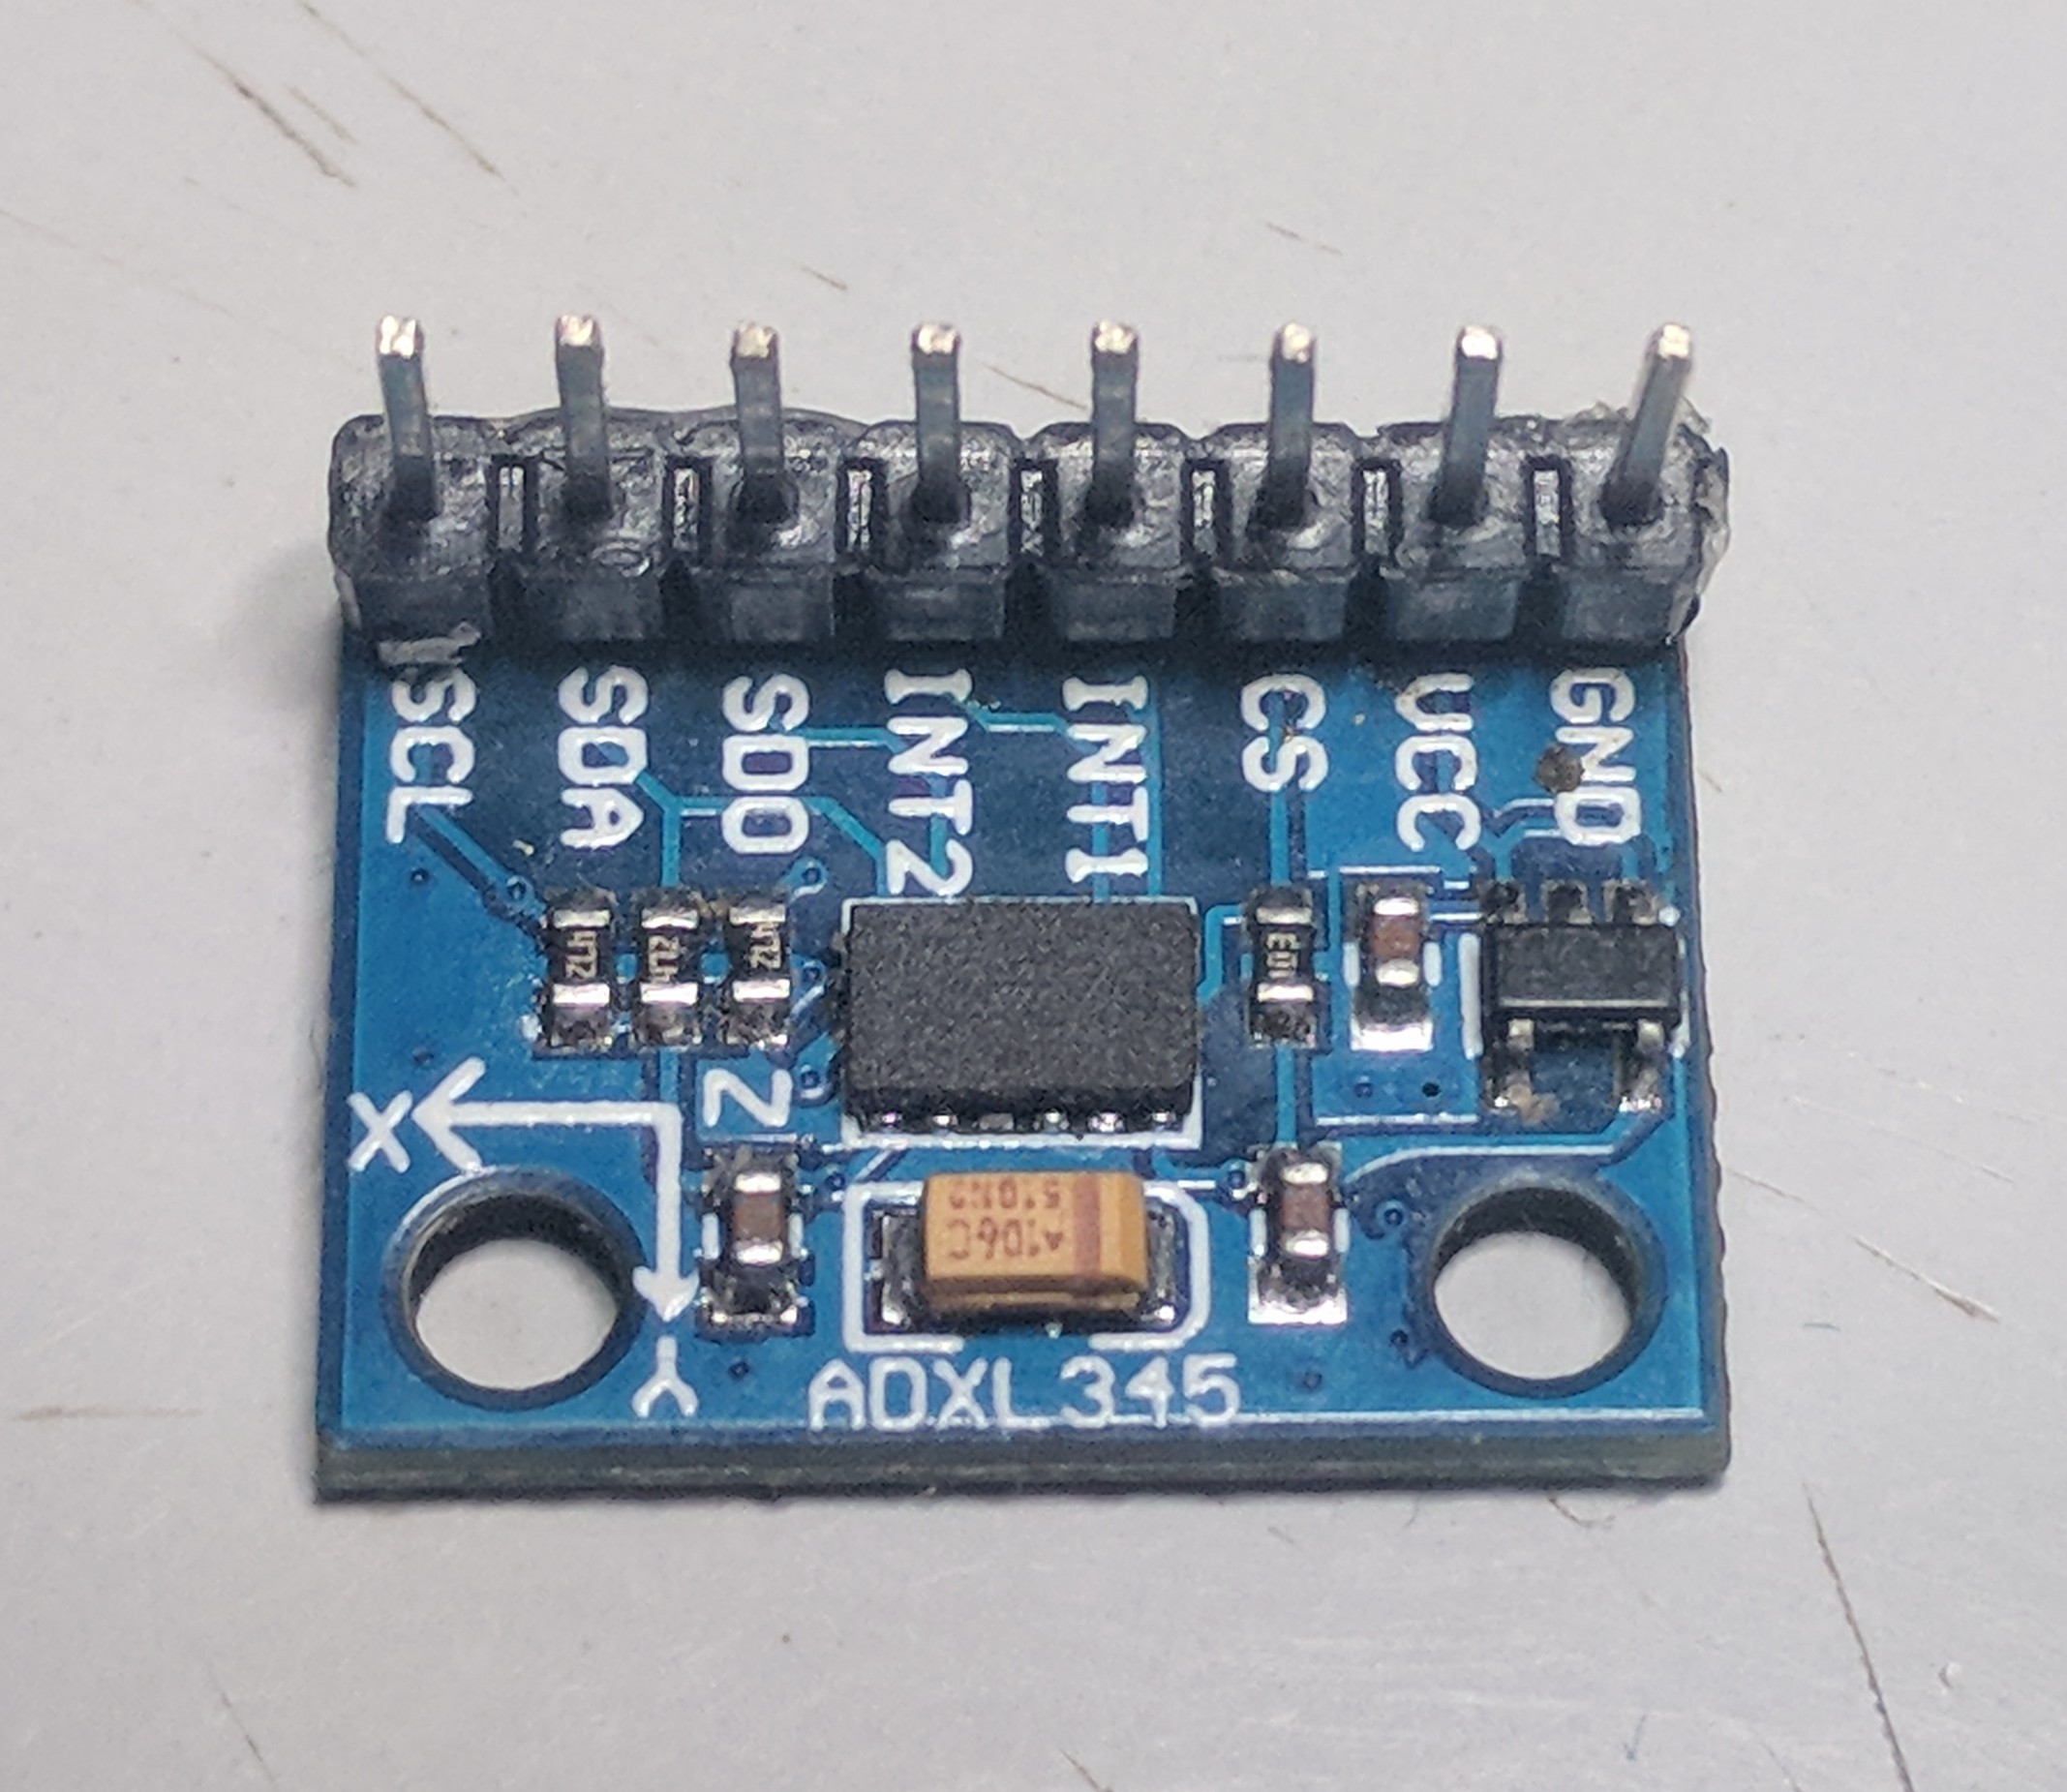
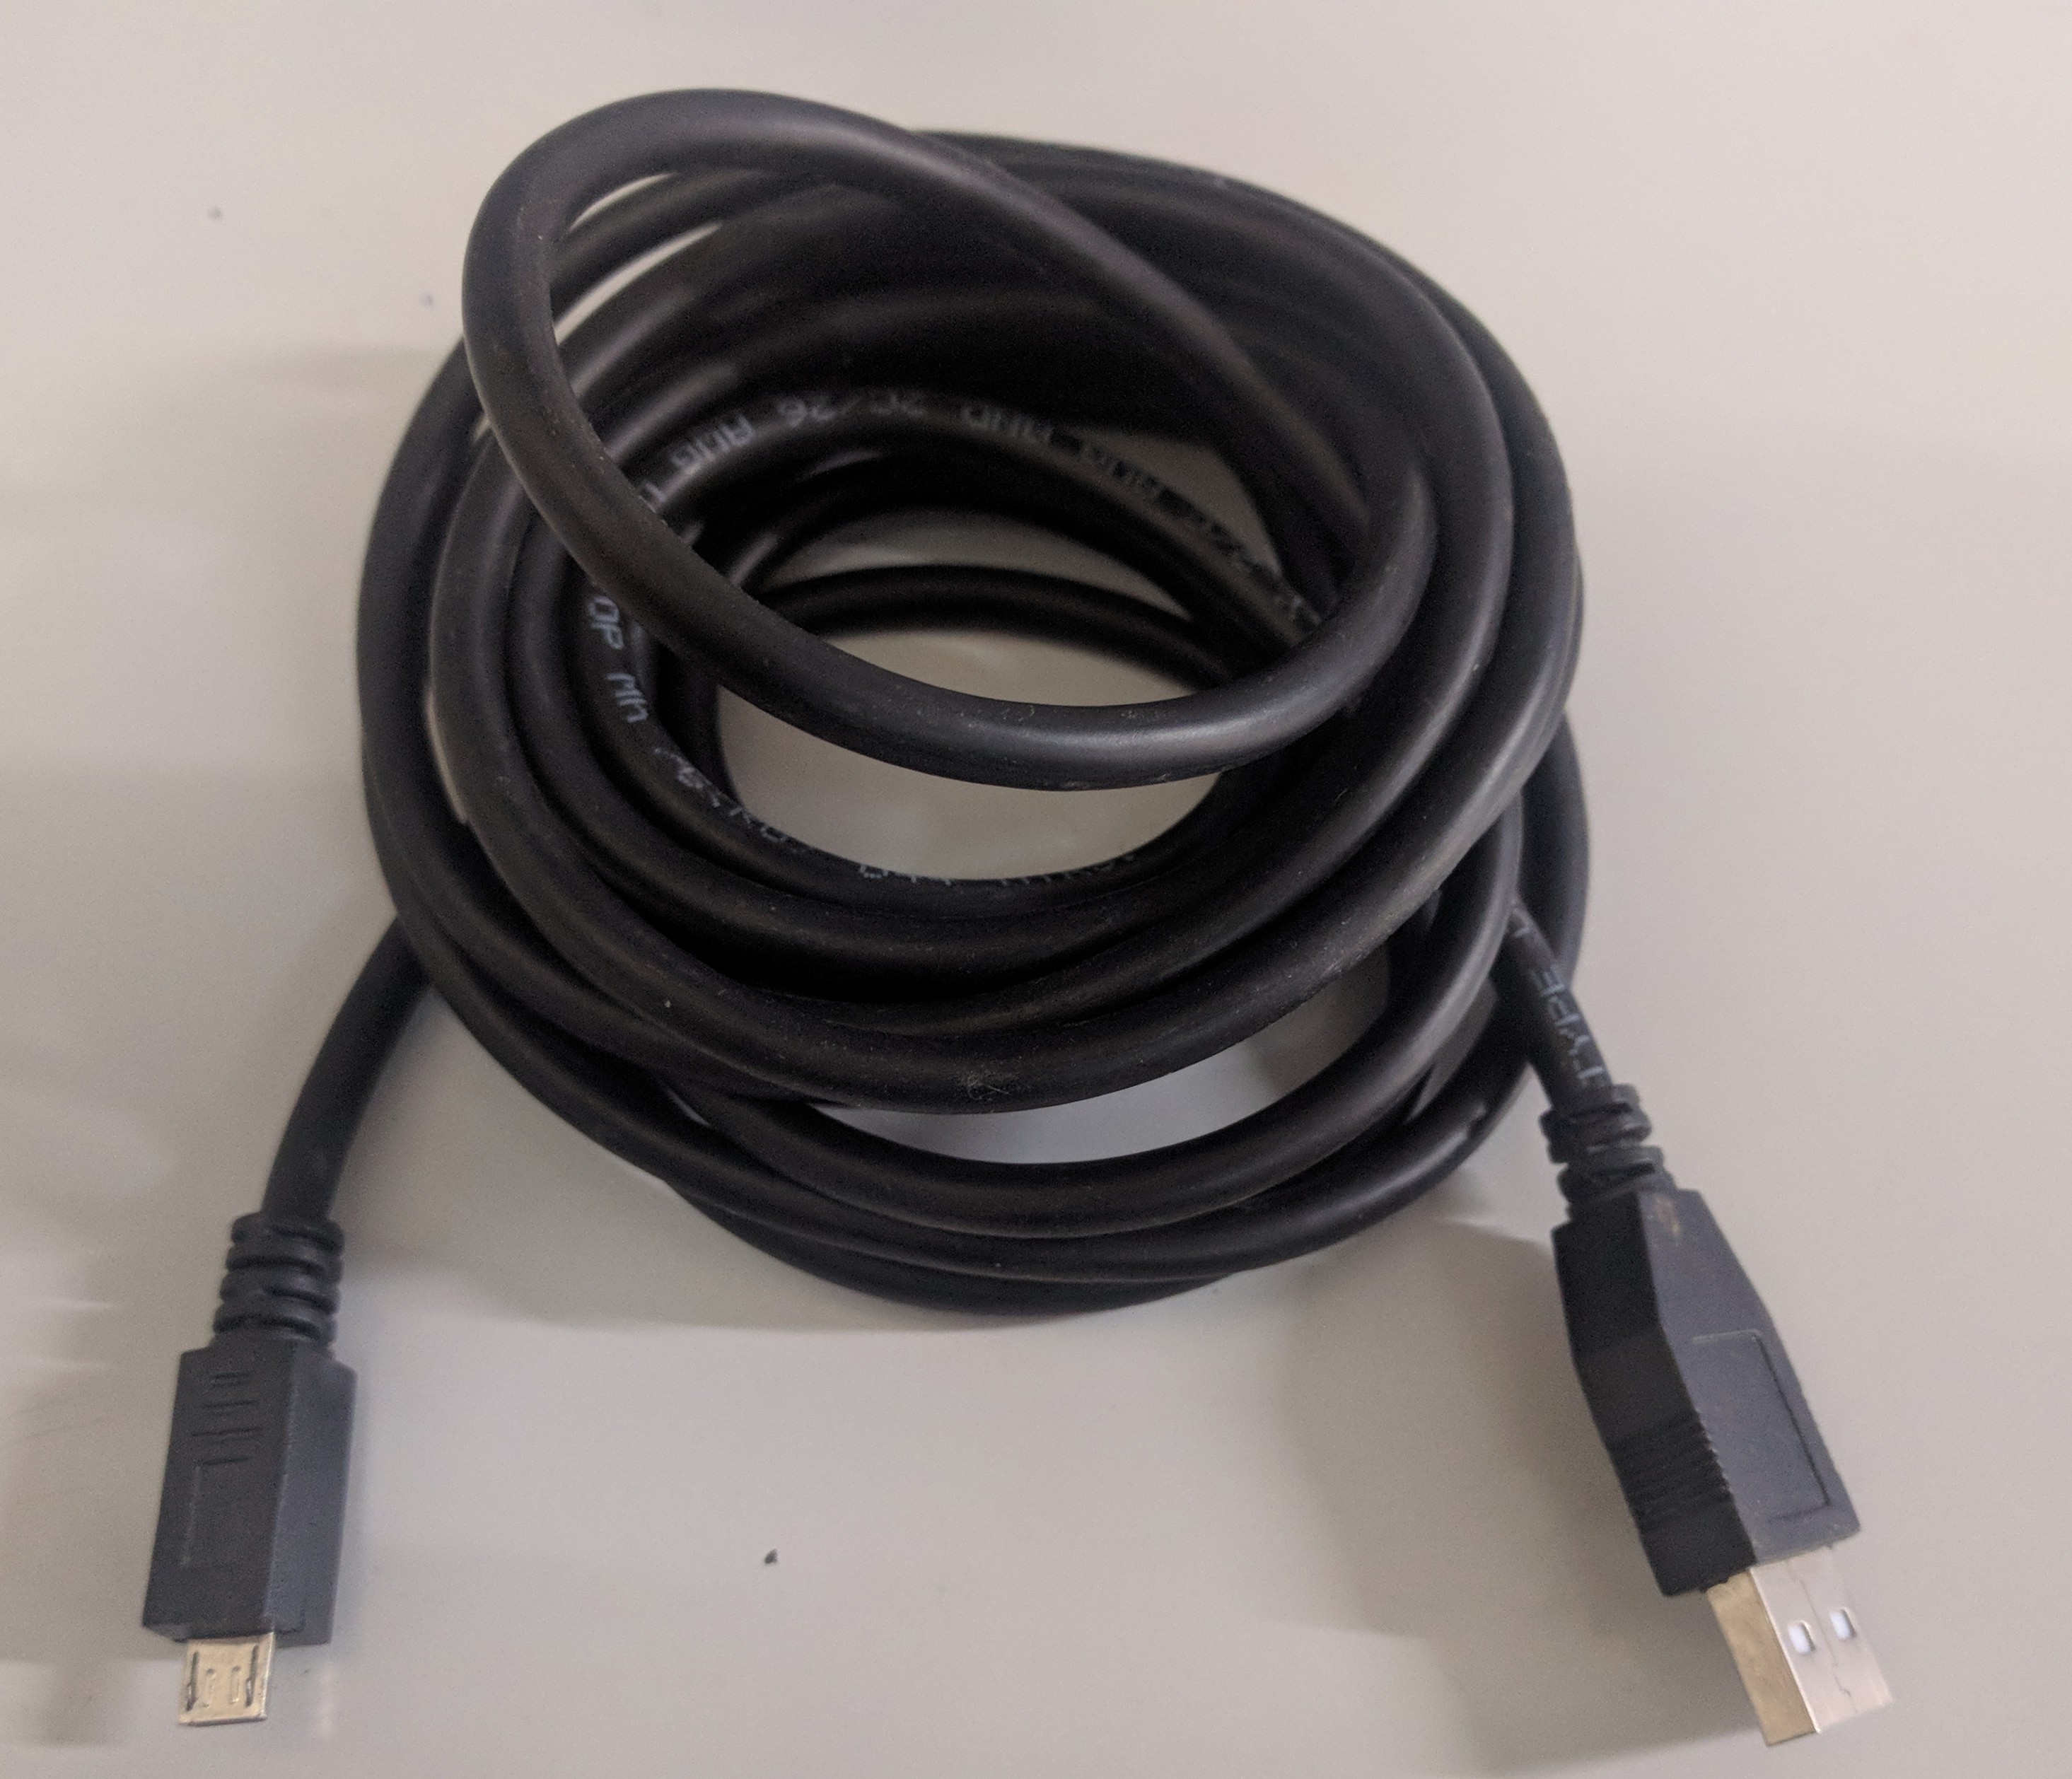
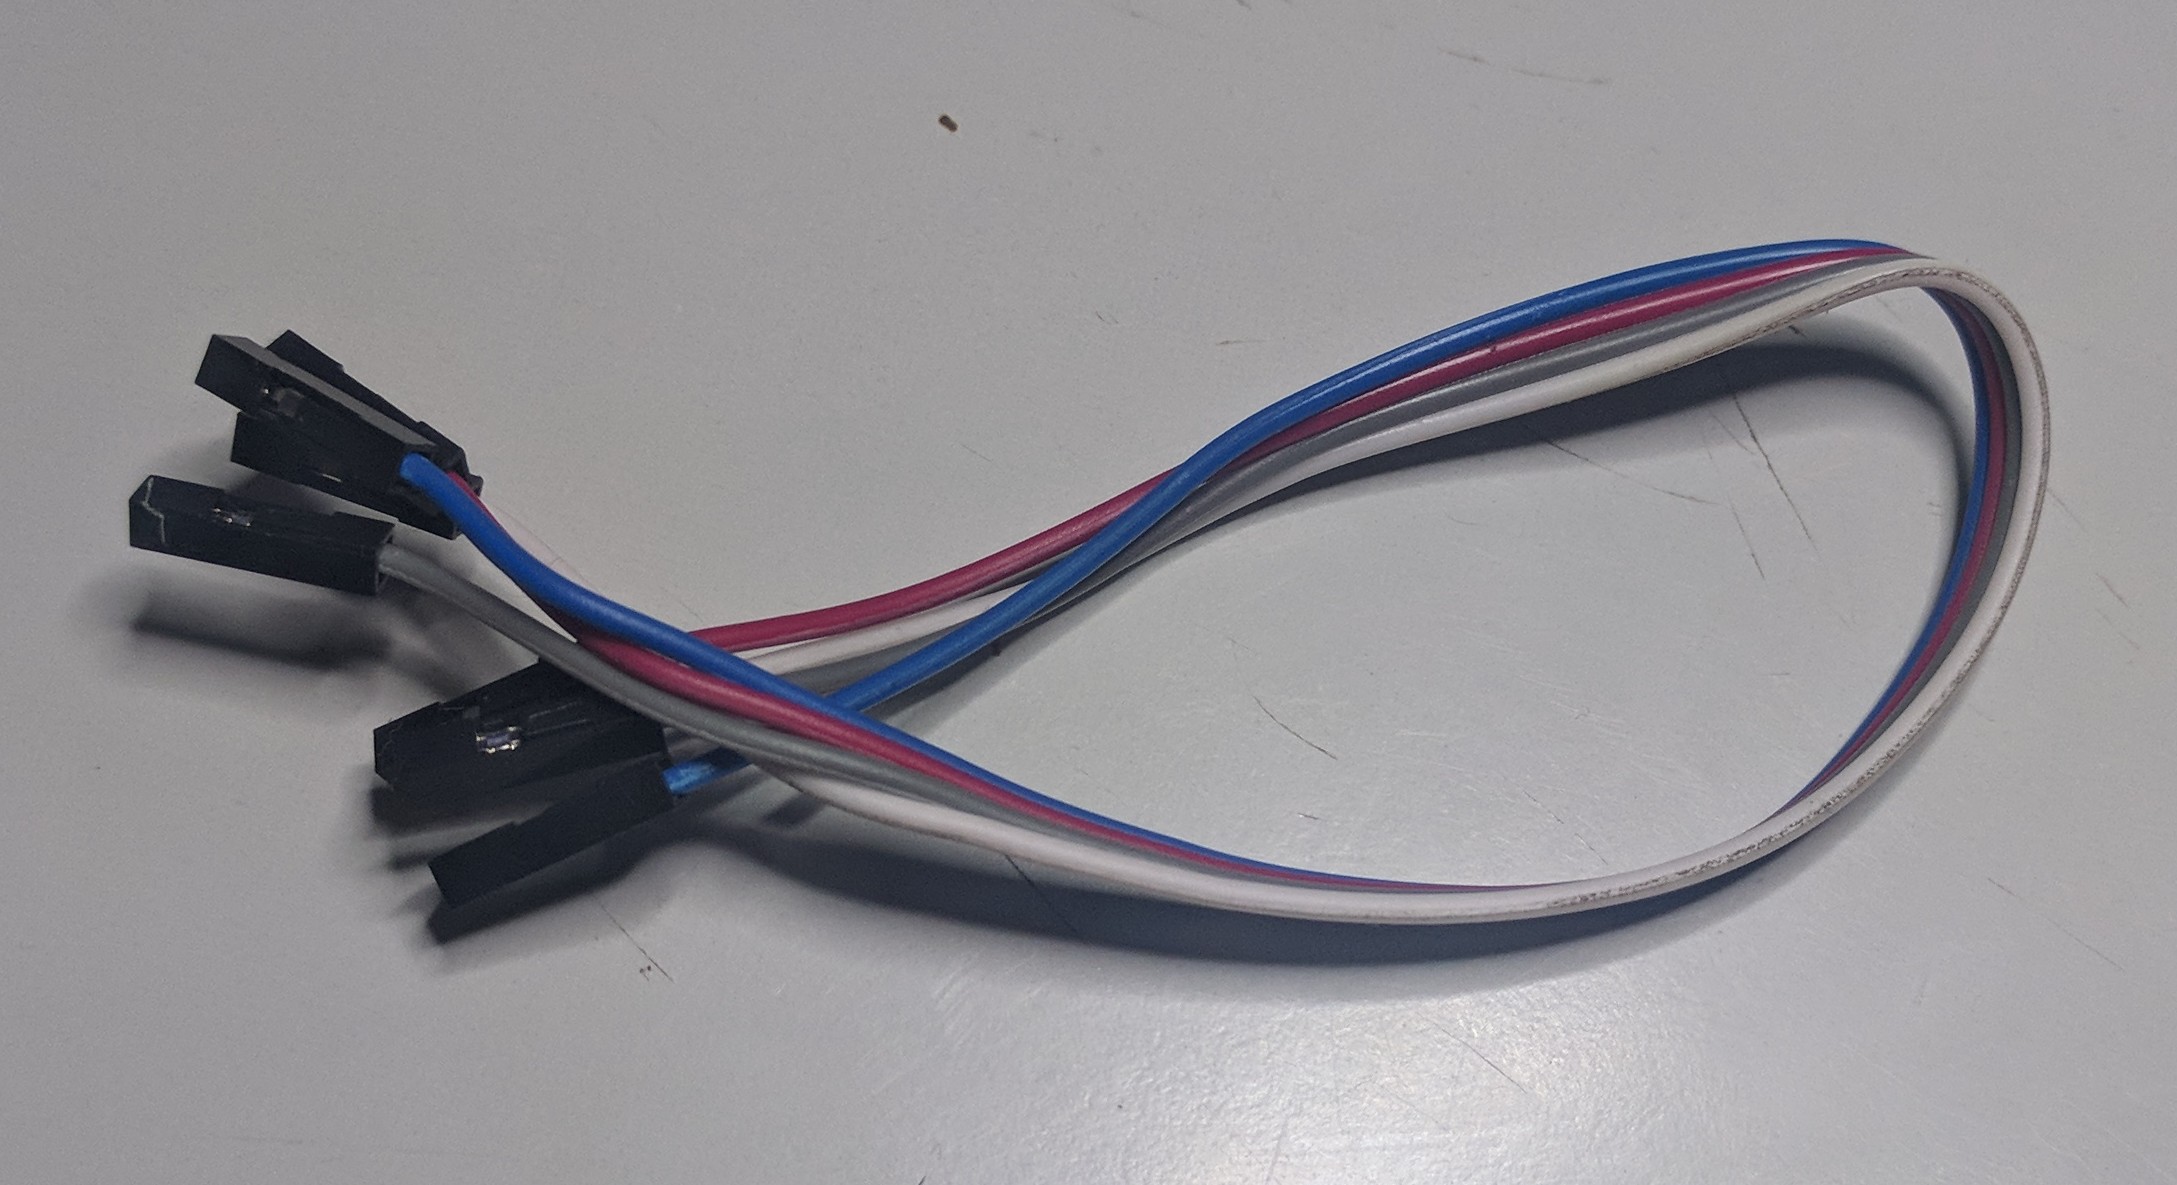
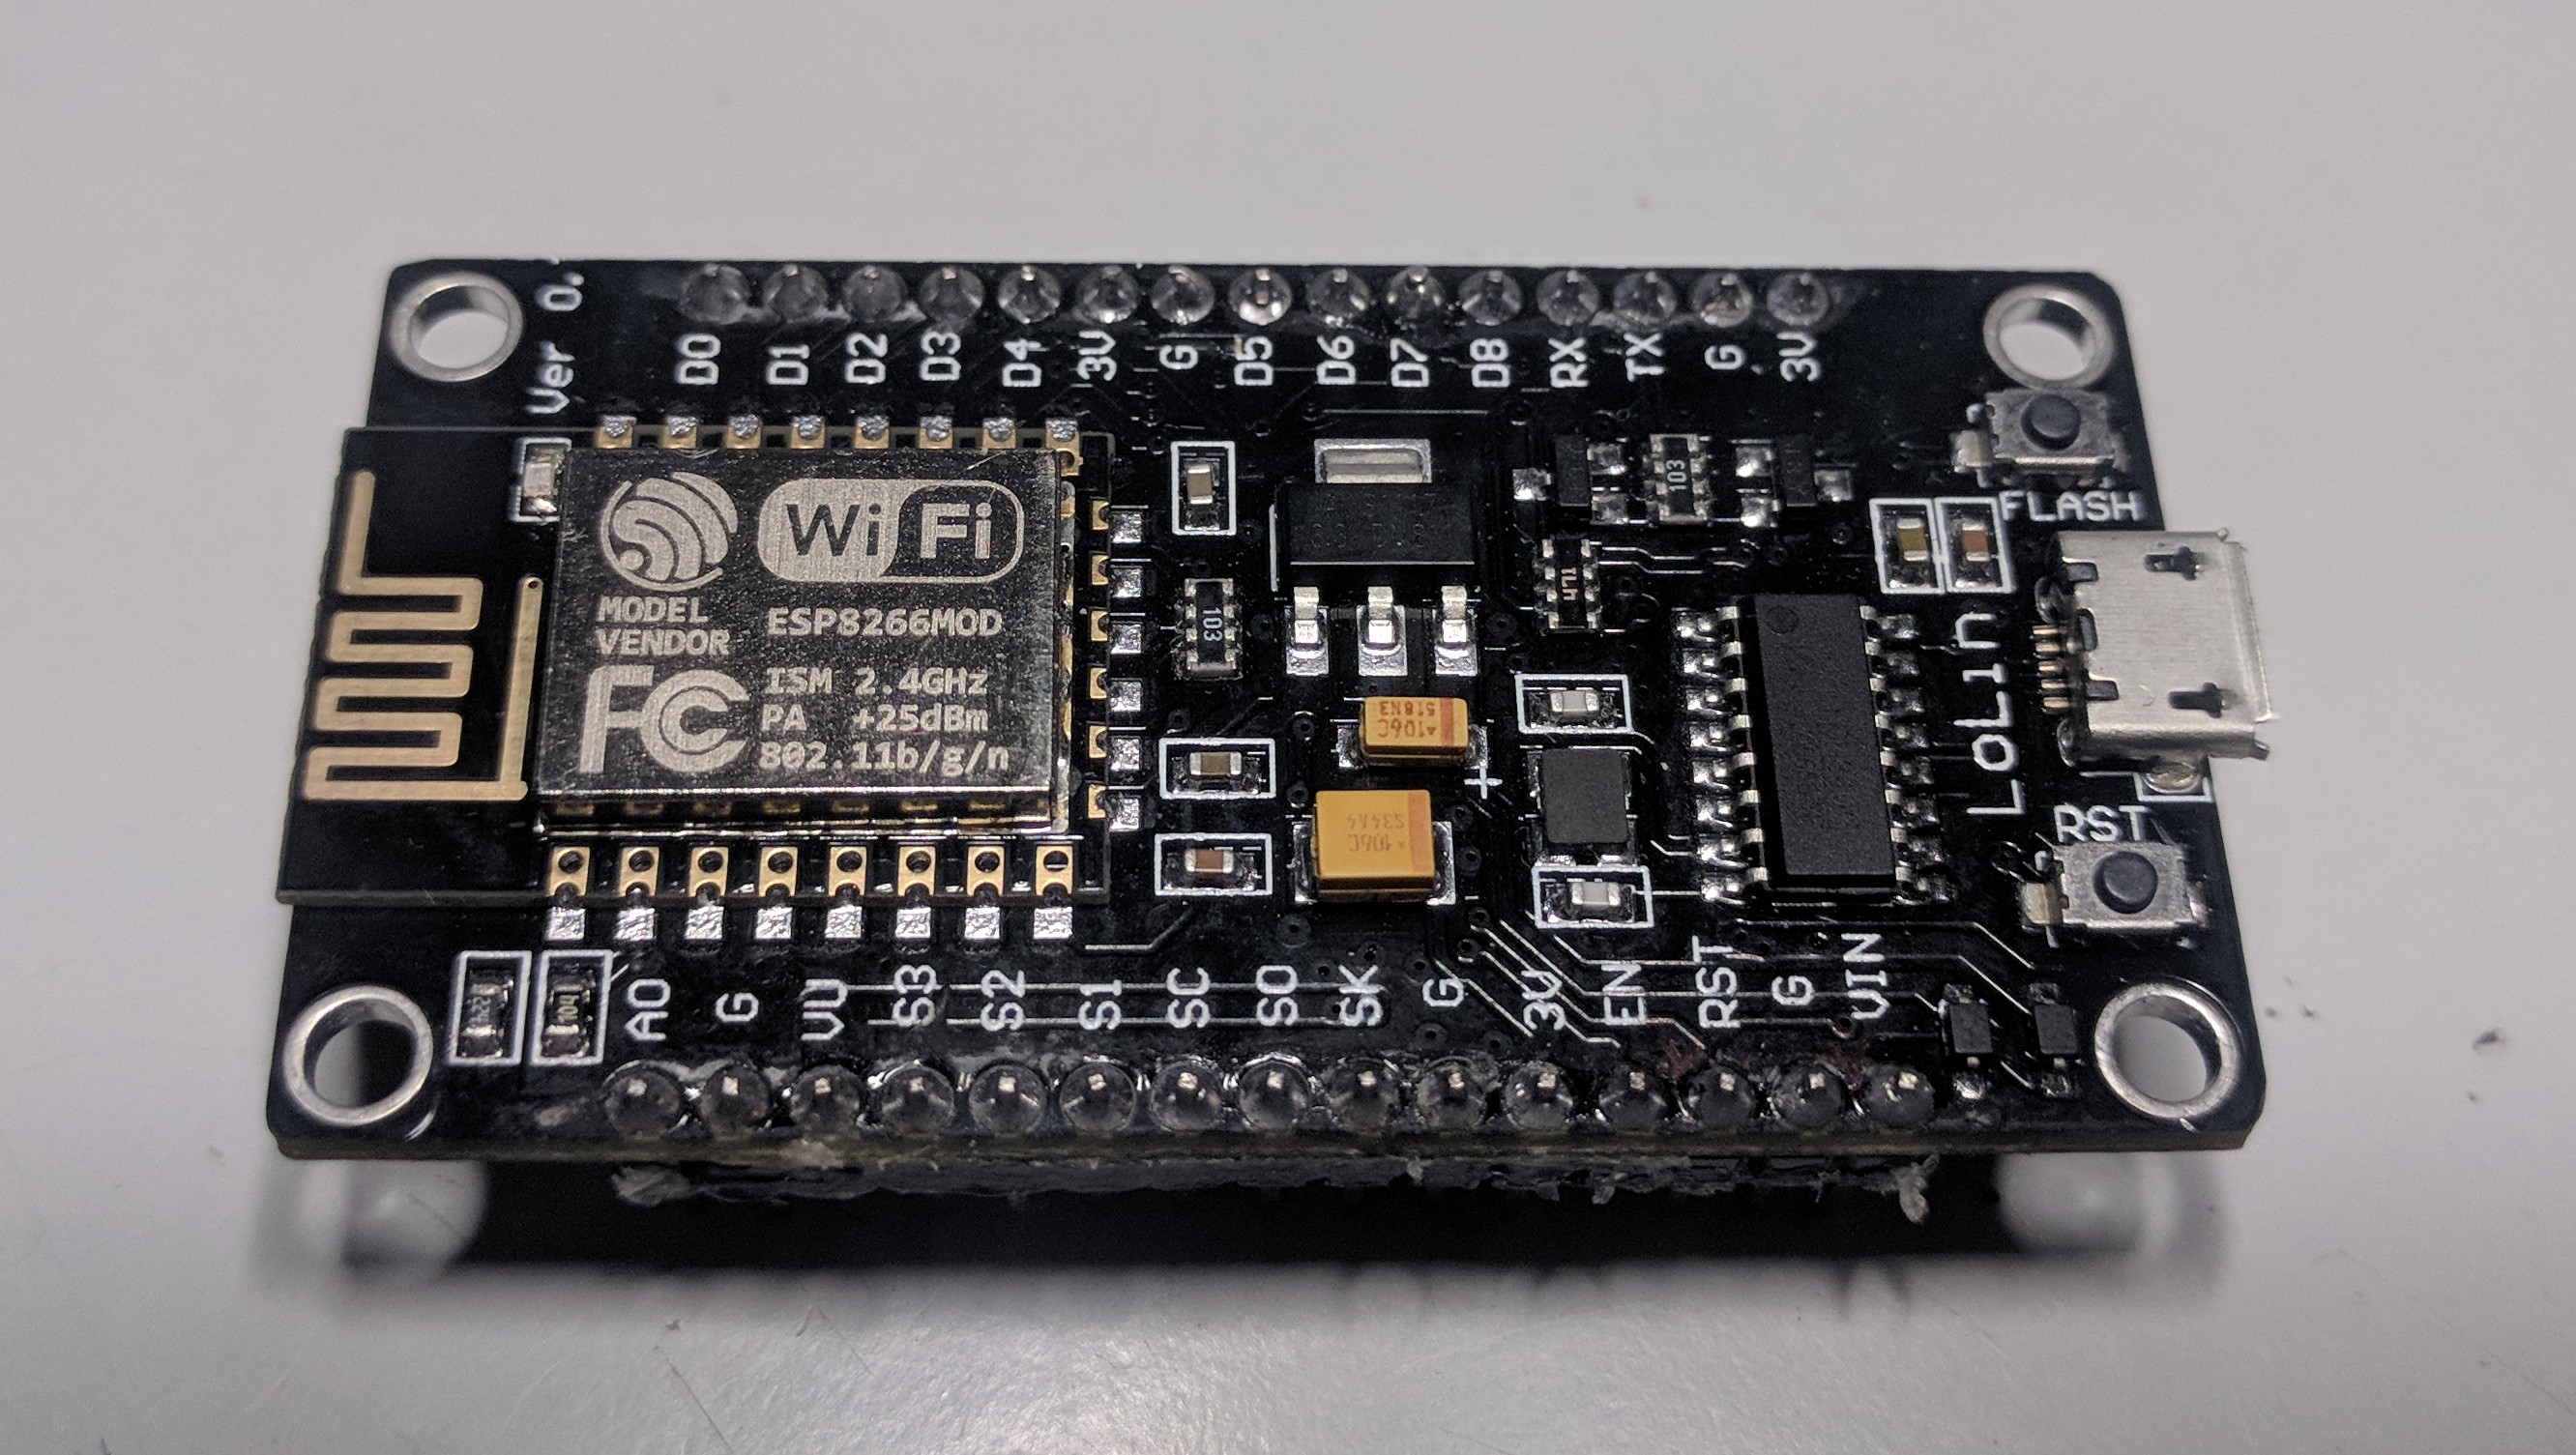
1. NodeMCU
2. ADXL345 accelerometer
3. Jumper wire - female to female
4. Micro USB cable A to B
5. Arduino IDE on your computer.
Installing NodeMCU Board Package
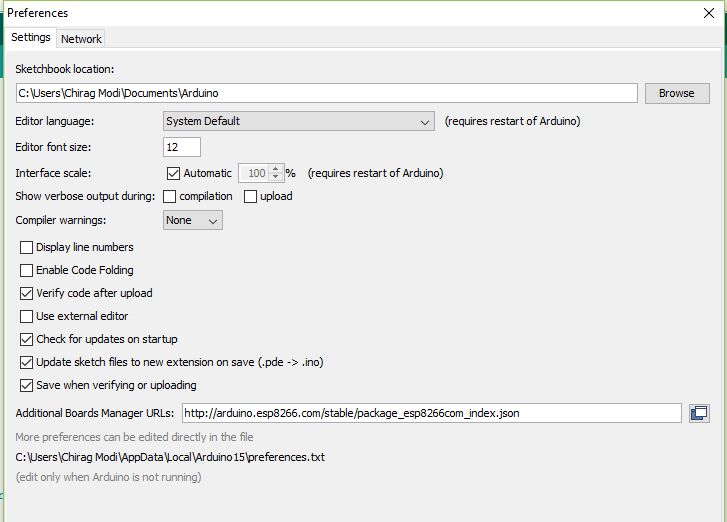
1. Open up Arduino IDE. Go to Files -> Preferences. Enter this Code into Additional Board Manager URLs field.
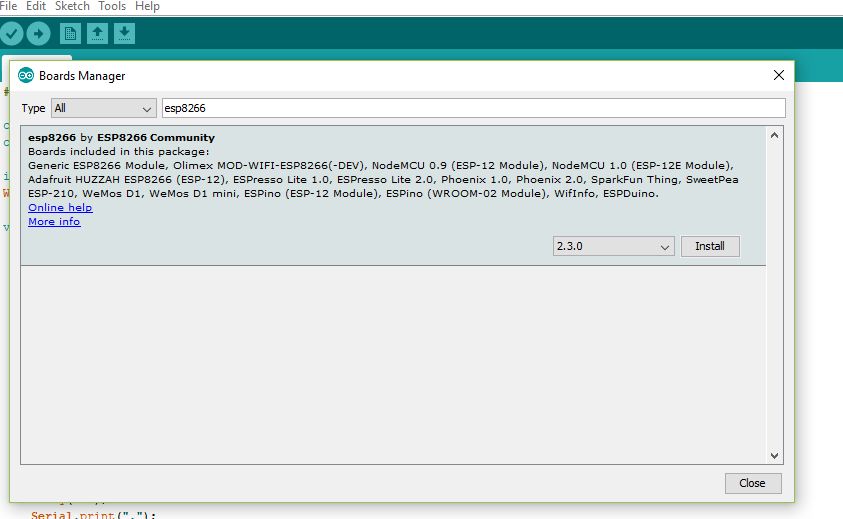
2. Now go to Tools ->Boards ->Board Manager, and search for ESP8266 and install the package.
Connections
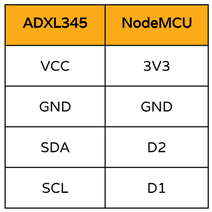
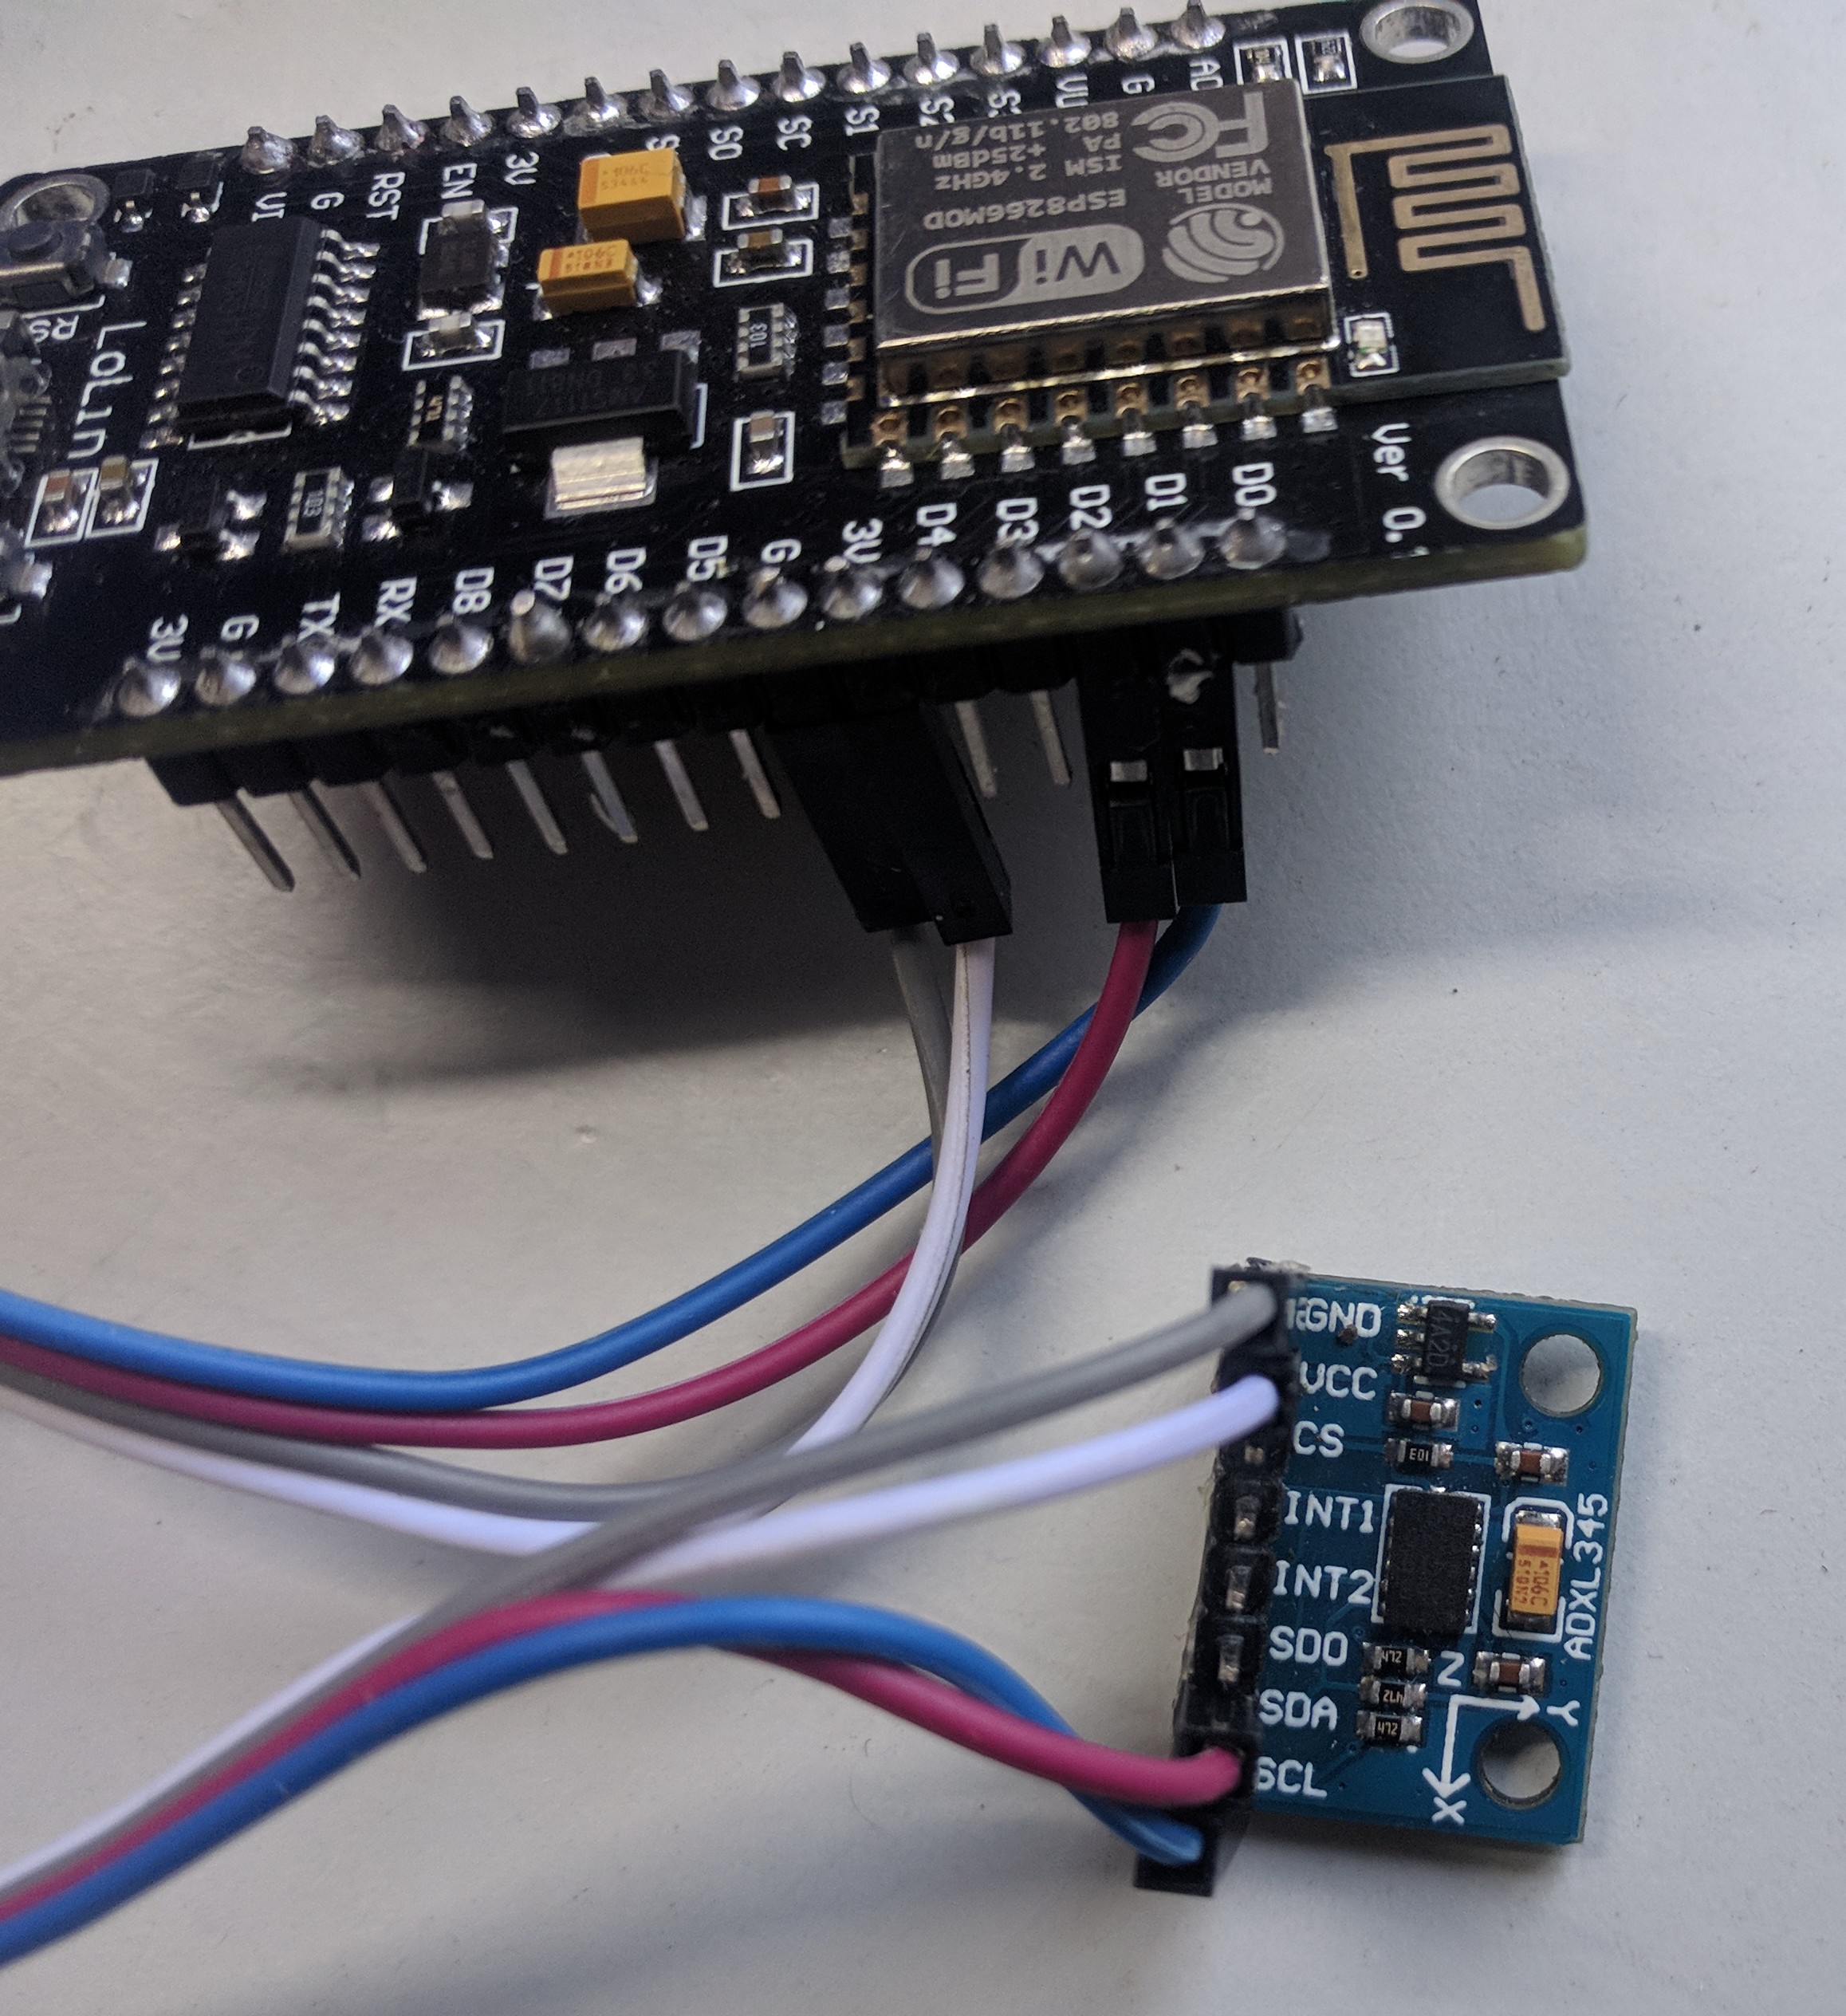
Interfacing of ADXL345 accelerometer with NodeMCU has to be done as shown in the image.
Mounting on the CNC Machine
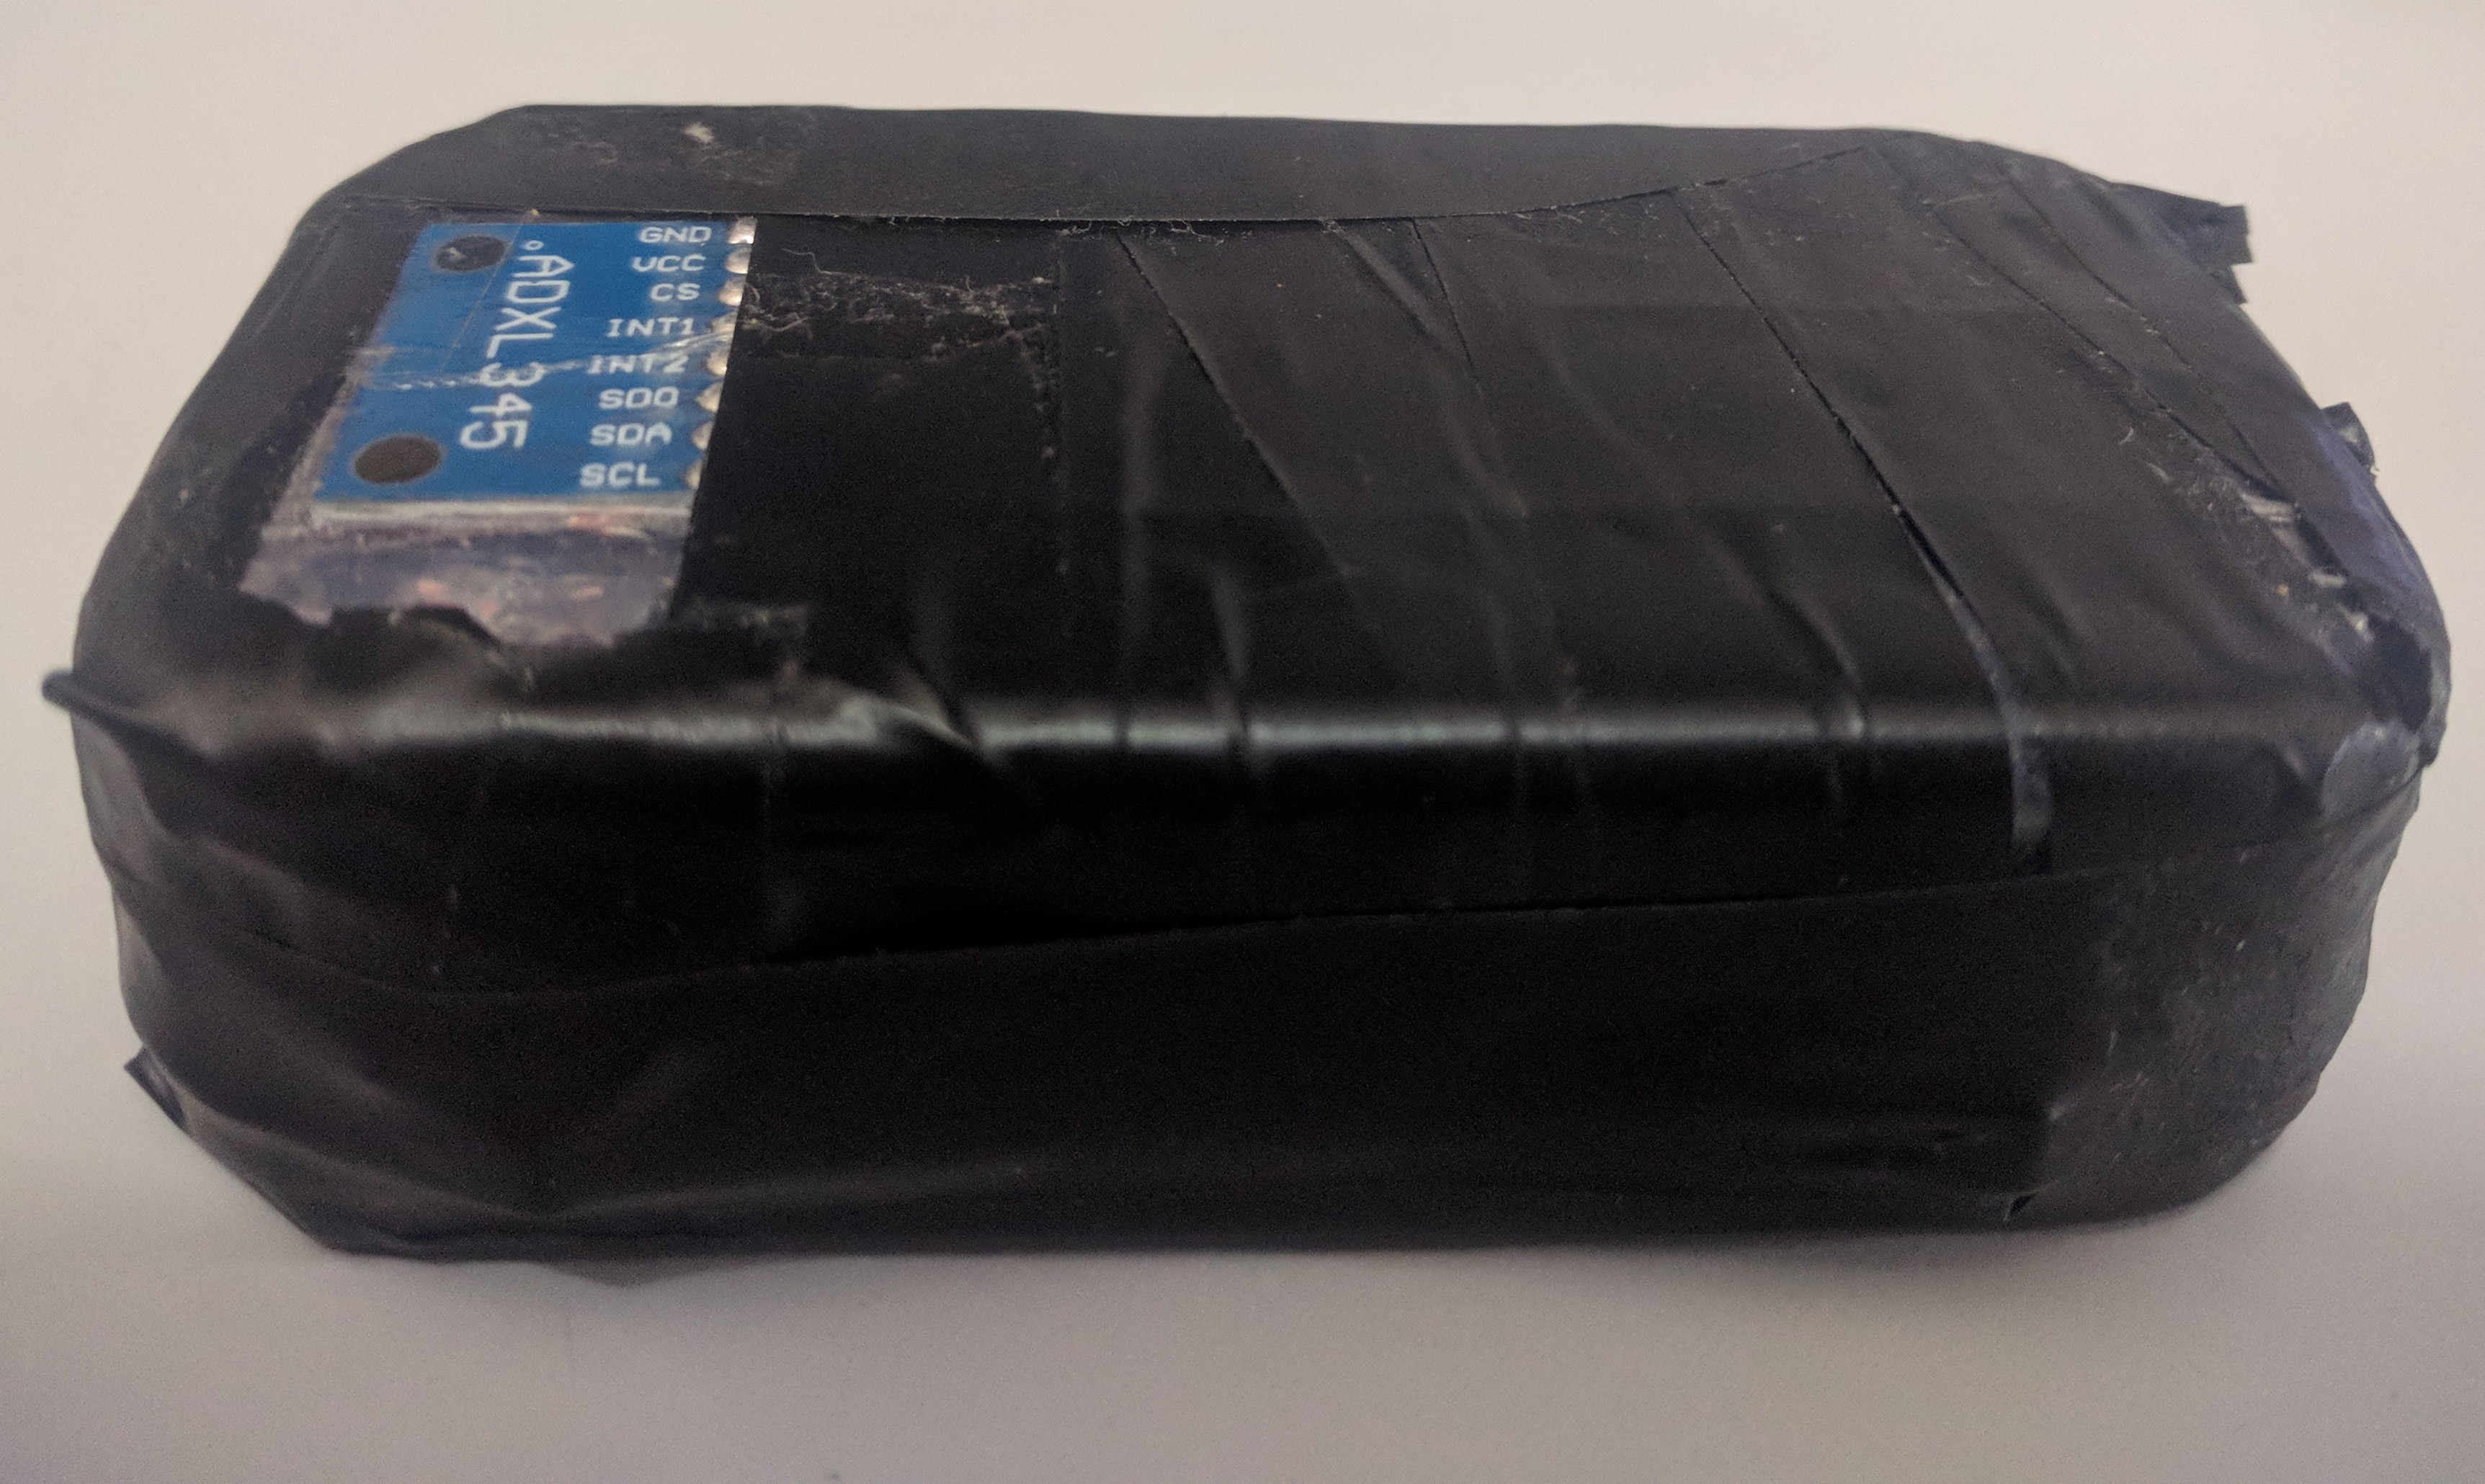
In-order to mount on a CNC machine I have embedded the circuit inside a small box as shown in the image.
Programming
1. Download and Install Adafruit sensor library and ADXL345 Library.
2. Click "File -> Examples -> Adafruit_ADXL345 -> sensortest" to load the example sketch from the library as shown below.
<p>#include <Wire.h><wire.h><br>#include <Adafruit_Sensor.h><adafruit_sensor.h>
#include <Adafruit_ADXL345_U.h> <adafruit_adxl345_u.h>

/* Assign a unique ID to this sensor at the same time */
Adafruit_ADXL345_Unified accel = Adafruit_ADXL345_Unified(12345);

void displaySensorDetails(void)
{
  sensor_t sensor;
  accel.getSensor(&sensor);
  Serial.println("------------------------------------");
  Serial.print  ("Sensor:       "); Serial.println(sensor.name);
  Serial.print  ("Driver Ver:   "); Serial.println(sensor.version);
  Serial.print  ("Unique ID:    "); Serial.println(sensor.sensor_id);
  Serial.print  ("Max Value:    "); Serial.print(sensor.max_value); Serial.println(" m/s^2");
  Serial.print  ("Min Value:    "); Serial.print(sensor.min_value); Serial.println(" m/s^2");
  Serial.print  ("Resolution:   "); Serial.print(sensor.resolution); Serial.println(" m/s^2");
  Serial.println("------------------------------------");
  Serial.println("");
  delay(5000);
}

void displayDataRate(void)
{
  Serial.print  ("Data Rate:    ");

  switch(accel.getDataRate())
  {
    case ADXL345_DATARATE_3200_HZ:
      Serial.print  ("3200 ");
      break;
    case ADXL345_DATARATE_1600_HZ:
      Serial.print  ("1600 ");
      break;
    case ADXL345_DATARATE_800_HZ:
      Serial.print  ("800 ");
      break;
    case ADXL345_DATARATE_400_HZ:
      Serial.print  ("400 ");
      break;
    case ADXL345_DATARATE_200_HZ:
      Serial.print  ("200 ");
      break;
    case ADXL345_DATARATE_100_HZ:
      Serial.print  ("100 ");
      break;
    case ADXL345_DATARATE_50_HZ:
      Serial.print  ("50 ");
      break;
    case ADXL345_DATARATE_25_HZ:
      Serial.print  ("25 ");
      break;
    case ADXL345_DATARATE_12_5_HZ:
      Serial.print  ("12.5 ");
      break;
    case ADXL345_DATARATE_6_25HZ:
      Serial.print  ("6.25 ");
      break;
    case ADXL345_DATARATE_3_13_HZ:
      Serial.print  ("3.13 ");
      break;
    case ADXL345_DATARATE_1_56_HZ:
      Serial.print  ("1.56 ");
      break;
    case ADXL345_DATARATE_0_78_HZ:
      Serial.print  ("0.78 ");
      break;
    case ADXL345_DATARATE_0_39_HZ:
      Serial.print  ("0.39 ");
      break;
    case ADXL345_DATARATE_0_20_HZ:
      Serial.print  ("0.20 ");
      break;
    case ADXL345_DATARATE_0_10_HZ:
      Serial.print  ("0.10 ");
      break;
    default:
      Serial.print  ("???? ");
      break;
  }
  Serial.println(" Hz");
}

void displayRange(void)
{
  Serial.print  ("Range:         +/- ");

  switch(accel.getRange())
  {
    case ADXL345_RANGE_16_G:
      Serial.print  ("16 ");
      break;
    case ADXL345_RANGE_8_G:
      Serial.print  ("8 ");
      break;
    case ADXL345_RANGE_4_G:
      Serial.print  ("4 ");
      break;
    case ADXL345_RANGE_2_G:
      Serial.print  ("2 ");
      break;
    default:
      Serial.print  ("?? ");
      break;
  }
  Serial.println(" g");
}

void setup(void)
{
#ifndef ESP8266
  while (!Serial); // for Leonardo/Micro/Zero
#endif
  Serial.begin(9600);
  Serial.println("Accelerometer Test"); Serial.println("");

  /* Initialise the sensor */
  if(!accel.begin())
  {
    /* There was a problem detecting the ADXL345 ... check your connections */
    Serial.println("Ooops, no ADXL345 detected ... Check your wiring!");
    while(1);
  }

  /* Set the range to whatever is appropriate for your project */
  accel.setRange(ADXL345_RANGE_16_G);
  // accel.setRange(ADXL345_RANGE_8_G);
  // accel.setRange(ADXL345_RANGE_4_G);
  // accel.setRange(ADXL345_RANGE_2_G);

  /* Display some basic information on this sensor */
  displaySensorDetails();

  /* Display additional settings (outside the scope of sensor_t) */
  displayDataRate();
  displayRange();
  Serial.println("");
}

void loop(void)
{
  /* Get a new sensor event */
  sensors_event_t event;
  accel.getEvent(&event);

  /* Display the results (acceleration is measured in m/s^2) */
  Serial.print("X: "); Serial.print(event.acceleration.x); Serial.print("  ");
  Serial.print("Y: "); Serial.print(event.acceleration.y); Serial.print("  ");
  Serial.print("Z: "); Serial.print(event.acceleration.z); Serial.print("  ");Serial.println("m/s^2 ");
  delay(5000);
}</adafruit_adxl345_u.h></adafruit_sensor.h></wire.h></p>
Testing
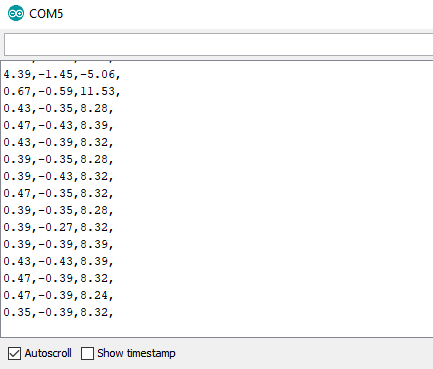
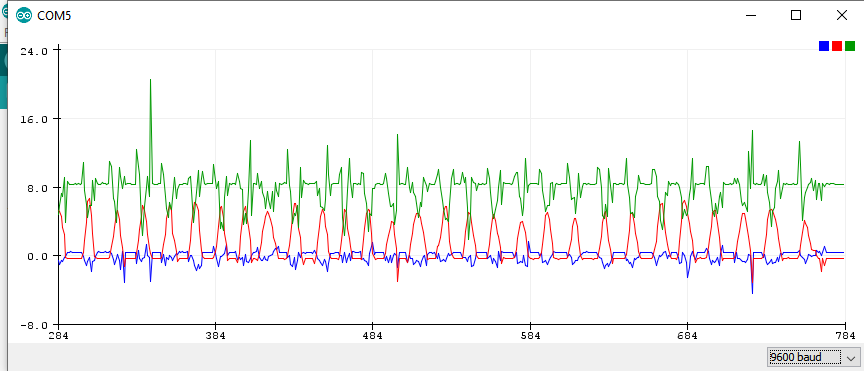
1. Click on the compile/upload button to compile and upload the sketch to the Arduino. You should see output similar to the image.
2. Watch the values change when the drilling process happens which can be seen in the serial monitor and serial plotter.
3. Referring to the image above every spike represents the drill hit which basically tells the number of drills made on the board.
Issue
Since the setup has to be mounted on CNC machine the wired connections might get loose due to vibrations.
Solution
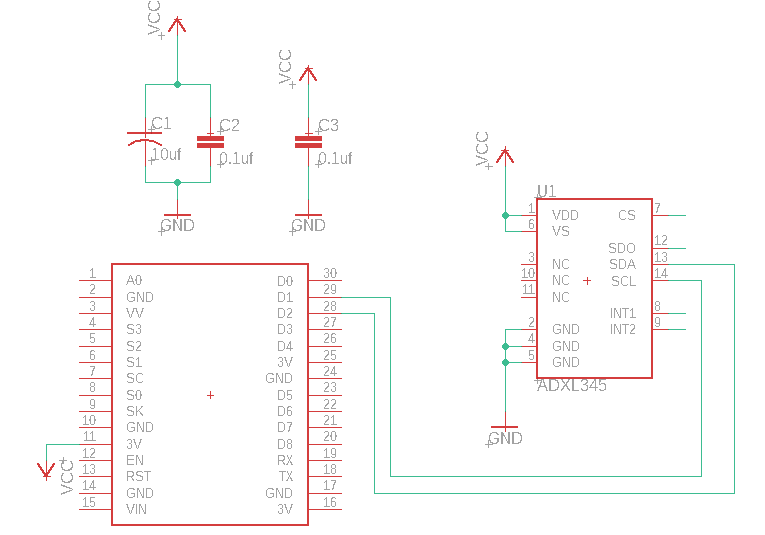
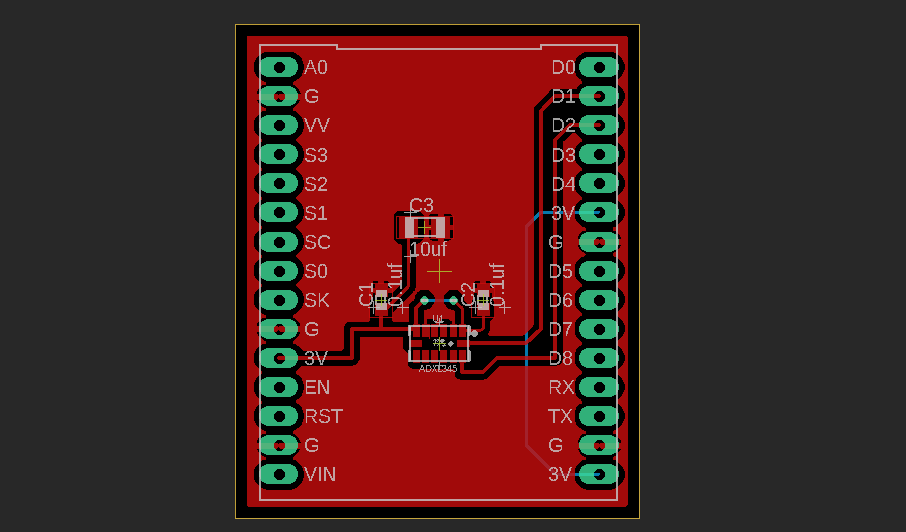
To solve this issue I will design a daughter board for NodeMCU using EAGLE CAD tool.
The corresponding schematic and board layout are as shown in the images.
To get this board manufactured we have to send Gerber files to the manufacturer. The Gerber files have been shared.
Downloads
Uploading Gerbers on LionCircuits
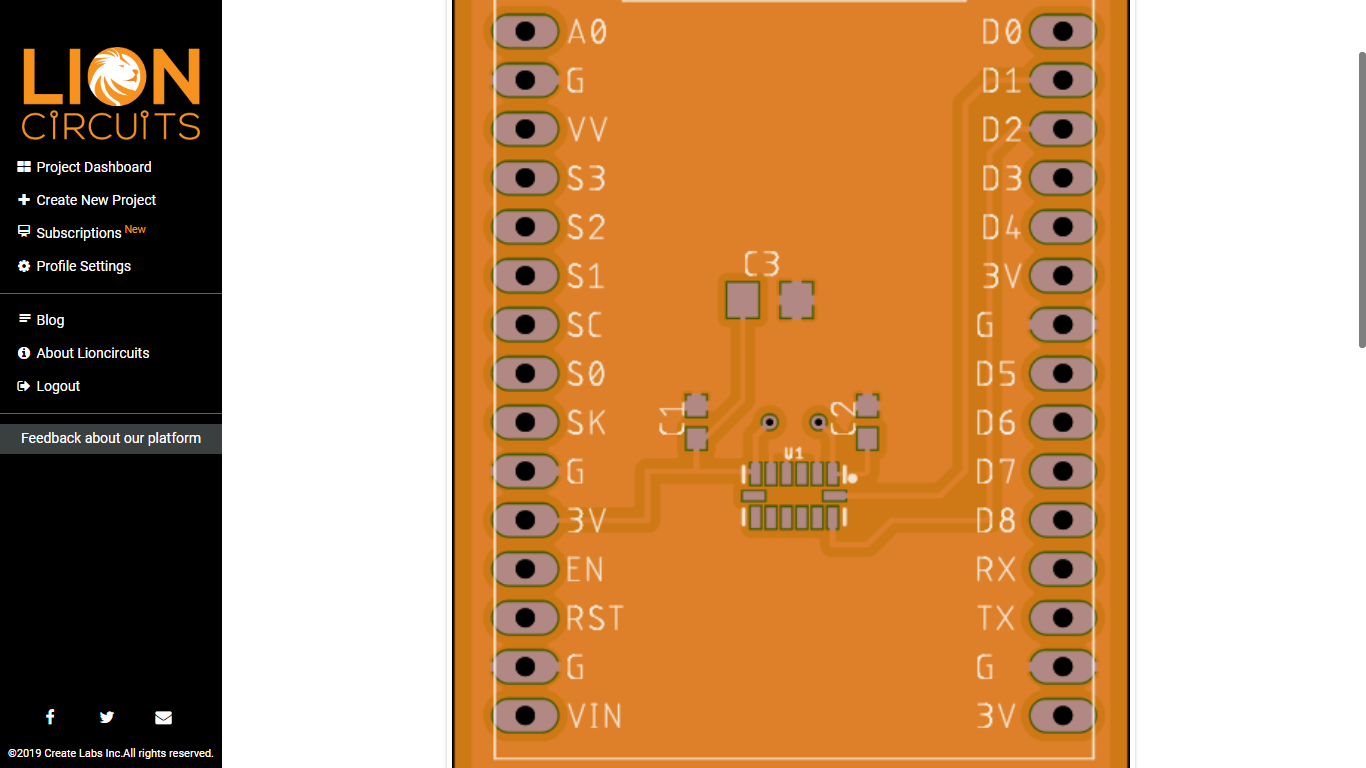
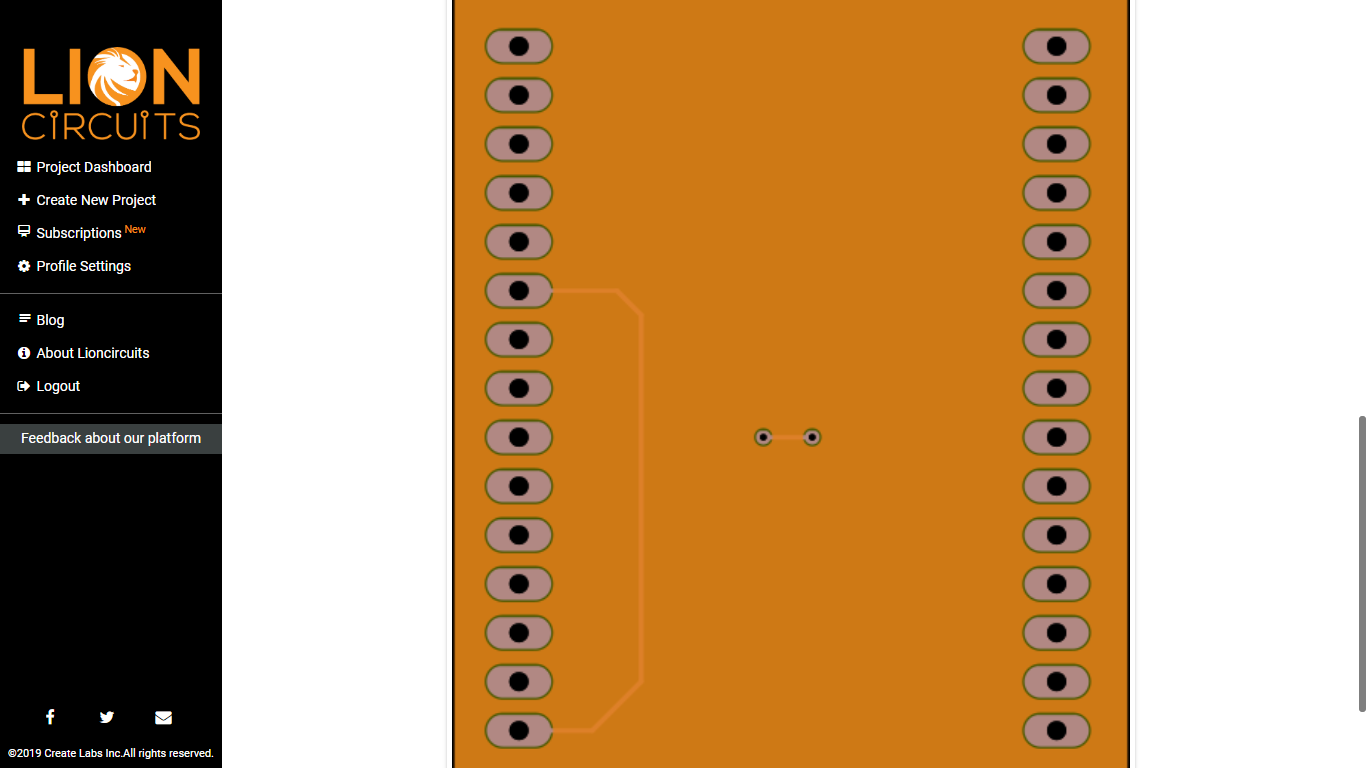
I have uploaded the Gerber files onto LionCircuits Platform.
I am currently trying to get access to the CNC machine again to update the results.