Draw Electronic Schematics With CadSoft EAGLE
by westfw in Circuits > Electronics
470951 Views, 350 Favorites, 0 Comments
Draw Electronic Schematics With CadSoft EAGLE
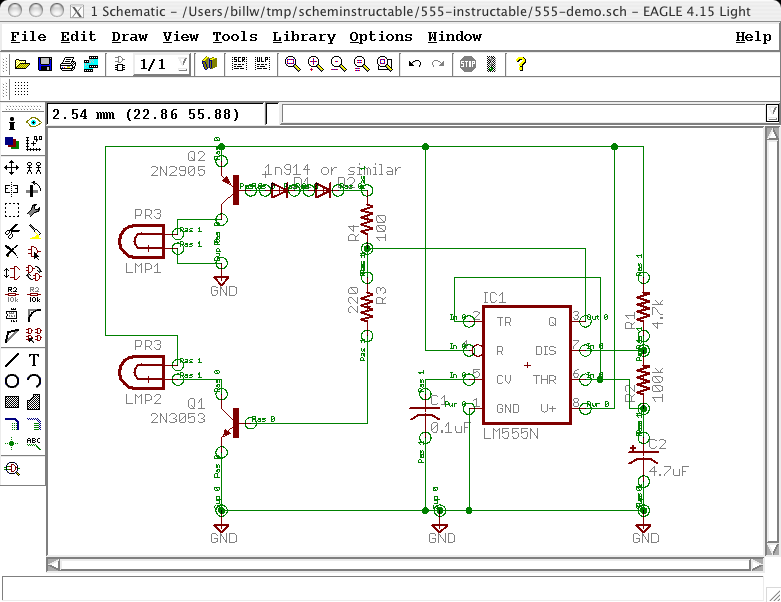
There are a couple Instructables here on some of the finer points of Eagle (making your
own library parts: https://www.instructables.com/id/ERHQQ180Y3EP286NQY/
modifying the design rules: https://www.instructables.com/id/EZVIGHUBGCEP287BJB/ )
But feedback indicates that a lot of people could probably use an Instructable on the
more basic aspects of creating a schematic and board.
This Instructable covers creating a schematic, presumably from a printed schematic in
a magazine or image on the web. I'll start with schematic shown, which is from
http://www.bowdenshobbycircuits.info/555light.gif
It's got a "typical" collection of parts, and is vaguely useful as well.
Cadsoft EAGLE generic information:
Cadsoft EAGLE is available from http://www.cadsoftusa.com/
Cadsoft is a German company that is a veritable mecca of software distribution enlightenment. In addition to the reasonably-priced professional PCB design packages ($1200), they have freeware, lite, non-profit, and other intermediate licenses. Their software runs under windows, linux, and MacOSX. It's slightly quirky, with a steep (but not too high) learning curve on the front end, but from most reports it is not any more so than other professional CAD packages. They have online support forums that are active from both the company and other users, the package is under current development and gets better with each release. A number of PCB fabricators will accept their CAD files directly. It's good stuff.
Use it. Propagate it. Buy it when you "go pro."
See also:
Creating PCB from Schematic
Creating Library parts
Design rule modification
Send CAD Files to manufacturers
Create New Project
Start up the Eagle control panel, and right-click on "projects" to create a new project.
You'll get to name it whatever you want.
Create New Schematic in the Project
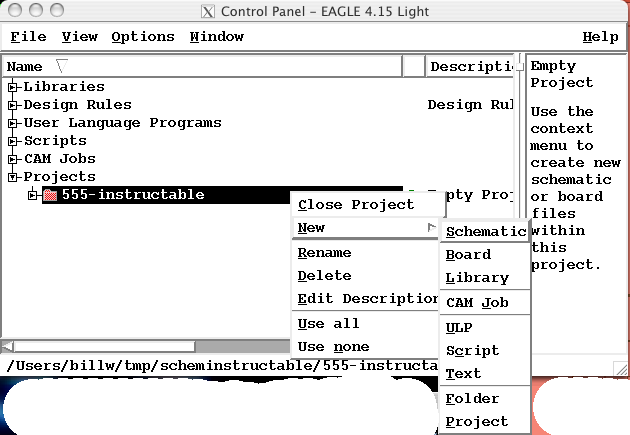
Once you have created the new project, it will be "opened" automatically (which doesn't do much other than tell EAGLE that "this is the current project".) Right click on the new project and follow the popup menus to create a new schematic.
Find and Place ("add") Components


Components are added to a schematic from the ADD dialog, which you get to by clicking the ADD button over on the GUI menu.
One of the major challenges of using Eagle is finding the components you want in the "official" libraries.
These libraries are extensive, not particularly well named (and the components aren't so well named either), and seem to date back to a time when there was a different philosophy about multiple packages for a particular device. Resistors and capacitors have so many packages defined that picking the right one is difficult. Transistors, despite formable leads, tend to only have a single package defined. Many experienced EAGLE users don't use the standard libraries at all, copying common components and packages into private libraries or creating them from scratch.
The search capability of the add dialog is pretty good; you just have to be less specific about what you search for if you expect to find it.
When working from a published schematic, I prefer to add all the components in the approximately correct locations before I start connecting anything.
Once you've finished the add dialog, the part will get attached to your mouse pointer, and you can put it down wherever you want on the drawing page by clicking the left mouse button. The right mouse button rotates the part 90 degrees. The middle button, or left and right simultaneously (maybe) "mirrors" the part drawing, which may also be useful.
Add Integrated Circuits
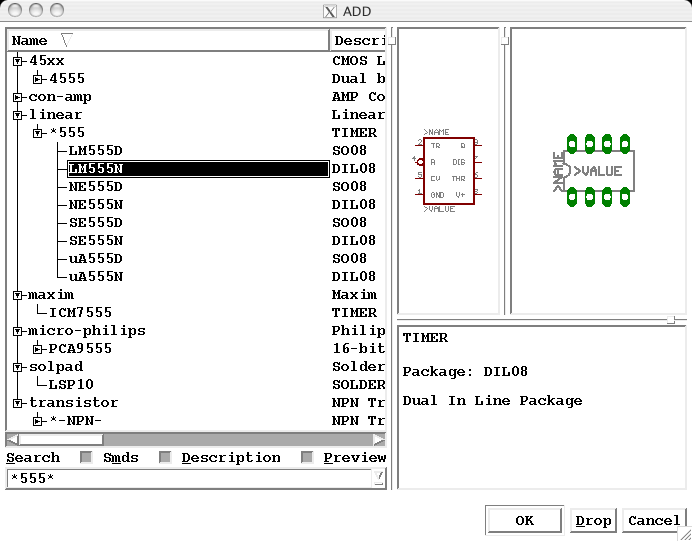
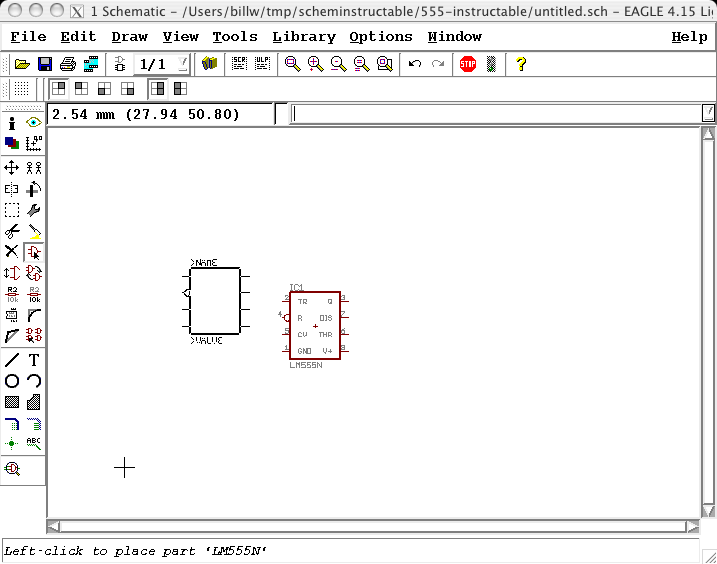
Let's search for our 555 timer. Lots of companies have manufactured the 555, and given it slightly different suffixes and prefixes. LM555N, SE555, TL555, NE555; all are pretty interchangeable. If we search for just "555", there are several results; we can check the preview panel to see which one looks most appropriate. In this case, we'll use LM555N from the "linear" library.
(The string search in the add dialog will need wildcard designators around a substring, so you search for "*555*" to find all parts with a "555" in the name.)
You'll notice that the EAGLE part drawing doesn't look very much like the 555 drawing on the schematics we're trying to enter, the pins are in different places, and have funny names attached as well as pin numbers. And it's not like the pin layout matches the actual package shape either. We'll have to be careful when making our connections.
Add Resistors
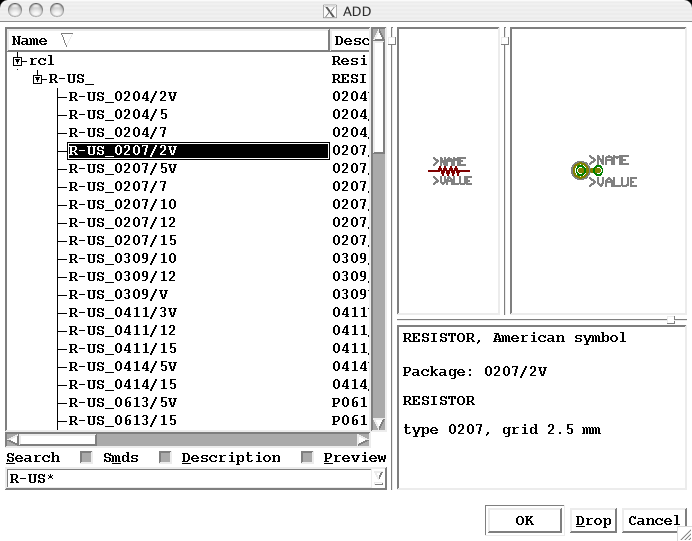
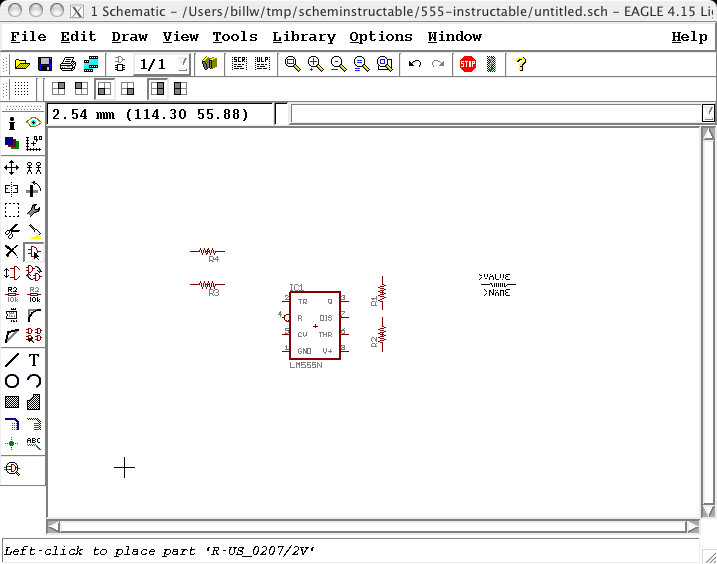
Resistors, simple components that they are, cause a lot of confusion for Eagle beginners, perhaps because the eagle library contains 100+ different package/schematic options for generic resistors. Or perhaps it's because a search for short word like "R" isn't practical, and a search for "resistor" turns up a bunch of special purpose specific-manufacturer devices.
The general purpose fixed resistor devices are called either R-US (if you like the US zigzag line type of schematics symbol) or R-EU (if you prefer the European simple rectangle.] The package options are numerous, but make sense after you realize that there's a common format: "WWLL/SS" where WW is the body width, LL is the body length, and SS is the hole spacing, all in truncated millimeters. A typical 1/4W resistor measures about 2.5mm in diameter and 7mm long; hole spacing depends on how you bend the leads. So R-US_0207/10 is a 1/4W resistor with 10mm (actually 4*2.54, or 10.16mm, since we want to stay close to a 0.1 inch (2.54mm) grid.) R-US_0207/2V is the same resistor mounted vertically with 2.54mm lead spacing. 1/8W resistors are similarly designated R-US_0204/SS"
I'm going to pick a vertical package for use on our schematics, though of course it doesn't matter for the schematic drawing anyway. Perhaps I'll do the board layout in a "related" Instructable later...
Add Capacitors
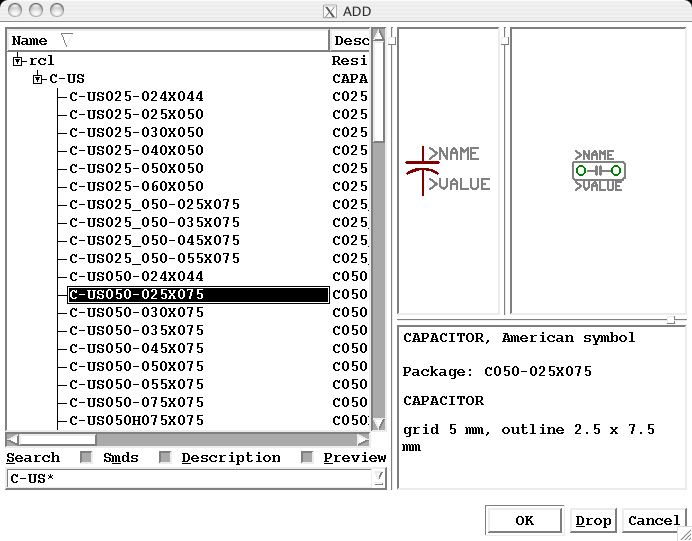
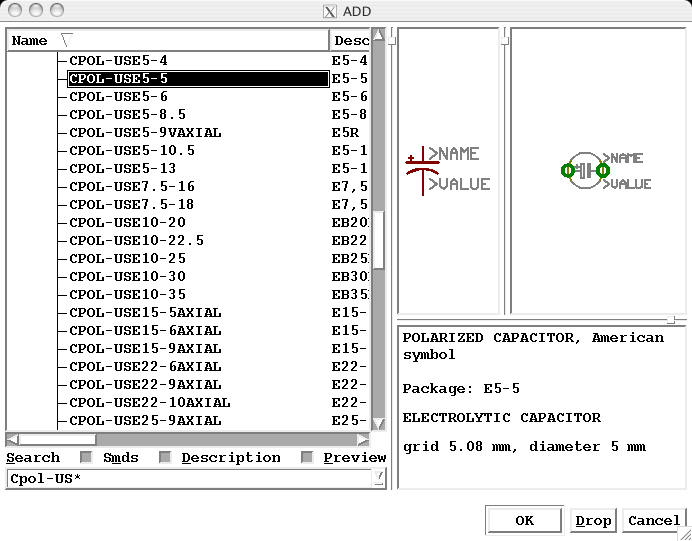
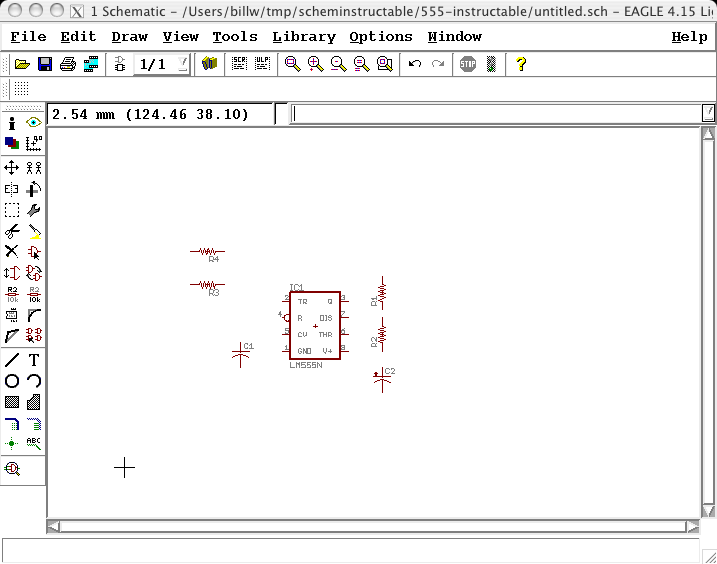
Capacitors are worse than resistors, largely because their bodies come in a wider variety of shapes (that are less standardized), and of course there are all those different types; disk, ceramic, mylar, film, electrolytic, tantalum, AC filter, etc (and those are just the FIXED value caps!) Again, there are slightly different US and European schematic symbols C-US and C-EU in rcl.lib. Again, there's a plethora of packages, but there's a standard format. In this case it's SSS-WWWXLLL, where SSS is the lead spacing (with an extra digit this time!), WWW is the body width, and LLL is the body length.
Polarized caps are similar (CPOL-US or CPOL-EU in rcl.lbr), with a package name like TSSS-DD, where T is a type designator (E for electrolytics, TT for tantalum drops, for instance) SSS is the spacing again (only now it probably has an actual decimal point!), and DD is the diameter (for radial caps)
Most hobby projects can get away with either 2.5mm or 5mm lead spacing, and the designer "remembering" to leave enough space for the physical capacitor body; there might not be a silkscreen anyway.
(the "silkscreen" is the pictures and text describing the components, usually printed in white ink on the component side of the board (if you had it made professionally.) Library designers spend a lot of time getting the silkscreen to look nice; all wasted if you make a board that doesn't have that printing.)
Add Lamps
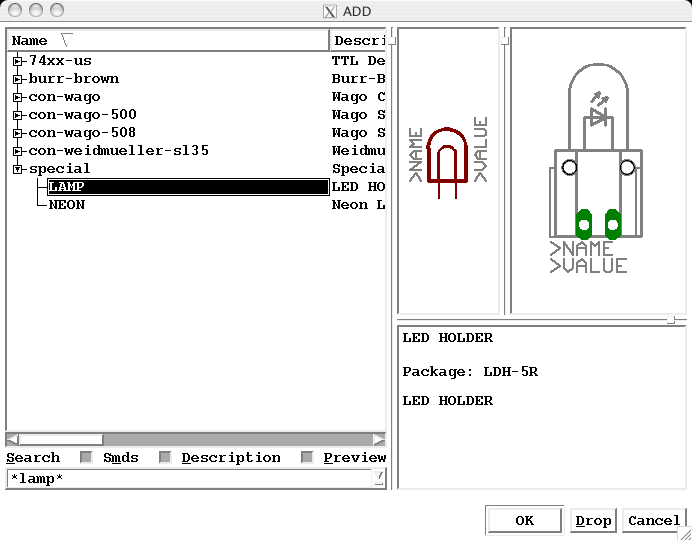
When you have parts that aren't going to mount on your actual PCB anyway, such as control knobs and battery packs and switches and lightbulbs and such, you of course have a lot of flexibility in how they are portrayed on the schematic and PCB. You can use single pins for each wire, or find a part whose drawing isn't too obnoxious that has pins of appropriate size and shape for attaching wires as well as an actual component.
The eagle library has *A* "lamp" part. It says it's actually an LED holder, but the drawing is OK and the part has pins suitable for attaching wires that go to off-board lamps, so it looks fine for our purposes.
Add Other Semiconductors
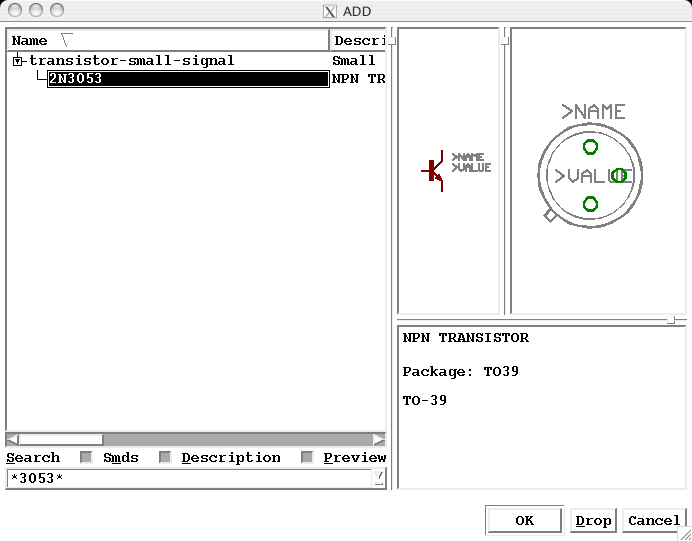
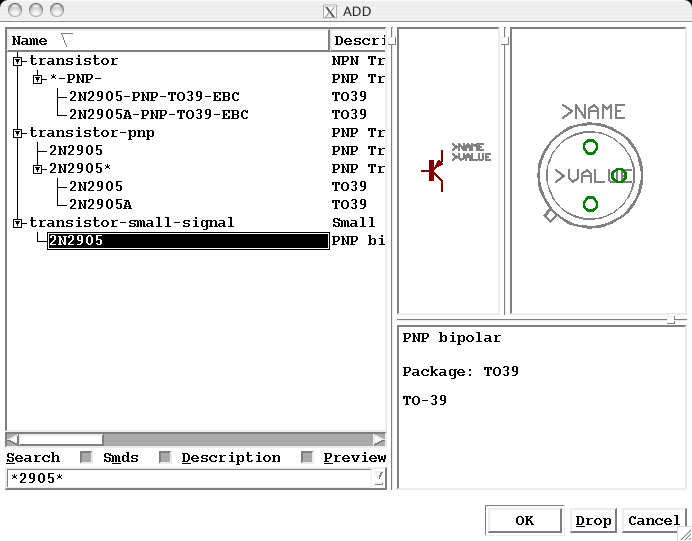
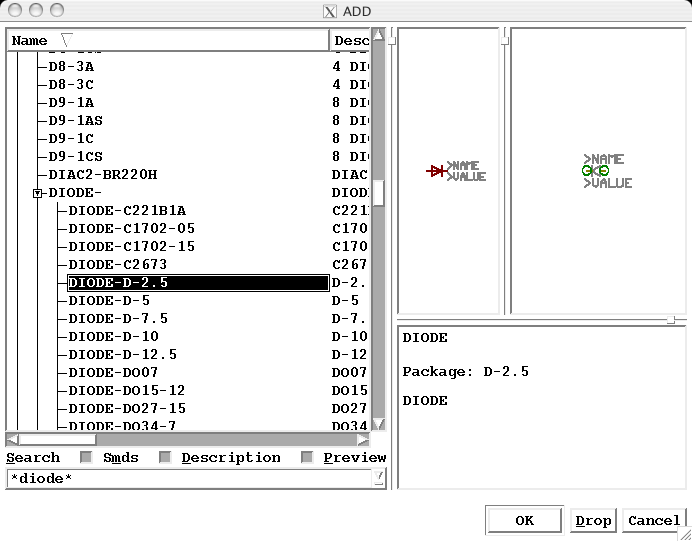
We luck out because the transistors called for actually exist in the EAGLE library, and there isn't much choice of package. There are some choices for the PNP transistor, but they're all the same anyway.
The 1n914 diode isn't in the library, but a search for just "diode" turns up some generic diode footprints that will work fine. I'll mount the diodes vertically to match the resistors.
Add Ground Symbols
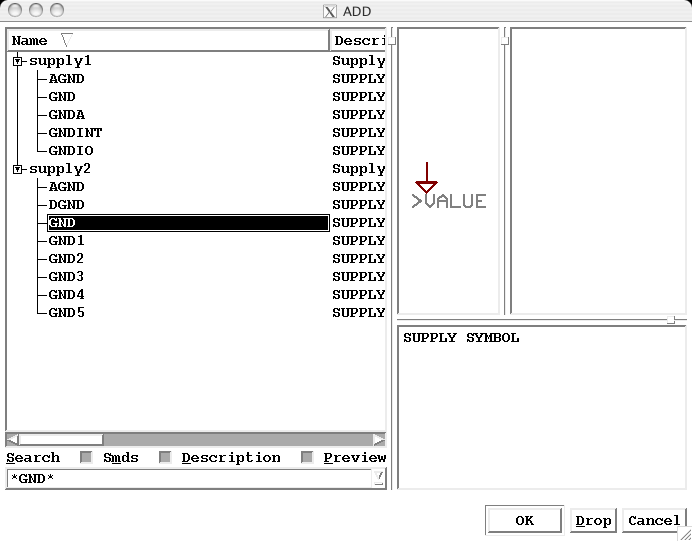
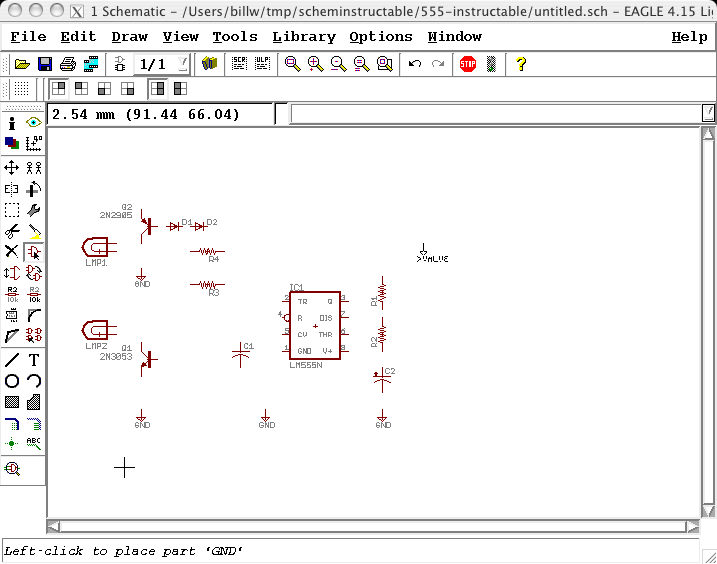
There are some symbols for various supply off in the "supply1" and "supply2" libraries. They're handy, make your schematic look nicer, and have magical properties when it comes to connecting things; the pin on a supply symbol has a magic name so that all the pins on all the GND symbols are connected together, whether you draw them or not.
Re-zoom the Drawing
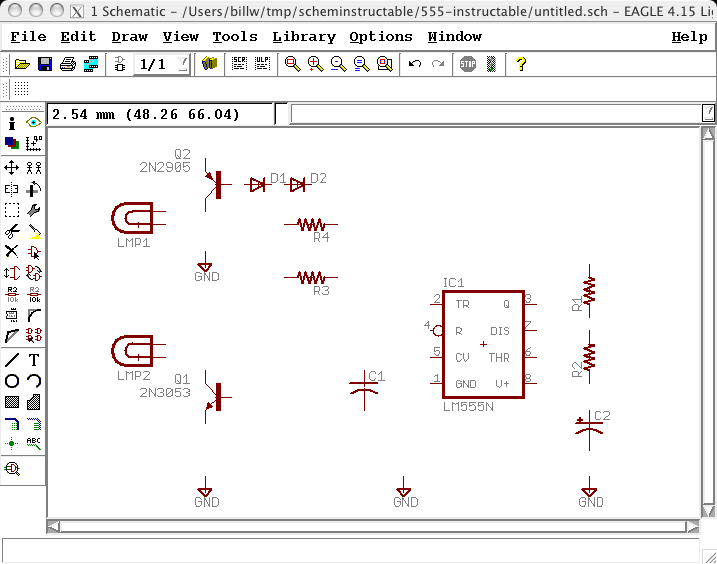
Since we have all the components added, we can use the zoom-to-fit button to fit things better in our window...
Save Your Work Often
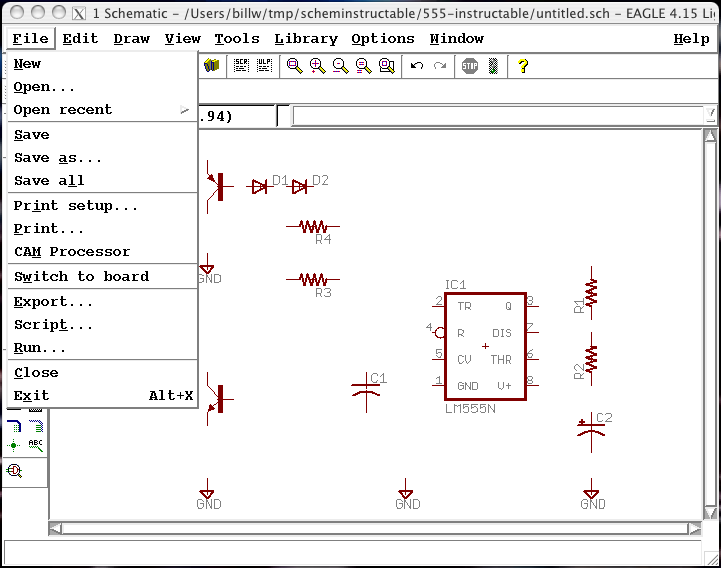
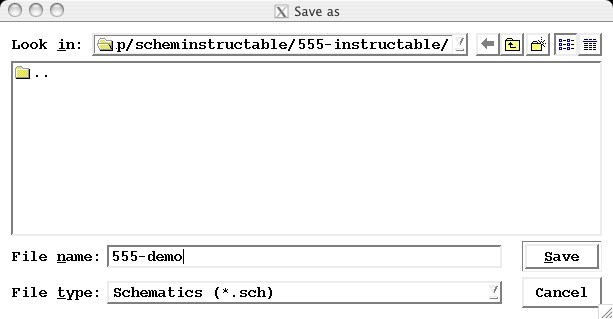
Now is a good time to save our work. This is where you get to attach a name to your schematic, as well. You might need to use "save as" for your first save, to prevent it from saving "untitled.sch".
Fiddle With the Layers a Bit


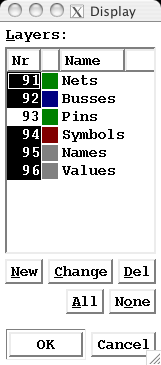
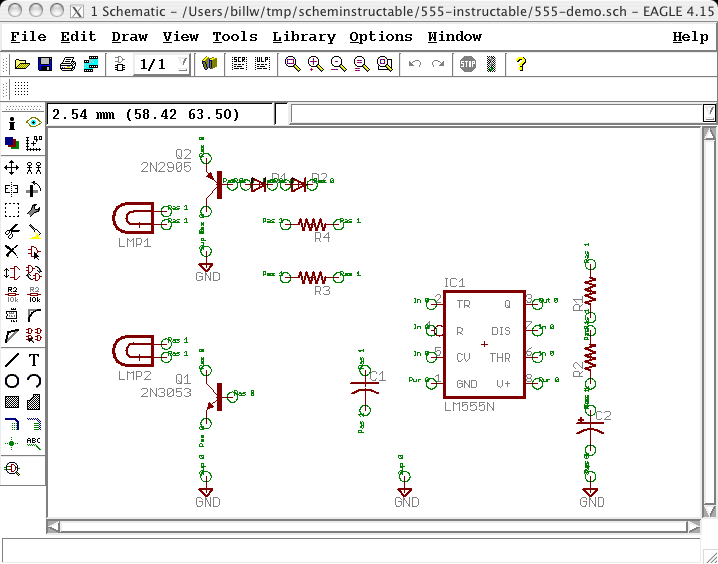
It can be helpful to turn on the "pins" layers so you can see exactly
where you are supposed to make connections on the various components.
Start Making Connections


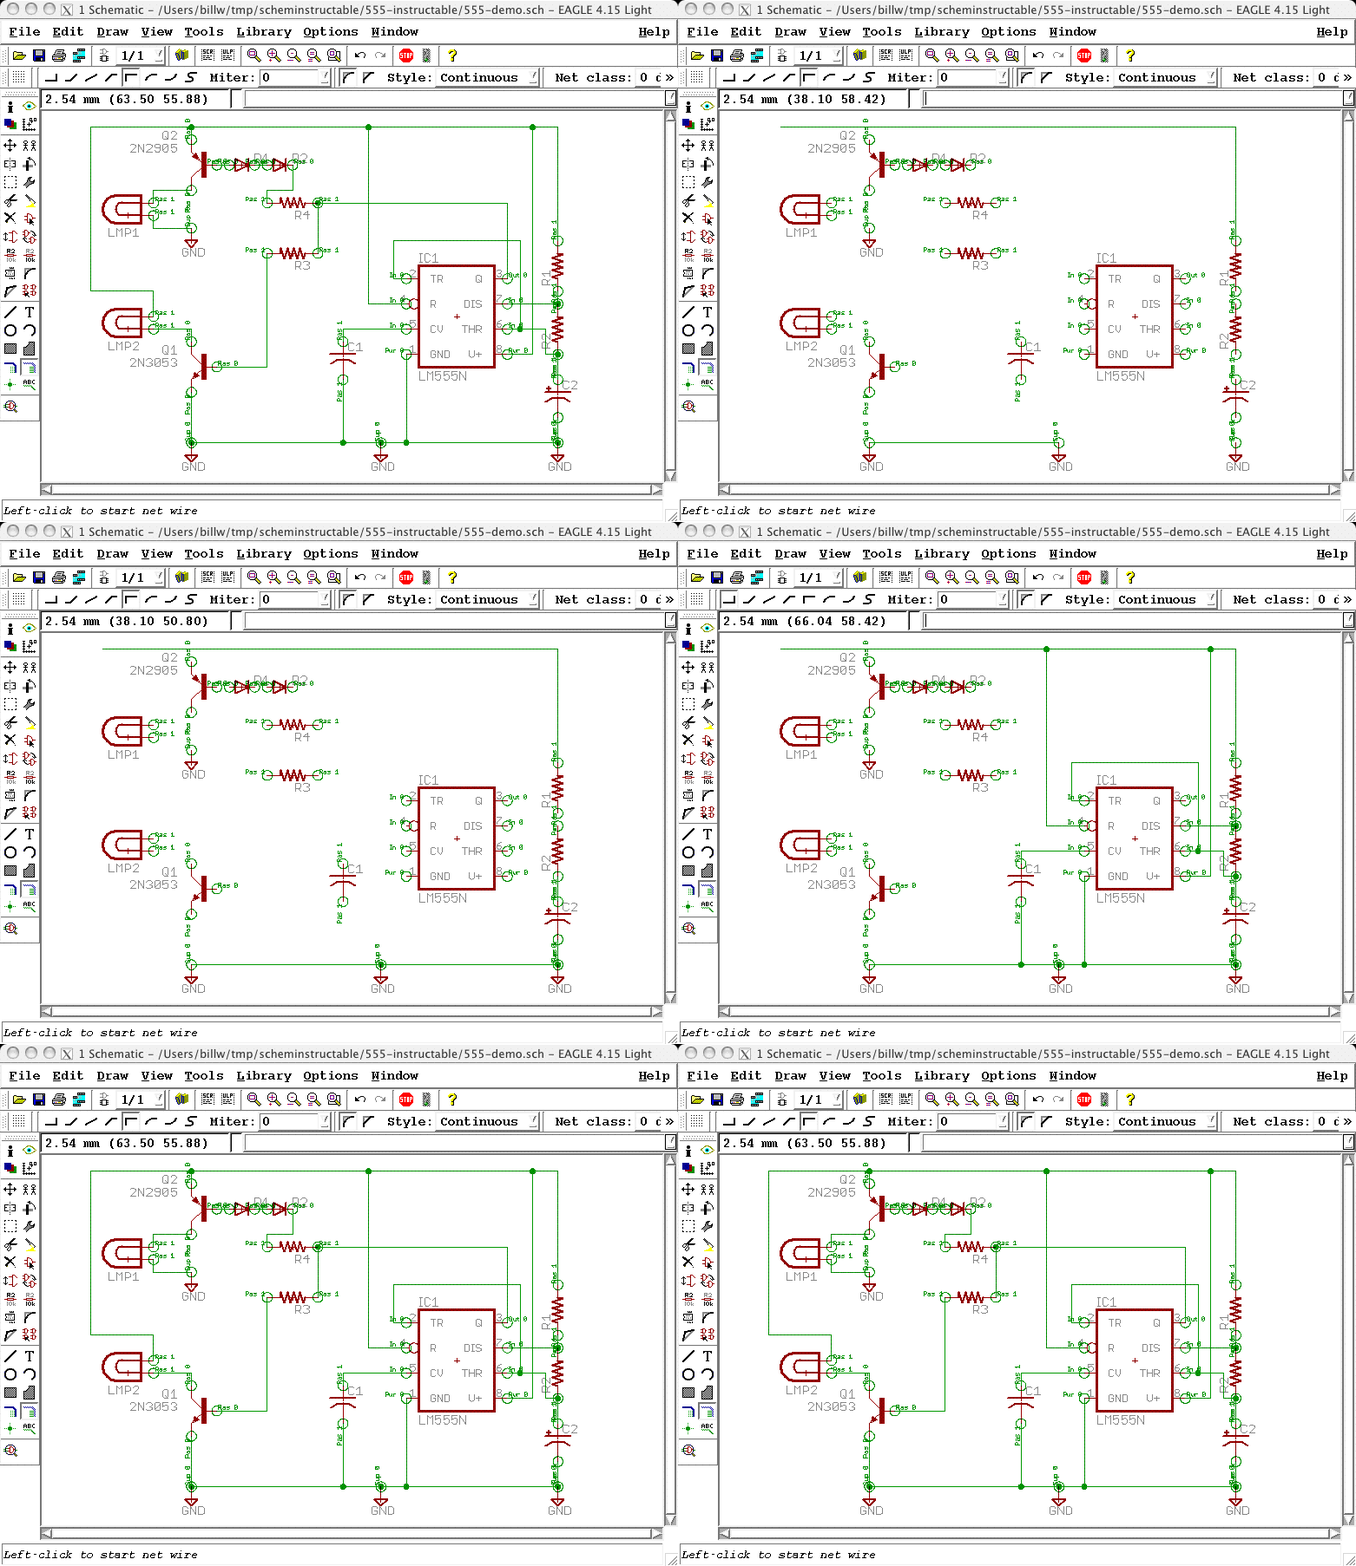
You might think that you'd use the "wire" command to make connections in your circuit.
However, a wire in EAGLE is just a line; to properly make actual electrical connections, you need to use the "net" command. Nets will automatically form junctions when terminated on pins or other nets; I don't think wires are so nice.
Once you've clicked the NET button, your mouse pointer becomes your drawing tool. Click on a pin (or anywhere, actually), move your mouse somewhere else and you'll see a line. The actual route that the line takes is controlled by the "wire bend" setting for the line, which you can control with your right mouse button. Schematic designers tend to like nice straight lines with right angles.
So first I draw a nice V+ line sort of over the top of the schematic, starting at the top of R1. Next, similar for a ground wire (you don't actually need to connect the GND symbols, they're "magic" in they name the net that connects to them, and all nets of the same name are connected whether you can see lines between them or not.) Then I go wild and connect all the other pins appropriately, either to other pins to to the existing nets. Junctions (big solid dots) should get insterted
Downloads
Neaten Things Up


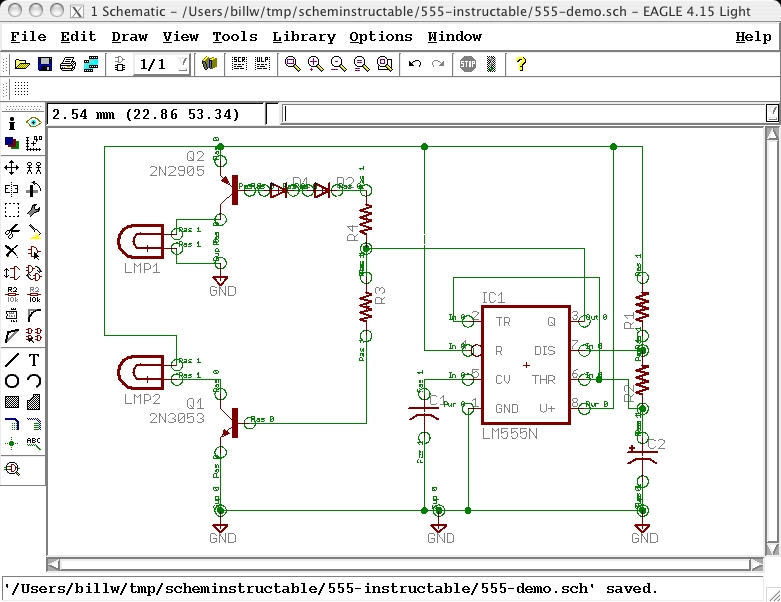
We can make things a bit neater by moving some of the components, junctions, and wires around just a BIT using the Move button. When you select an object after clicking the move button, the object gets attached to your mouse pointer and behaves like when you were adding objects with respect to the other mouse buttons.
Apply Component Values
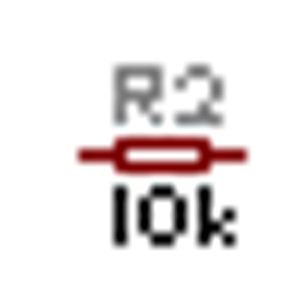


When we plopped down the components during the "add" phase, we didn't assign specific values to any of them. Some of the components (ie 555, transistors) have inherent values that don't need to change. But the resistors, capacitors, and diodes should all have their values filled in appropriately.
Values are assigned using the "Value" button. After selecting the button, click on each component near its origin (little "+" sign), and you should be presented with an opportunity to change the value.
Do Rule Check!

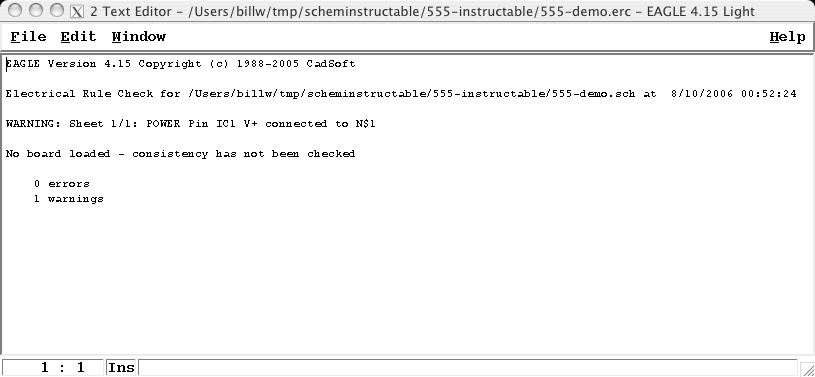
The button shown does an electrical rule check. It will check whether the pins designated outputs are connected to inputs, whether there are obvious missing junctions, and stuff like that. When we run it on our schematics so far, we get a warning that the power pin named V+ on the 555 is connected to a net that DOESN'T have the name V+. We could fix that with the name command, or just leave it as is.
In general, you don't have to FIX every warning that shows up in a rule check, but you should understand what the complaint is, and have a good justification WHY you don't need to fix it.
Done!
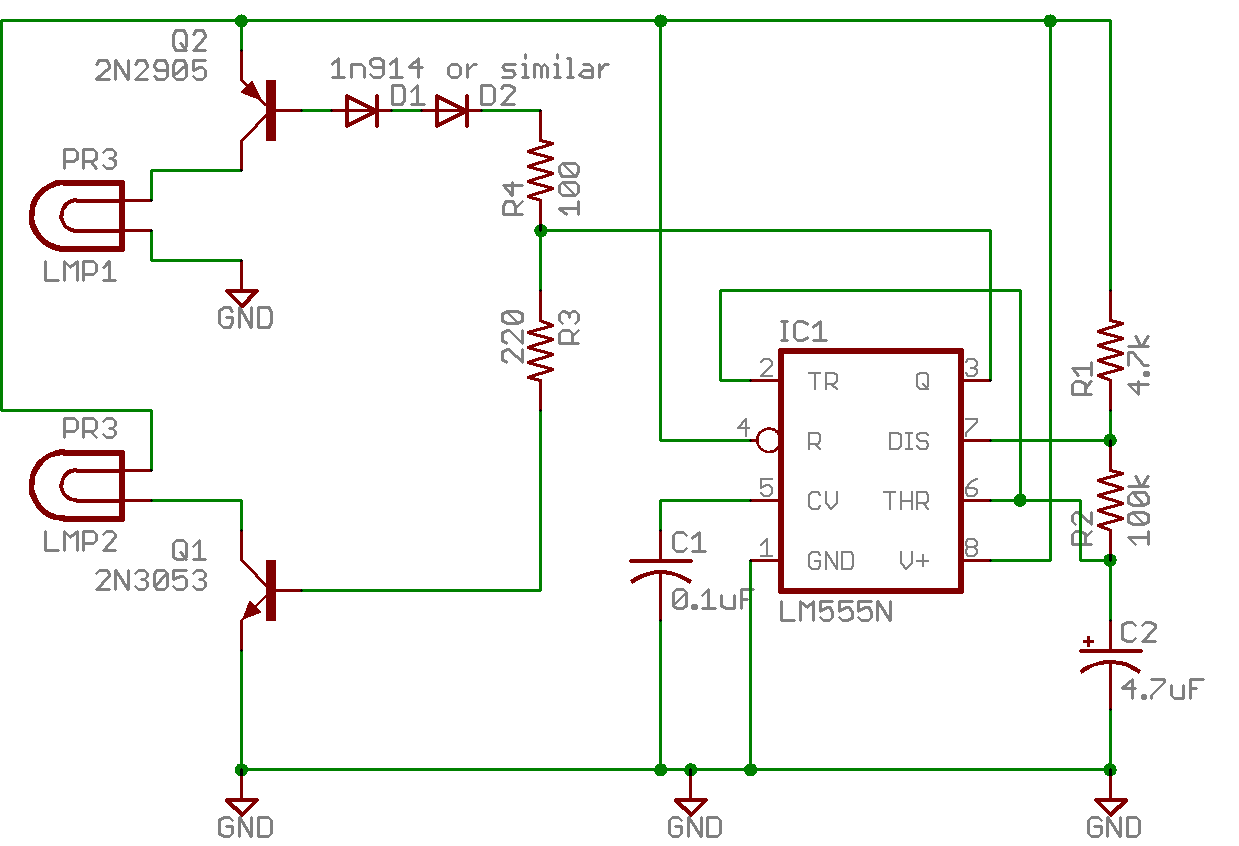
That's about it, as far as this schematic goes. Turn off the PINS layer to make it less busy; Looks OK, eh? There are a couple things that have been left out that will become apparent when we try to make a PCB from the schematics, but that's a topic for another instructable.
Here's the finished, exported schematic drawing.
A Couple of Other Hints


Some of the other buttons that are useful to beginners are described in the pictures.
Many EAGLE commands can be entered three ways:
1) via the buttons on the left-hand vertical toolbar
2) via the text menus on the top of the window
3) via the text command input area
Don't get confused...