Dr. Poison Mask From 3D Scan
by vspencer in Craft > Costumes & Cosplay
5557 Views, 23 Favorites, 0 Comments
Dr. Poison Mask From 3D Scan
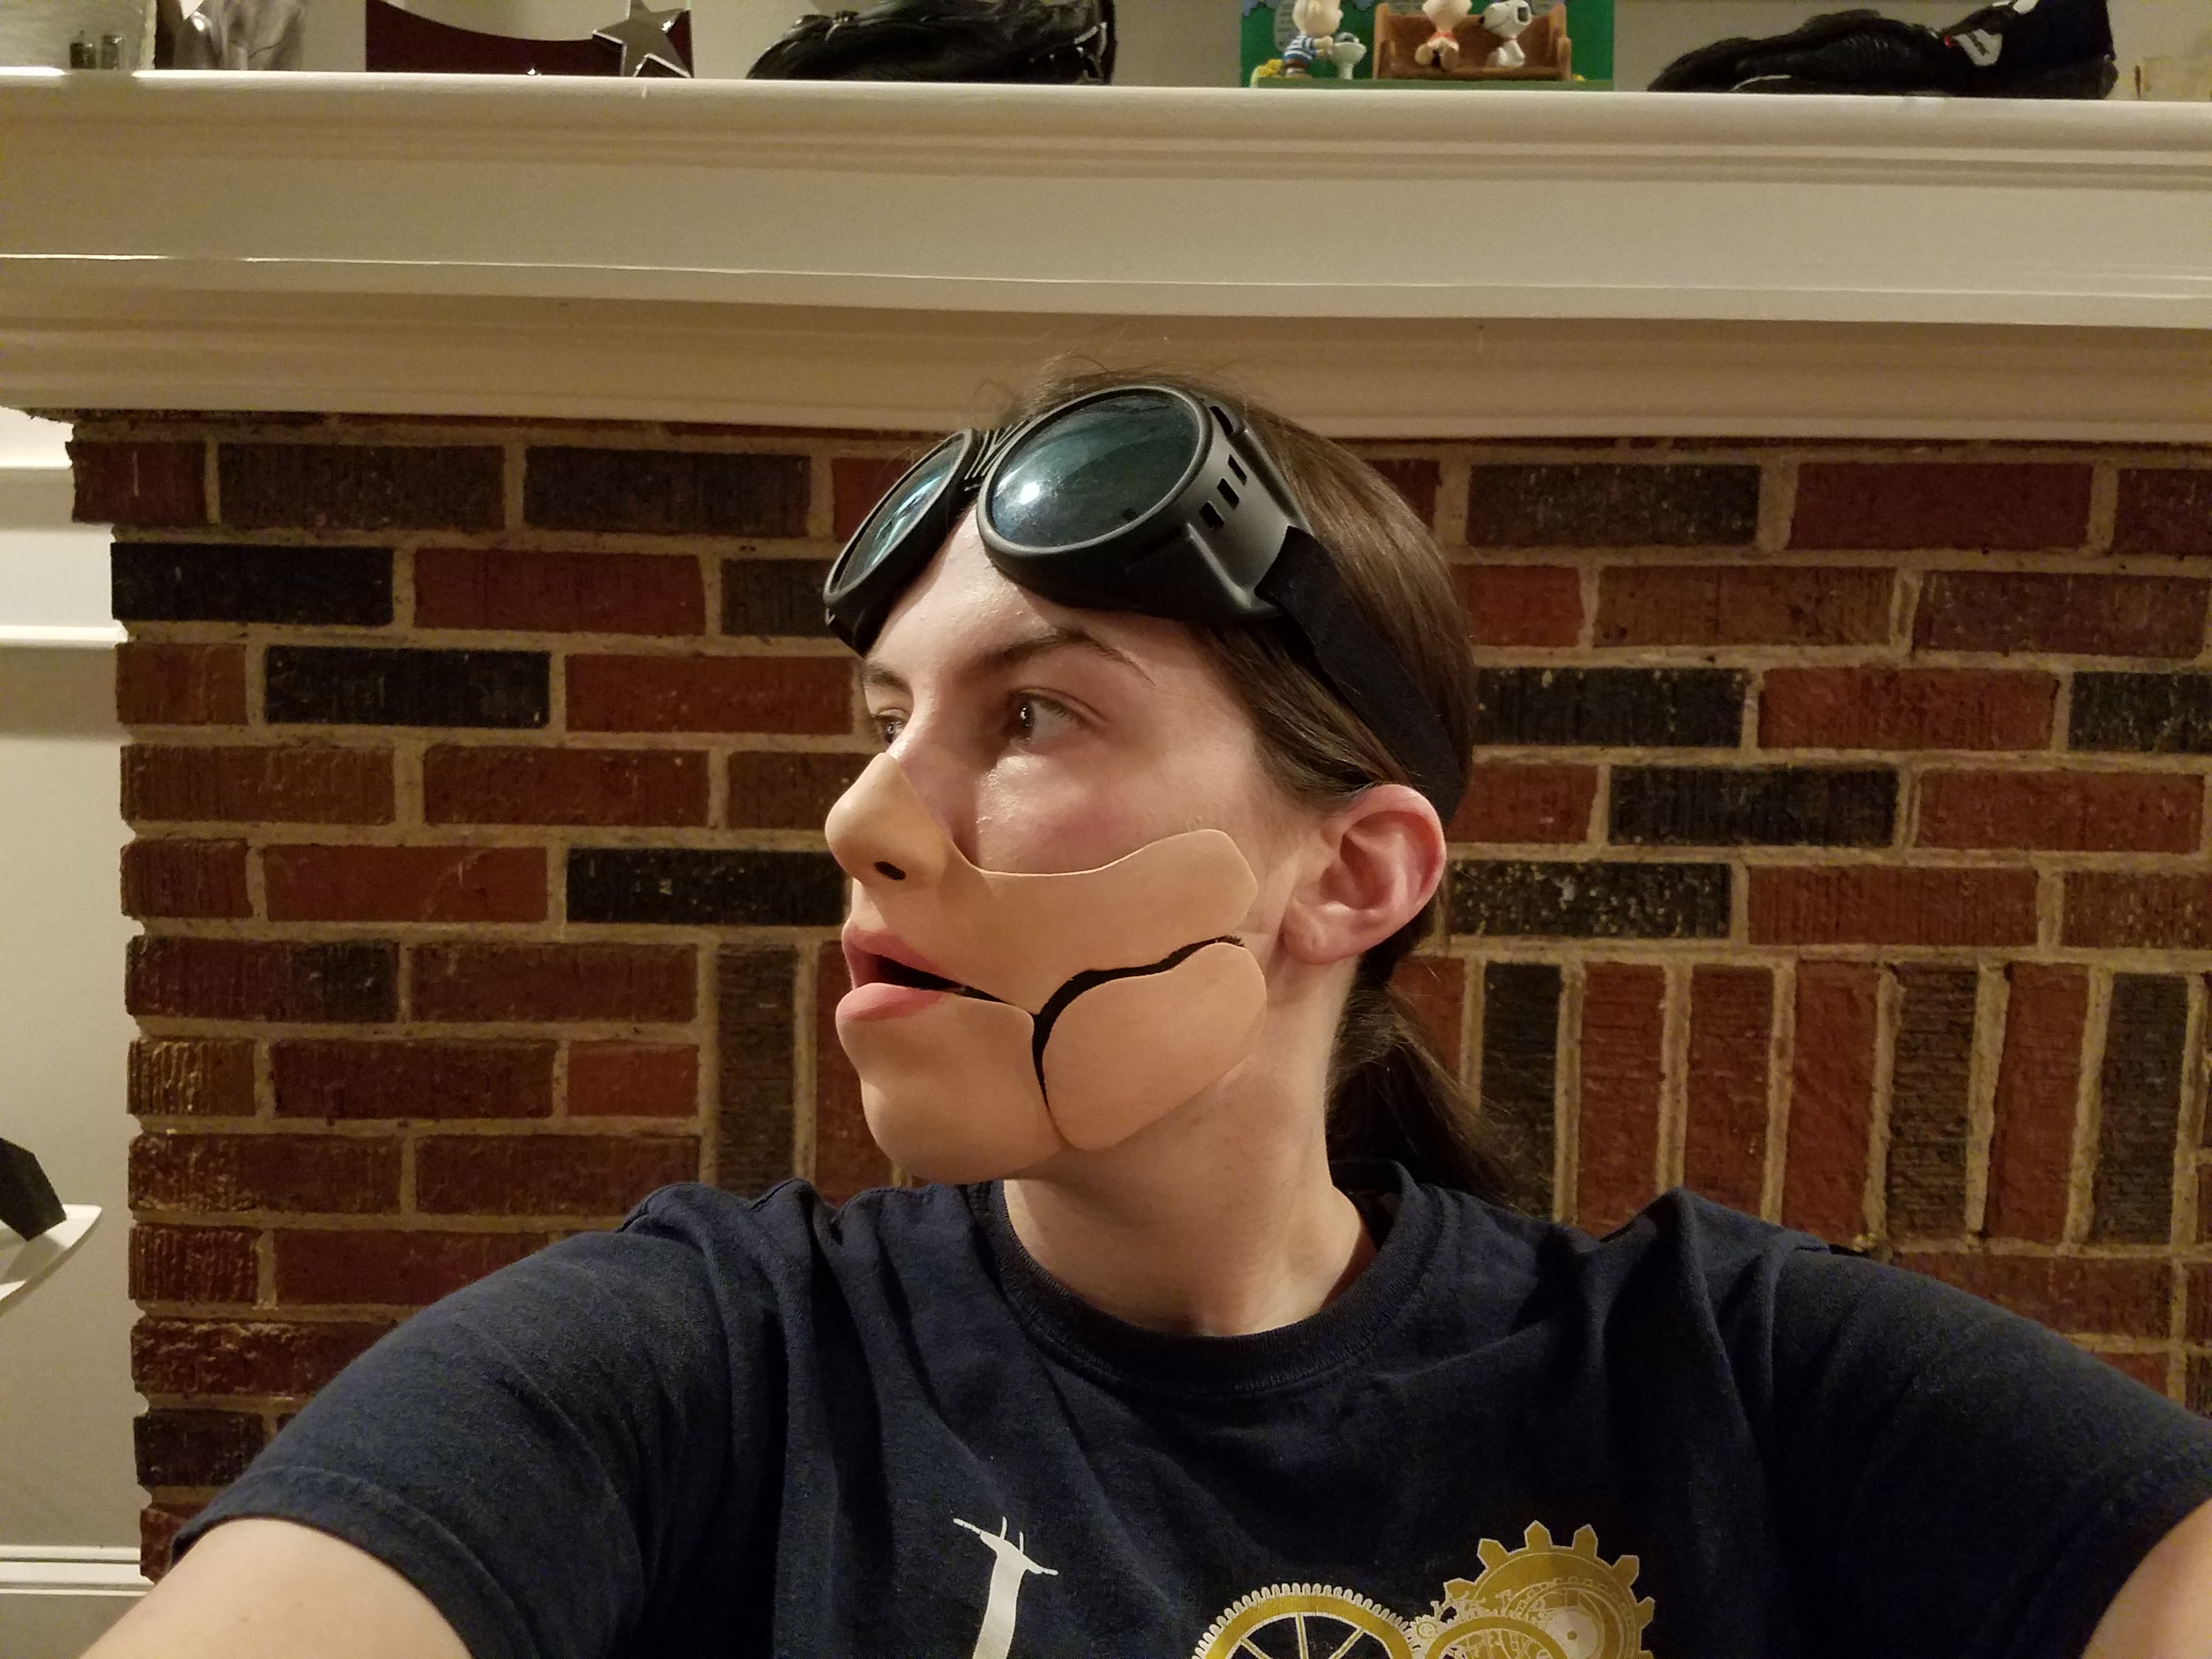
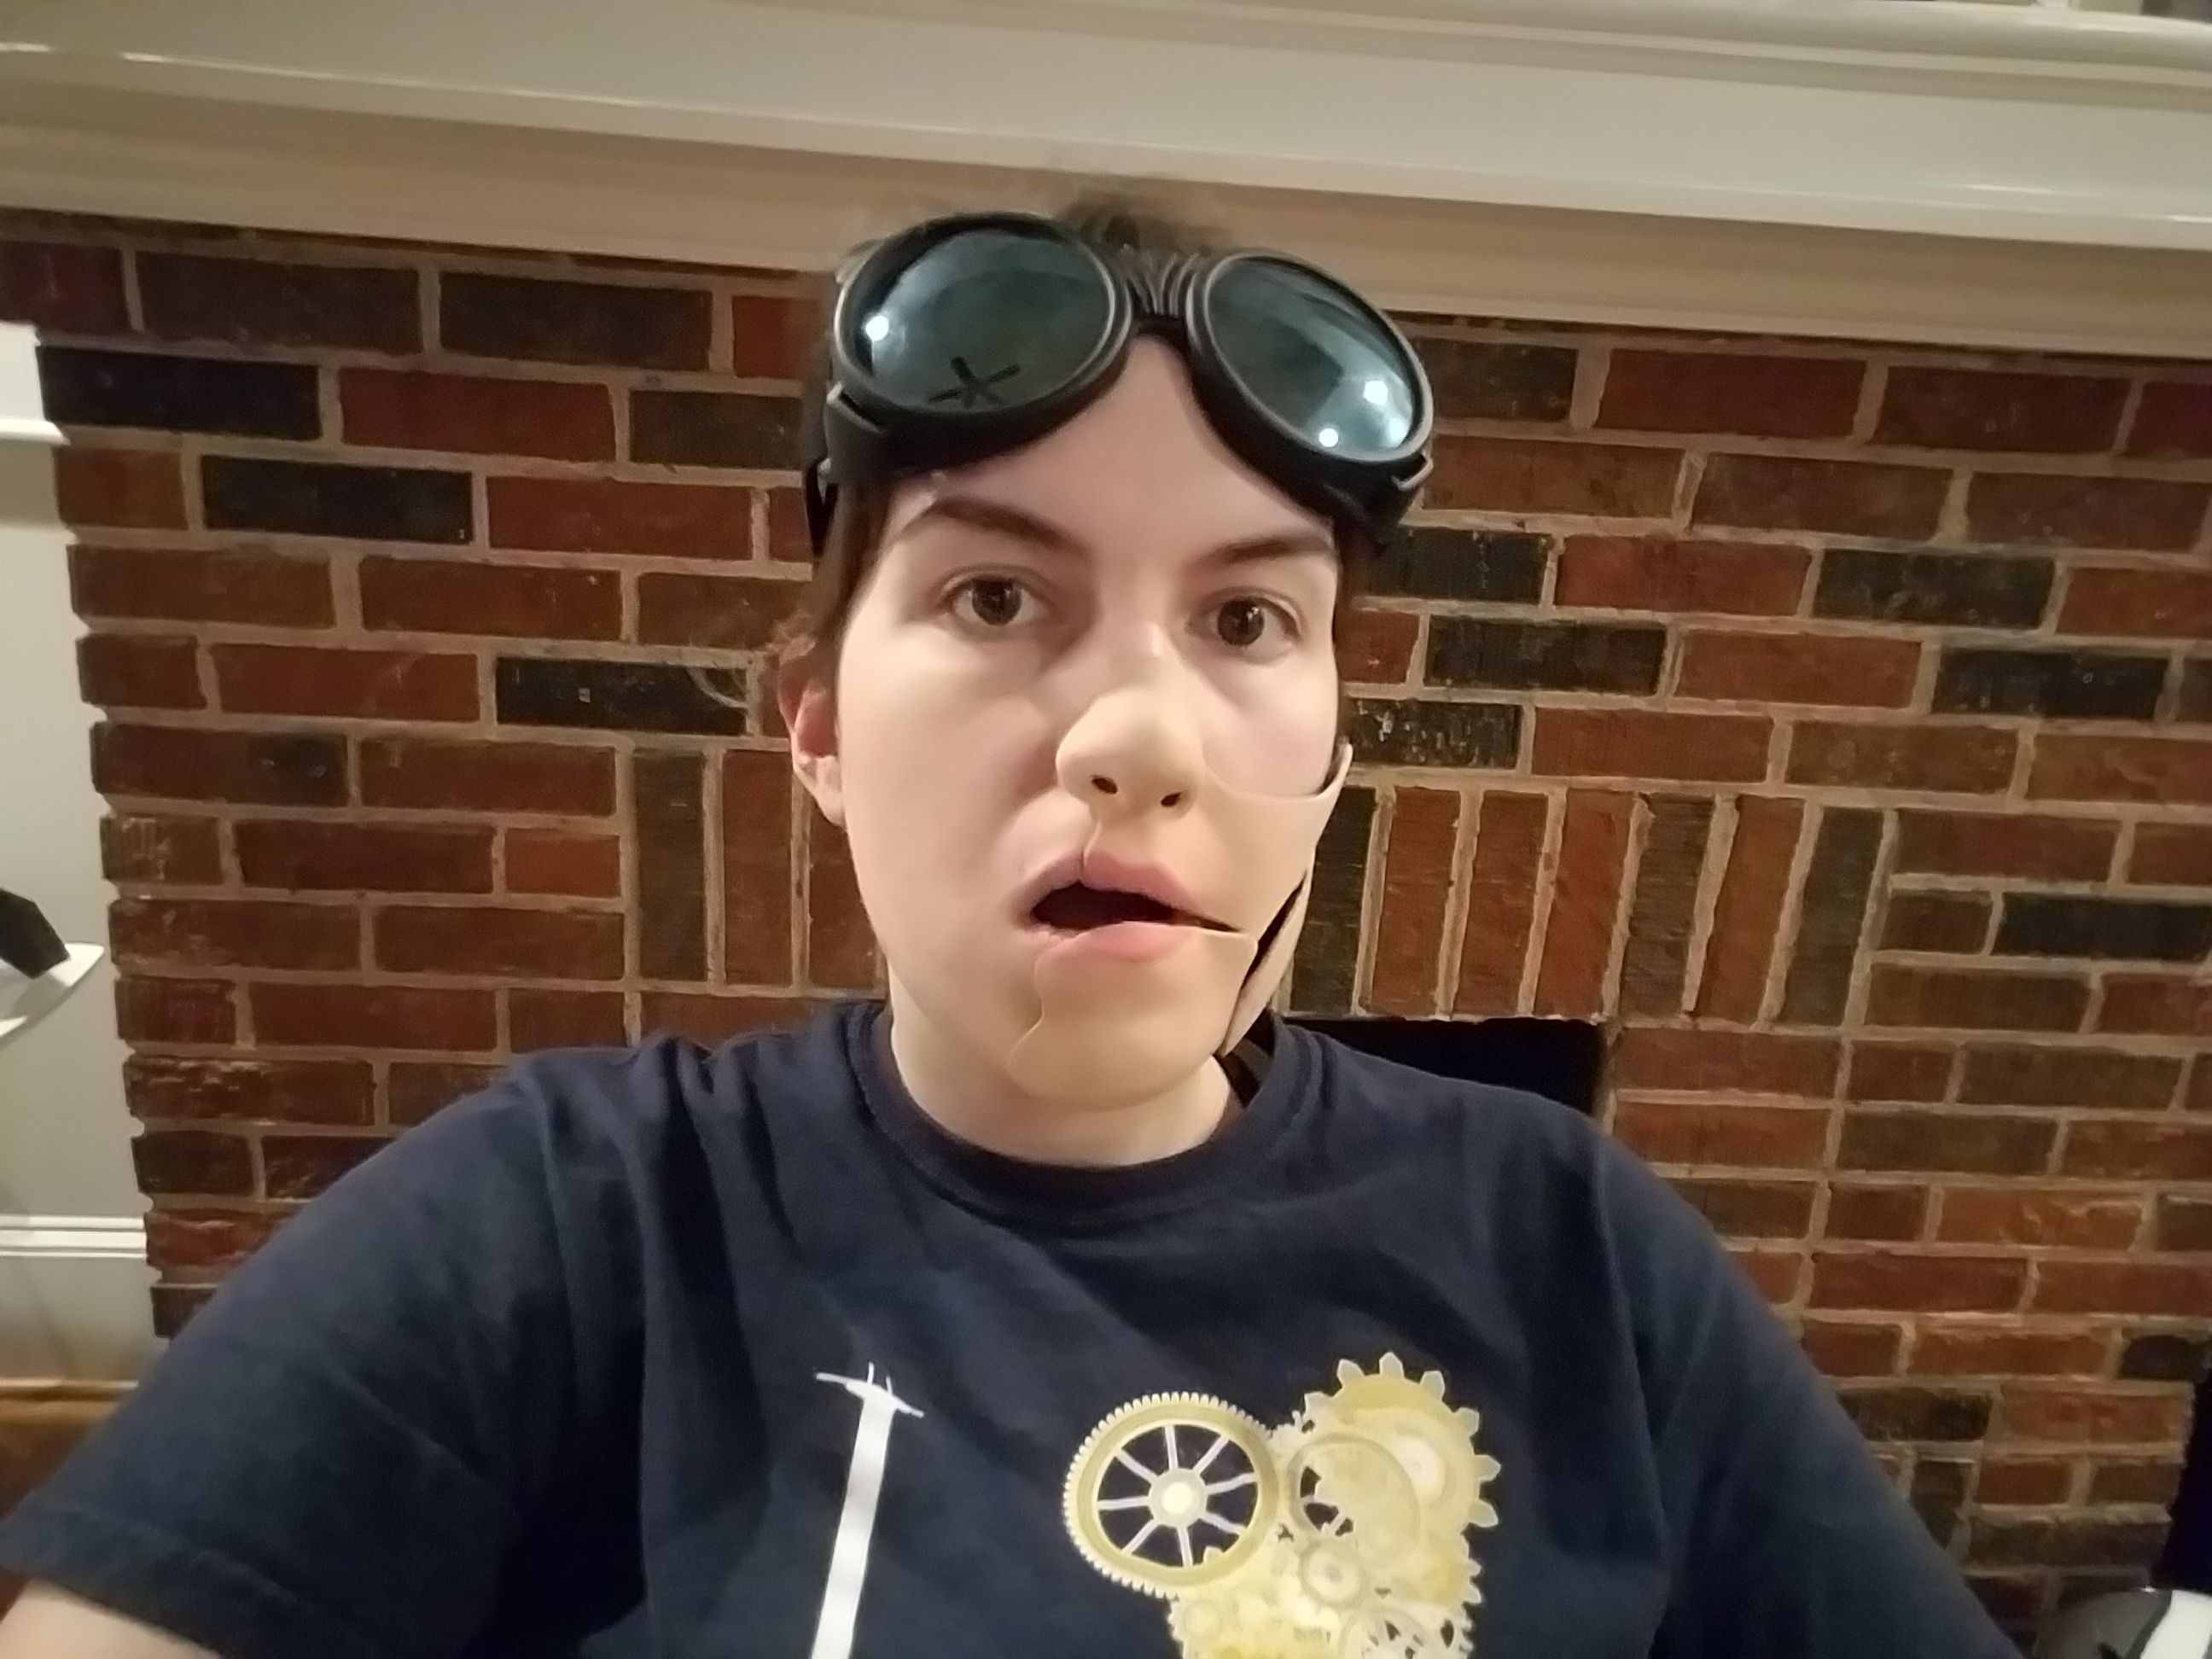
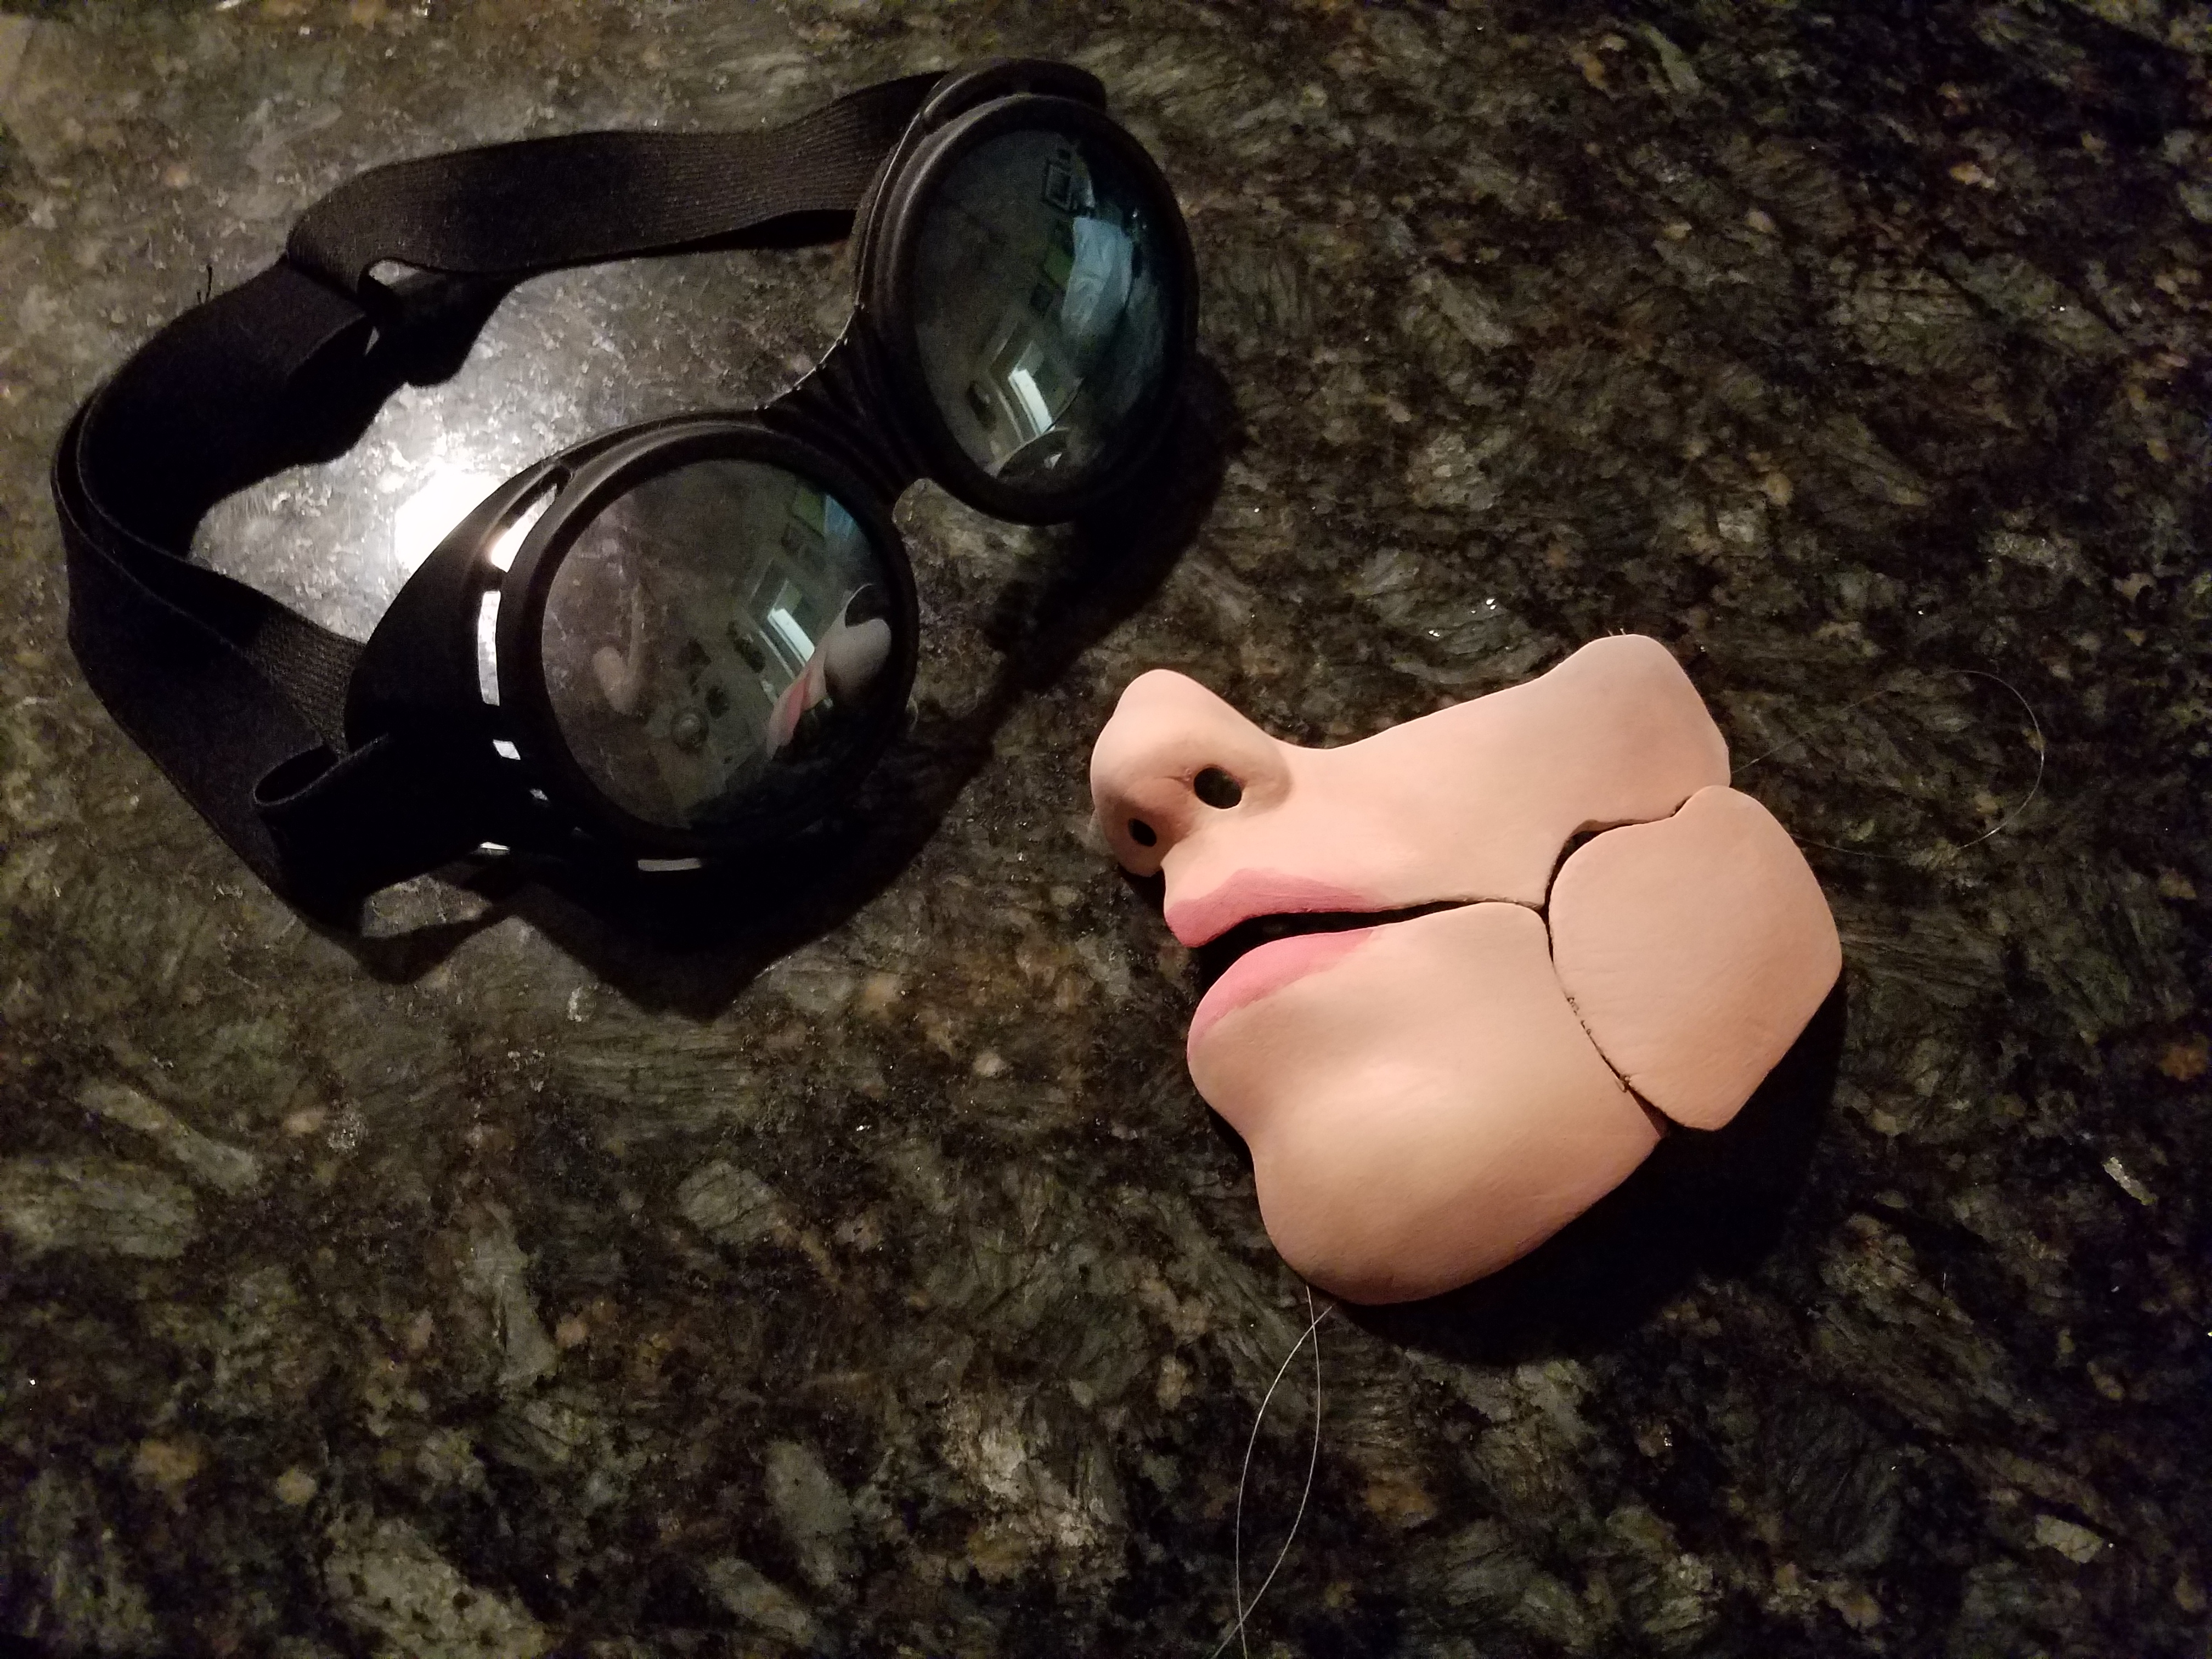
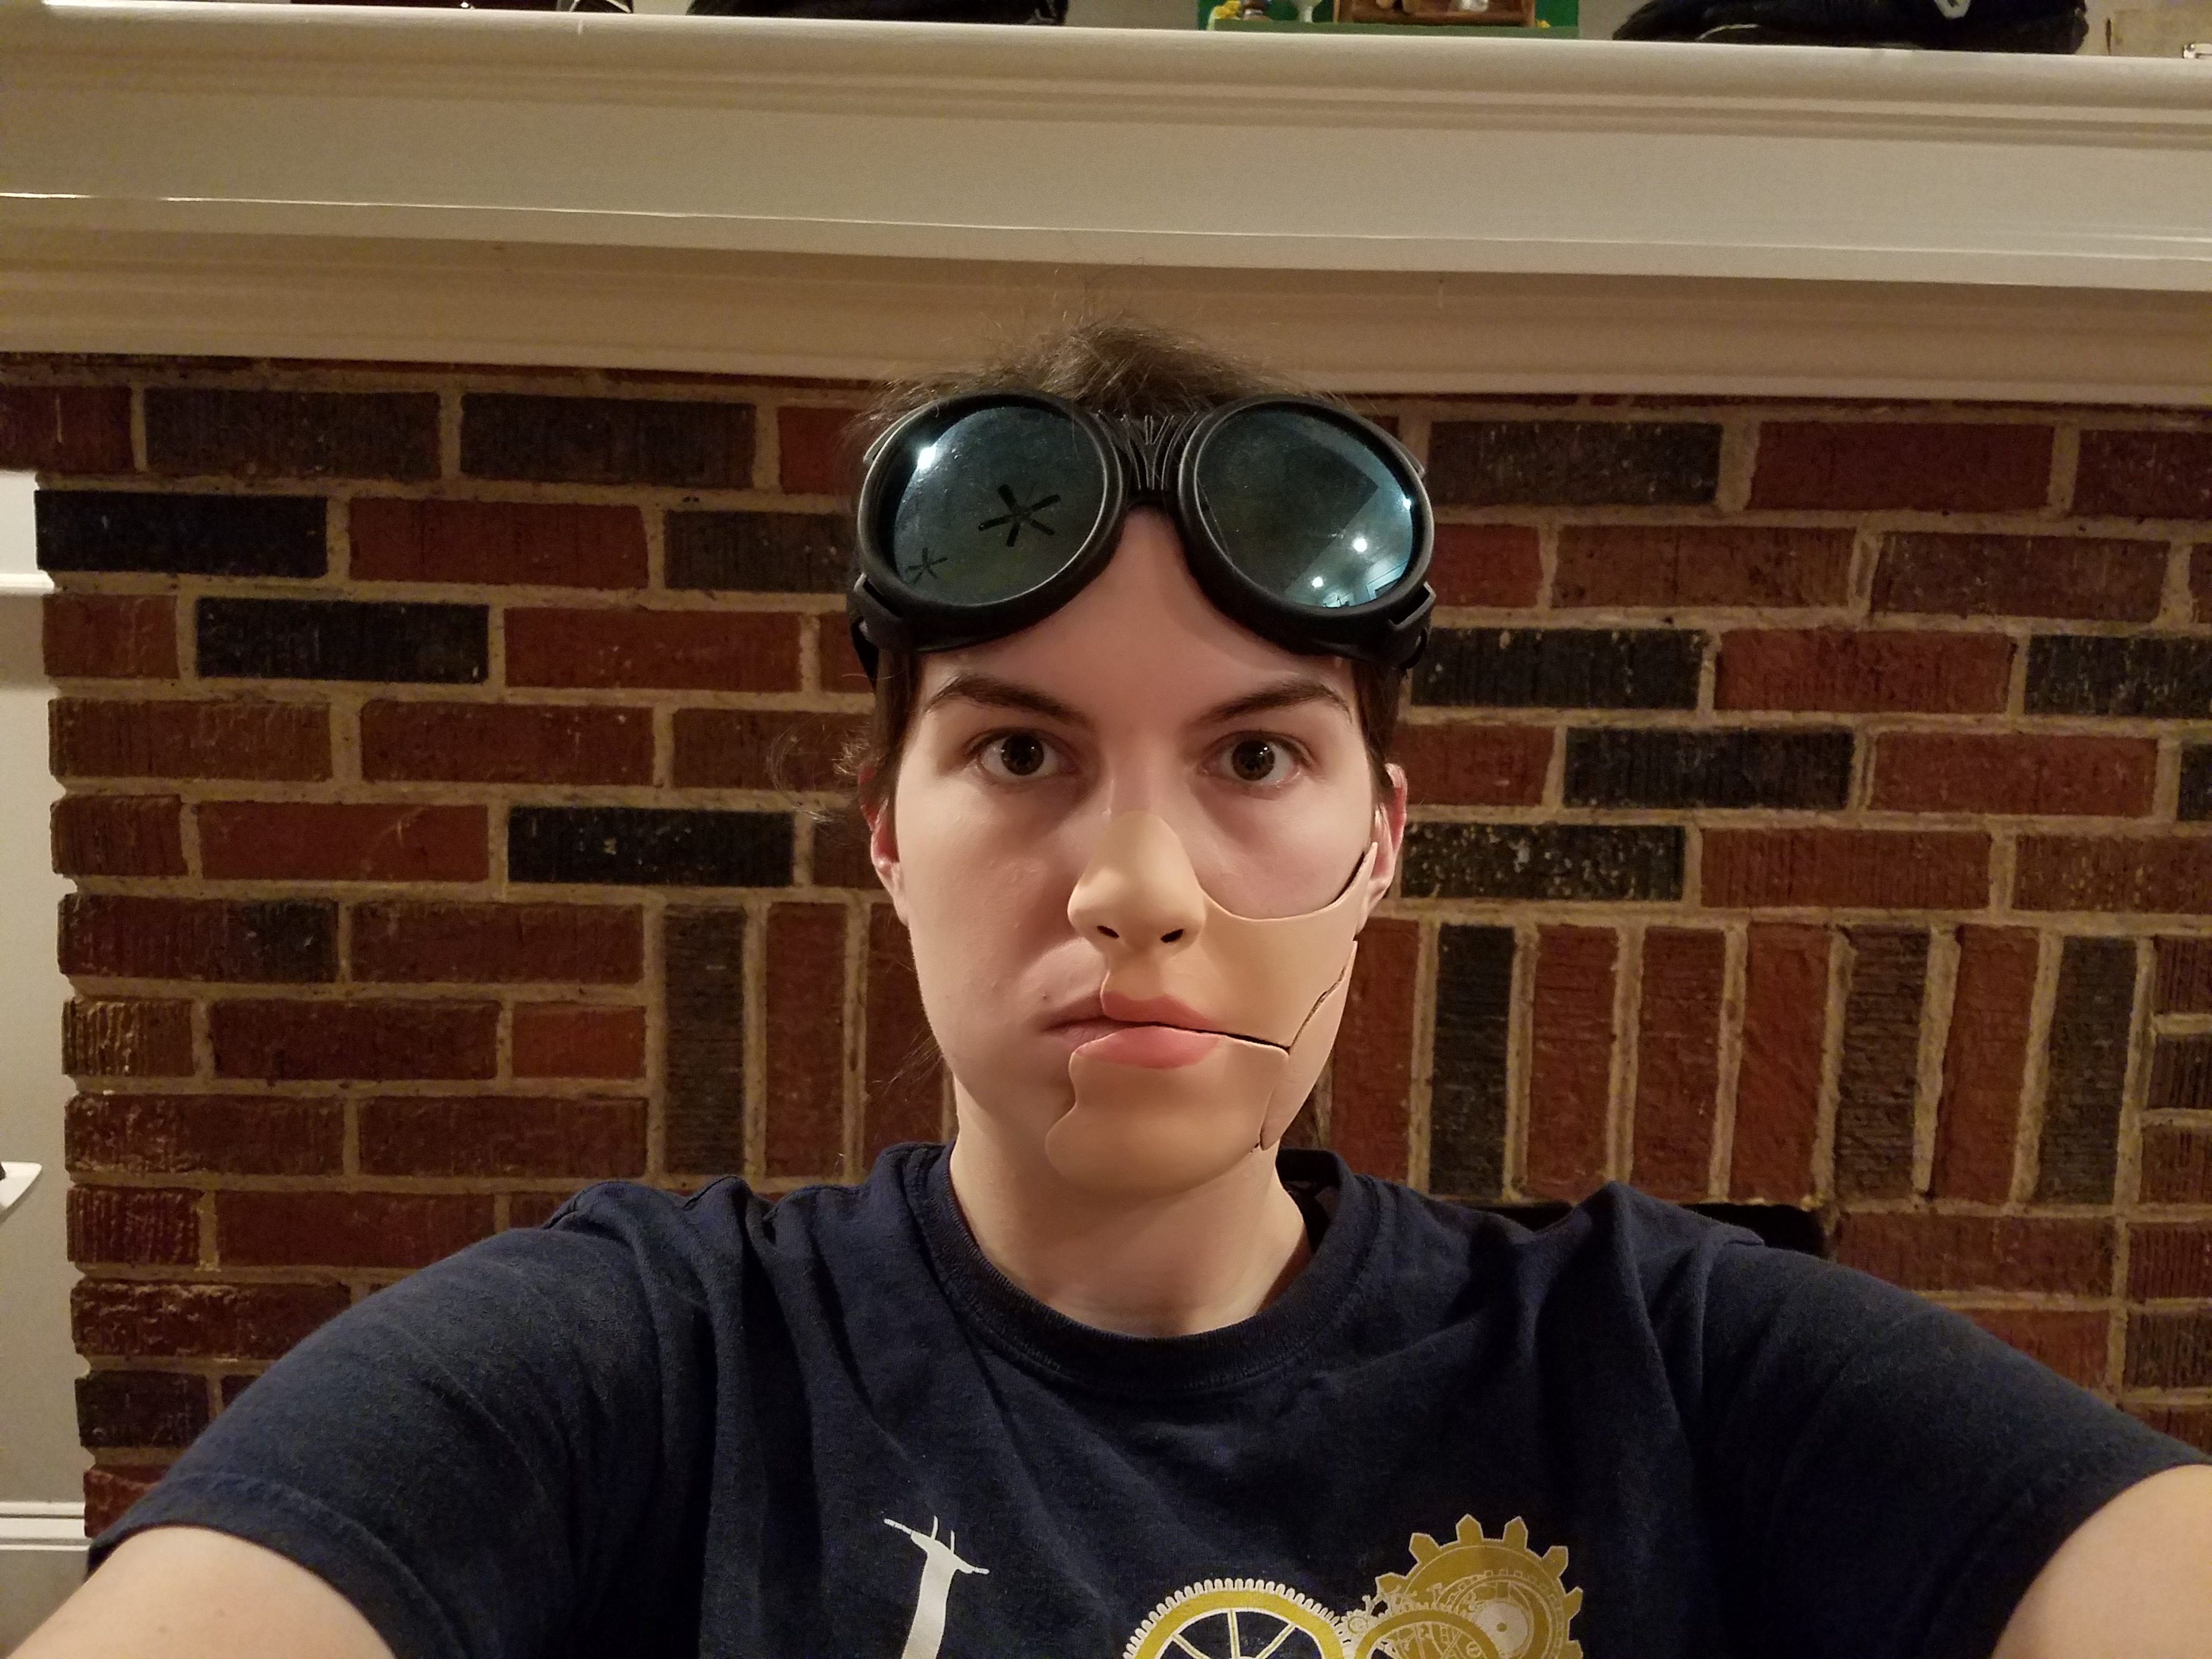
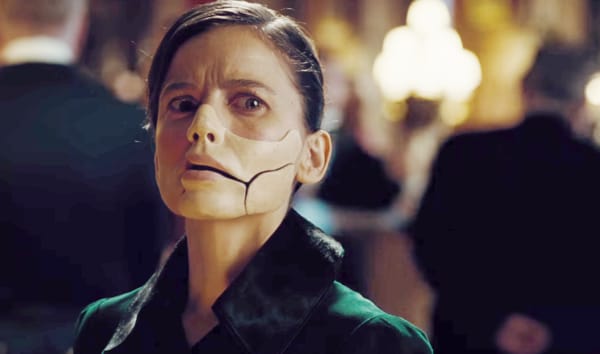
Like many people all over the world, I saw Wonder Woman this past week. I loved every part of that movie, but I was particularly blown away by the character design of one of the villains - Dr. Poison. I was particularly enthralled by her creepy ceramic mask, and I decided that I NEEDED to have one.
I've been fortunate enough to have access to a high quality 3D scanner, and I spent the majority of last semester learning how to custom fit objects to my face. Since I haven't seen a lot of people doing that, I figured I could kill 2 birds with one stone and teach you all how to make a Dr. Poison Mask from a 3D scan of your face.
Materials:
- Acrylic paint
- Primer Filler
- Matte Clear Coat
- Sandpaper (80, 220, 400)
- Hot Glue
- Fishing Line
- Spirit Gum (For Conventions, probably)
Tools:
- 3D scanner
- 3D printer
- graphics tablet (optional, but really helpful for selecting in Meshmixer)
Software:
- Meshmixer (It's free!)
Get a High Quality 3D Scan of Your Face.
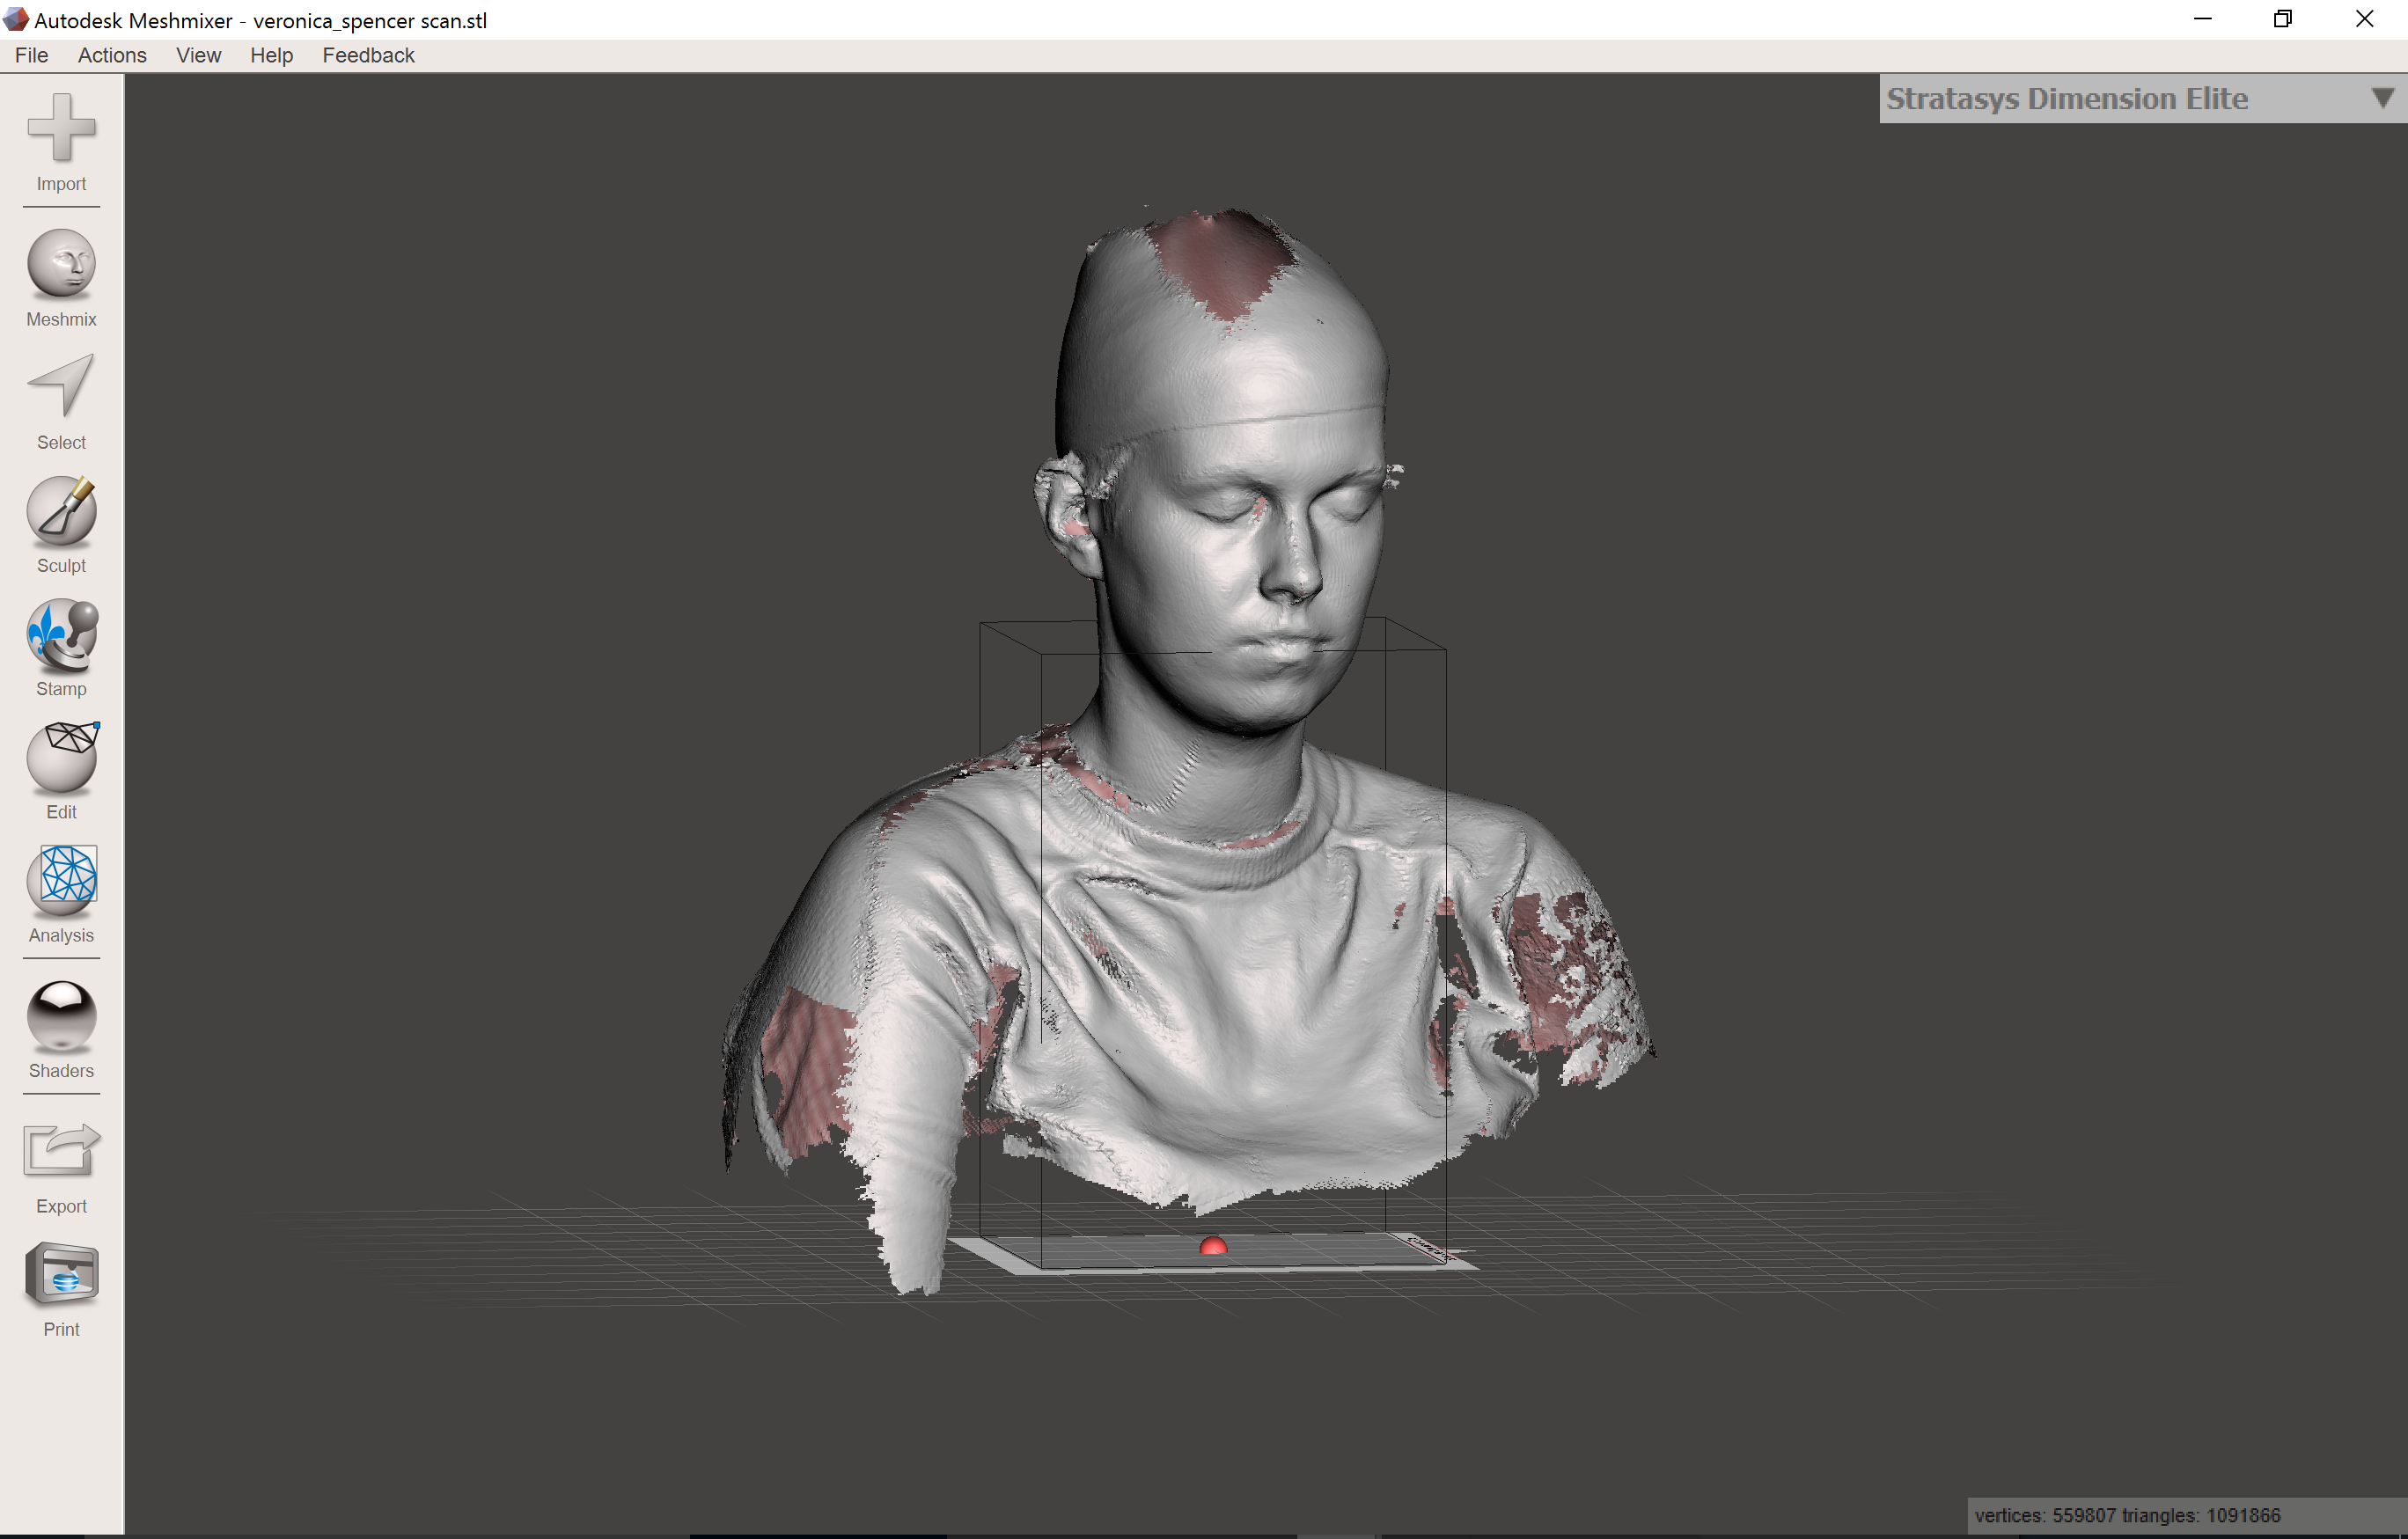
This past Spring, I had access to the Body Scan Lab at Georgia Tech for several of my class projects. During that time, I was able to use our Artec Eva Scanner to acquire a high fidelity scan of my face. It was a lot like this video, but with less classy narrating and more nauseatingly bright strobe lights.
If you don't have a 3D scanner at or near your makerspace, there are a lot of companies that are beginning to offer 3D scanning services, for a fee. While you can custom design your own masks and props with this technique by using other less expensive scanners, the drawback is that a low quality scan may not capture all of the details of your face - which can yield a less comfortable, less seamless fit in the final item.
The great thing about having a 3D scan of your face is that you can reuse it for a lot of different projects, ranging from costuming to mounts for wearable tech, so if this sounds like a thing you want to get involved in, I would highly recommend springing for high quality scan.
Clean the Scan.
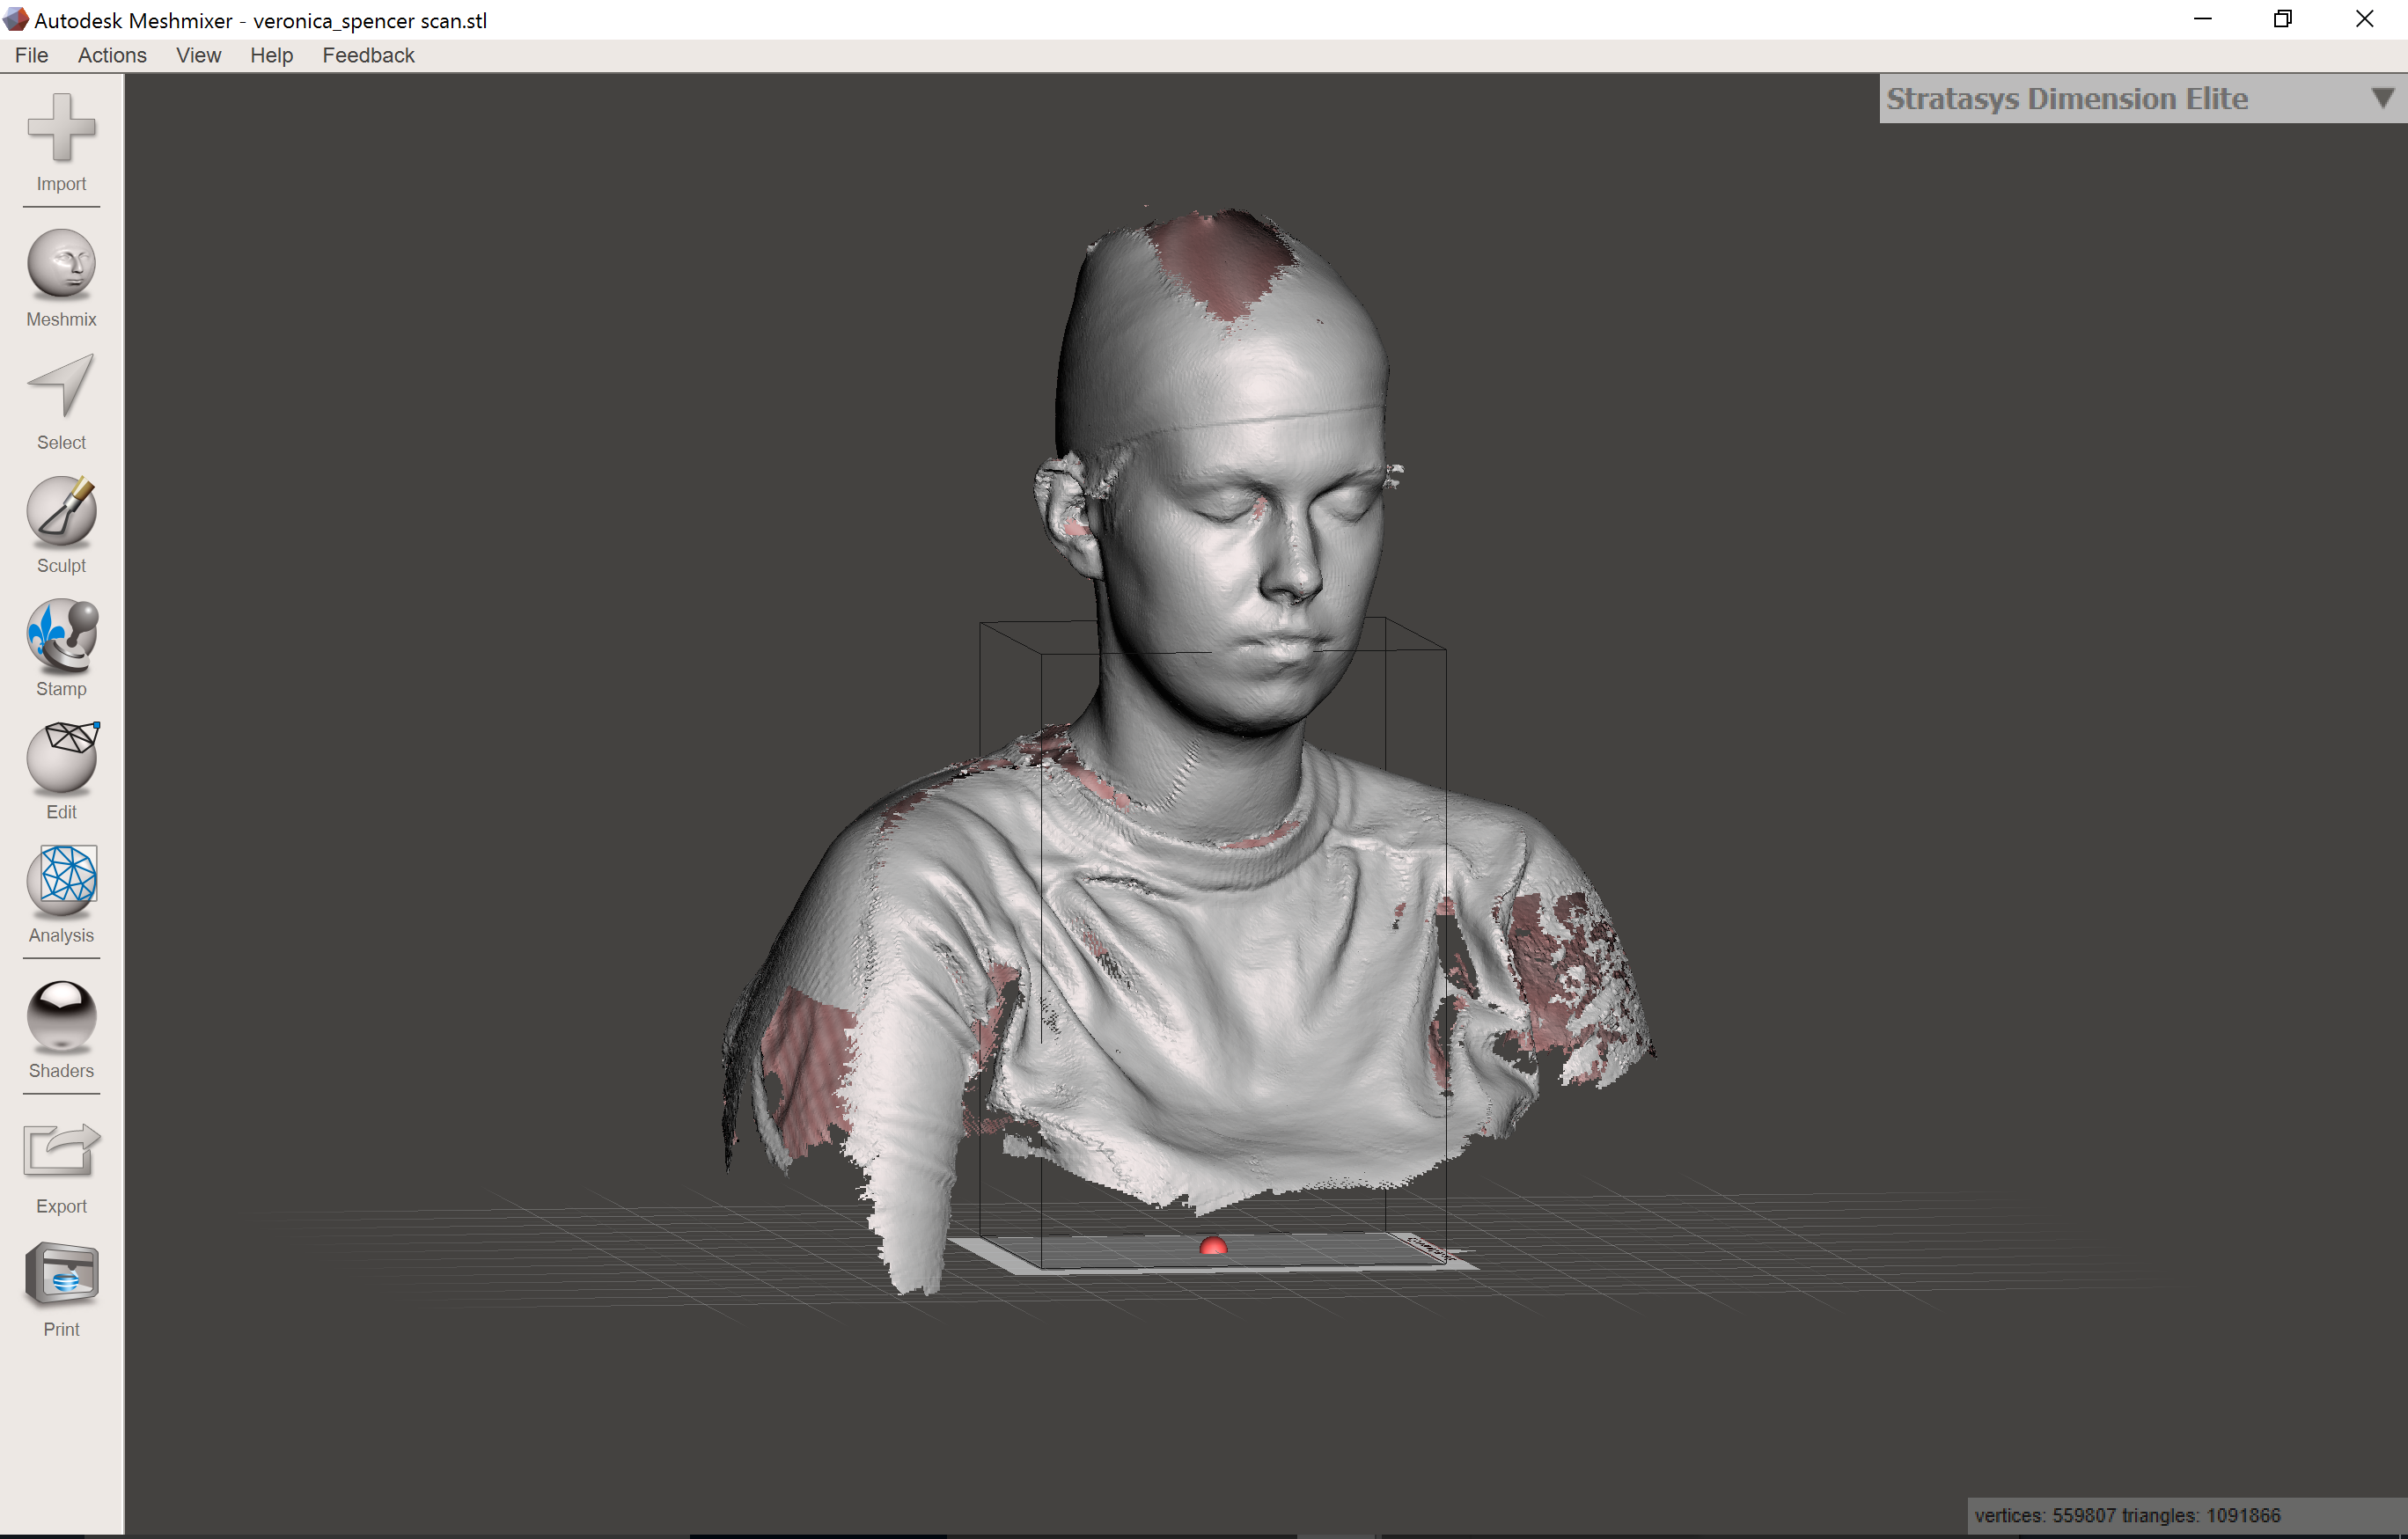

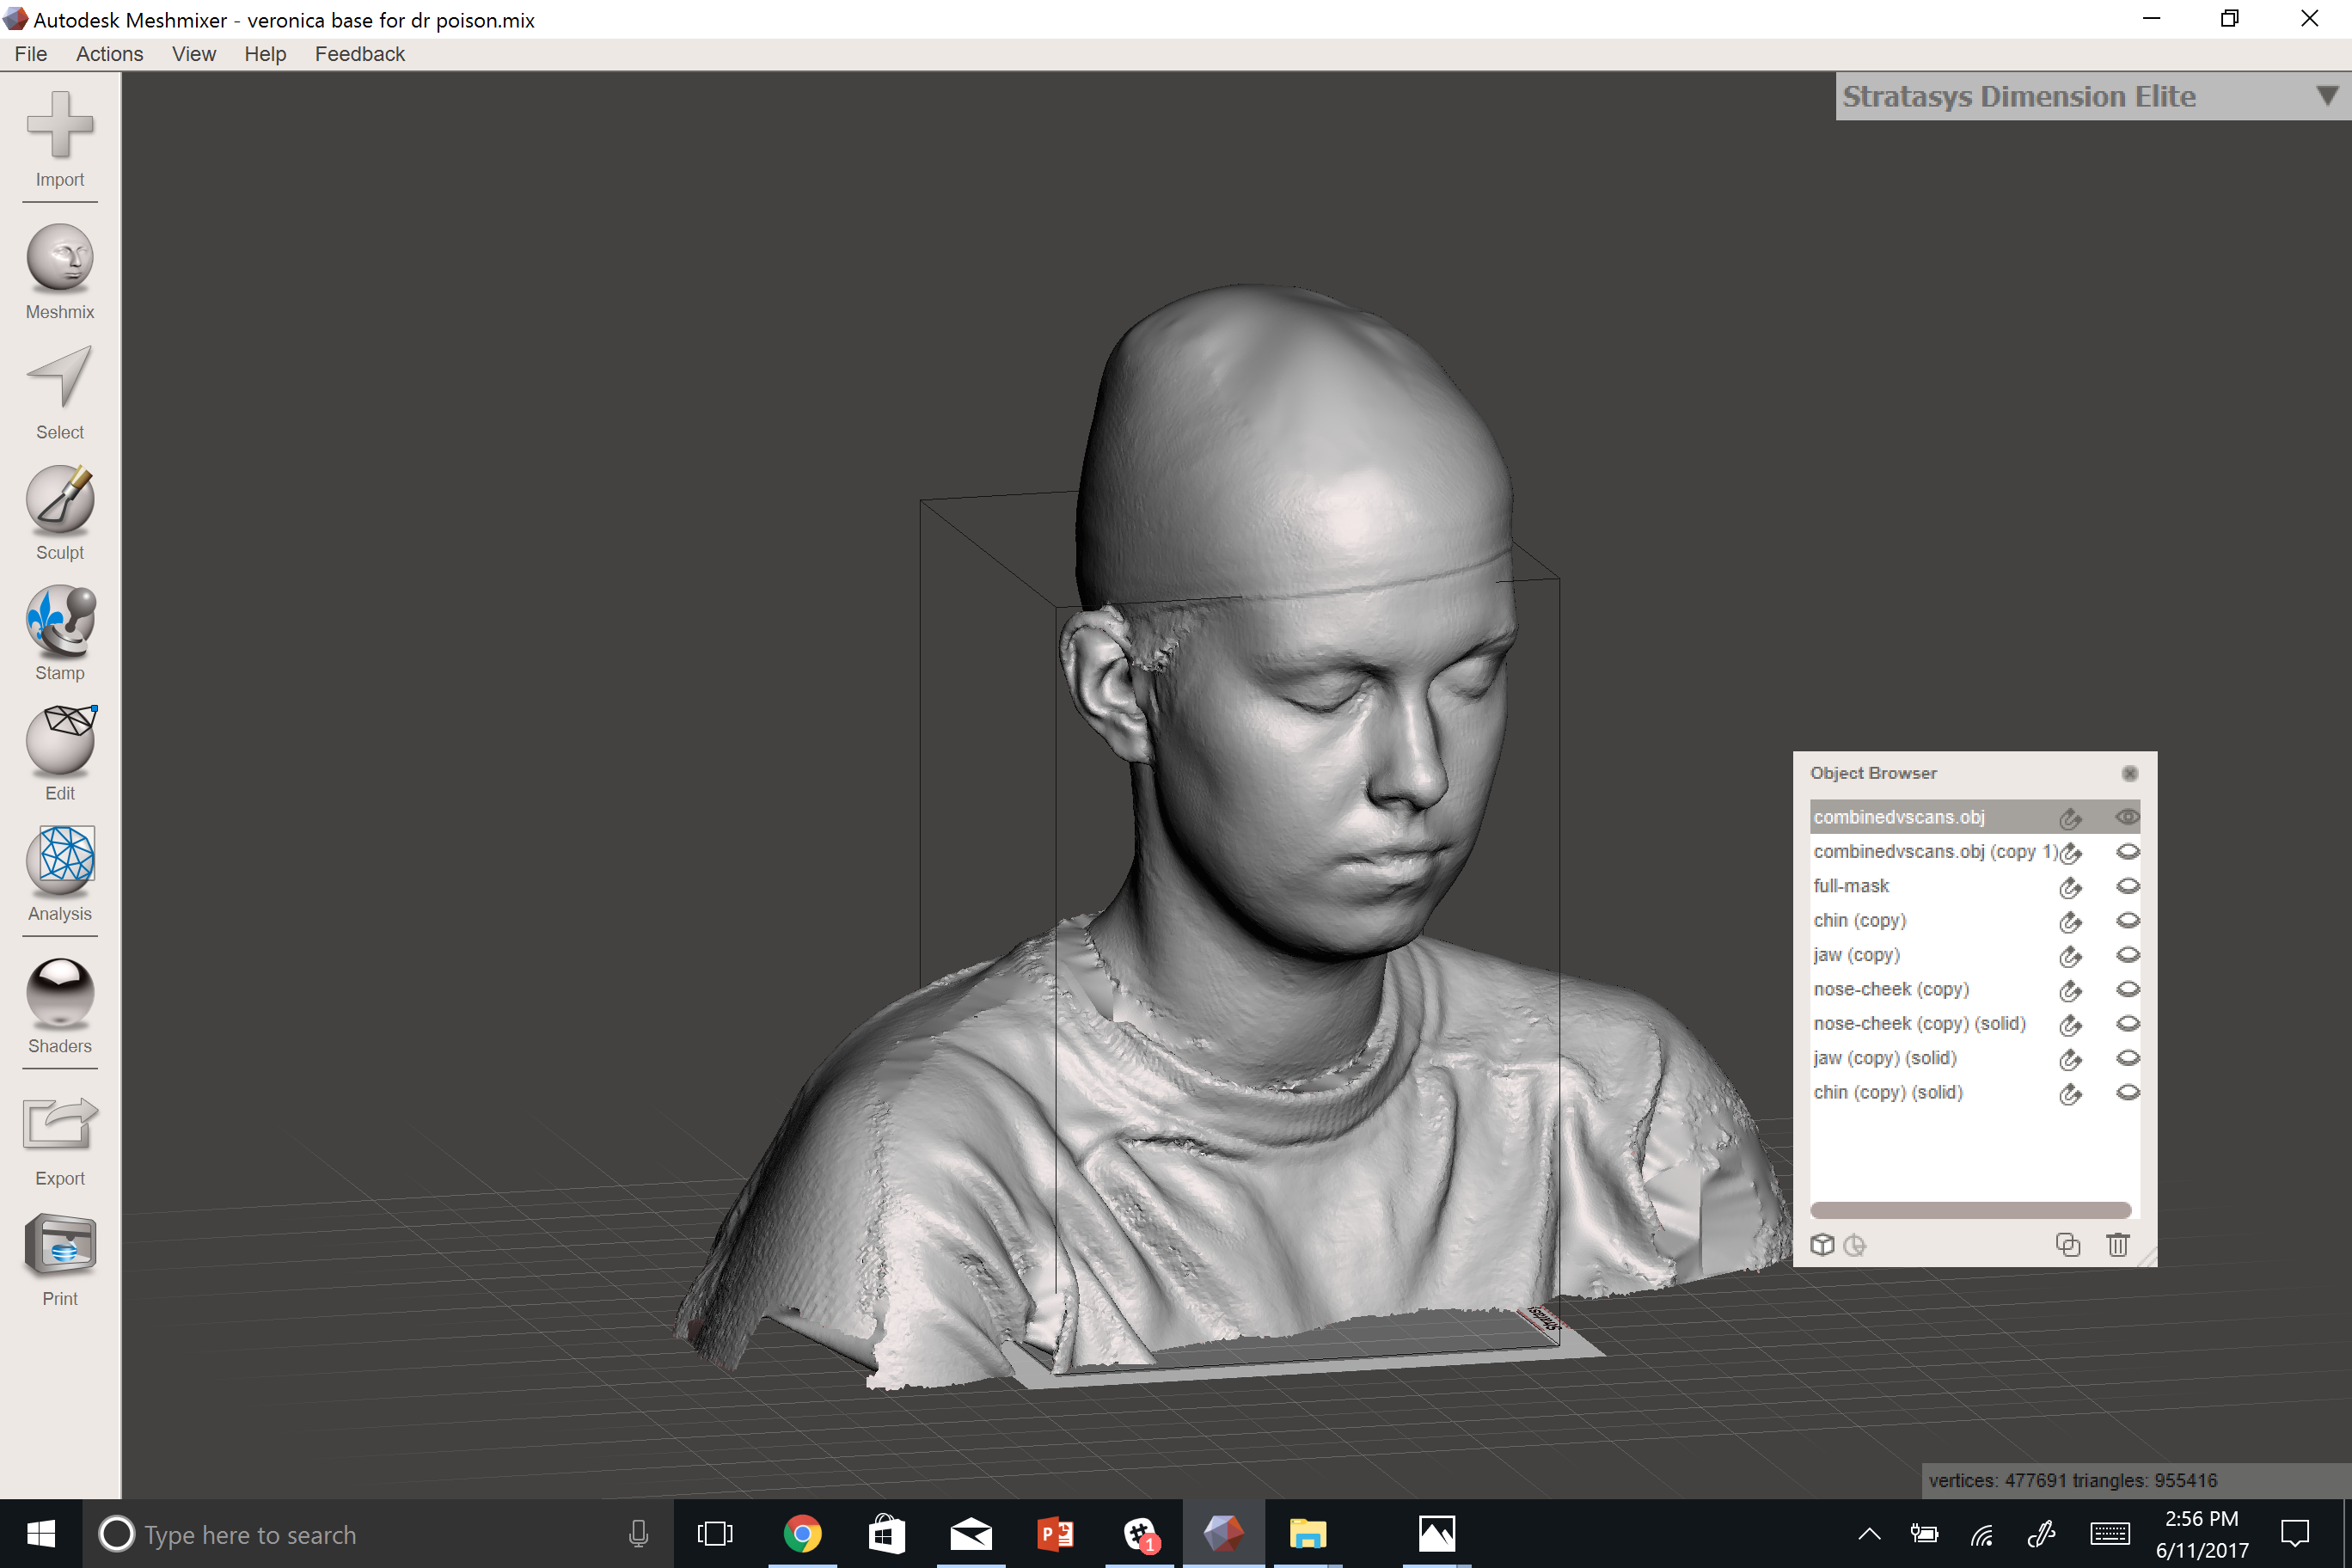
Any 3D scan, regardless of the quality of the scan, will have its own associated difficulties in use.
If your scan has a lot of holes right where you'll need to put features, you should patch them. This is covered in a LOT of other tutorials - so I won't be covering it here, but be aware that it takes a long time AND you may still have errors/dimensional irregularities in the final file. If you essentially have to rebuild the entire scan piece by piece, you should probably just try to get rescanned.
If your computer is lagging while working with your scan, you need to reduce your polycount. In Meshmixer, this can be accomplished by using the following method:
Select all of the model > Edit > Reduce
How much you need to reduce the triangle count is up to you, and it becomes a delicate balance of how much detail your computer can support vs how much of your scan resolution you lose. I found that my computer (Surface Pro 4, i7, 16gB of RAM) could handle the scan when it was reduced to 955,000 triangles.
Select the Overall Mask Shape, Based on References.
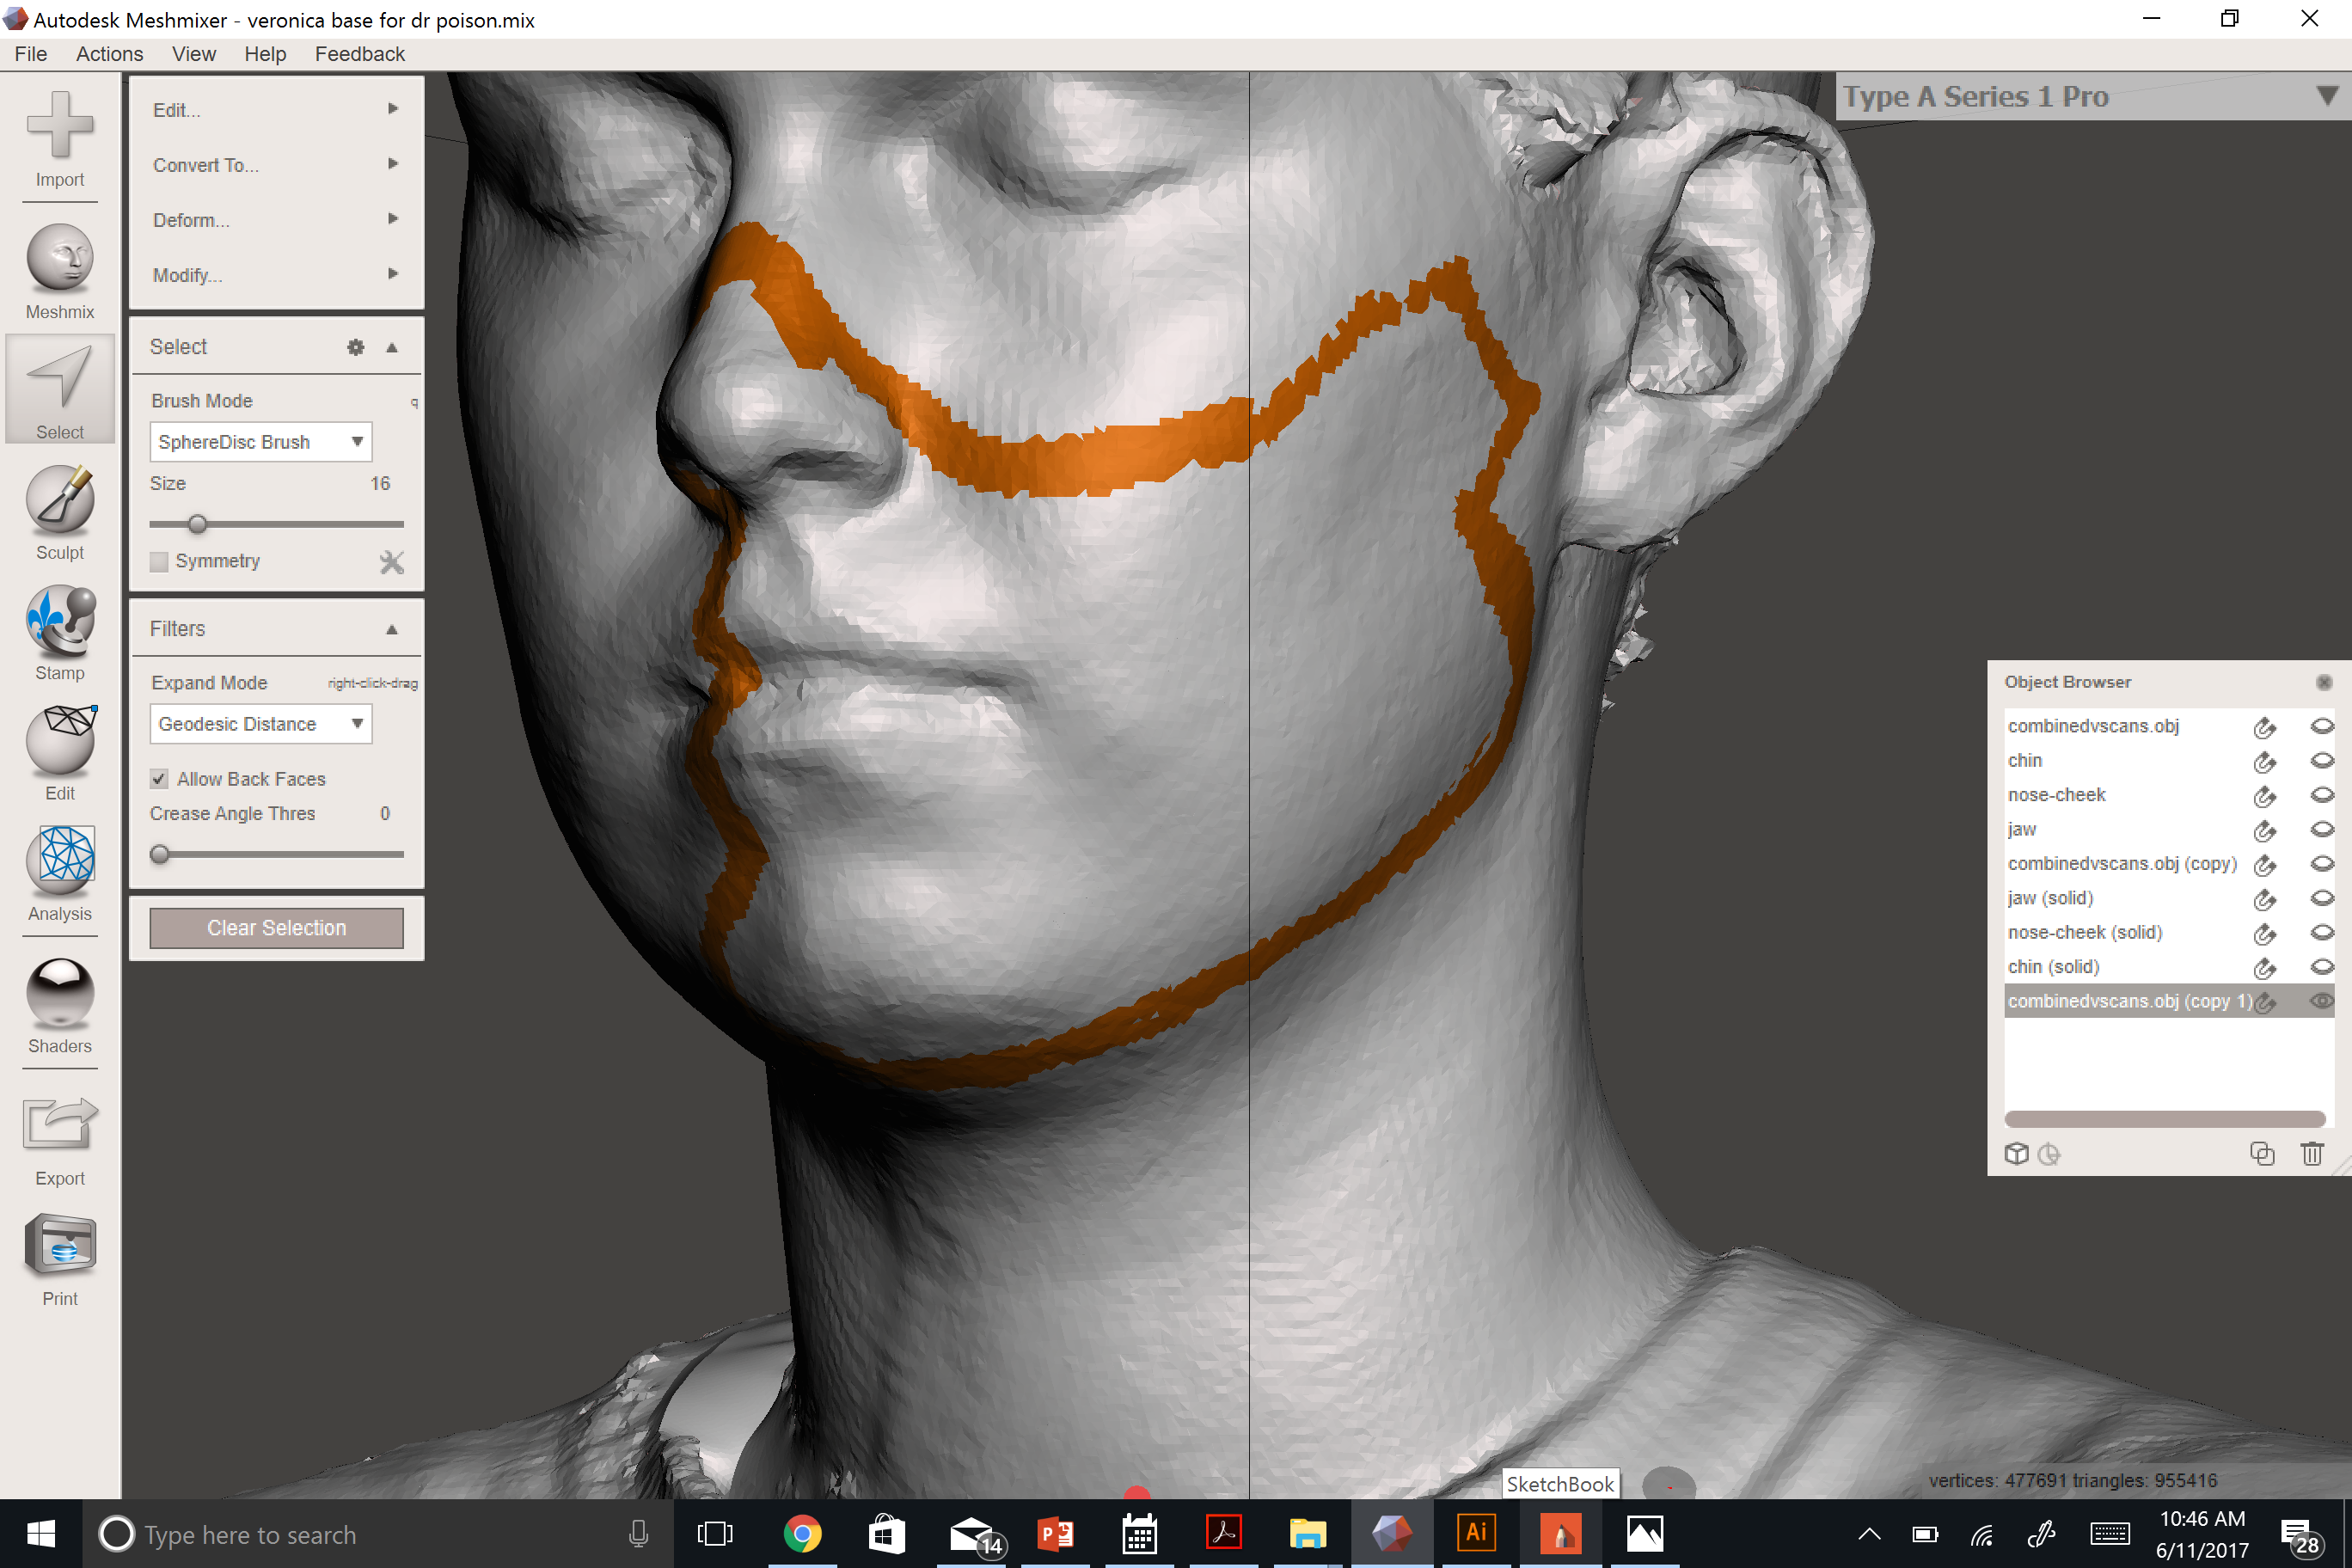
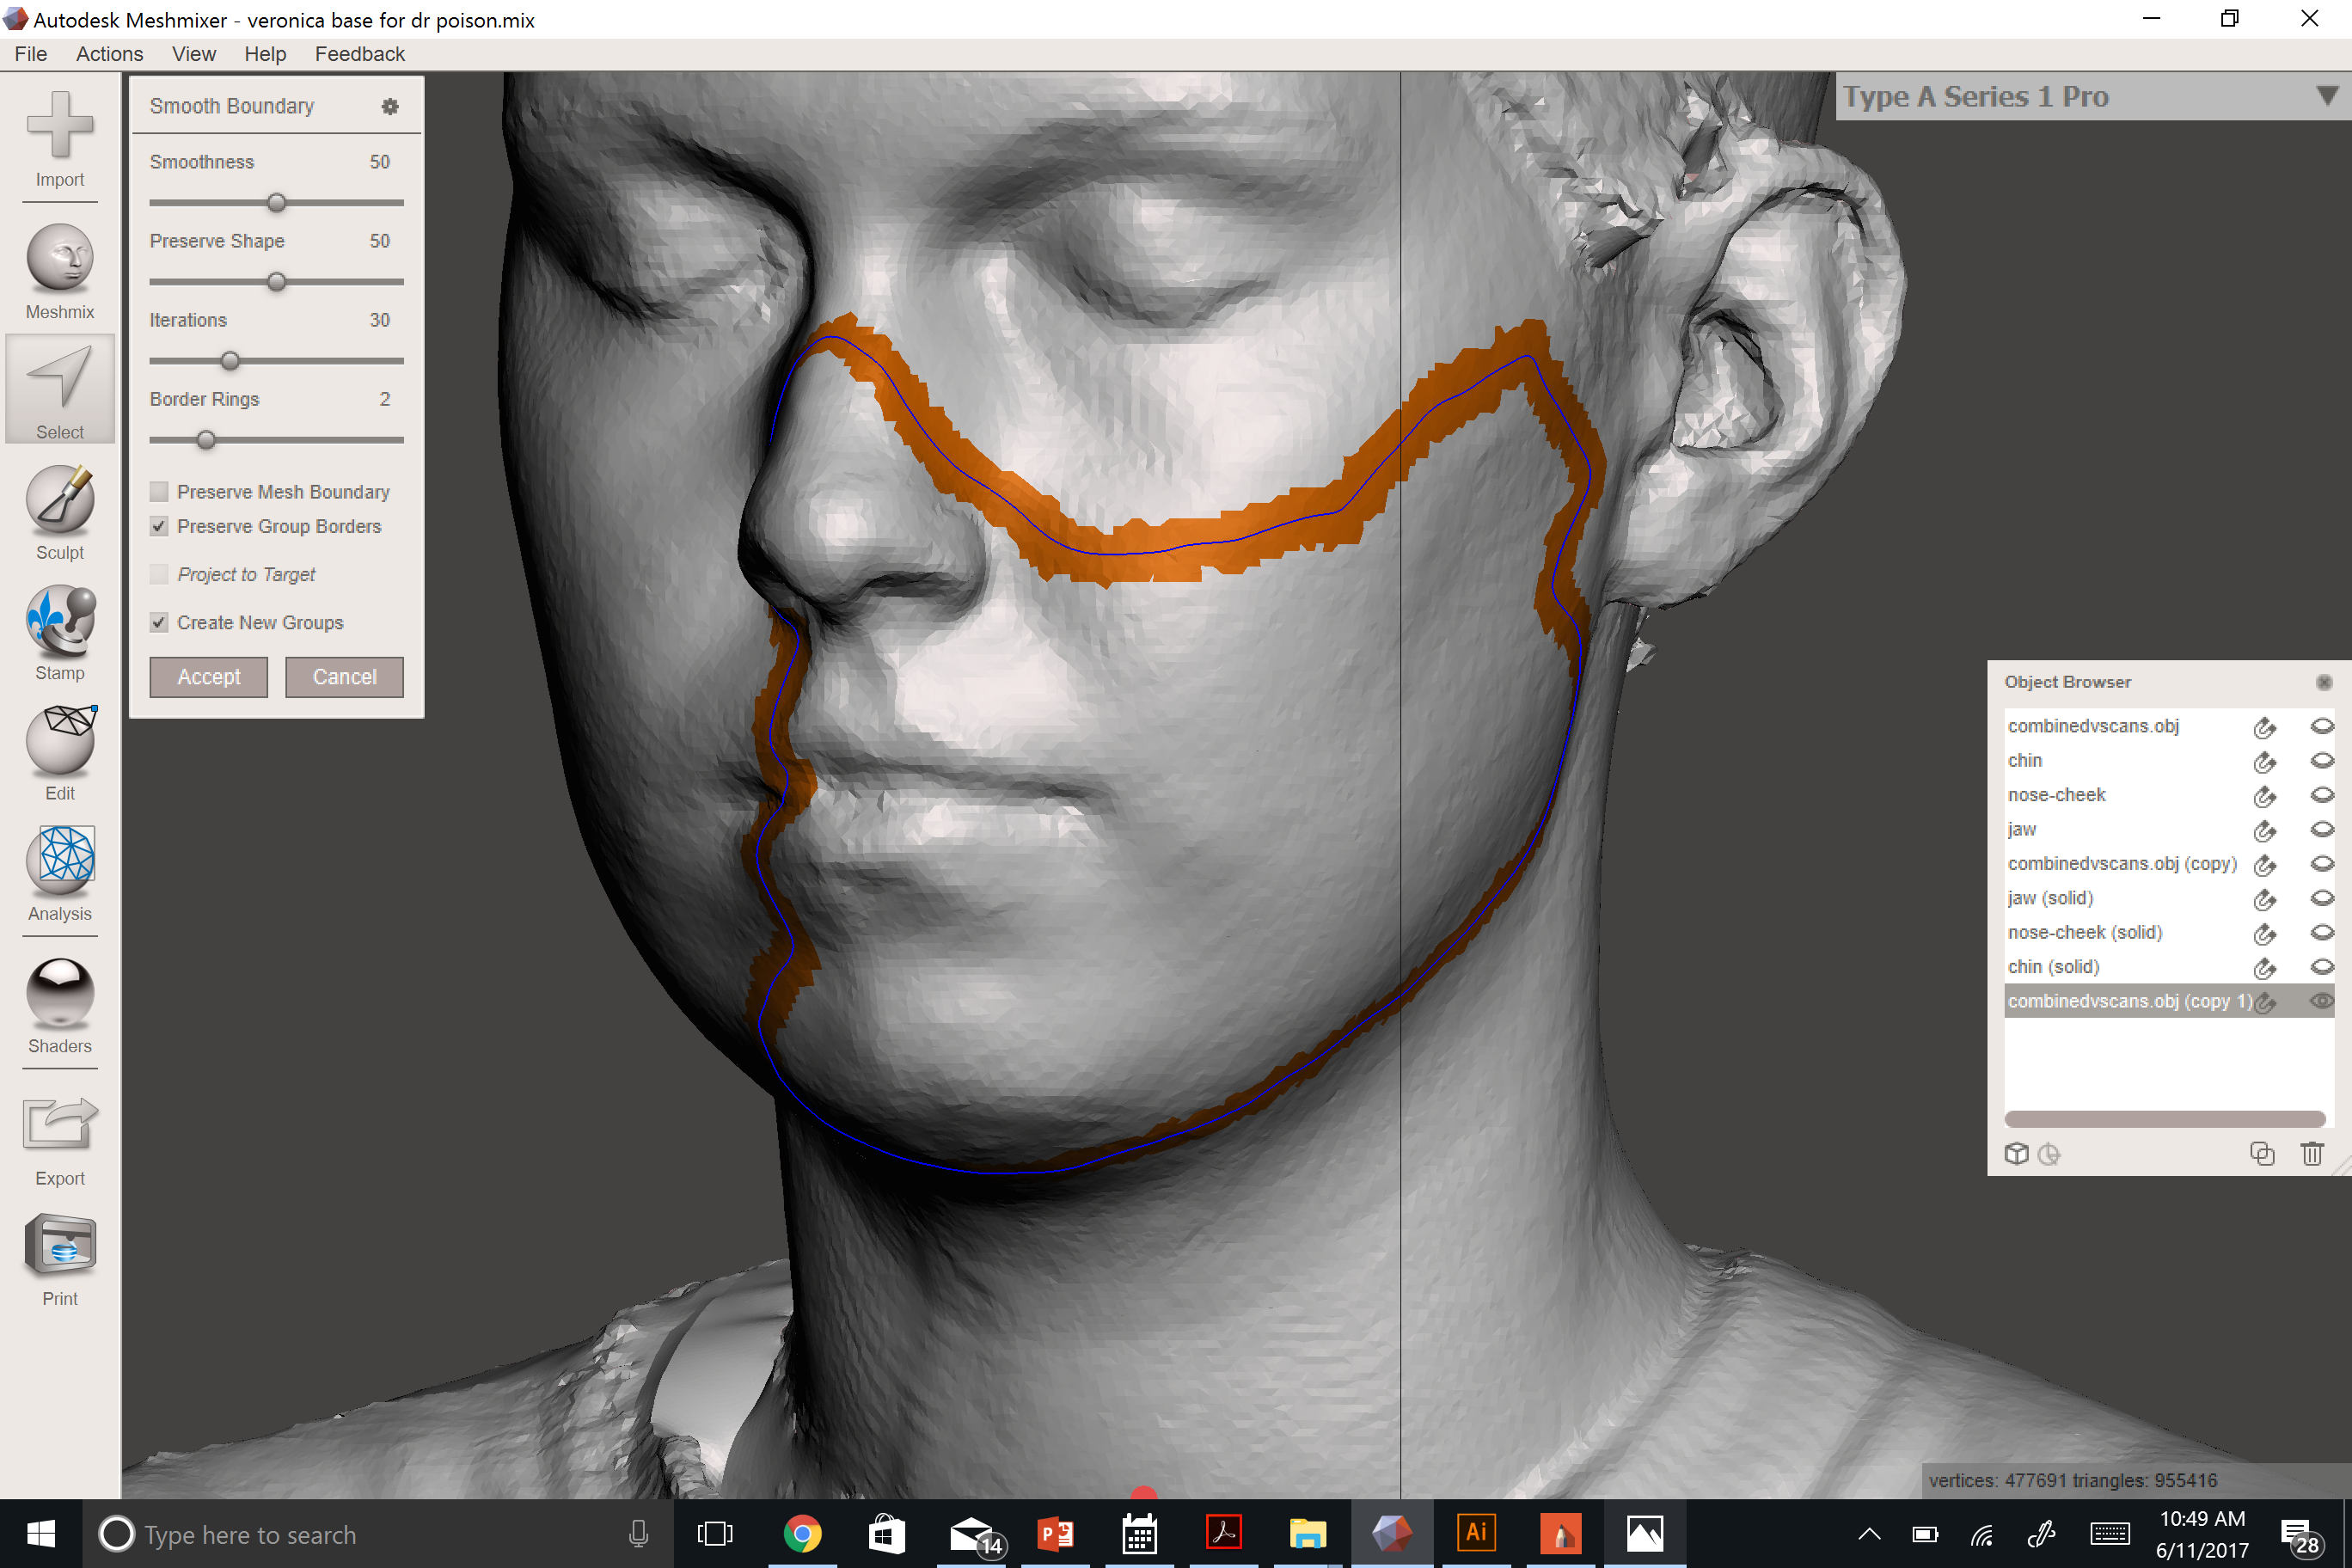
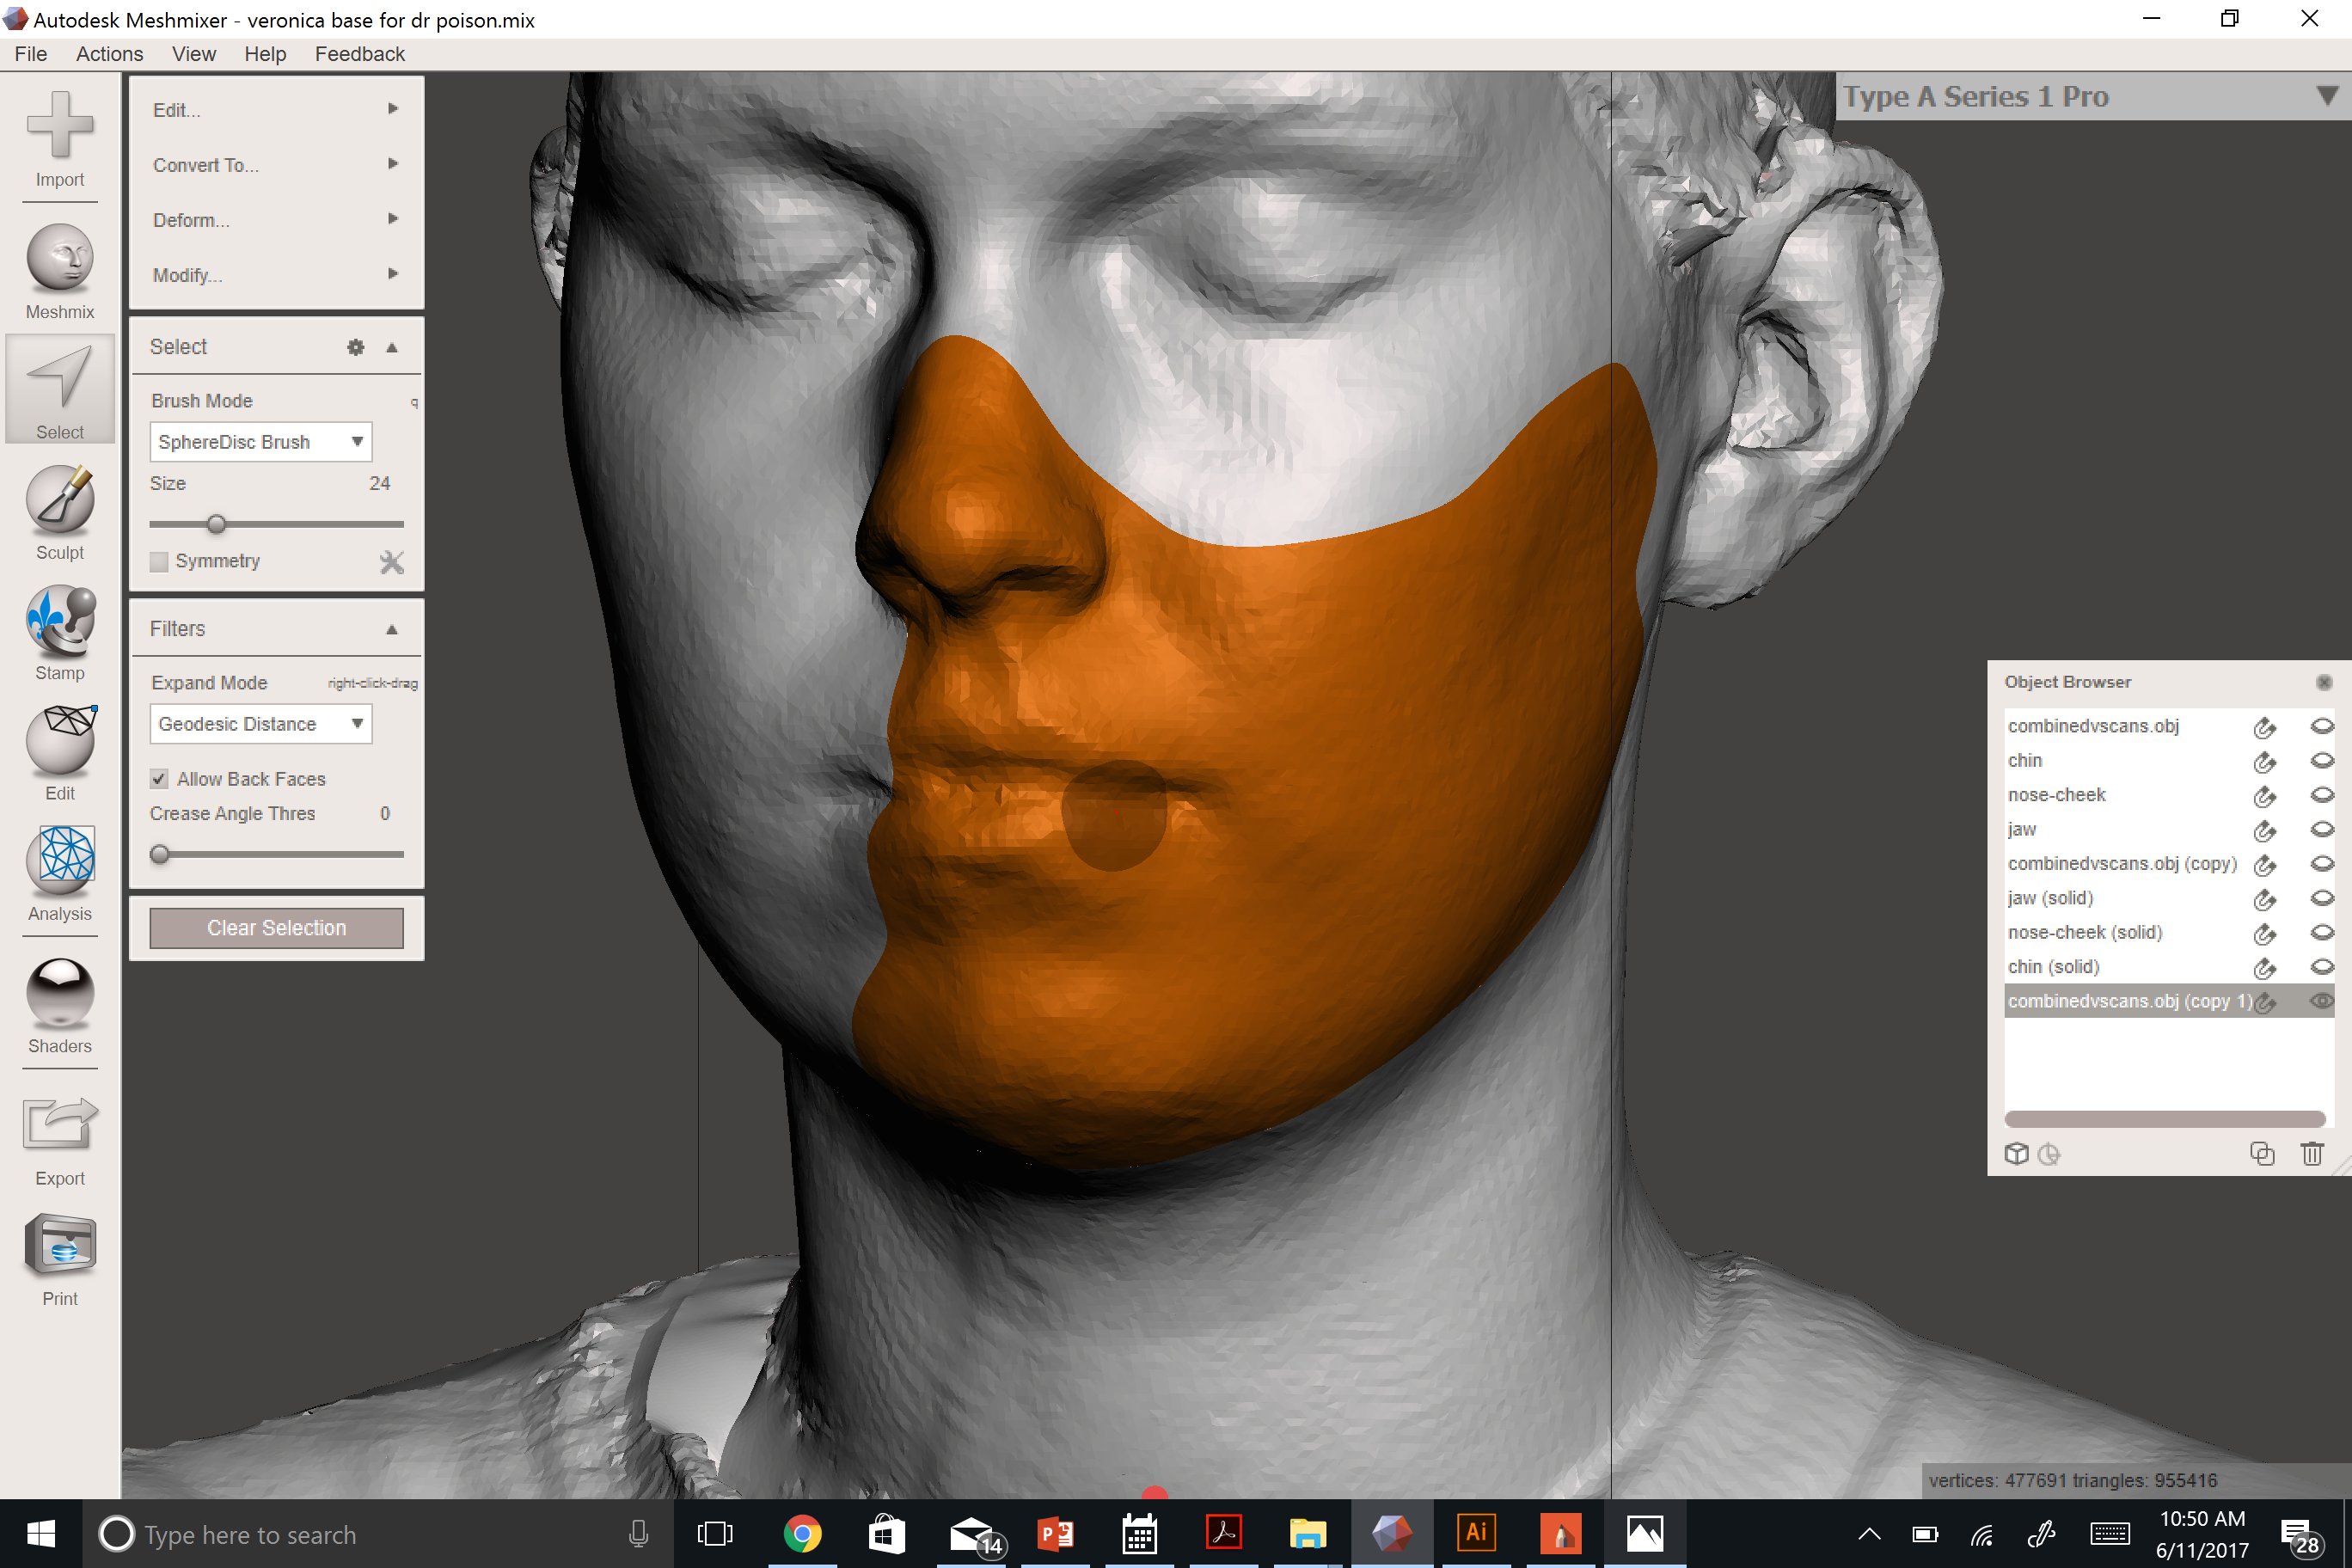
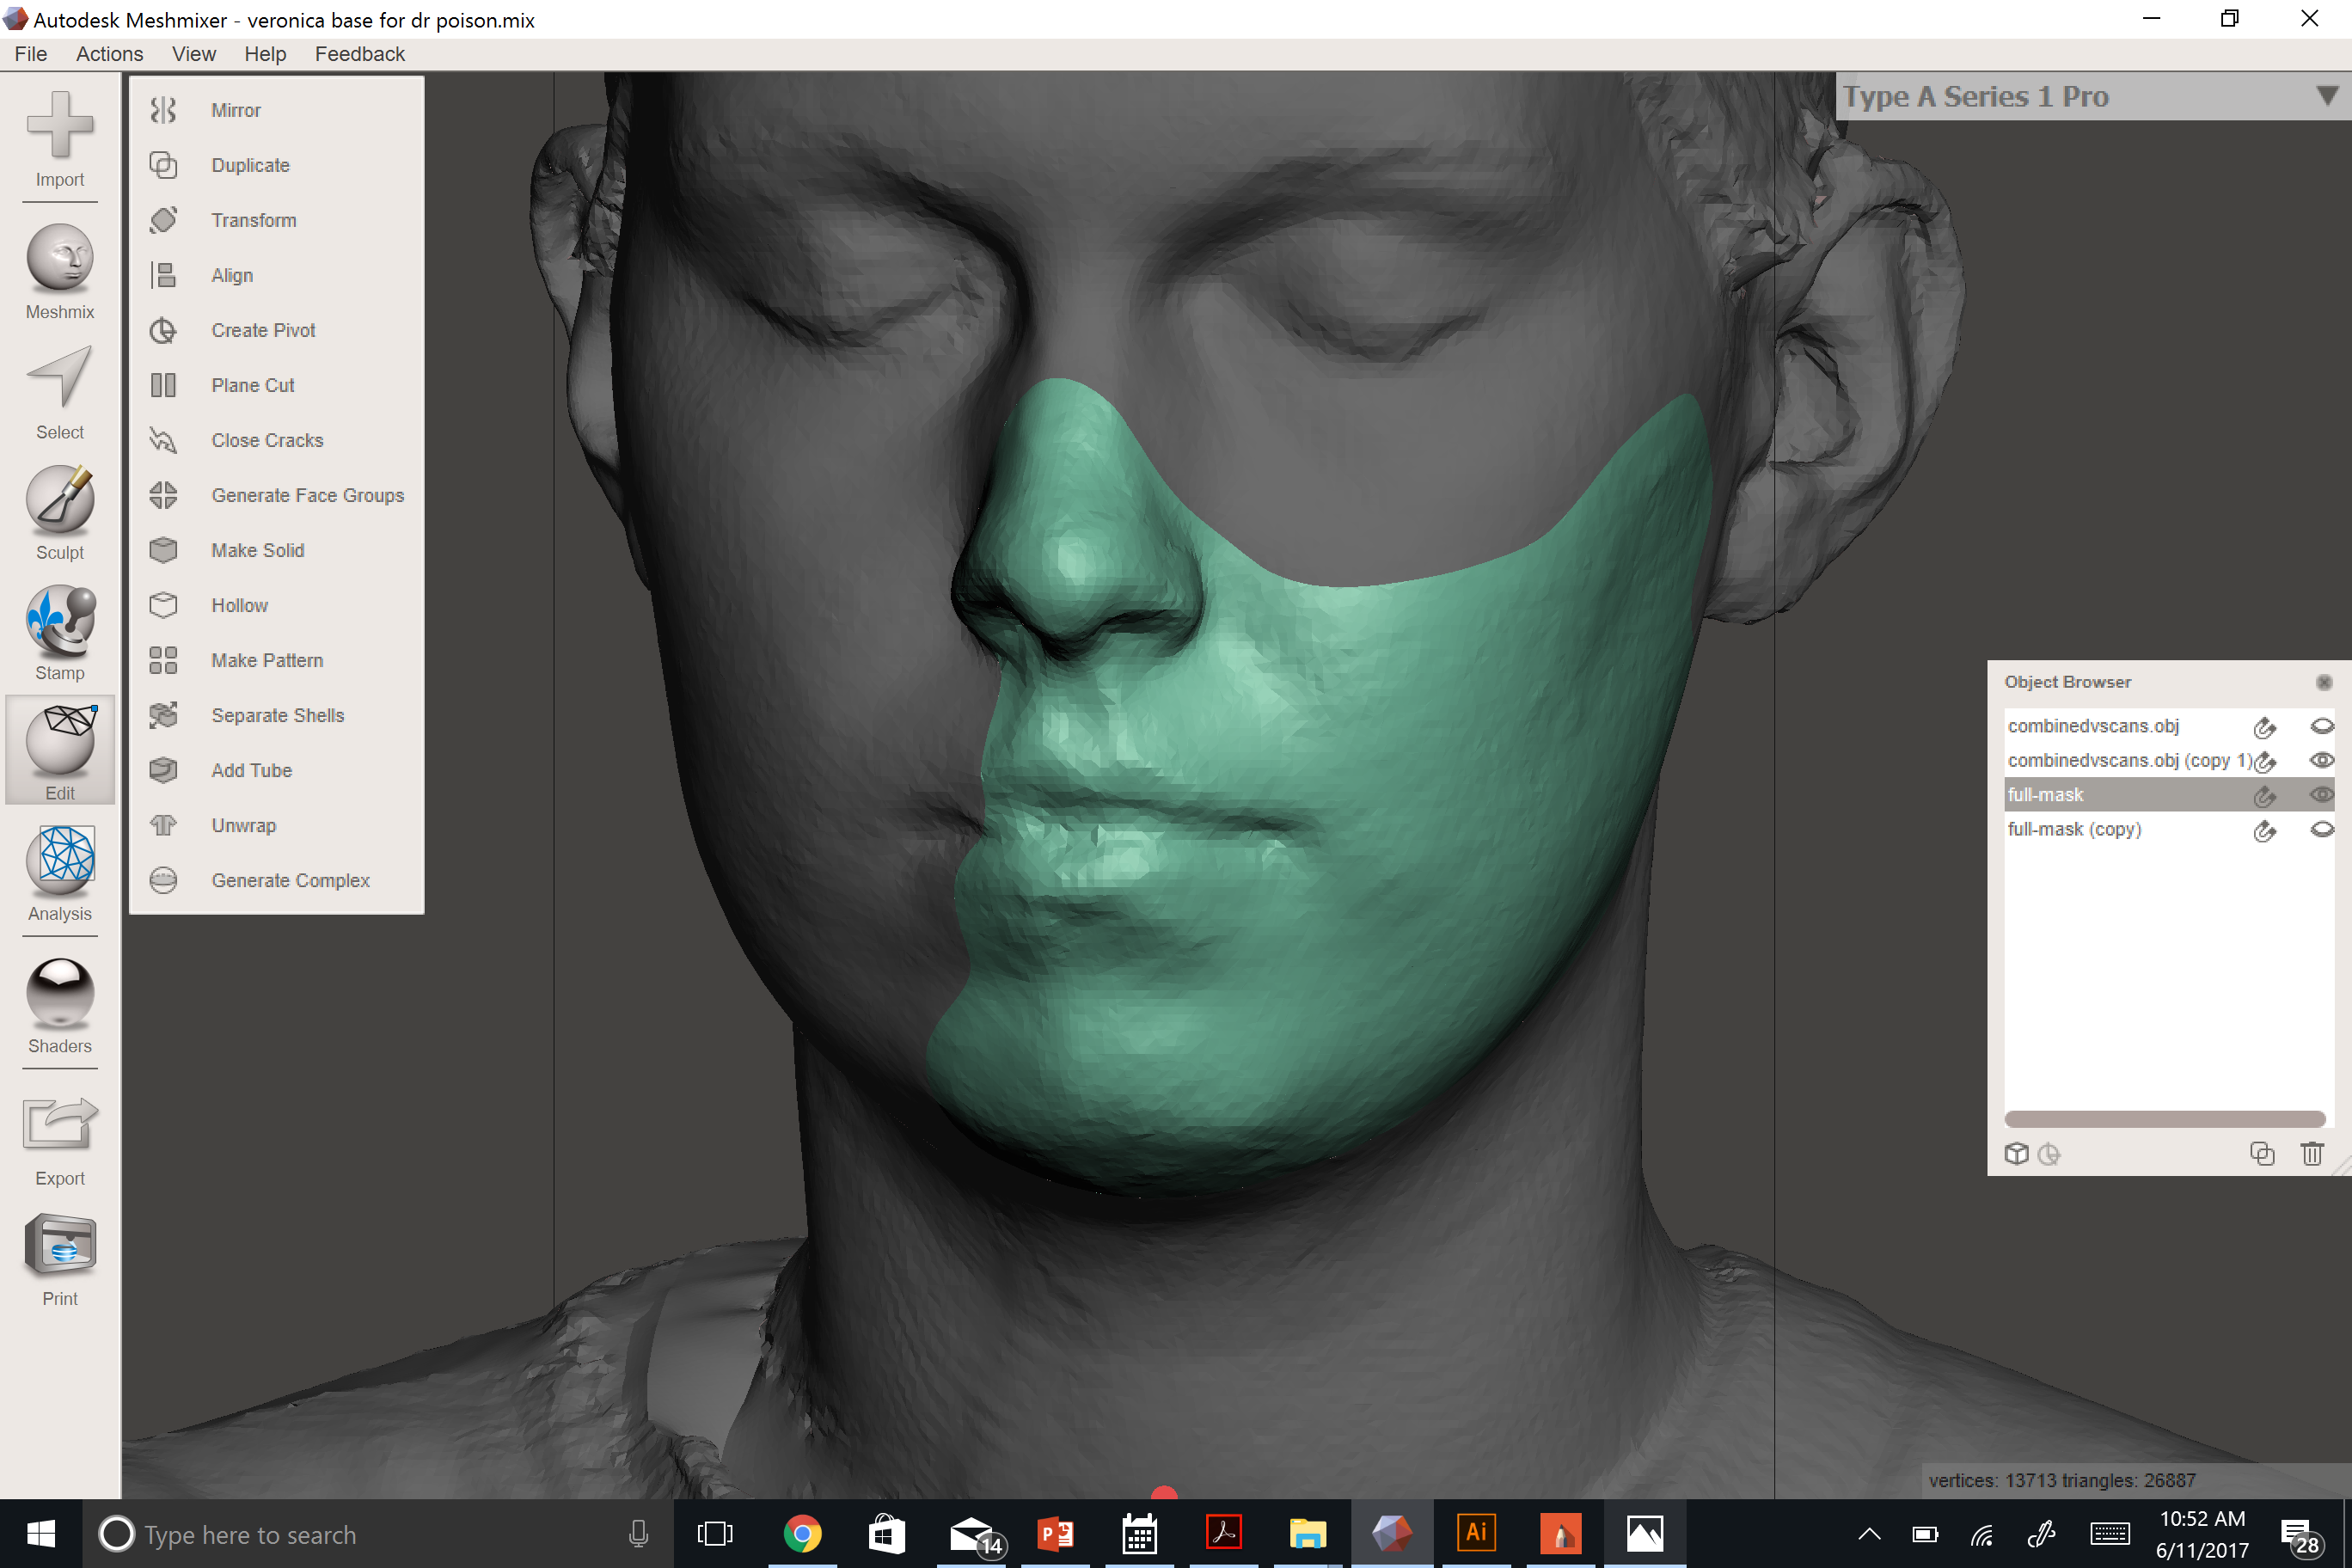
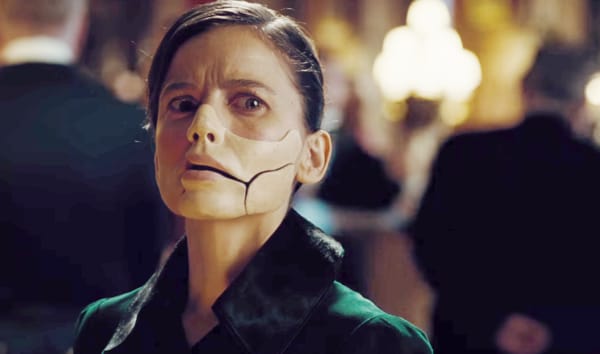

It's time to draw on your face!
- Make a copy of your cleaned scan, using the Object Viewer. NEVER make changes on your original - in case you have to abandon ship and restart.
- Using the select tool, roughly outline the area covered by the full mask. Even though Dr. Poison's mask has 3 pieces, we're treating the mask as one piece for now. It helps us get tighter seams in between the pieces later.
- Smooth the boundary of the selection. (Hotkey "b".) Fiddle with the settings until you get an outline that looks correct, then hit accept.
- Select everything within the smooth outline you've created. Literally just paint within the lines.
- Separate the mask from the rest of your face. (Hotkey "y".) This will allow you to easily make changes on a different object without having to reselect everything. It's also why I suggested that you make a copy of the original.
Create Different Areas of the Mask, Also Based on References.
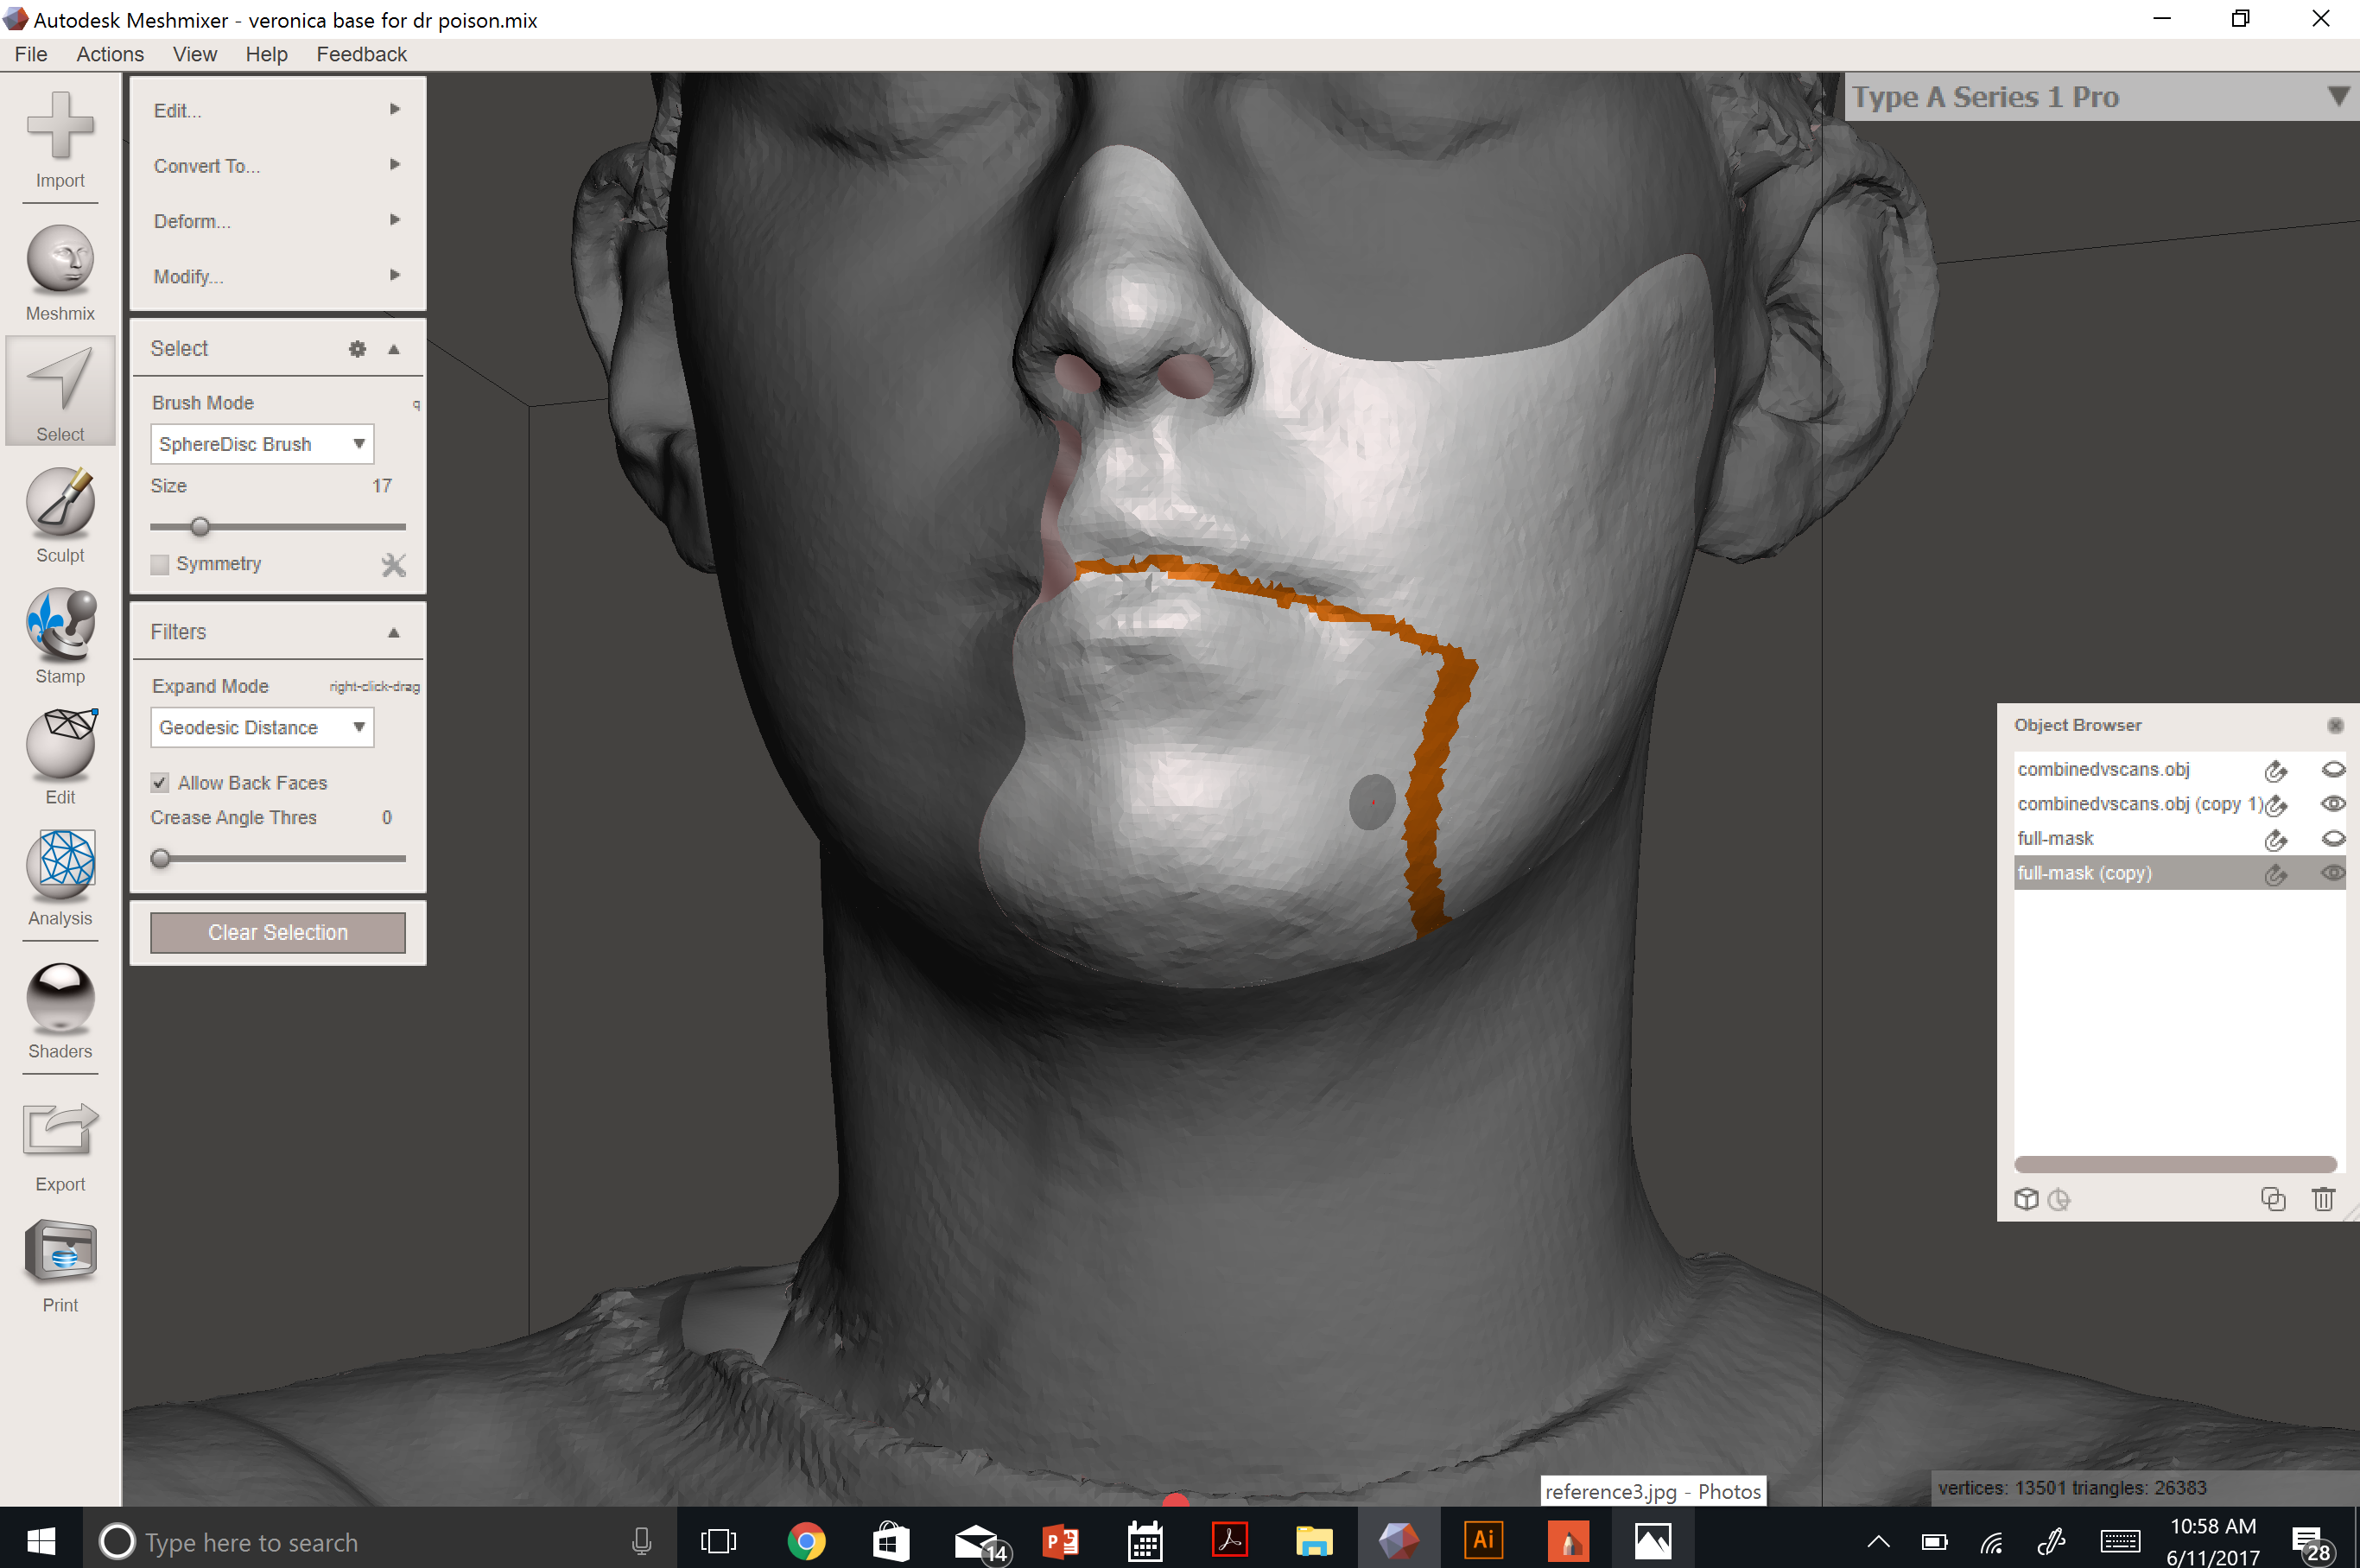
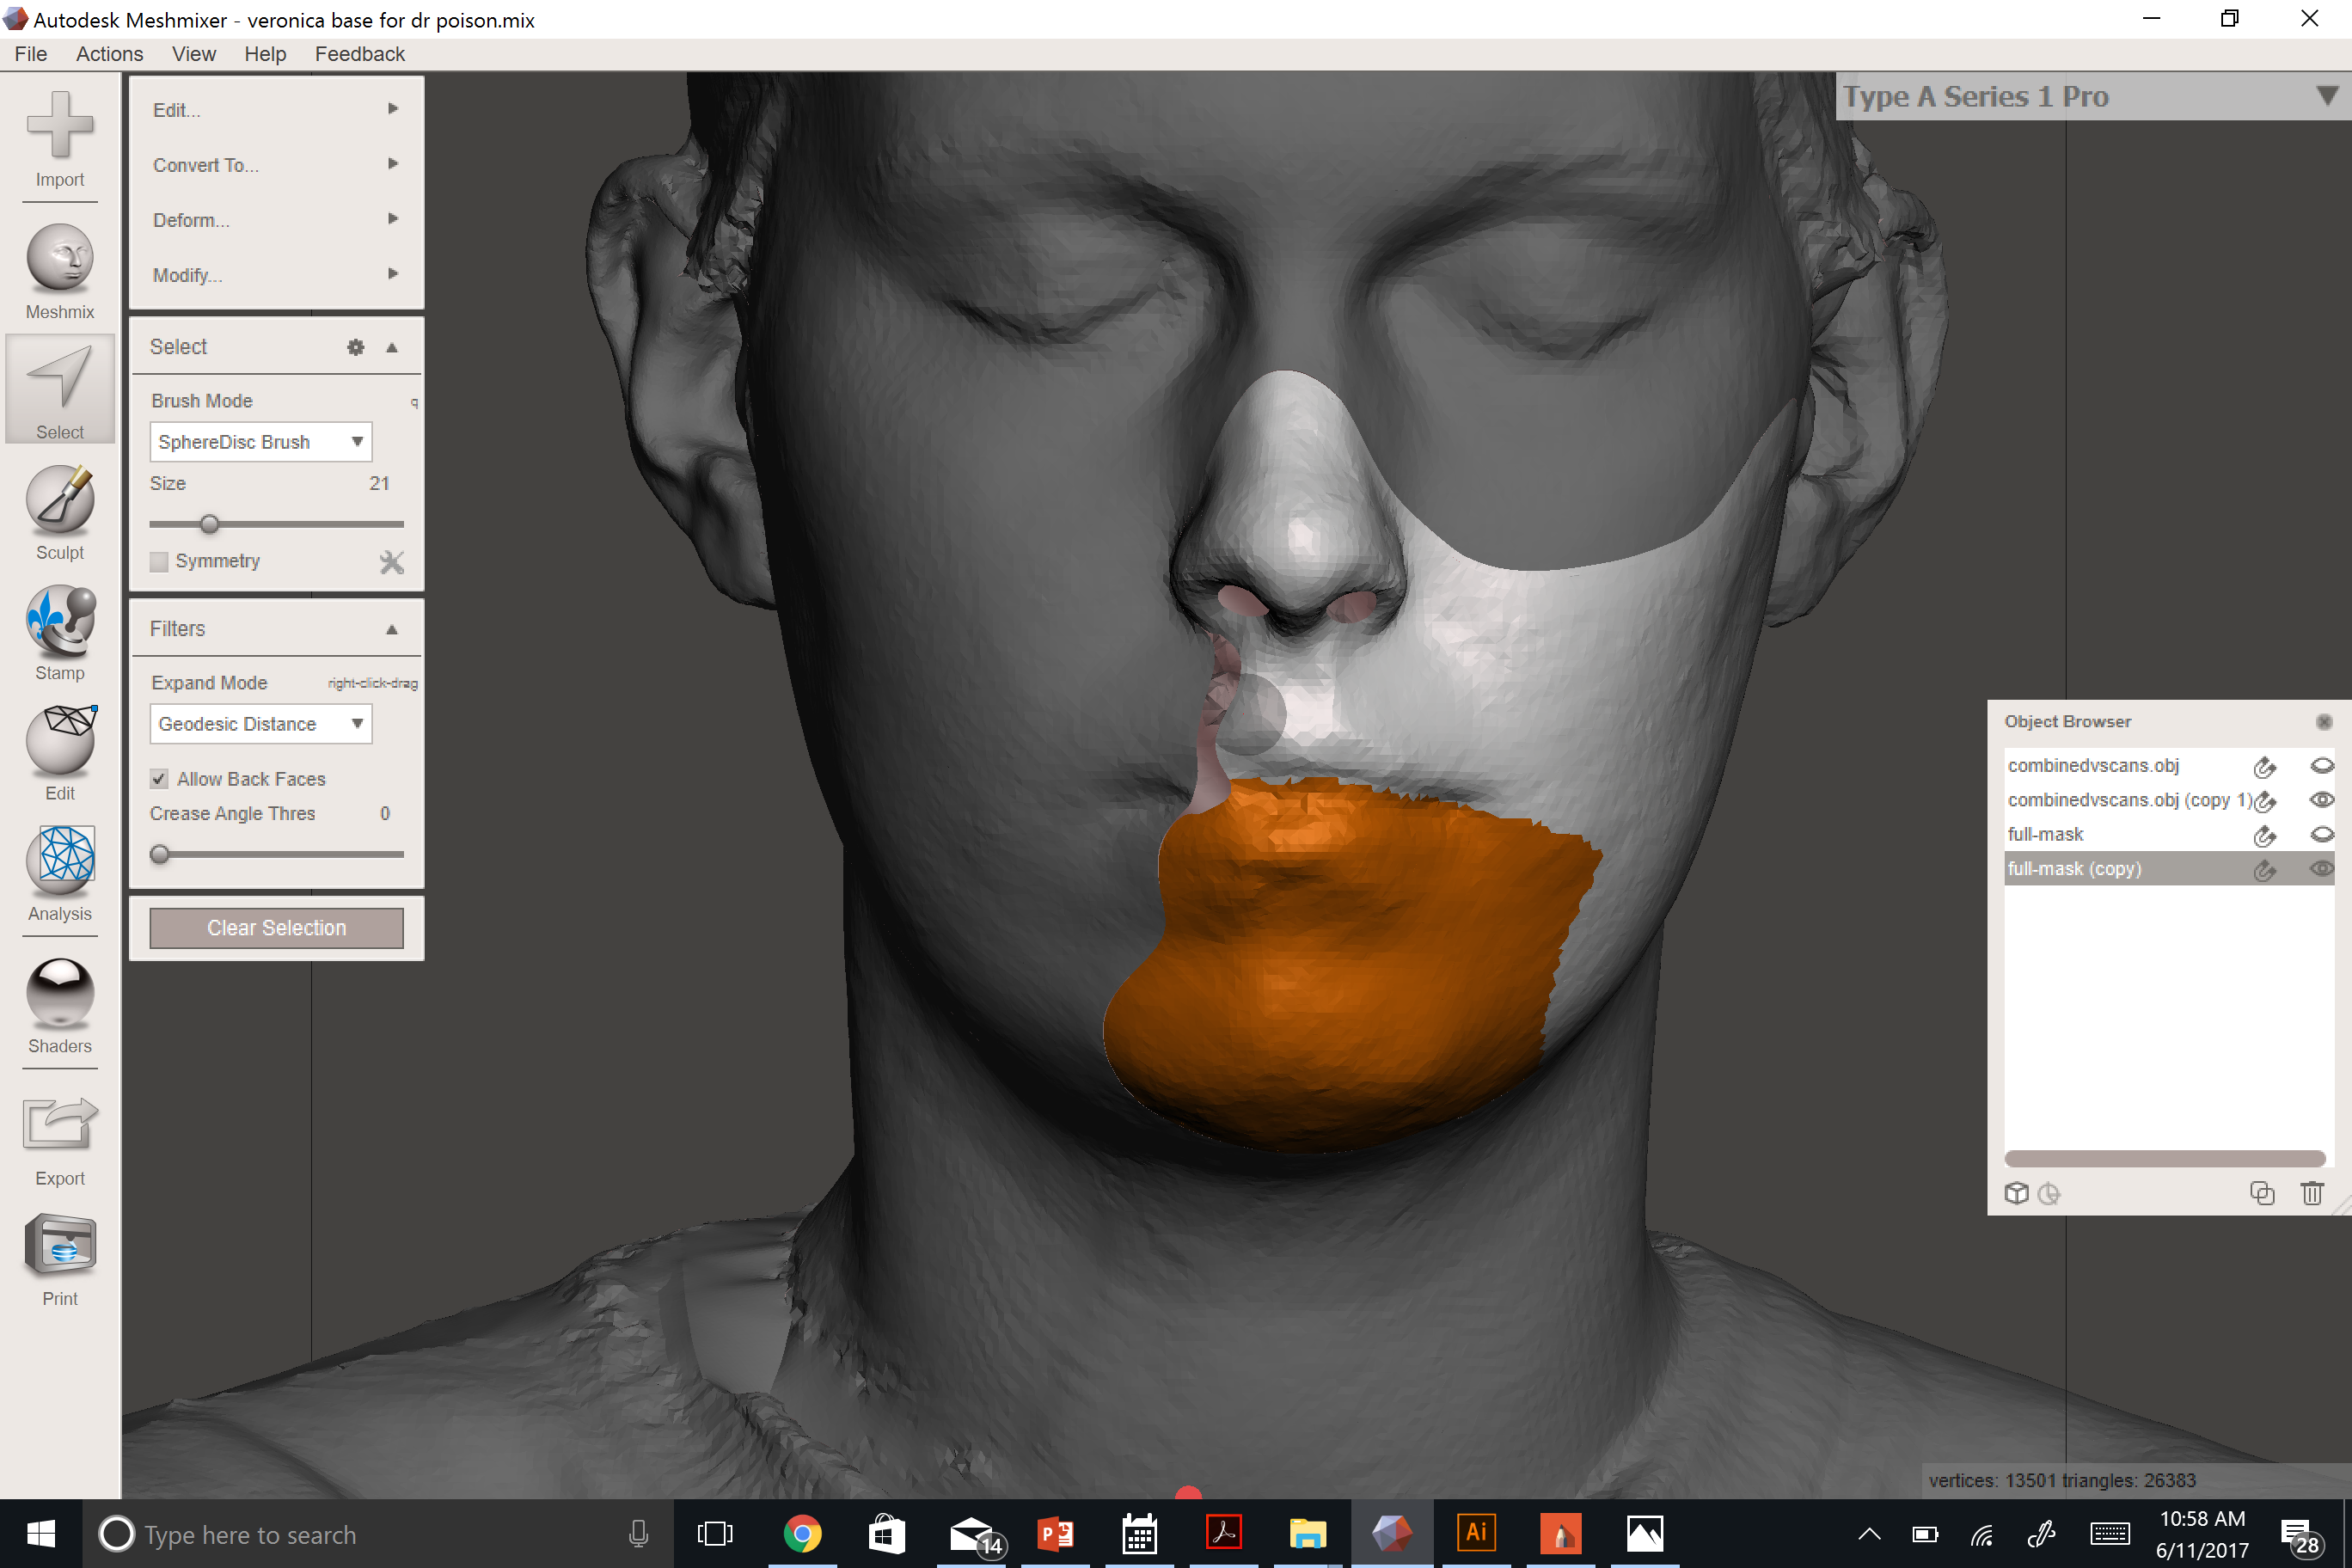
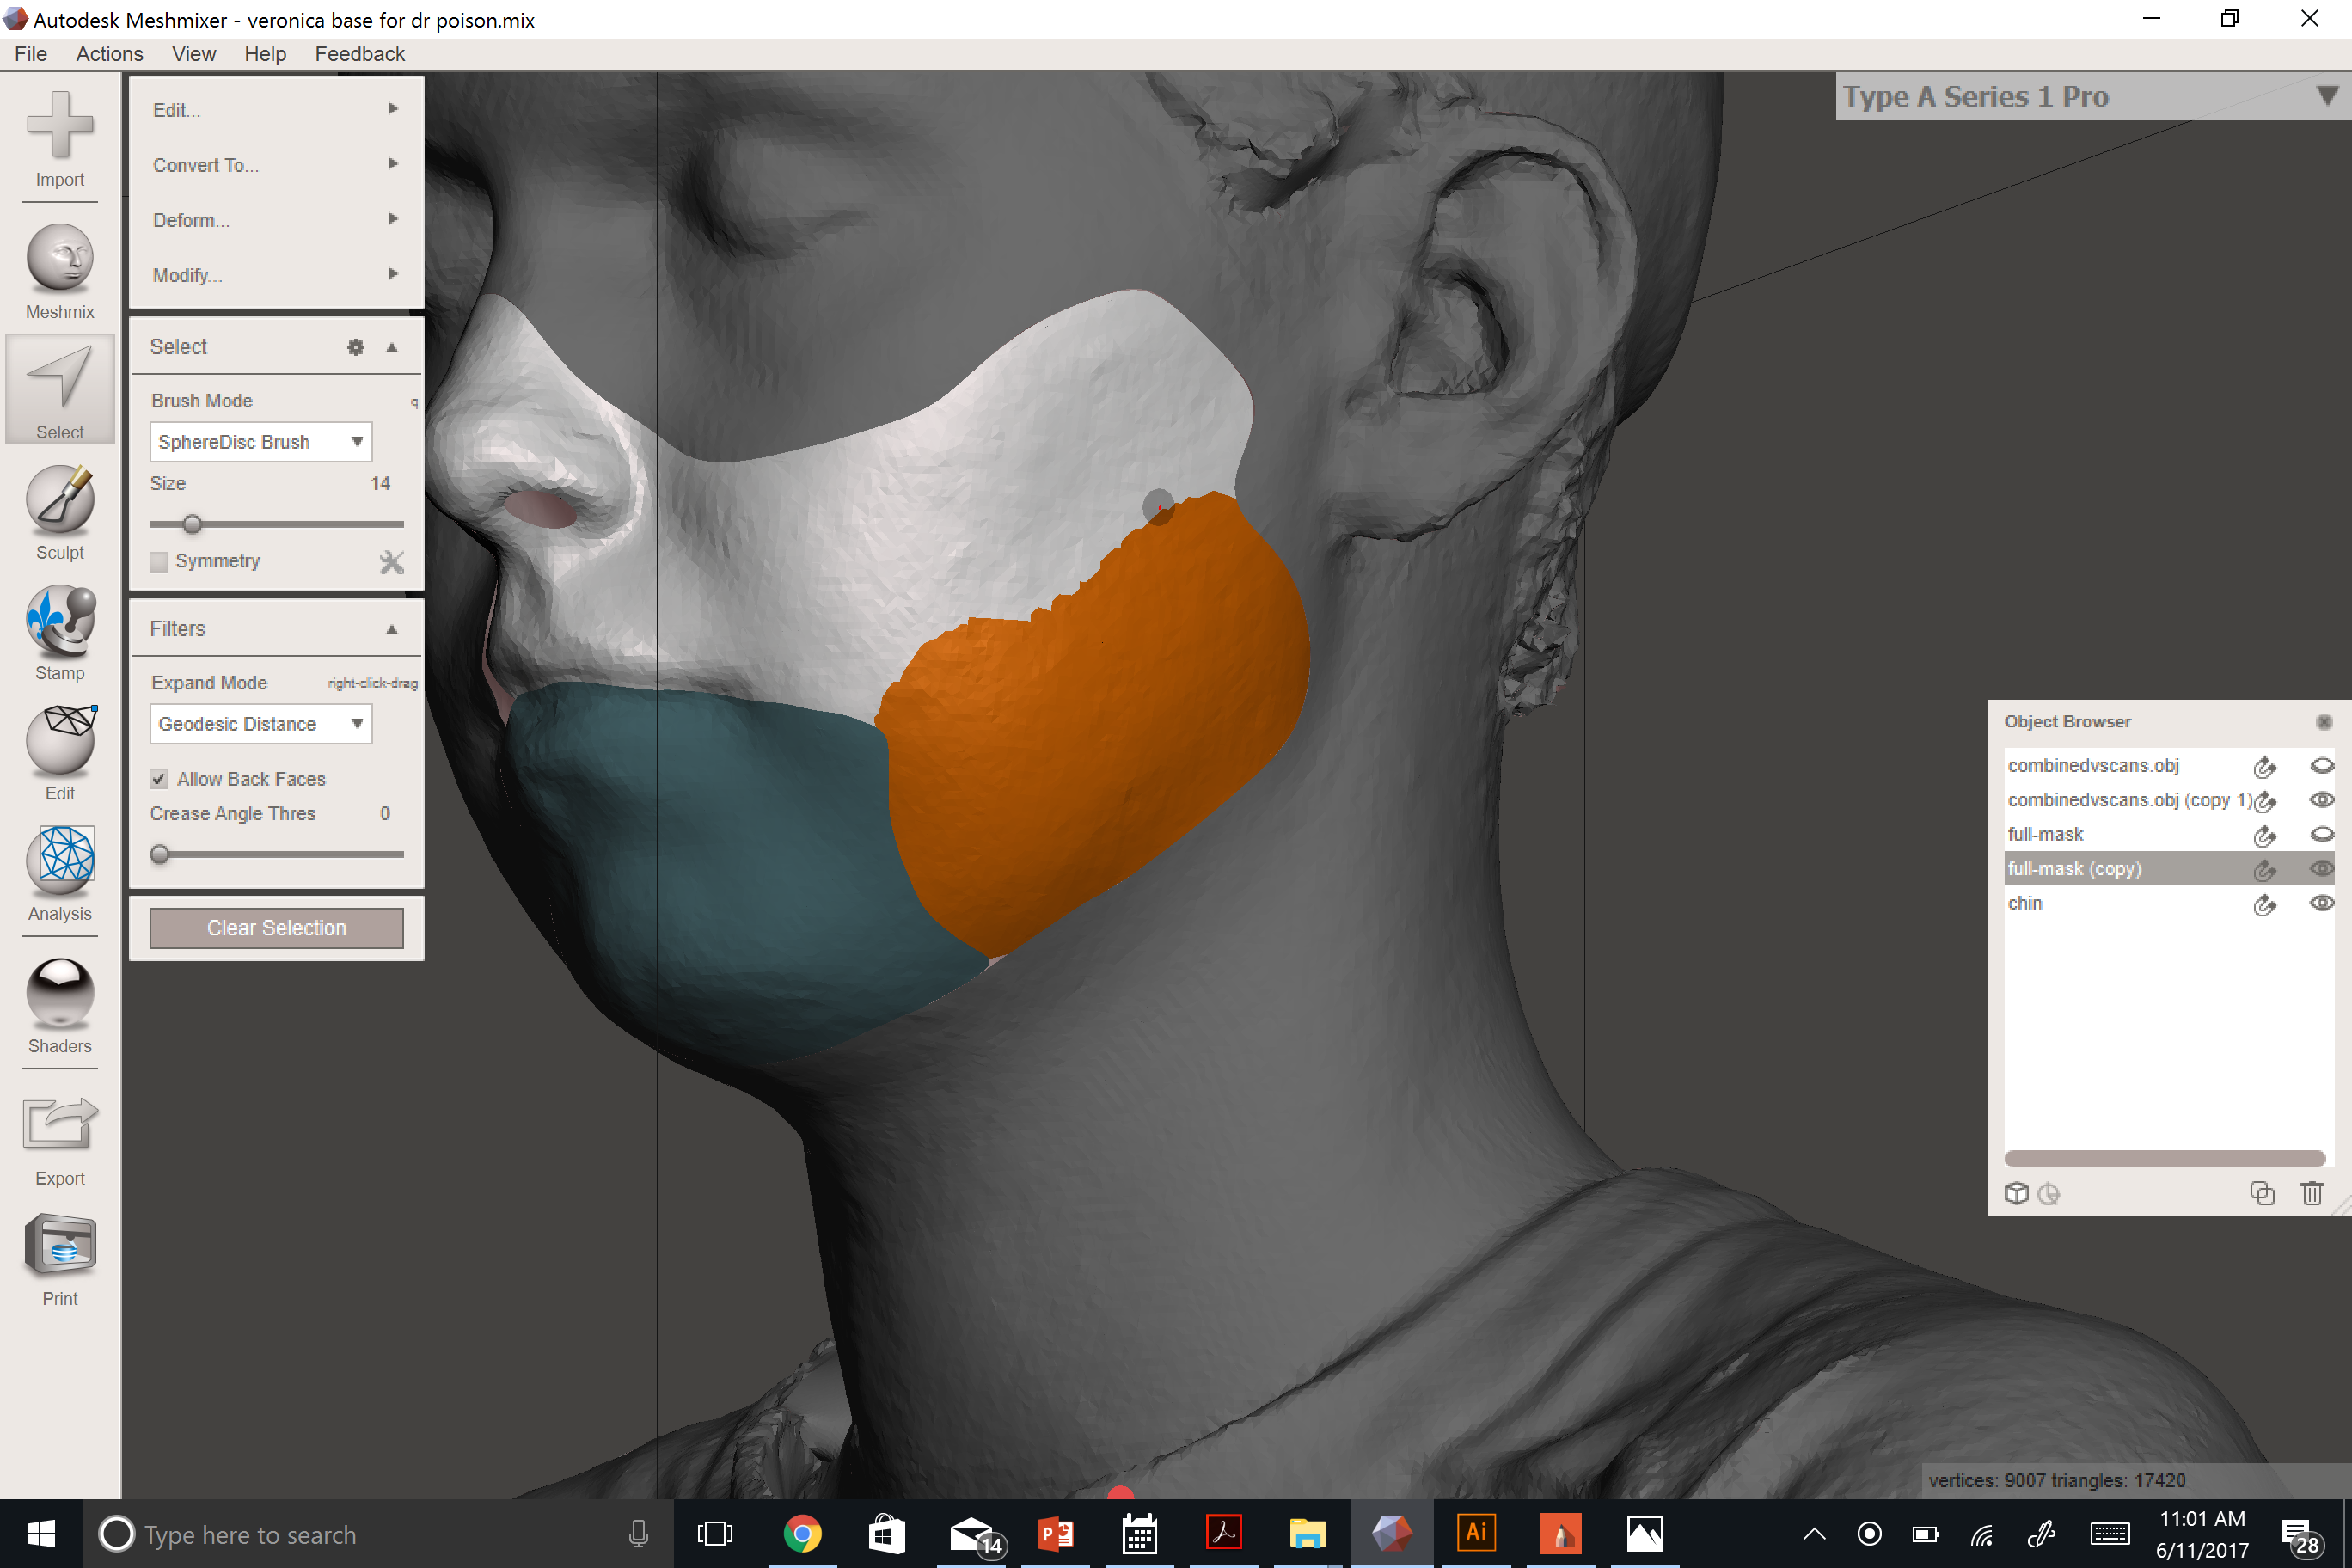
Just like for the last step, we're going to draw, smooth and section off pieces of the mask.
- Select and delete the area where your nostrils are.
- Make a copy of the raw mask.
- Using the select tool, outline the chin area.
- Smooth the boundary. ("b")
- Separate the chin piece. ("y")
- Repeat for the jaw piece.
Make Gaps Between Mask Pieces.
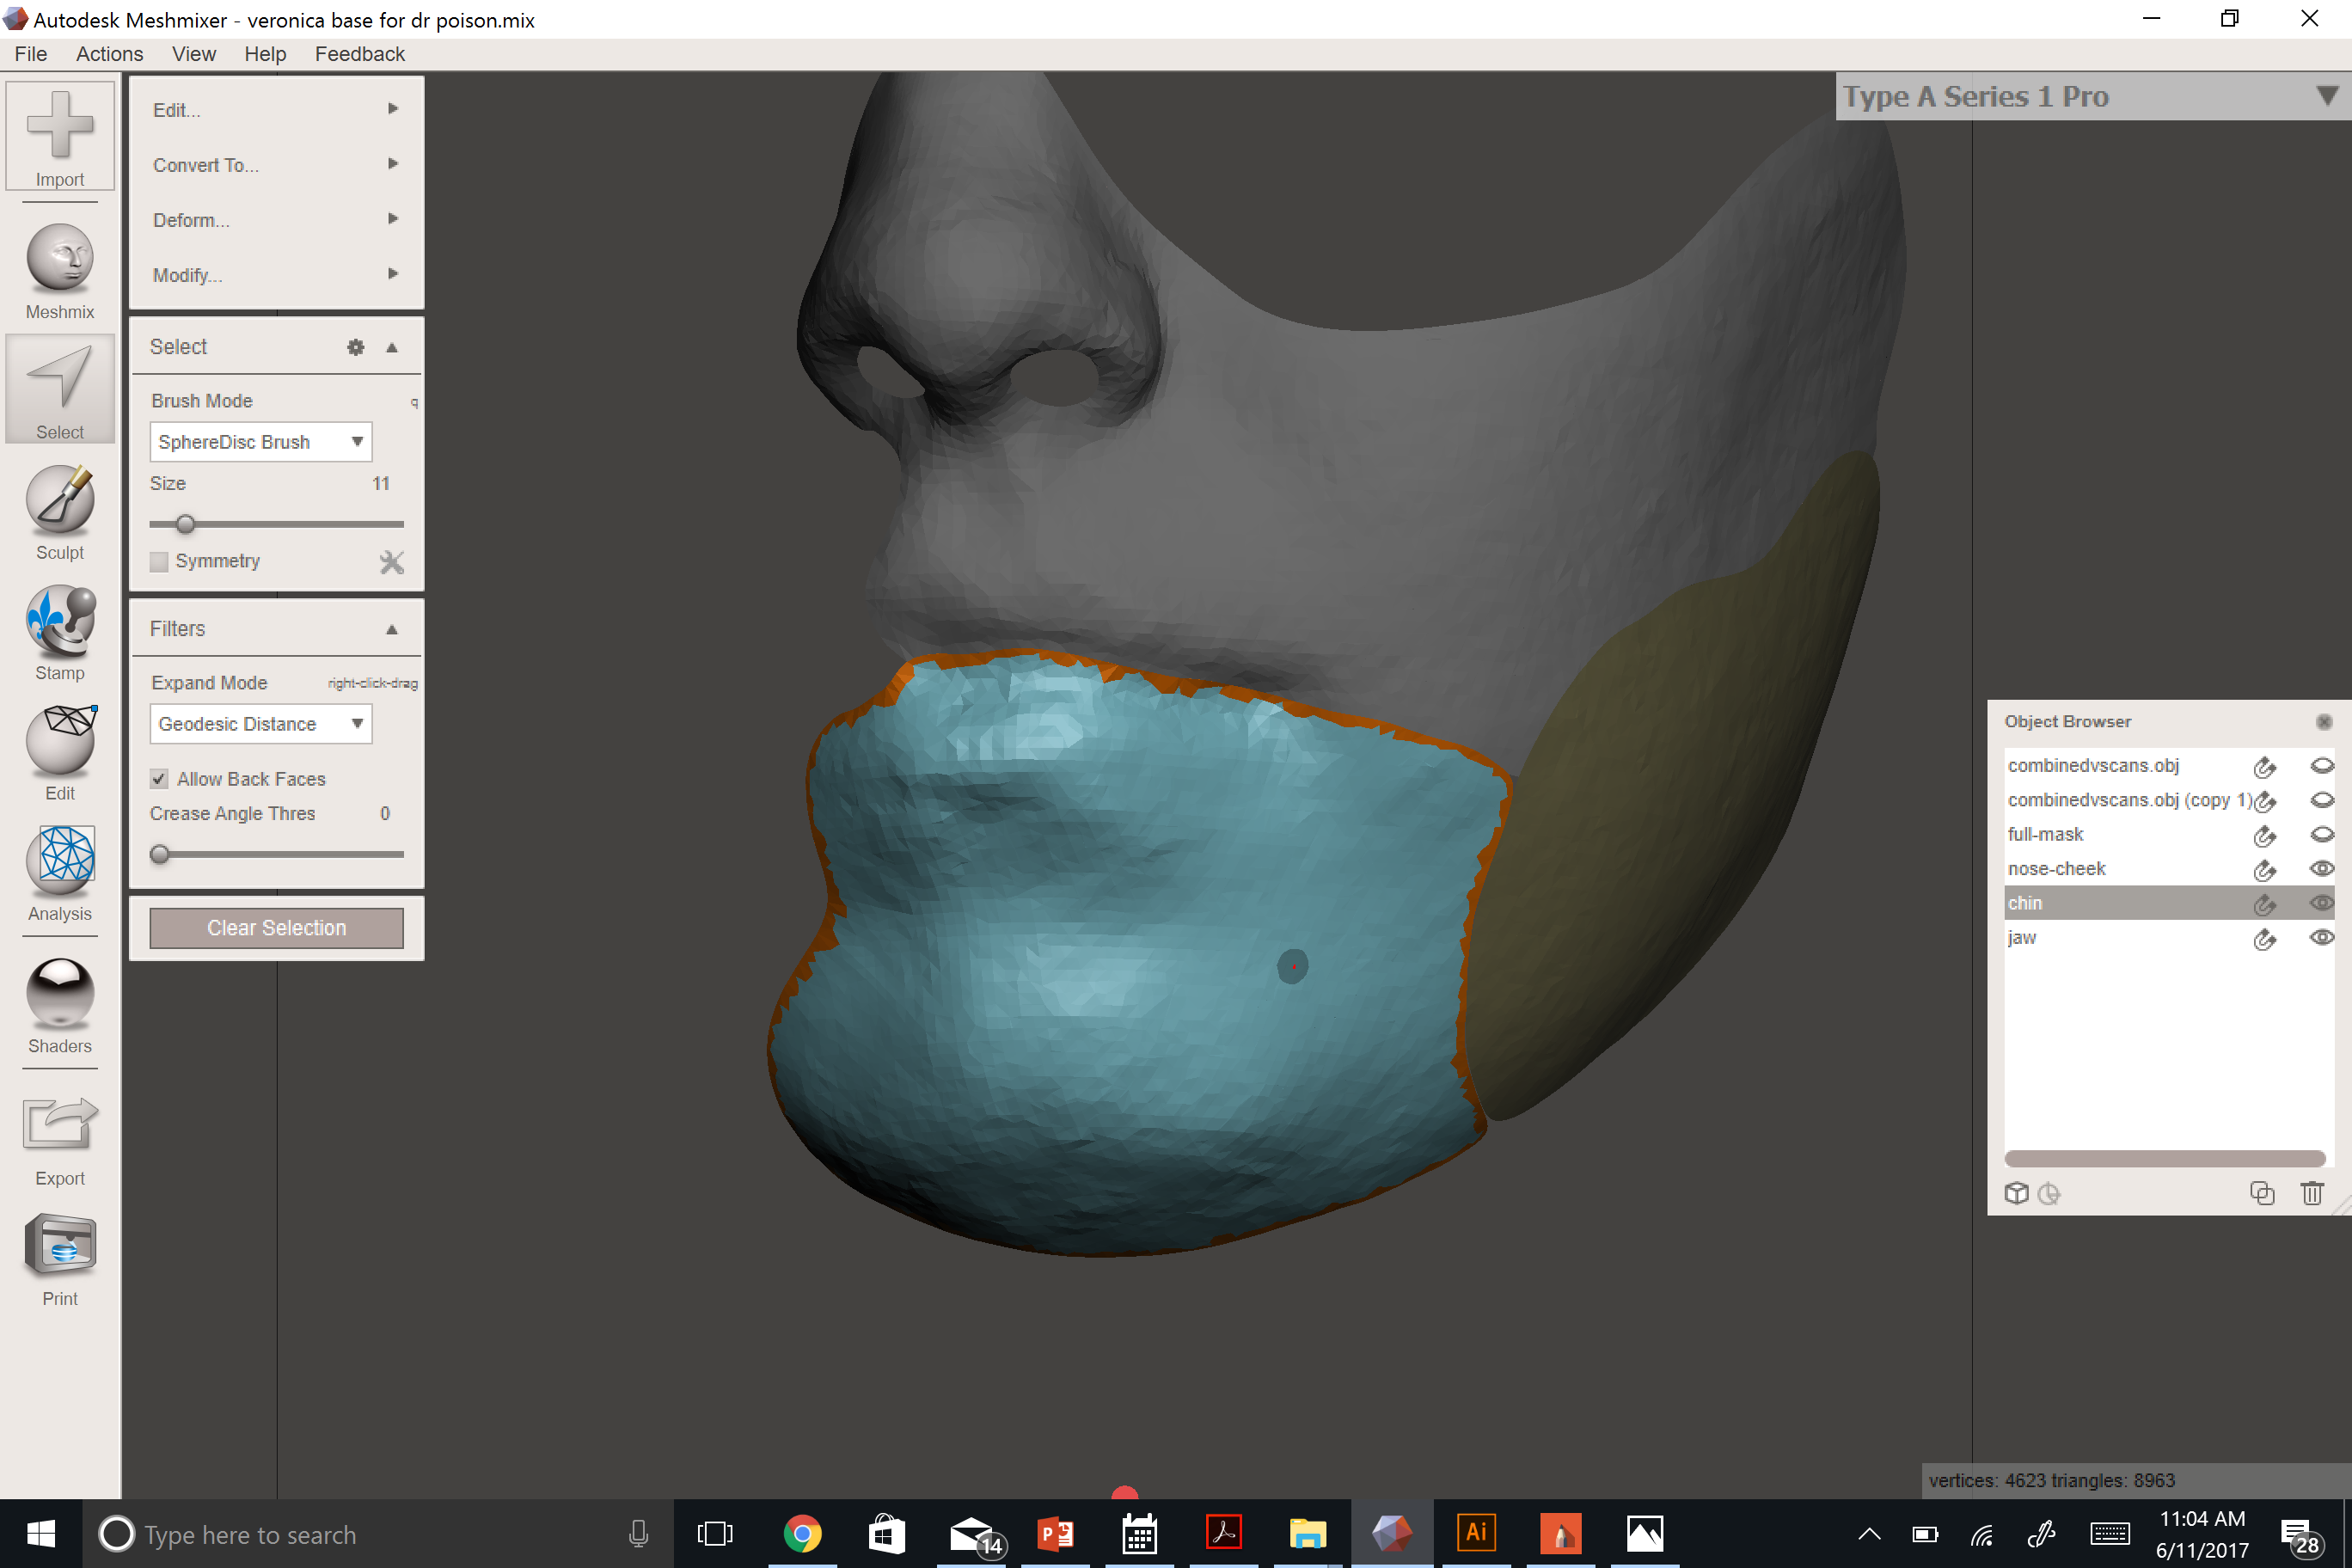
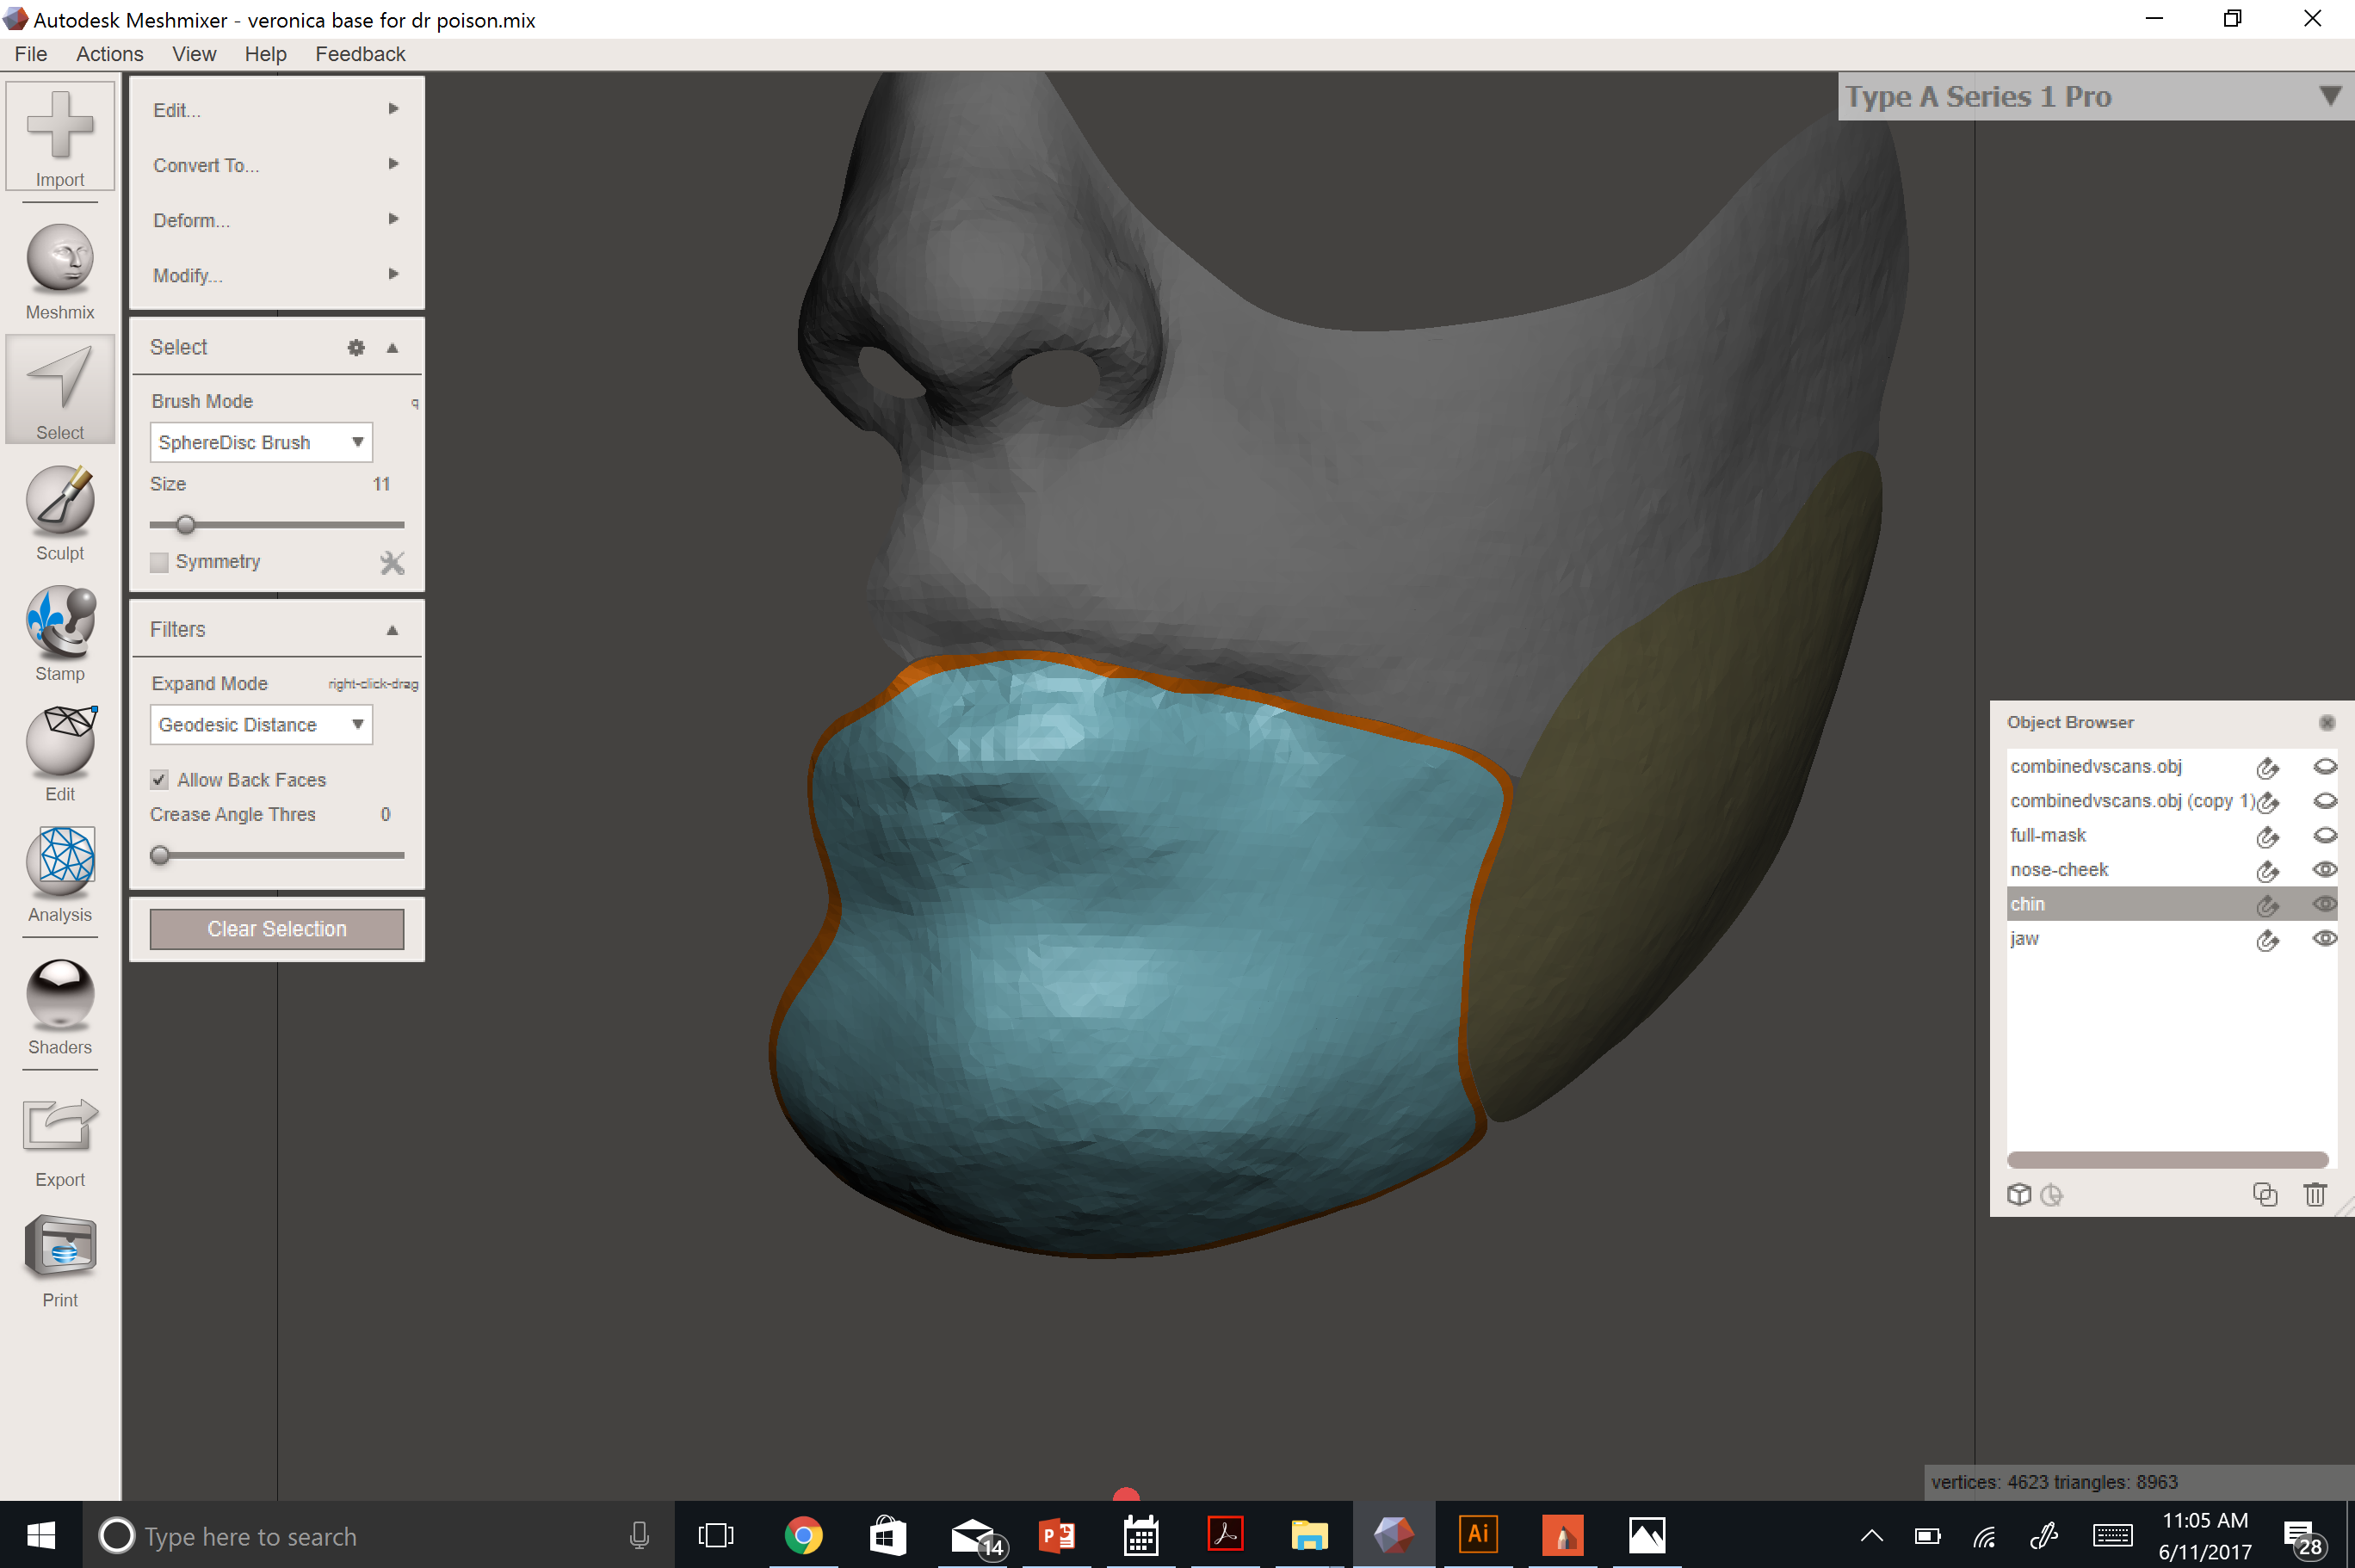
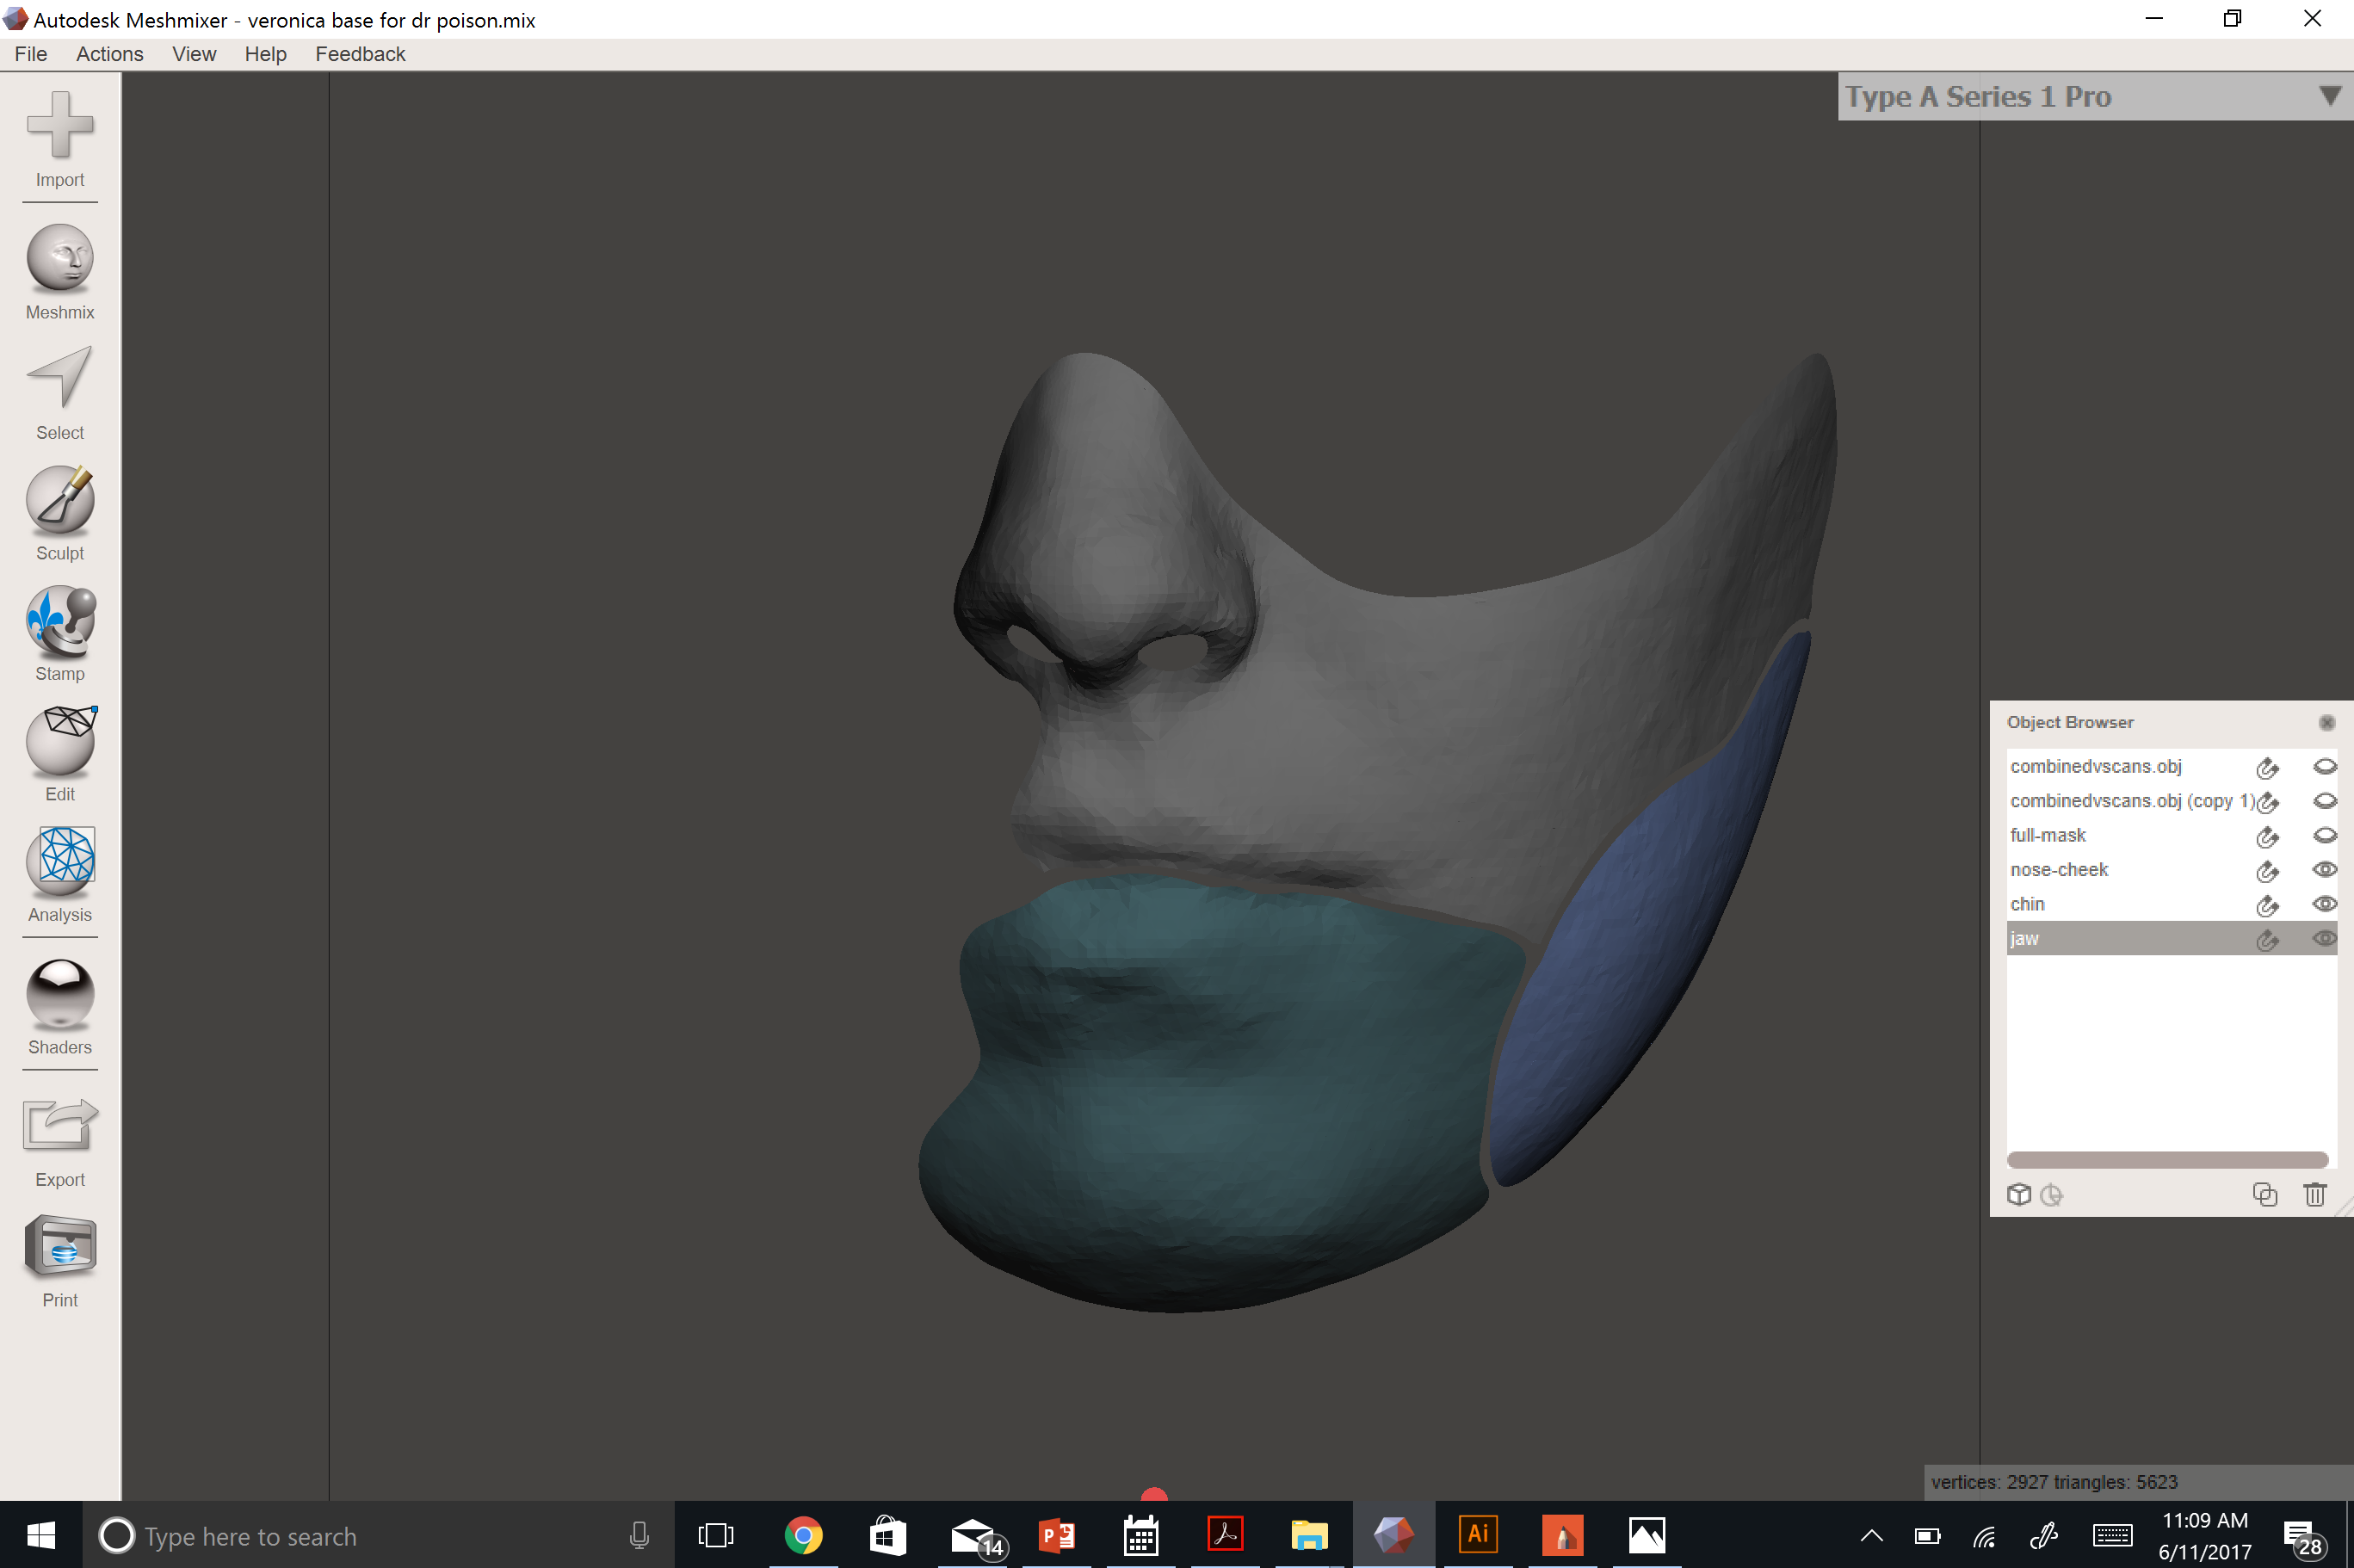
Since we'll be extruding the surface out, you are going to need wiggle room between the pieces of your mask, or else you won't be able to move your mouth. For each piece, repeat the following:
- With the select tool, double click the border of one of the pieces of the mask. This will automatically select the entire border of that piece.
- Smooth the boundary. ("b")
- Delete the highlighted, smoothed boundary.
- Make a copy of the piece in the Object Viewer.
Offset Each Mask Piece.
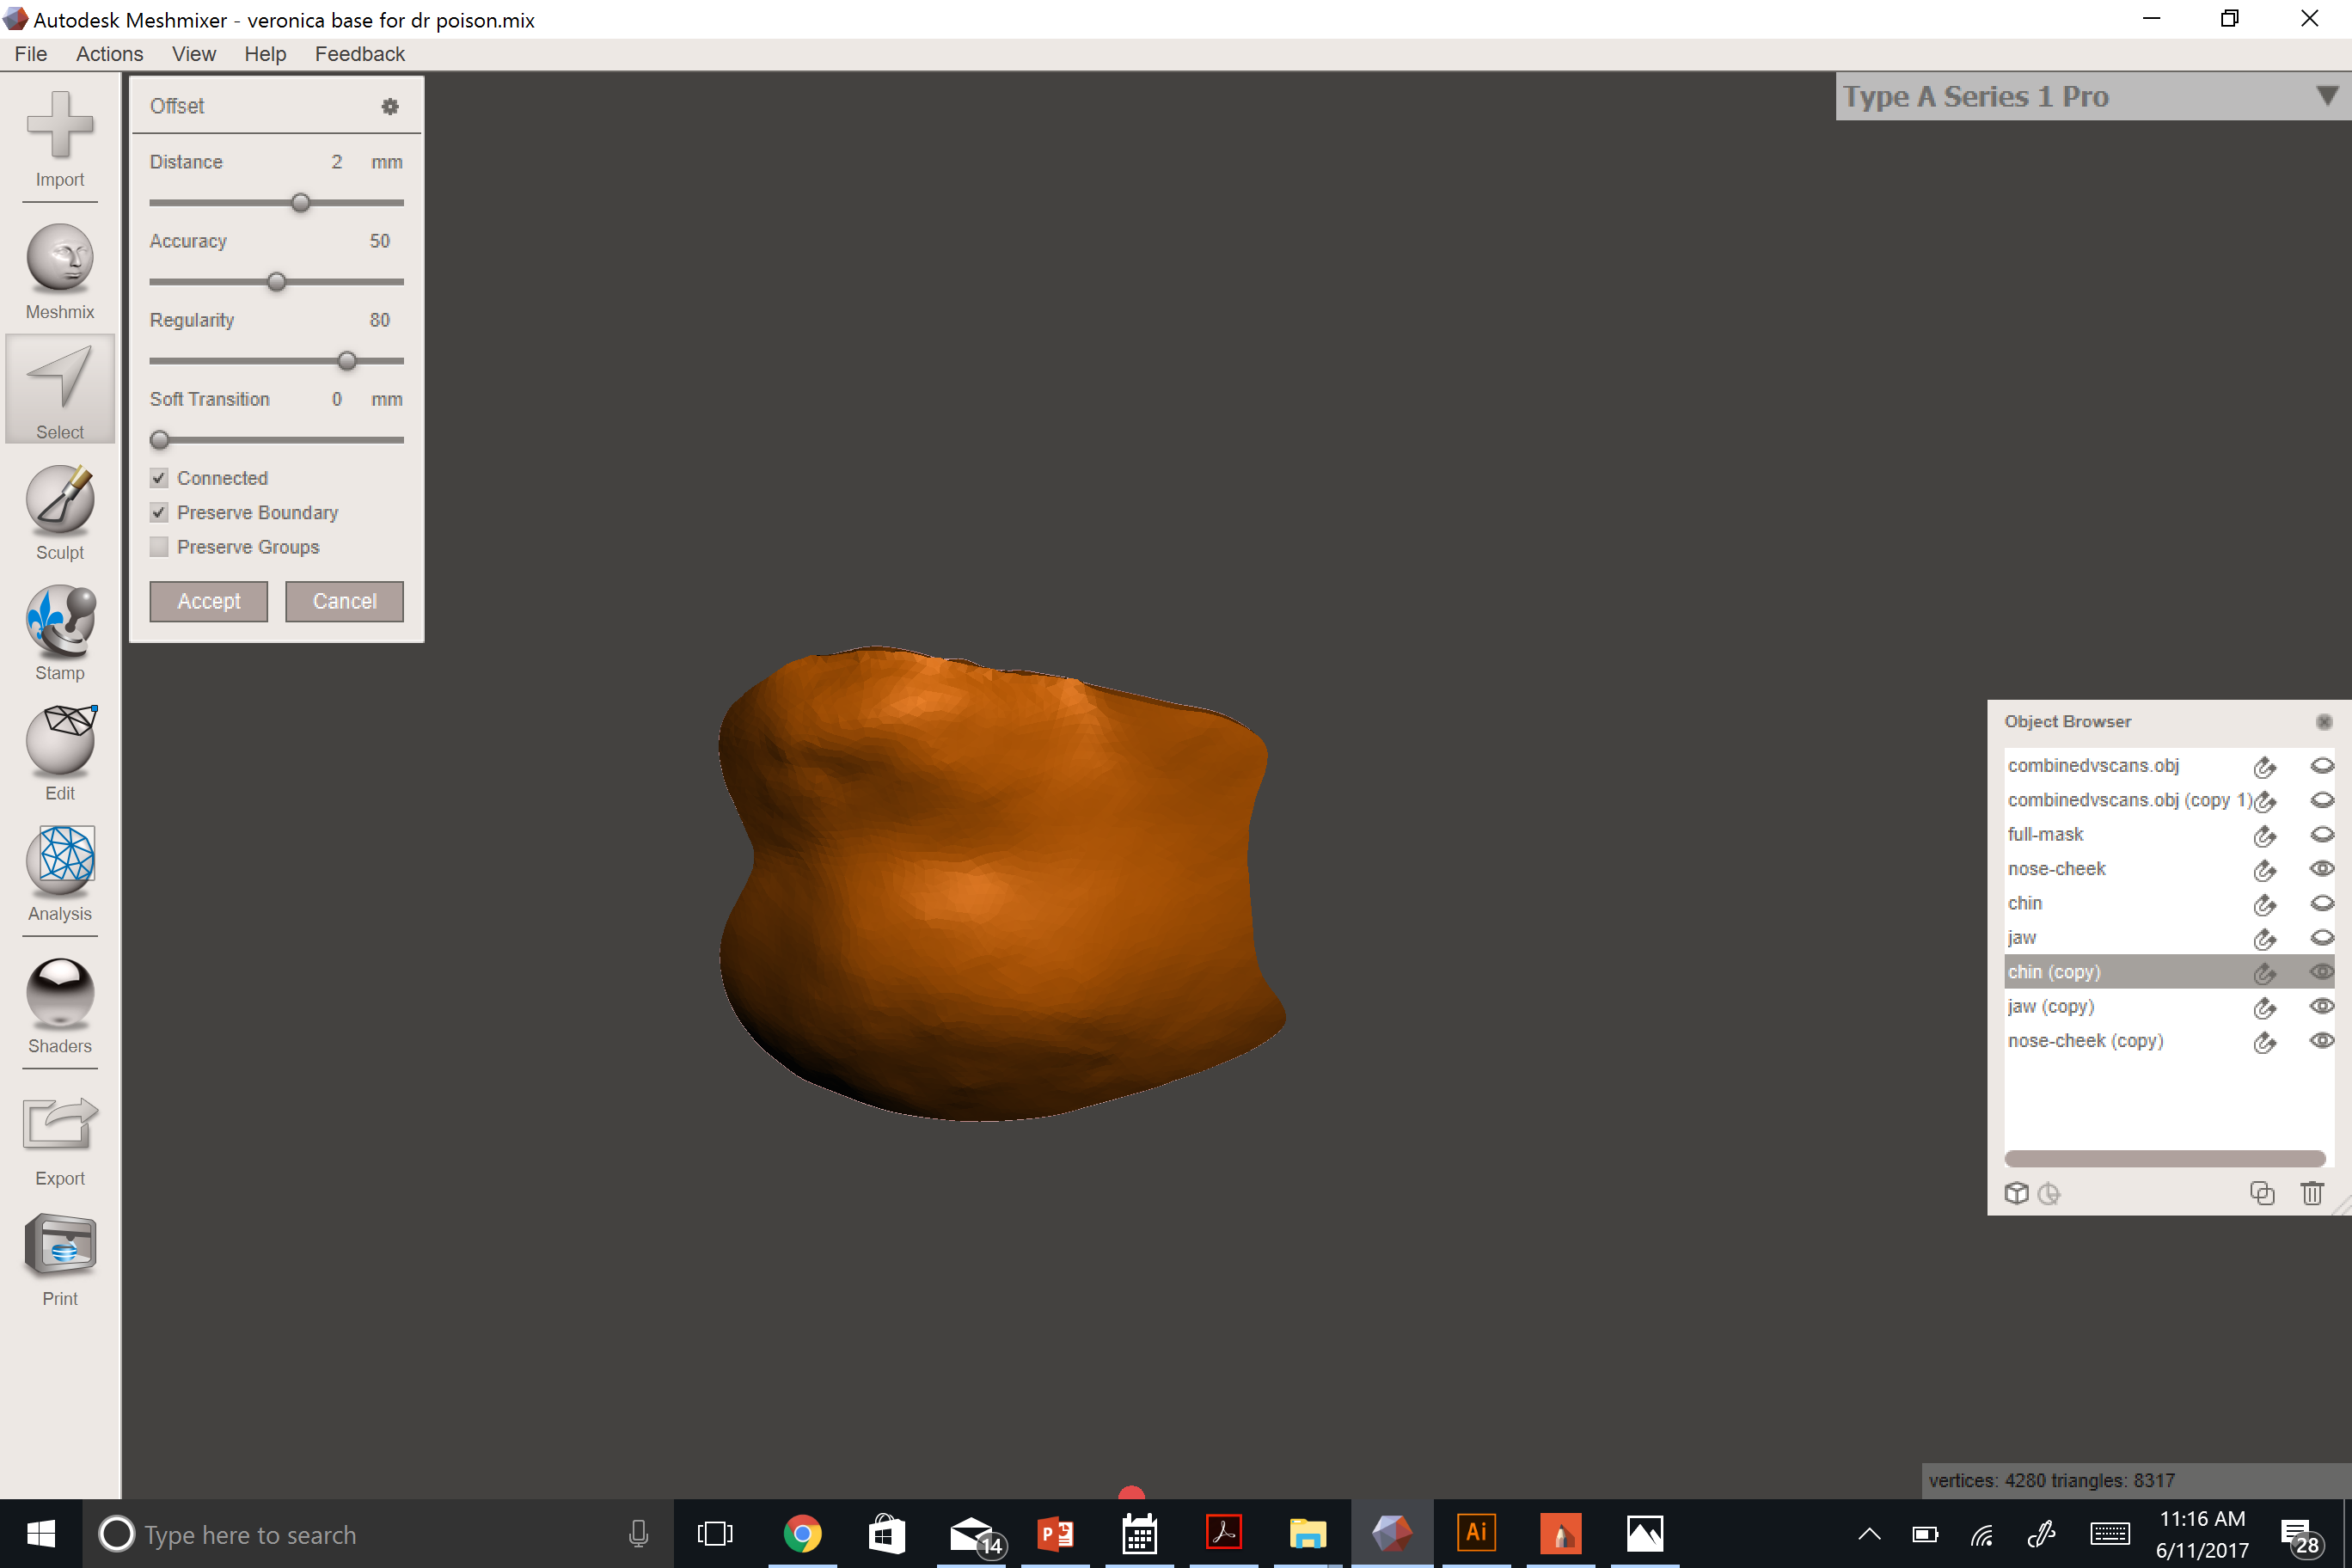
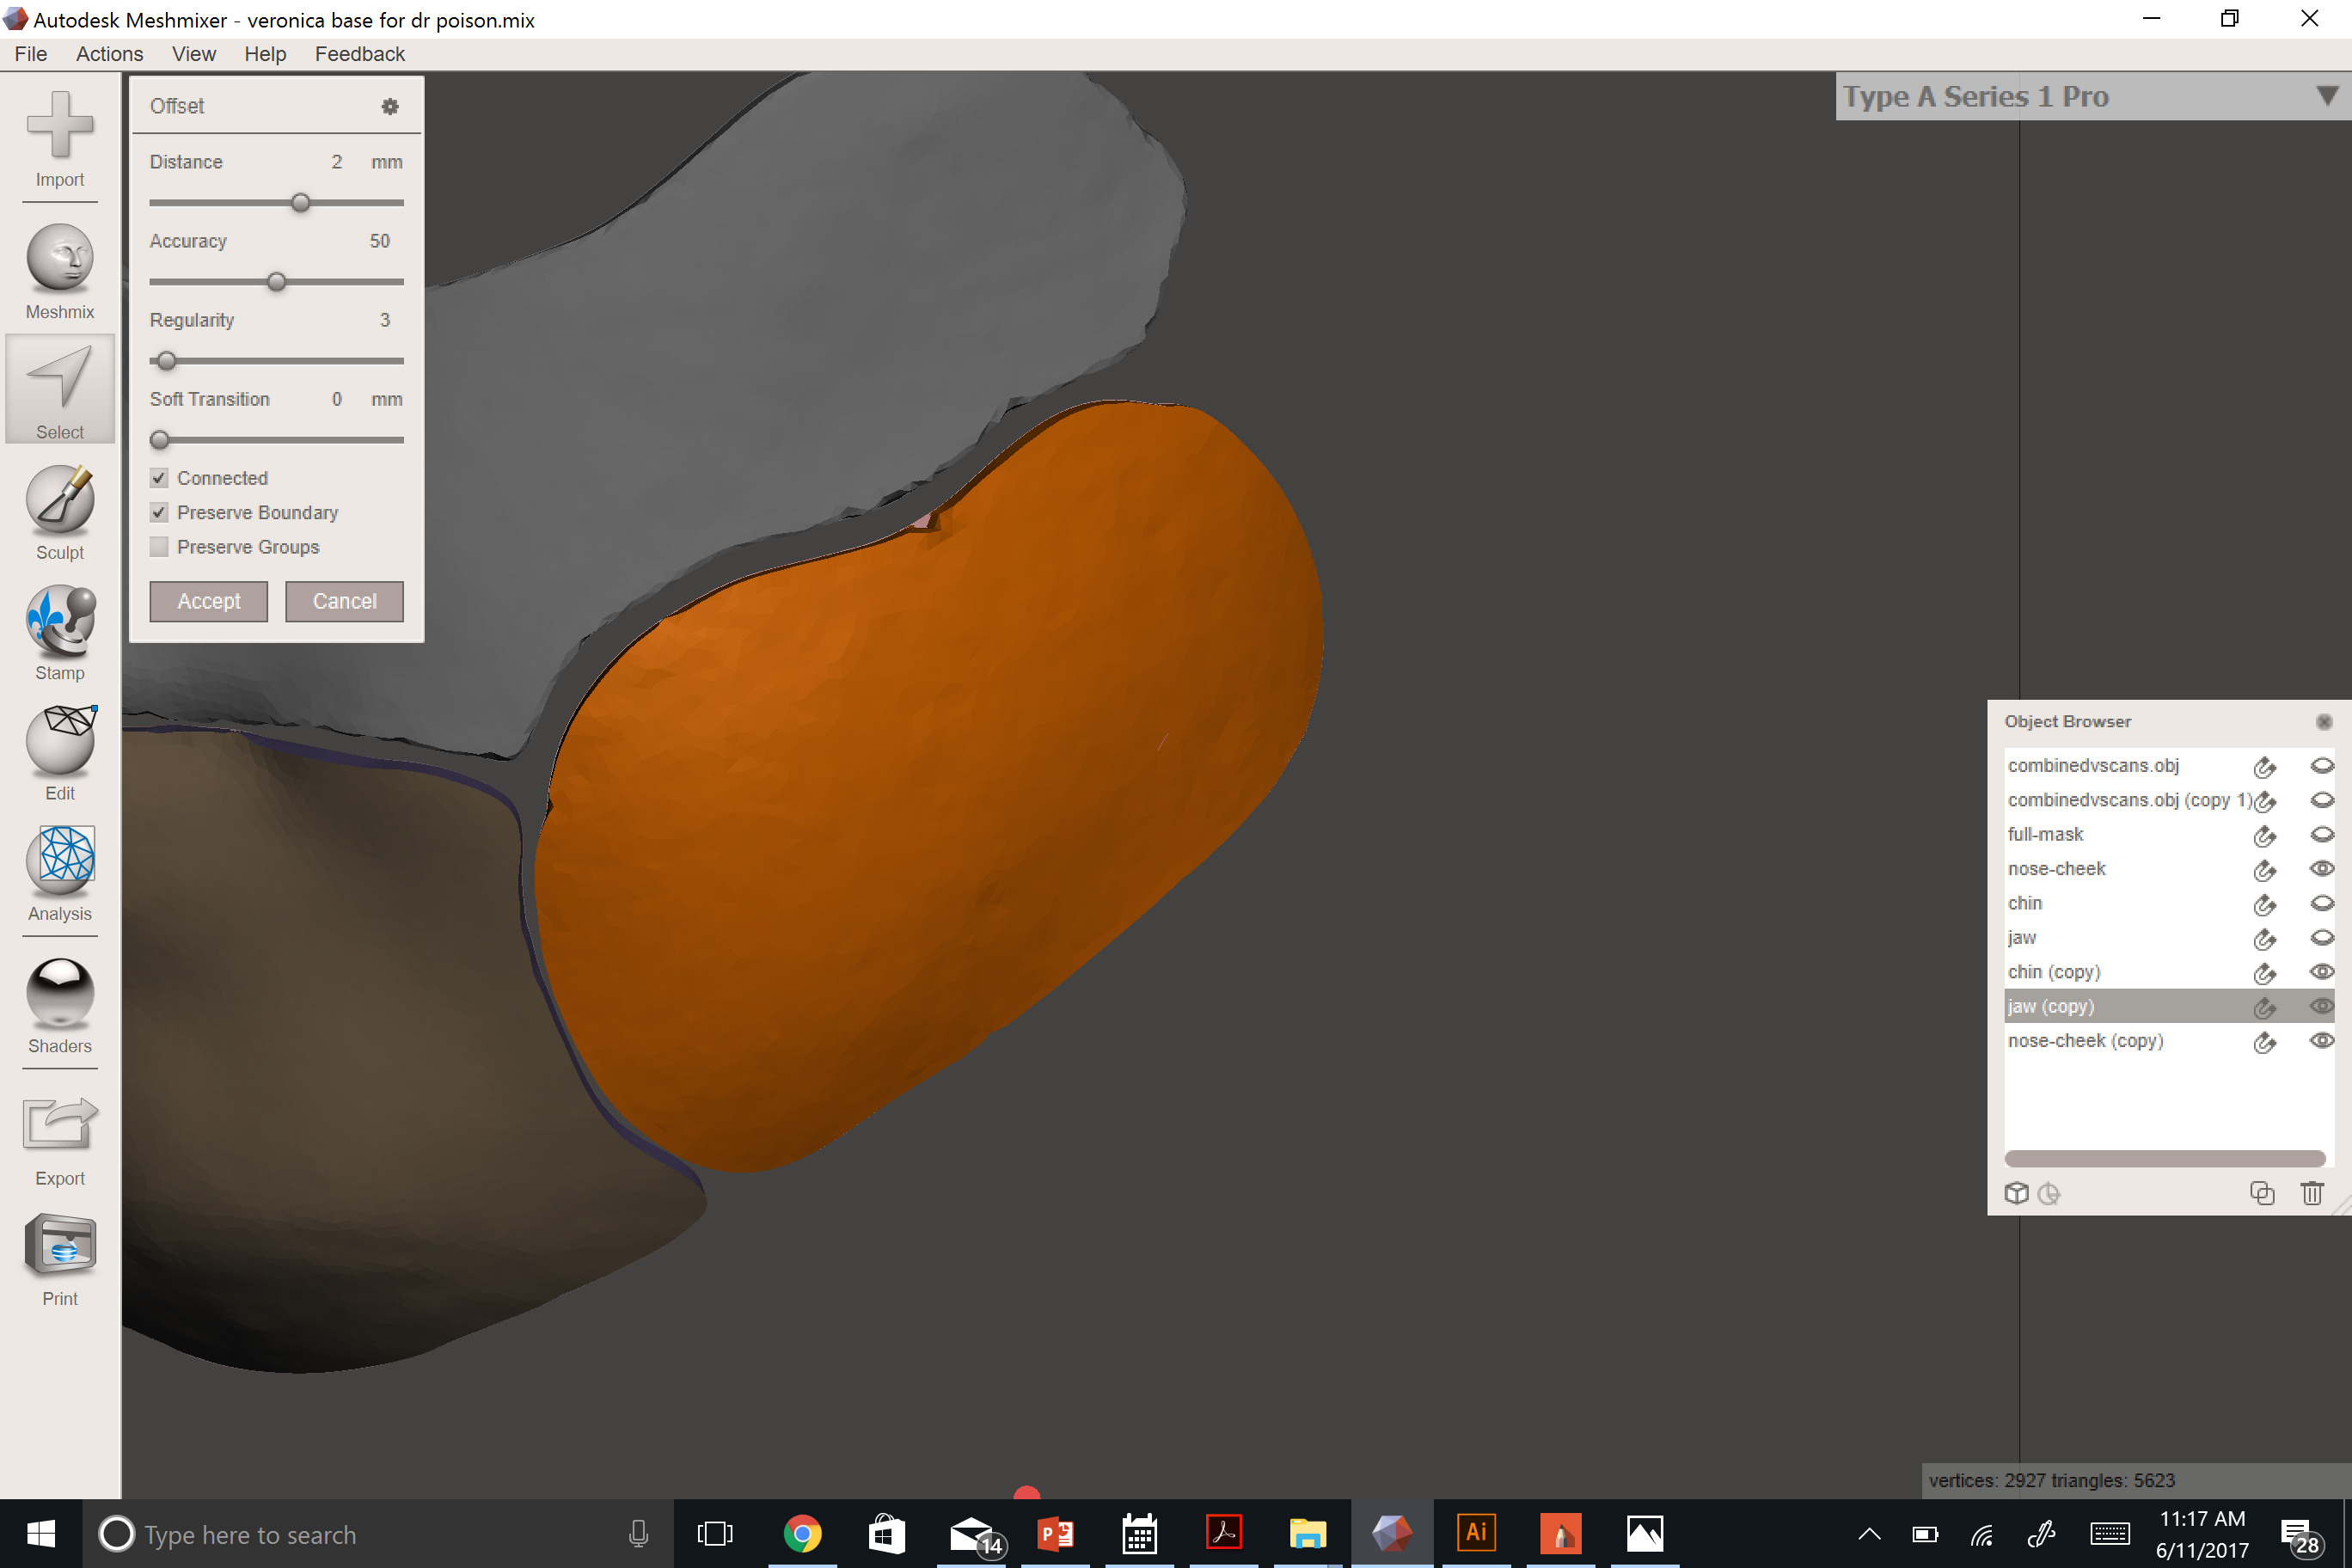
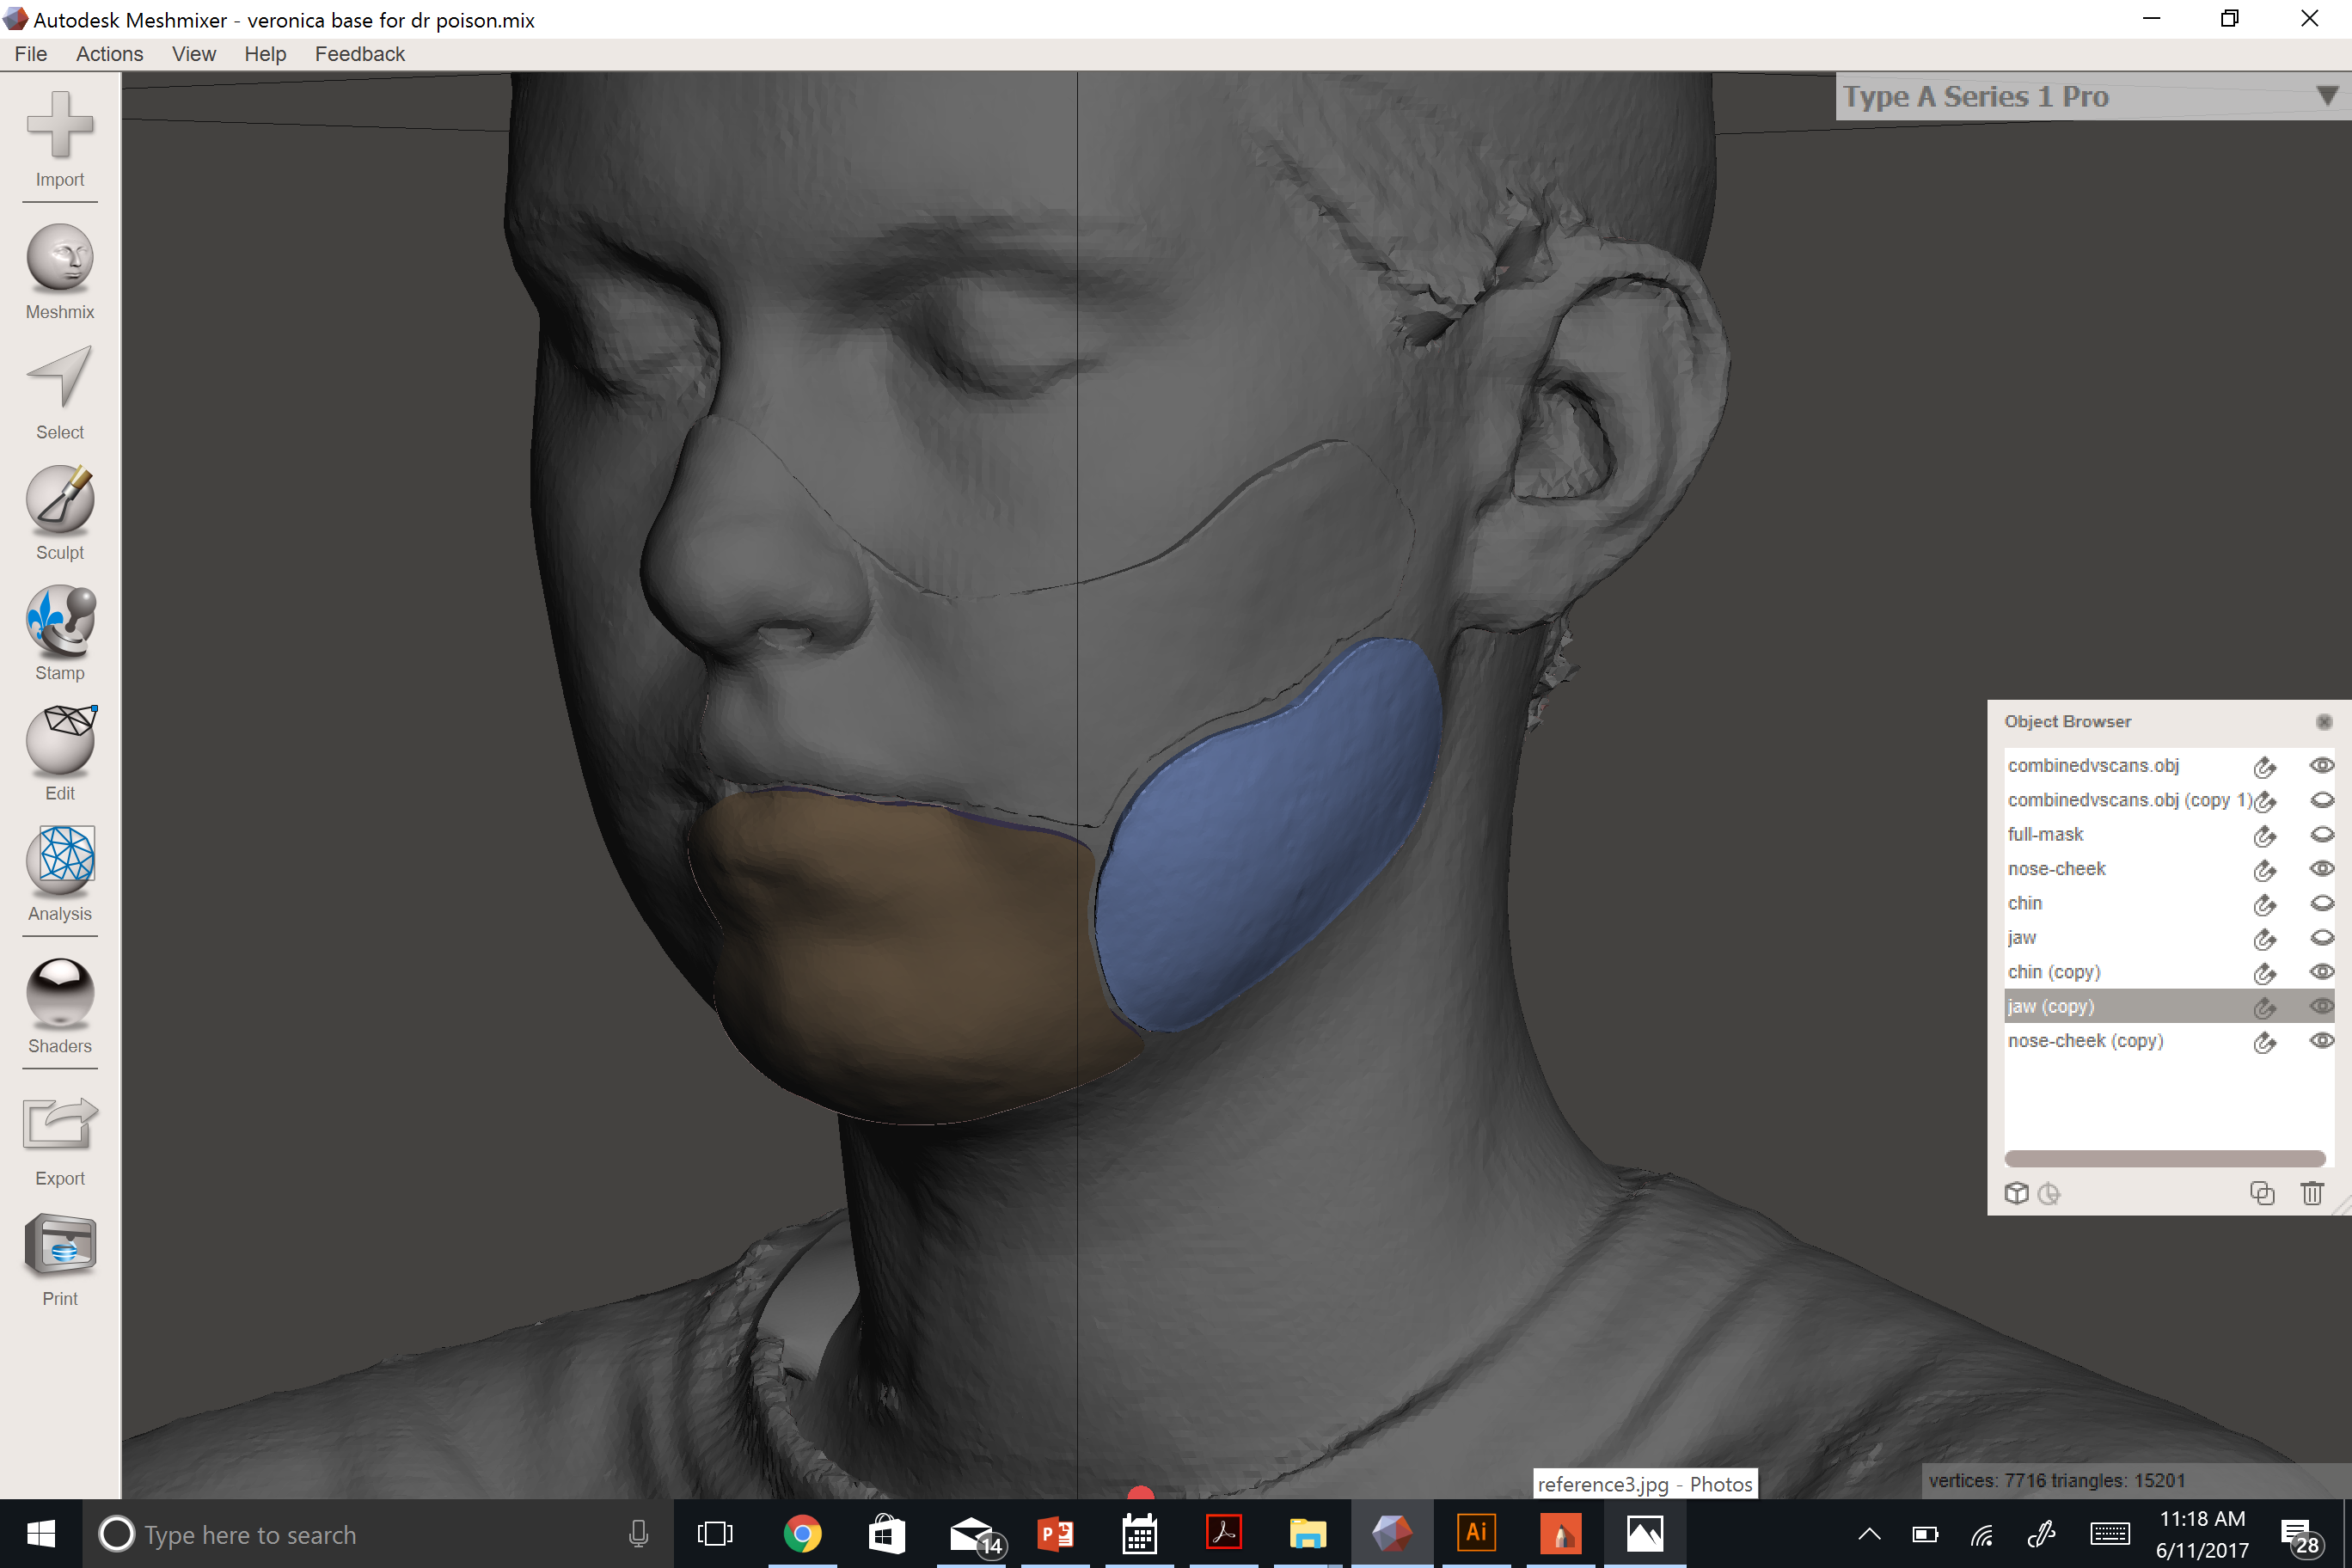
Offset is how I add thickness to the mask. Make sure that you offset by a consistent value. In my case, I used 2 mm.
Depending on the settings that you use during the offset, you may generate choppy edges, as seen in the second picture. I found that no single group of settings worked consistently. By playing around with the settings, I was able to mitigate most of the weird edges.
Combine the Original Pieces of the Mask With Your Offset Pieces.
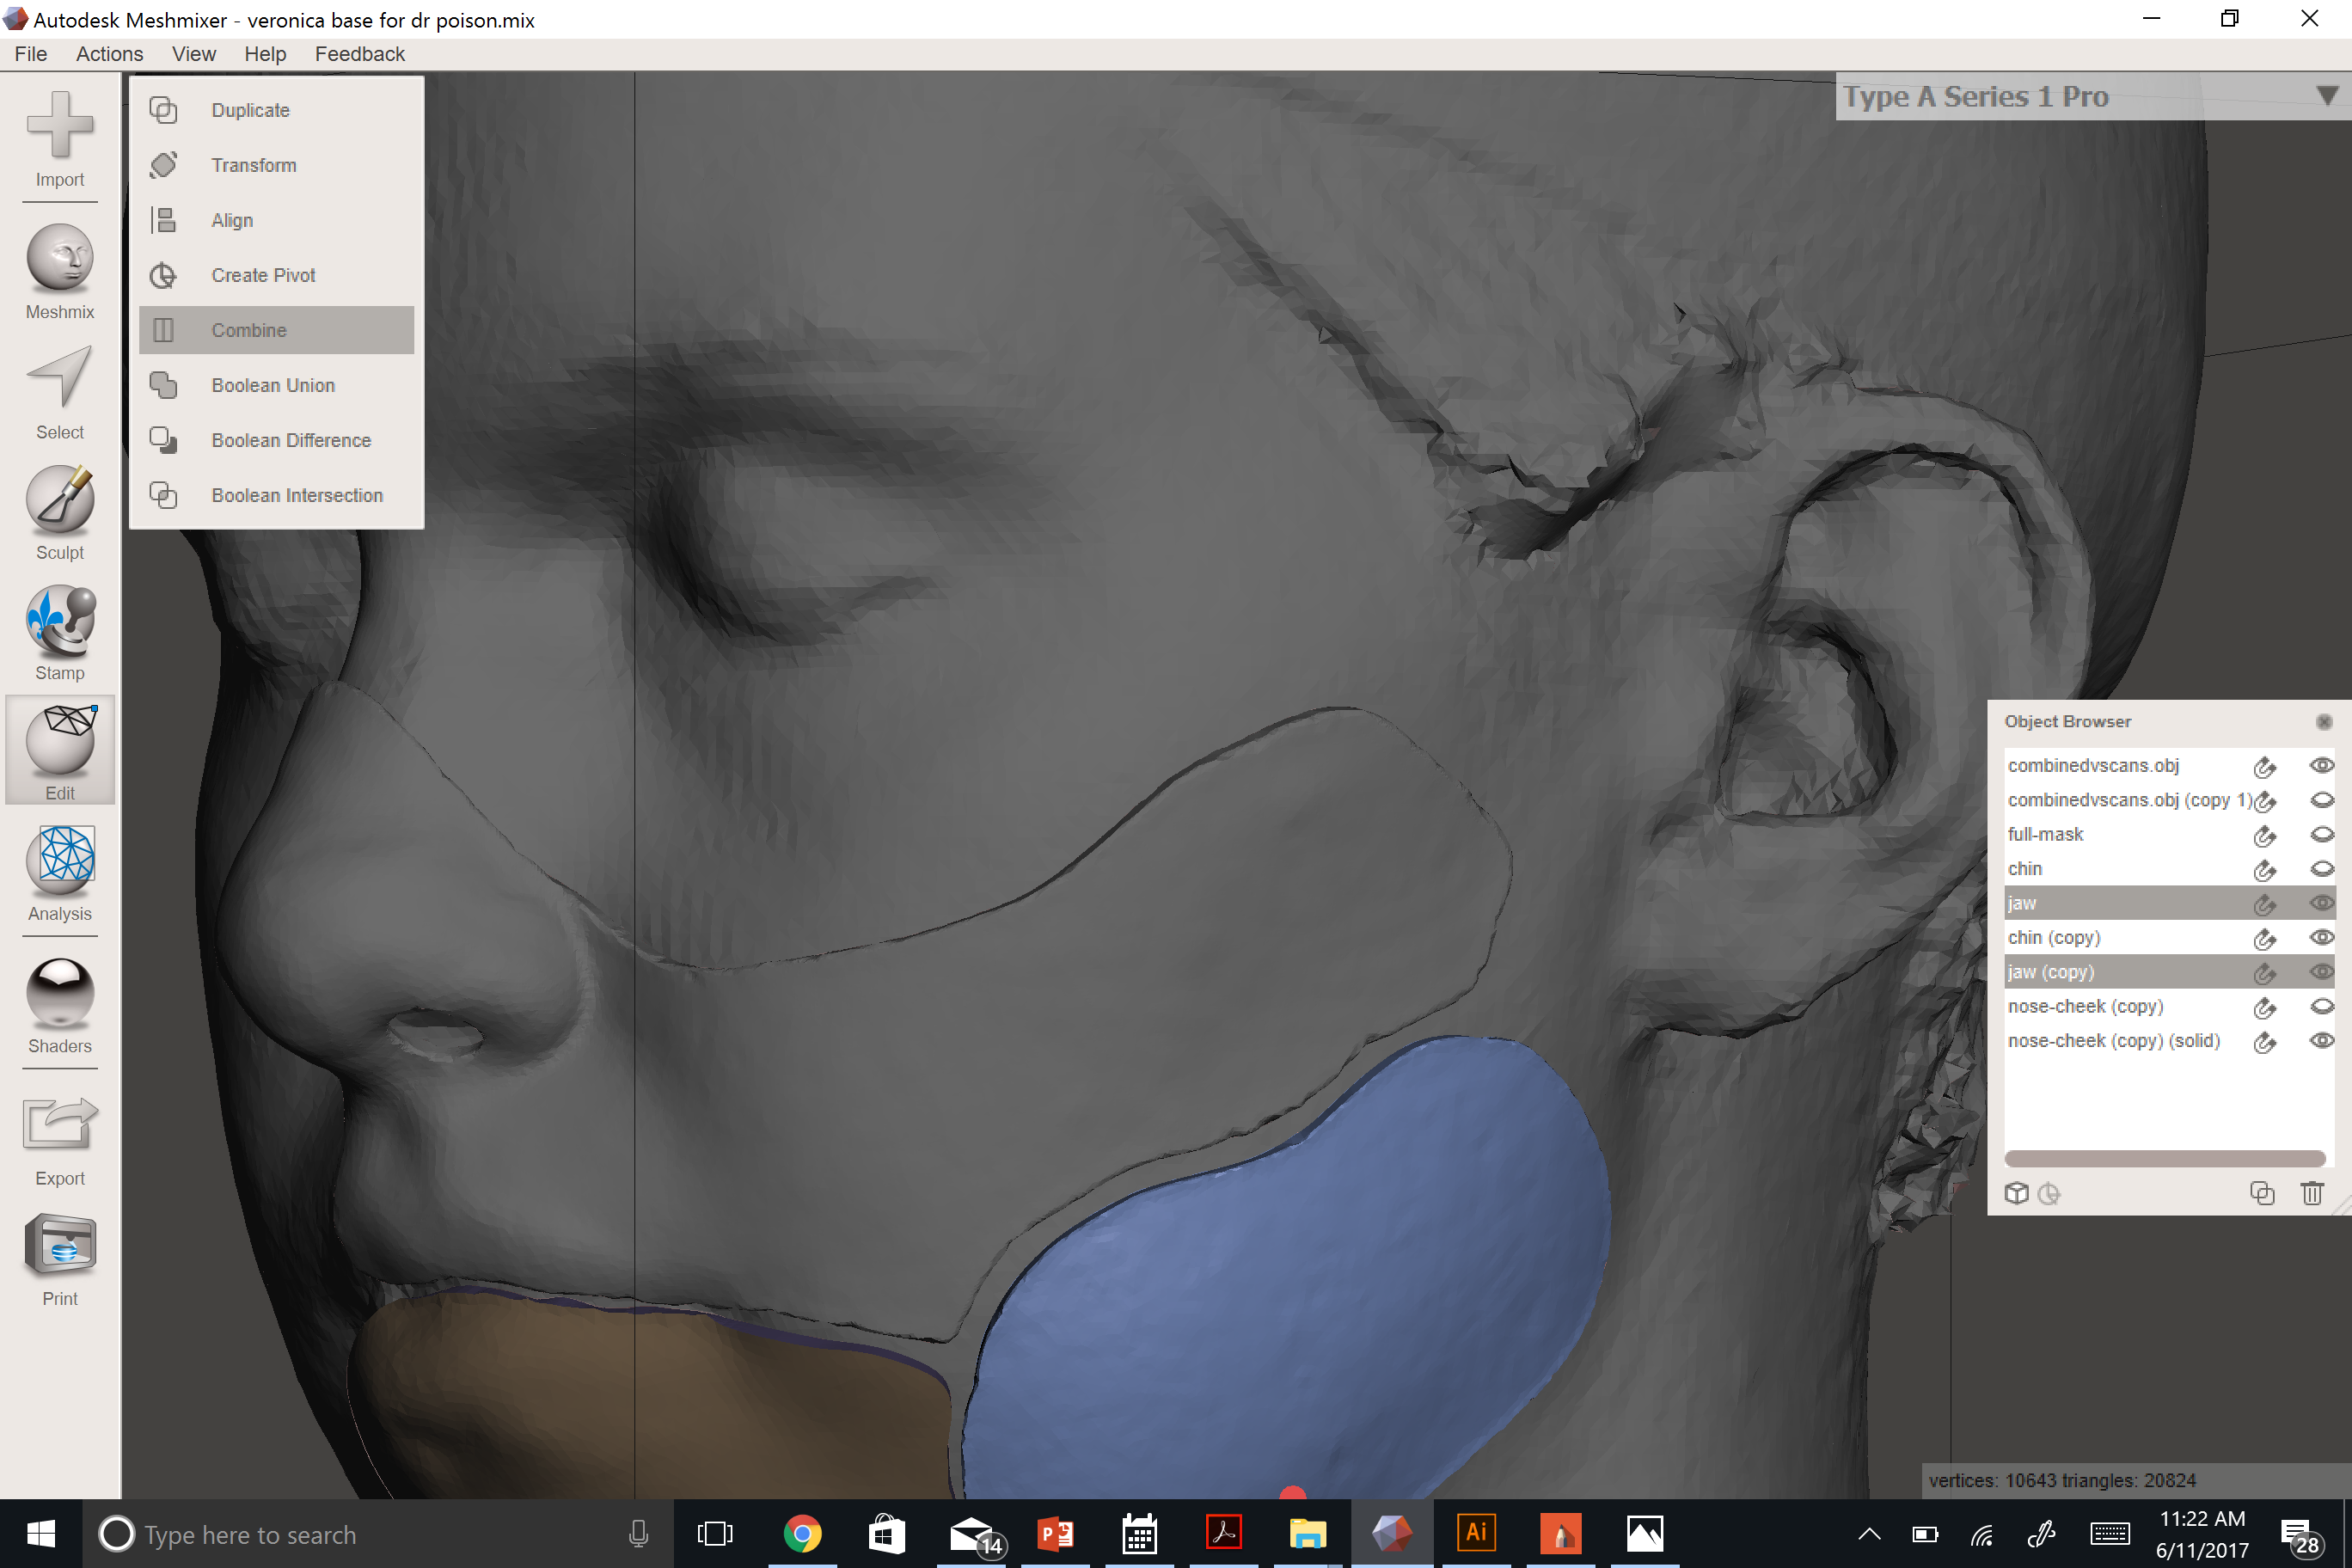
Select both the original and the offset pieces of the mask in the object viewer. Meshmixer will automatically bring up a menu that has the option to combine.
Repeat for each pair of pieces.
Make a Solid of Each Individual Mask Piece.
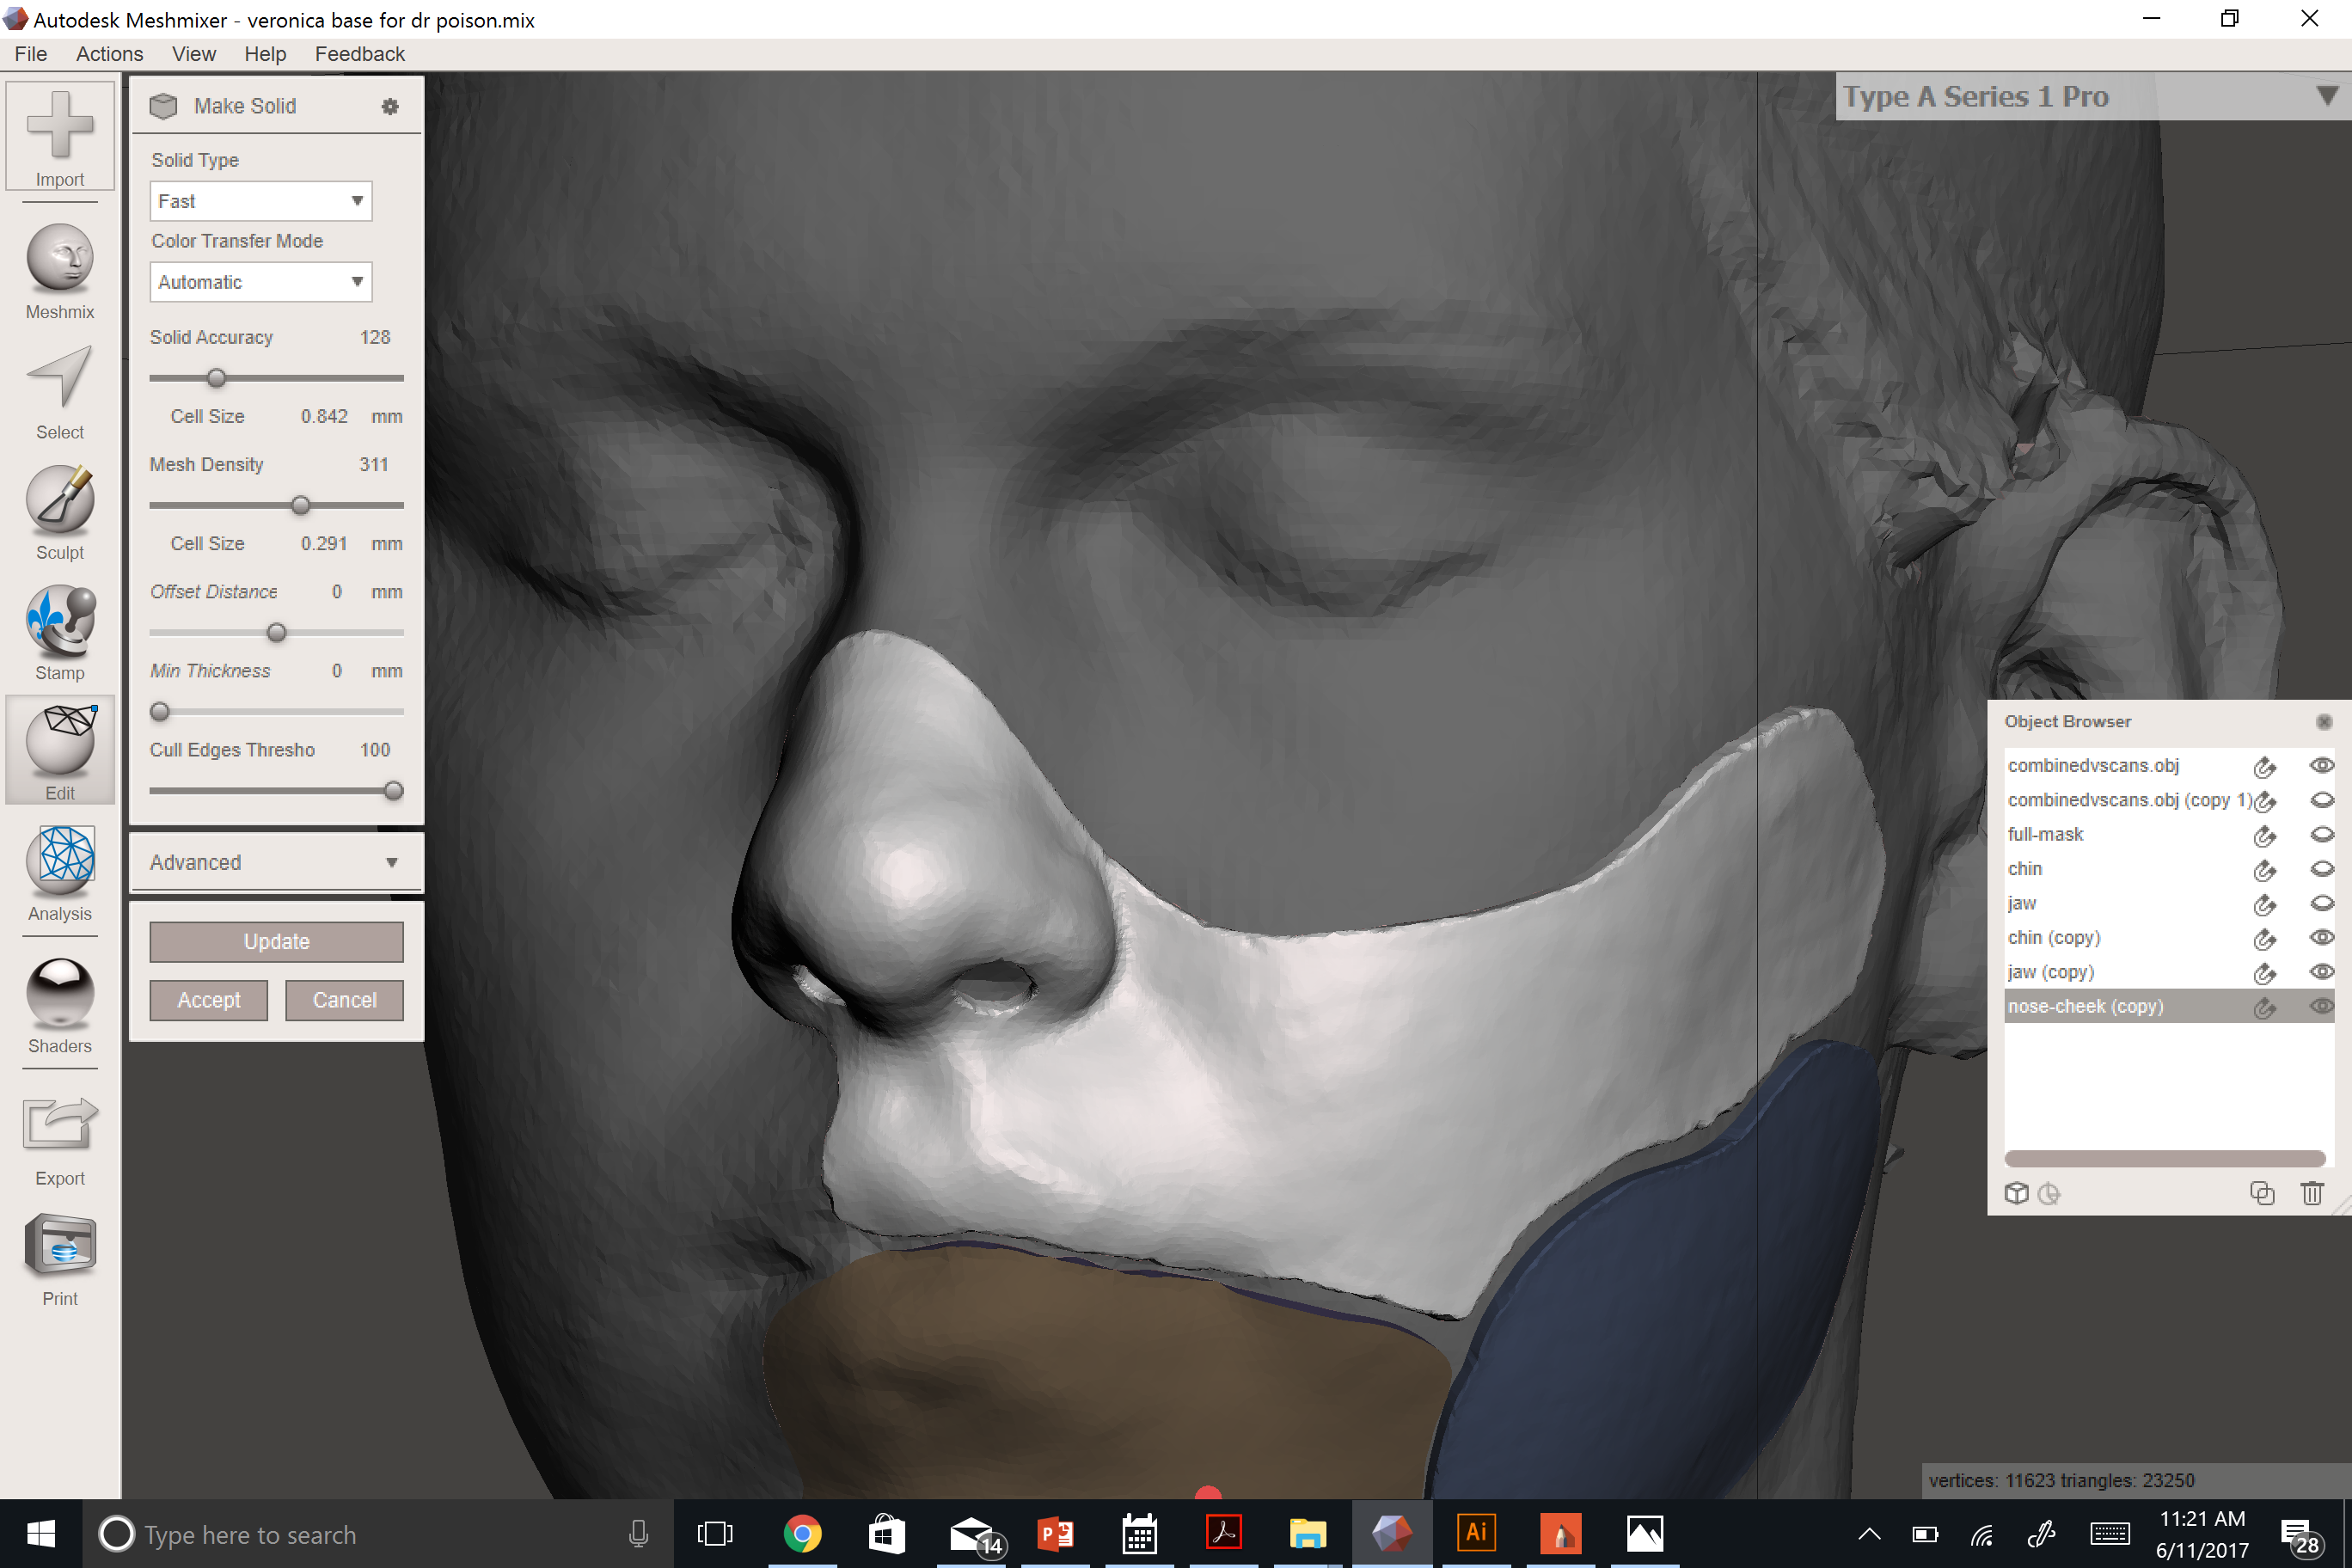
You'll find this option in the "Edit" menu. Slide the option bars until you reach a solid body that isn't forming random holes.
"Attract to Target" to Clean Up Any Mis-matched Surfaces.
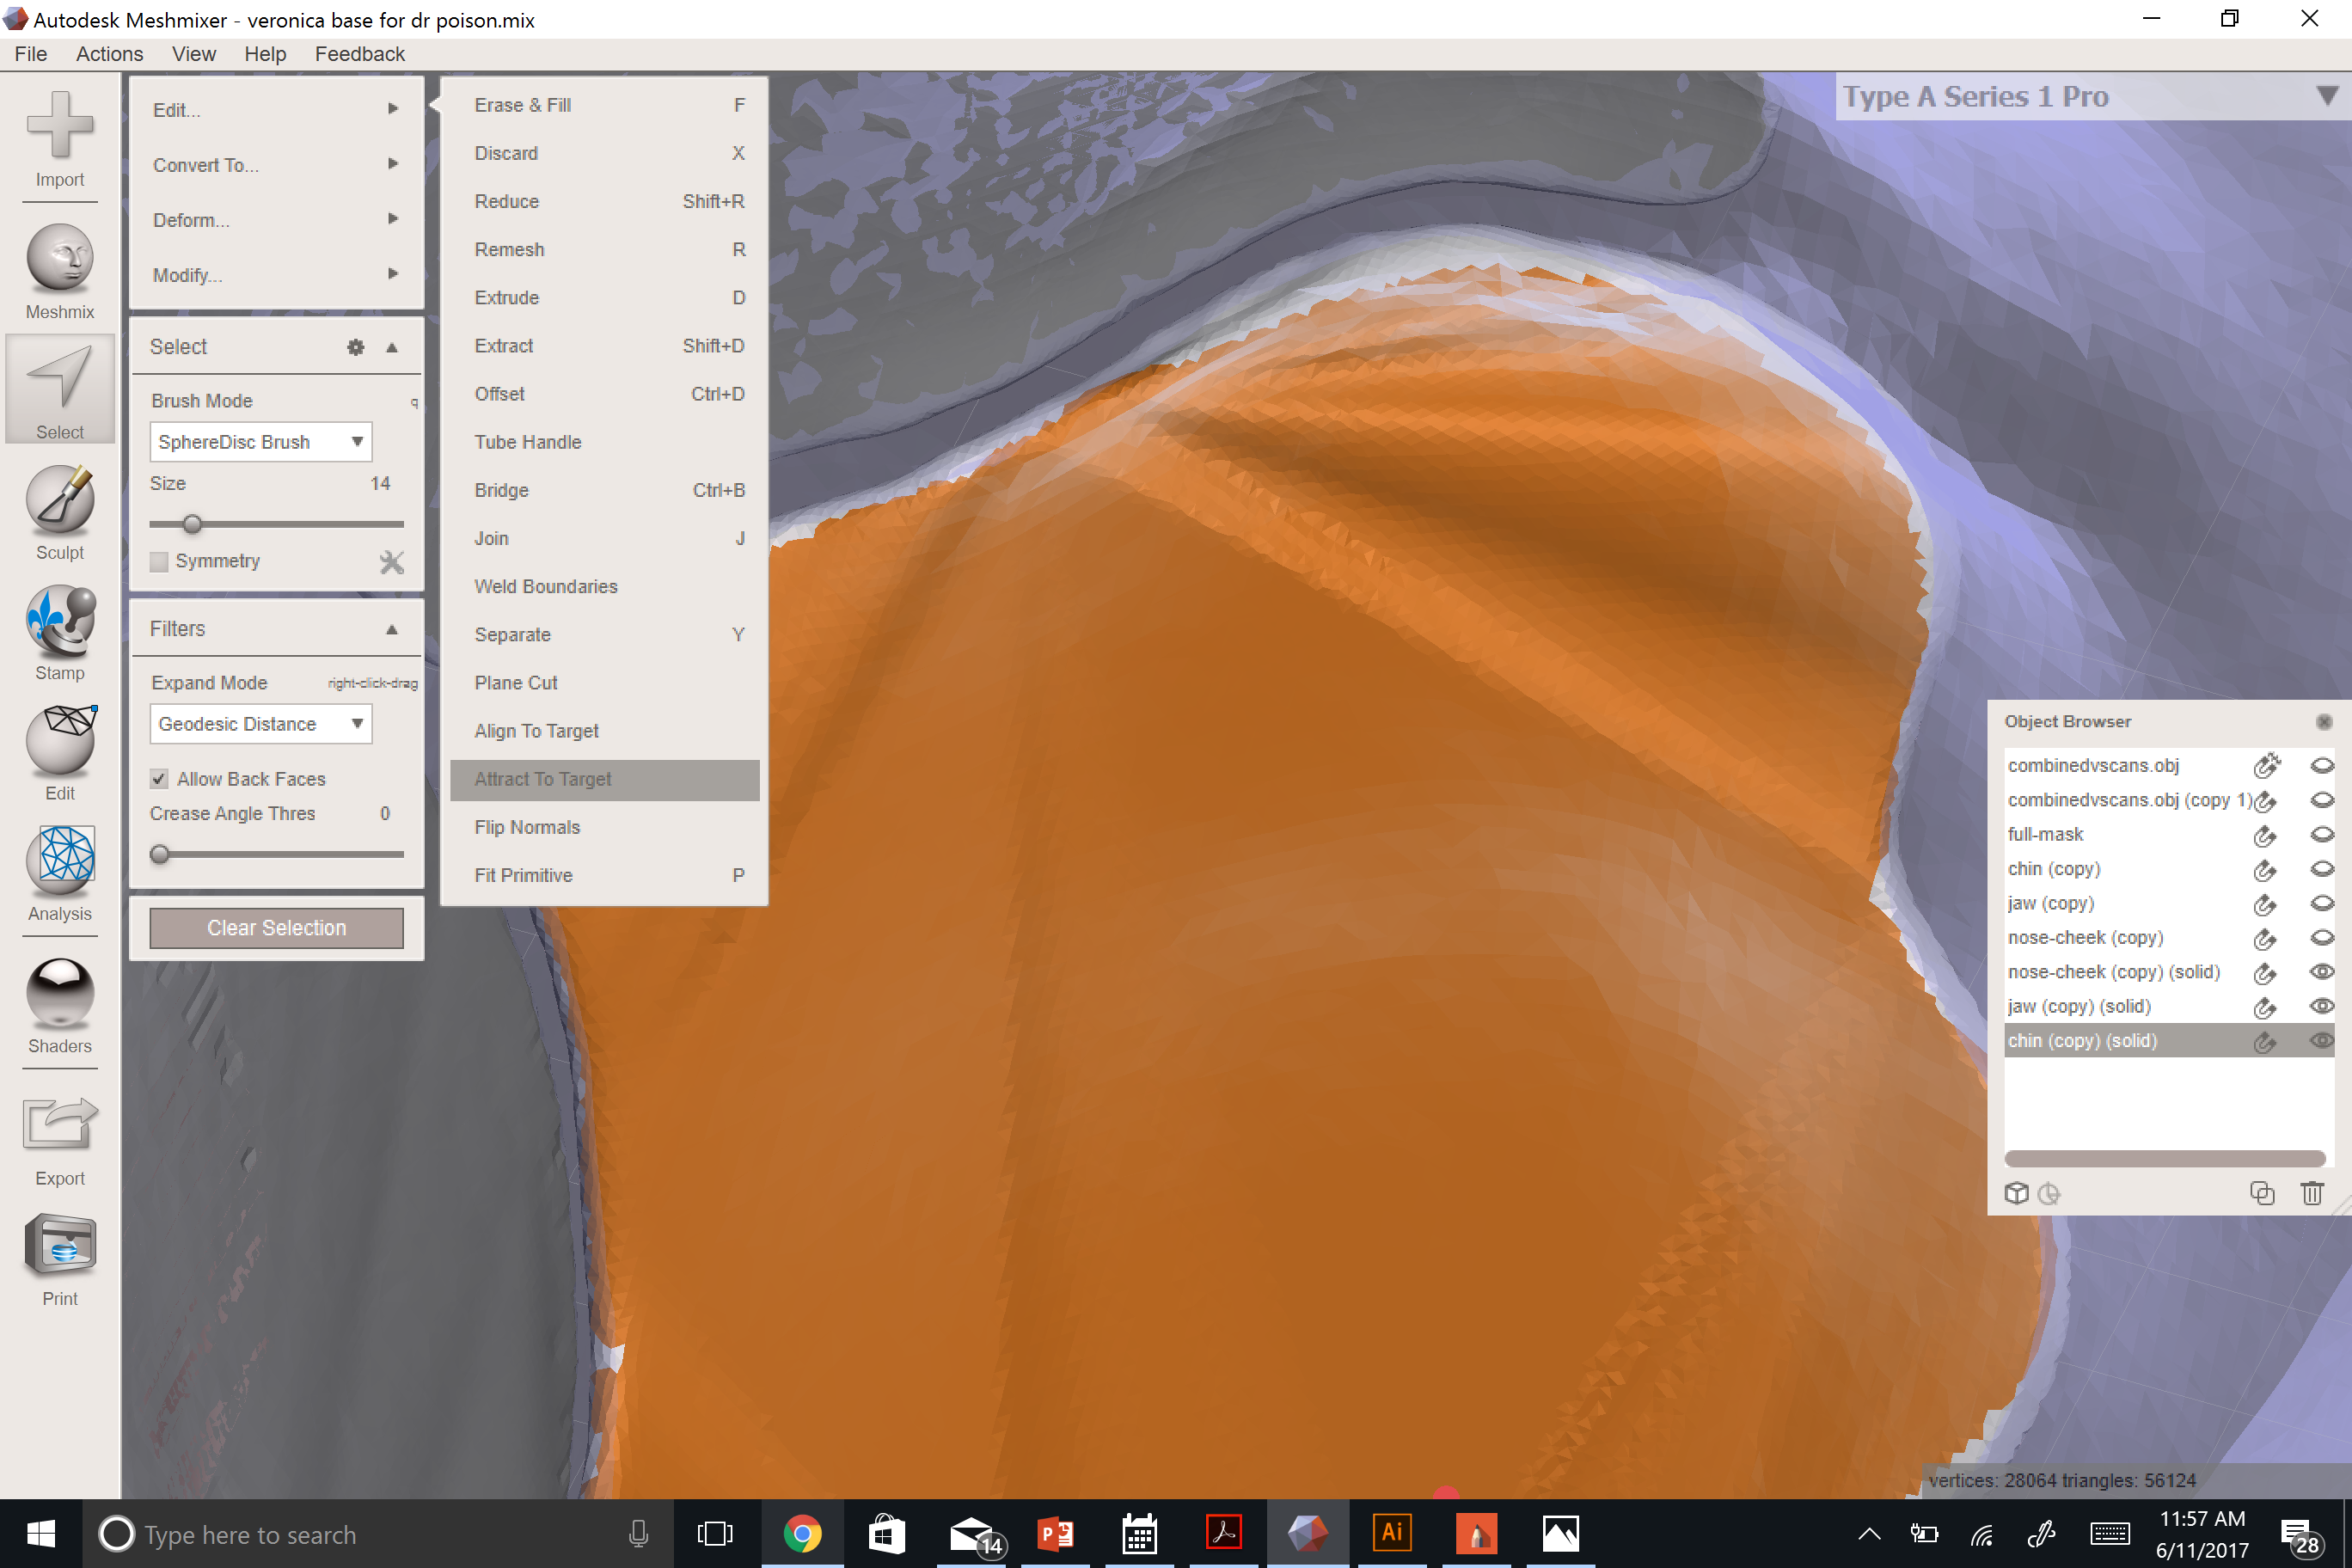
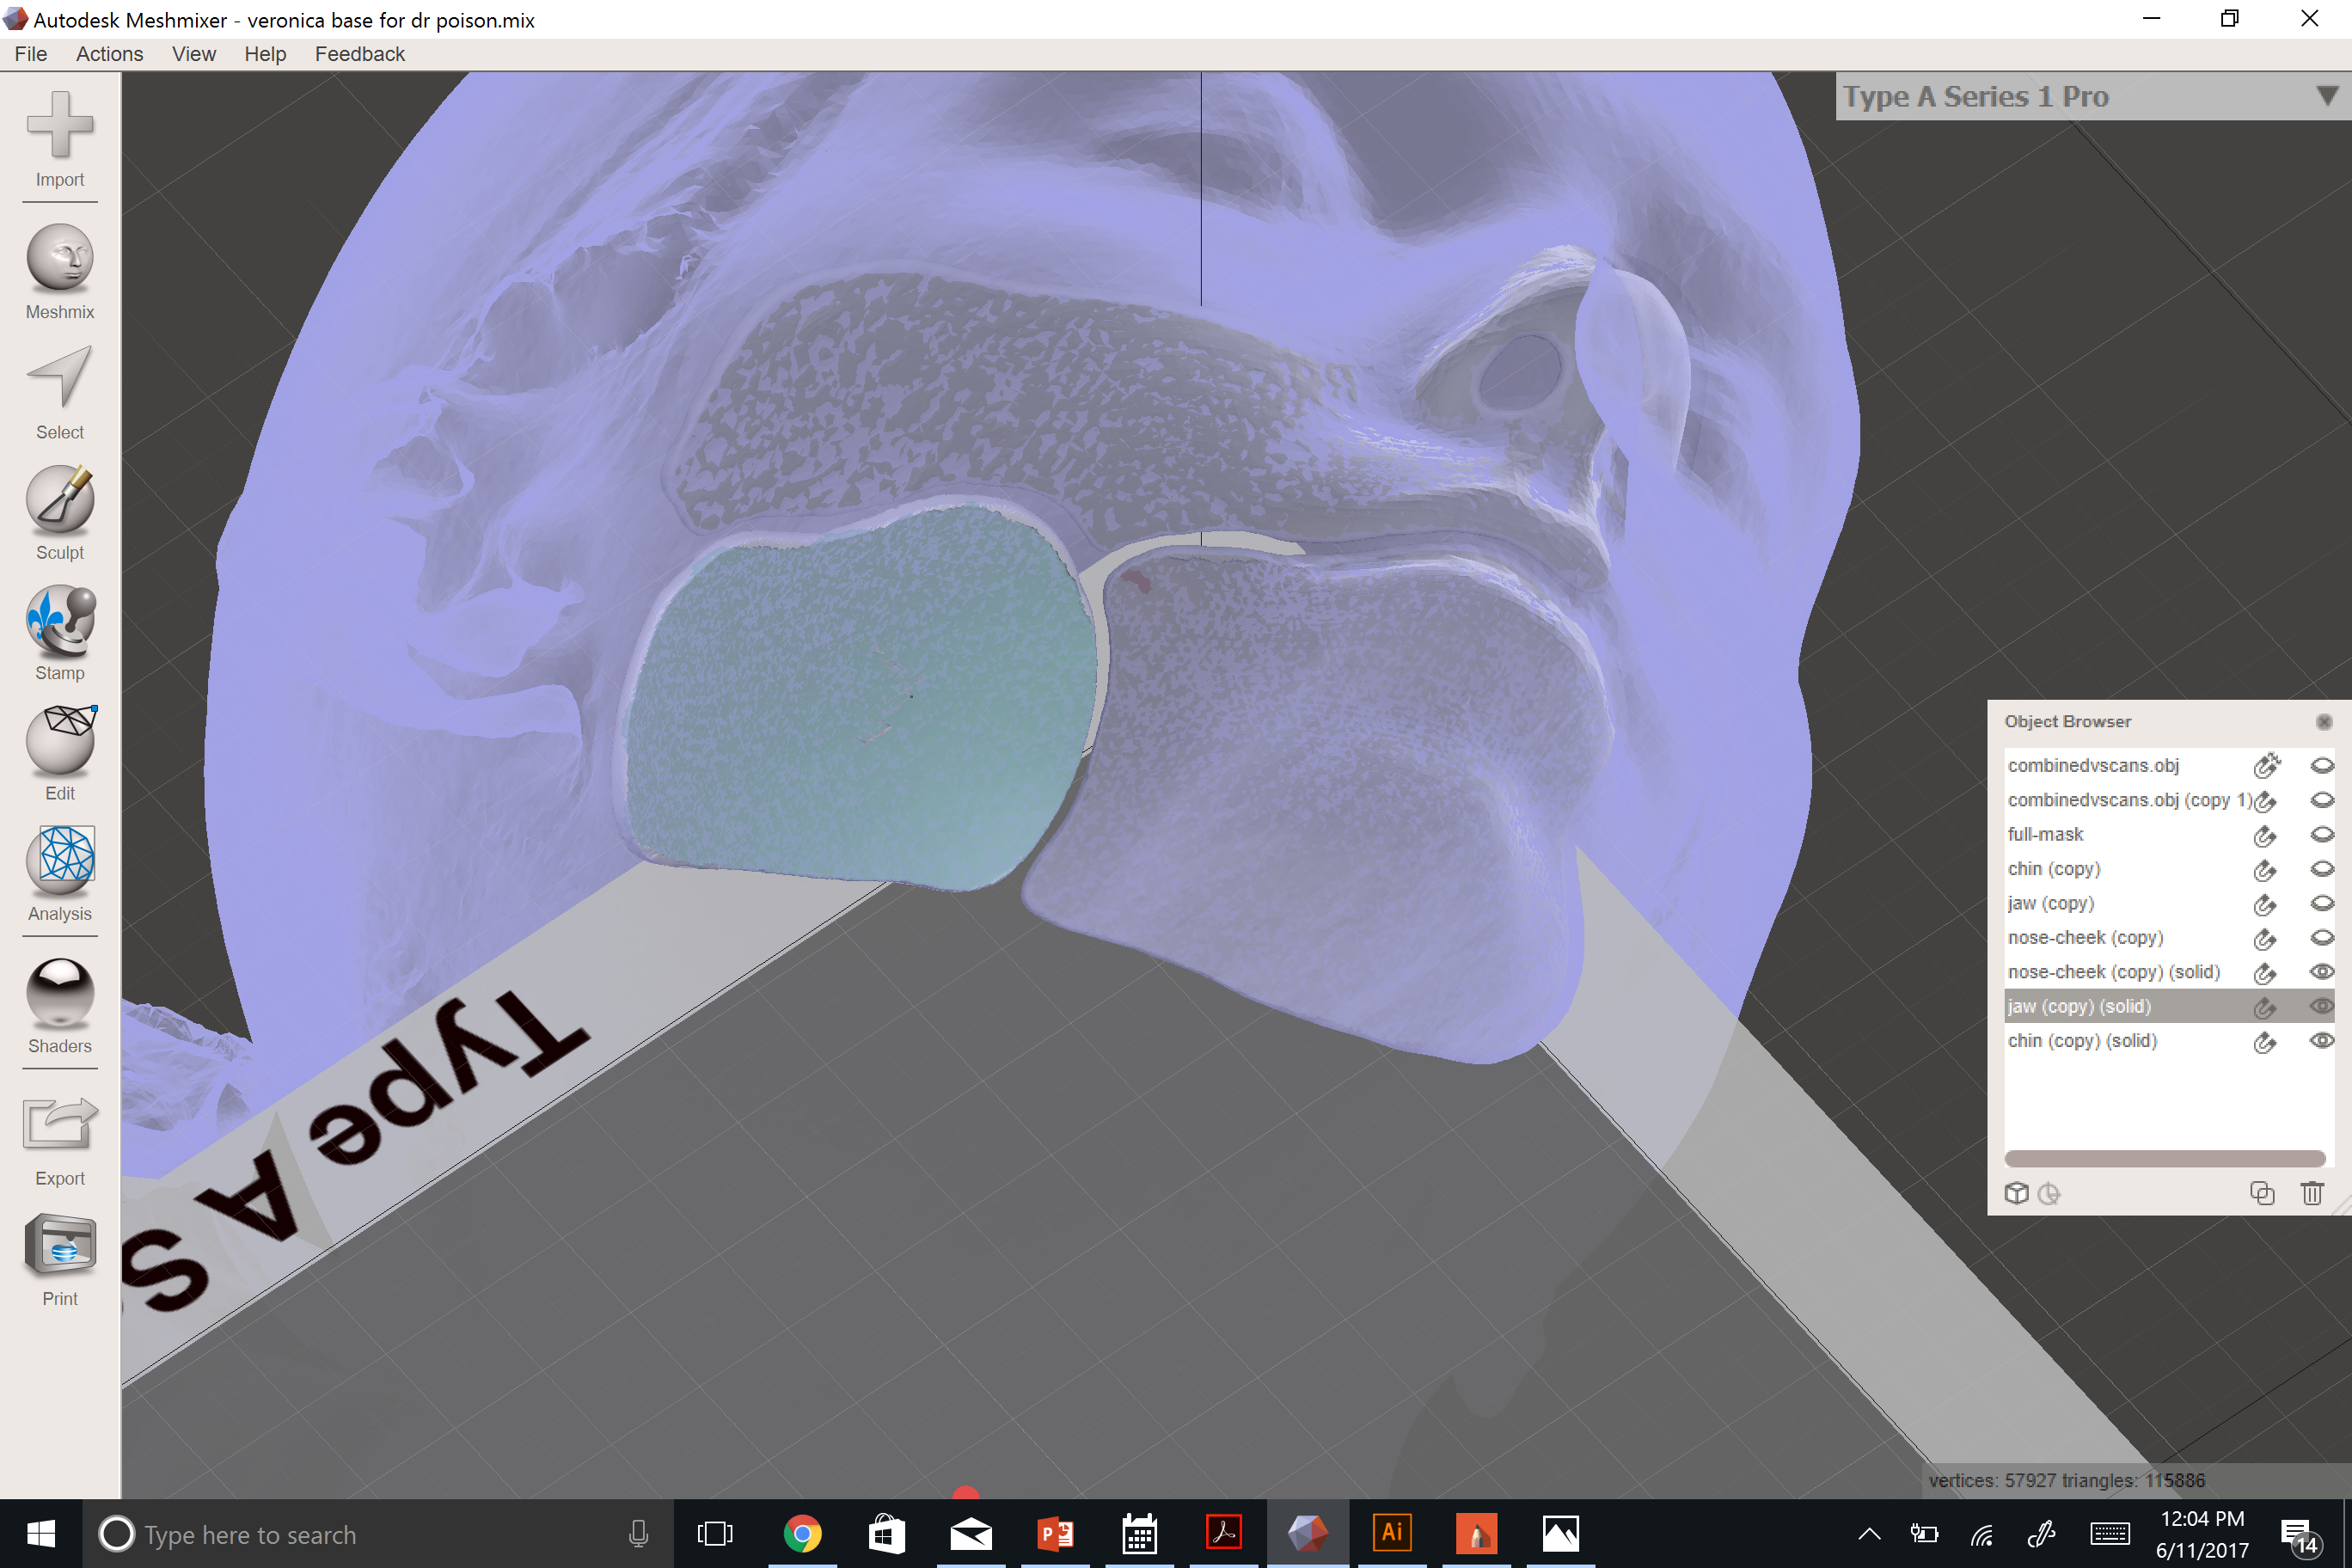
Sometimes, when you create a solid, the program will ignore the fact that you had an original copy of your mask piece that fit your face perfectly, and it will just create some random surfaces to fill in the hole. Obviously, you can't use that part of the mask if it doesn't fit your face. Fortunately, Meshmixer has a built in solution.
- Make the back of your mask pieces into different face groups. Select the back surface of each mask piece, and go to Modify > Create Face Group. This will turn the selection into a differently colored item that is easy to select later.
- Make the original copy of your face scan into a target. Click the horse-shoe/magnet icon next to it in the object viewer, and that object will turn ghostly blue.
- Make a mask piece your active object. Click on it in the object viewer.
- Select your custom face group. Double click on the area you just created.
- Attract to target. This option is in the Edit menu.
Surfaces that are identical to the target take on a splotchy sort of appearance, as seen in the second image.
Highlight/Sculpt Features.
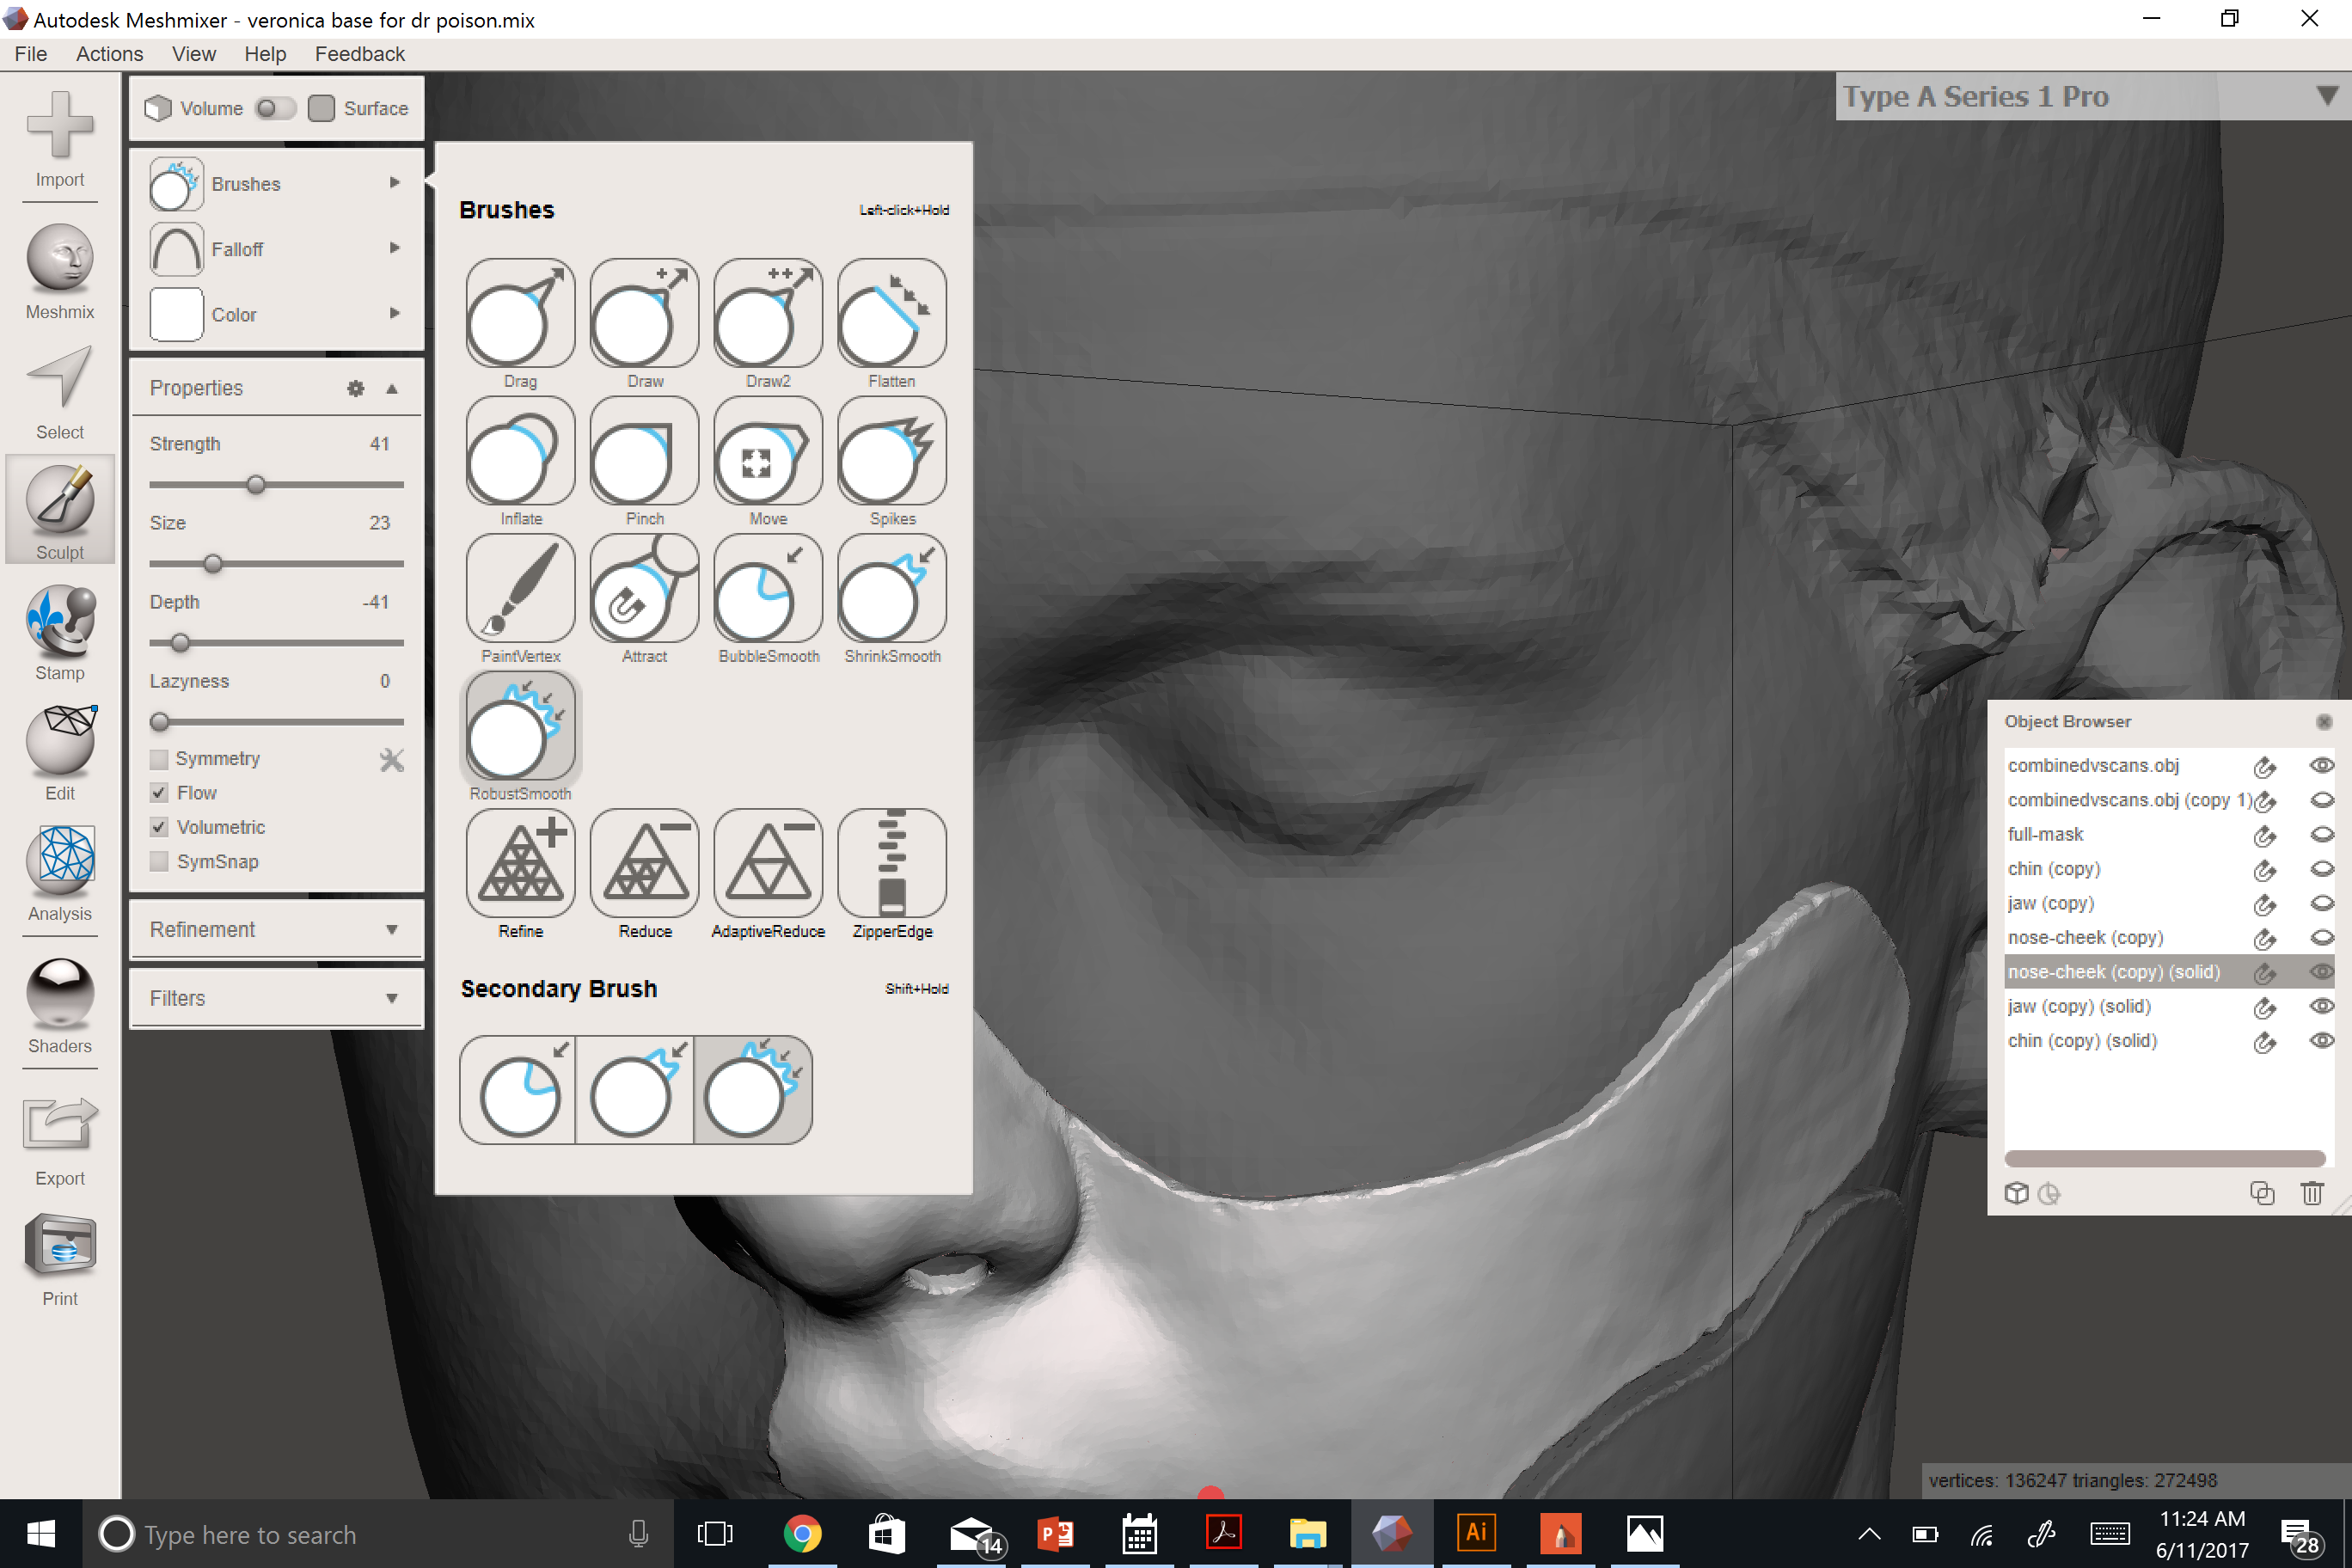
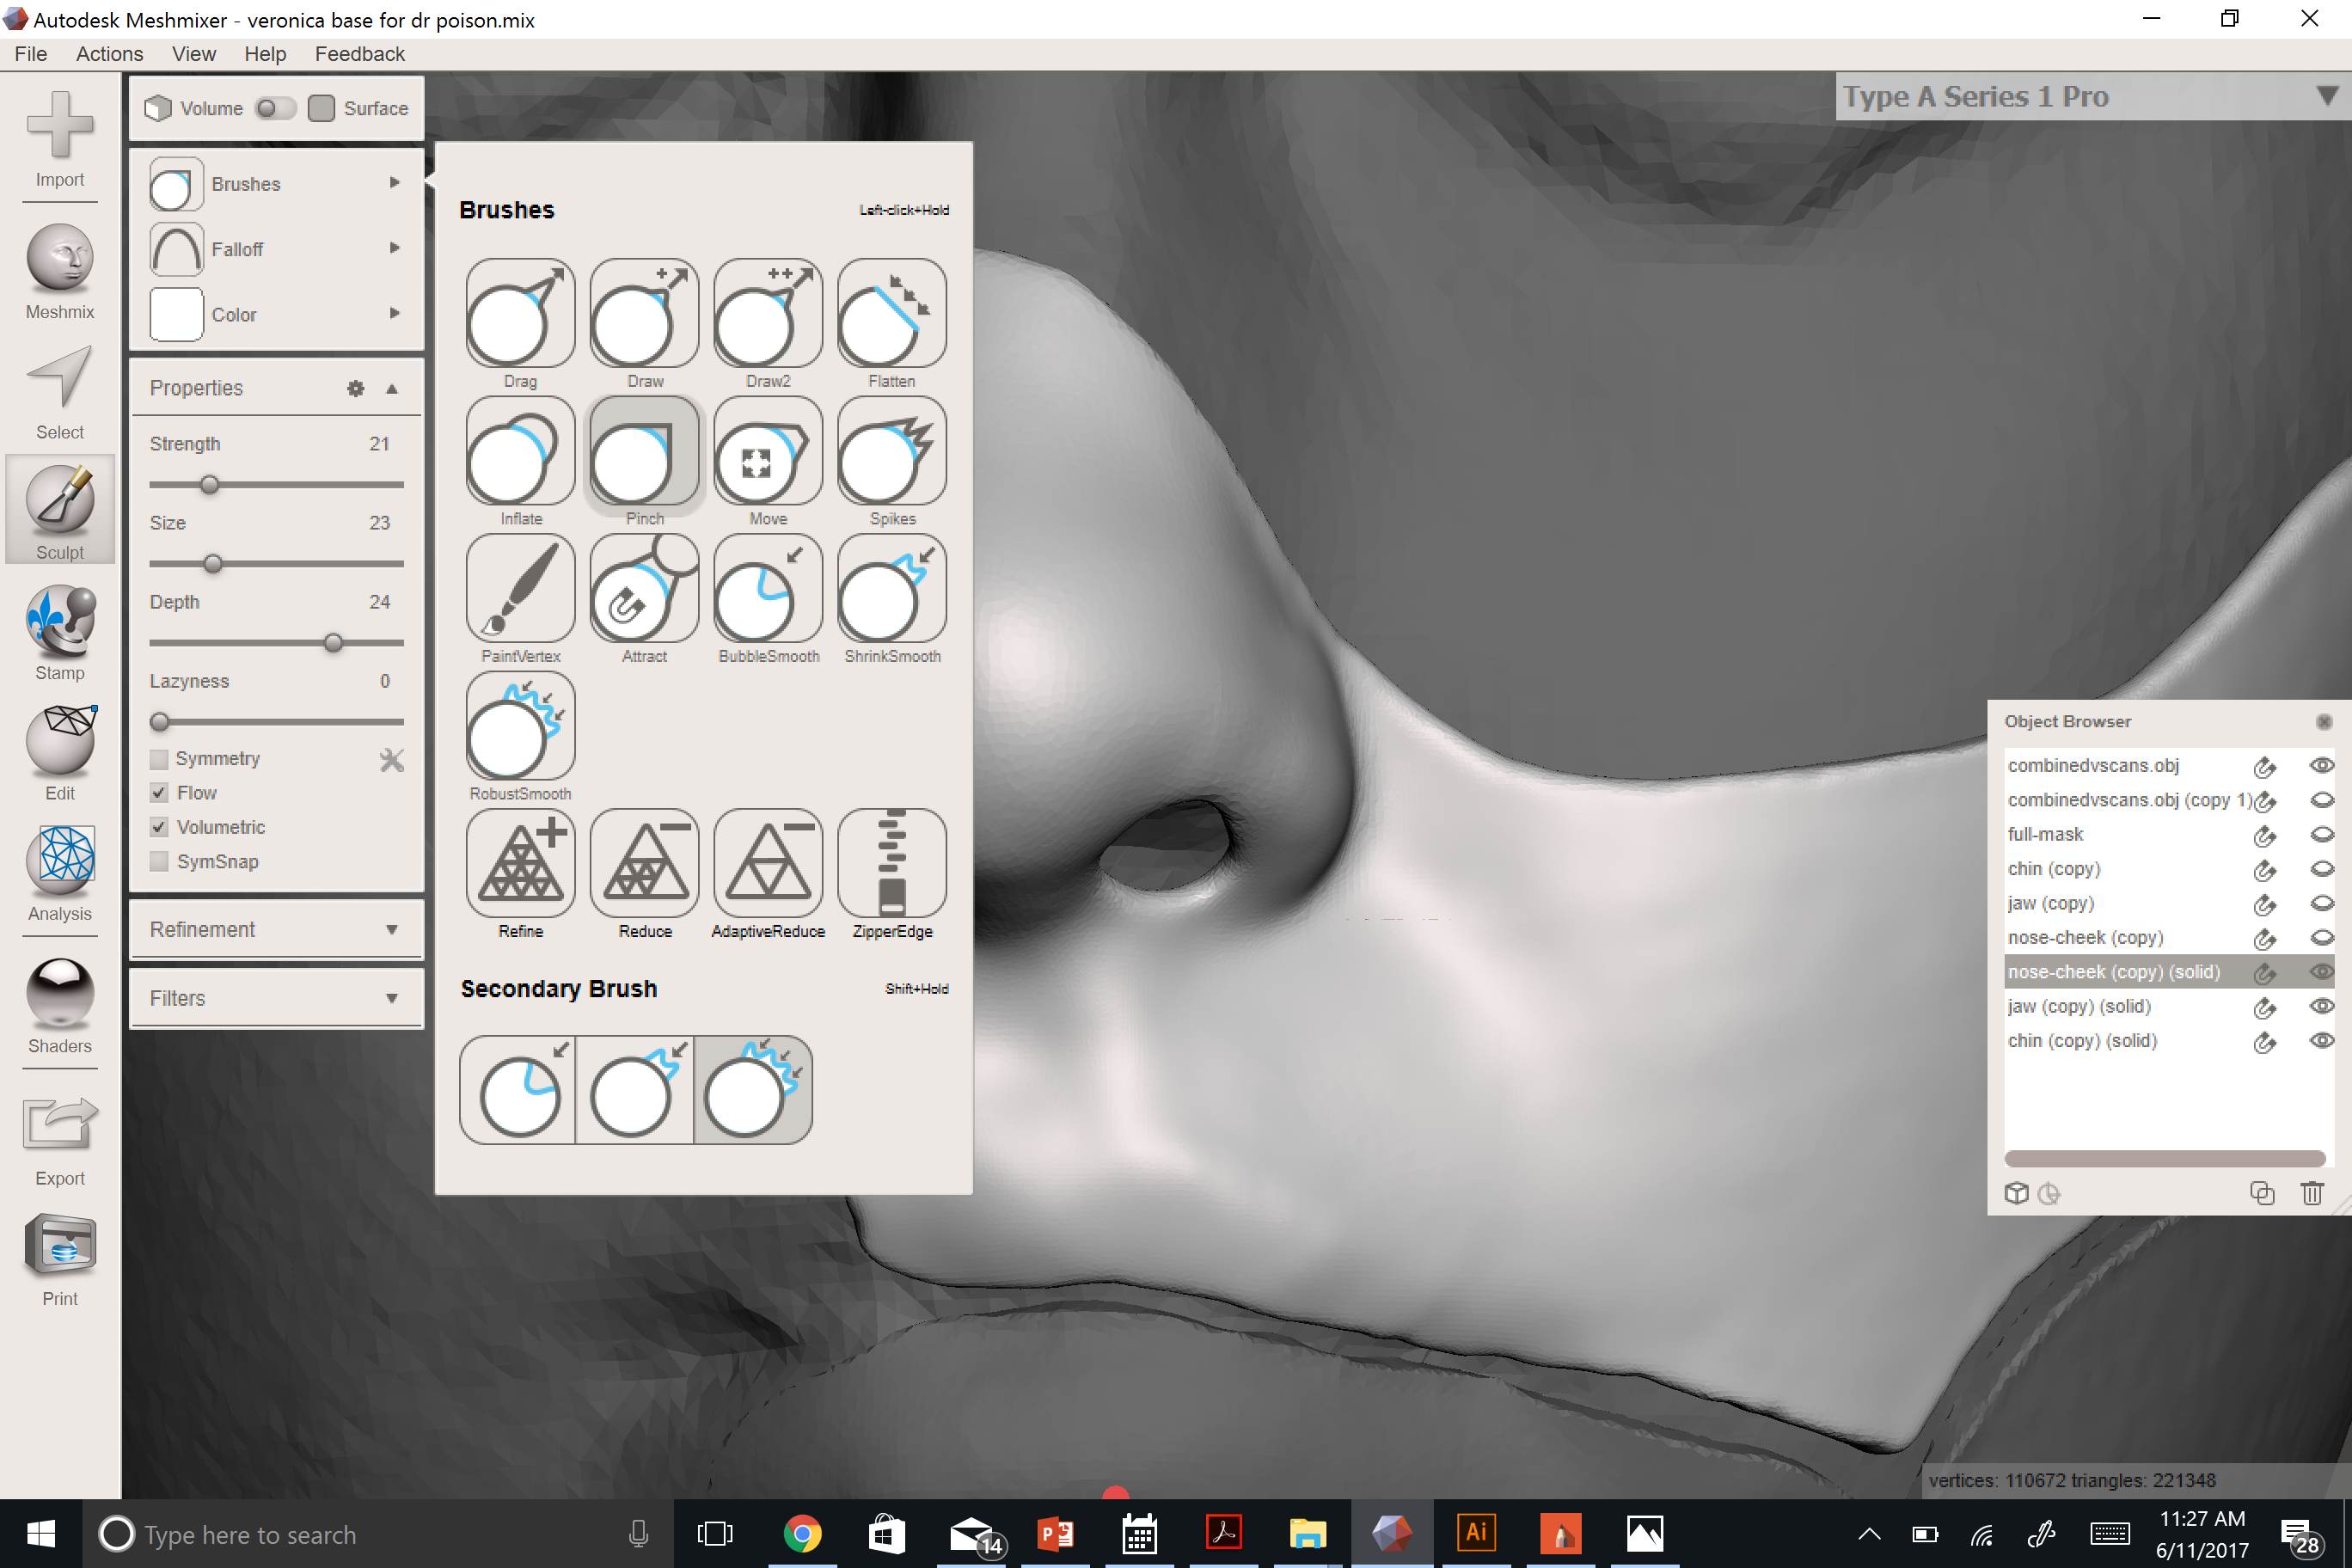
Use the sculpt tool to customize your mask. I used the Robust Smooth brush to take care of irregularities in the scan, and to create as smooth of a surface as possible. I also used the Pinch brush to sharpen some of my features that were lost in the offset, like the edges of my upper lip and the smile line, which is very evident in Dr. Poison's mask.
Print Parts.
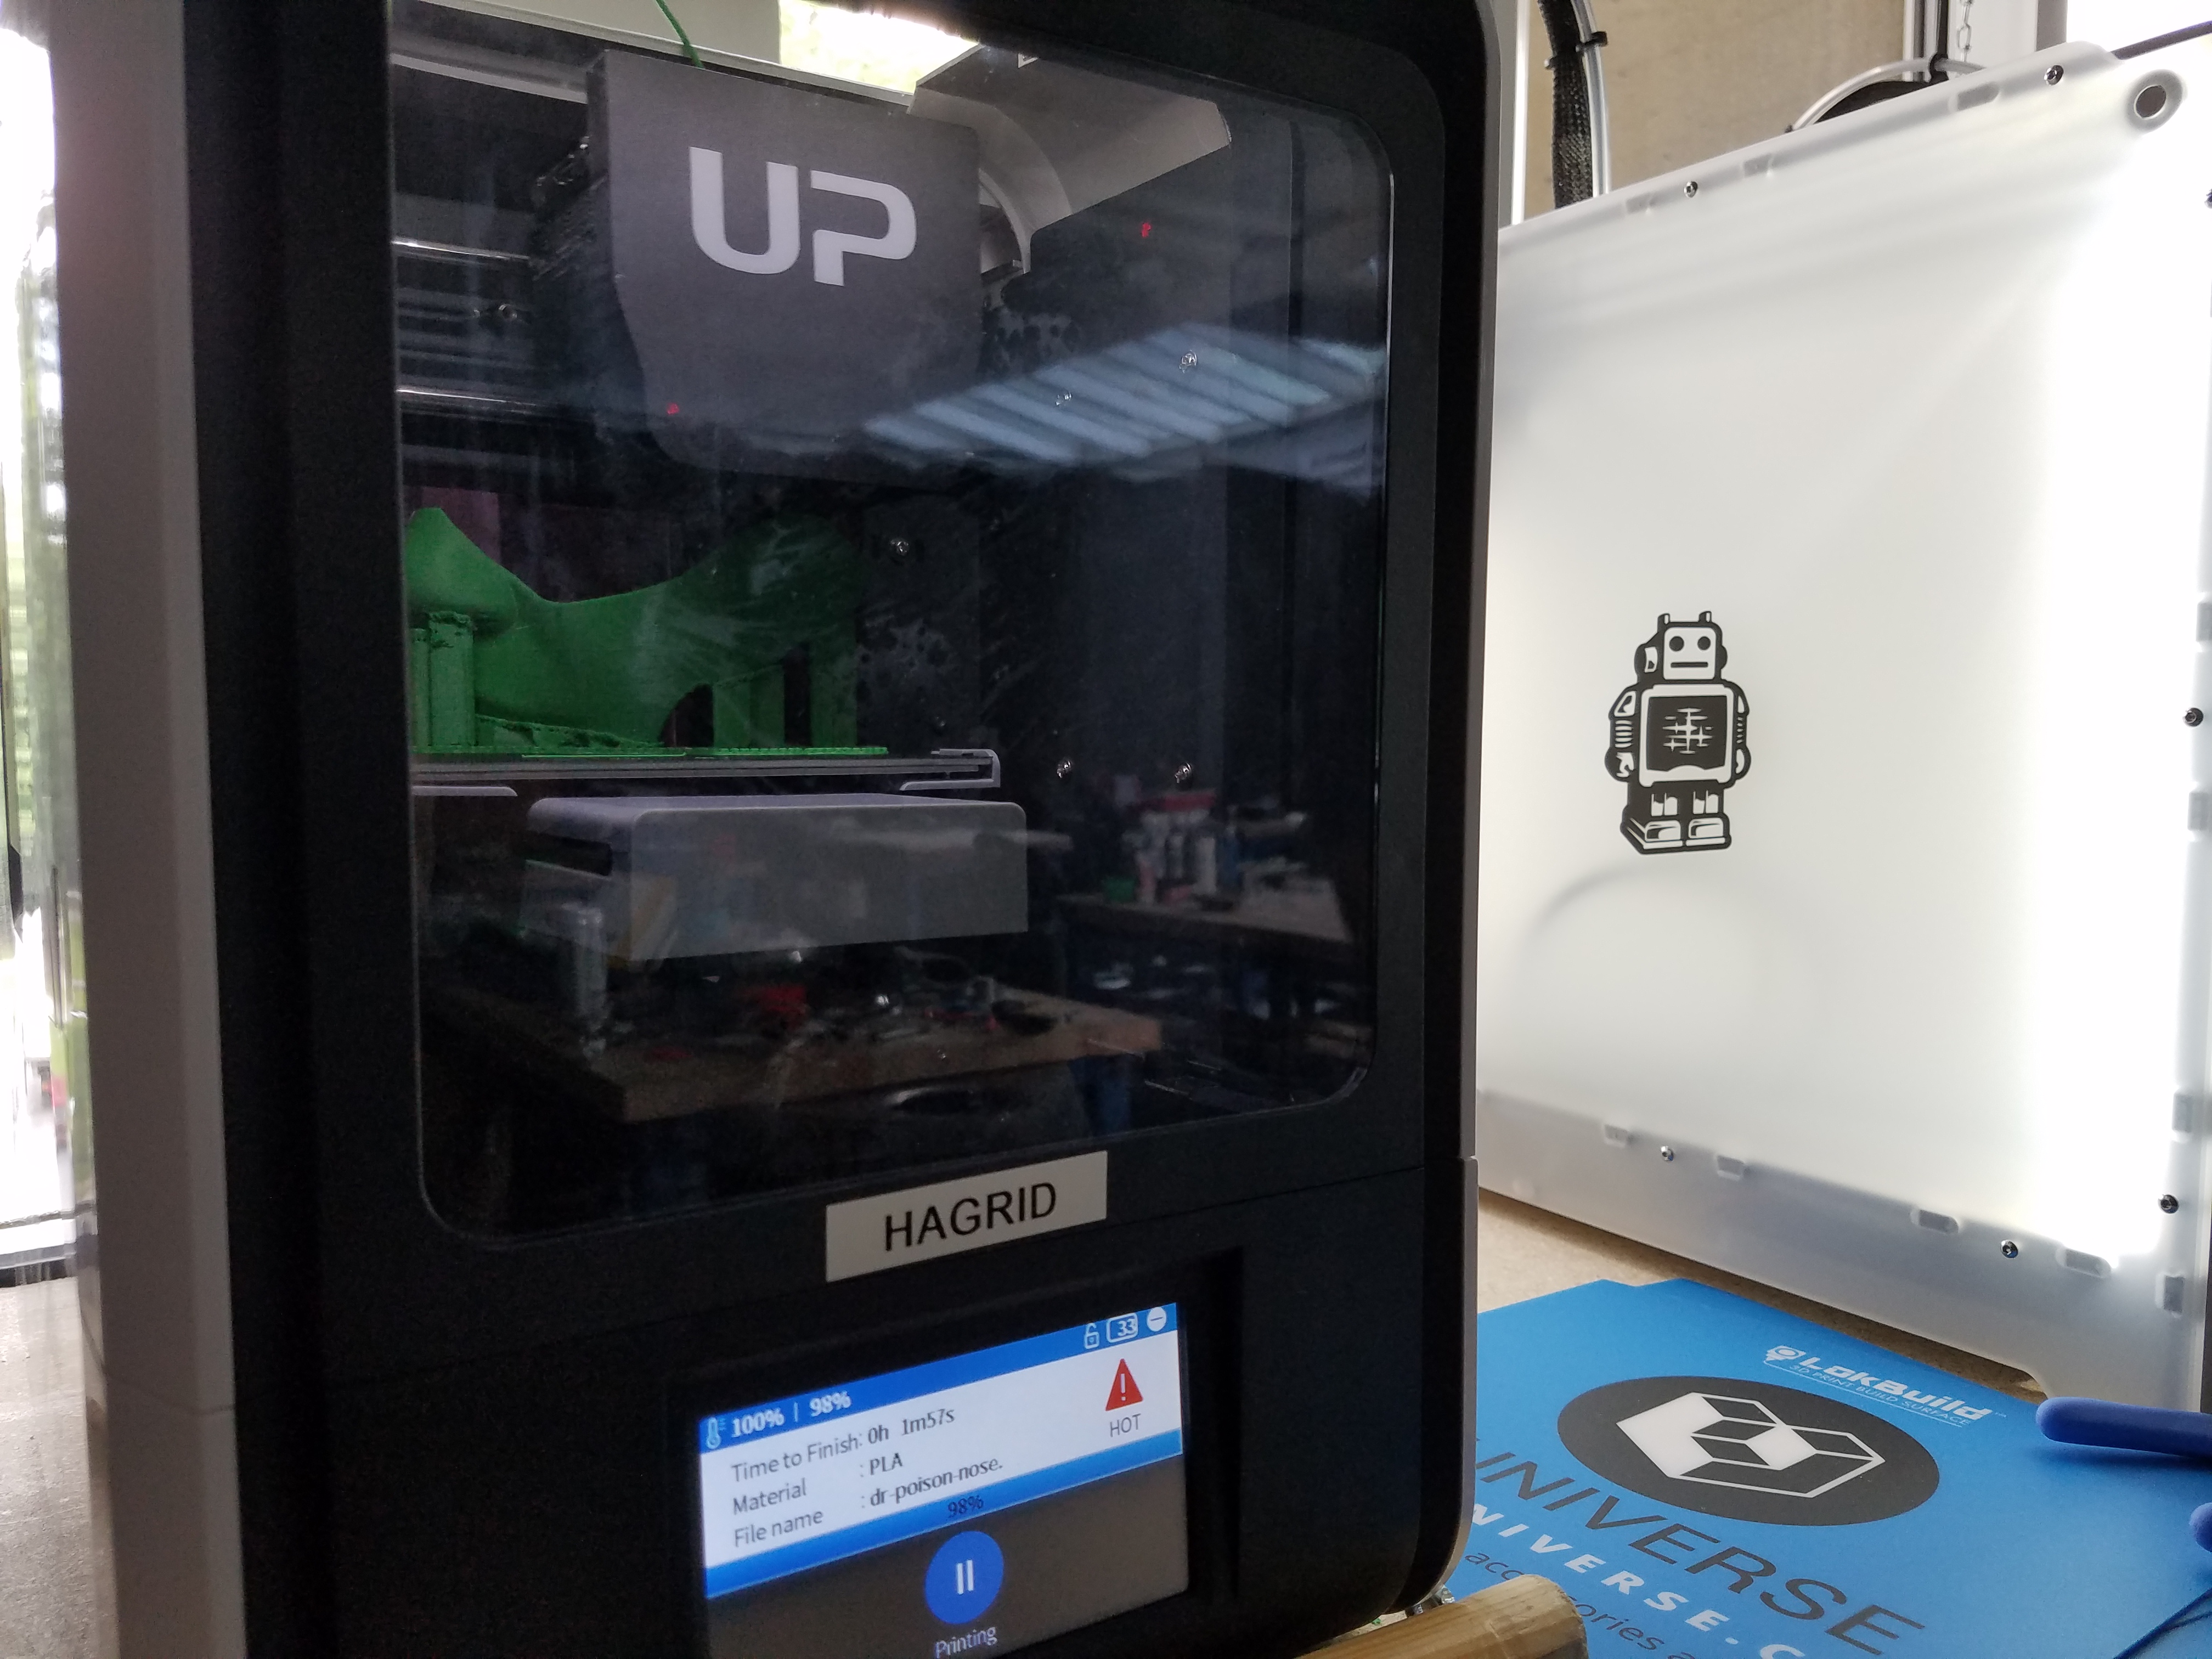
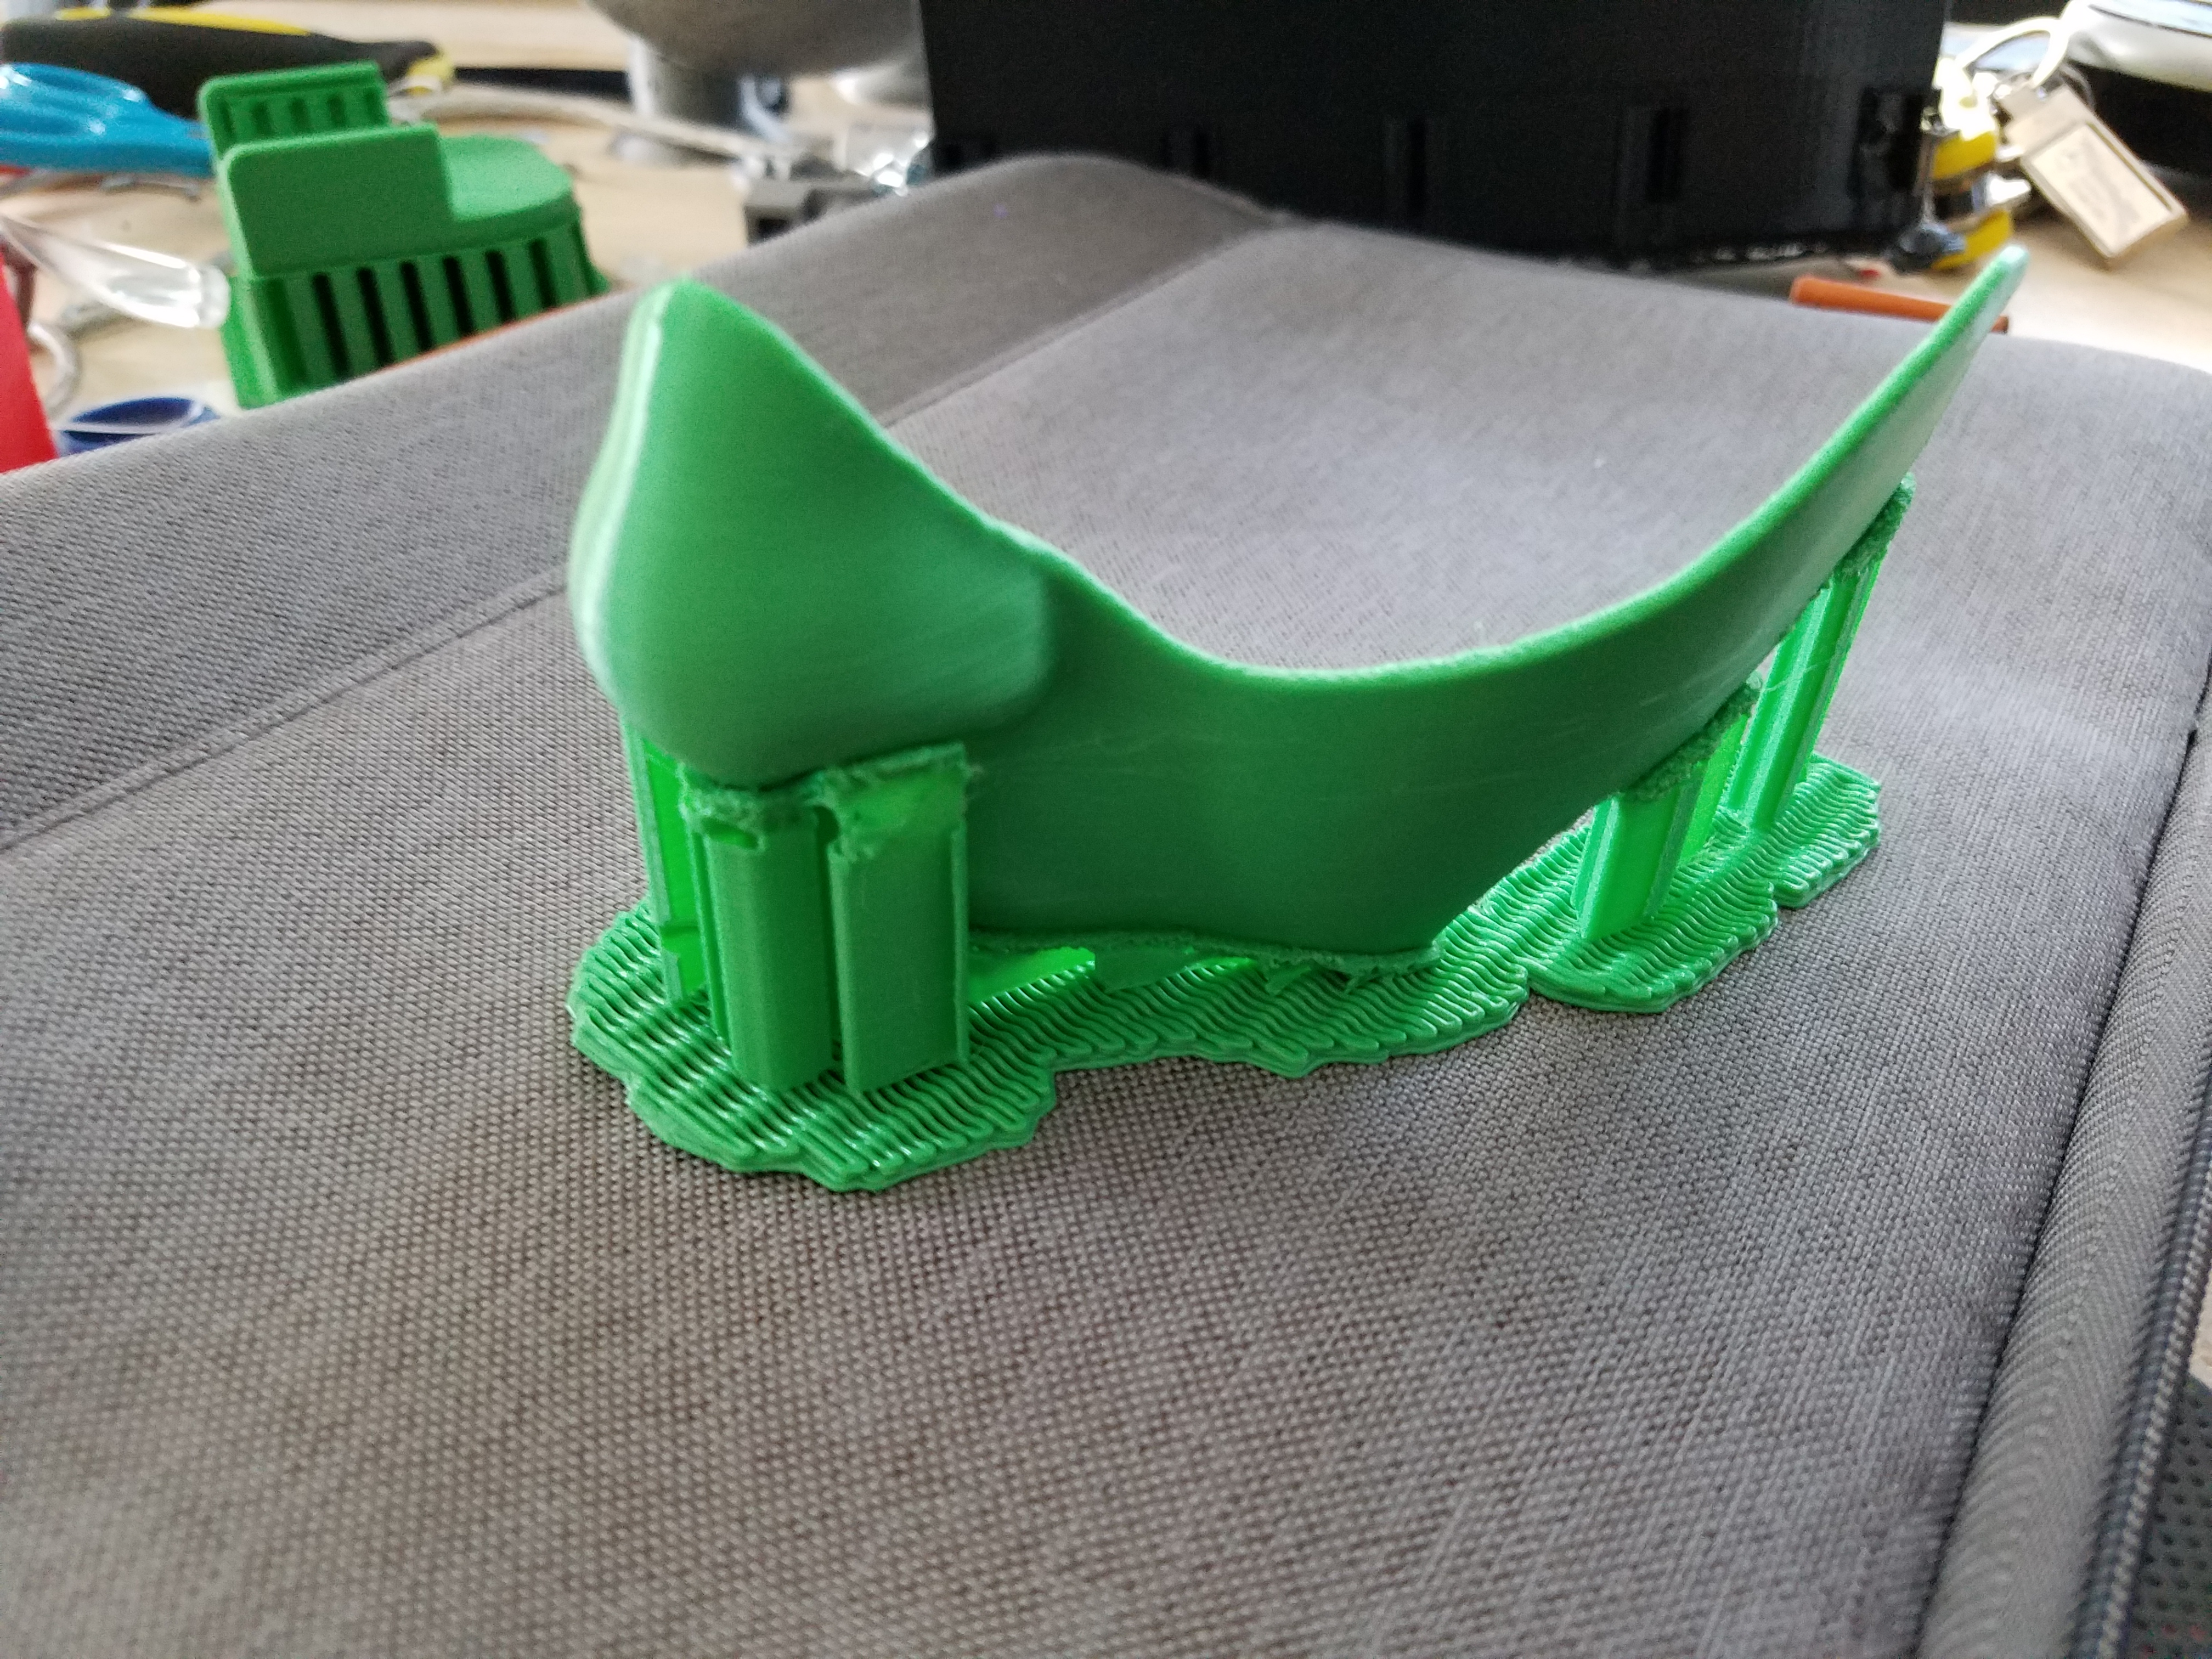
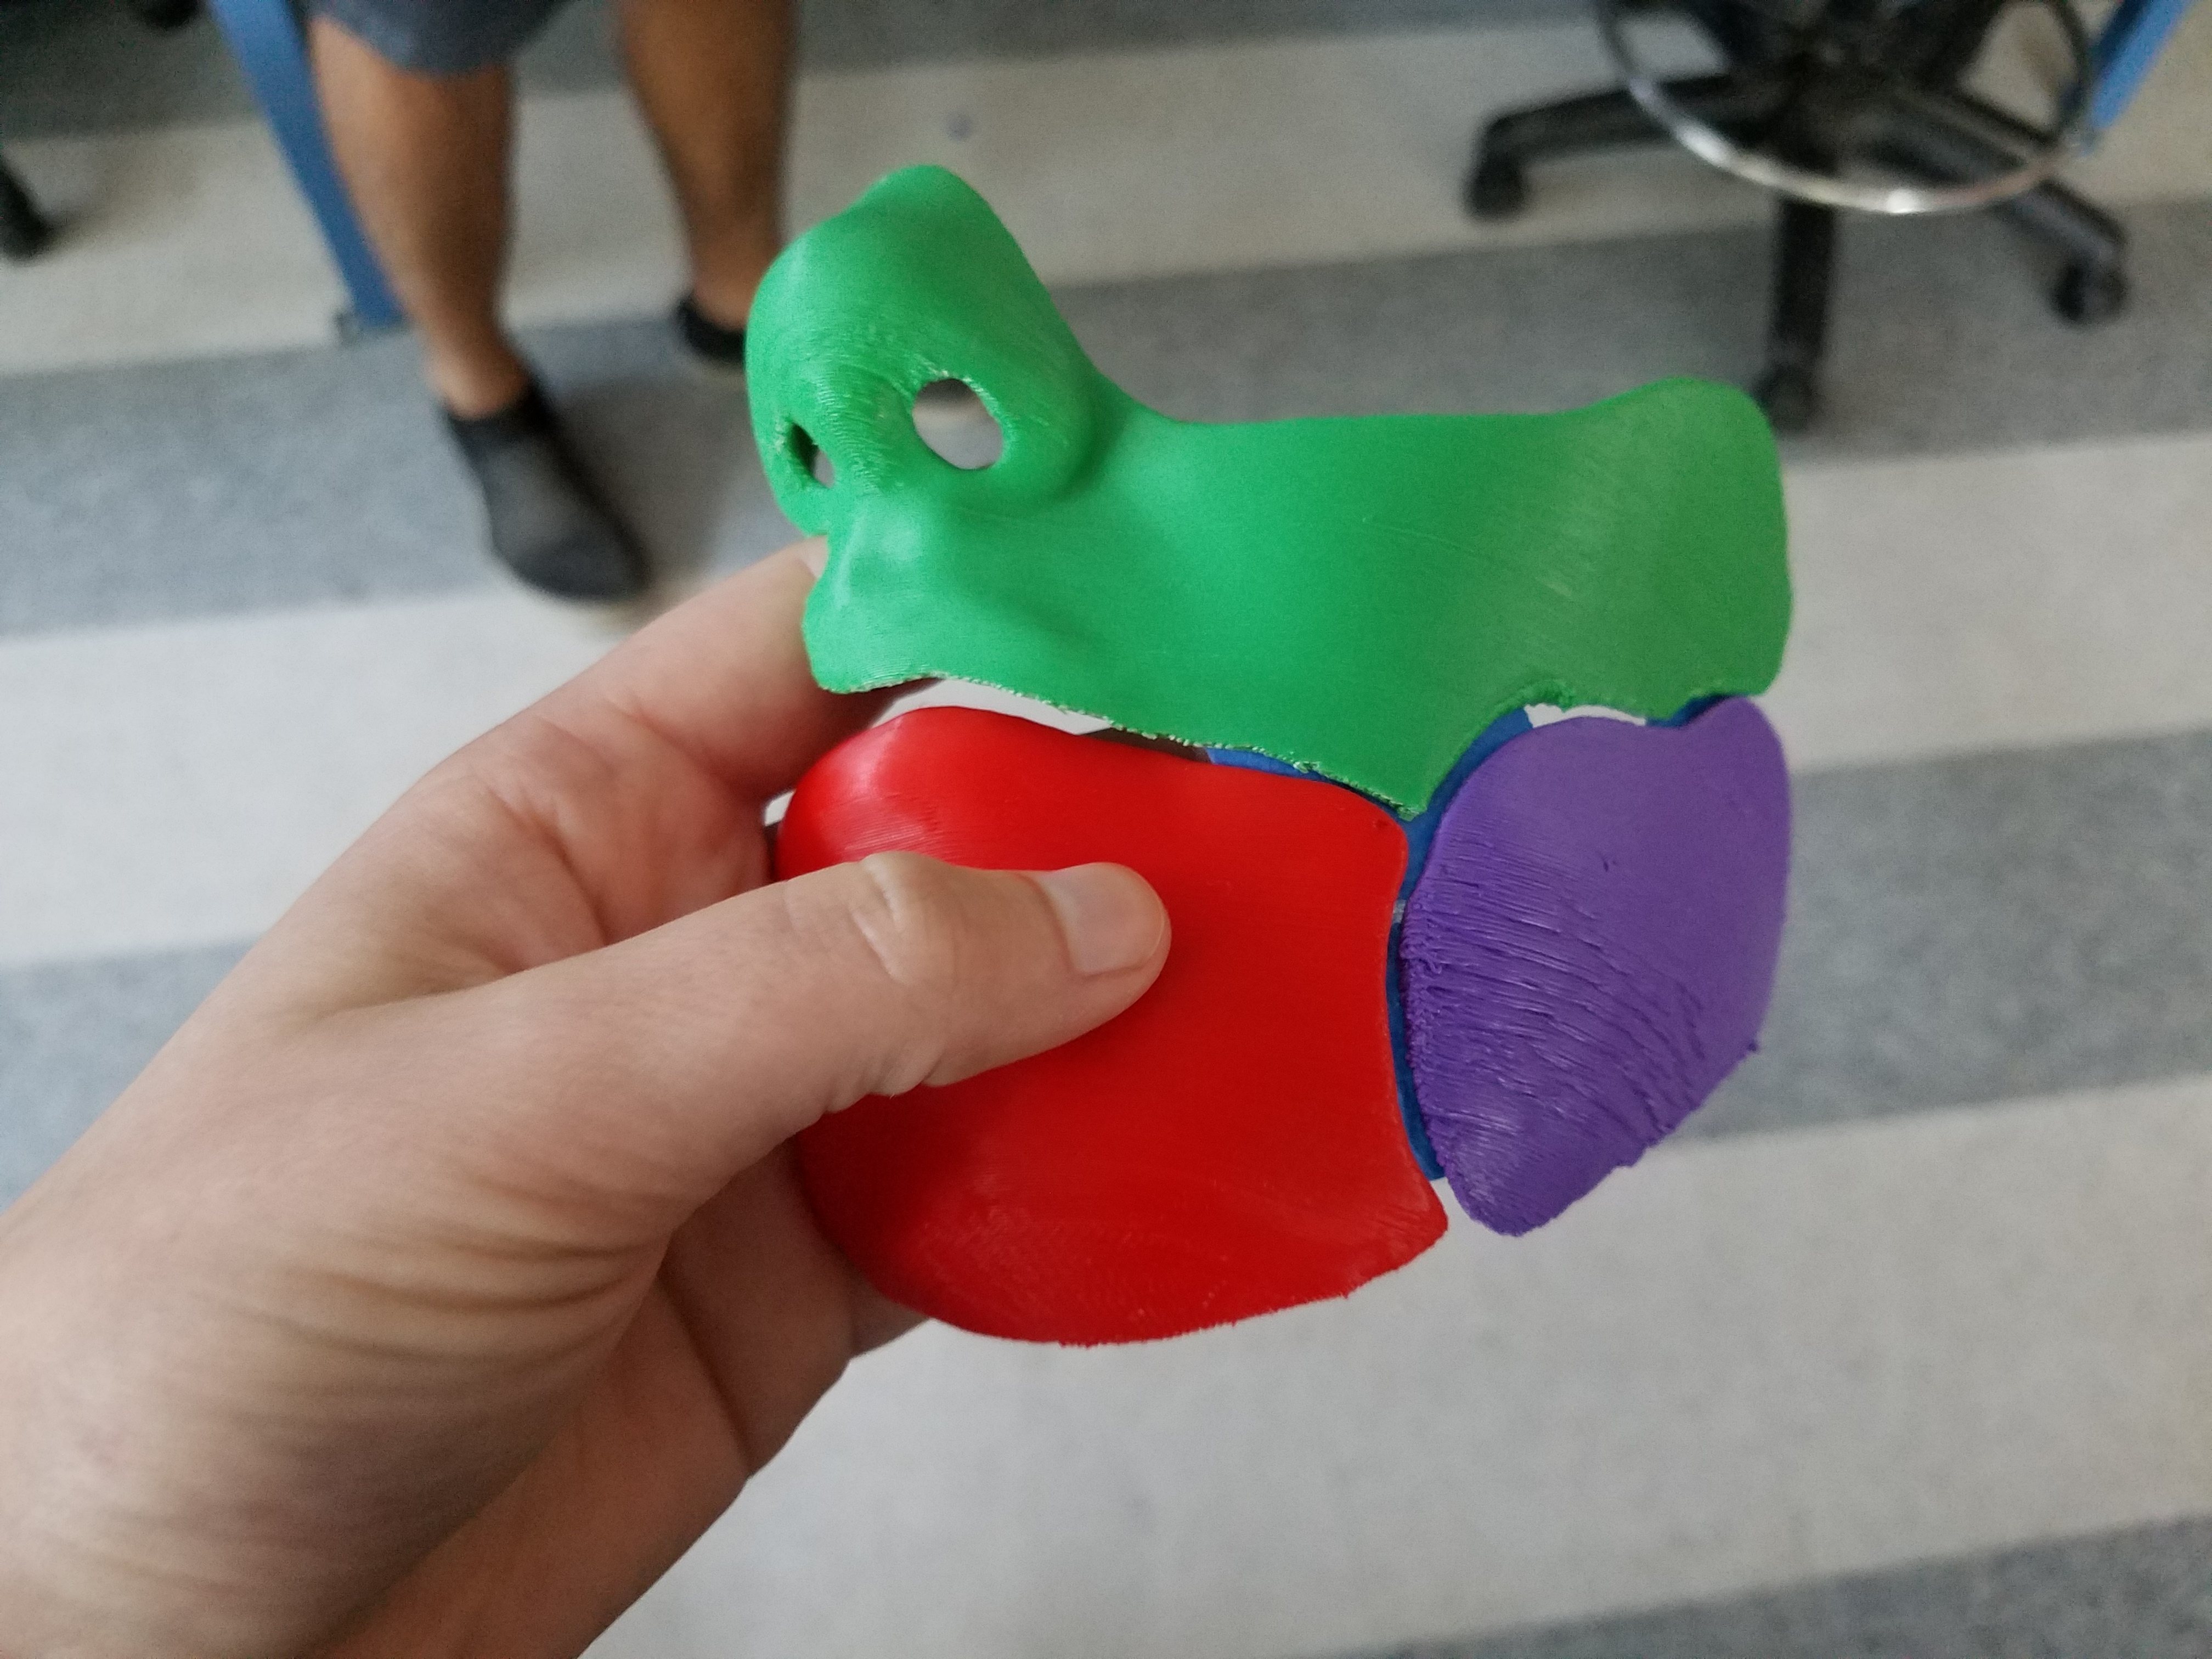
Print out each part individually, and also clean all the support material off of the pieces.
Prime and Sand... and Prime Again.
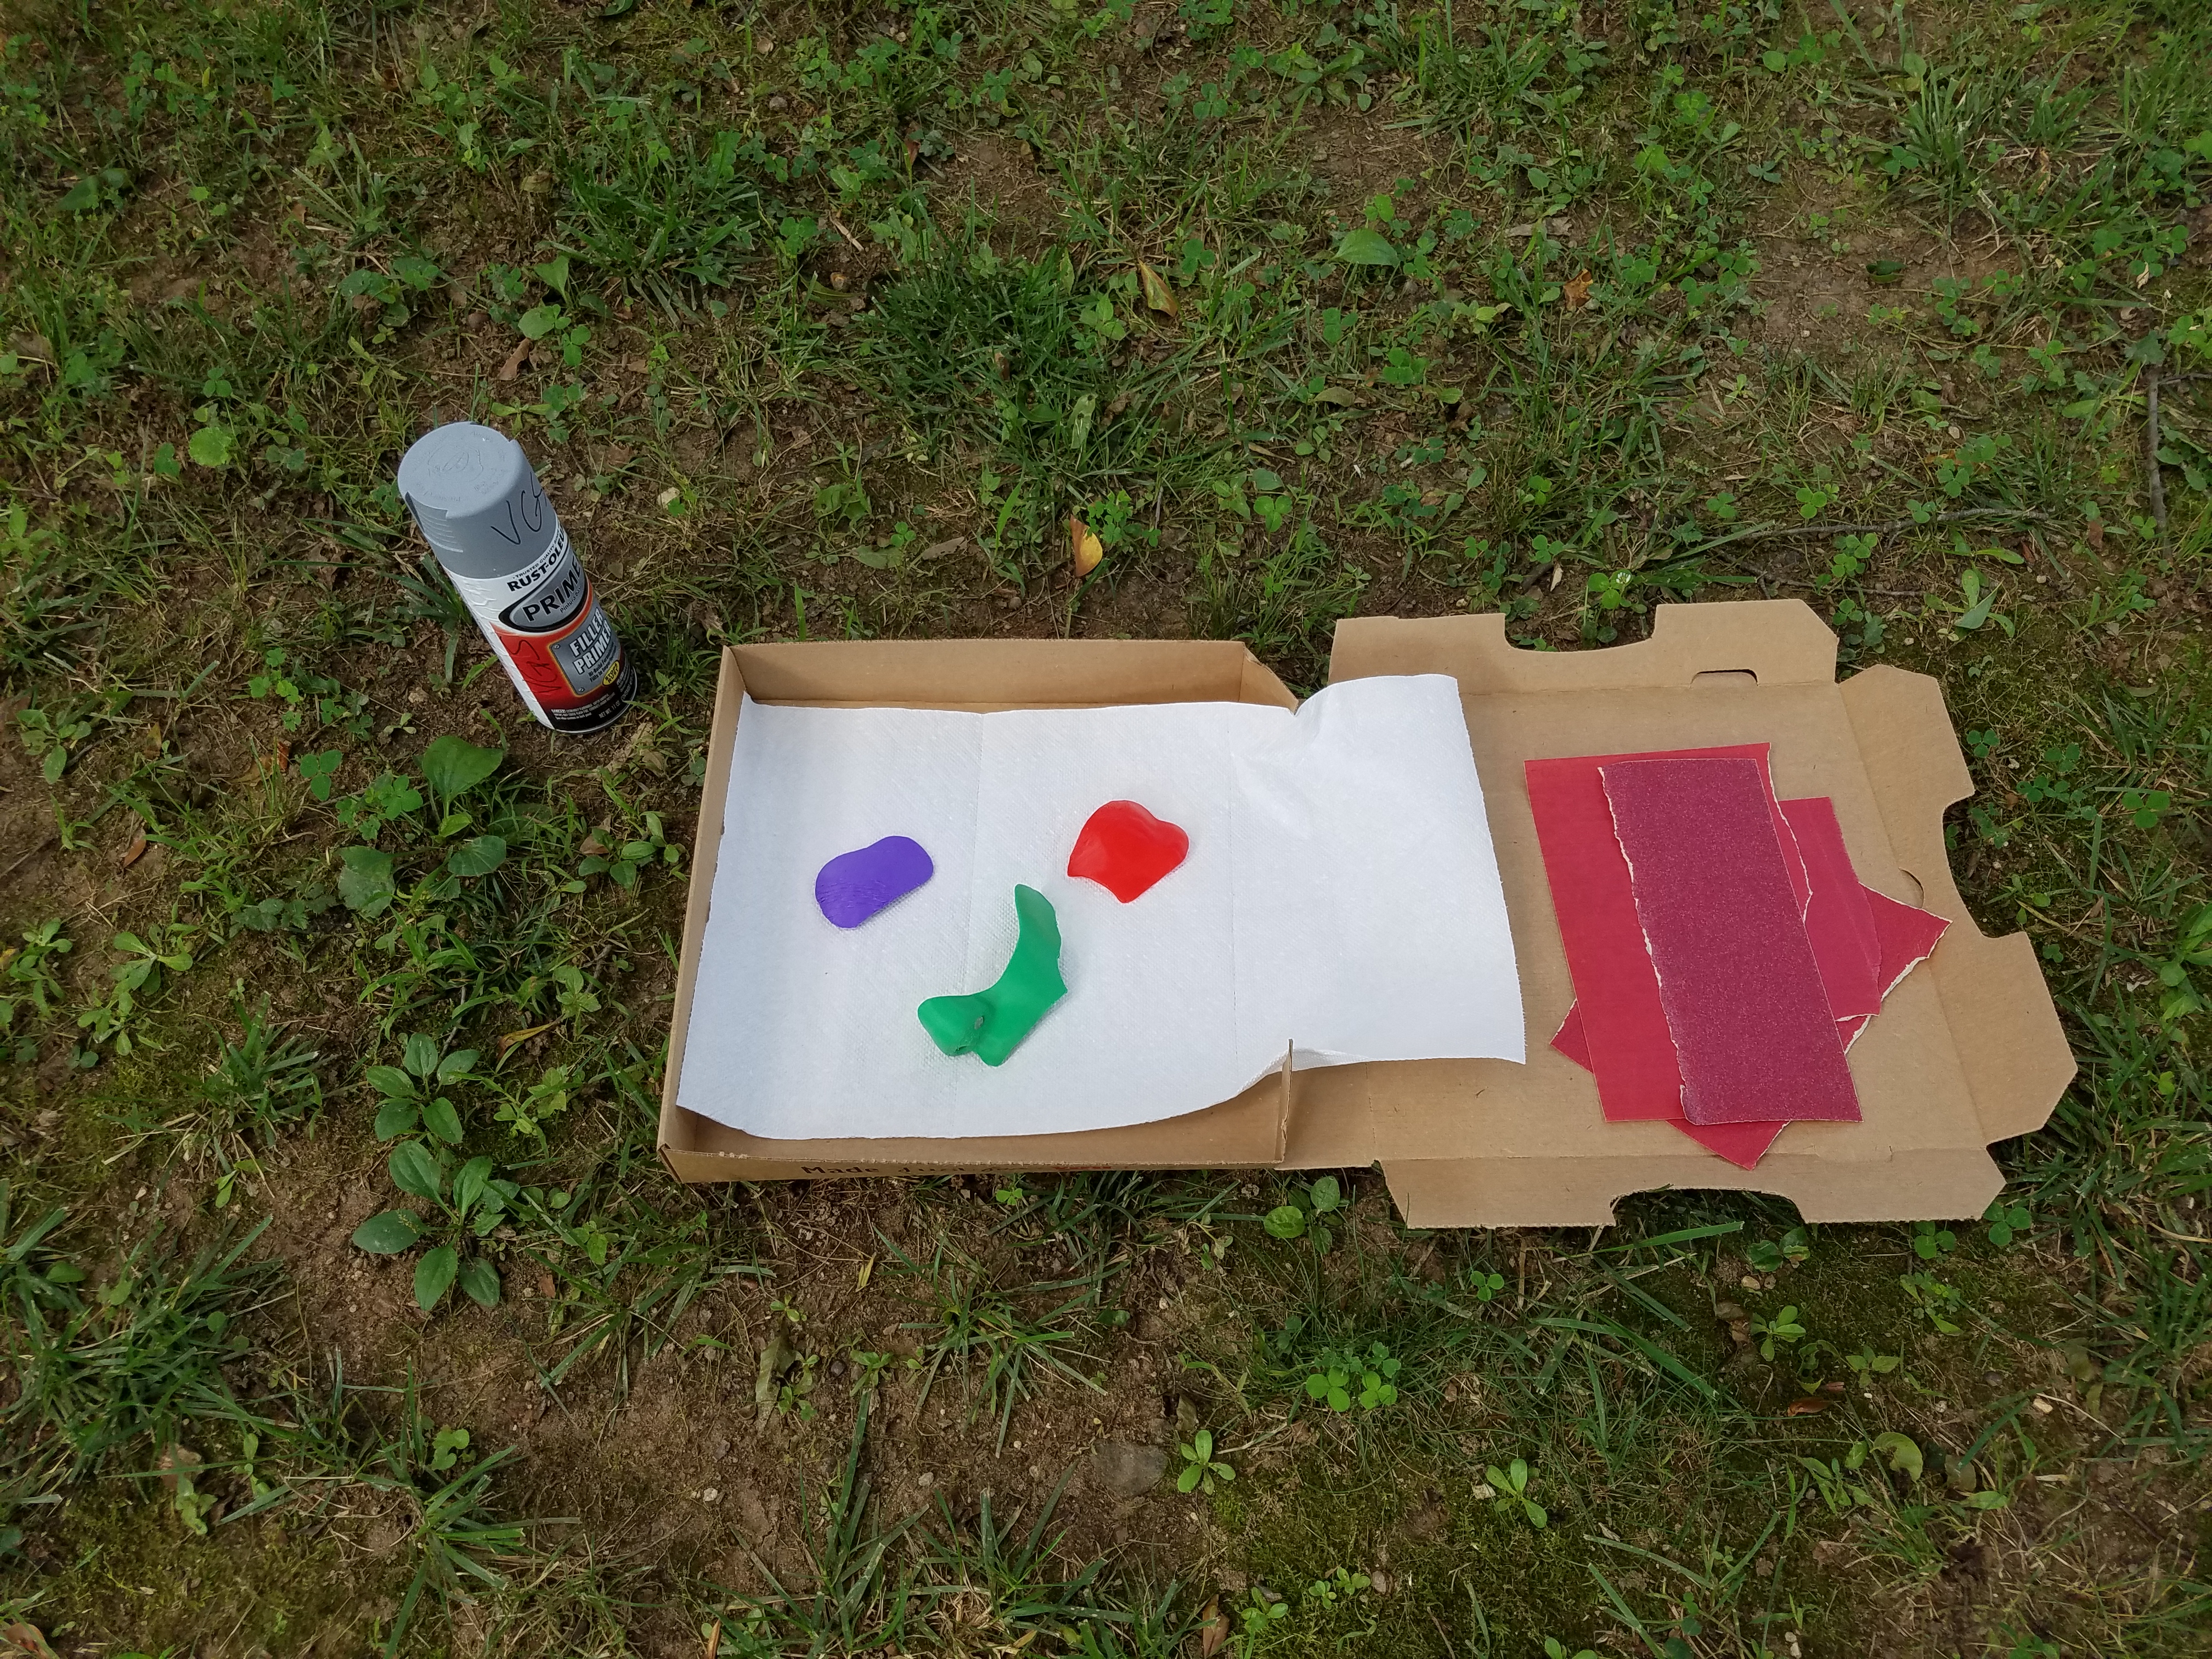
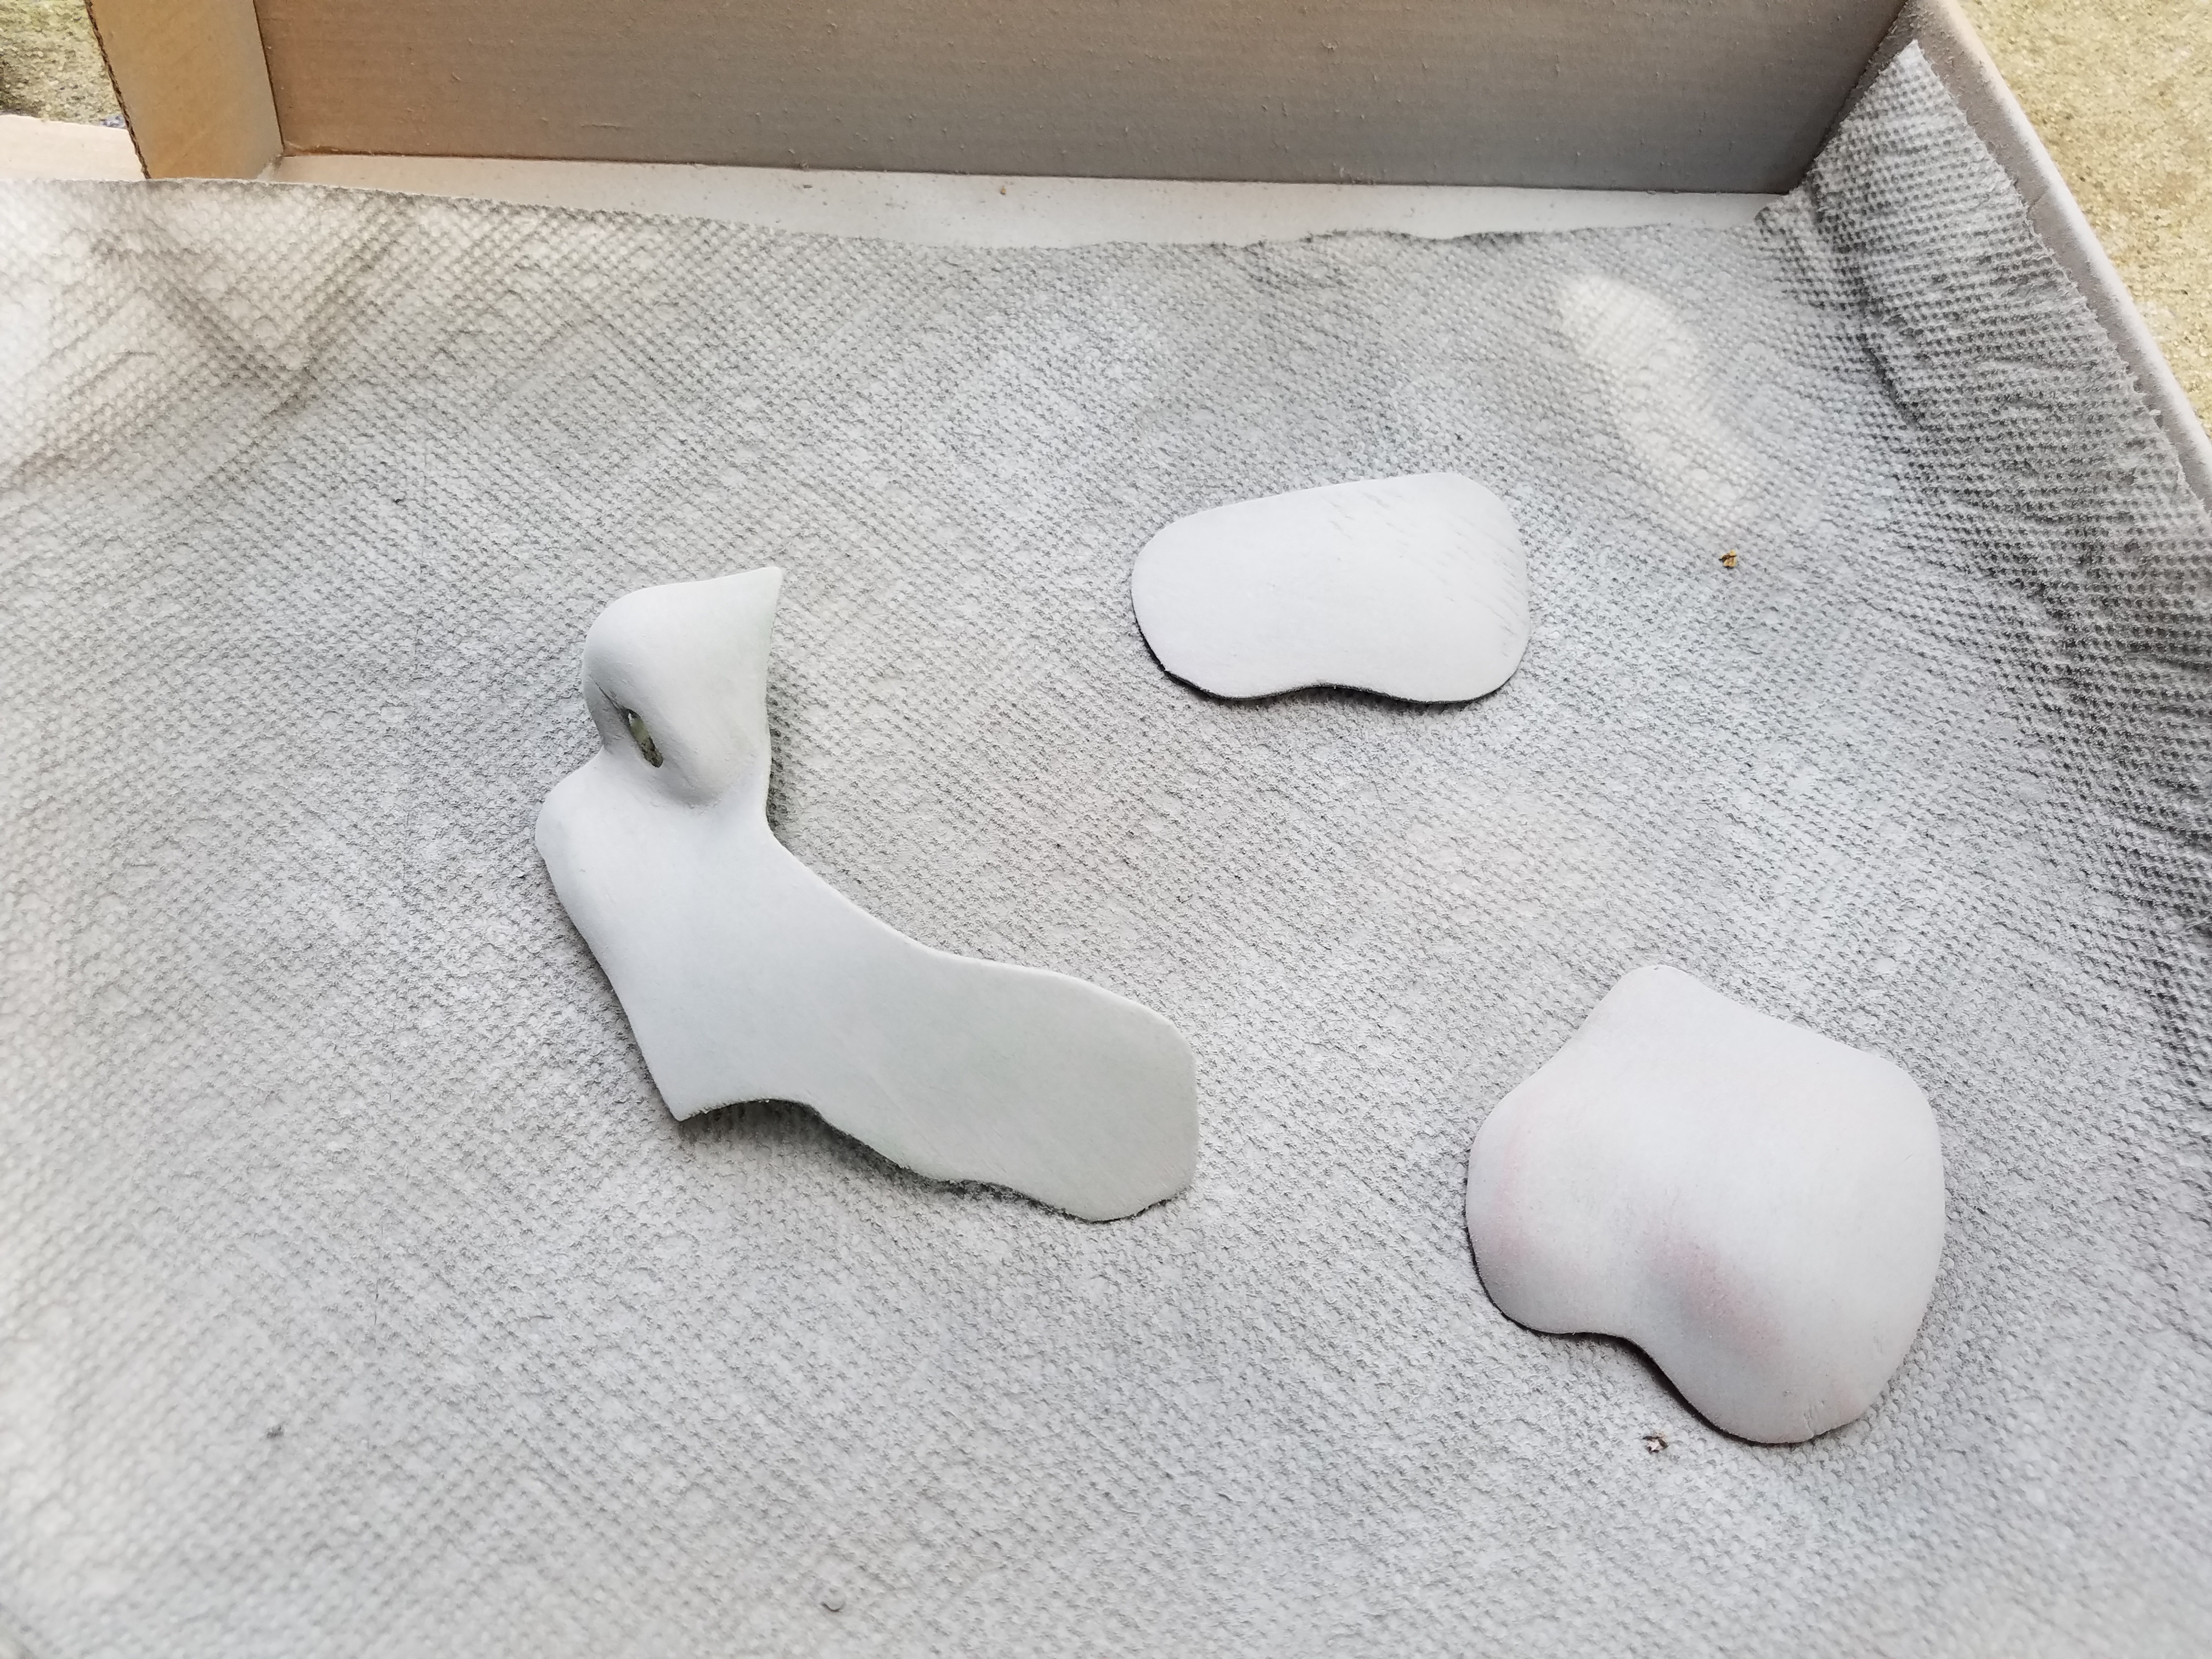
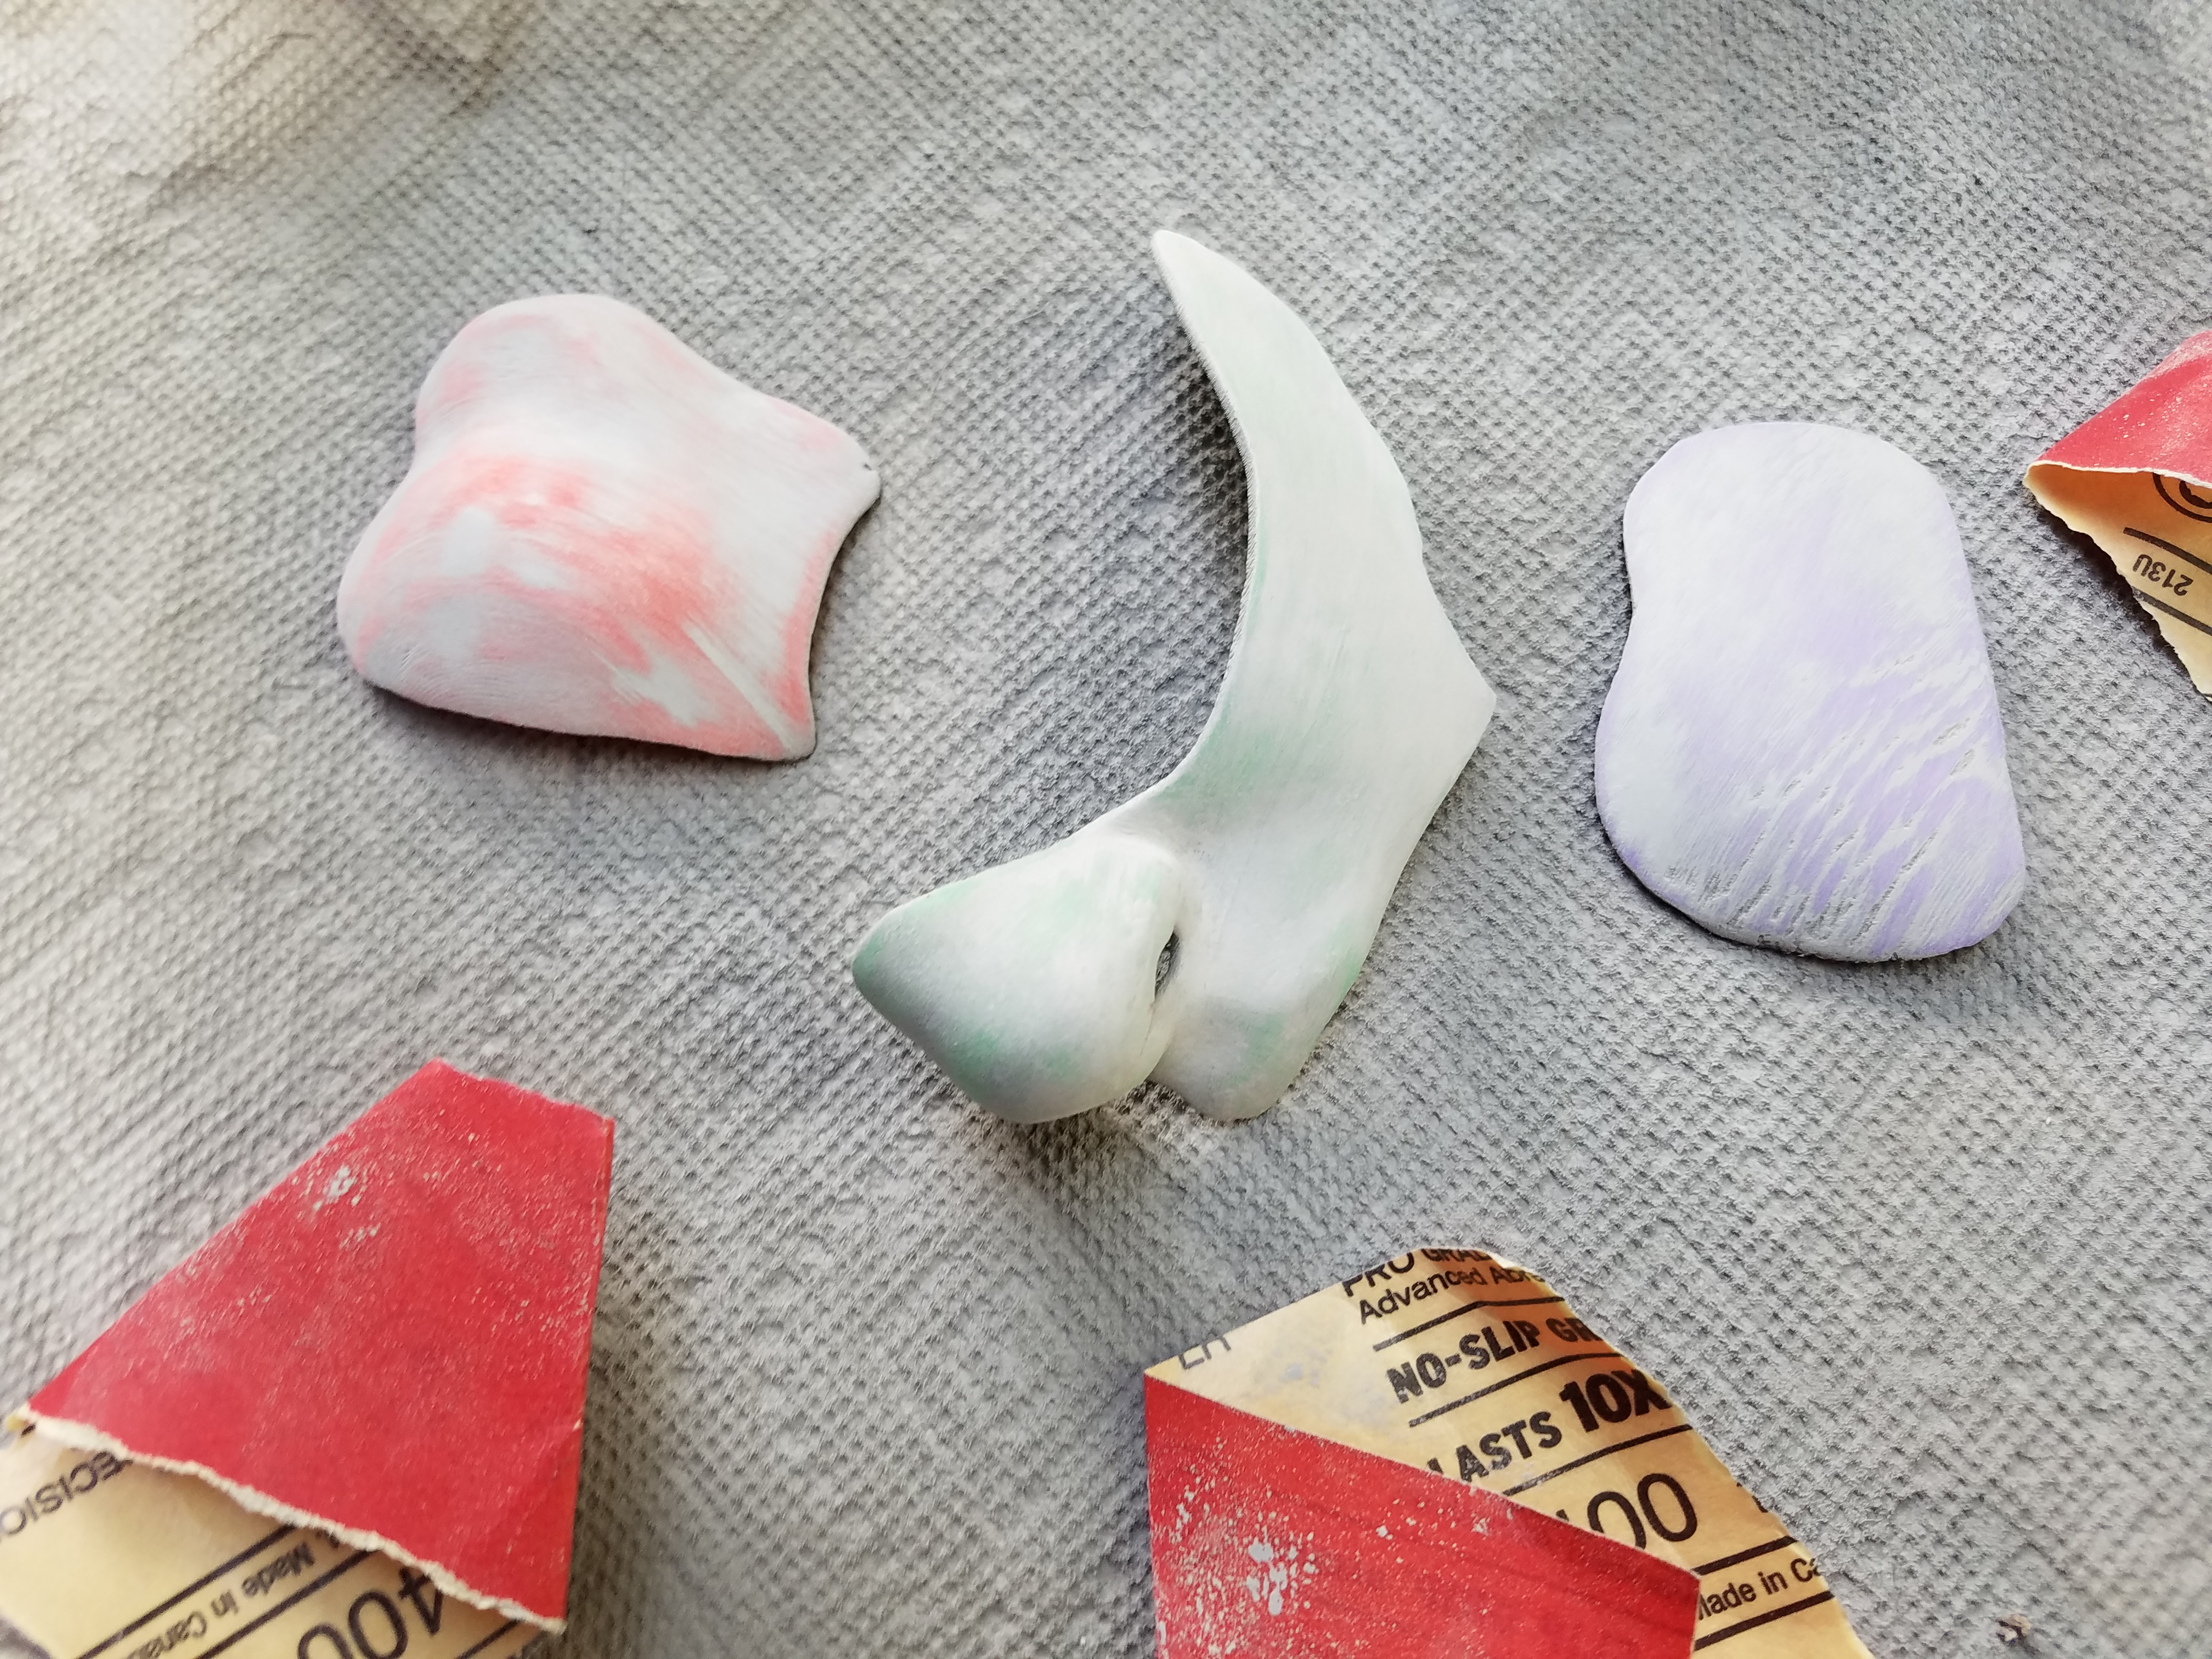
I did about 6 or 7 coats of primer filler. In between each coat, I sanded down the models. I got everything to 400 grit.
Rig It Up!
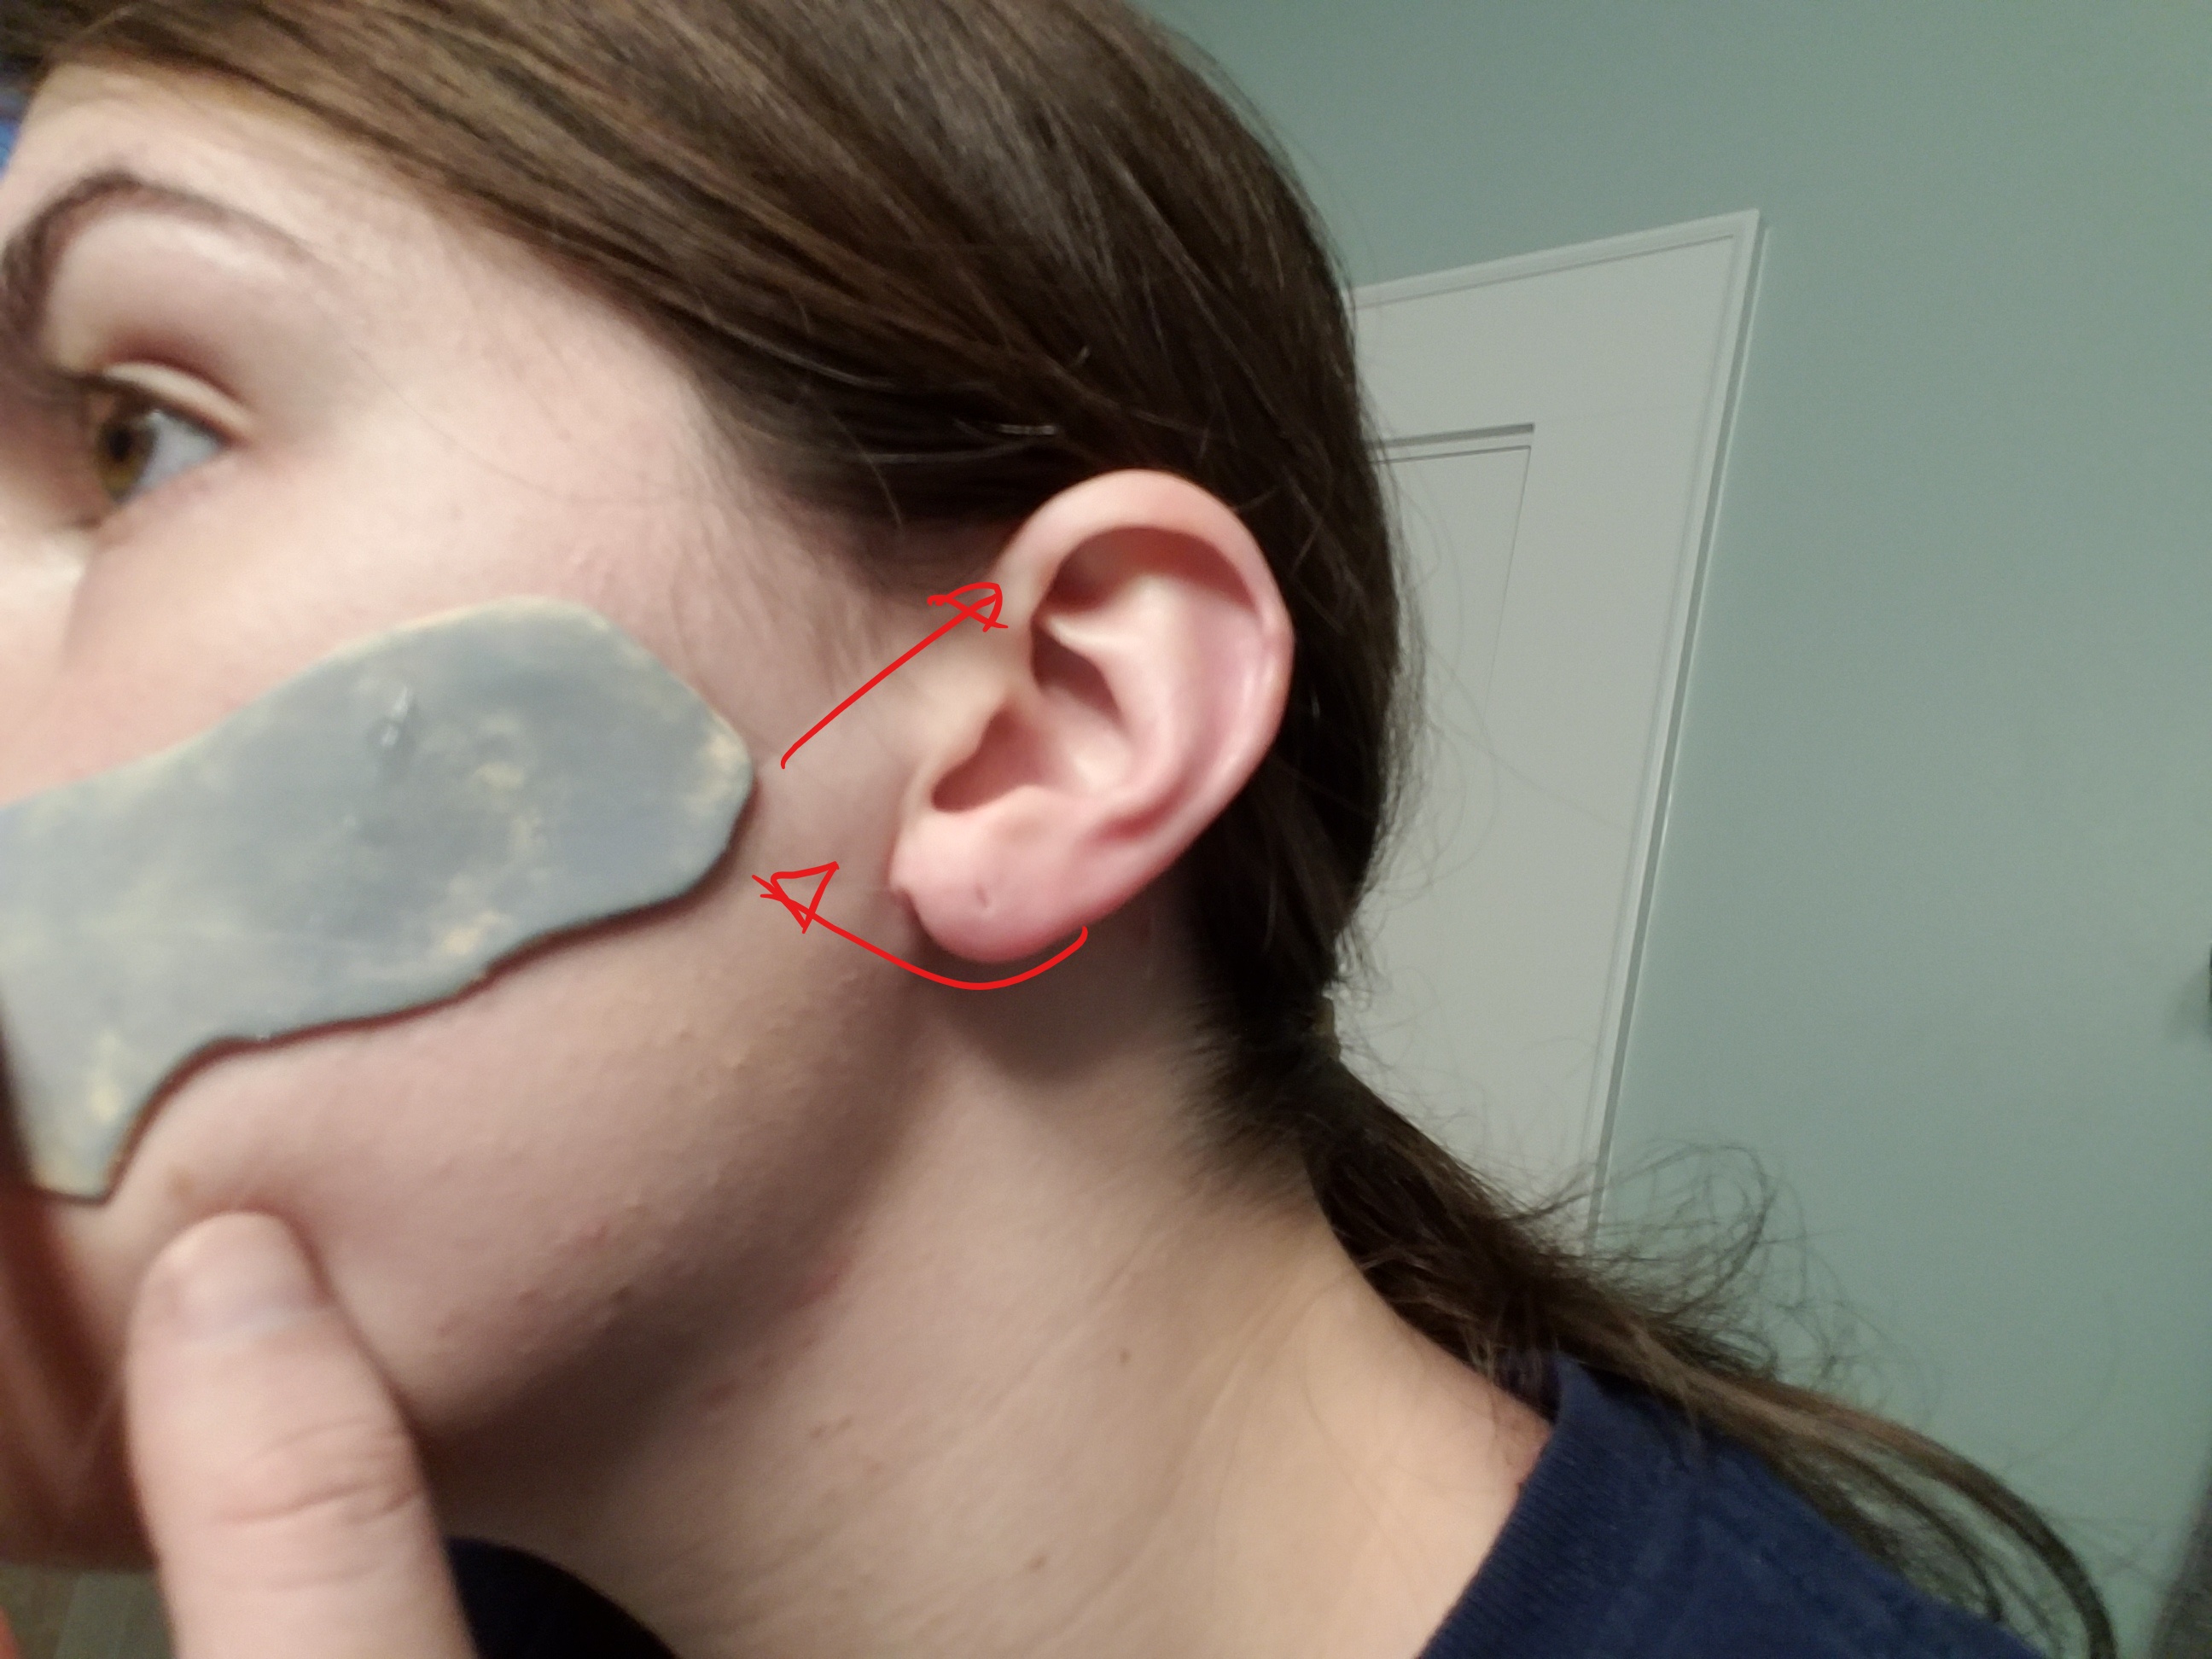
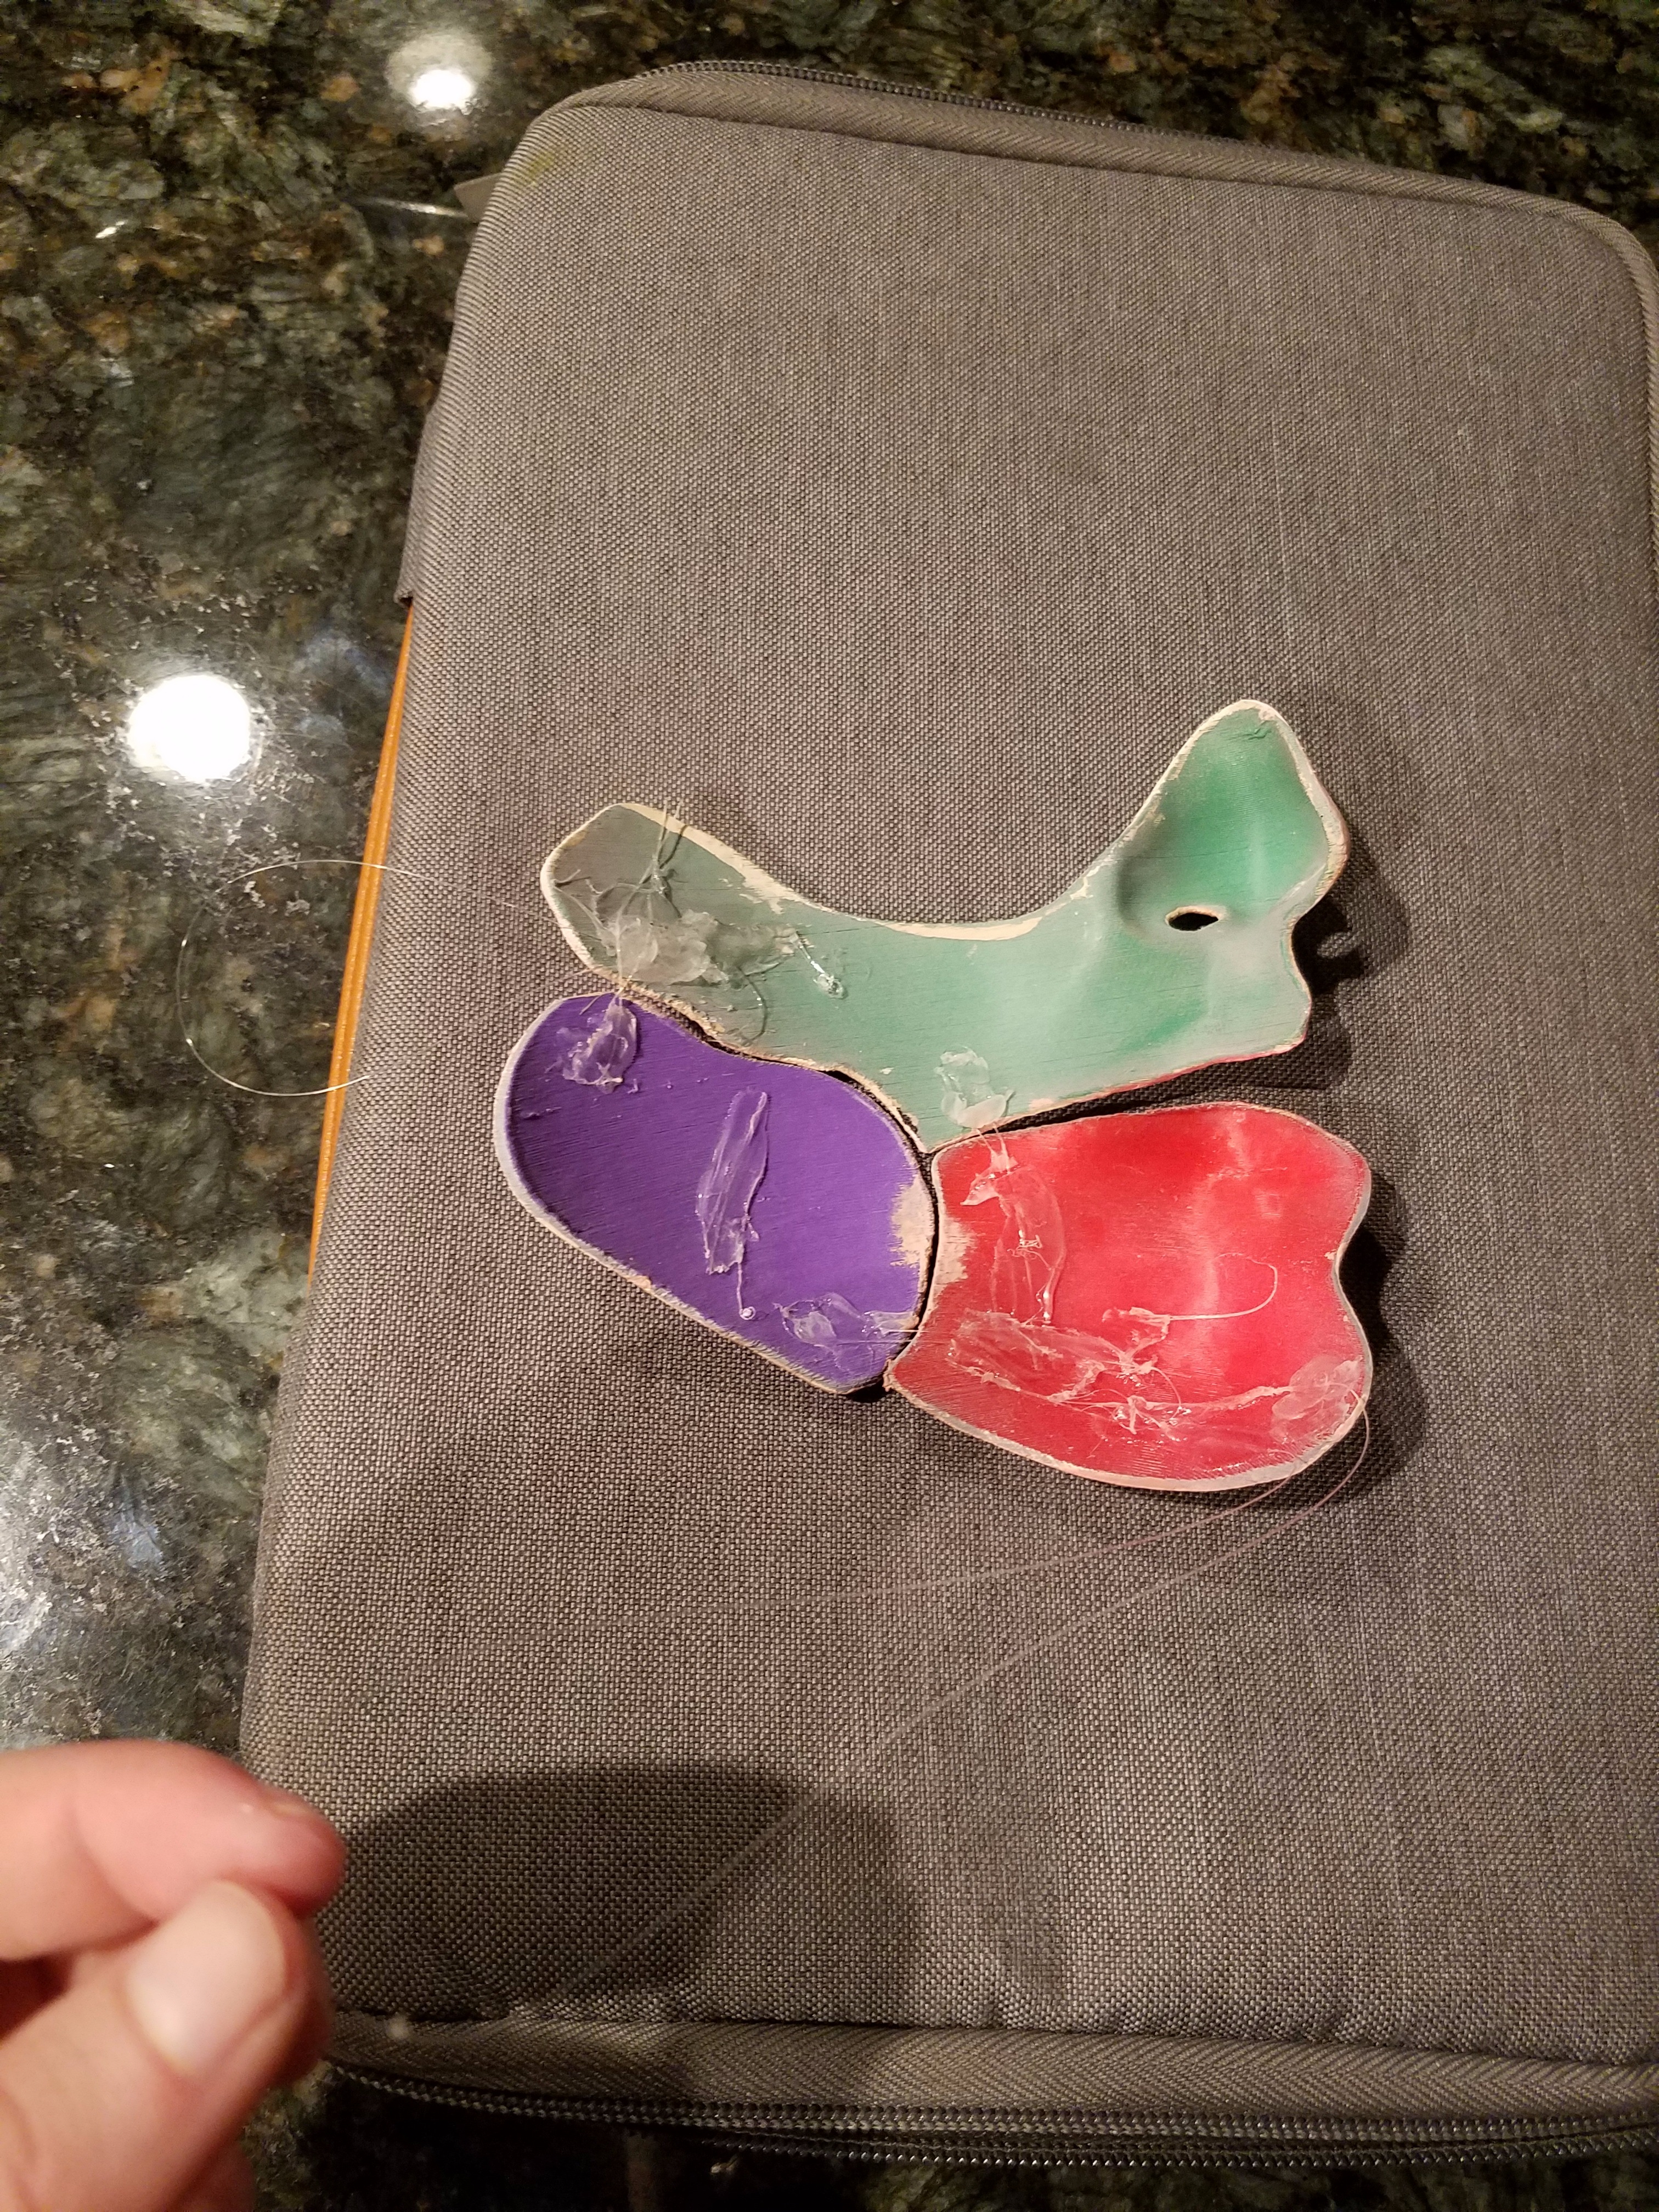
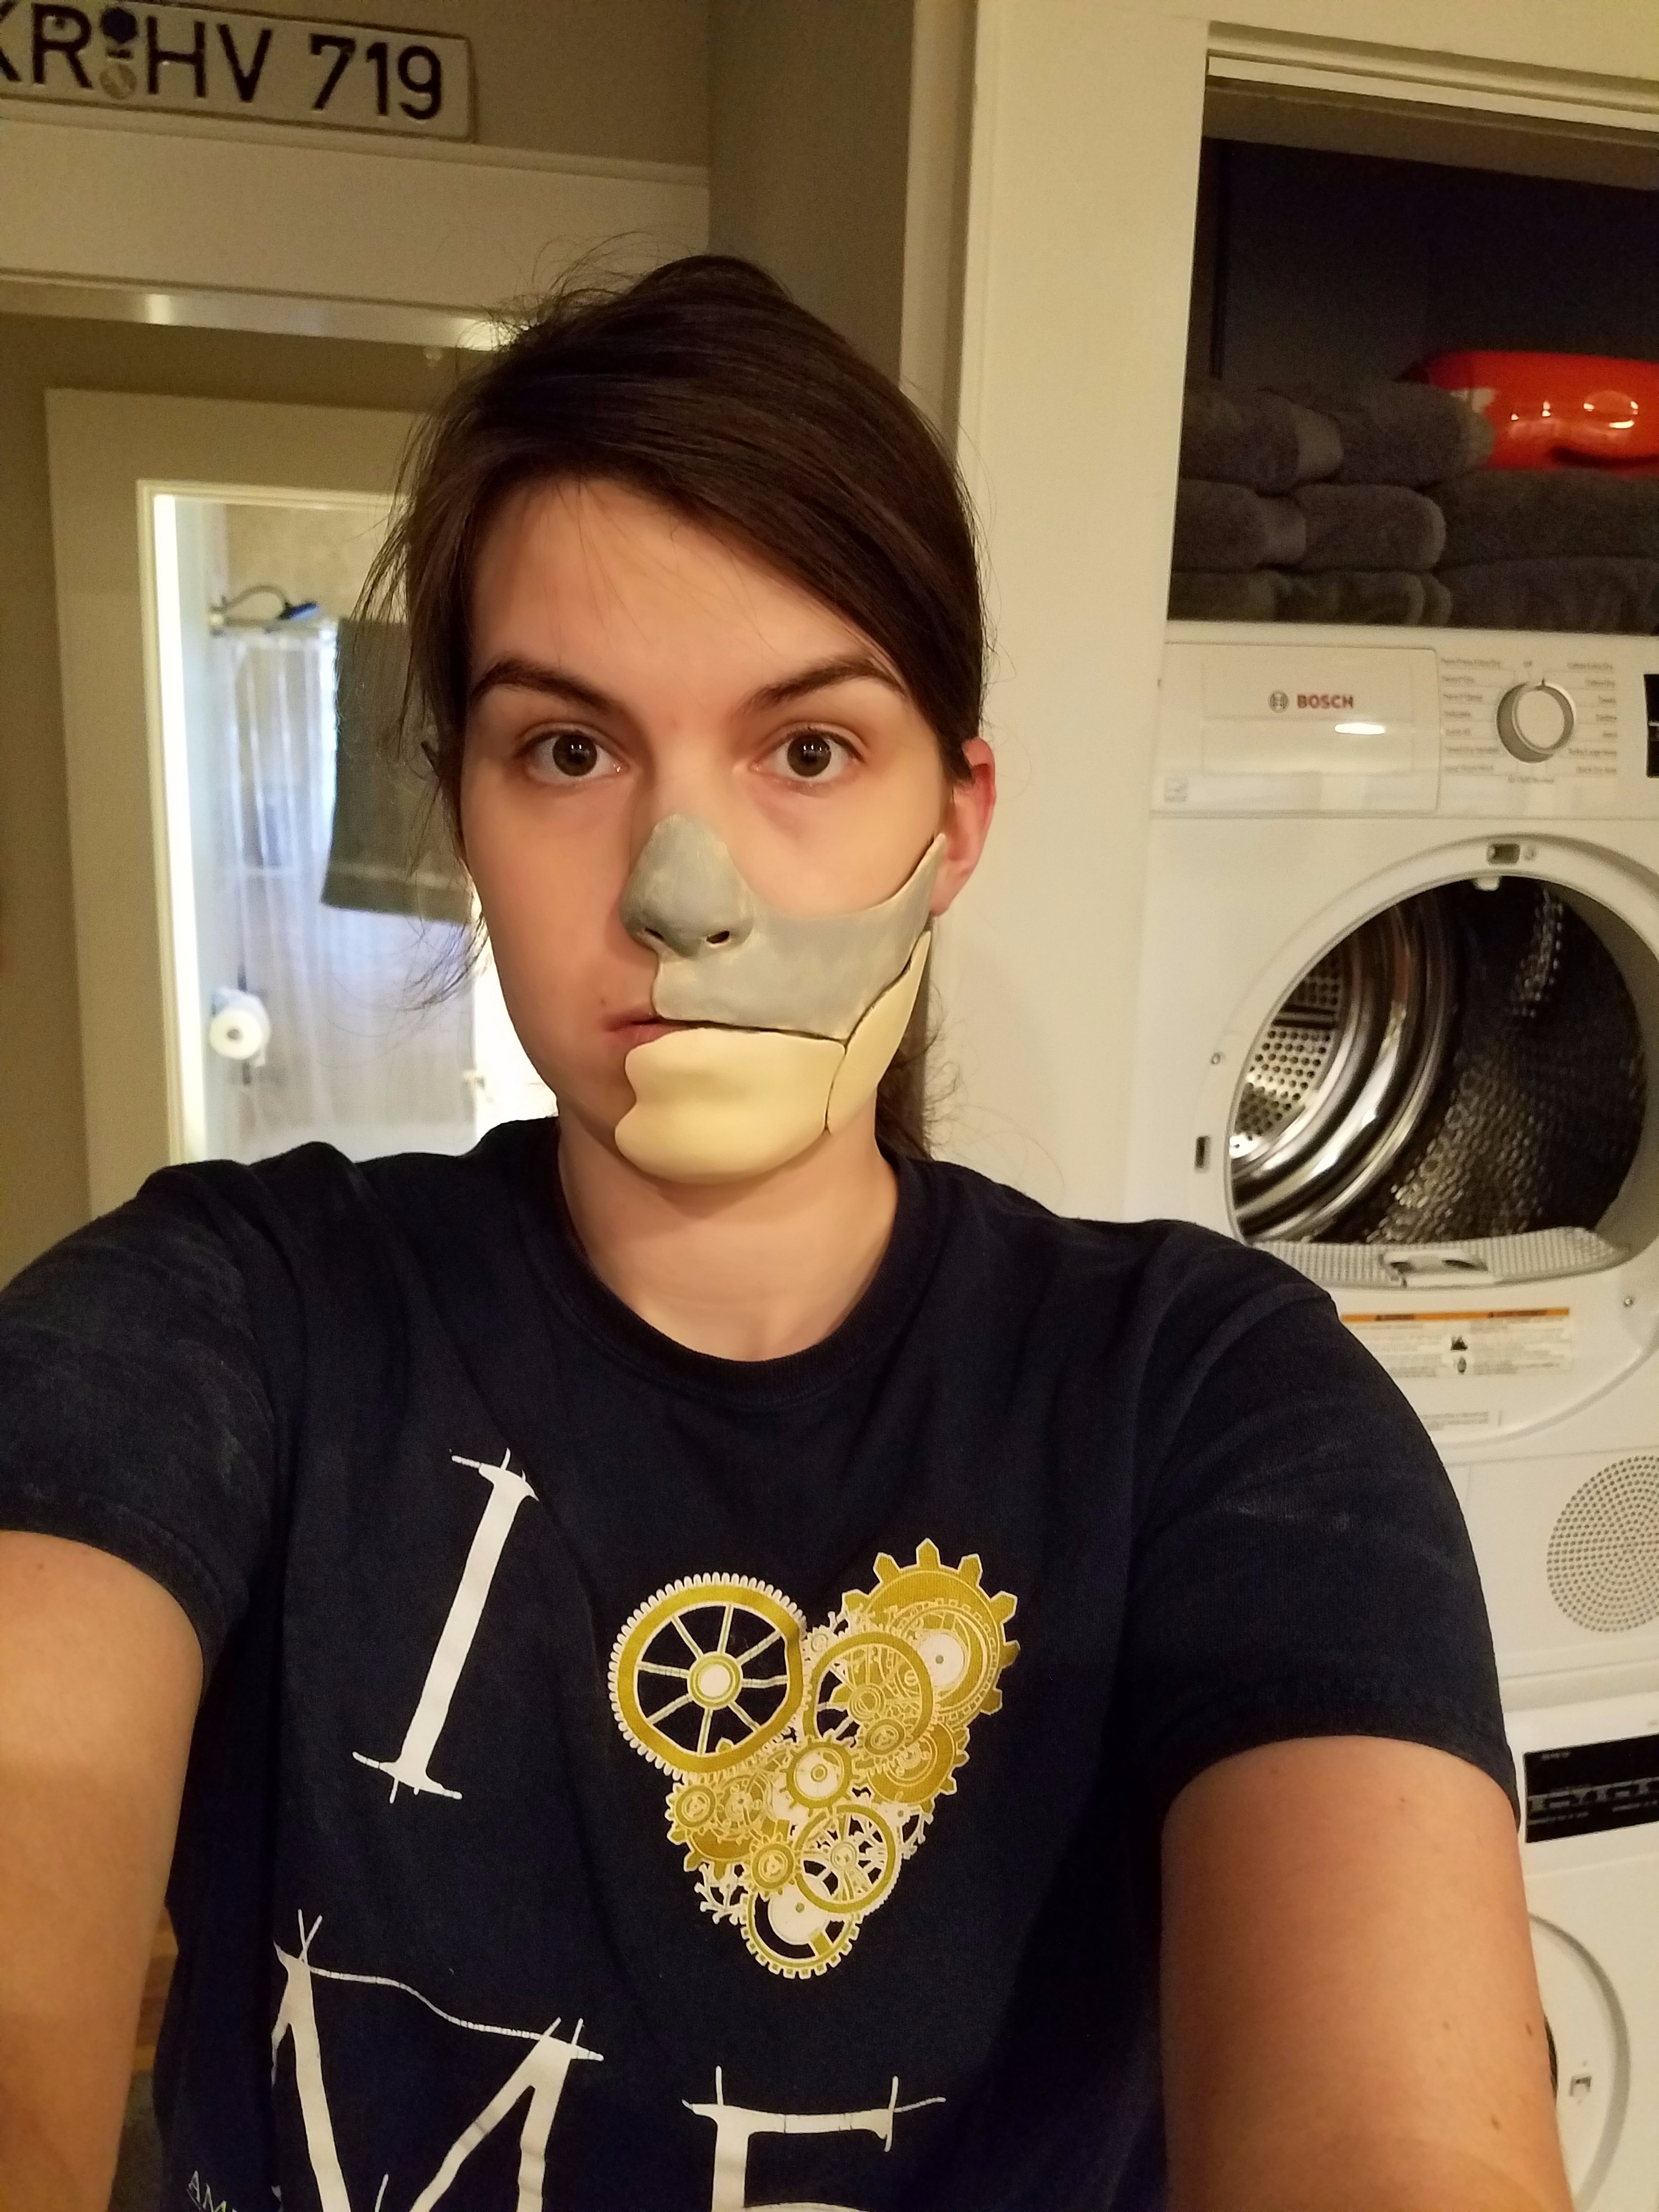
Originally, I expected to do the rigging last, after the painting. Then I disastrously tried blending to match my face color without the mask being on my face. You should almost definitely do the rigging first.
I ended up making 5 loops out of fishing line. This is definitely a trial and error process, but here's the order that I did the loops in.
- Fit the loop behind my left ear to hold the nose/cheek piece on my face. This is shown in the first picture.
- Attach the chin and the nose piece with a loop at the corner of the mouth.
- Fit a loop behind your right ear, from the chin piece. The loop should be long enough to fit underneath your chin/right jaw.
- Attach the chin to the appropriate side of the jaw.
- Attach the jaw to the nose/cheek piece.
Note: for Cons, it might be better to use spirit gum. Talking with the fishing line rig can get pretty cumbersome.
Paint and Seal!
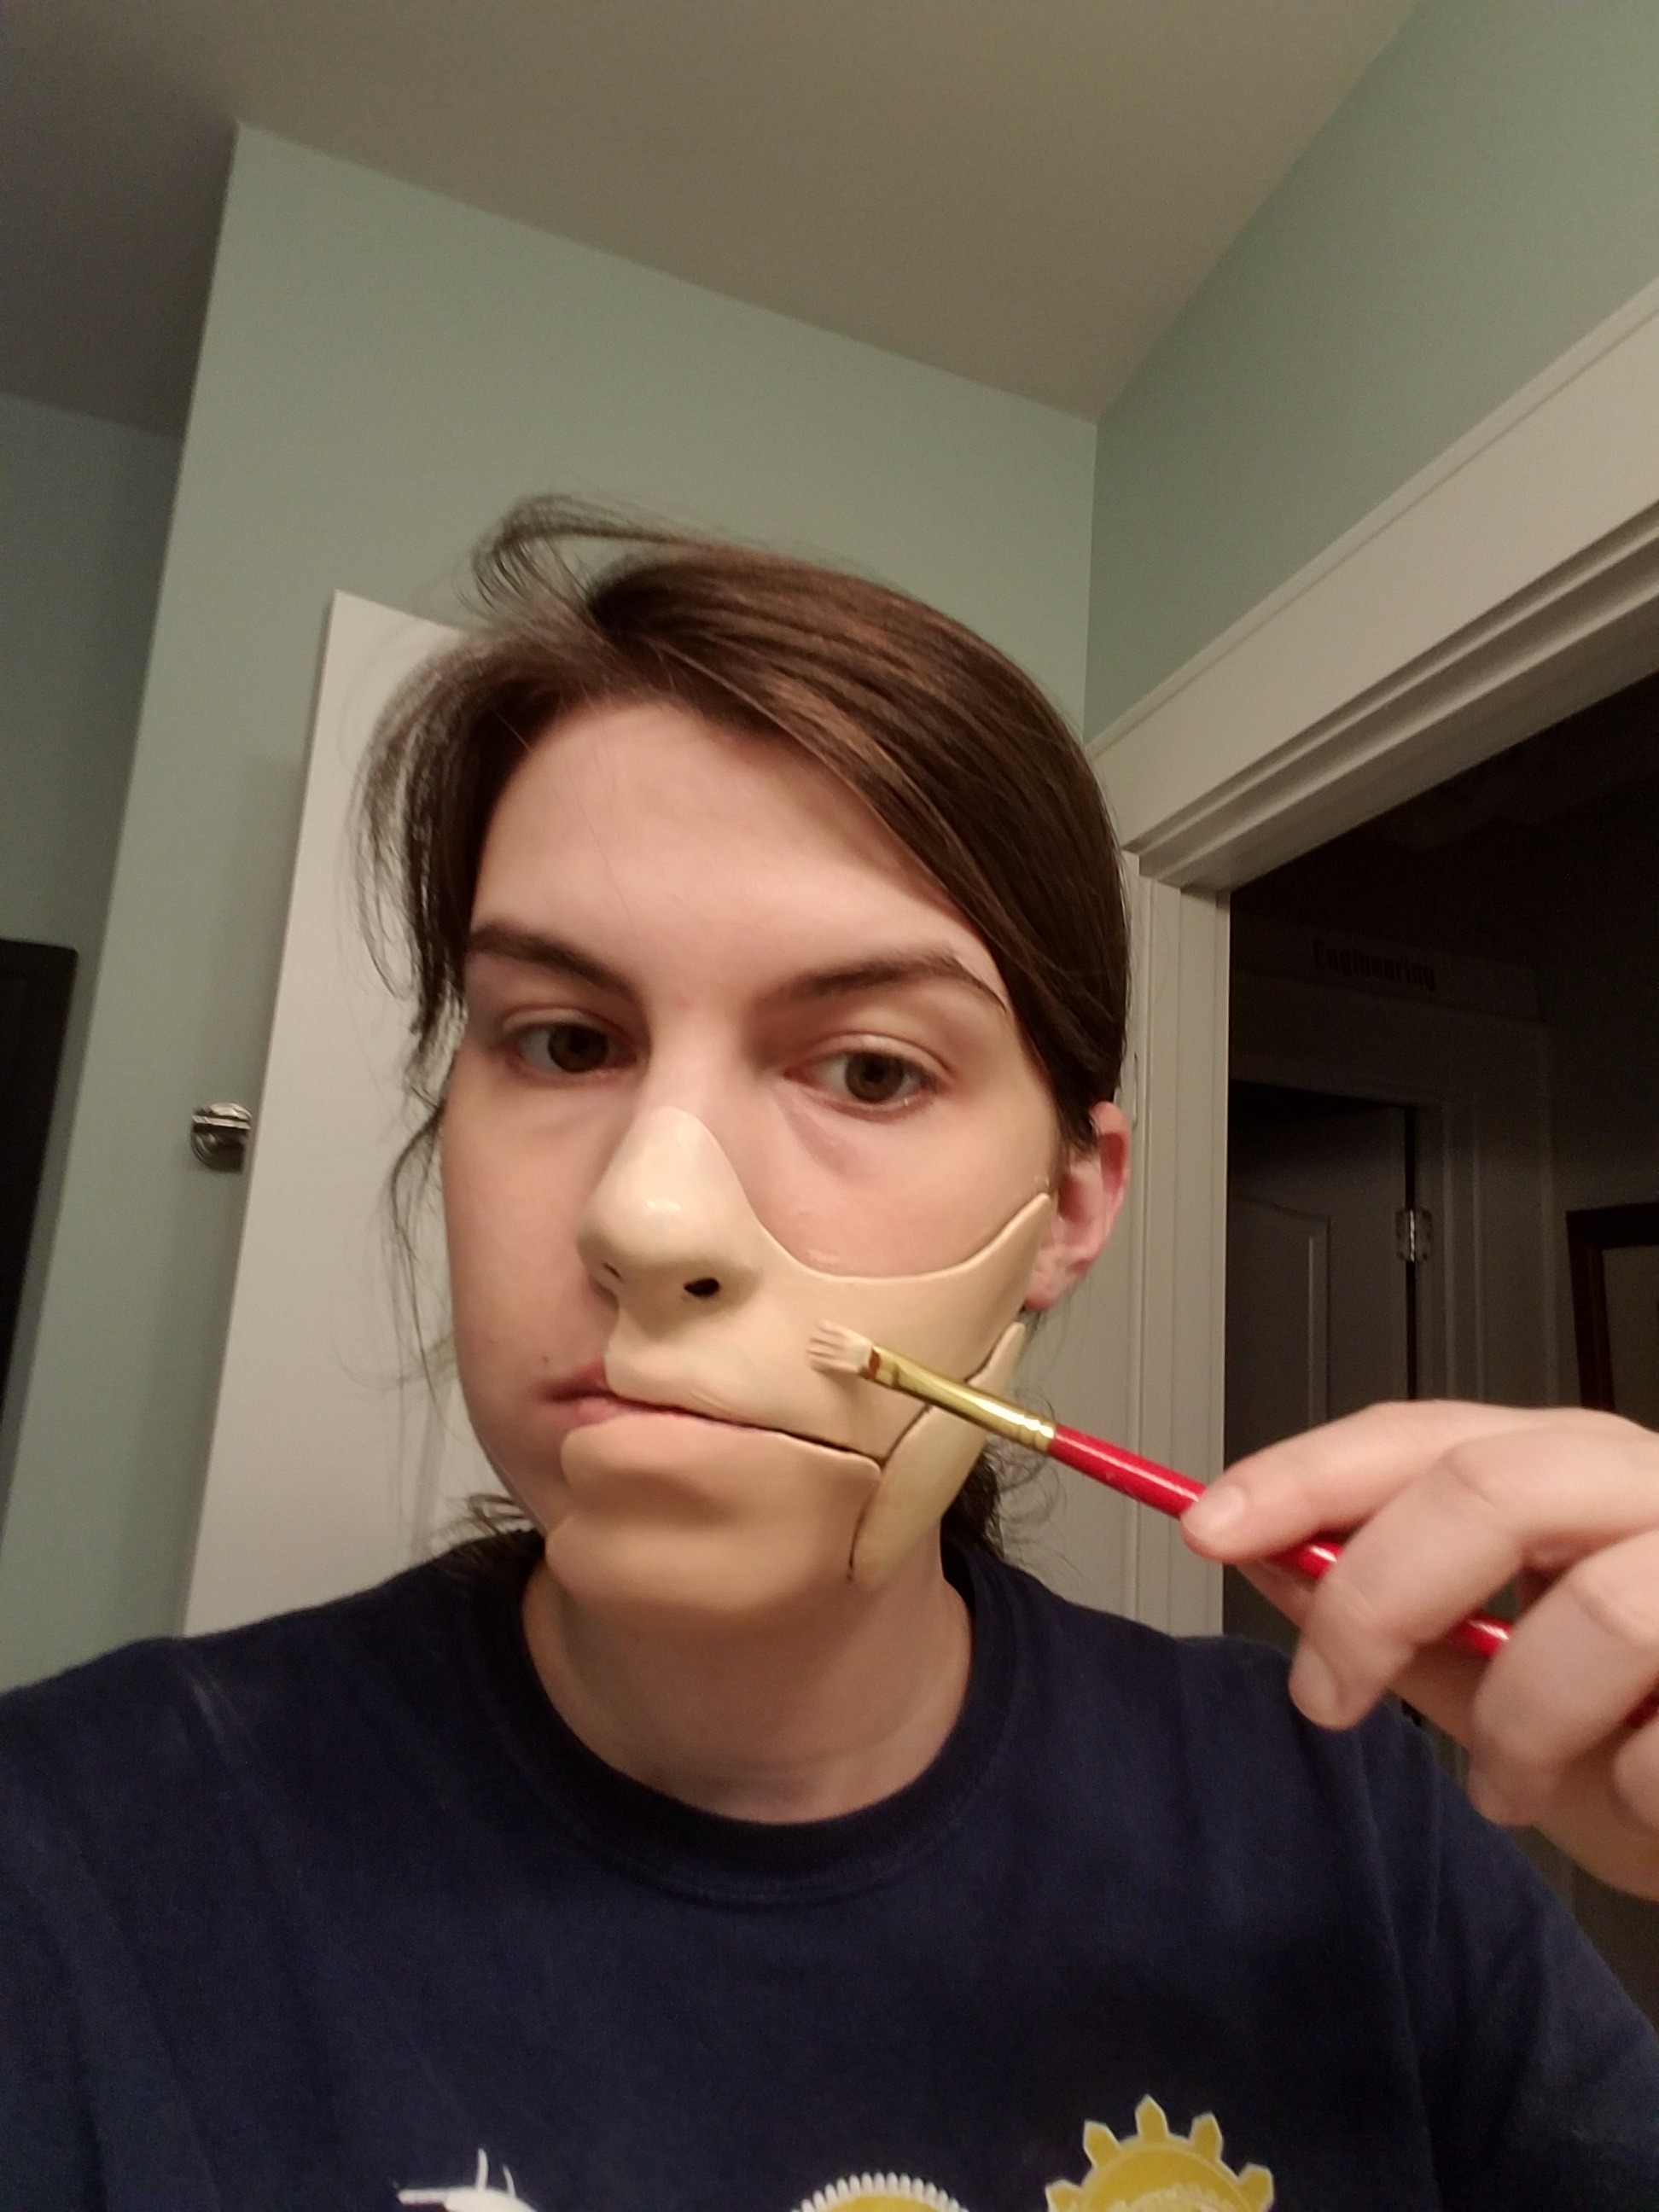
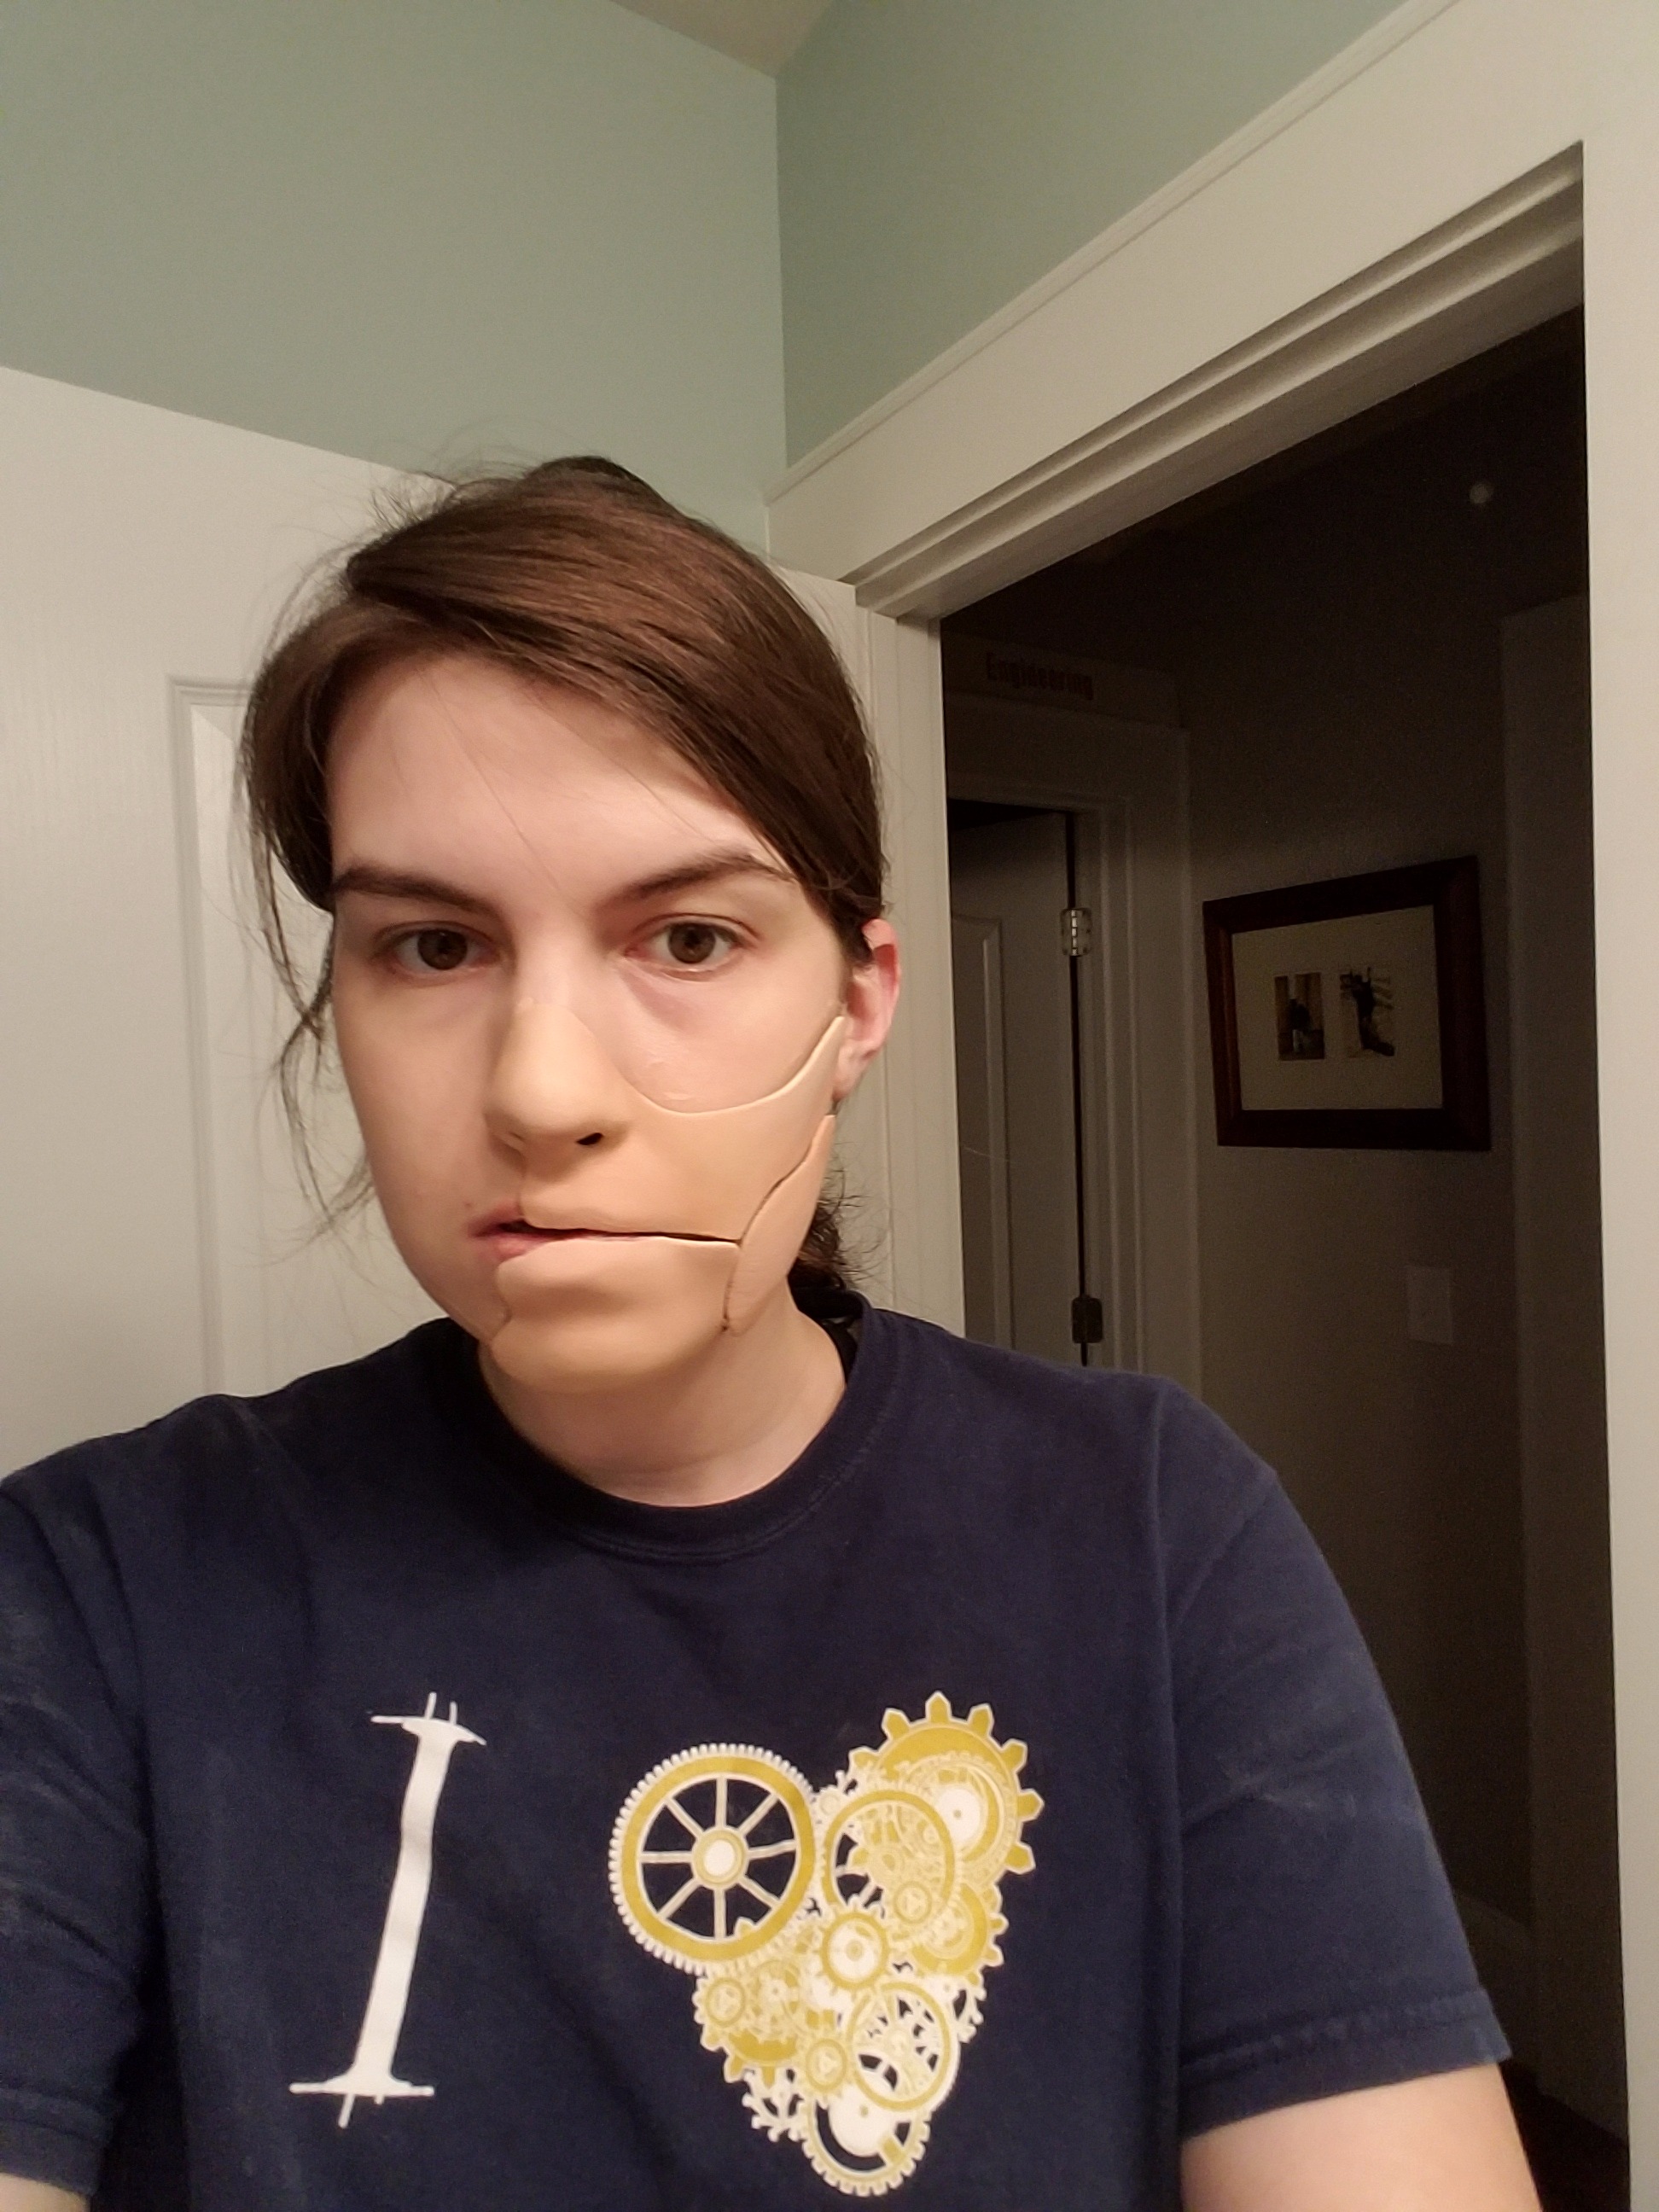
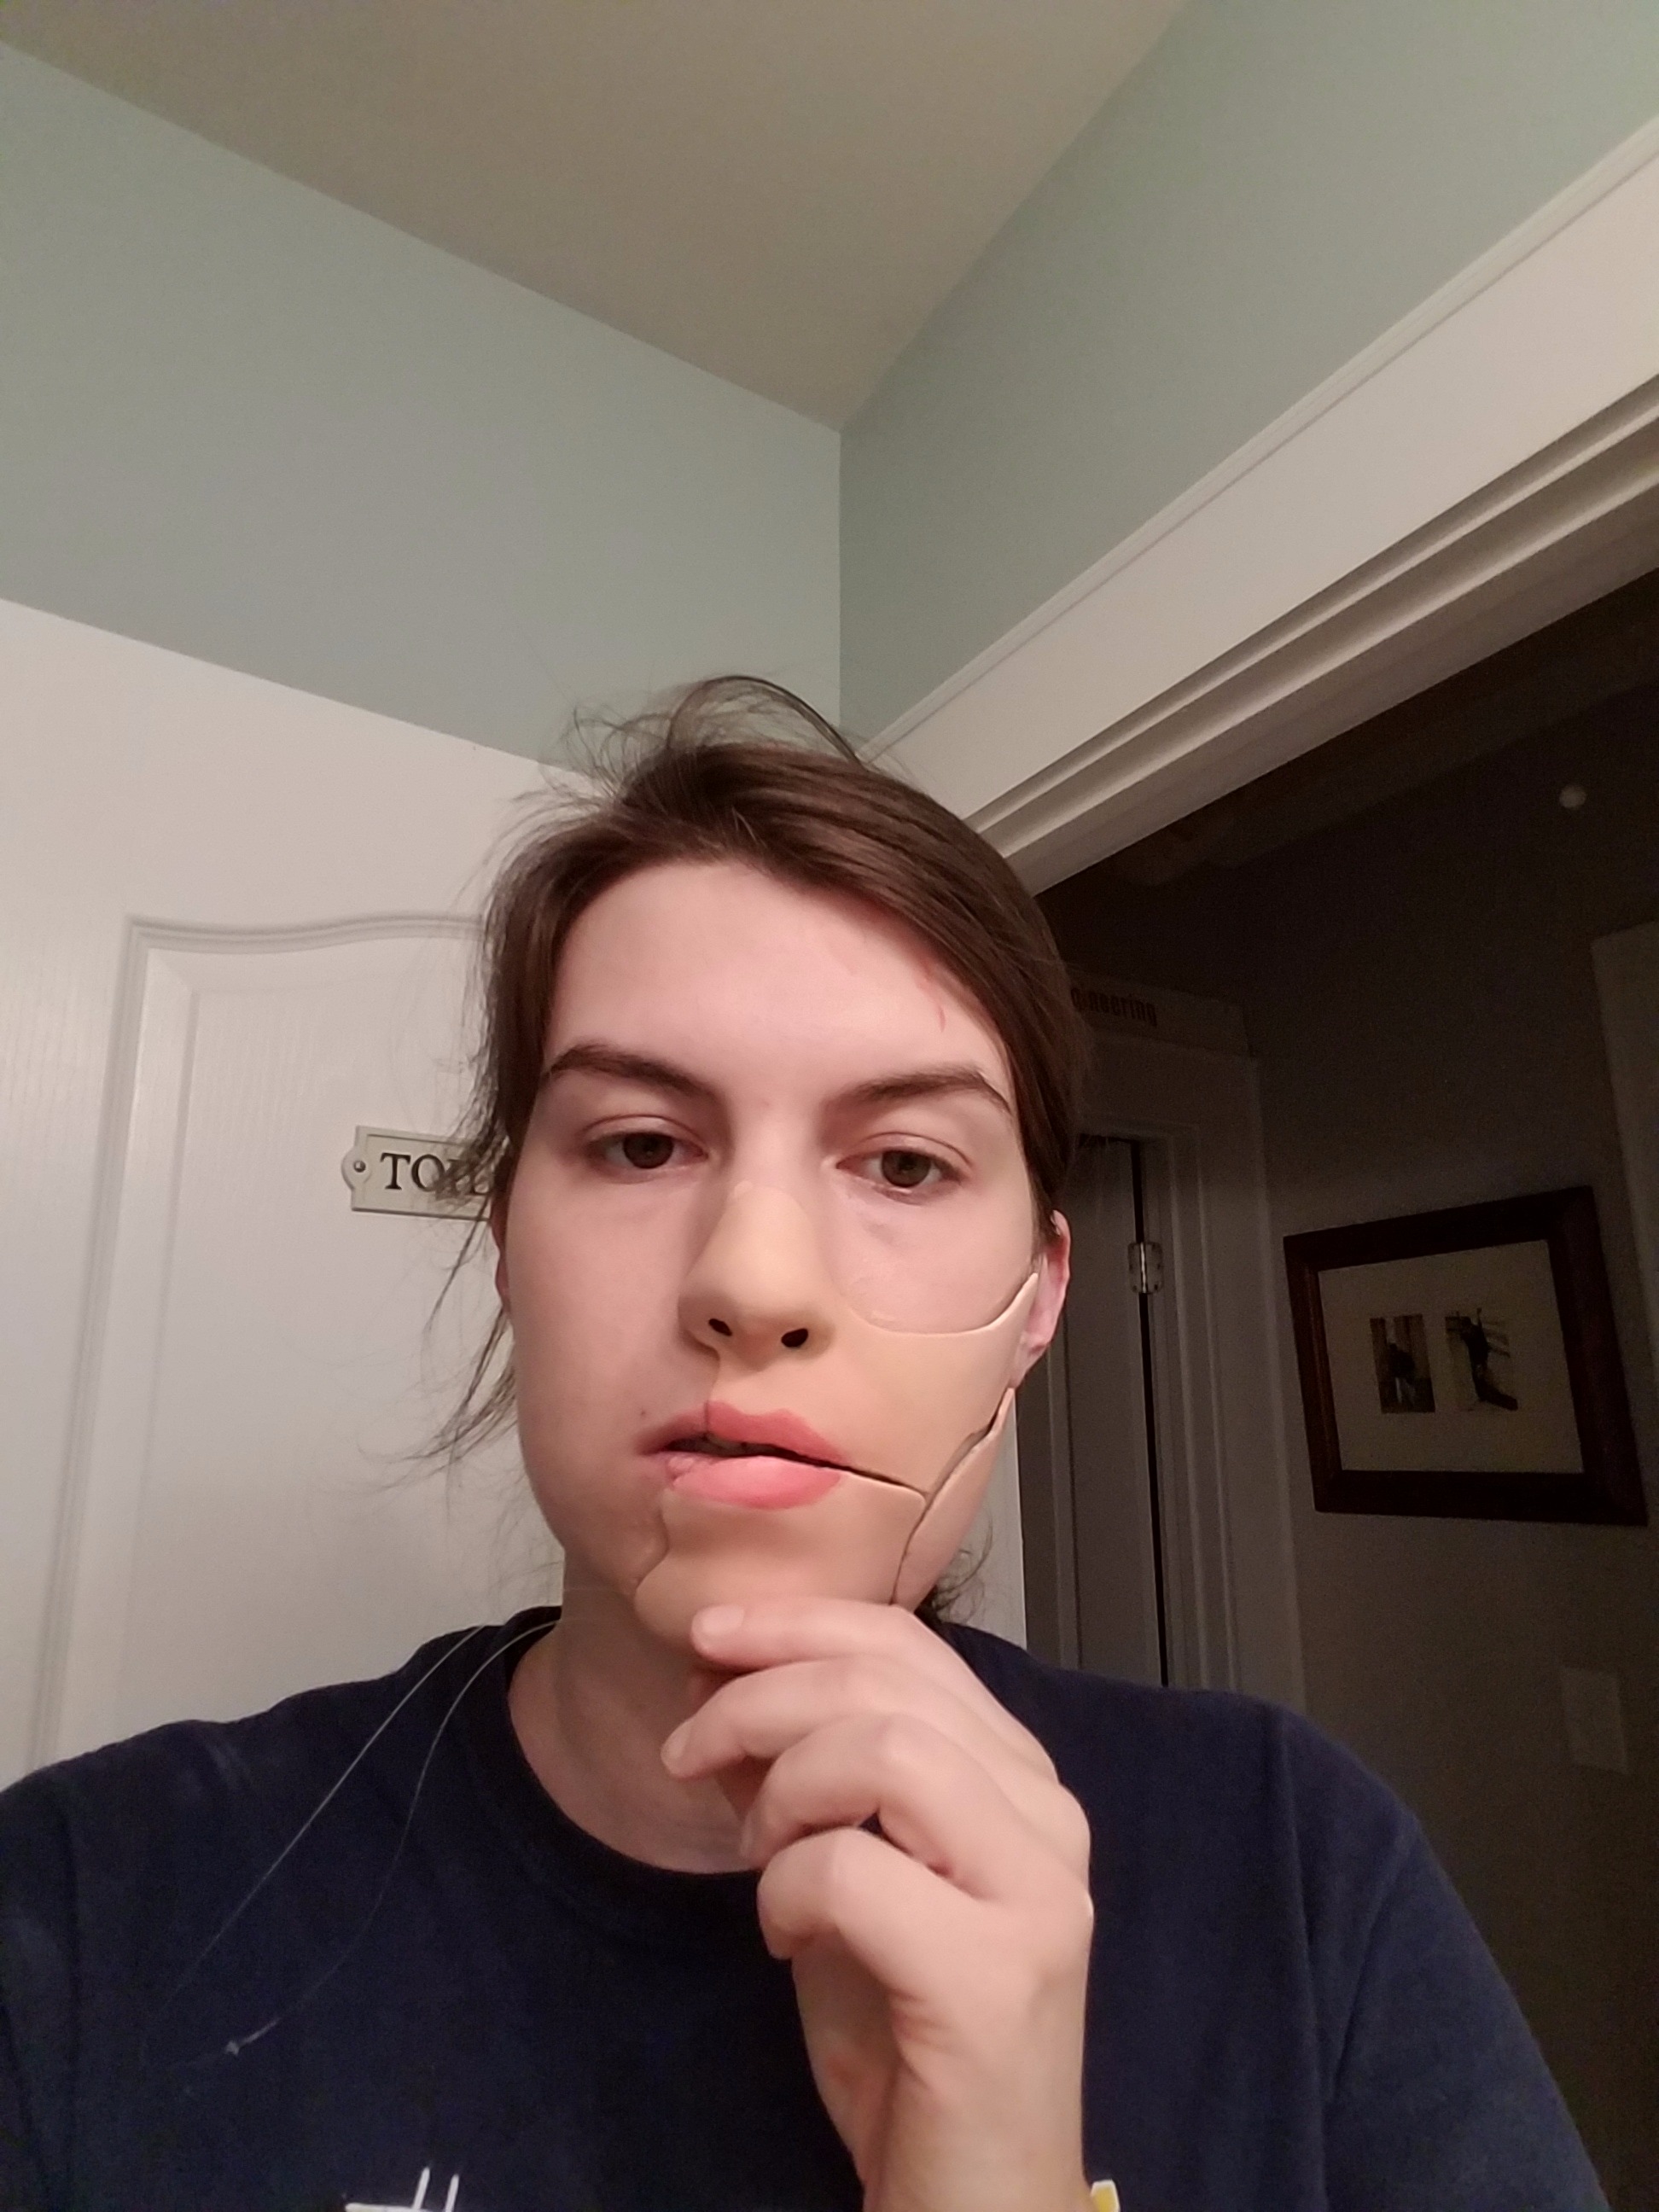
Wear your mask, and look at yourself in the mirror. Using a wide arrangement of acrylic paints, try to match your natural skin color as closely as possible. This took me 3 or 4 mixes to get my final color.
Paint directly on your fake face, and don't worry about acrylic paint getting on your real face - just try to not get it in your mouth.
If you're feeling bold, use contouring to emphasize the shape of the mask. Dr. Poison's mask is pretty flat in the movie, so it's okay if you can't figure it out.
For the lips, you'll want to try and match your natural lip color. Again, this is a trial and error kind of thing.
After all of your acrylic paint has dried, dust your mask with a coat of matte clear coat to protect the surface.
Enjoy your mask! When wearing it out, I would suggest layering some black paint underneath the "cracks", just to highlight the work you've done!