Docker Pi Series of Sensor Hub Board About IOT
by EsoreDre in Circuits > Raspberry Pi
3882 Views, 1 Favorites, 0 Comments
Docker Pi Series of Sensor Hub Board About IOT
Hello,every guys.Nowadays,almost everything is related to IOT.No doubt with that,our DockerPi series board also supports the IOT.Today,i want to introduce the DockerPi series of SensorHub how to apply to IOT to you.
I run this item which is based on the Azure IOT HUB.Azure IOT HUB could be used to build IOT solutions with reliable and secure communications between millions of IOT devices and a cloud-hosted solution backend.
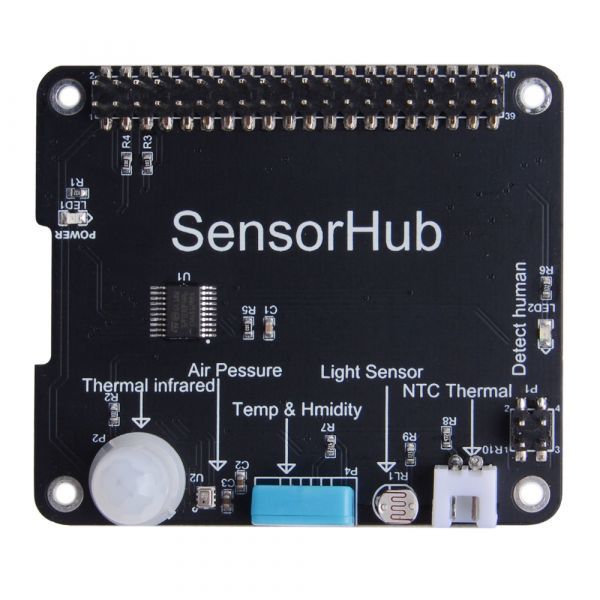
For example,you could know the temperature of your room and whether somebody has been arrived your home on the internet by using our SensorHub.
Supplies
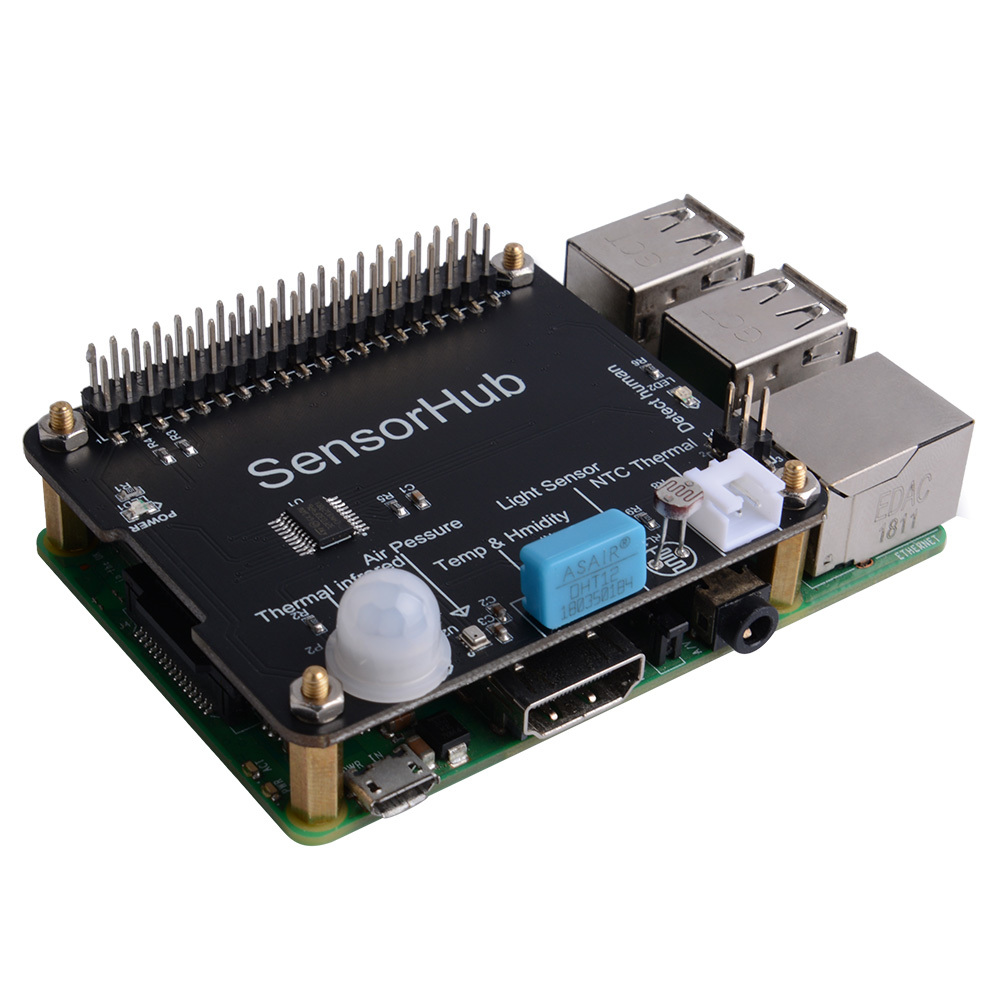
- 1 x Sensor Hub Board
- 1 x RaspberryPi 3B/3B+/4B
- 1 x 8GB/16GB TF Card
- 1 x 5V/2.5A power supply or 5v/3A power supply for RPi 4B
How to Install the DockerPi Series of SensorHub With the RaspberryPi

Let's first look at how to install the DockerPi series of SensorHub with Raspberry Pi
You just need to insert their 40pin pins into it.
Be careful.Please turn off the power when you are installing them.
Open the RaspberryPi's I2C(1)

Execute the command on the picture :sudo raspi-config
Open the RaspberryPi's I2C(2)

Open the RaspberryPi's I2C(3)

Software Environment(1)

First you need check your python3's version.
Software Environment(2)

Then you need to install the Azure relevant components.Be careful,you must use the command which include the "python3":
Software Environment(3)

Next you need to check whether you have already installed the tool of git,if you have installed the git,please execute the following commands:
Codes(1)

- Go to the following directory: azure-iot-sdk-python/tree/master/azure-iot-device/samples/advanced-hub-scenarios
- Open the following file:update_twin_reported_properties.py
- You will see the source file codes following on the picture:
change to the following codes on the picture:
the HostName...which you could get from the Azure webiste.Open the file:get_twin.py and do the same:
Codes(2)

You also need import some python3 libraries in file update_twin_reported_properties.py :
Codes(3)

Then join following codes on the picture,you can also copy and paste on your file:
bus = smbus.SMBus(1)
await device_client.connect() aReceiveBuf = [] aReceiveBuf.append(0x00) # 占位符 for i in range(0x01,0x0D + 1): aReceiveBuf.append(bus.read_byte_data(0X17, i)) if aReceiveBuf[0X01] & 0x01 : state0 = "Off-chip temperature sensor overrange!" elif aReceiveBuf[0X01] & 0x02 : state0 = "No external temperature sensor!" else : state0 = "Current off-chip sensor temperature = %d Celsius" % aReceiveBuf[0x01]light = (bus.read_byte_data(0x17,0x03) << 8) | (bus.read_byte_data(0x17,0x02)) temp = bus.read_byte_data(0x17,0x05) humidity = bus.read_byte_data(0x17,0x06) temp1 = bus.read_byte_data(0x17,0x08) pressure = (bus.read_byte_data(0x17,0x0B) << 16) | ((bus.read_byte_data(0x17,0x0A) << 8)) | ((bus.read_byte_data(0x17,0x09))) state = bus.read_byte_data(0x17,0x0C) if (state == 0): state = "the sensor of BMP280 is ok" else: state = "the sensor of BMP280 is bad"
human = bus.read_byte_data(0x17,0x0D) if (human == 1): human = "live body has been detected" else: human = "no live body"
Codes(4)

Then run the file update_twin_reported_properties.py and you will see the result:
Codes(5)

Then open the file:get_twin.py and input following codes,you could also copy the codes and paste on your files:
    print("{}".format(twin["reported"]["state0"]))
    print("Reported light is: {}".format(twin["reported"]["light"]),"Lux")
    print("Reported temperature of board is: {}".format(twin["reported"]["temperature"]),"degC")
    print("Reported humidity is: {}".format(twin["reported"]["humidity"]),"%")
    print("Reported temperature of sensor is: {}".format(twin["reported"]["temperature1"]),"degC")
    print("Reported pressure of air is: {}".format(twin["reported"]["pressure"]),"Pa")
    print("Reported {}".format(twin["reported"]["state"]))
    print("Reported whether detect live body is: {}".format(twin["reported"]["human"]))
Codes(6)

Then run the file get_twin.py and you will see the result which is updated from the file update_twin_reported_properties.py :