Distance on 7 Segment 4 Digit Display Using HC-SR04
by CYNAlDE in Circuits > Arduino
3789 Views, 1 Favorites, 0 Comments
Distance on 7 Segment 4 Digit Display Using HC-SR04

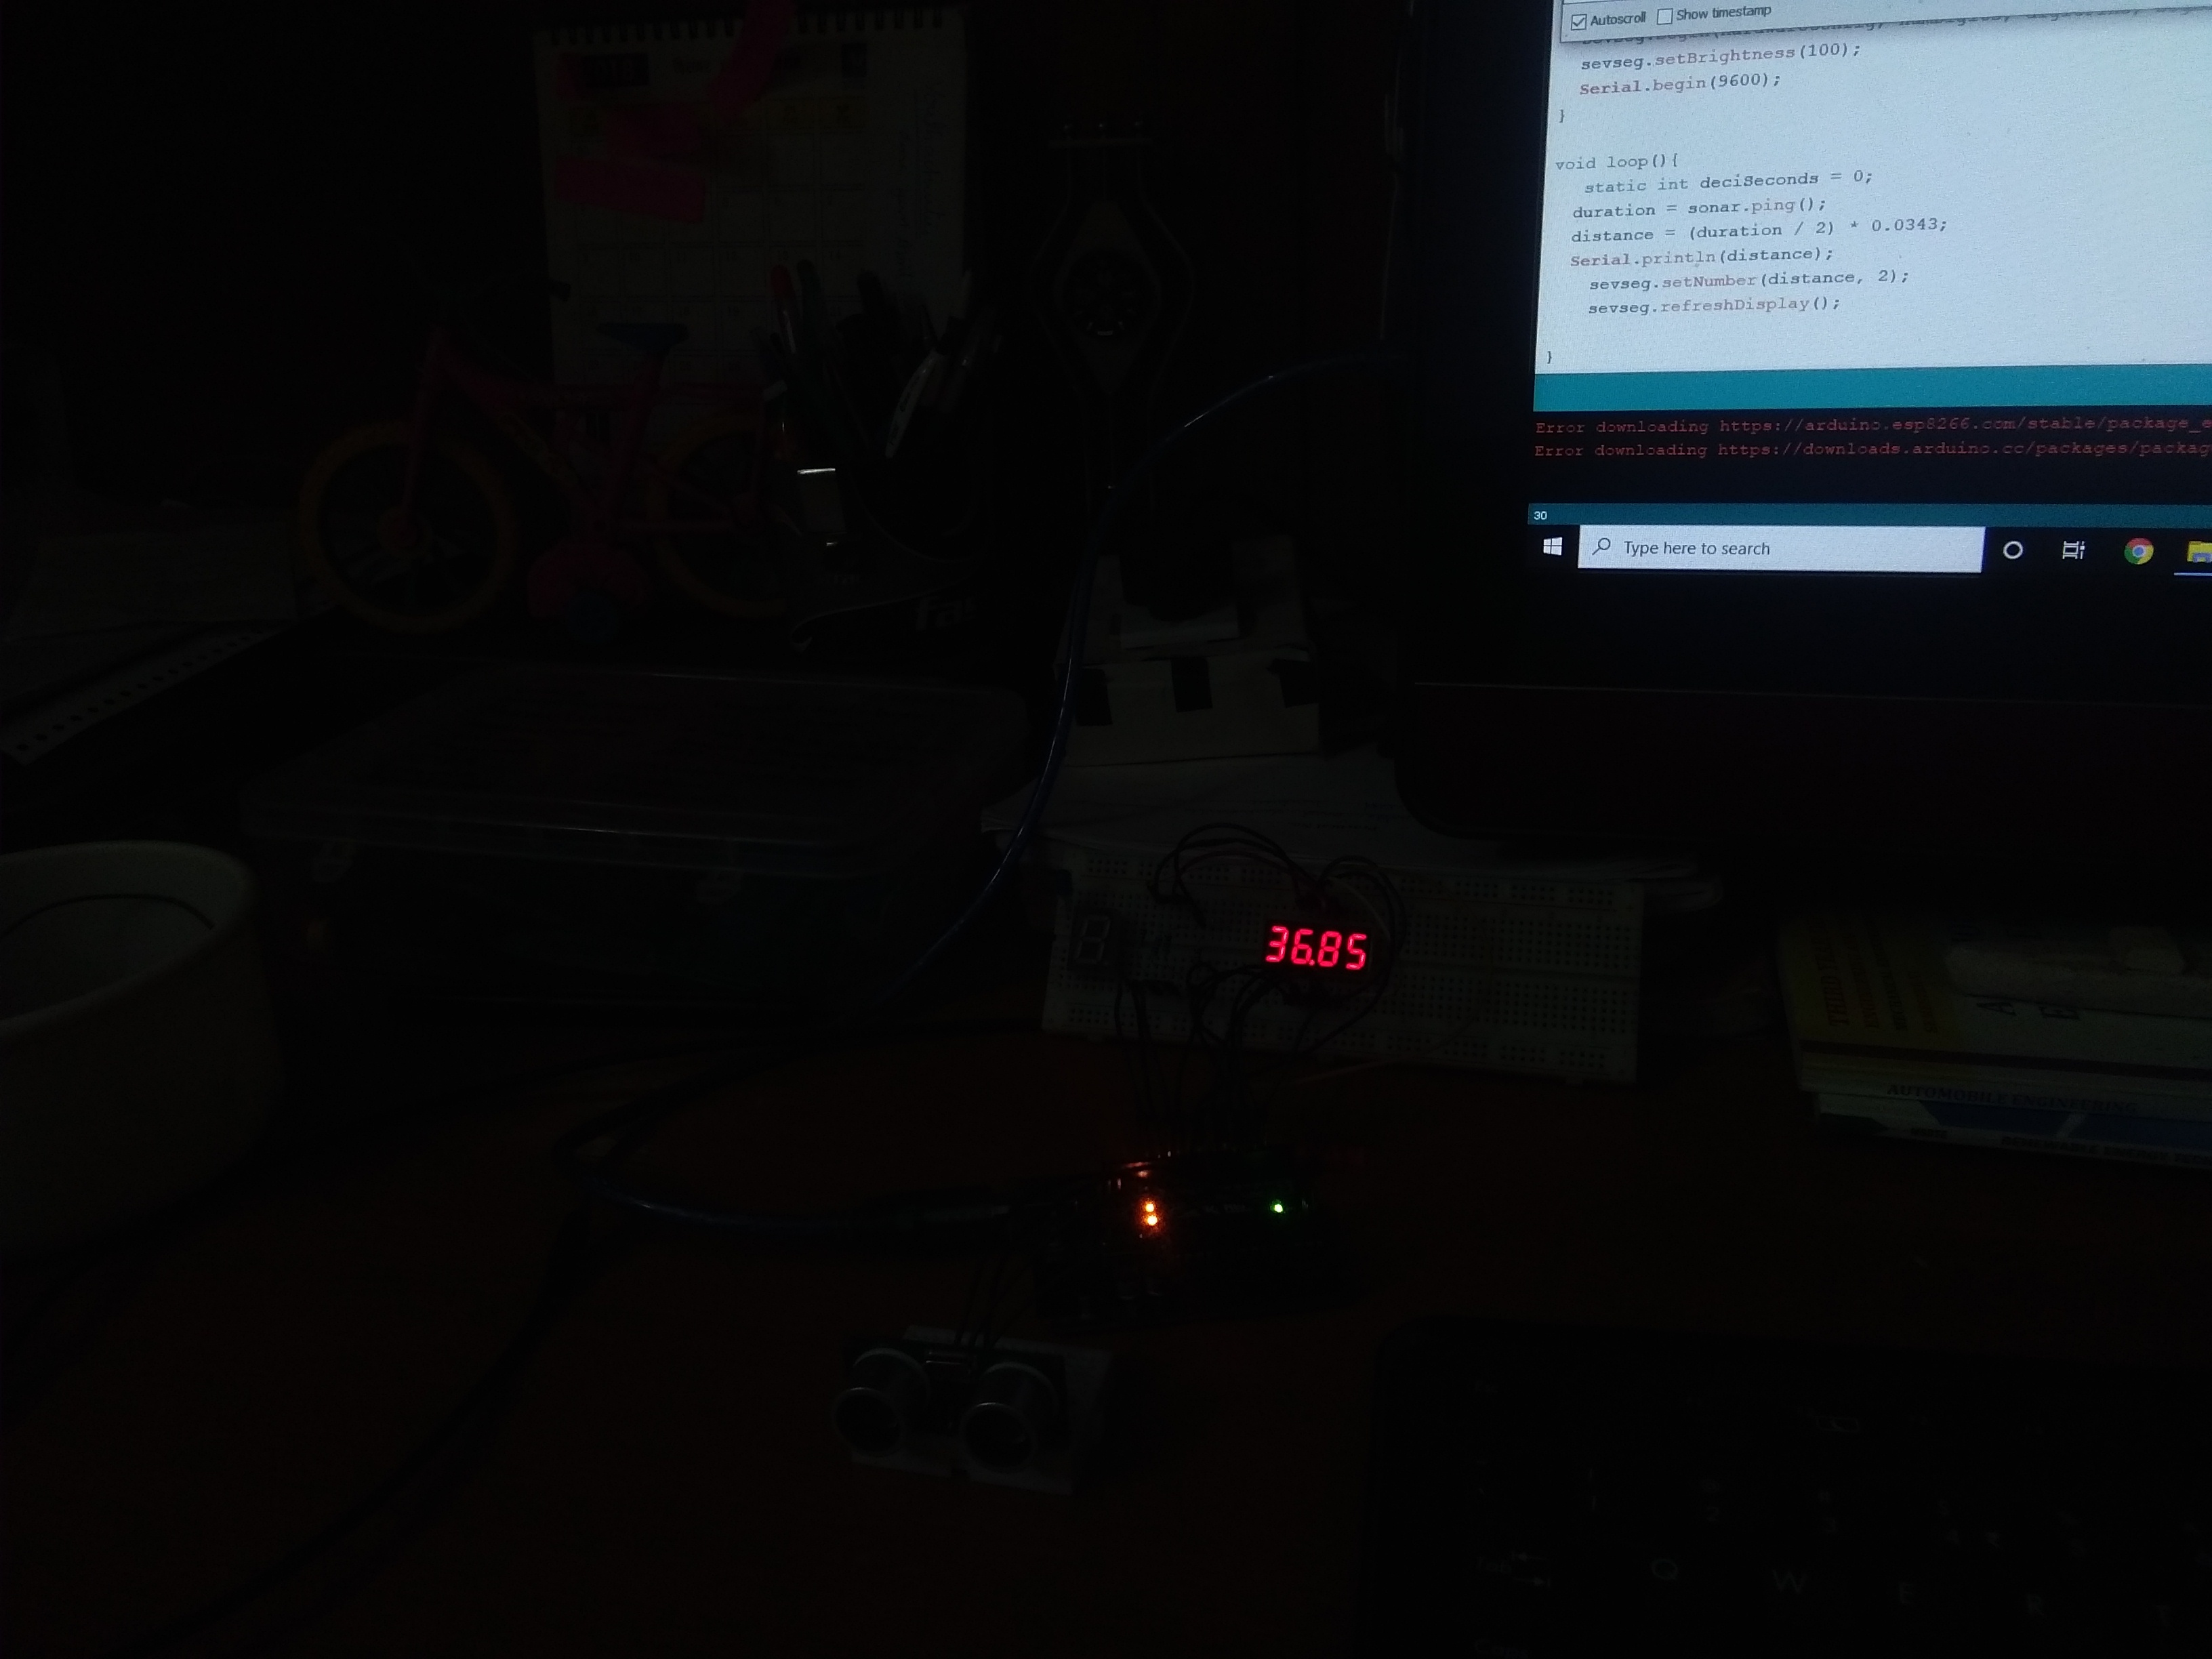
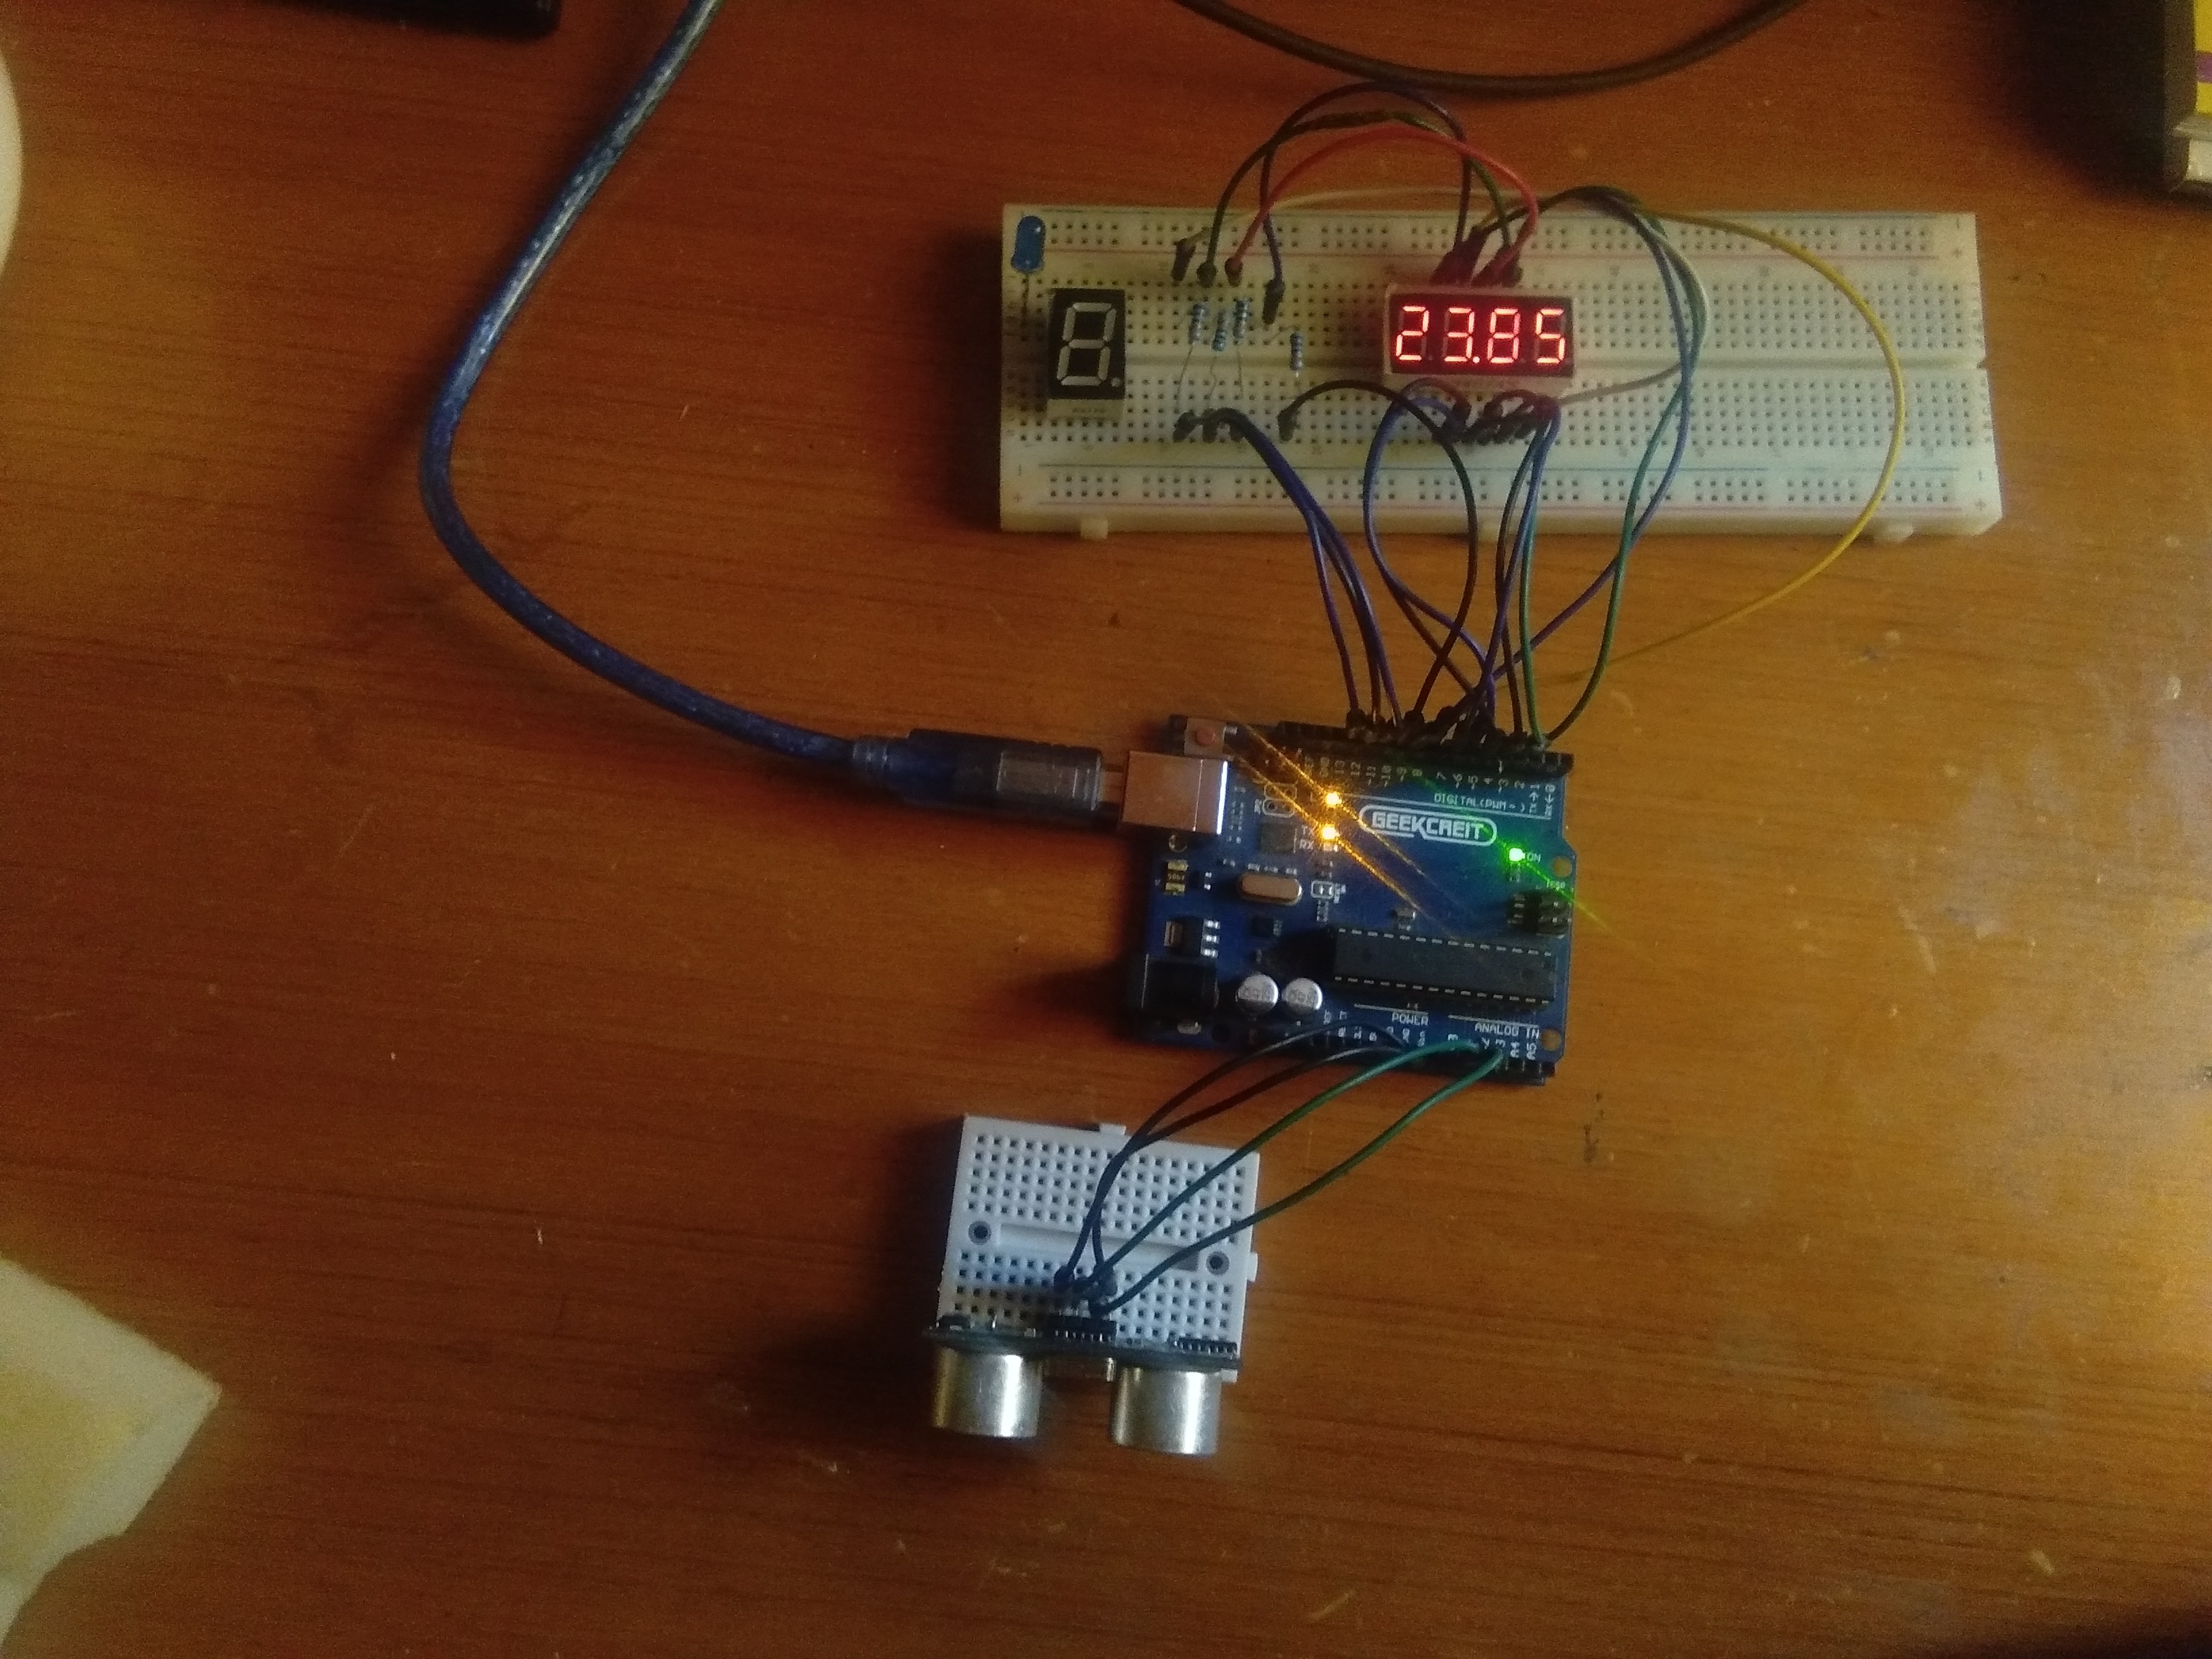
In this article I will show you how to connect an Arduino UNO with a 7 segment 4 digit displaying the the distance measured from the hc-sro4 ultrasonic sensor. It is accurate about +- 1 cm , pretty much accurate. This is a very simple setup. we will not be using any drivers for 7 segment display, we will be connecting directly to the 12 pins of the display.
Before starting off you should check whether your display is common cathode or common anode
Supplies
Arduino UNO * 1
HC-SR04 *1
7 segment 4 digit display *1
1 k ohm resistor * 4
Jumper cables
Breadboard
Connecting the Pins to Arduino


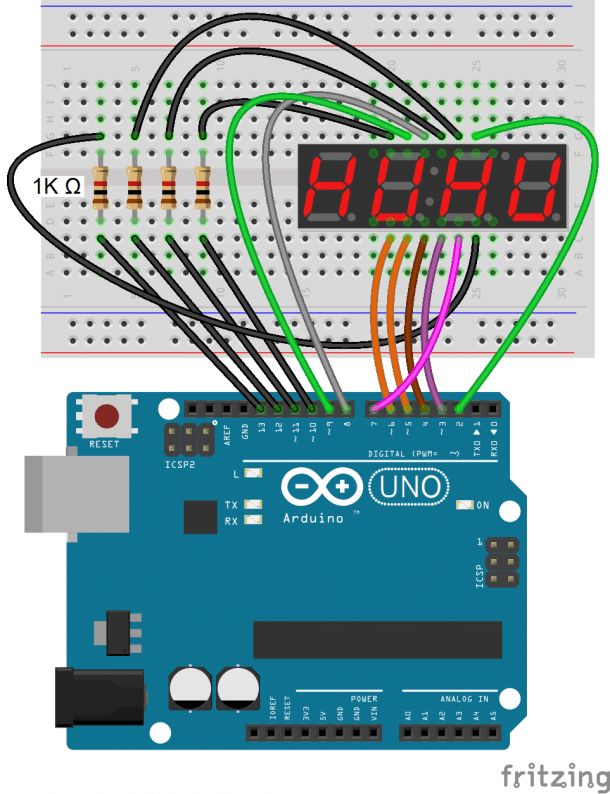
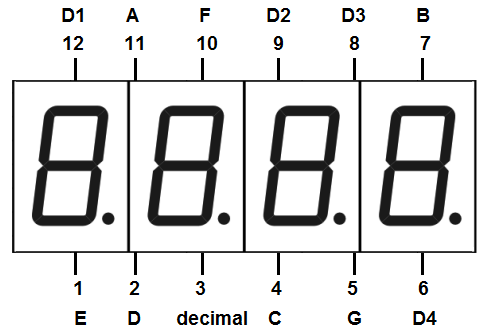
Above is the pin out for the display there are total of 12 pins total. The display I am using in this is a common cathode which is very common. Do not refer the pin numbers on the right pic(white colored) it is just for the representation. We will be connecting 1k ohm resistor so that it doesn't harm the led, you can also swap the resistor to maybe 330 ohm so brightness will increase. you can also adjust brightness of the display in the program. So moving on we will first connect the display to Arduino UNO. Connect it according to the diagram above. it is small i know just click on the photo it will pop out to be big, or just download the diagram.
Next u need to wire the ultrasonic sensor connect it as directed
VCC = 5v,
Trig = Analog 0,
Echo= Analog 1,
Gnd = Gnd,
Code

#include "SevSeg.h" // display library
#include "NewPing.h" // hc-sr04 library
#define trig A0
#define echo A1
#define Max 400   //max distance that can be dtected by hc-sro4
SevSeg sevseg;
NewPing sonar(trig, echo, Max);
float duration, distance; // to store data
void setup(){
  byte numDigits = 4;
  byte digitPins[] = {10, 11, 12, 13};
  byte segmentPins[] = {9, 2, 3, 5, 6, 8, 7, 4};
bool resistorsOnSegments = true; bool updateWithDelaysIn = true; byte hardwareConfig = COMMON_CATHODE; // U can change it to COMMON_ANODE if needed sevseg.begin(hardwareConfig, numDigits, digitPins, segmentPins, resistorsOnSegments); sevseg.setBrightness(100); // U can set it from 0-100 Serial.begin(9600); // distance will be also printed on the serial monitor u can also see it there. }
void loop(){
   static int deciSeconds = 0; // by this the screen will not flicker
  duration = sonar.ping();
  distance = (duration / 2) * 0.0343;
  Serial.println(distance);
    sevseg.setNumber(distance,2);// this will shift the decimal point to two characters from the right
    // u can change it to 1 if u need to print more more that 100 cm for ex (distance, 1)
    sevseg.refreshDisplay();

}