Discover the Best Way to Sharpen a Photo
by Mary_M in Circuits > Cameras
349 Views, 1 Favorites, 0 Comments
Discover the Best Way to Sharpen a Photo
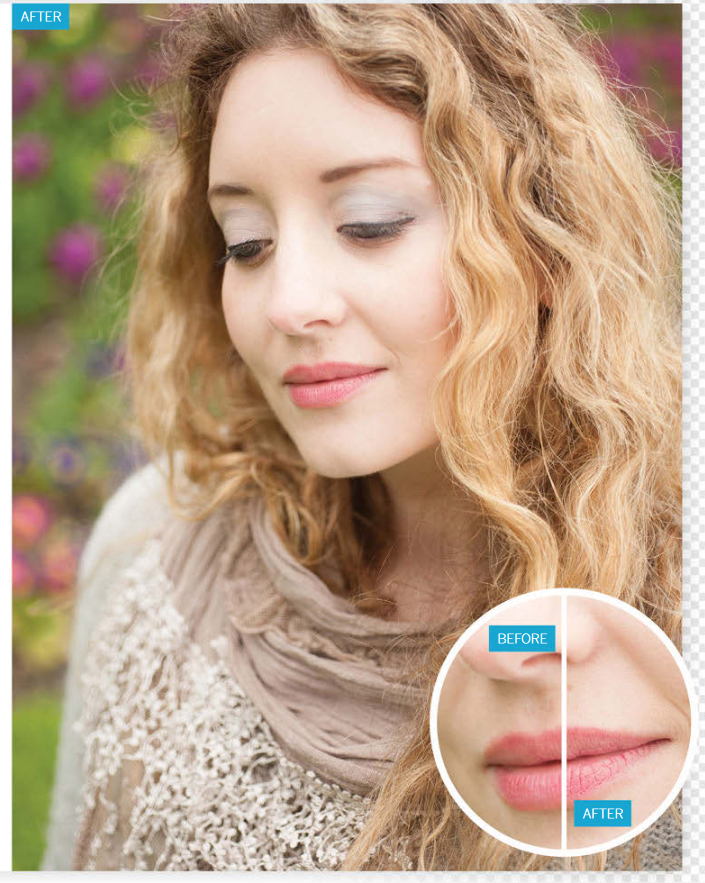
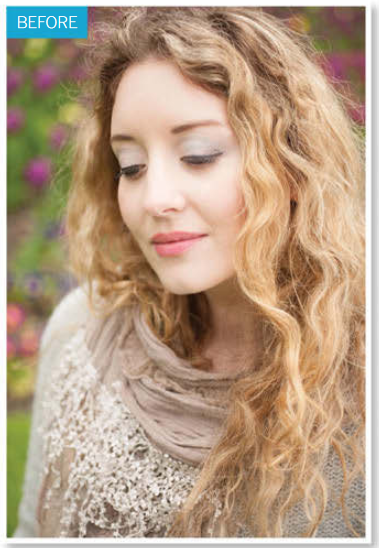
Use Photoshop Elements to sharpen soft-looking details while keeping artefacts at bay
There are several reasons a photograph may look a little soft. For starters the camera’s Auto Focus (AF) point may not have overlapped the key area of interest, causing it to blur. Or if you shoot with a wide aperture setting then you’ll have a much narrower depth of field, so only a shallow area could be in focus. Our starting image was captured using a wide aperture of f/3.2, which creates an attractive blurred background. This blur (or bokeh) helps the model stand out in the image. We wouldn’t want to sharpen a deliberately blurred background, but we can make fine details such as the model’s eyes stand out more effectively with a little sharpening, courtesy of Photoshop Elements’ collection of sharpening tools and commands.
Many photos will benefit from some sharpening. Even if your image looks relatively sharp on your computer display, it can still print out fairly fuzzily on a printer. A touch of post-production sharpening helps to create a print with more punch, especially if you use raw-format files.
Photoshop Elements makes soft objects in a photo look sharper by increasing the contrast around the edges of details in the image. This contrast change gives certain features more impact, making them appear sharper. Sharpening is a balancing act. If you increase the contrast around the edges by too large an amount, you can add sharpening artefacts such as haloes and noise. We’ll show you how to recognise and therefore avoid adding artefacts while sharpening your own images. In this walkthrough we’ll sharpen JPEGs, but if you want to discover how to sharpen raw files, check out the tutorial in chapter 10.
Step 1: Examine the Image at 100%
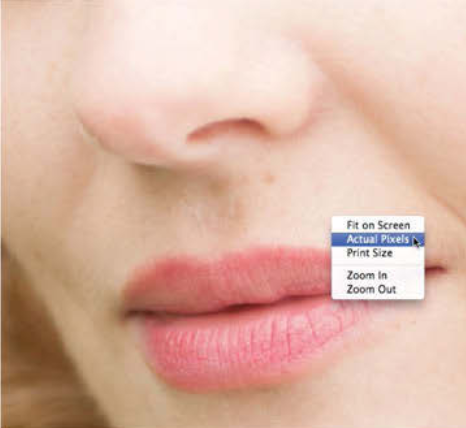
Go to File -> Open and browse to our ty_elements11.jpg start image. To accurately assess how sharp a photograph really is, you need to look at the pixels at 100%. Grab the Zoom tool from the Toolbox. Right click and choose Actual Pixels from the context-sensitive pop-up menu. Hold down the space bar to temporarily summon the Hand tool, and drag the image to reveal the model’s mouth. The lips lack detail because they suffer from a slightly soft focus.
Step 2: Try Auto Sharpen
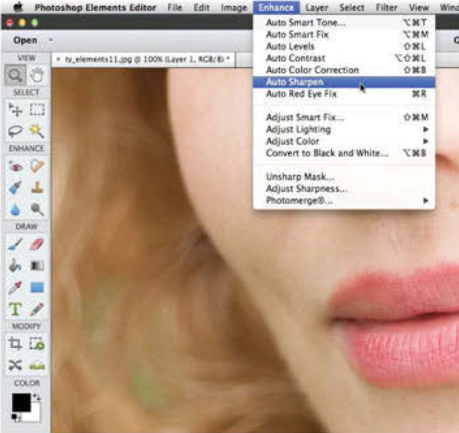
Before sharpening a photo, click the Background layer’s thumbnail in the Layers panel. Press Cmd/Ctrl+J to make a duplicate layer. You can then sharpen this copy. If you’re in a hurry you can go to Enhance>Auto Sharpen. This will sharpen the image and reveal more detail, but you can’t change the strength of the operation. Click the top layer’s eye icon to compare the two versions of the shot, then click the Undo button.
Step 3: Sharpen Incrementally
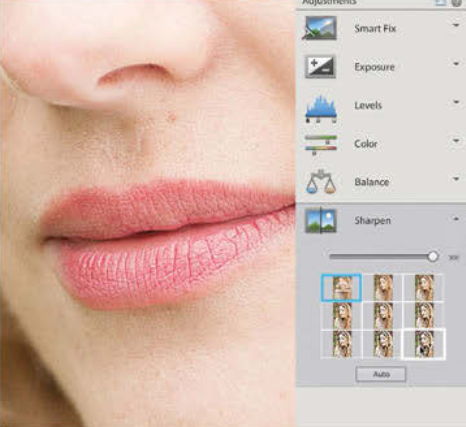
To sharpen an image quickly while retaining control over the sharpening amount, click the Quick editing tab. Click Adjustments, then click Sharpen. You can either drag the slider right to increase the sharpening, or click the preview thumbnail to increase the sharpening in incremental jumps. If you choose too high a setting you’ll exaggerate unwanted details such as the facial hair and image noise in the blurred background.
Step 4: Adjust the Sharpness
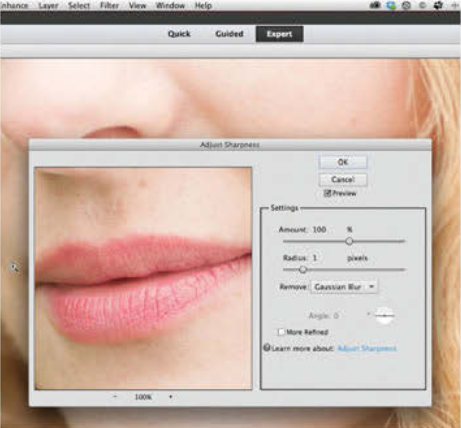
The Quick adjustment option is fine for a bit of rough-and-ready sharpening, but it can add artefacts as you saw in the previous step. Click the top left thumbnail to reset the shot to its unsharpened state (or drag the slider to 0). Click back to the Expert editing tab to access a sharpening command that offers more editing choices. Go to Enhance and choose Adjust Sharpness. By default this displays the photo at 100% magnification.
Step 5: Recognise Artefacts
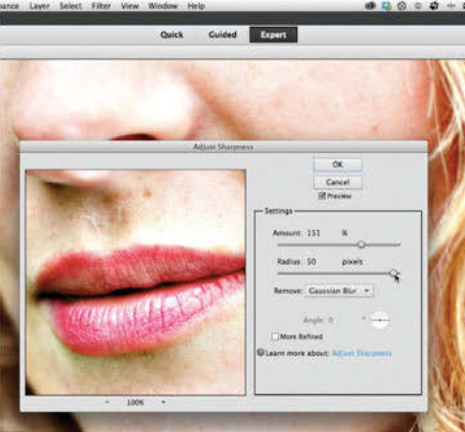
To help you learn more about sharpening artefacts, push the Amount slider up to 150% to see a dramatic change in edge contrast. Increase the Radius to 50 pixels to increase the spread of the edge contrast change. This creates ugly artefacts such as blown-out highlights, dark clipped shadows and over-saturated colours. As a rule, don’t exceed a Radius value of 2.0 to help avoid creating over- sharpening artefacts.
Step 6: Remove Lens Blur
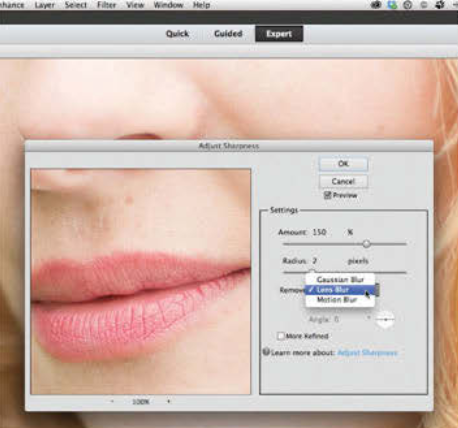
Drop the Radius slider to 2.0 pixels. Click and hold down the mouse button over the preview window to see the unsharpened version of the photograph, then release the mouse button to see how much the slider settings are sharpening it. For more subtle but effective sharpening, set the Remove drop-down menu to Lens Blur. This helps to reduce artefacts such as haloes (noticeable lines clinging to the edge of contrasting edges).
Step 7: Extra Options
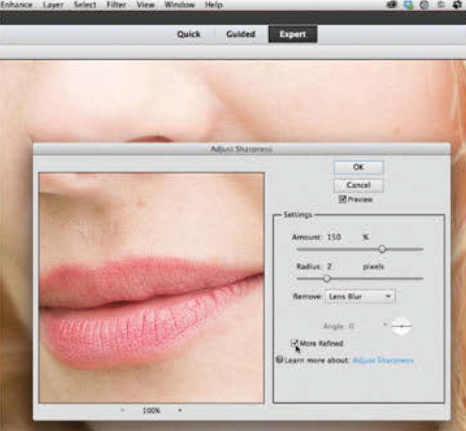
If your photo suffers from shake-induced blur (due to a slow shutter speed) then you might want to try setting the Remove menu to Motion Blur. You can then drag the Angle wheel to try to counteract the direction of the blur. In practice this doesn’t tend to work well. You may be tempted to tick the More Refined box, but this tends to add extra sharpening artefacts such as noise (especially if you’ve captured the shot using a high ISO setting), so just click OK.
Step 8: Before and After
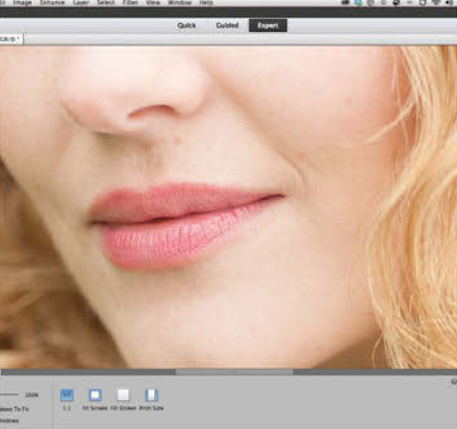
You now have a sharpened version of the photo that has a balance between revealing texture and details without adding artefacts such as noise to the soft-focused background. Click the top layer’s little eye icon to turn it on and off to compare the sharpened details with the softer ones on the layer below. If the top layer is too sharp you could always drop its opacity value to reduce the sharpening amount.