Digitalizing Escher's Tiling Patterns
by DanMar in Design > Digital Graphics
144 Views, 3 Favorites, 0 Comments
Digitalizing Escher's Tiling Patterns
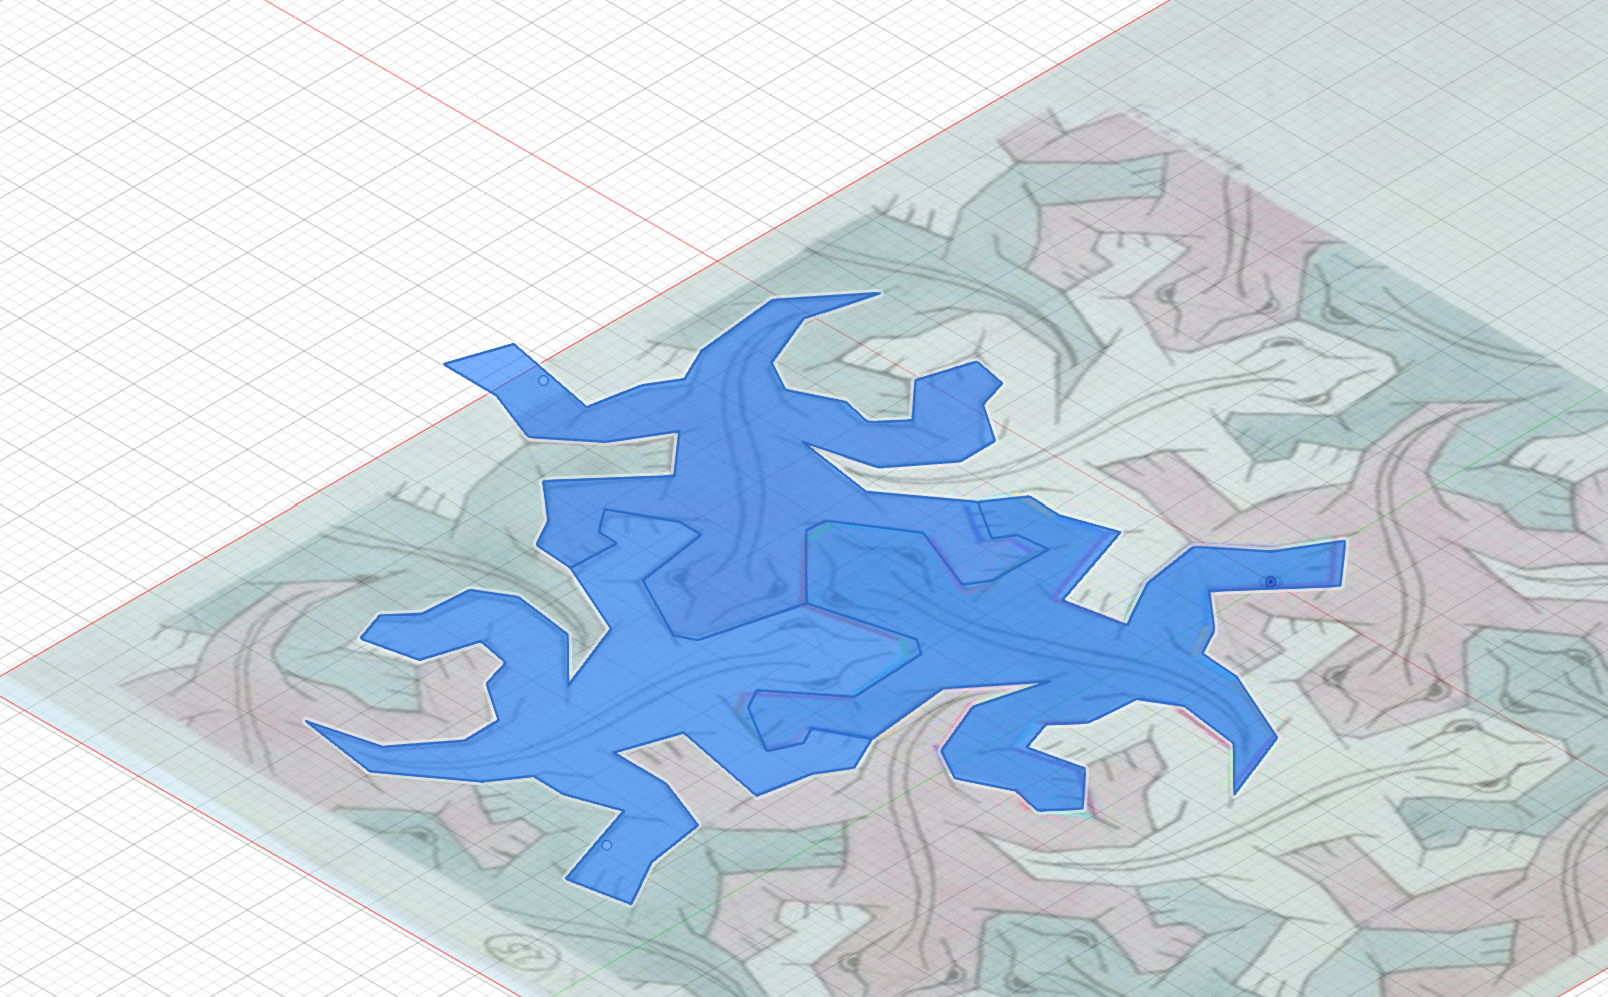
I discovered M.C. Escher as an artist and especially liked his infinitely tiling animals. This inspired me to convert them into a digital format so they can be used as wallpapers, 3D models or anything else you can imagine. My favourite is the tessellating lizard, but you can use this guide to convert other tiling patterns - in best case even ones you designed on your own.
Supplies
- You need a pattern that you like. Many of Escher's artworks, including his pattern designs, can be found here.
- I used Autodesk Fusion 360 for the designing process. You can get it for free for personal use in projects like this.
- Additional software for further specific uses, such as Photoshop/Krita for creating wallpapers or Cura and Blender for 3D printing and designing.
Find Same Sides
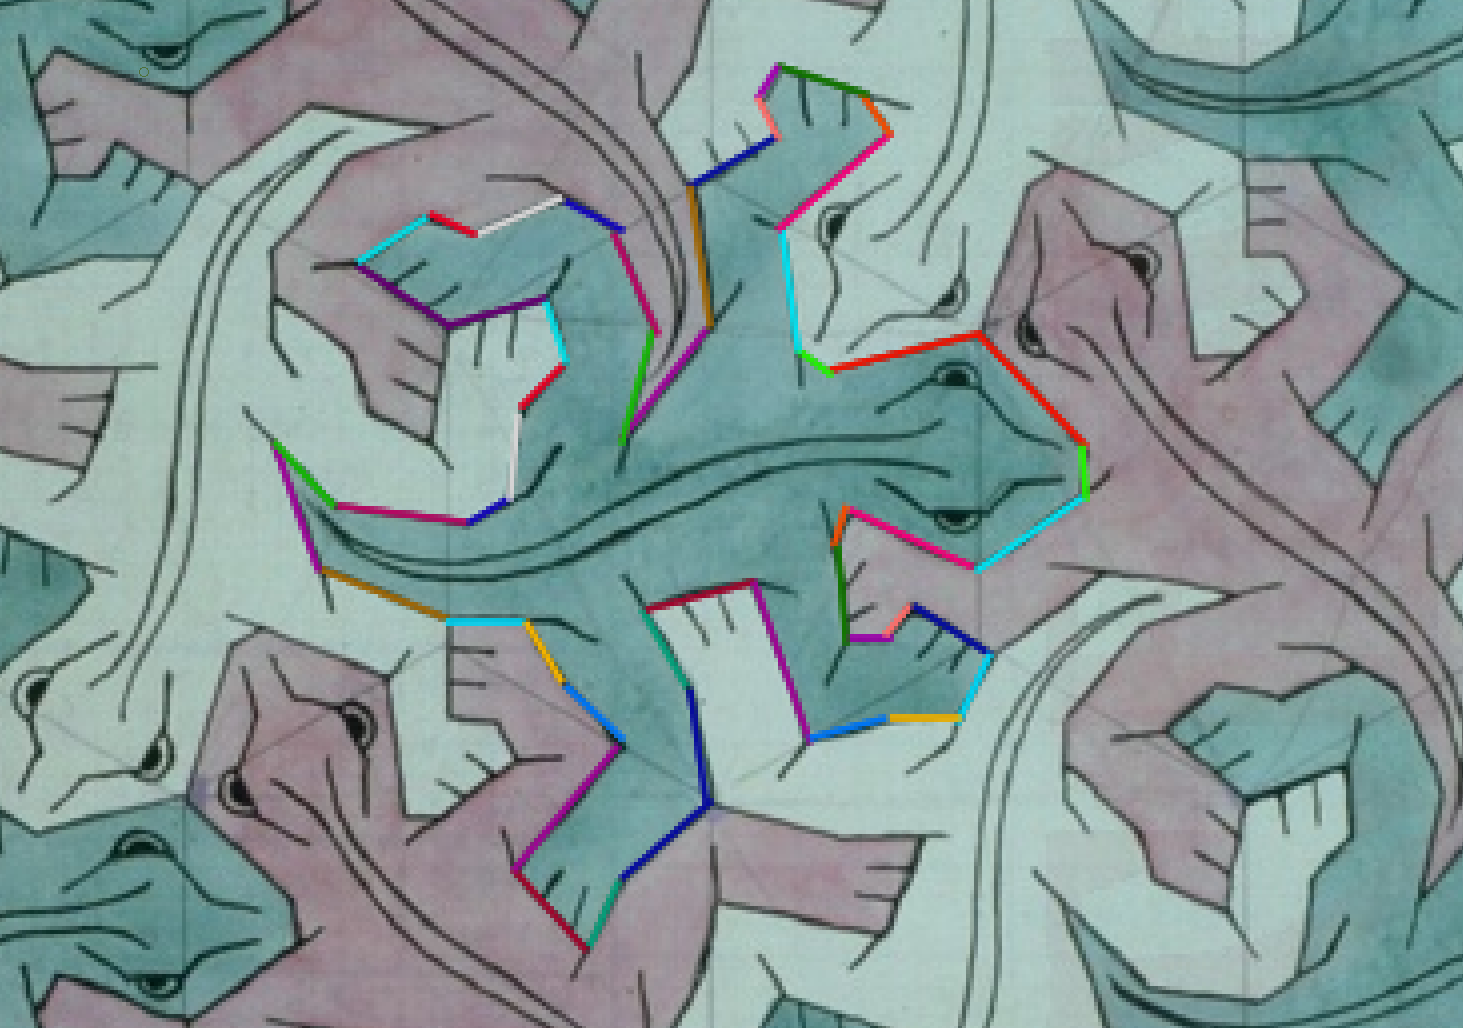
The cool thing about these patterns is that they fit perfectly together with themselves. To achieve this, two sides must be equally long and have the same angles on each side. For the next steps, it will be useful to find the matching sides and create an image marking them in the same color. You can easily do this in Krita with the basic draw line tool.
Import Reference in Fusion360
Create a new file in Fusion. In this step, import your edited image into Fusion 360 as a reference. Then, you create a sketch on the same axis.
Getting an Rough Outline
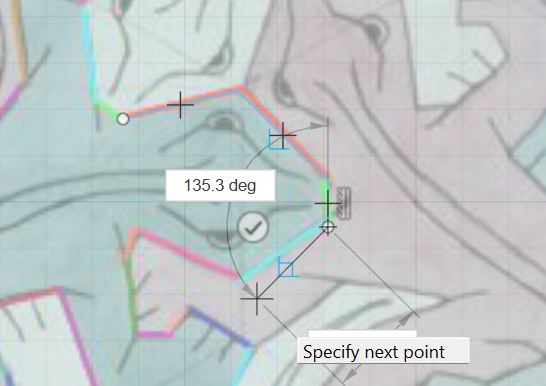
Use the line tool to outline your shape. After closing the line, you can adjust the corner to your liking.
Once you're finished, go to the Selection Tool -> Selection Filters and only tick Sketch Geometry Constraint. Now, select every constraint (the small grey icons) and hit delete. This will remove all automatically created constraints. Don´t forget to reset your selection tool to normal.
Add Constraints
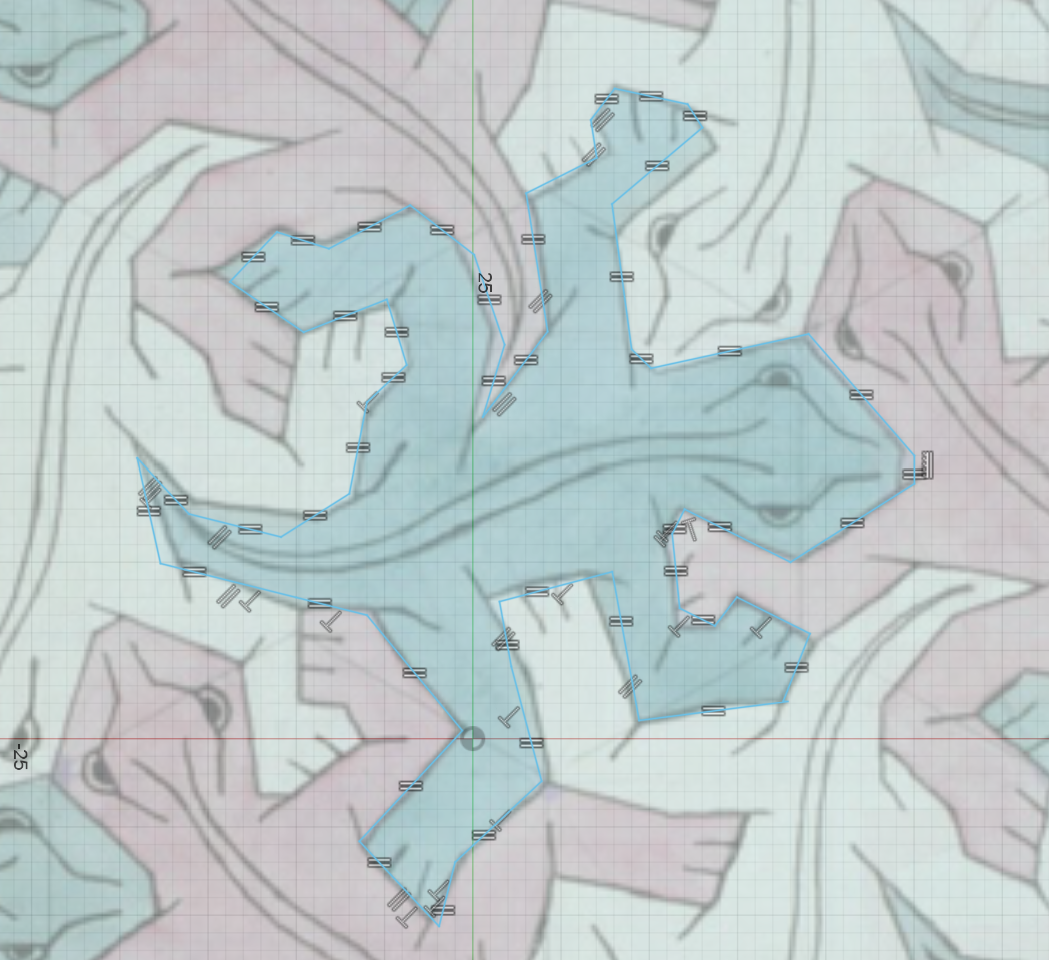
Now, you can use the Equal Tool. Click two sides of the shape you previously marked as equal to set their lengths as equal. If your selected pattern has only one repeating shape, every side of it needs to be constrained in length to another side.
Set Specific Angles
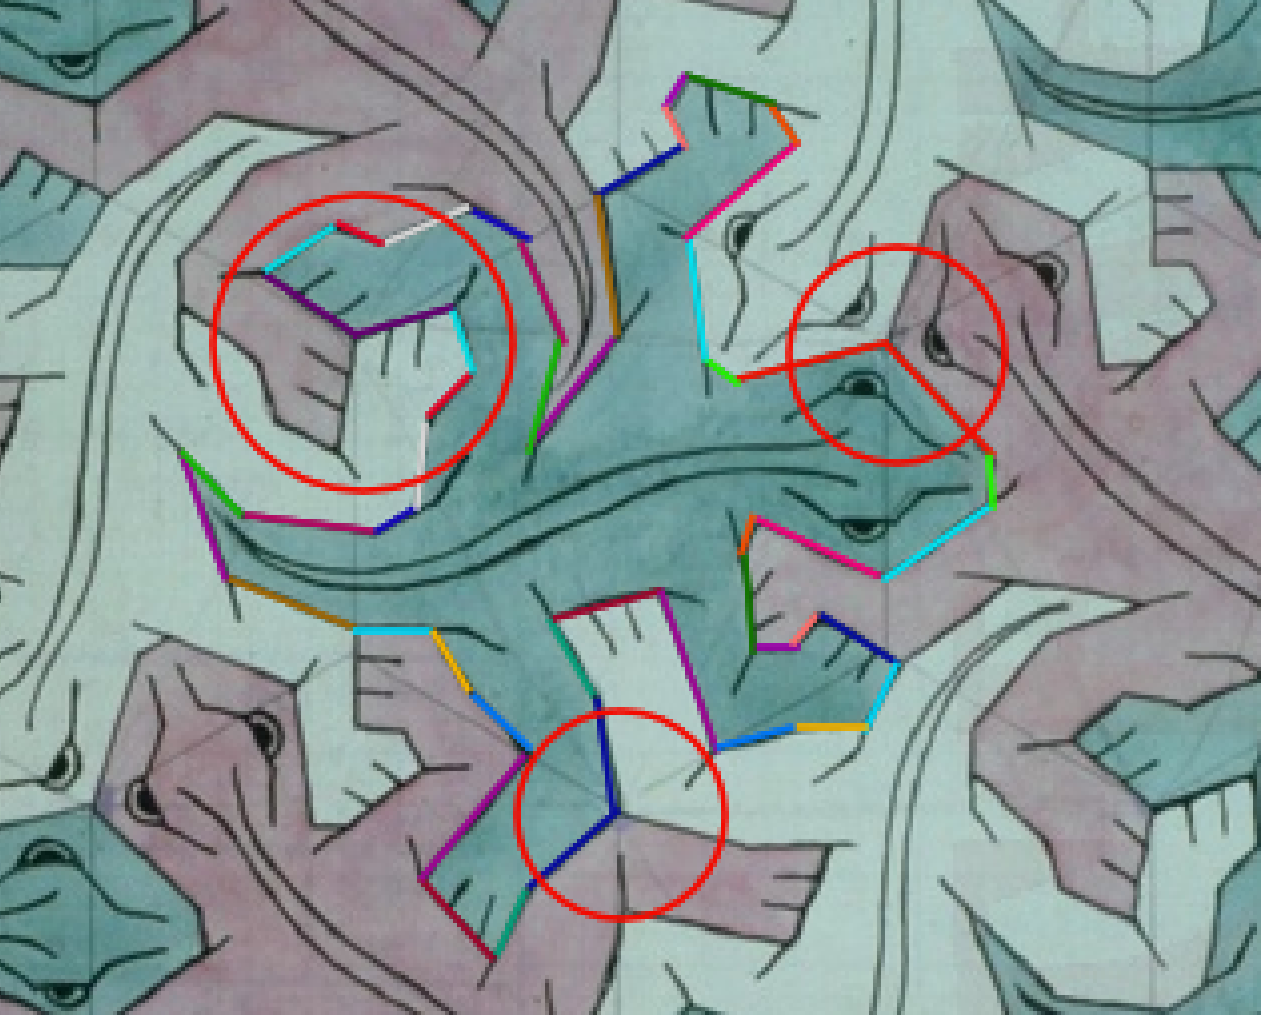
In this tile, there are three spots where the same angles meet at a single point. We know, for sure, that these angles are 360° /3 = 120°, so it is practical to set these first. Select the two sides forming the angle and press D to set dimensions. Press Enter and type 120° in the box that pops up. Hit enter again to set the angle.
Set Angles
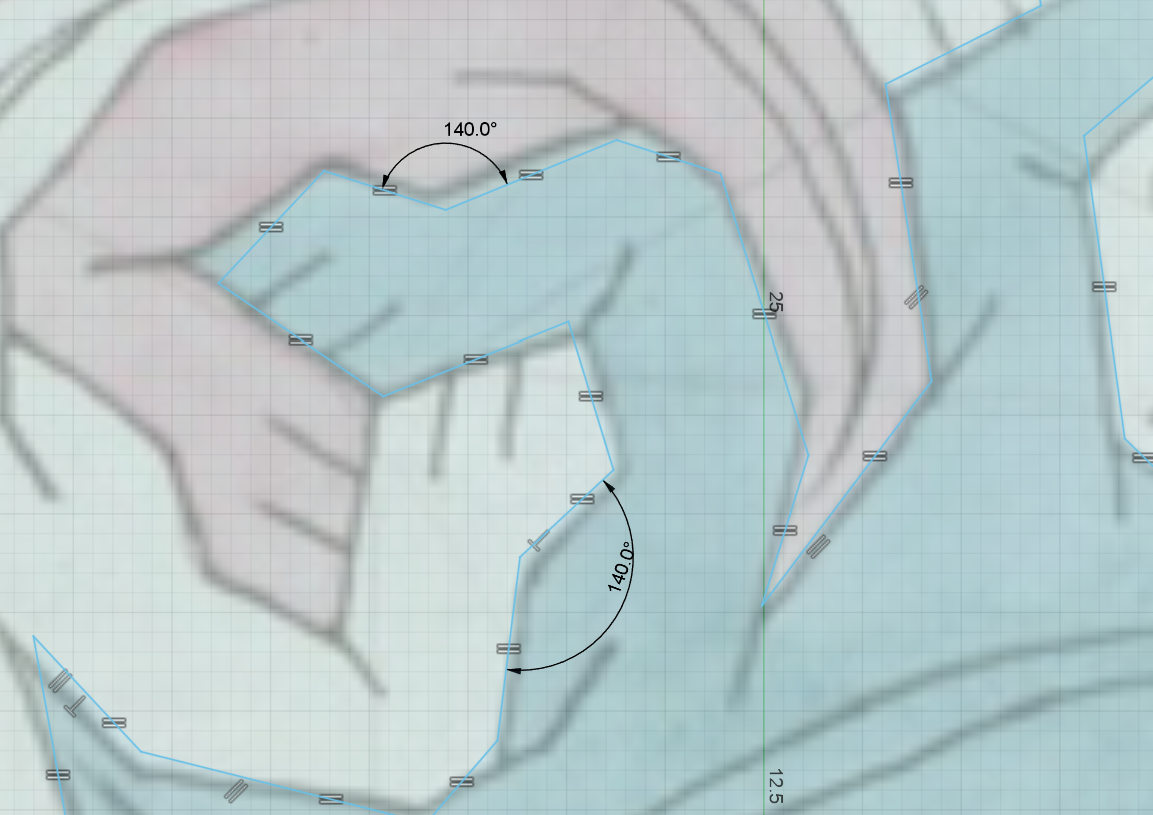
Select the Sketch Dimensions tool or press D. Select an angle and draw in the dimensions. You can manually adjust them now or leave them as they are. Next, select the angle between the two sides that are the same length as the ones of the previously set angle. When the value box pops up, don´t enter the value of the first angle you set but just click on its dimension mark. This will link the value of the second angle to the first one.
Downloads
Finish
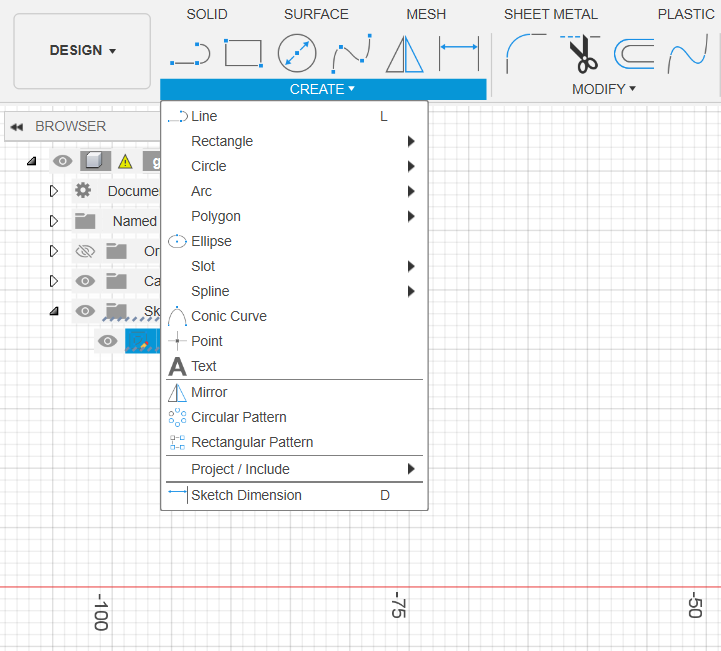
Now the form is not completely defined, so you can still move the corners. However, the constraints make sure that after any changes, the form will still tile seamlessly with itself.
To check if everything has worked, you can select in this case the Circular Pattern option. Choose one point where three identical points meet as the mirror point. If everything is correct, the three shapes should tile perfectly together.
What You Can Do Now
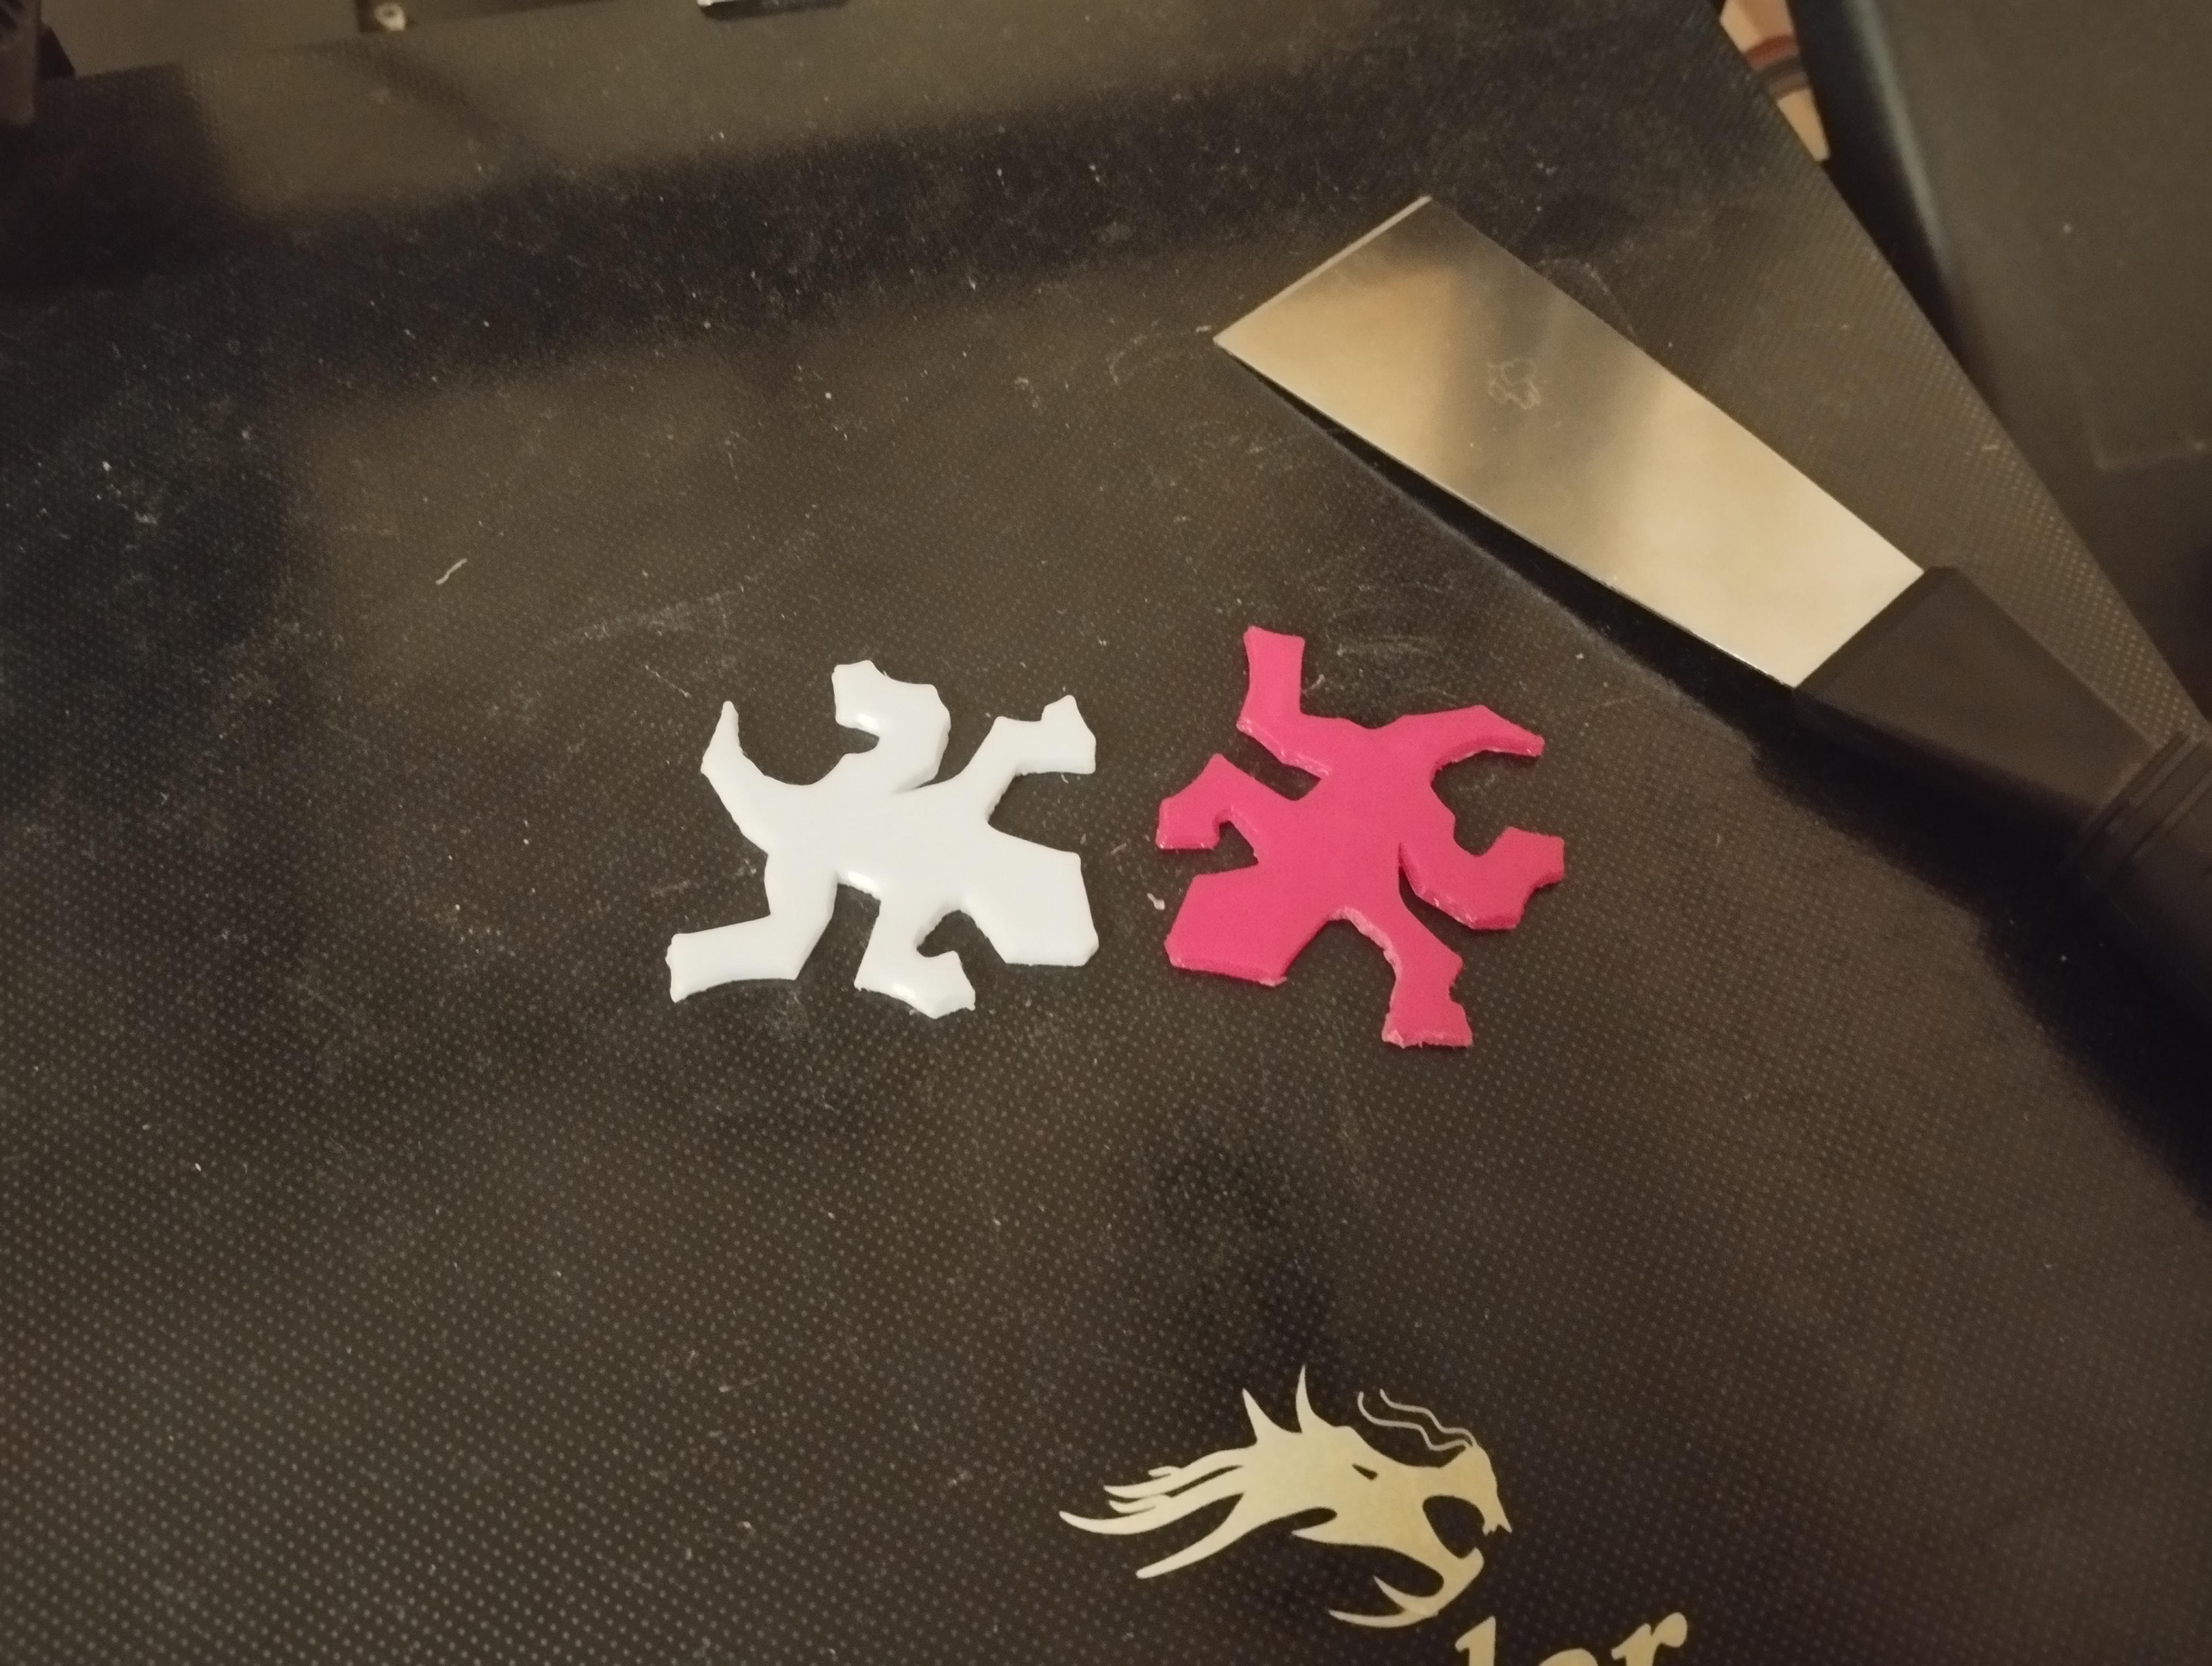
- You could edit your sketch further in Fusion and prepare it for 3D printing. You probably will need to adjust some side lengths to allow for more tolerance. Your model is designed to fit perfectly but your 3D printer doesn't print 100% accurately. You will need to increase the tolerance to make them tile correctly. Alternatively, you can just print them and sand them down afterward to make them fit.
- You can export the sketch - for example as fbx or obj - and import into Blender. You can use the Array Modifier to make your pattern tile seamlessly. From there, you could use sculpting tools to personalize your model or edit it in other ways.
- If you want to export the sketch as an SVG file, use this tutorial https://www.instructables.com/Export-a-SVG-File-in-Fusion-360/ or if that doesn´t work import and export it in Blender as svg. In Blender, you will need to delete everything but the outline and convert it to Grease Pencil to export it properly. (There is probably a much easier method.)
Thanks for following along. Feel free to leave makes/ ideas / questions in the comments.