Digital Unicorn
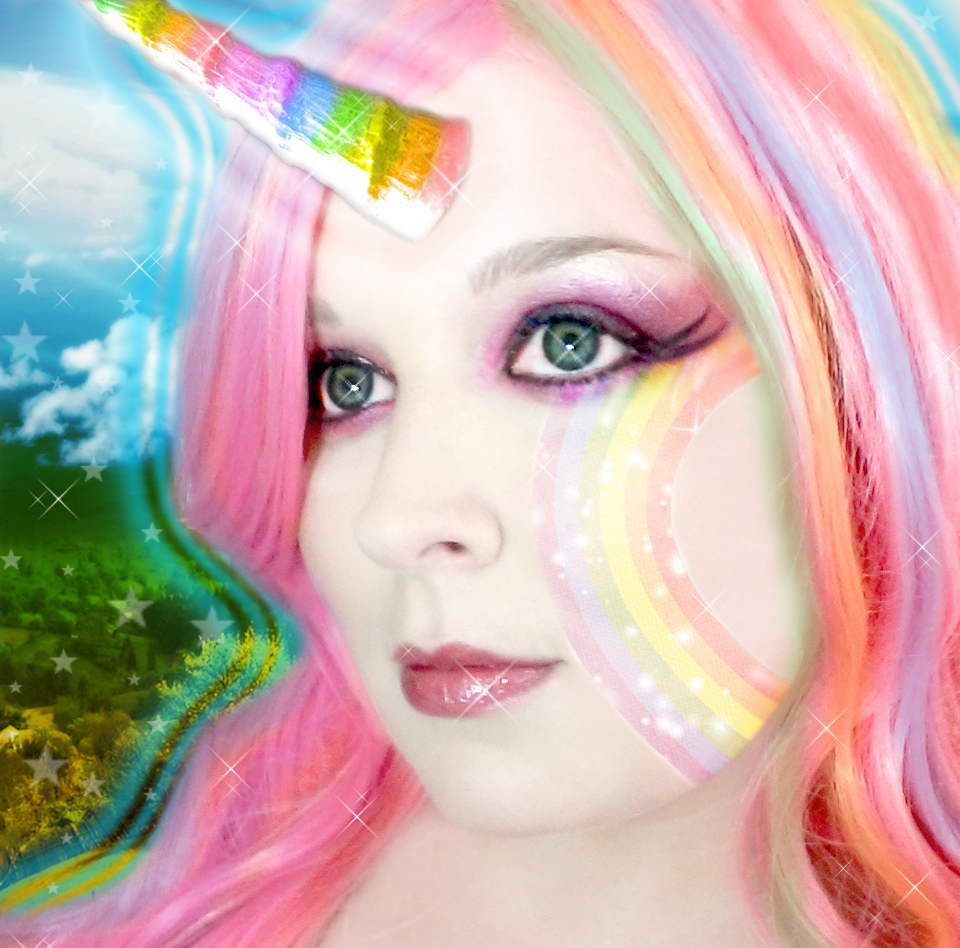
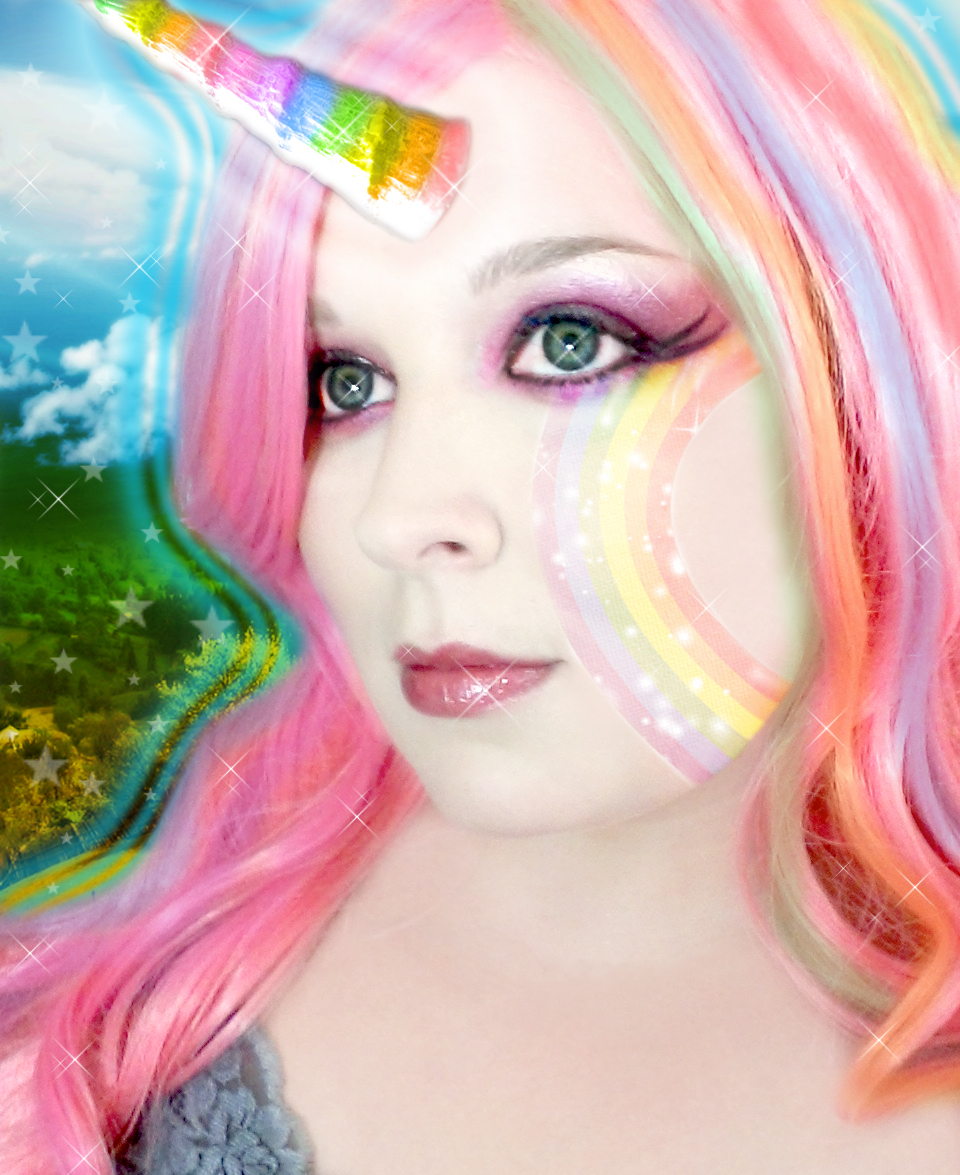
I don't think there is a standard for unicorn humans, but I will just share my take. :) This is what I wanted to do for myself to transform into a digital unicorn. Using Photoshop and some pretty images of nature and rainbows, you'll have lots of fun.
Horn Shopping
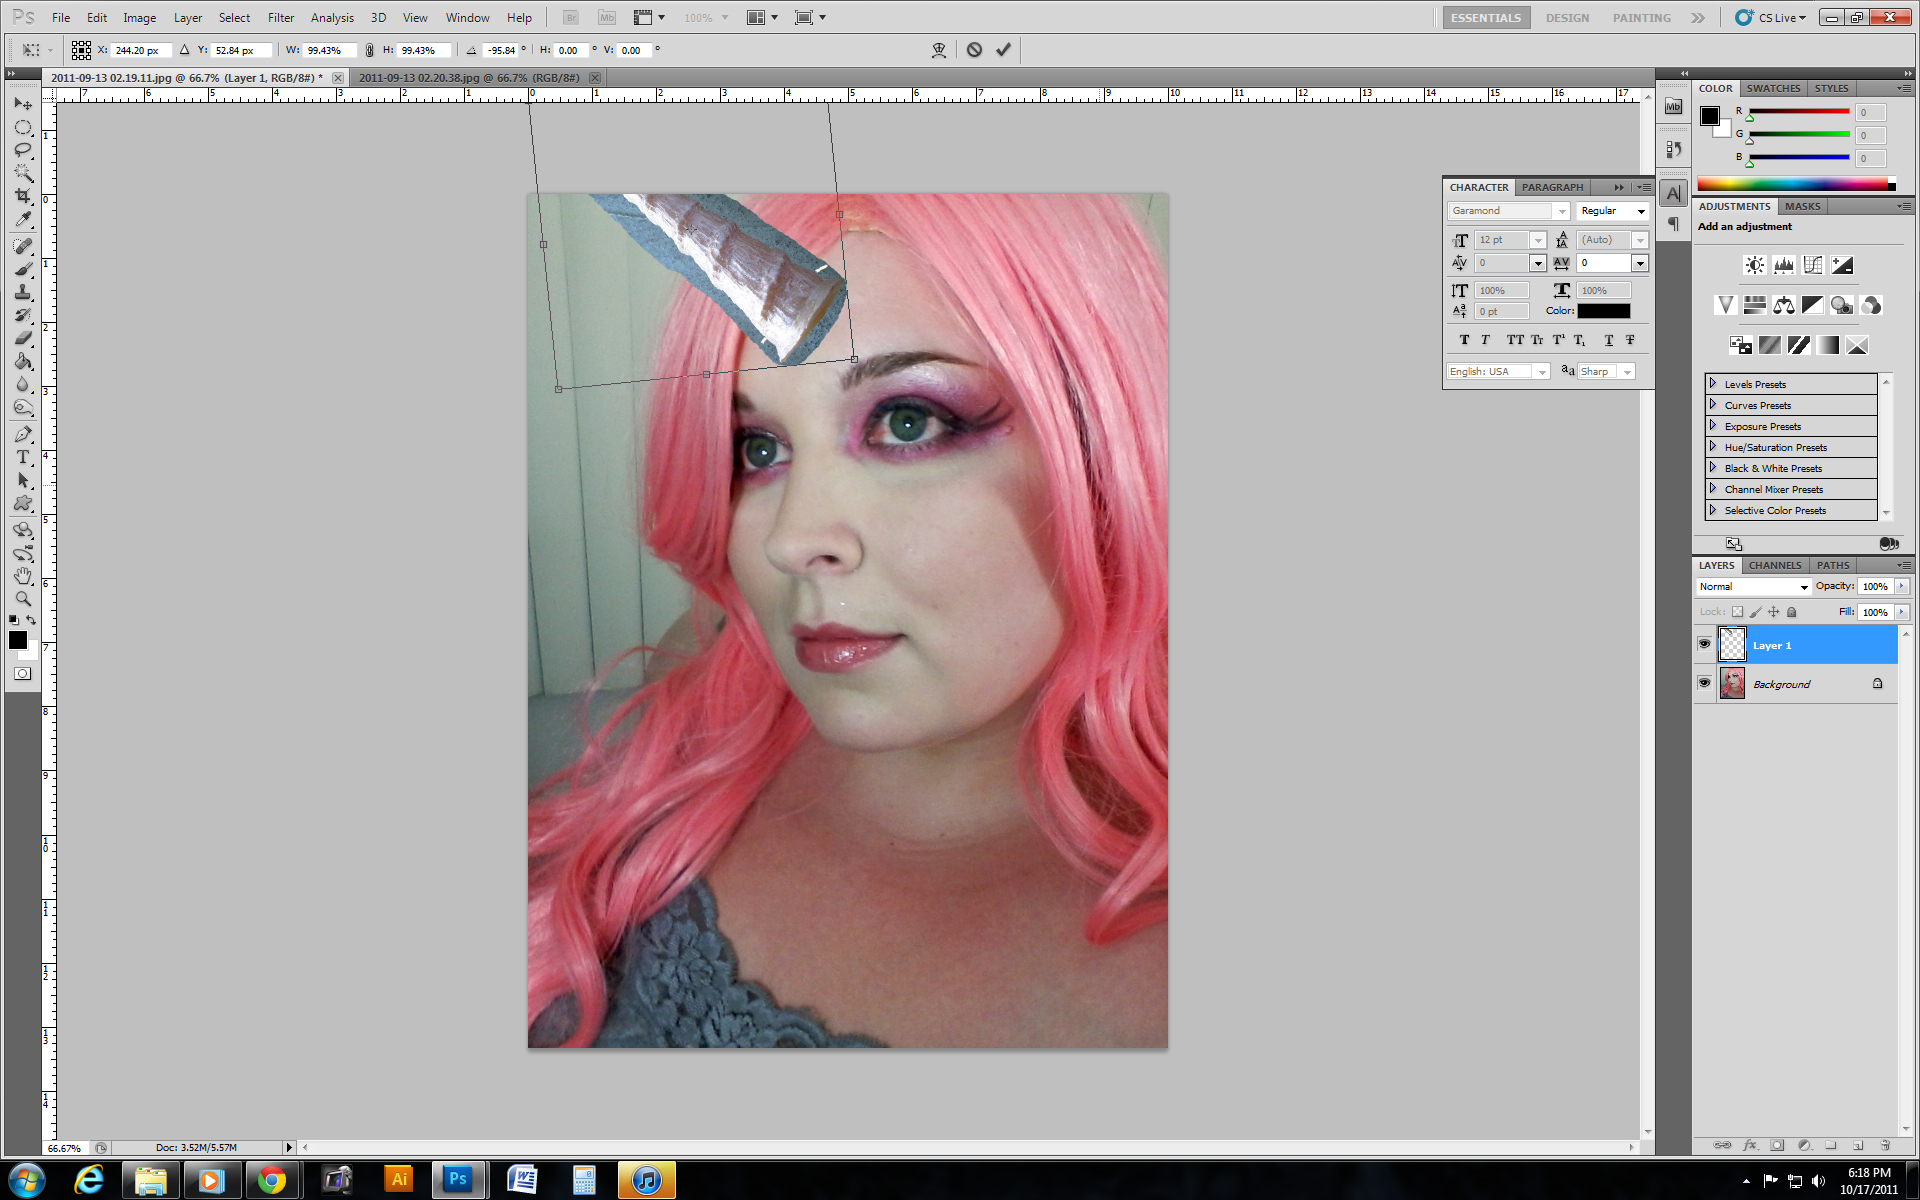
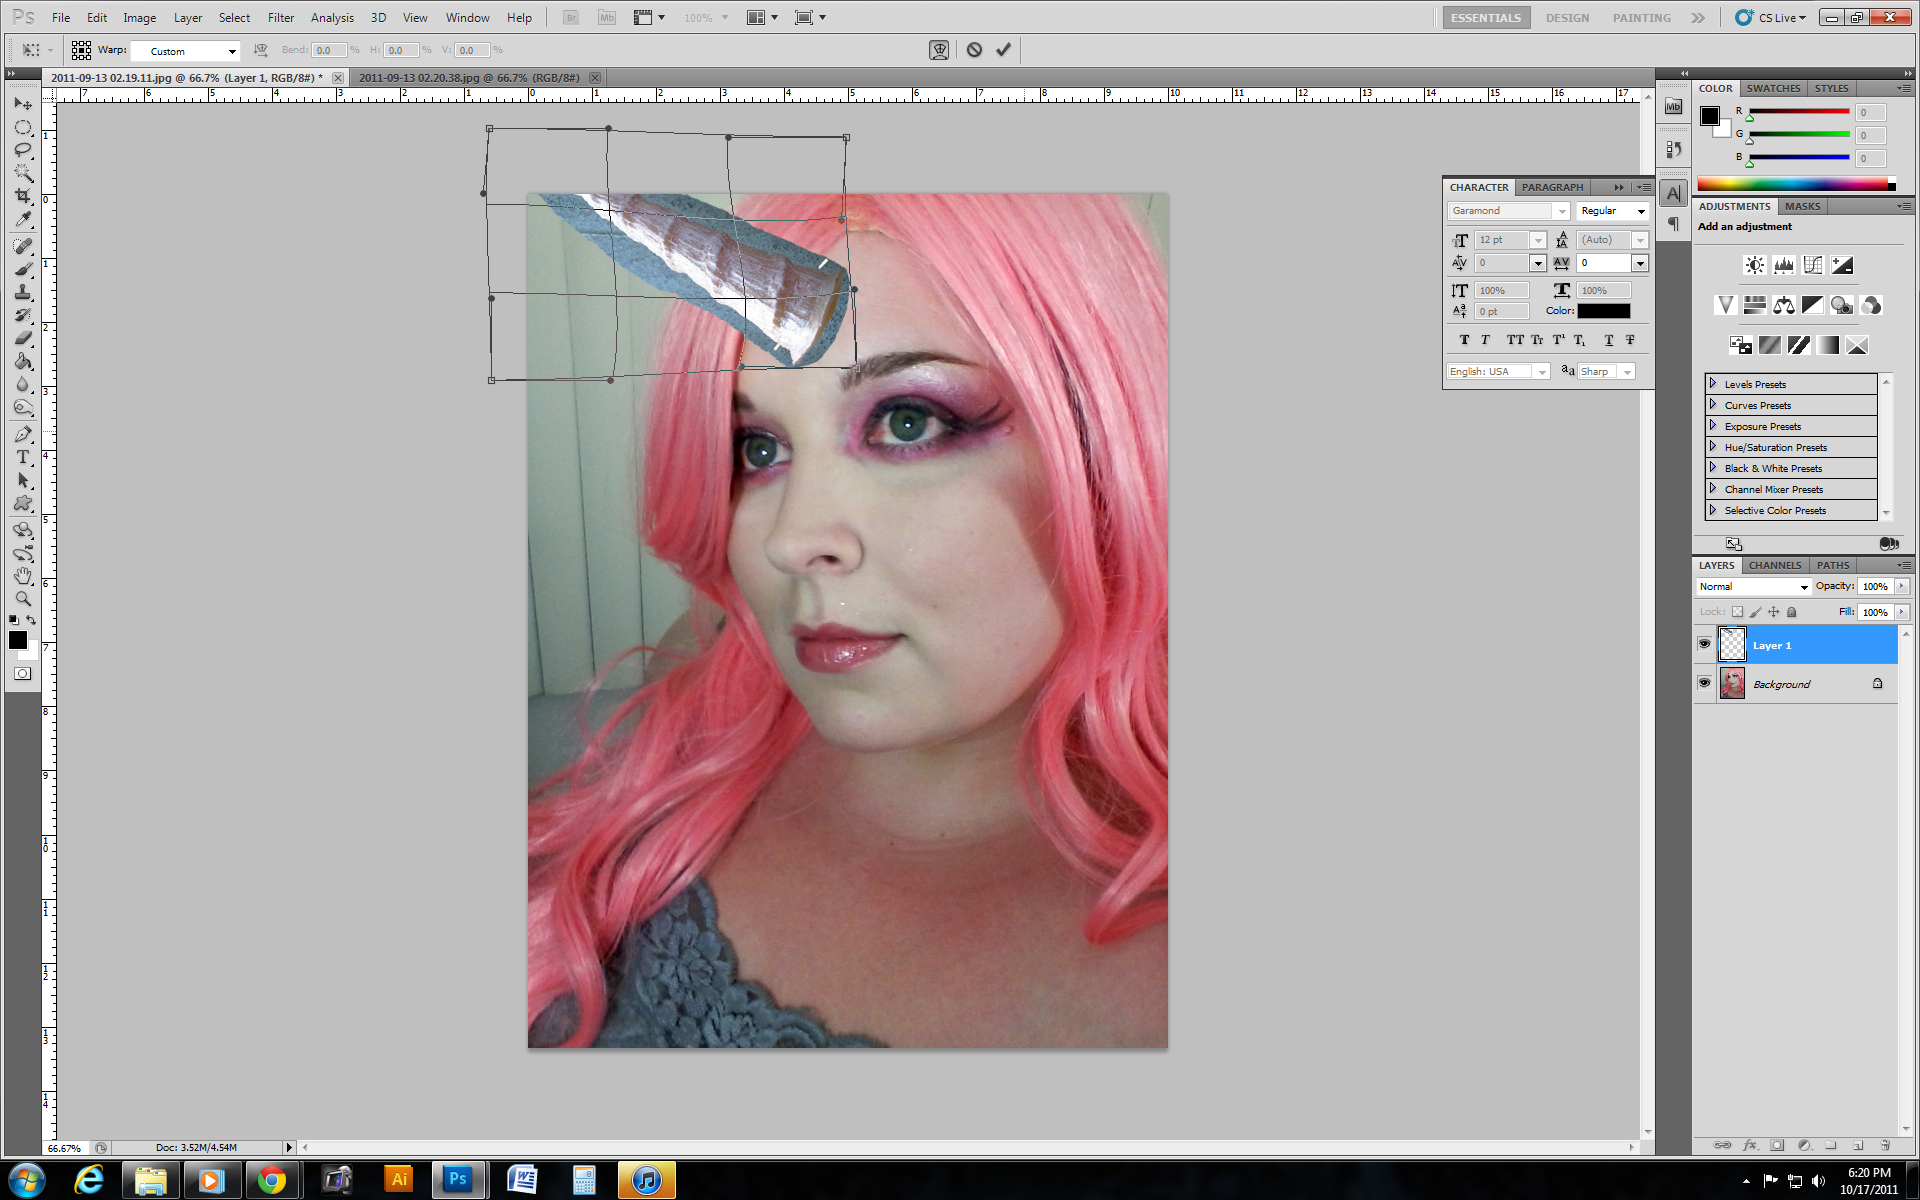
Find the image that you want to use, and the horn you'd like to adorn upon yourself or someone else.
Use the lasso tool to outline the horn and press V on your keyboard to initiate the MOVE option. Drag it onto your head. Press CONTROL + T to transform it in the position that you'd like, as well as size it appropriately. Press enter to commit to the change.
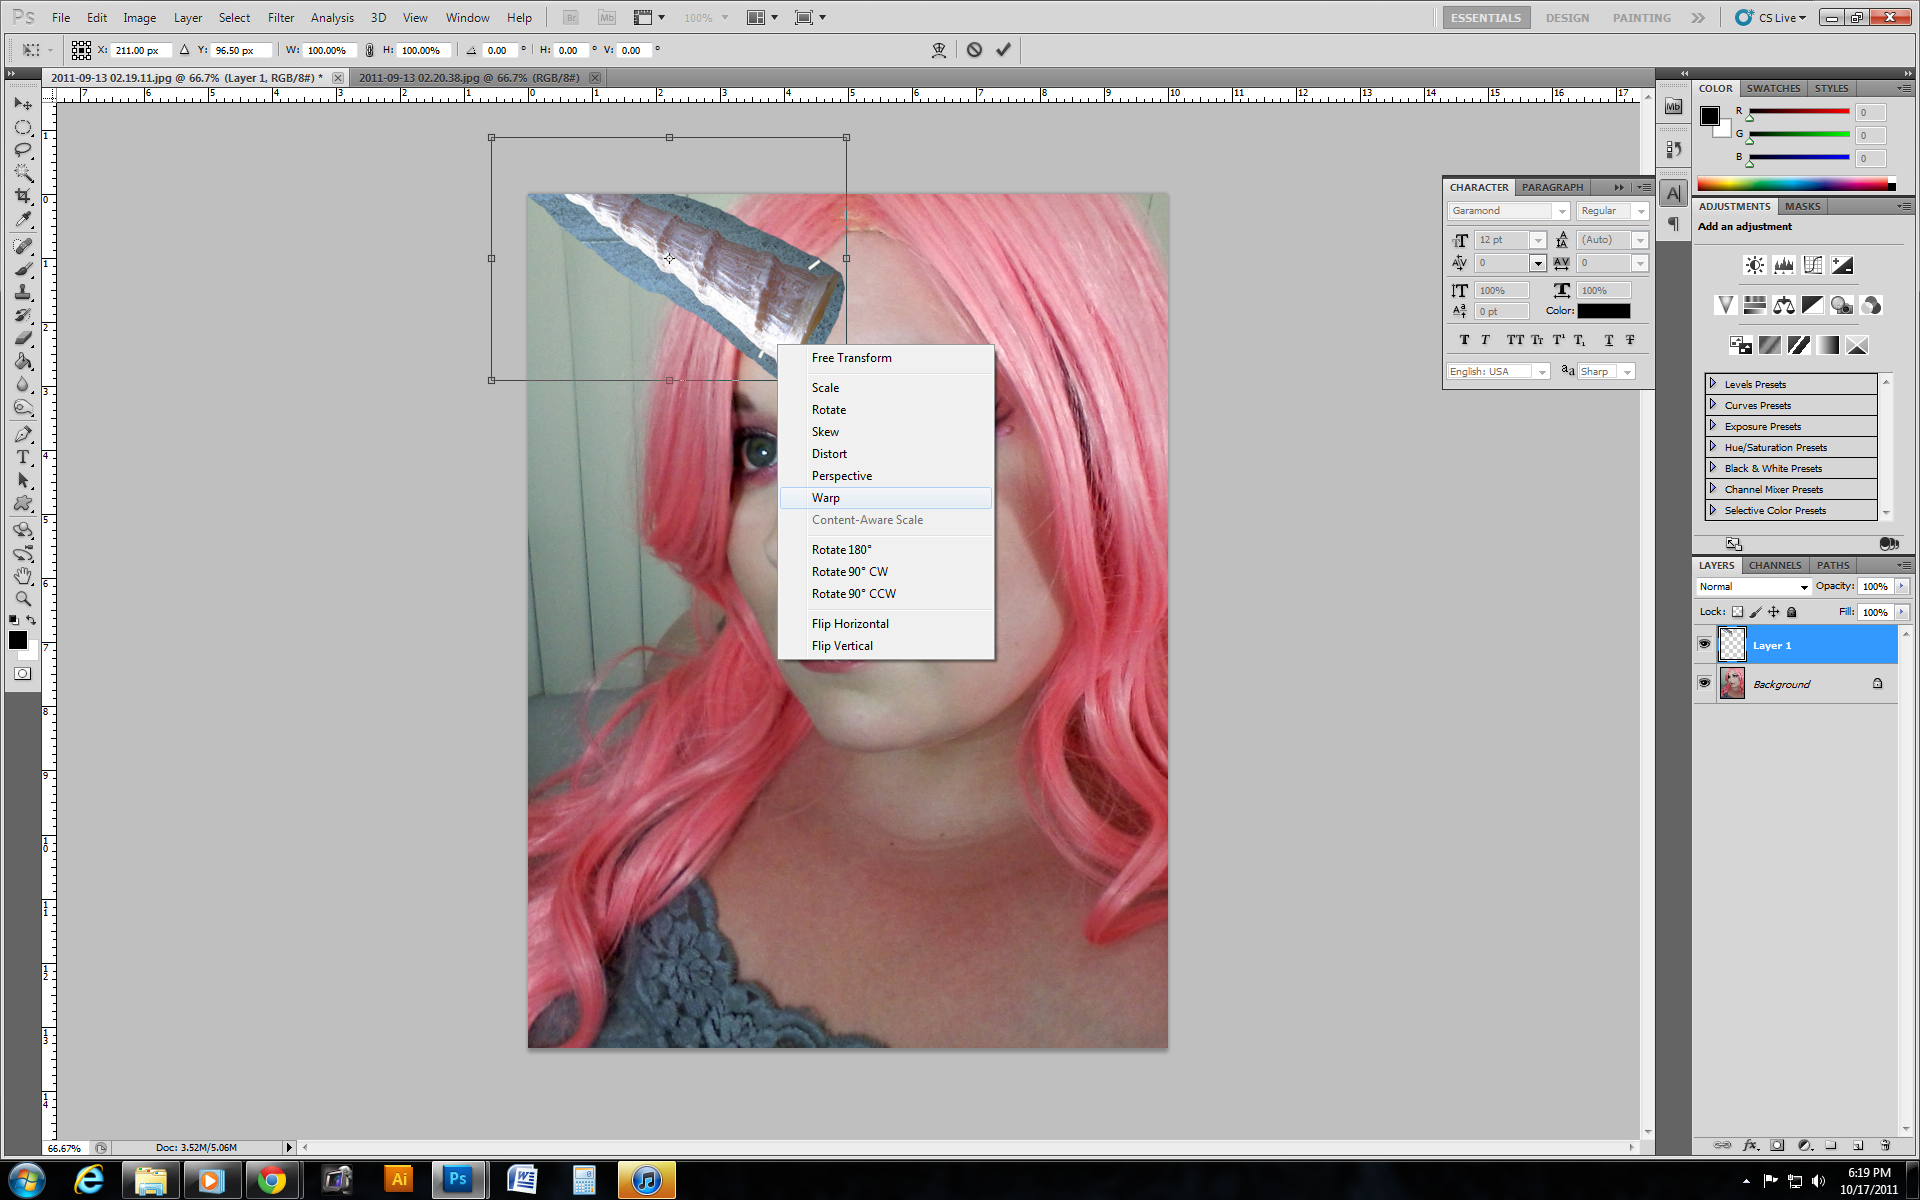
Next, transform it again, right click and select WARP. Manipulate it further if you'd like. Press enter to keep the change.
Next, use the eraser too, fuzzy circle shape and do a soft erase, close to the exterior of the horn.
Pale Face
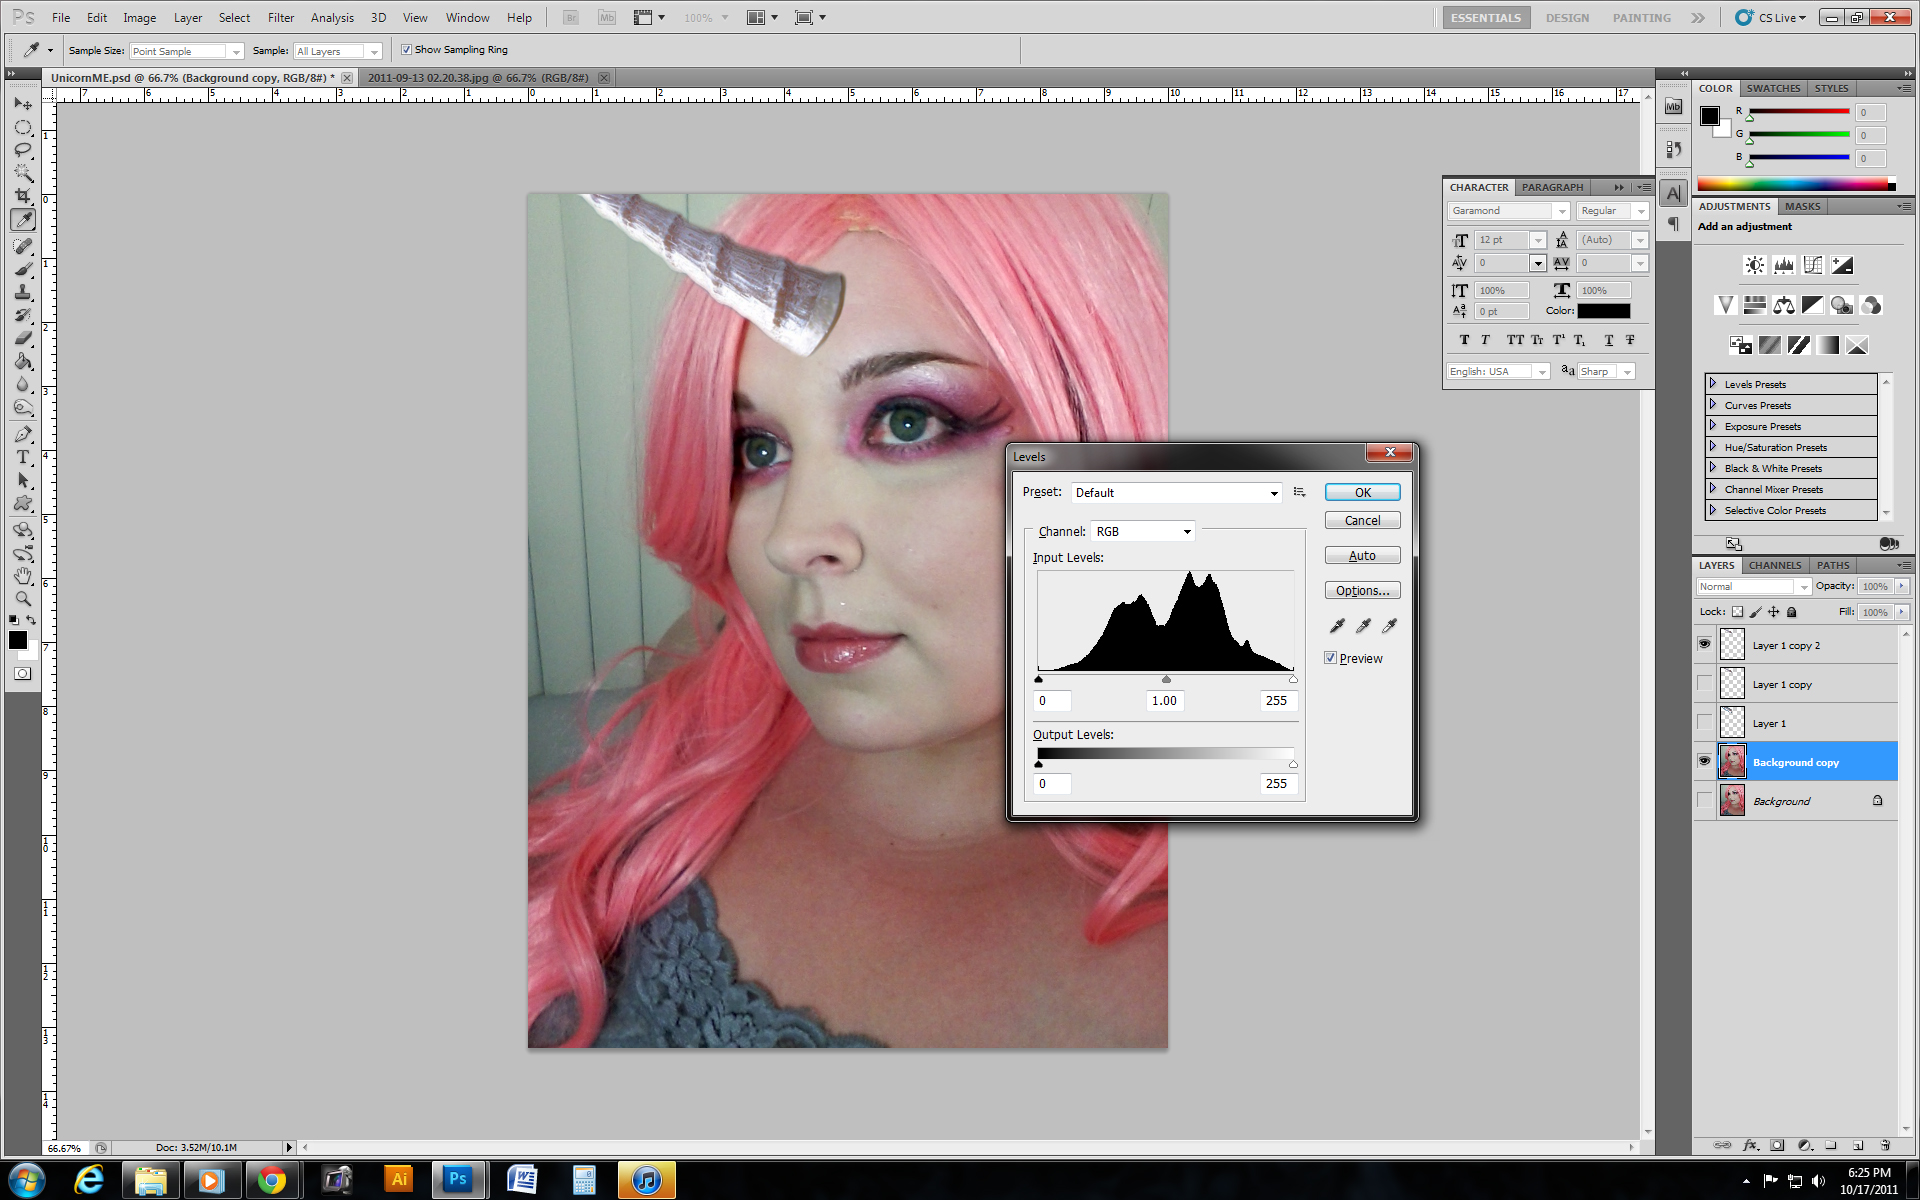
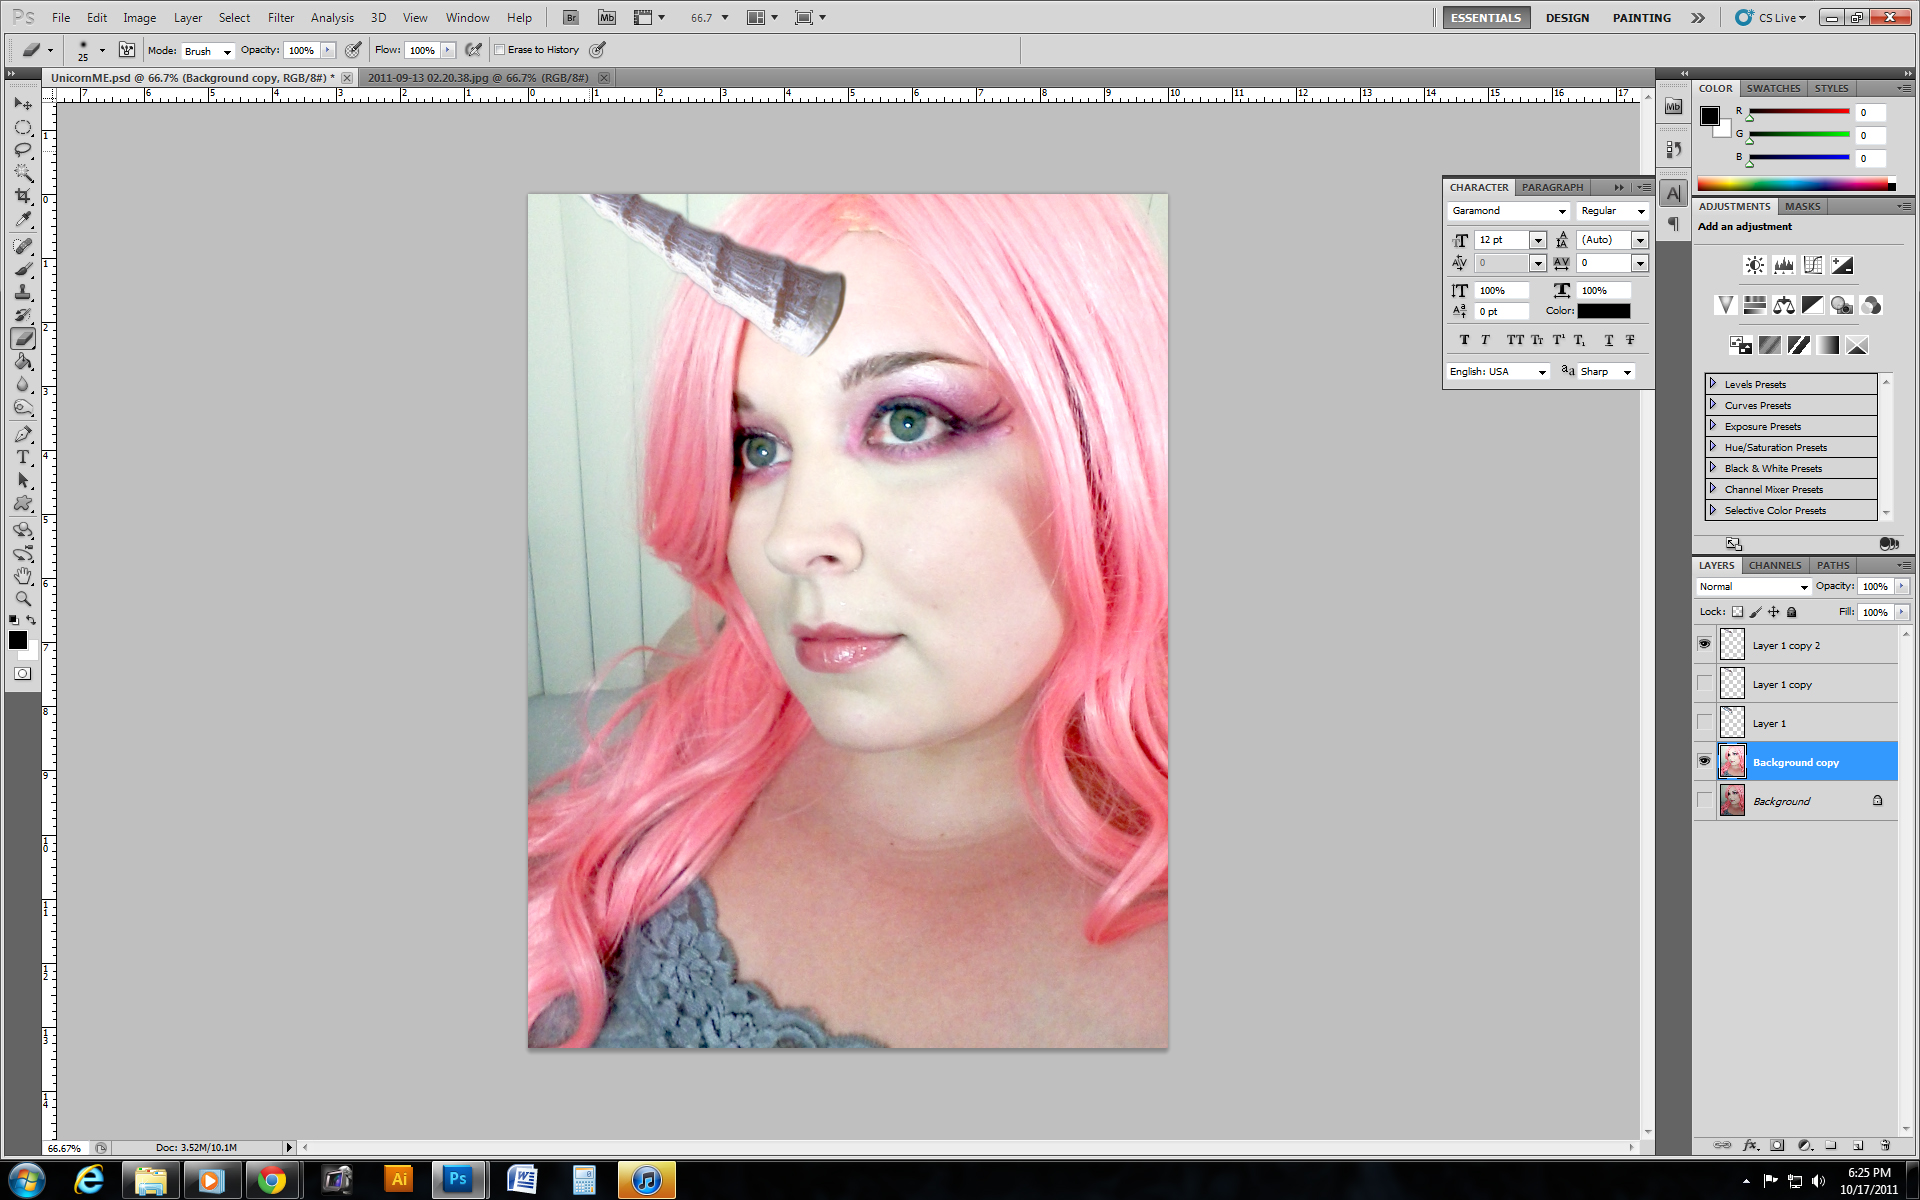
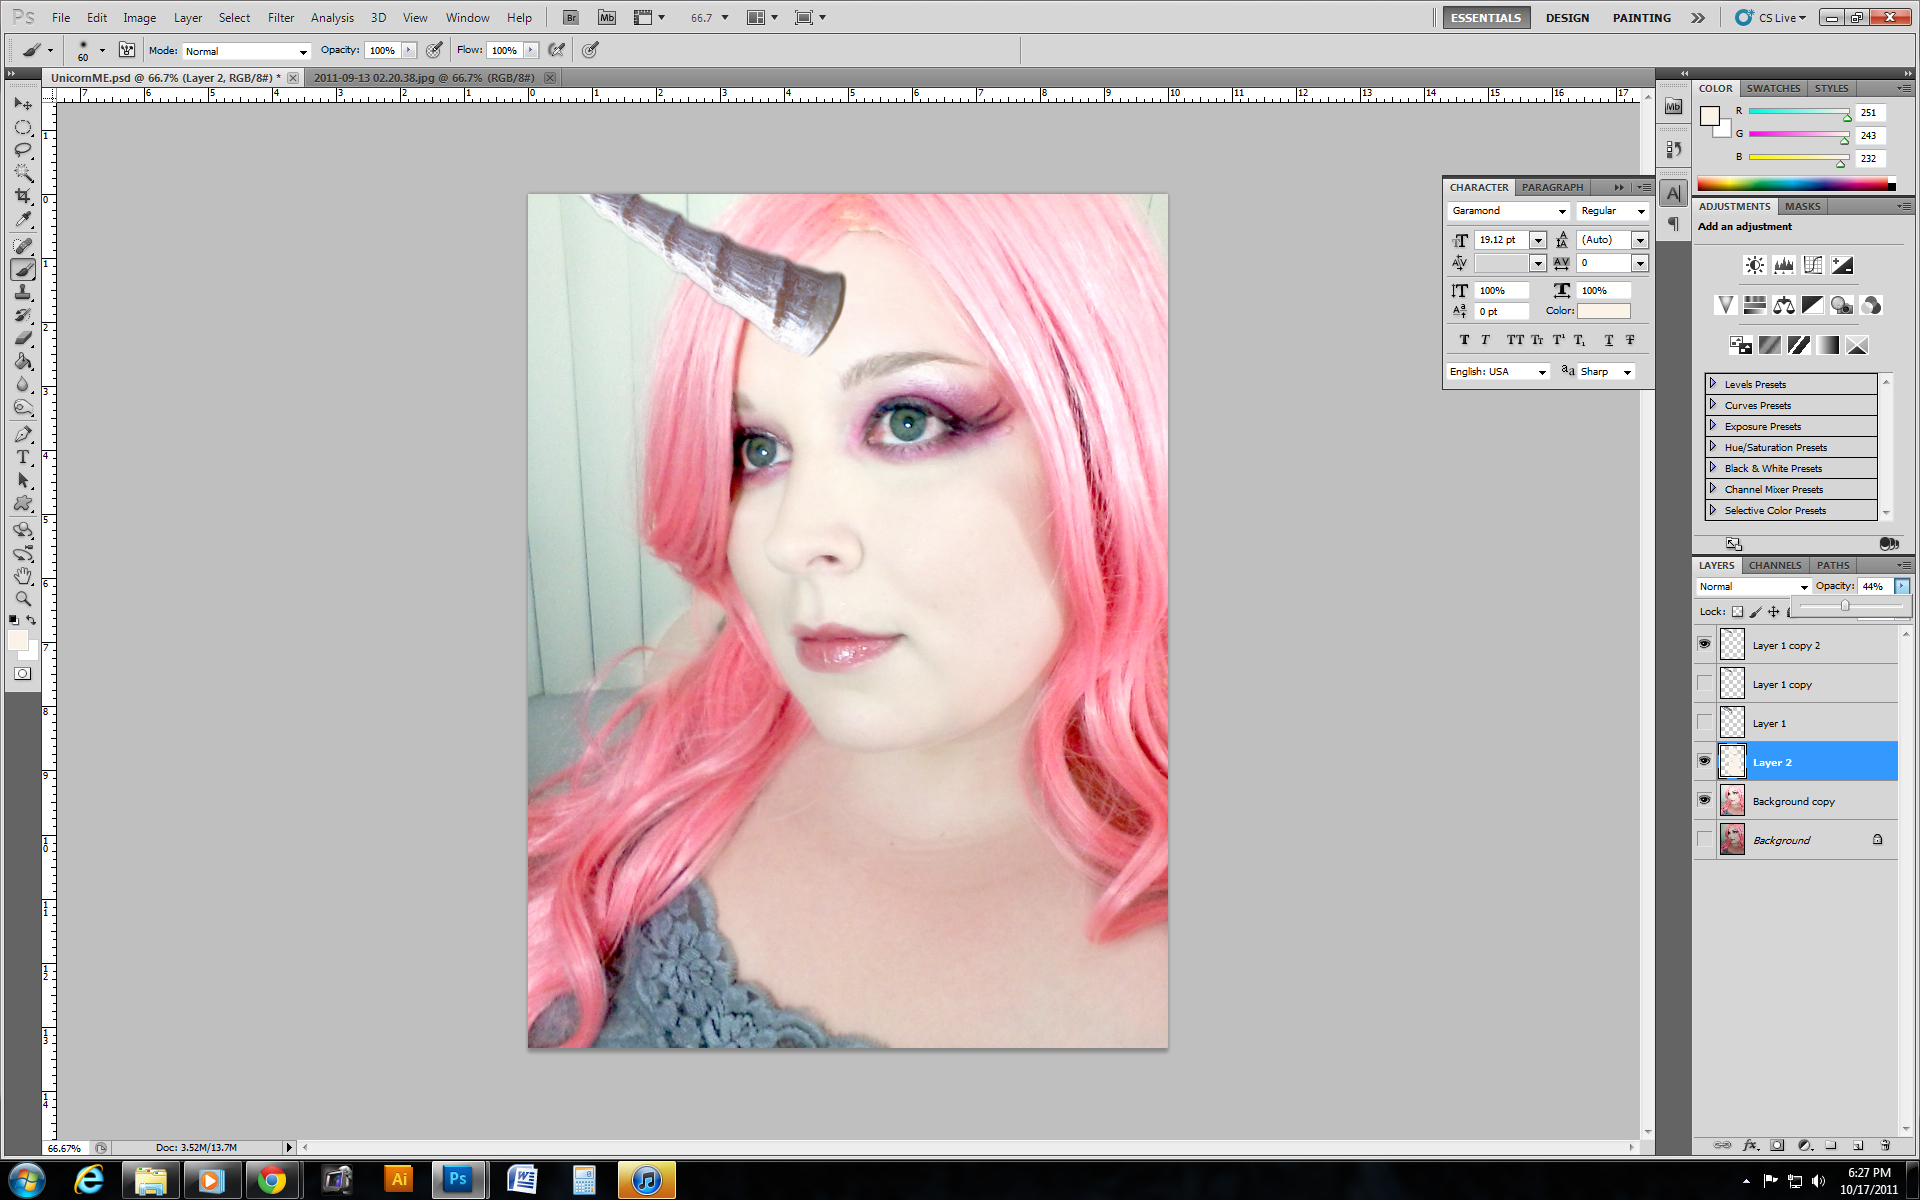
Time to change the look of your face to a more pale palette. Select the layer with your image (self) and press CONTROL + L to open the LEVELS option. Play with the little triangles on the timeline to adjust accordingly. You don't want to go grey, or black, but more light, while still keeping some darks in their true state.
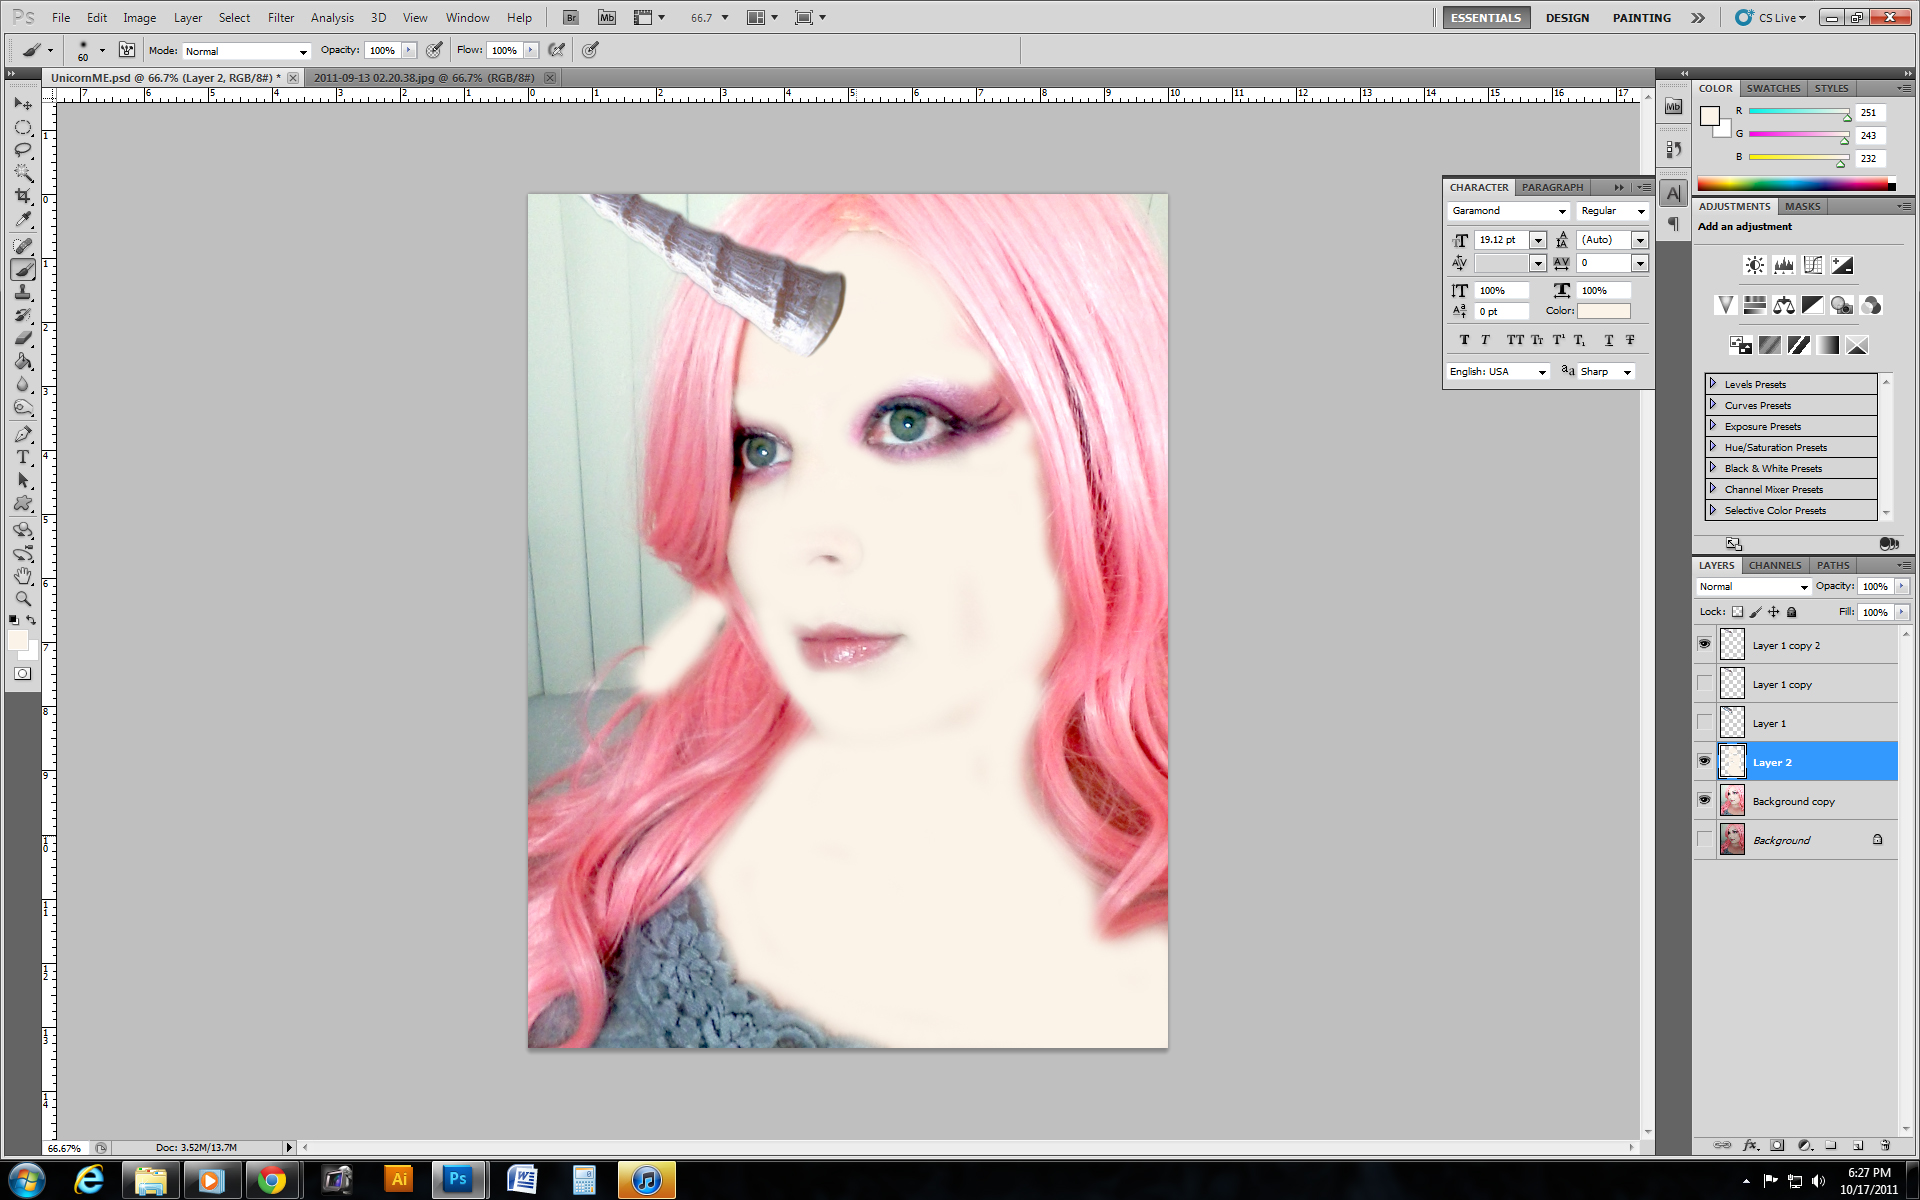
Next, make a new layer and use the eyedropper tool to select a light color from your new face color. Then go into paintbrush and do a coat over your skin that's showing, which will further lighten it. (If you can't get the color sampled correctly, make sure you have your SELF layer selected before you use the eyedropper, so it selects the color from the right layer. THEN switch to your NEW, blank layer, to start your painting.
Above the layers area, select the opacity to be about 40% so that it has a nice overlay.
Horny Decor
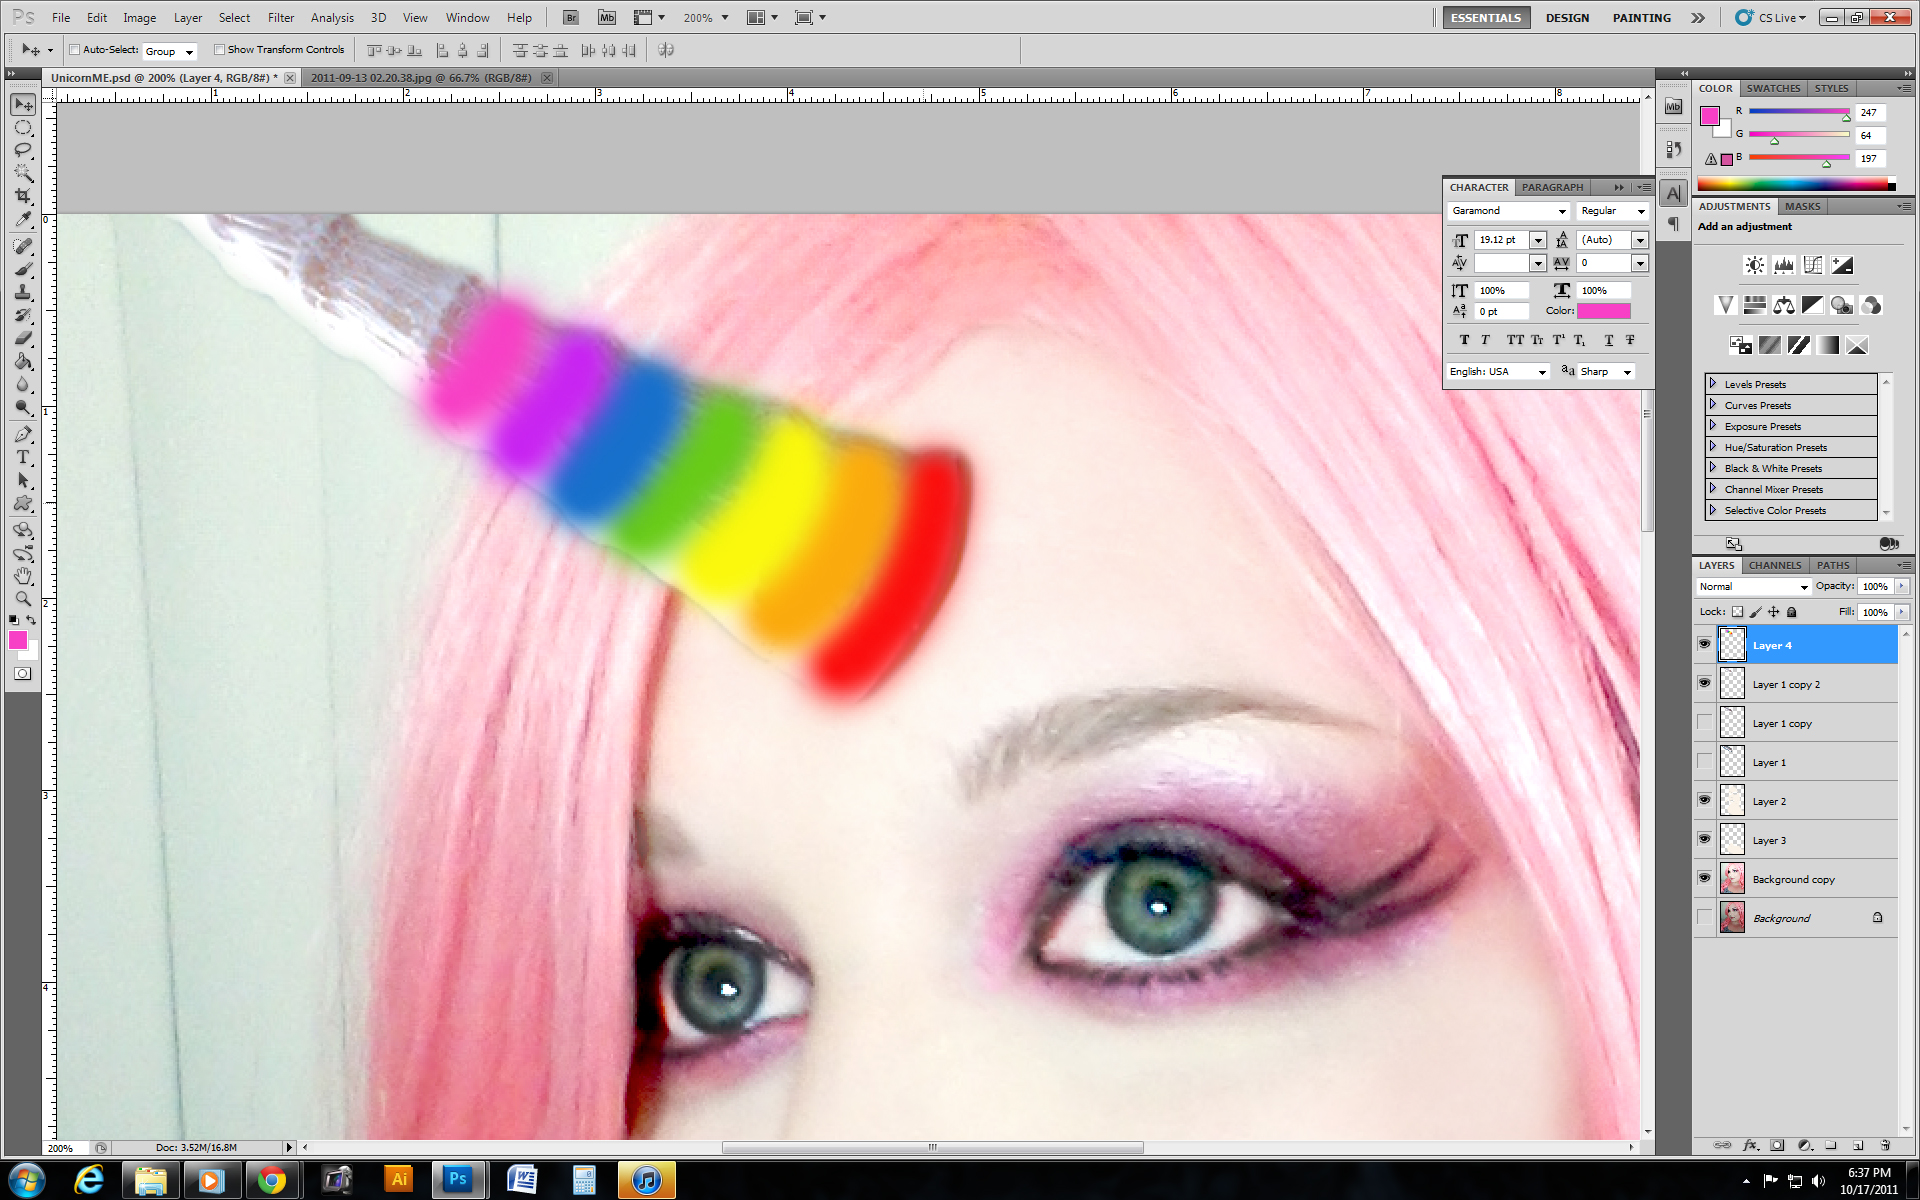

Now, make a new layer above the horn layer and keep using that soft brush shape. You want to paint your horn whatever colors you'd like. Just keep them all on the same layer.
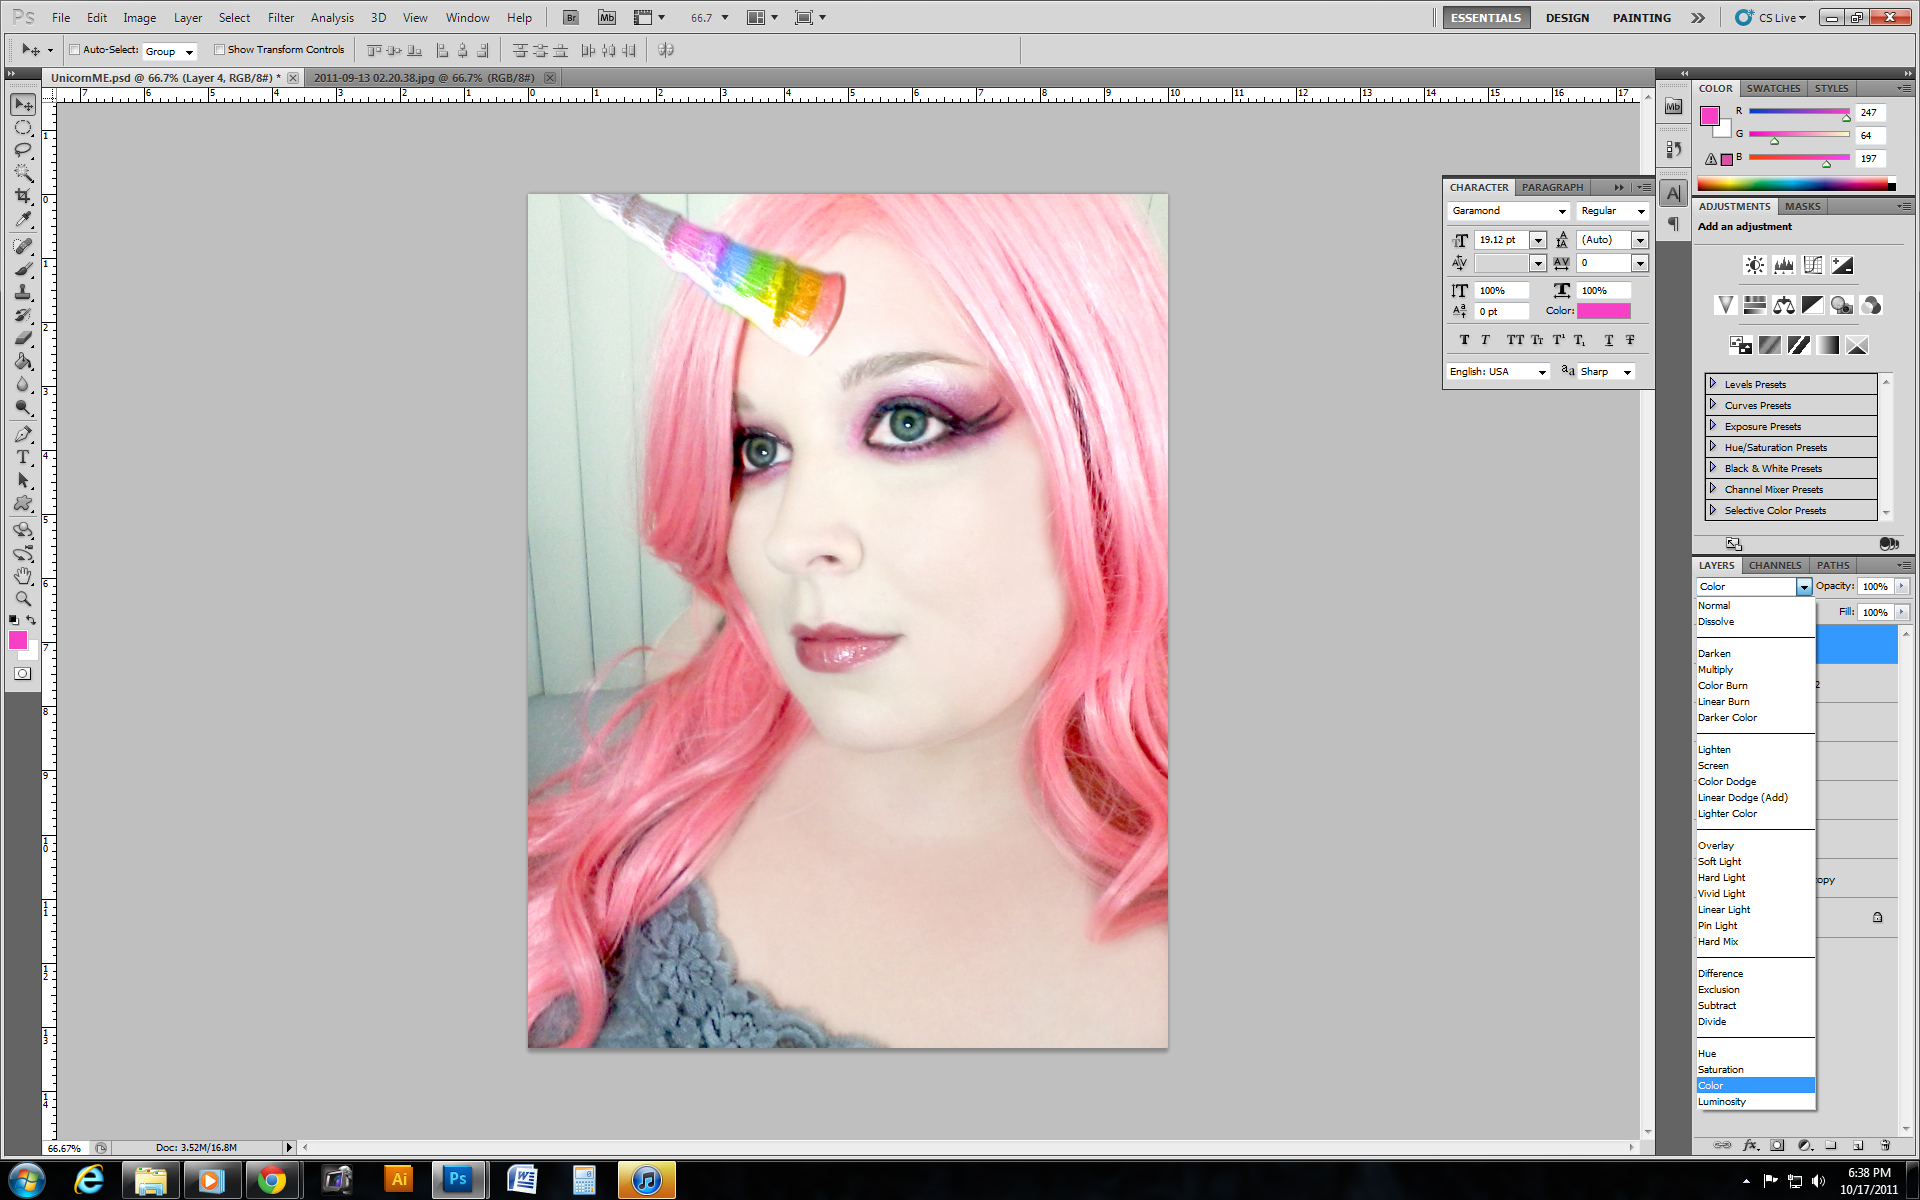
Next, change the layer mode to COLOR.
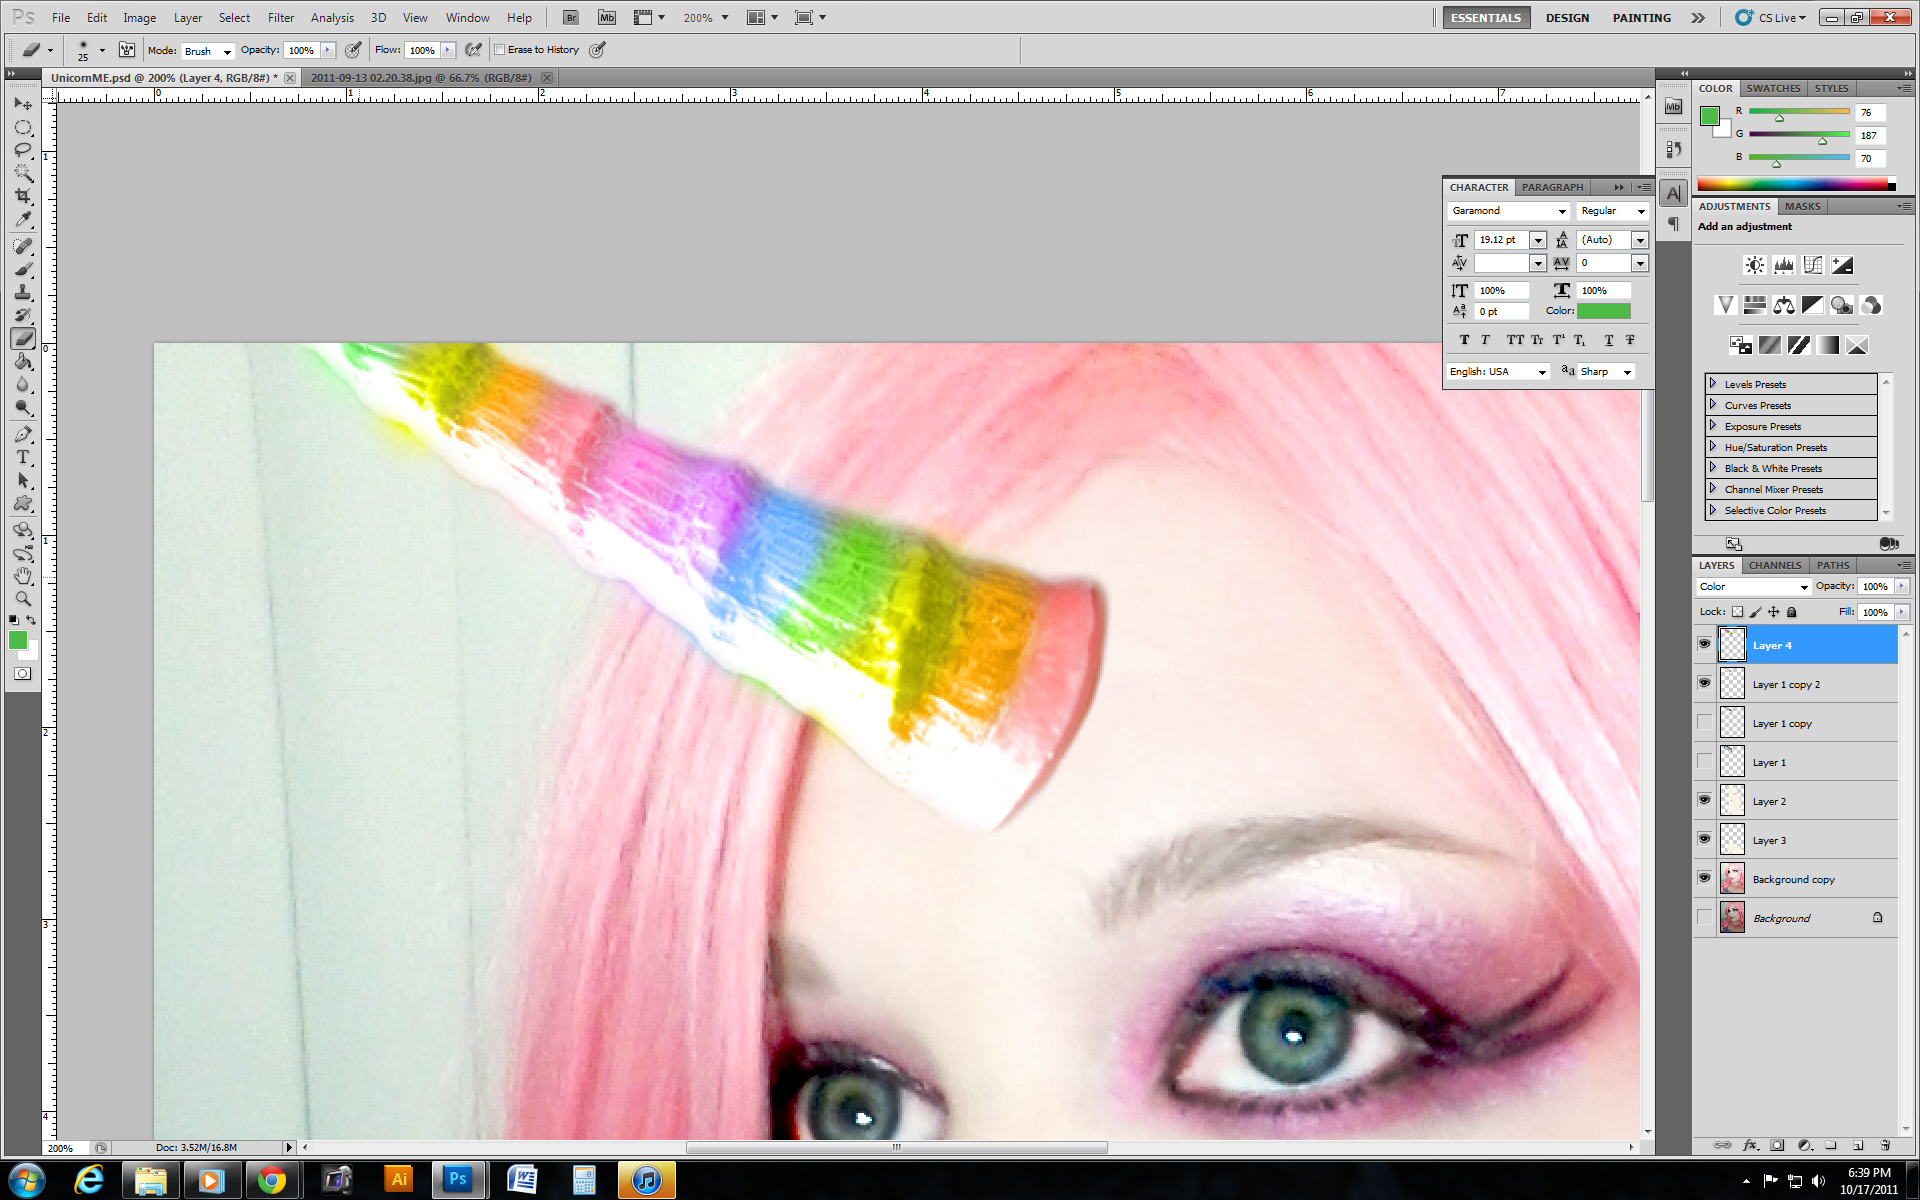
Now, use the soft eraser and get rid of the colors that you accidentally made outside the horn.
Next, change the layer mode to COLOR.
Now, use the soft eraser and get rid of the colors that you accidentally made outside the horn.
Setting the Mood
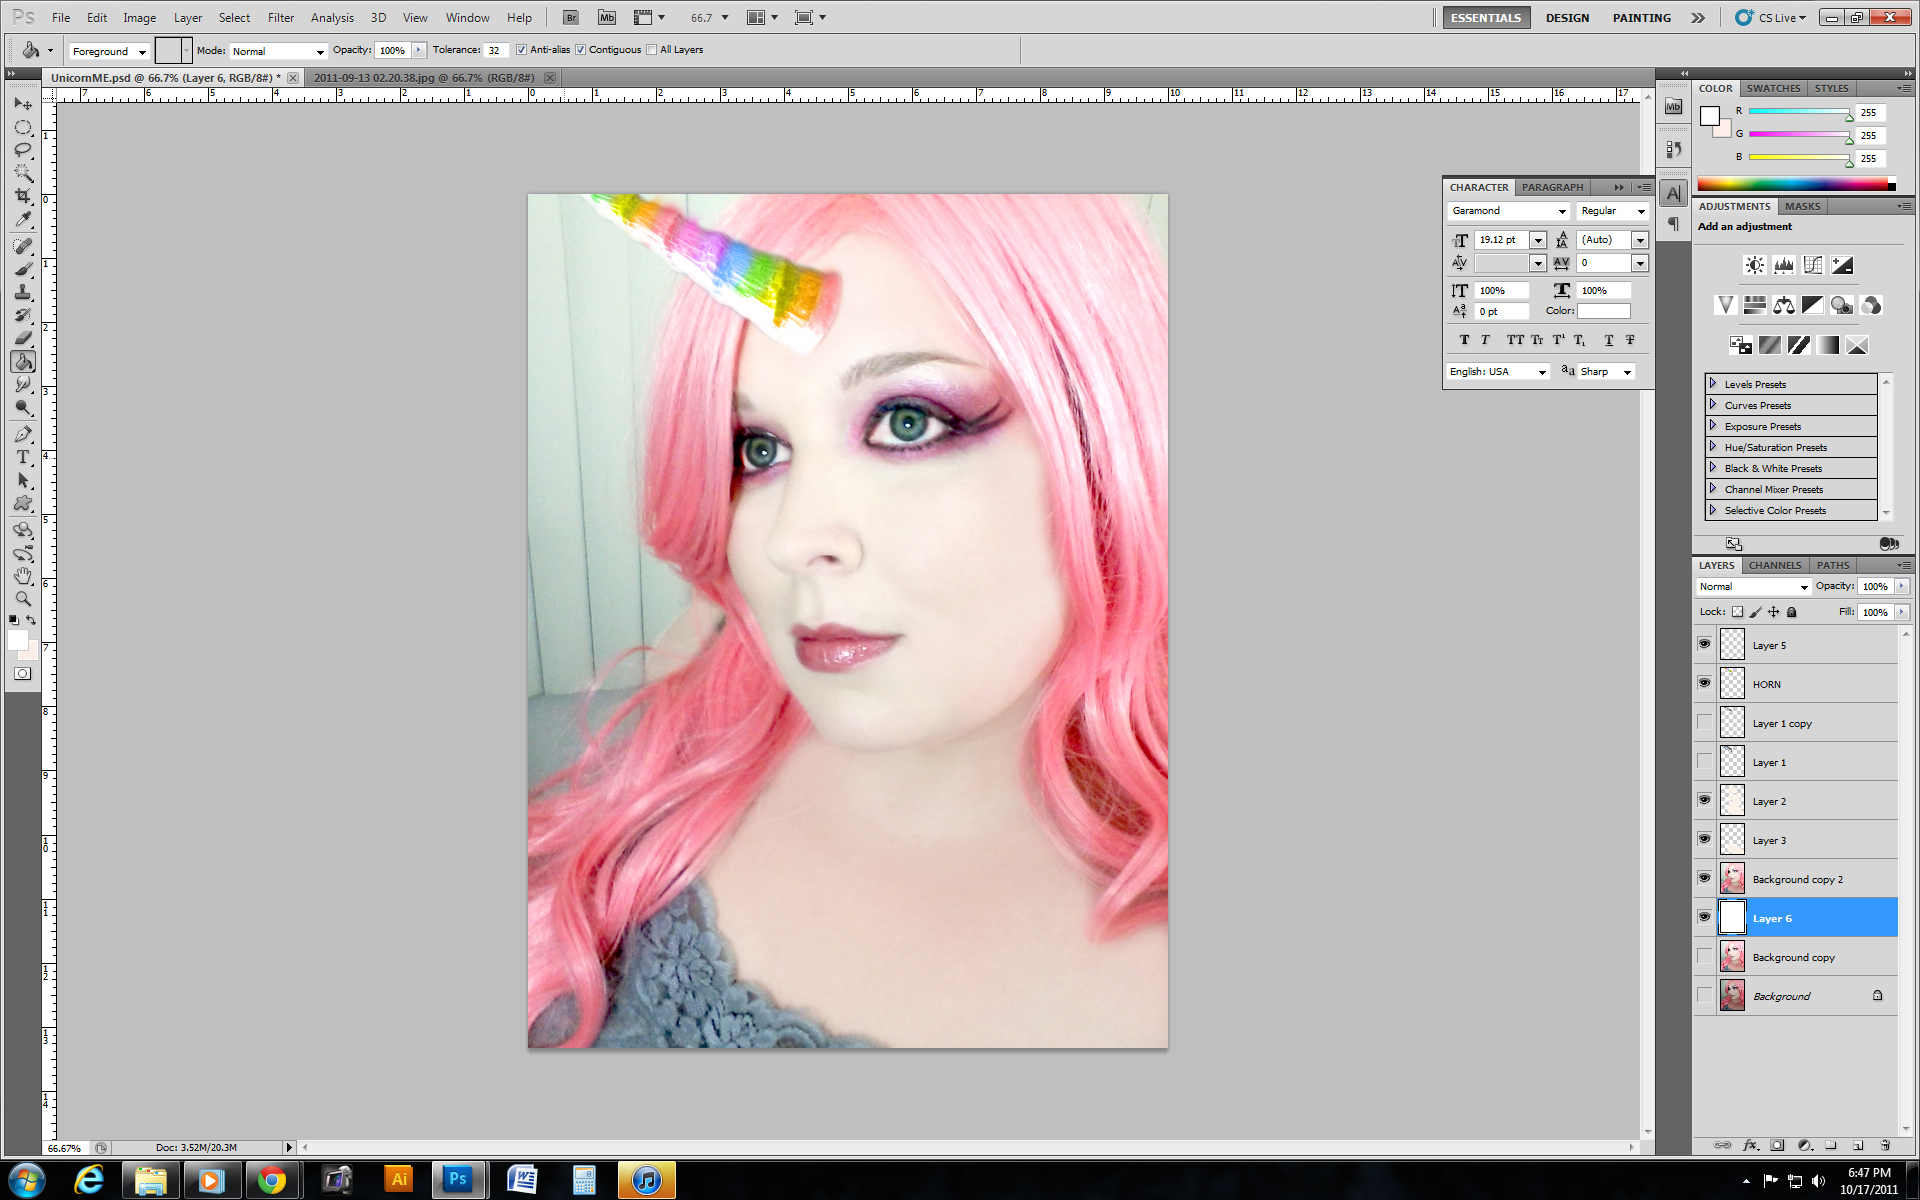
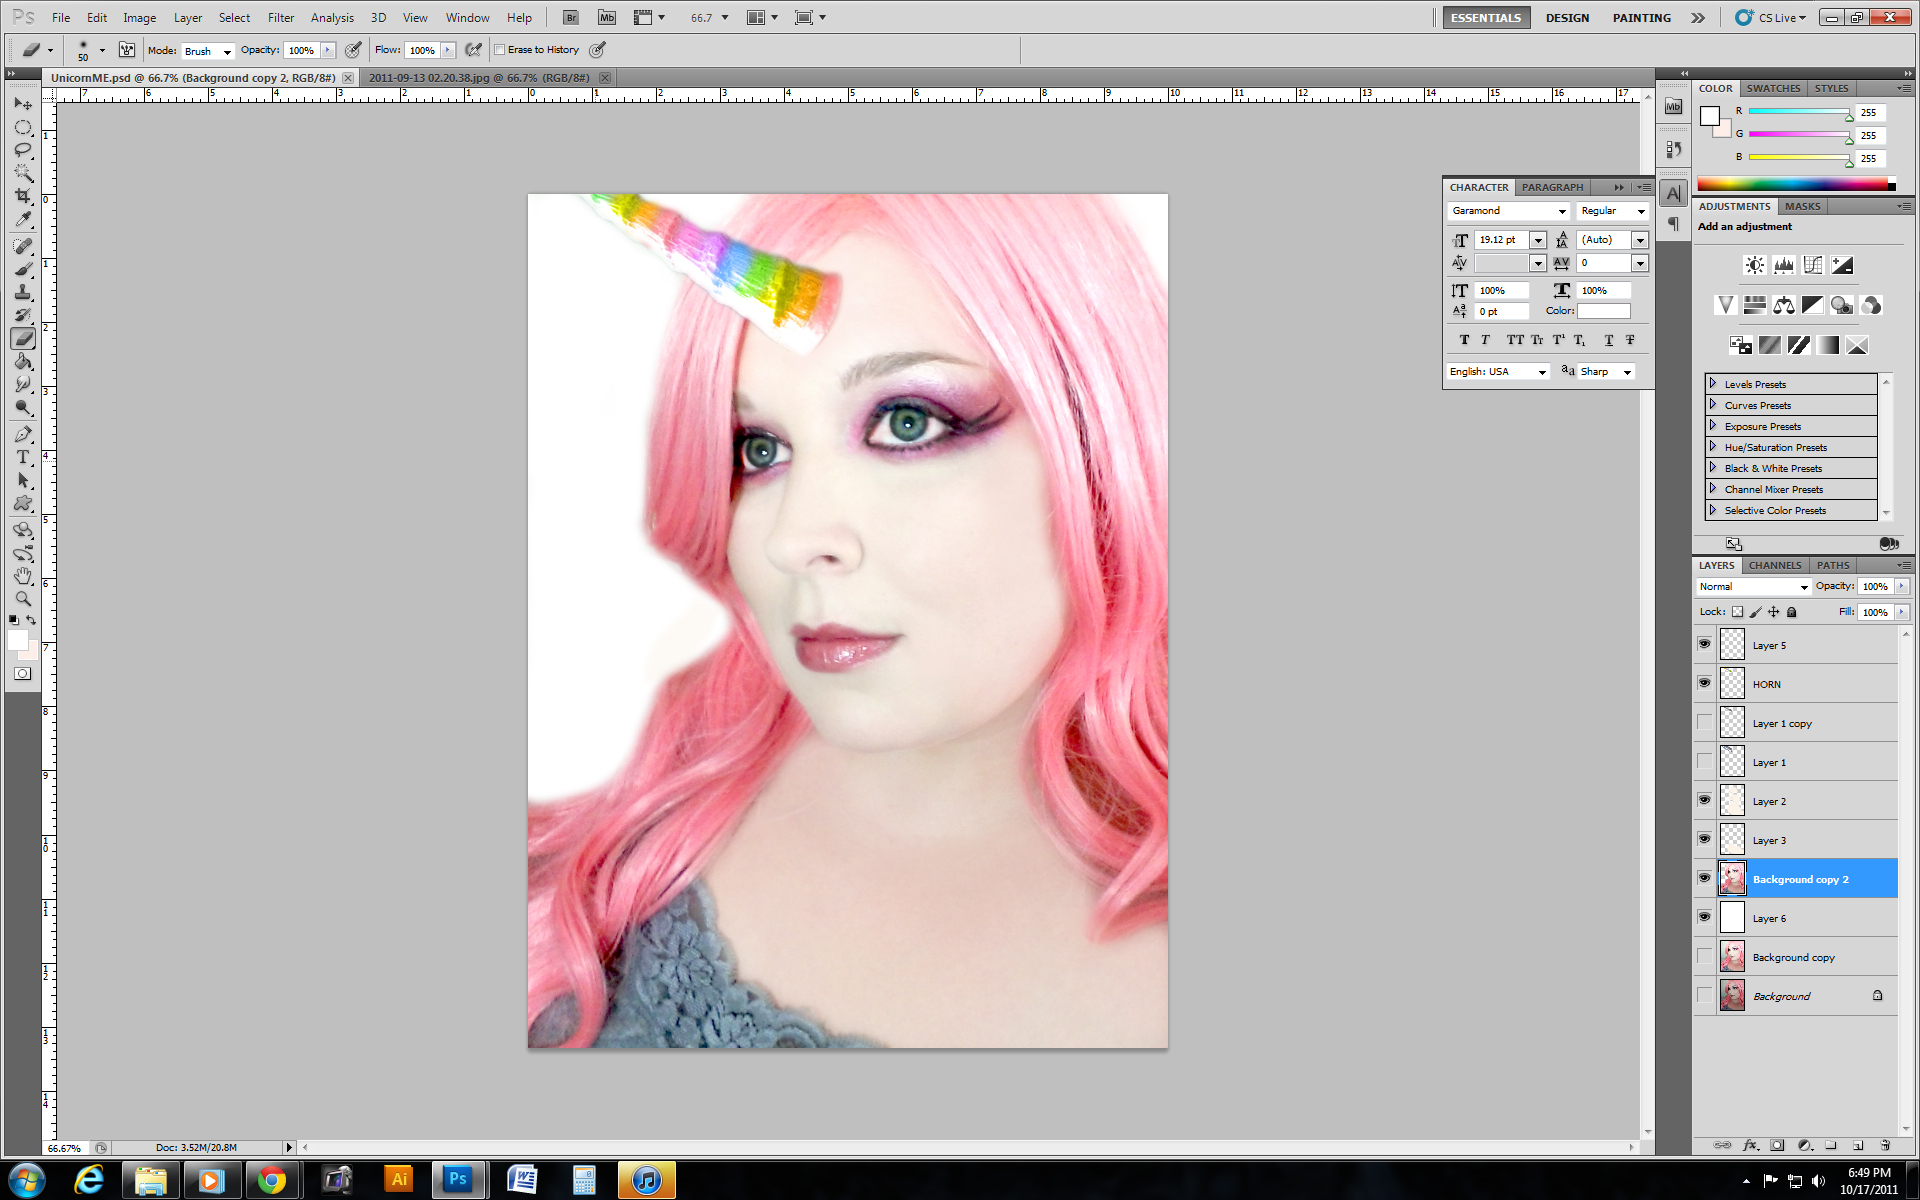
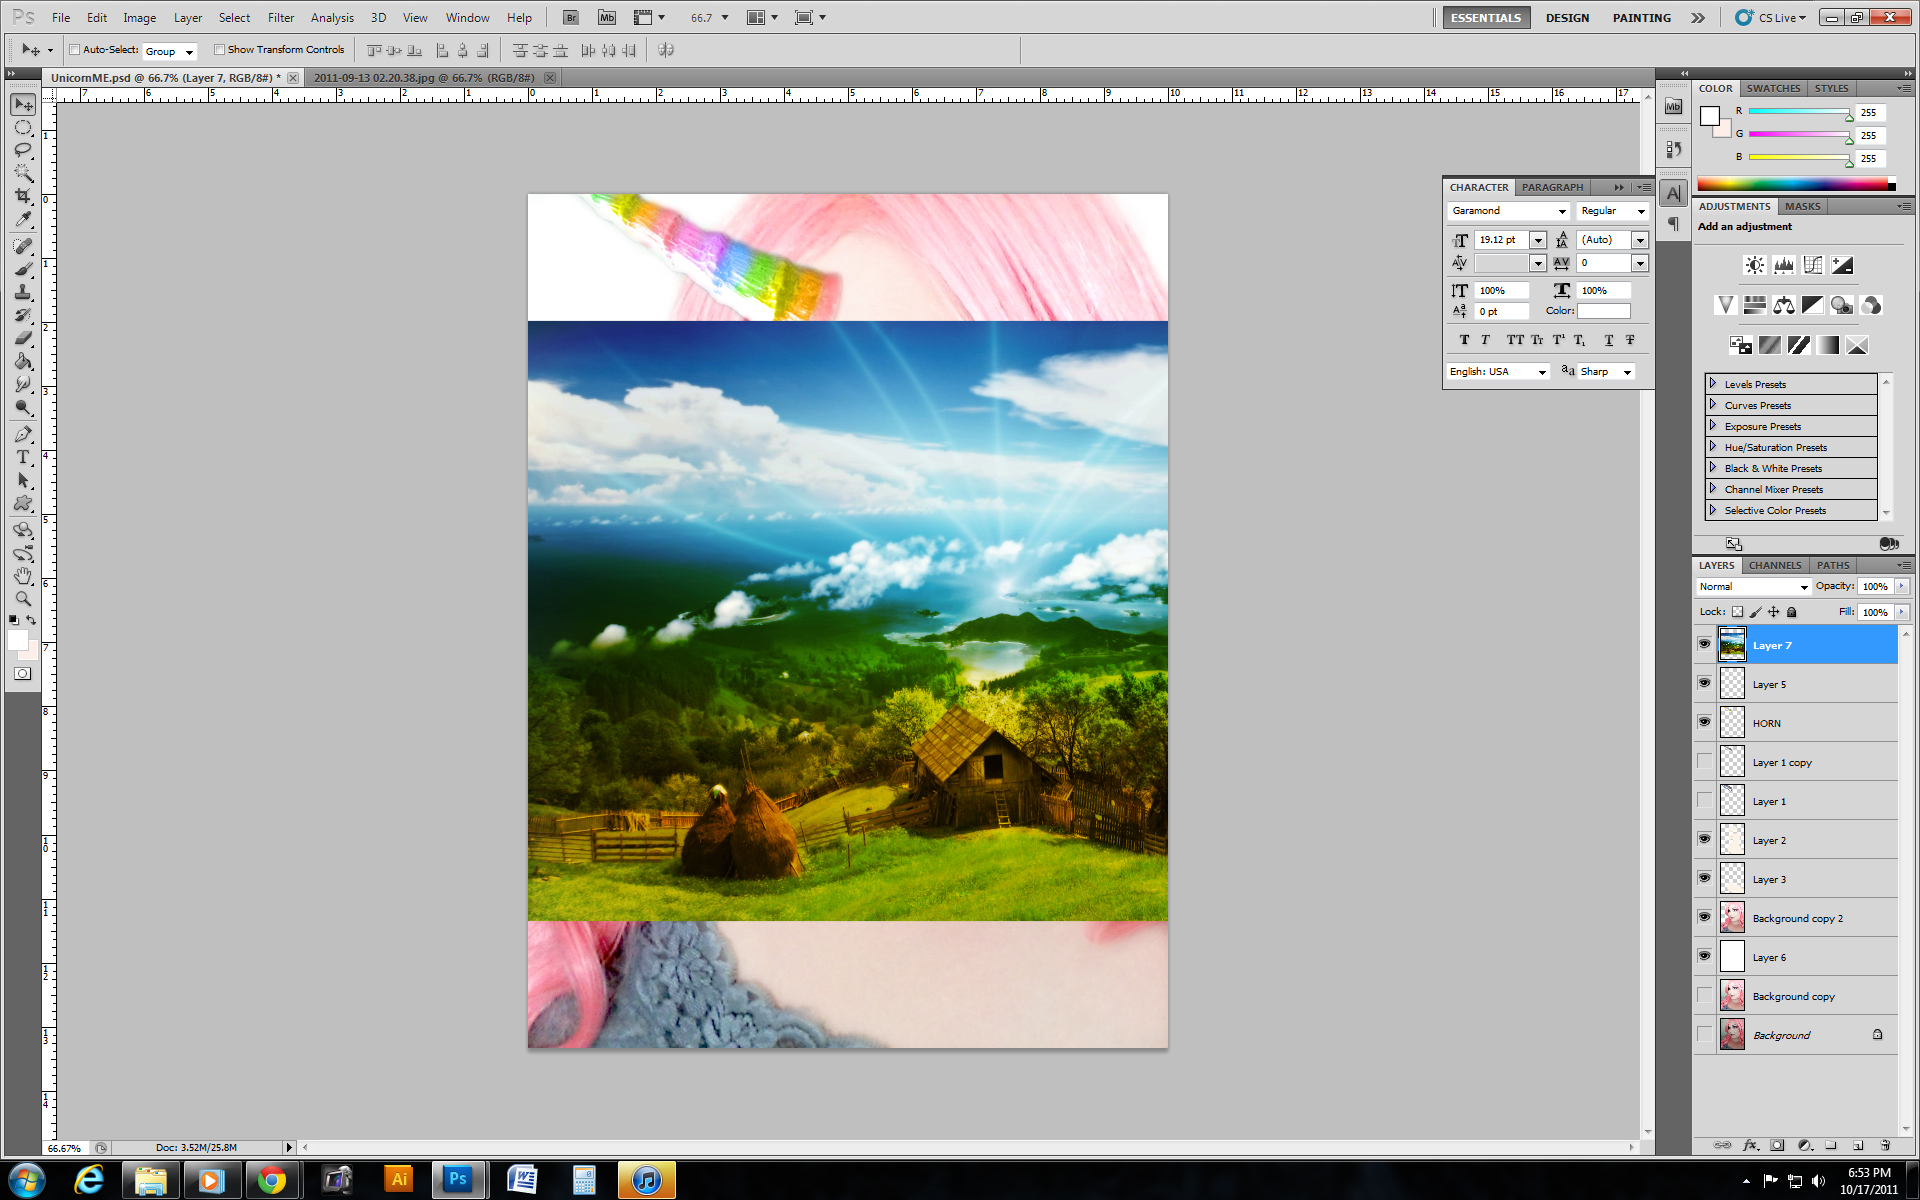
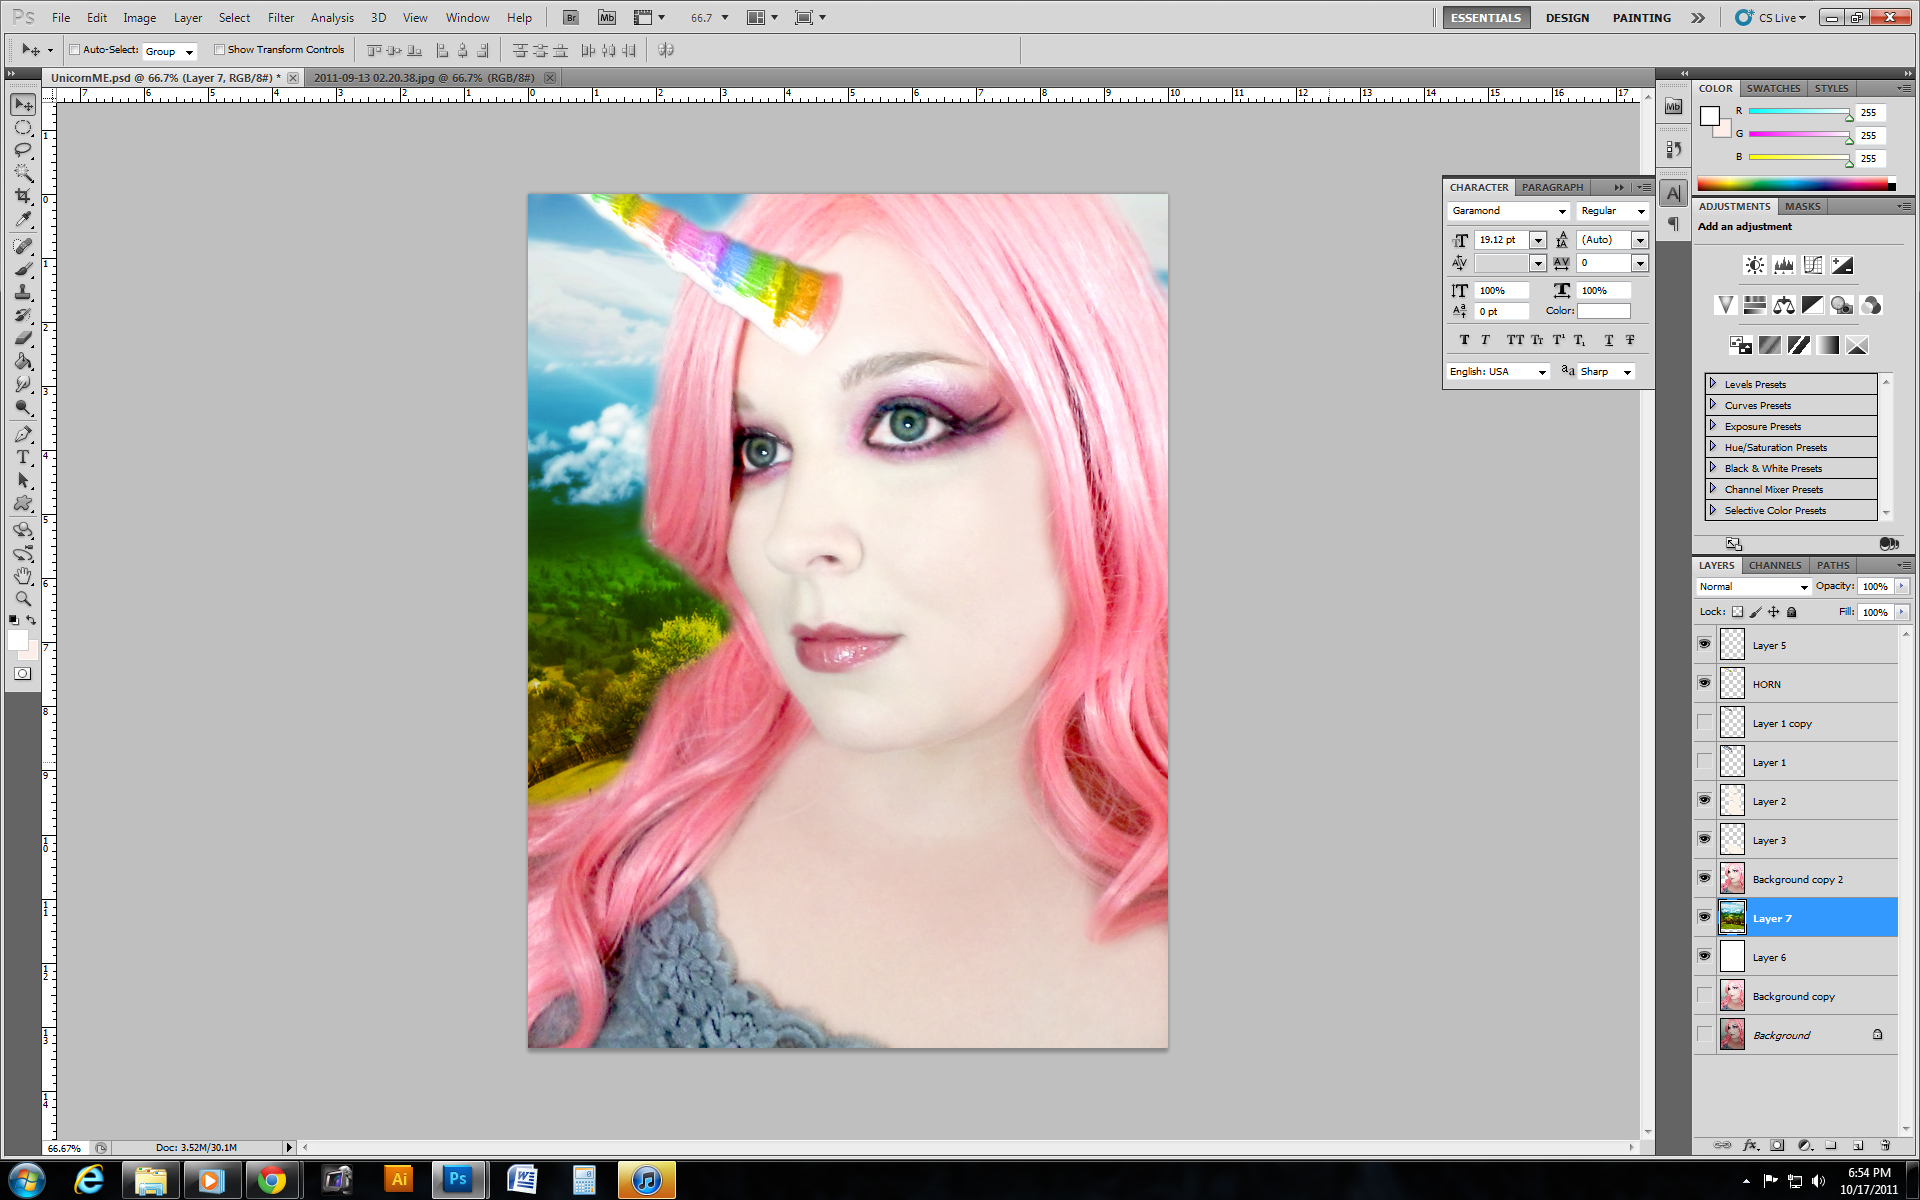
Now it's time to get rid of your boring background.
Make a new copy of yourself layer...then between YOU and YOU, make a new layer and paint it white with the paintbucket tool. That will give an entirely white layer.
Now, use the soft eraser and erase your entire background around yourself. (on the top layer of you) --- should be like this: YOU, WHITE, YOU..... You will see solid white, everywhere you erase. (And the other layer of YOU is just in case you mess up.)
Now that your background is gone, bring in a layer of your chosen background. Go with something nature-like. Press CONTROL + T to size your background as you wish and drag the layer on top of the white one. Now you should have the nature around you.
Adding a Glow

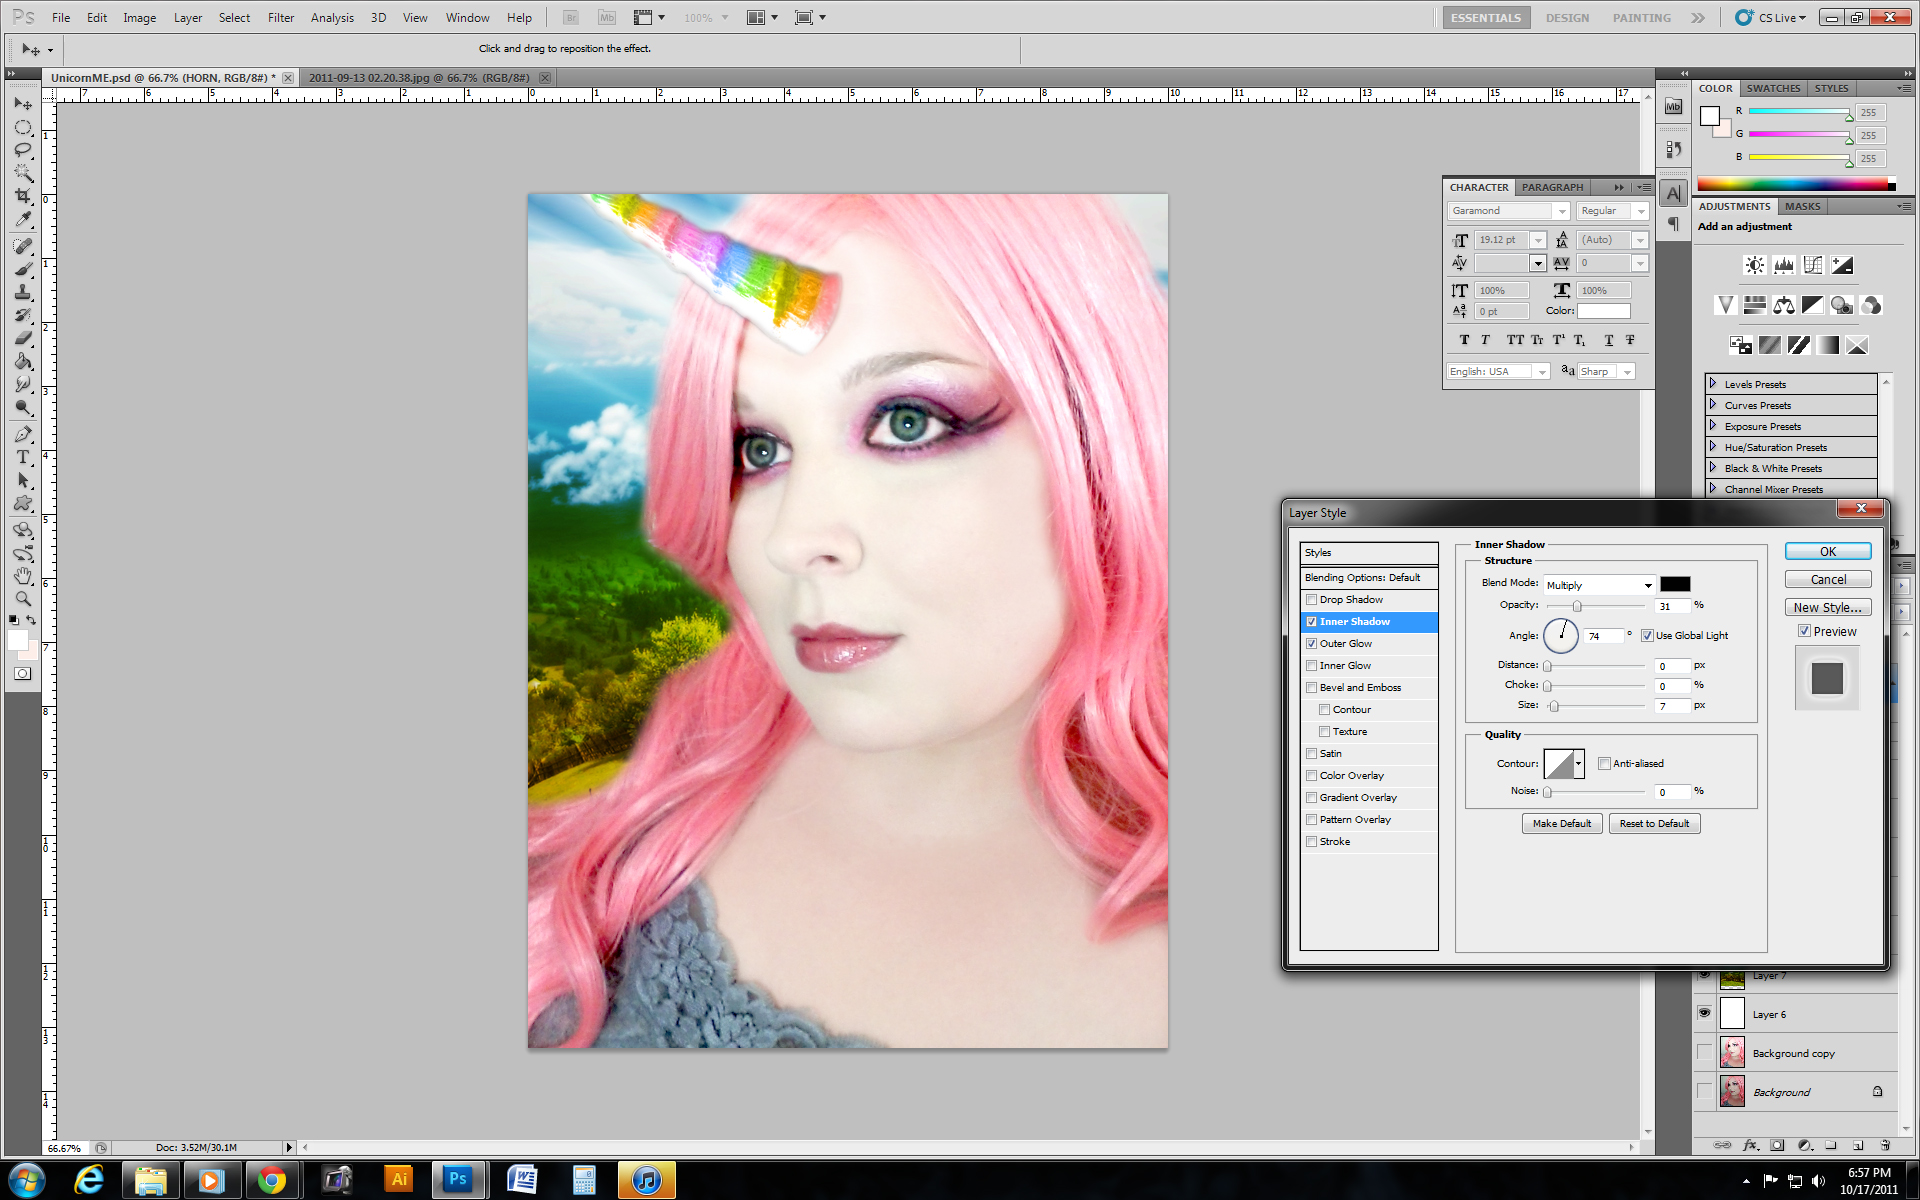
Your horn is on it's own layer, and the color layer of the horn is, also. Using the control and click, select the 2 layers (horn and color) then press CONTROL + E, that will merge the two layers into one. Again, use the eraser if you need to clean up around the outside of the horn.
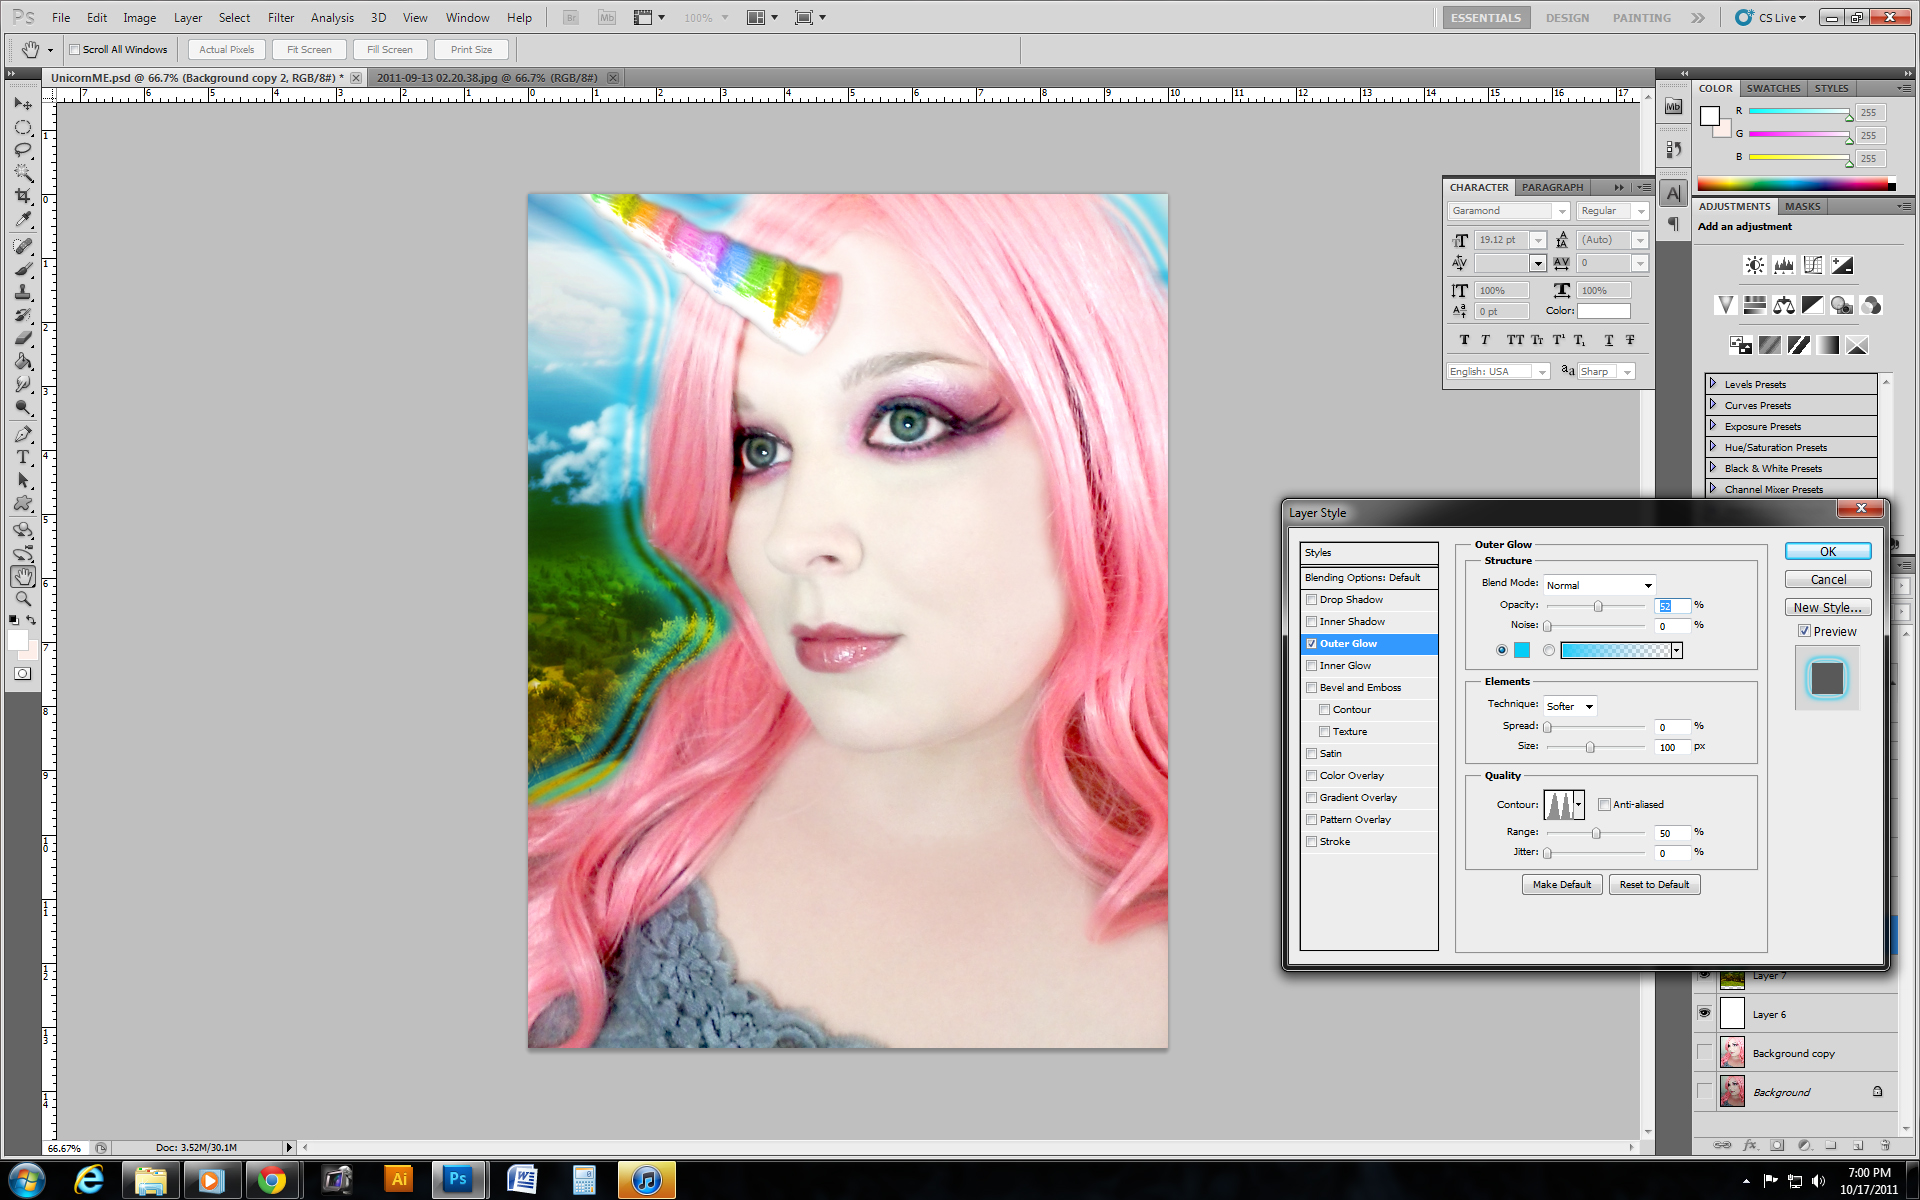
Go into the FX panel and add an outer glow, to your specifications. I chose the mode with 2 peaks in the drop down menu box and that gave a double glow. ;) I also added an inner glow of a darker color to define the horn more.
Now select the layer of YOU, and go to the FX button and give yourself a glow. I went with a double glow of blue. :)
Sparkles and Rainbows!
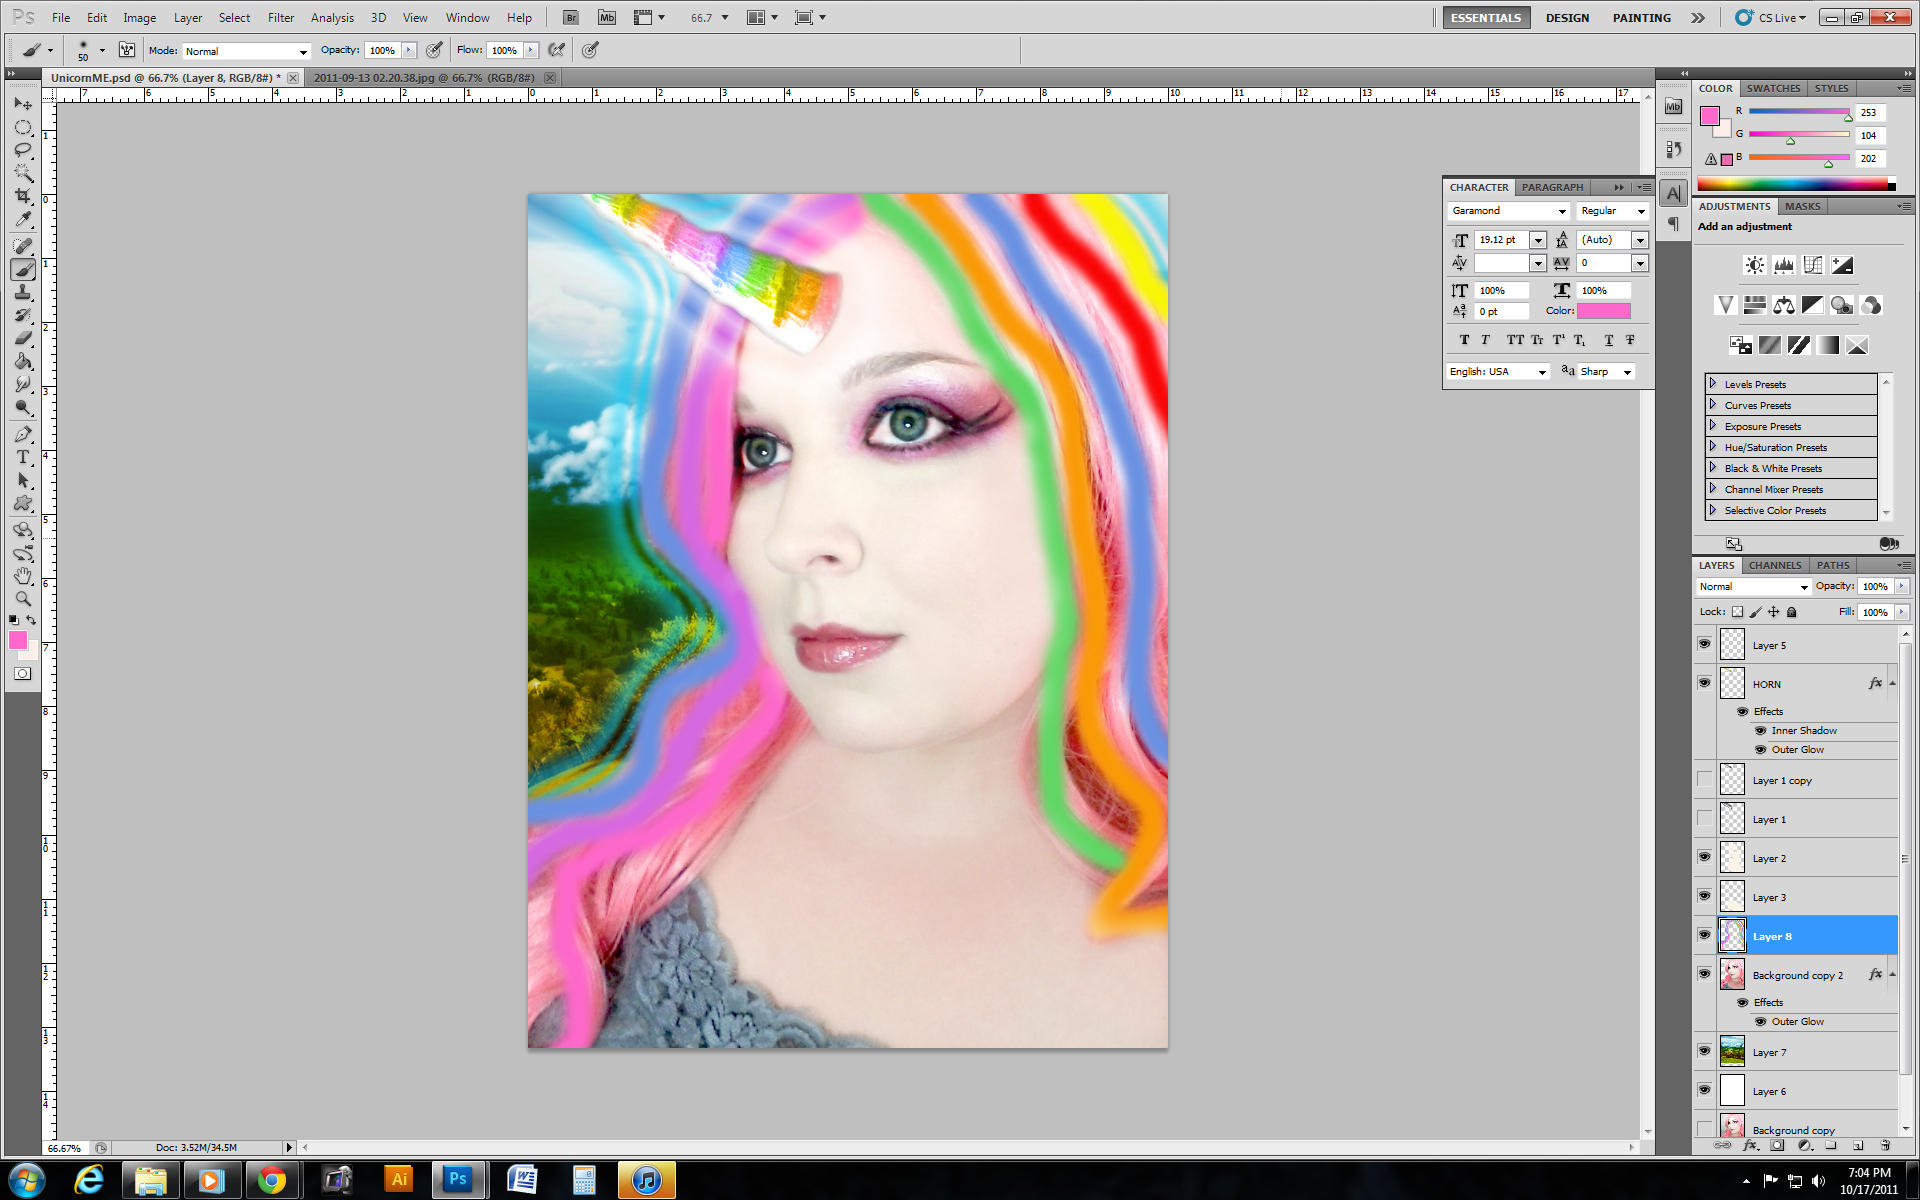
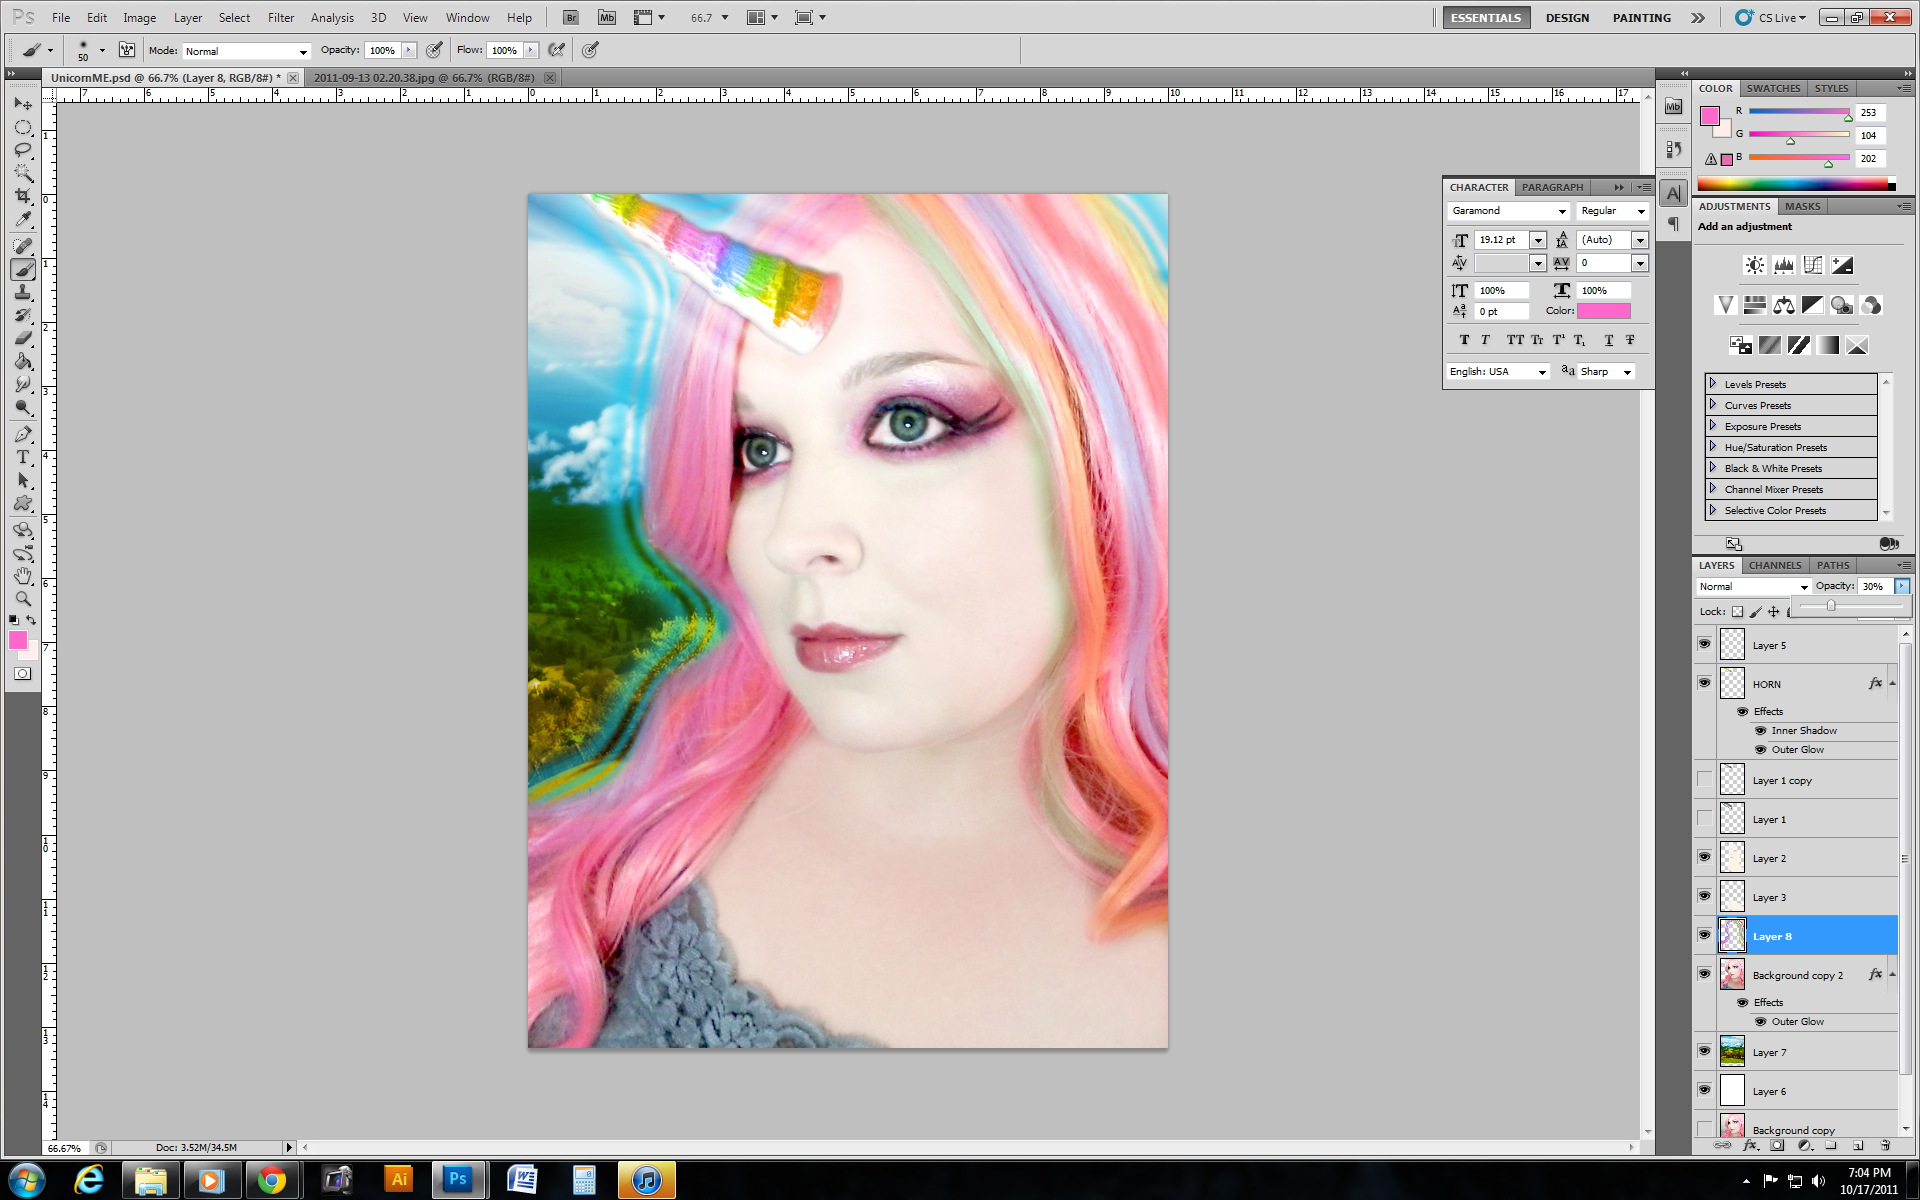
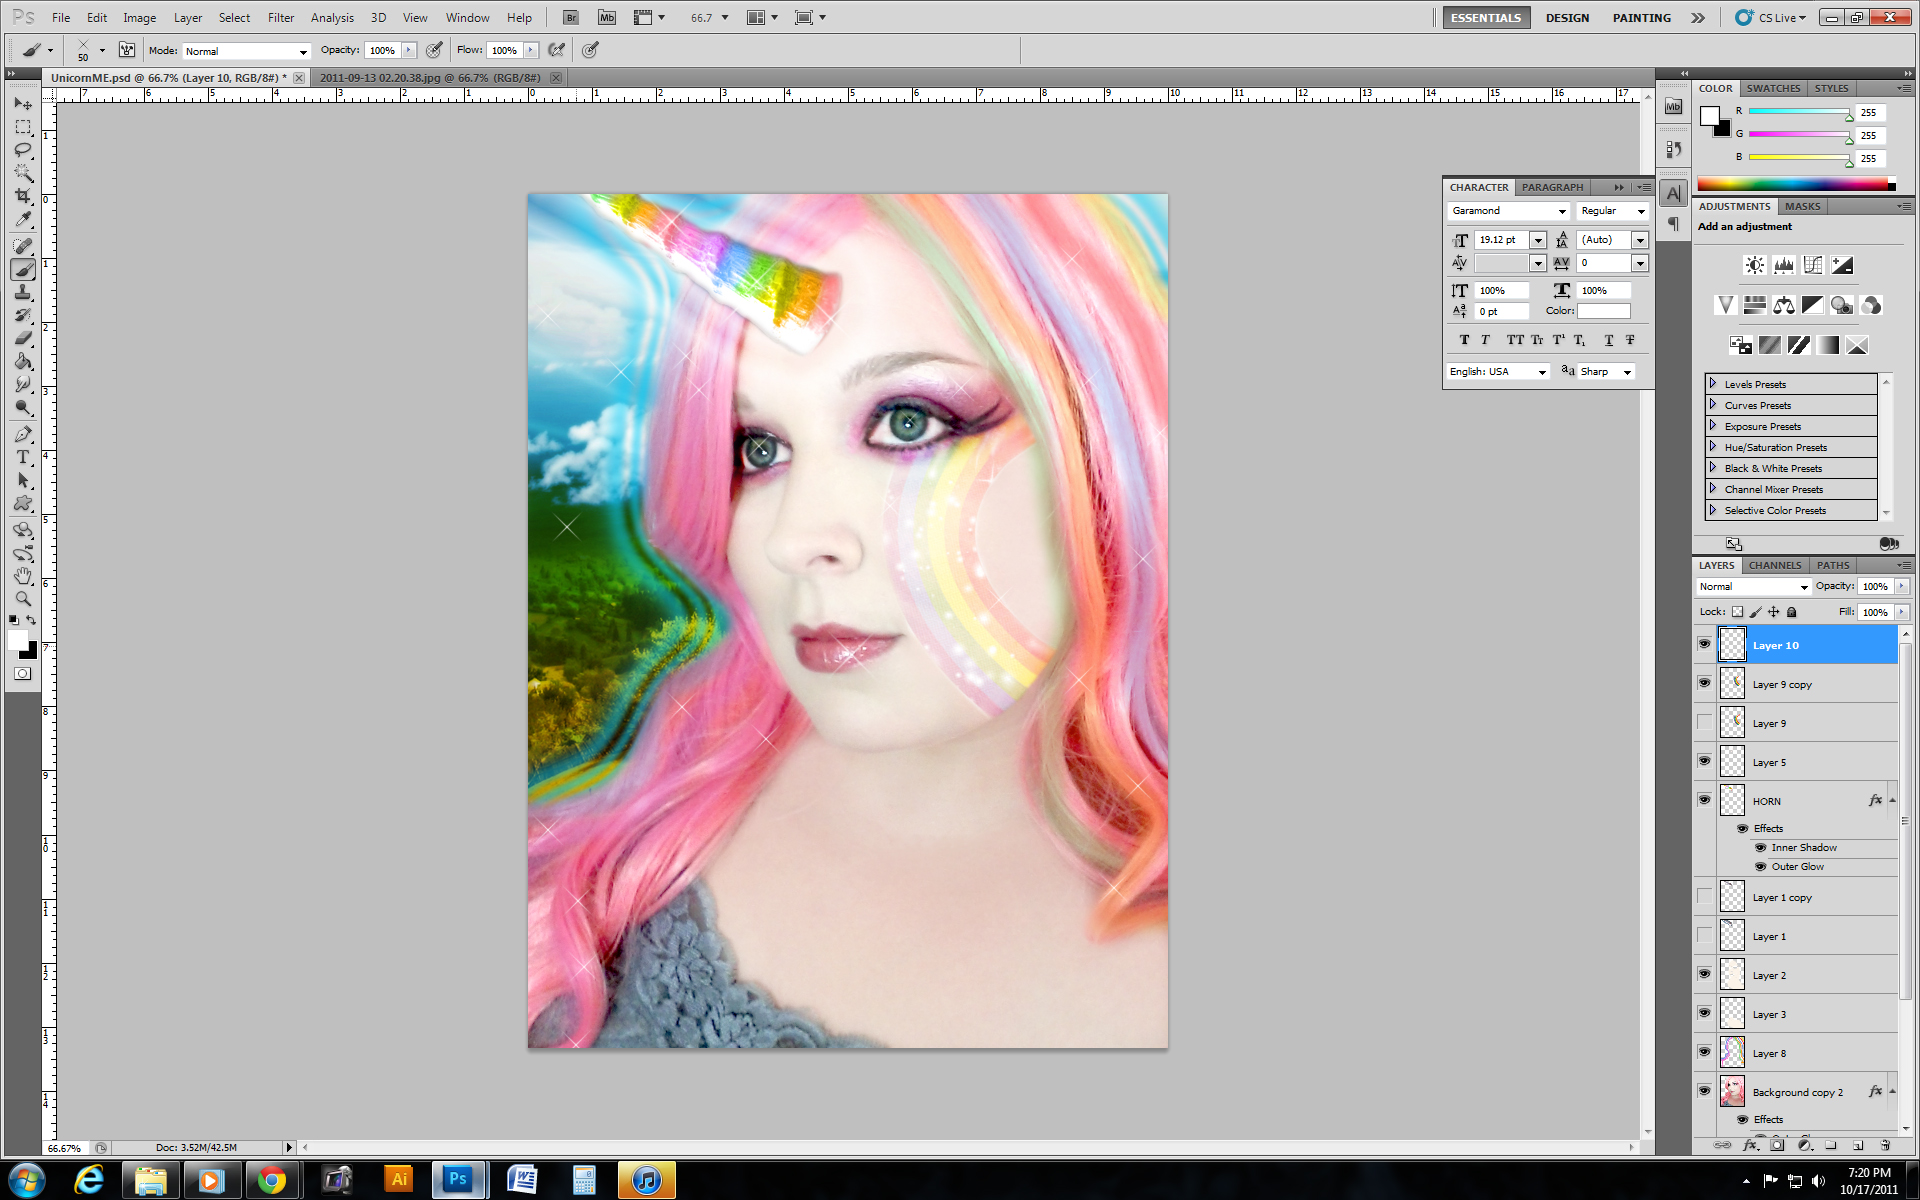


No unicorn pic is complete without the sparkles and rainbows!
Optional - add a new layer on top of YOU, and use the soft brush to color some highlights in your hair. Then turn down the opacity of that layer so it absorbs into the hair, and overlays nicely.
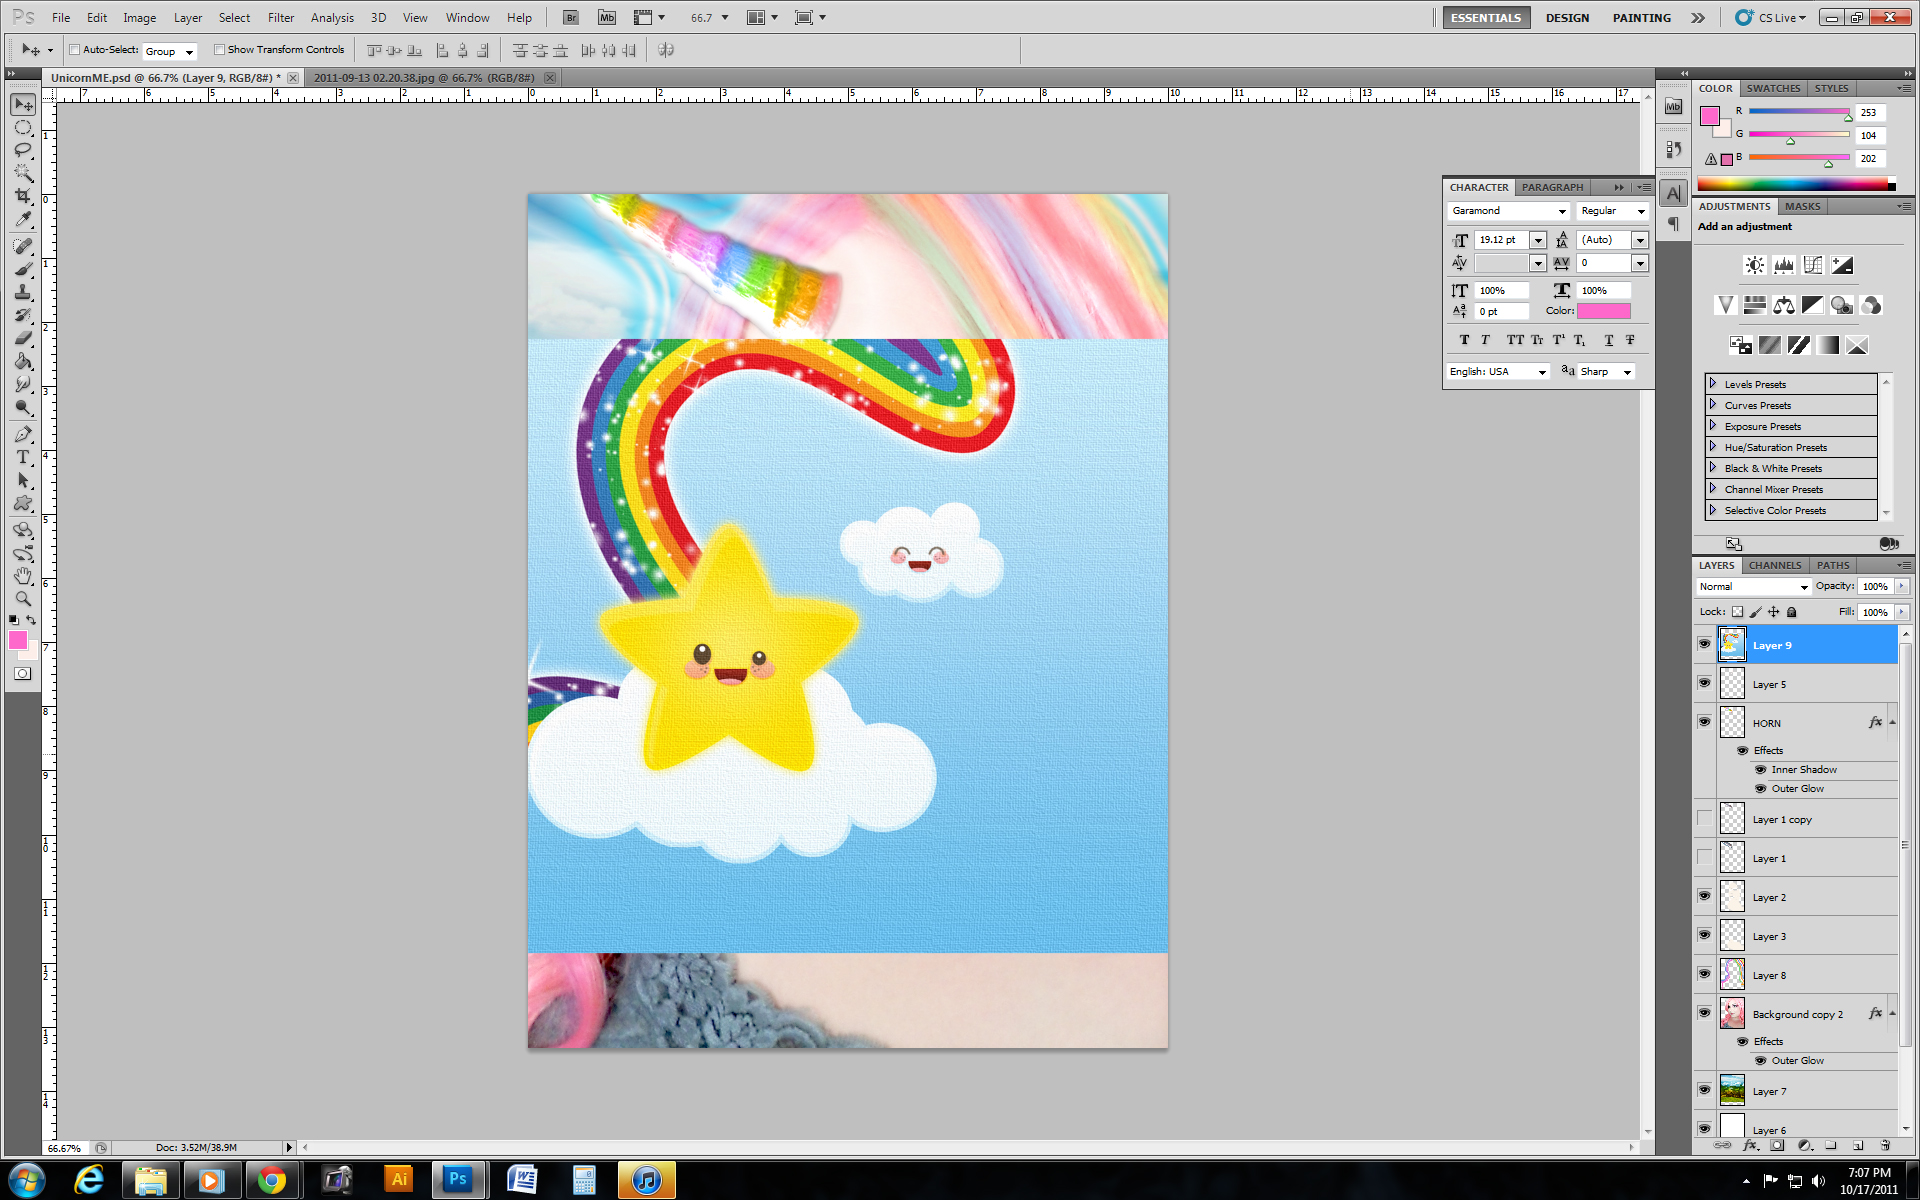
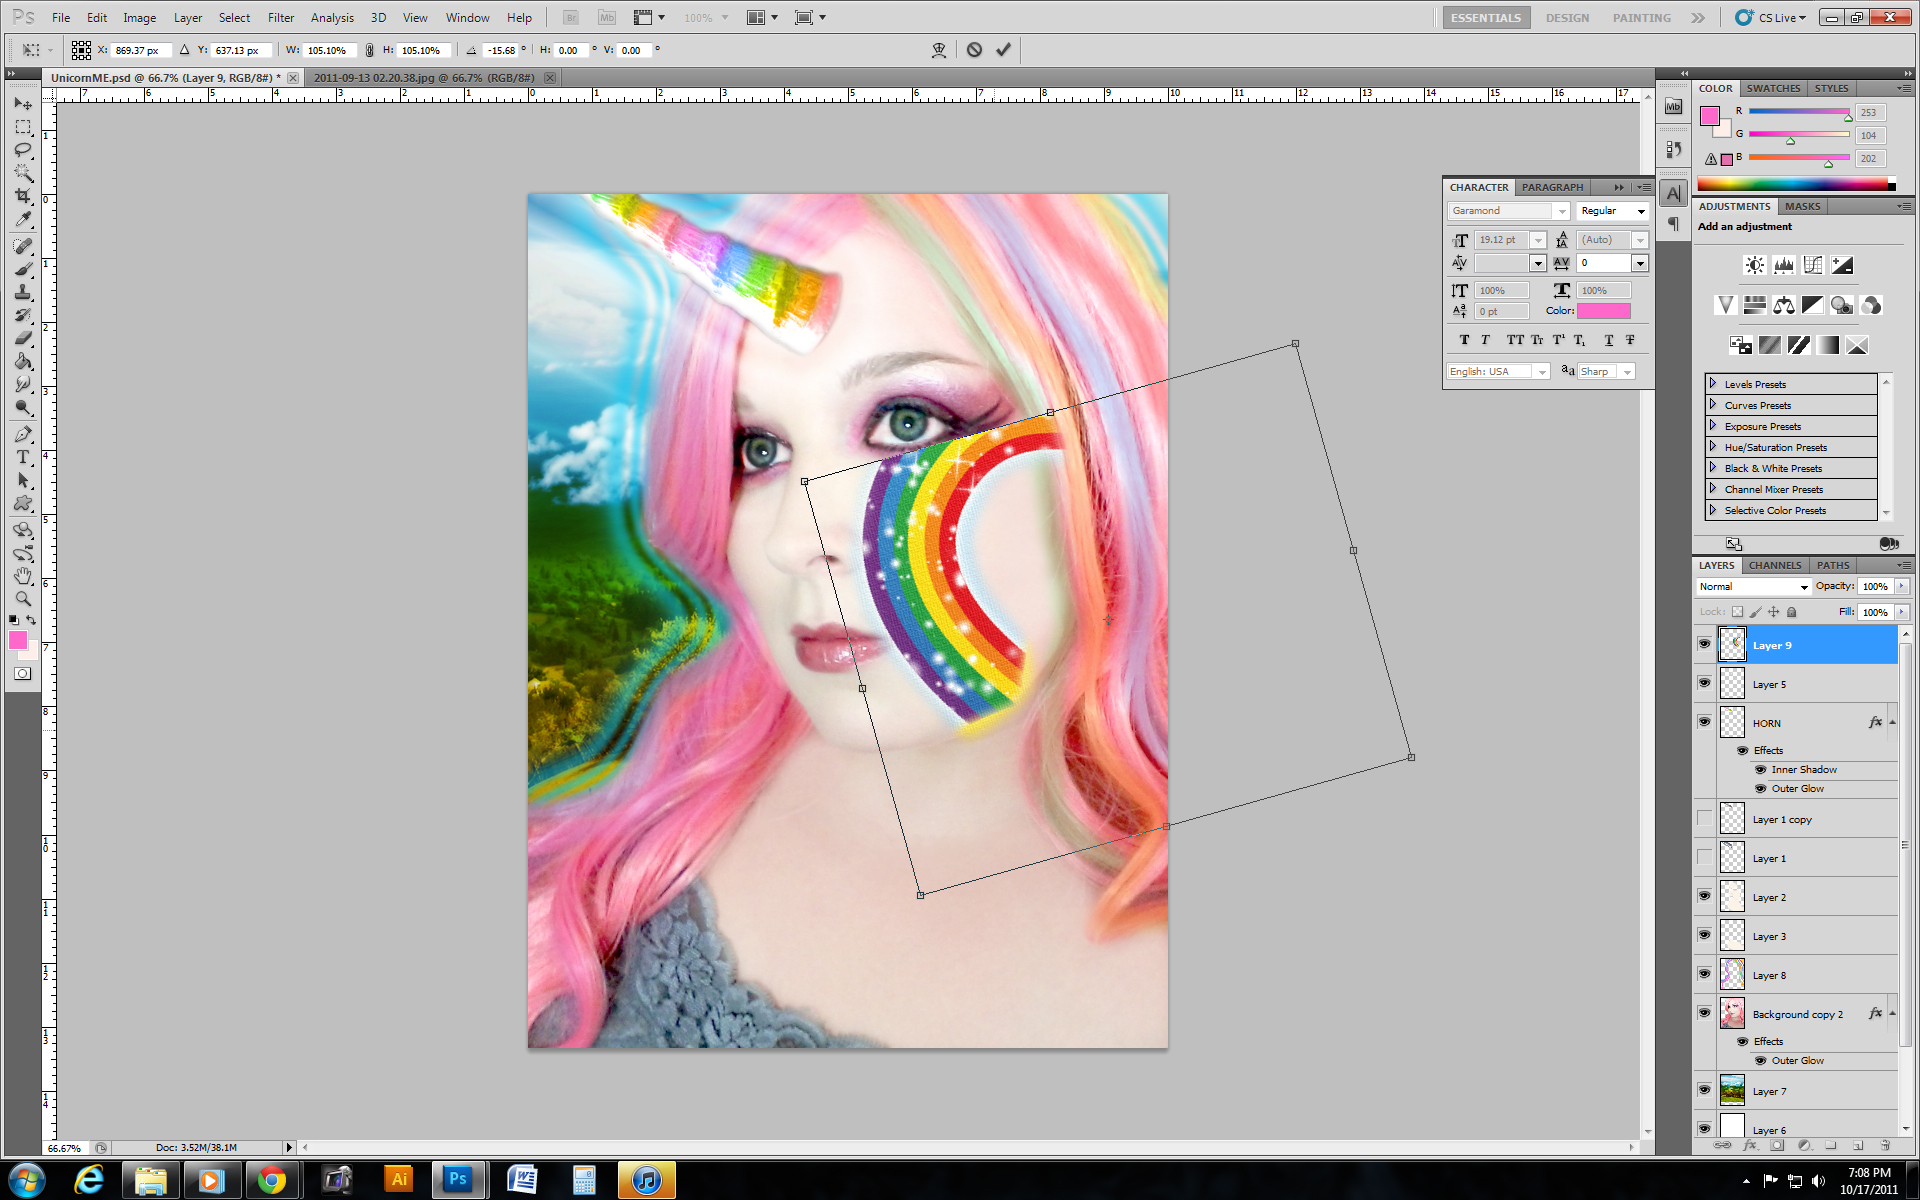
For the cheek rainbow, I chose an image that I liked and brought it into my image. I erased most of it, only leaving the basics of what I wanted. I did the CONTROL + T to transform and size it to the position I liked.
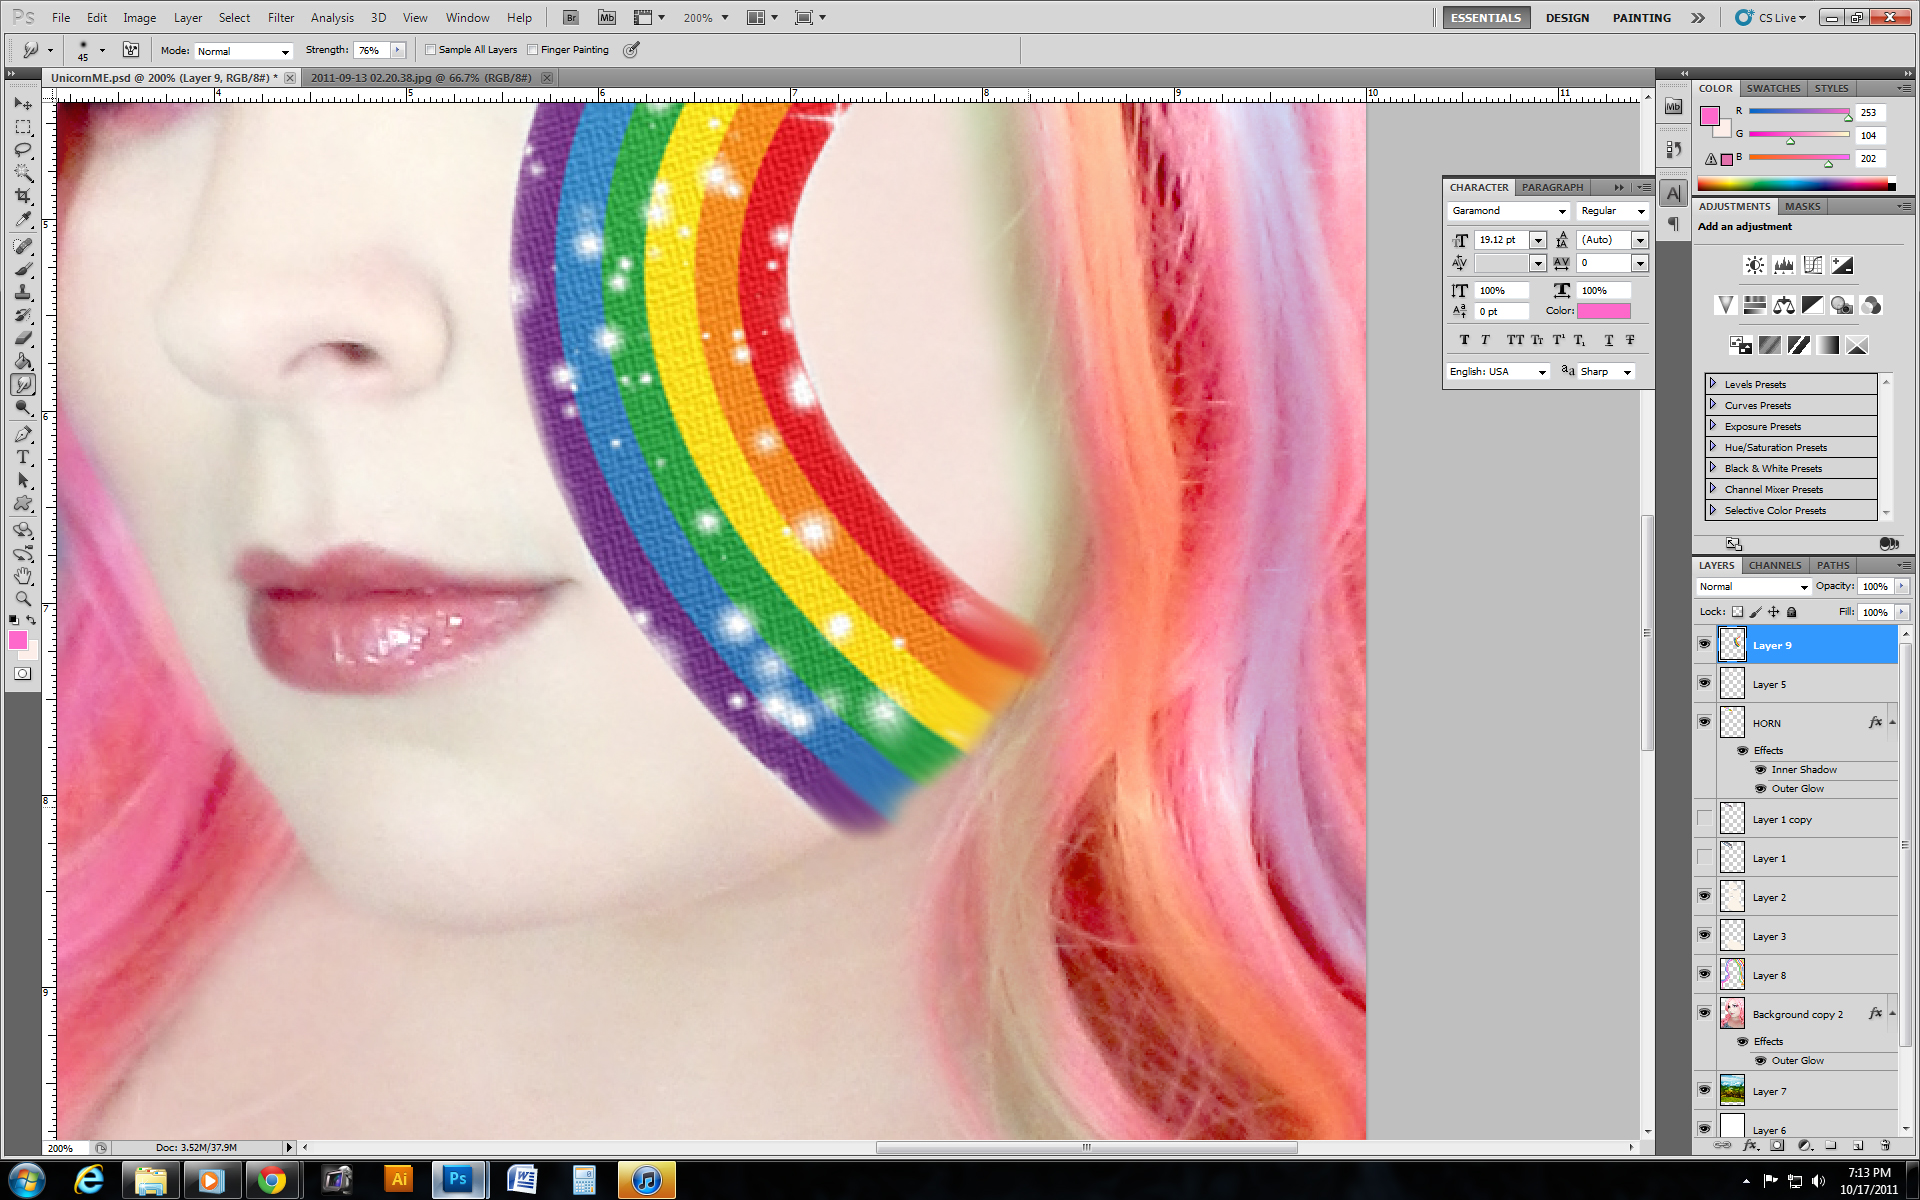
Next, I used the SMUDGE tool, which looks like a down-pointing finger. (Under the waterdrop tool.) I smudged the edges of the rainbow to where I needed them to extend - like the edge of my face and to my hairline. Then I used the soft eraser to clean up any edges and made it perfected.
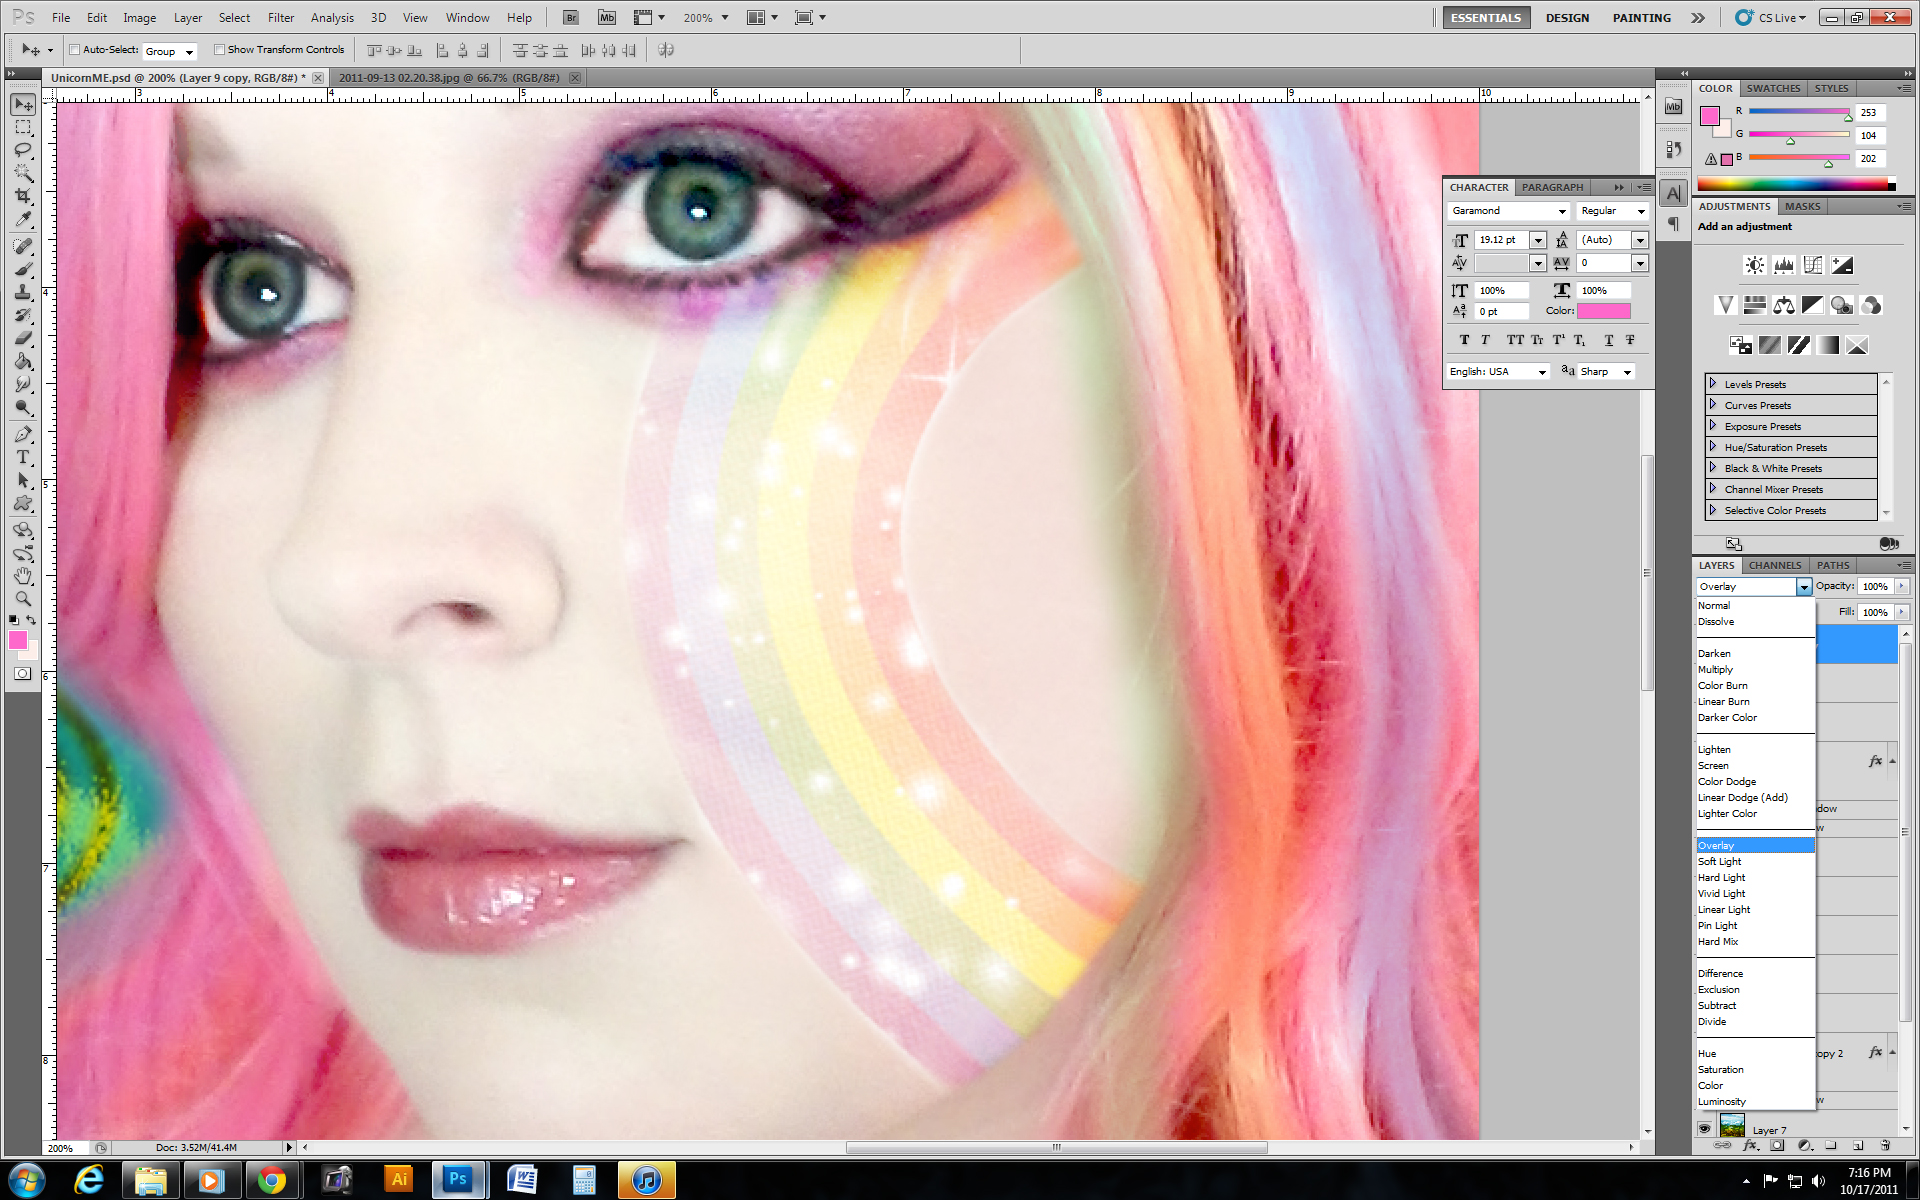
After I had the right shape, I changed that rainbow layer into OVERLAY mode and it was the look I was going for! :D
For sparkles, make a new layer on top of all the other layers and choose the brush that looks like a THIN X in the brush palette. I've learned that it looks like a sparkle! If you want to change the size, just use the [ and ] brackets as a shortcut to sizing your brush.
I also used the star brush on it's OWN LEVEL, and sprinkled some stars everywhere and turned down that level's opacity. The options are yours!! :D
ENJOY BEING A DIGITAL UNICORN!! <3