Digital Synth VRA8-P for Arduino Uno
by risgk in Circuits > Arduino
4033 Views, 14 Favorites, 0 Comments
Digital Synth VRA8-P for Arduino Uno
Made by ISGK Instruments
Concept
-
3 Voice Pseudo Polyphonic Synthesizer for Arduino Uno
Features
- 3 Voice Pseudo Polyphonic Synthesizer (Paraphonic Synthesizer), MIDI Sound Module
- Serial MIDI In (38400 bps), PWM Audio Out (Pin 6), PWM Rate: 62500 Hz
- Sampling Rate: 15625 Hz, Bit Depth: 8 bits
Demo Audio
VRA8 Series
- Digital Synth VRA8-M https://www.instructables.com/id/Digital-Synth-VRA8-M-for-Arduino-Uno/
- Digital Synth VRA8-X https://www.instructables.com/id/Digital-Synth-VRA8-X-for-Arduino-Uno/
Notes
- Exhibited in Maker Faire Tokyo 2016
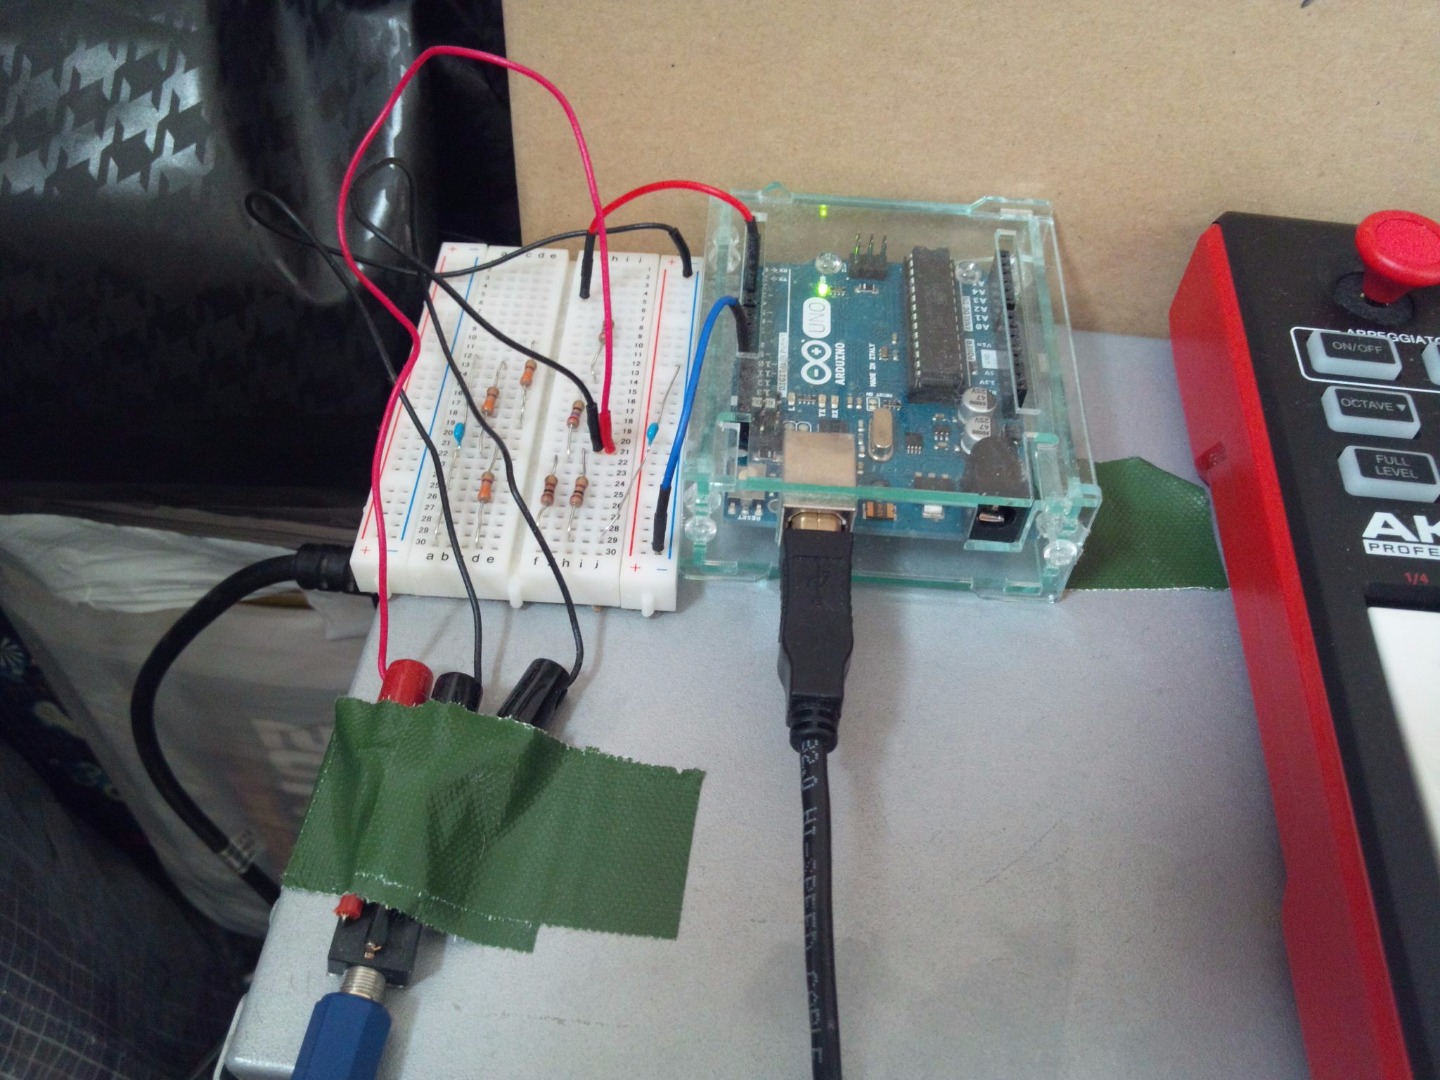
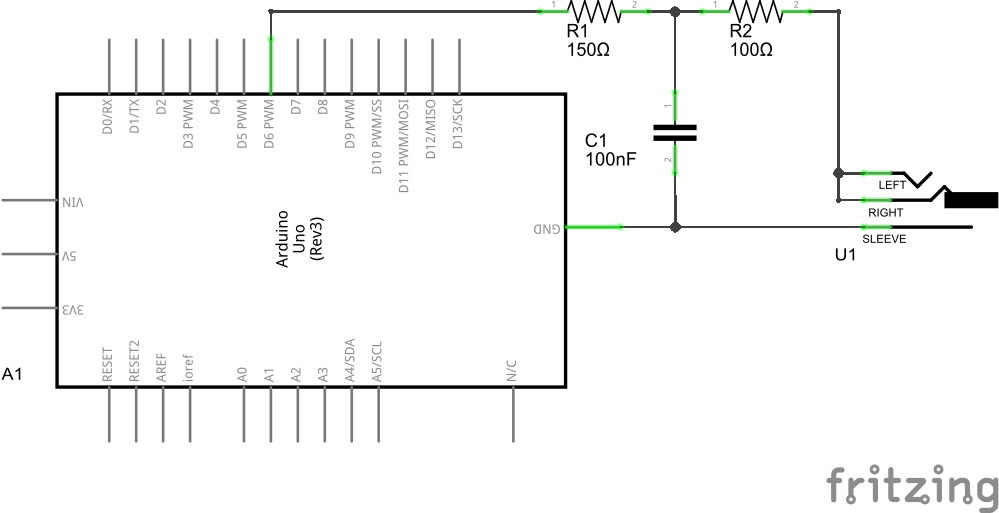
Wiring
Required Hardware
- A1: Arduino Uno
- U1: 3.5 mm Audio Jack
- R1: 150 ohm Resistor (or 140 ~ 160 ohm Resistor, e.g. 100 + 47 ohm Resistor)
- R2: 100 ohm Resistor
- C1: 100 nF Capacitor
- Wires
Wiring
- See the image
Software Installation
- Download Source code and extract it.
- Download Hairless MIDI<->Serial Bridge and extract it.
- Download loopMIDI and install it.
Start Synthesizer
Explanation for Windows
- Write DigitalSynthVRA8P.ino to Arduino Uno and quit Arduino IDE.
- CAUTION: Use Arduino IDE 1.6.8 or later.
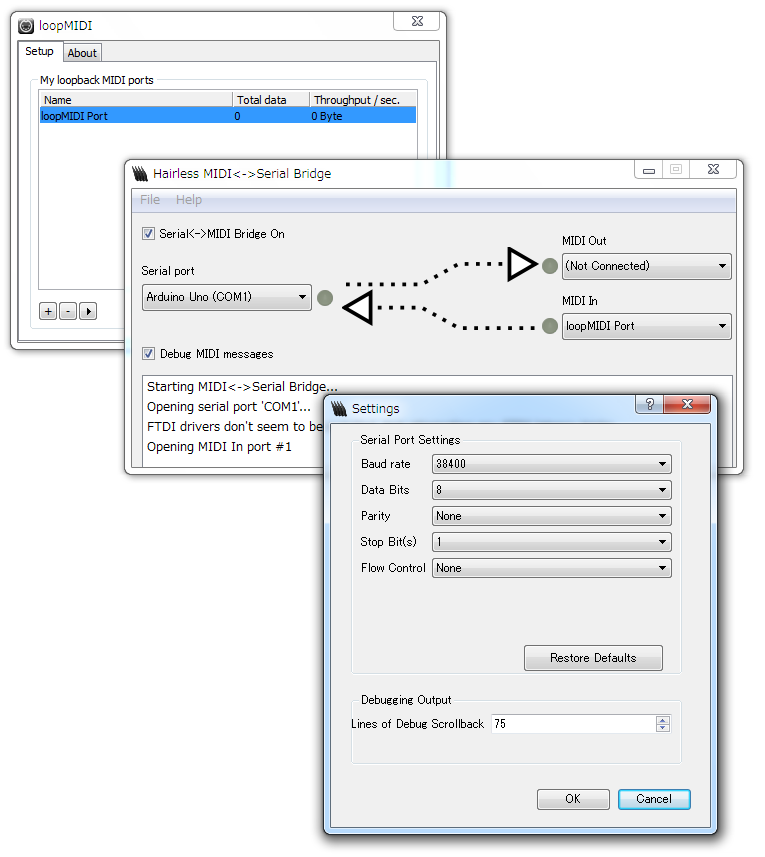
- Start loopMIDI.
- Start hairless-midiserial.exe (Hairless MIDI<->Serial Bridge).
- Set [File] > [Preferences] > [Baud rate] to 38400 bps.
- Select Arduino Uno (COM*) on Serial Port.
- Select loopMIDI Port on MIDI In.
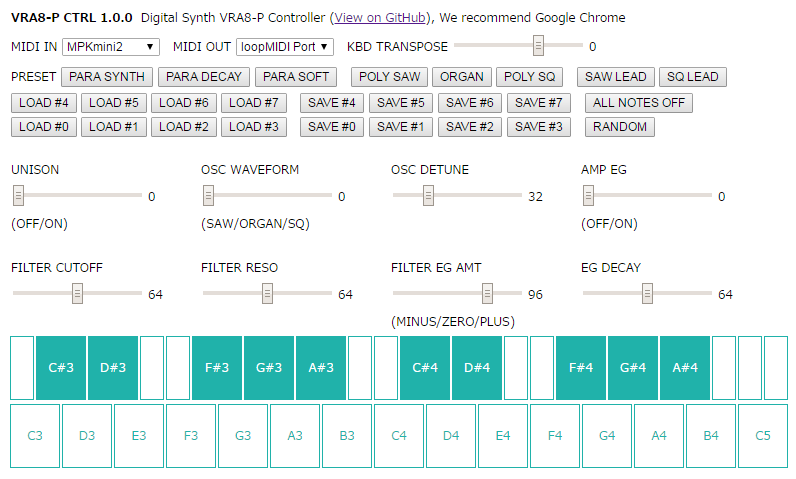
- Open vra8-p-ctrl.html (VRA8-P CTRL) with Google Chrome.
- Select loopMIDI Port on MIDI OUT.
- Select a MIDI controller on MIDI IN (if you have it).
- Click (or touch) the Software Keyboard, and you can hear the sound.
CAUTION
- Click sounds may occur when you connect the audio out to an amp/a speaker or reset the board
- Click sounds may occur when you change the controllers (especially AMP EG and FILTER CUTOFF)
- Low FILTER CUTOFF with high FILTER RESO can damage the speakers
- The Arduino PWM audio output is a unipolar LINE OUT
- Please connect this to a power amp/a headphone amp (not to a speaker/a headphone directly)