Digital Environmental Education Domotics
by HorizonLab in Circuits > Raspberry Pi
1123 Views, 0 Favorites, 0 Comments
Digital Environmental Education Domotics
The following Instructables presents a "Smart Home device" developed
under the scope of the EU project Digital Environmental Education. The original purpose of this device, however, is not only to develop a sort of remotely control of devices; the project has an educational goal that is to sensitize teenagers towards "Green Thinking", teaching them tips to save energy.
Digital Environmental Education Domotics
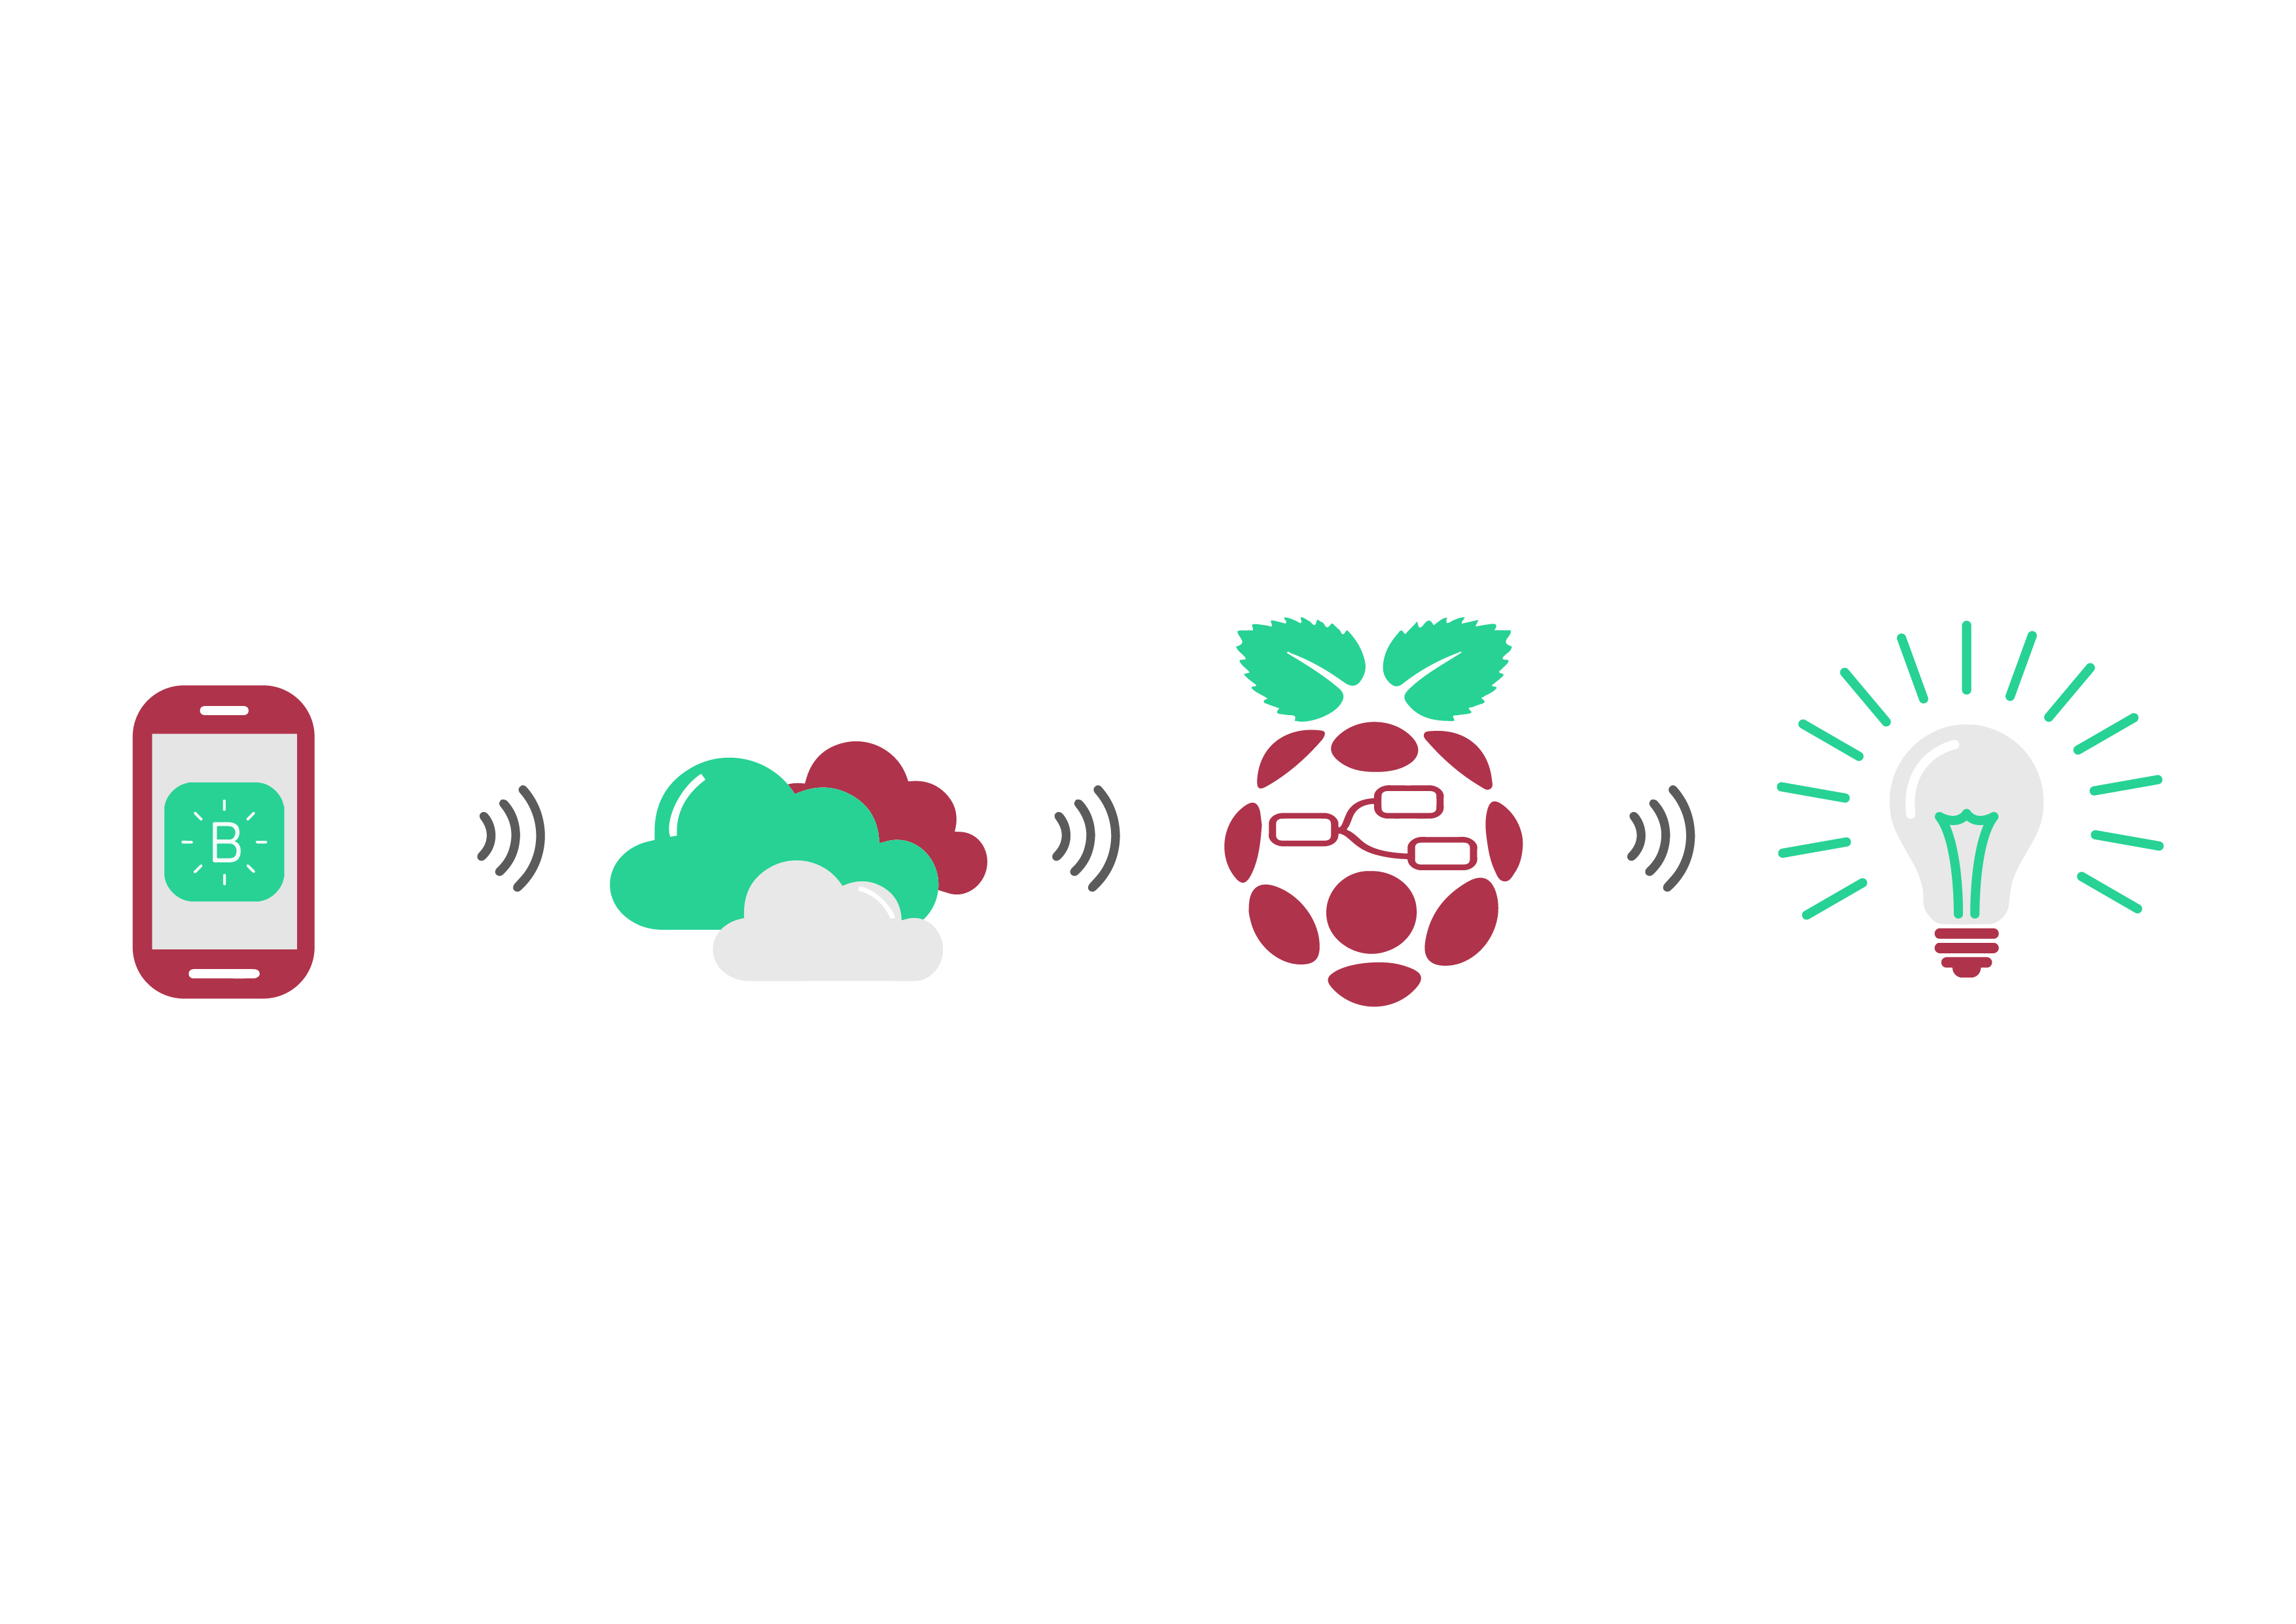
In the following we describe how to control a device receiving notifications about its staturs. In particular, we show two cases
First-> A led lamp coupled with a luminosity sensor: when the light is switched on and the luminosity in the environment does not change, the user gets a "green notification" with the request to turn the lamp off.
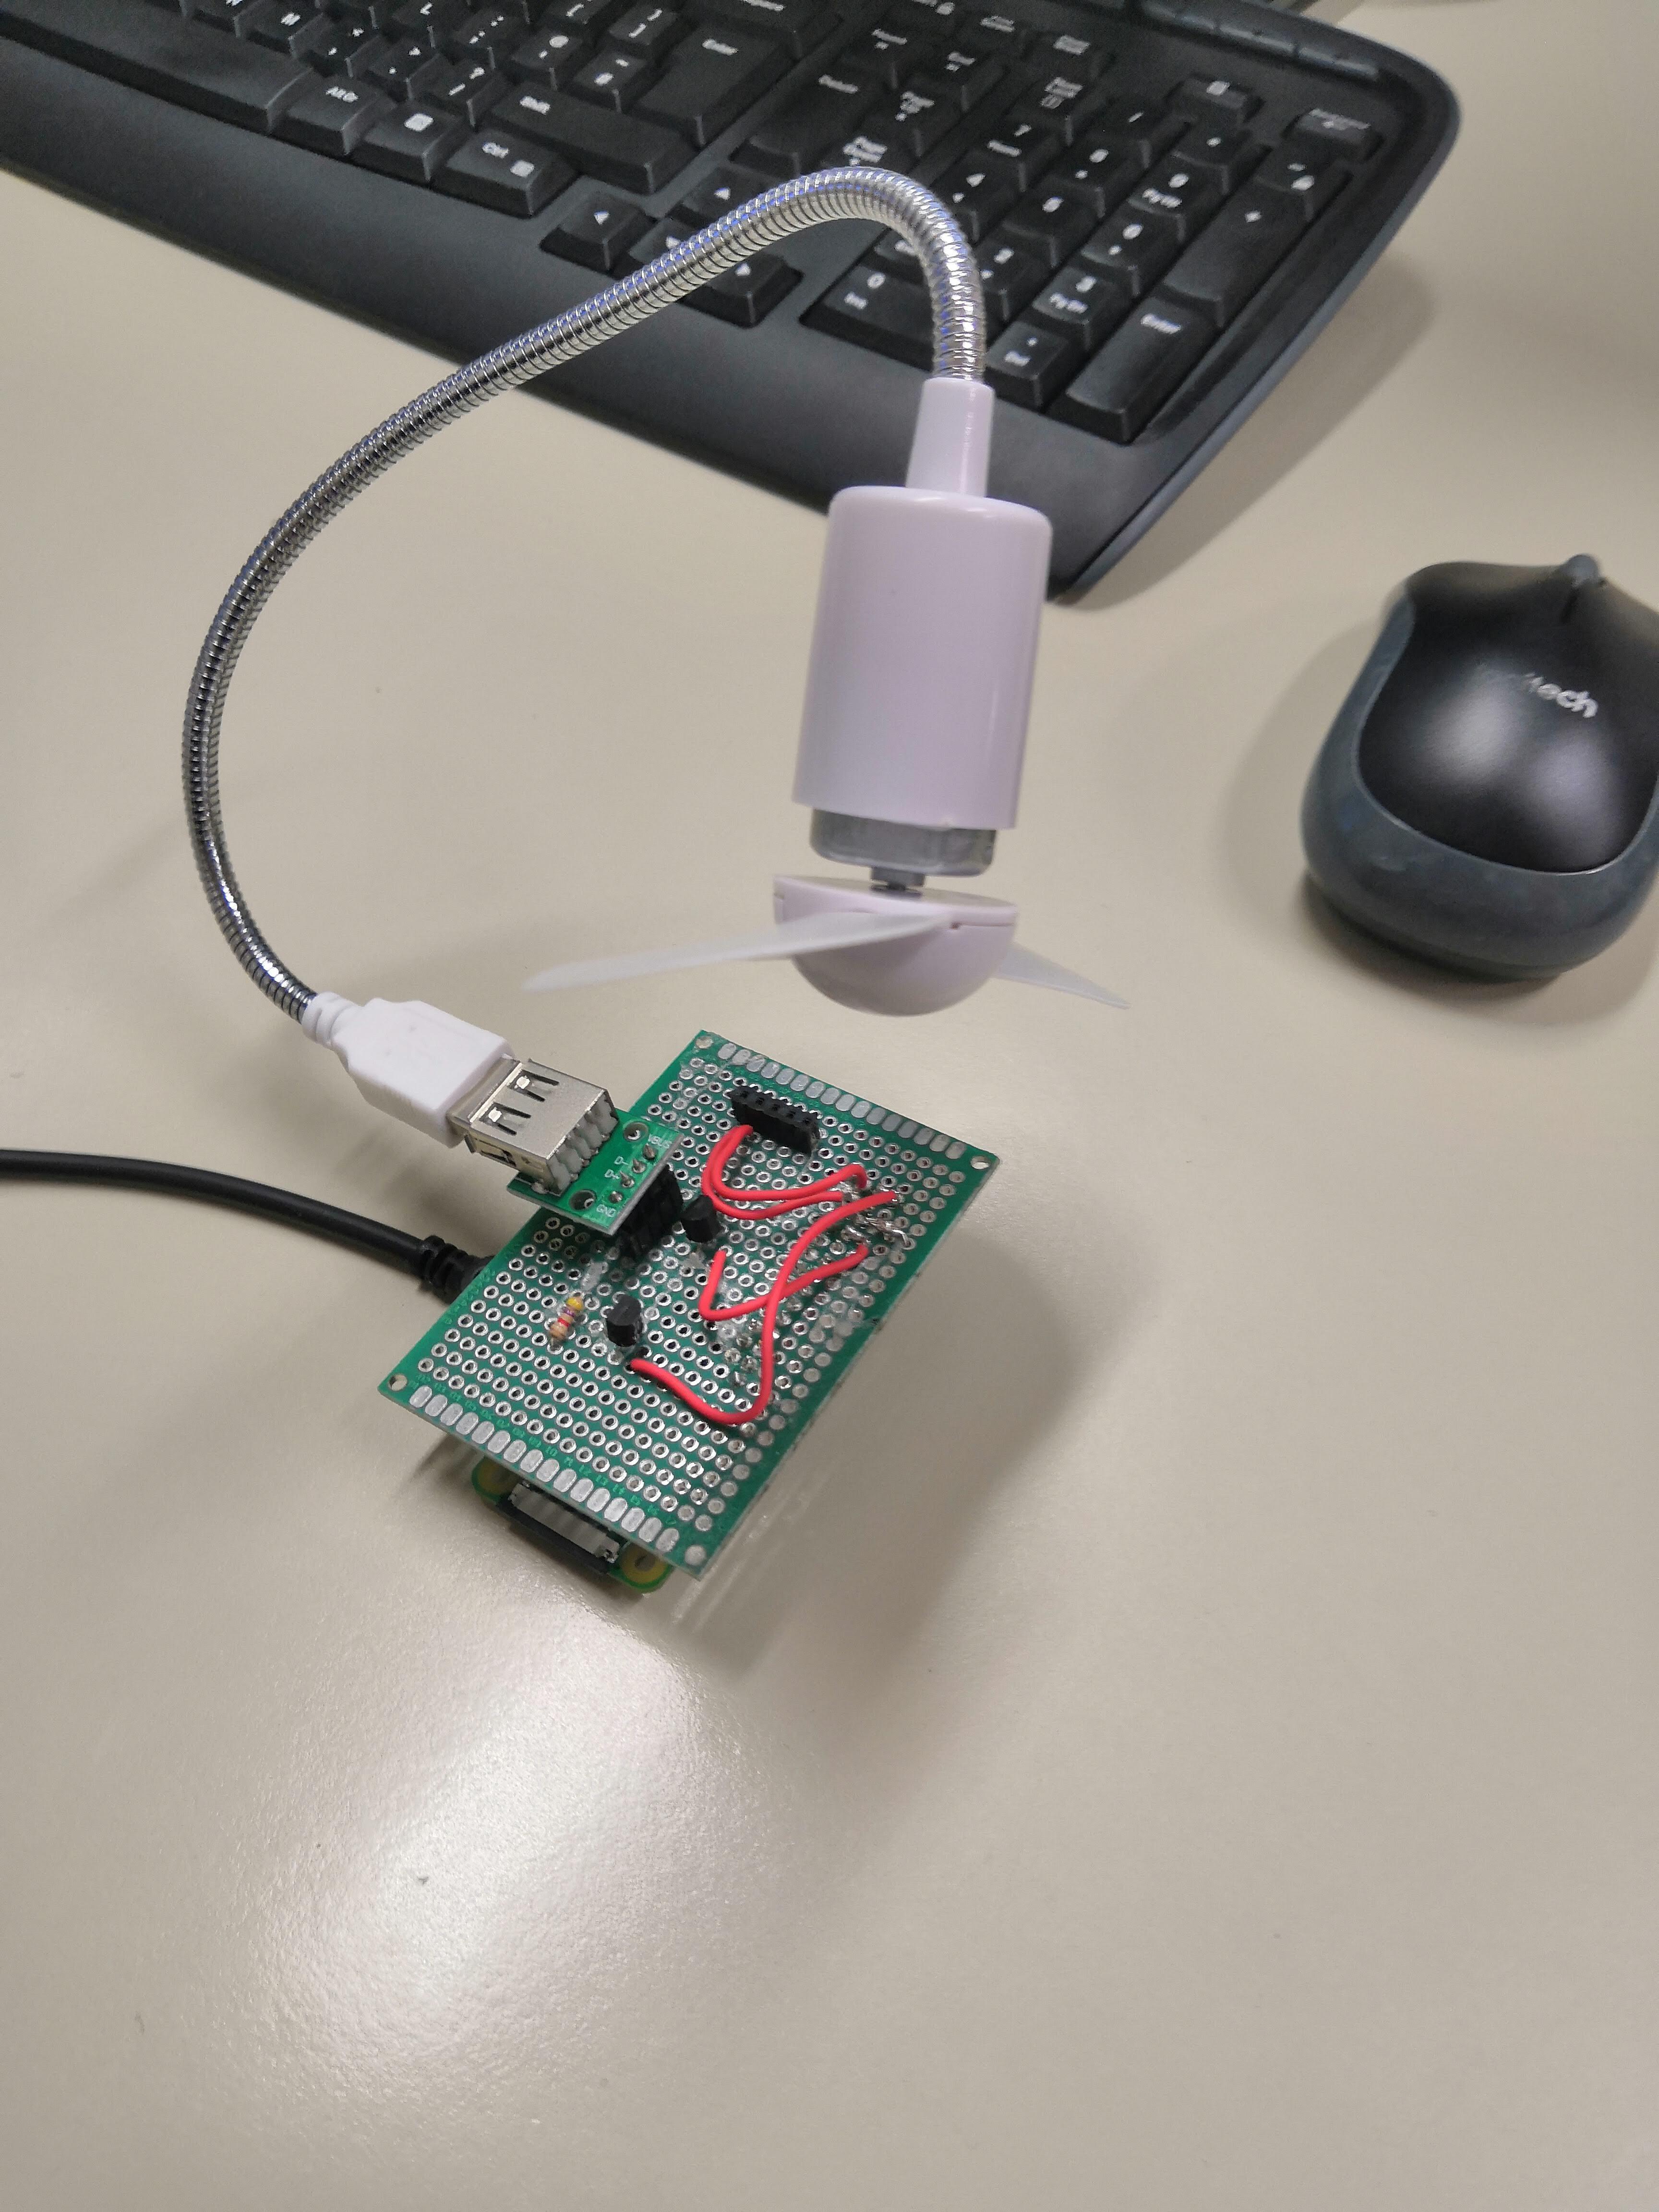
Second-> A fan coupled with a temperature sensor: when the fan is switched on the temperature does not change, the user gets a "green notification" with the request to turn the Fan
The control and the notification service has been developed using BLYNK, a well known smartphone application.
What you need:
- Raspberry Pi 0 w (or another Raspberry Pi device with WiFi Connection),
- SD card (minimum size 8GB) with an image of Raspbian,
- Nodered (application for Raspbian, included in the full installation),
- A pin strip compatible with Raspberry,
- A power supply (5V 2A possibly),
- A solder (with solder past, obviously),
- A transistor (we used PN2222A),
- A temperature sensor (we used DS18B20),
- An USB female connector,
- A light sensor (we used ADPS9301),
- An usb powered lamp,
- Various jumpers (MM, FF, MF depends on the pins you use),
- A 3d printed enclosure case,
- ... (patience) ...
- and, ofc a smartphone with BLYNK
;)
Soldering
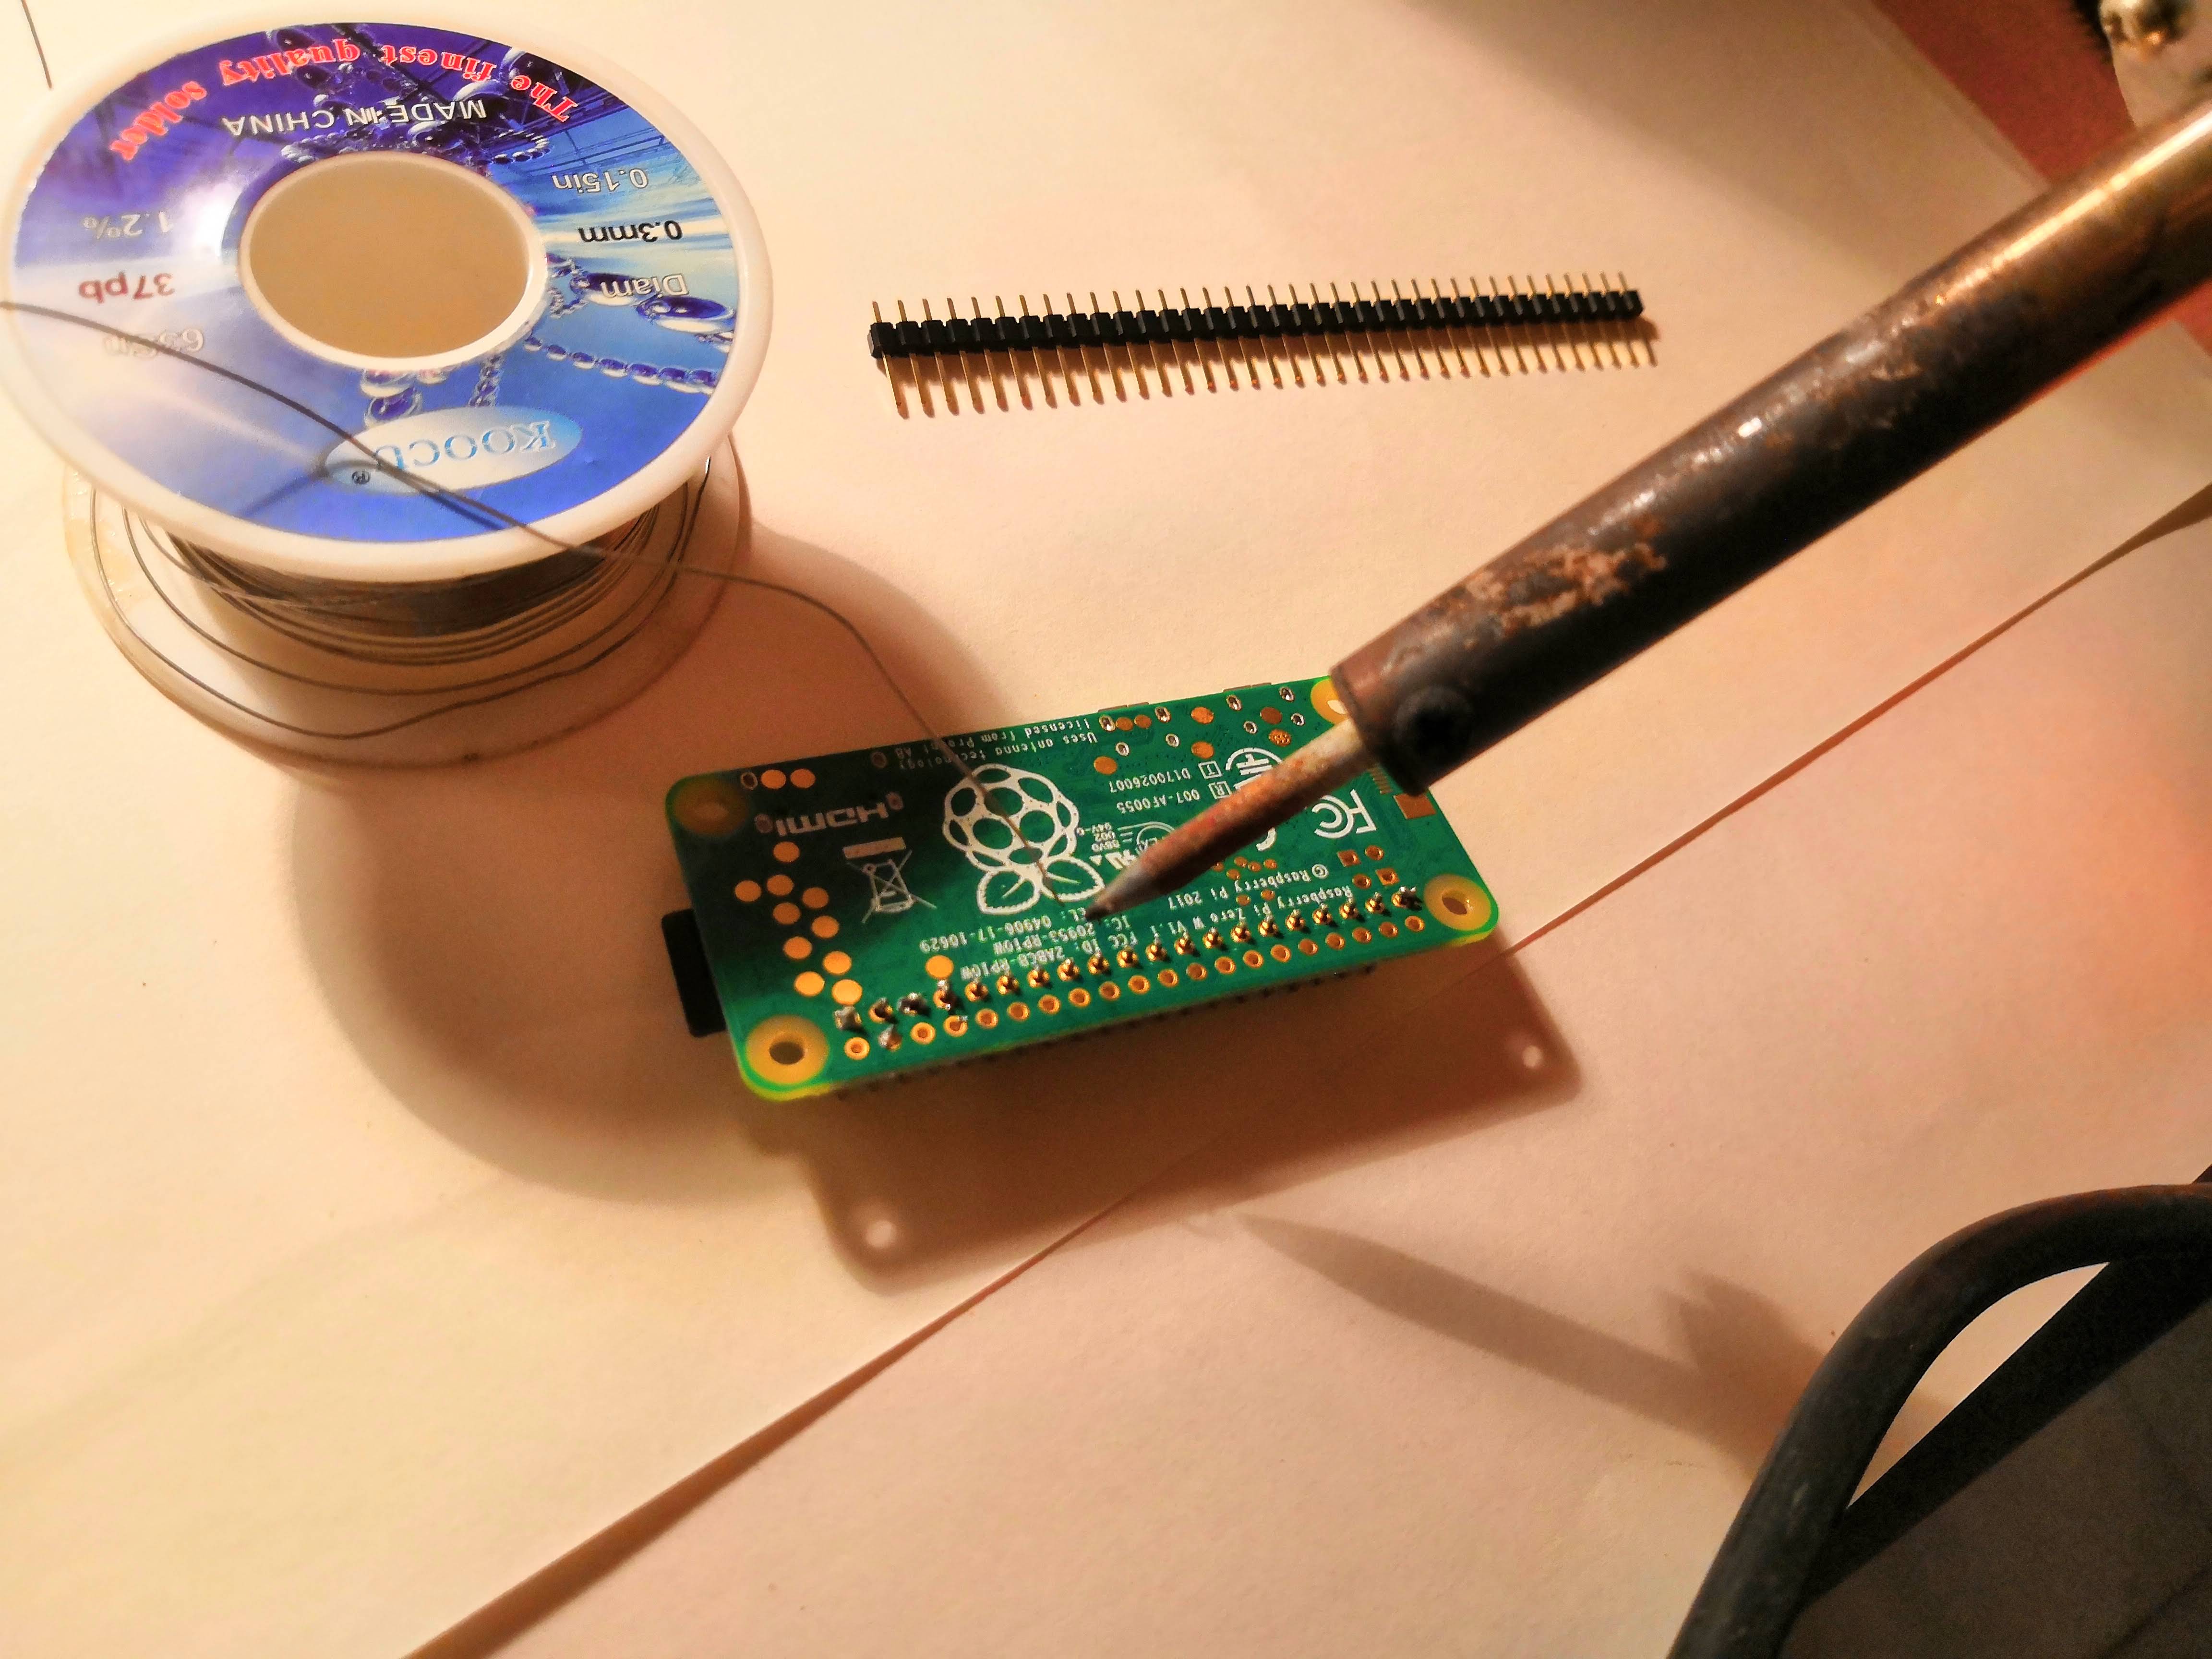
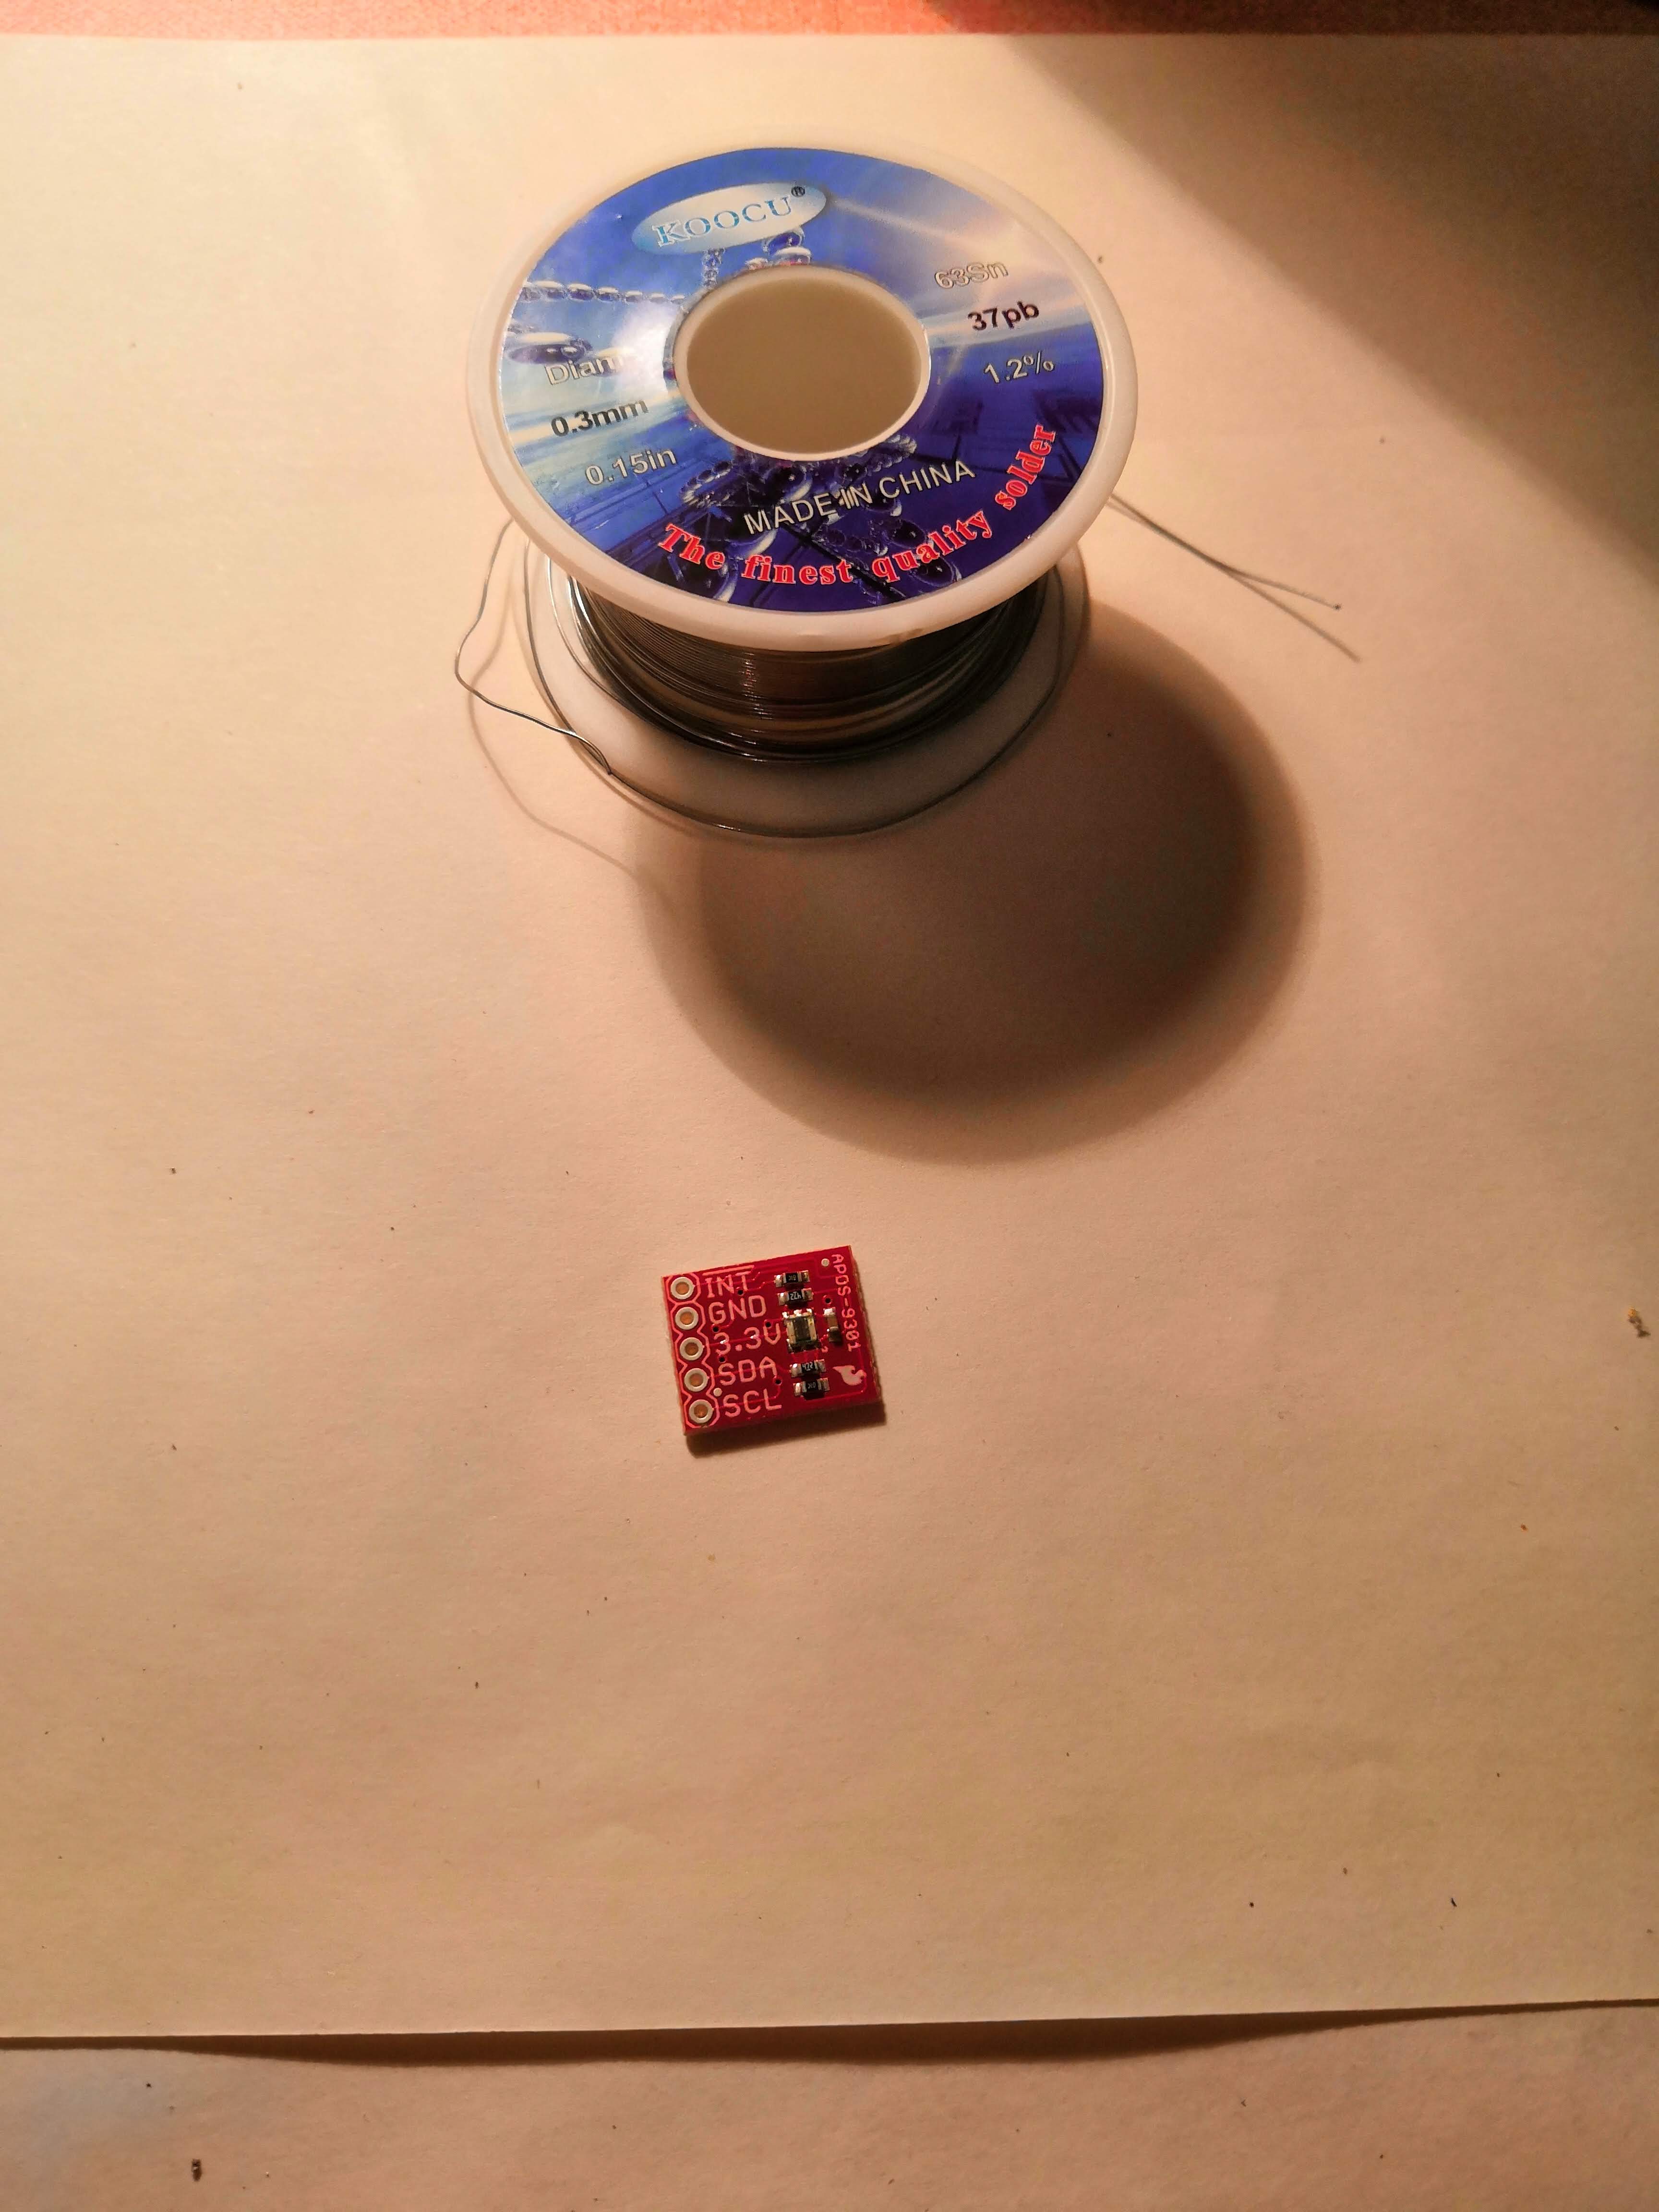
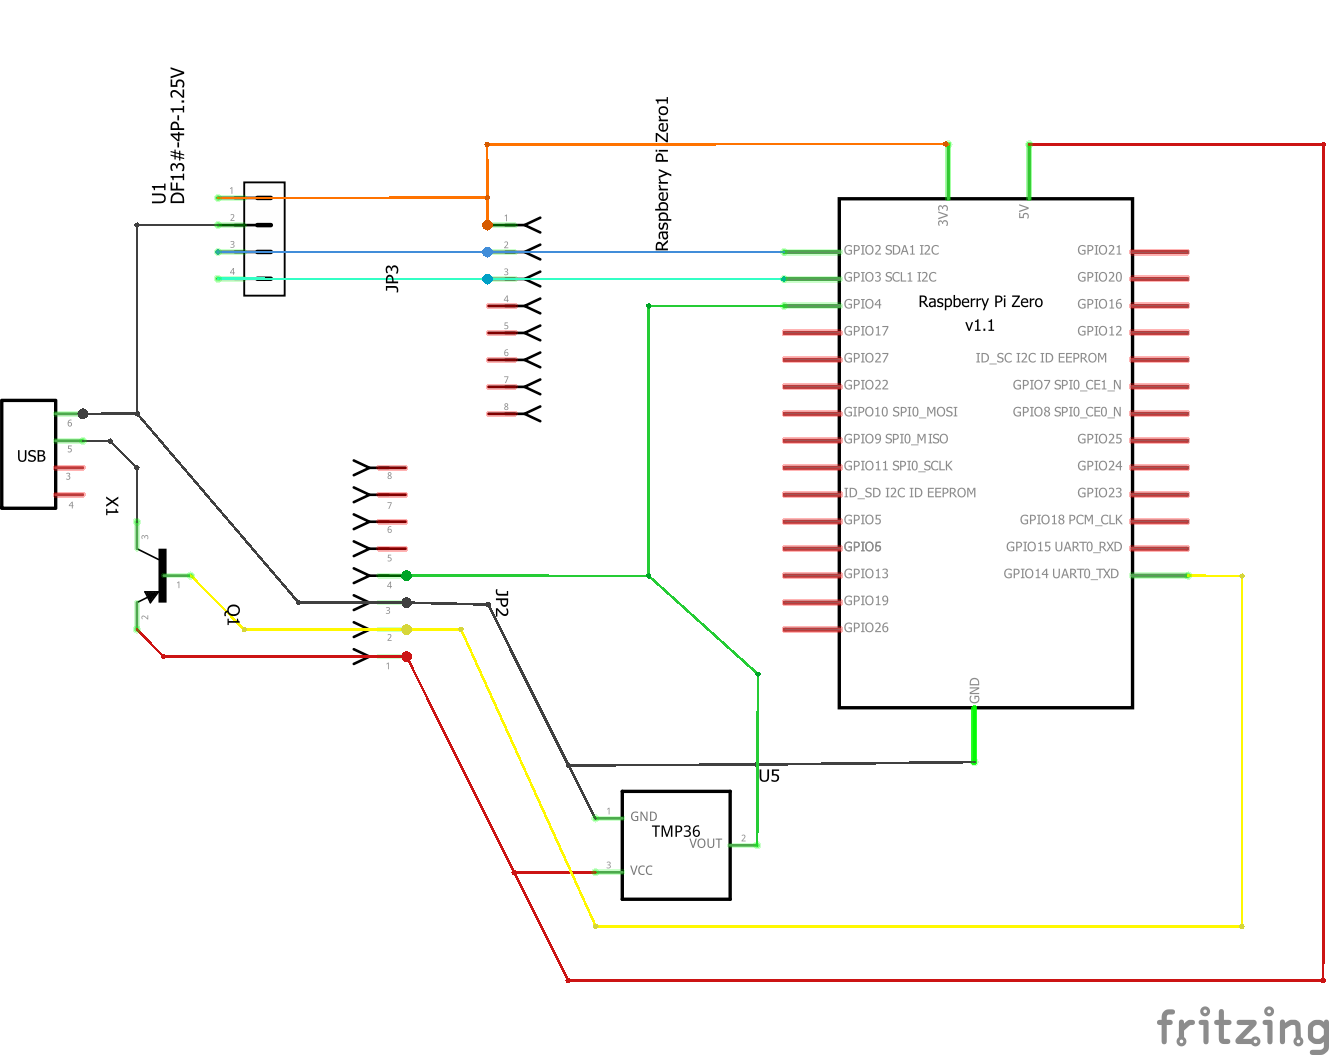
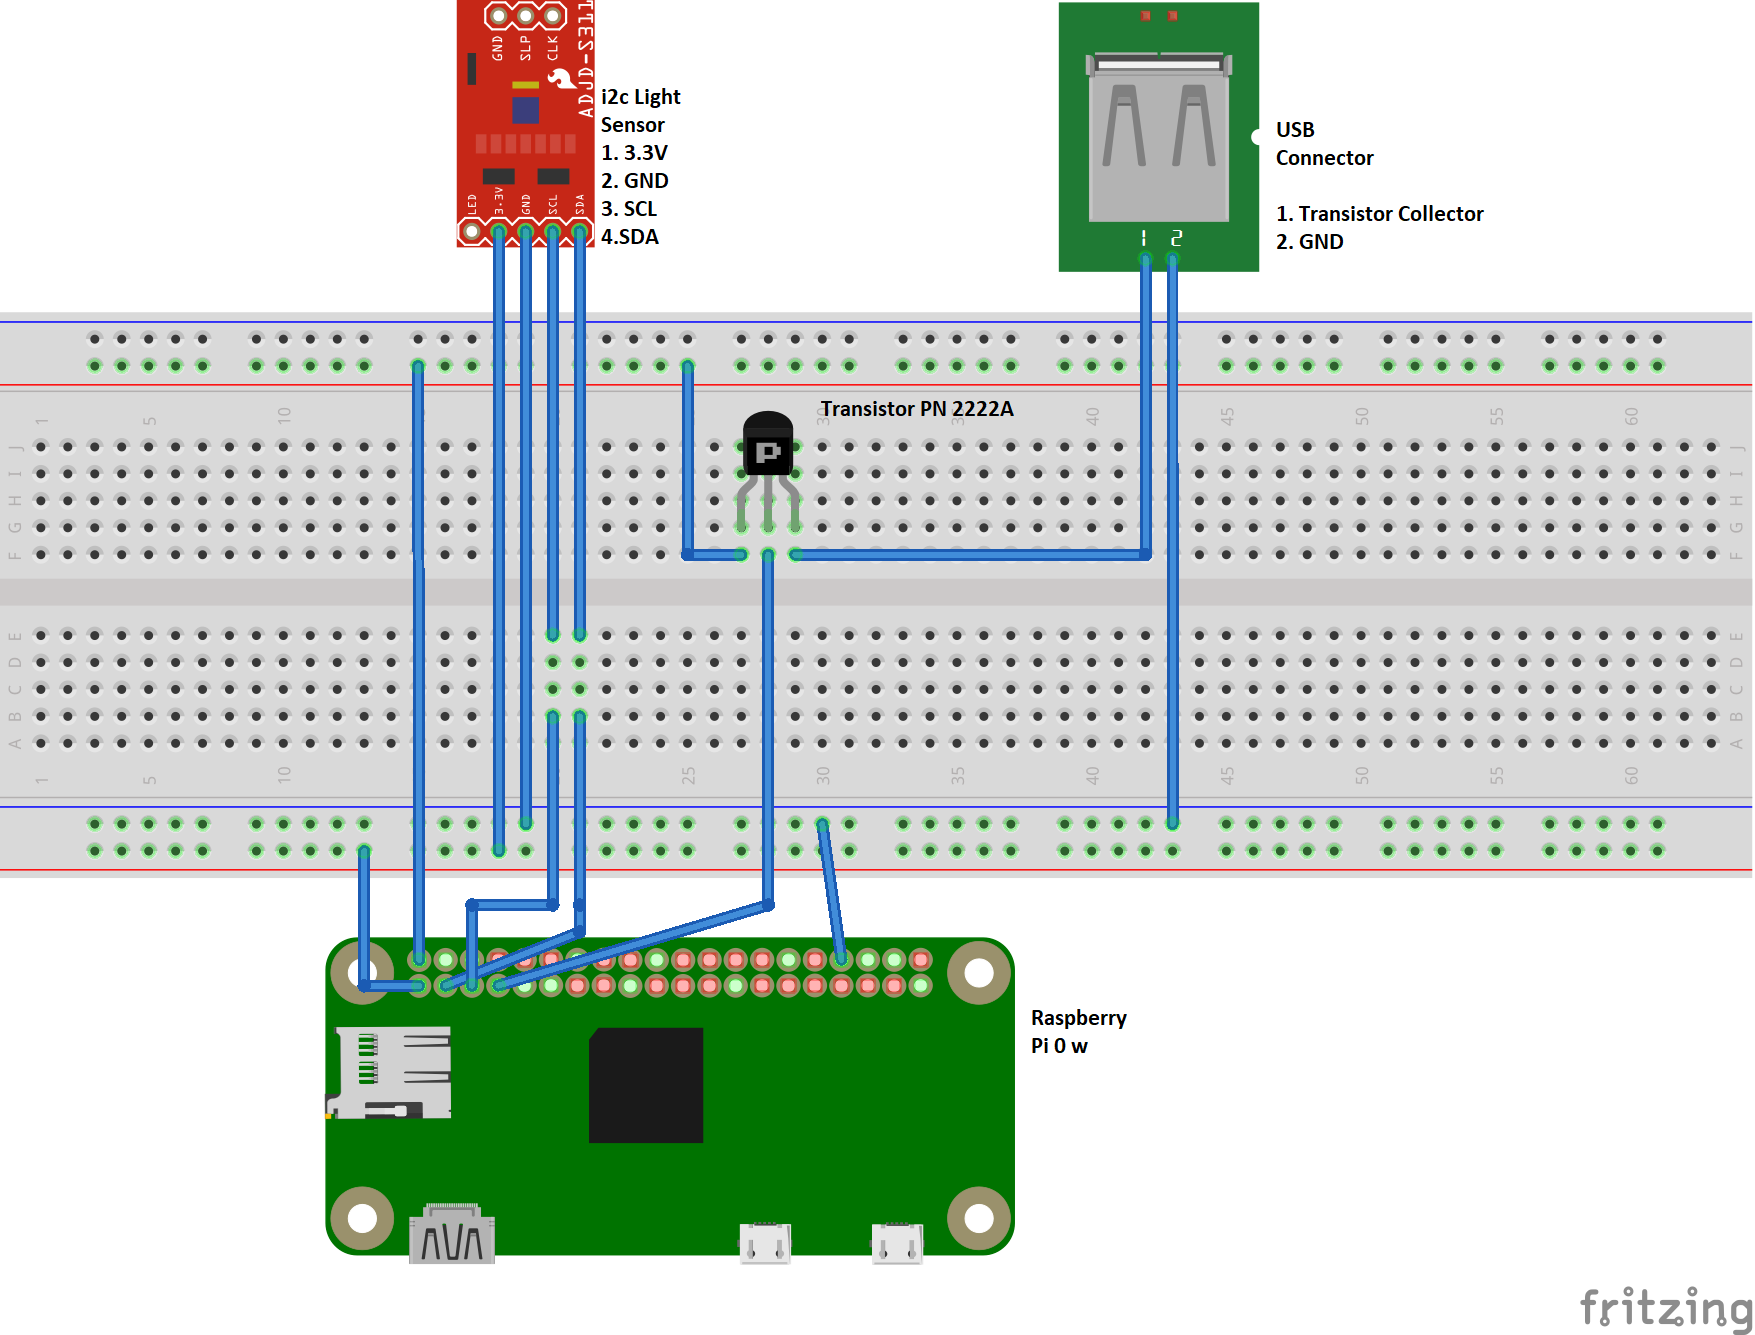
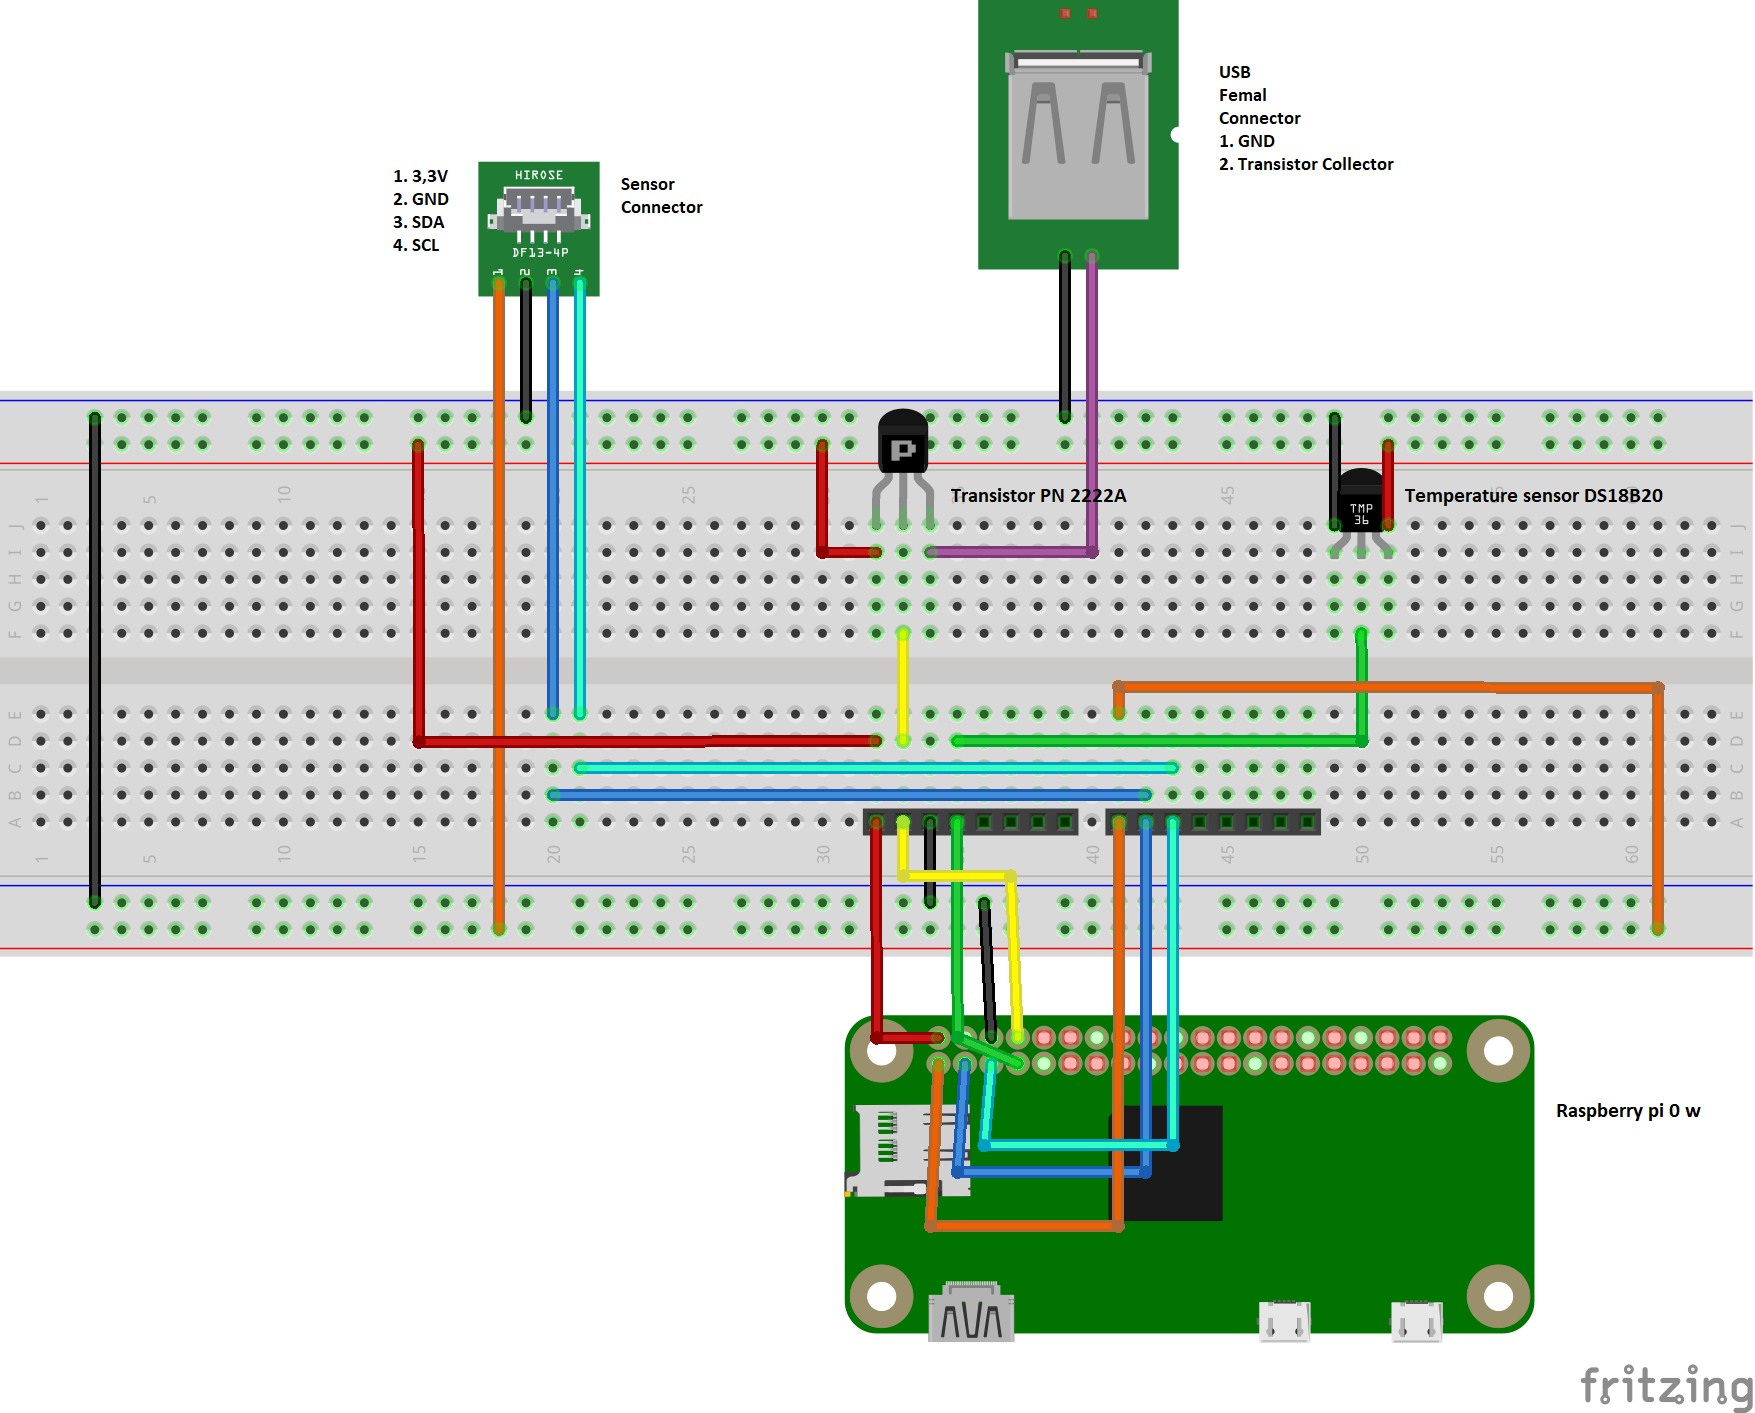
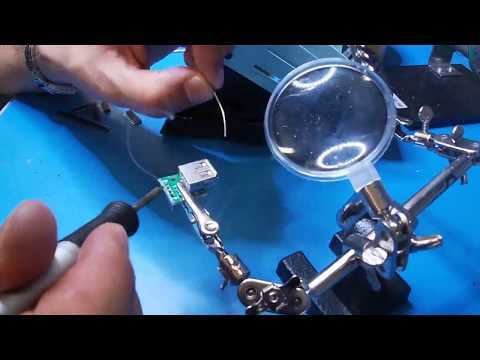
The first step towards the assembly of the complete device is to have well soldered pins. Problems in the soldering lead to sneaky failures very hard to identify. Do not underestimate the importance of this step.
Choose accurately the type of pin you solder on the borad. We soldered male pins on the board, so we will use female jumpers. You are free to solder female connectors, as well you use male jumpers.
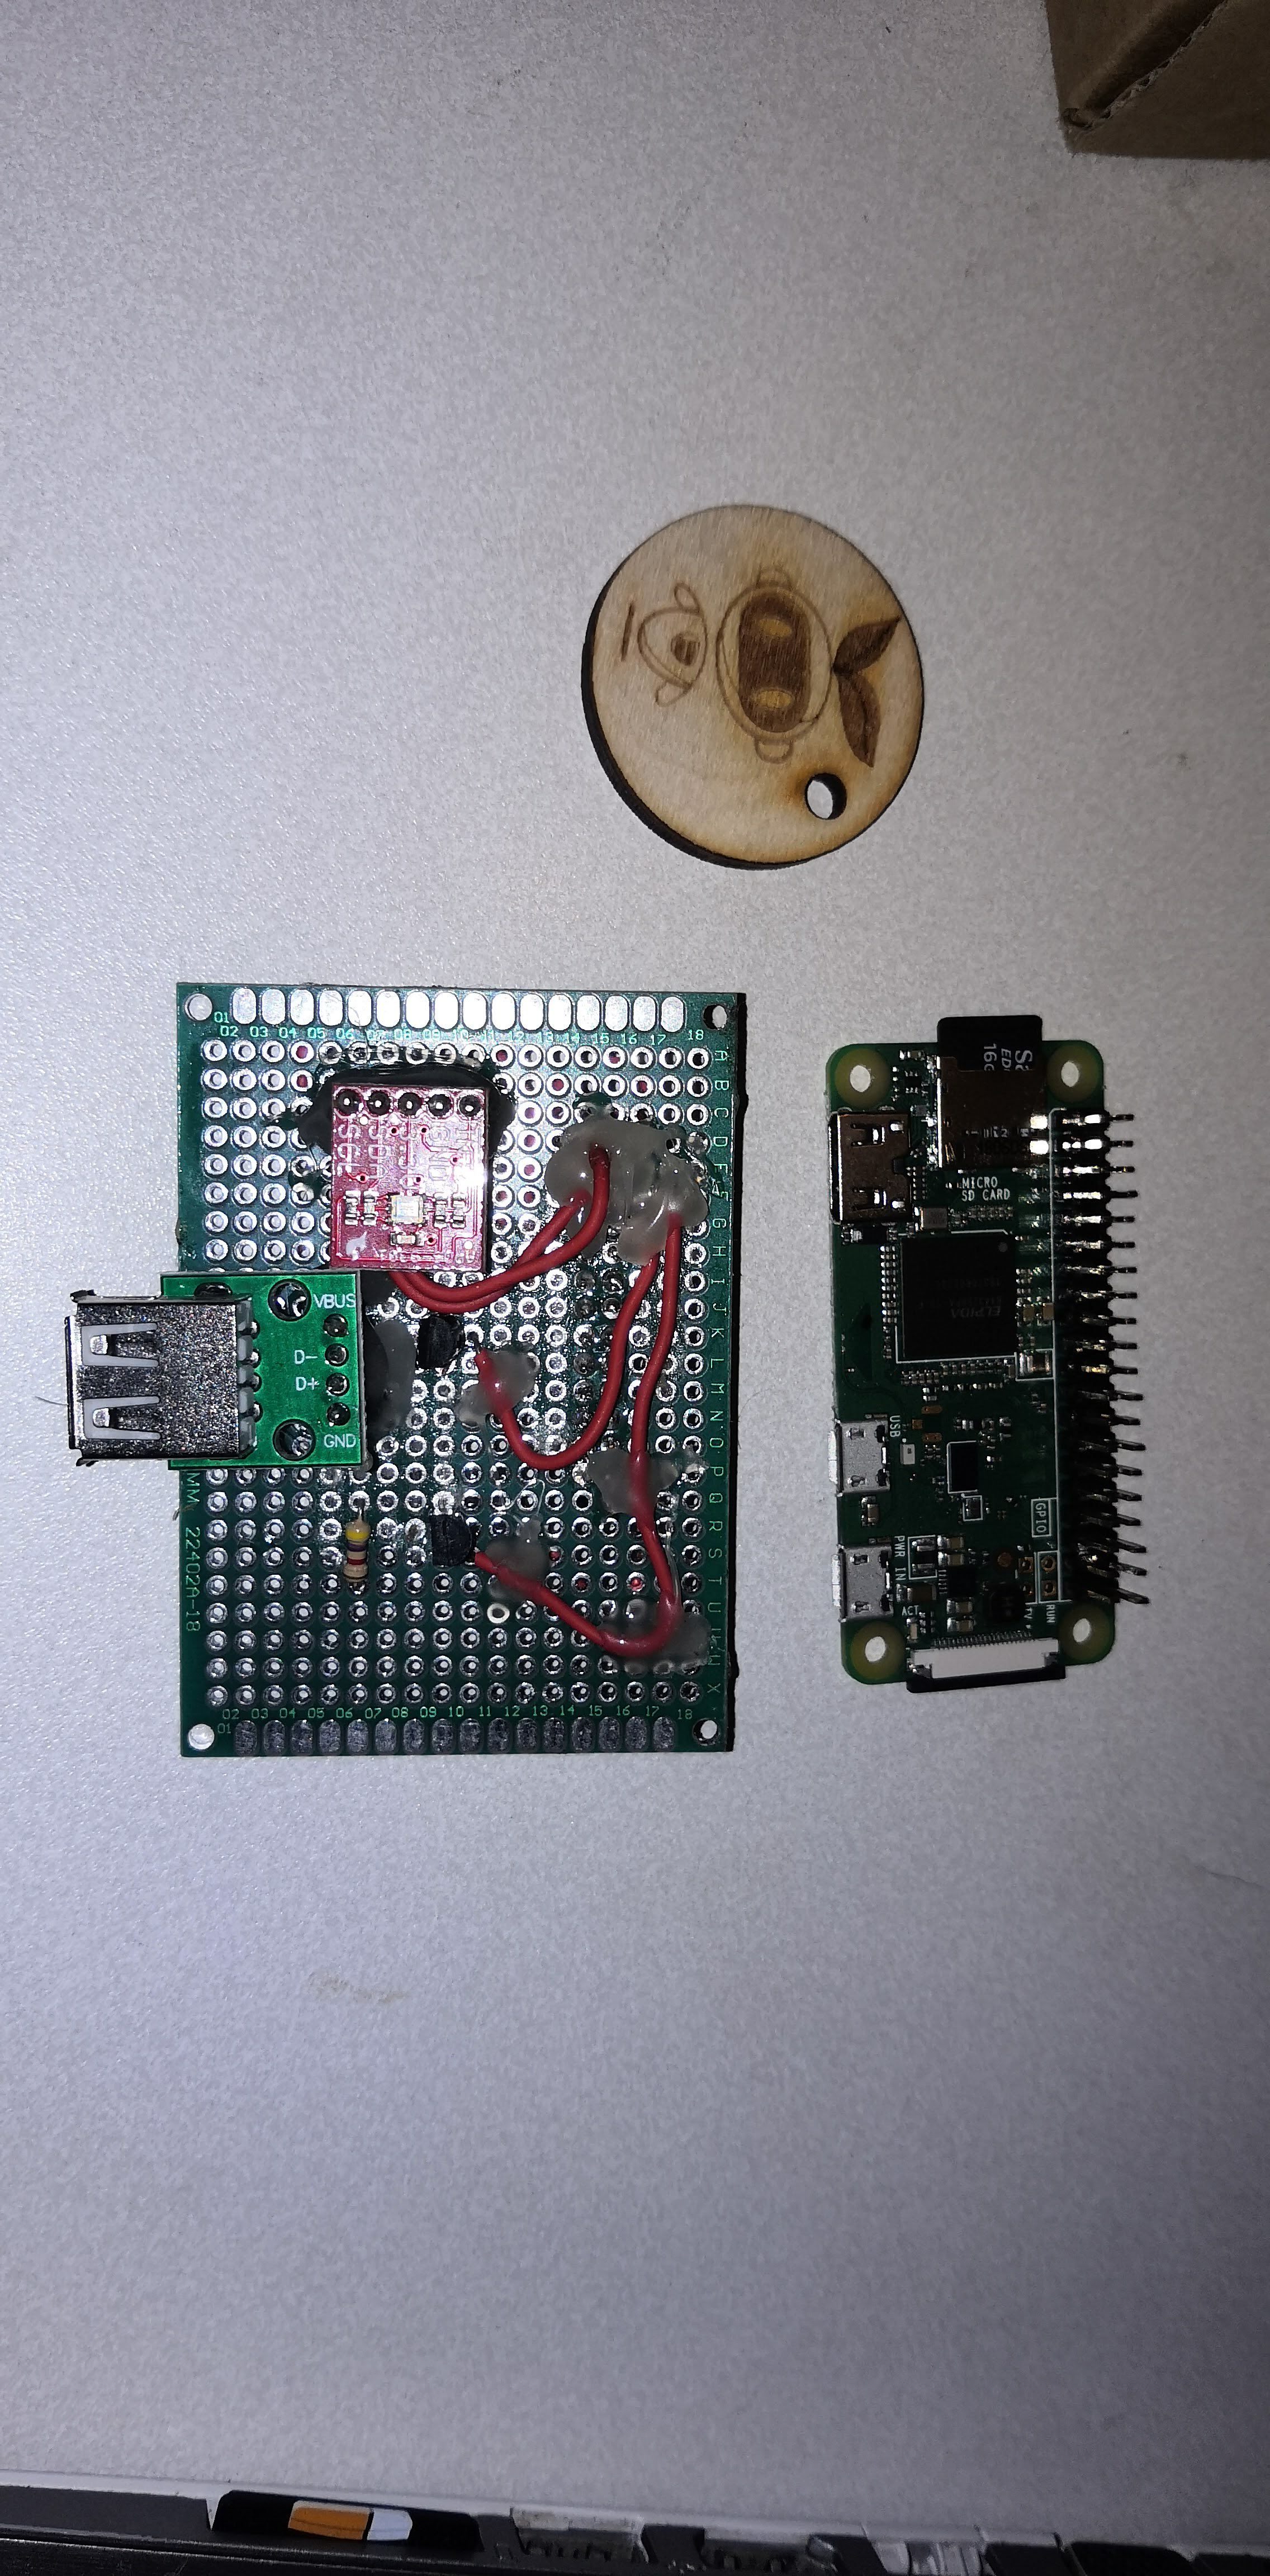
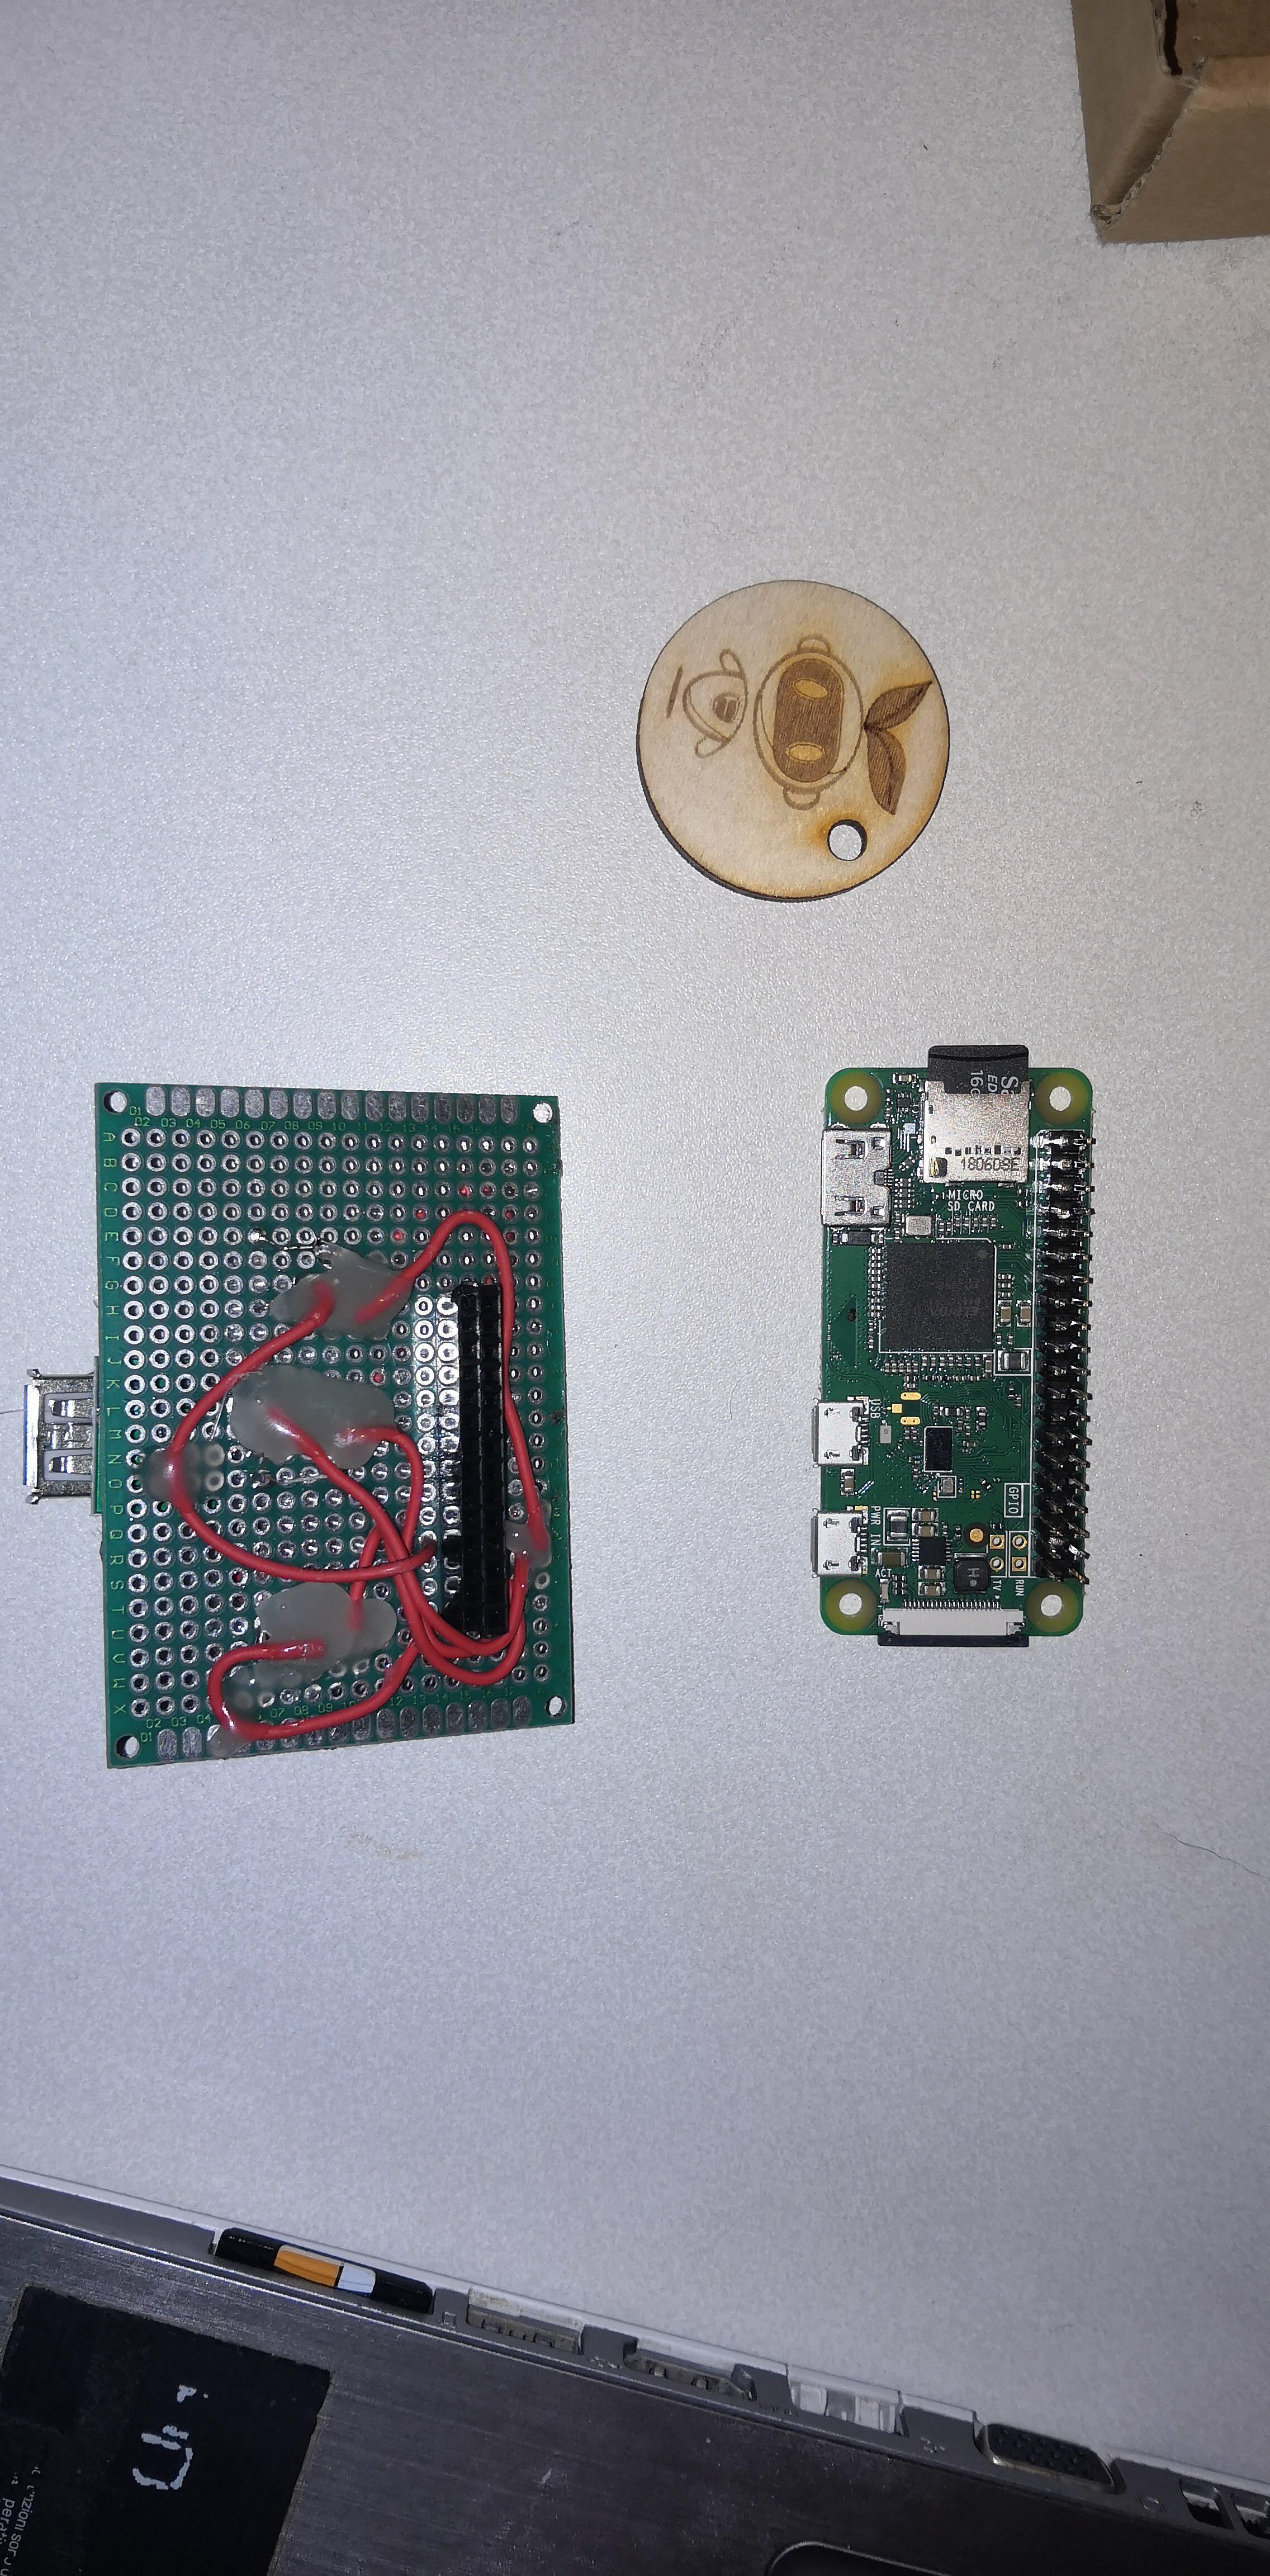
In the attached photos, you find the soldered pins on the Raspberry Pi 0 w and an example of light sensor, not soldered yet.
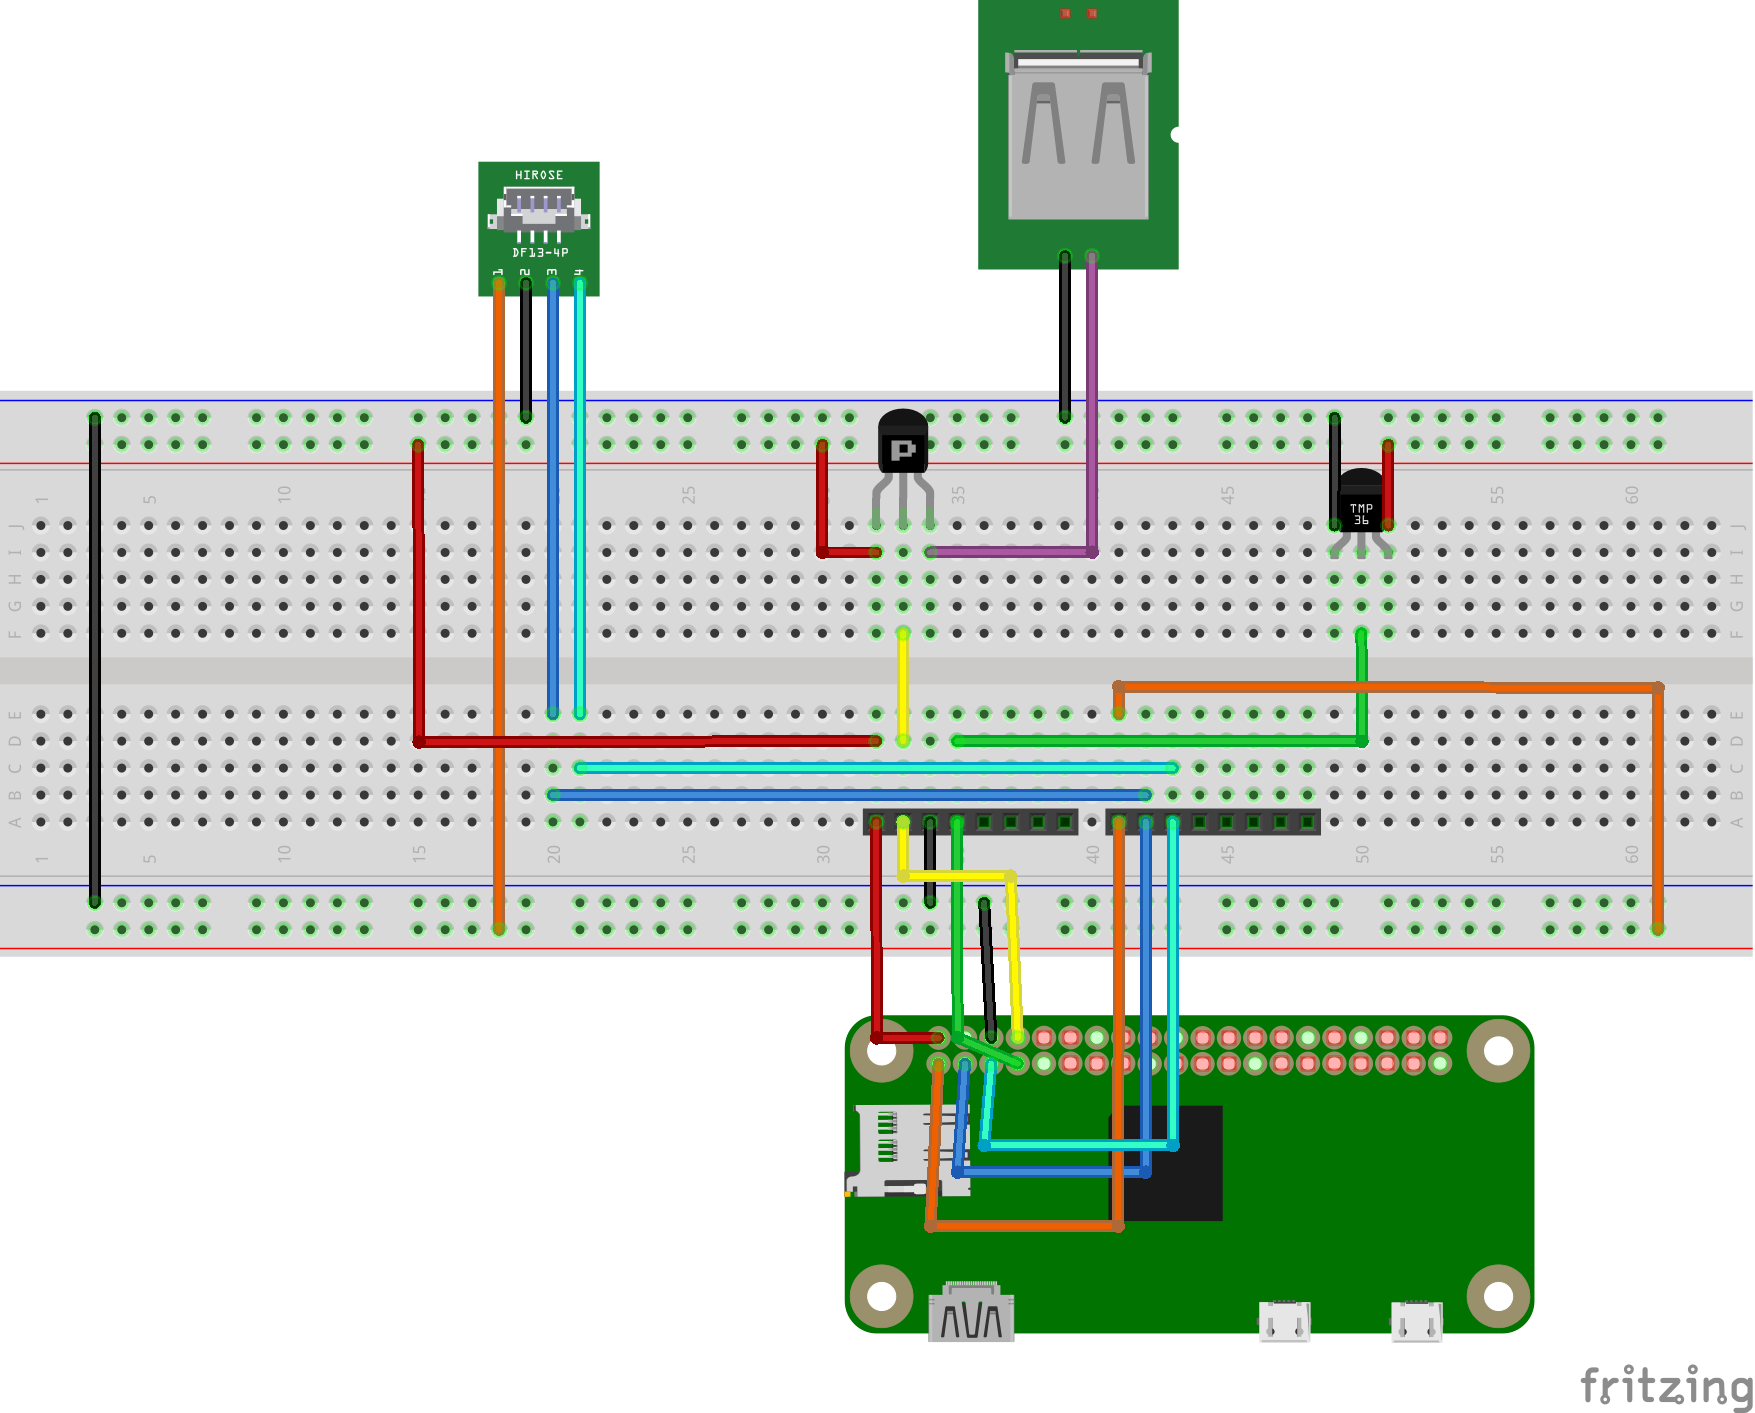
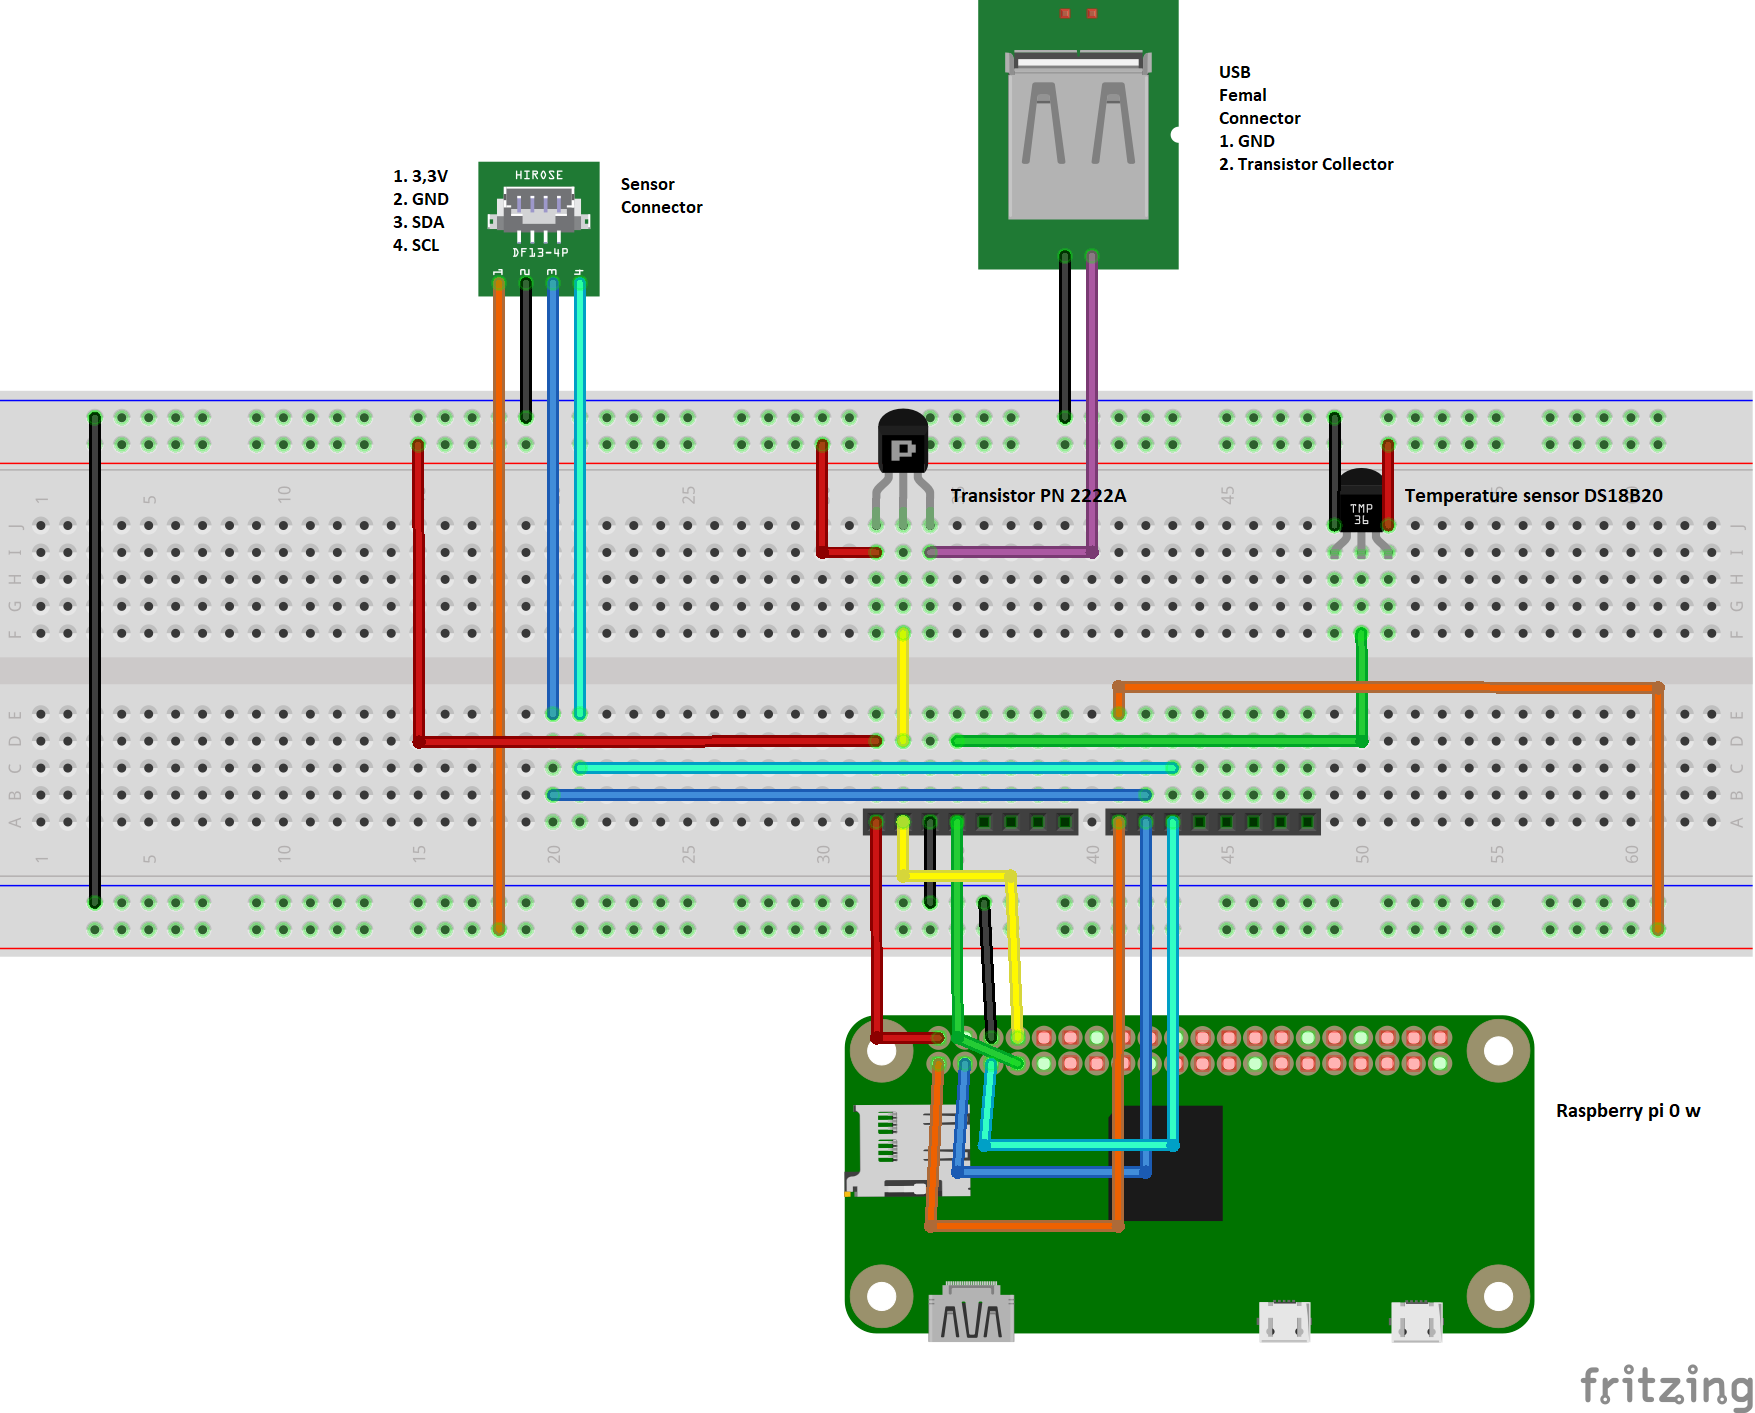
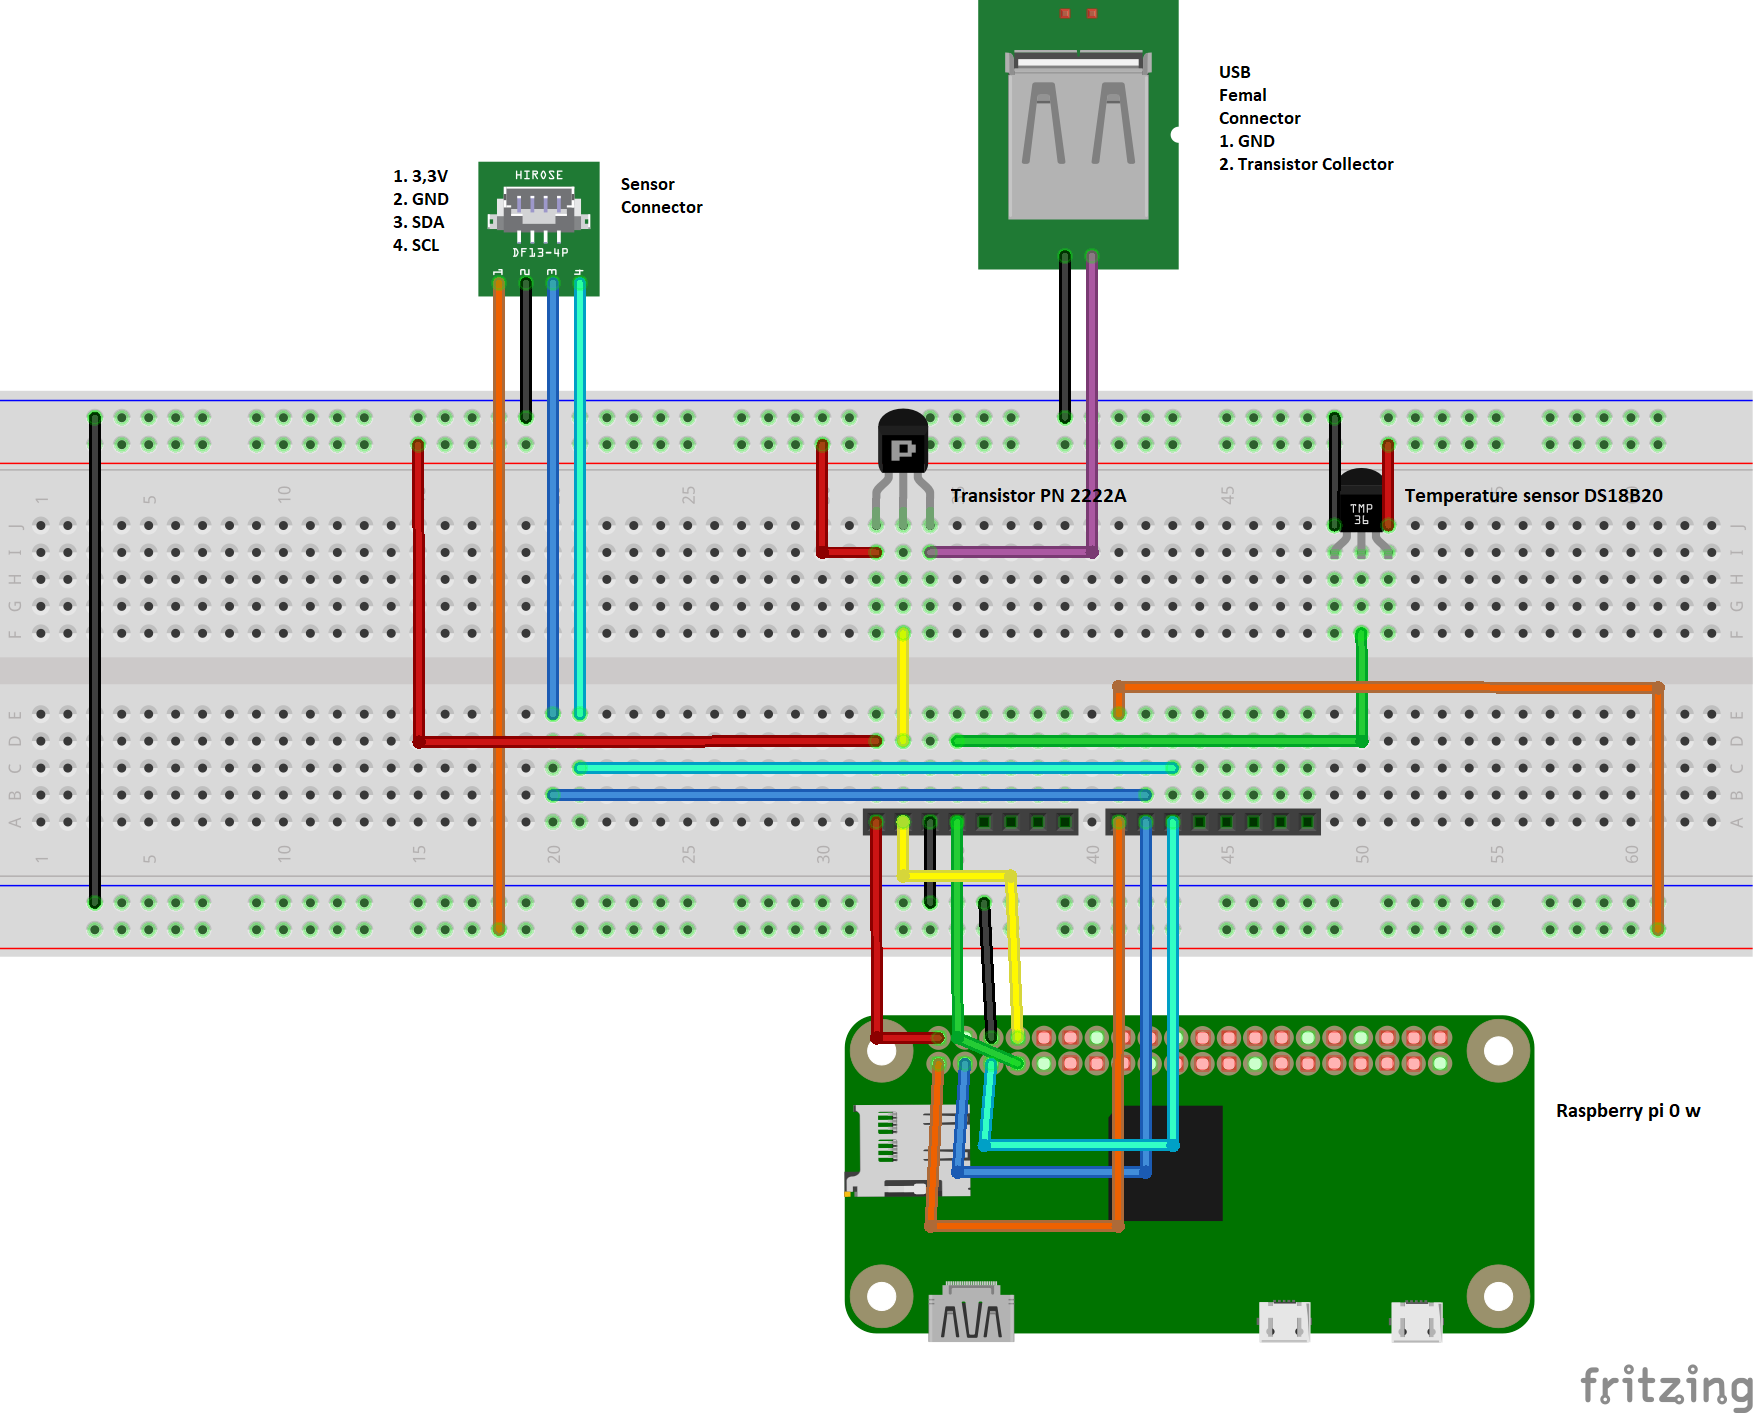
The solderings have to be done according to the schematic presented in figure 3. In the picture, a dummy i2c Light Sensor has been used. Connections with the Raspberry pi 0 w have been done using as reference the website pinout.xyz
(In picture 4 you find the schematic with a generic connector for a generic sensor that works with i2c protocol. Note that different sensors may have a different order in the pins, so check you sensor before you solder your pcb)
The following videos could be helpful.
An USB socket is great in all cases similar to the this one. It allows to use several devices and it makes highly reusable all systems described in this tutorial. You find a video attached showing how to solde a usb socket.
Raspberry Software Side
Be sure your sd card has enough space for the (quite large, actually) Raspbian Image; 8 gb should be ok. We recommend to install the version that includes the recommended software. In this way, there souldn't be problems with Node.js and NodeRed.
Set up your device, connecting it to a screen and to an input device.
Ready? Connect the power supply - turn on your Raspberry pi 0 w- , log into the system and connect to a wifi network. Update your software at the first run, not to have problem in the future.
(Optional step: you could set up a SSH connection and working from another therminal. This could let you save a lot of time since the management of the inputs result into high computational burden for the board. As other alternative, you can use VNC.)
From the Raspberry software side, we just need to run some commands on the terminal:
>> sudo apt-get install nmp
>> npm install --global node-red-contrib-blynk-ws
(this let you download and install the libraries for the comunication between Raspberry and the BLINK app)
>> sudo systemctl enable nodered.service
(this adds nodered to the startup services. This is very useful: the process starts when the device is turned on)
>> node-red start
Blynk on Your Smartphone
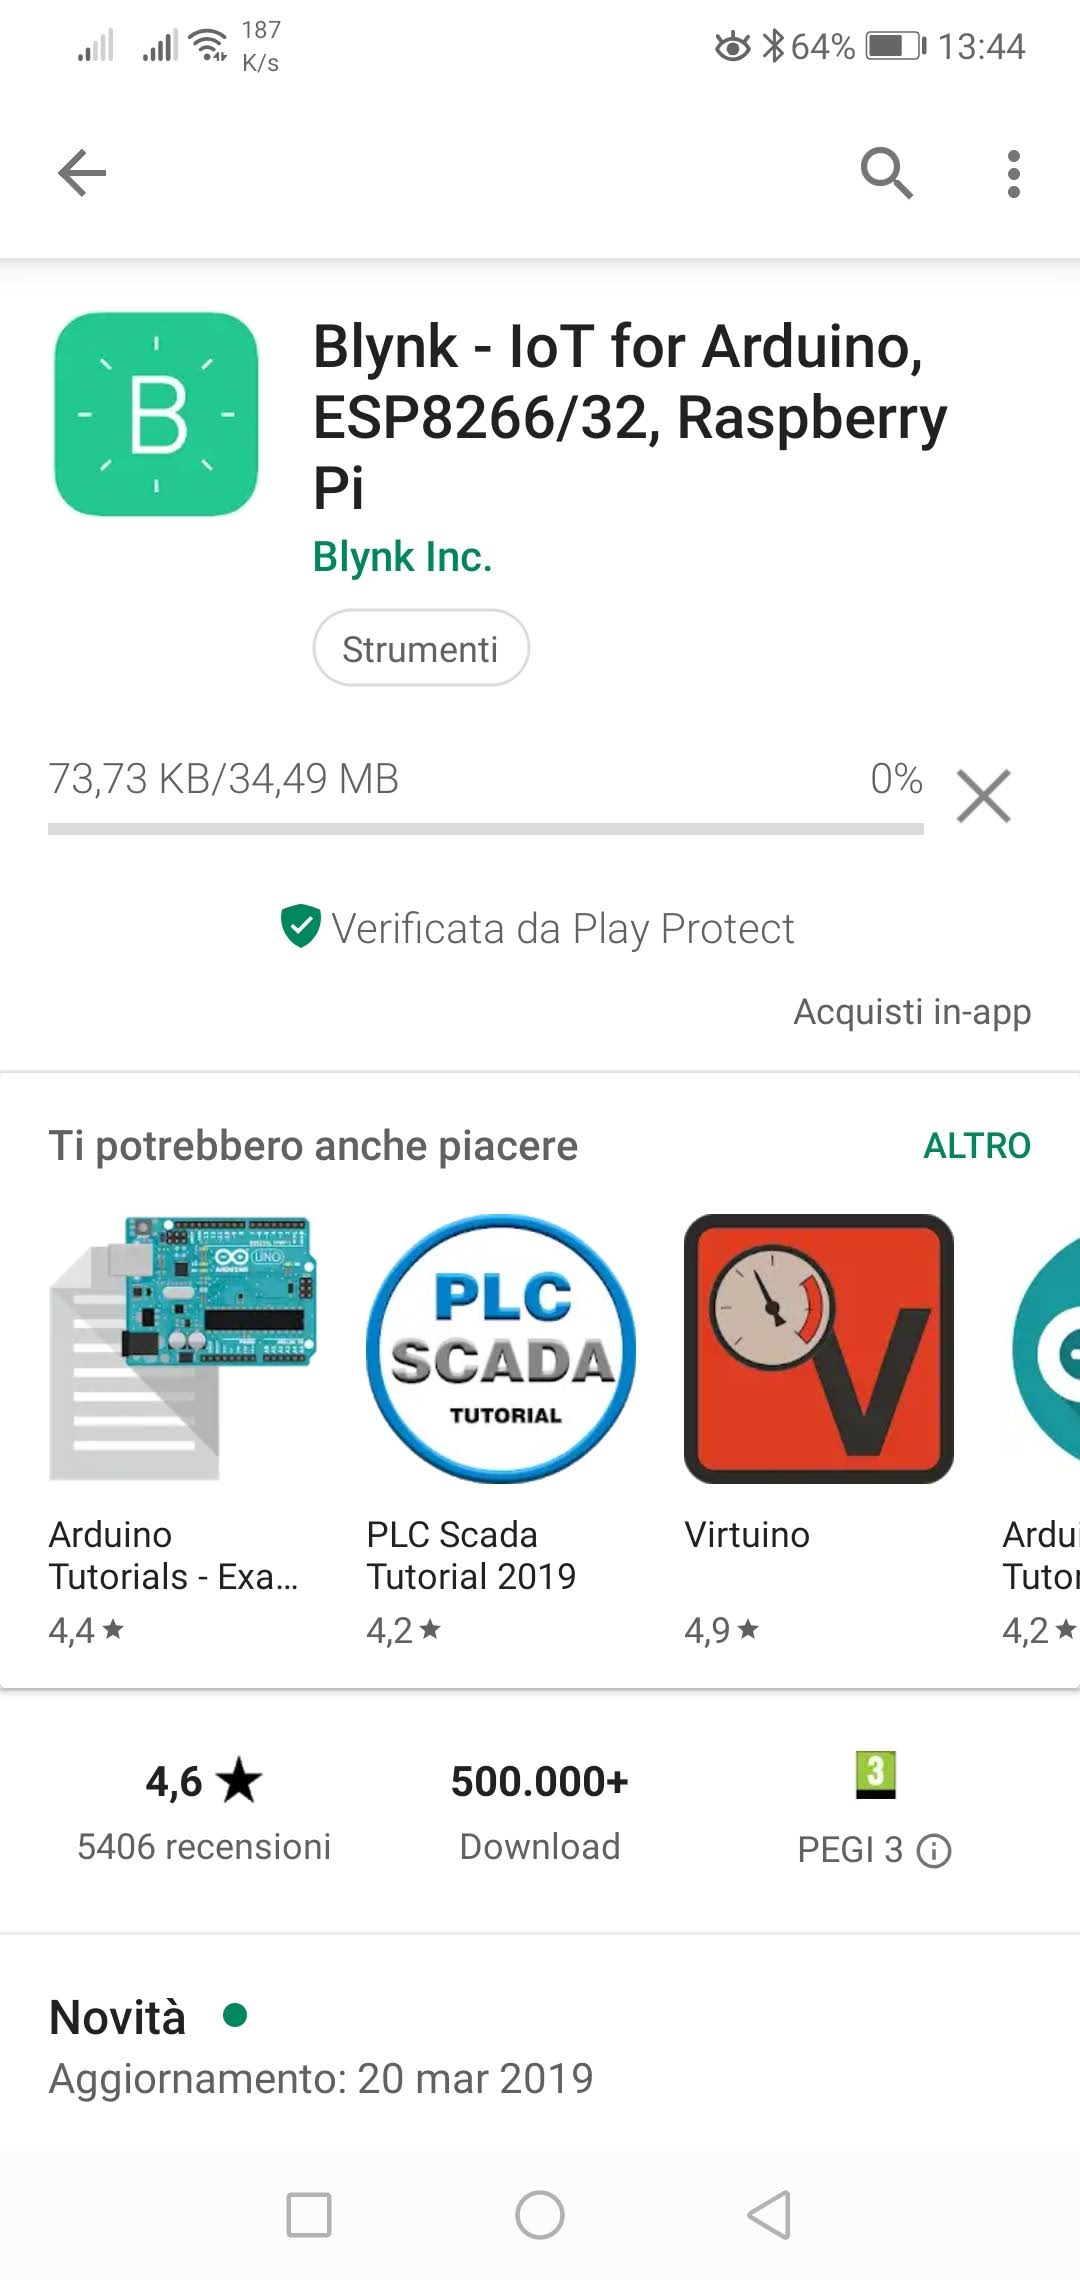
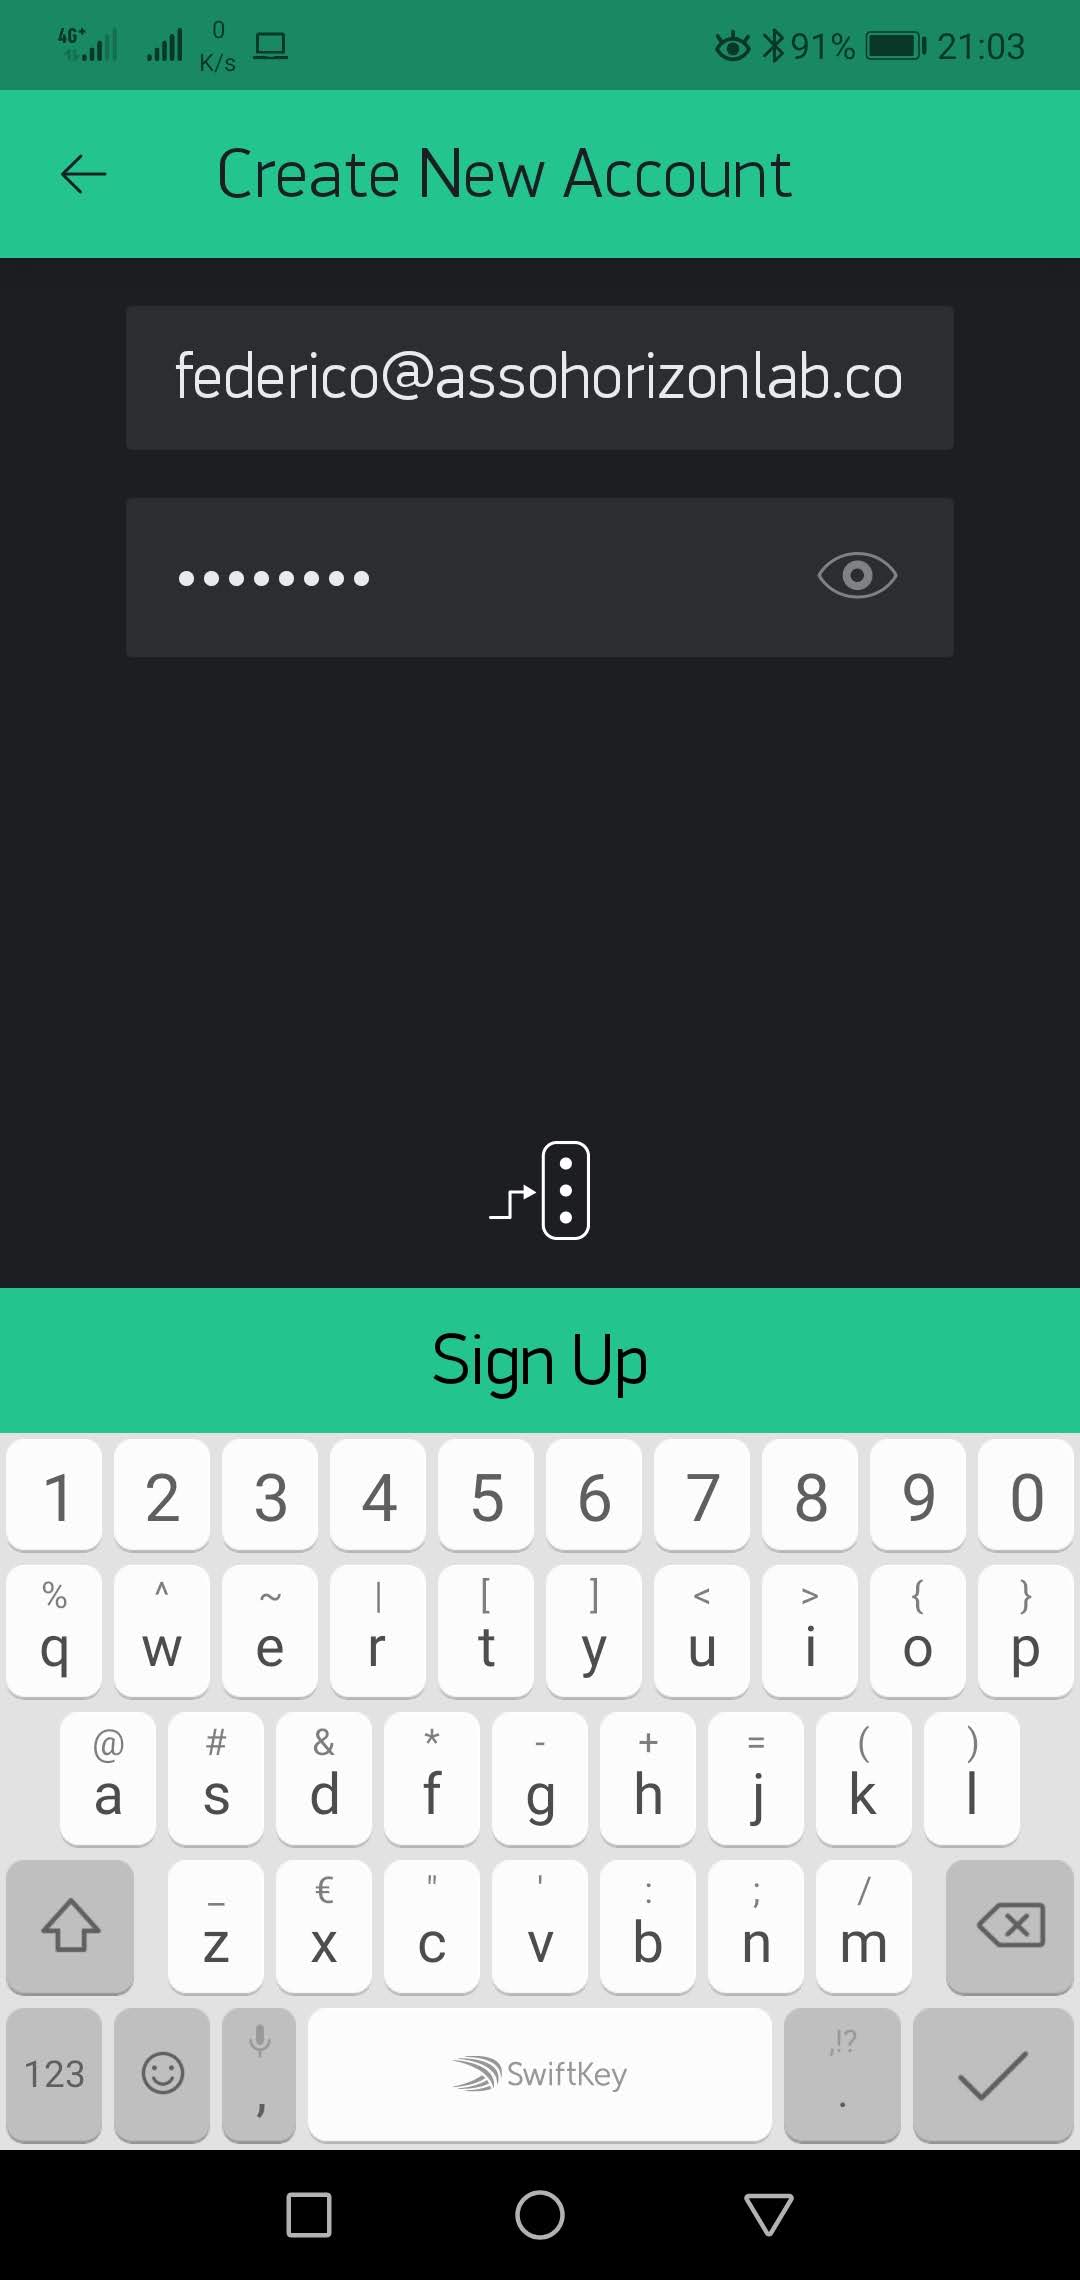
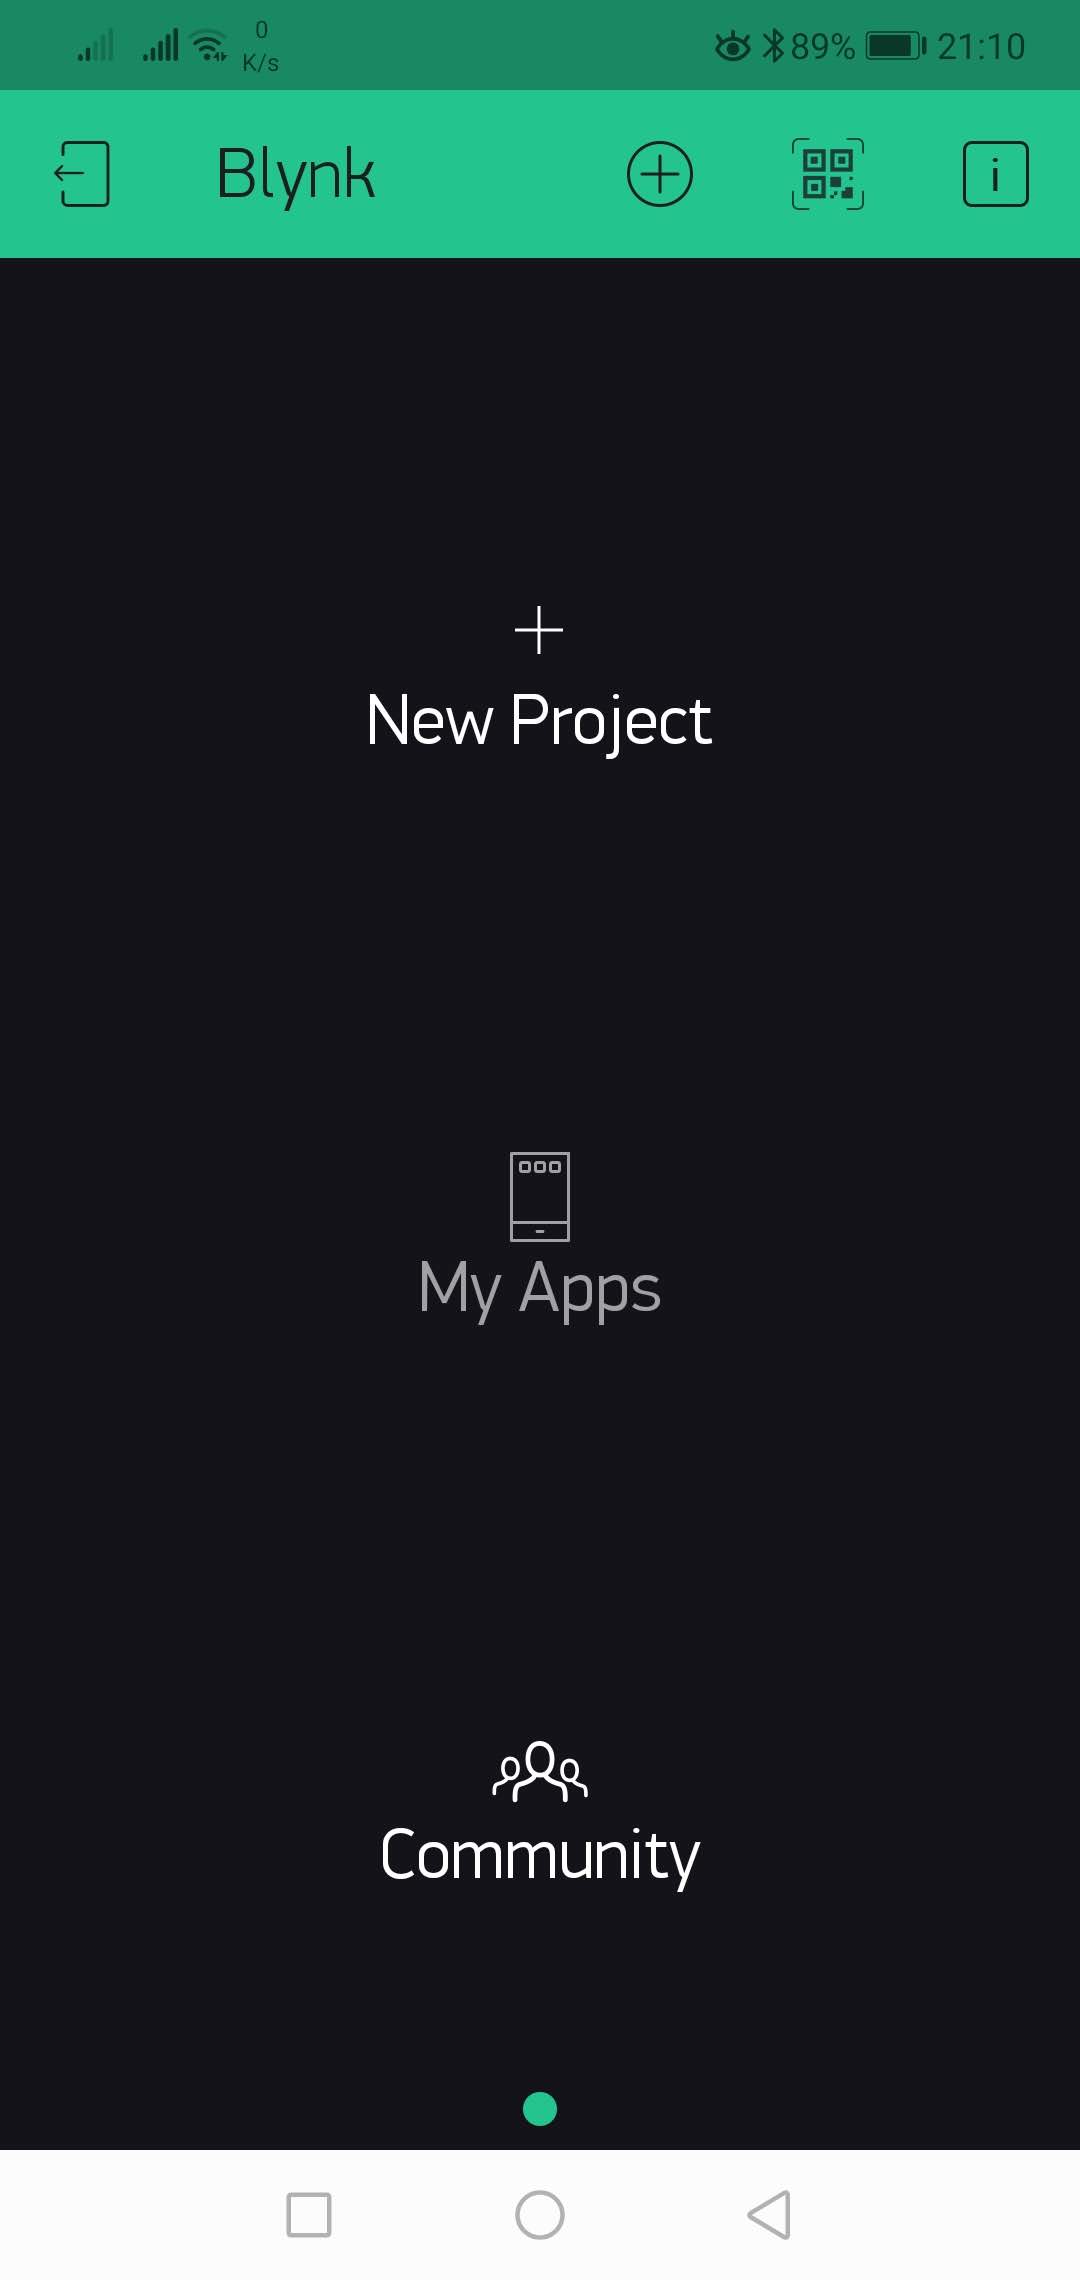
Download Blynk on your smartphone, run it and create your account (see images 1-3).
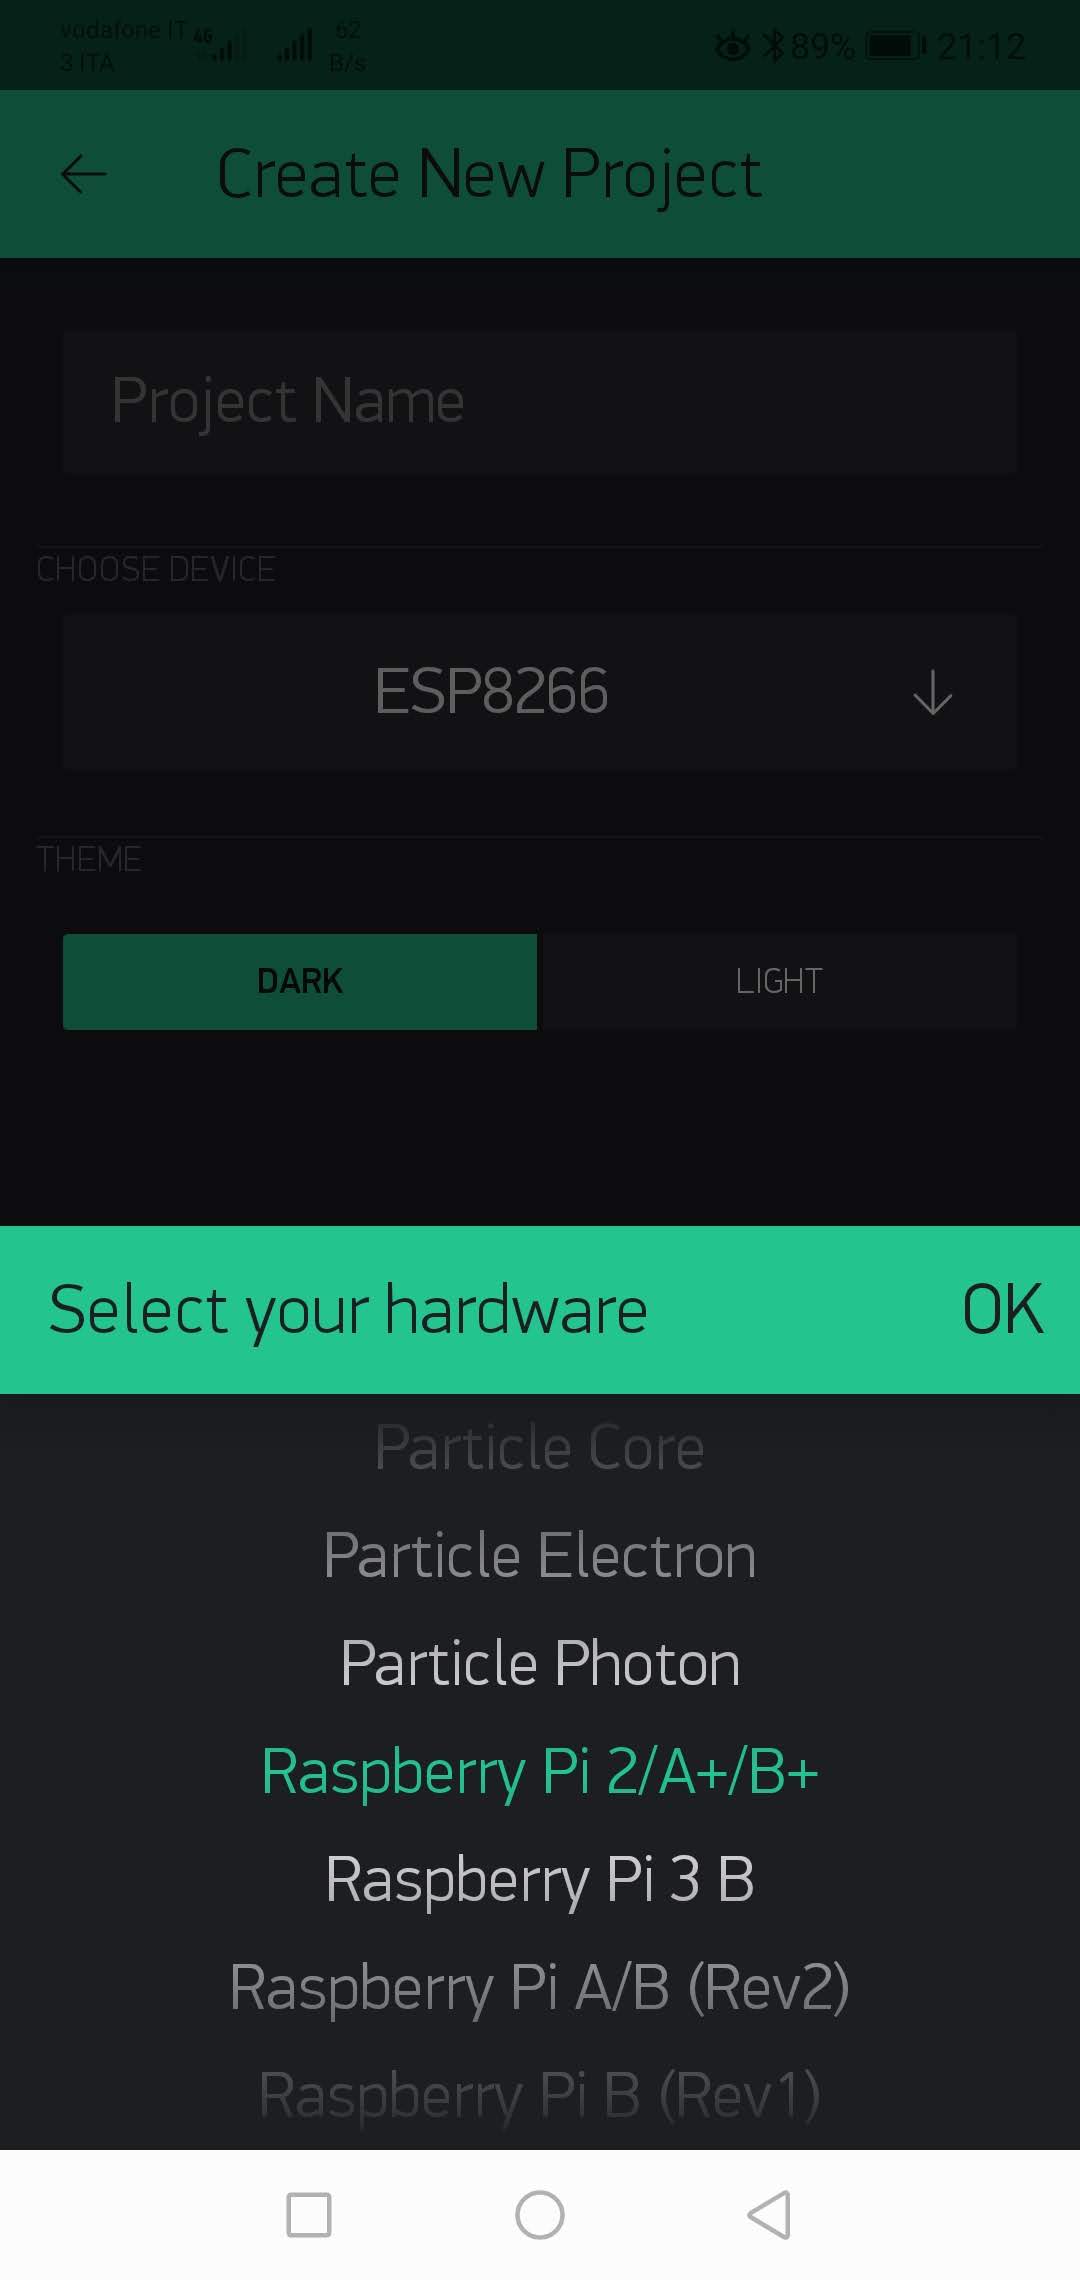
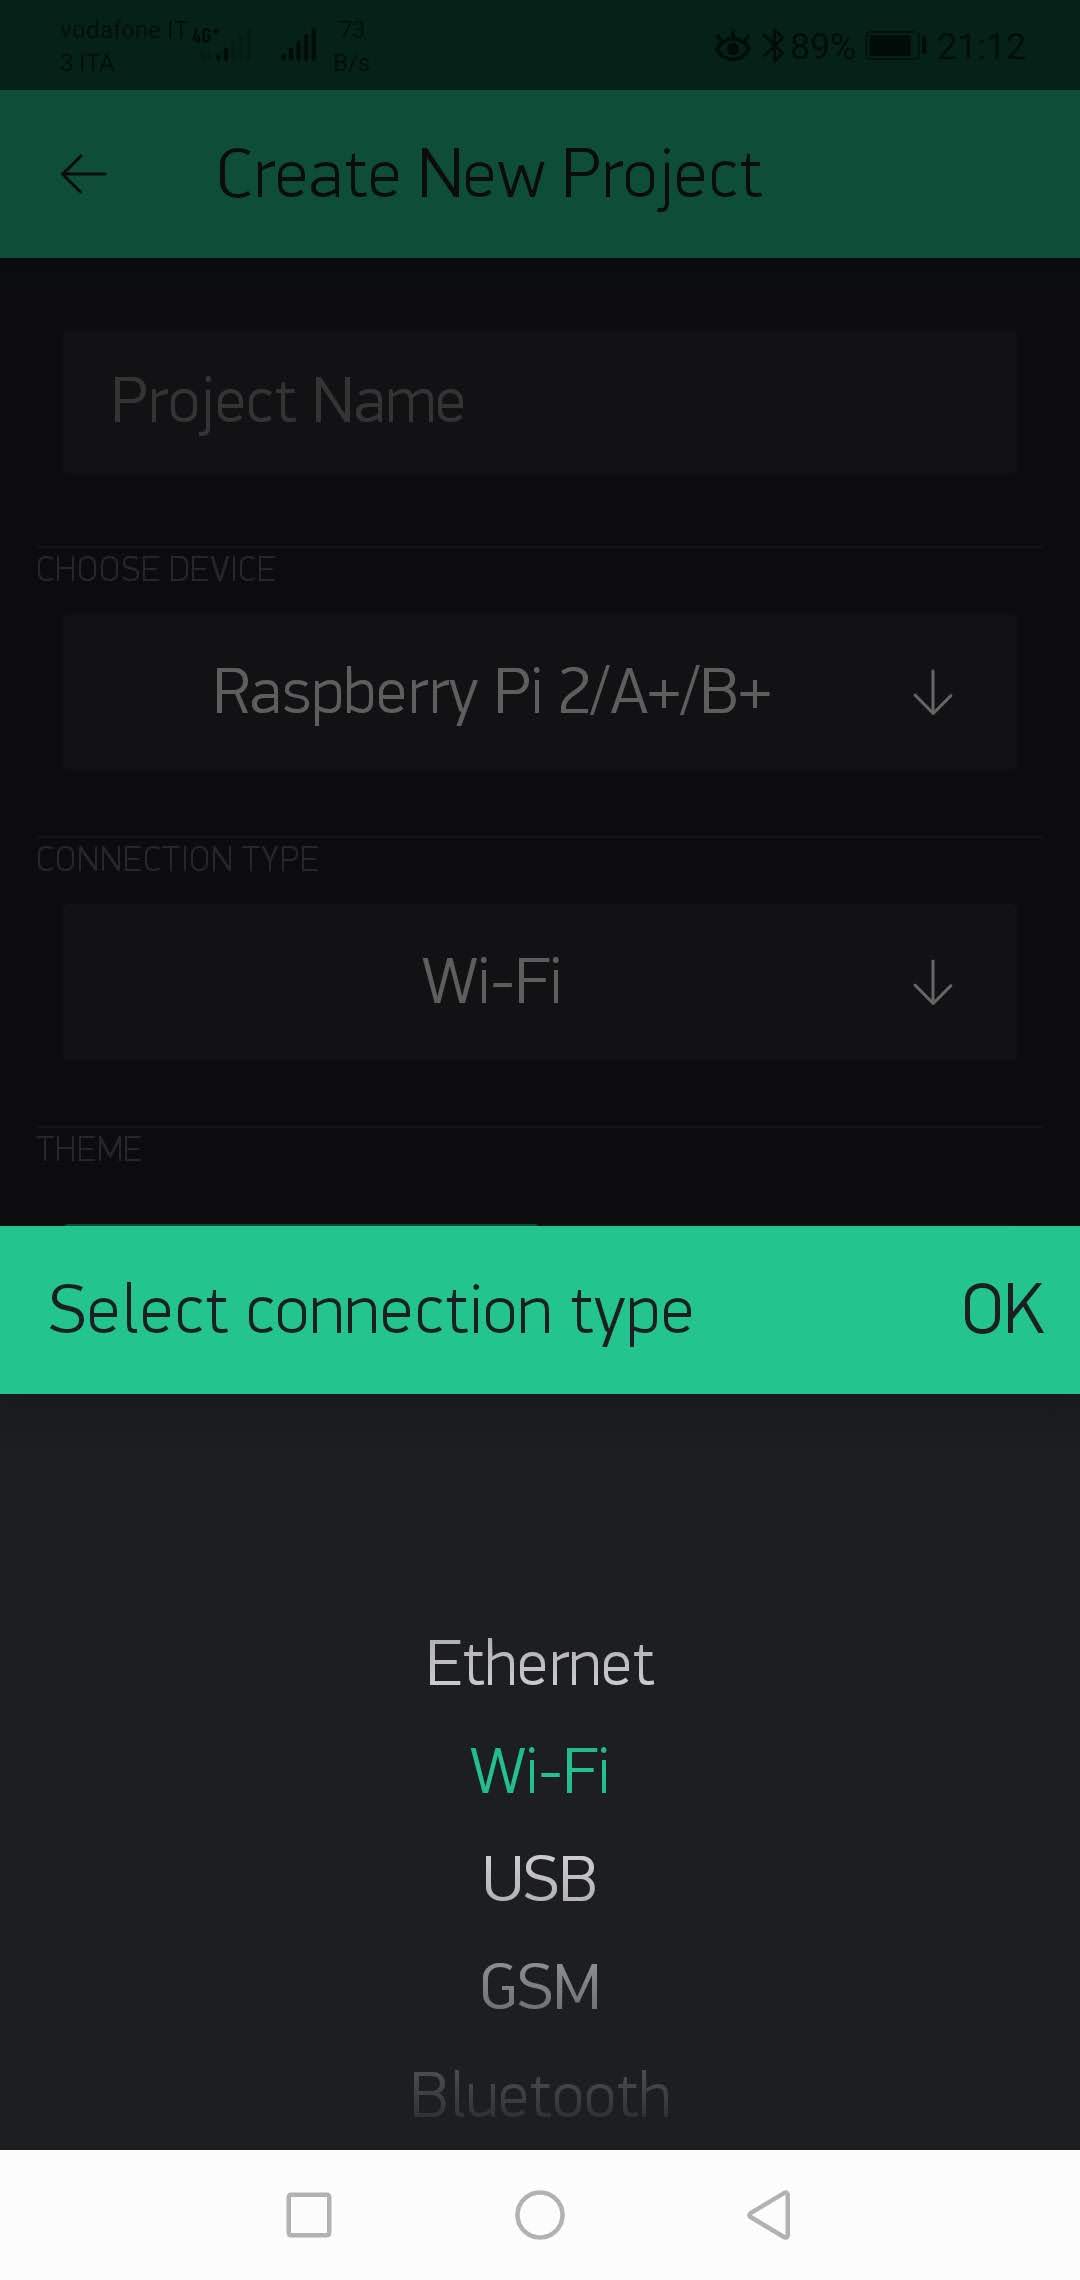
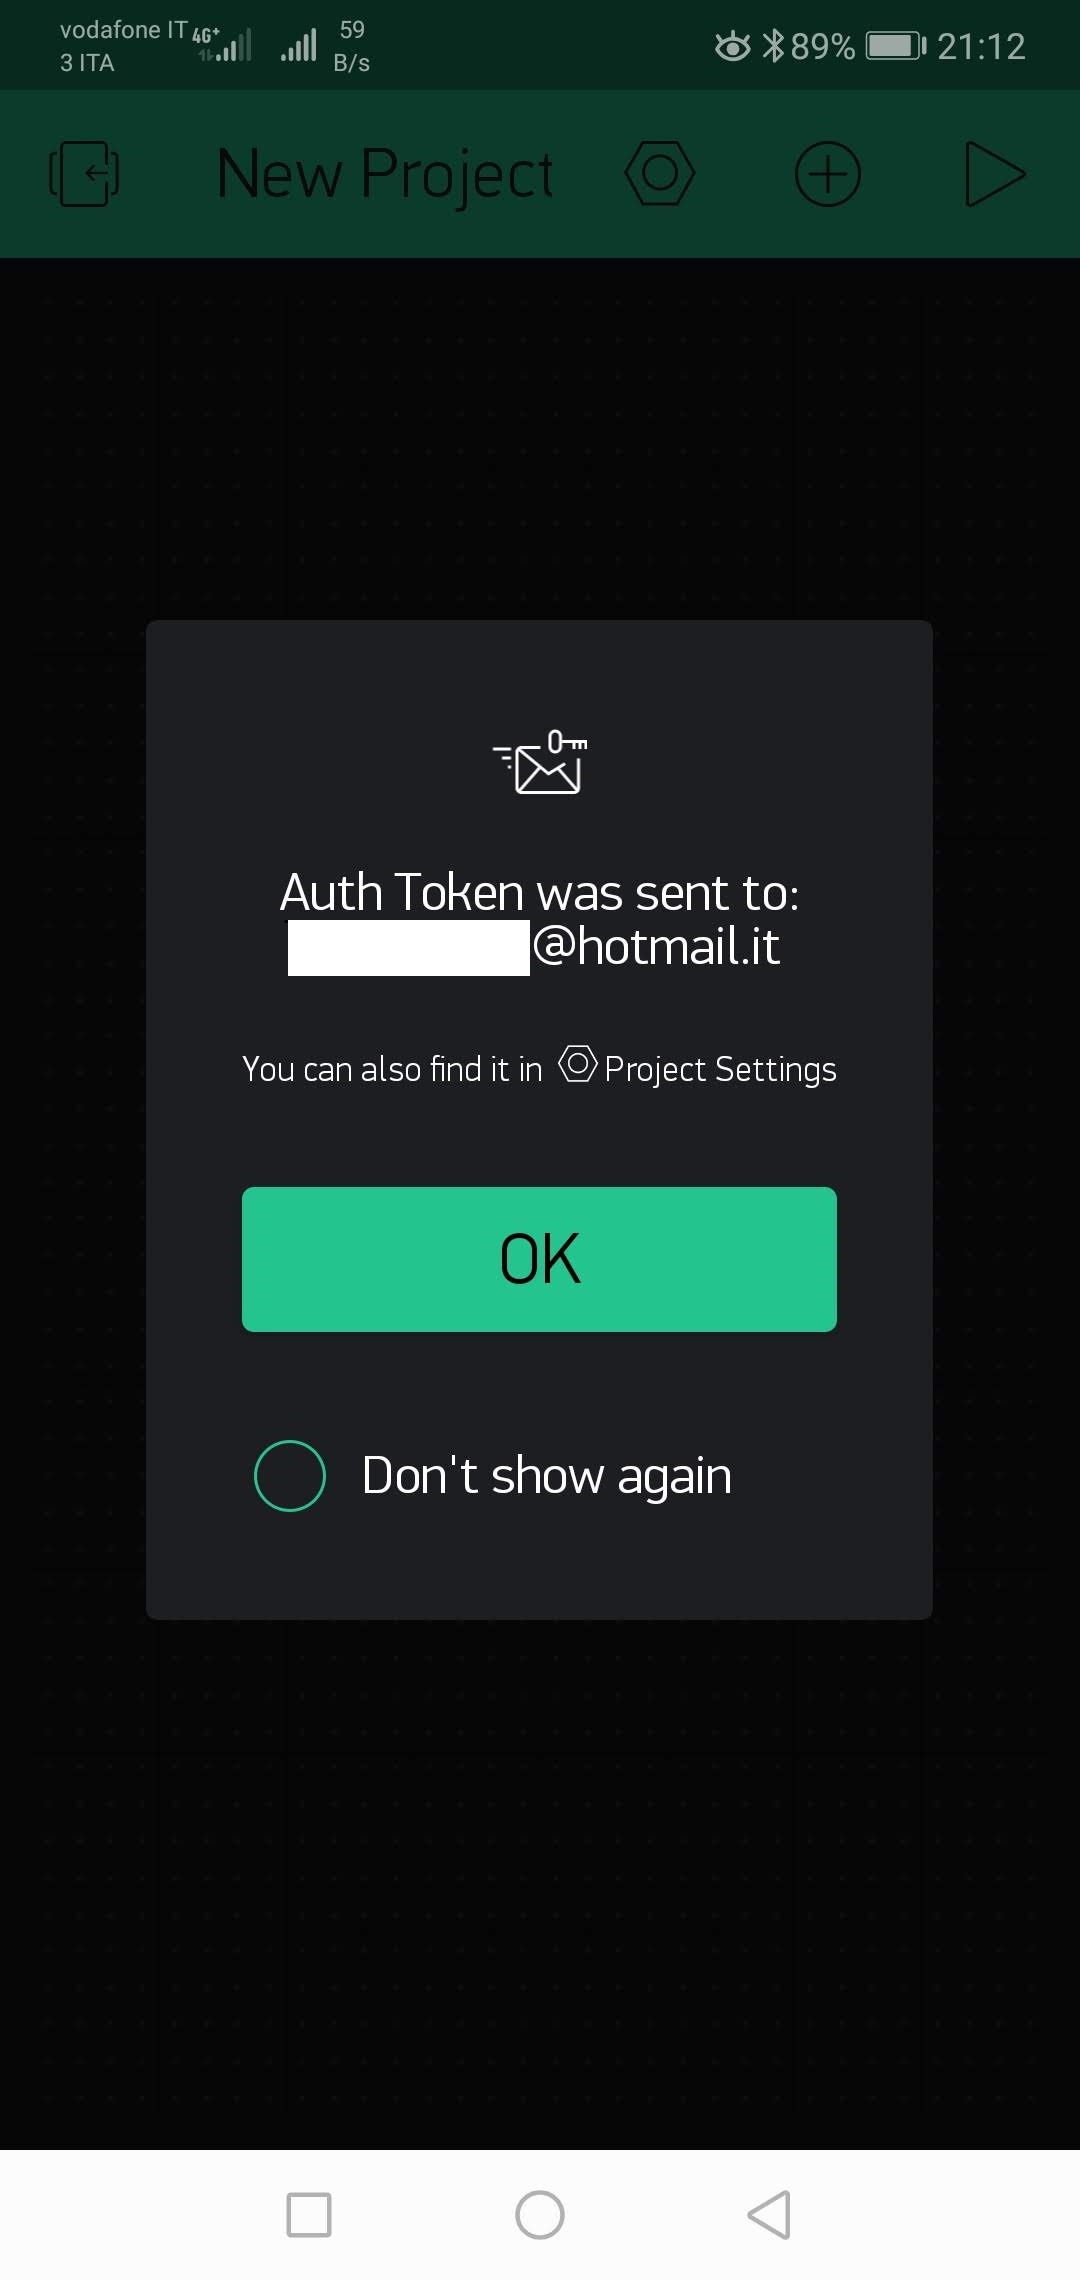
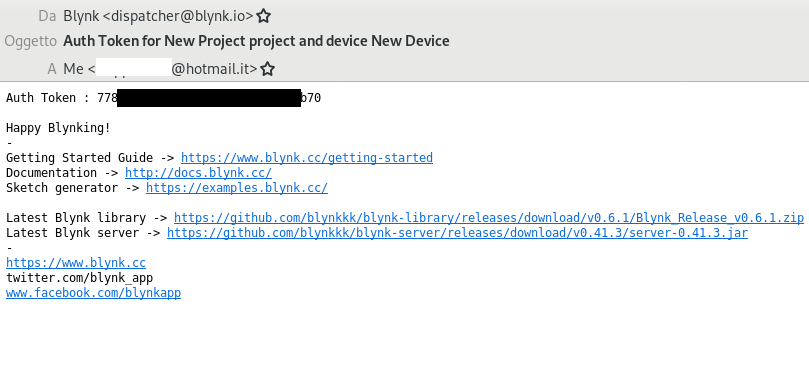
Create a new project selecting as hardware Raspberry Pi 2 and connection type WiFi (pictures 4 & 5). Once the project is created you will receive a mail containing the authorization token for your project (pics 6 & 7).
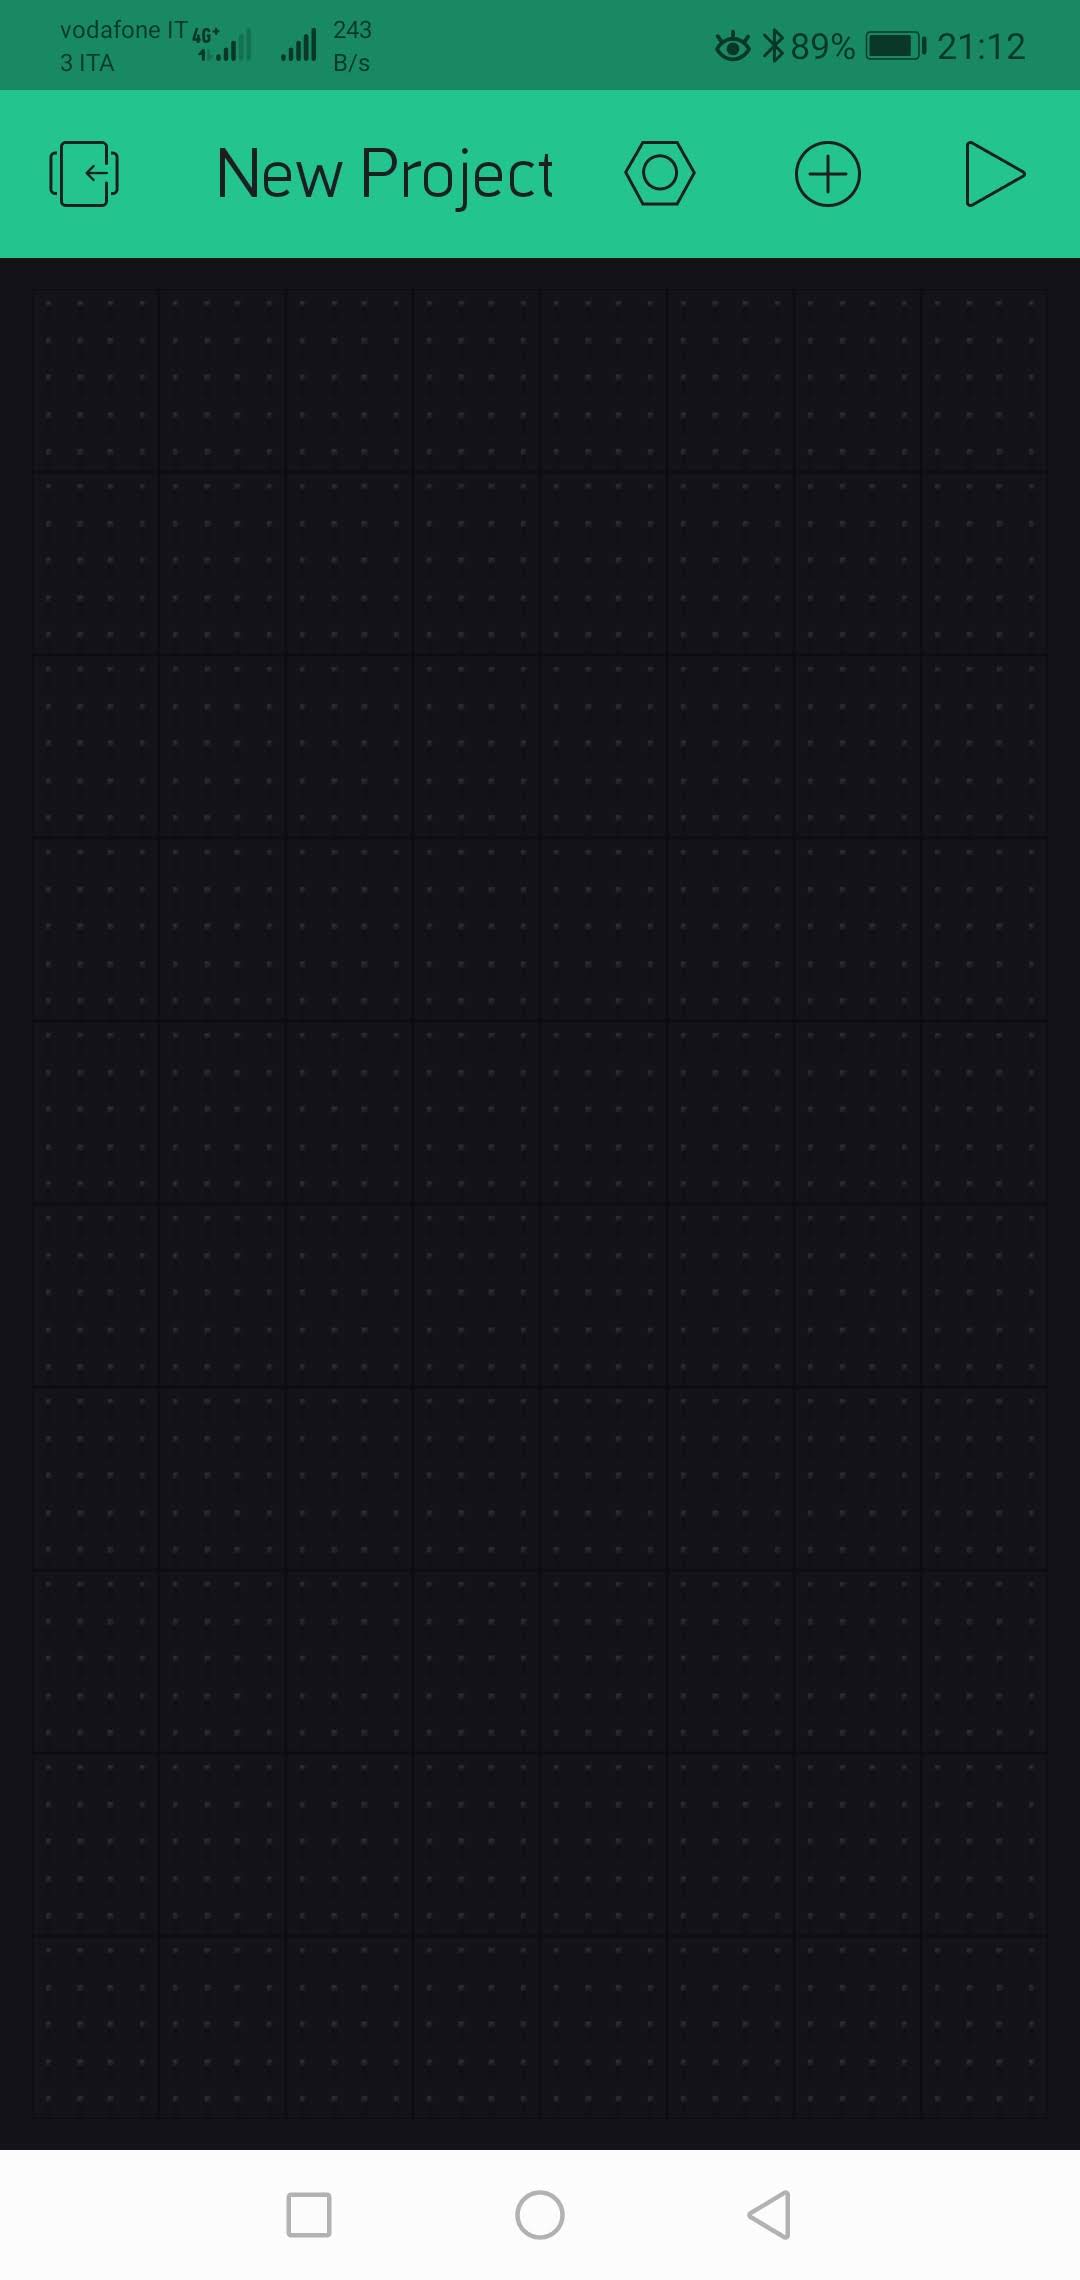
On your smartphone you have a blank blynk project (pic 8). Note that BLYNK offers you some free features for the project. By now, do not add anything! Adding useless stuff might affect your chance to create a free project. Of course, if you re interested into managing some bigger applications, you can pay to have unlimited access.
Node Red Console Setup
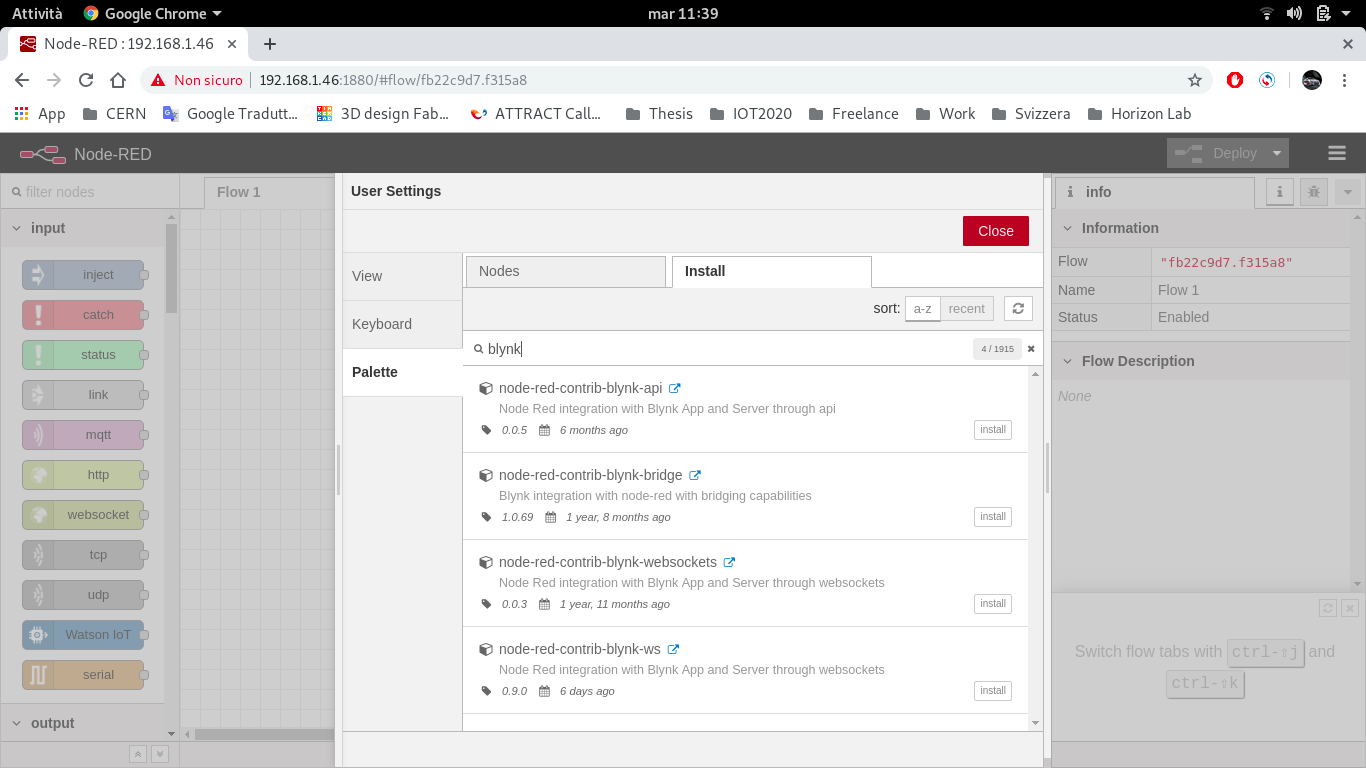
It's time to access Node-Red! You can do it via a common web browser (shown in the attached image).
Note that usually Node-Red is provided with Raspbian, in case your OS has not nodered installed, you can easly follow this tutorial.
https://nodered.org/docs/getting-started/local
If you are working locally (same subnet) on your Raspberry, you can access to Node-Red console simply typing 127.0.0.1:1880 in your address bar.
(If you set up a SSH connection, you can connect from the terminal changing part of the address with the ip address of your device)
Once you access Node-Red, click on the three lines in the upper right corner and then on Manage Palette. Go to the tab install and search for "blynk". Install the palette "node-red-contrib-blynk-ws". For the i2c comunication, install the palette "node-red-contrib-i2c", while for the ui "node-red-dashboard".
NodeRed Flow
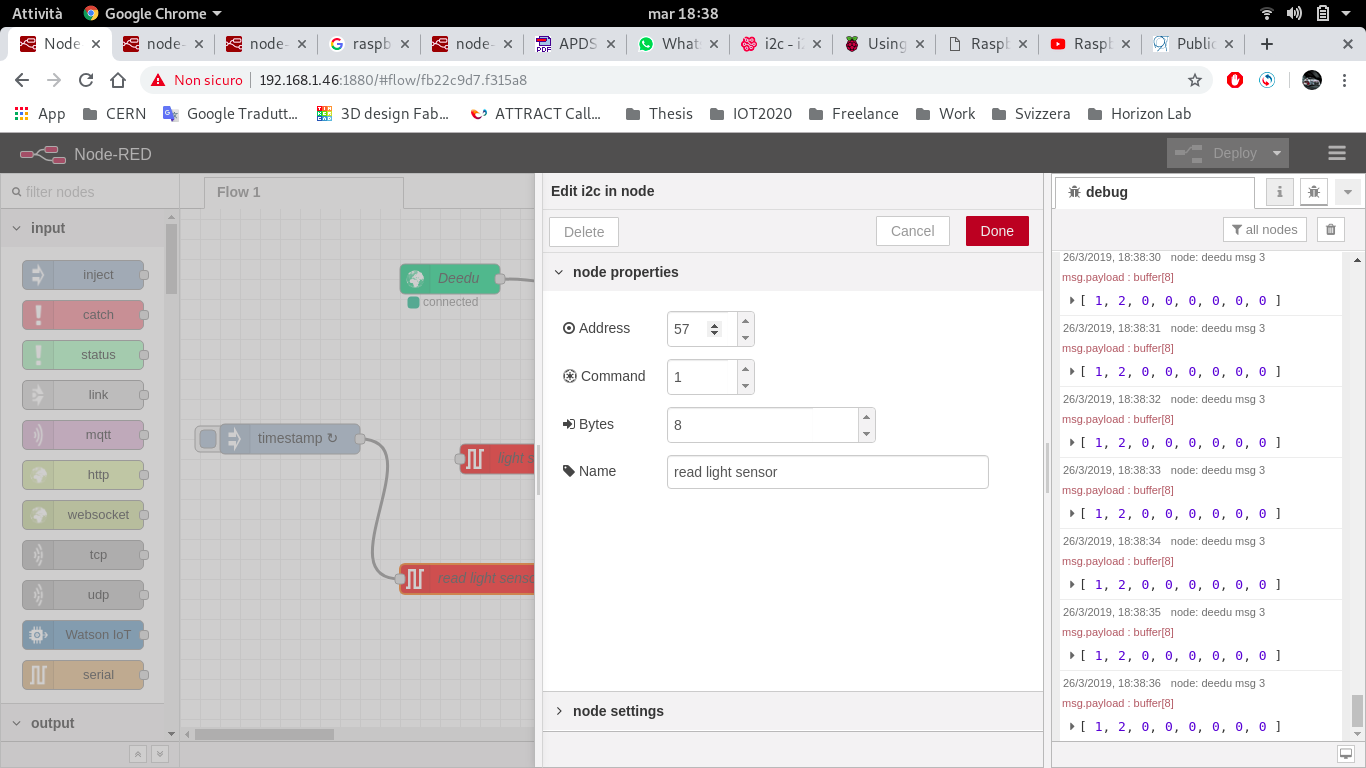
Once the palettes are installed, you can import the code you find attached to this step to create the flow. Just click on menu (top right) -> import -> from clipboard. Then, in the following window, paste the code copied from the file attached here.
Now, it is time to insert your personal data. In particular, you must insert the authorization token in the blocks "DEEDU1" ad "DEEDU2", changing the parameter "InsertYourTokenHere".
When done, click on deploy.
In case of problems, you could download an iso image here. Be careful, because it needs to be customized putting the blynk token generated on your smartphone.
Coming Back to BLYNK
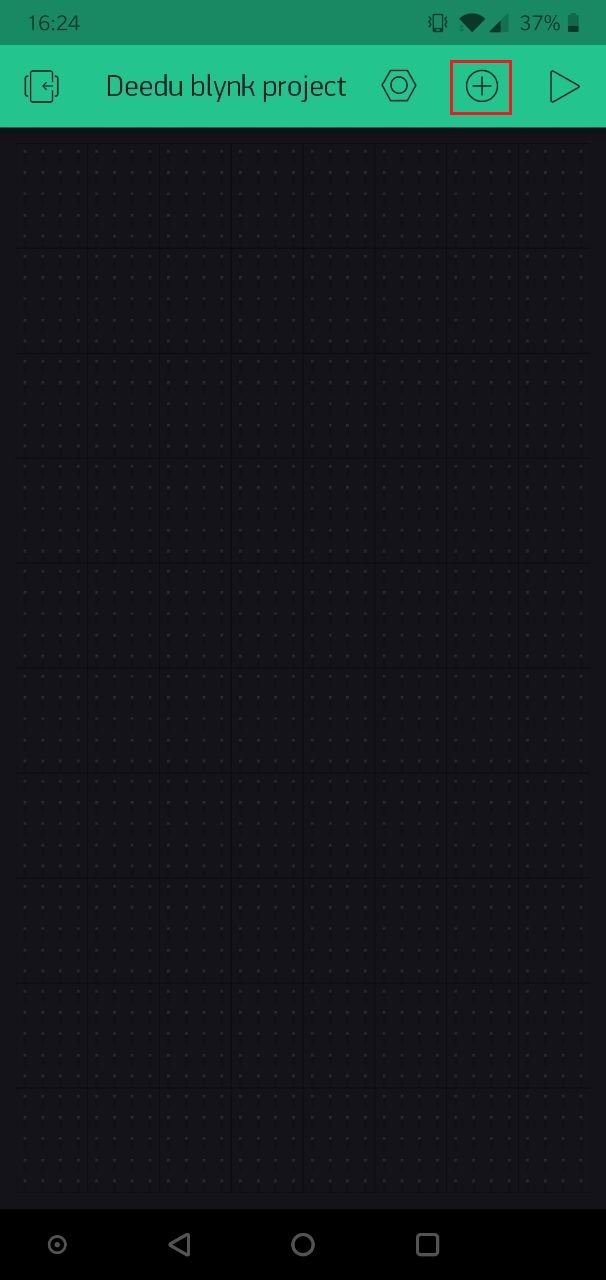
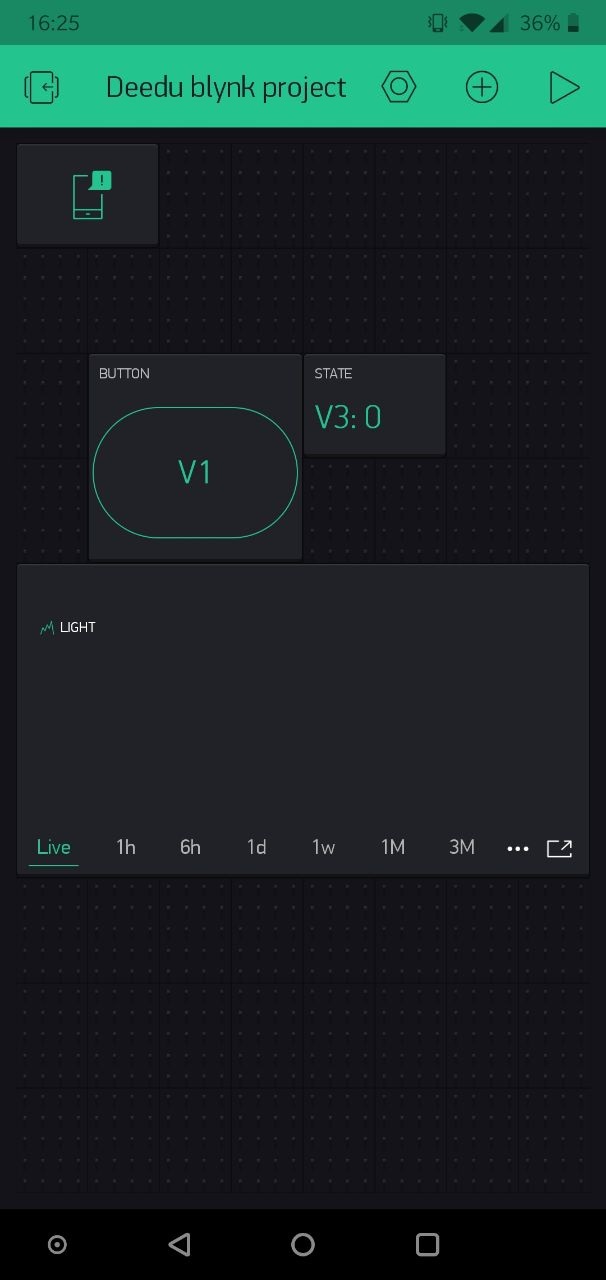
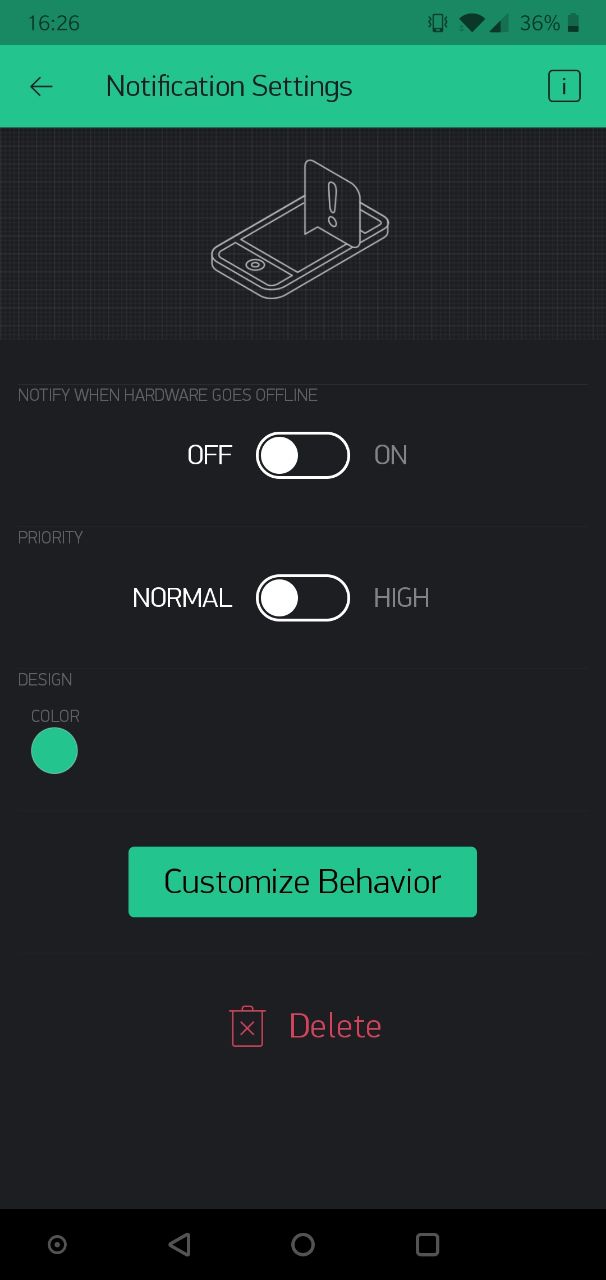
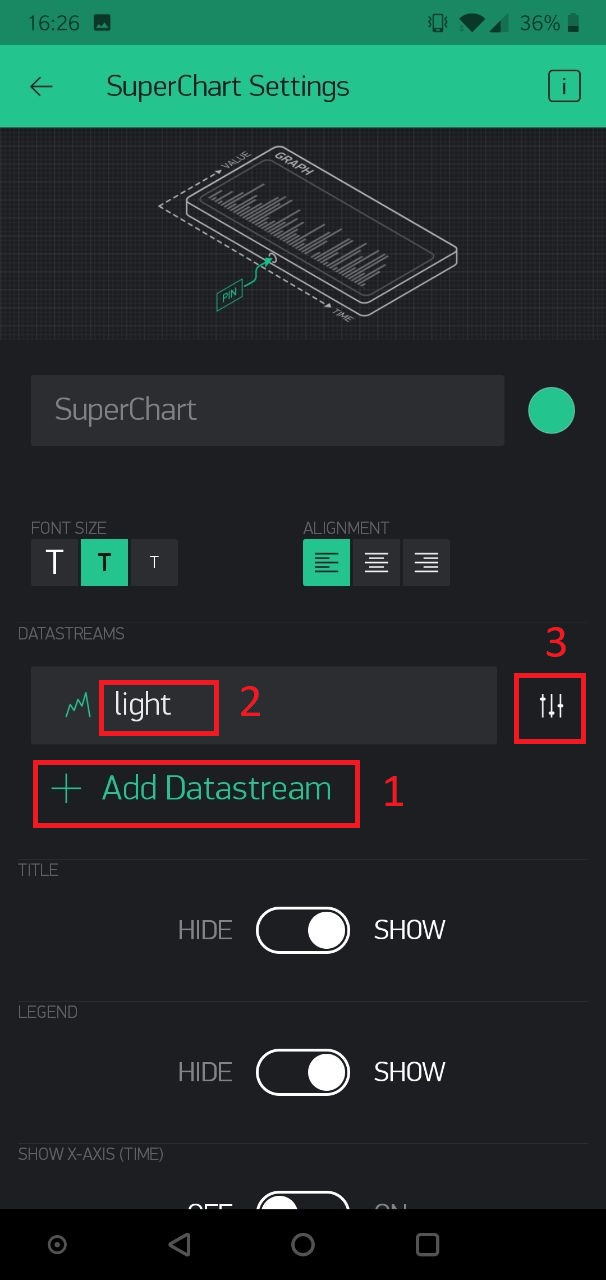
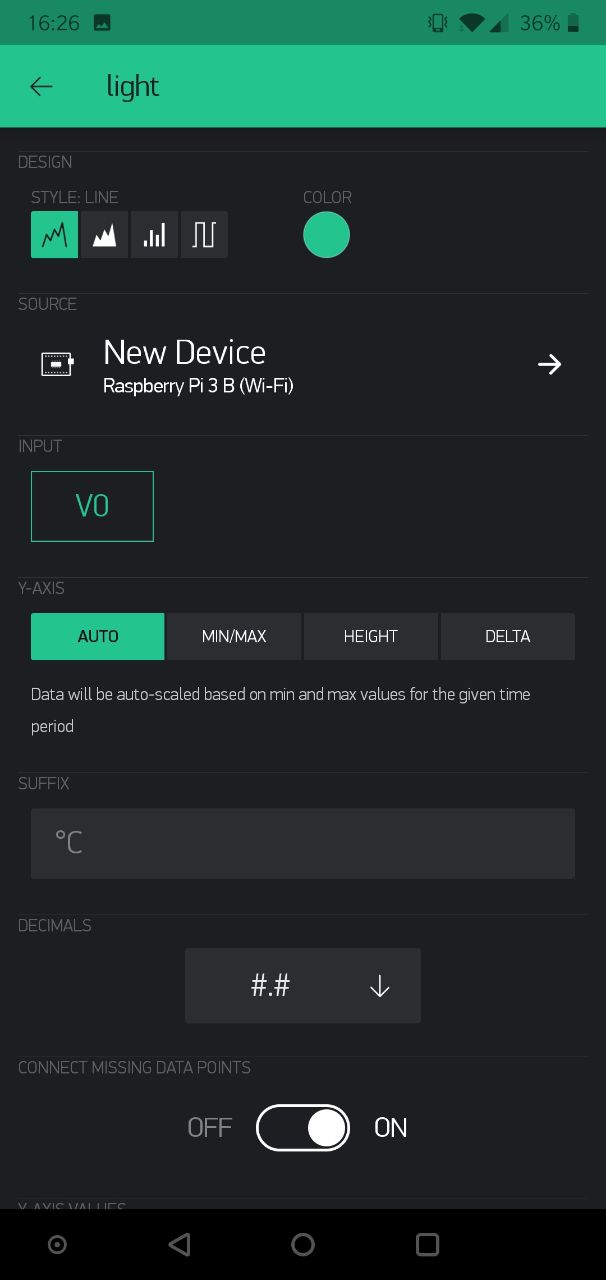
Now it is time to create the BLYNK project. We previously left the black project, as in Figure 1. Tap on '+' and select from the list the objects to re-create the project shown in Figure 2. You will need a Button, a Notification, a Chart and a Display tiles.
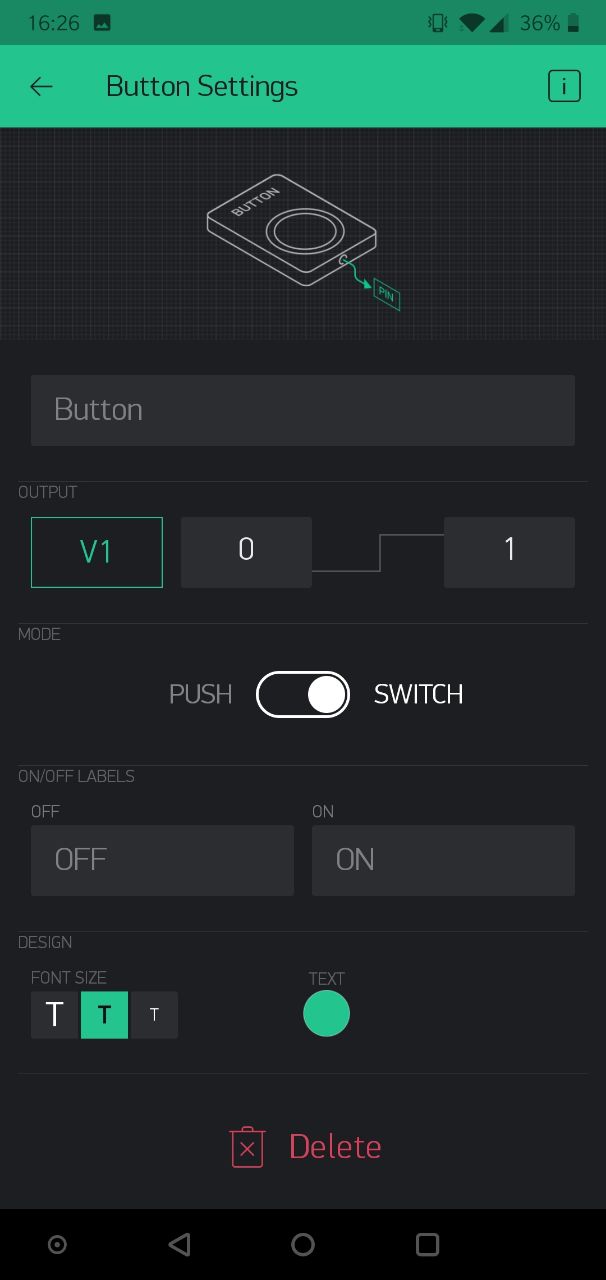
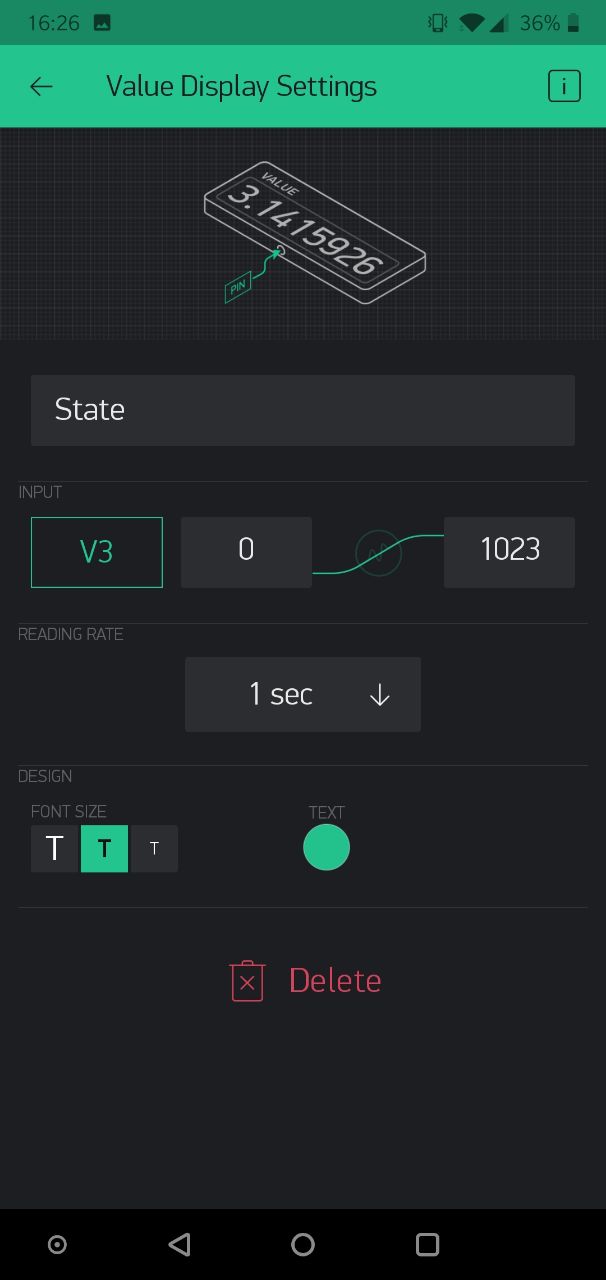
Button must be set as shown in Figure 3, Display as in Figure 4 and Notifications as in Figure 5. To set up the Chart, see the order shown in figure 6: tapping on the option tile, you need to set the same parameters shown in figure 7.
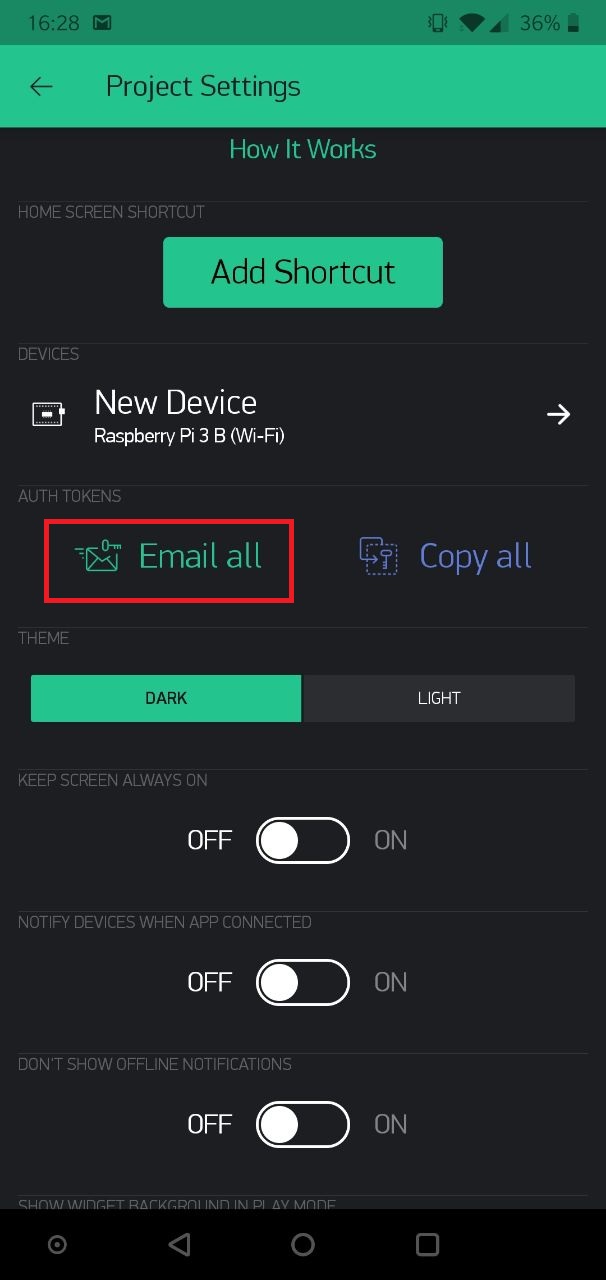
When finished, open the projects settings and tap on Email all.
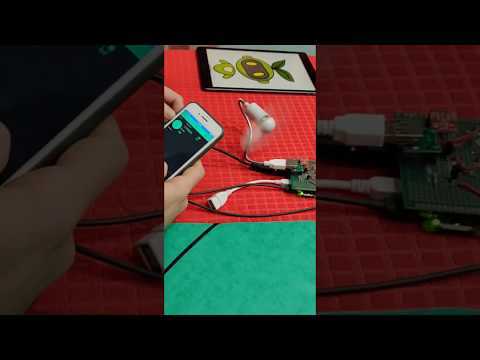
That's it! By touching the button, your Raspberry should turn the light on and, in case the luminosity does not change too much, you will get your notification :)
Final Test
Final Assembly
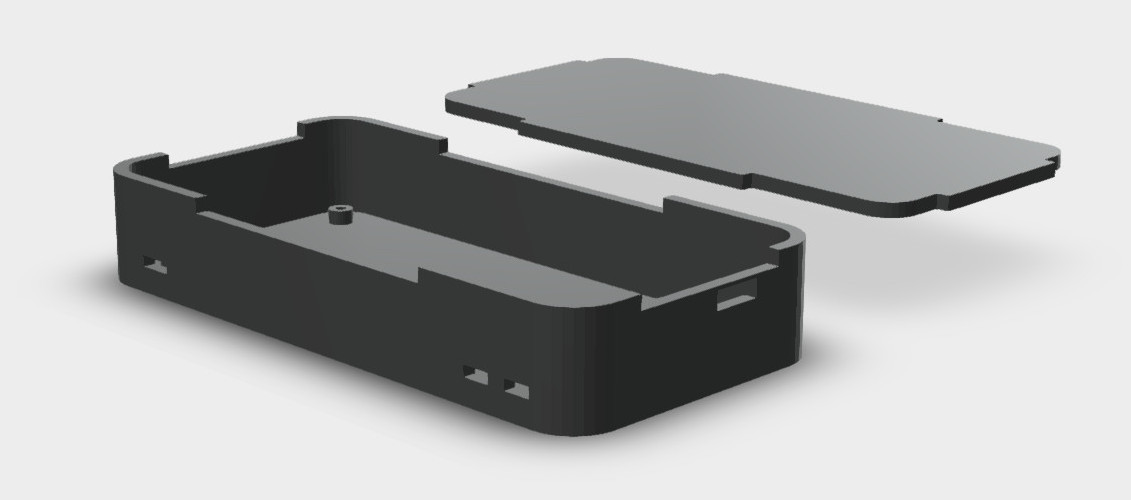
A 3D printable enclosure case is designed and showed above. You find it attached as .stl file. You can easily print the file using a common 3D printer with standard settings.
https://www.thingiverse.com/thing:4062244
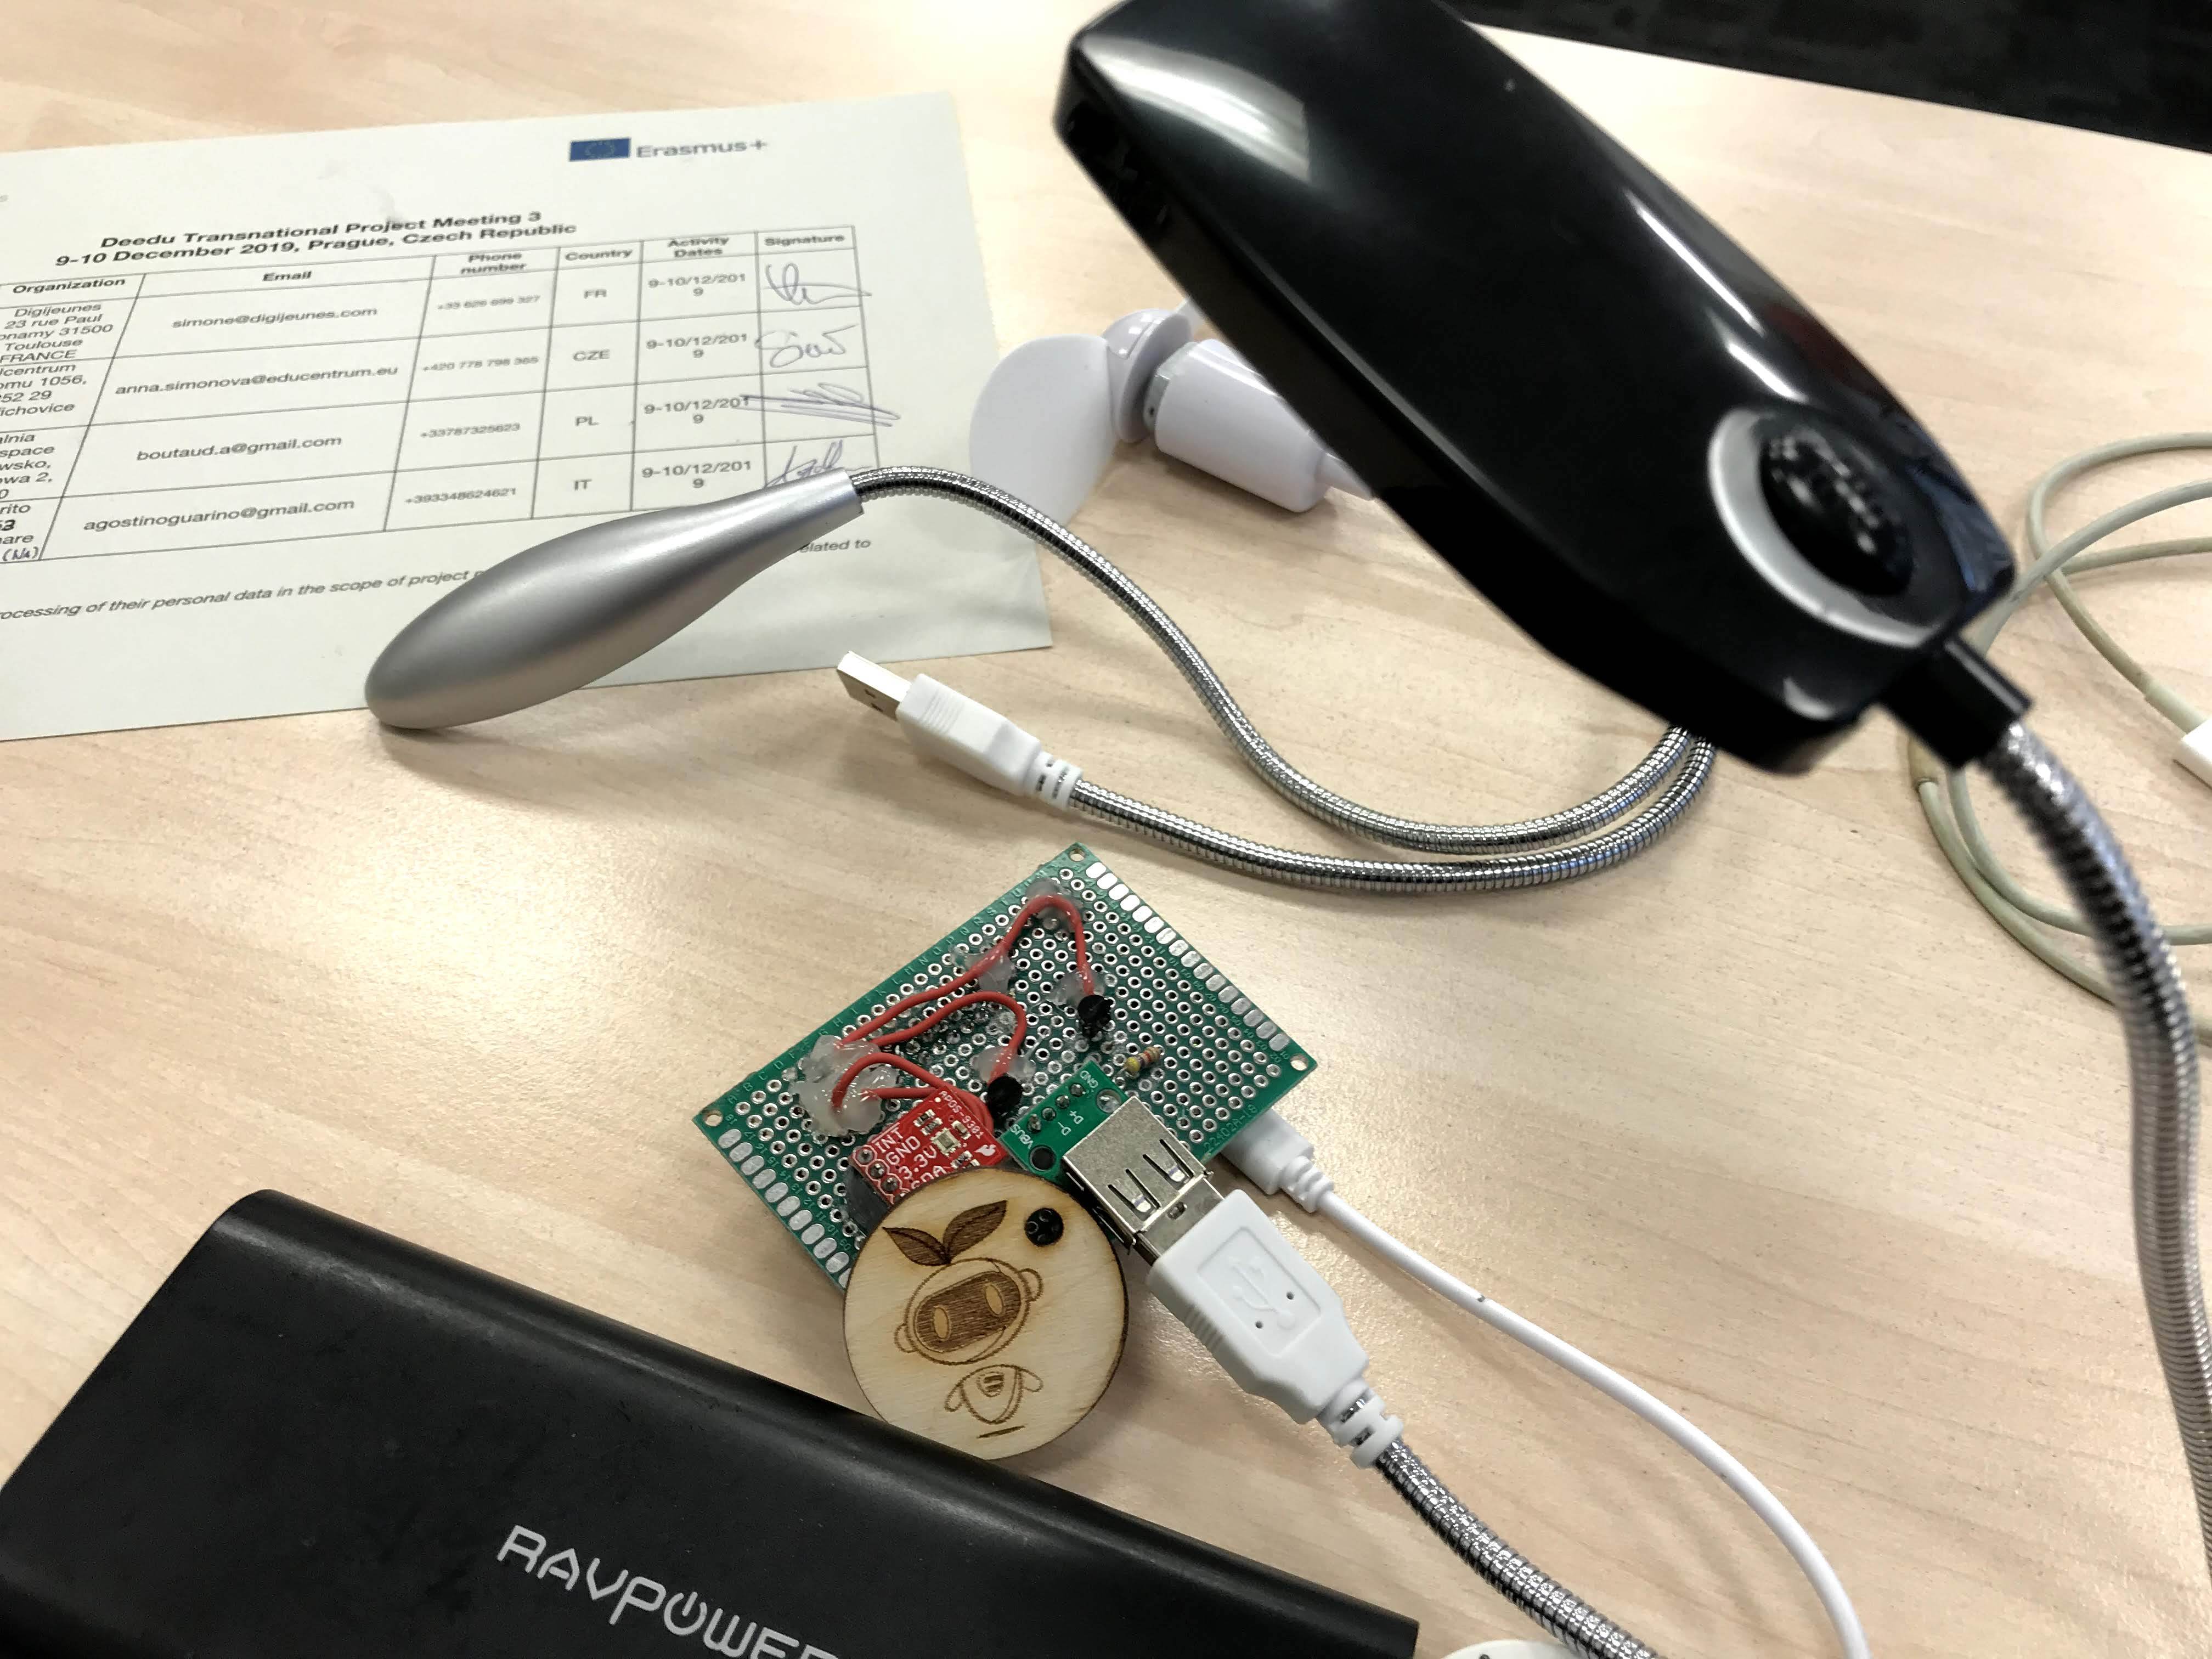
In the attached images you it is possibile have a view of what the device should look like.
Downloads
Using Other Sensors...
Obviously, the projects has been developed in the most general way possible. As proof of this, we tested our design using an i2c temperature sensor in place of the light sensor and a USB fan as actuator, not a USB light.
The idea is always the same: if the temperature does not drop when the fan is turned on, you will receive the same "green" notification.
This tutorial has been produced as part of the DEEDU project, co-financed by the Erasmus + Programme of the European commission. Project n°: 2018-1-FR02-KA205-014144.
The content of this publication does not reflect the official opinion of the European Union. Responsibility for the information and views expressed therein lies entirely with the authors. For more information, email us at info@digijeunes.com