Desktop Bar Skittles With Fusion 360
by Kevr102 in Workshop > 3D Printing
3351 Views, 21 Favorites, 0 Comments
Desktop Bar Skittles With Fusion 360
![IMG_9842[1].JPG](/proxy/?url=https://content.instructables.com/F9O/267T/KOZRGM1T/F9O267TKOZRGM1T.jpg&filename=IMG_9842[1].JPG)

I've seen one of these bar skittle games on a tv documentary recently and thought would it be possible to make a desktop version.
So this Instructable is how I went about making one.
The skittles I will make out of some solid brass bar I have to hand, and I will either 3D Print the Skittle base or make it out of a solid oak floorboard off-cut which I also have to hand.
The plan is to make the skittles first then come up with a design for the base on the fly so to speak, nothing sketched, just go with the flow.
The oak floorboard is 100mm x 100mm x 18mm so this is a good start for the base dimensions.
Supplies
Brass Bar 10mm
Steel ball
Steel polished bar 5mm
Small bearing with 5mm diameter inner hole
Wood for the base or 3D Print
3D Printer
CNC Machine
Making the Skittles
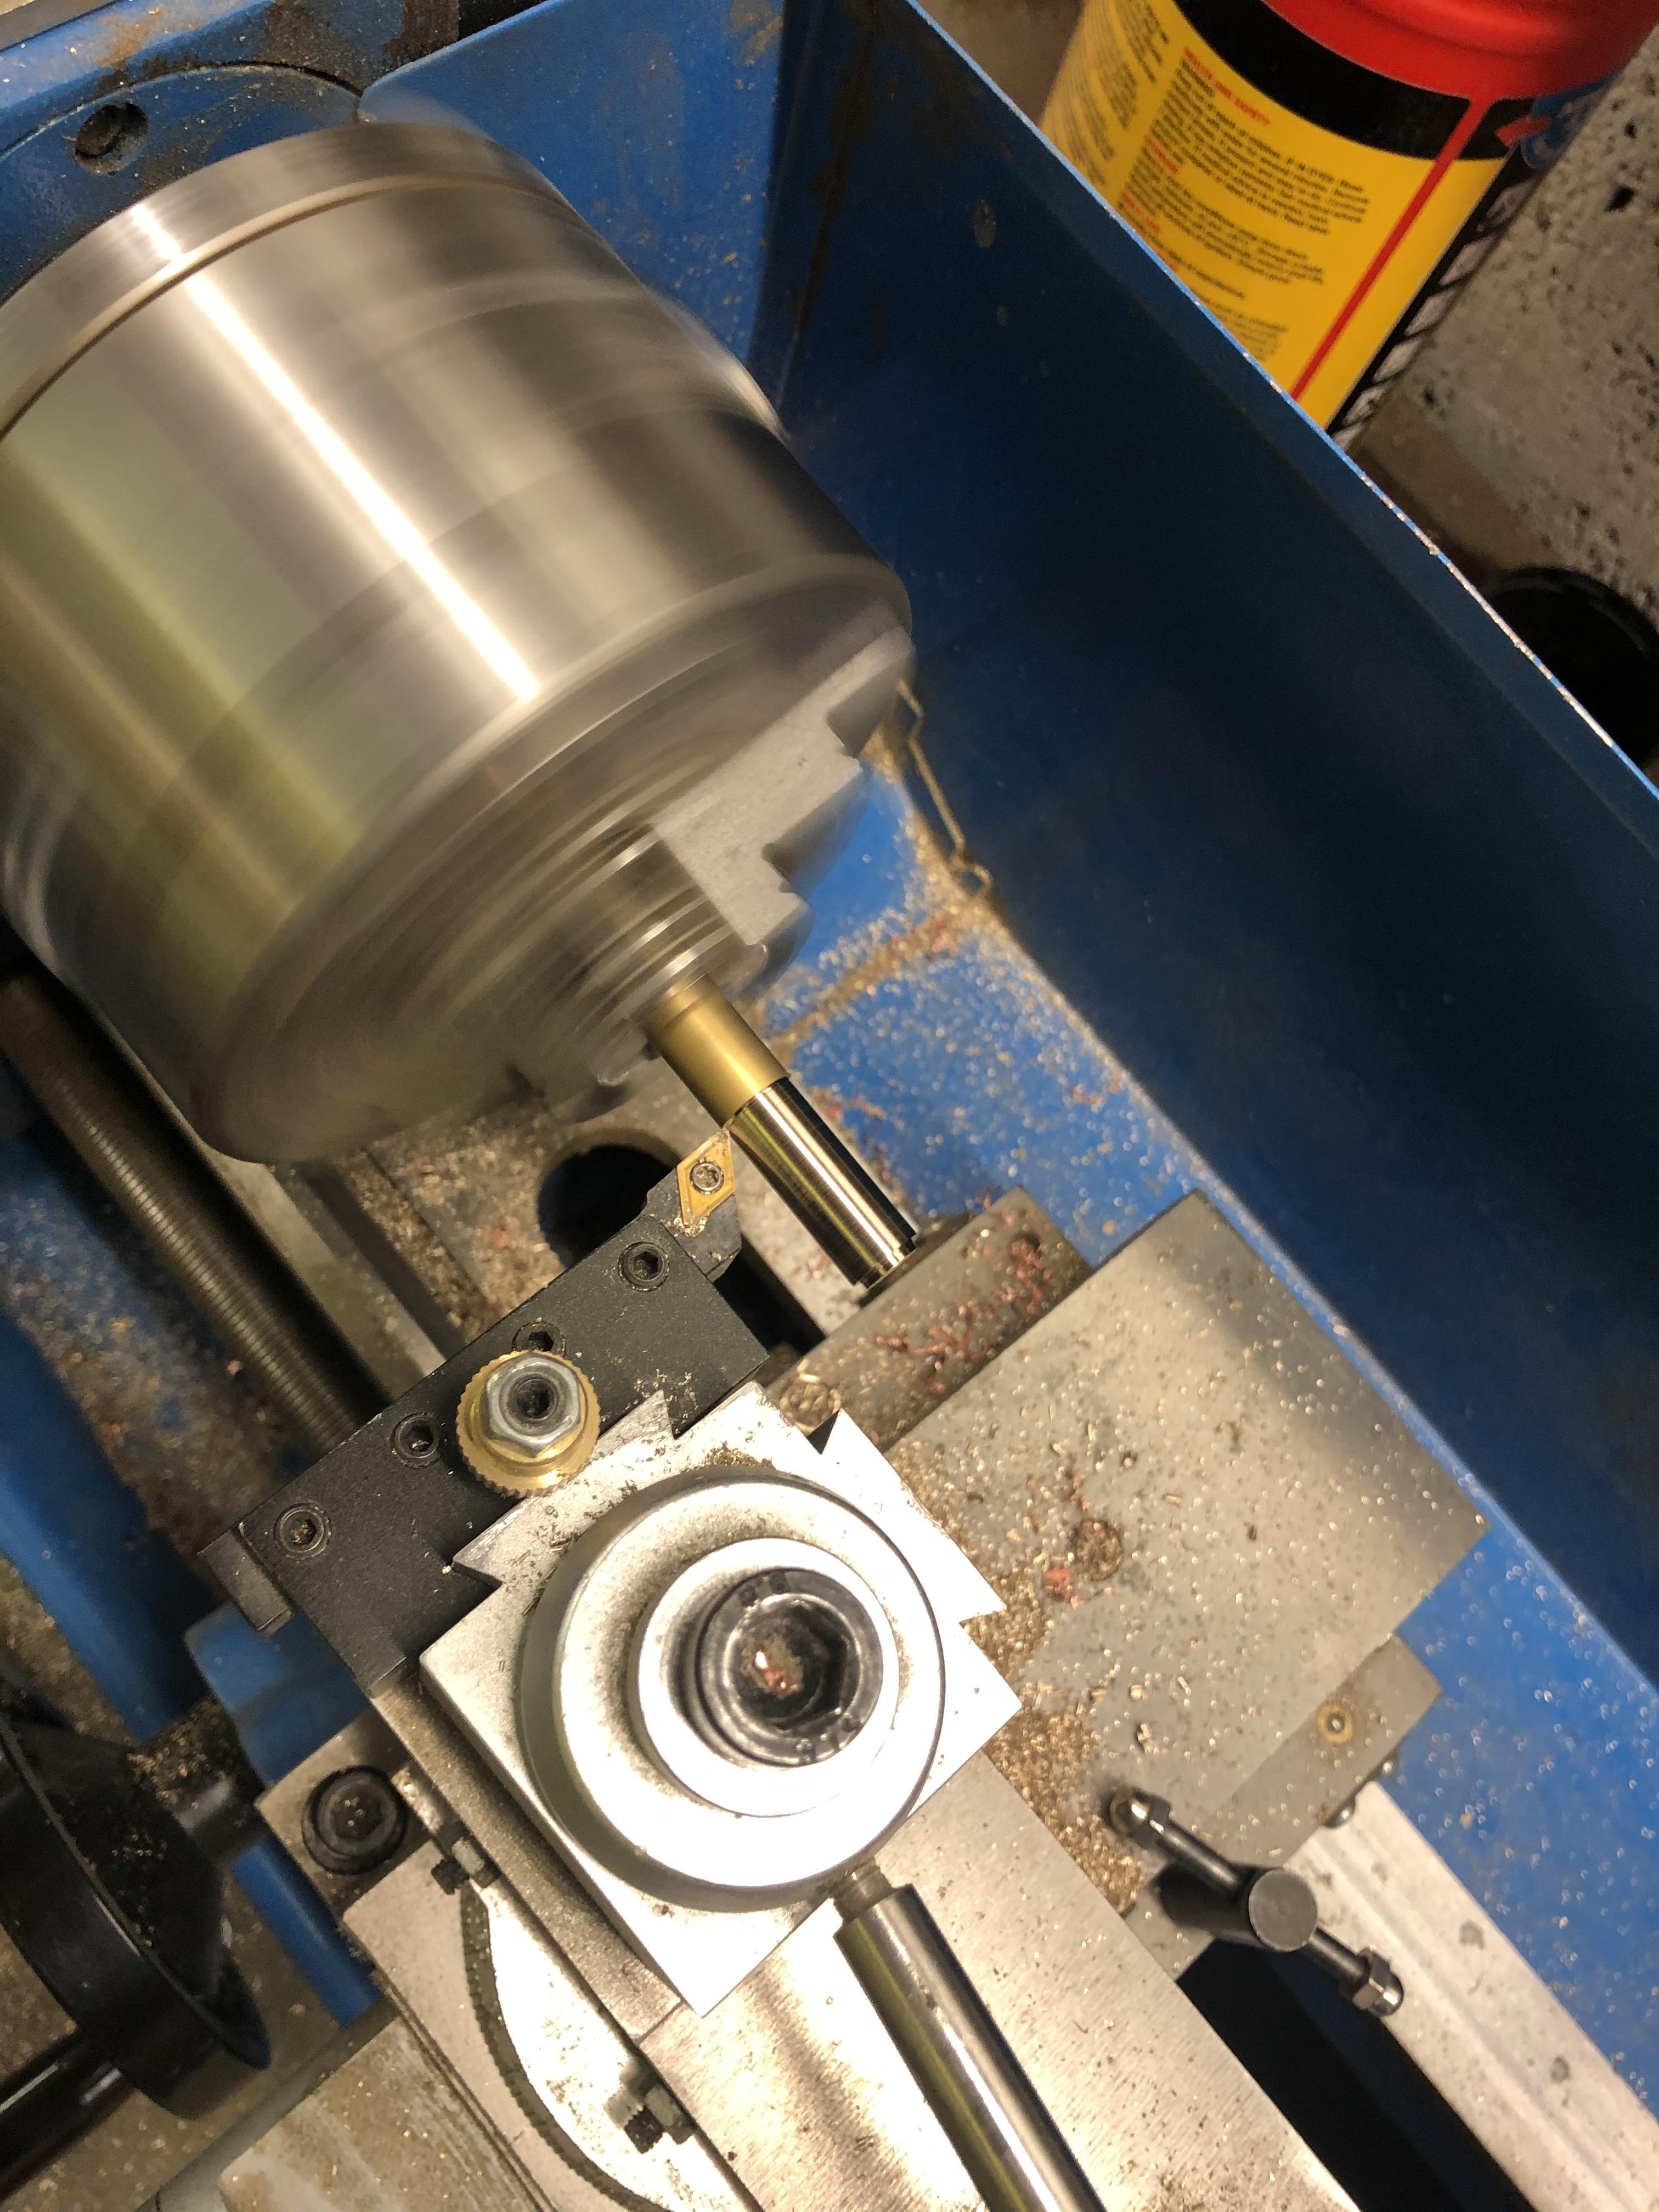
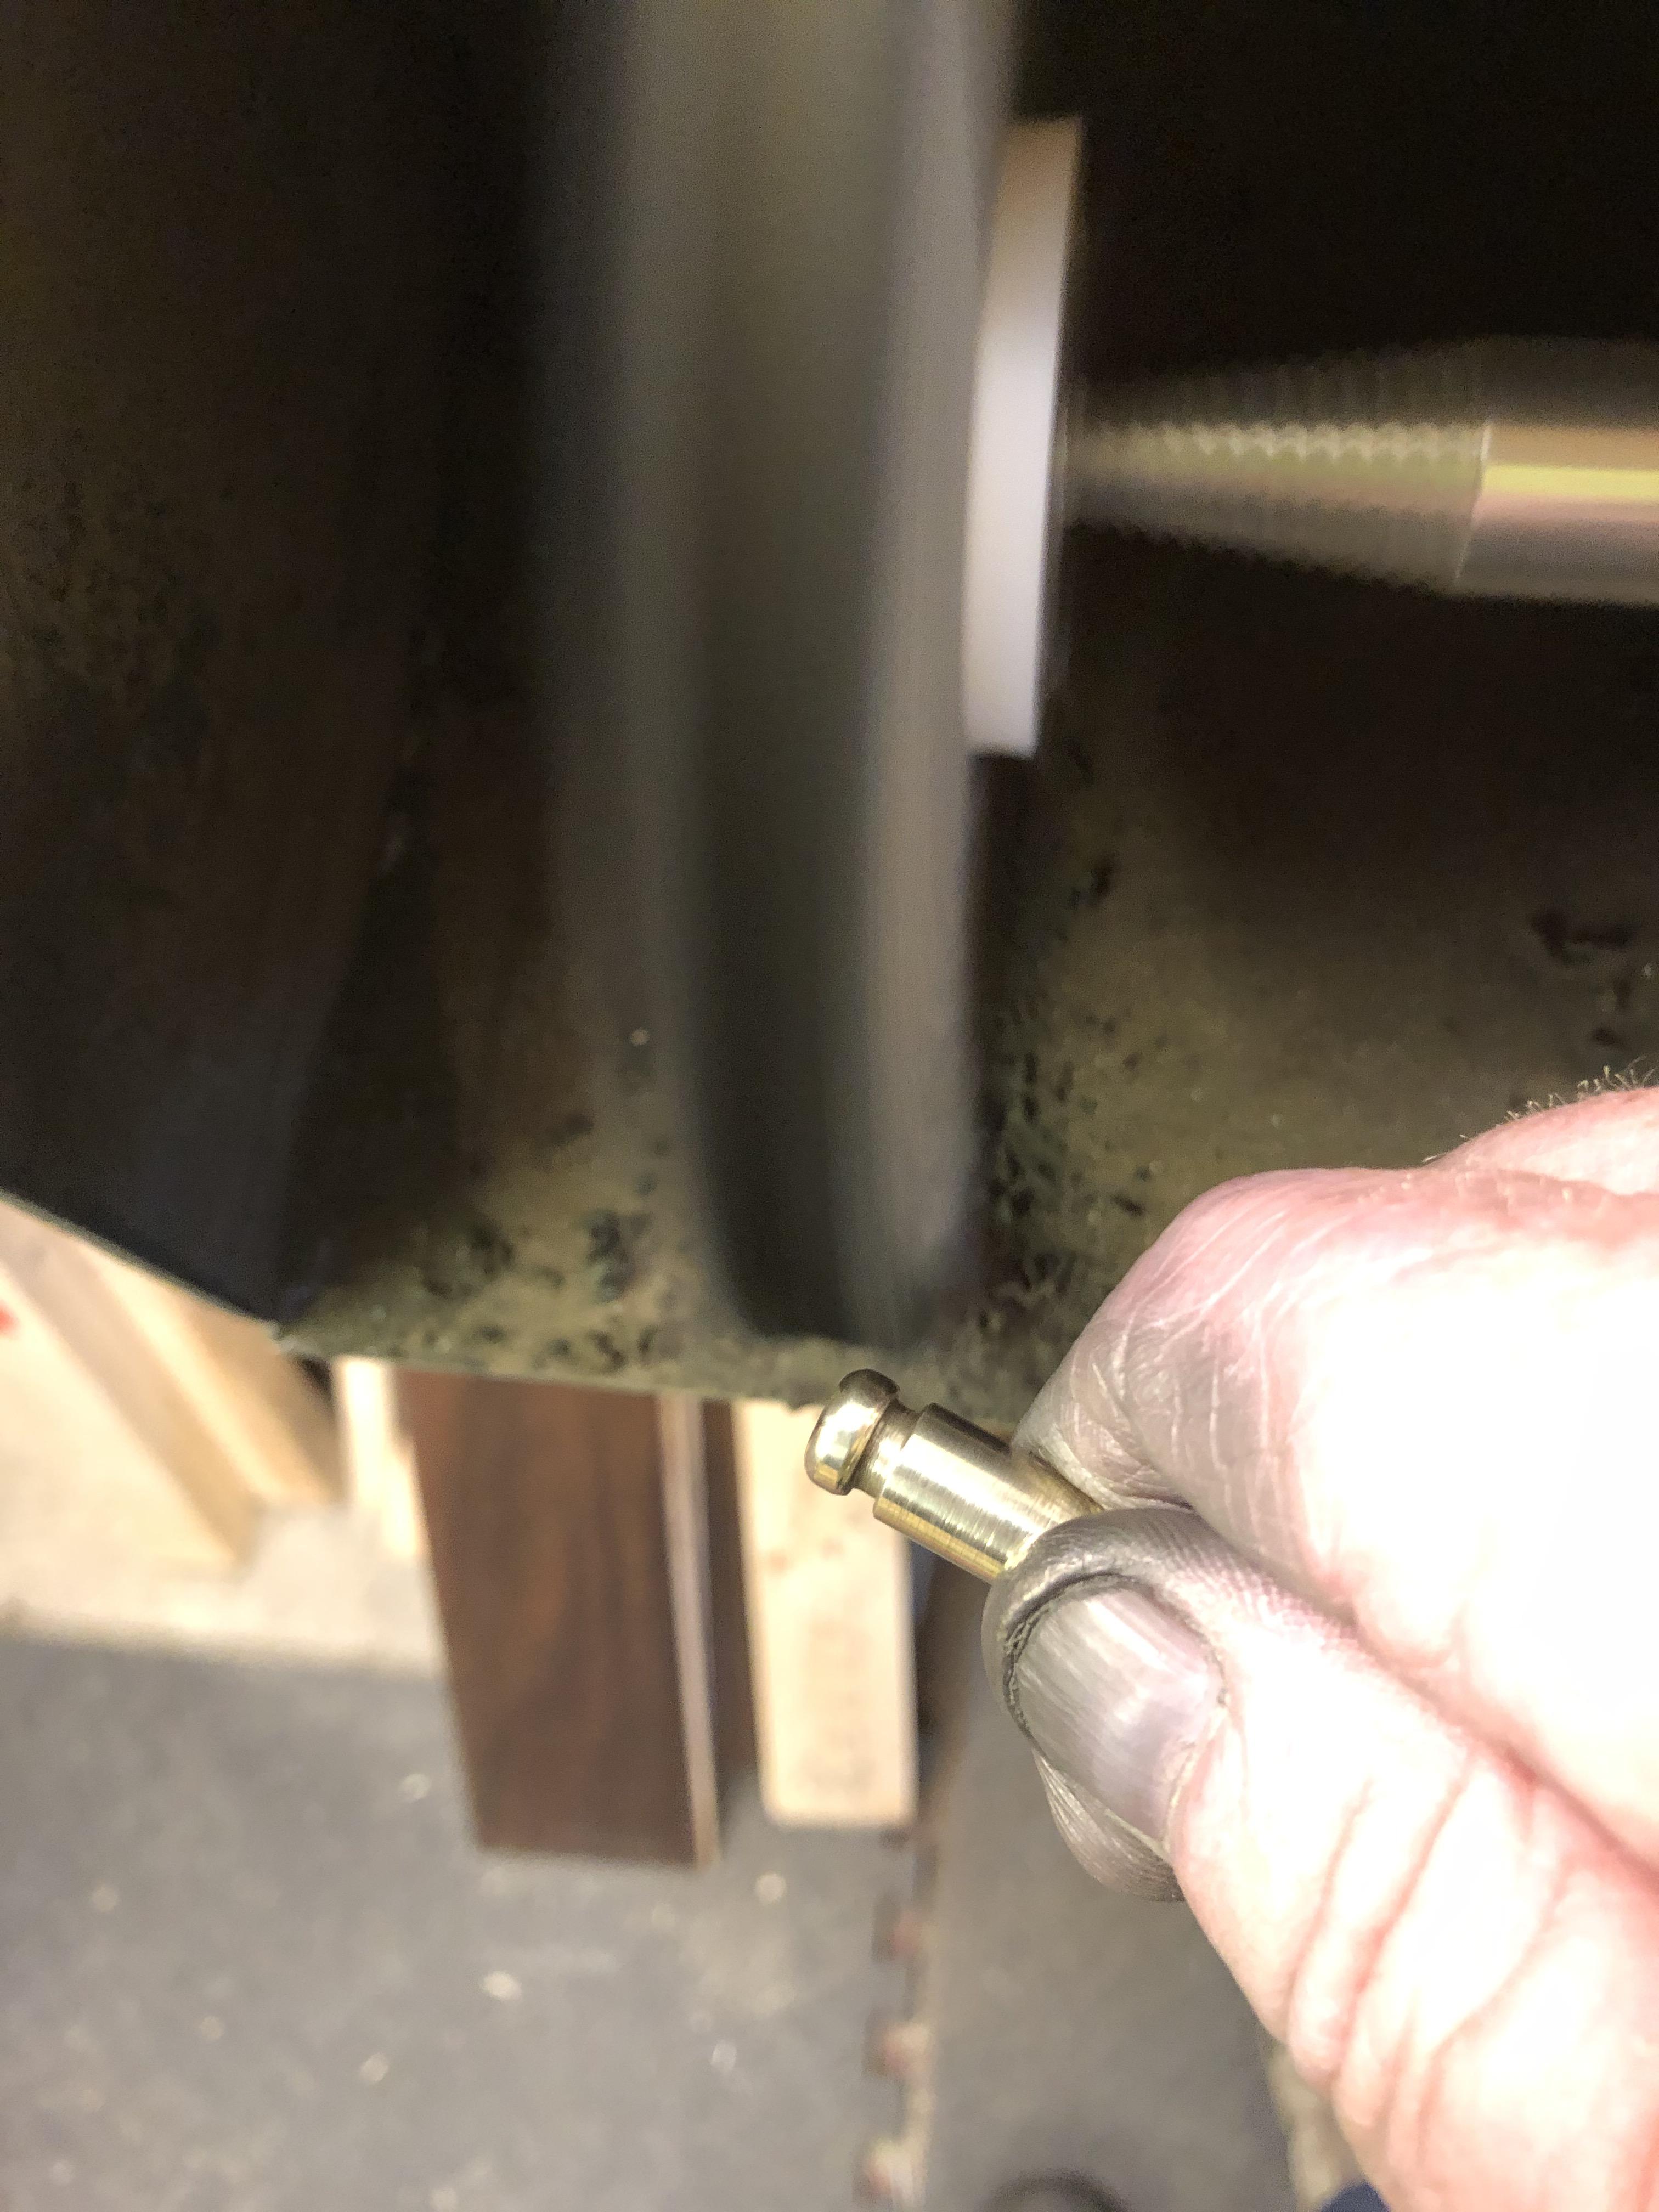
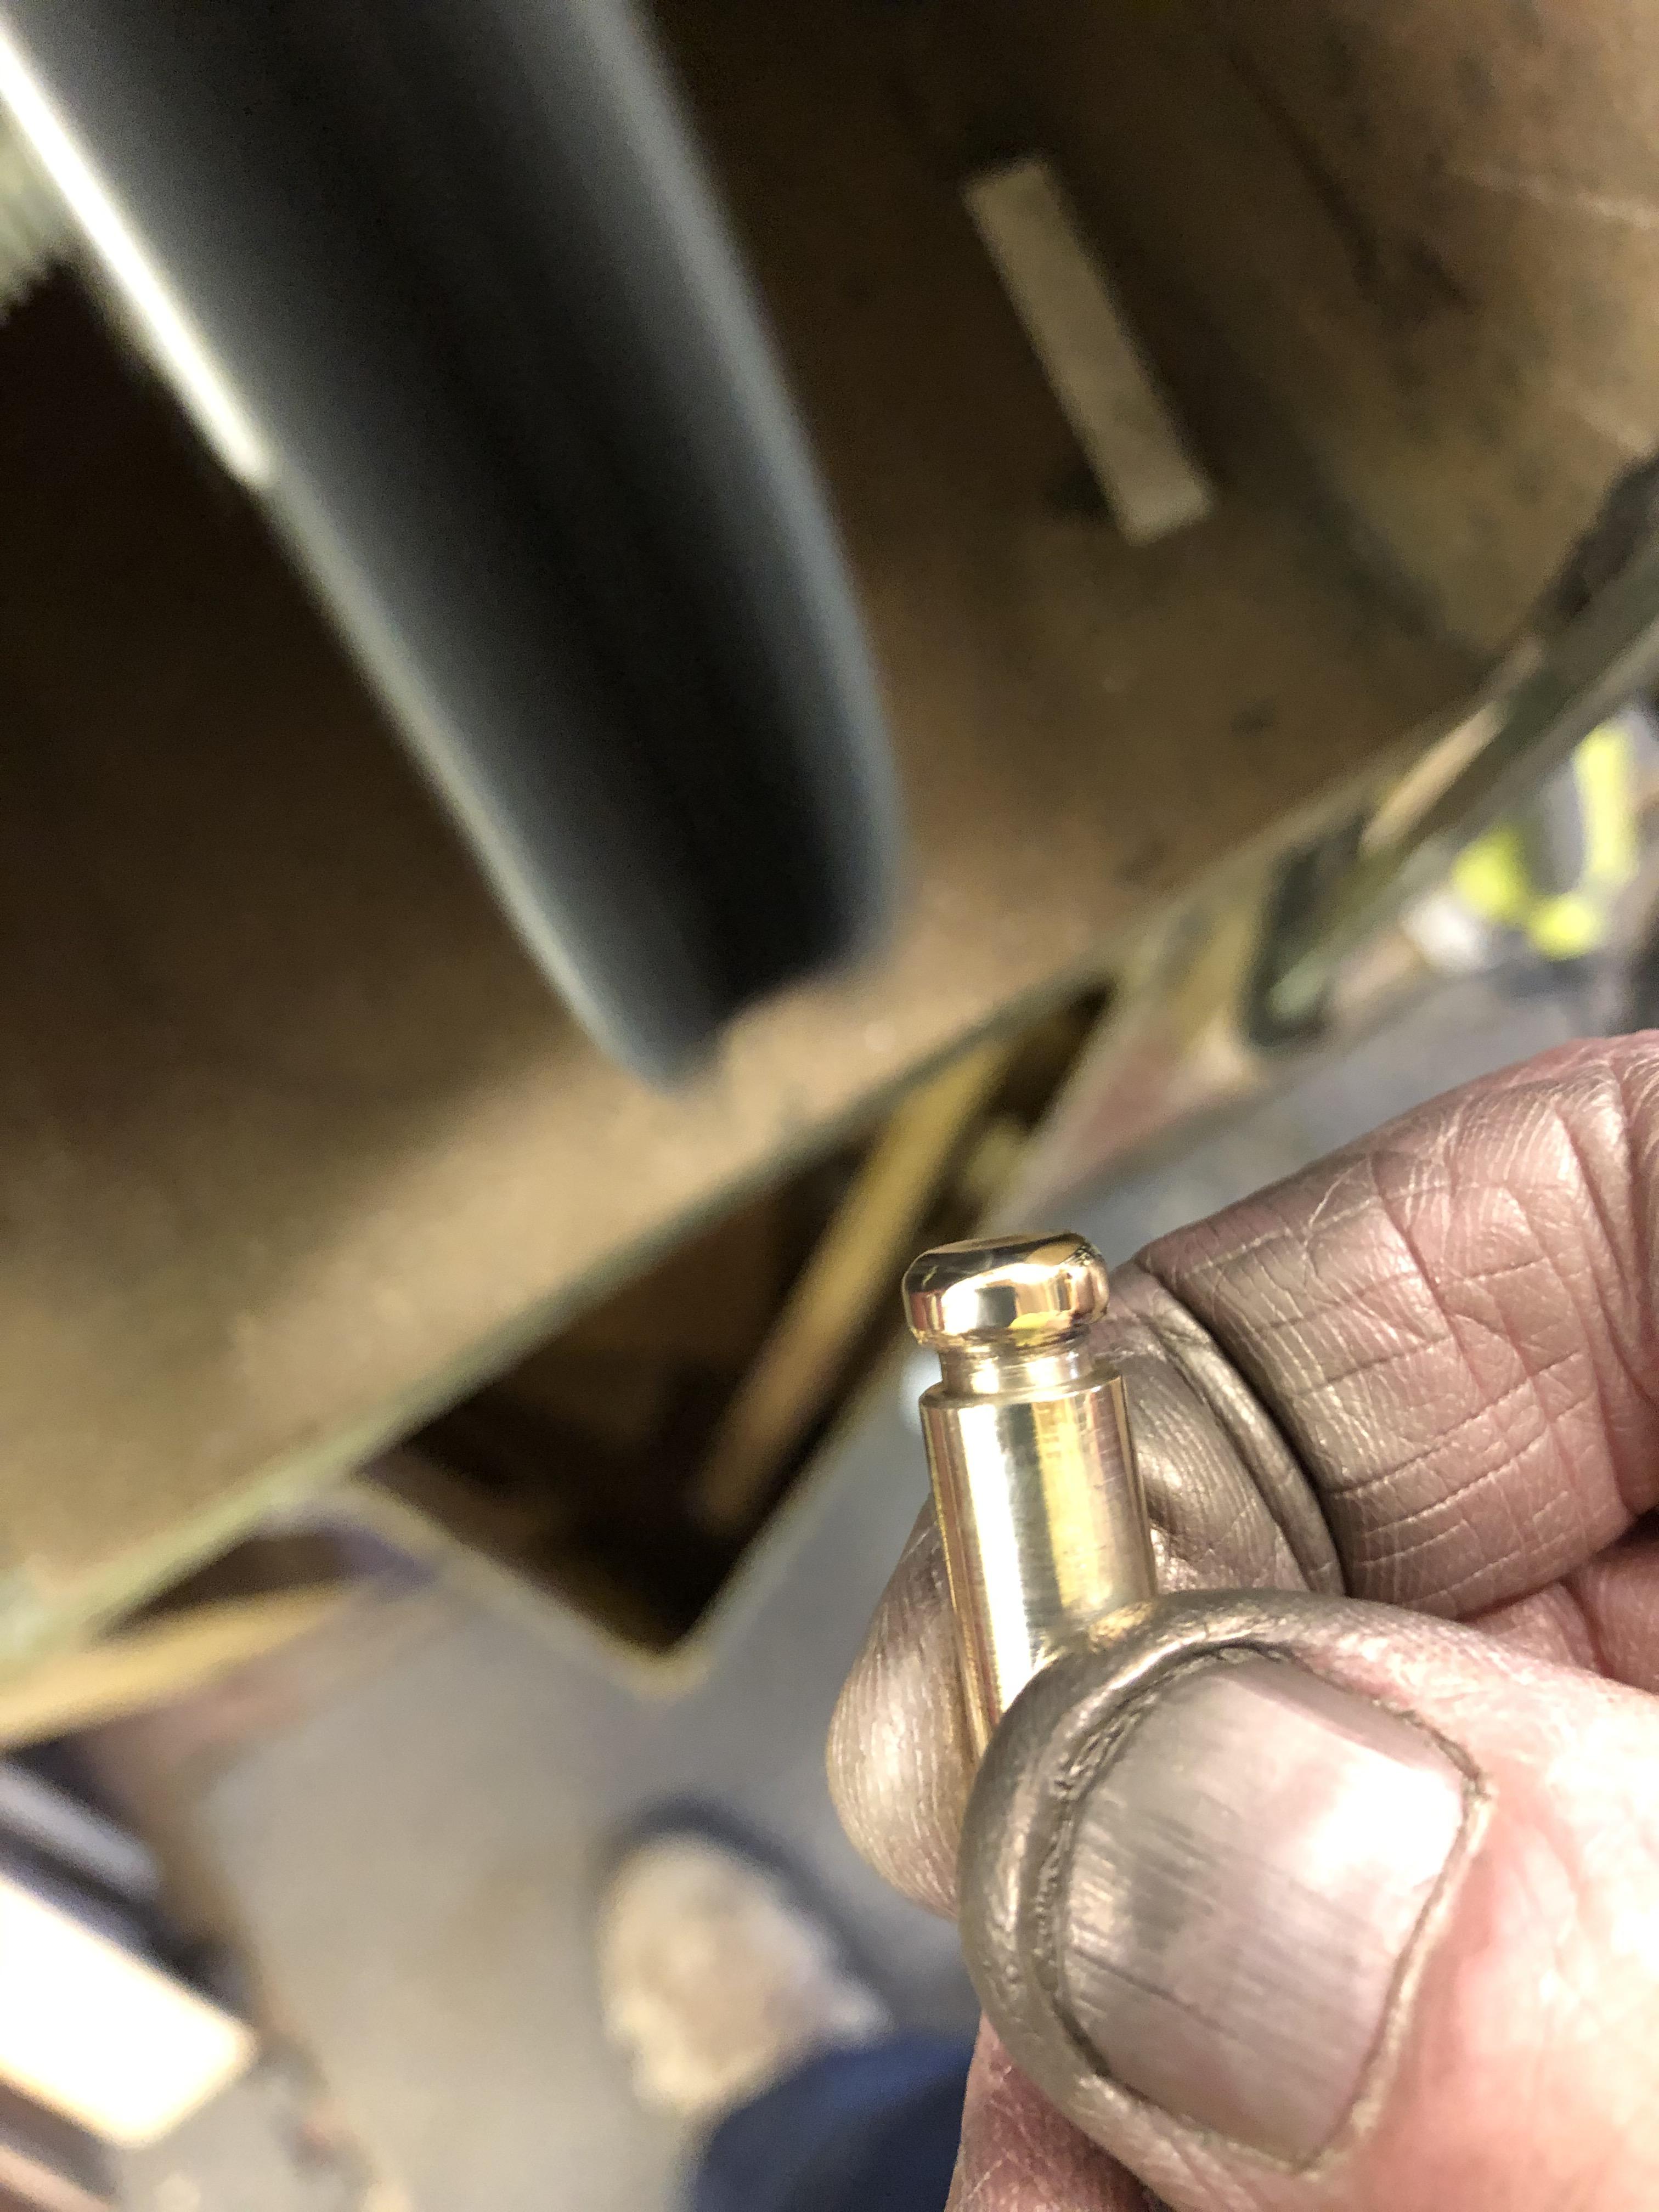
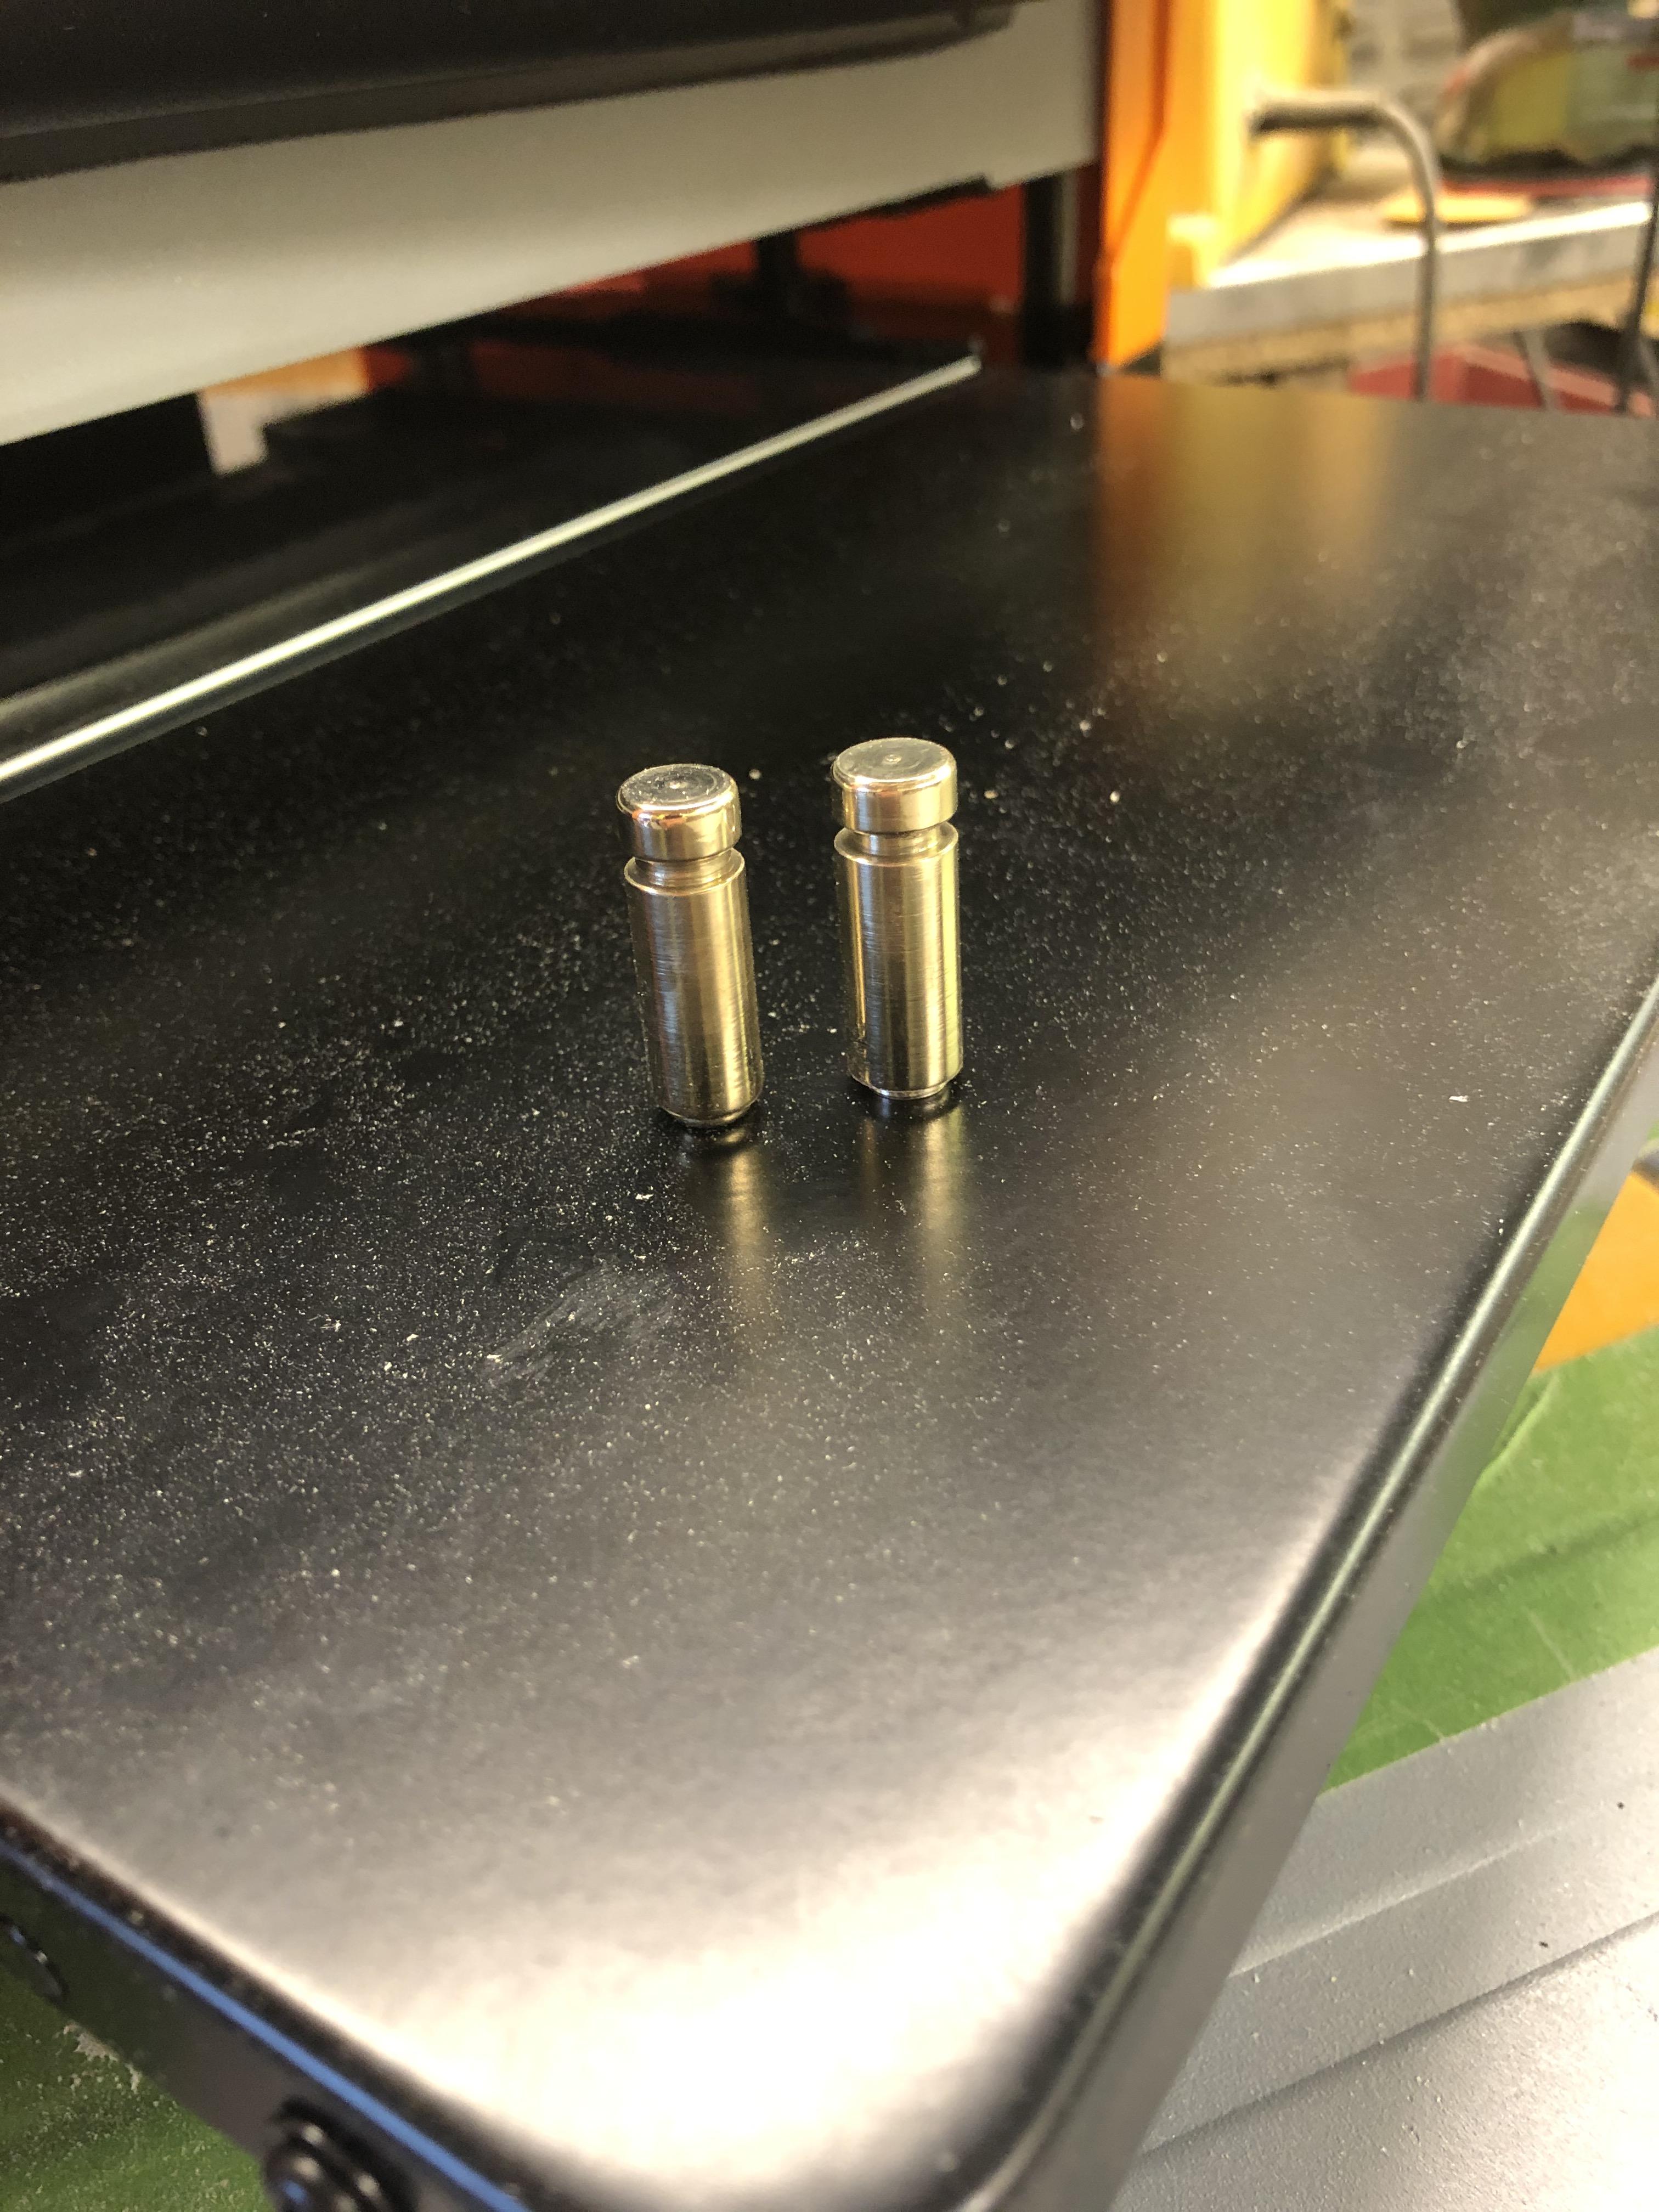
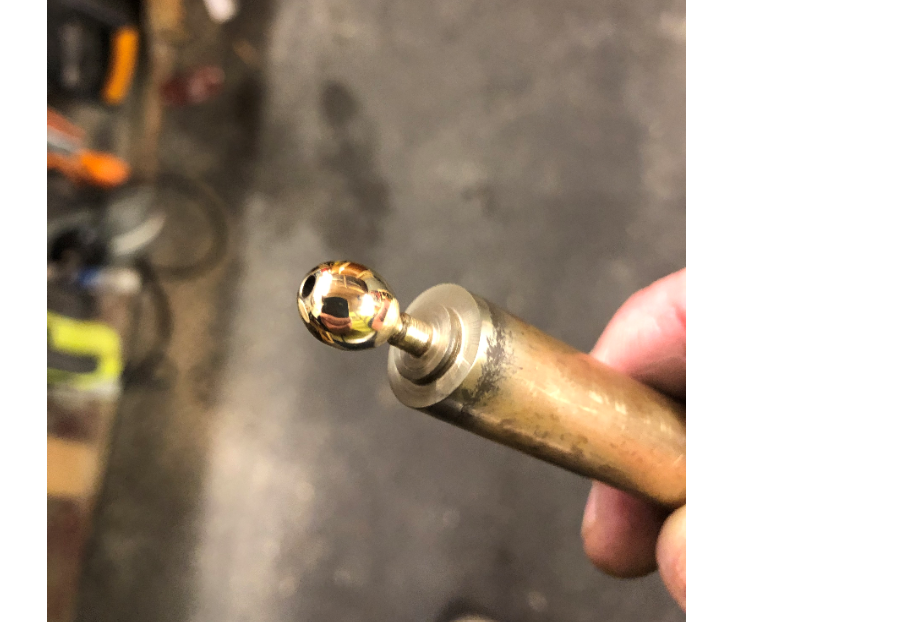
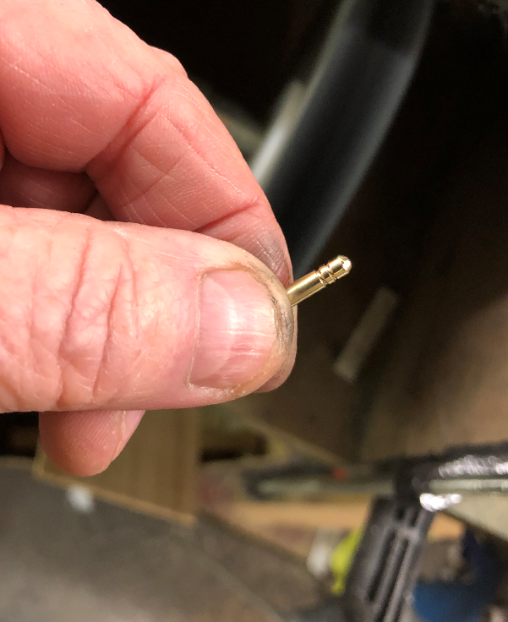
First operation is a metal lathe operation, the skittles don't have to be anything too fancy, I had 10mm brass bar and started by turning it down to around 8mm, I then cut a groove at the top end resembling a skittle(Very loosely)
I also turned the bottom of the skittle down slightly as they will fit into recessed holes in the base
9no Skittles in total needed, then onto a quick polish on the buffing wheel.
With the skittles finished it was time to move onto a base design.
Designing the Skittle Base With Fusion 360
We are using Fusion 360 to design the base and we start off by selecting the new component tab and clicking ok,
at this point you can name the component, I don't name the majority of my designs as I seldom save them.
With a Fusion 360 hobbyist subscription you can save 10 designs I think, save them for the more challenging designs.
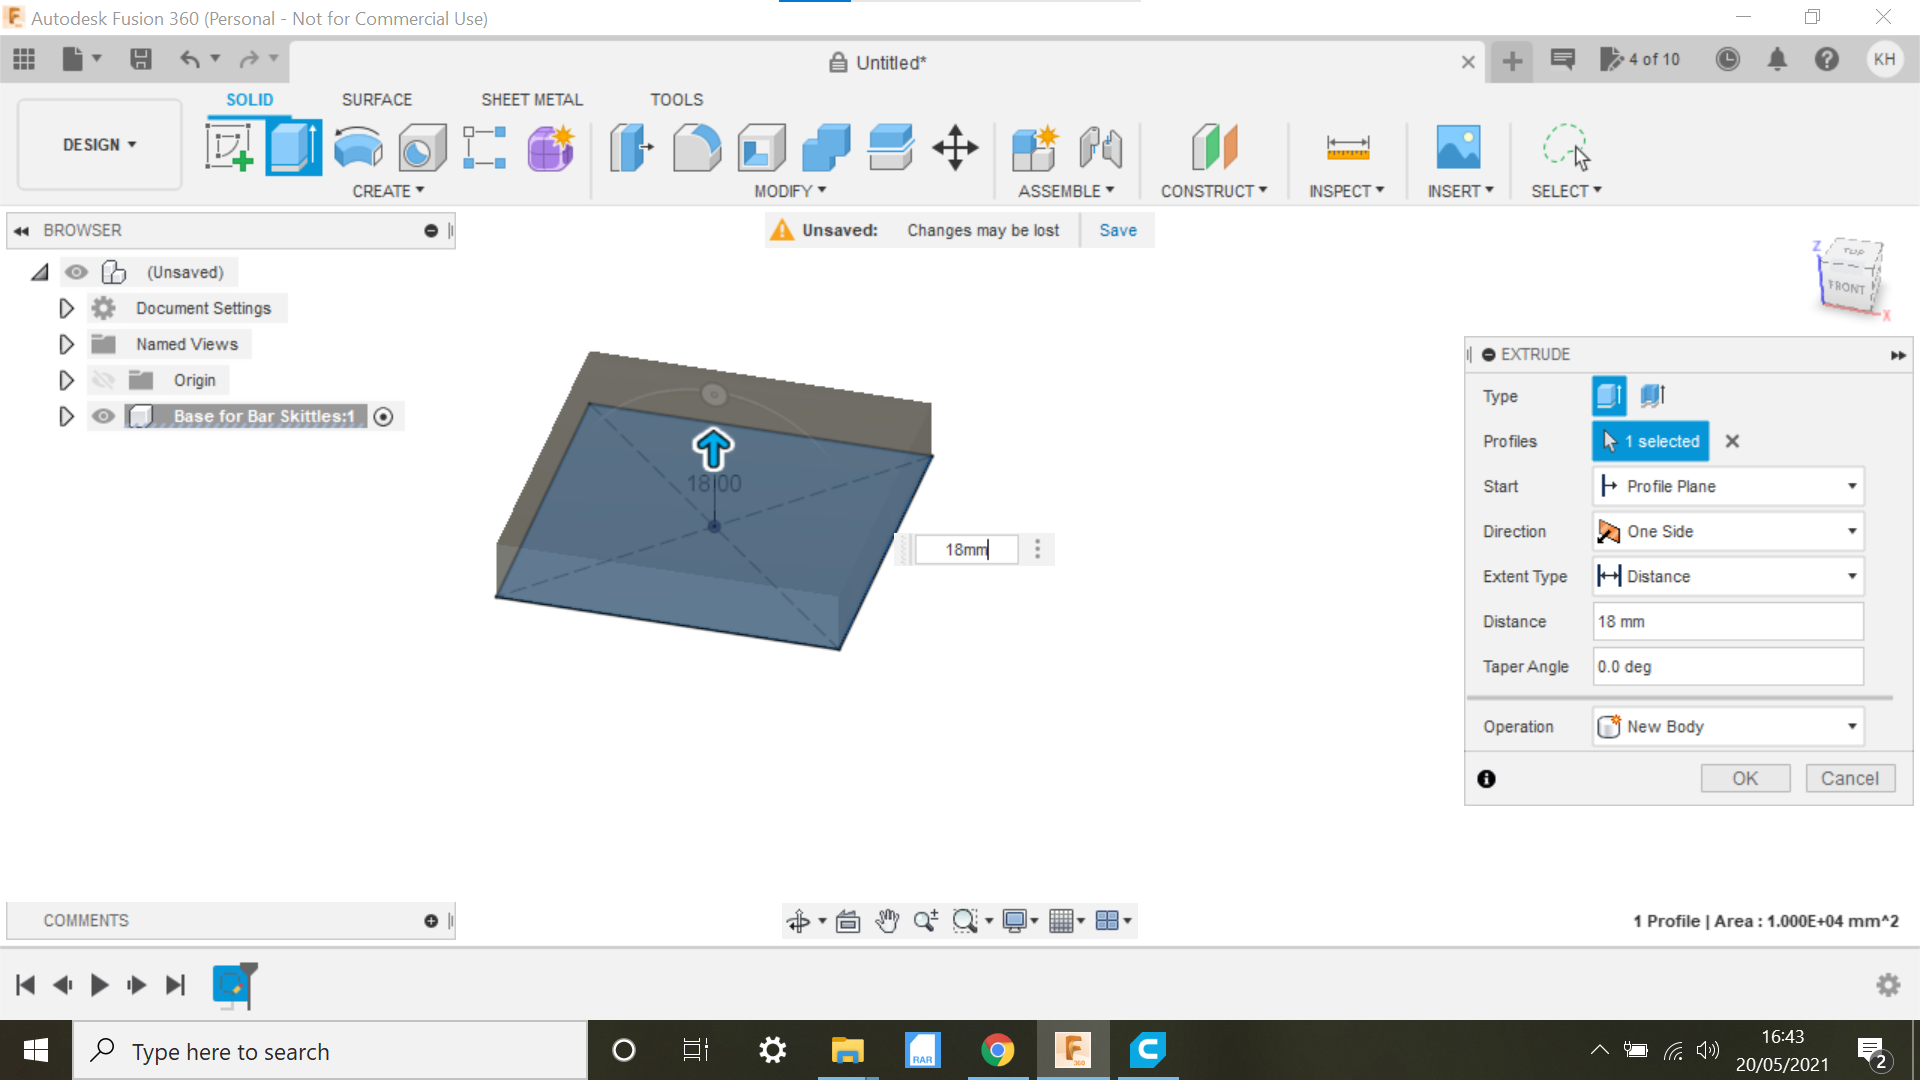
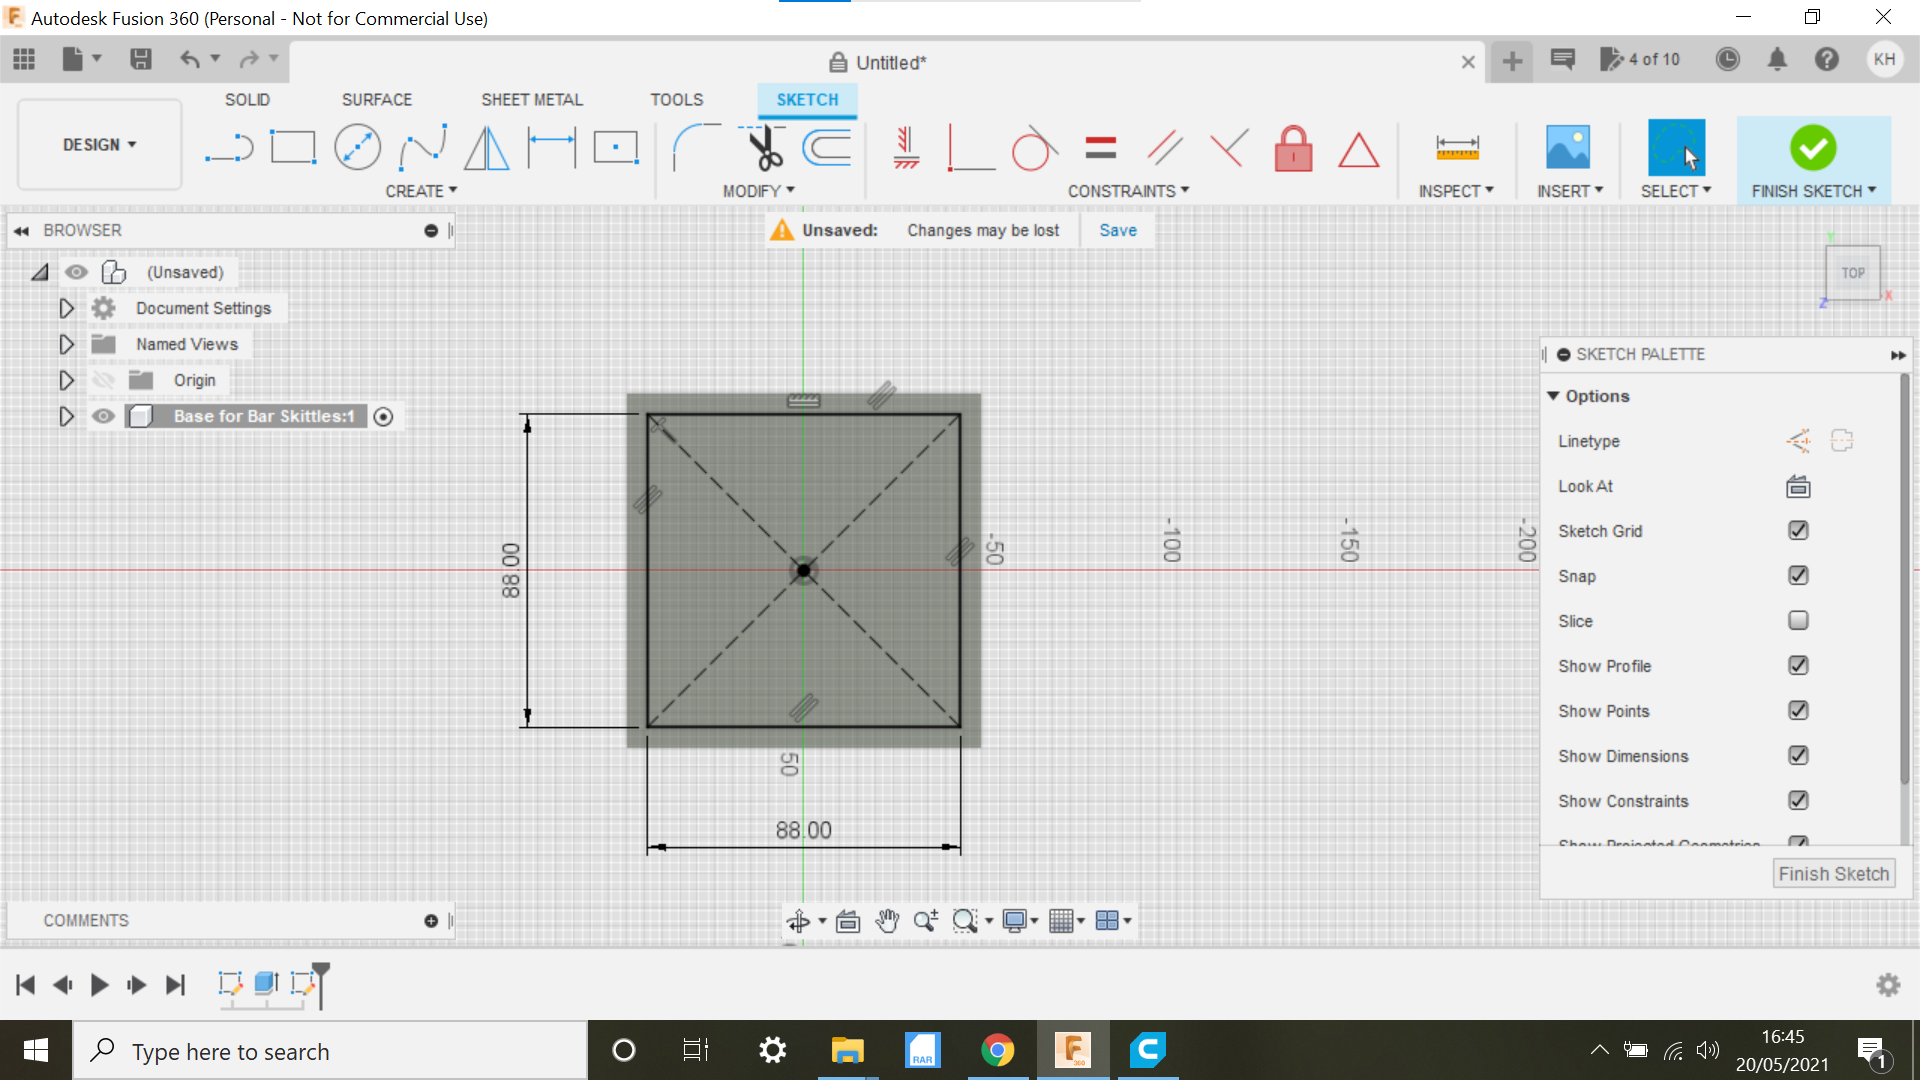
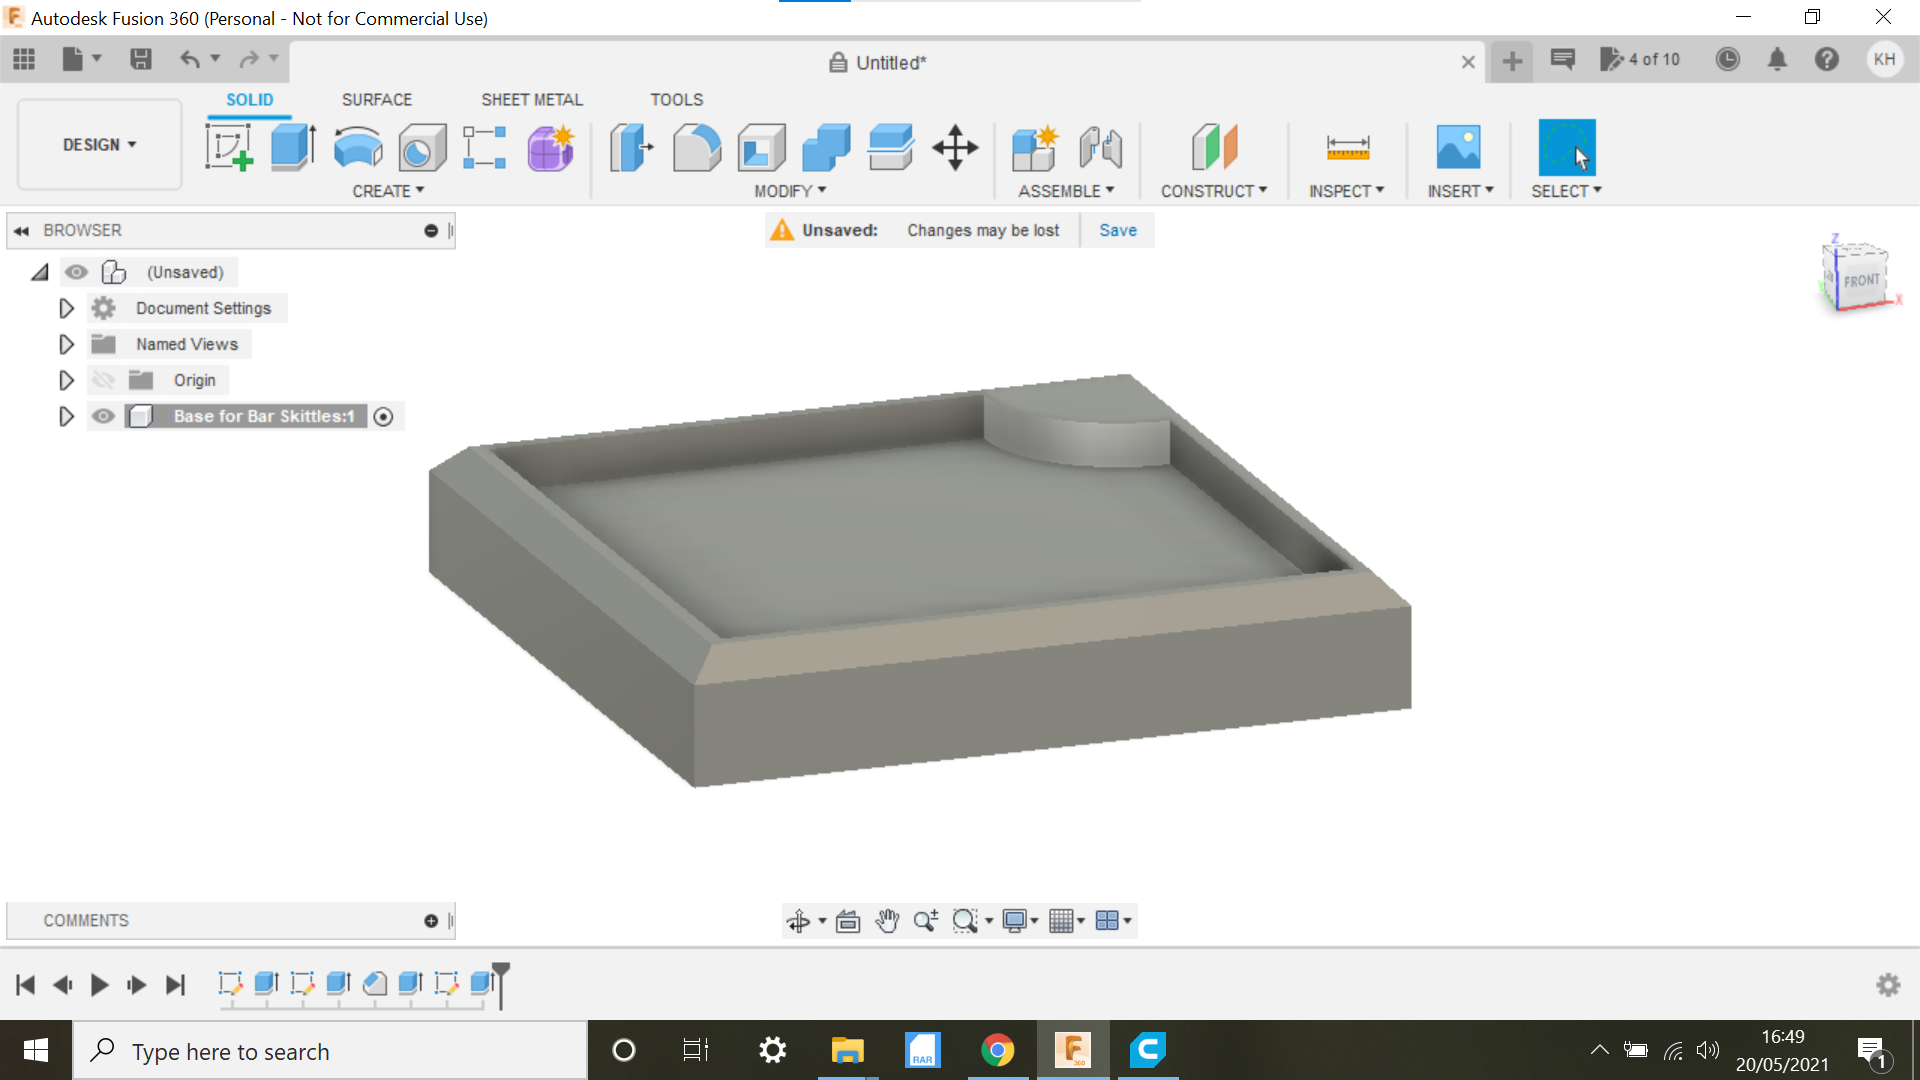
Ok... we now create a sketch, and selecting the Top plane we sketch a centre square on this occasion its 100mm x 100mm we then extrude it to 18mm.
We now create another centre square 88mm and bring it inboard, we then extrude that square -6 creating a nice border.
We can now create a chamfer around the edge.
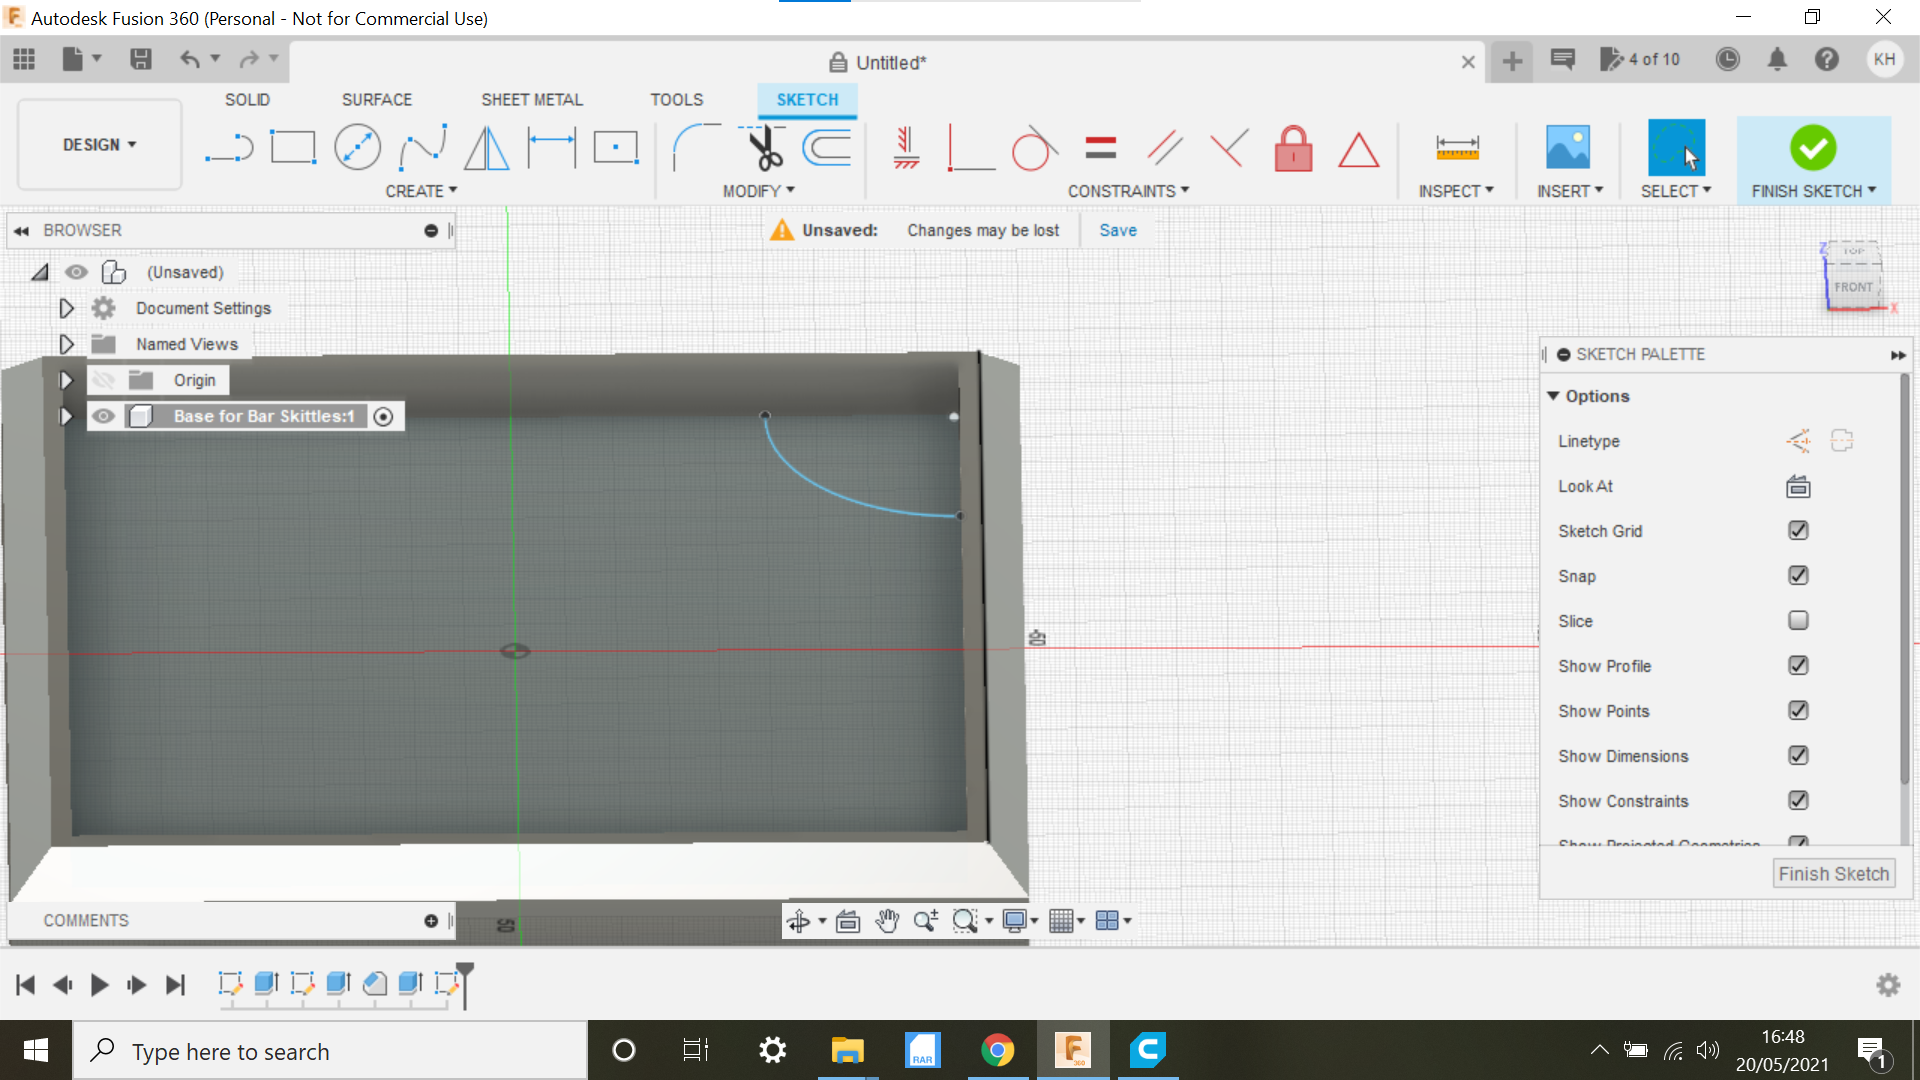
I use the arc tab and create a 3 point arc in the corner of the base, this arc will accommodate the shaft the ball swings around on, a centre circle is used to sketch a hole of 4mm to accommodate the shaft.
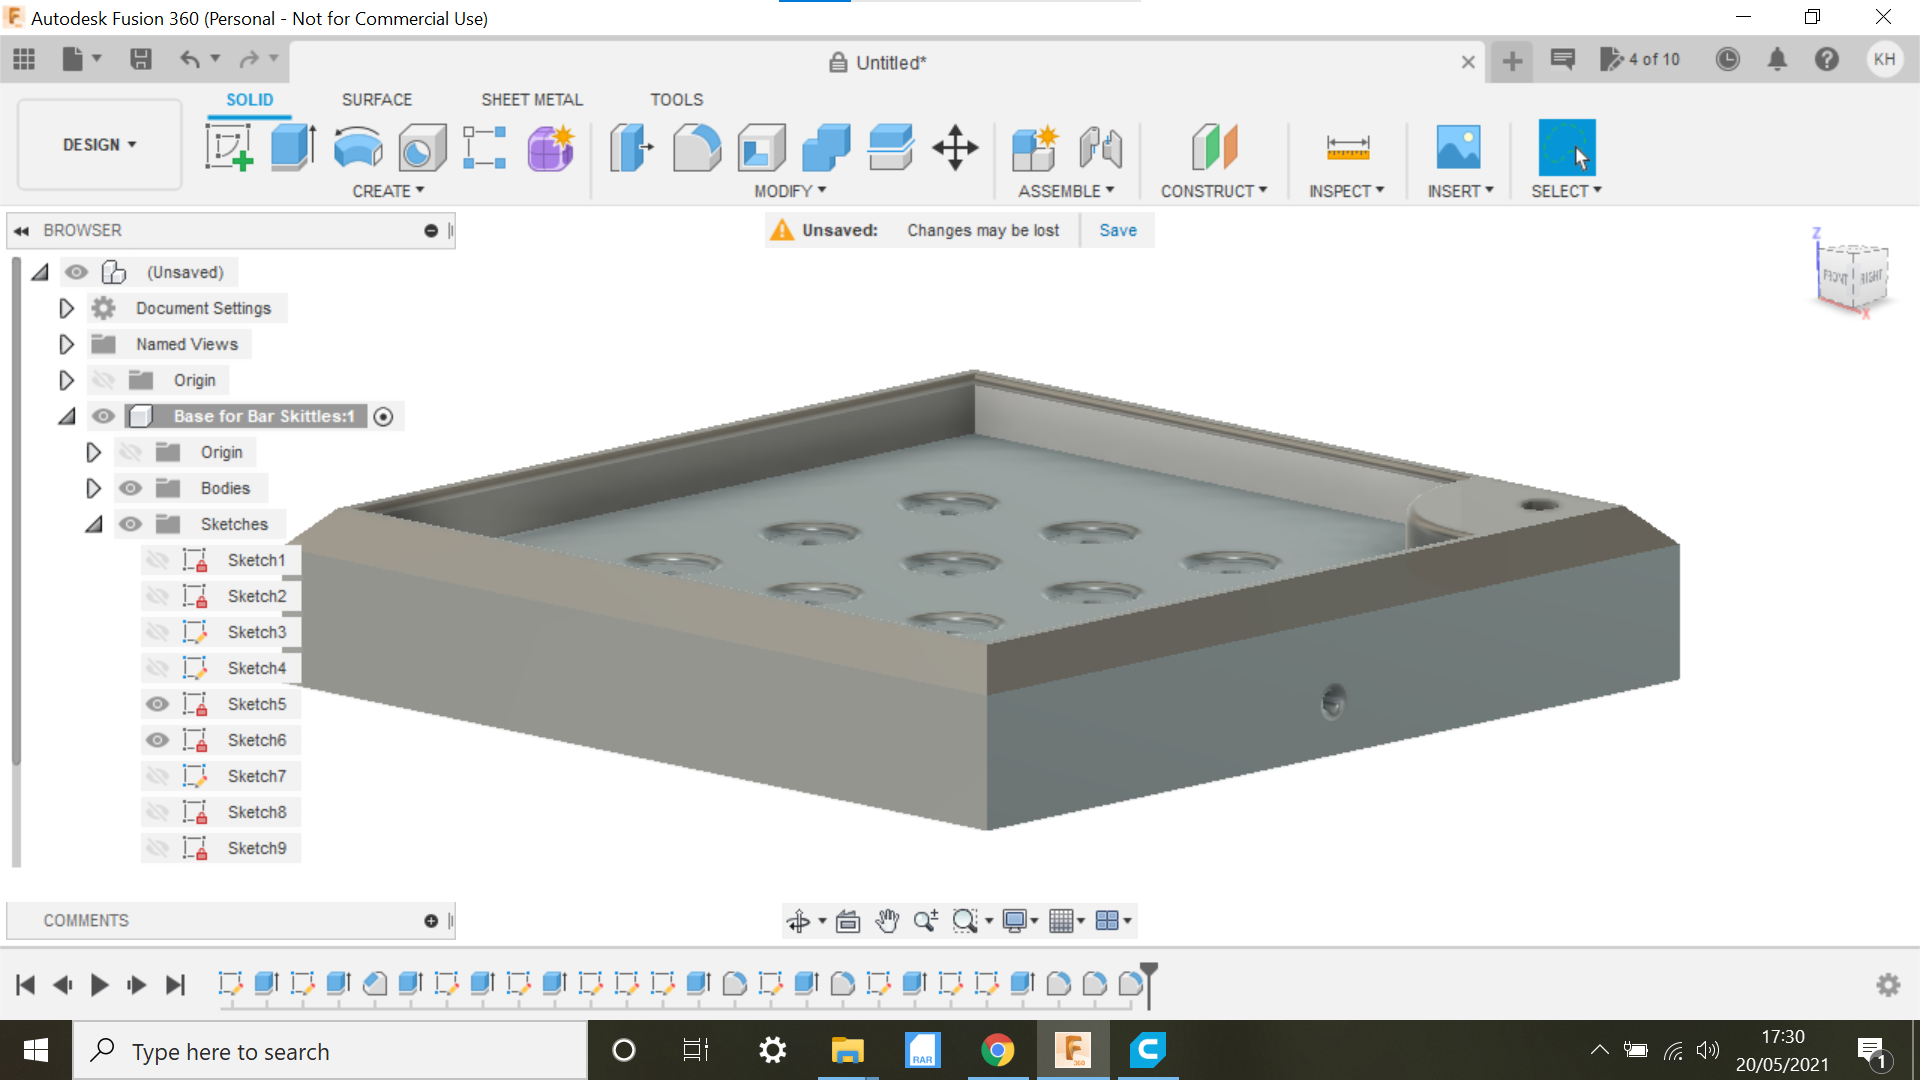
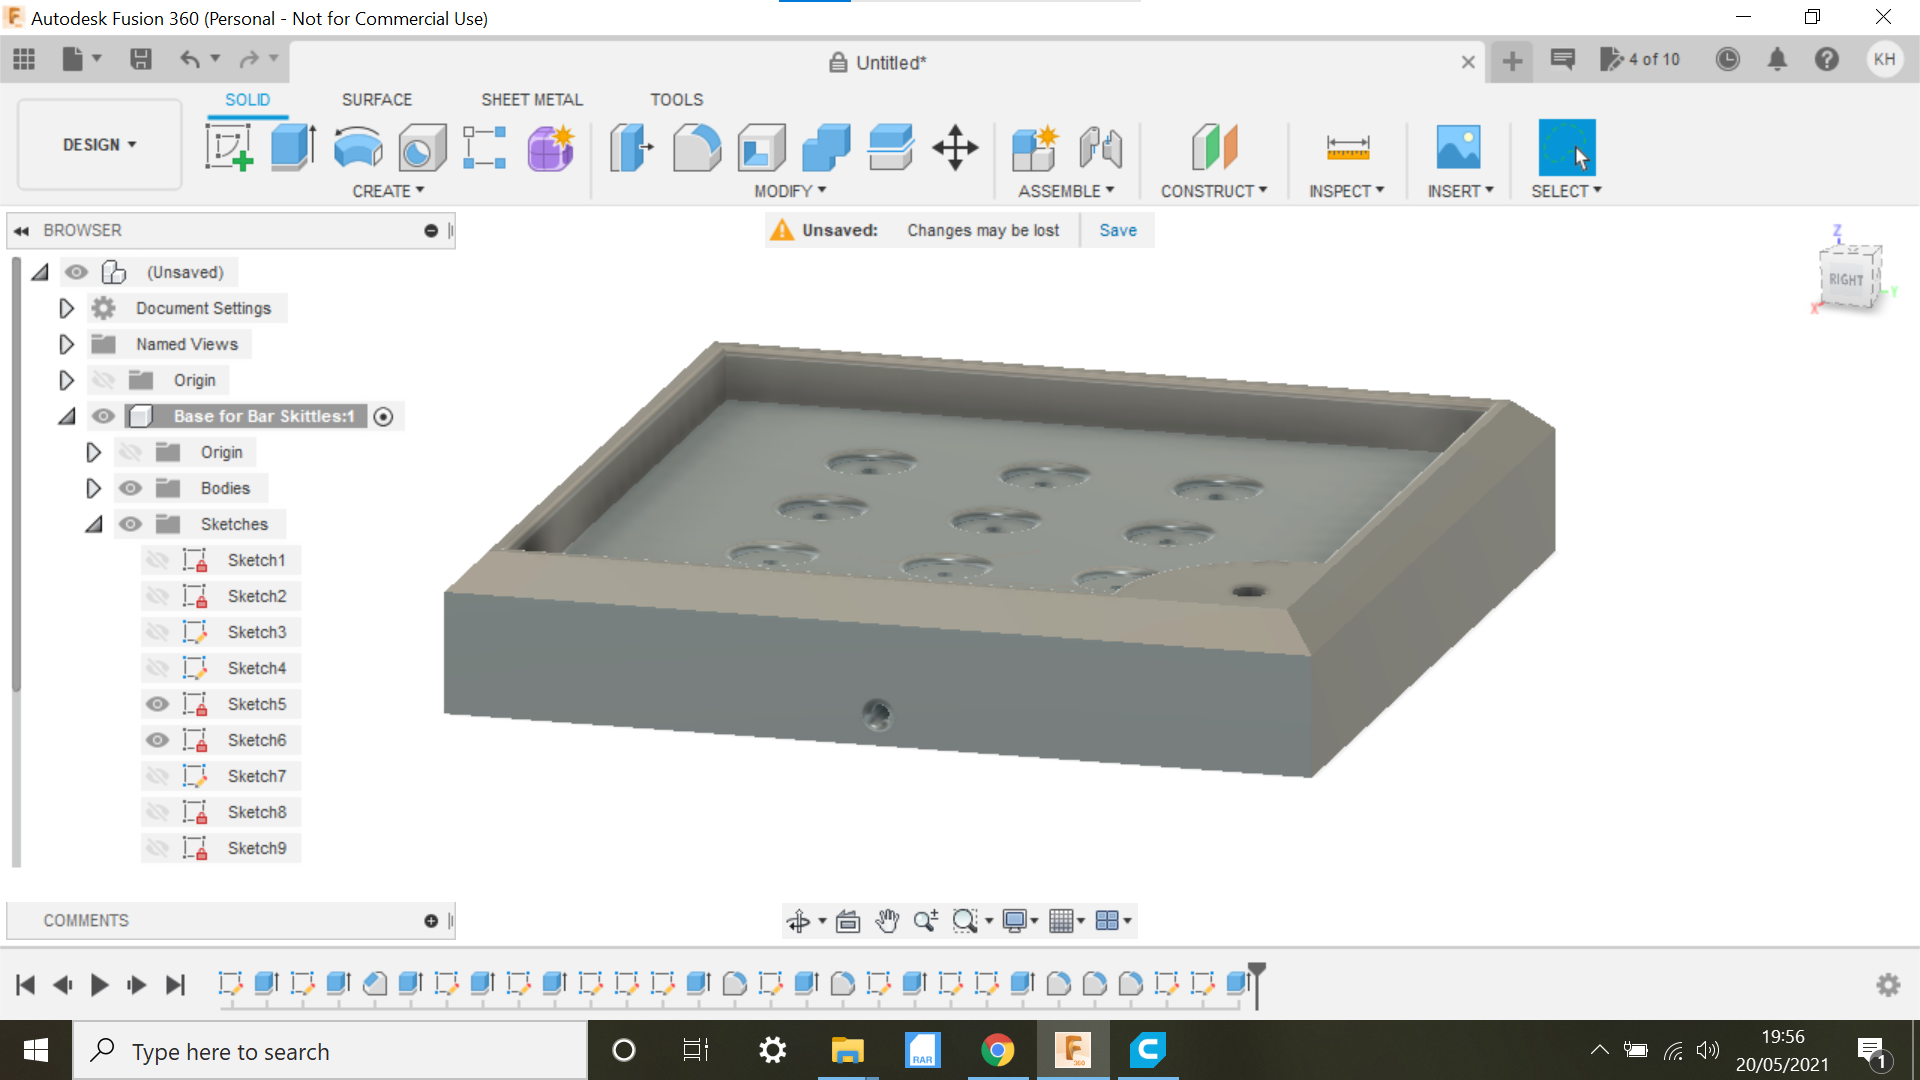
We now have the base design.
Creating Recesses in the Base Using the Pattern Function
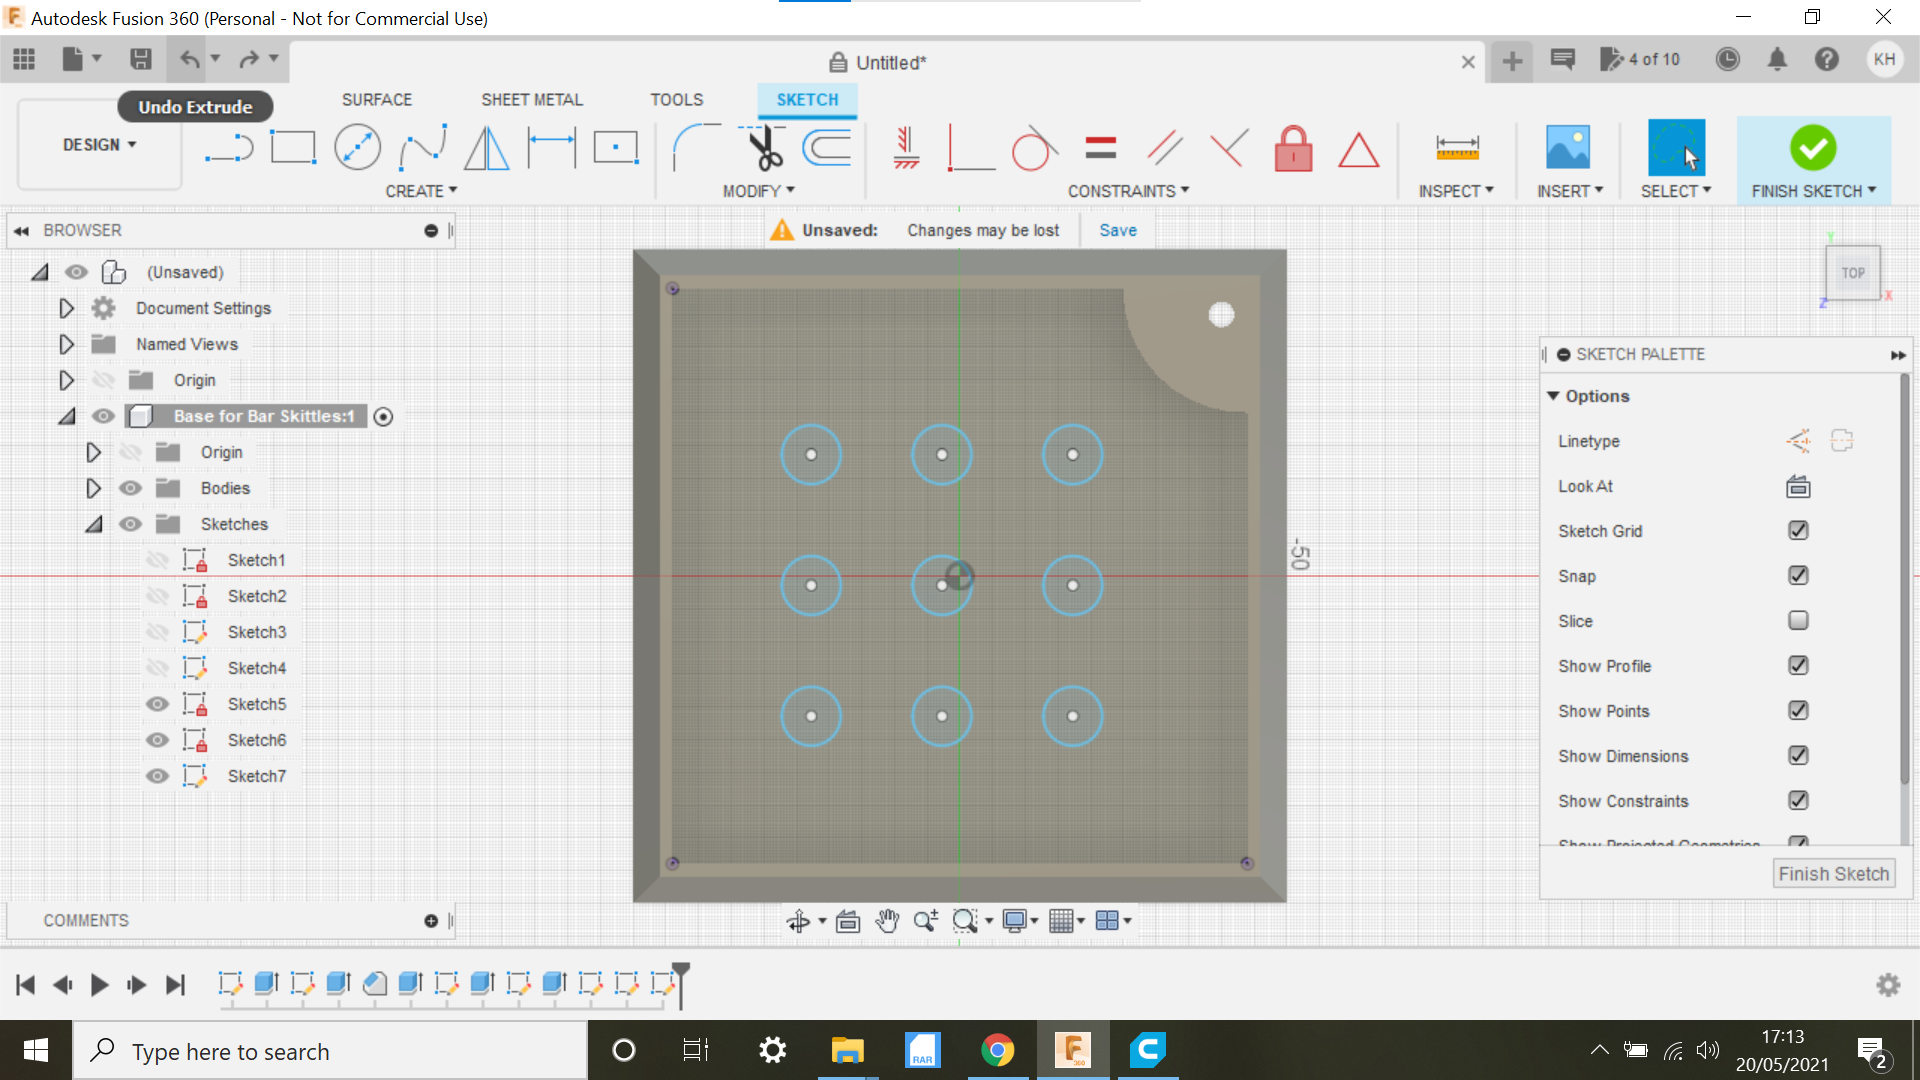

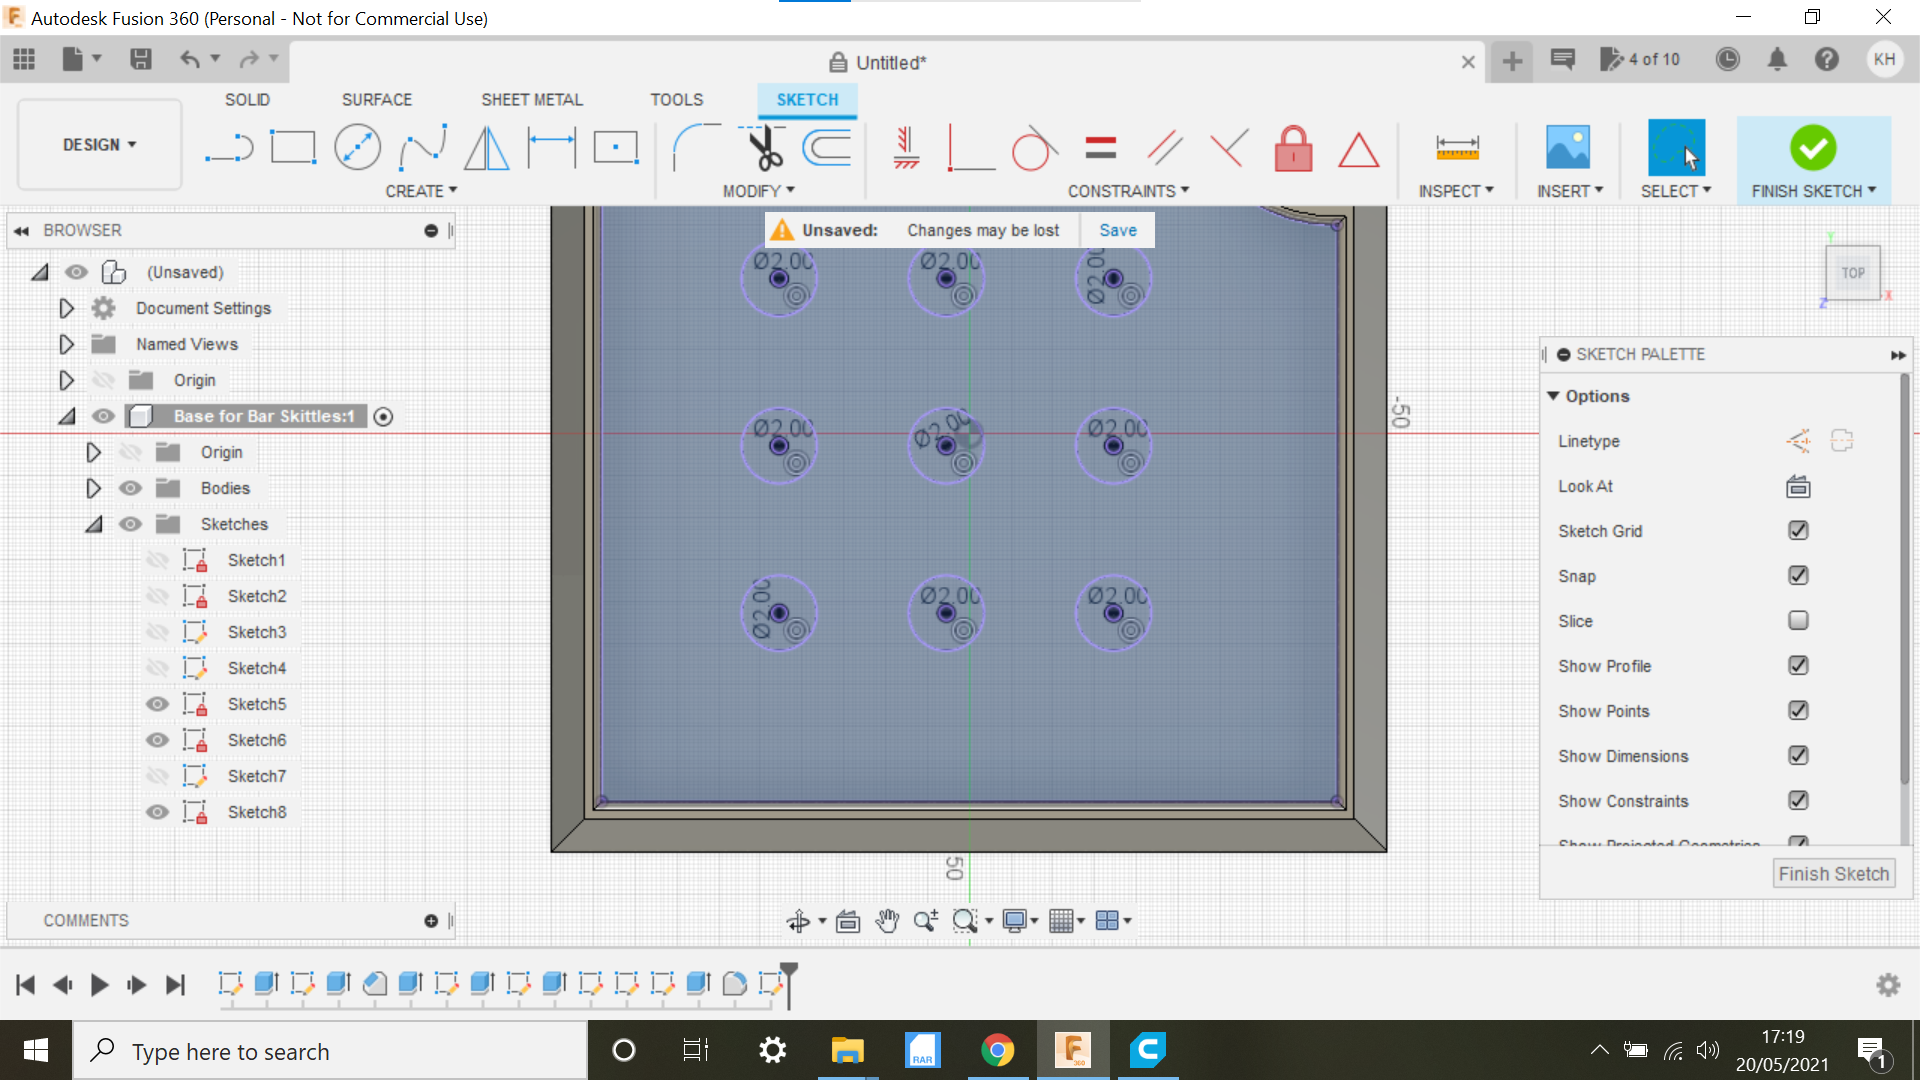
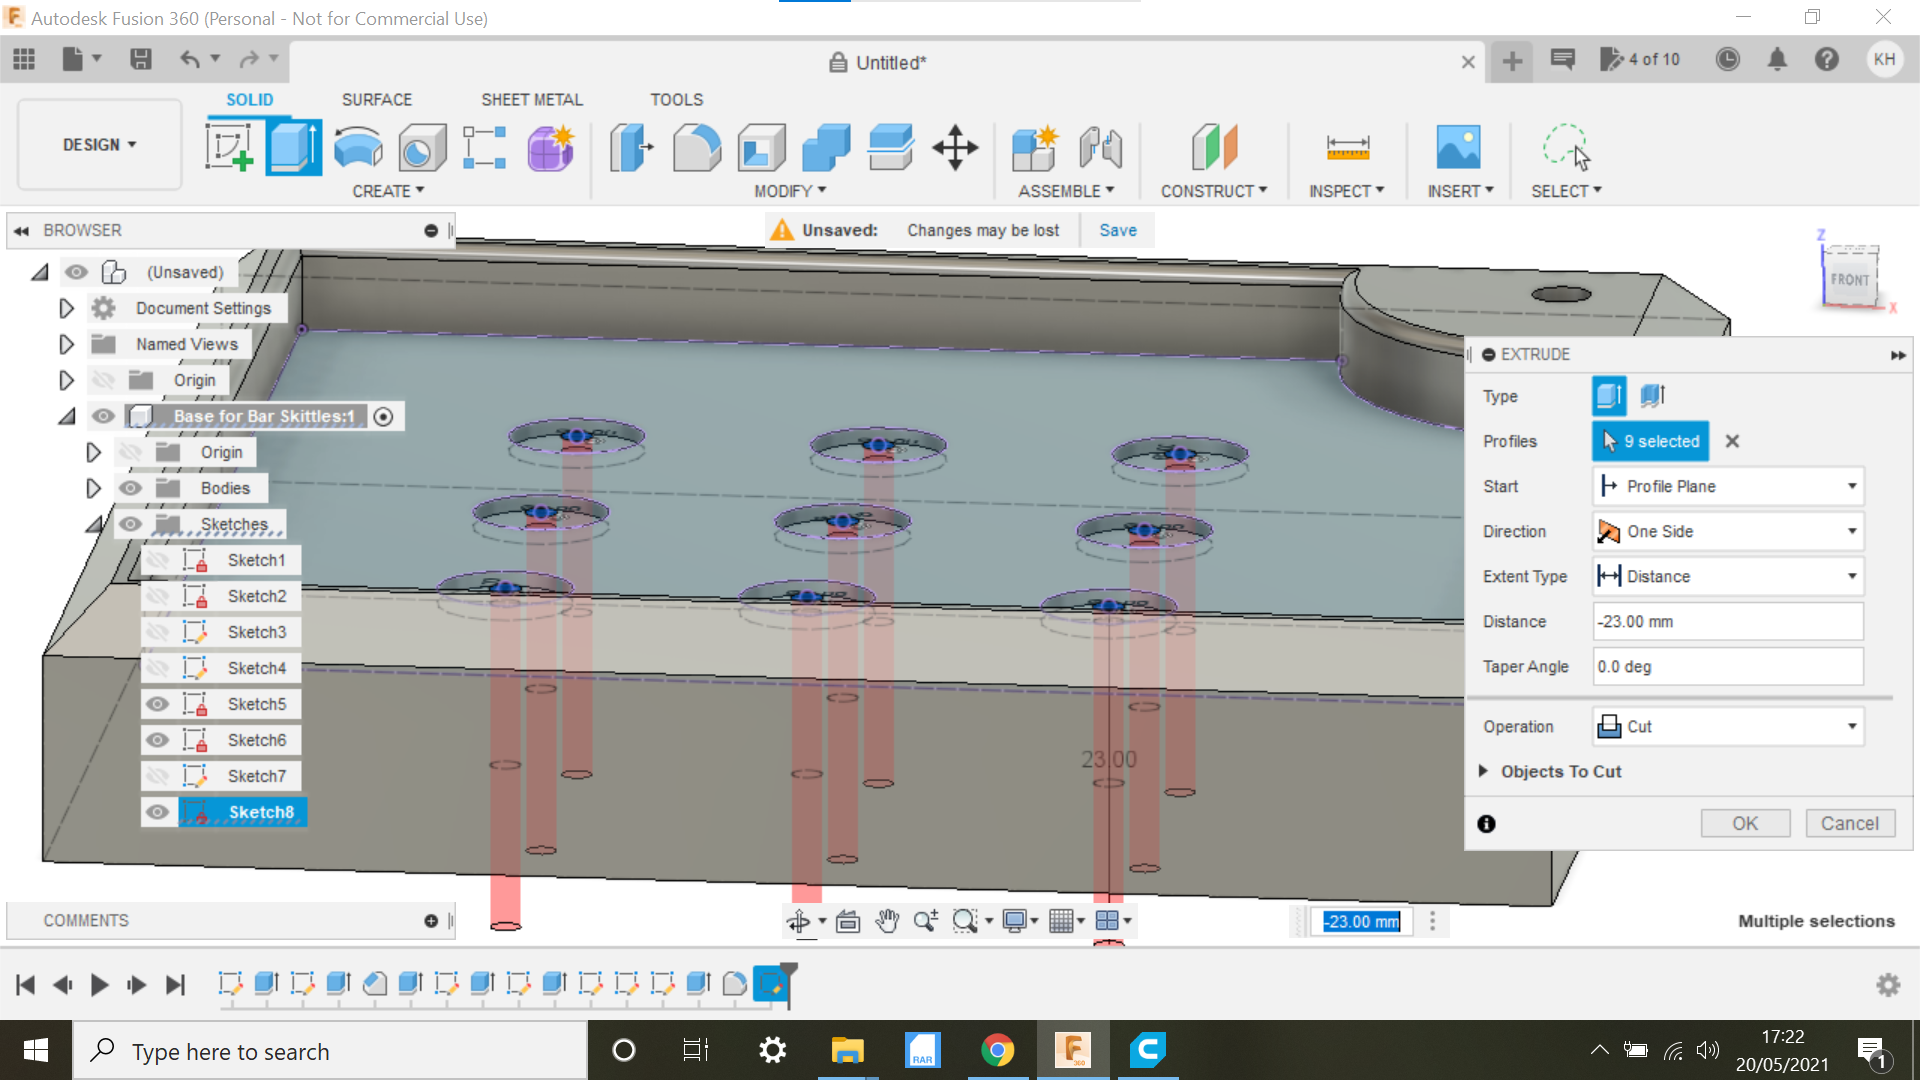
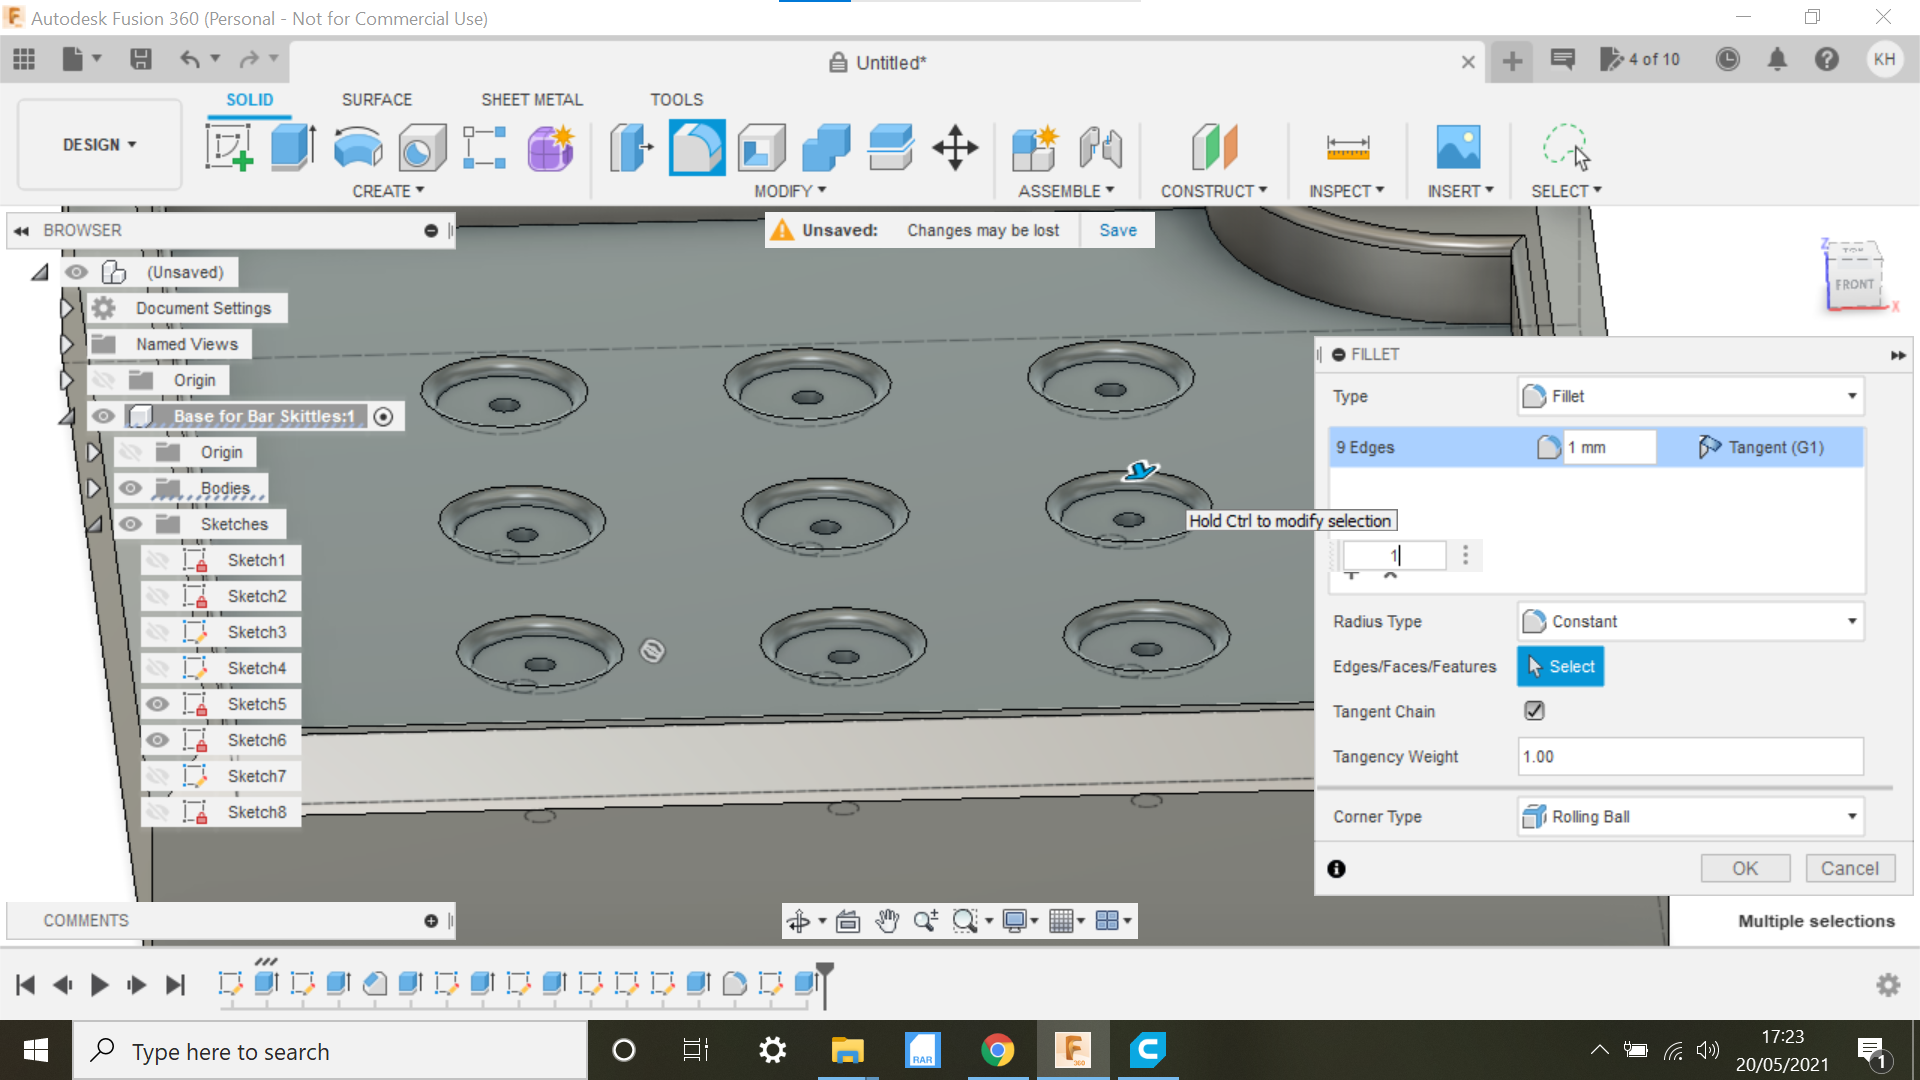
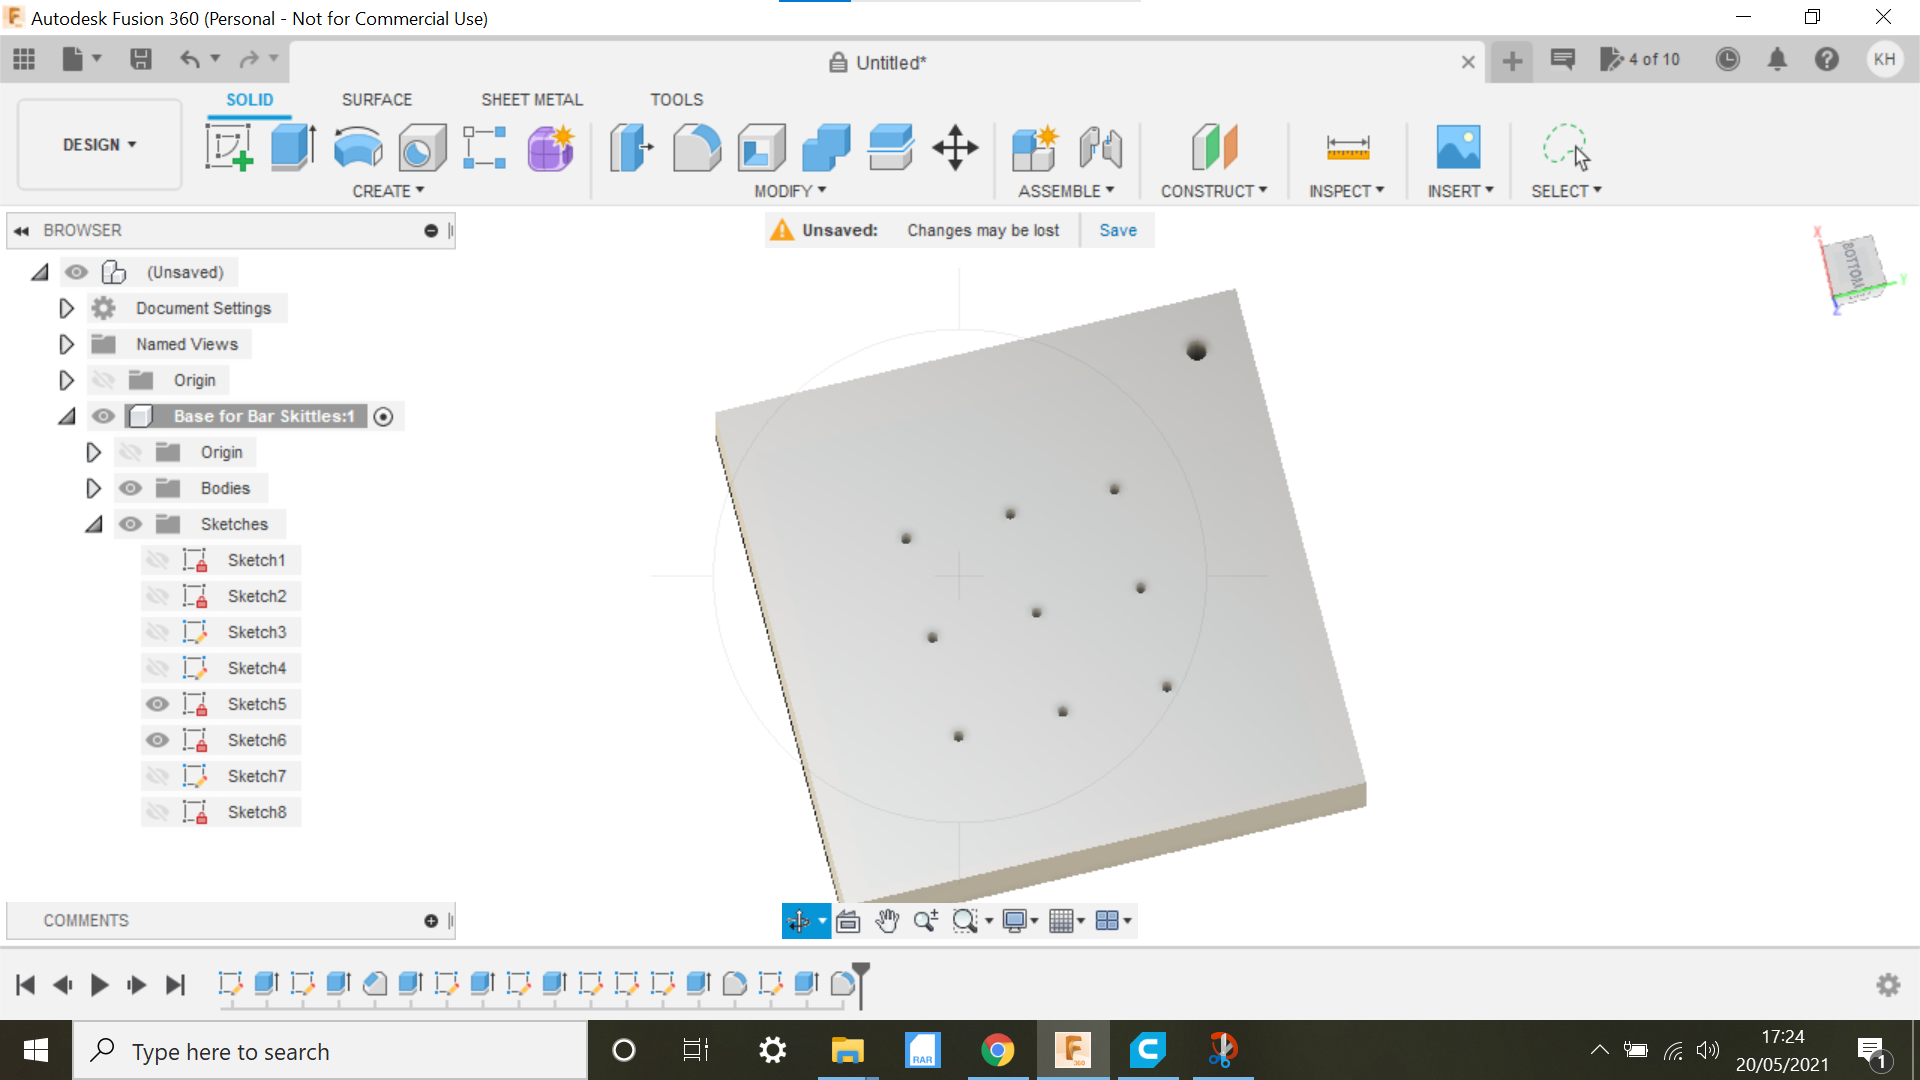
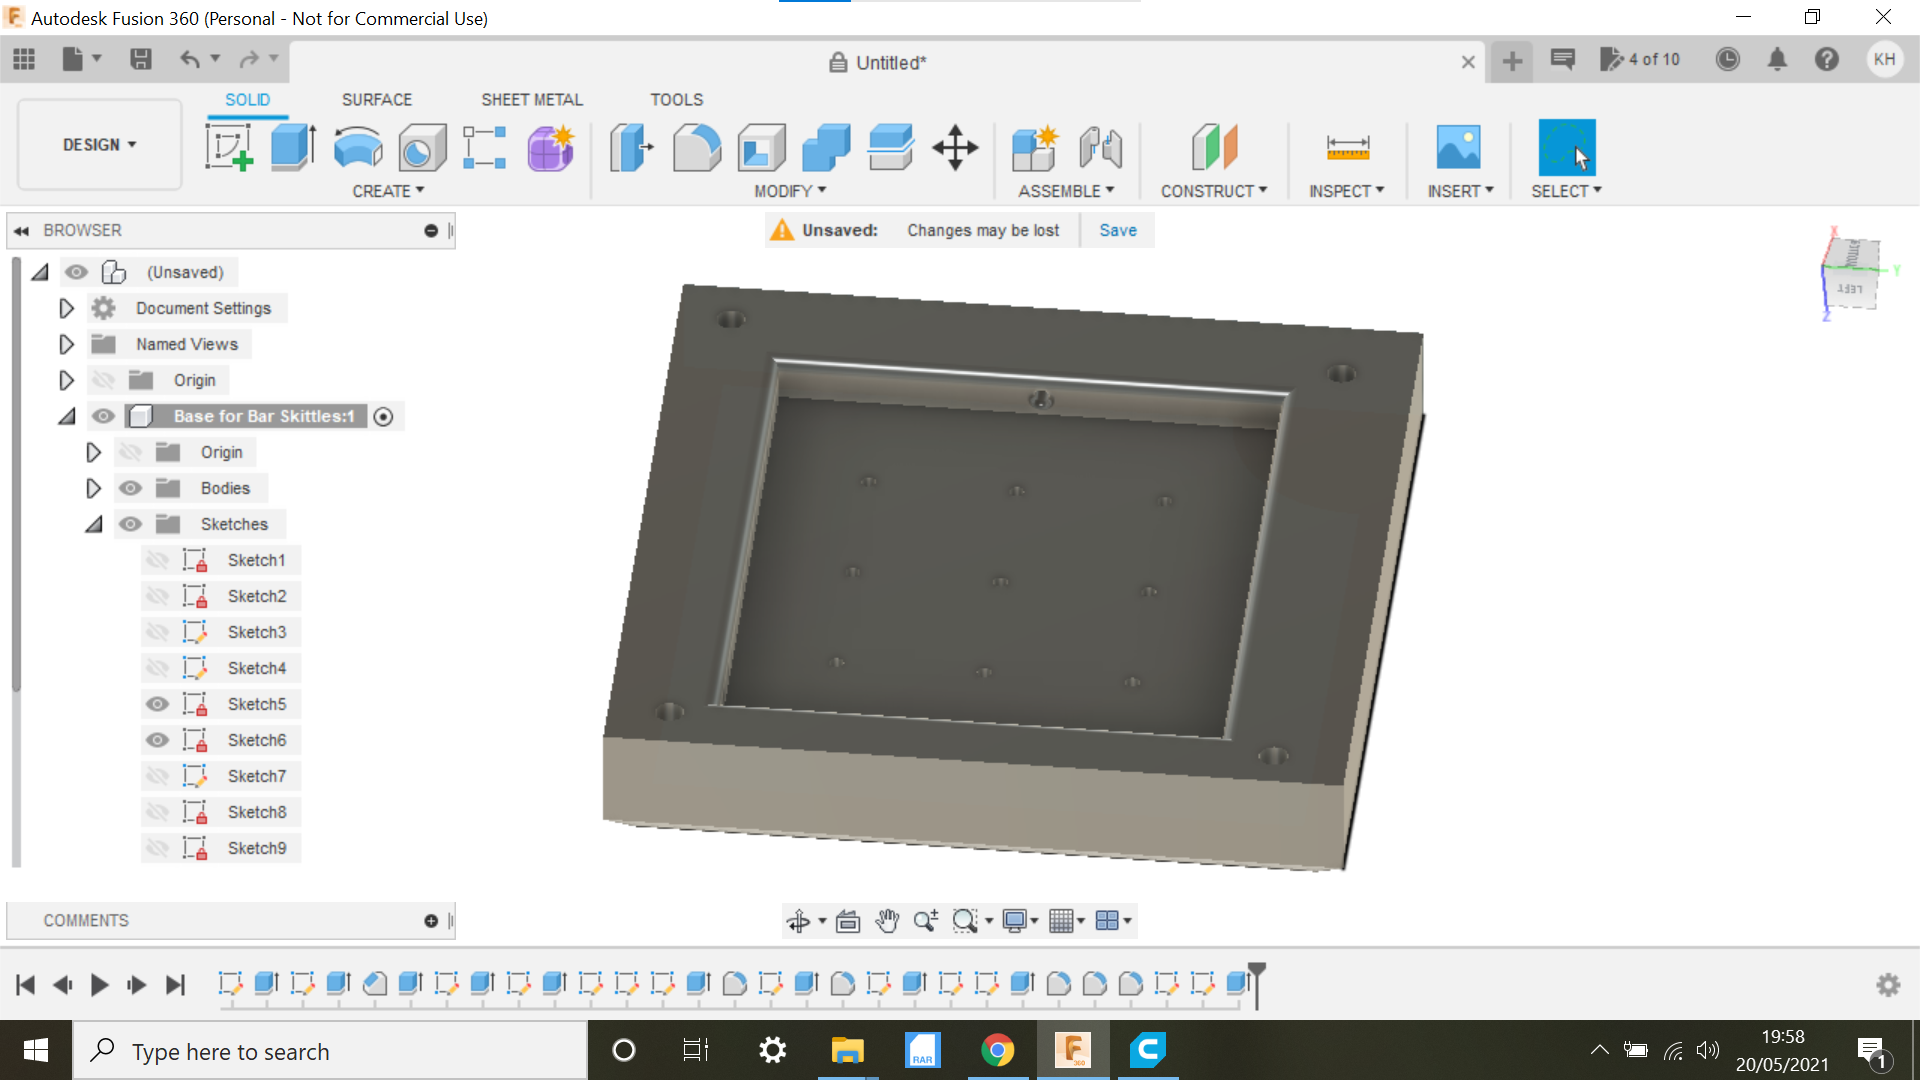
In this operation we need 9 holes or recesses to accommodate the skittles, we create 1 centre circle at 9mm diameter and place it into the face where the holes need to be.
Create an array of 9 holes and copying and pasting all 9 holes we can centralise them as In the screen shot.
We now need to flip the design and create a square cut-out, and also a hole in each corner for some suction pads.
The base design is now complete, onto the 3D printer.
Skittle Base 3D Print
![IMG_9823[1].JPG](/proxy/?url=https://content.instructables.com/F8E/8BKO/KOZRGLSI/F8E8BKOKOZRGLSI.jpg&filename=IMG_9823[1].JPG)
![IMG_9824[1].JPG](/proxy/?url=https://content.instructables.com/FLX/GEVB/KOZRGLTW/FLXGEVBKOZRGLTW.jpg&filename=IMG_9824[1].JPG)
The only thing we need to make sure we do is add support for the cavity under the base.
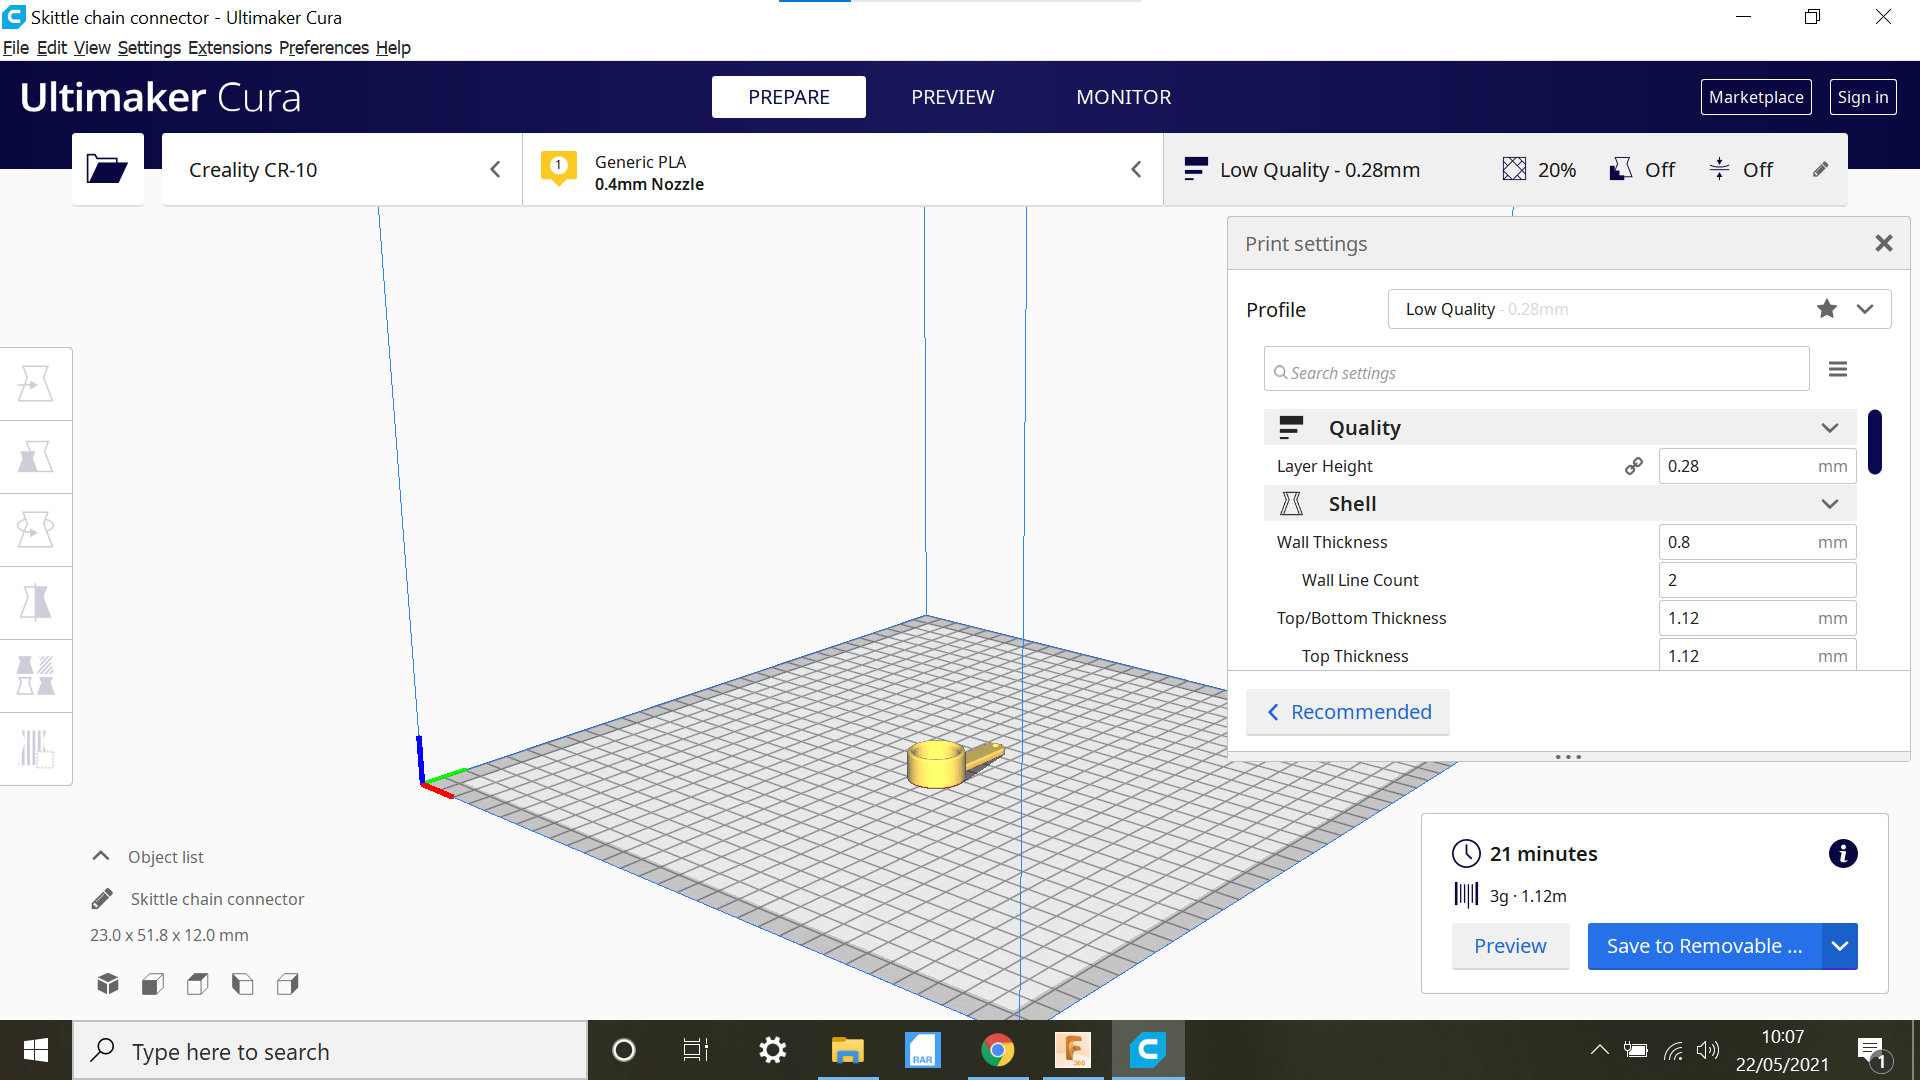
My 3D Printer is a Creality CR-10 with a Creality build plate, the only thing you need to do with these build plates is to check the level then wipe with Methylated spirit, then once the print is complete you let the whole thing cool down completely, after this the print is free just to remove off the bed, no scraper needed to remove the print etc.
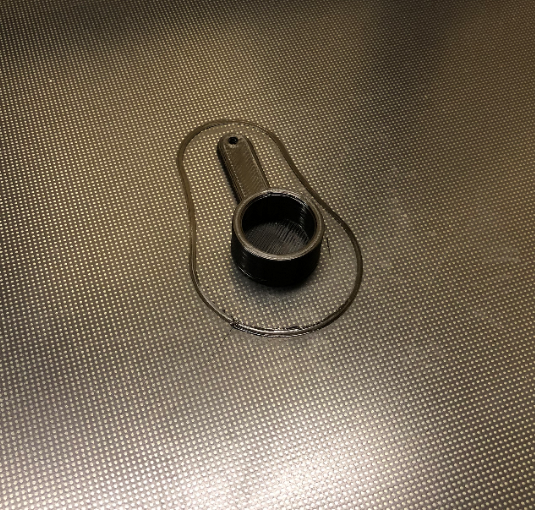
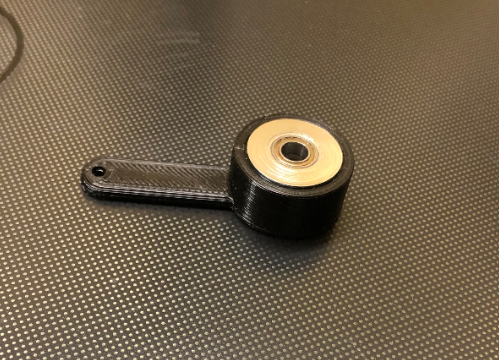
Holder for the Chain to Connect To.
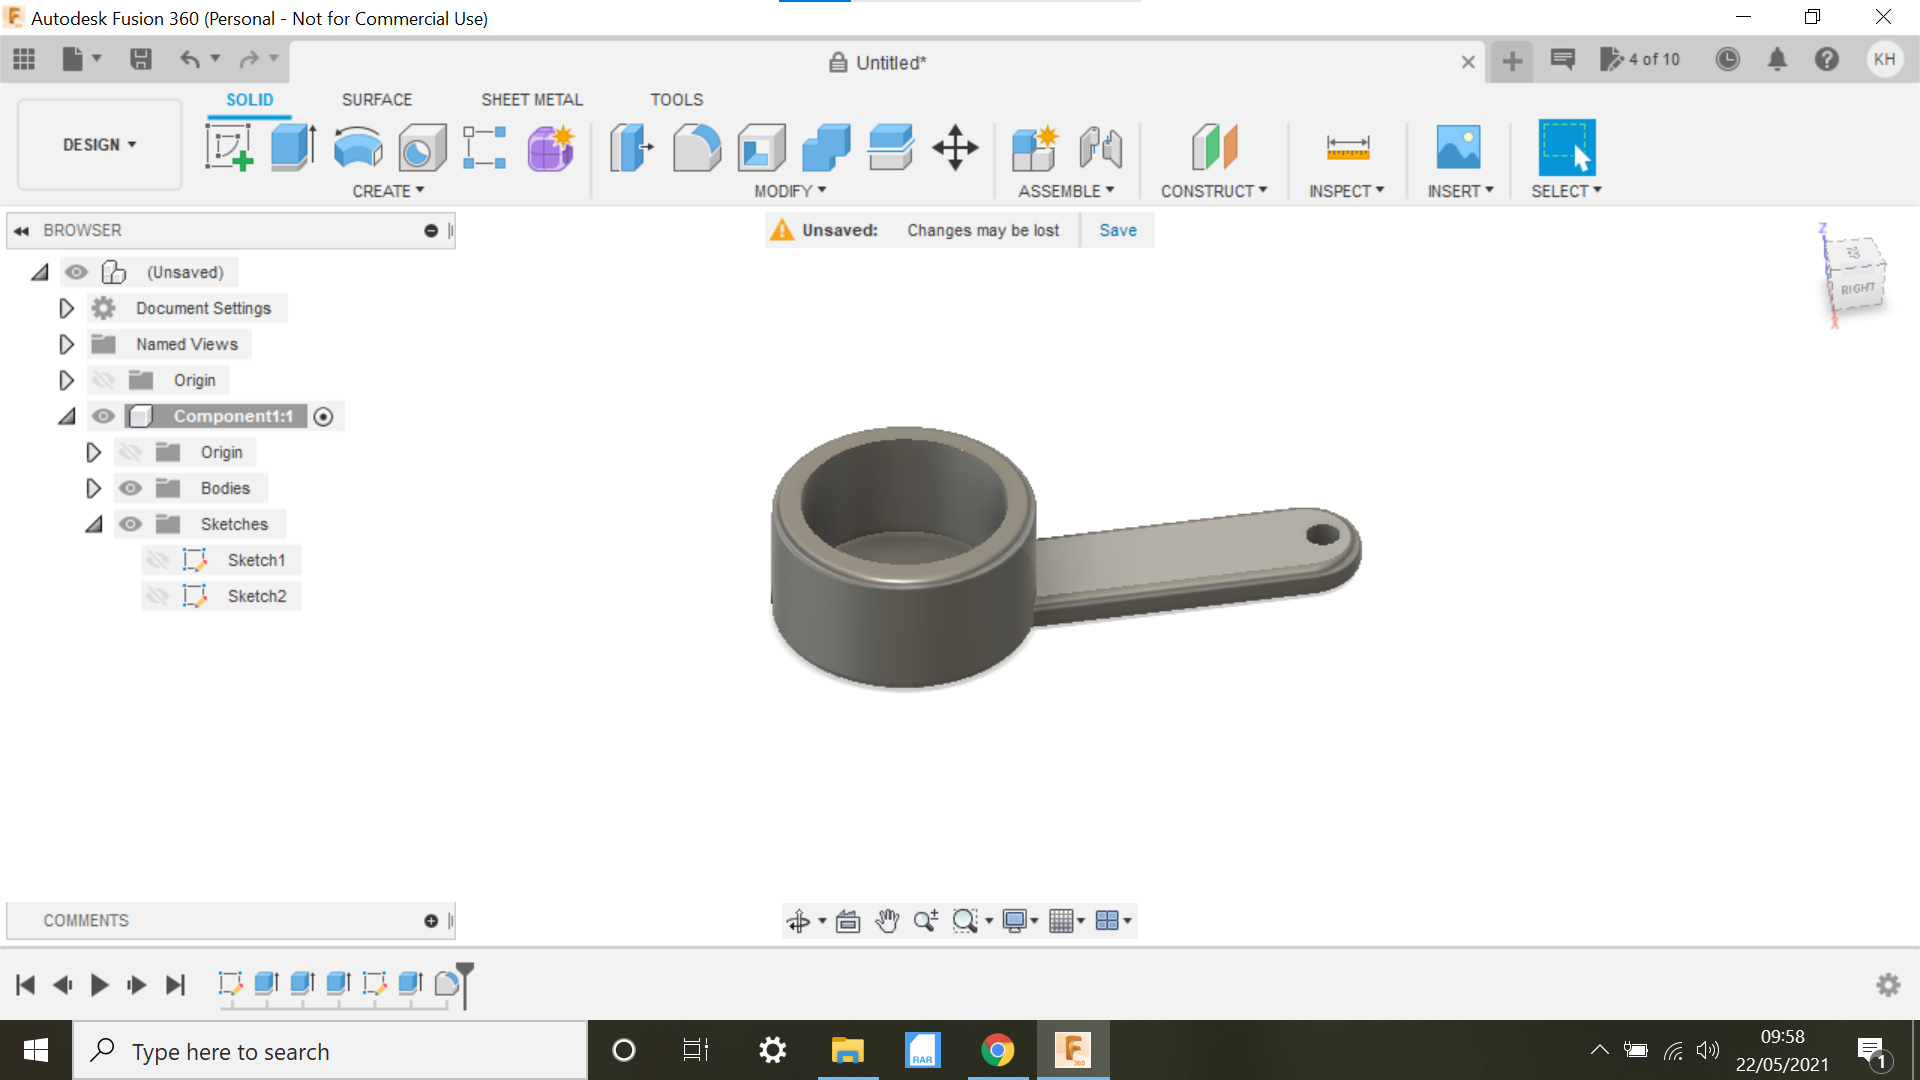
We need to make a part which will fit on top of the 5mm bar and needs to move freely, we will connect a chain or cord to this to connect to the Brass ball I made, I have a spare GT2 Belt pulley, this will do nicely as it has an internal bearing.
We will make the part in Fusion 360.
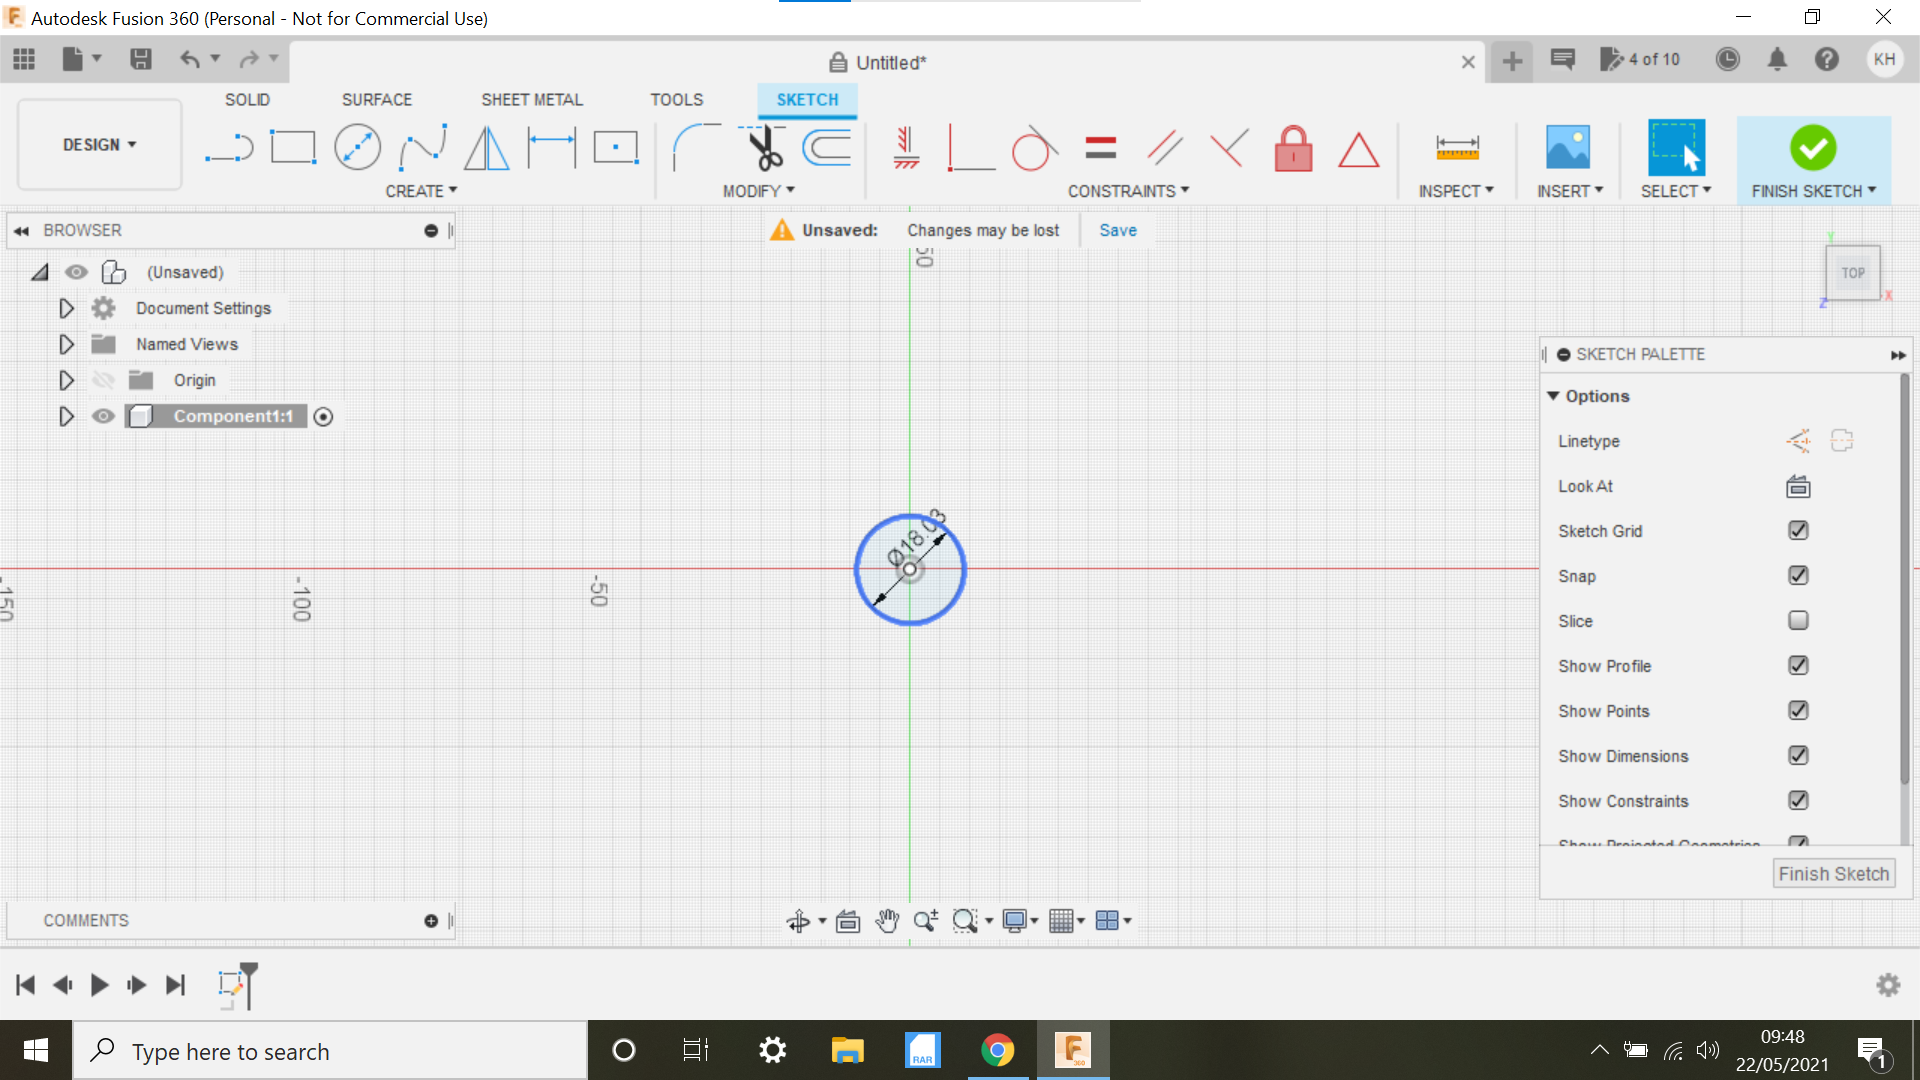
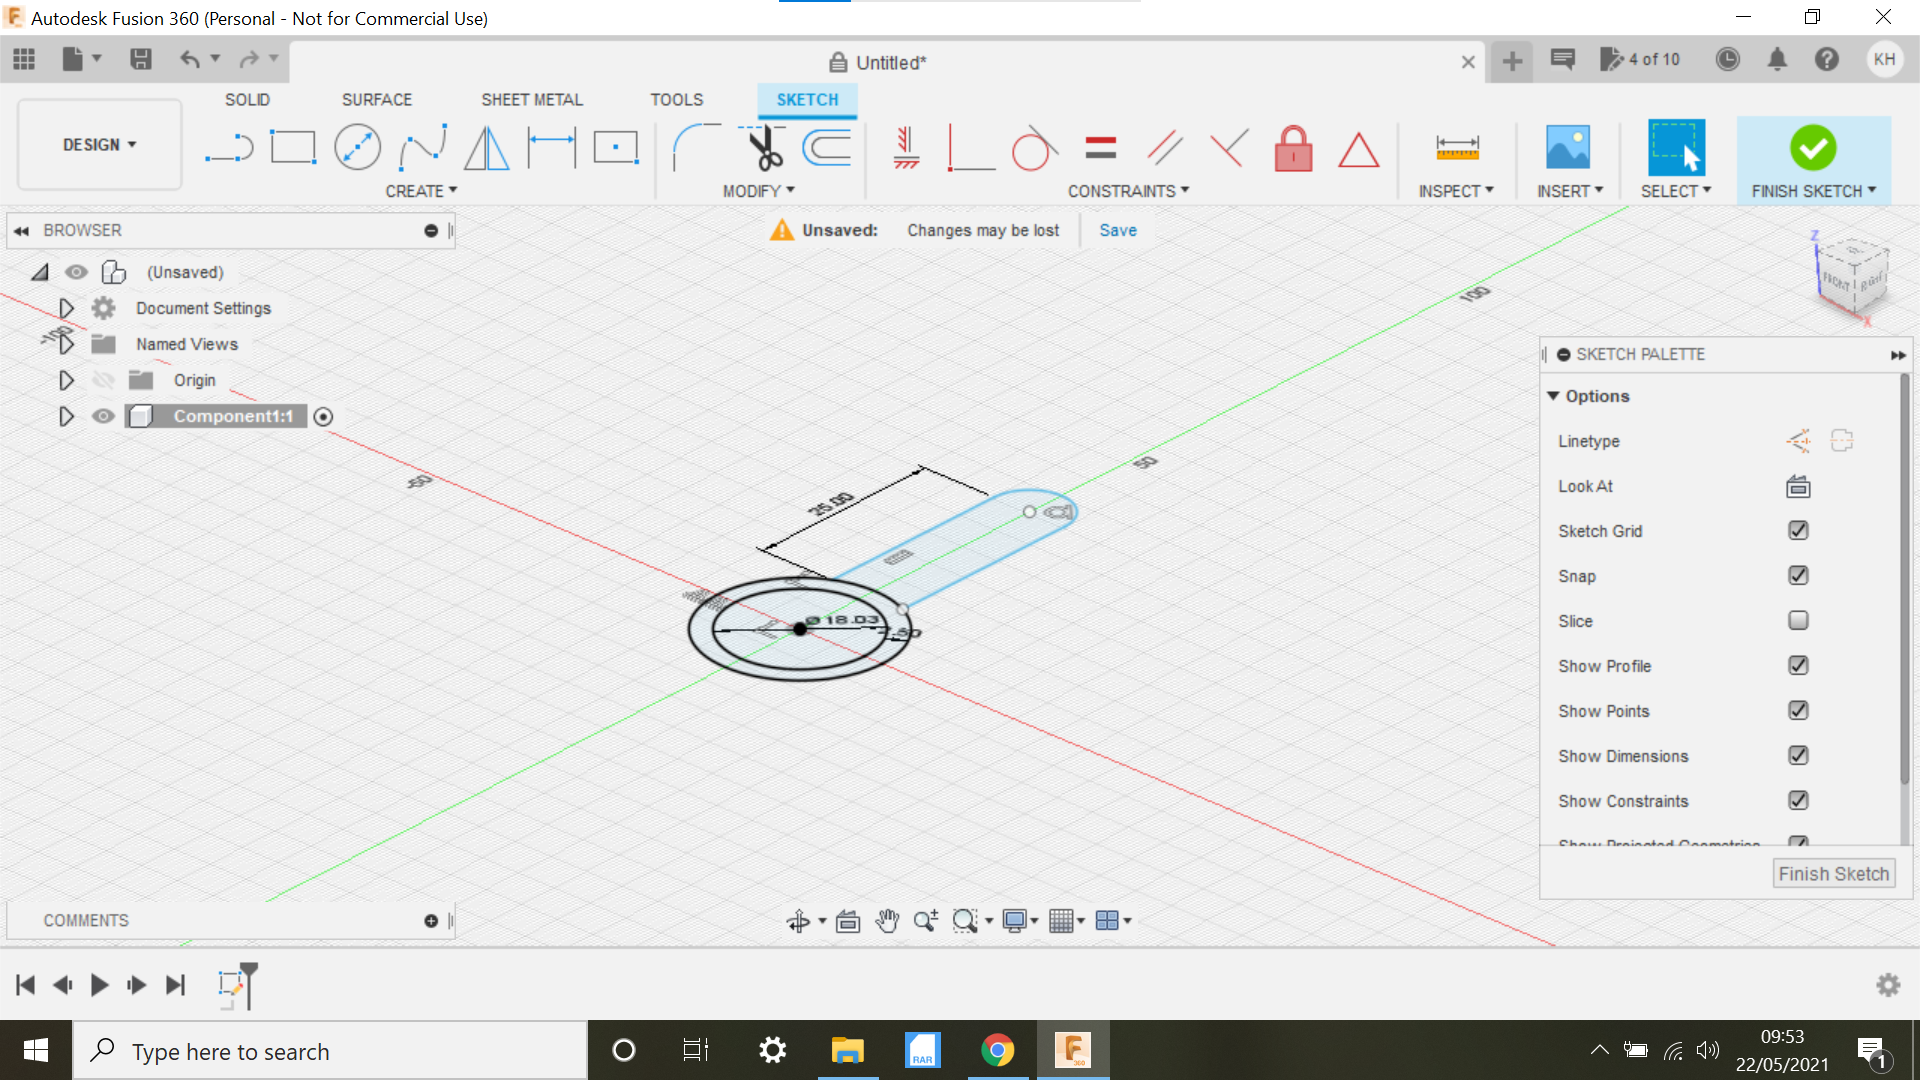
Starting out with a sketch, we select the top plane and create a centre circle @ 18.02mm which will give us a snug fit over the pulley, then using the offset tab create an offset of 2mm this is the wall thickness, we then sketch a handle which the chain will connect to, sketch 2 lines @ 25mm and then select the 3 Point arc tab, connect the 2no 25mm lines and create an arc.
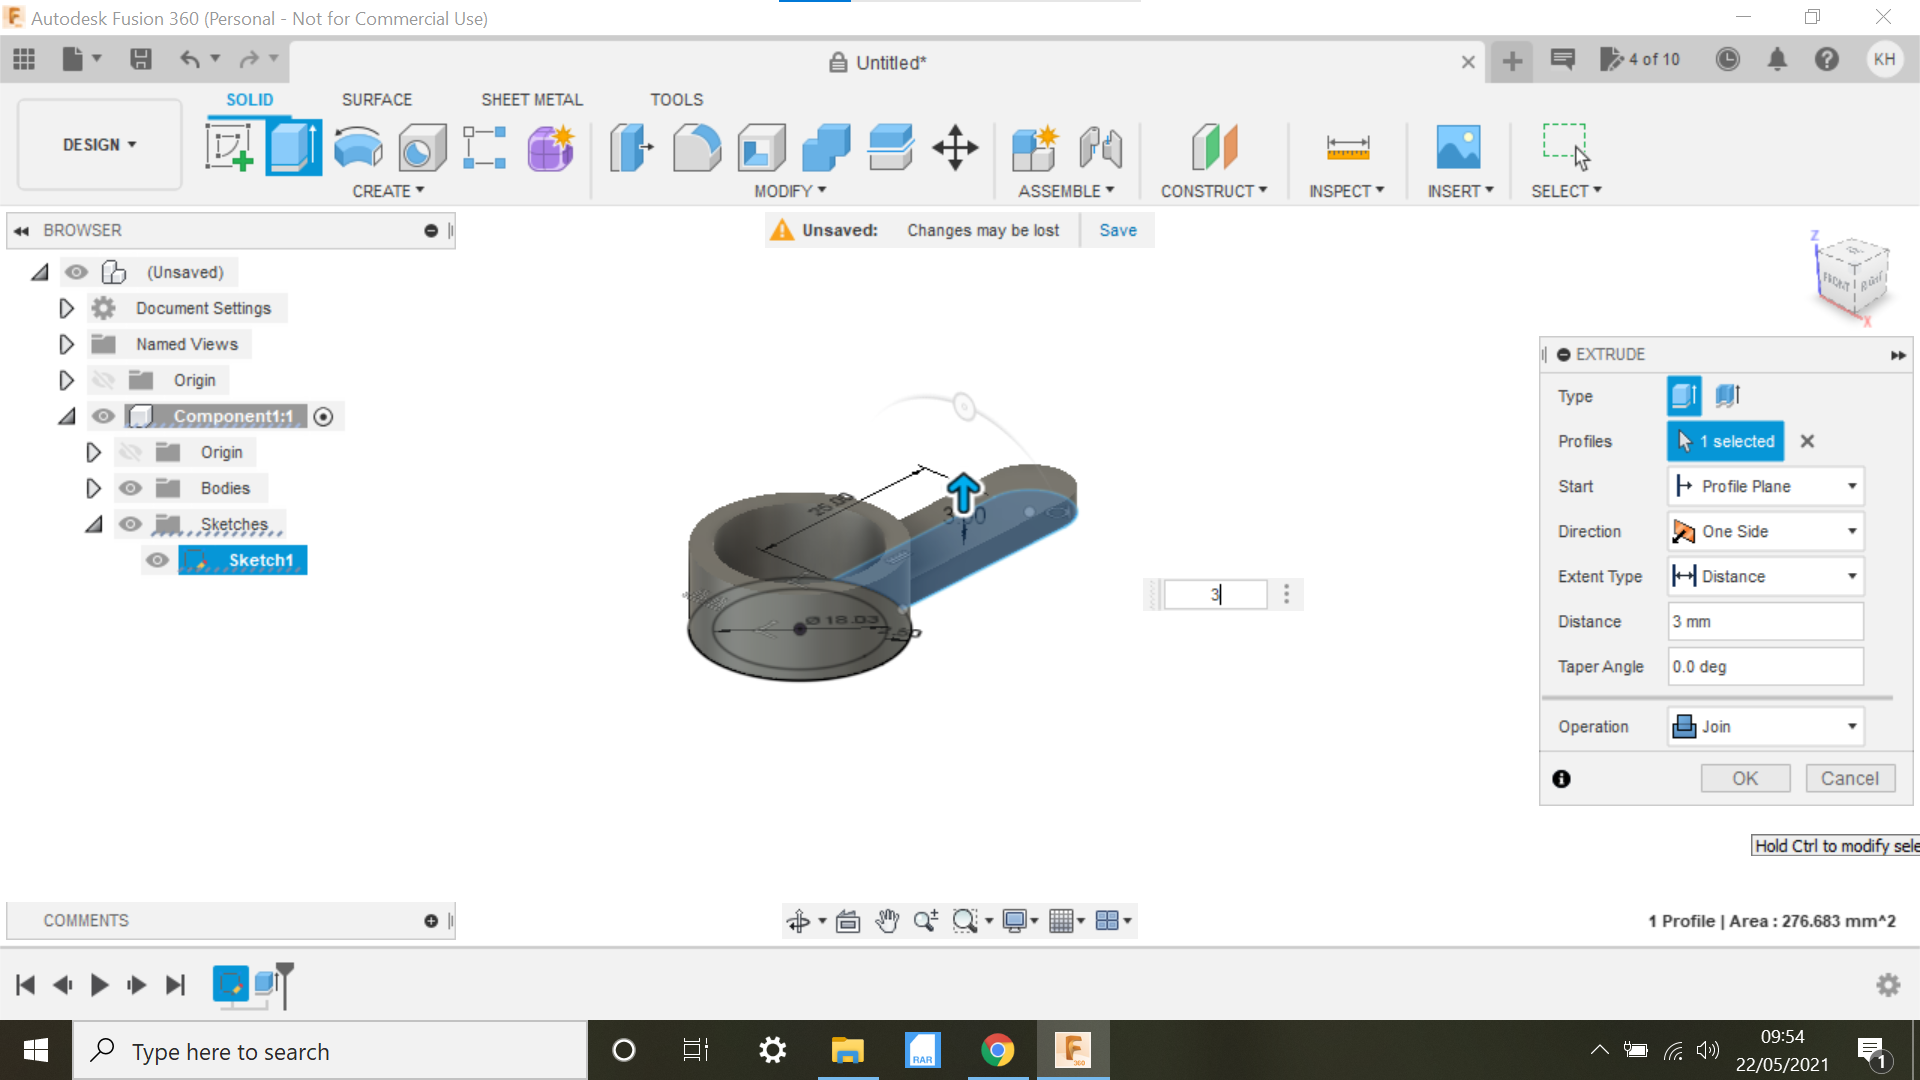
Extrude the inner part of the circle to 2mm then the walls of the circle to 12mm then the handle to 3mm.
Then create a centre circle hole in the handle to accommodate the ball chain.
Use the fillet function to round the edges, and that part is now complete.
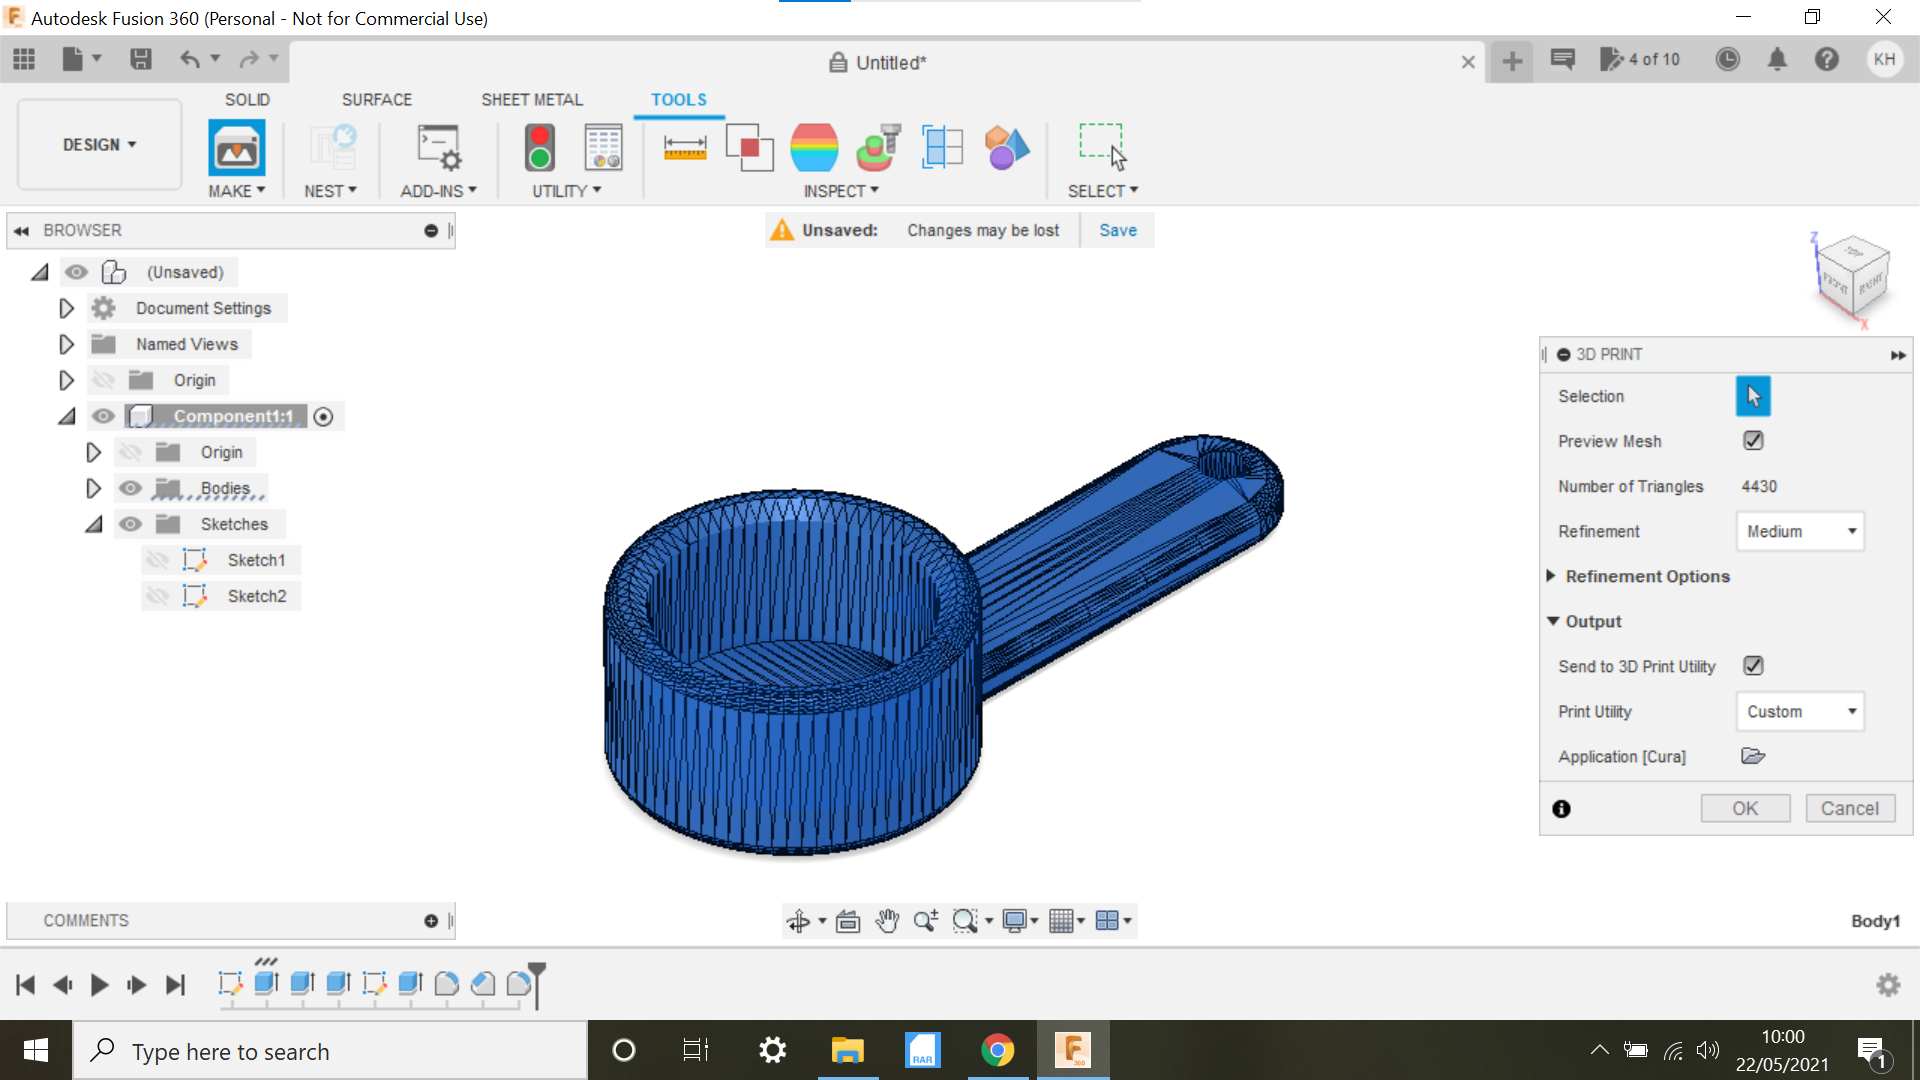
3D print the part and trial fit, make any adjustments to the sketch if needed and print again if necessary.
Finalising
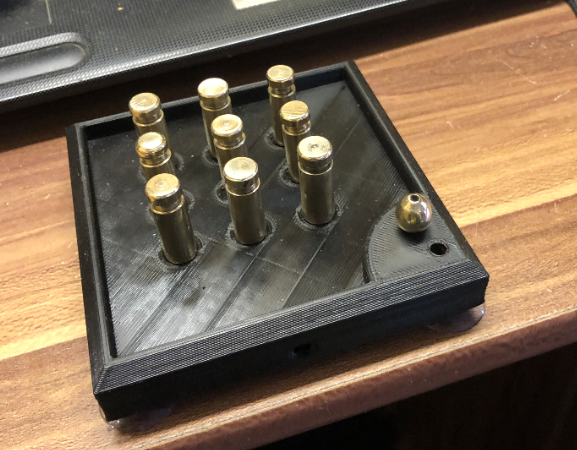
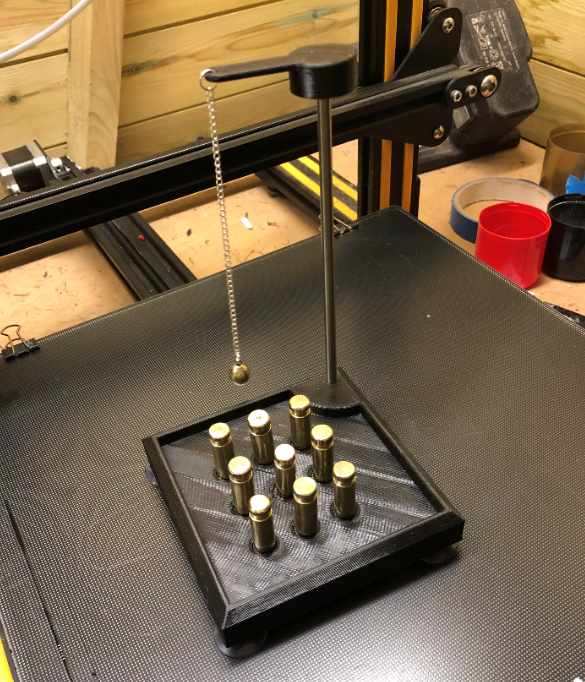
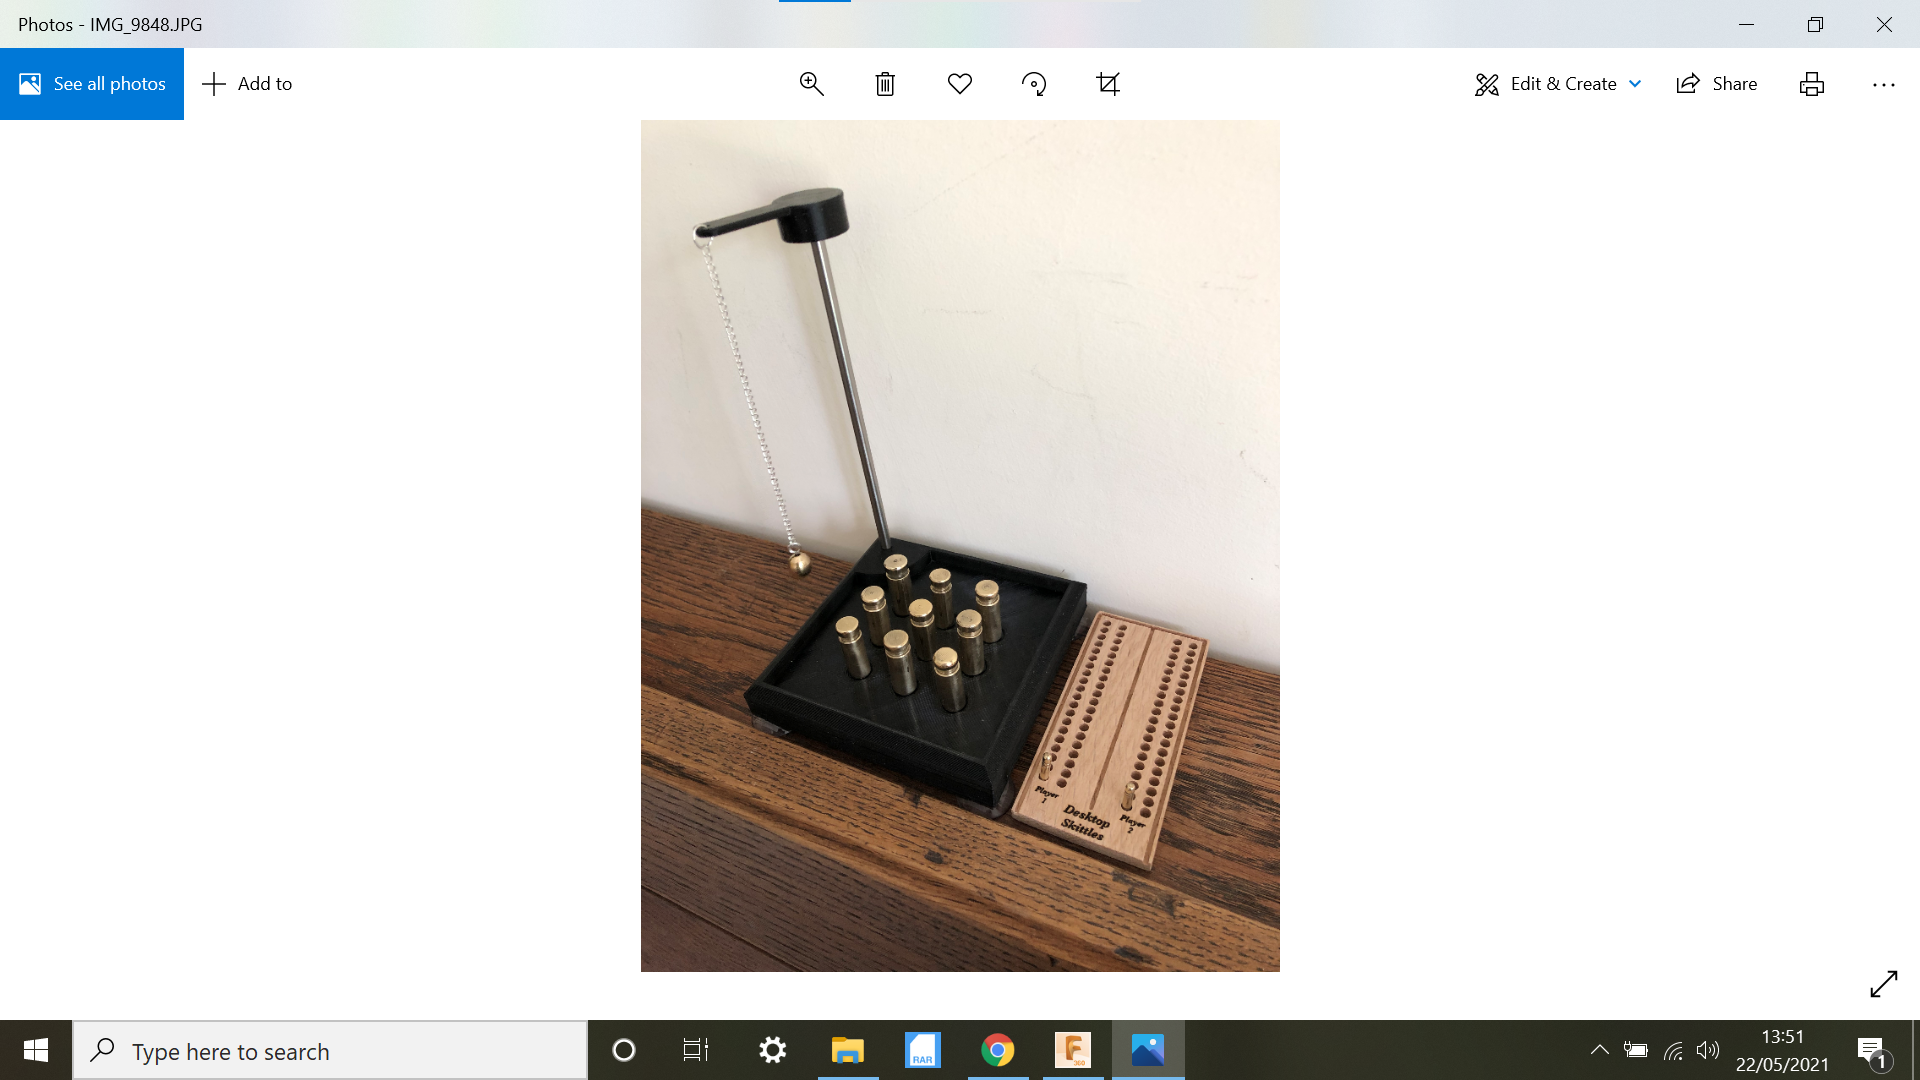
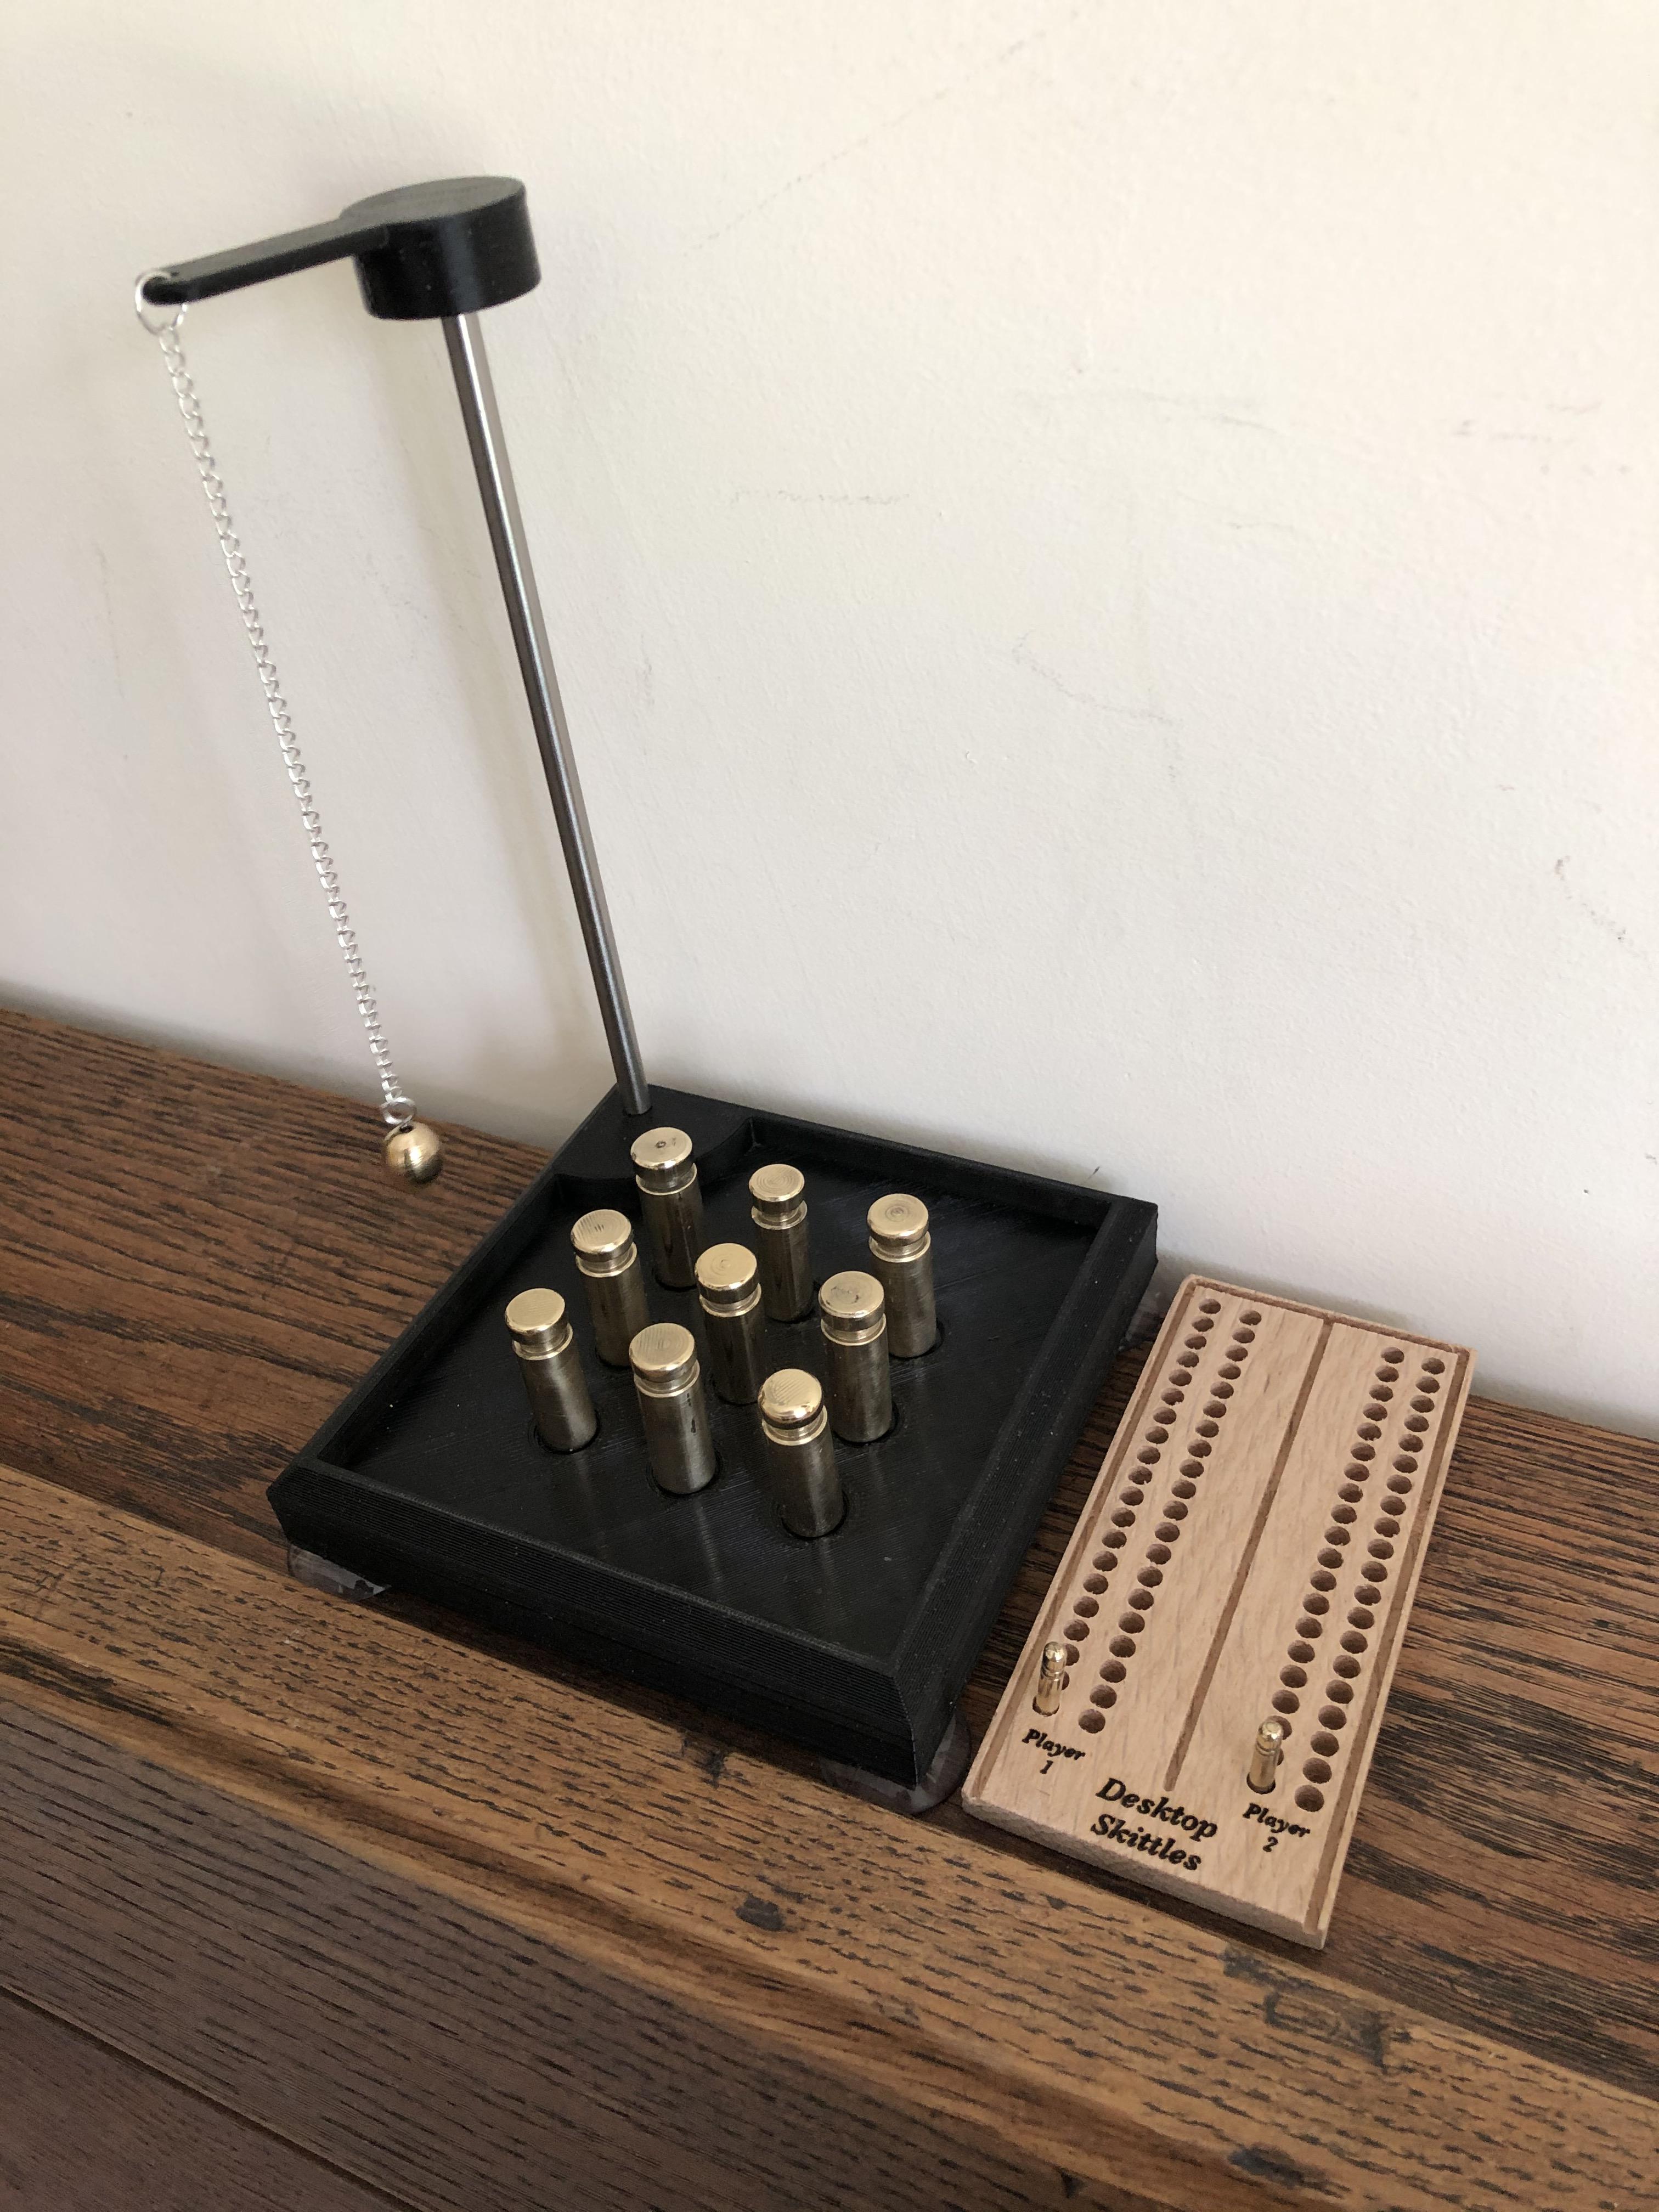
There we have it, a useable Desktop skittle set.
I made a small brass ball and connected it to a piece of chain.
I was going to connect pieces of cord to the bottom part of the skittles, the idea being that the cords would be connected together and a quick tug would re-seat the skittles, the idea never worked out, I think the circumference of the skittles was too small and the skittles need to fall freely anyway.
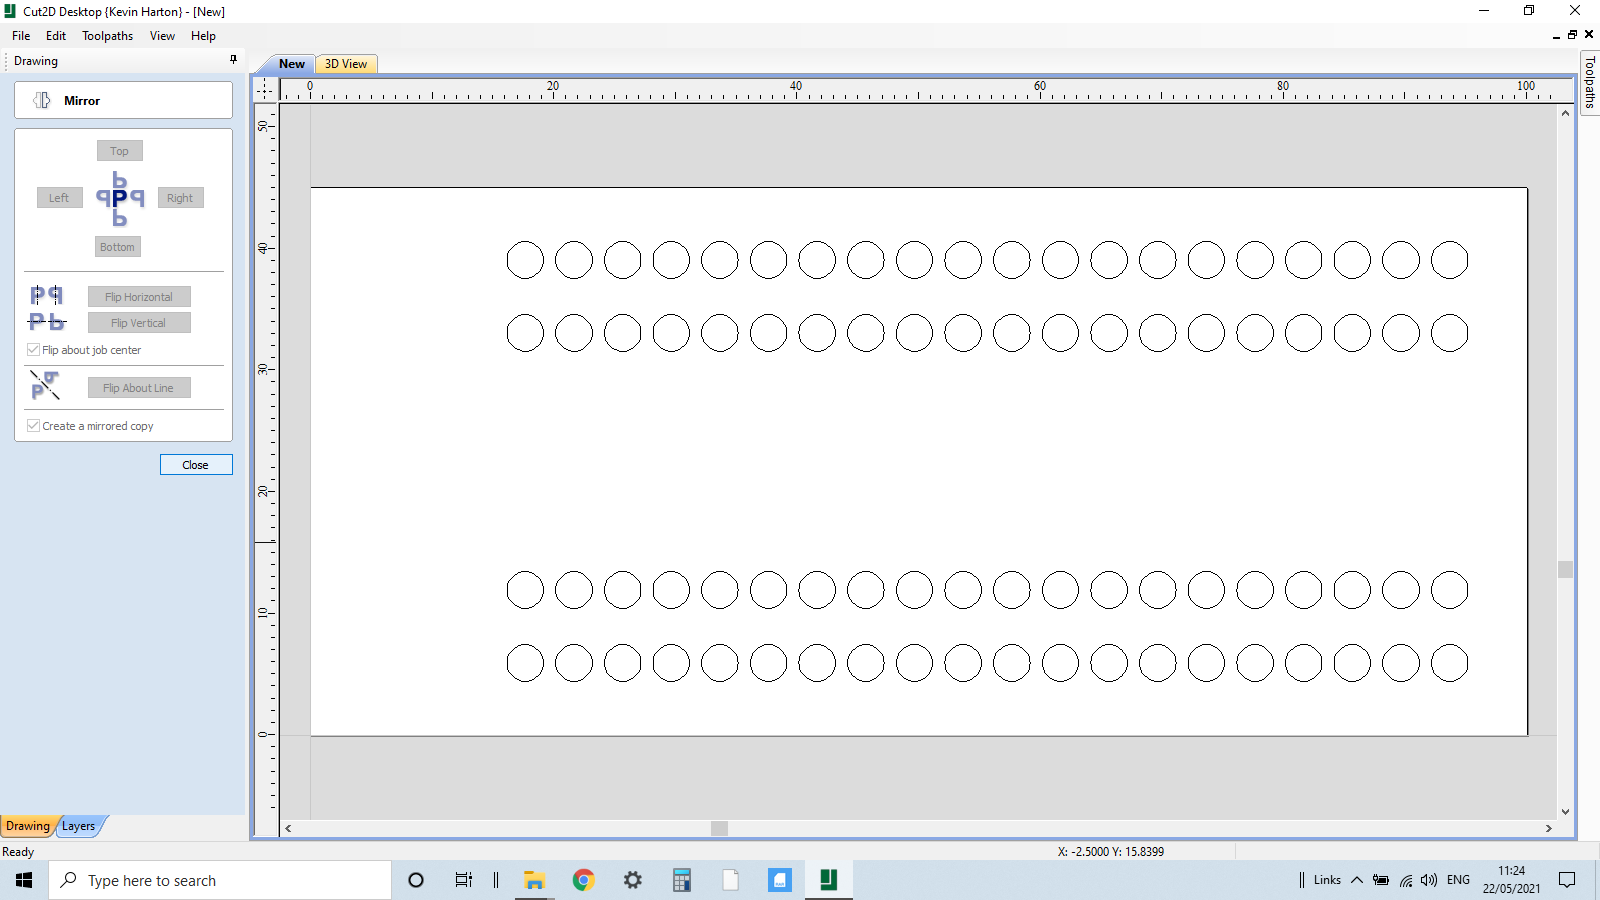
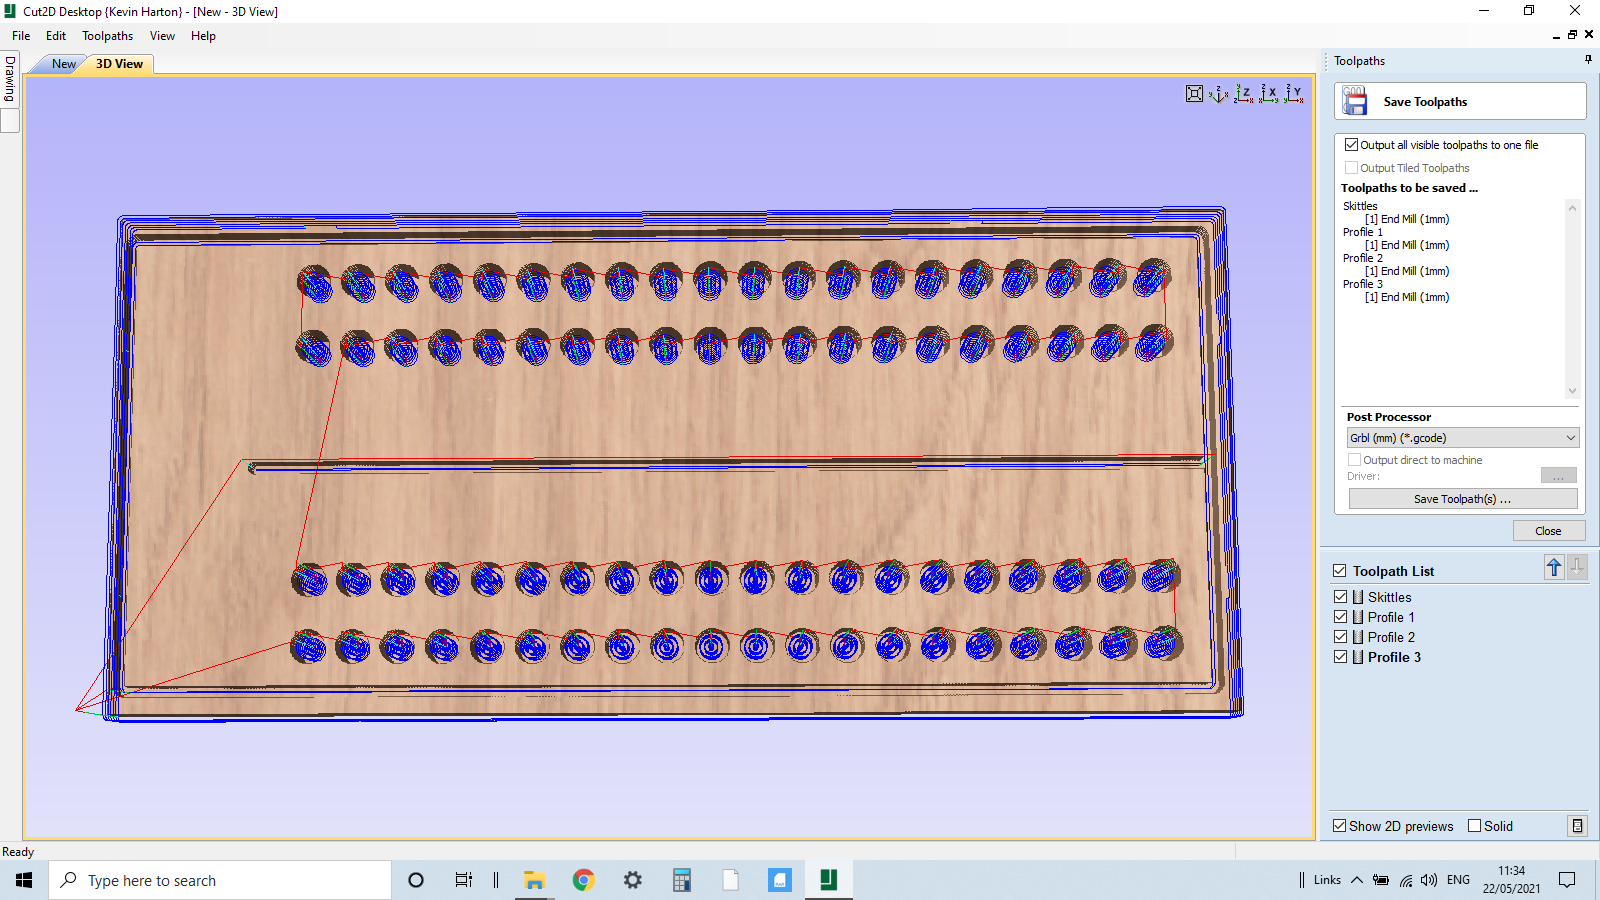
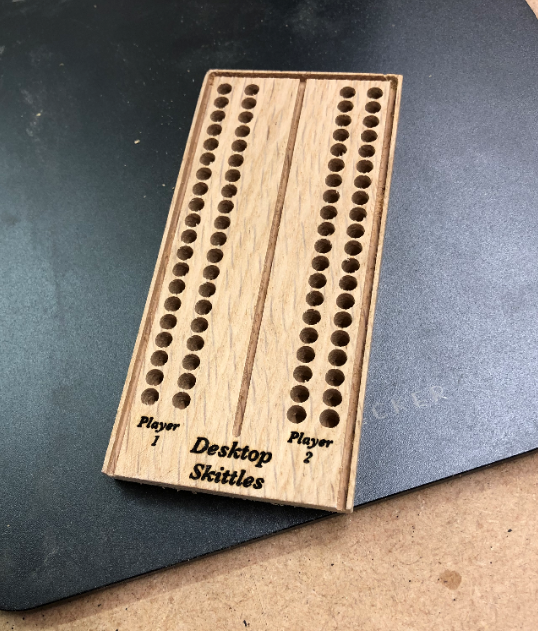
I made a little peg board using Vetric Cut2d created some holes using the Linear array Tab and then a rectangle and a separation line.
Thanks for looking!