Desk Name Tags
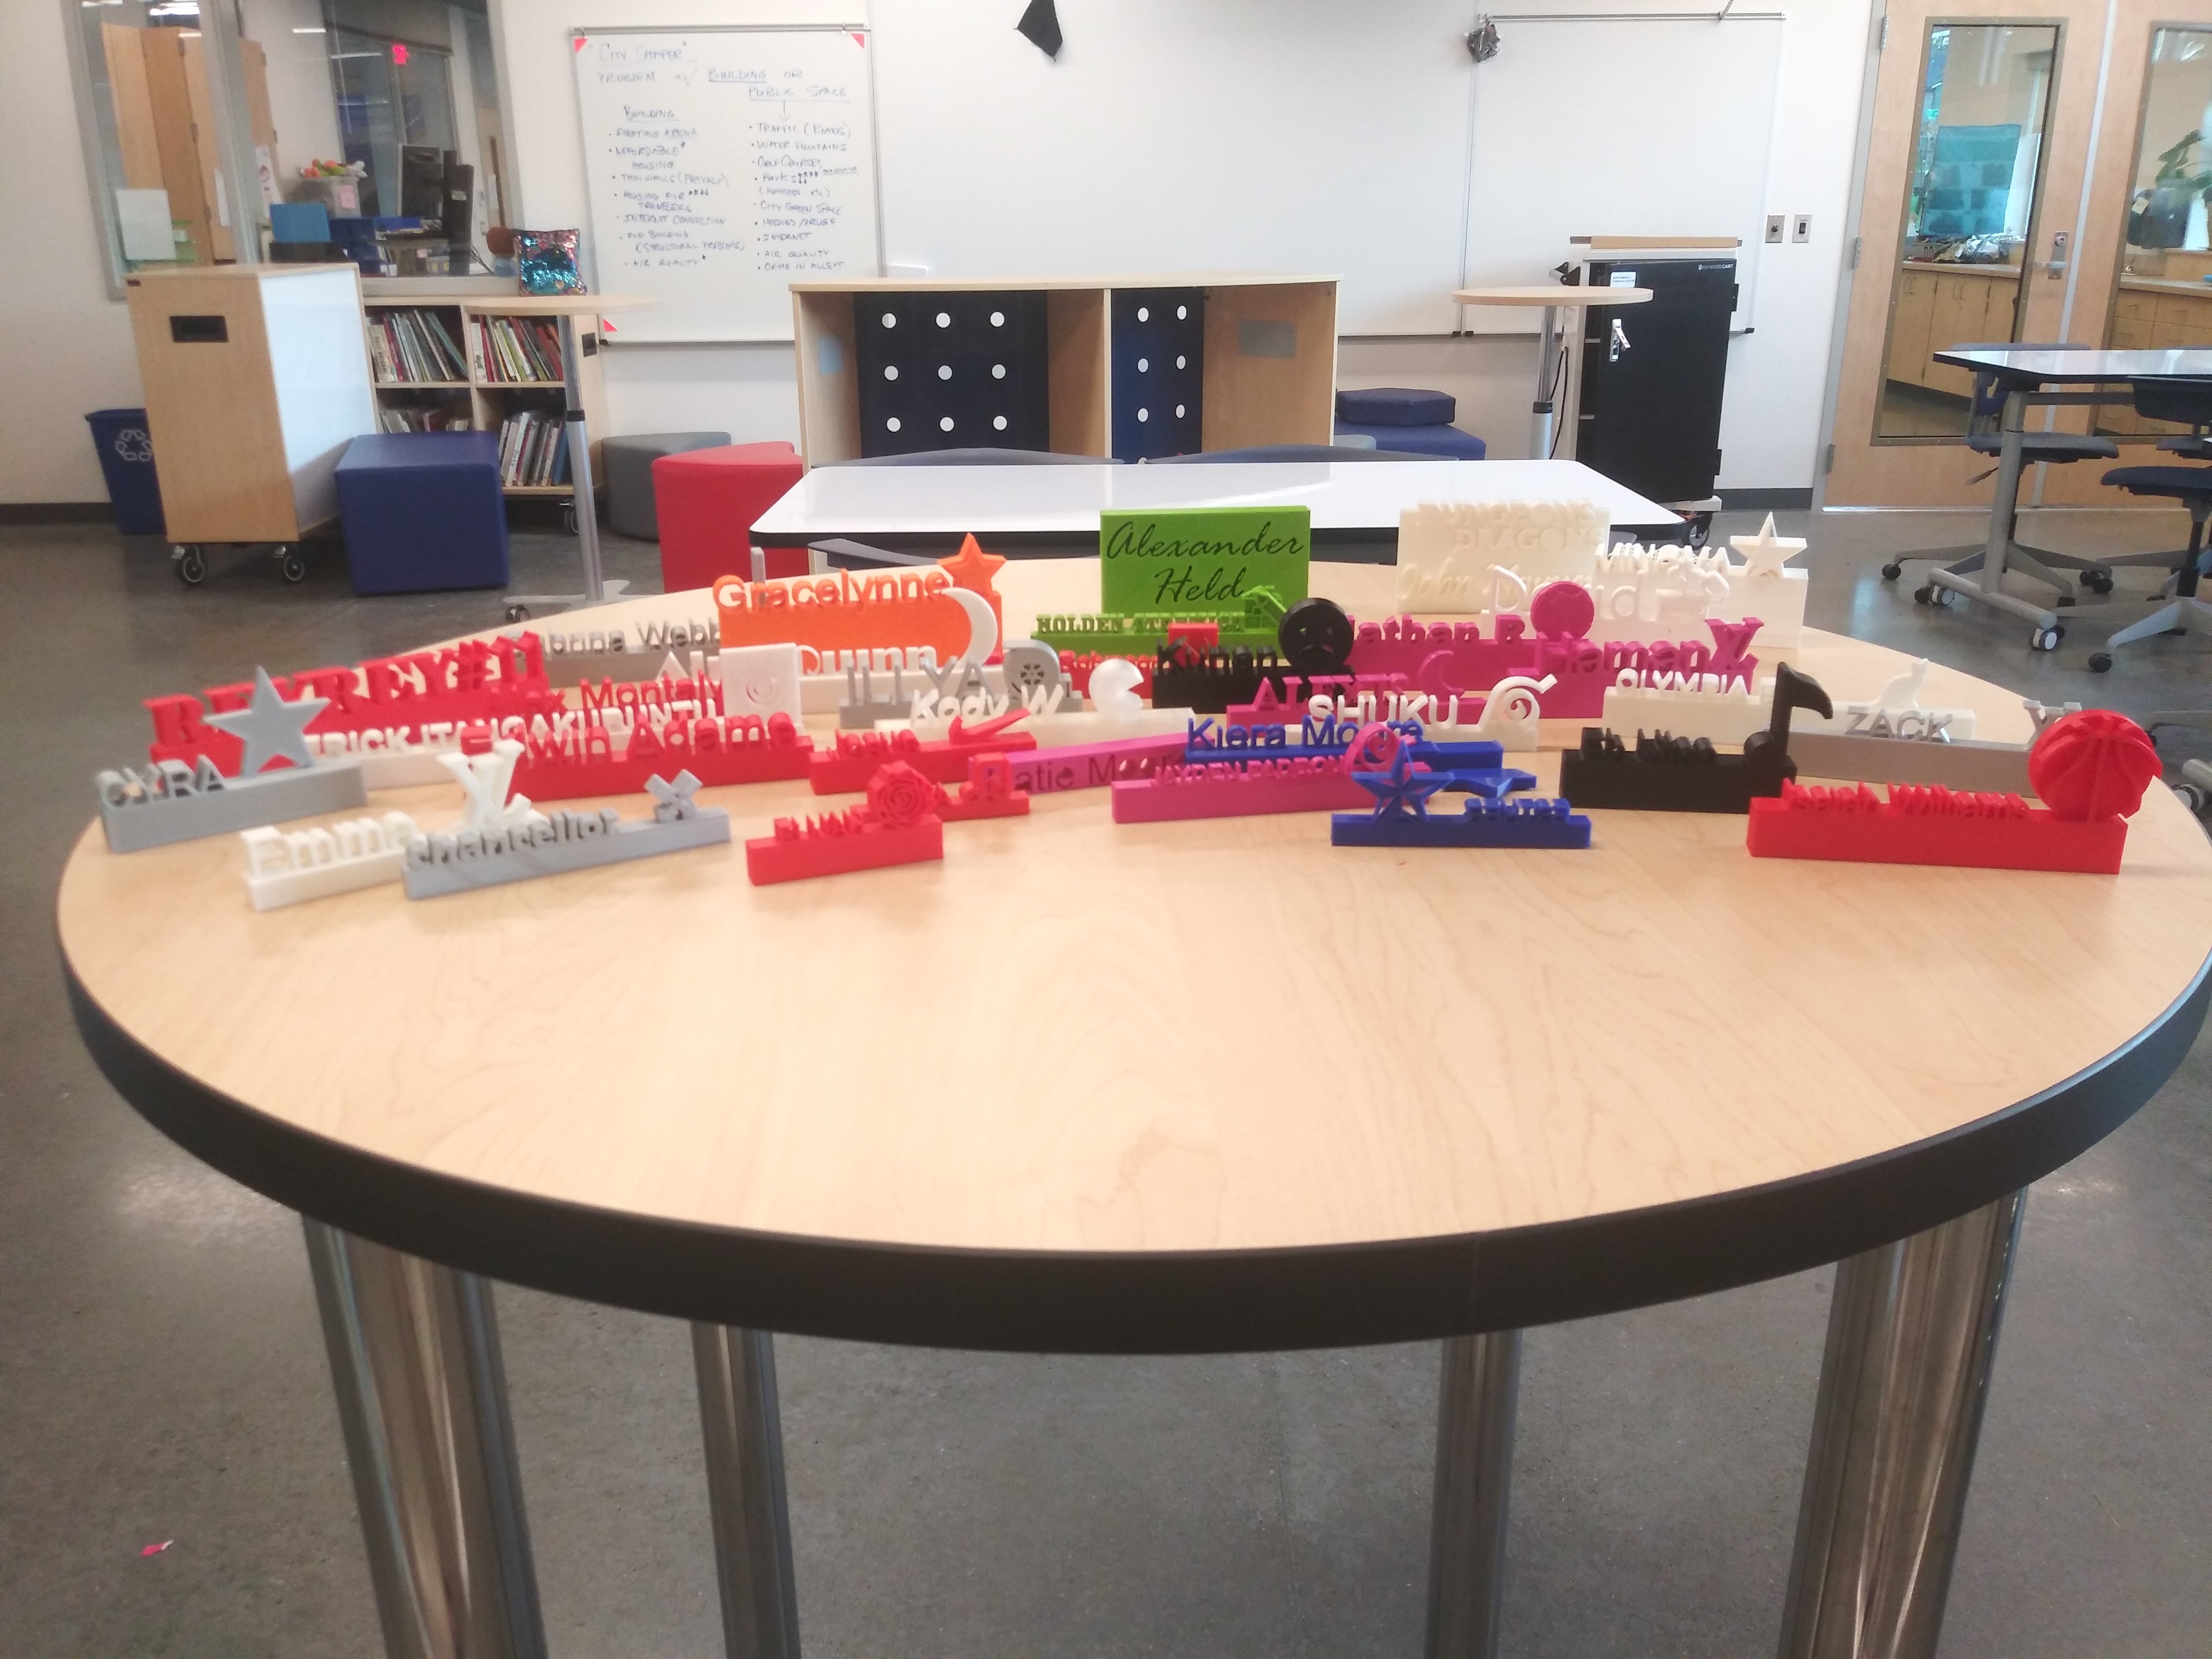
This is our first project each semester for an exploratory class in Digital Manufacturing for 8th graders. These students are brand new to computer aided design, so we start with this project to introduce the basic tools and interface within our schools' chosen CAD program, Autodesk Fusion 360.
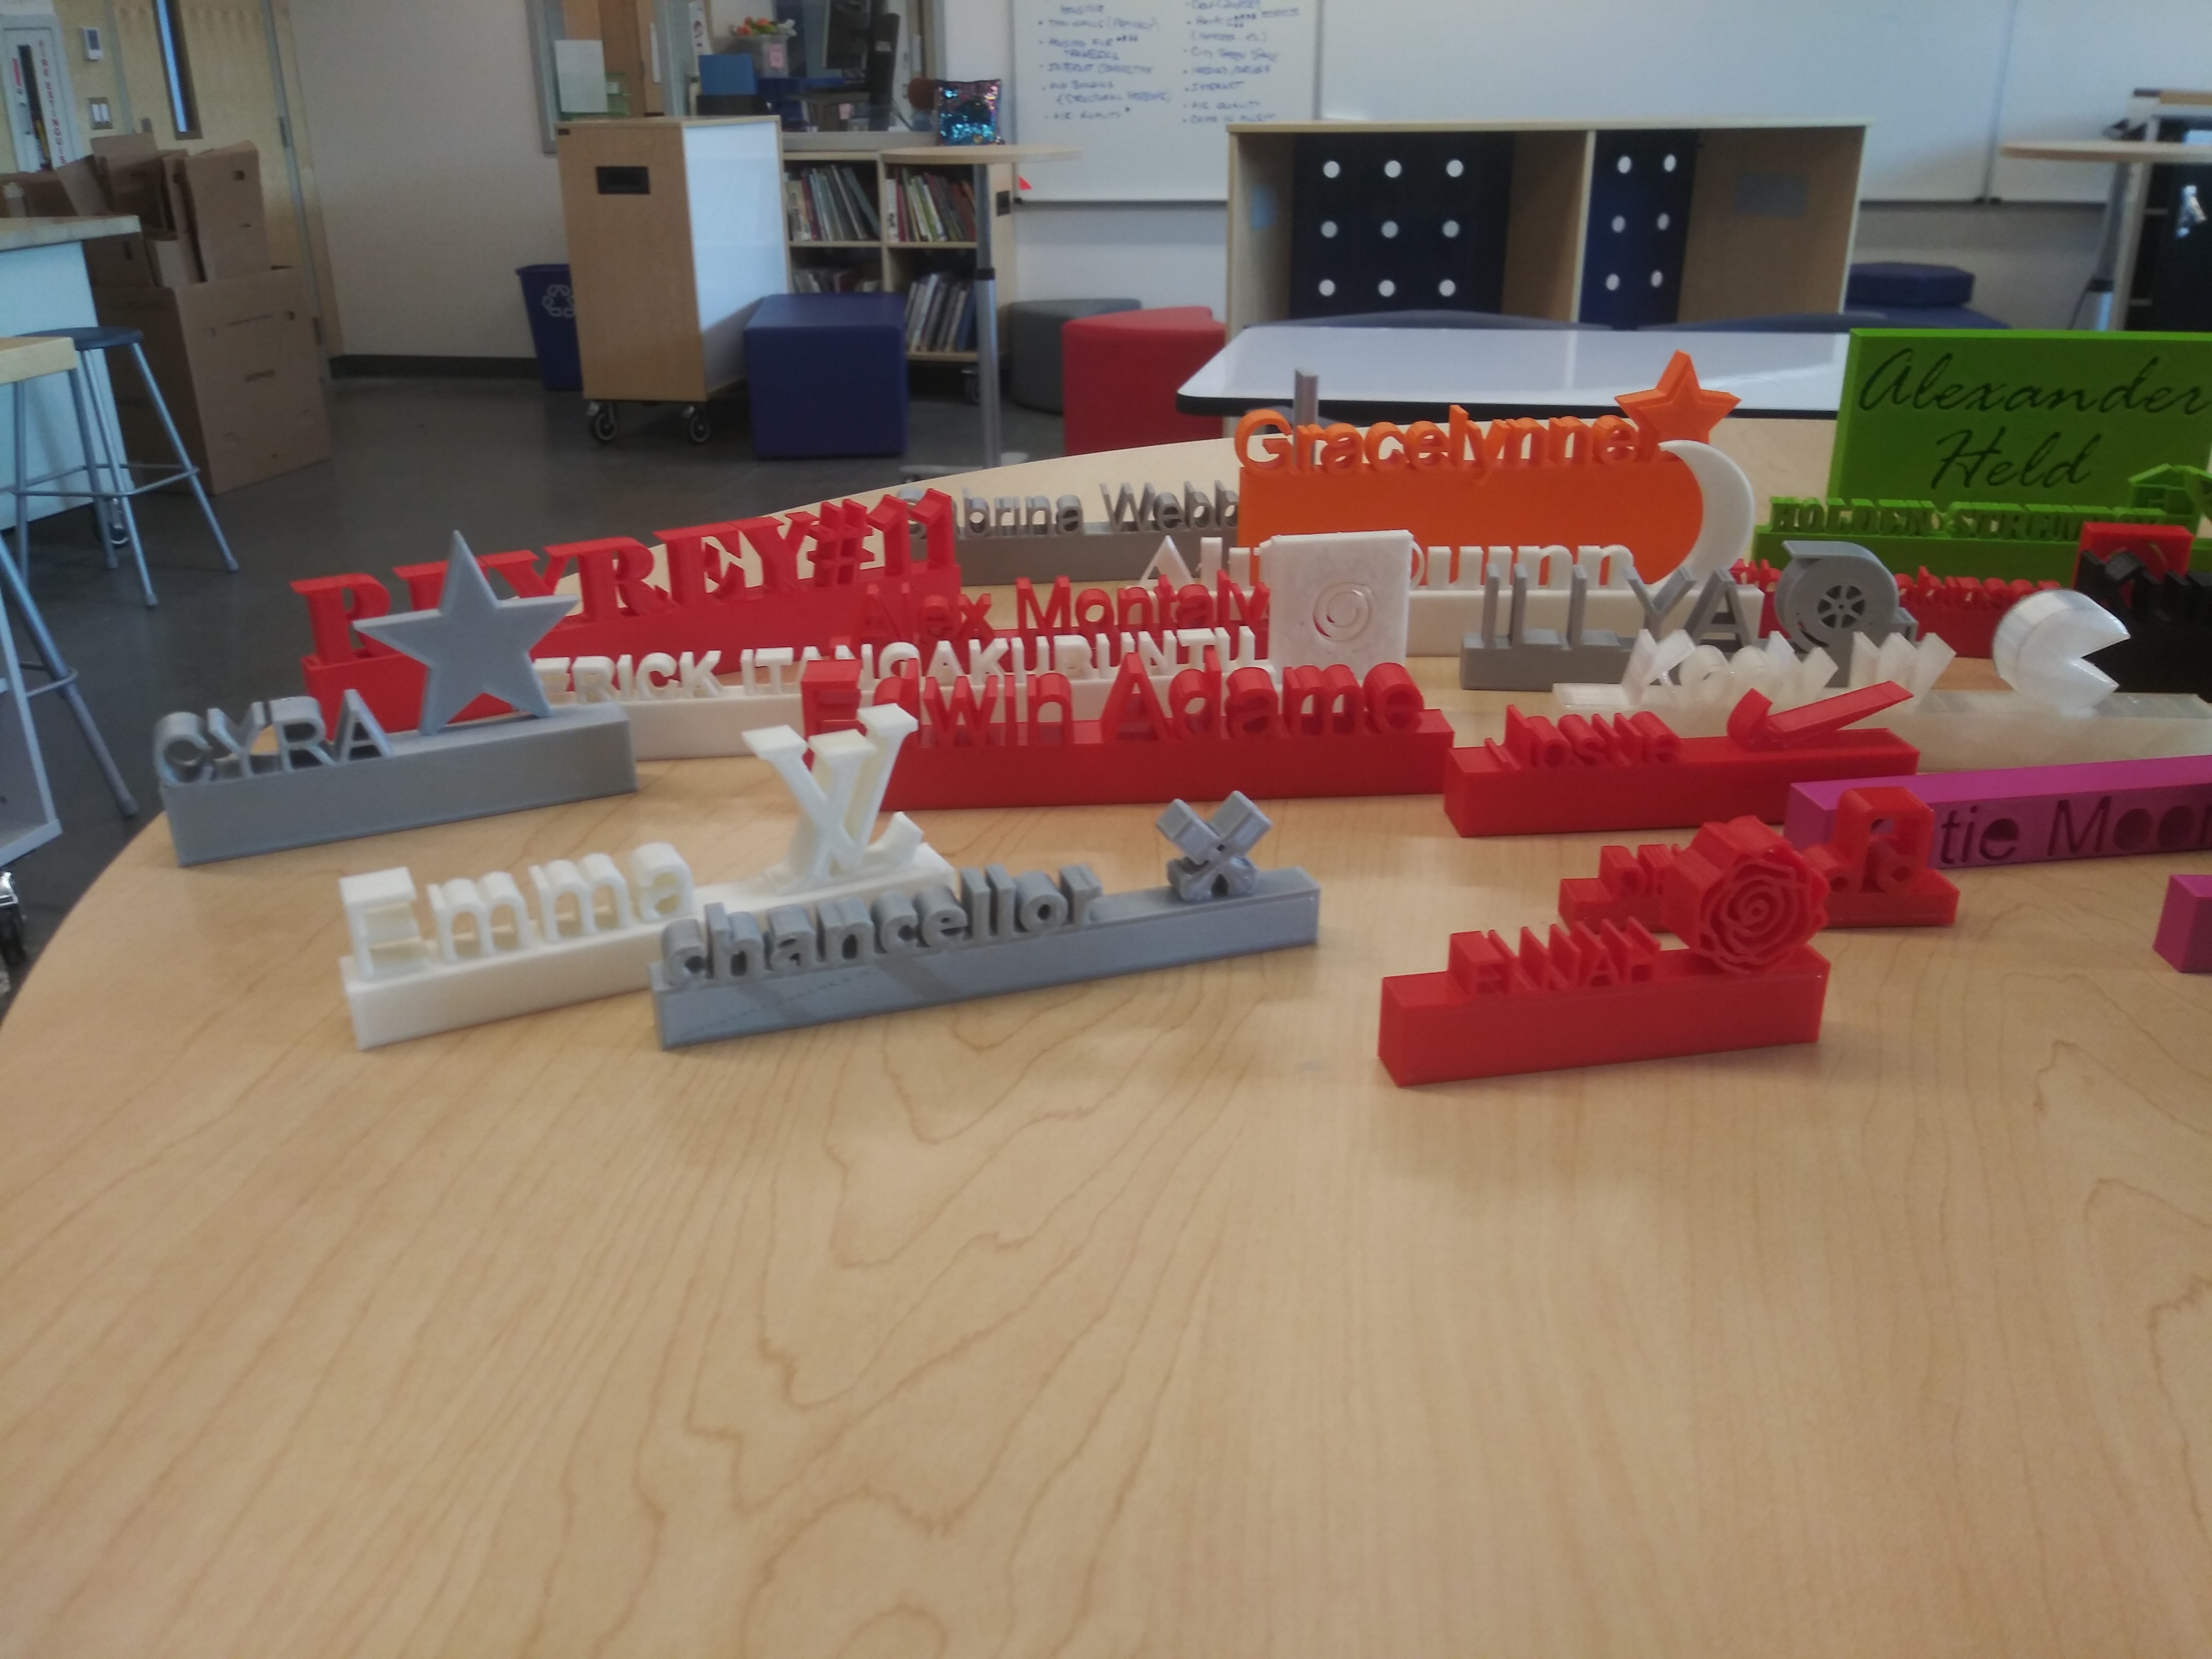
This is a great beginner project because it uses only a few simple tools, introduces a few new vocabulary terms, and gets you success very quickly. Also, many students names that they will never find on those "personalized name" things you see around at shops, so this is their first time having a "manufactured" item with their name on it. Bonus, it gives the kids a great official name marker for their desks.
Standards:
I can relate 2D shapes to 3D shapes
I can use the basic tools in a computer aided drafting program
Supplies
CAD program (we use Fusion 360)
3D printer
Sketch a Rectangle
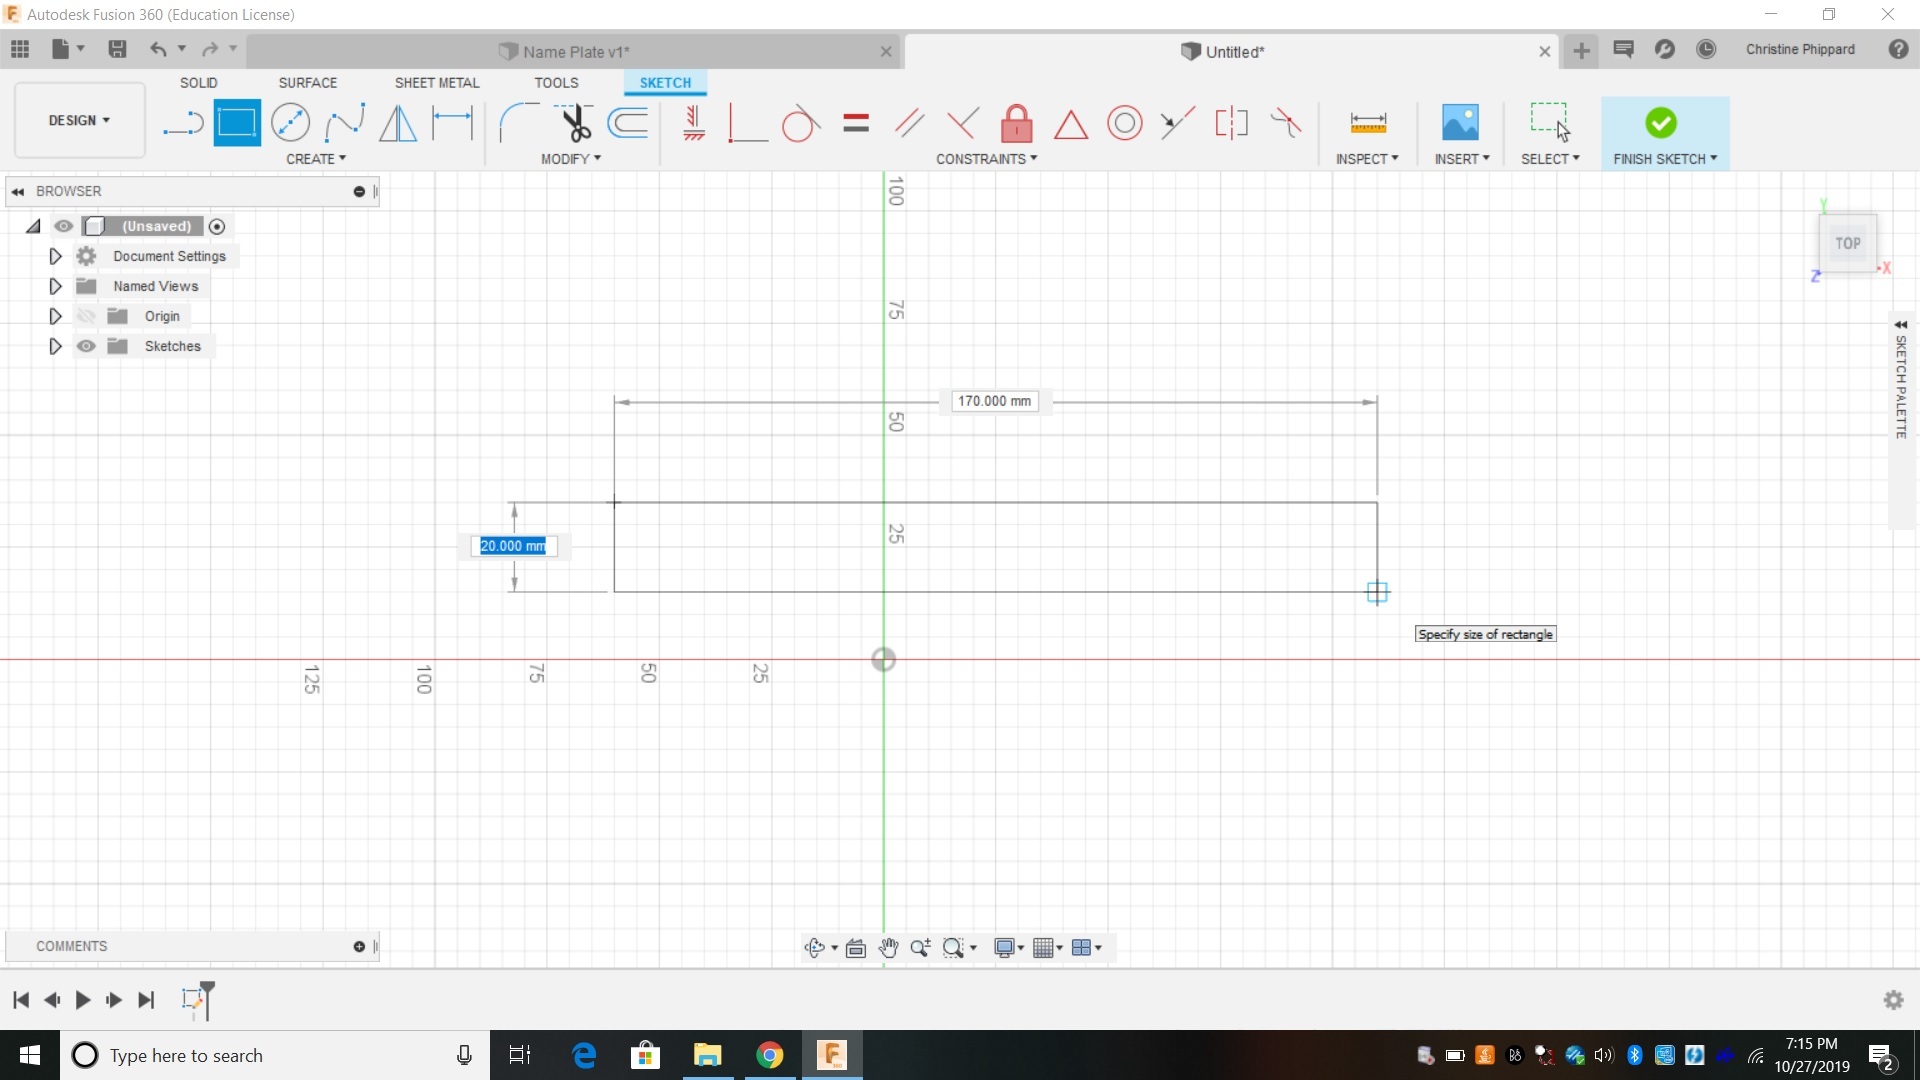
The SKETCH environment is where we make a 2D drawing of the object that we want to make 3D.
Our Name Tags have three parts: A rectangular base, our name, and a symbol/picture. We will break down the tag into these three parts. As you become more comfortable with Fusion 360, the whole project could be done quickly in one SKETCH.
Part 1 is the rectangle.
- Choose CREATE-->SKETCH.
- Click on the PLANE (flat surface) where you want to build this- here, we choose the "floor", which for my class should be your XY plane.
- You will be moved to the sketch workspace.
- Choose the 2-Point Rectangle tool (from the create menu, or key R)
- Draw a rectangle by clicking two points.
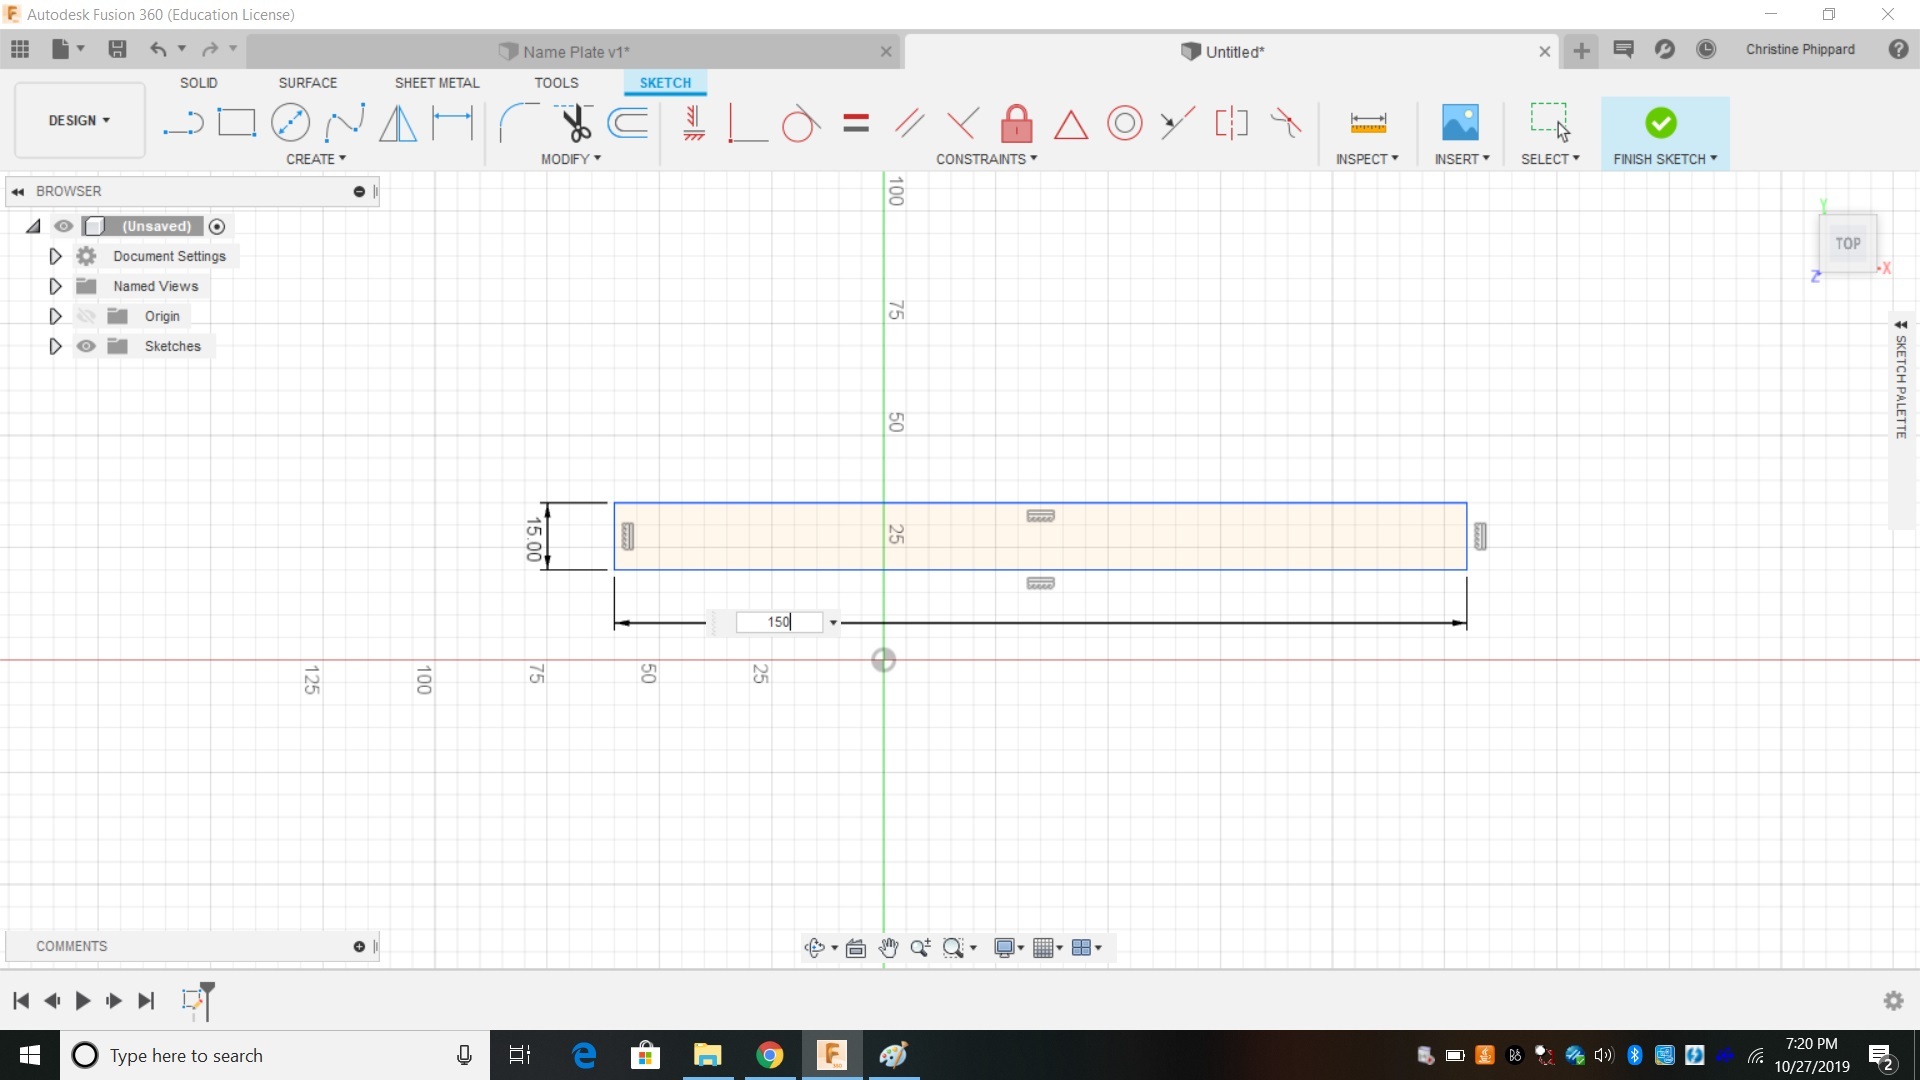
- You can add dimensions when drawing the rectangle, or afterwards using the DIMENSION tool.
- On the keyboard, click D for dimension. Click each line to add a dimension.
- For most names, the rectangles have been about 15 mm x 120 mm. (you can change the dimension later if needed)
Extrude Your Rectangle
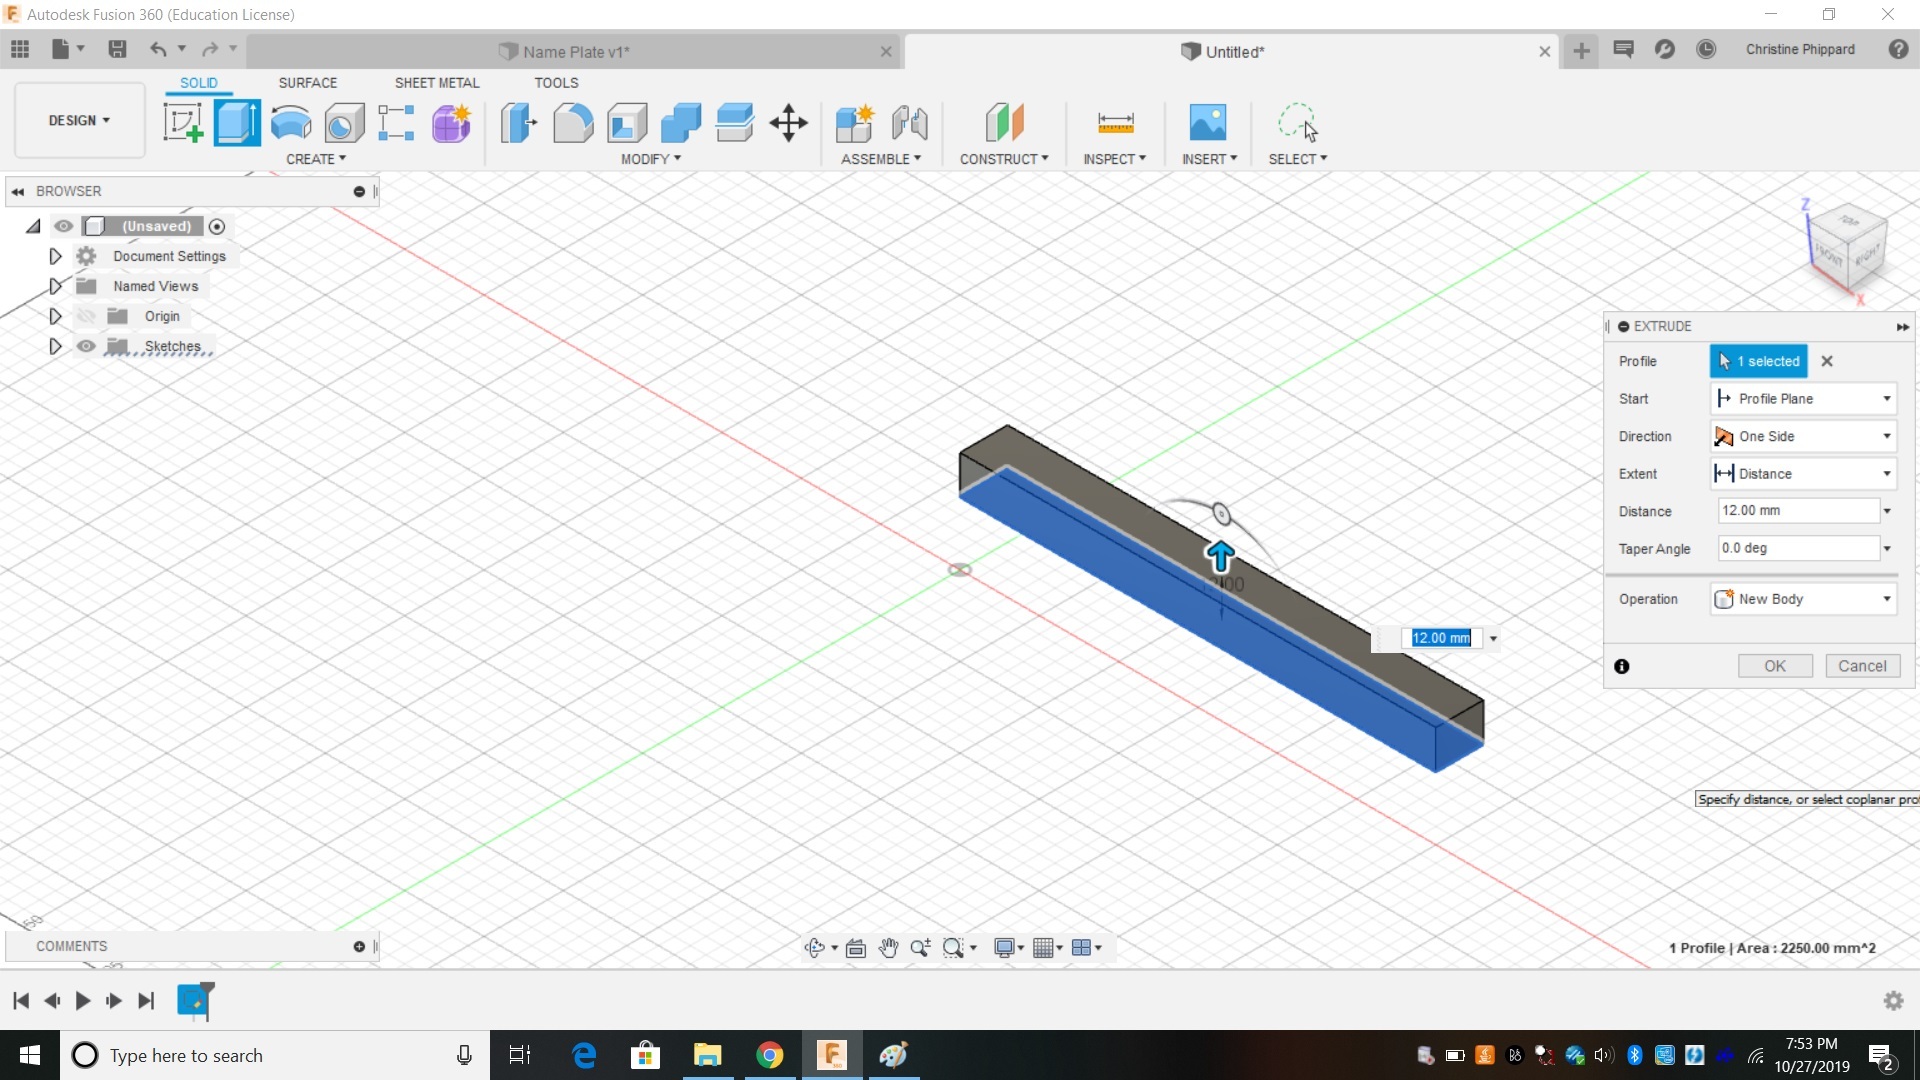
- Click "Finish Sketch"
- Click on your rectangle
- Click "E" on your keyboard to access the extrude tool. The extrude tool will take a shape and pull it out to make it 3 dimensional.
- For distance, we have found that 12 mm is about right for most of the name tags.
Hooray! You made a 3D shape. :)
Add Your Name
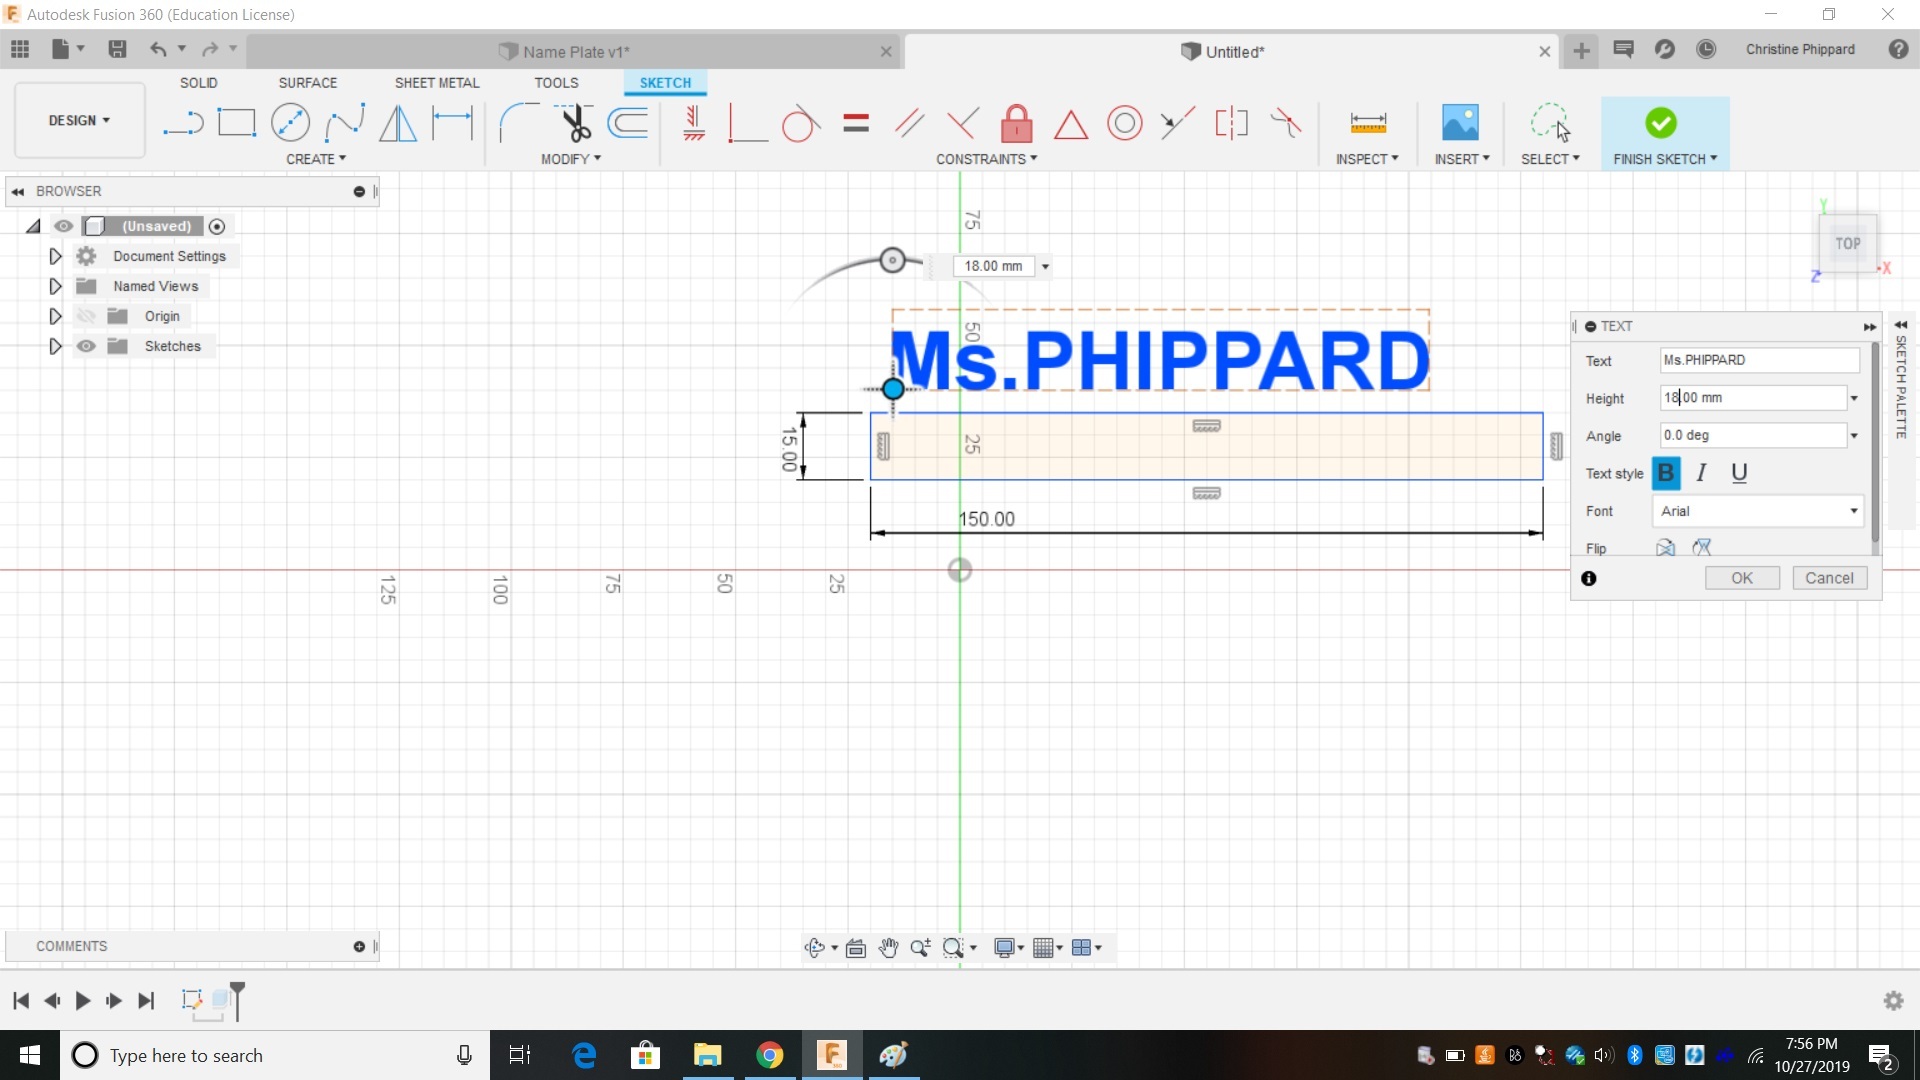
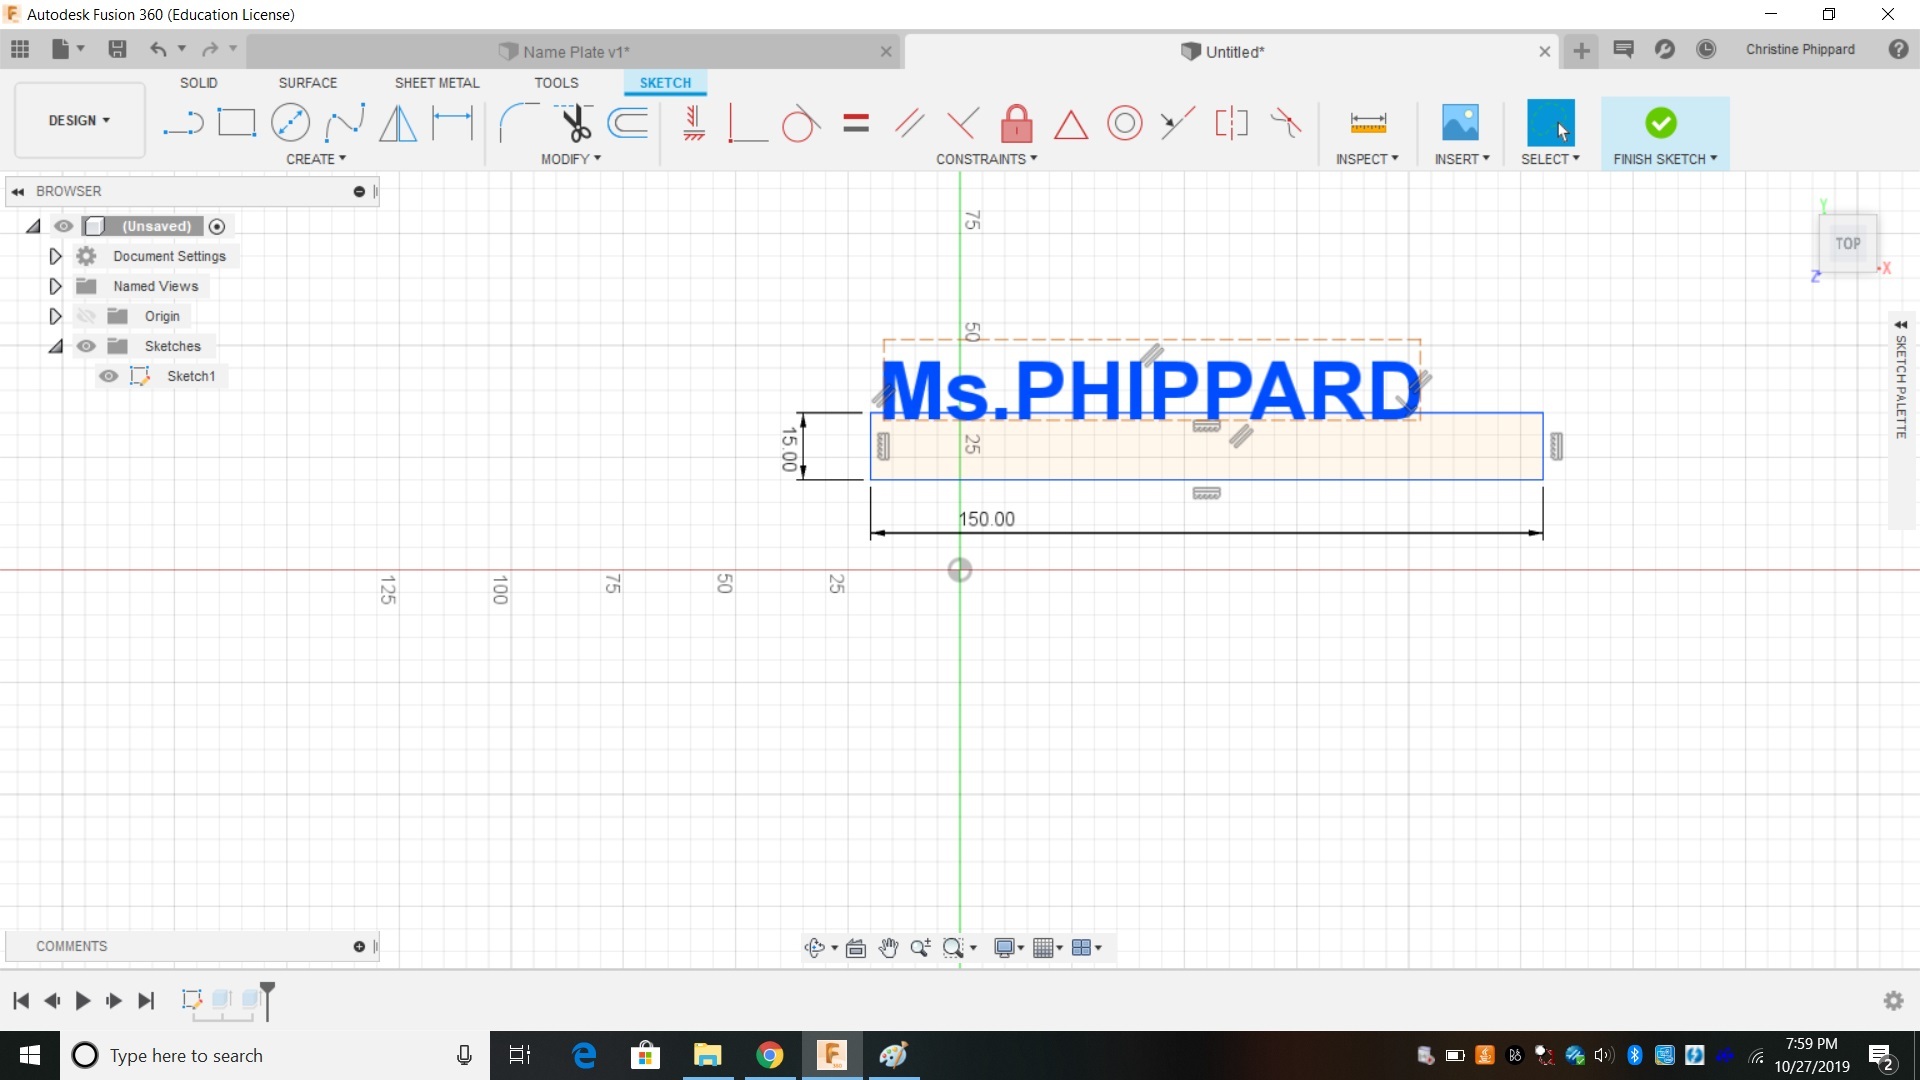
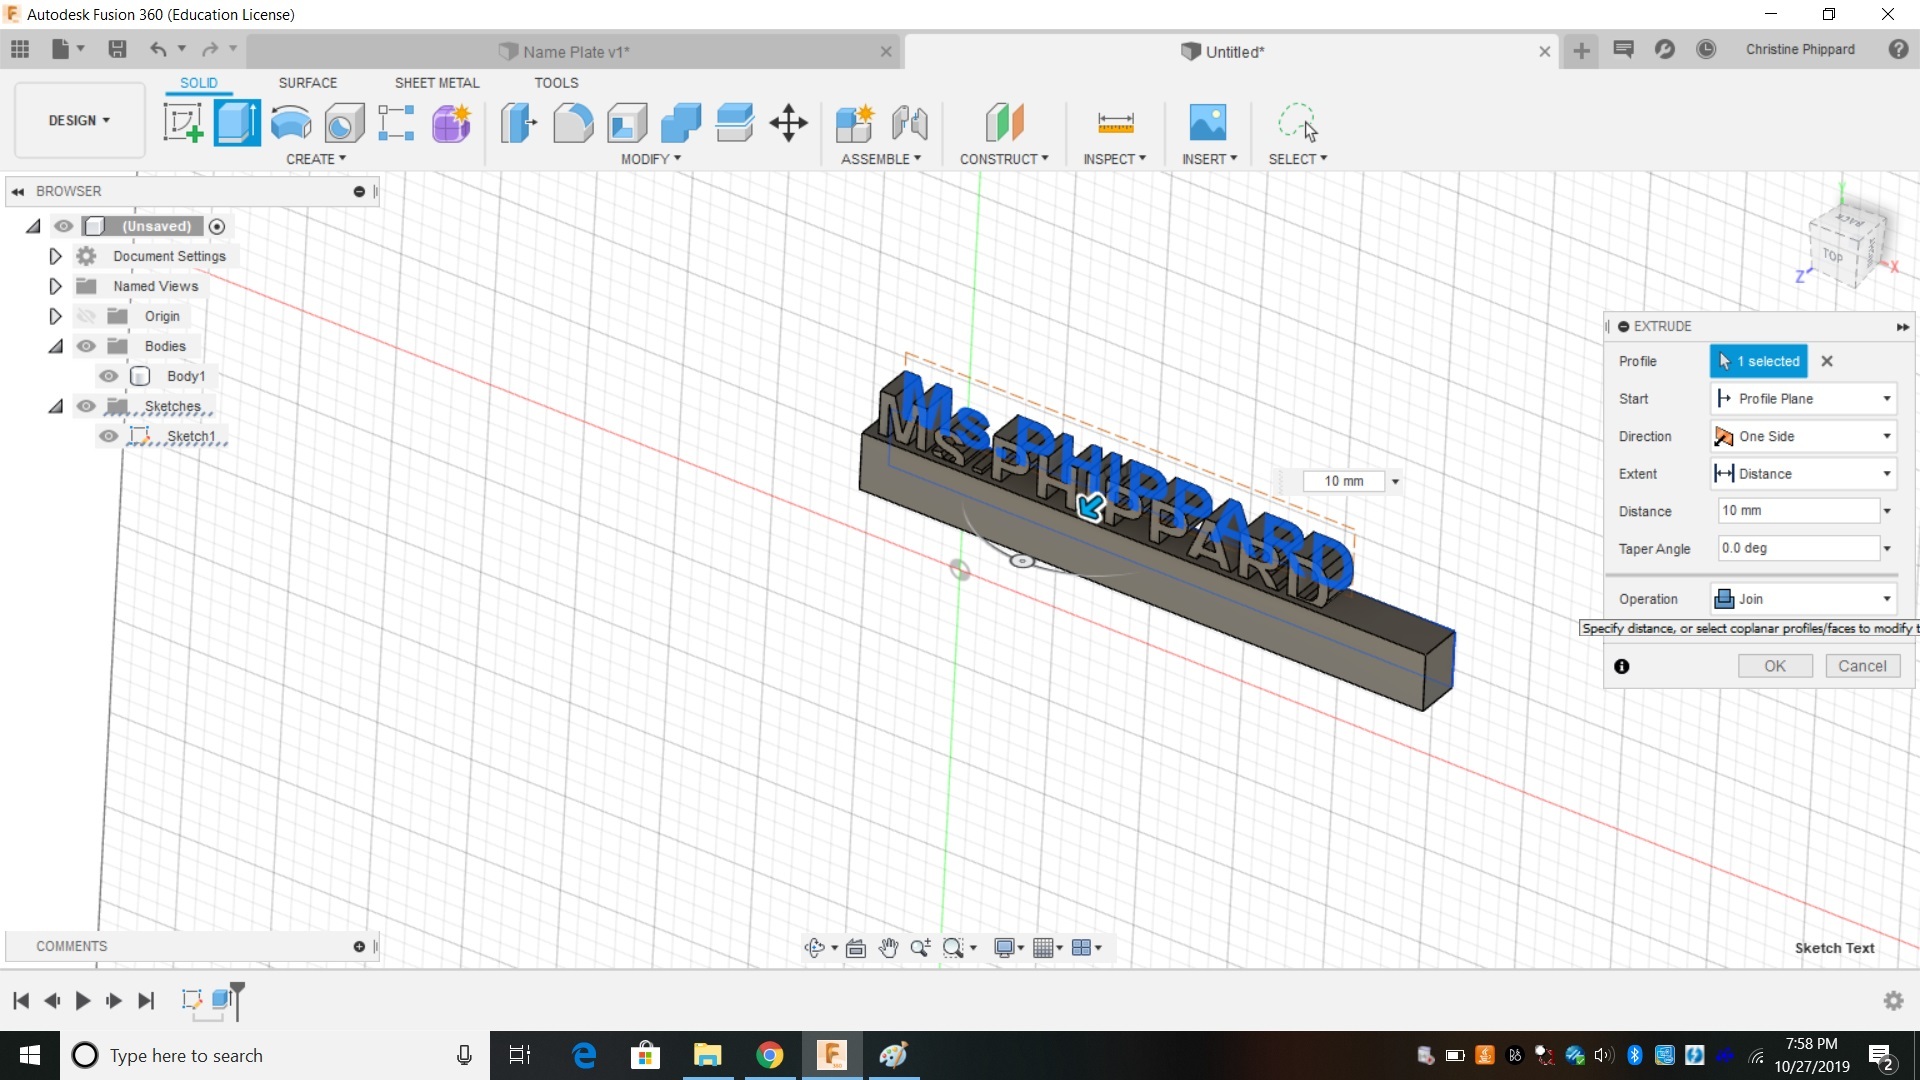
One useful feature of Fusion 360 is that you can go back and EDIT previous actions. In this case, we are going to practice this by editing the SKETCH that we made of the rectangle.
To edit a sketch, you use the TIMELINE, found at the bottom left of your screen. You find the feature that you wish to edit, and either double click , or right click and select "edit sketch"
Now that we have re-opened the sketch, we can add our names.
- Click the CREATE menu and find the TEXT tool
- Click anywhere on the sketch plane
- Type in the name you wish to have on your name tag
- To change the size of the name, change the height of the letters. Most use 15-20 mm.
- Choose your font.
- some fonts will throw errors and will not extrude later
- pay attention to hanging letters - anything that hangs into the rectangle may be cut off.
- pay attention to fonts with lots of "loose pieces"- anything disconnected won't end up as part of your final print.
- Hit enter to finalize your name (you can edit it later by double clicking it)
- Move the name so that it overlaps the rectangle by at least 1 mm
- Click "Finish Sketch"
Oh No! Our sketch is gone! (Don't panic!) Fusion has a habit of hiding a sketch once you use it.
- In the BROWSER to the left on your screen, click the arrow next to Sketches
- Click the EYE icon to unhide the sketch
- Now you can extrude! "E" key on your keyboard. Click the text for your name.
- Extrude the text 10 mm.
- Change the operation to JOIN (notice all the things you could do here- cut, new body, etc)
- GREAT! You have a Name!
Add an Icon
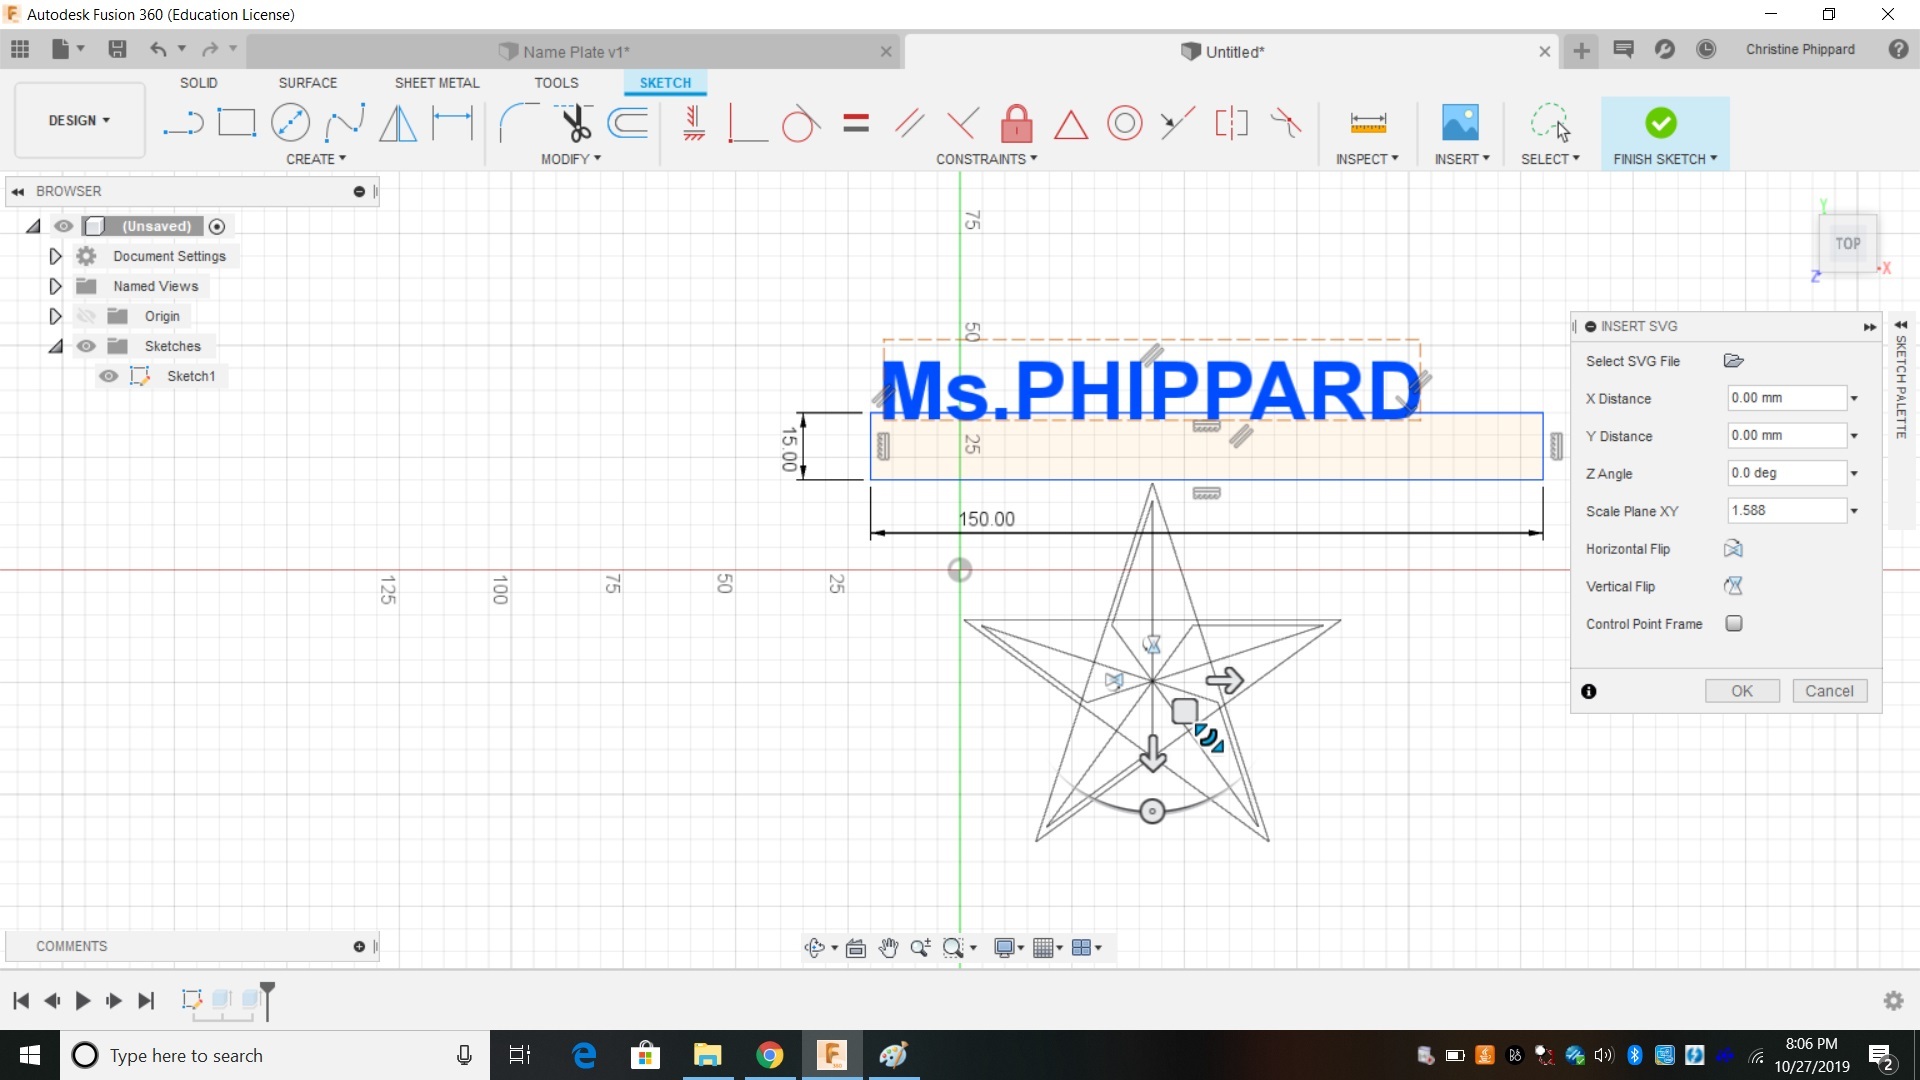
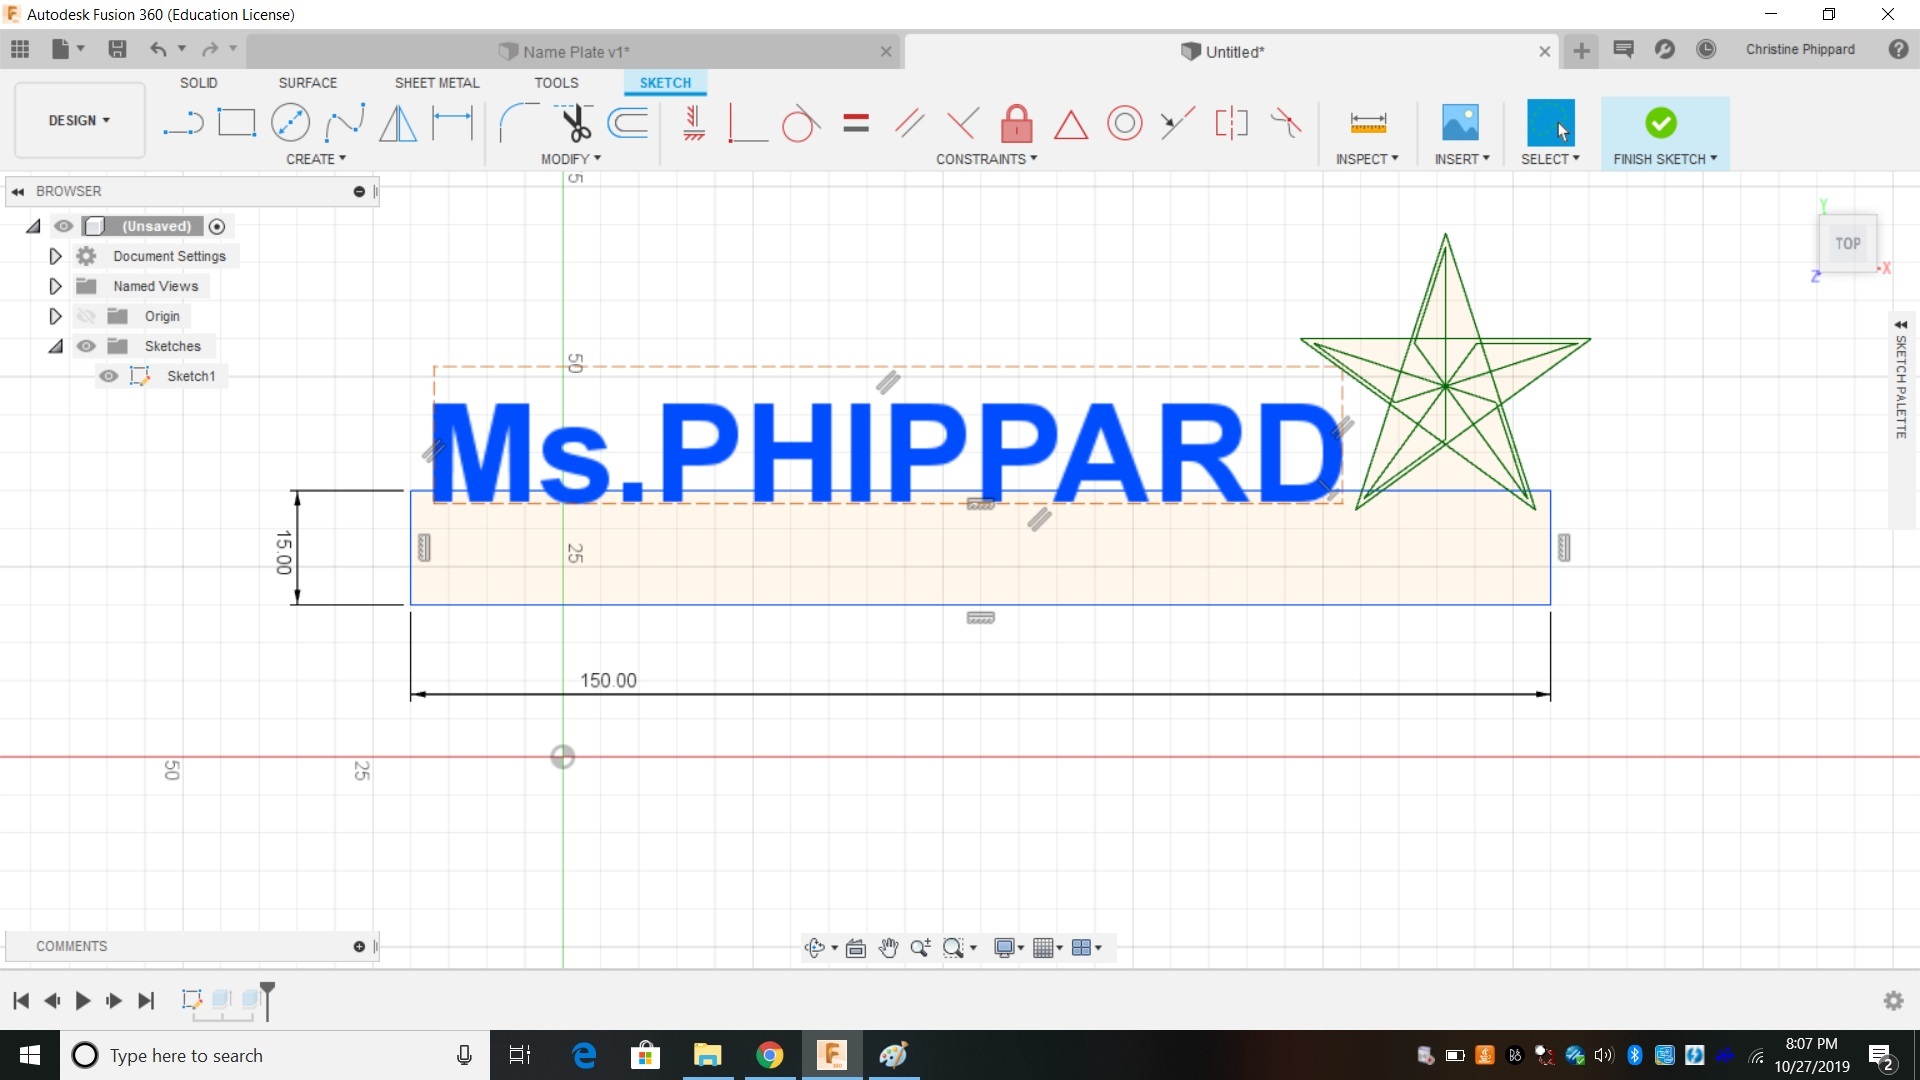
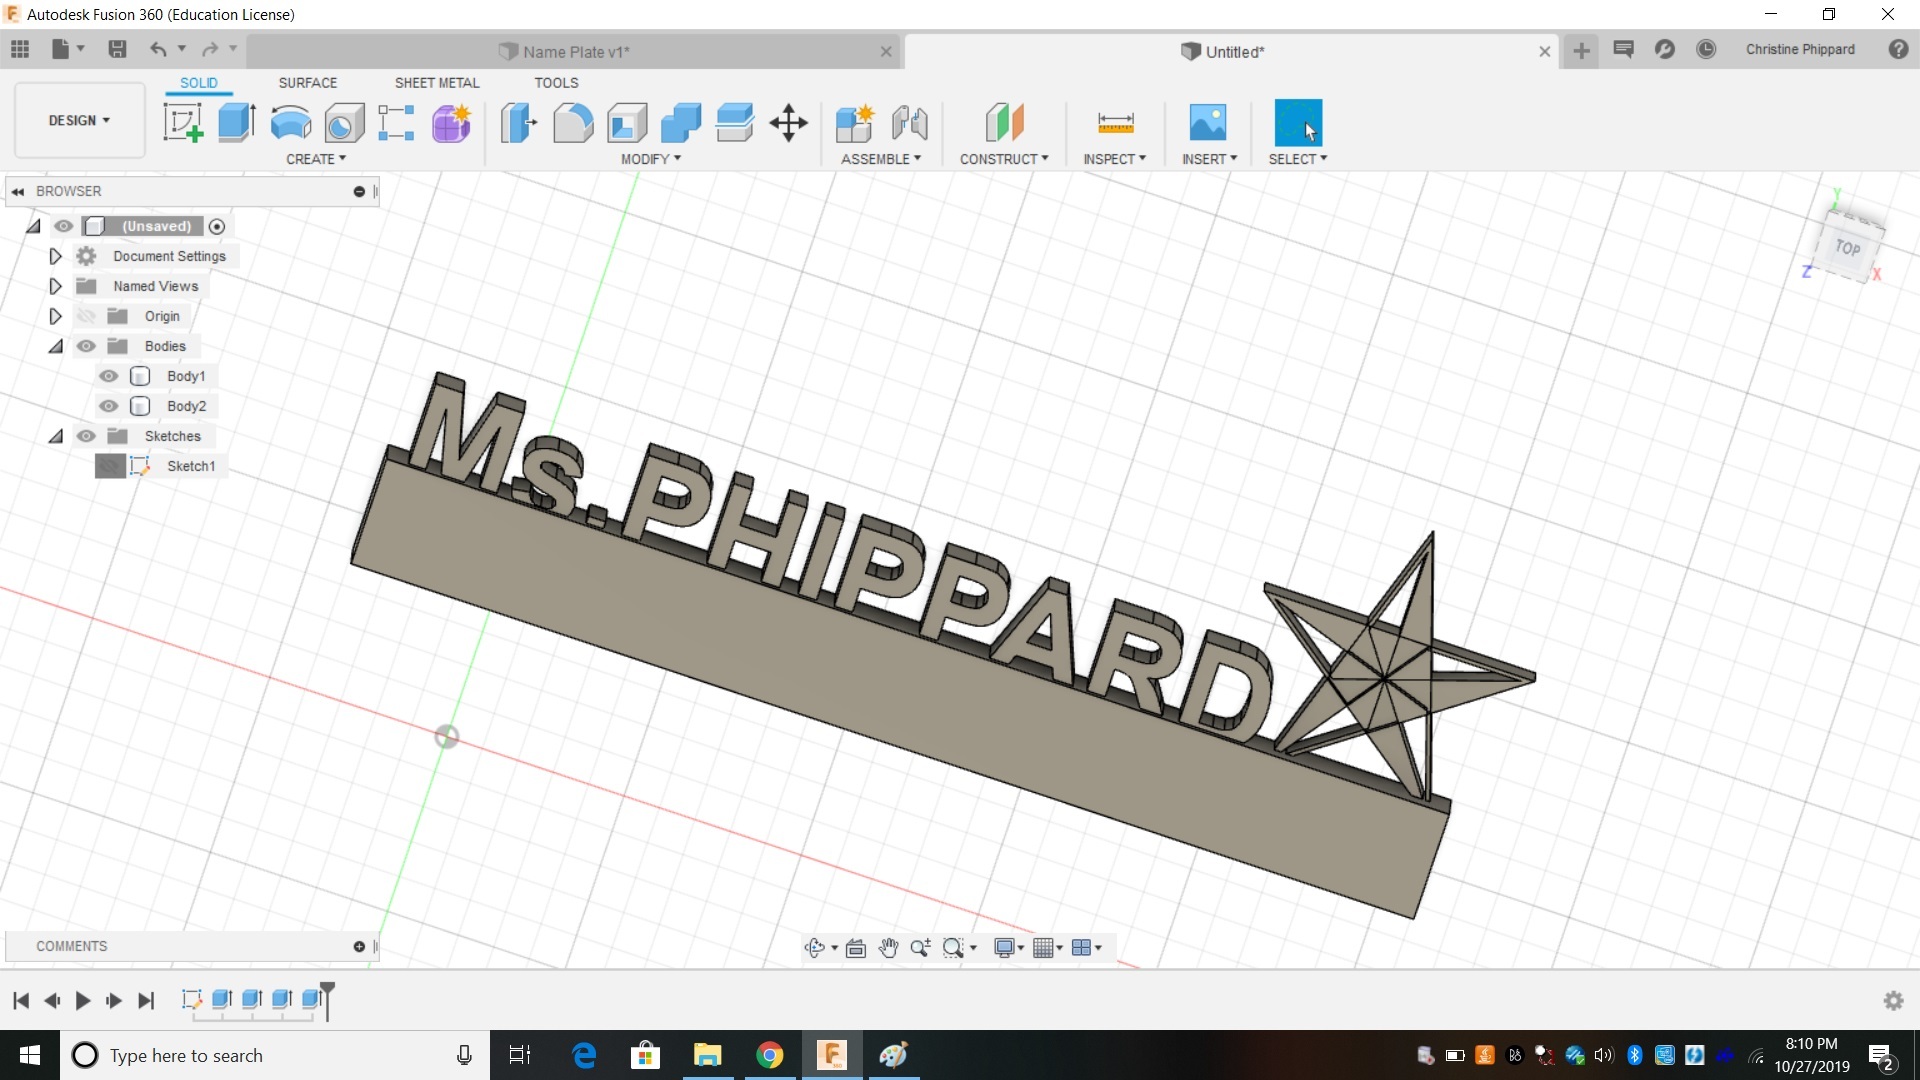
Double click in the TIMELINE to go back into the SKETCH.
We are going to use a feature in fusion called INSERT. This lets us insert a pre-drawn image file called an SVG file.
First, before doing this, go find an SVG file and download it. Make sure that you have permission to use the file (there are plenty of free creative-commons SVG files around). Have a file? Time to continue making!
In Fusion 360....
- Click INSERT MENU--> Insert SVG
- Click the folder and locate your SVG file on your computer
- Ta-Da! The SVG file appears! DON'T CLICK OK YET!
- The image usually is the wrong size and in the wrong place.
- It is best (way easier) to fix this now.
- The SQUARE on the image is a mover- click on it to drag the image around
- The little semi circle with two triangles is for SCALE- use it to resize your image
- The circle on an arc is for rotating the image.
- MOVE and SCALE the image. Get it exactly where you want it, THEN click ok.
- Once your SVG is in place, it will act like the rest of your sketch. Note: Only areas that shade in the tan color will be able to extrude. If you need to, you can add lines to your image to close areas to make them work.
- When you are satisfied, click "Stop Sketch"
Your SVG is ready to EXTRUDE. Remember- E on the keyboard.
TIP: This will be much more interesting if you extrude different parts of it different amounts. Just remember to set each extrude to "JOIN"
Details, Details
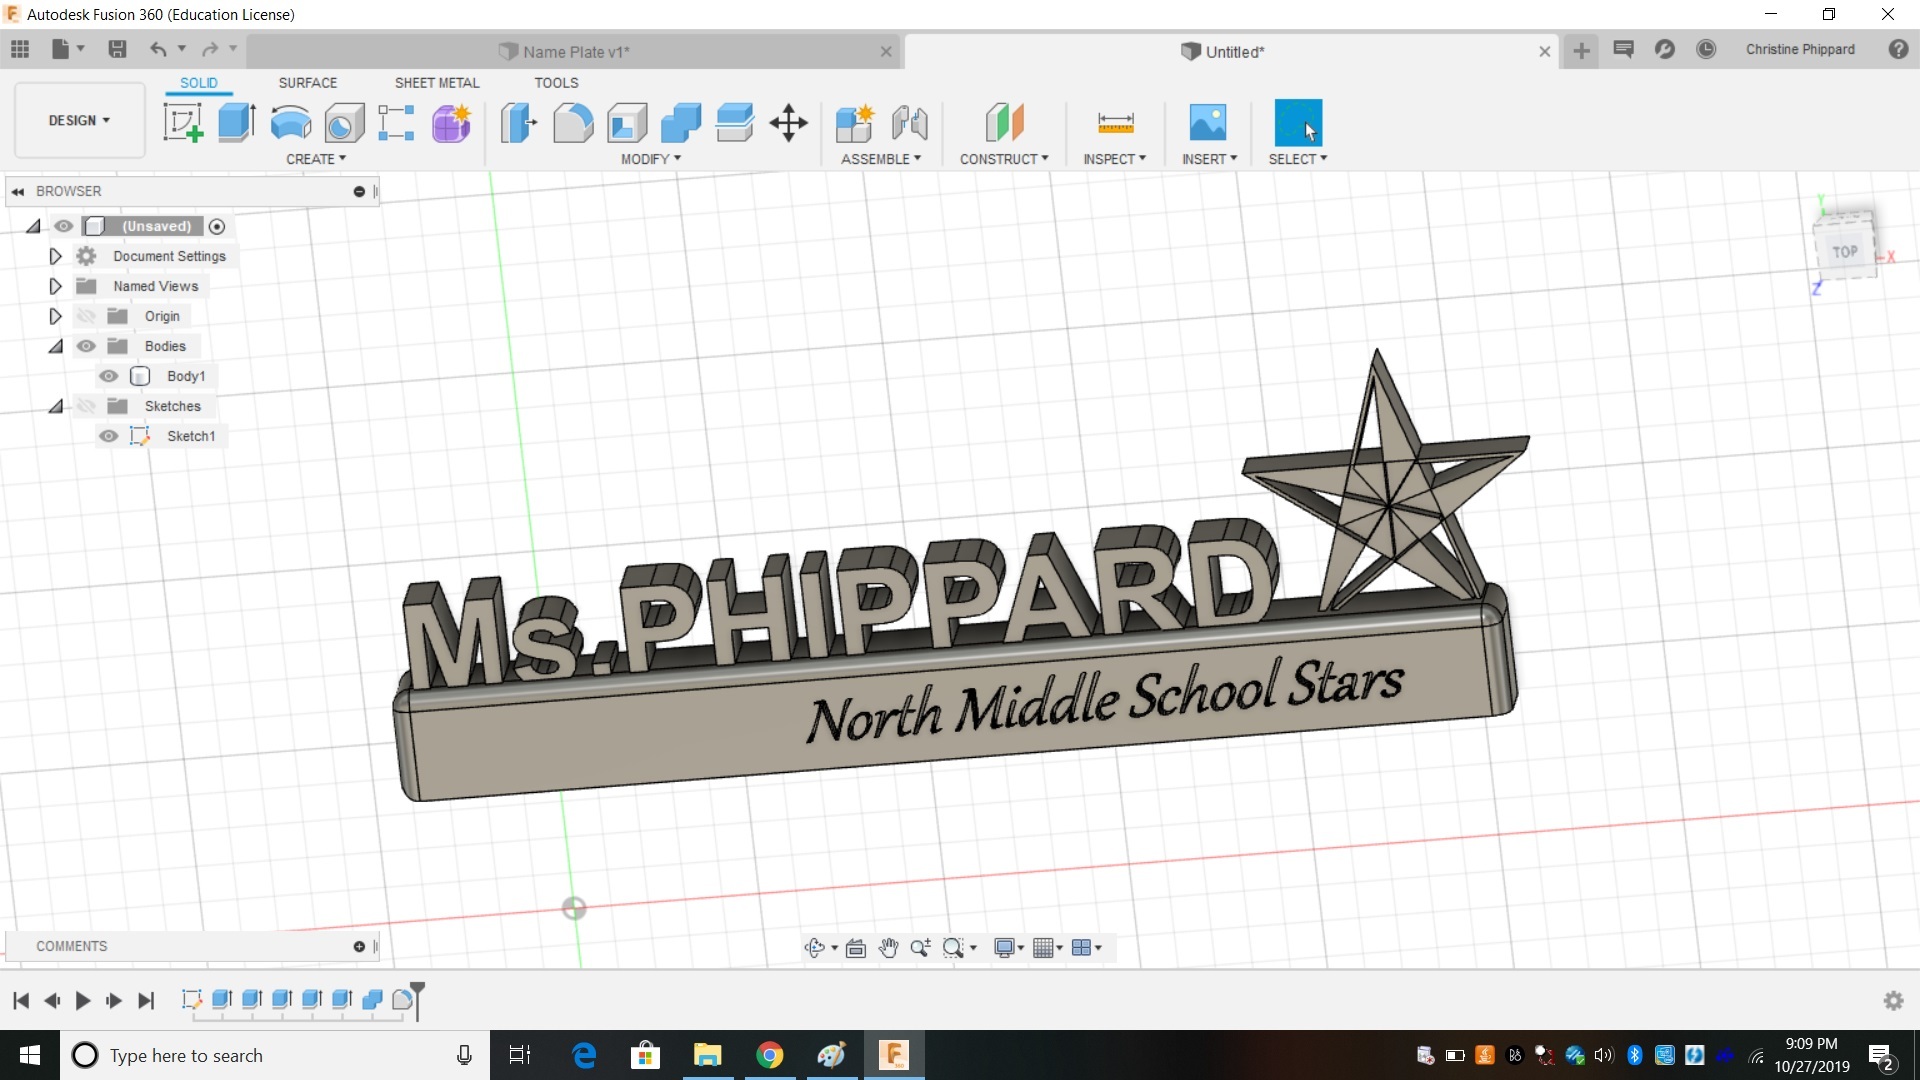
Check out your design. Are you happy with it? You can edit anything in the original sketch and it will update the entire design!
Is the rectangle too big or too small? - Go back into the sketch and double click any dimension to change it.
Do you want to add more text to your rectangle? Click on the FACE of the rectangle, and you can CREATE SKETCH there. Some students like to add a quote here. Or if you are making a name plate for a teacher, you can add their subject title.
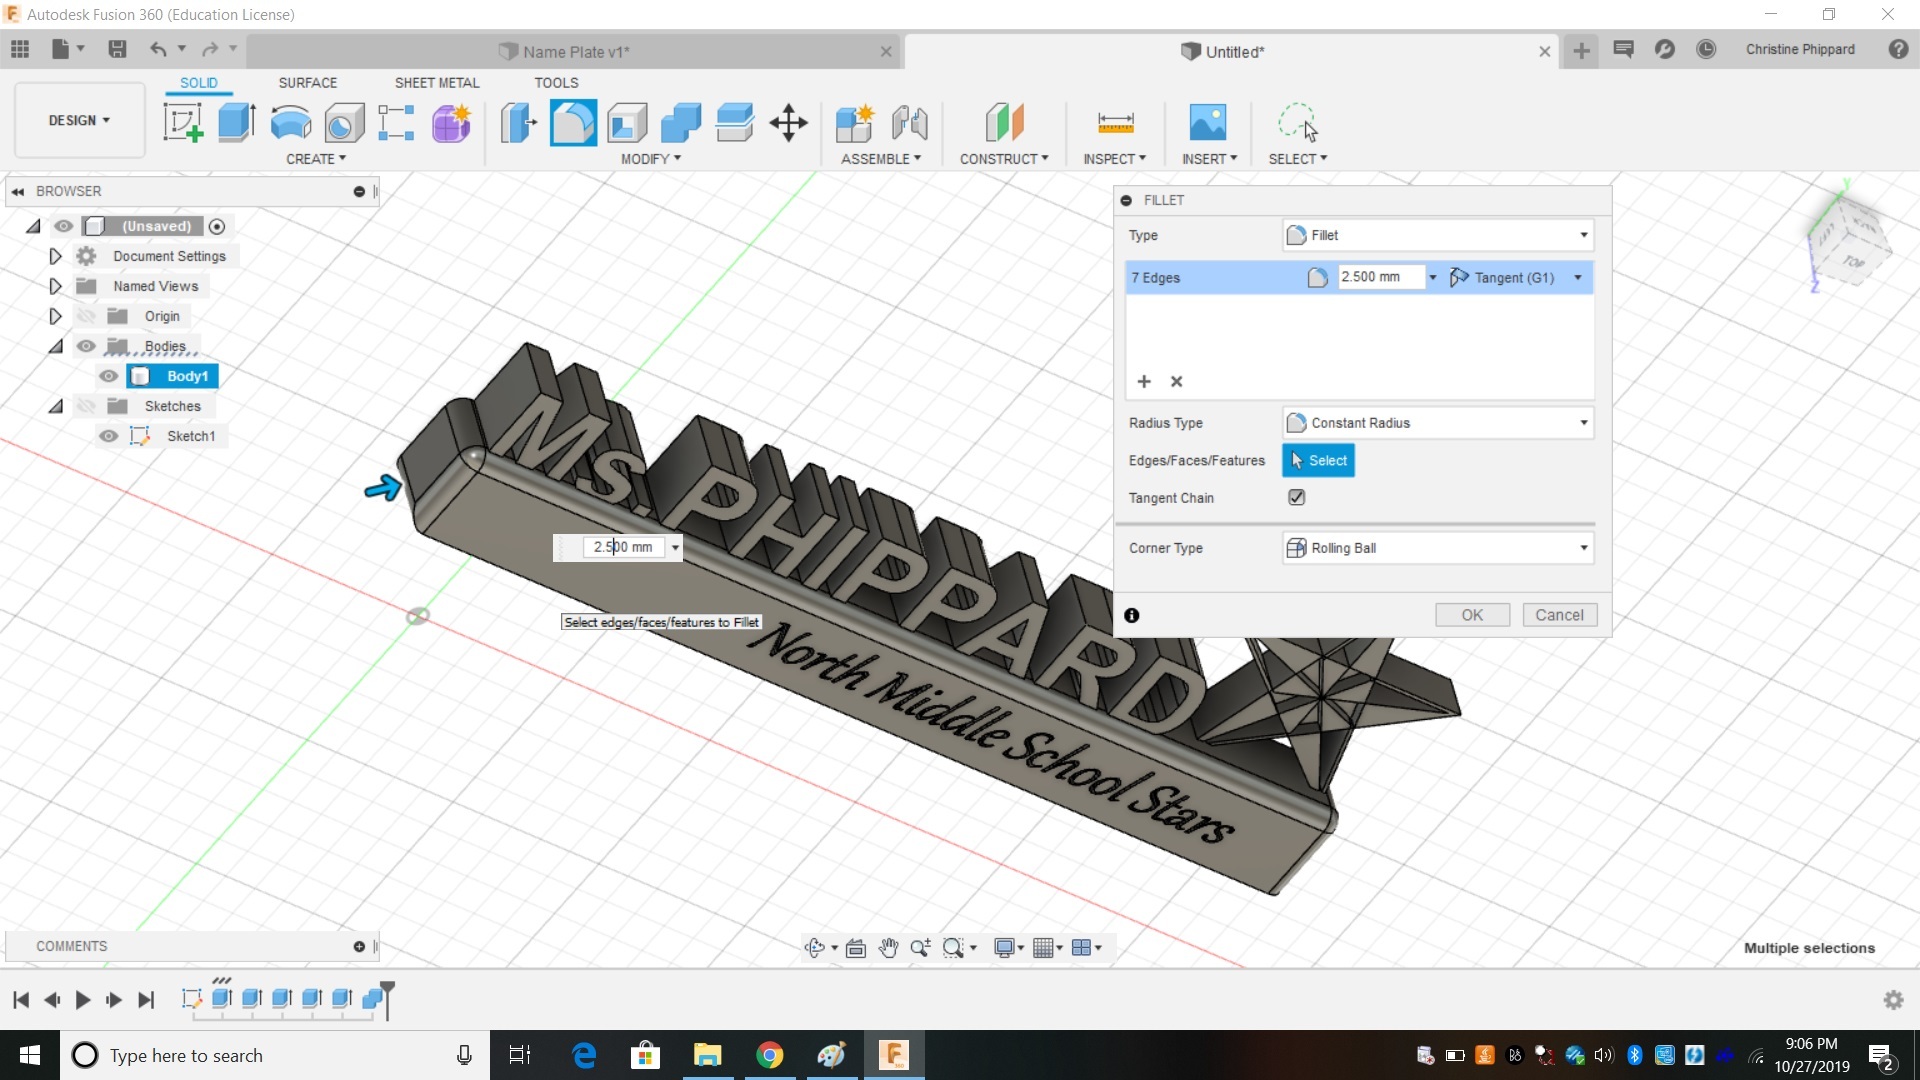
Let's also smooth the edges to give it a finished look.
- Click MODIFY-->fillet
- Select the edges of the rectangle base
- Choose a distance of 2.5 mm
- Click okay.
Export for Printing
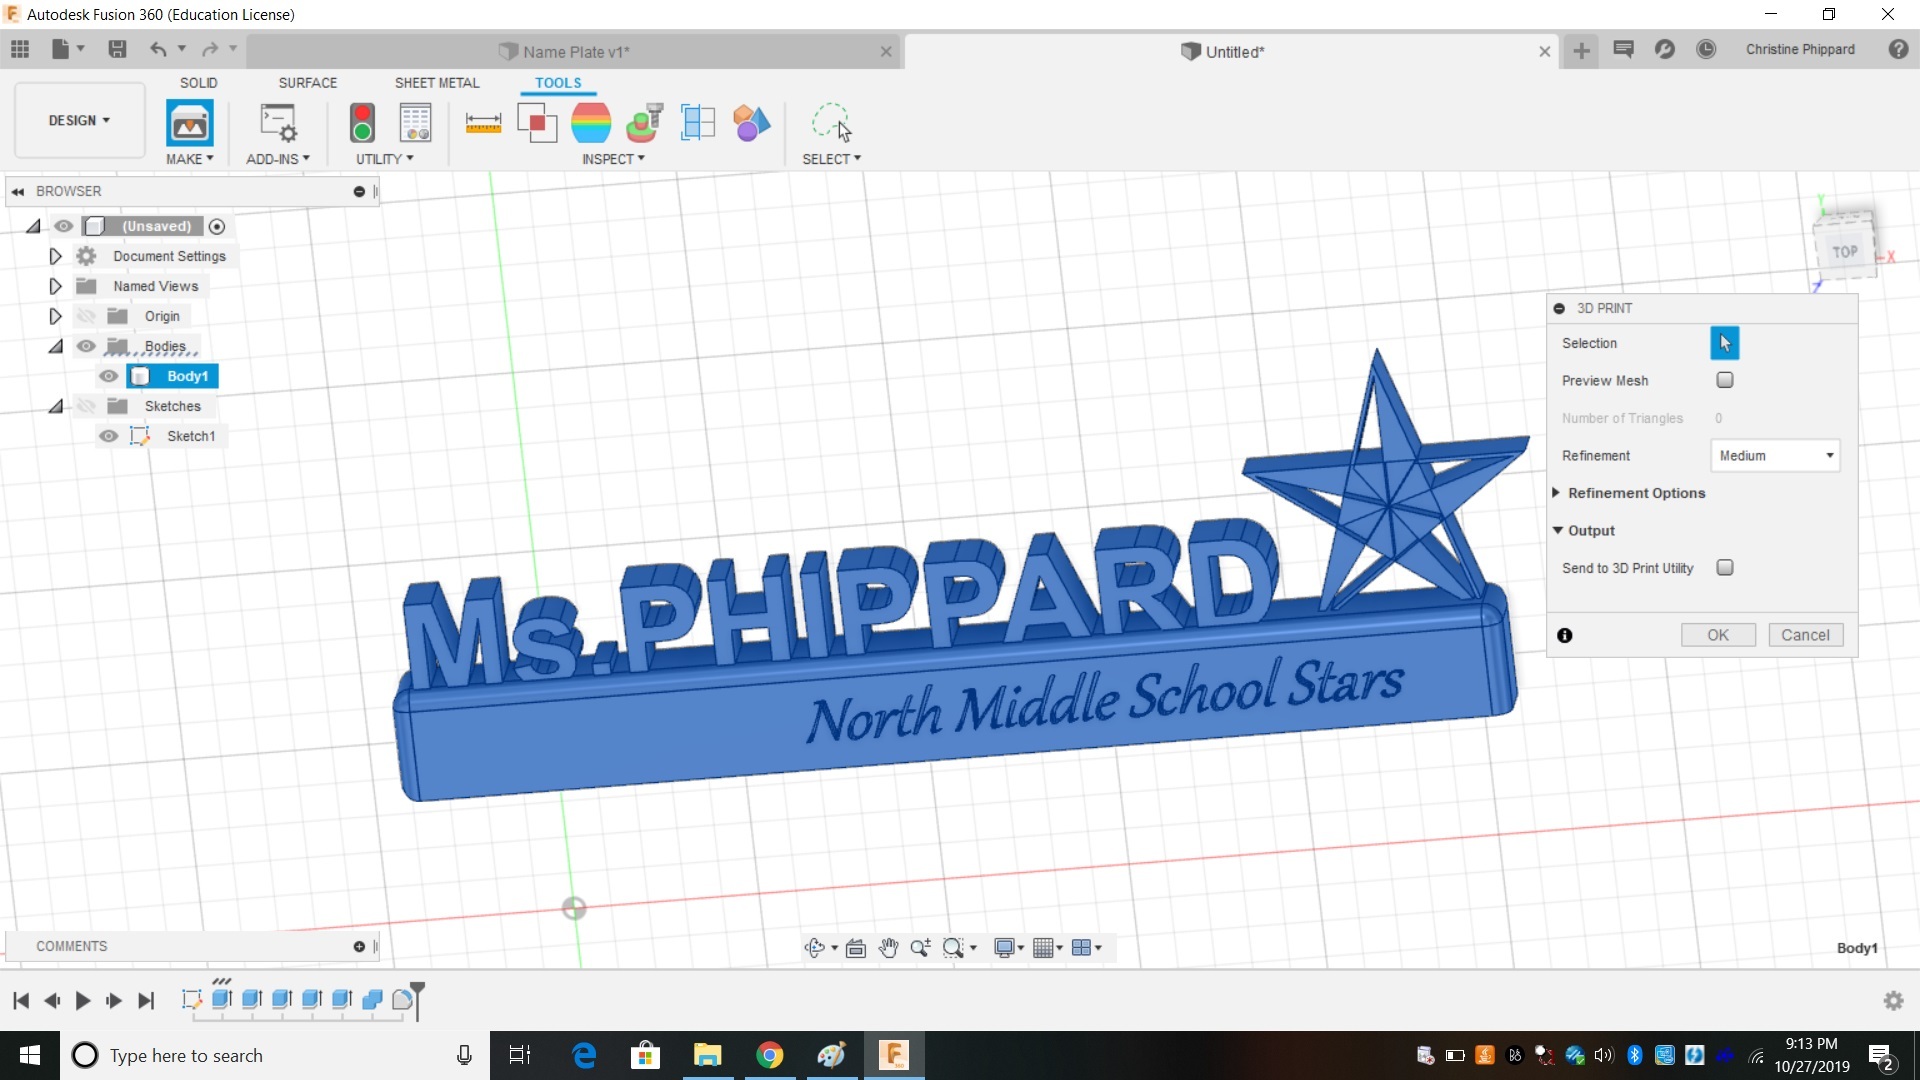
In the Menu choose TOOLS, and click on the 3d printer. Select your name tag. If it is all one piece, it will all highlight blue. If NOT, you are not ready for this step. With Fusion you can send direct to a 3d print utility, or just save as an .STL file (which is what my students do).
If it did not all highlight blue, use the MODIFY-->COMBINE tool and try to combine all the pieces. If this doesn't work, your pieces are not physically touching. This means you will need to move them in the sketch. Once you move them in the sketch, the model will update automatically (automagically?) and hopefully everything will be collected.