Desk CNC-PC2-Benjamin Gamboa Durand
by Benjamin417 in Workshop > CNC
994 Views, 8 Favorites, 0 Comments
Desk CNC-PC2-Benjamin Gamboa Durand
Hello friends, today we are going to develop a very fun and entertaining project to make a "DESK" in simple steps. You are going to like it, let's "GET STARTED"
Materials
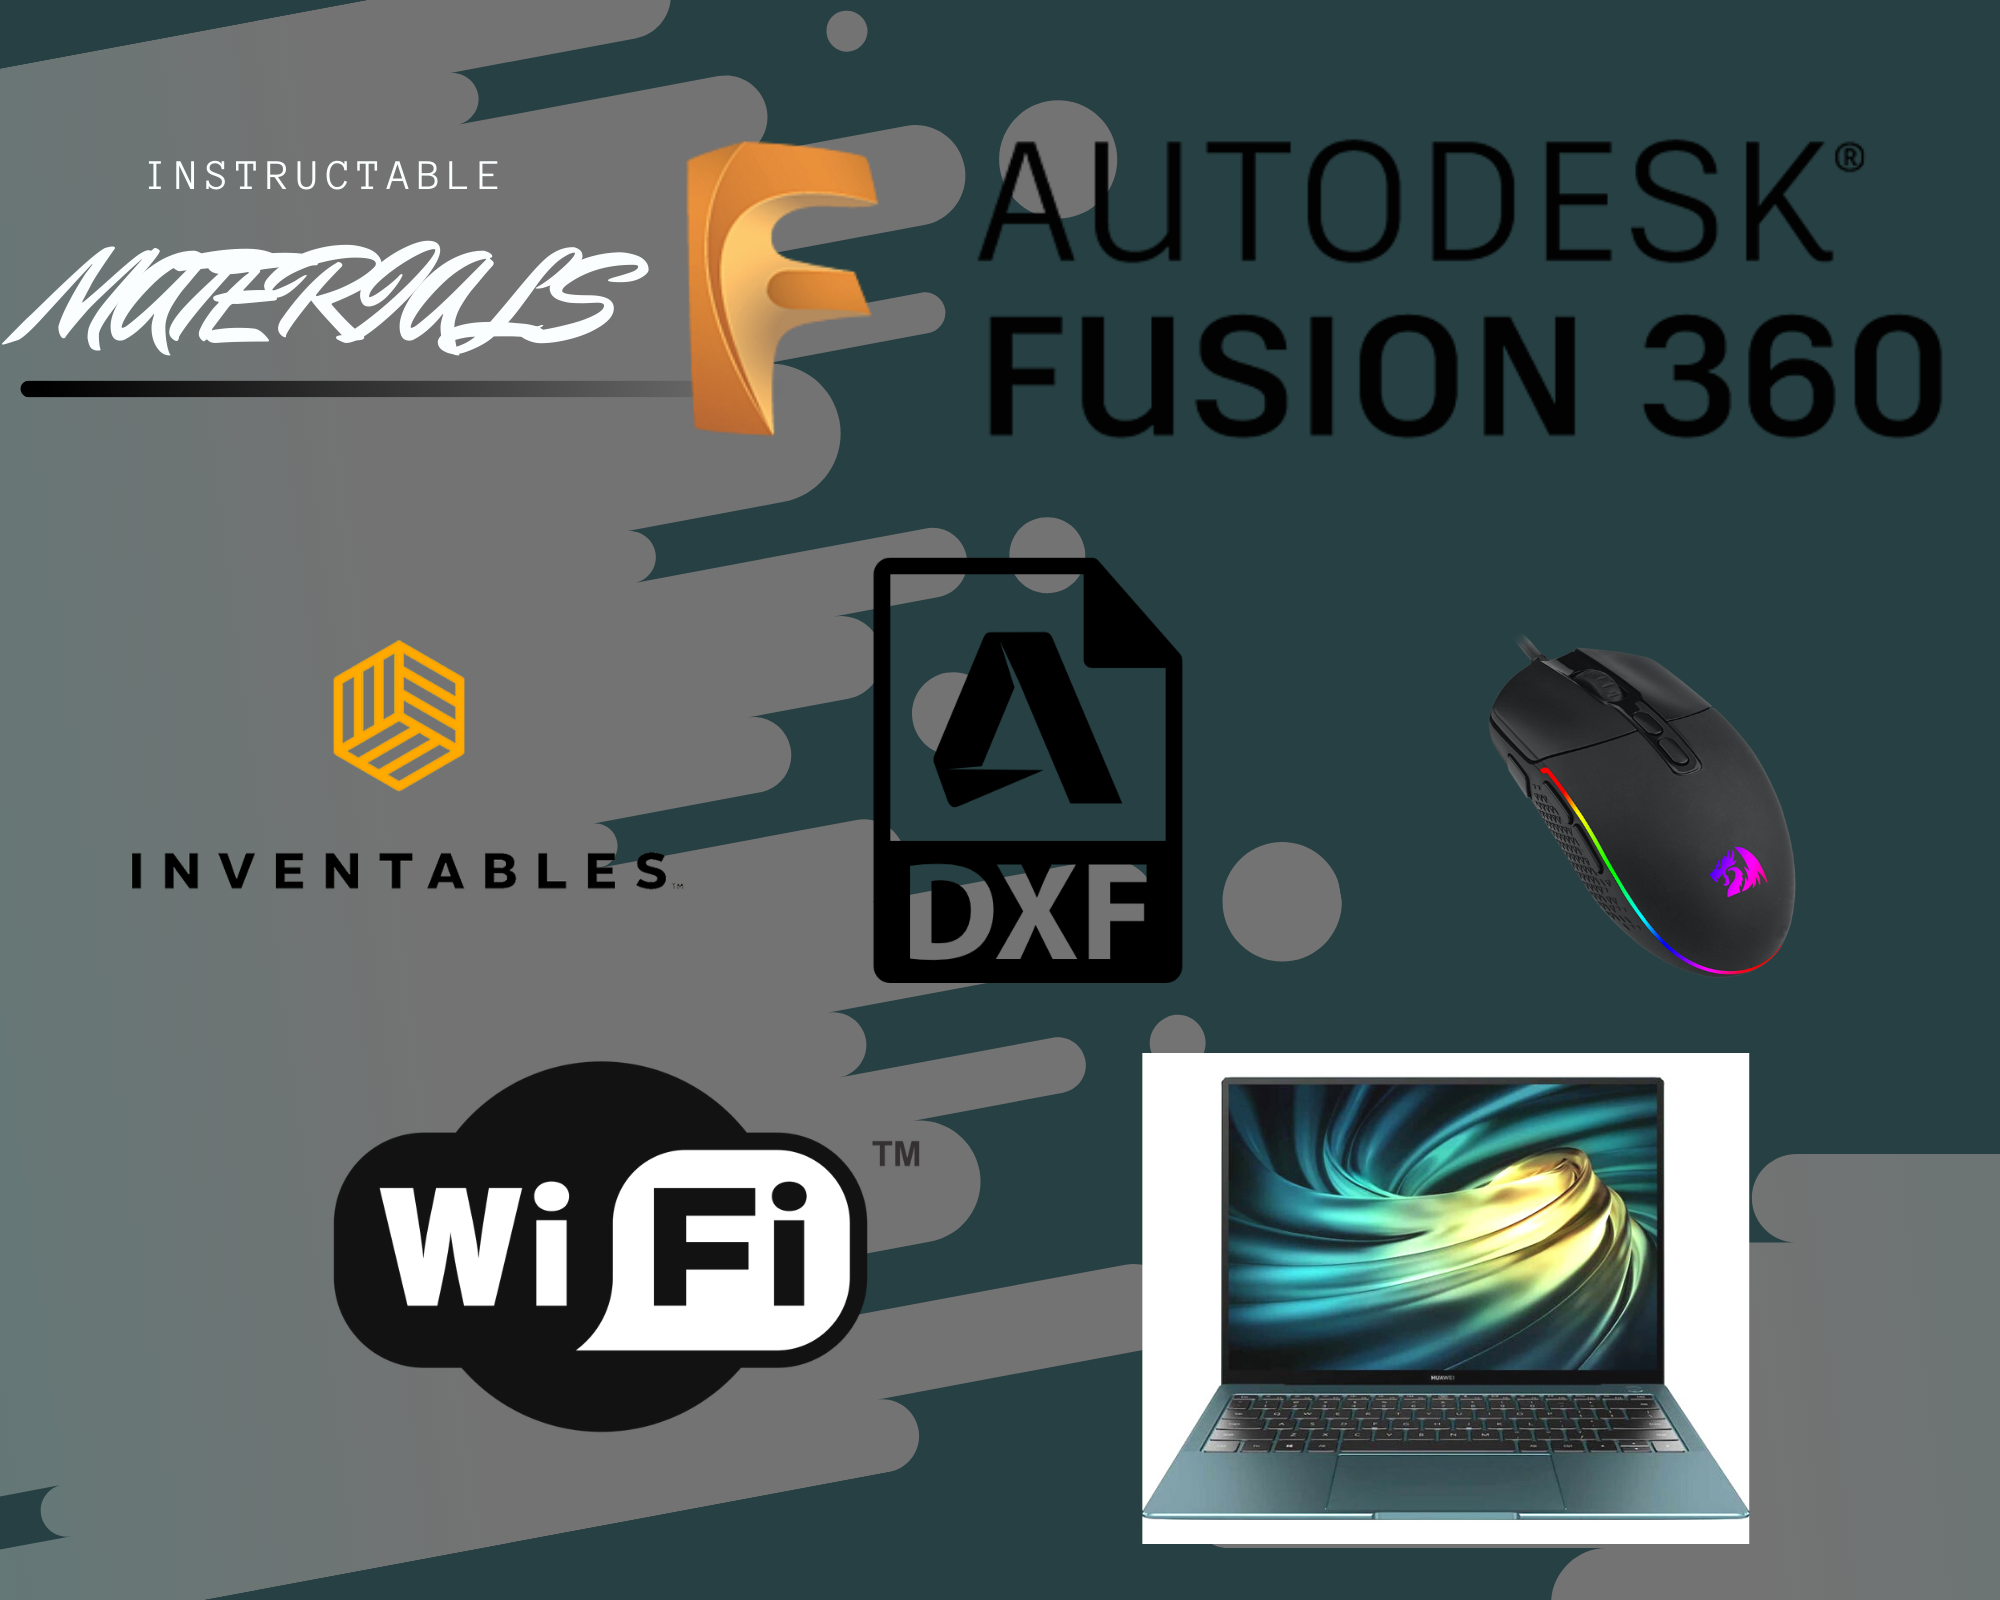
- Computadora (Windows 10)
- Software Autodesk Fusión 360
- Periféricos:
- Mause
- Teclado
- Imagen DXF
- WIFI
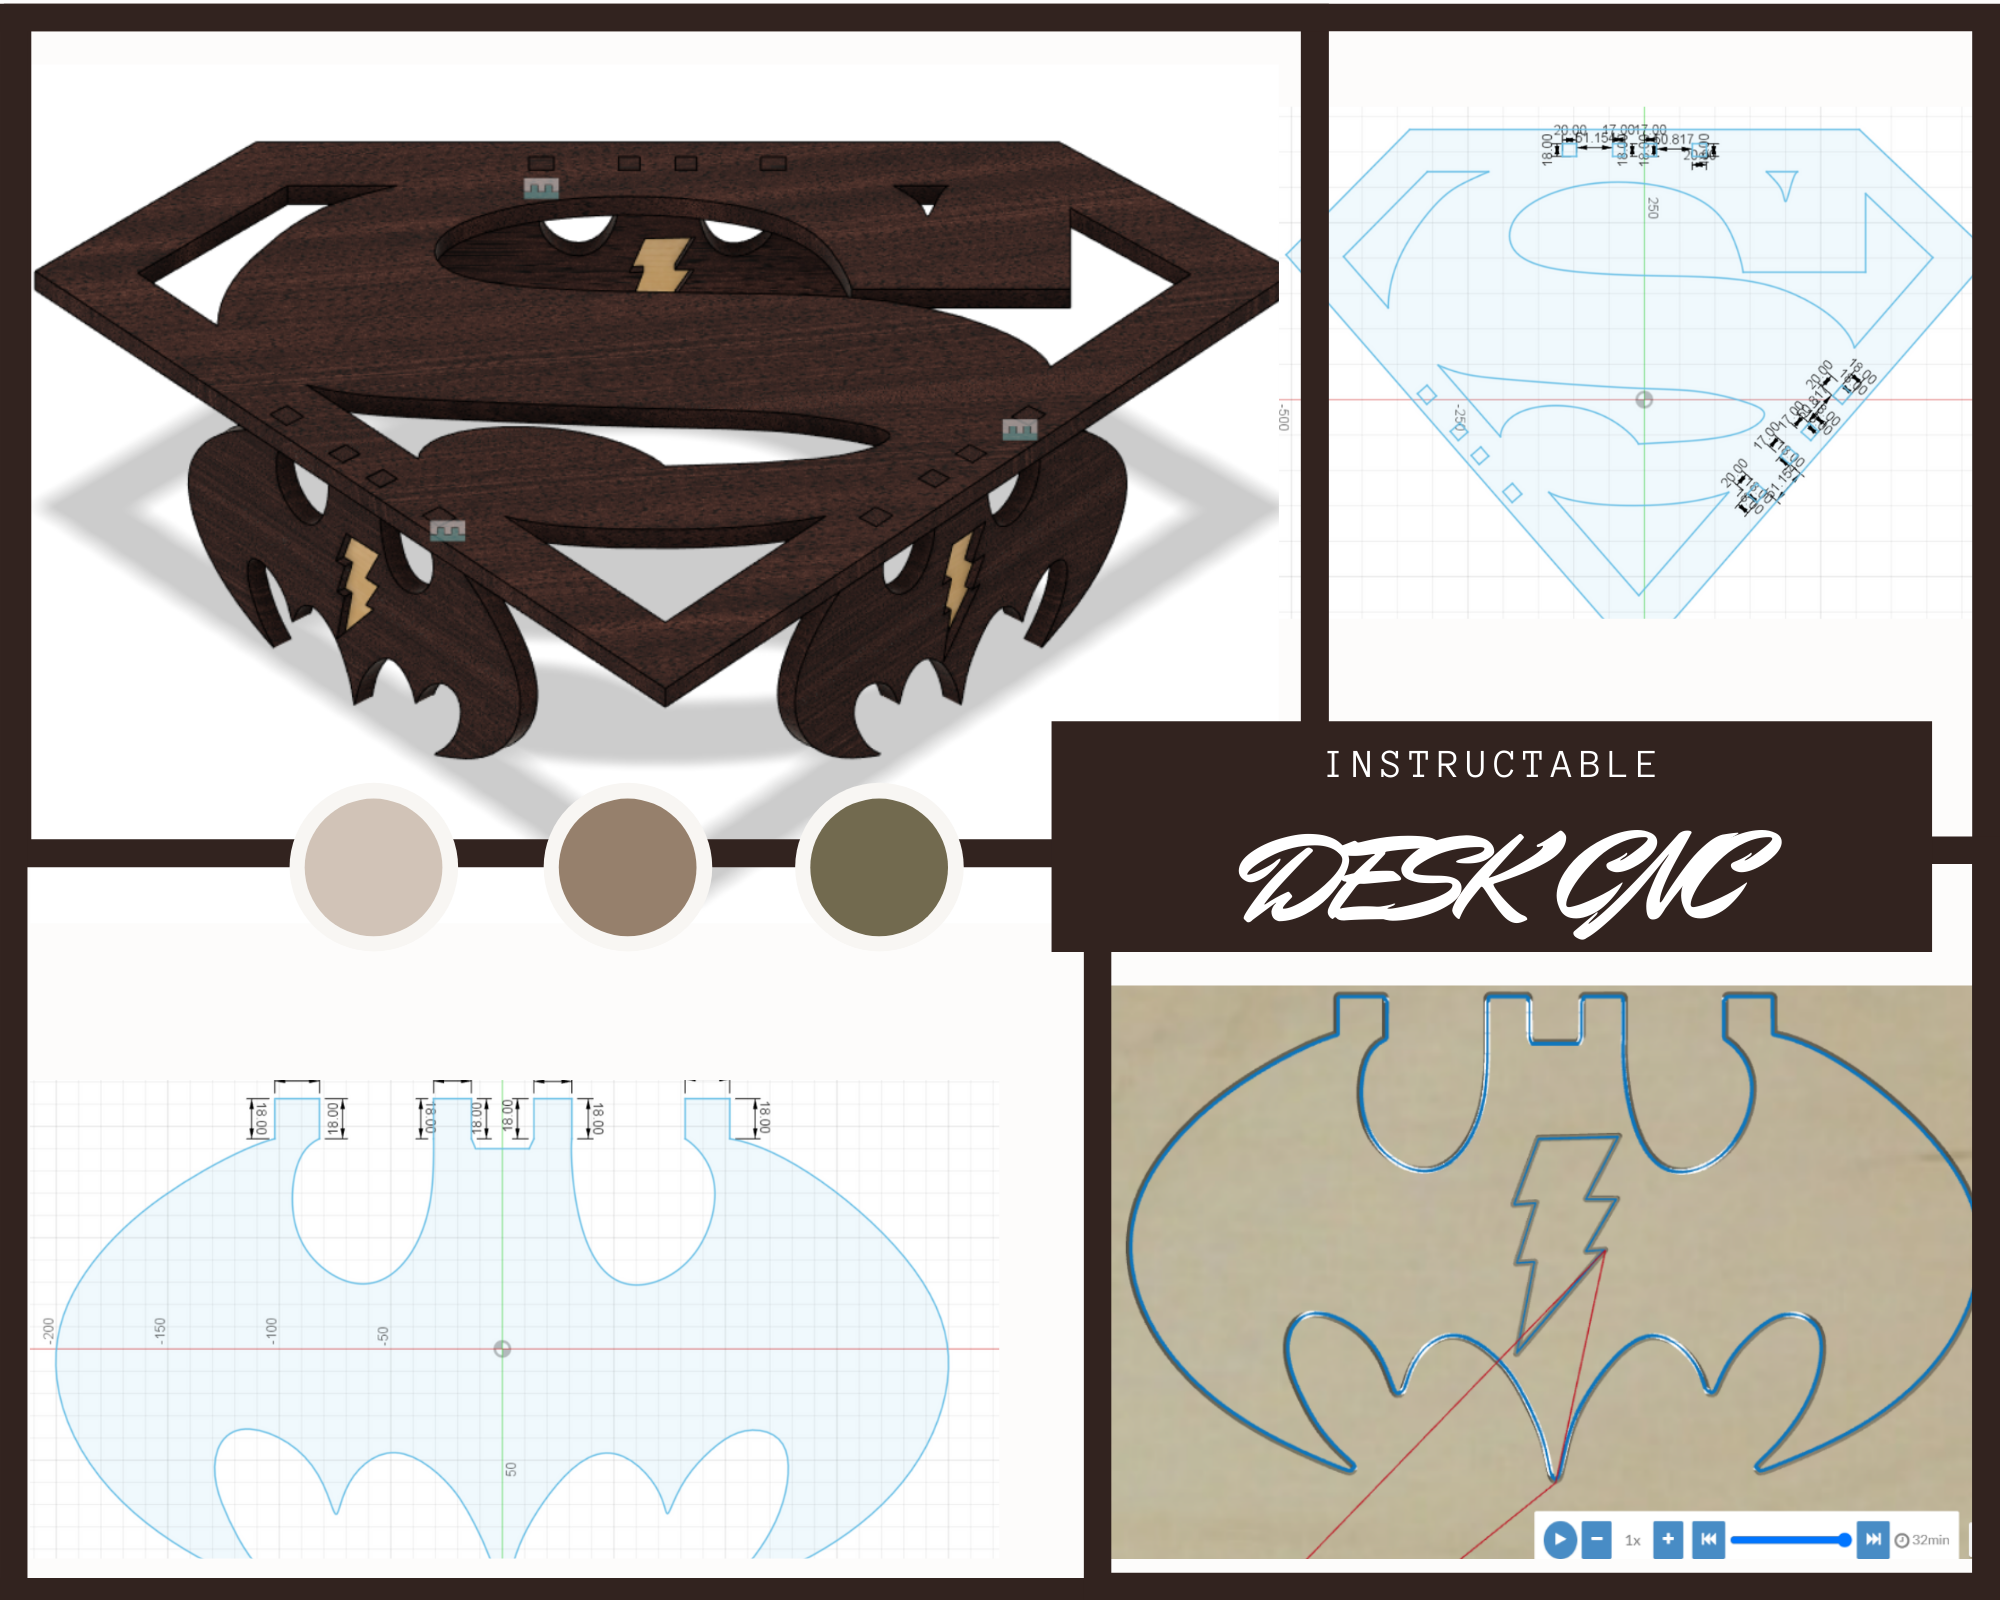
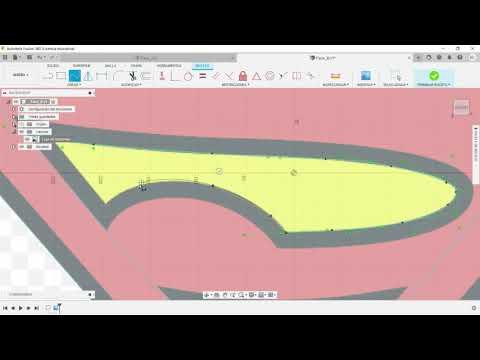
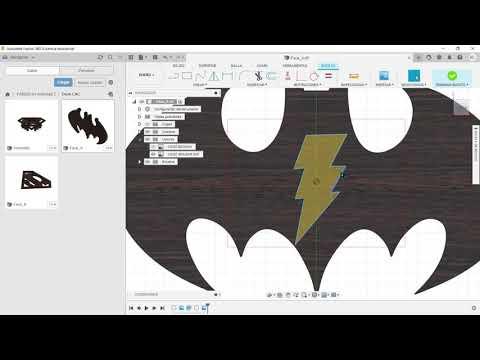
FACE_A
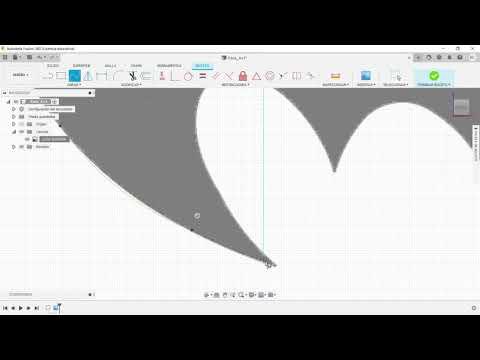
We will start by opening "FUSION 360" and we will create a folder called CNC table to file all our faces and so on, then we will place ourselves in sketch to develop the Face_A and we will place ourselves in the Blue and Red axes, and we will do it following the sequence that is observed in the video and finally, do not forget to save our Face_A already extracted.
- Don't forget that the tools to use are: LINE-SPLINE: FIT POINT SPLINE-EXTRACT- APPEARANCE-INSERT: CANVAS-OFFSET
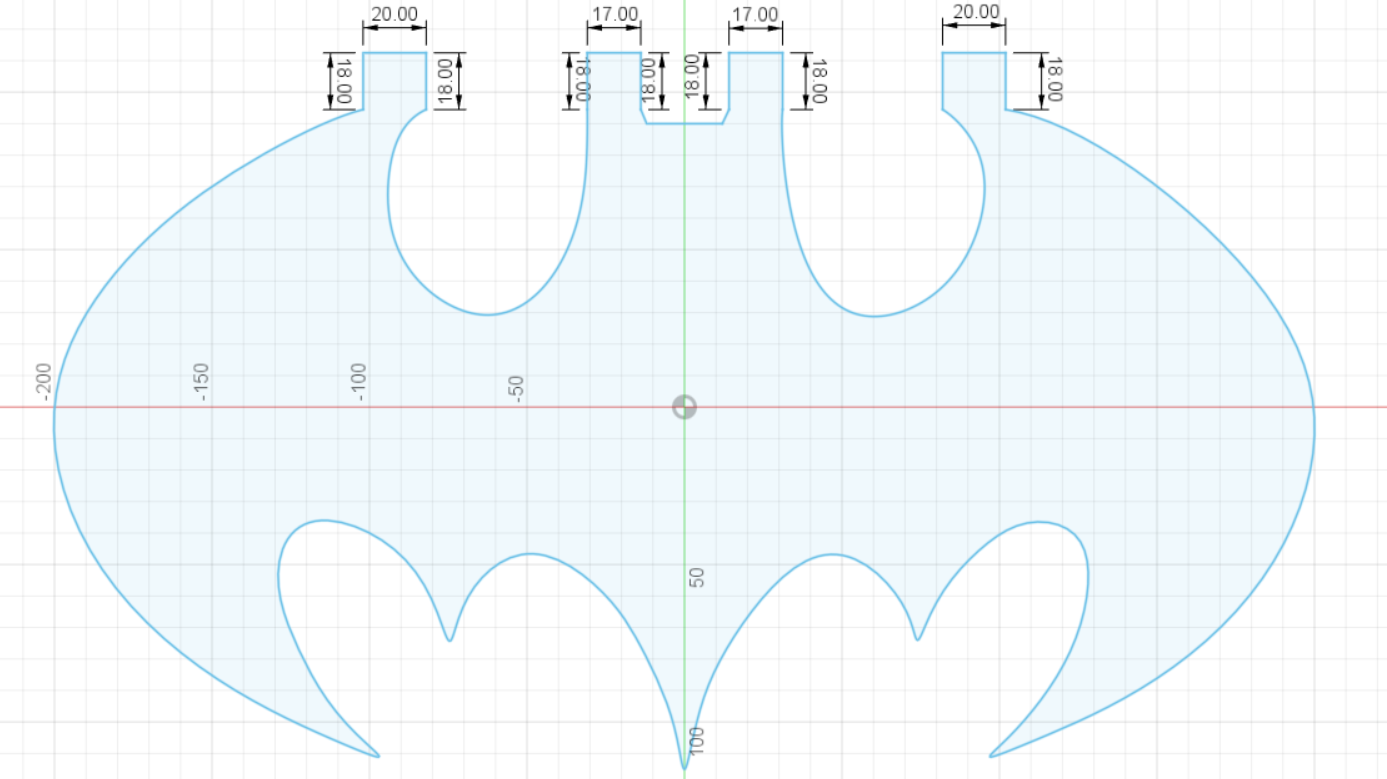
FACE_B
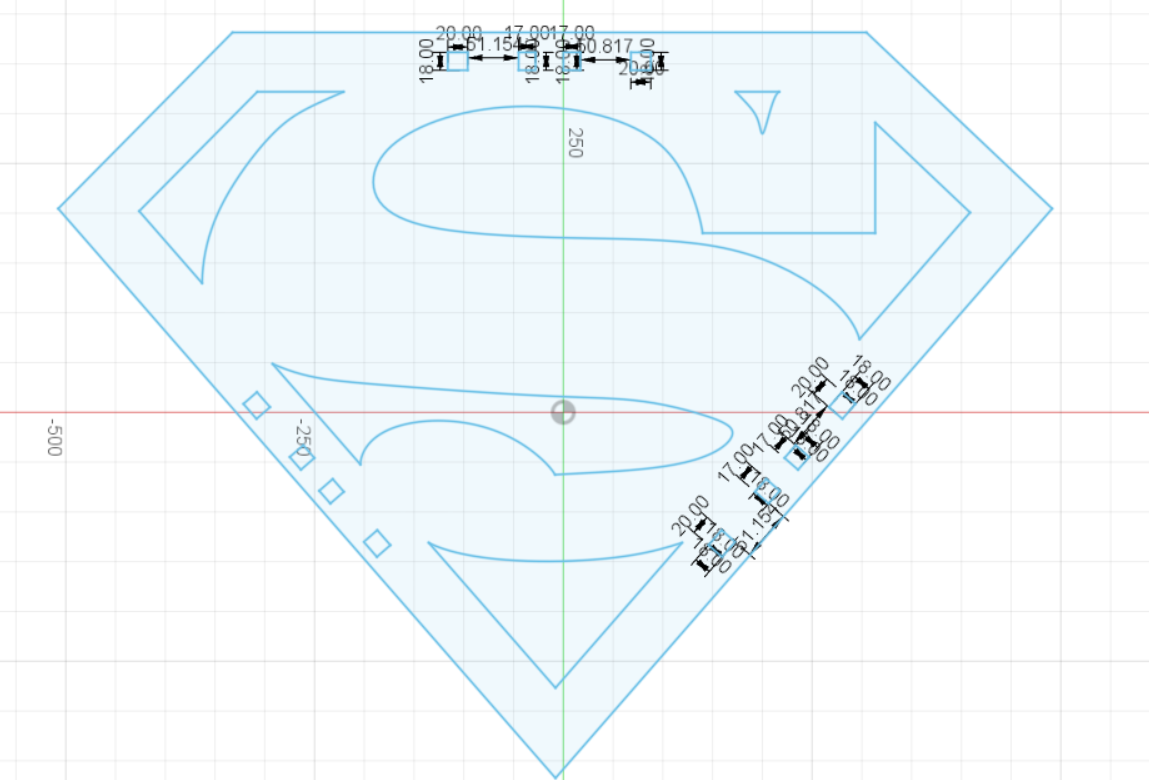
Next, for Face_B we will start creating a new project to develop this face we will use the color axes "Red and Green", this will be the Superman logo it is very fun to make this design we follow the simple steps of the video and you will see how easy it was, before finishing the development of the work save it.
- Don't forget that the tools to use are LINE-CUT-OFFSET-MIRROR-SPEED-EXTRUSION-SPLINE: FIT POINT SPLINE-INSERT: CANVAS-OFFSET-APPEARANCE.
ASSEMBLE
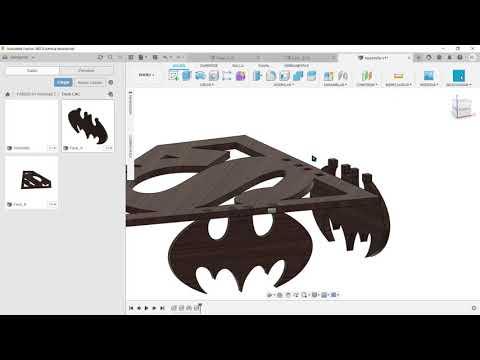
Now coming to our last steps the assembly will be a way to join our faces, we will start placing the part that will join with all the faces, (Face_A) for convenience and then the Faces_B, and we will place three equal parts of the Face_A and then join them with the Face_B, very important to place them in a new file. We will use the new drawing of the design giving right click on each Face to place it, do not forget to save the development of the work at the end.
- Don't forget that the tools to use are: JOINT
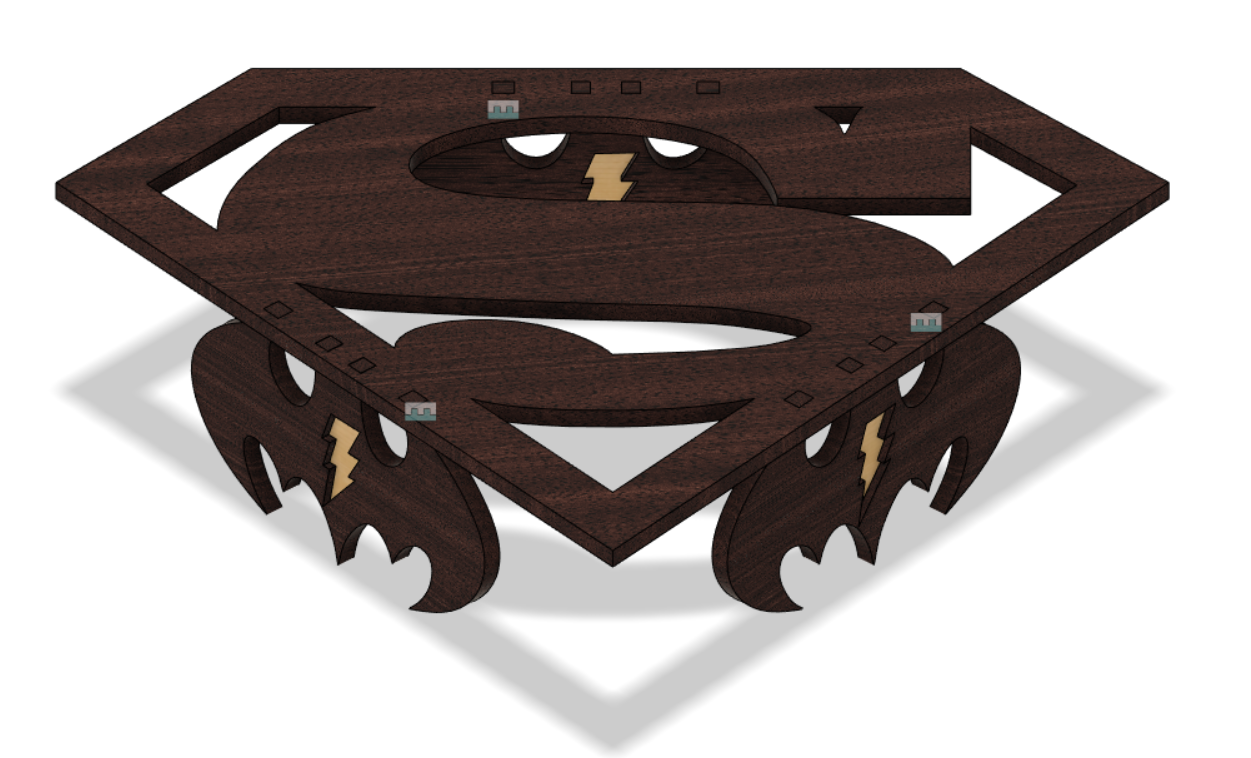
PERSONALIZATION
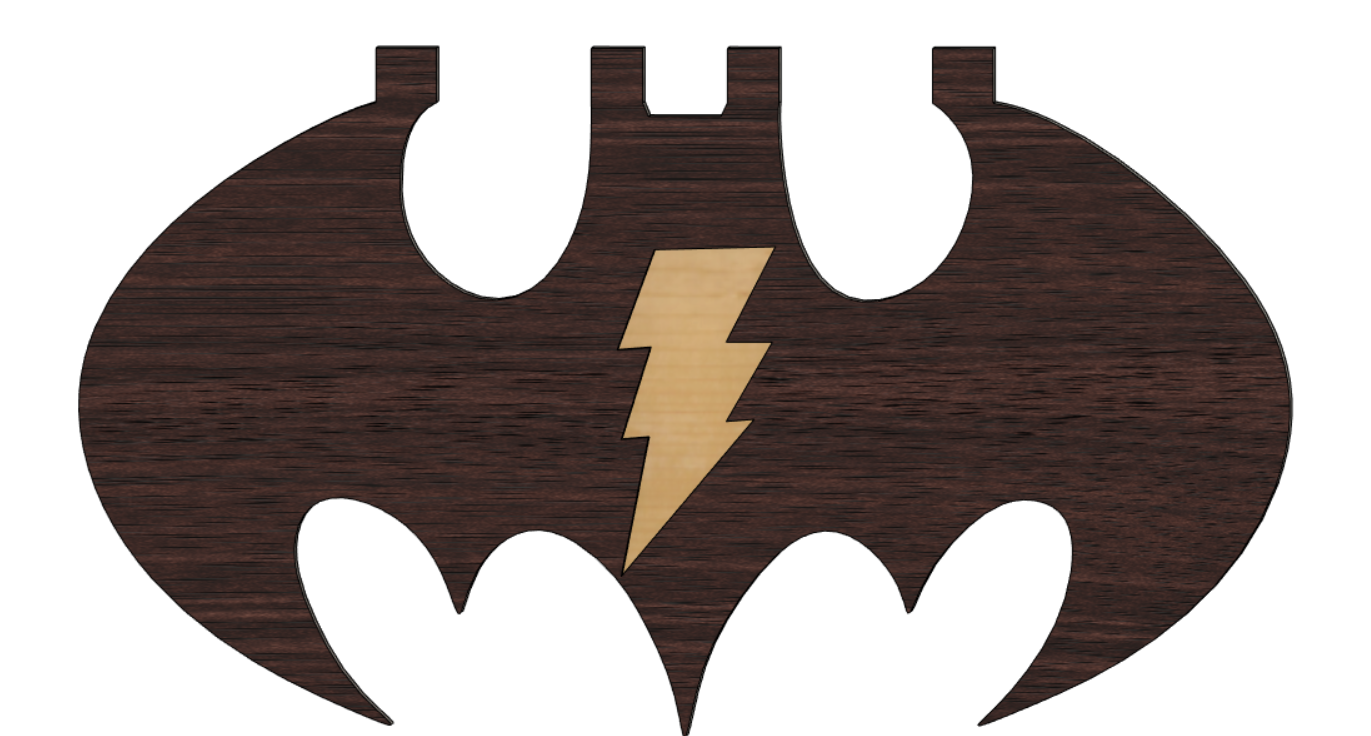
For customisation on any of the faces, preferably Face_A, select and place in Insert - Canvas and choose the image of preference, then use the Spline tool and select the perimeter of the chosen image.
- Don't forget to put Sketch - sketch 2- Save as DXF to put it in Inventable.
- Don't forget to save the file at the end.
- Don't forget that the tools to use are: INSERT-CANVAS- SPLINE-FIT POINT SPLINE-LINE
INVENTABLES
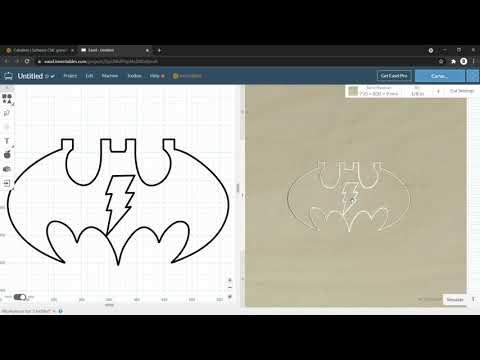
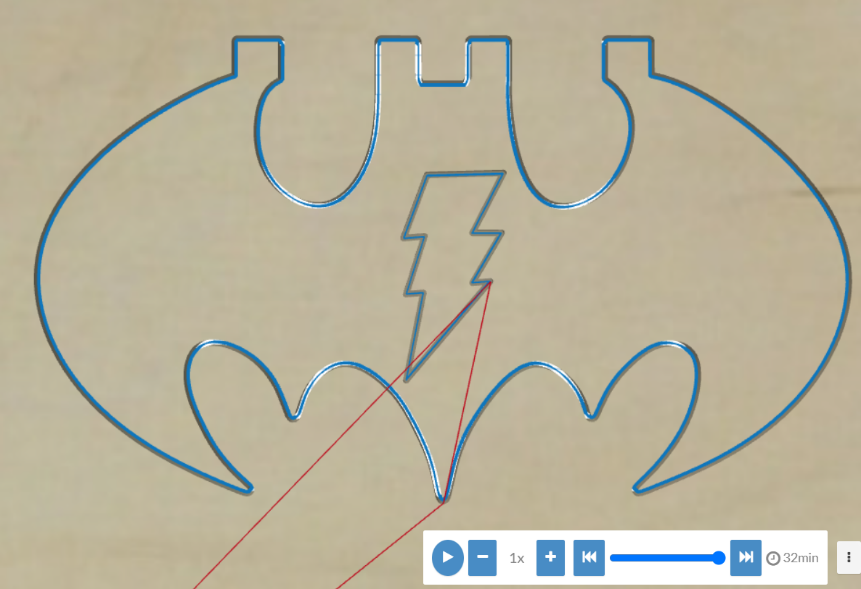
Finally, we will open Inventable on the website of our choice and I will leave you a link to the program.
The file that we save in fusion 360 in the customisation section, we will first configure the cutting and engraving of our CNC job, as indicated in the video, then we will see the simulation by selecting the chosen file.
Link: https://www.inventables.com/