Designing and 3D-Printing Ford Ranger Console
by cartyski in Workshop > 3D Printing
811 Views, 1 Favorites, 0 Comments
Designing and 3D-Printing Ford Ranger Console


I love my Ford Ranger, but I really was getting tired of my cupholder not fitting my water bottle and my phone was getting tired of being thrown on the floor.
By the end of this instructable, hopefully you will have gained some insight on how you could create your own console for your own vehicle and desired needs.
Supplies
Free Model STL (Cost of print: $7.89)
https://www.printables.com/model/701467-ford-ranger-magsafe-cupholder
Measure, Measure, Measure


I began by measuring everything! The bracket's every detail was noted and then 3D-modeled. Among the most essential measurements were dimensions of the Magsafe and Hydroflask of choice.
Trial and Error and Error


In an effort to conserve filament, I truncated my design solely for fit testing. While the bracket aligned perfectly, a slight deviation appeared in the curve along the seat, as shown.
My initial test prints used standard PLA (Polylactic Acid), the ubiquitous choice for 3D printing. Anticipating potential heat-related issues since the design would be exposed to fluctuating temperatures in a truck, I opted for a PETG (Polyethylene terephthalate) roll. PETG, boasting similar strength to PLA but with added flexibility and resistance to heat and UV rays, emerged as the optimal choice for ensuring longevity in my model.
In a scorching Texas climate or similar, I would have opted for ABS (Acrylonitrile butadiene styrene), a material known for its very high impact resistance and heat tolerance and notably used in LEGO production.
Slice and Dice


Satisfied with the fit of all components, I brought the full model into Bambu Studio, a 3D model slicer. A slicing program allows for the generation of a detailed layer-by-layer code, including supports for overhangs in the model. Slicing is an essential step before each 3D print, providing the printer with the necessary instructions.
Following a 12-hour overnight printing process, the model emerged successfully. While removing the supports posed some challenges, the use of robust organic supports ensured an efficient and effective print outcome. Upon removing the PETG model, it was instantly distinct from the familiar PLA, and I found myself impressed by its flexibility.
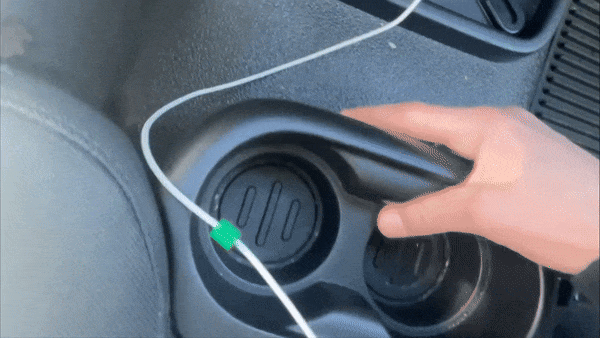
Like a Rug


Fits nice and snug. After some post-processing (sanding+poly), she sits and she stays.
Now, my Hydro Flask sits perfectly, and my phone no longer fumbles around while I drive. I hope you enjoyed my first Instructable! Thanks for reading.