Design a Medal Using TinkerCAD (With Pictures)
1800 Views, 8 Favorites, 0 Comments
Design a Medal Using TinkerCAD (With Pictures)
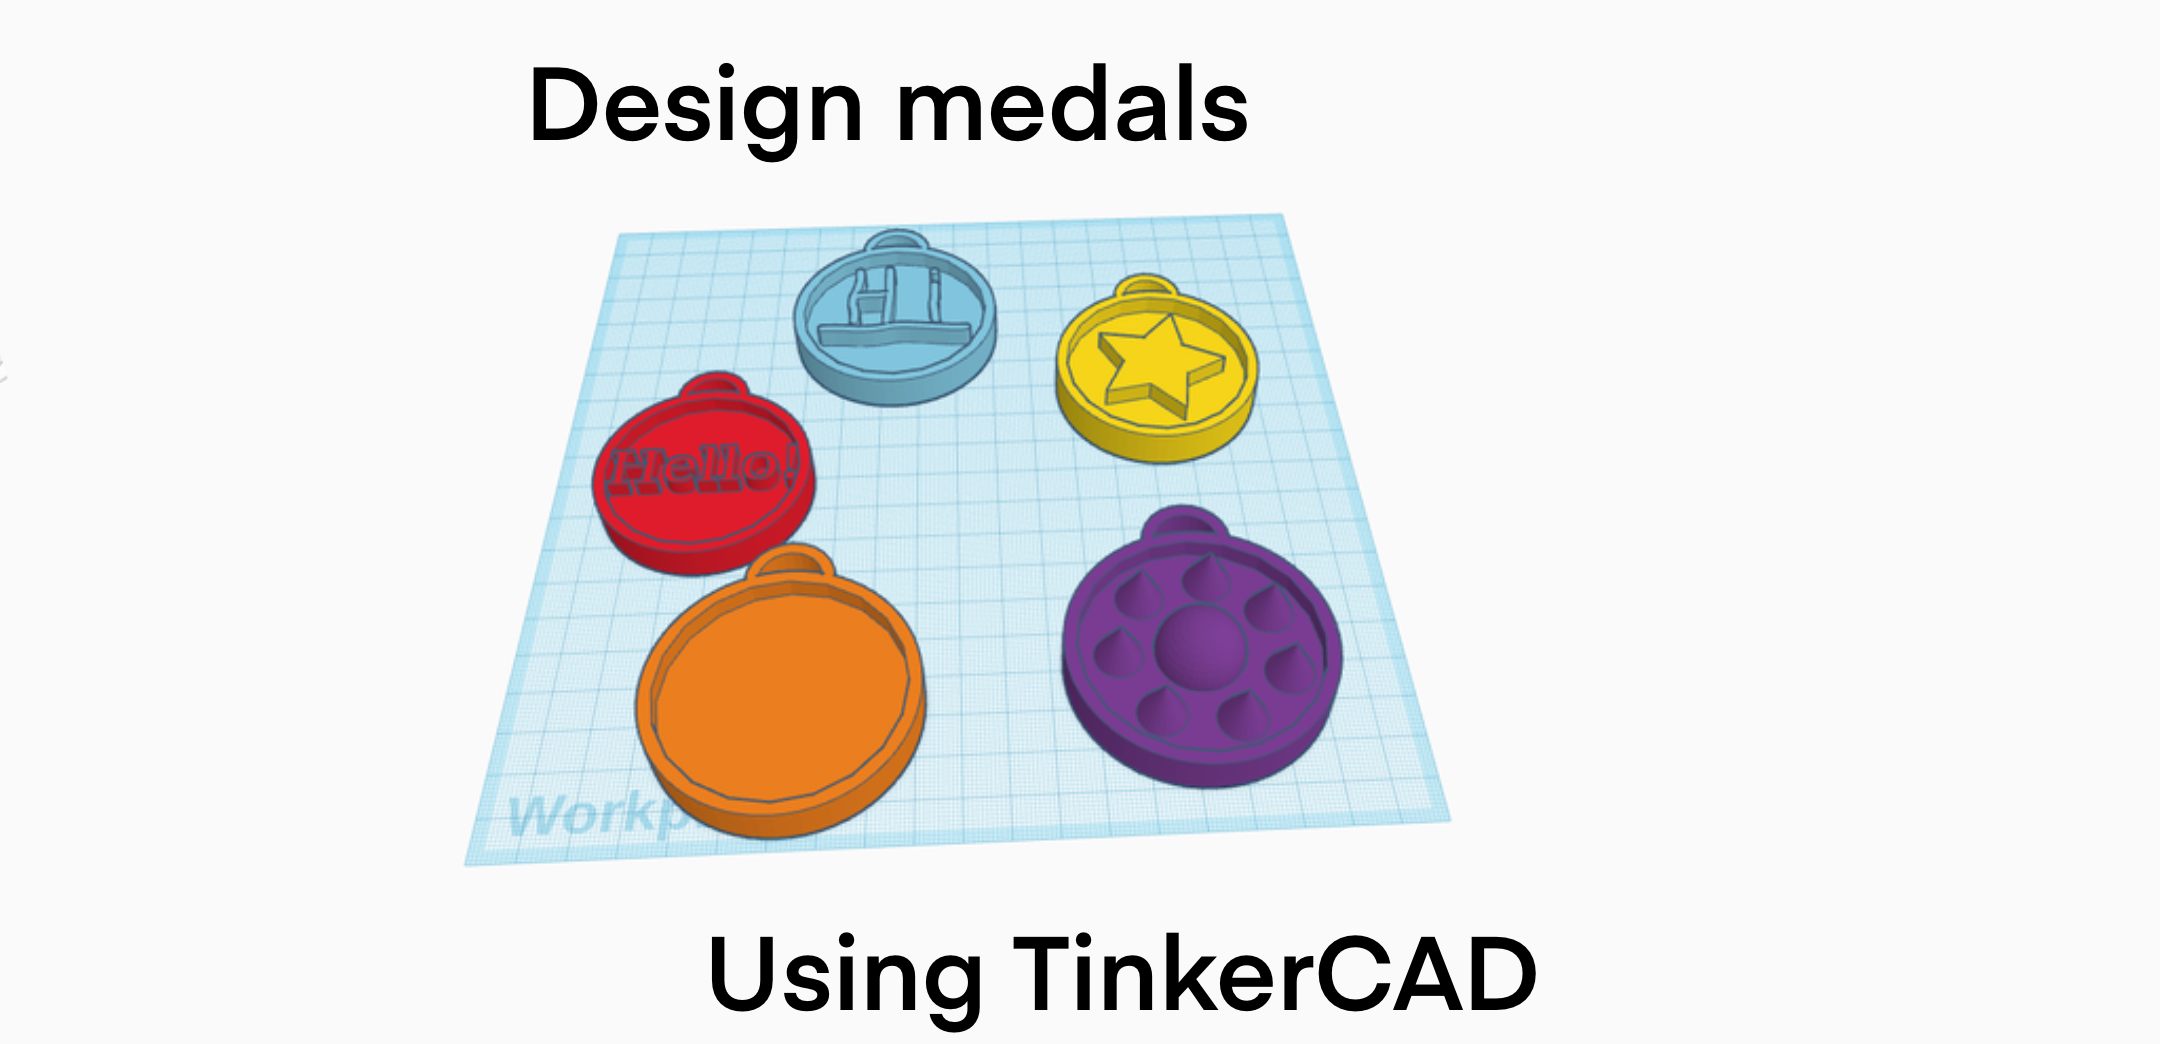
In this Instructable, you will learn the basics of TinkerCAD 3D modeling and how to make a simple medal. This Instructable (I admit) has also been very useful for myself, getting to know and get the grips on TinkerCAD. I thought that making a medal would help you learn how grouping, holes, changing the size and different ways of making shapes work. (I have tried so many different ways to try and get the videos to work without you having to download them, as a .gif format, as a .webm format, mp4, trying to intergrate it, attaching it as a file etc. Sadly, the only way that worked for me was to attach it as a file and you would have to download it. Apologies for that inconvenience. If you have any idea of how to get this working, please do add a comment on how. Also, sorry about that step 2, 5 and 6 are in a .webm format, they are too large in a .mp4 format).
Supplies
- A TinkerCAD account (free)
- A working computer to design on (I don't need to link that, you are viewing this on one. And yes, it works on phones and iPads too!)
Making the Body of the Medal
Make the Indent for the Details
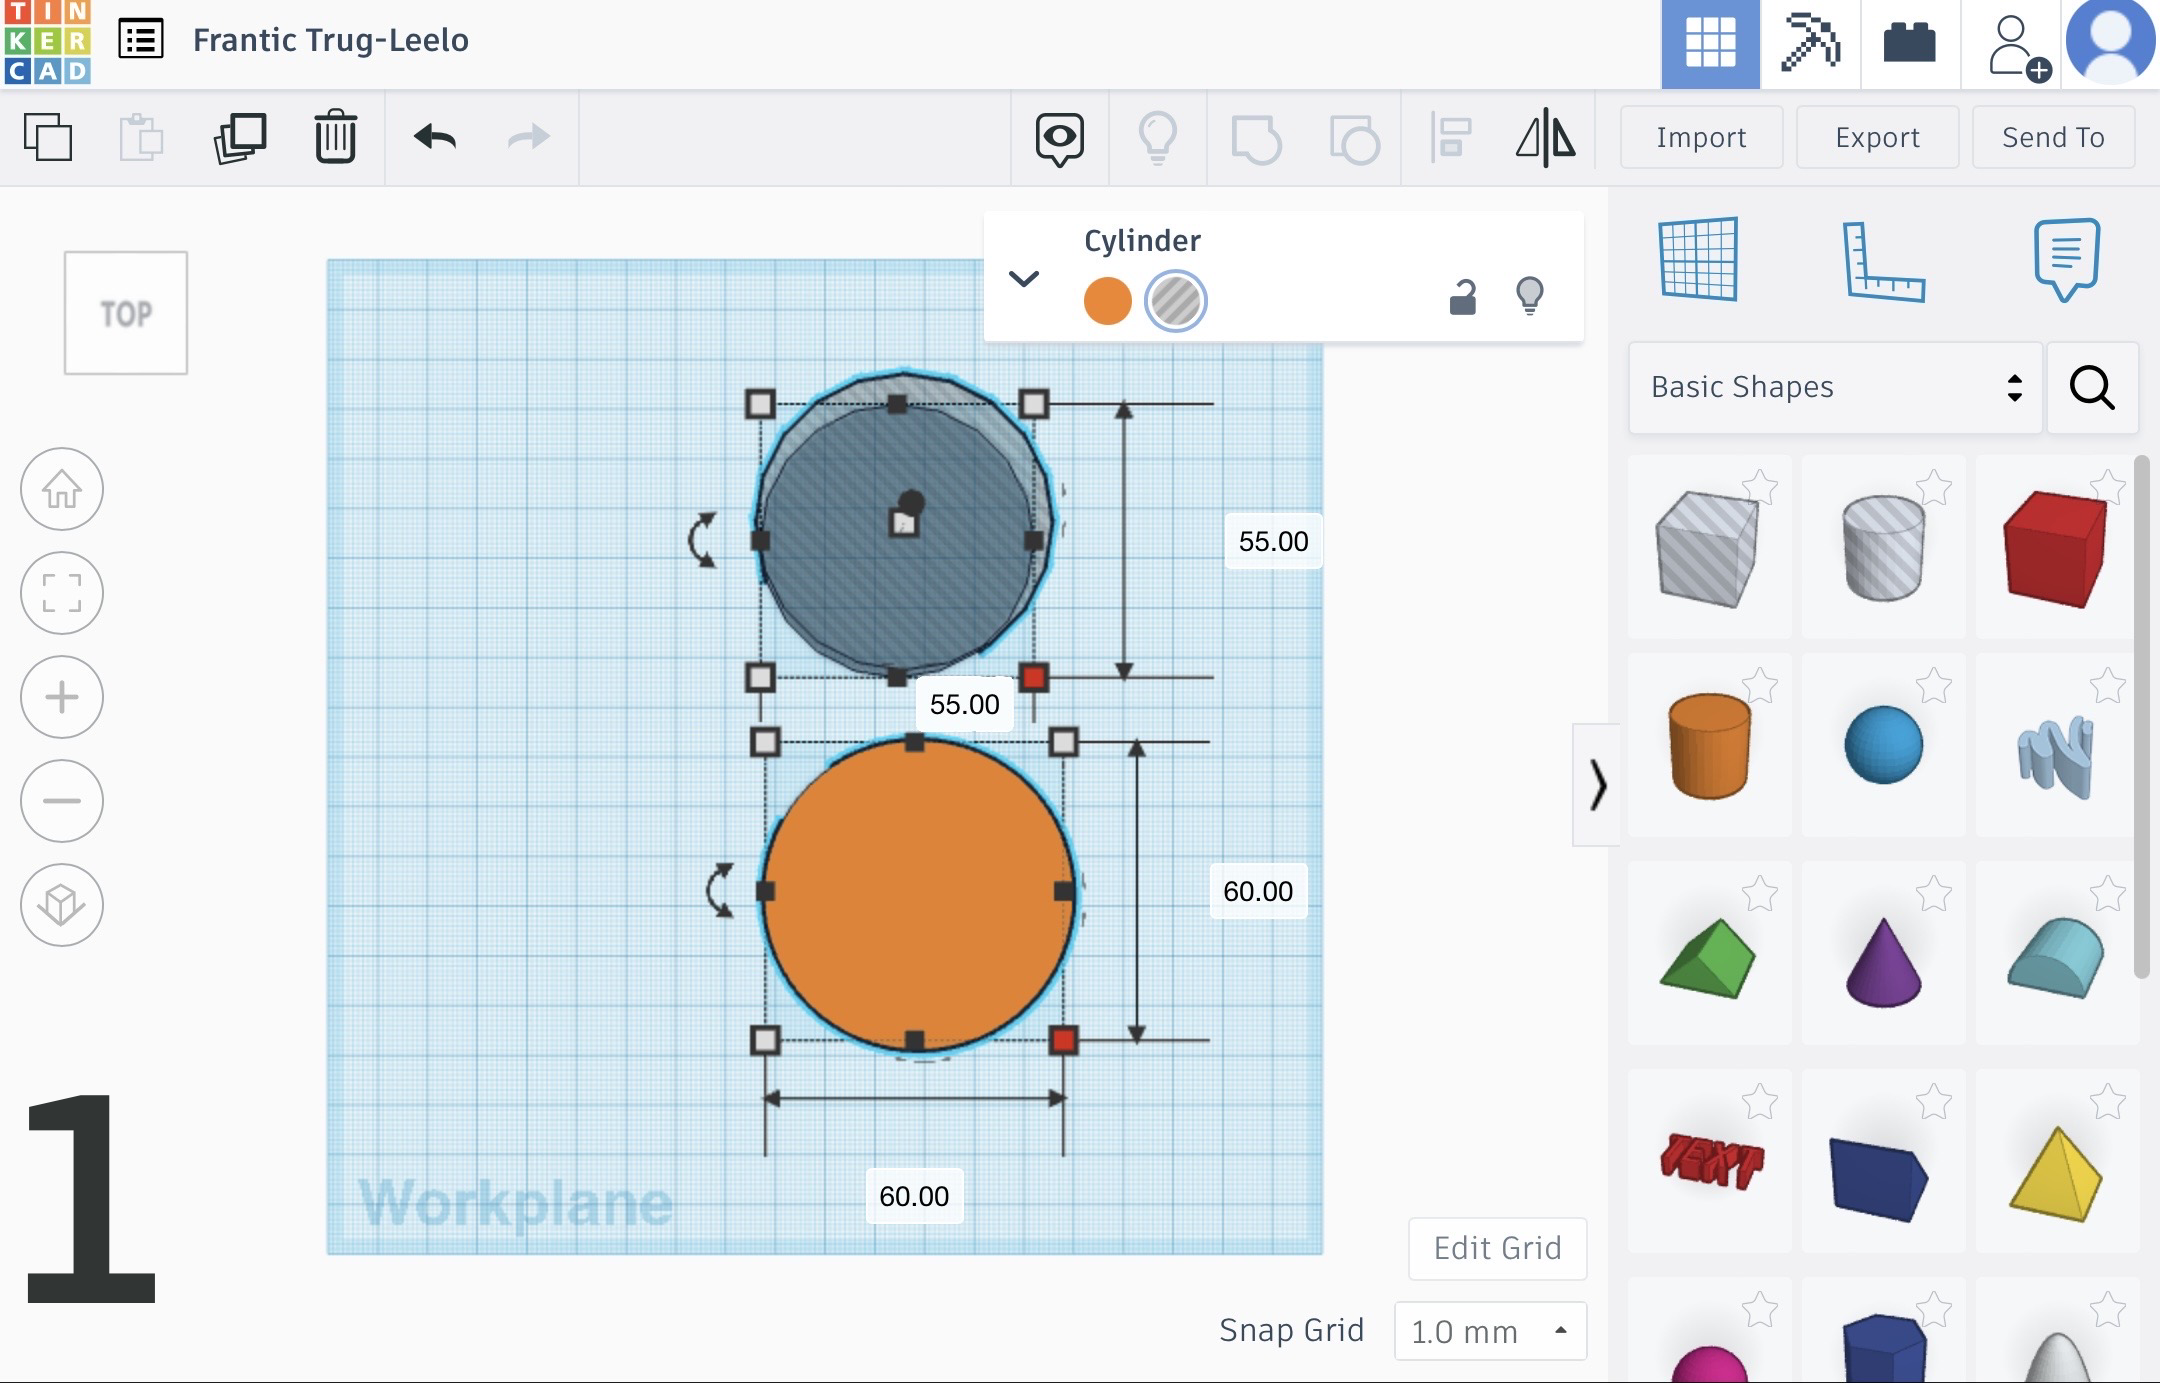
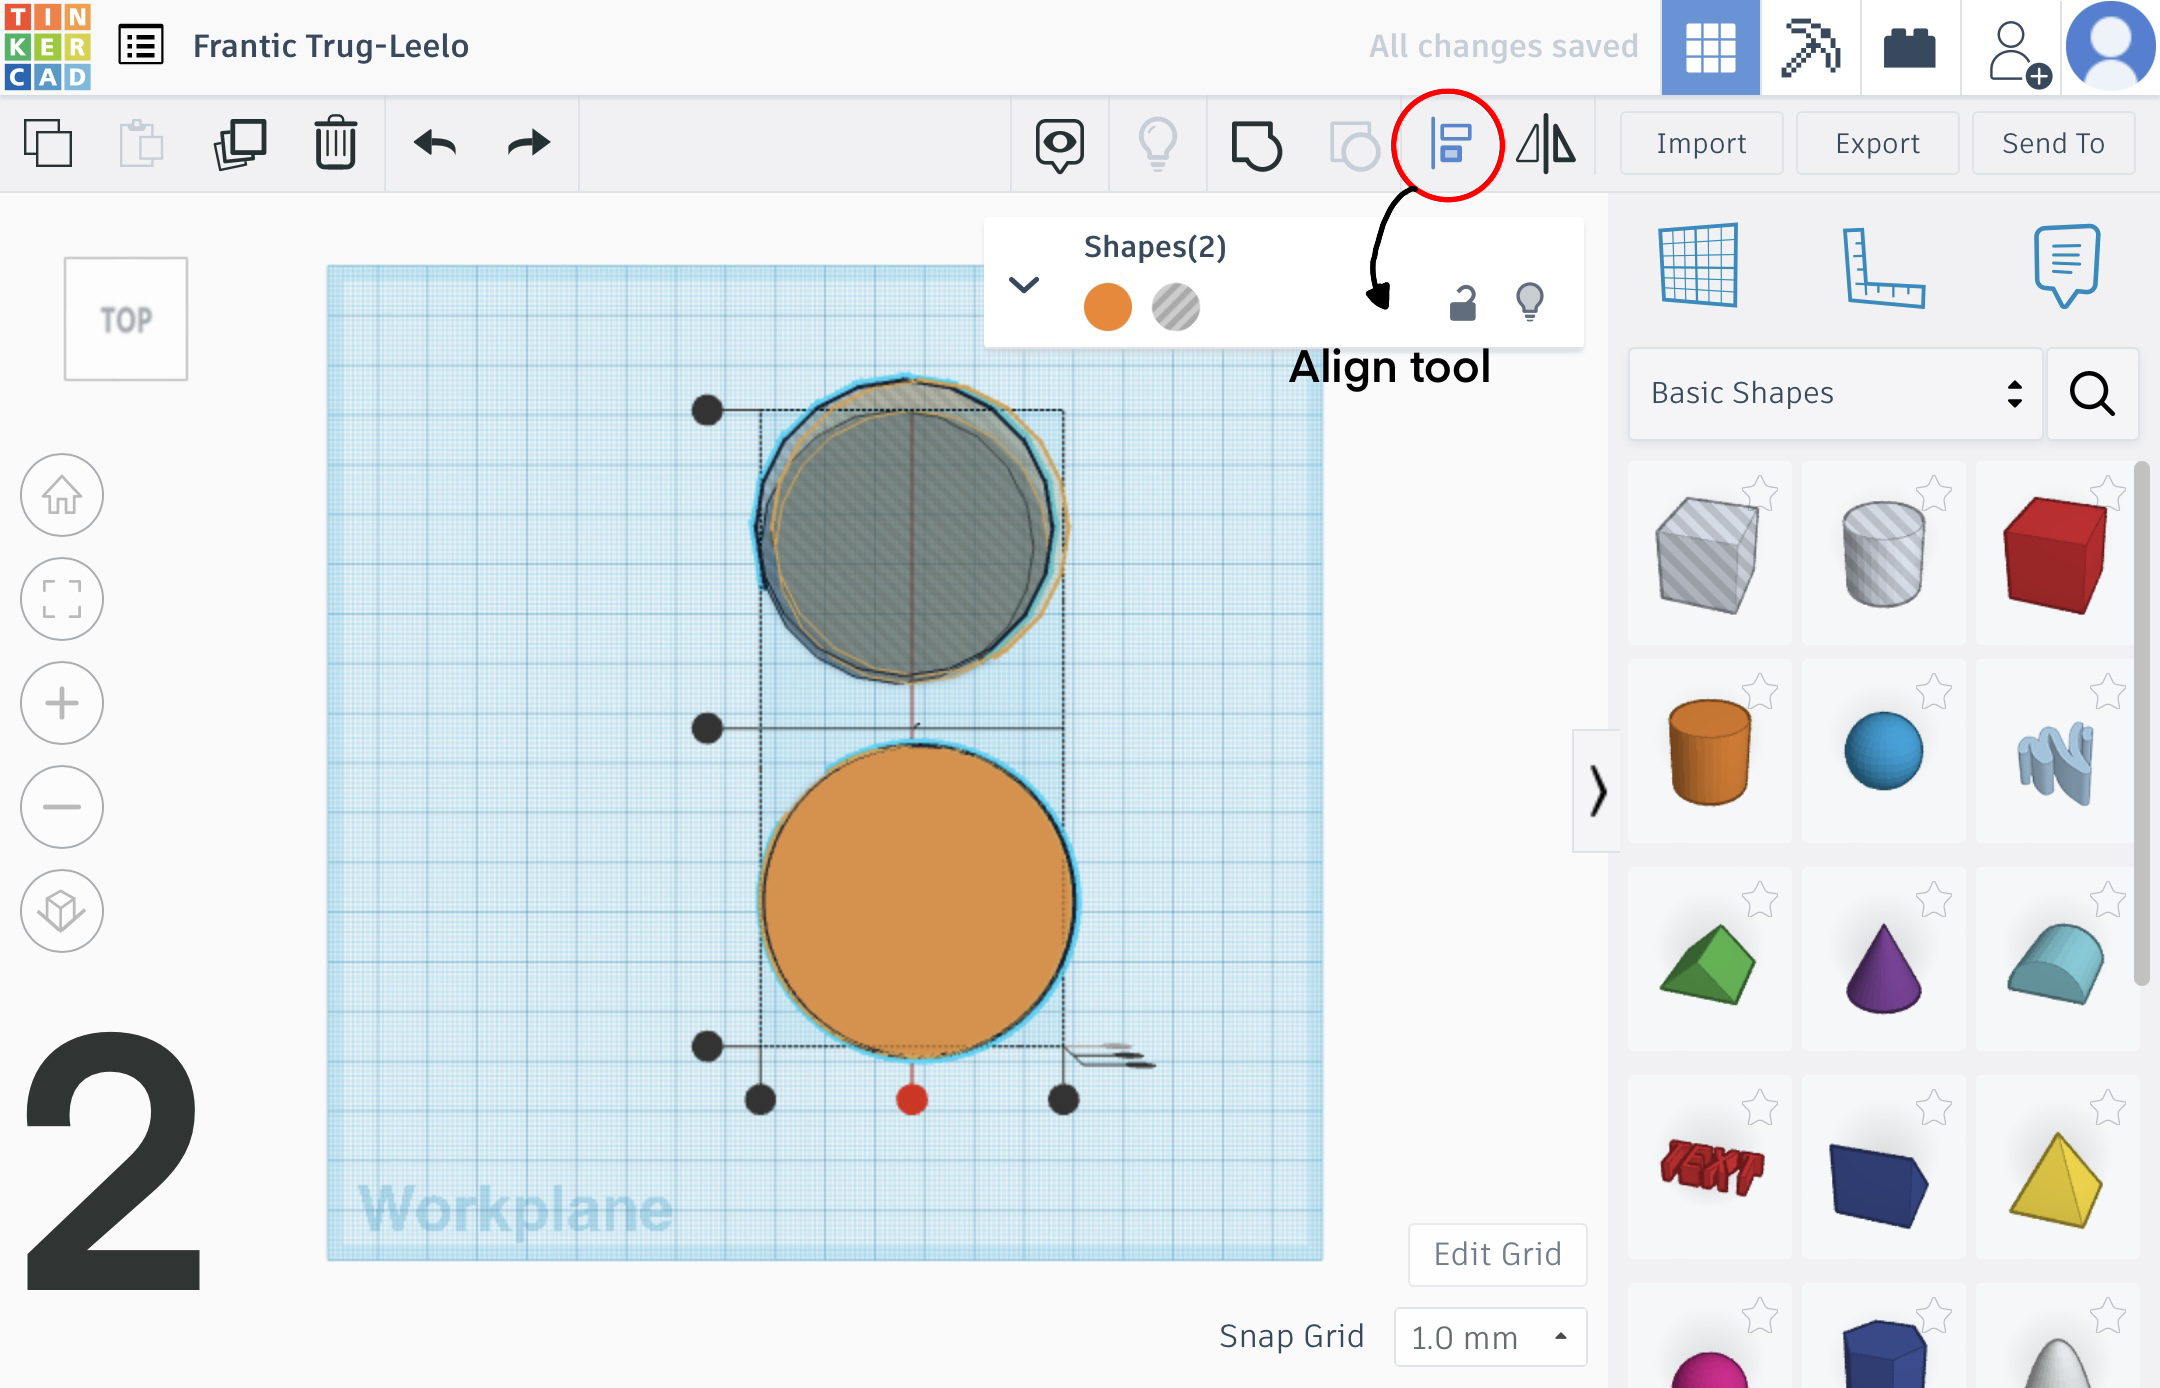
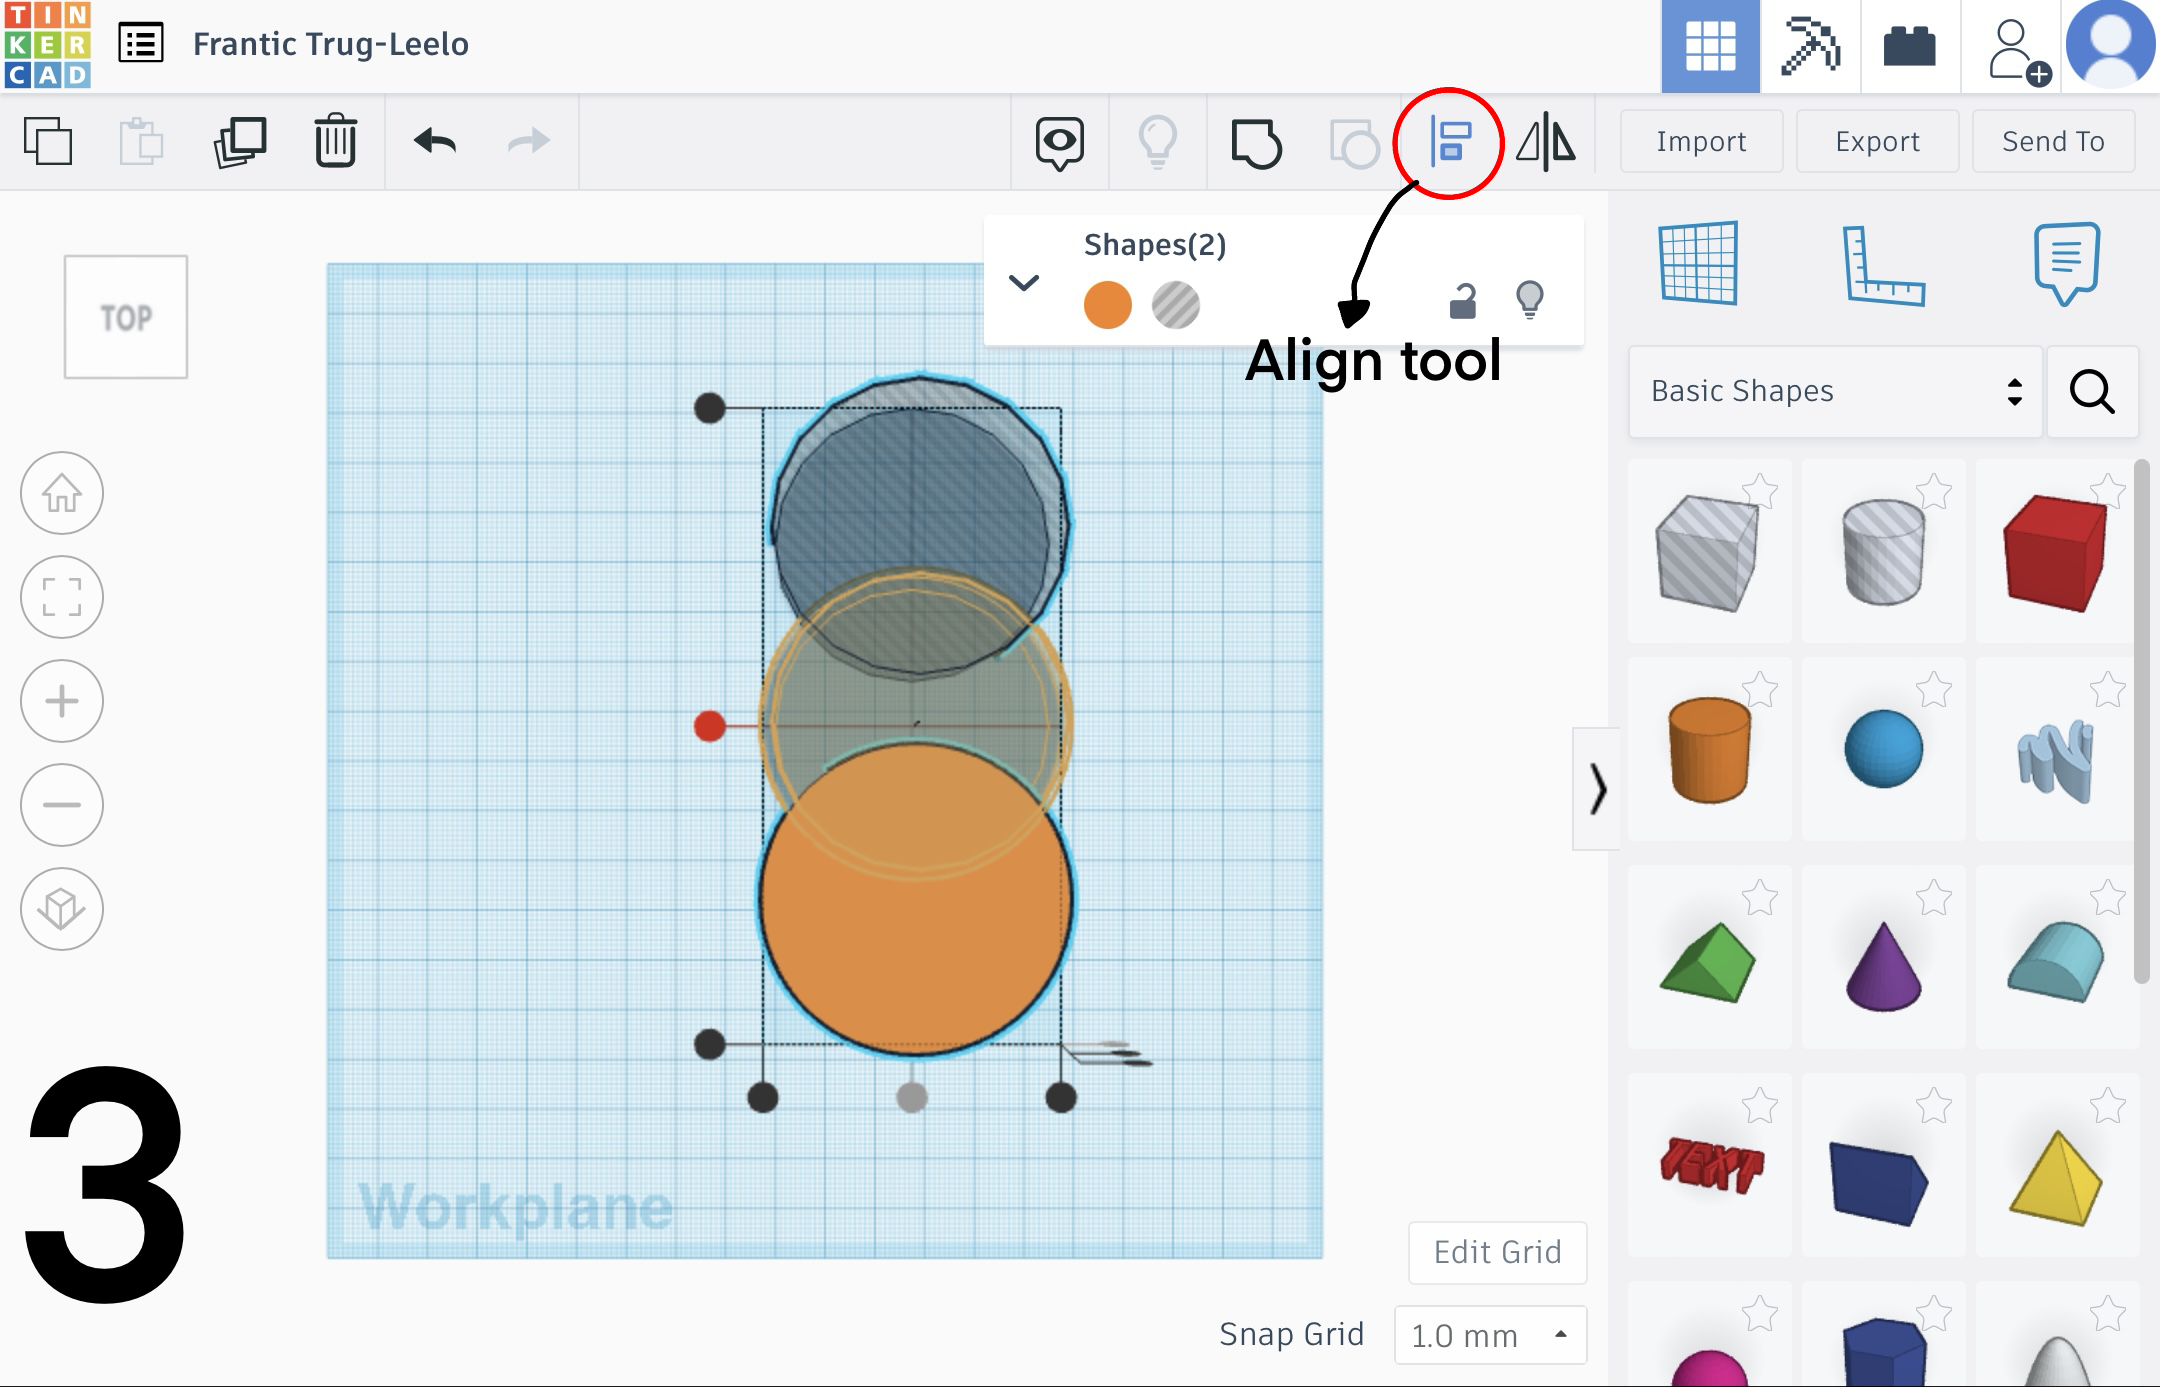
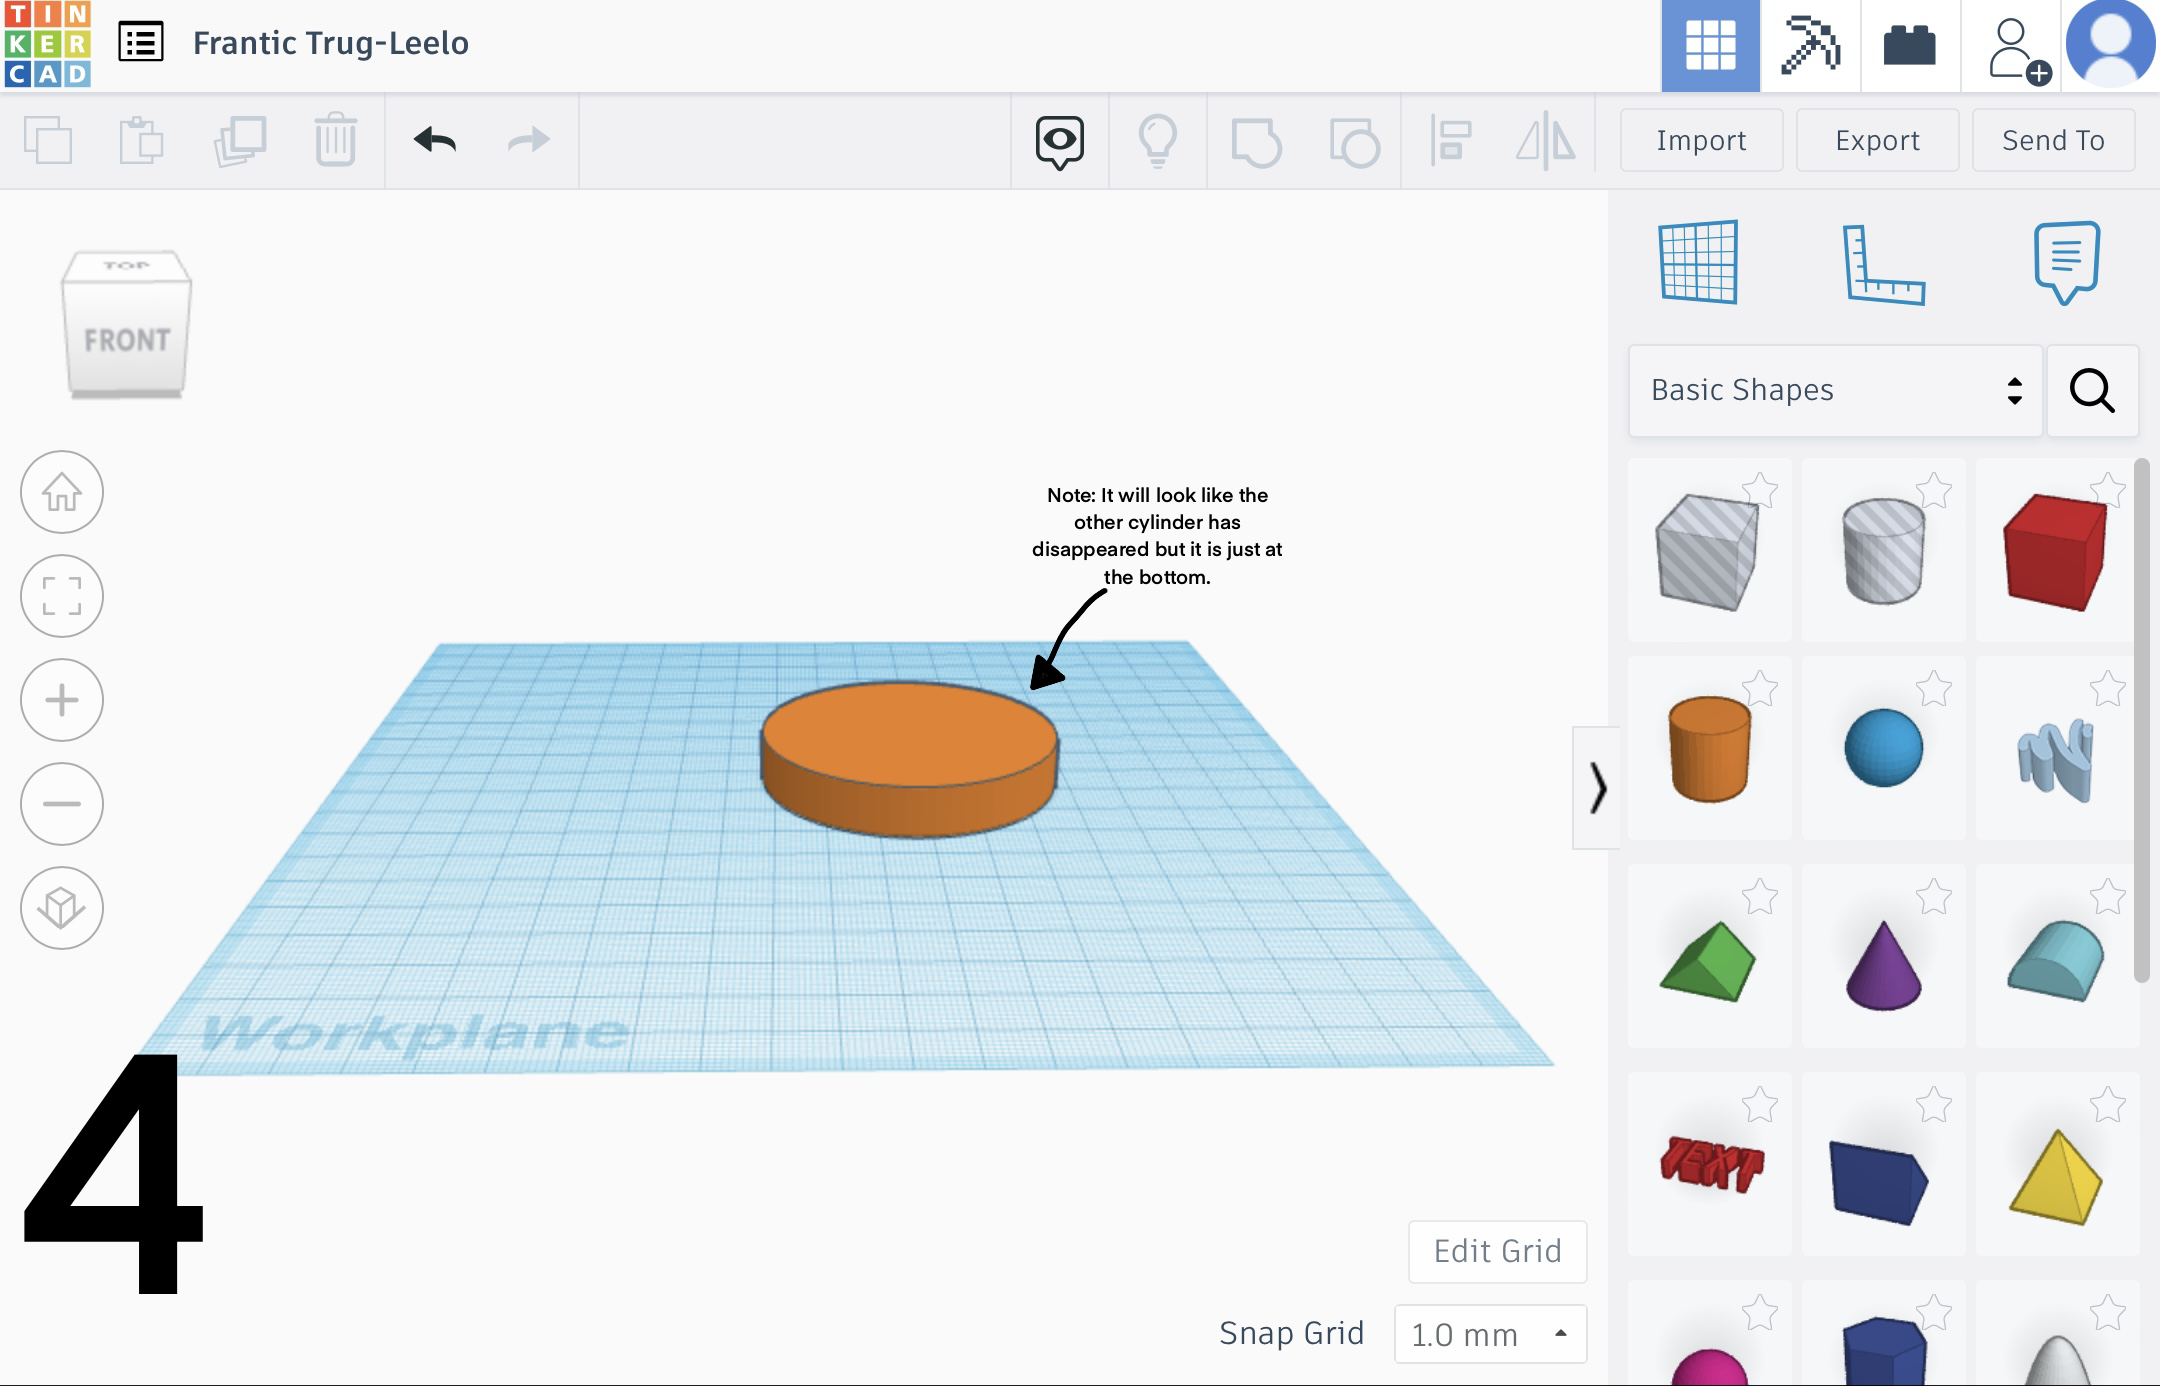
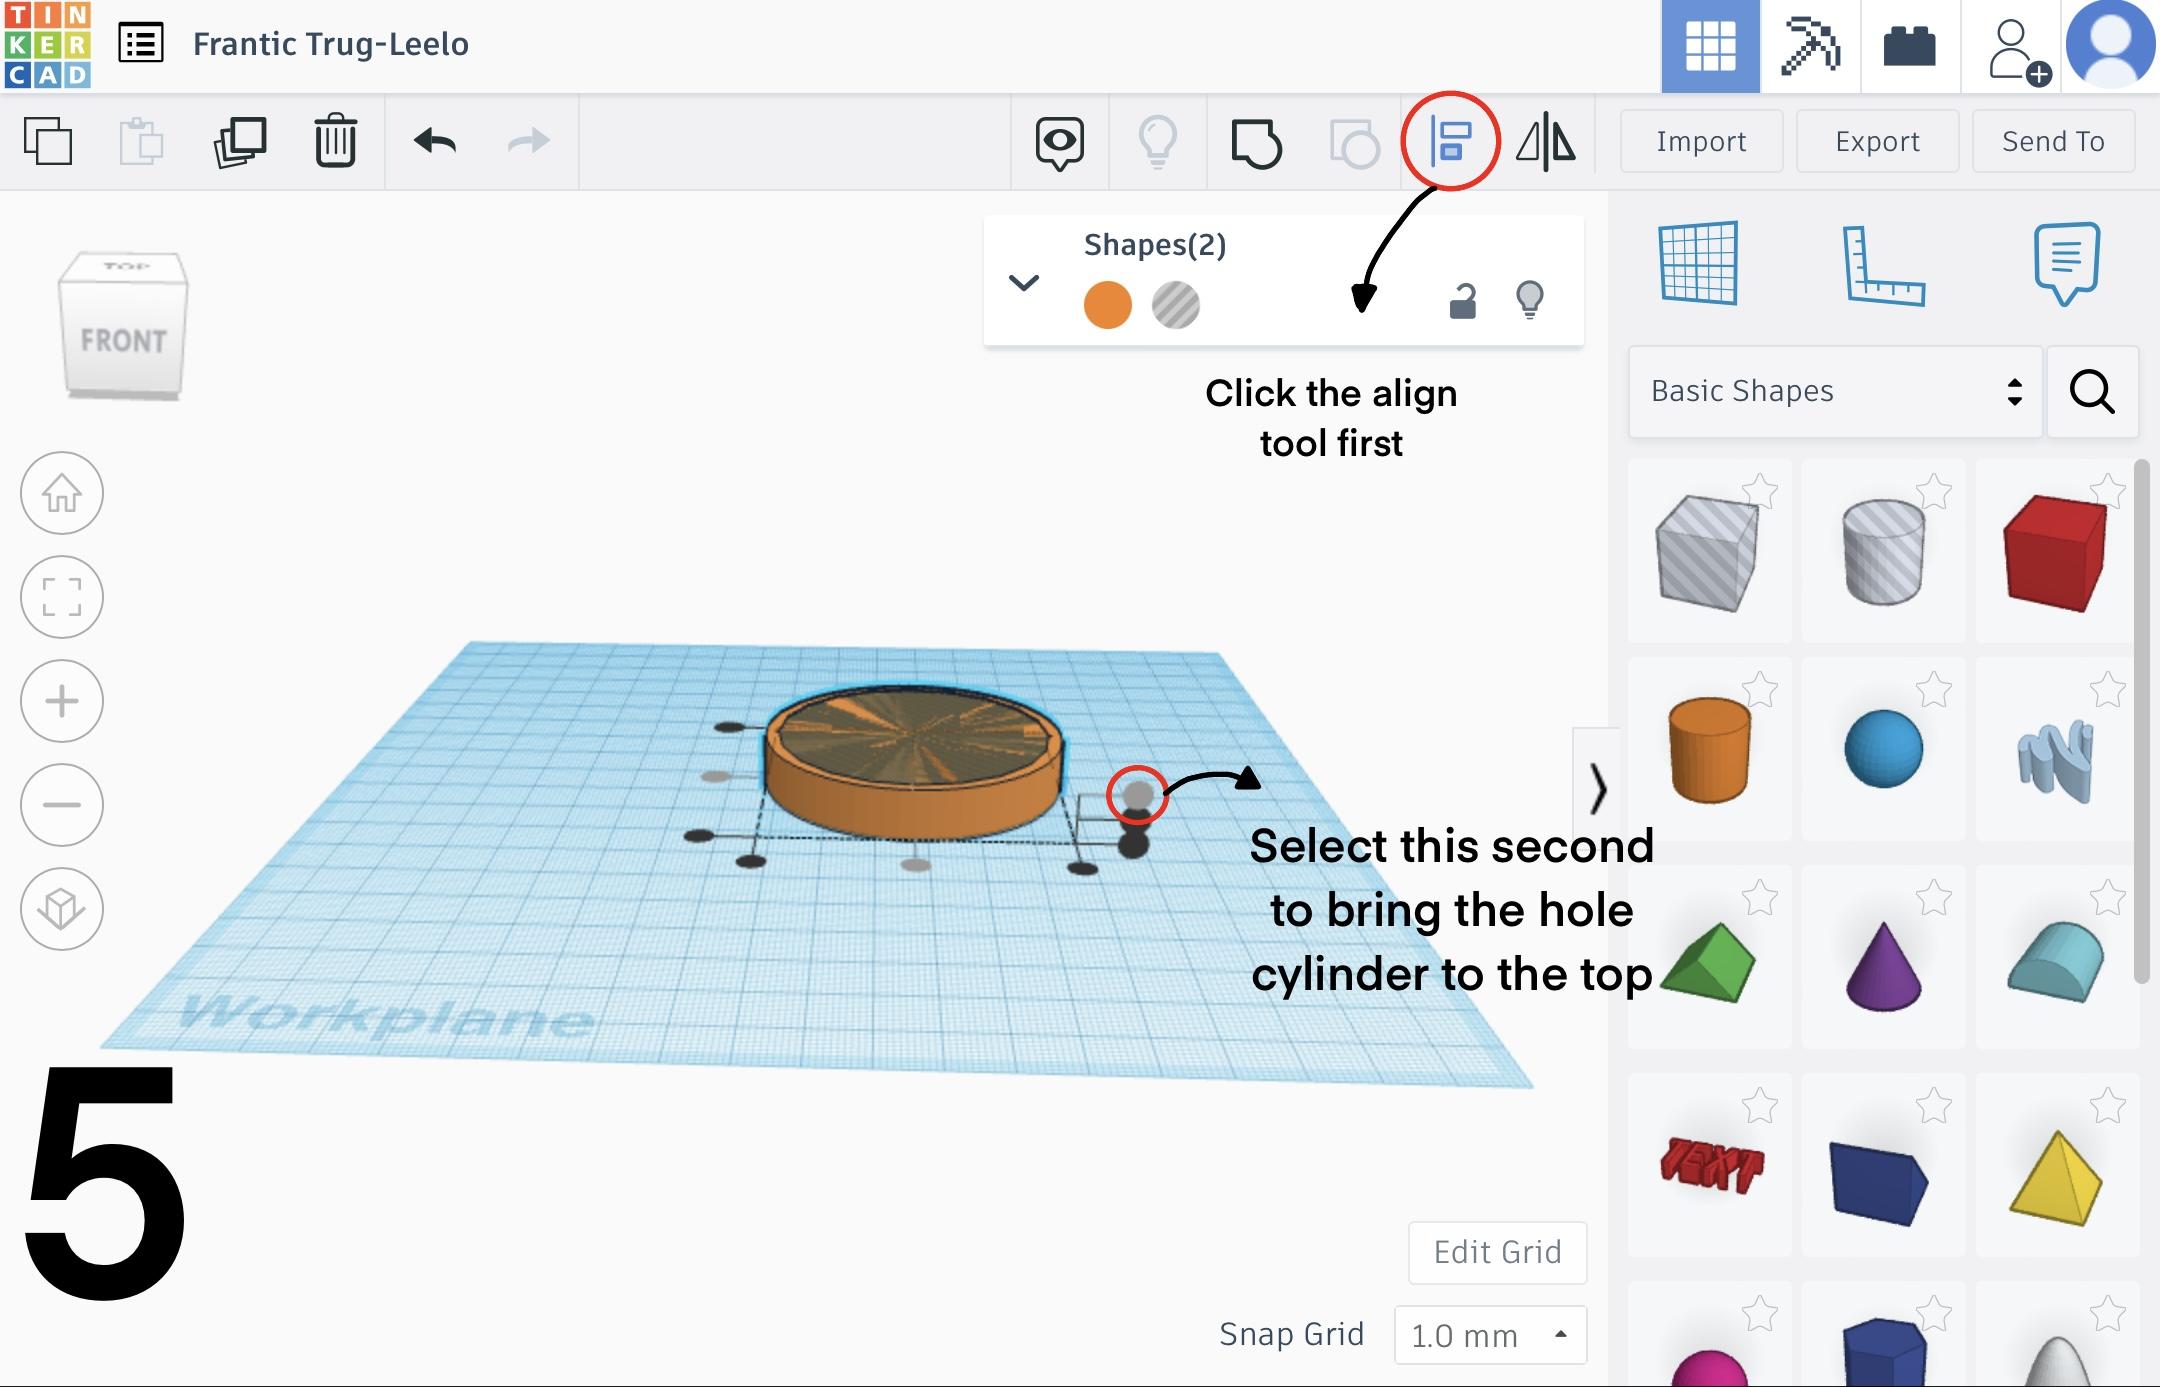
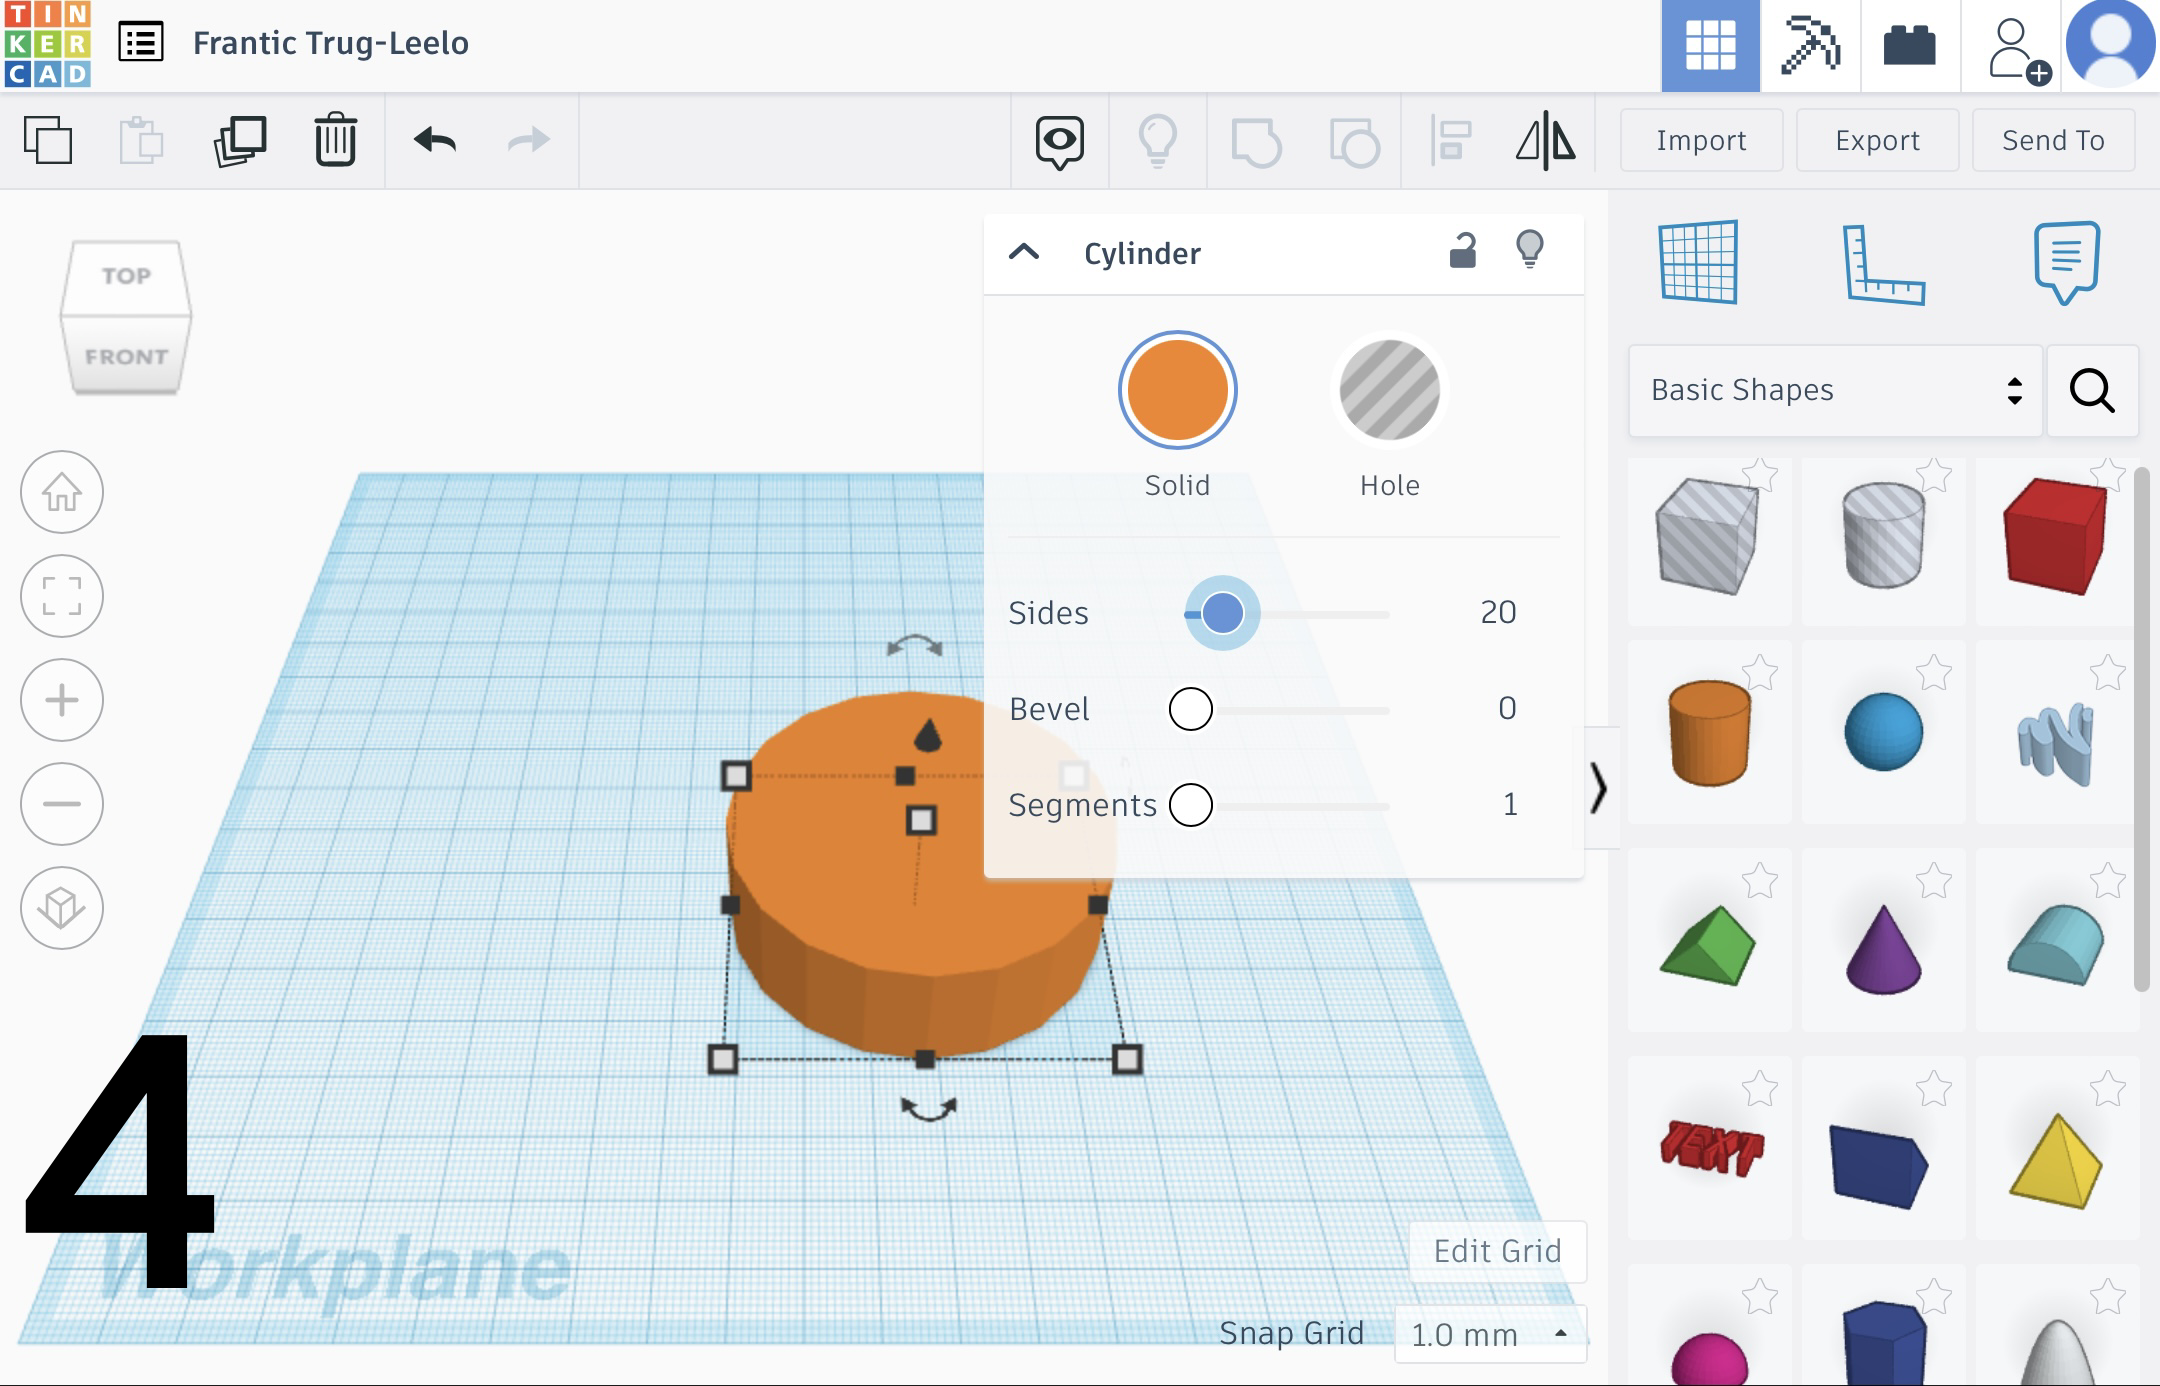
Then, get a hole cylinder and make it 55mm wide and 55mm thick, or 5mm smaller in diameter than your other cylinder (Picture1.). Using the align tool, align the side of the hole and solid shape (Picture 2.). Do the same with aligning the centre (Picture 3.). Change the height of the hole to 5mm (note that it will look like the hole has disappeared but it is just at the bottom.) (Picture 4.). Using the align tool, align the hole to the top of the medal.(Picture 5.)
Note. The hole should still be grey (but it will look different in the 3D attachment)
The Loop for the Ribbon
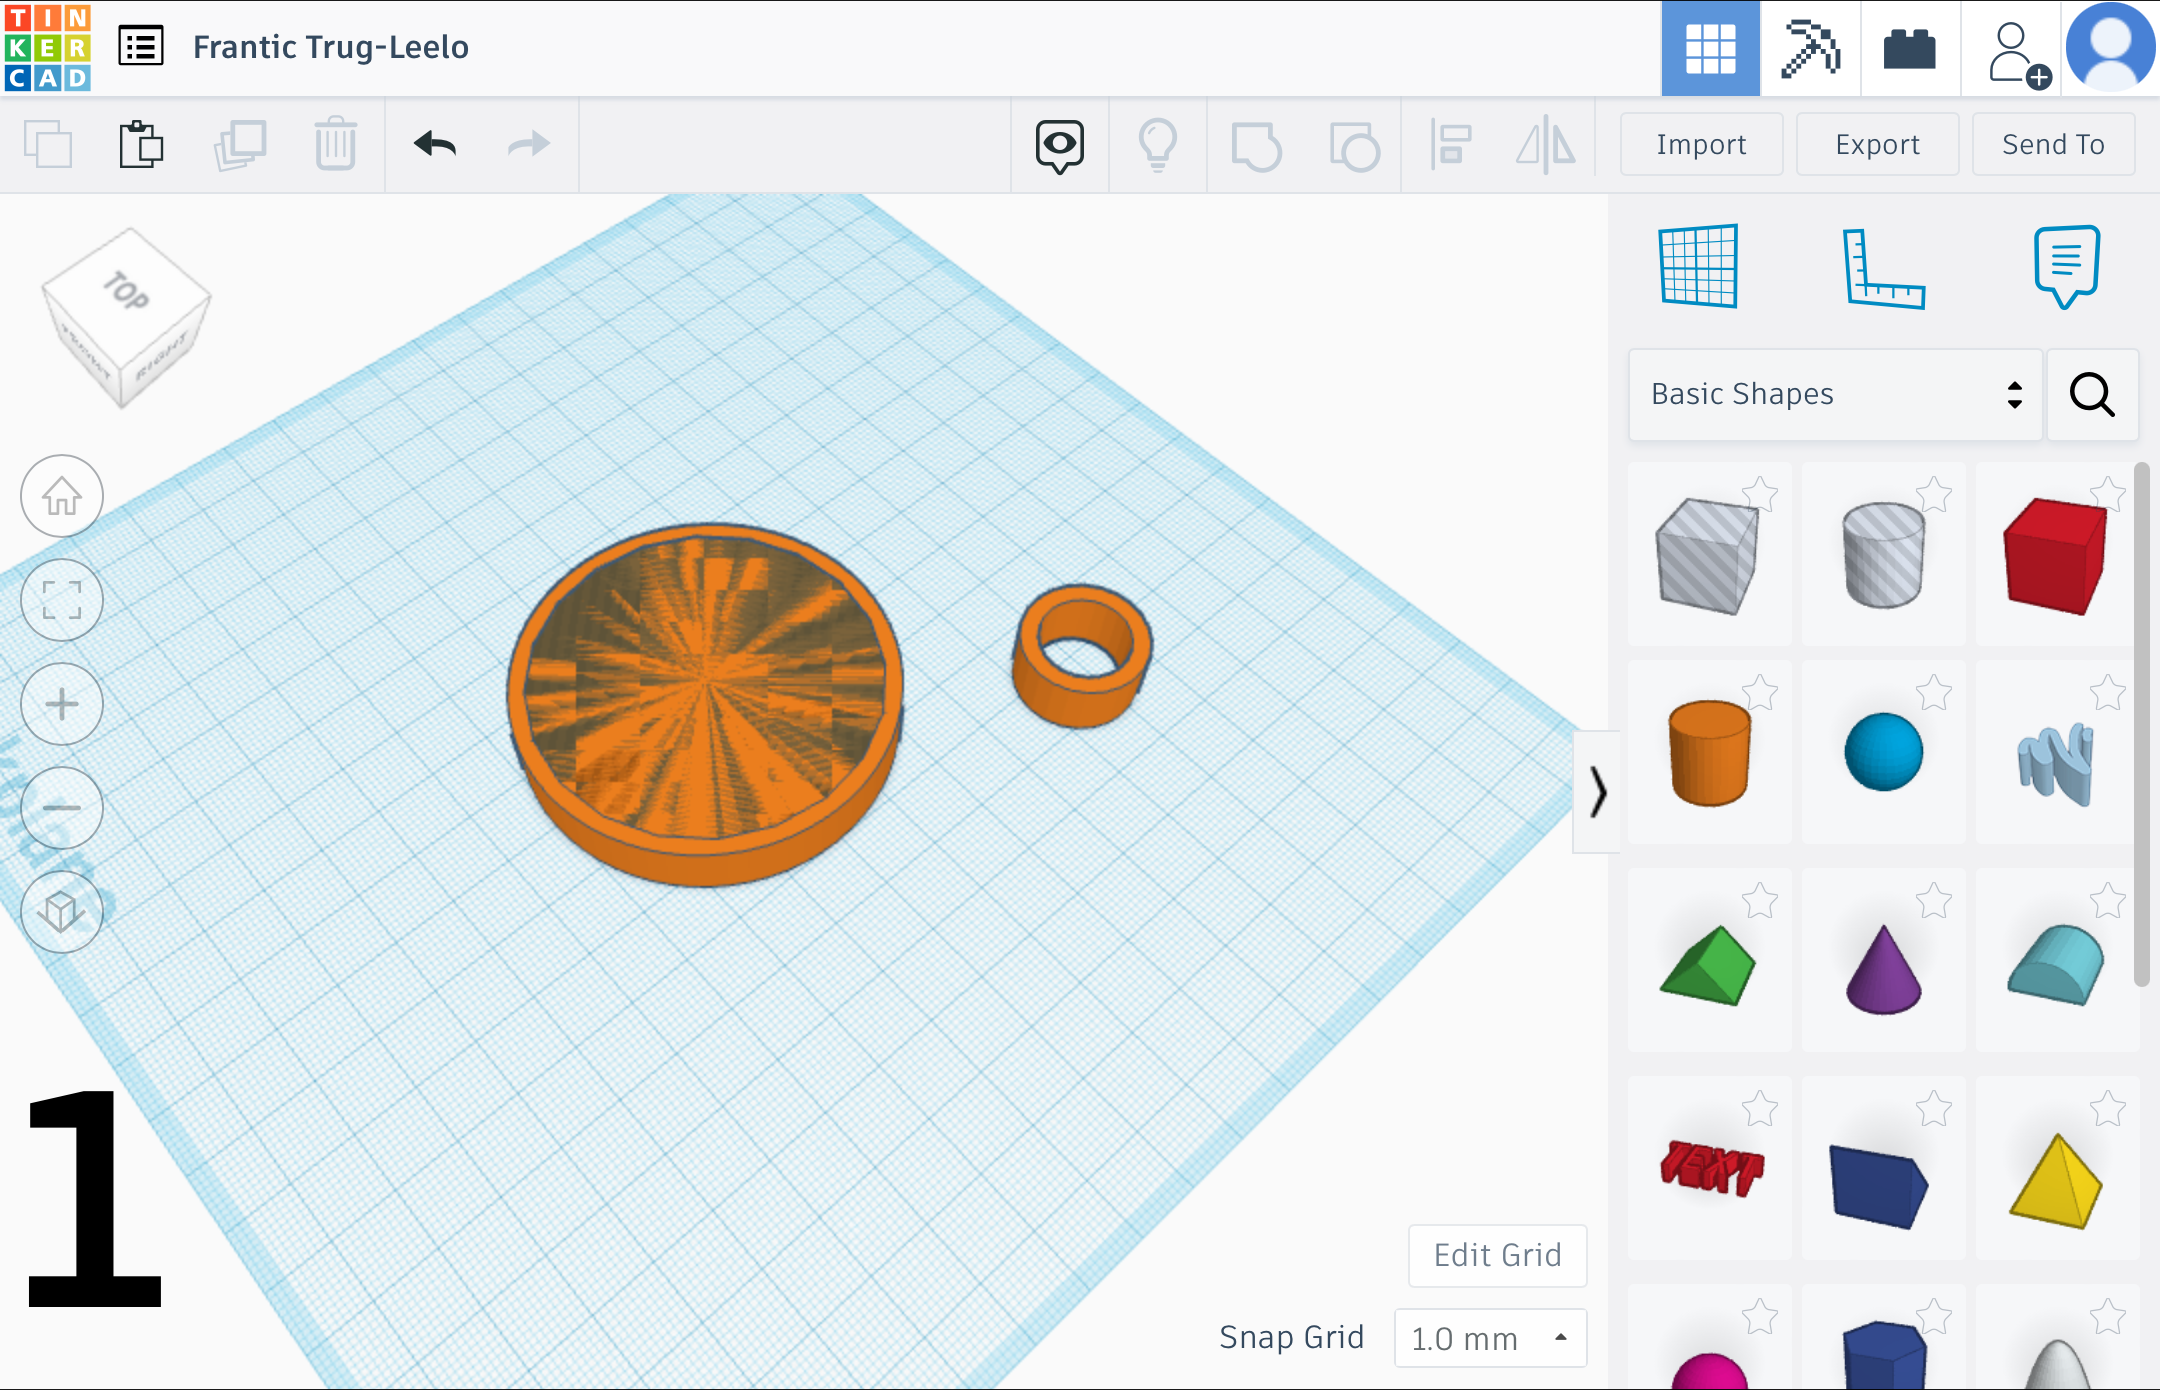
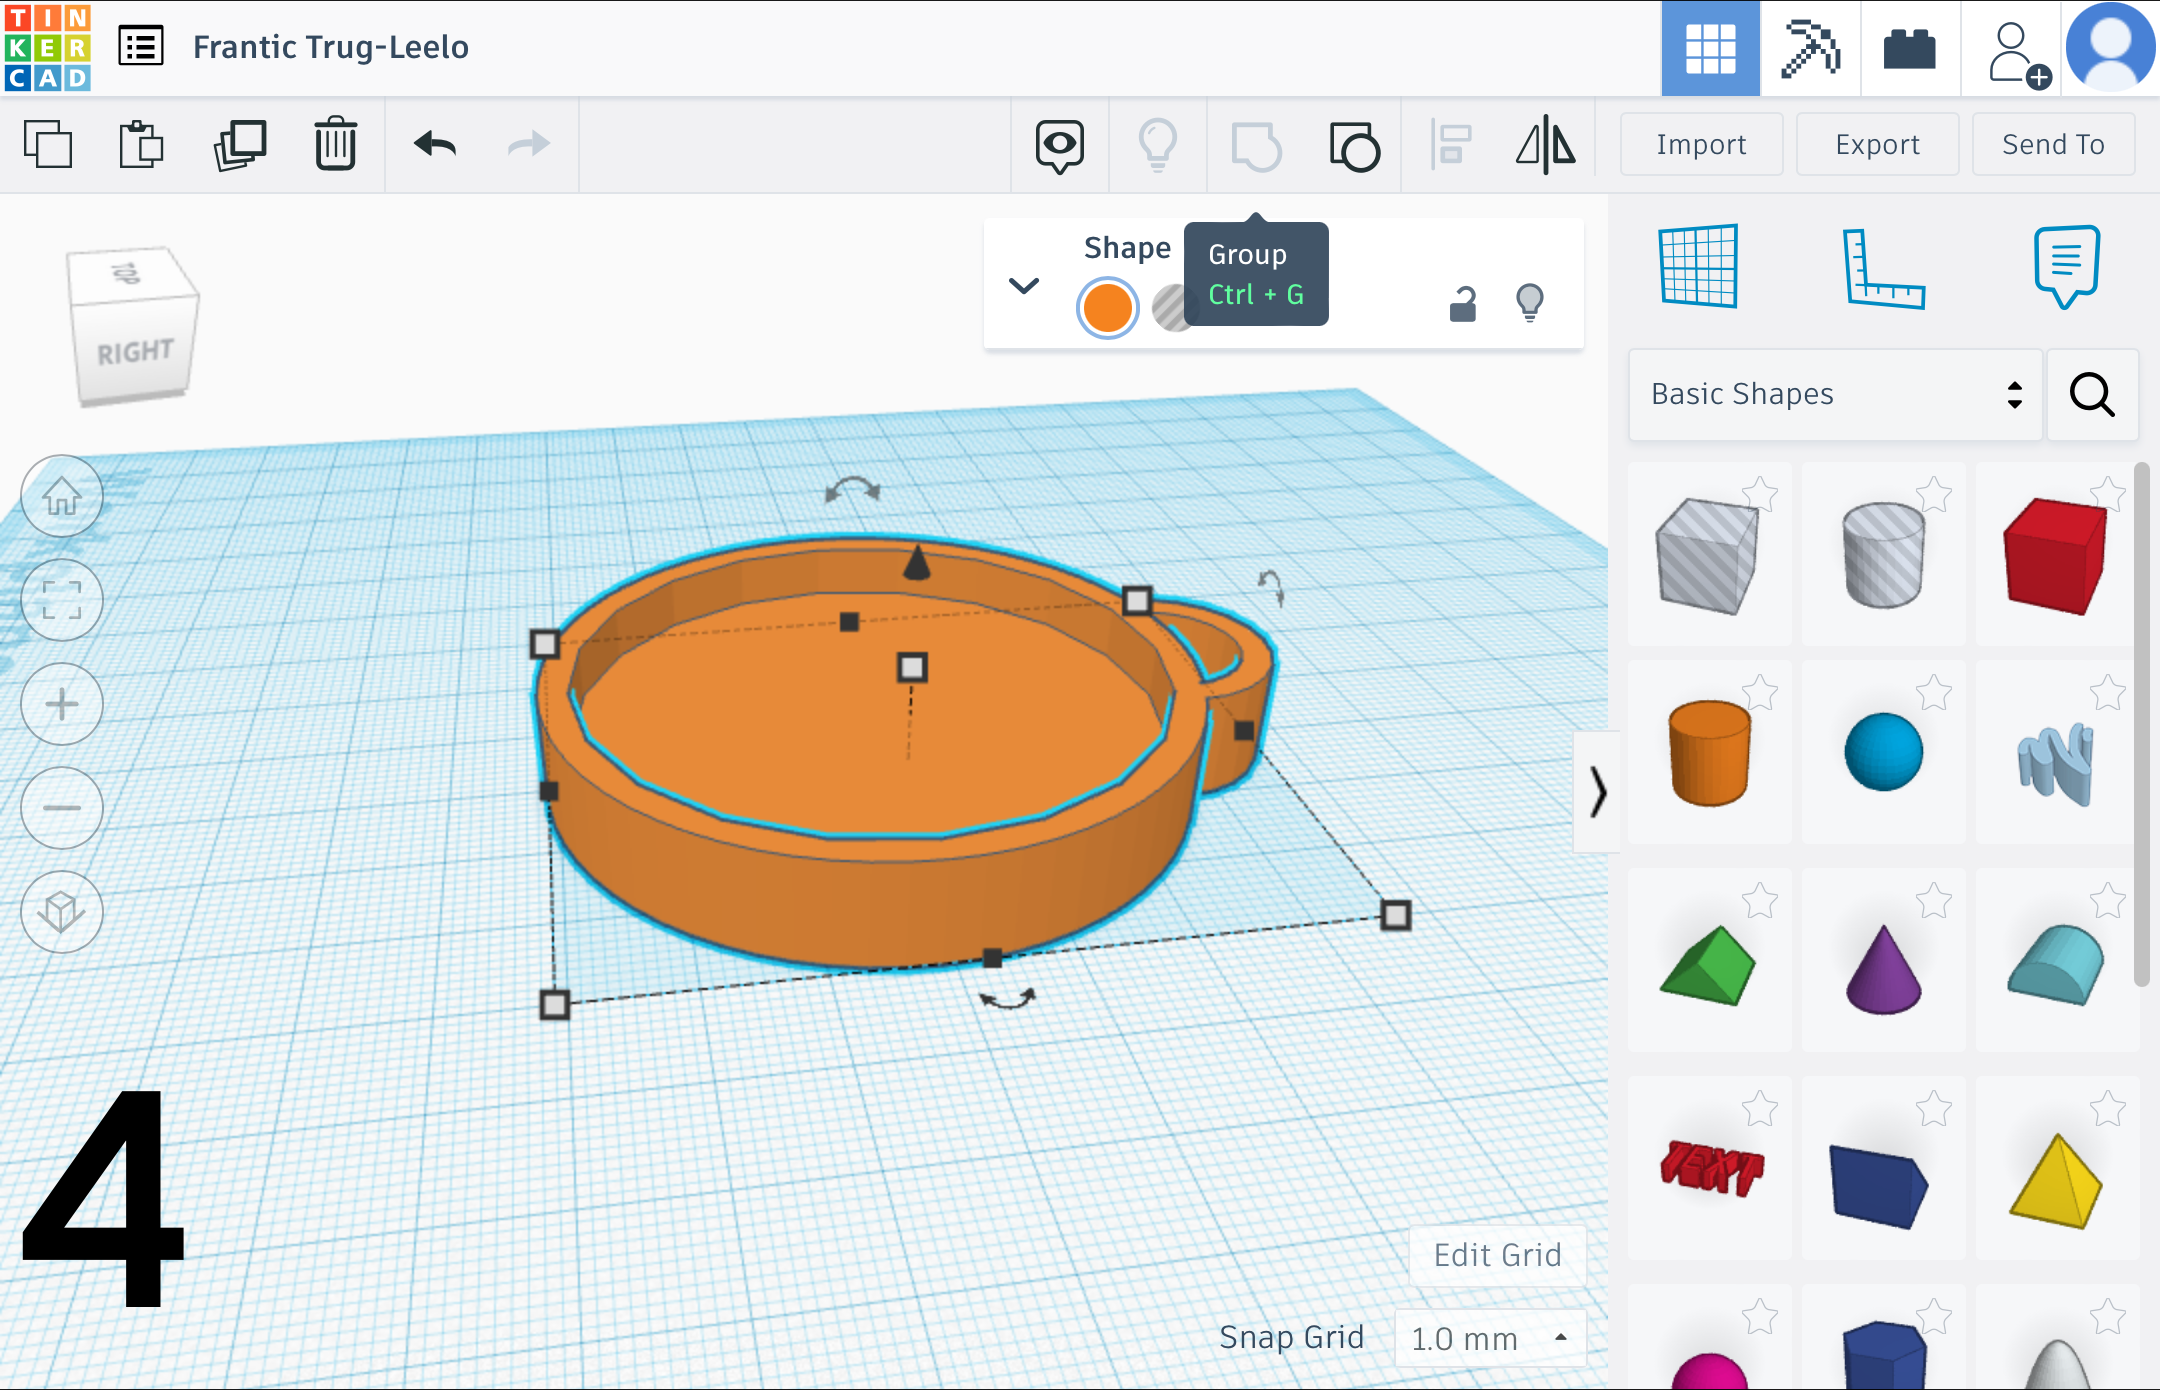
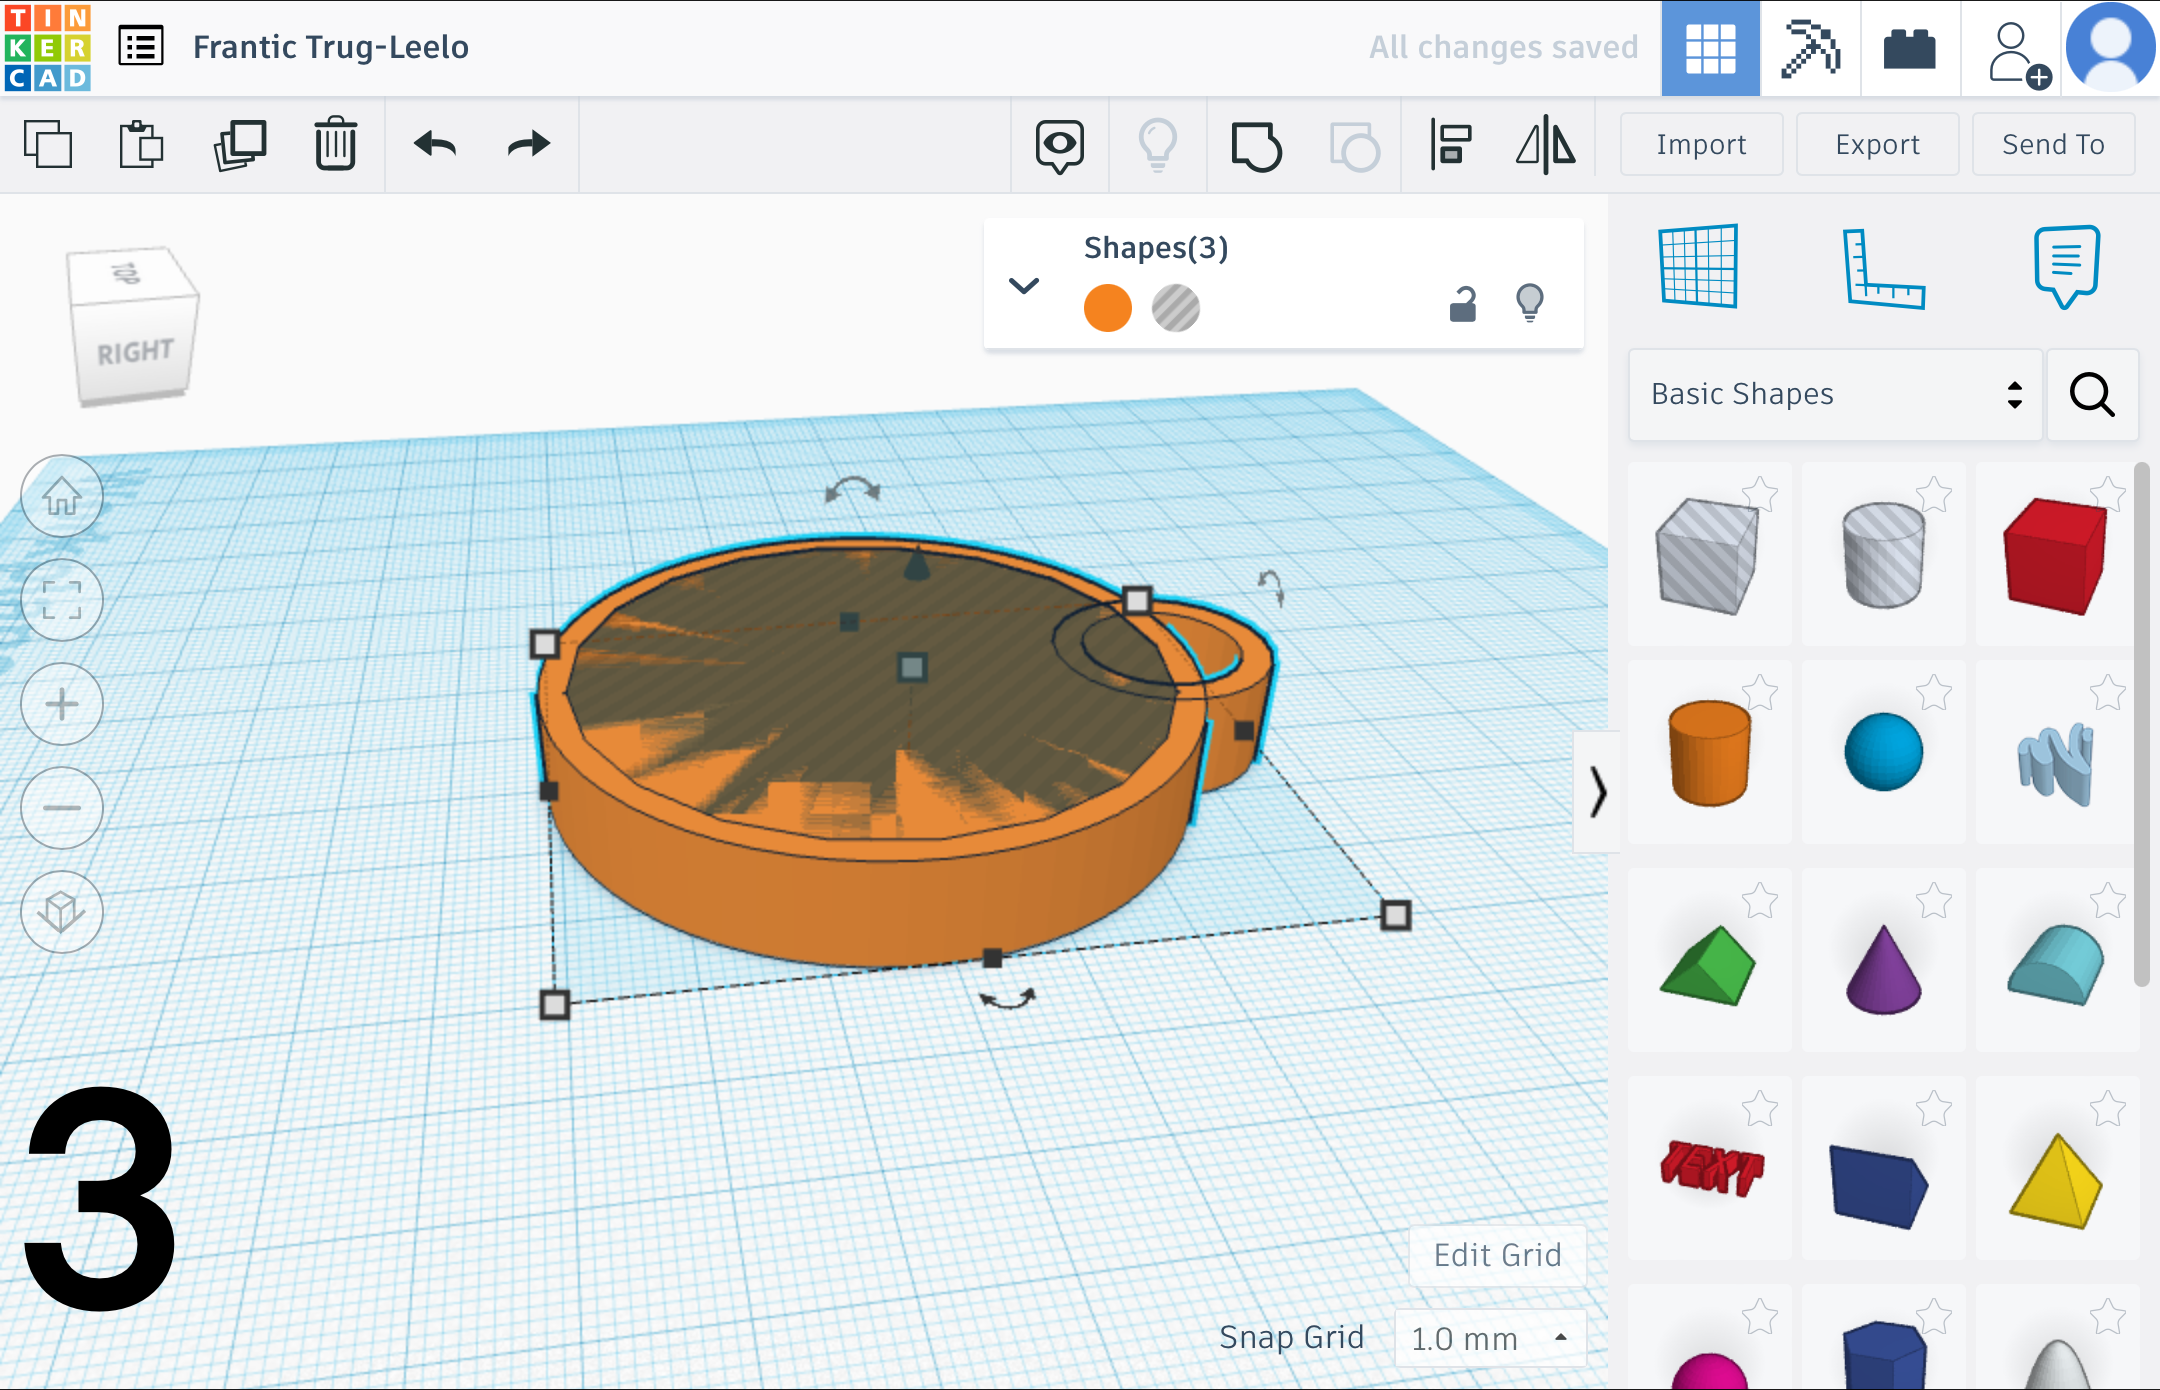
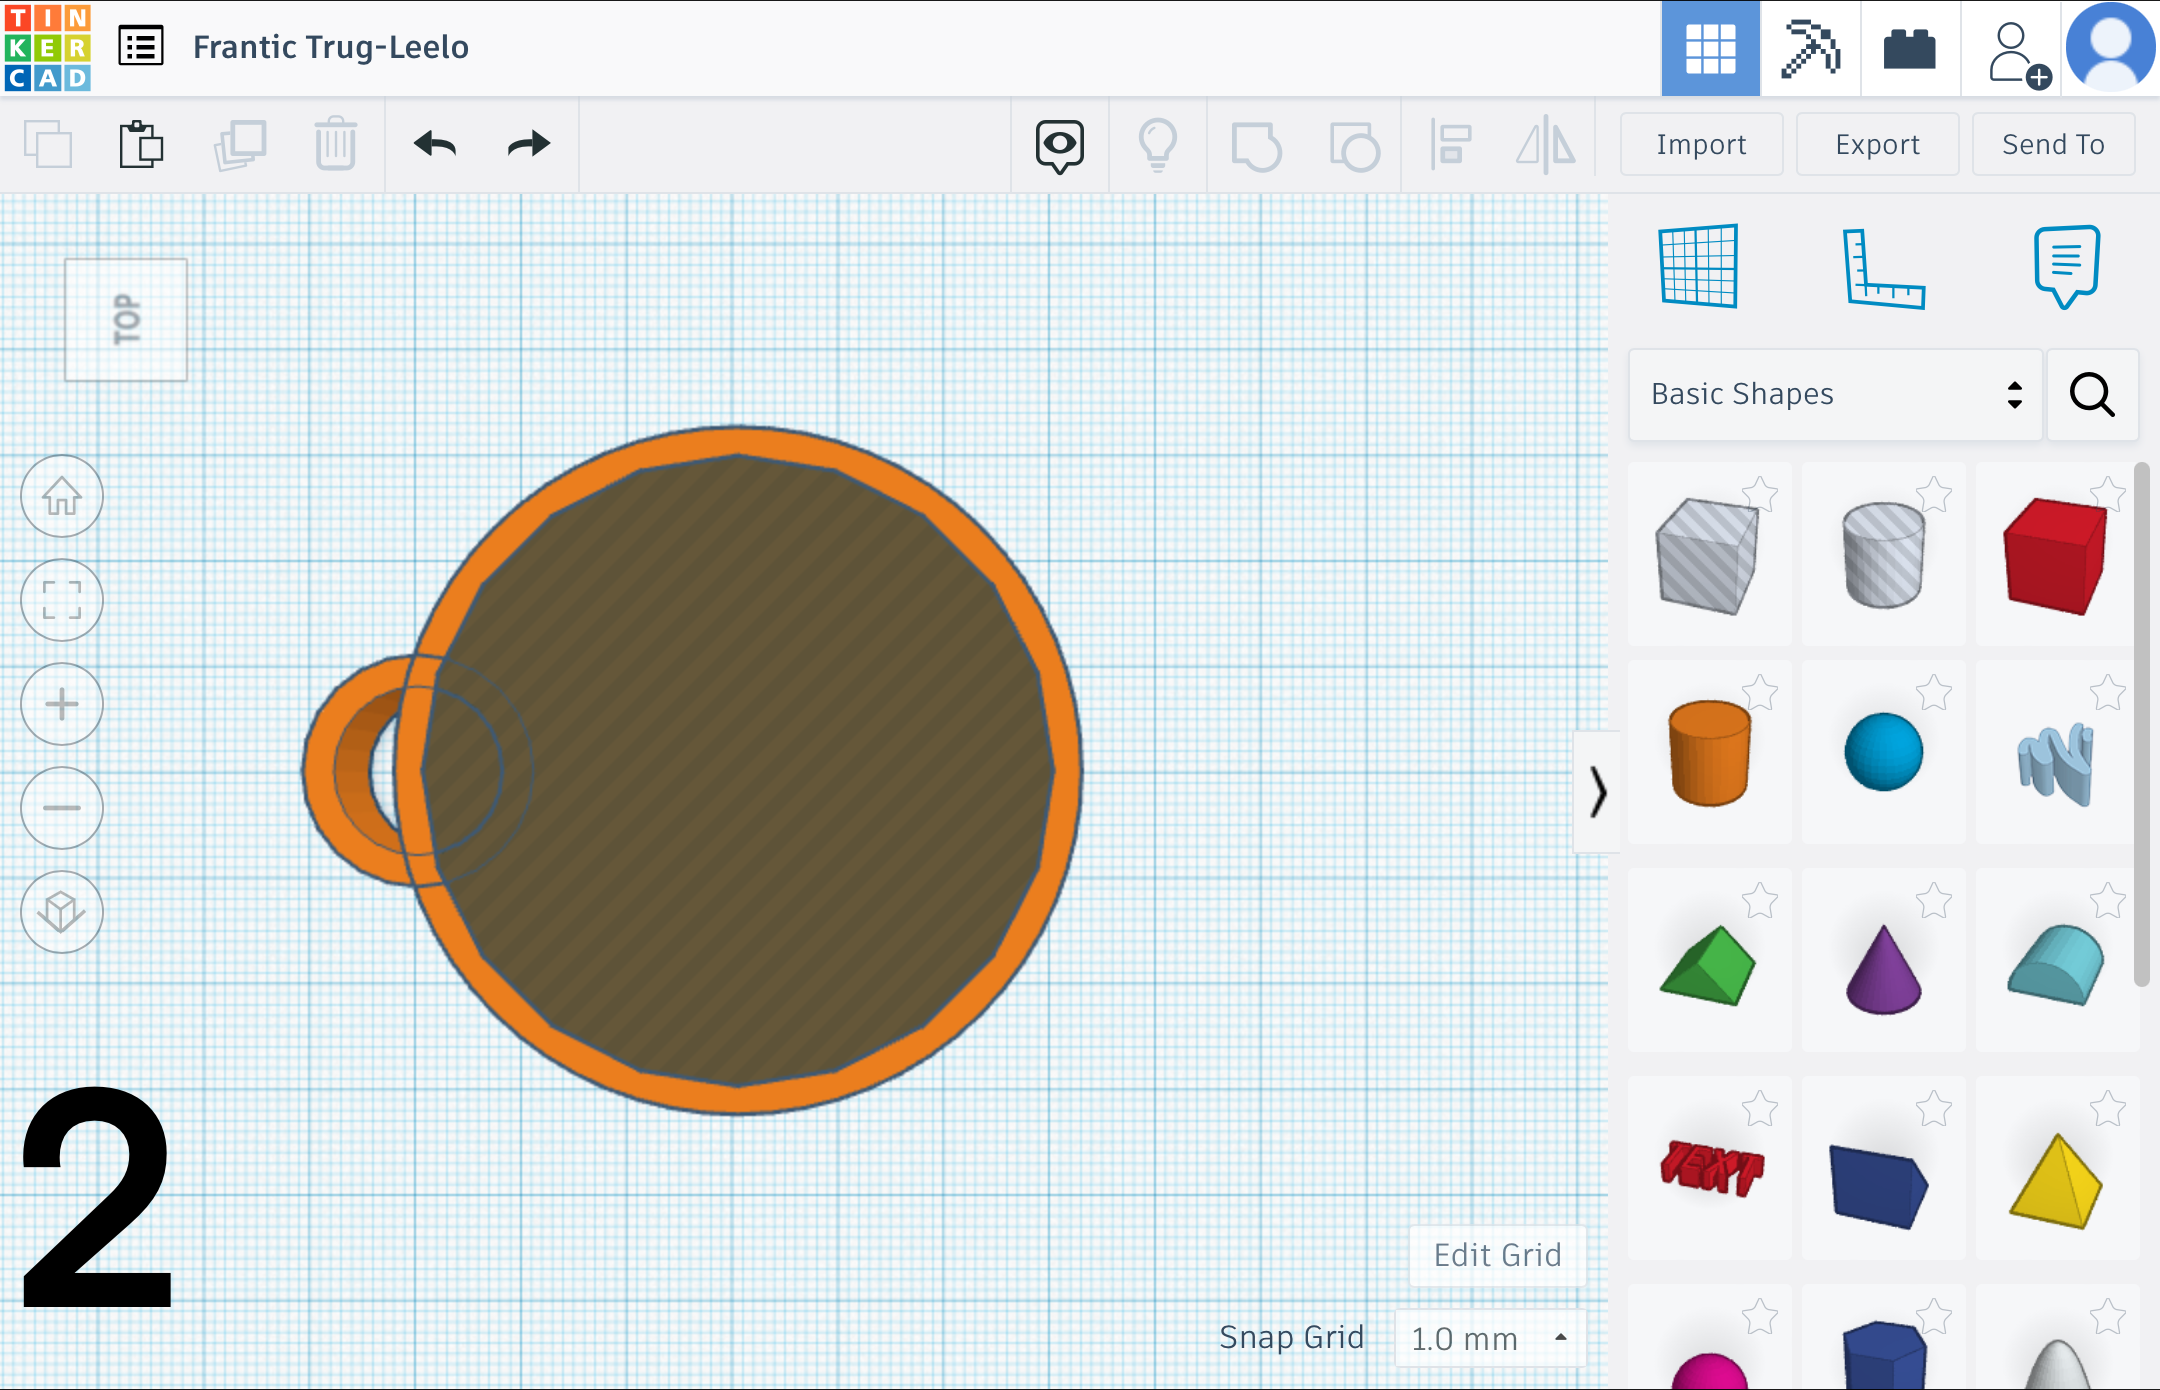
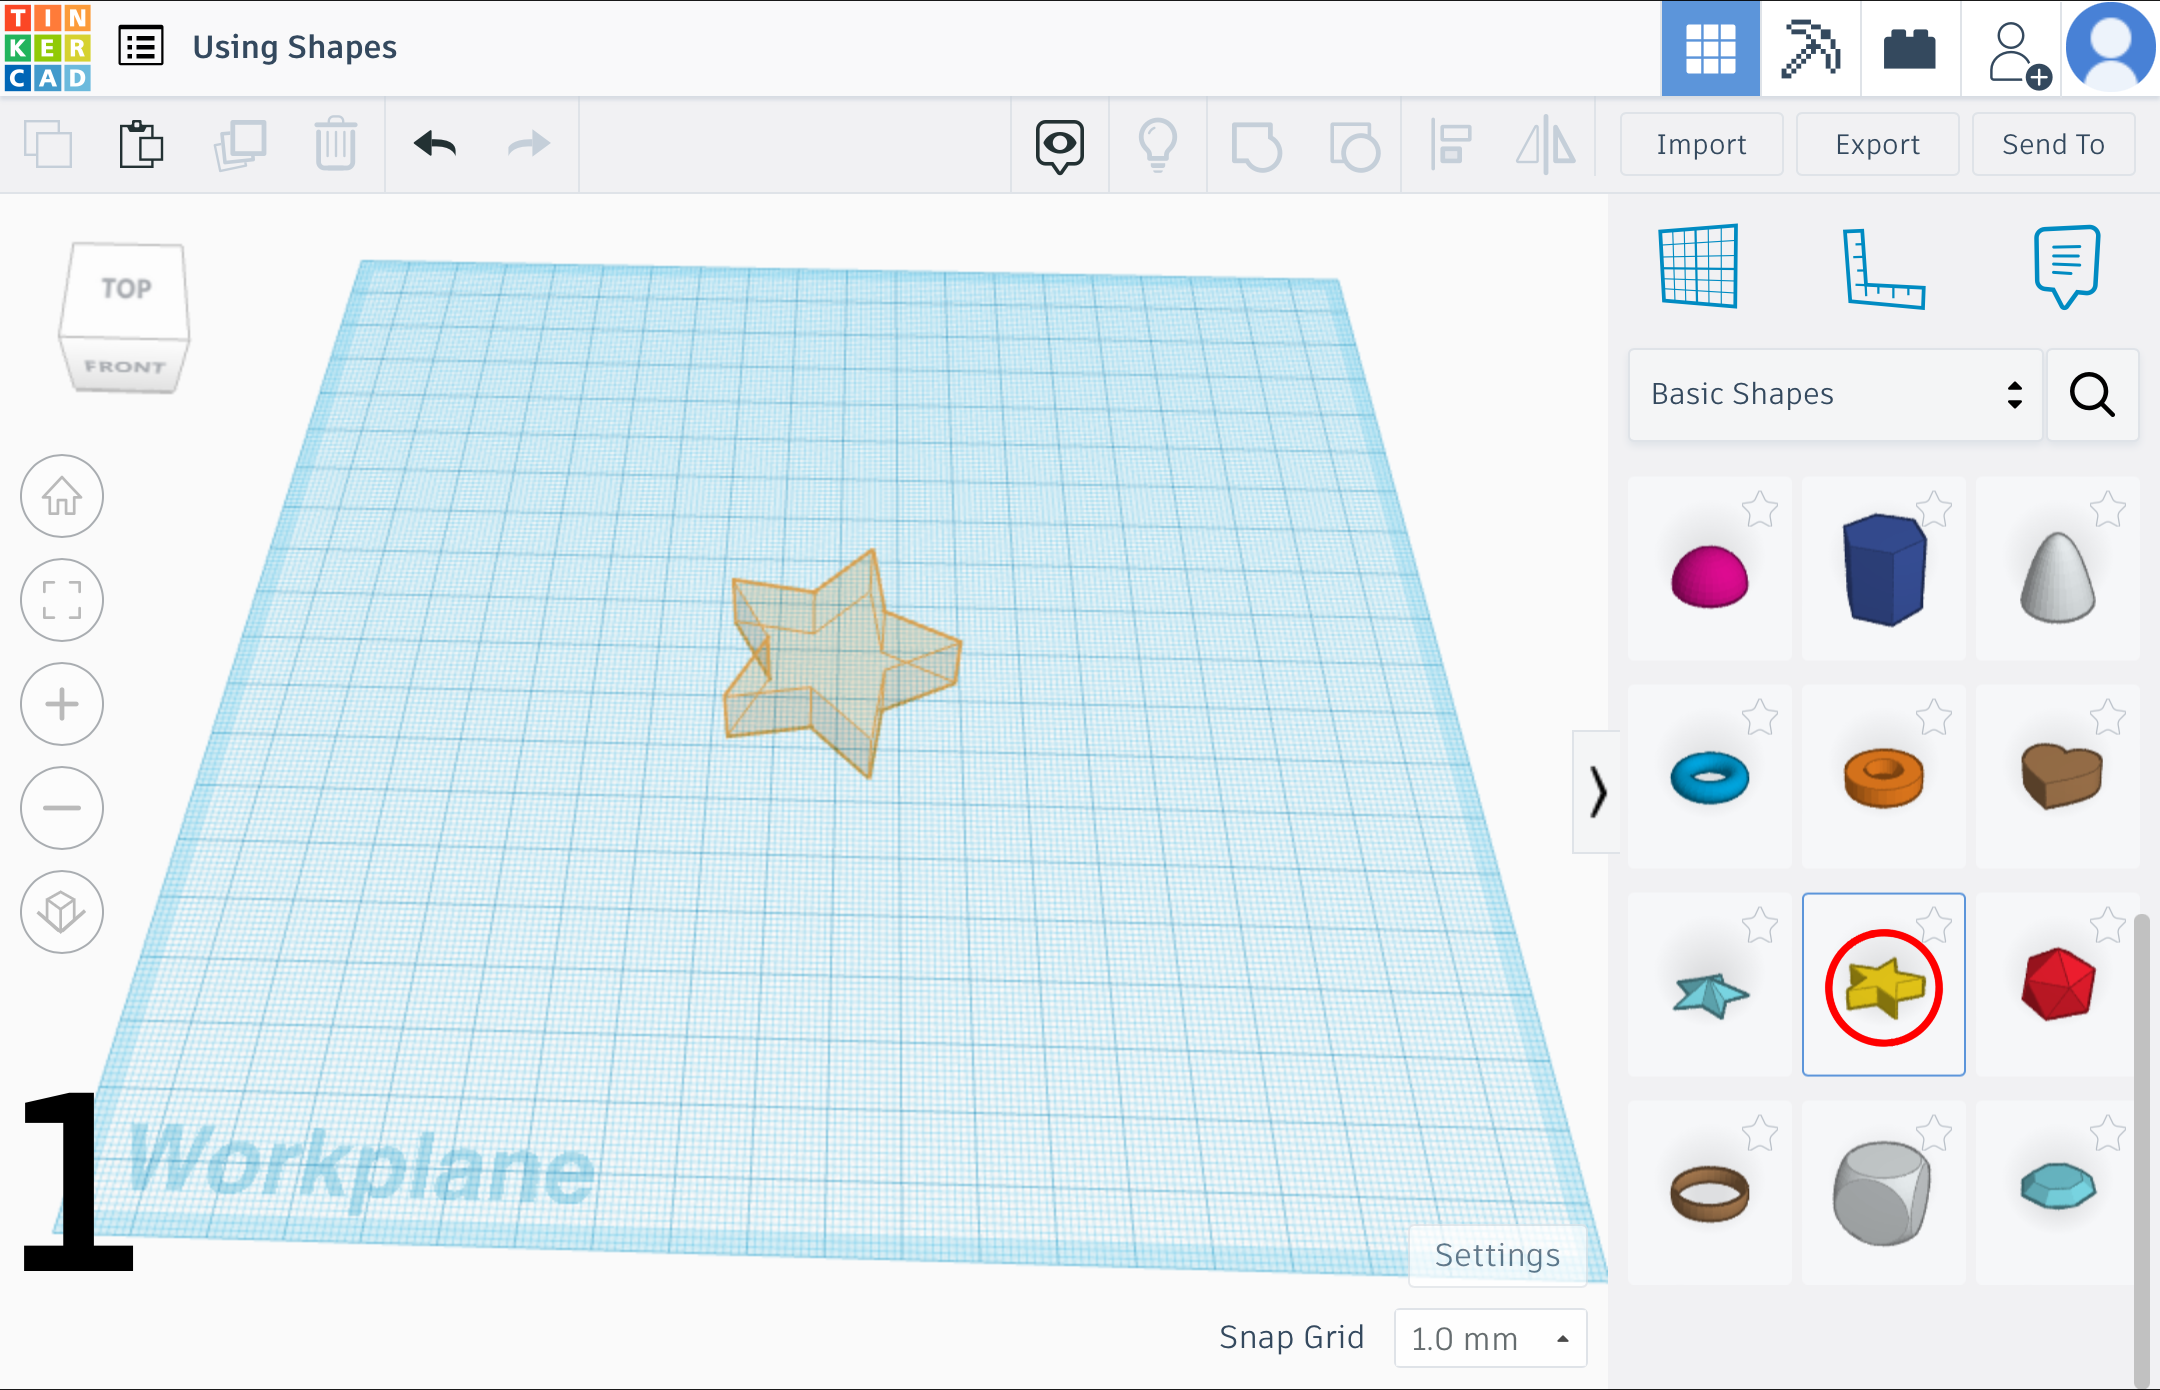
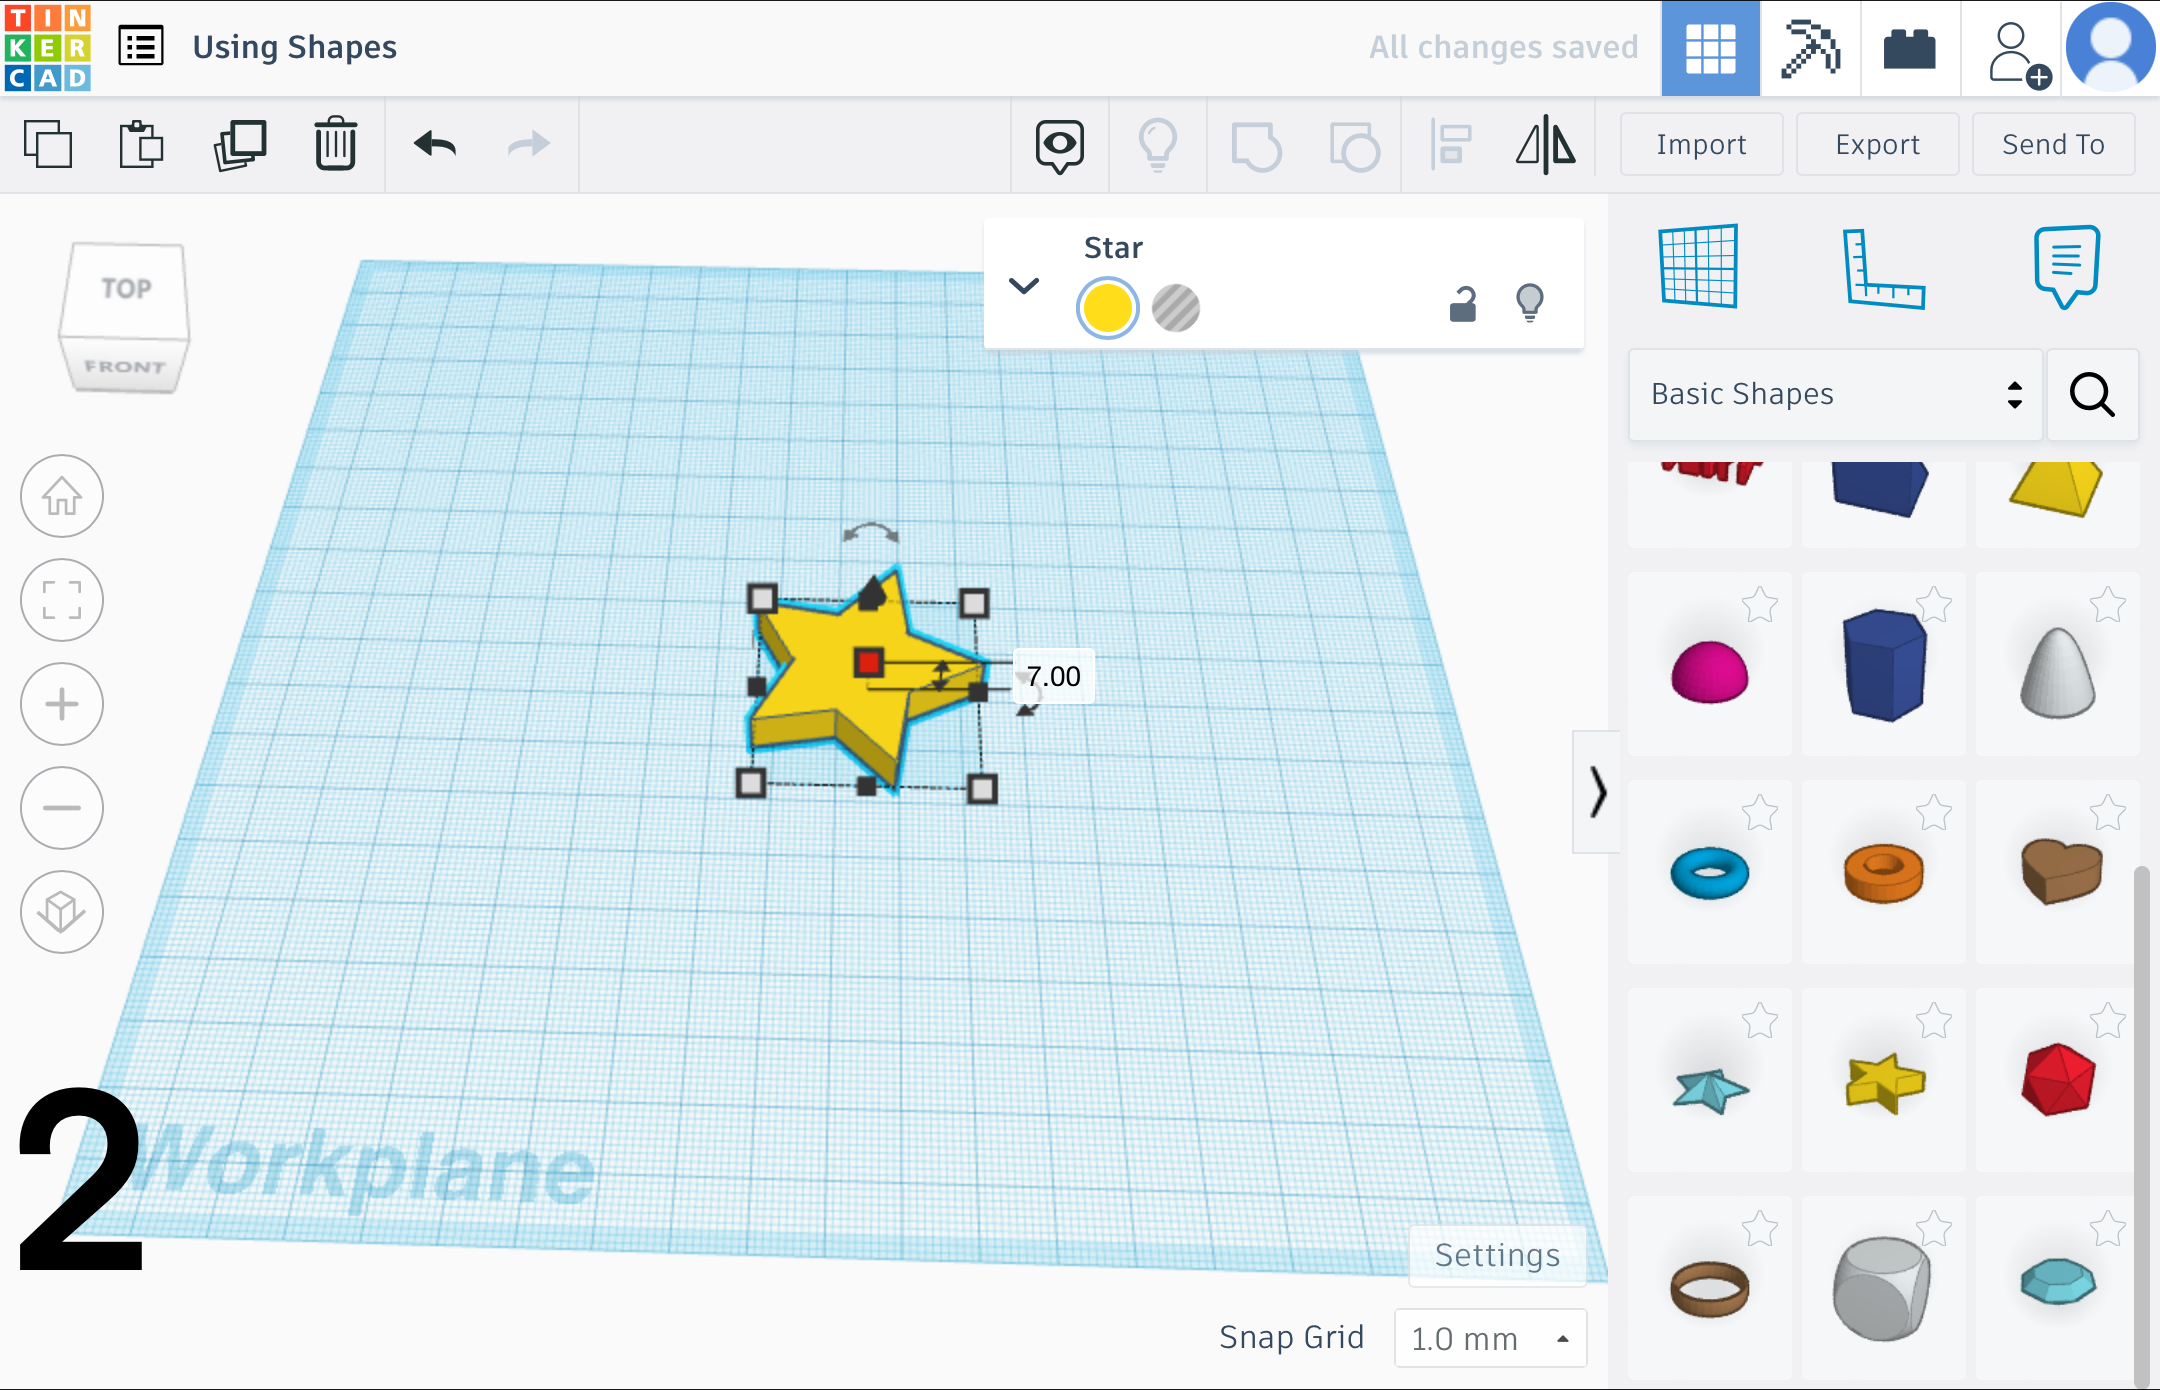
Extra Ways of Making Designs - Pre-made Shapes
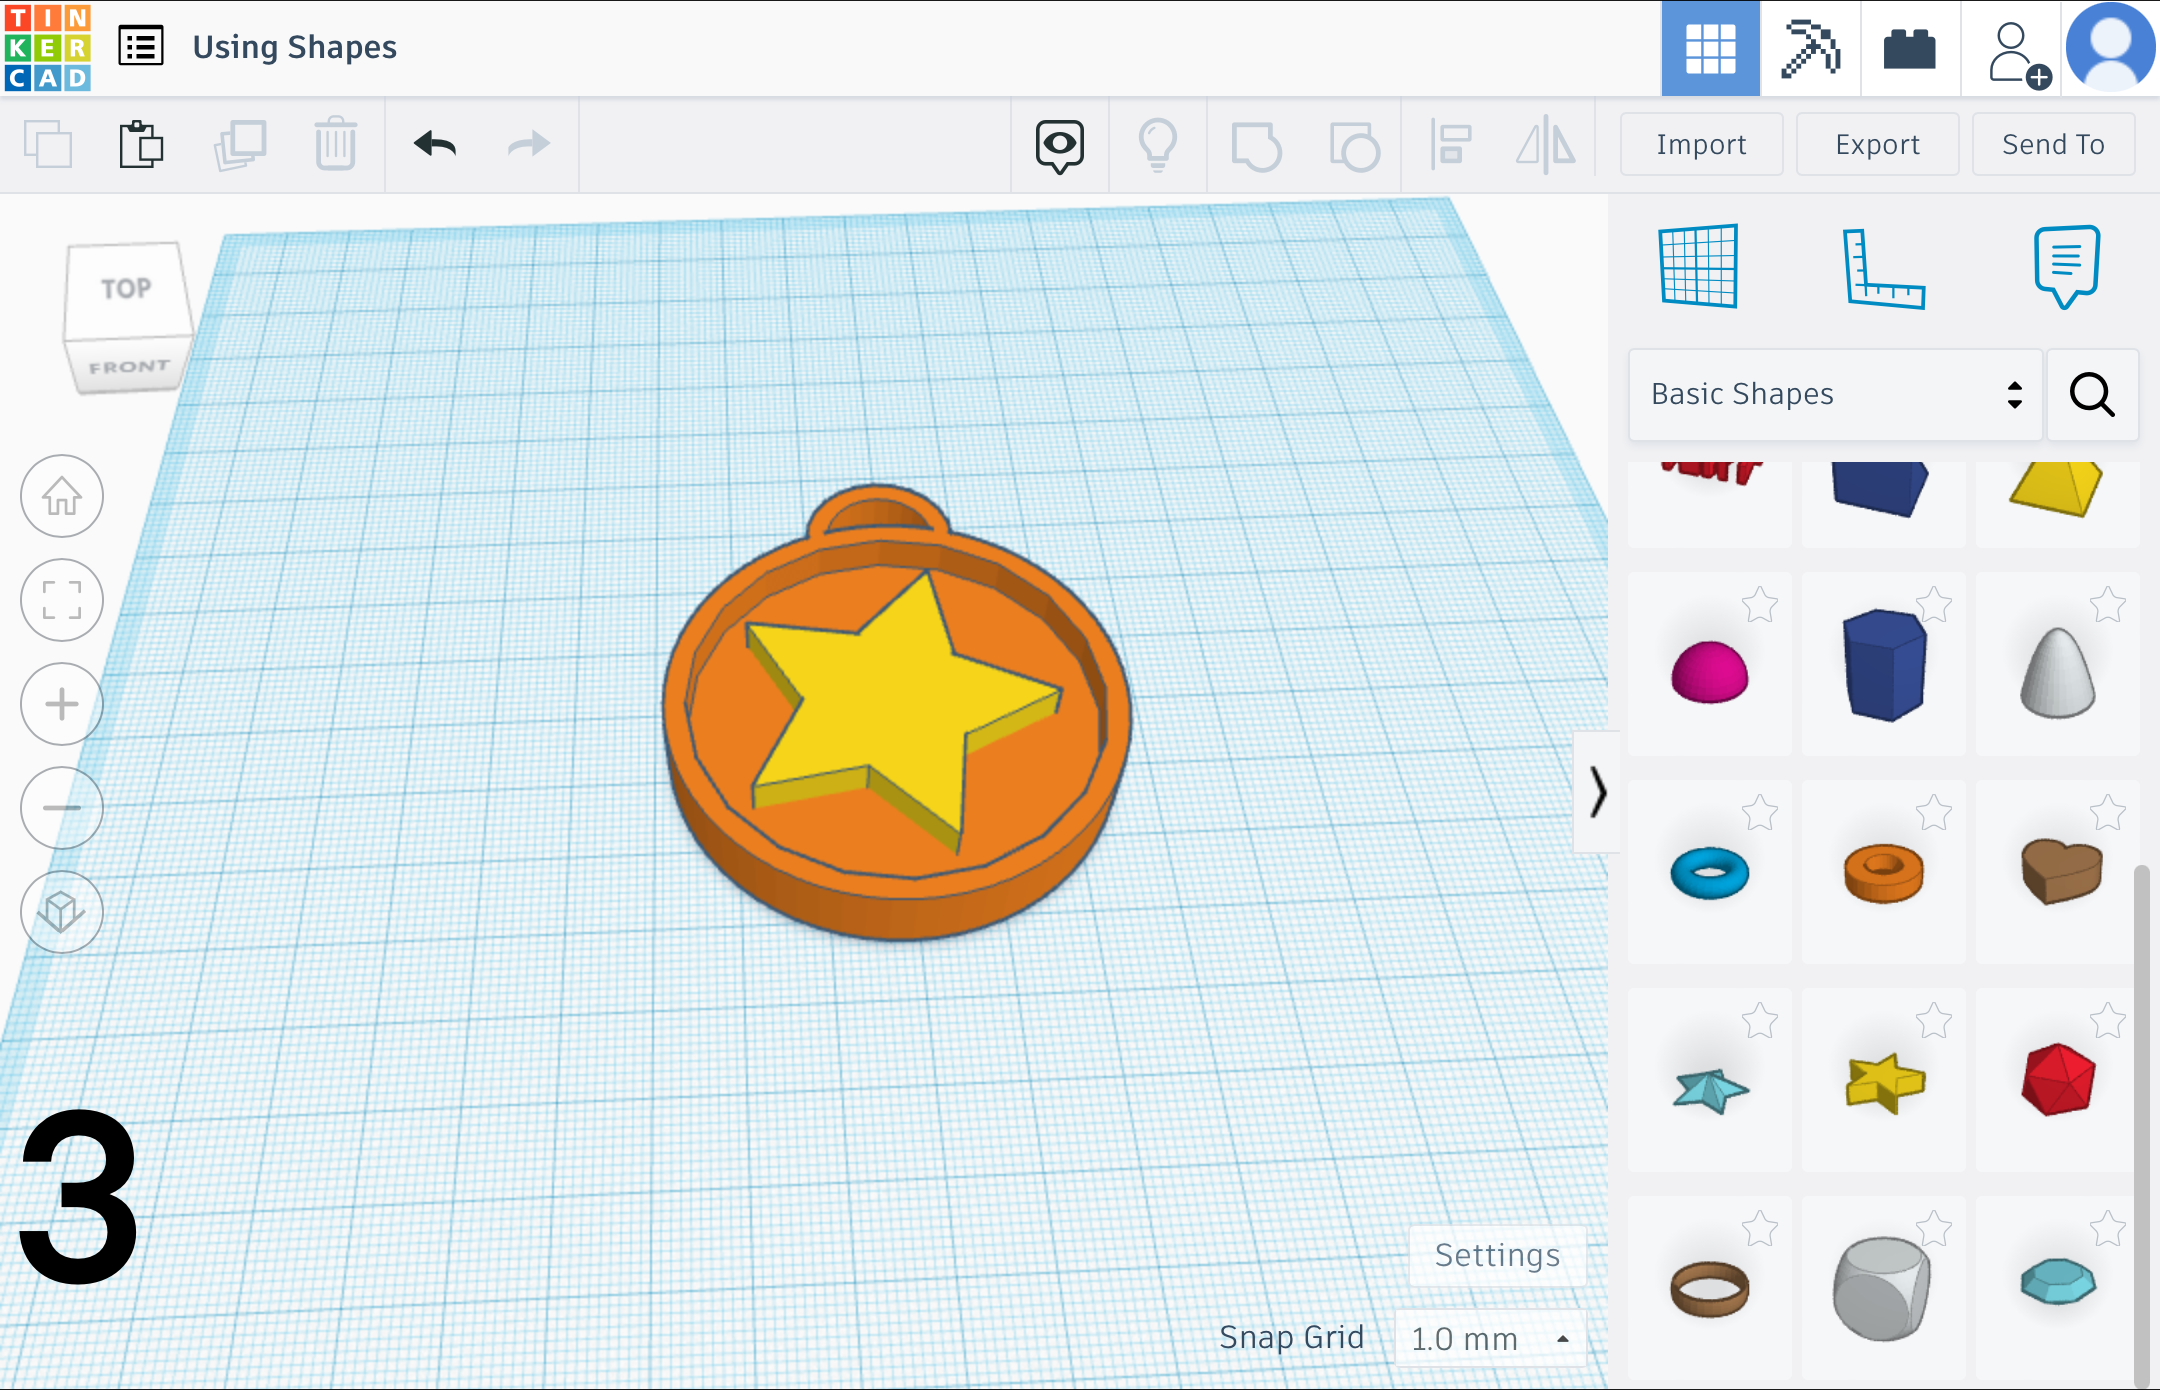
Extra Ways of Making Designs - the Scribble Tool
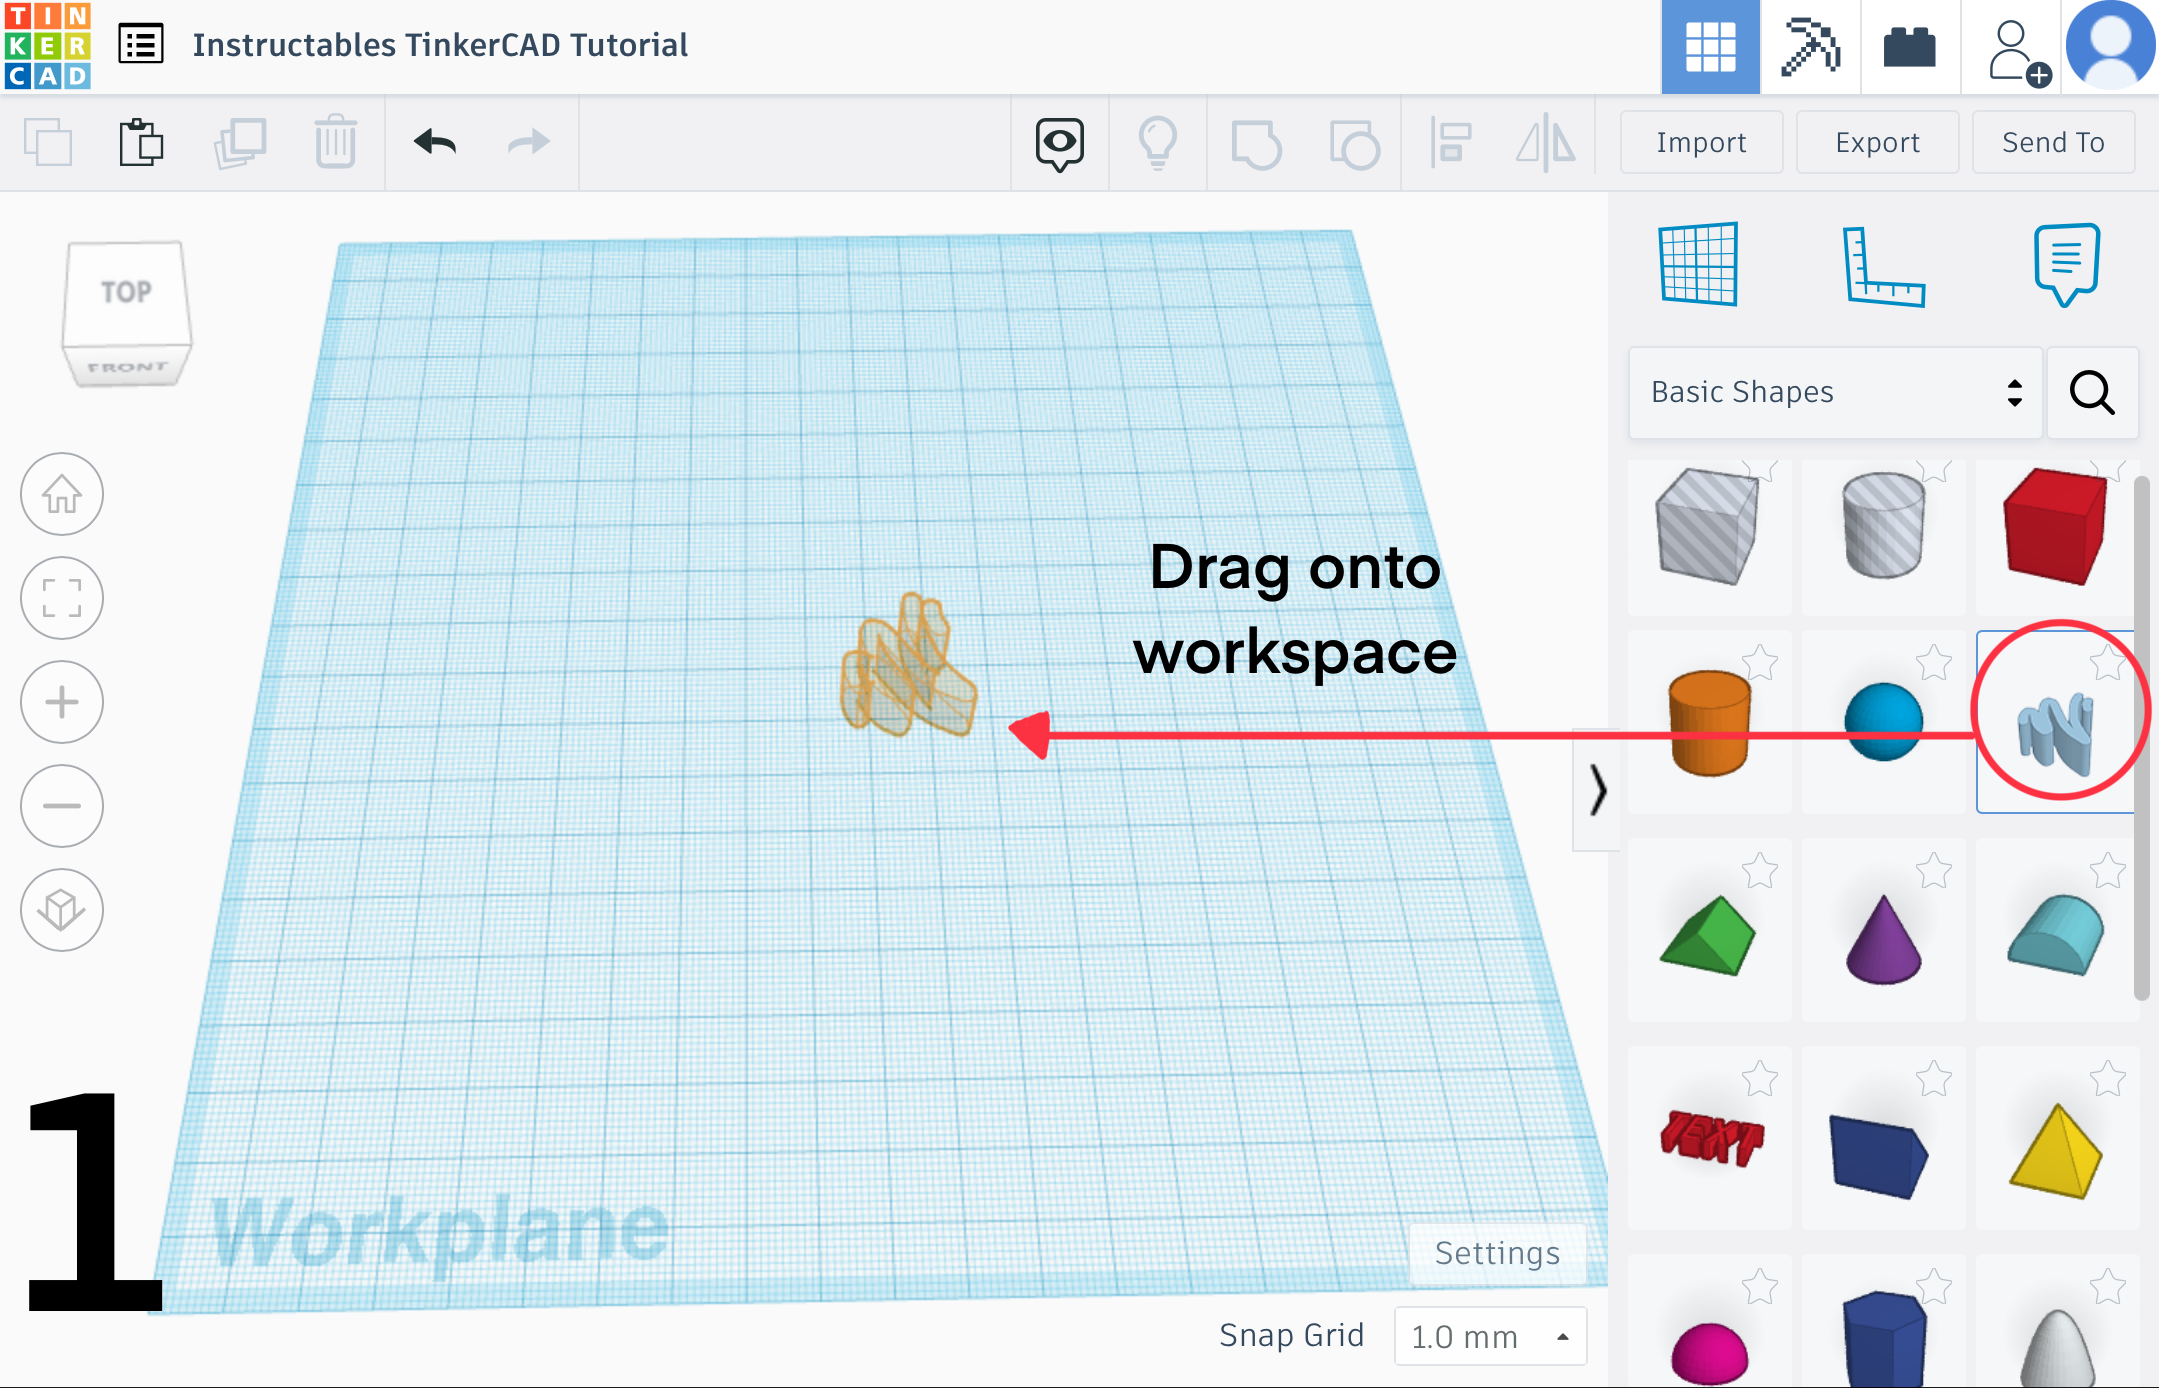
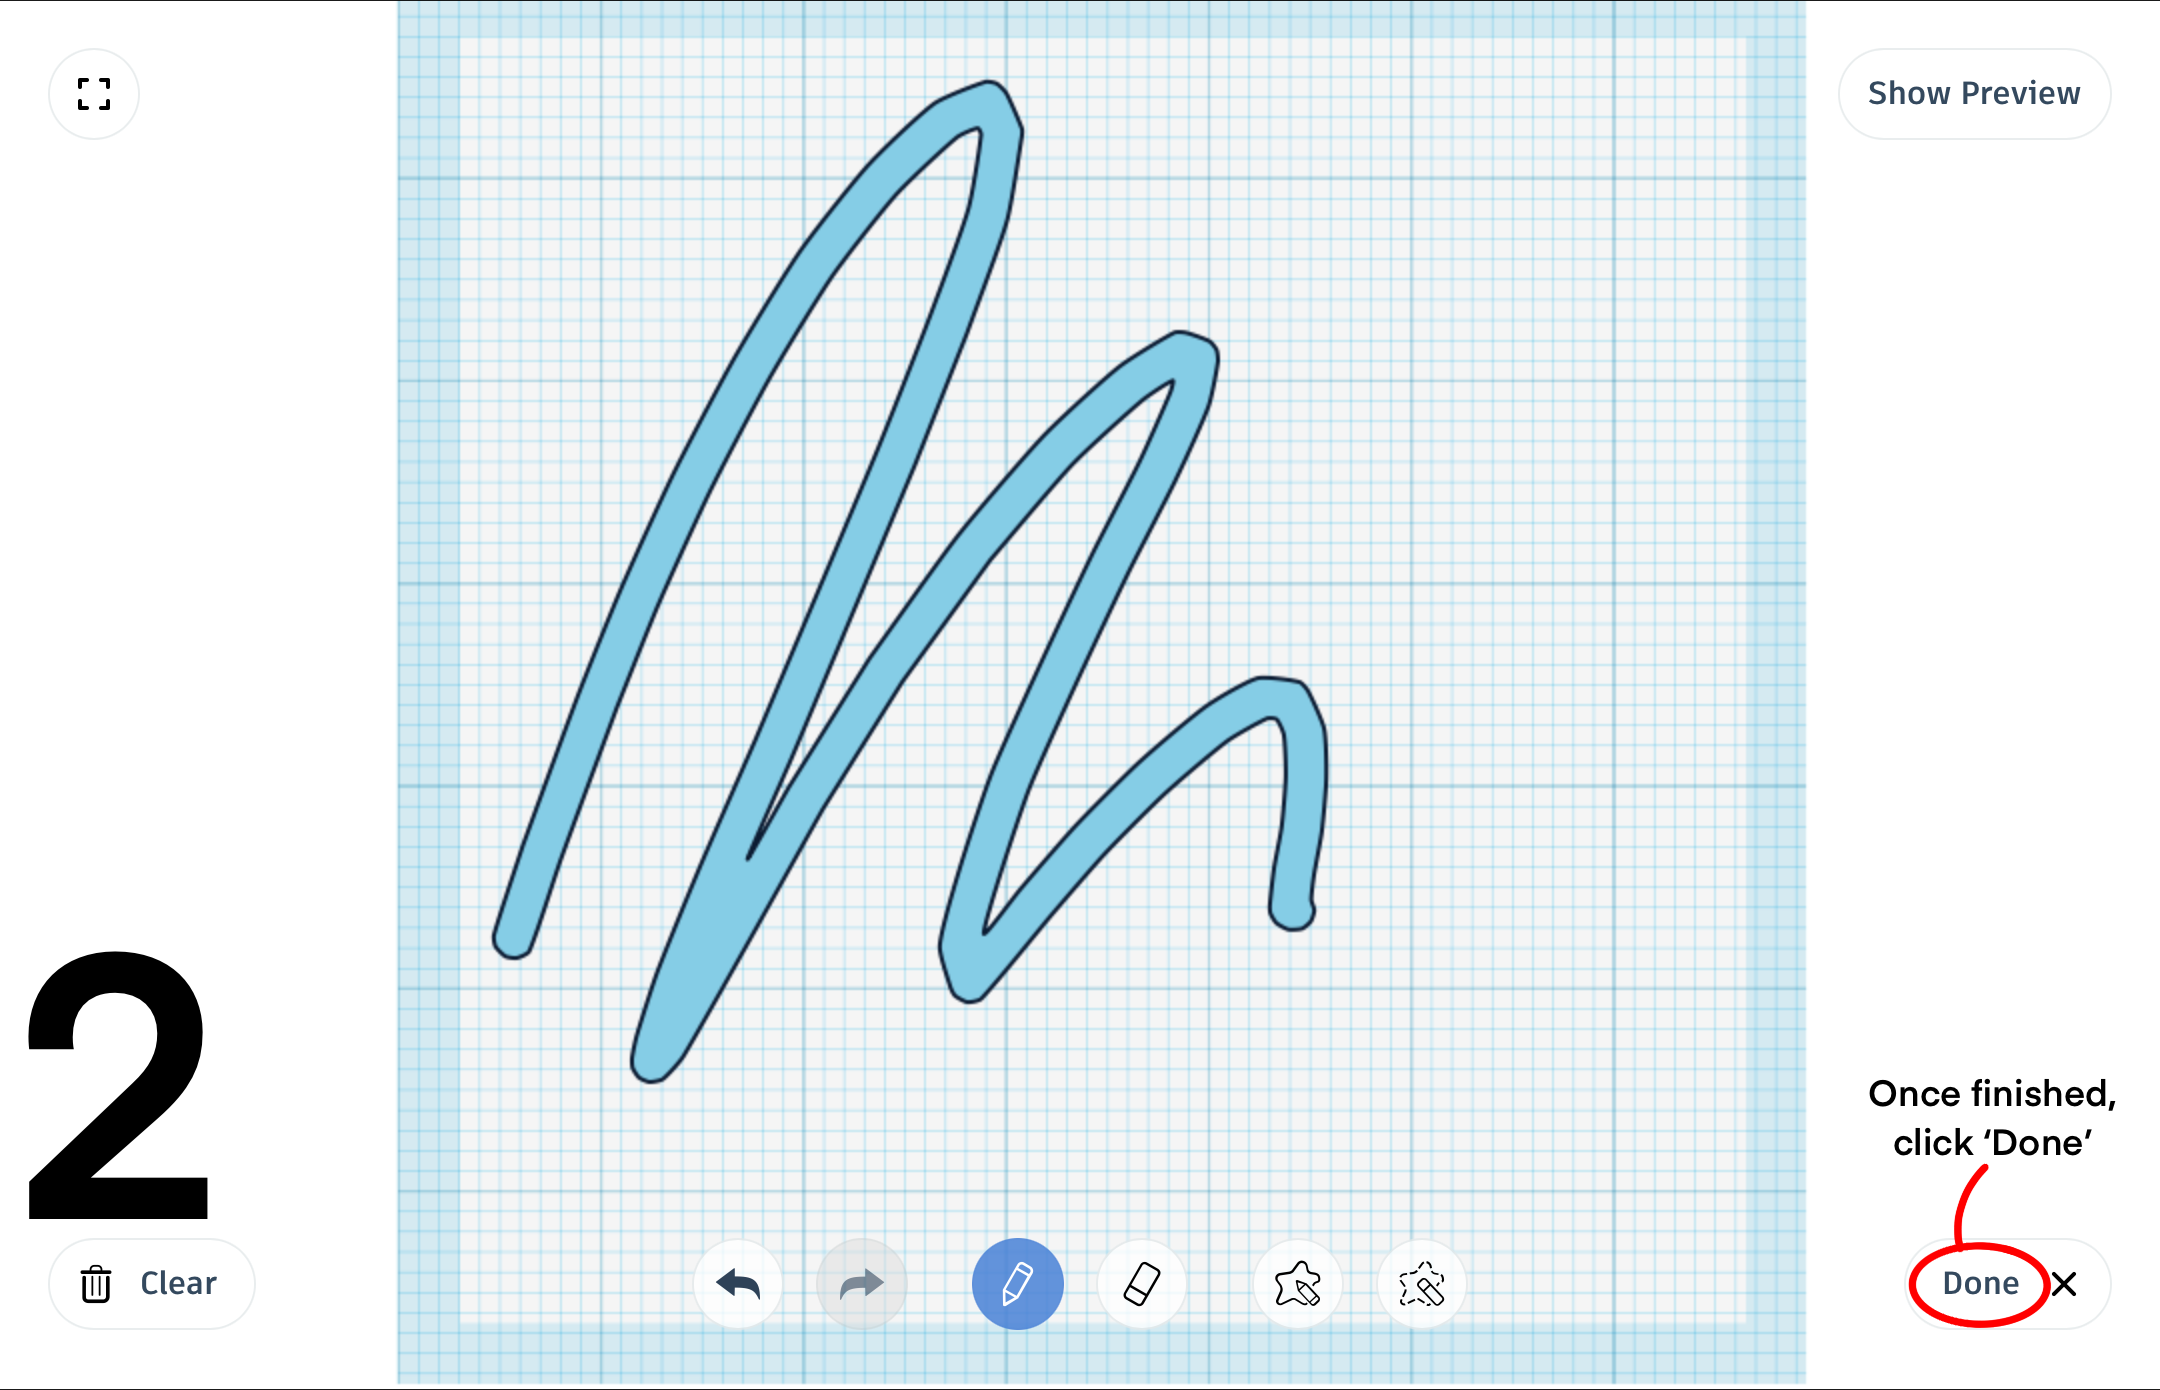
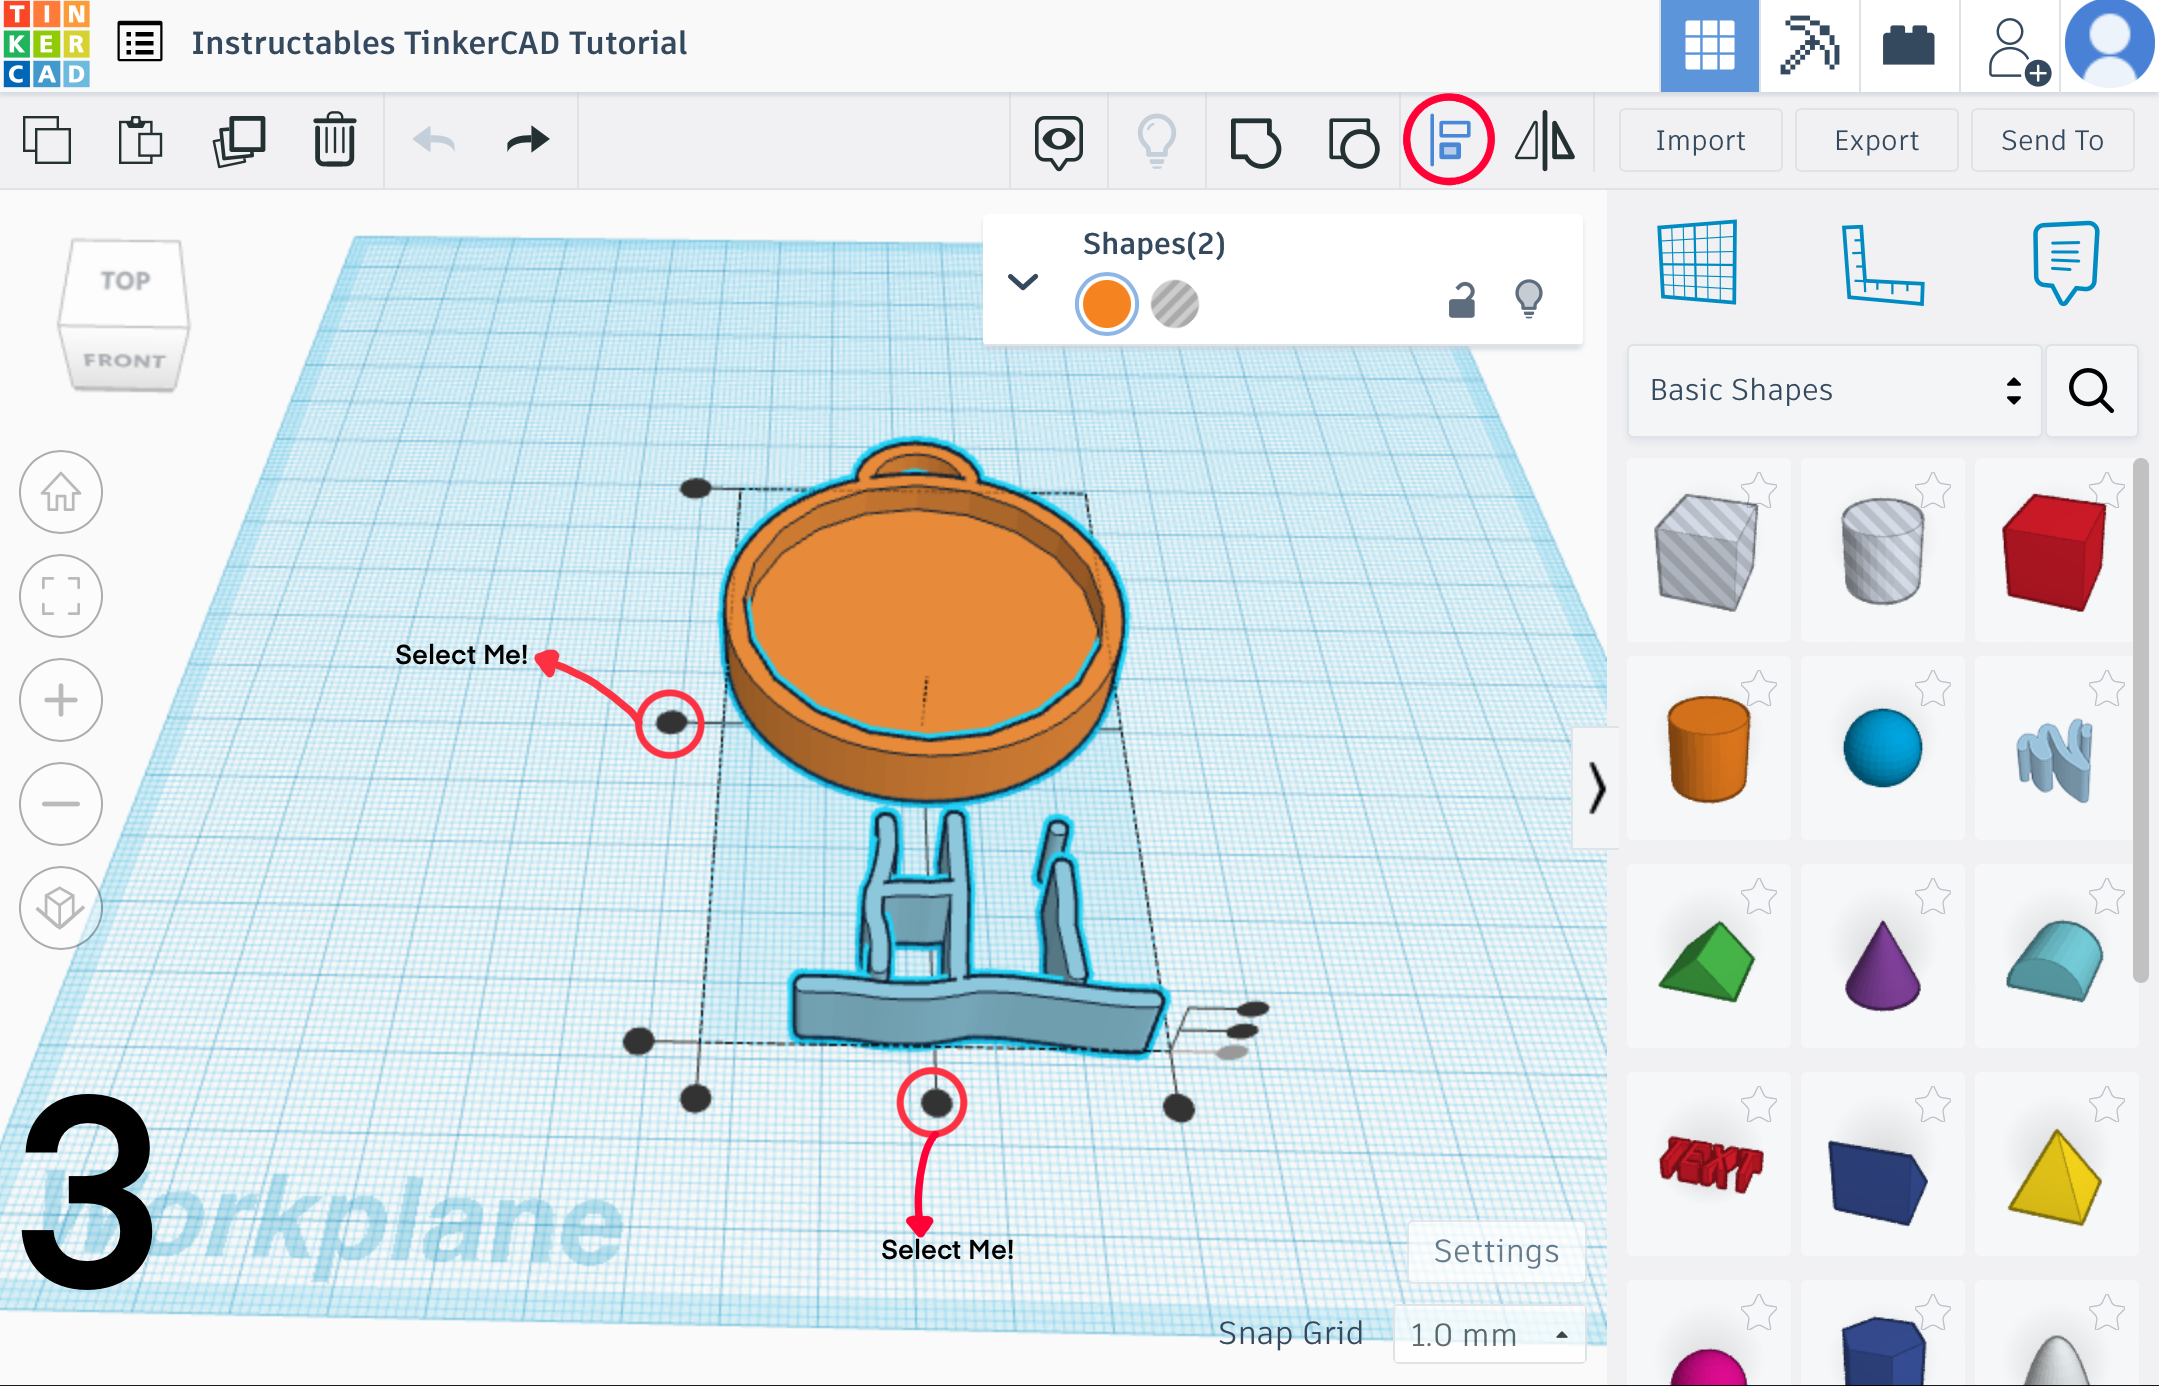
First, you will need to drag and drop the scribble shape onto your workplane (Picture 1.). A 2D screen will pop up where you can draw. Here you draw what you want to be on your medal. In the top right corner, there will be a preview of what the 3D object will look like. Once finished, click ‘Done’ (Picture 2.). You should now see your drawing in 3D. Resize the scribble to your needs and re-edit it if needed. Once you have resized and made all of the changes you want, you need to put the design onto the medal using the align tool (Picture 3.). Group the medal and scribble and then you are done (Picture 4.).
Extra Ways of Making Designs - Using Text
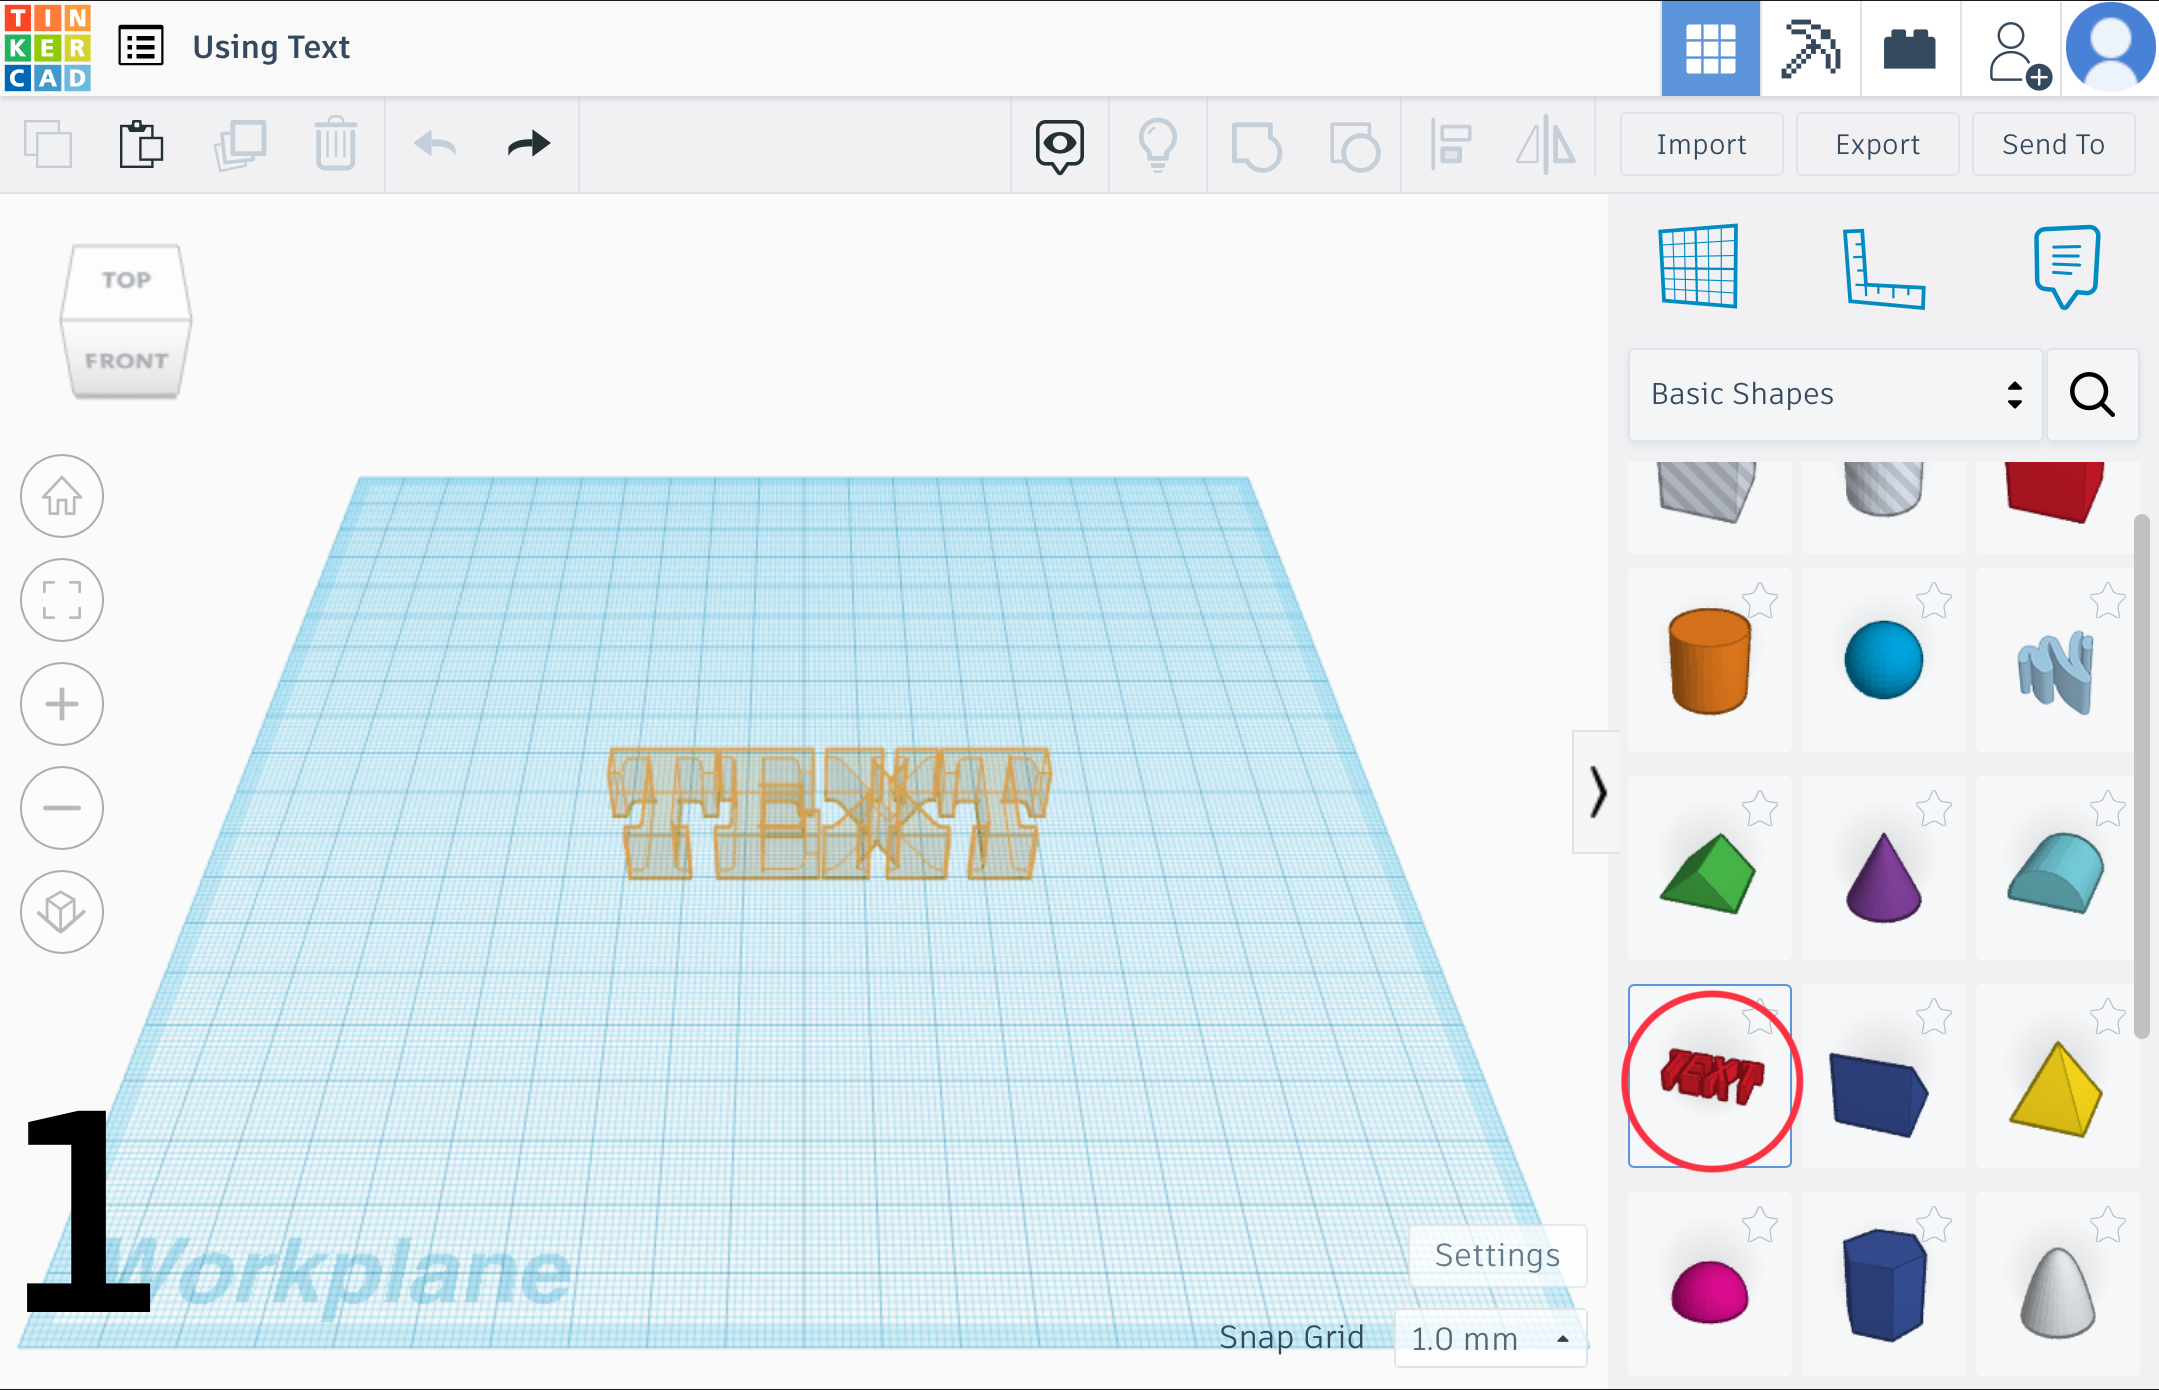
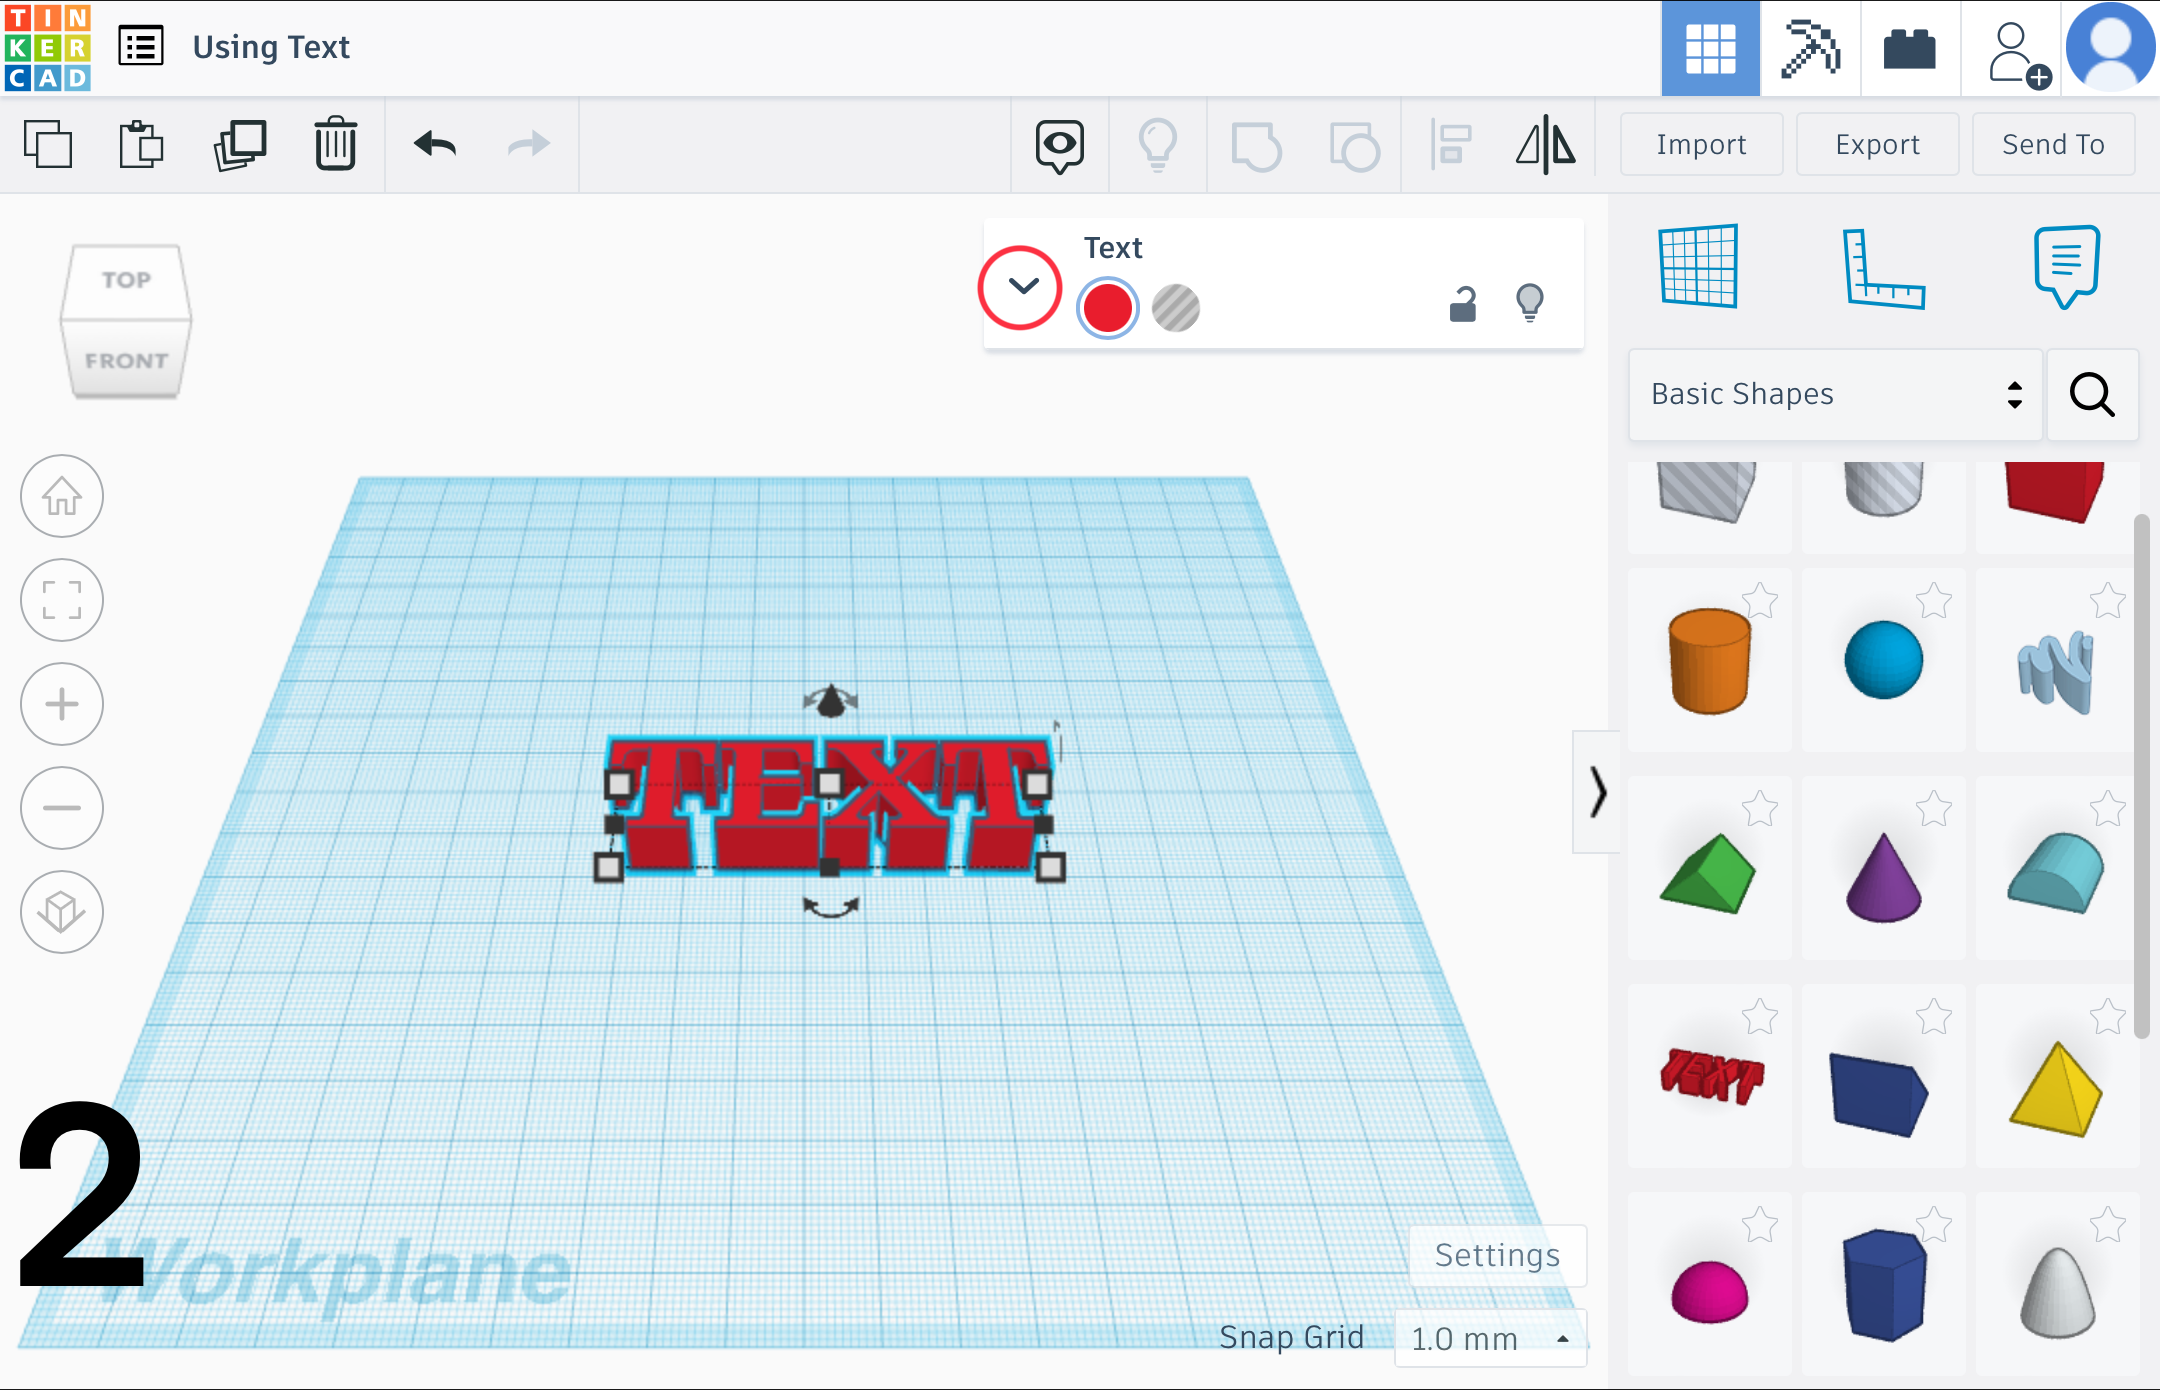
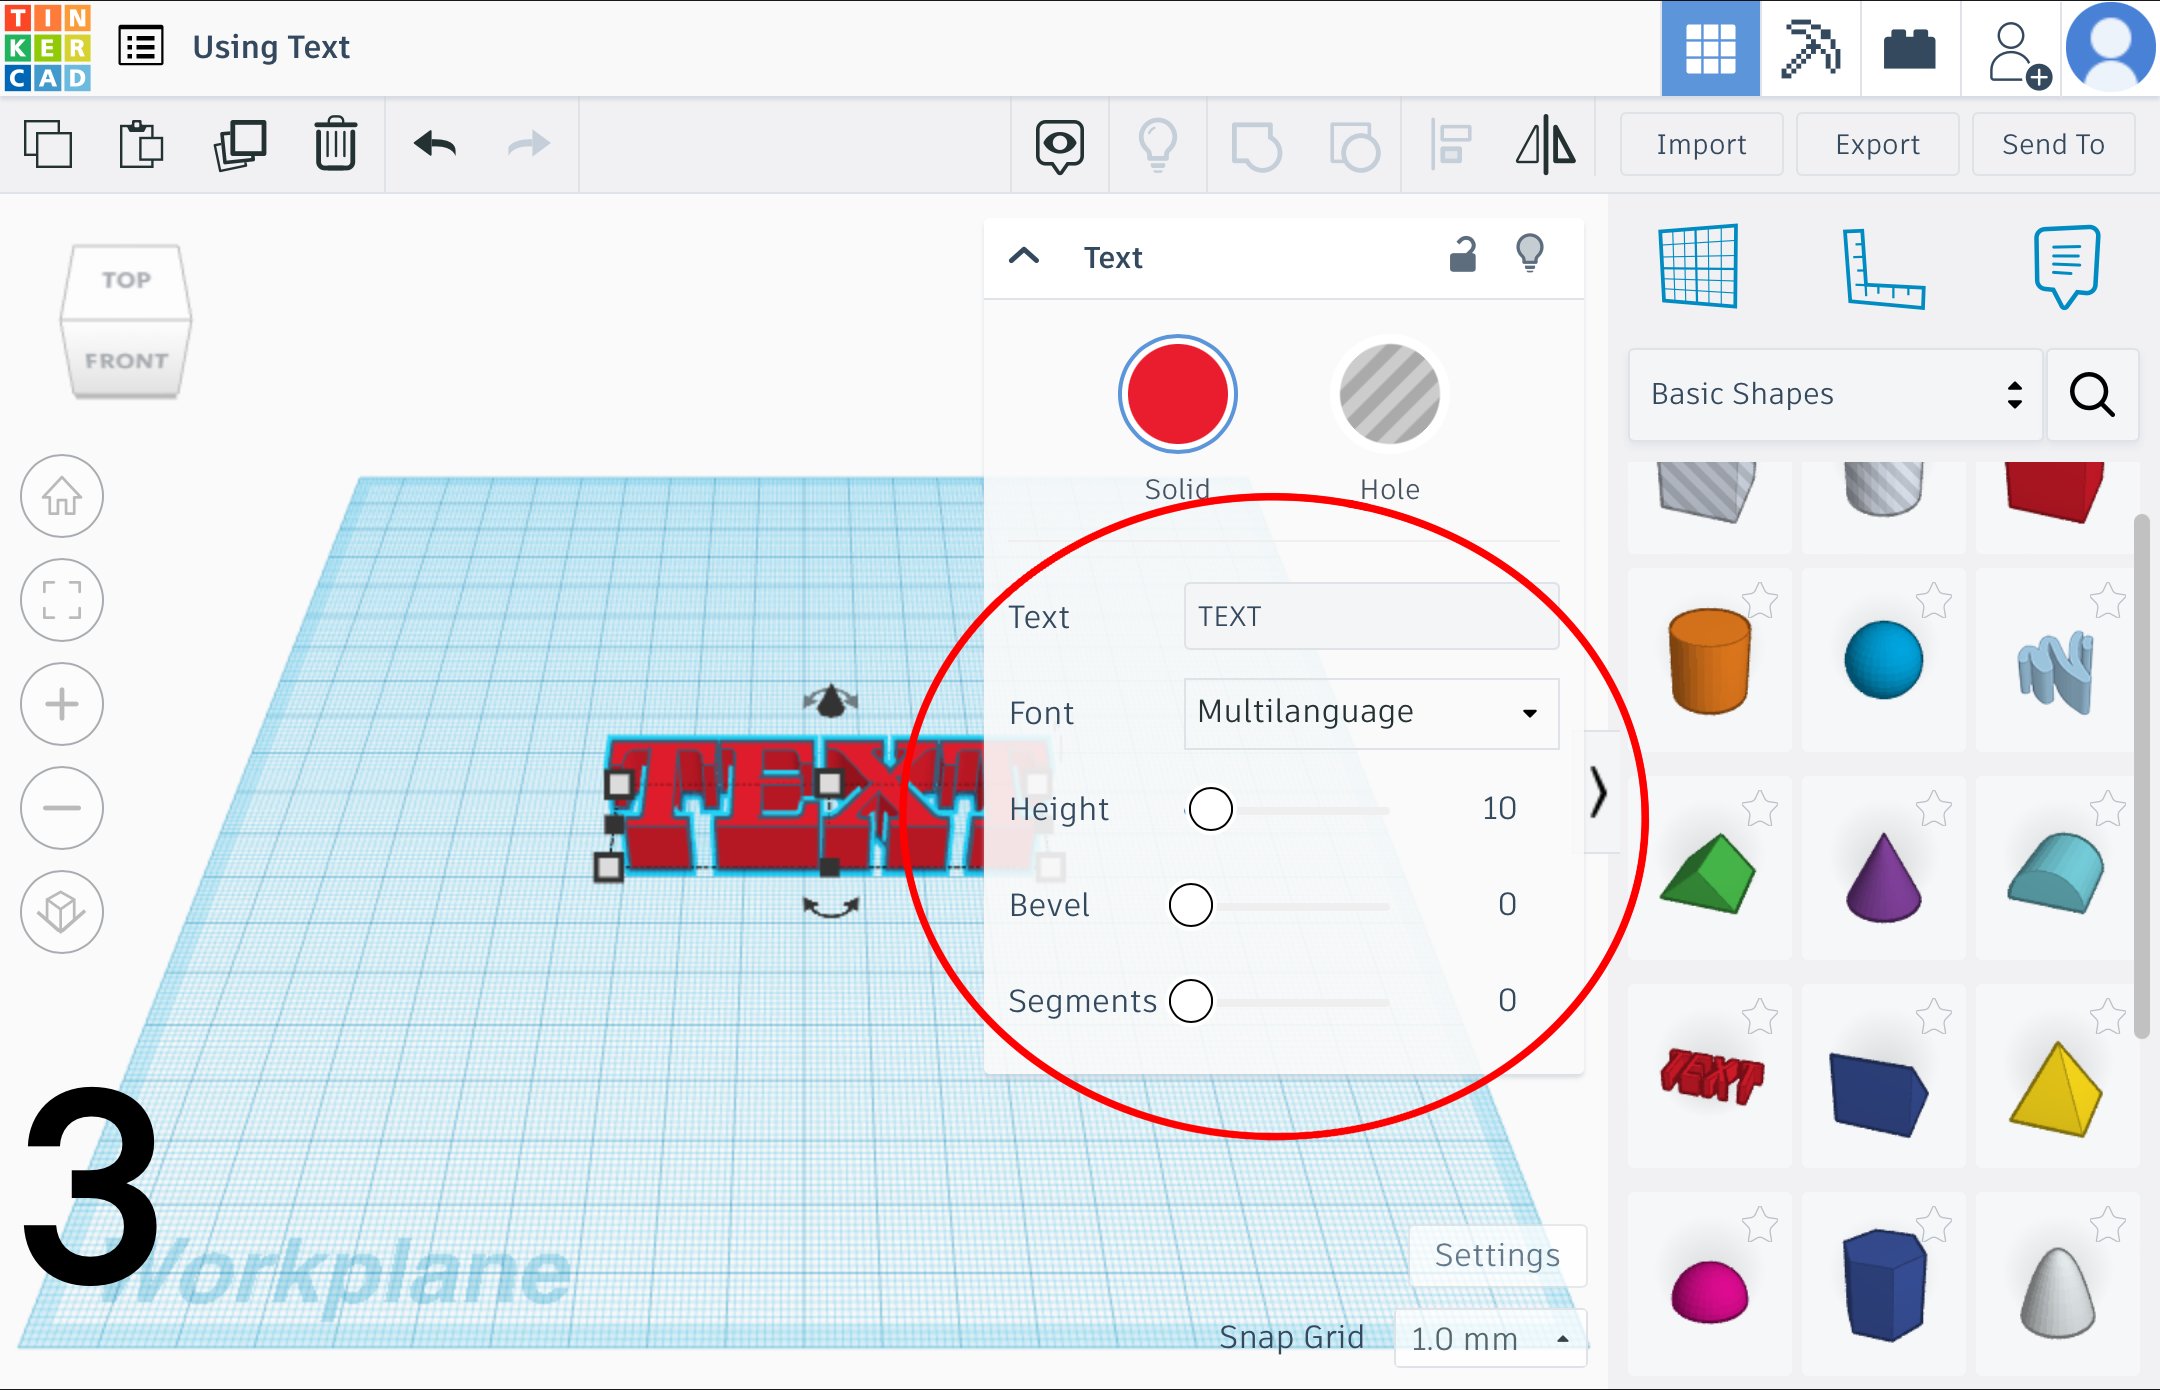
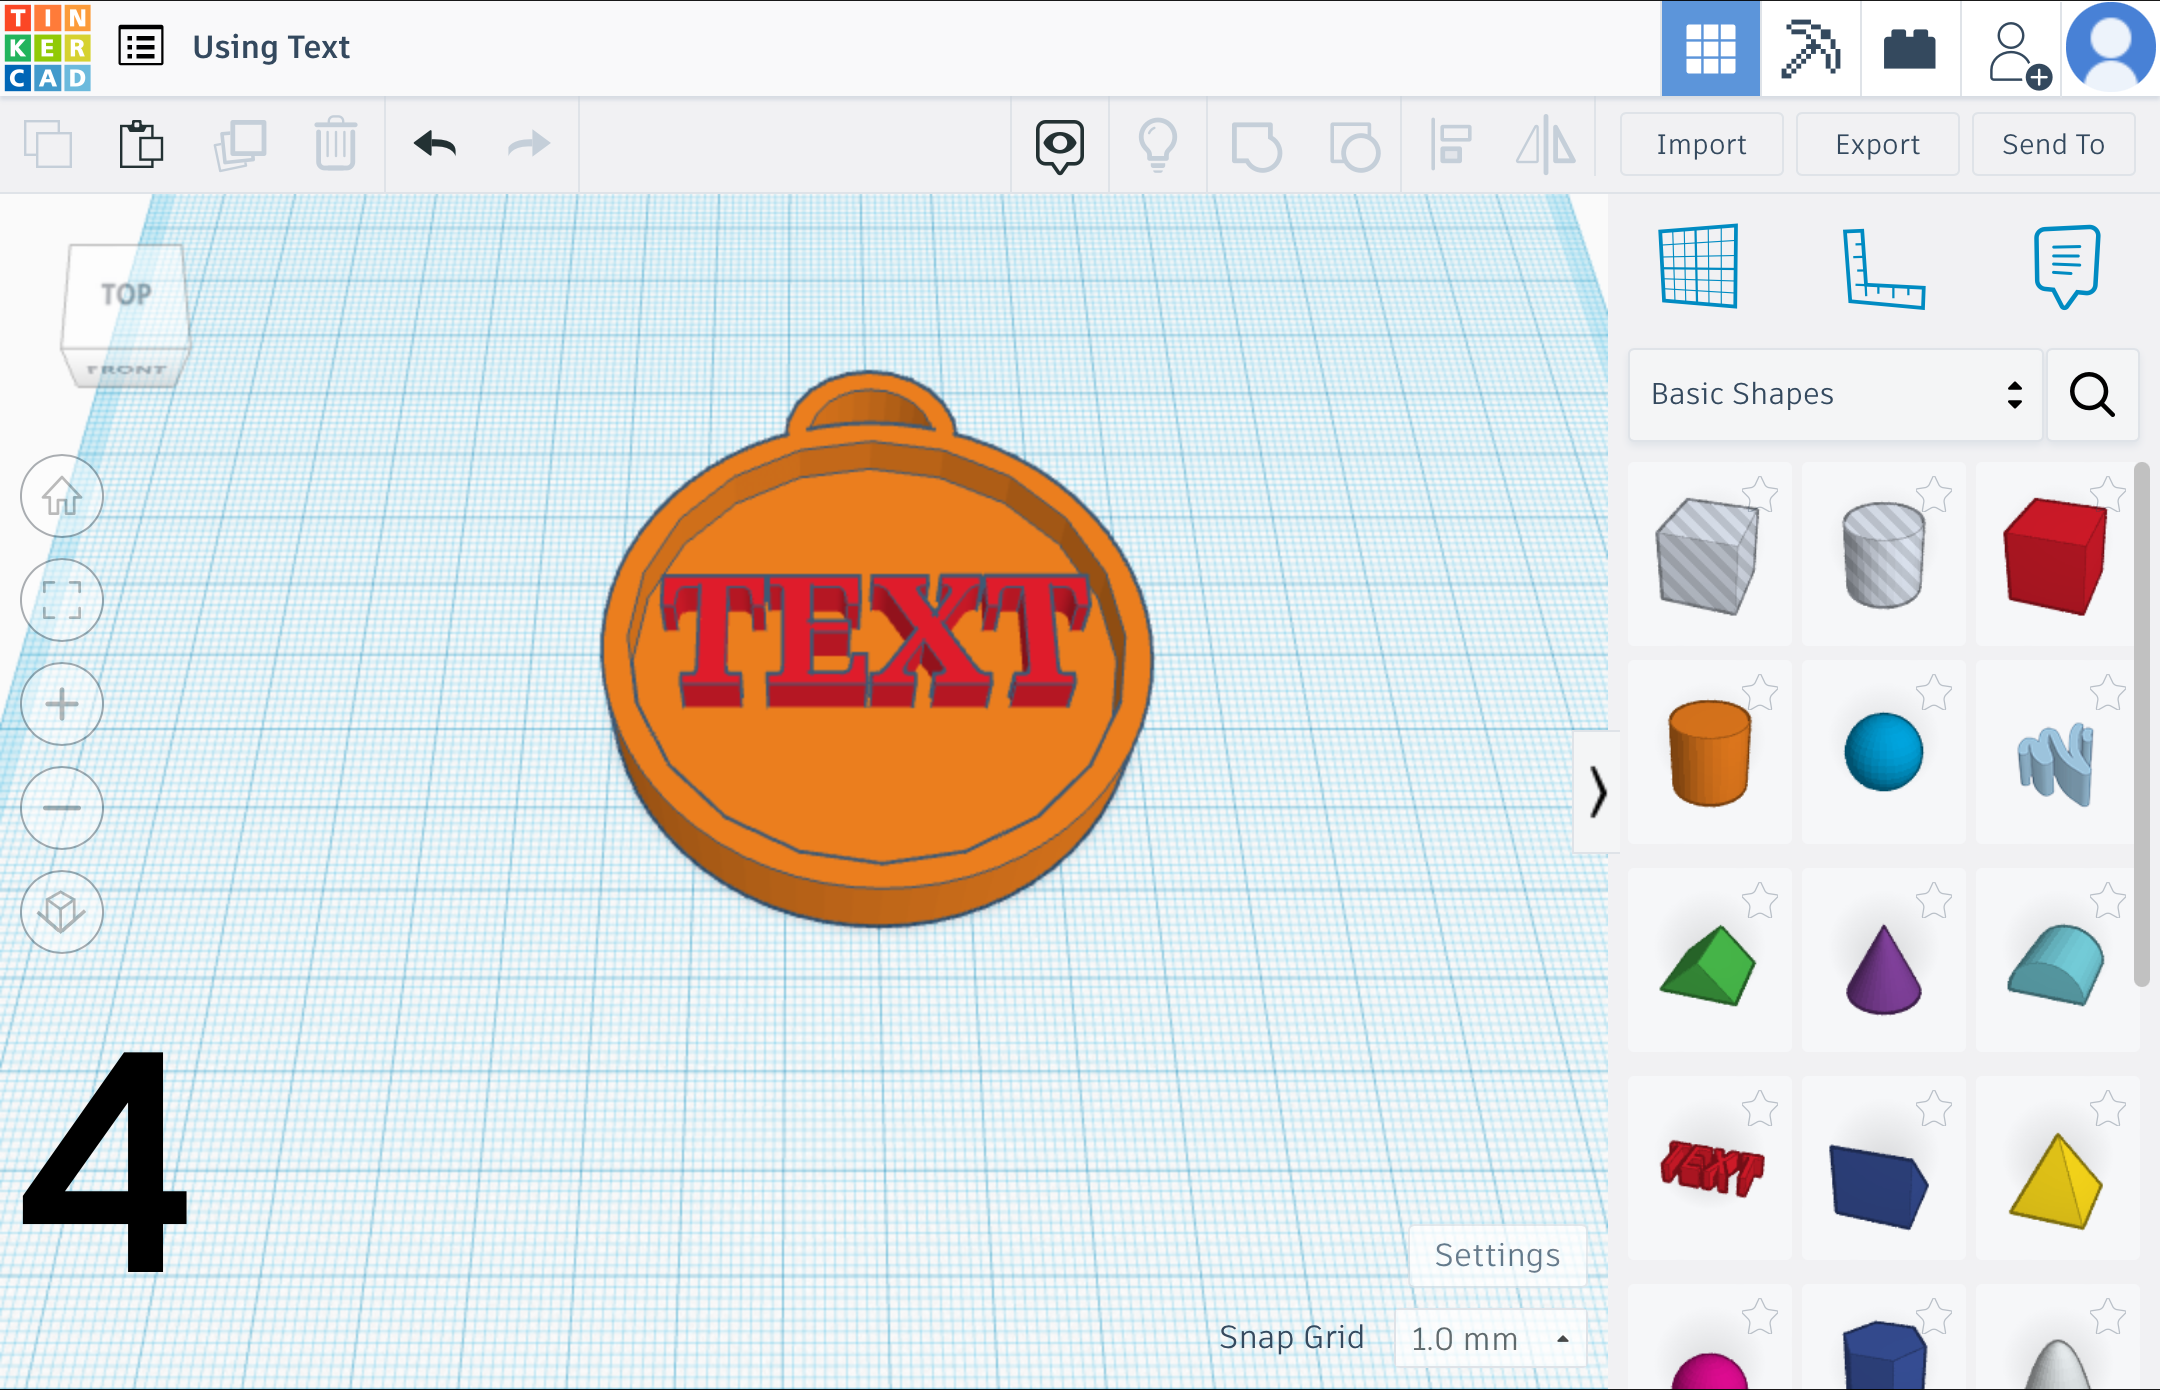
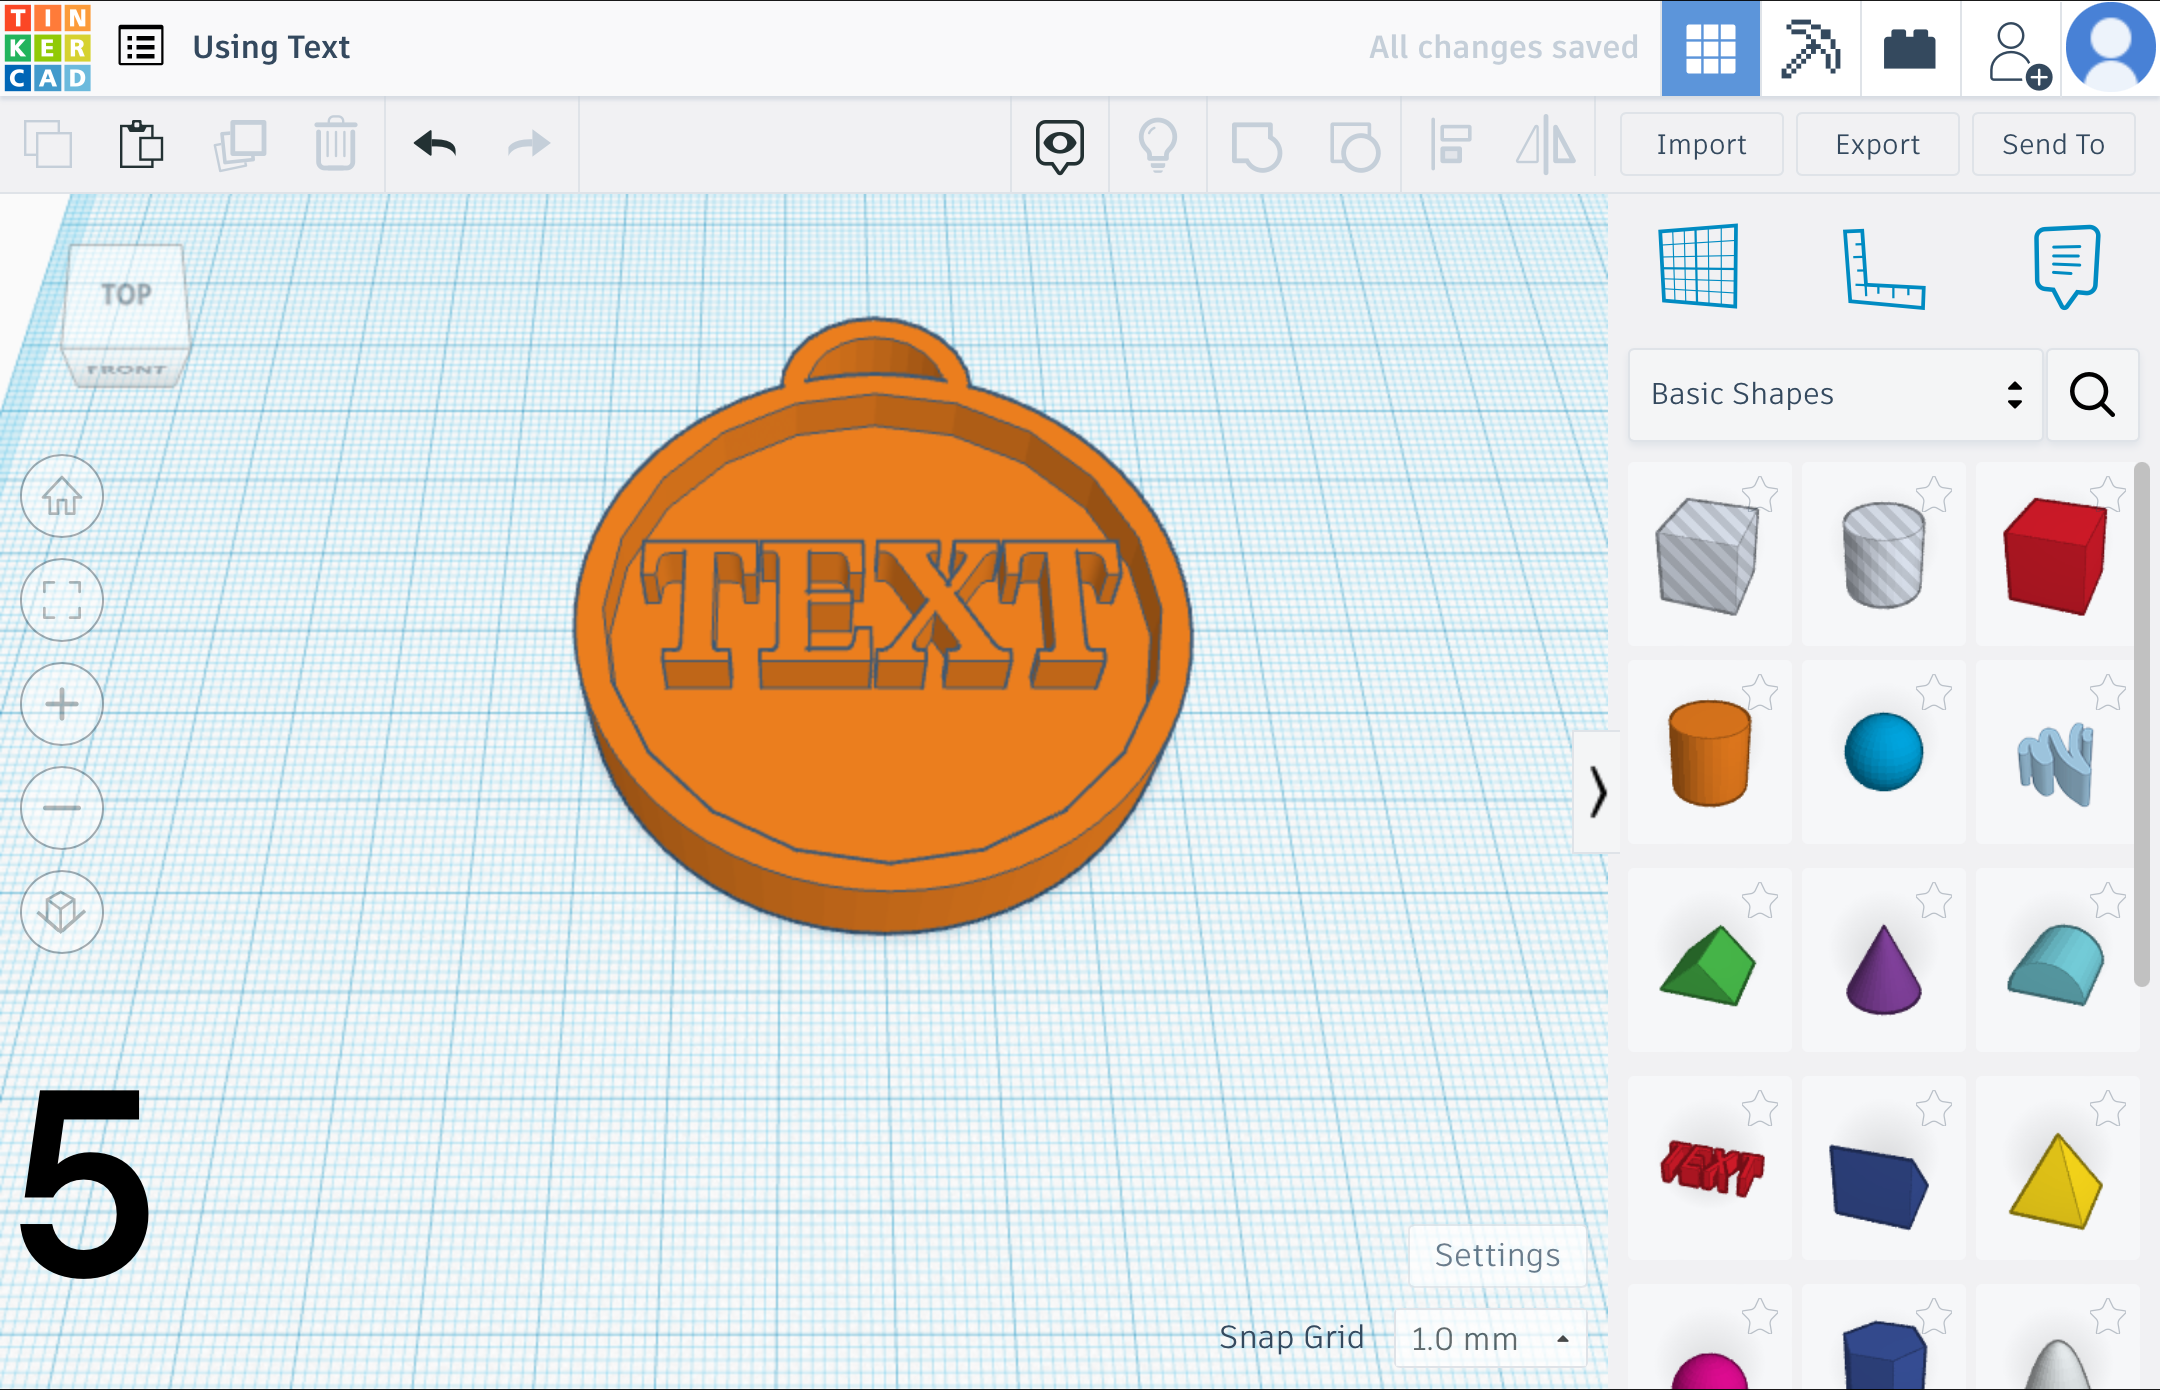
To use text, drag and drop the text from the side panel onto the workplane (Picture 1.). Select the text and click the down arrow where it says that the text is selected (Picture 2.). Change the font, size, height, bevel, segments, and what the text says (Picture 3.). Re-size the text to your needs and use the align tool to align the medal and text as explained in the previous step (Picture 4.). Finally, select the medal and the text and group the two together (Picture 5.).
If you have had any issues, have a suggestion, or just have anything to say, please feel free to mention in the comments.