Design Your Home With Autodesk Homestyler
by antoniraj in Design > Digital Graphics
102302 Views, 694 Favorites, 0 Comments
Design Your Home With Autodesk Homestyler
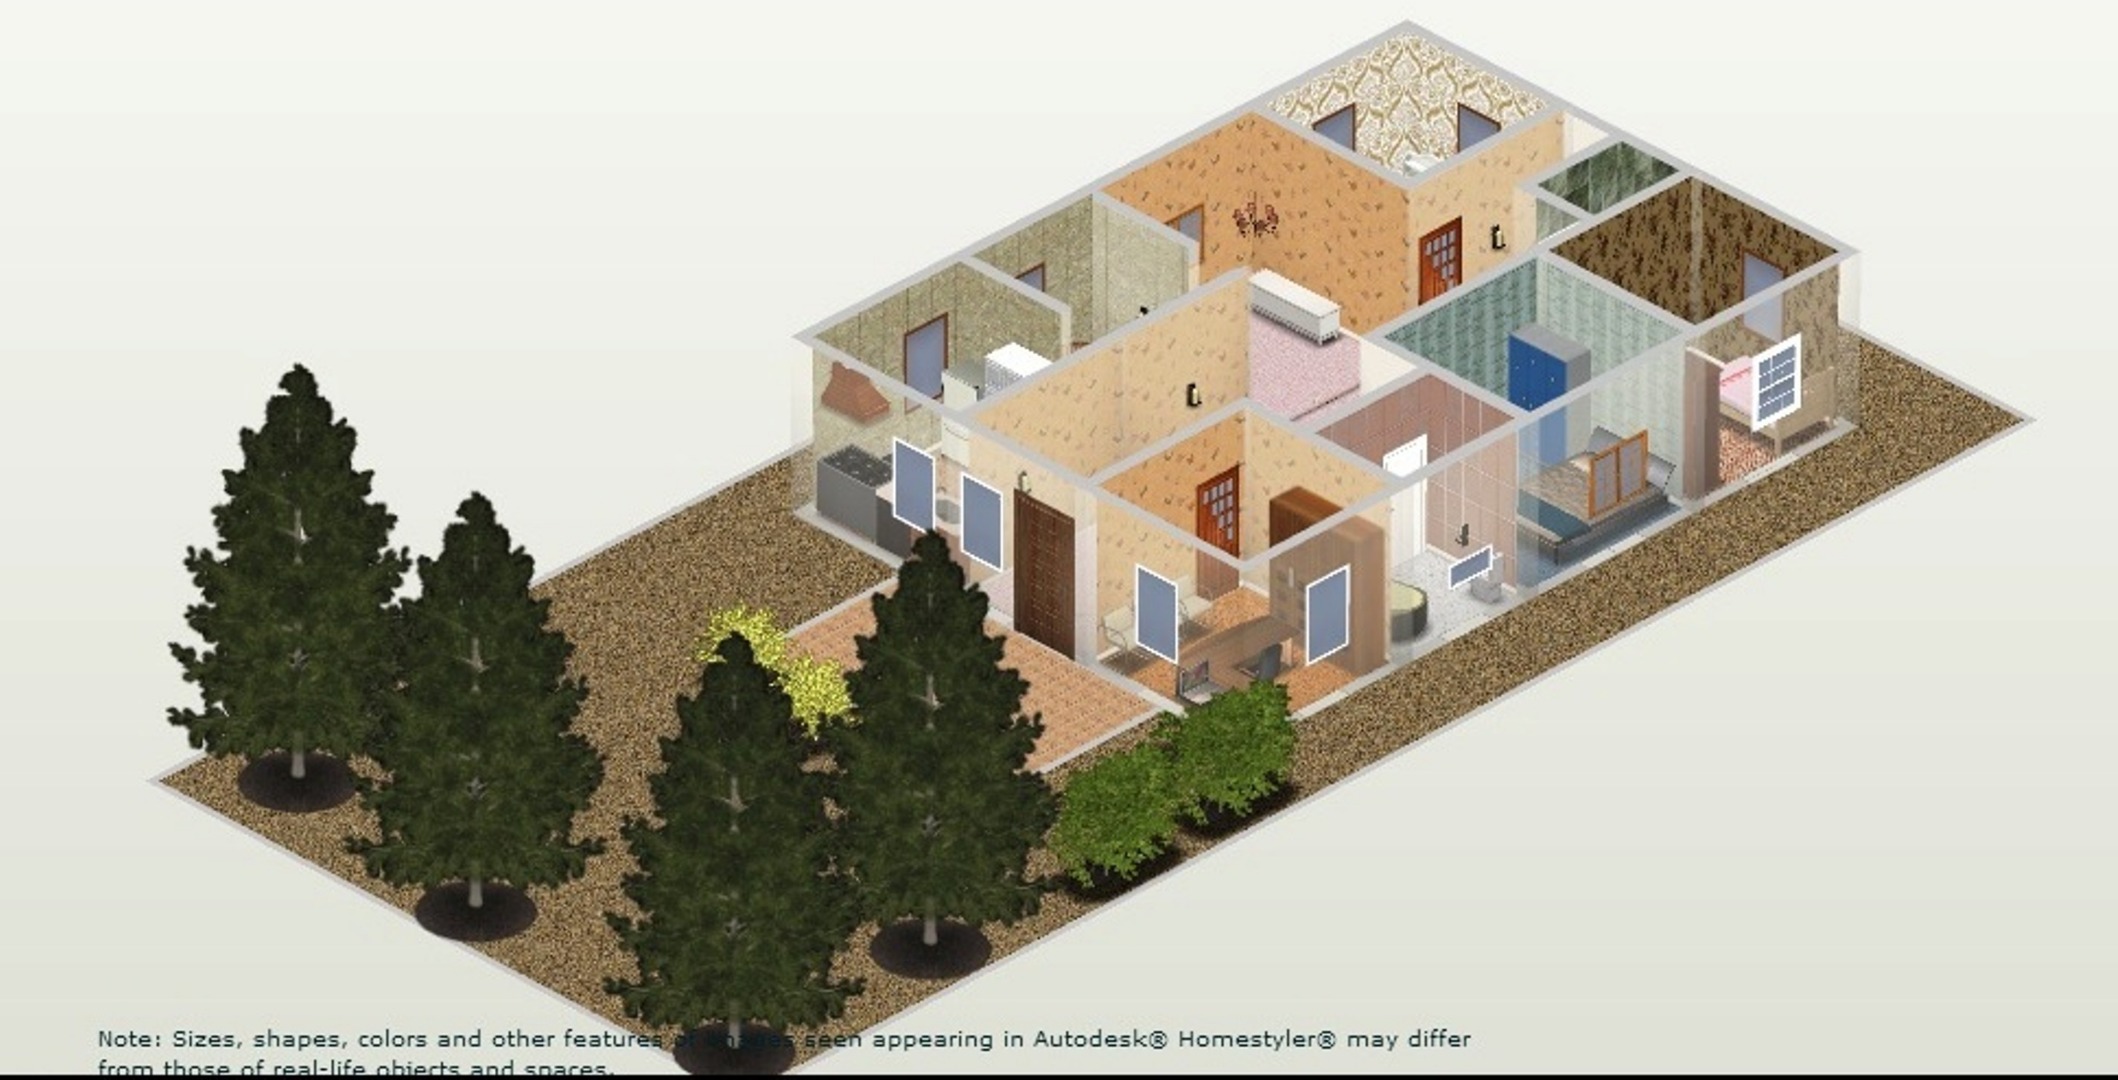
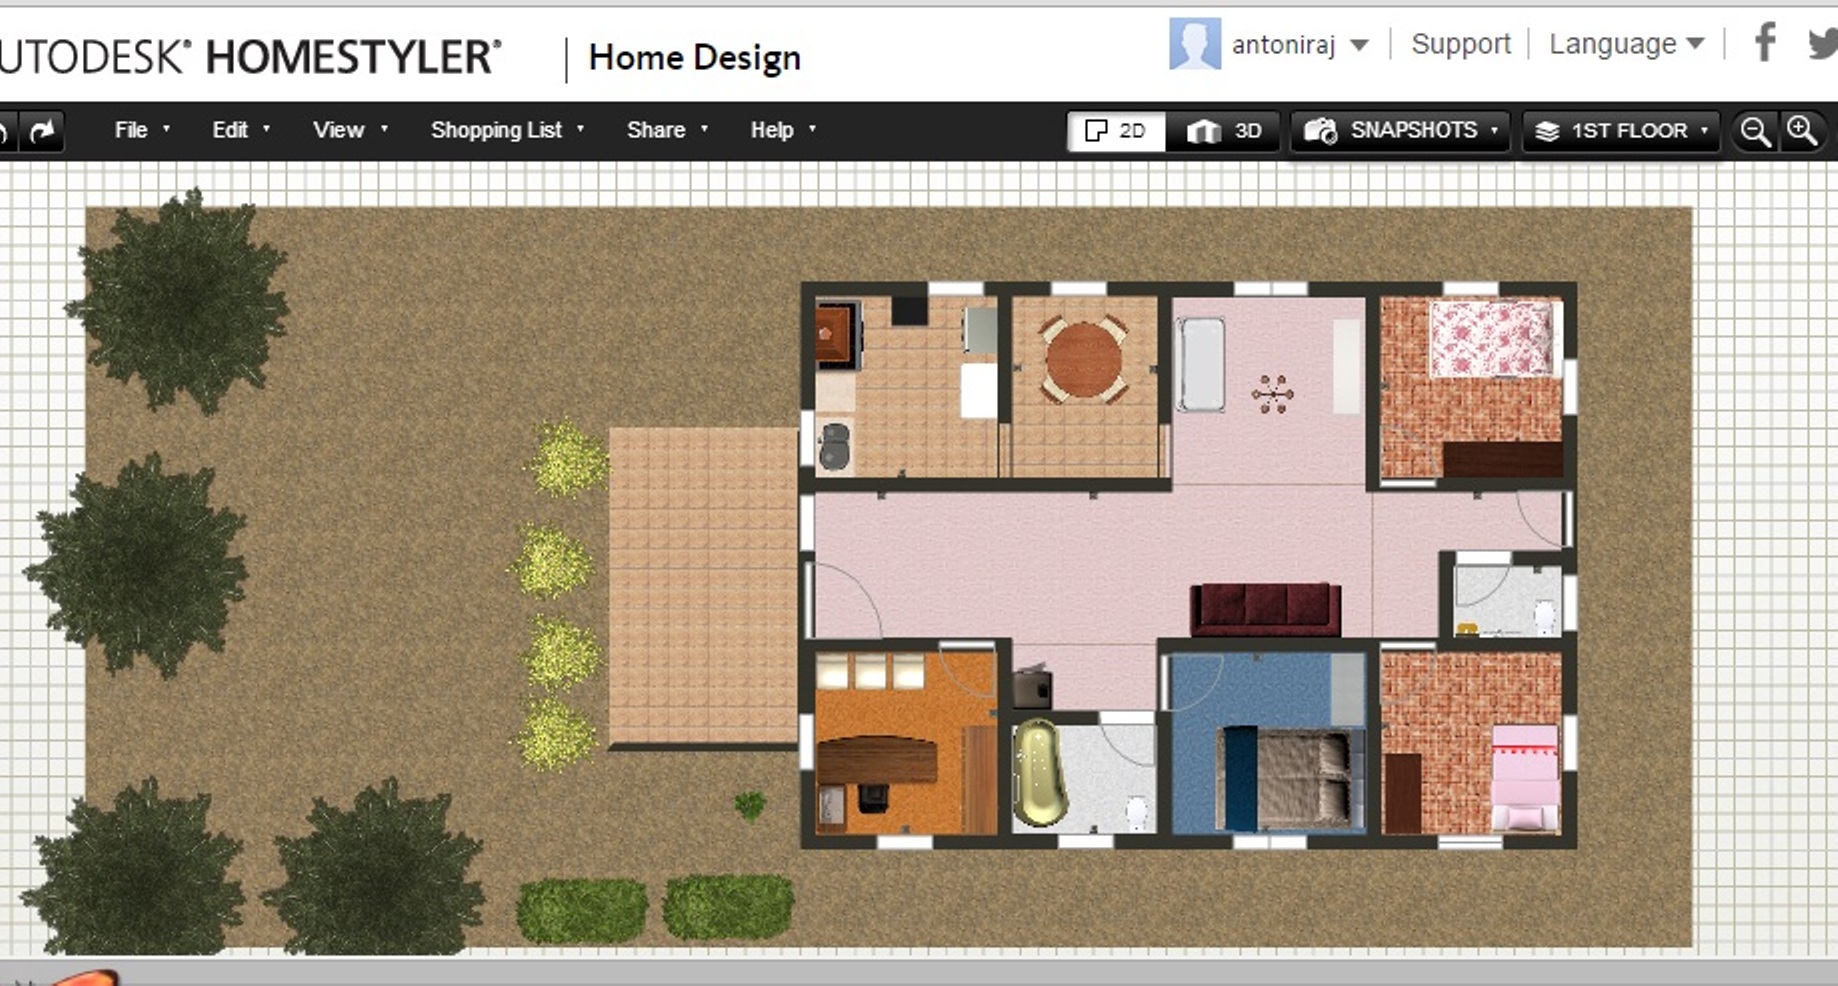
Autodesk Homestyler is a free online home design software, where you can create and share your dream home designs in 2D and 3D. The online tool allows you to either upload your existing floor plan or create a new one with simple drag and drop system from the catalog. You can build the rooms one by one including doors and windows, add flooring, paint walls, furnish rooms with real life products and add landscape to your design. You can also view your design in 3D mode and rotate it to view in different angles. What is more, you can take a real life snapshot of any room you have designed even before you actually start the project. You can also make 360 degree panorama of your design from any position inside the rooms.
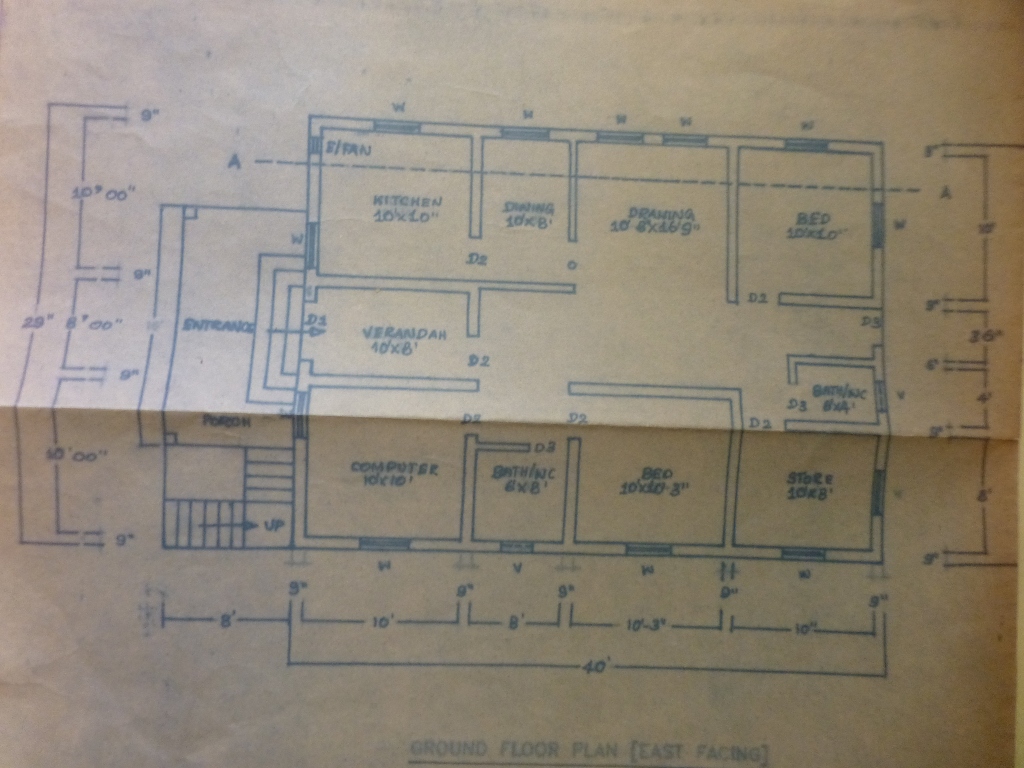
This instructable will guide you with simple to follow, step-by-step instructions on How to design your home using Autodesk Homestyler. I will use our existing home plan as a model for this, which you can see in the last picture above.
Sign in and Open Up the Design Page
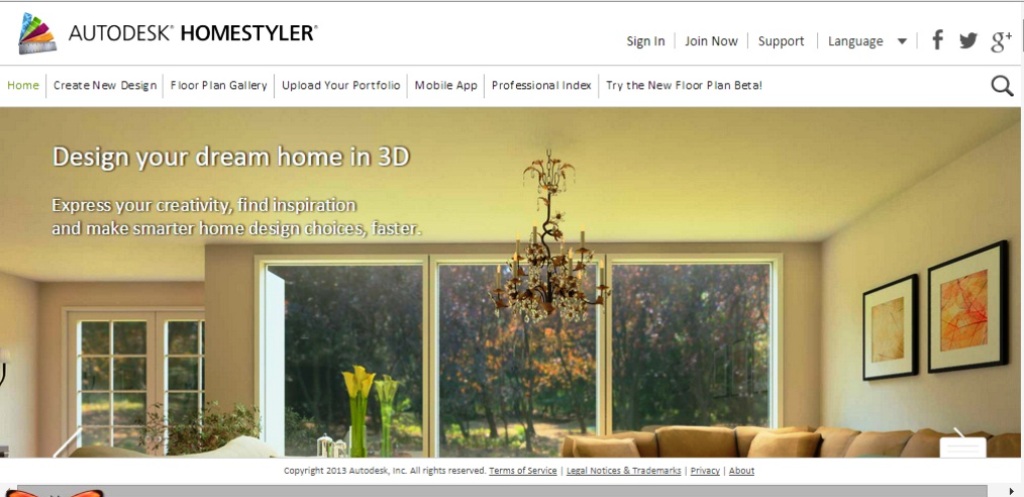
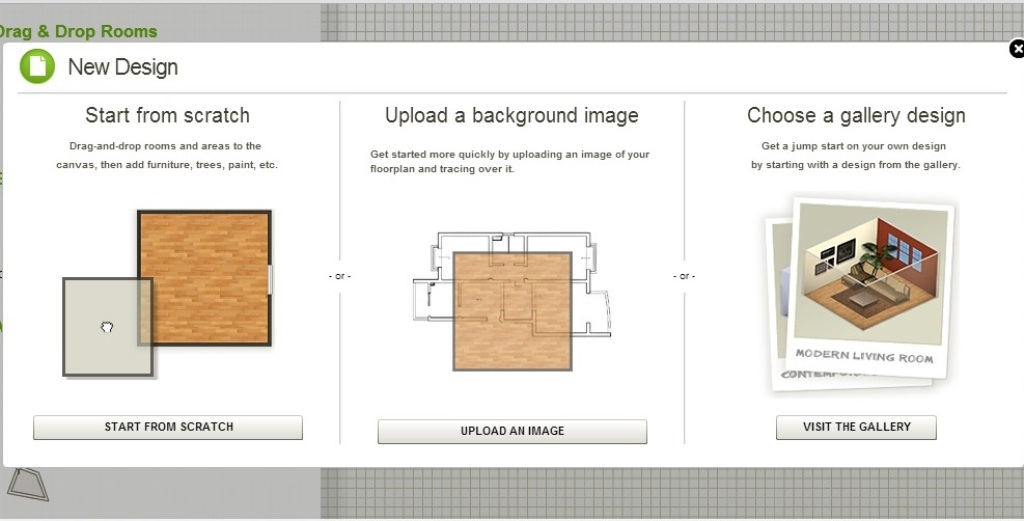
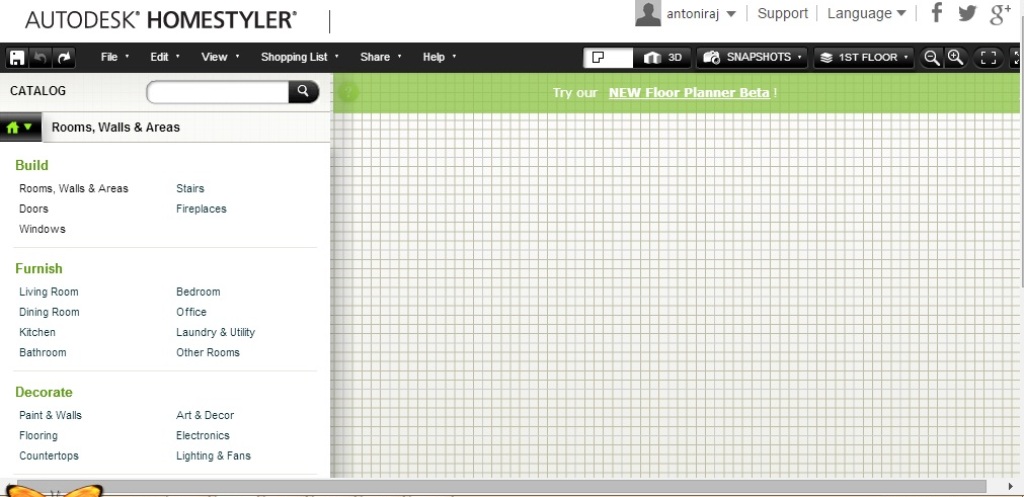
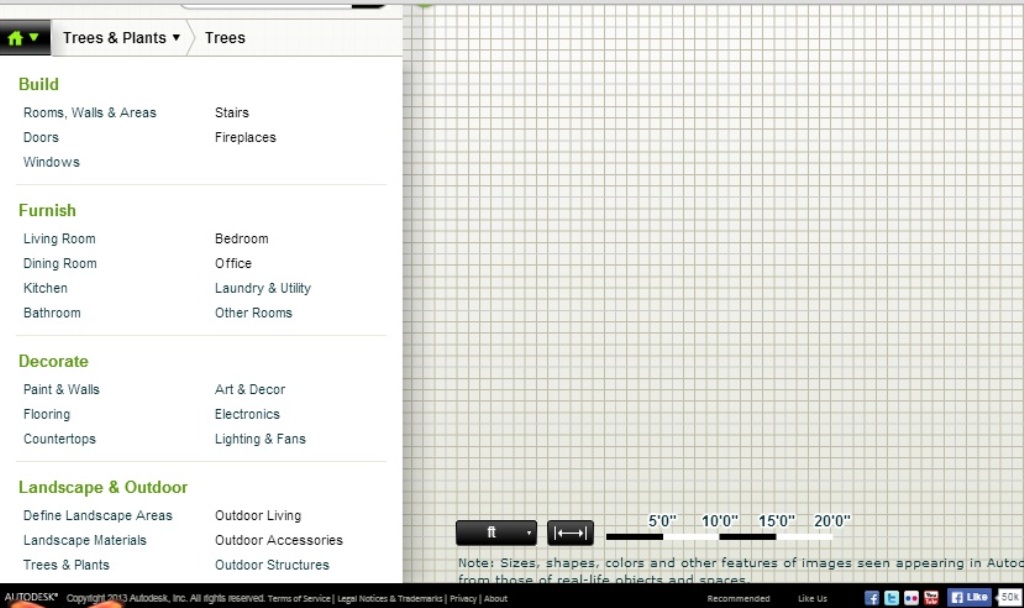
To build your design in Homestyler, you need to create an account at this link :
- If you are new, click on "Join Now" and create an account. If you are an existing user, just sign in to the site.
- To start your design, click "Create new design". This will give you three options, "Start from scratch", "Upload a Background image" and "Choose a gallery design".
- Click on "Start from scratch", and you will be taken to the design area as shown in the third picture. You will be in 2D mode while designing. There are many drop down menus on top of the page. We will come to each one as and when required.
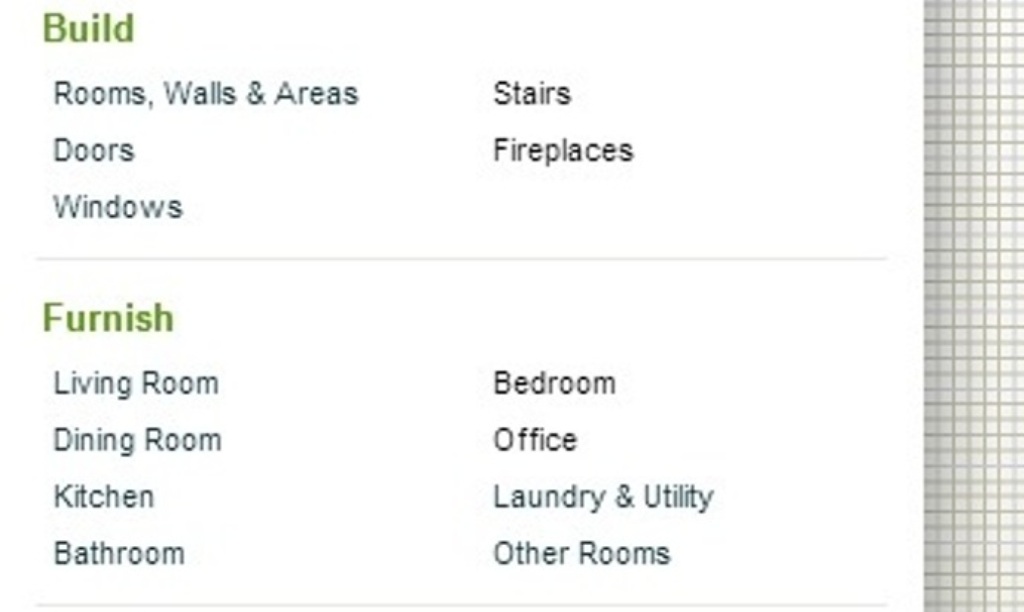
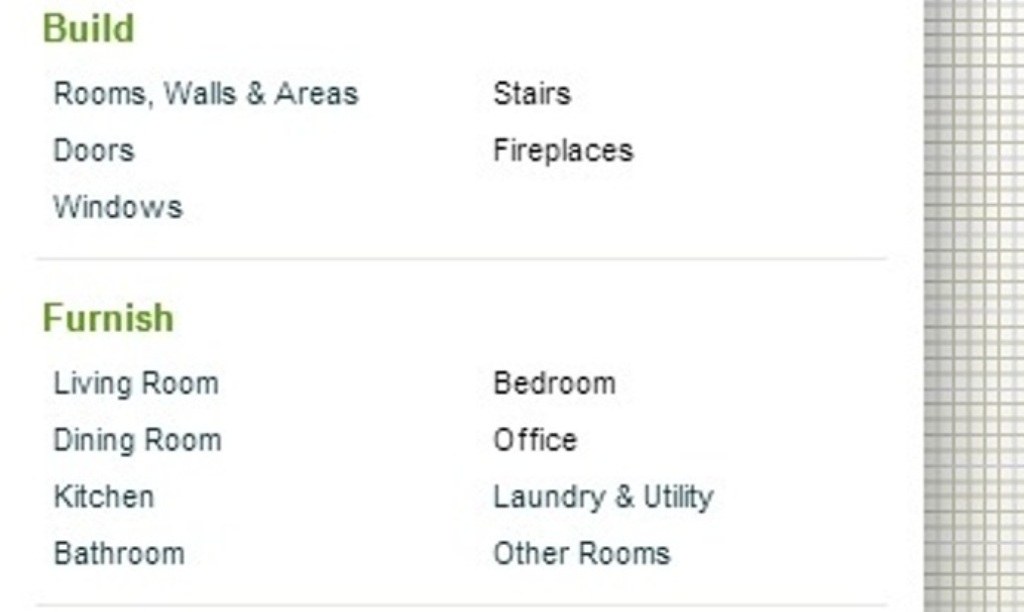
- On the left hand side under "Catalog", you can find different headings like "Build", "Furnish", "Decorate" and "Landscape & Outdoor". Under each heading there are different options, which you can select as required during building your design.
- You can change the unit type from feet to meters by clicking the first button on the bottom of the design area. Clicking on the second one will show you complete dimensions of your design. The third one with incremental measurements is the scale.
Set Level Properties
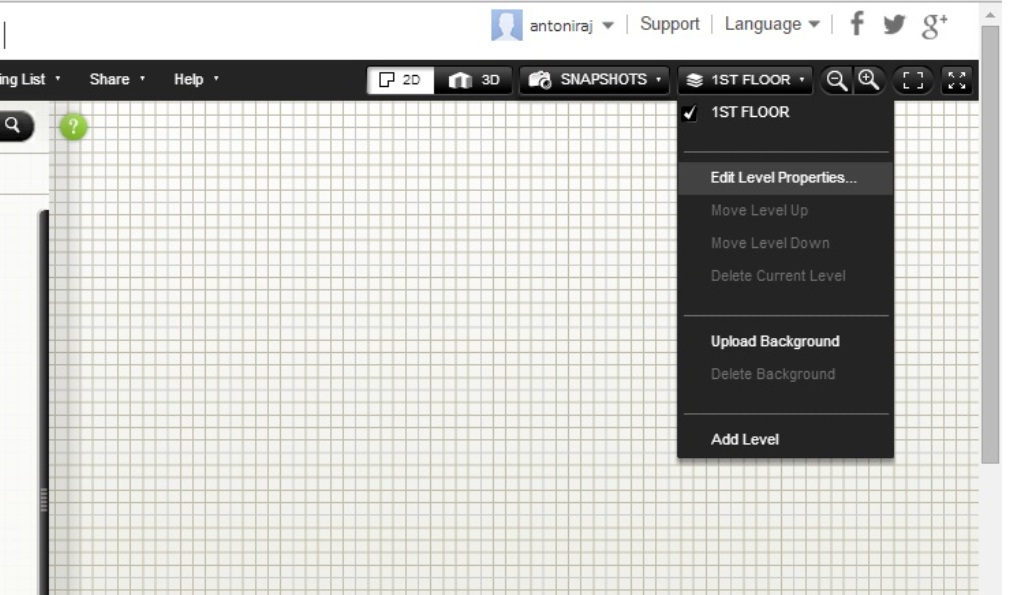
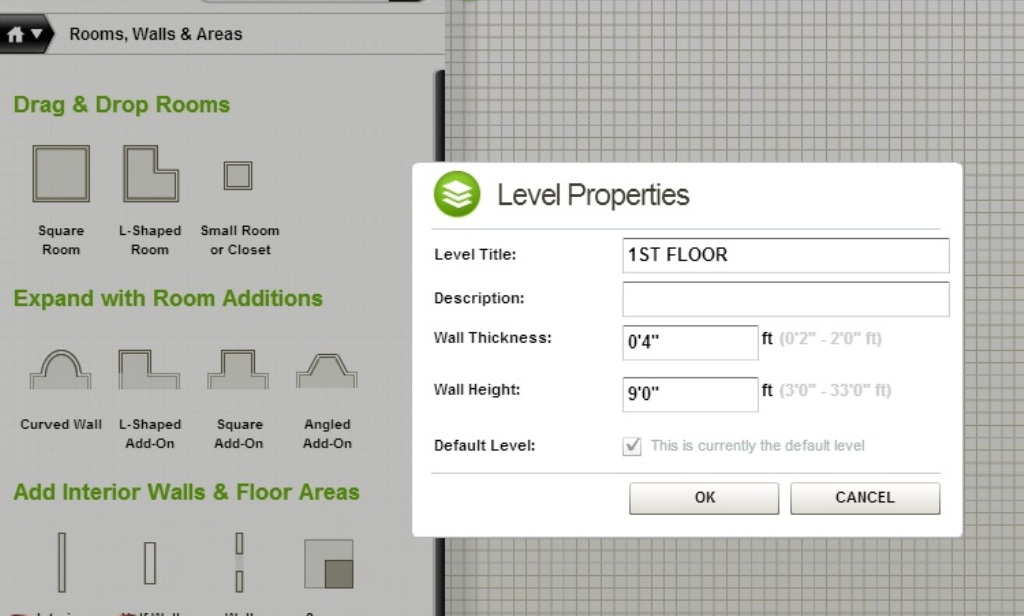
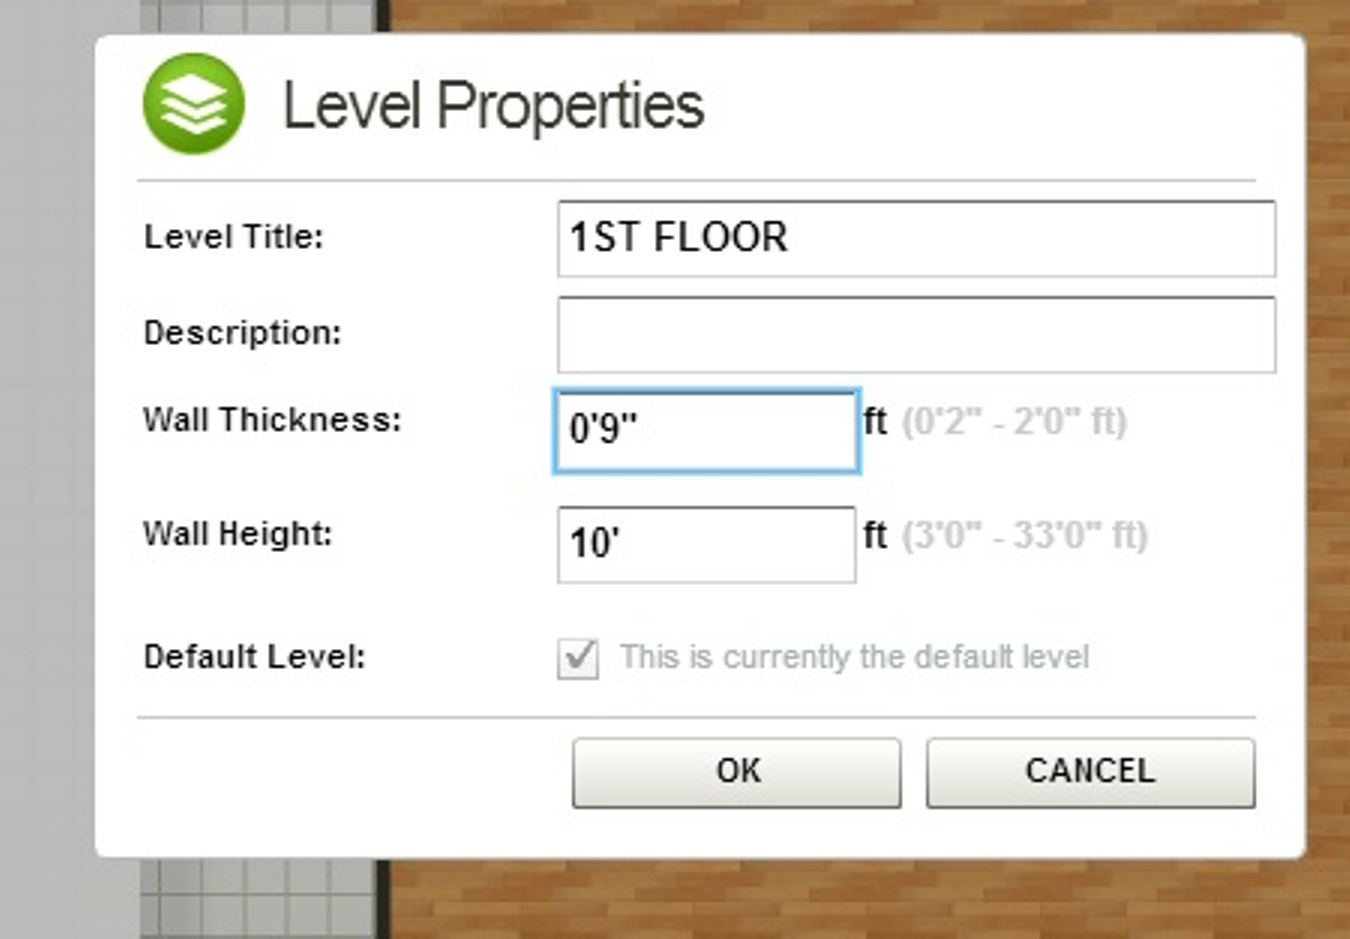
Before starting our design, we need to set Level Properties for our design.
Click on "First Floor" and then "Edit Level Properties" from the drop-down menu. This will bring out a Level properties dialog box.
Here, the Level Title is "1st Floor", which you can leave as it is. The default values for the Wall thickness is 0' 4" and the wall height is 9' 0". In my design I have kept the wall thickness as 0' 9" and wall height as 10' 0". You can make the necessary changes as required. This is Global Default Level which will apply to all walls.
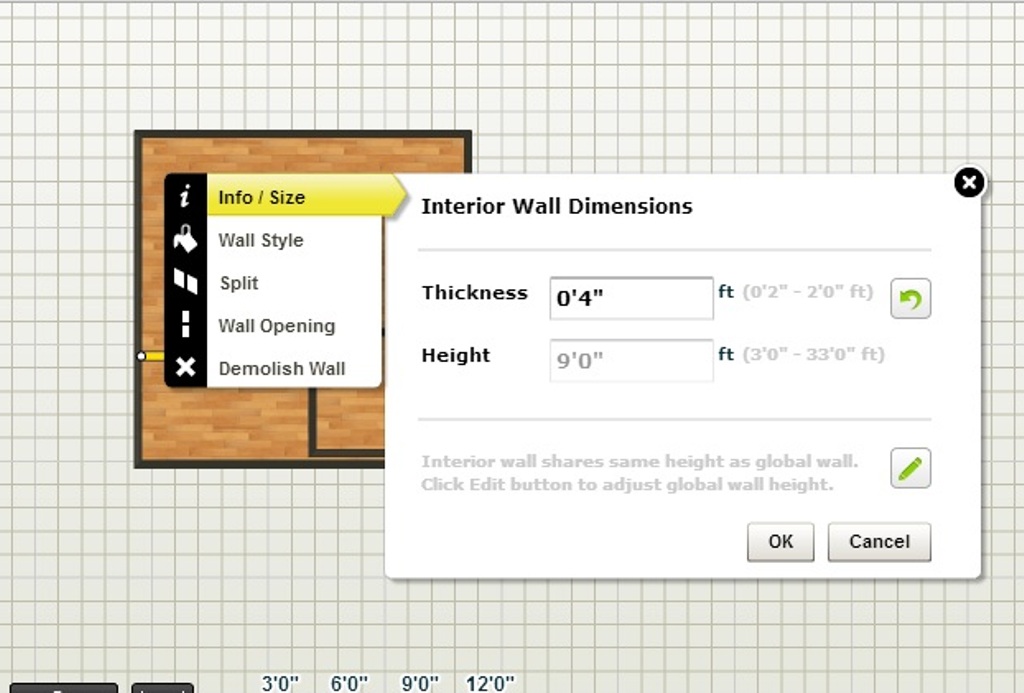
You can not adjust the height of any interior walls other than the value set in Level Properties. However, you can adjust the wall thickness for a particular interior wall. To do this click on the wall and then click "Info/Size" from the menu. Here you can change the wall thickness as desired.
Build Your Floor Plan
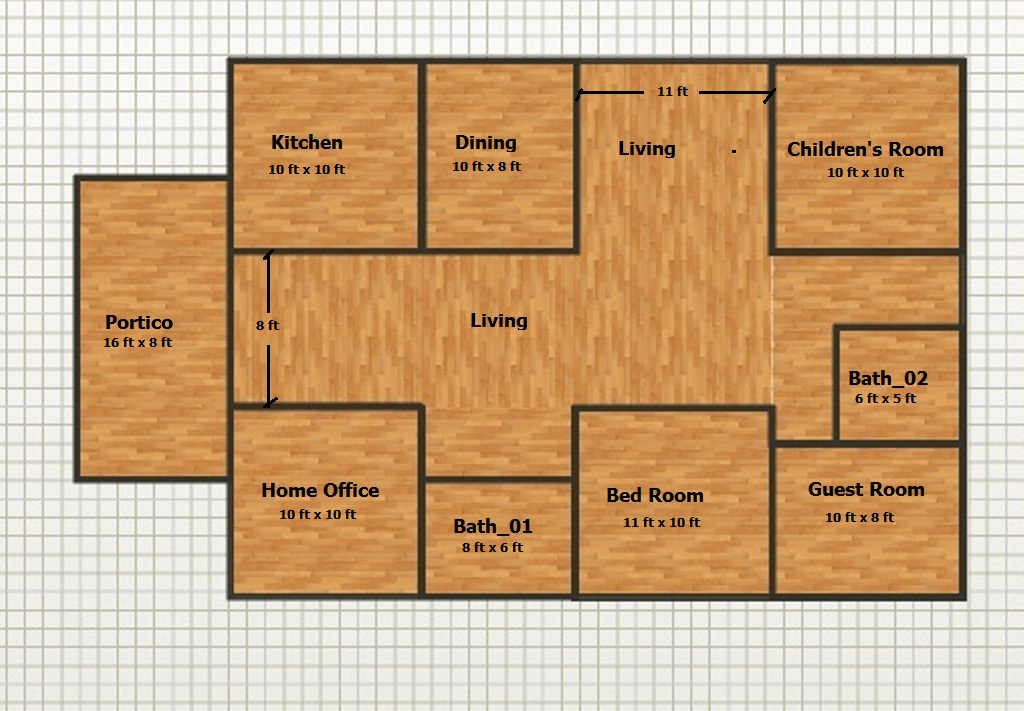
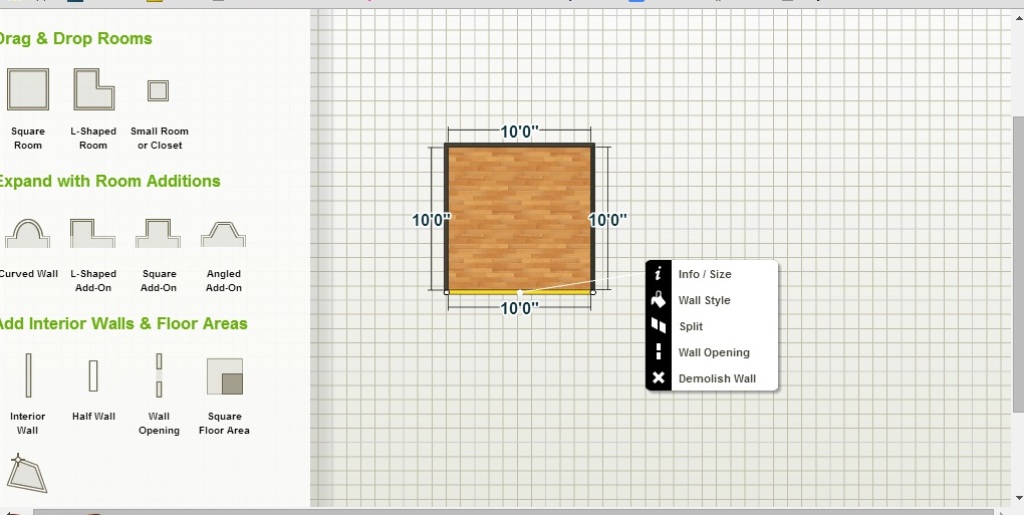
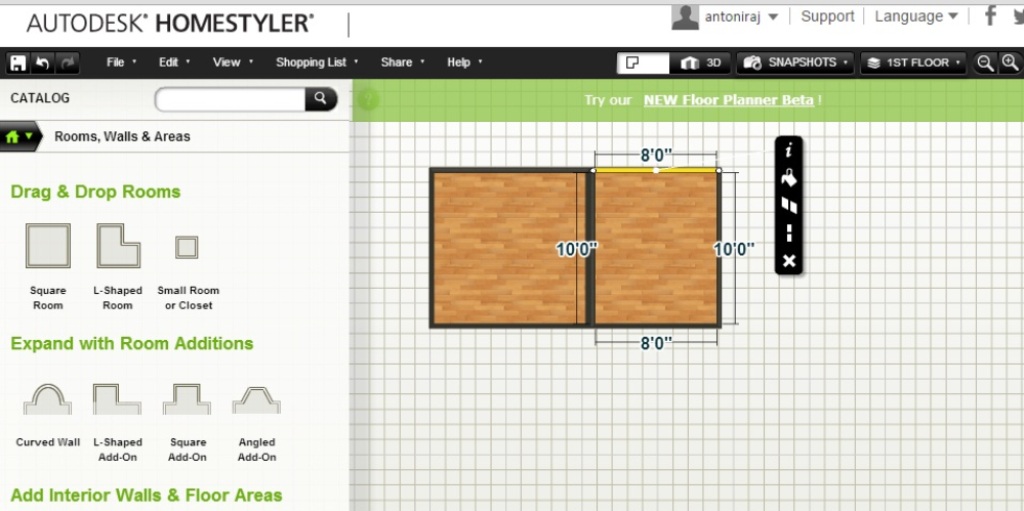
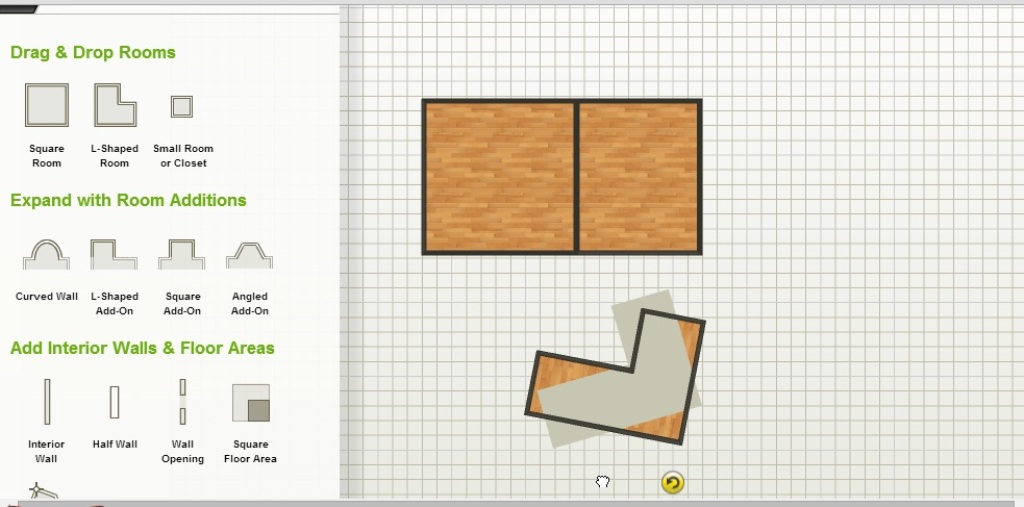
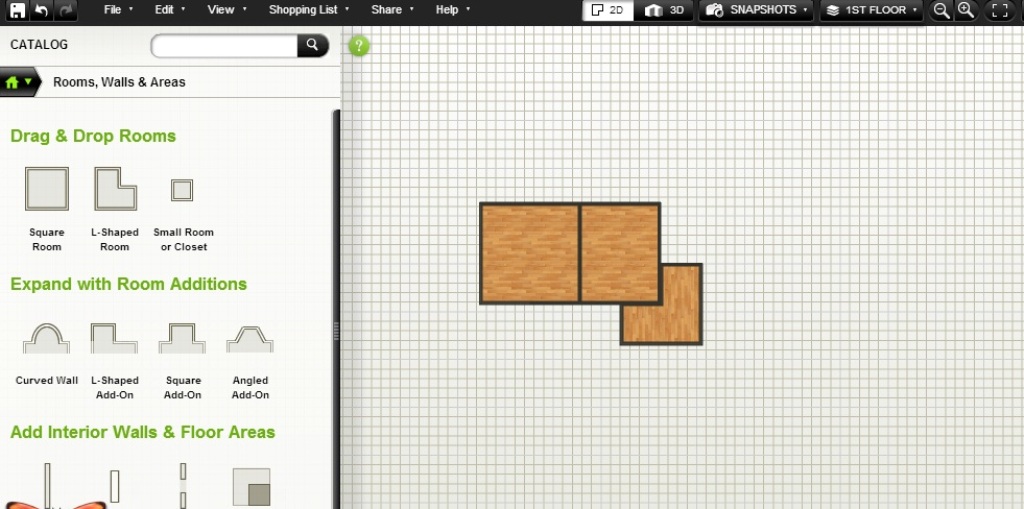
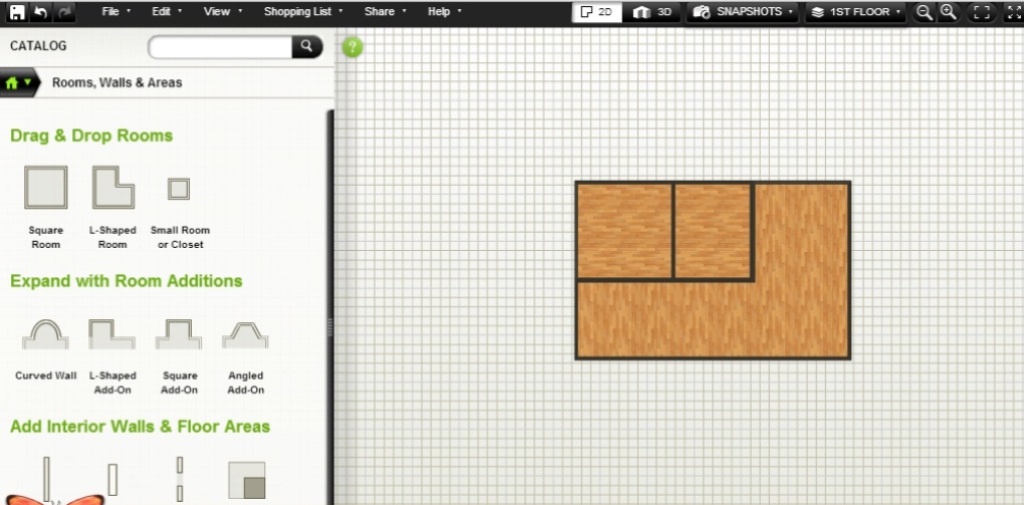
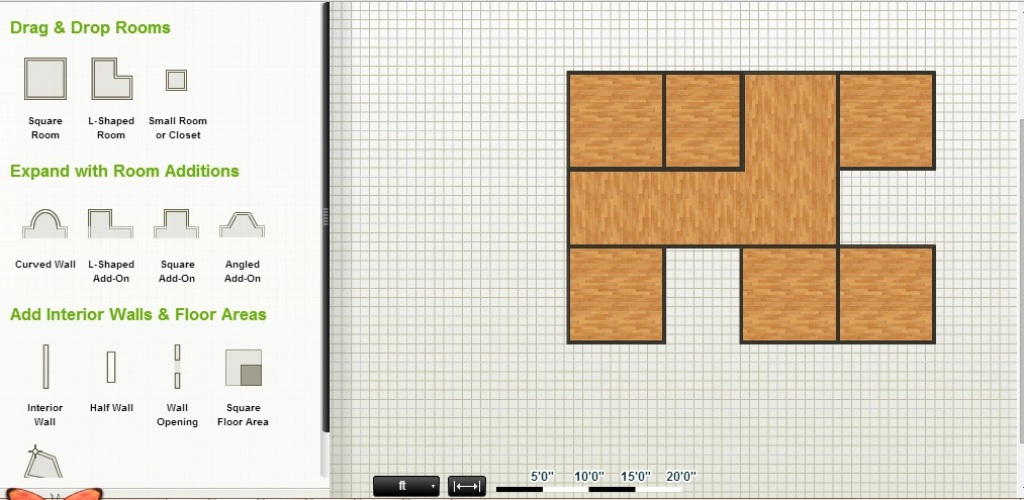
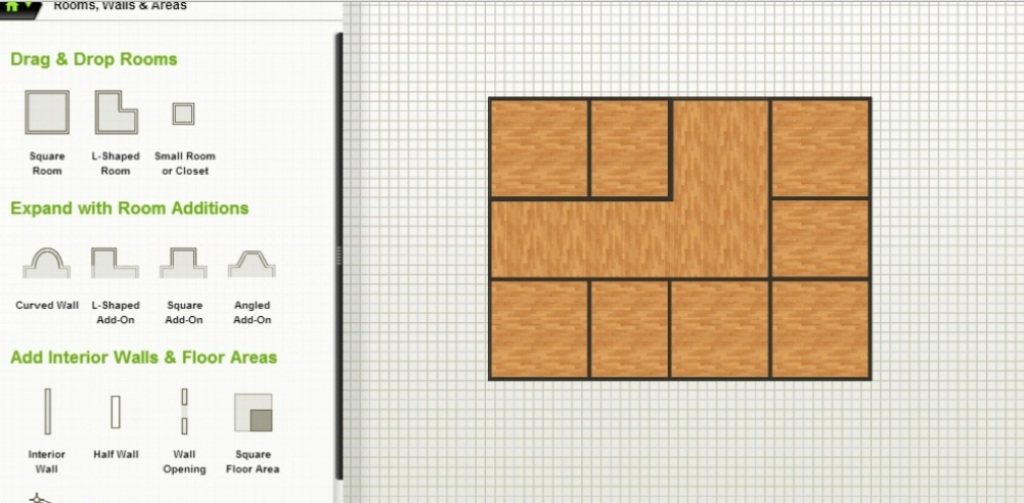
I have given the layout plan with dimensions in the first picture. Let us build the floor plan starting from kitchen, that is from top left.
- In the Catalog menu click "Rooms, Walls & Areas" under Build. This will bring you different shapes under "Drag & Drop Rooms", Expand with Room Additions" and "Add Interior Walls & Floor Areas".
- Drag and drop the "Square Room" into the design area.
- Bring your mouse over any wall and a double-sided arrow will appear. Click on the highlighted wall and dimensions of the room will appear. Now you can resize the room as required.
- You can add dining room by simply dragging the square room, placing it adjacent to the kitchen and then resize it.
- The living room and open area are a combination of squares and rectangles. First we will add the "L" shaped room and them modify it latter.
- Drag and drop the "L" shaped room from the catalog. You can rotate it to the direction you want using the yellow arrow by clicking on the "L"shape.
- Place it adjacent to the Dining room as shown and then resize the shape to fit the floor area.
- Now you can add Office room, Bed room, Guest room and Children's room at the respective locations as shown in the picture.
- In the remaining gaps, place two square rooms and resize them as required.
Now your floor plan is almost done except for the two bathroom areas.
Internal Modifications
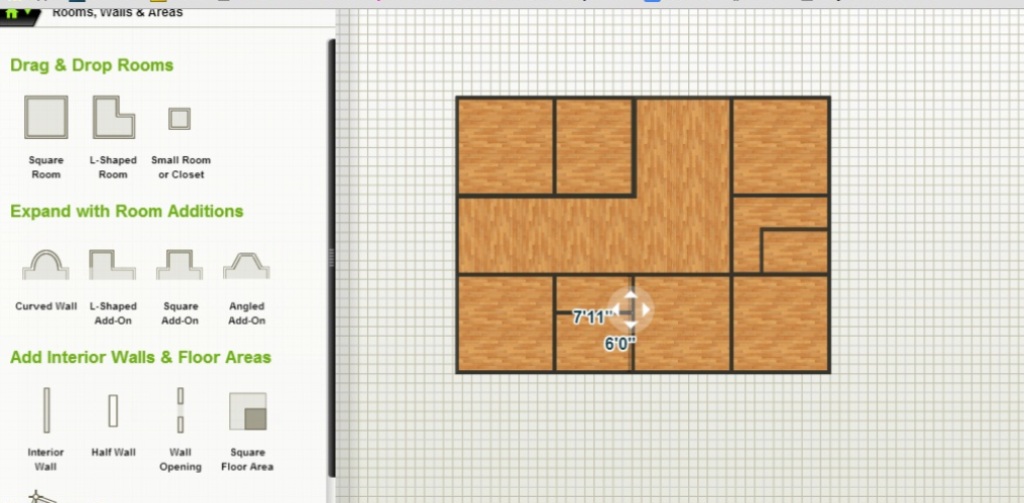
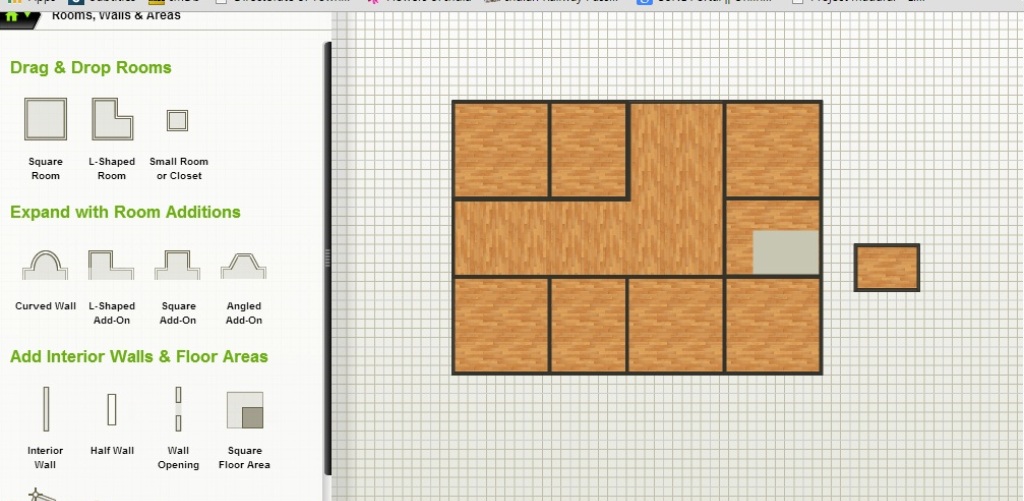
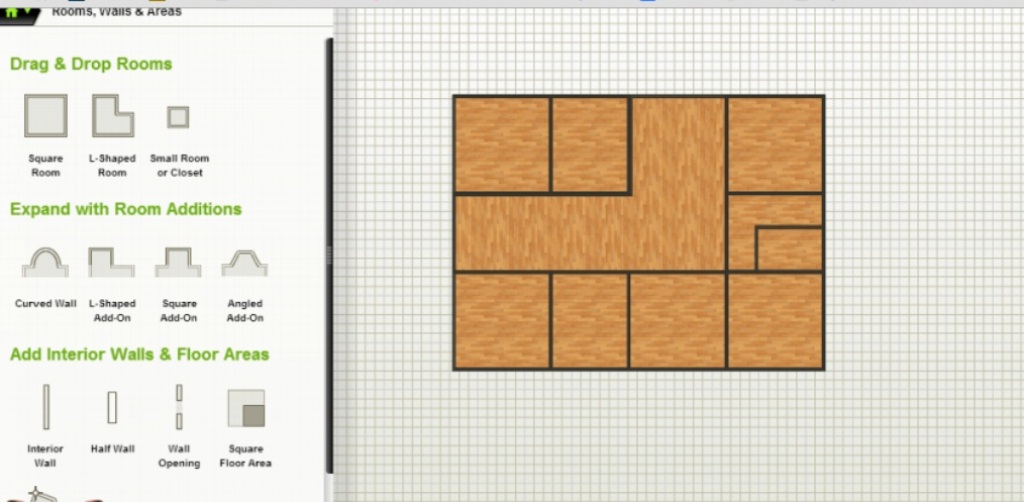
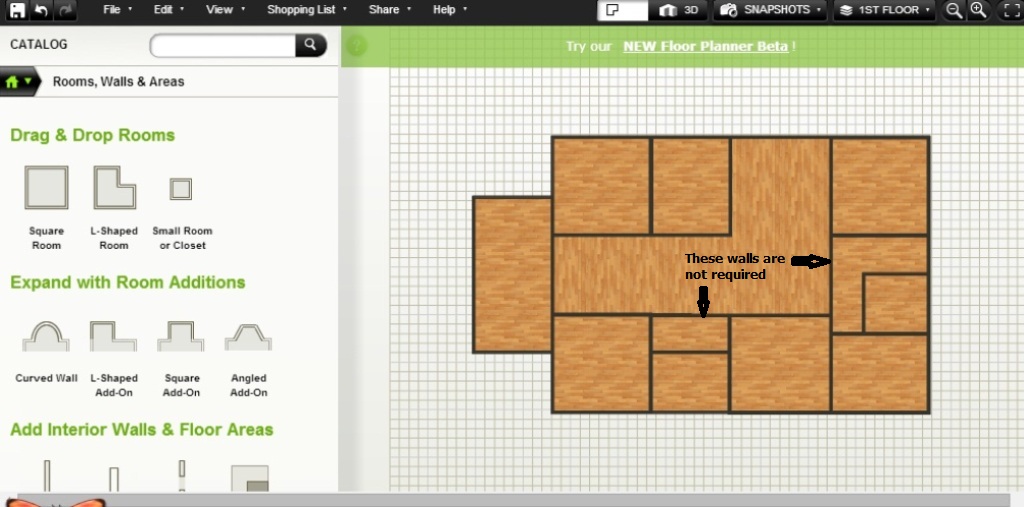
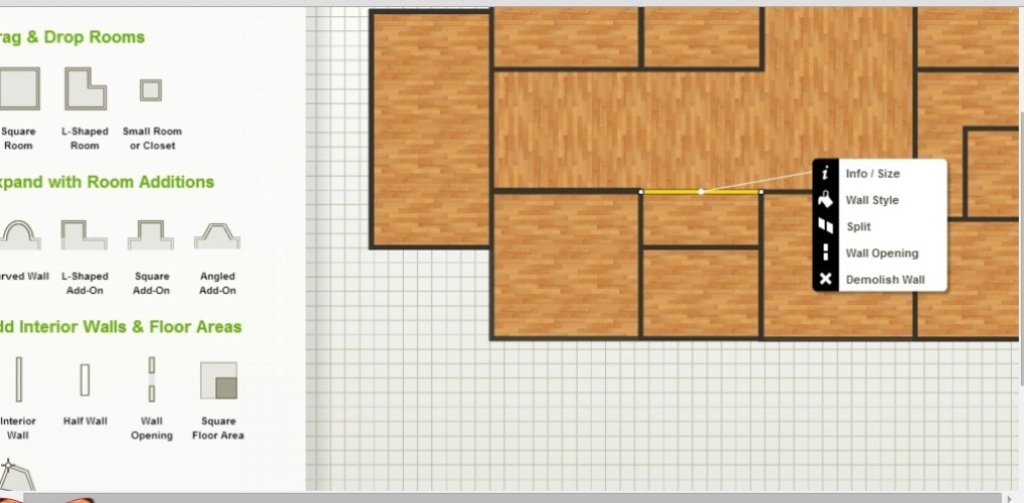
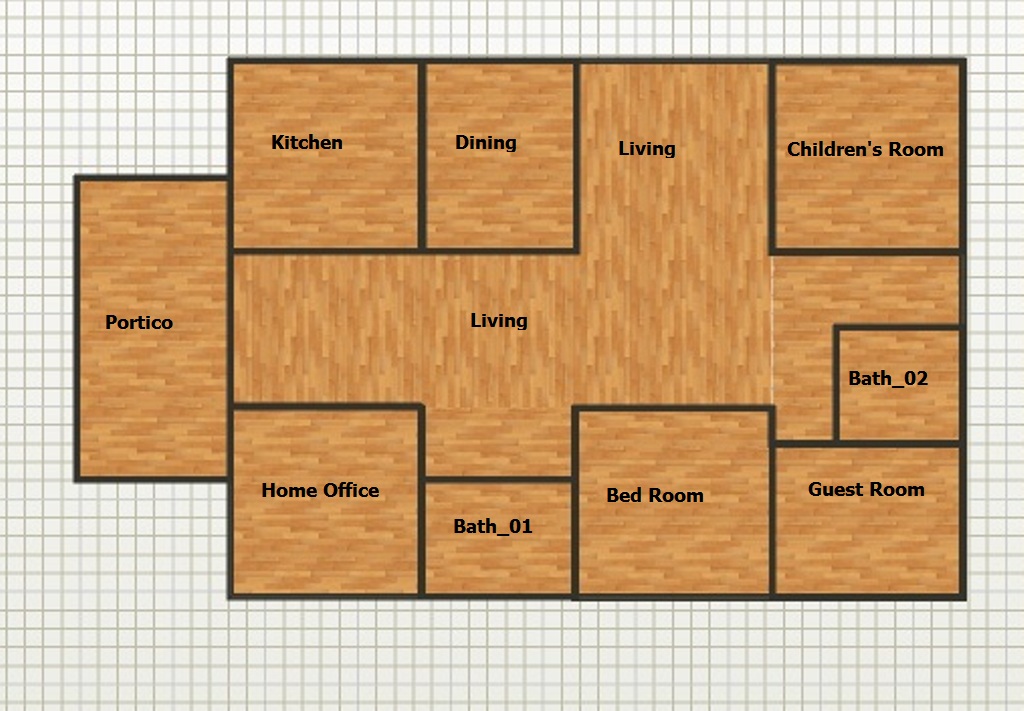
In this step, we will add an interior wall to partition Bath_01, add a small room for Bath_02 and Dismantle the walls which are not required
- Drag and place an Interior wall from the "Add Interior walls & Floor Areas" menu in the Bath_01 area and extent the wall so that it meets on both ends with existing walls.
- For placing the wall at the correct location, click on the wall and move it as per the dimensions which appear while moving.
- For the Bath_02 area, drag and drop a square room outside the floor plan in the design area, and resize to the required dimensions.
- Place the resized Bath_02 at the correct location. In the picture you can see it as grayed out.
- For the Portico, drag and drop the "Square Floor Area" in front of the house from the "Add Interior walls & Floor Areas" menu and resize as required.
- Now there are two walls which we do not require. Click on the wall and click "Demolish wall" on the menu which appears when the wall is highlighted and the wall will disappear.
Now our floor plan is completed.
Flooring
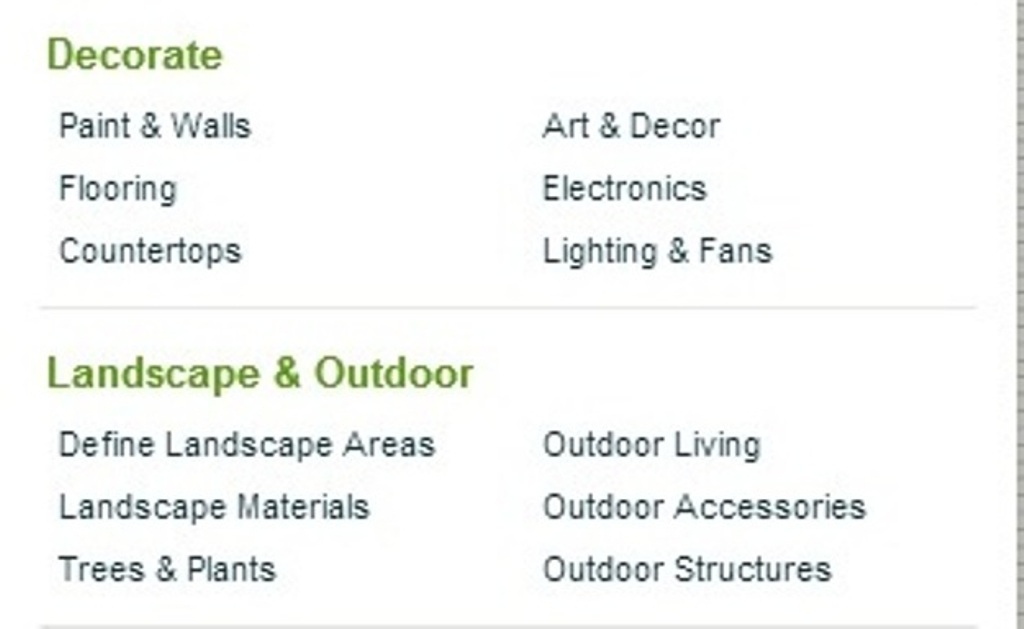
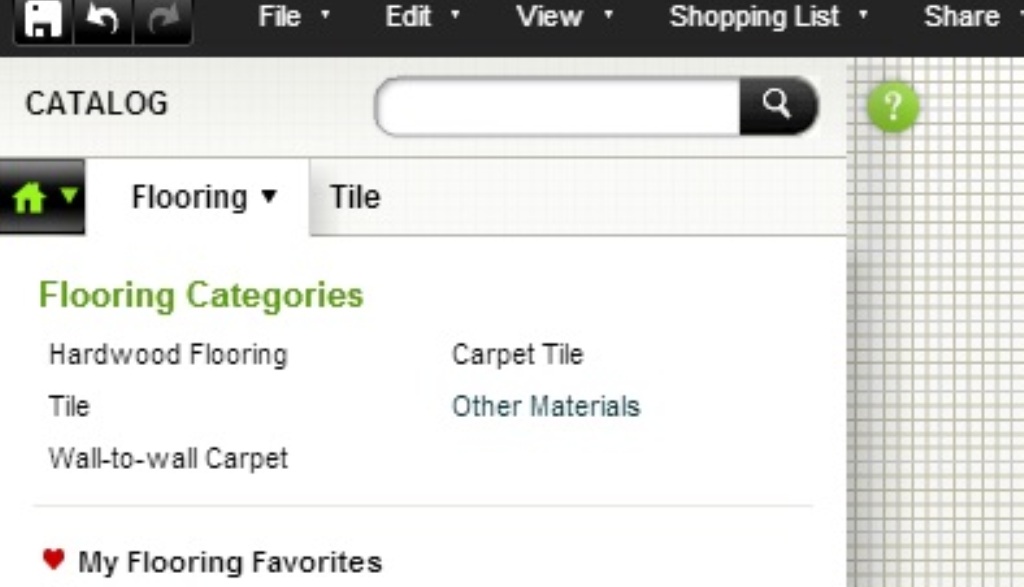
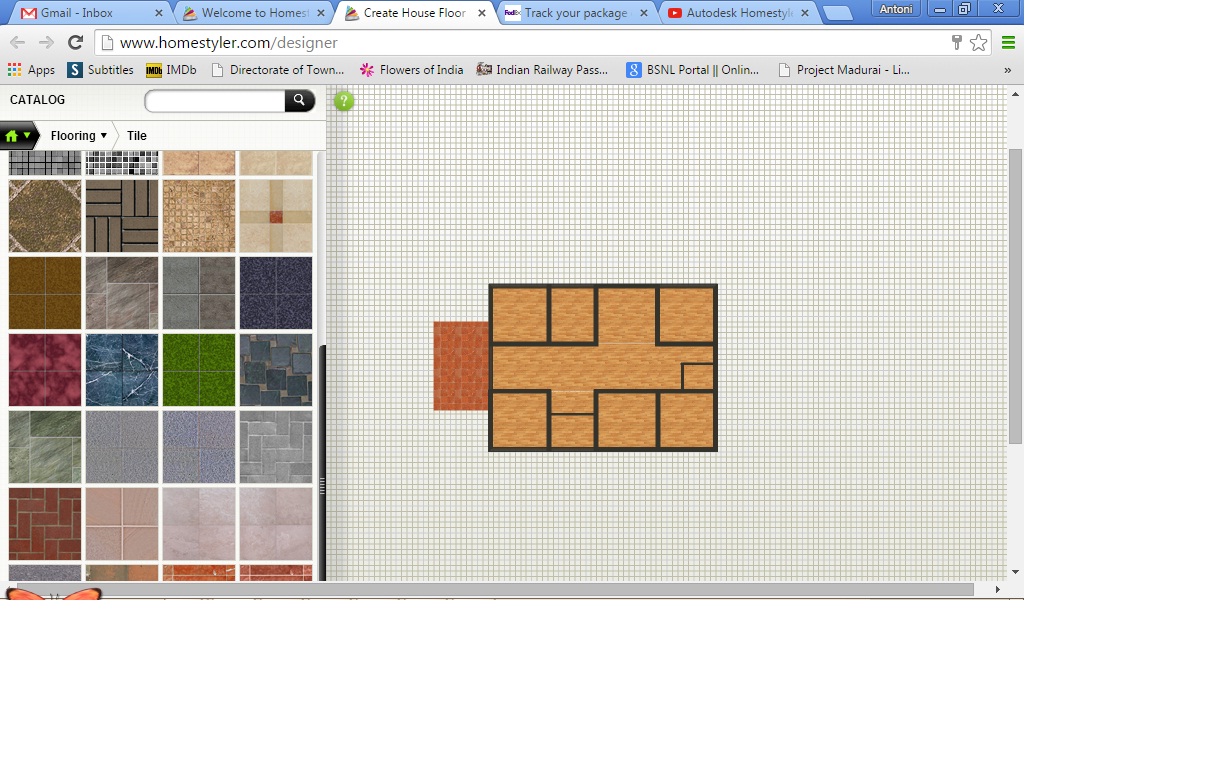
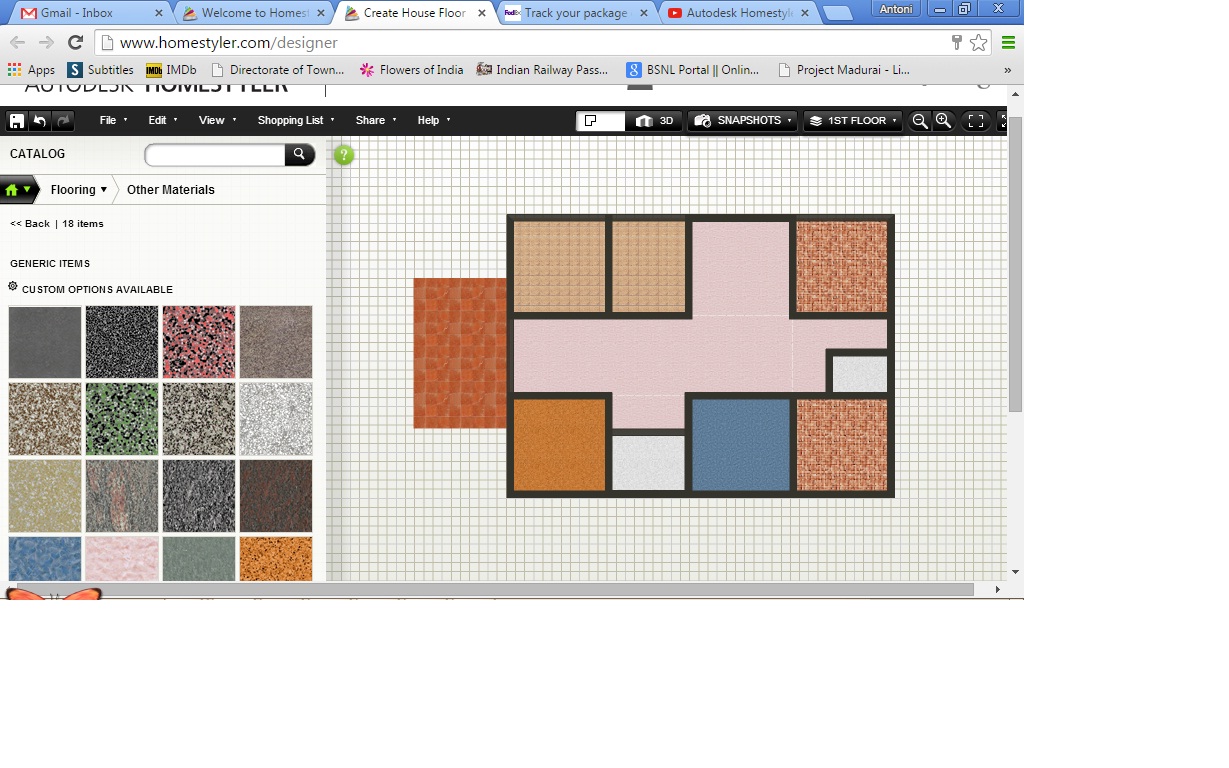
At this stage, I could have added doors, windows and any openings in walls. However, I have designed flooring first. So, let us see how we can do flooring for our design.
- You can find "Flooring" under "Decorate" catalog. Click on "Flooring" which will bring out the Flooring Categories.
- Under this, you can find Hard wood Flooring, Tile, Wall-to-Wall Carpet, Carpet Tile and Other Materials. I have used Tiles and Other materials in this design.
- Click on the Tiles or Other Materials menu and drag and drop the design you want inside rooms, that's all. You can also experiment with different flooring material as you like.
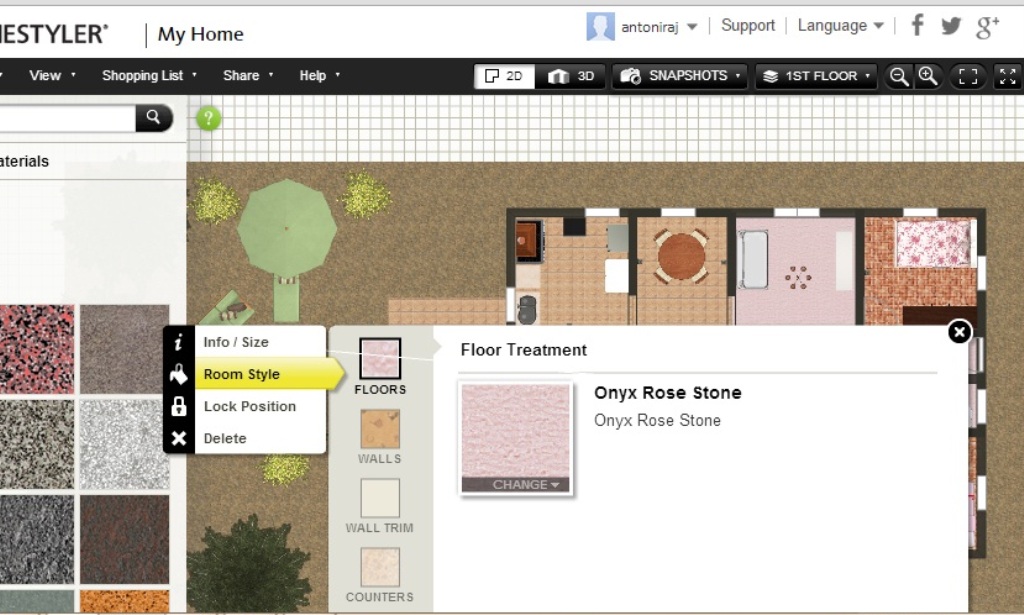
- To see what type of flooring material you have used, click inside the room and click Room Style. Here you can see that I have used Onyx Rose Stone for the living room area.
Add Doors and Openings
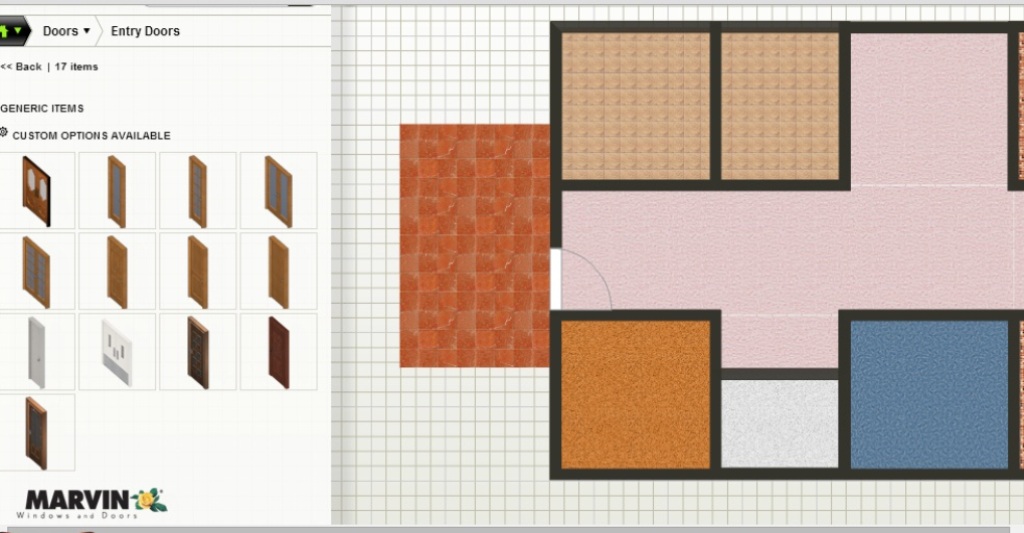
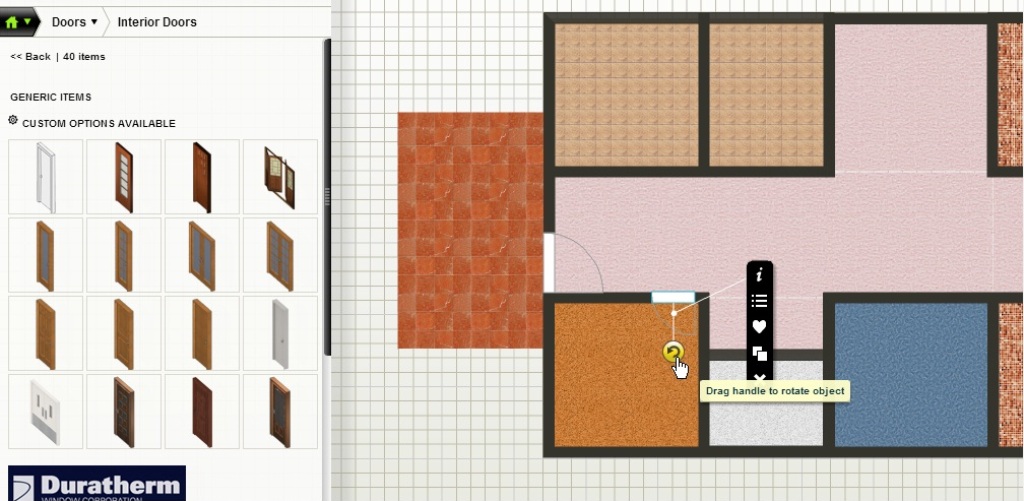
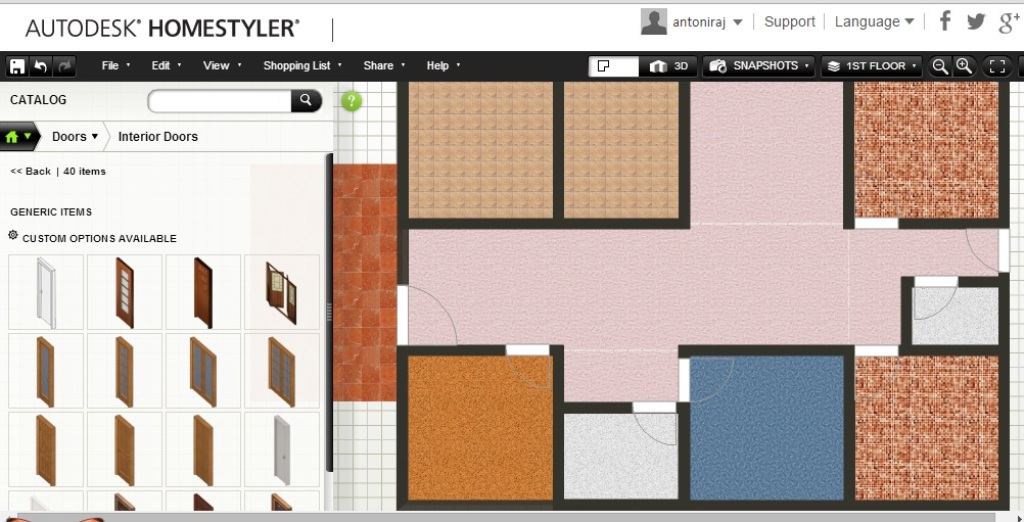
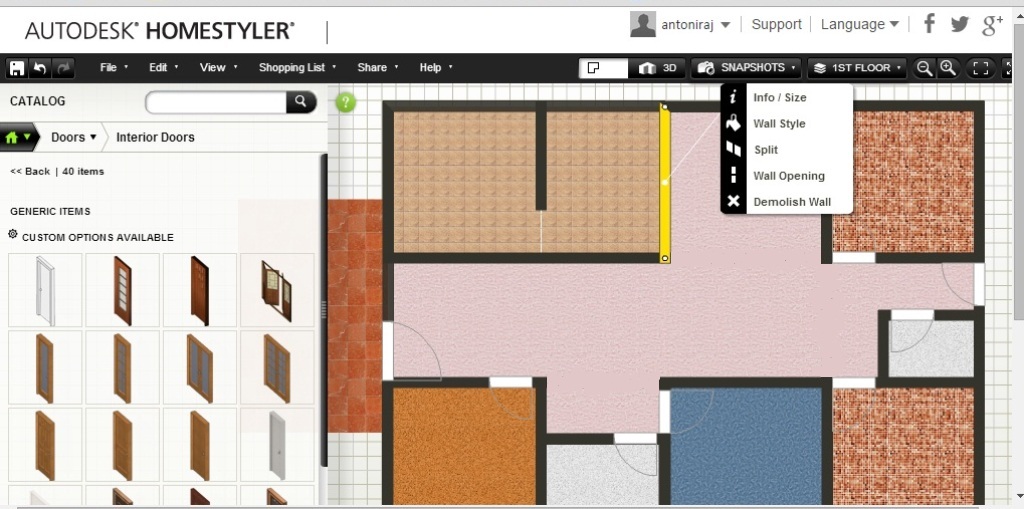
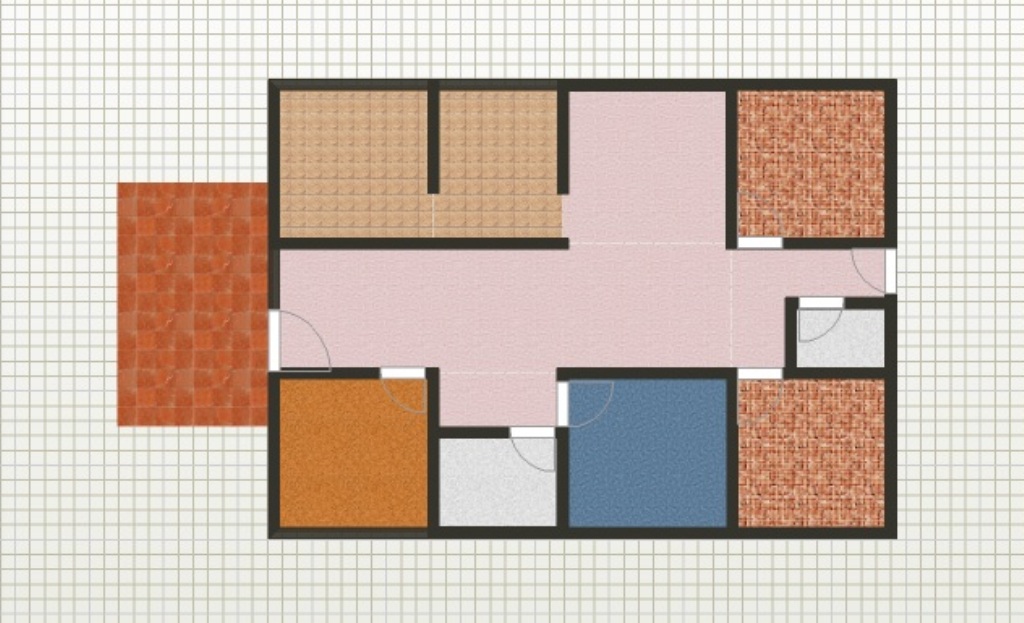
In this step we will add Doors and Openings to our design.
- Click on the Doors menu under Build category.
- Here you will find Entry Doors, Interior Doors, Patio Doors, Closet Doors and Garage Doors.
- Click on Entry Doors. You can select the design you want and drag & drop on the front wall. For interior doors, select from the Interior Doors menu and place the door in position.
- You can use the yellow handle to rotate the door so that it will open to the side you want.
- I have provided openings in kitchen and dining room walls. To create an opening in a wall, click on the wall and then "Wall opening" from the menu which appears.
- You can adjust the placement and dimension of wall opening using the arrows.
The last picture shows the completed design after this step.
Add Windows
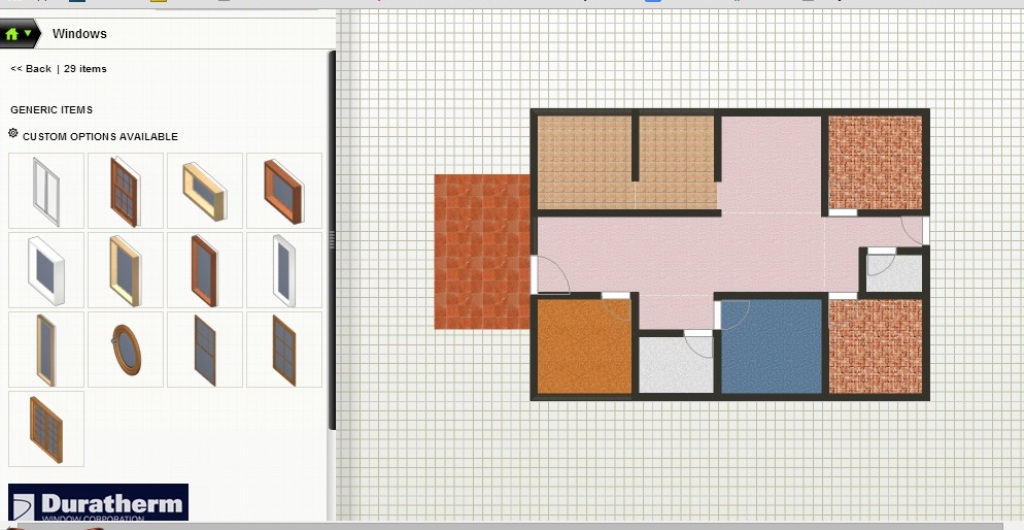
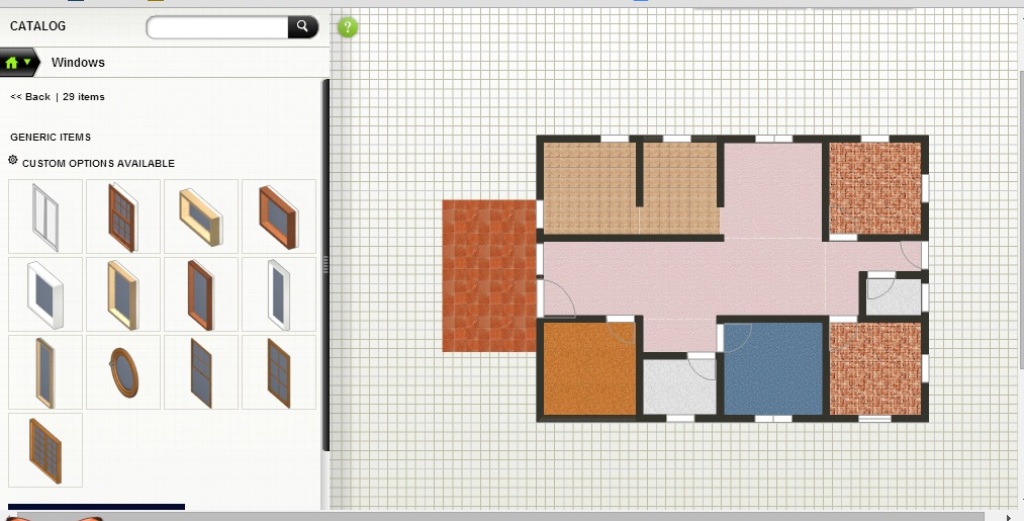
Click on the Windows menu under the Build category.
- Drag and drop the type of window you want at the desired location. Remember, you can not adjust the dimensions of doors and windows, they are prefixed.
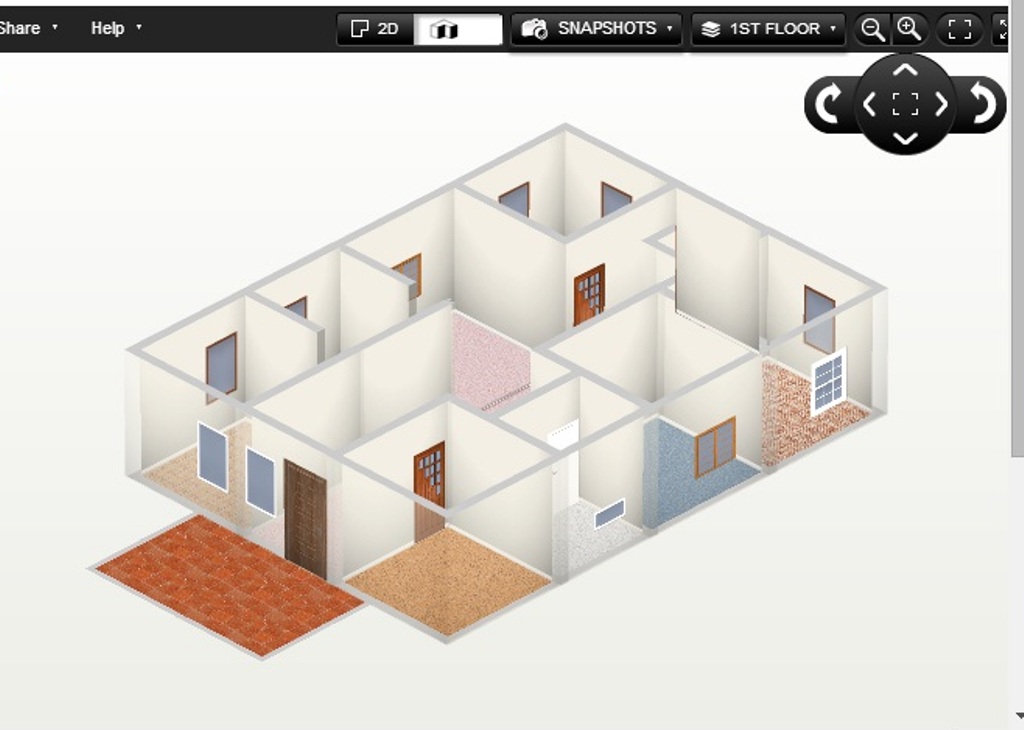
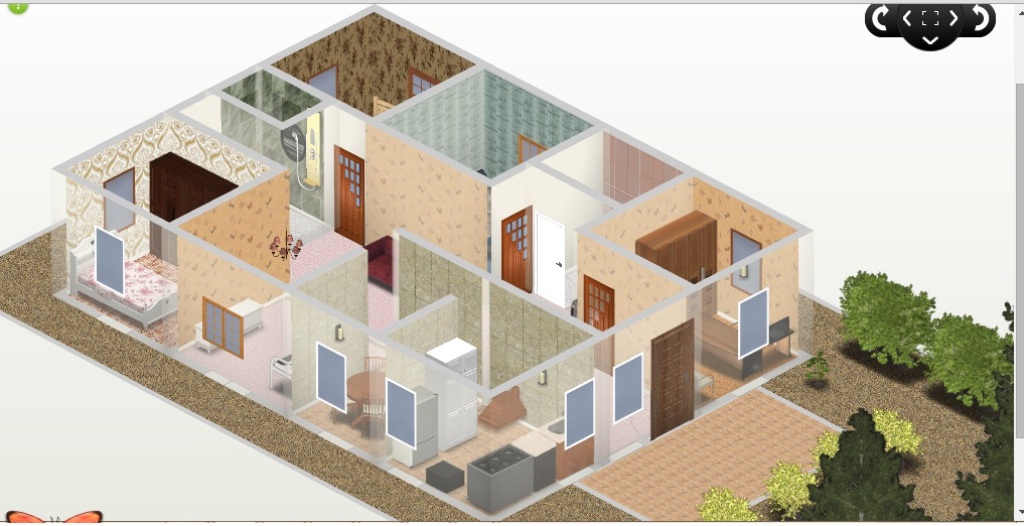
The last picture shows our design in 3D after adding flooring, doors, openings and windows.
Decorate Interior Walls
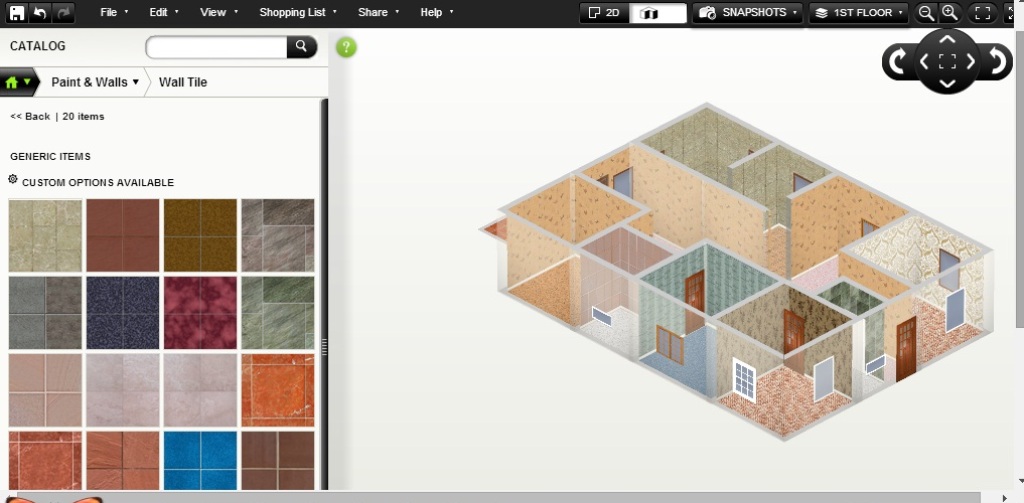
In this step we will decorate the interior walls.
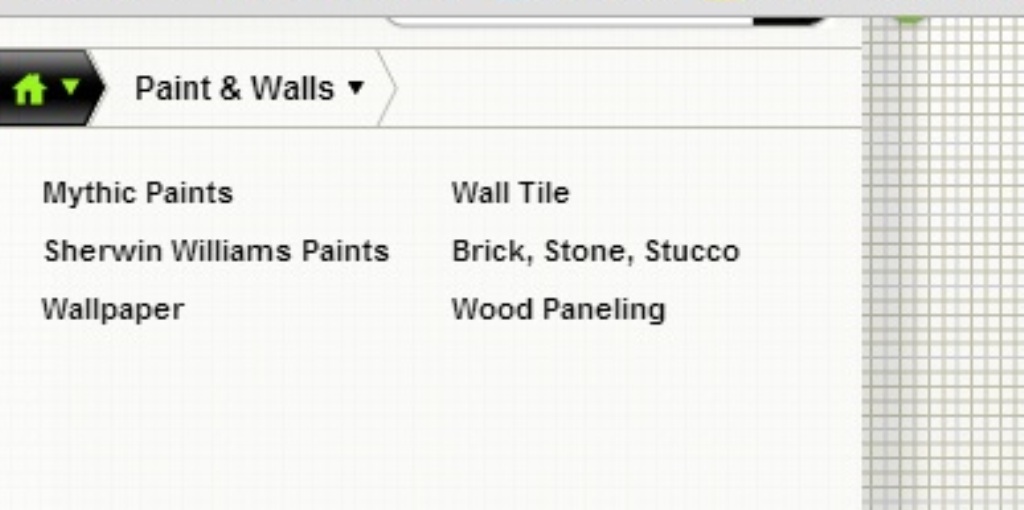
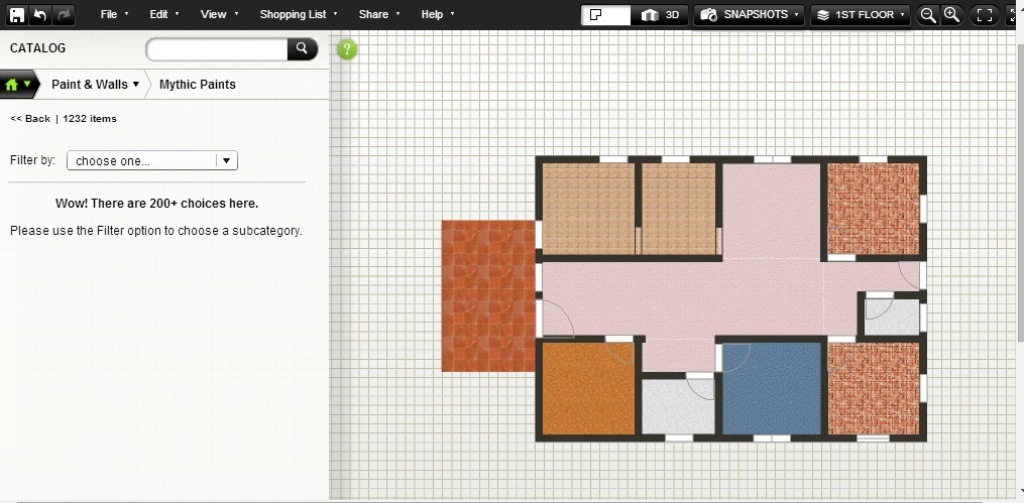
- Click on the "Paint & Walls" menu under Decorate category.
- This will bring you "Mythic Paints", "Sherwin William Paints", "Wall Paper", "Wall Tile", "Brick, Stone Stucco", and "Wood Paneling".
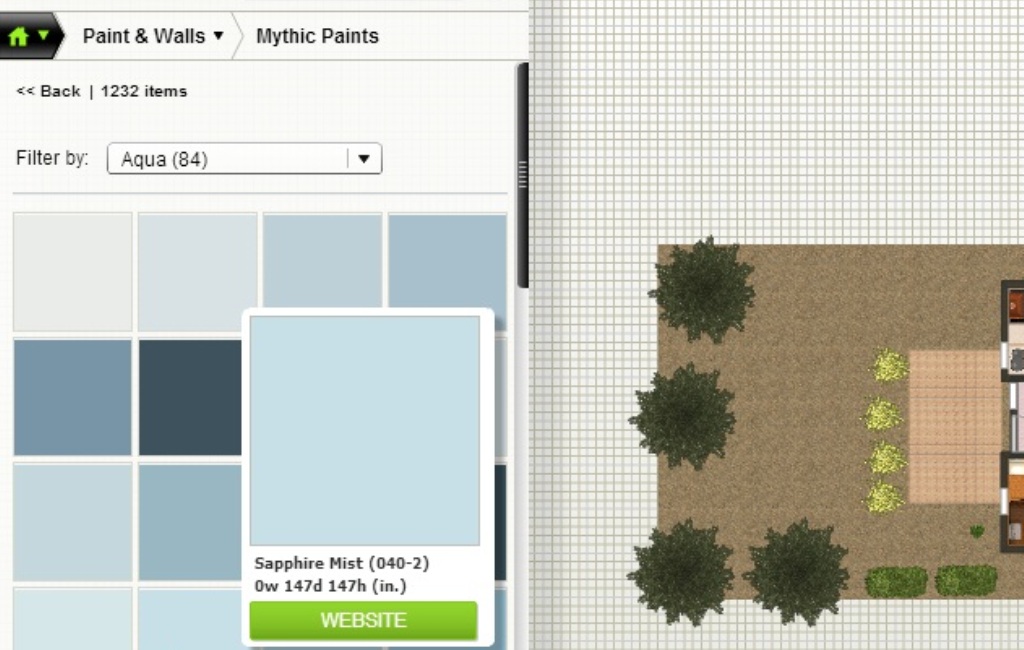
- The paint varieties are branded with so many shades under different colors. When you click on and select a shade, then you need to enter the manufacturer's website for more information and to apply that shade.
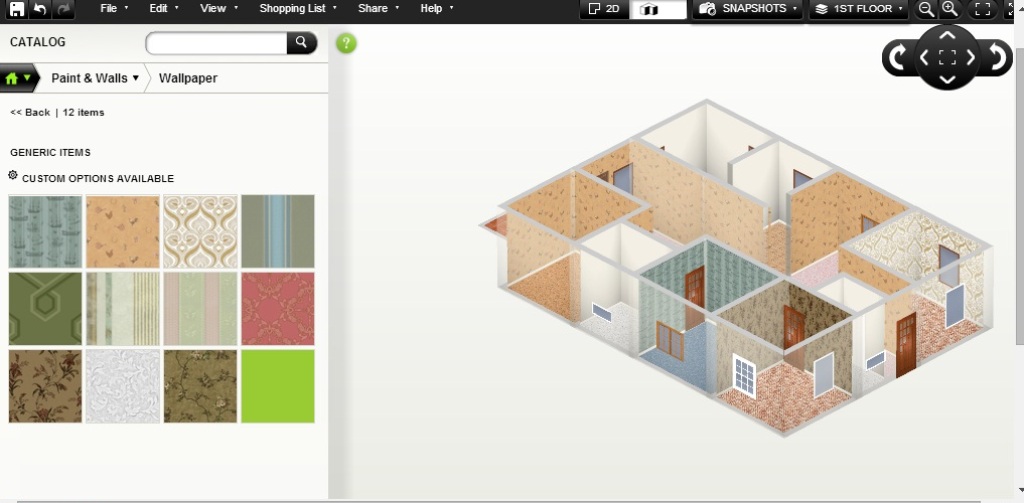
- To make it simple, I have selected Wall paper for living, office, bed, guest and children's rooms and wall tiles for kitchen, dining and bath rooms.
- To apply paint or wall paper or wall tiles, you need to be in 3D mode.
- Click on 3D and your design will be rendered in 3D.
- Now drag and drop the type of wall decoration you want inside the room and it will apply to all walls inside the room.
- Hold down the ctrl key if you want to apply painting or tiles for a single wall.
The last picture shows the completed home in 3D after this step.
Furnish Living, Office and Bed Rooms
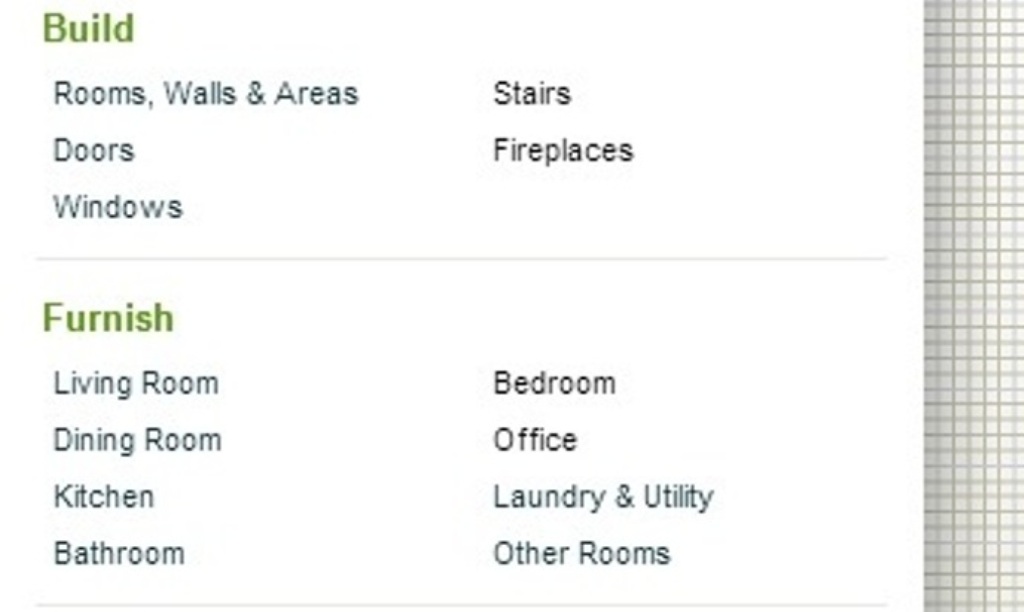
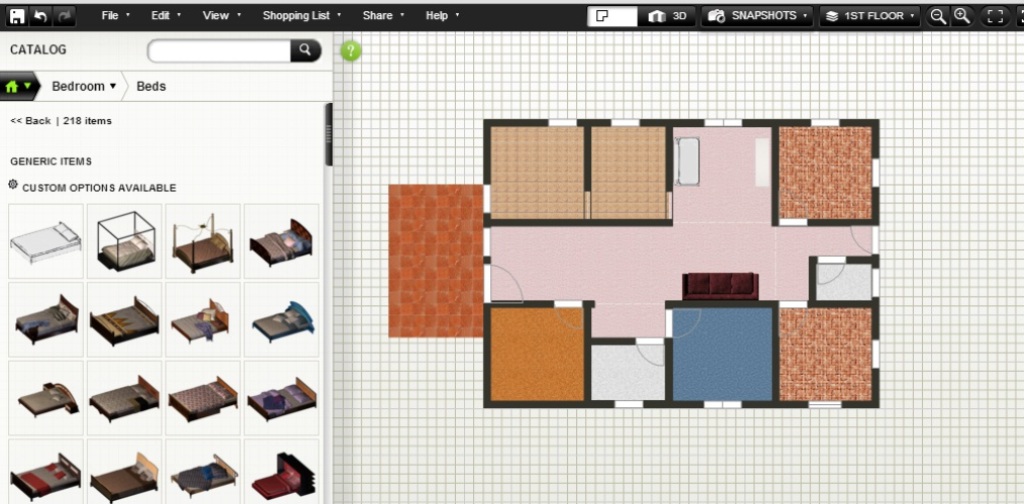
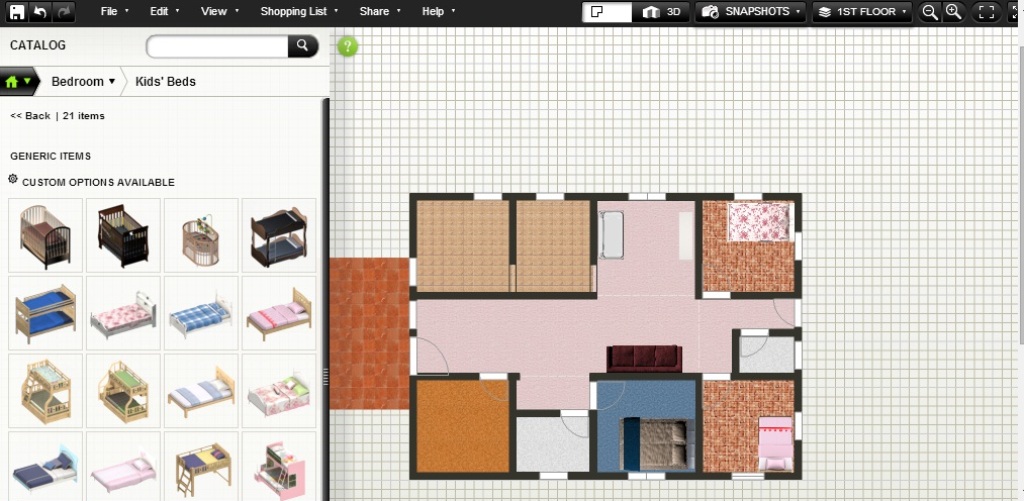
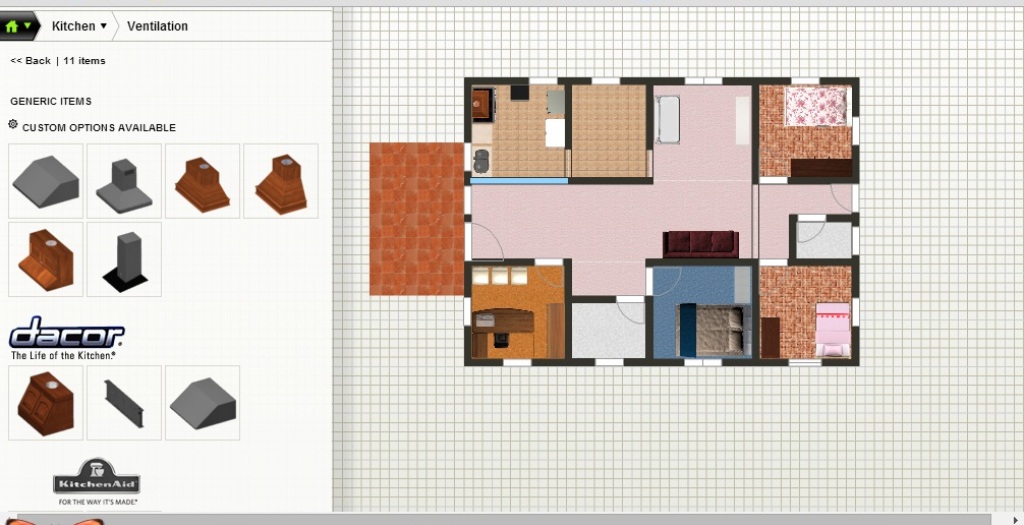
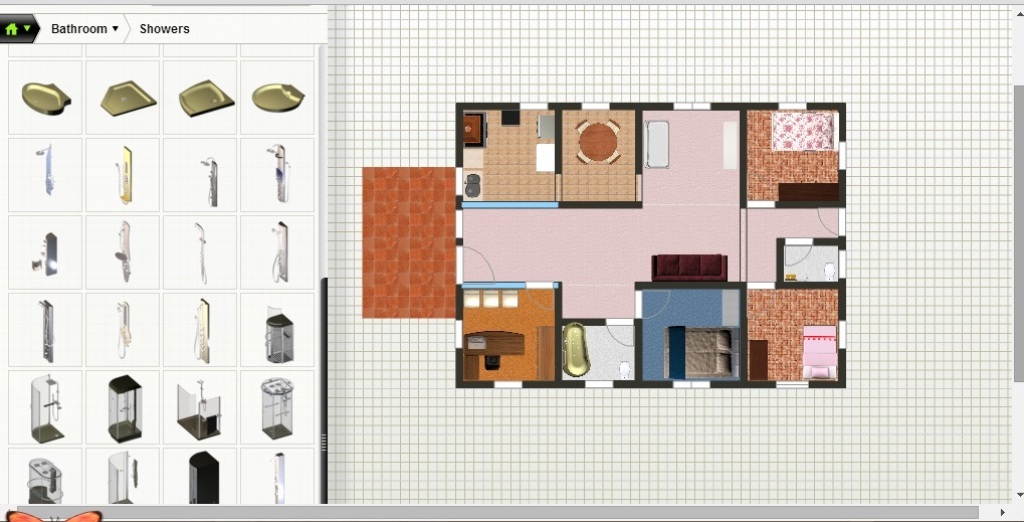
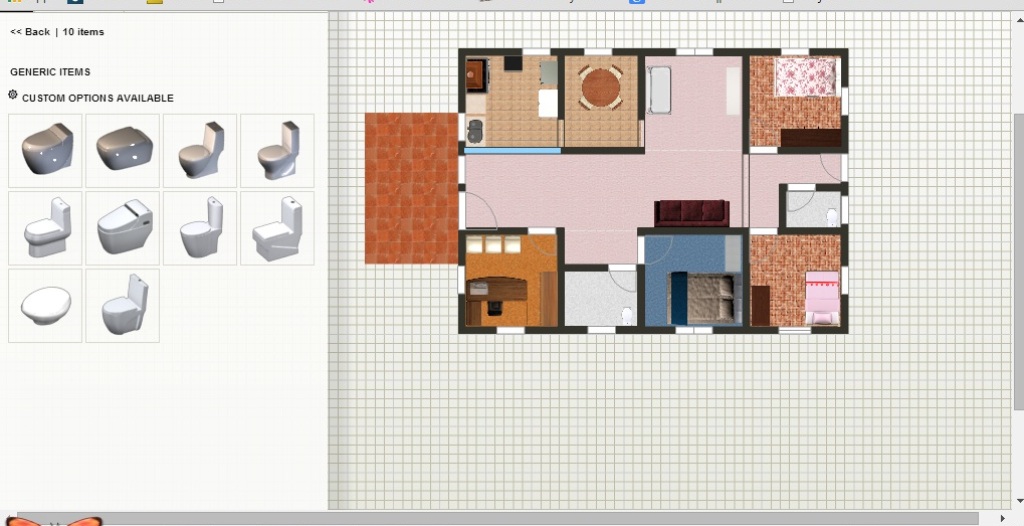
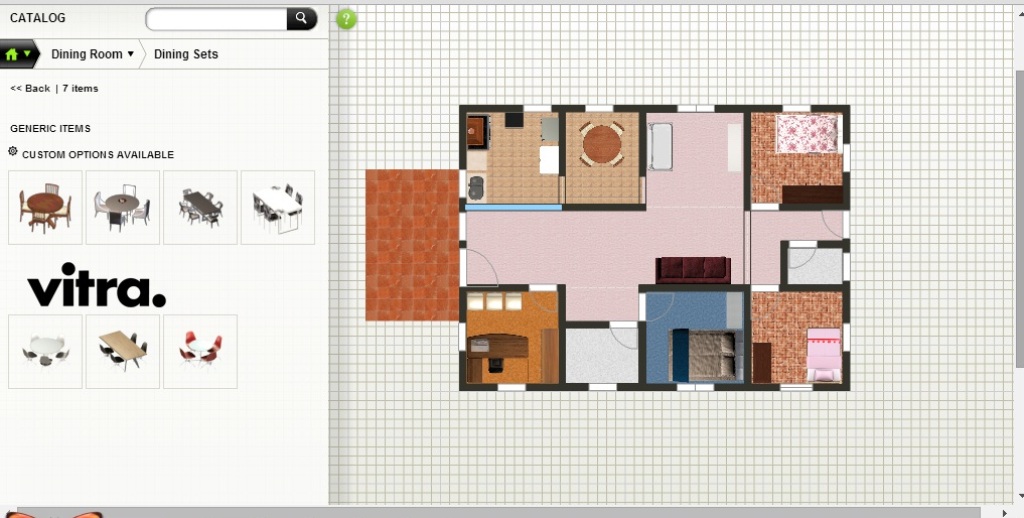
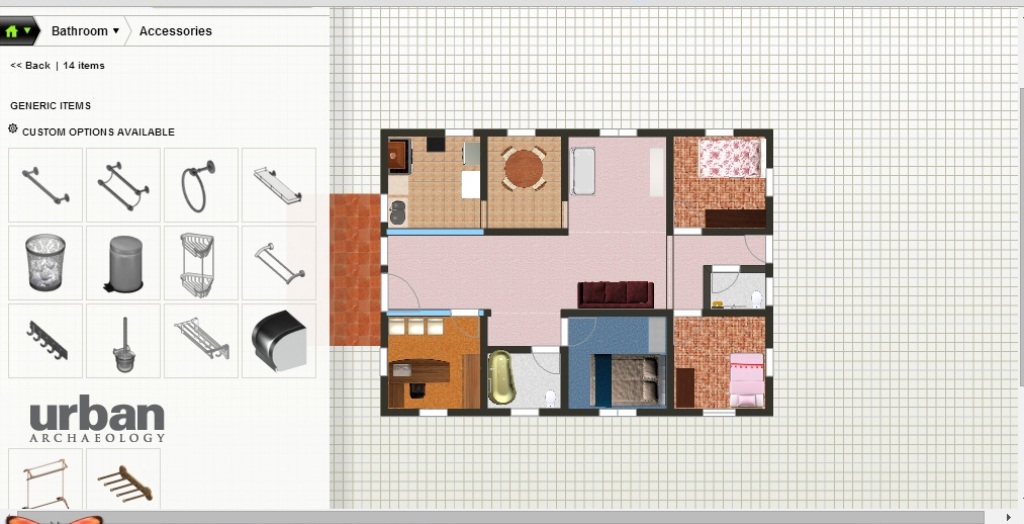
The "Furnish" catalog contains items required for Living Room, Bed Room, Office, Bath rooms, Kitchen, Dining, Laundry & Utility and Other Rooms. Most of the items under these heading are real life products and can not be resized.
Click on each category, select and place items as required by you. You can place Sofas, Chairs, Benches, Accent Tables, Media Units, Storage, Accessories, Beds, Night Tables, Dressers, Armoirs, Mirrors, Desks, Computer, Cabinets, Dish washers, cooking ranges, Refrigerators, Sinks, Showers, Toilets and all. Just drag it from the menu and place it where you want. You can play around with these items, rotating and moving them around to your design.
Lighting
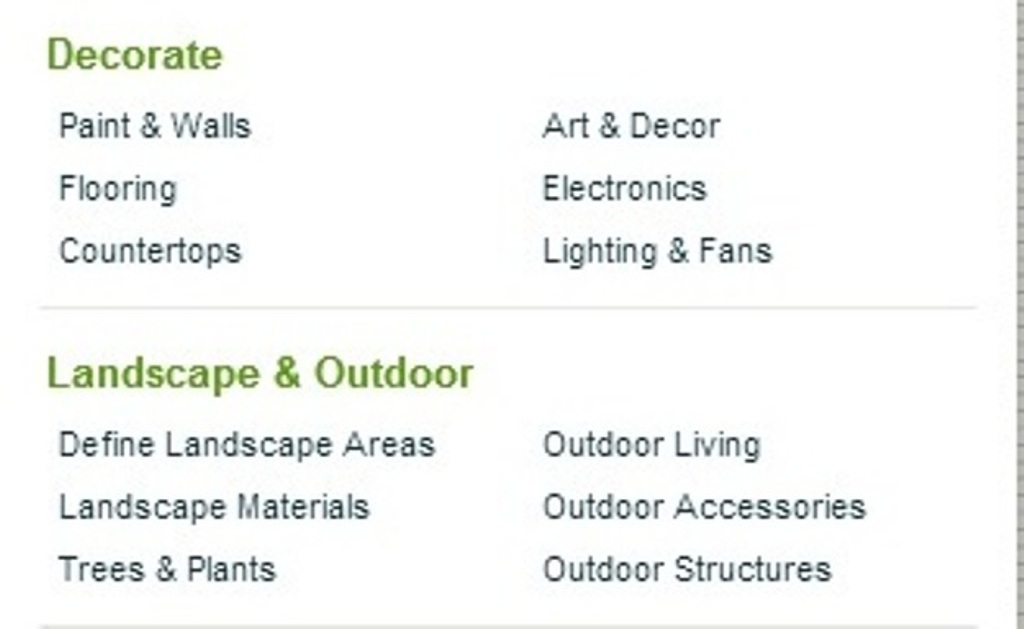
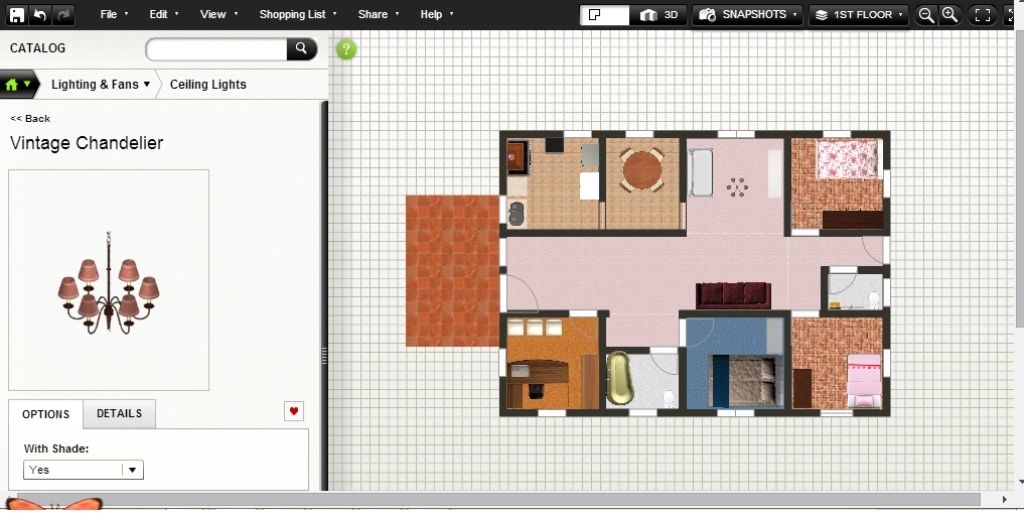
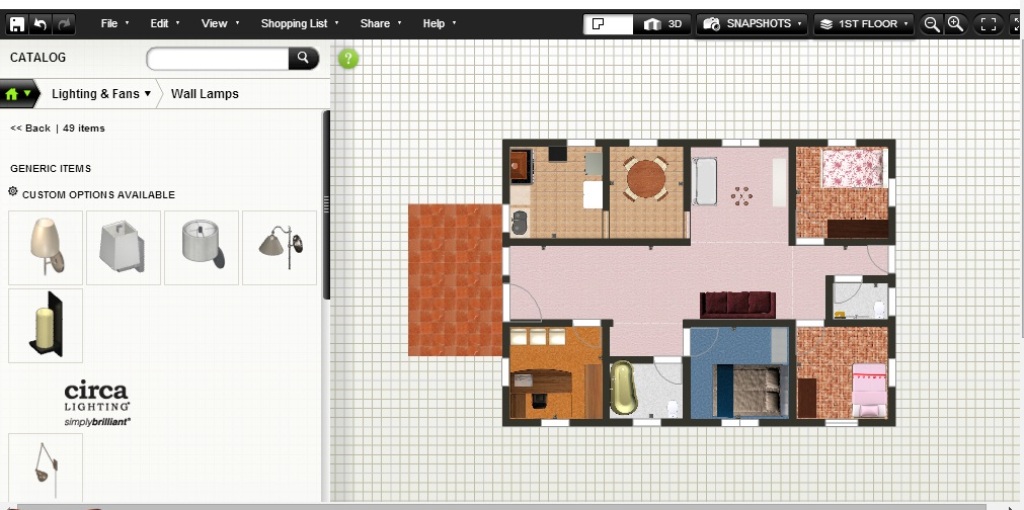
There is not much in Lighting. Click on Lighting & Fans from the Decorate category. You have options like Ceiling Lights, Floor lamps, Table Lamps and wall Lamps. Drag & drop the lighting you want in each room.
Landscaping
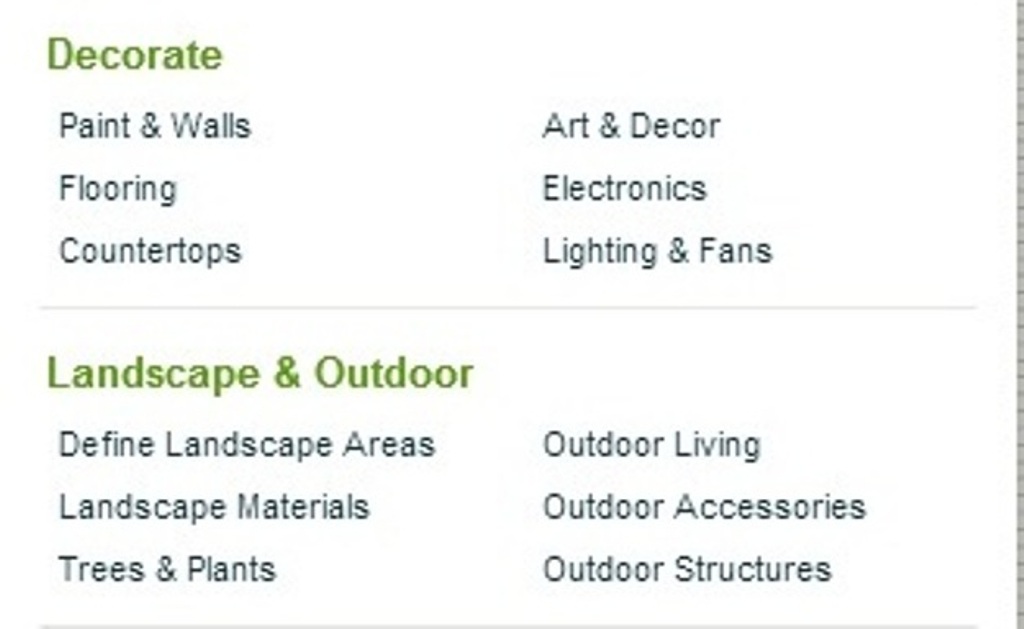
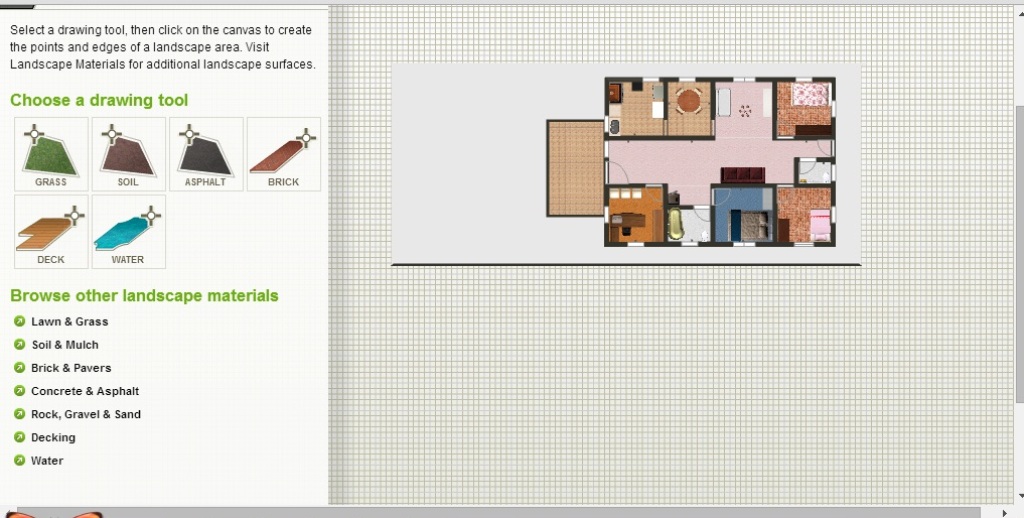
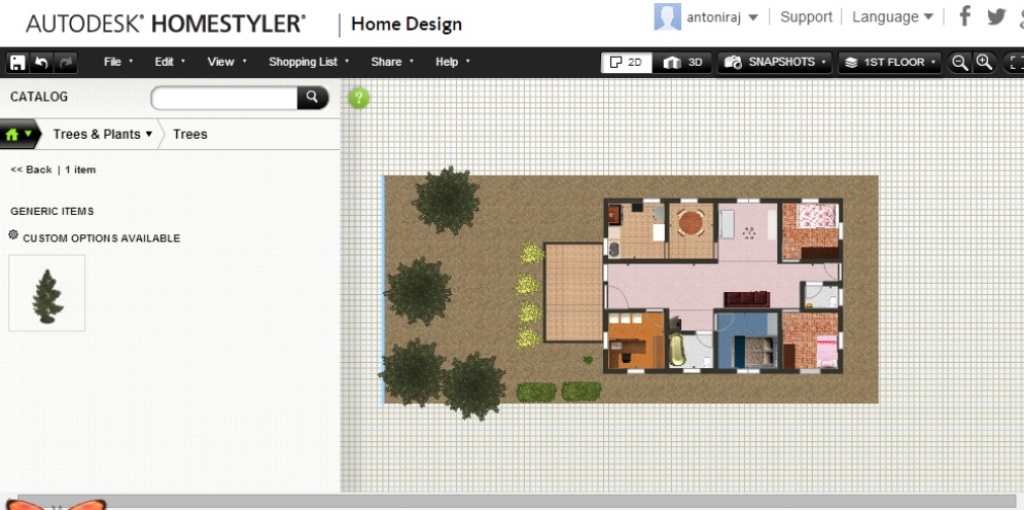
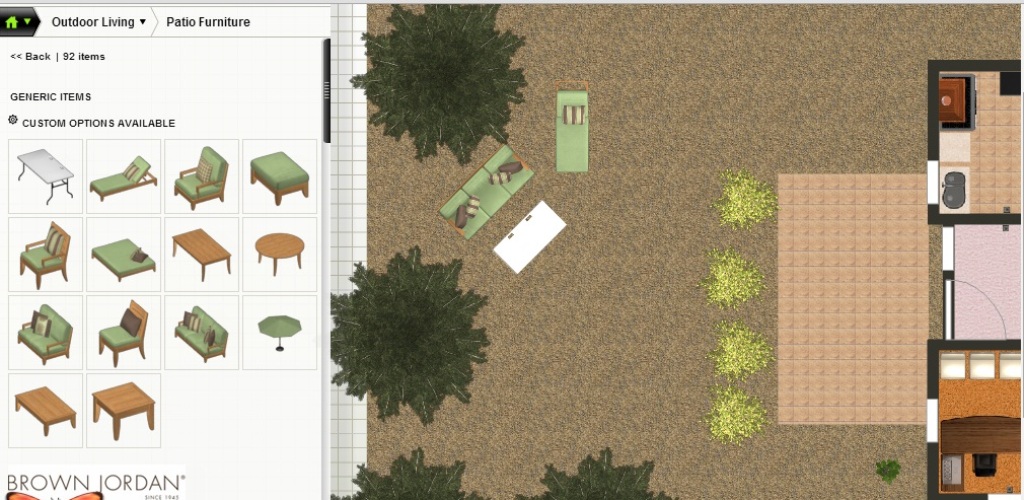
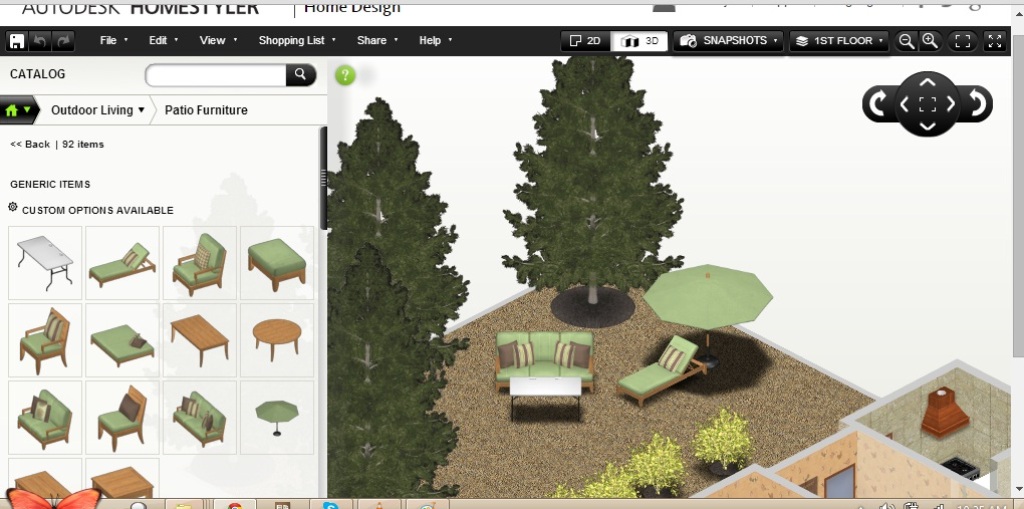
After completing your interior design, you may want to do Landscaping around your home.
First, you need to define the Landscape area with the specific landscape material. You can choose landscape material like Grass, Soil, Asphalt, Brick, Deck and Water. Then using it as a drawing tool, click on points and edges to define the landscape area around your home design.
Here you can see that I have selected a rectangular area using Soil drawing tool around my home design for landscaping. Then you can drag and drop trees, plants, Outdoor accessories and outdoor structures from the menu.
3D View of the Design
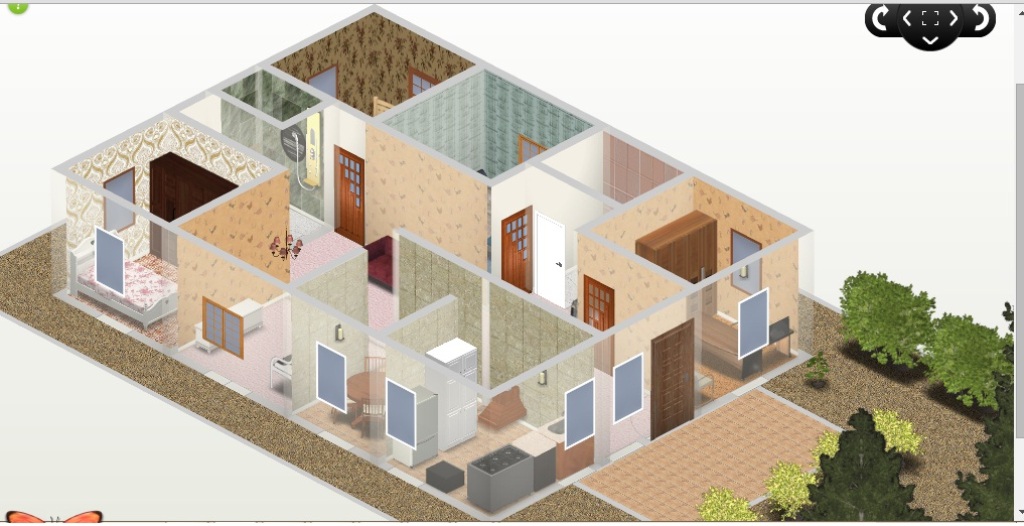
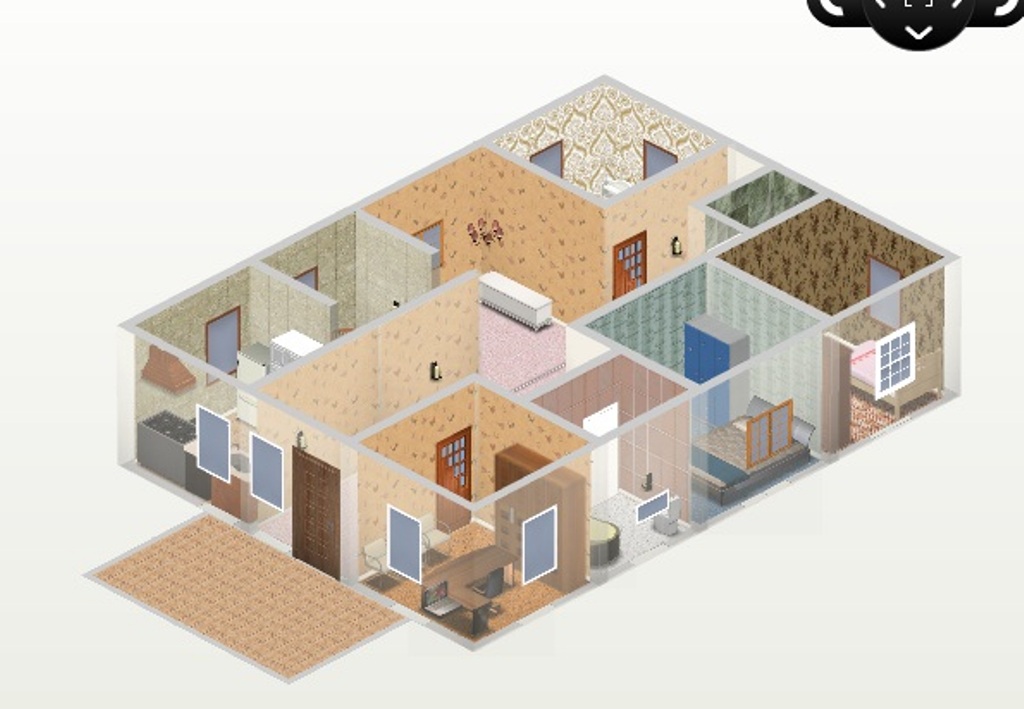
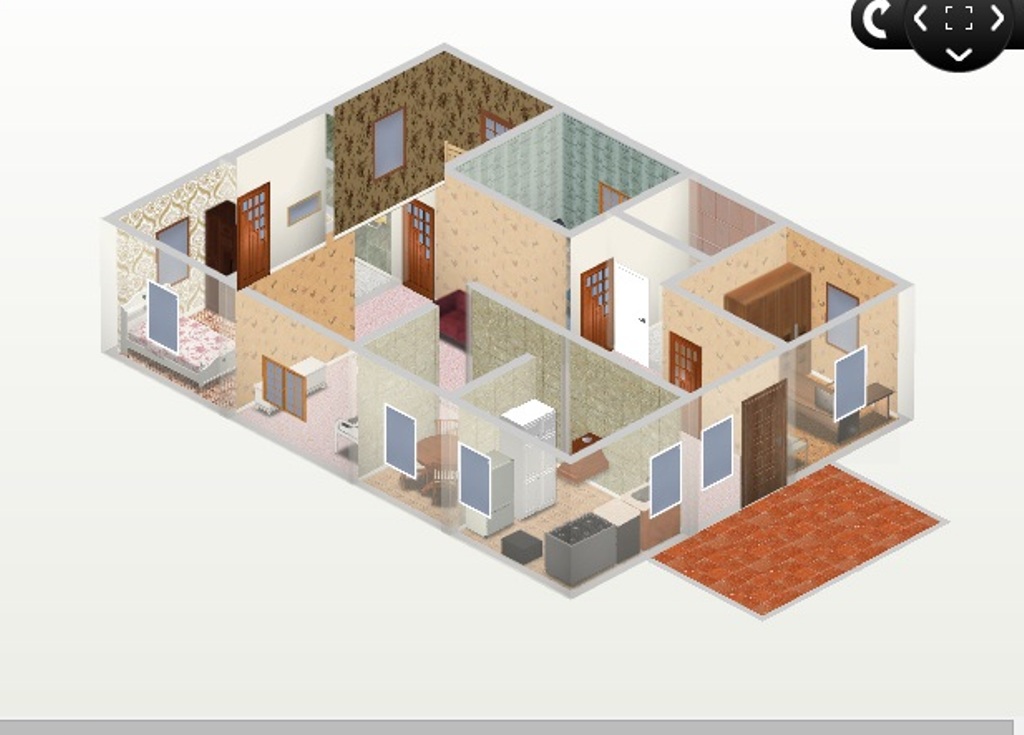
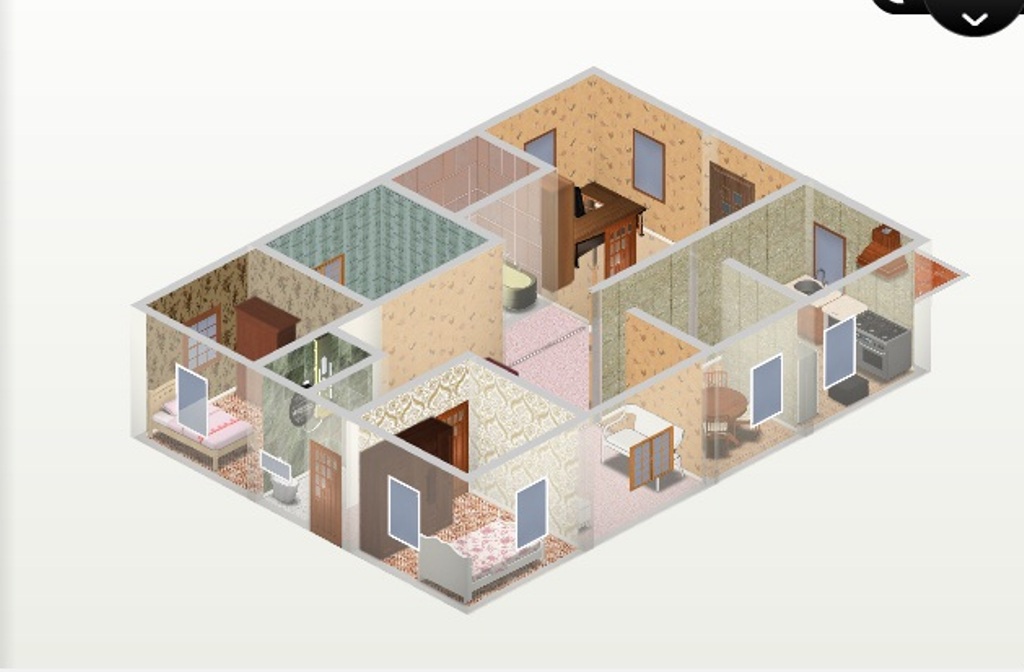
As you have completed your design, you may want to view it from different angles in 3D mode.Click on 3D and your design will be rendered in 3D in no time. You can rotate the view clockwise as well as counter clockwise and view it from different angles. You can also make any change you find necessary.
Here are some of the of 3D views of the design from different angles.
Create Snapshots of Your Design
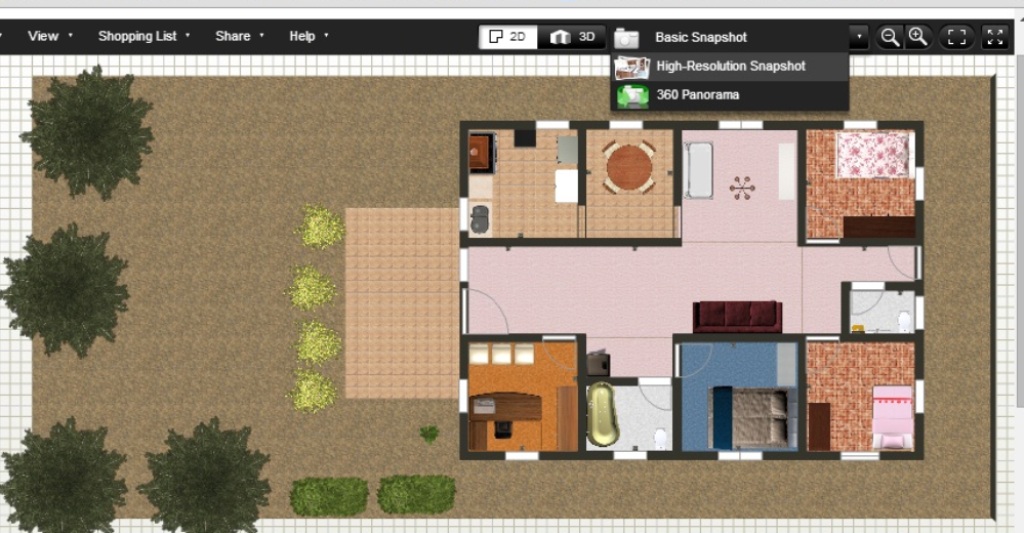
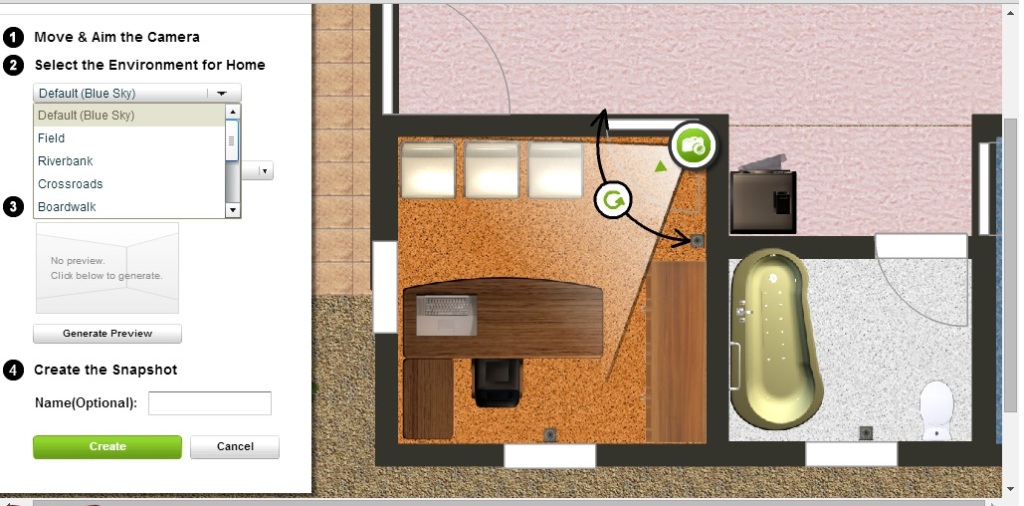
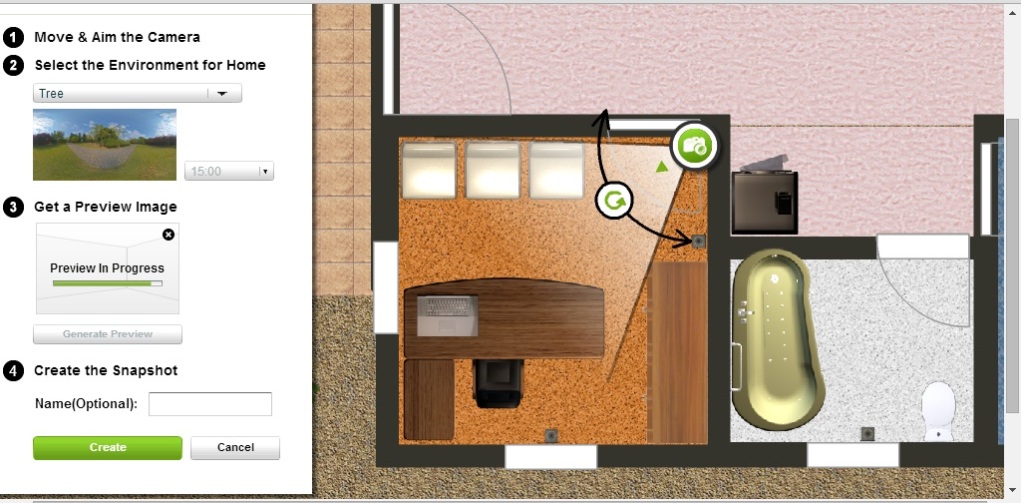
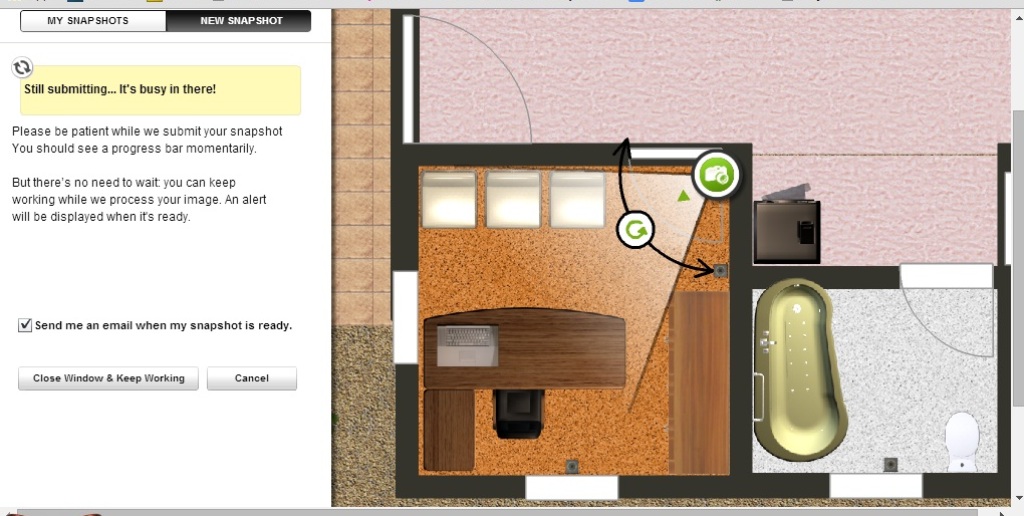
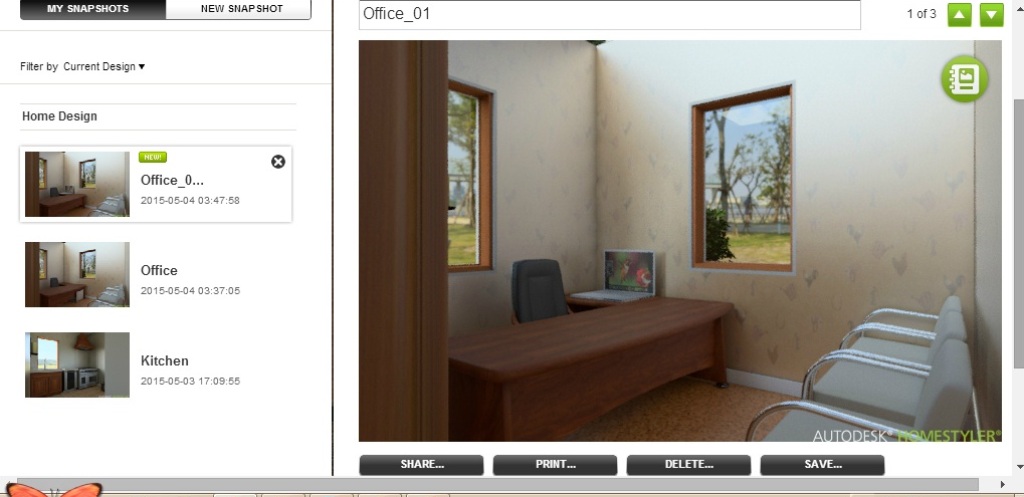
Autodesk Homestyler has an option to take a snapshot of your design from anywhere inside a room which produces a photo-realistic views of your design. Your design should be in 2D mode to take snapshots.
- Click on "Snapshots". The drop-down menu will give you option between Basic Snapshot and High-resolution snapshot.
- Click on High-resolution Snapshot. In the next page, click "Create Your First Snapshot"
- A camera with focusing area will appear in your design.
- Move the camera and position it from where you want the snapshot to be taken.
- Then select the environment for the home. You can choose options like Blue sky, River Bank, Field, Cross Roads et cetera. These environments will show through the glass windows in the snapshots.
- You can preview the snapshot by clicking on Generate Preview. You can re-position the camera or change the environment if you do not like the preview. You can give a name to your Snapshot which is optional
- Click Create Snapshot. The Autodesk Homestyler sent your snapshot to their lab for processing. This may take some time. If you have opted for email notification, you will be notified by mail when the snapshot is ready. Otherwise, you will also get a notification in the Homestyler design page itself that your snapshot is ready.
- Click on the notification to view your snapshot. You can also save the snapshot to your computer as a jpeg file.
You can view some of the snapshots taken in different rooms in the next step.
Snapshots of Rooms
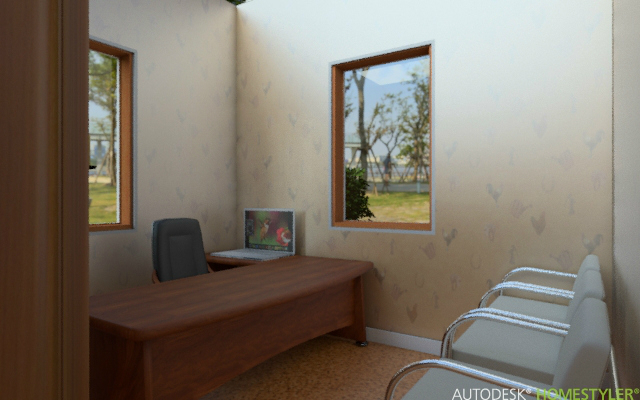
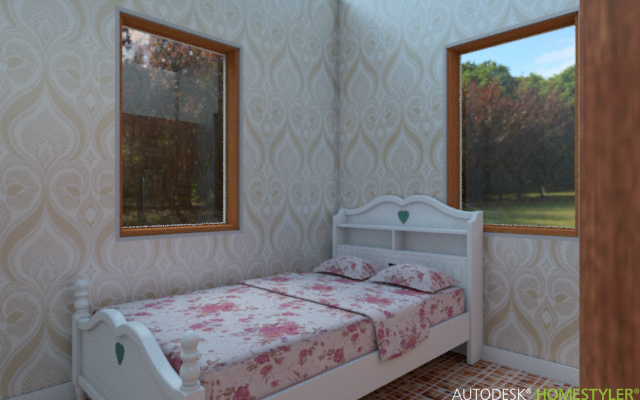
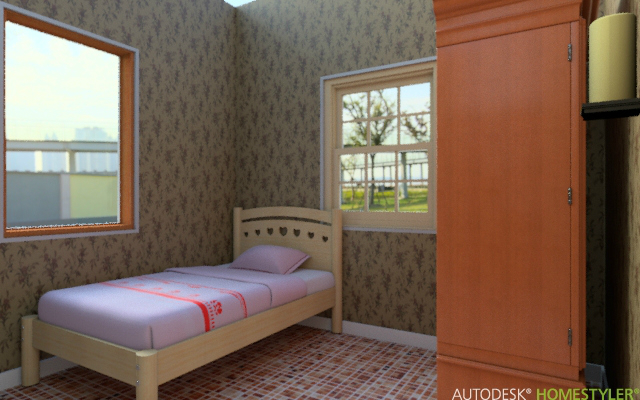
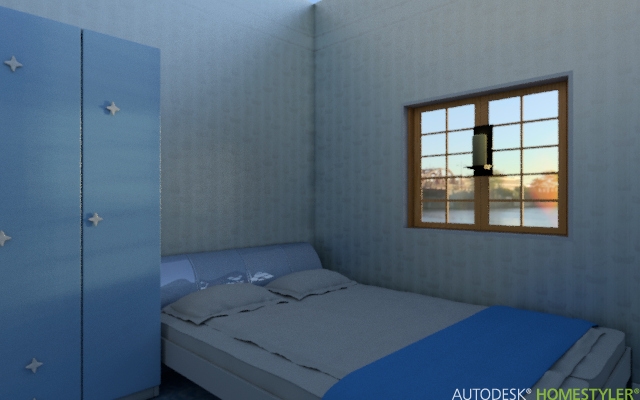
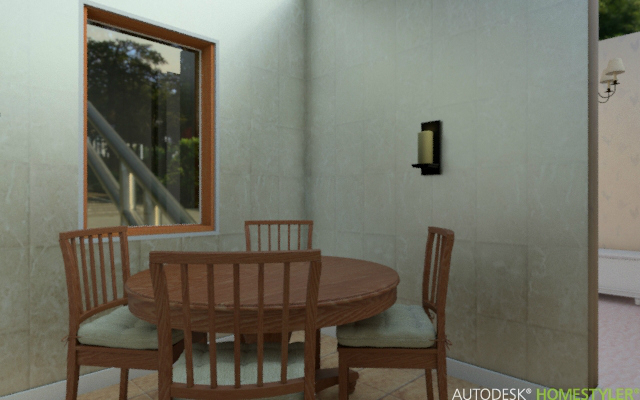
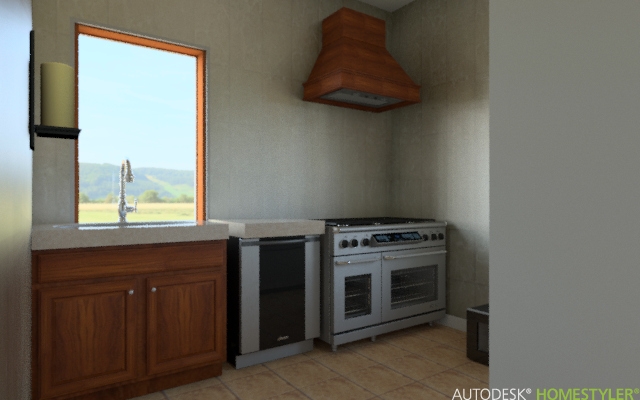
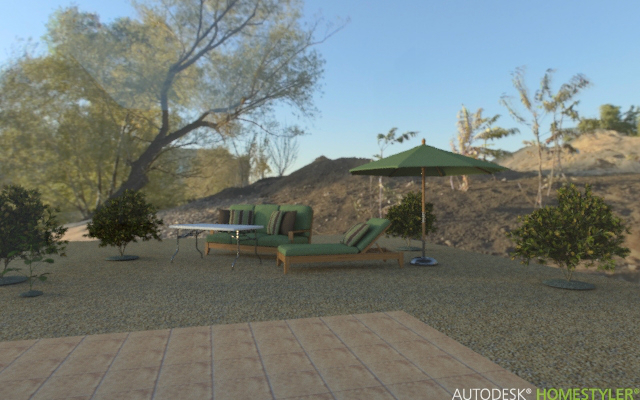
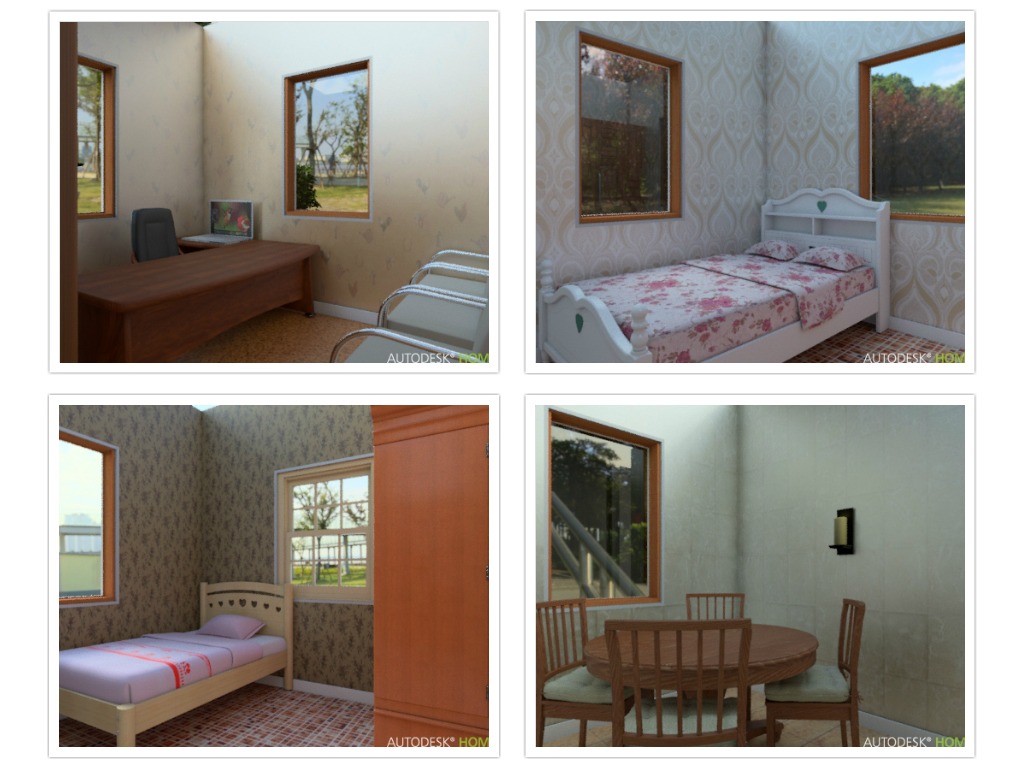
These photo-realistic images are snapshots of the home design we created here.
These are Office, Kids Room, Guest Room, Bed Room, Dining, Kitchen and outside view taken through the window.
Creating Panoramic View
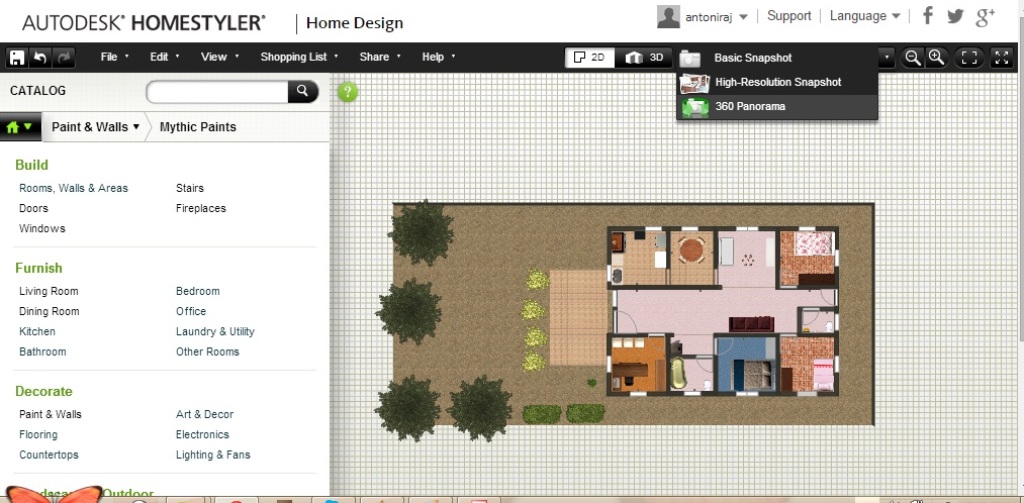
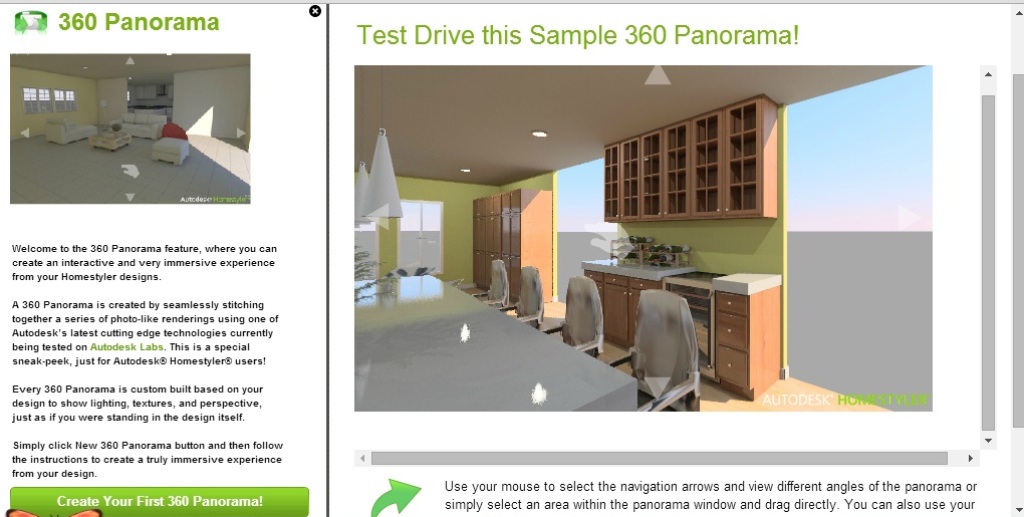
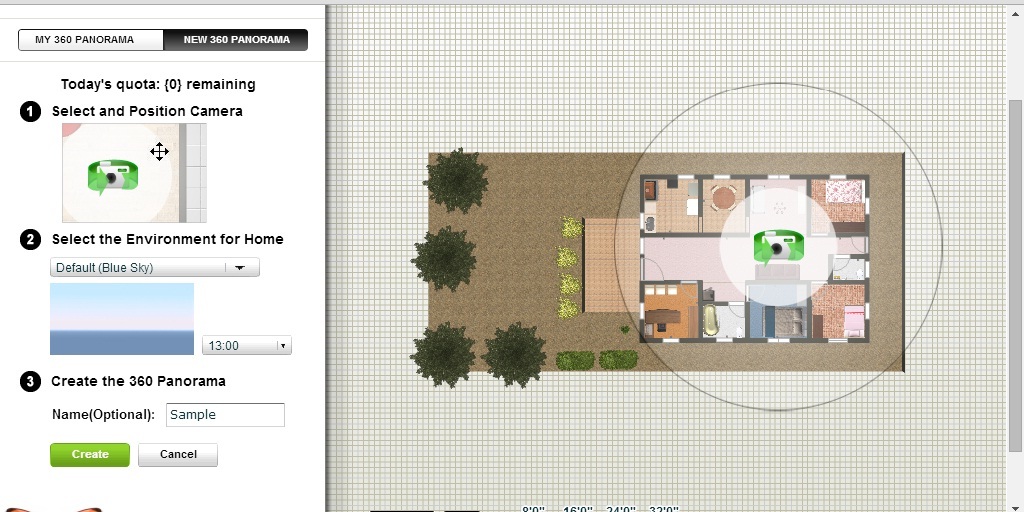
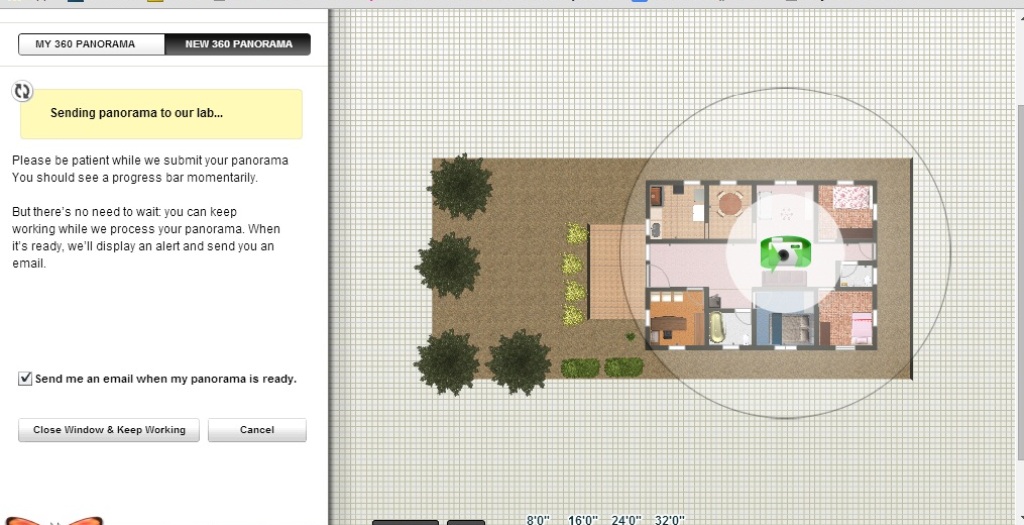
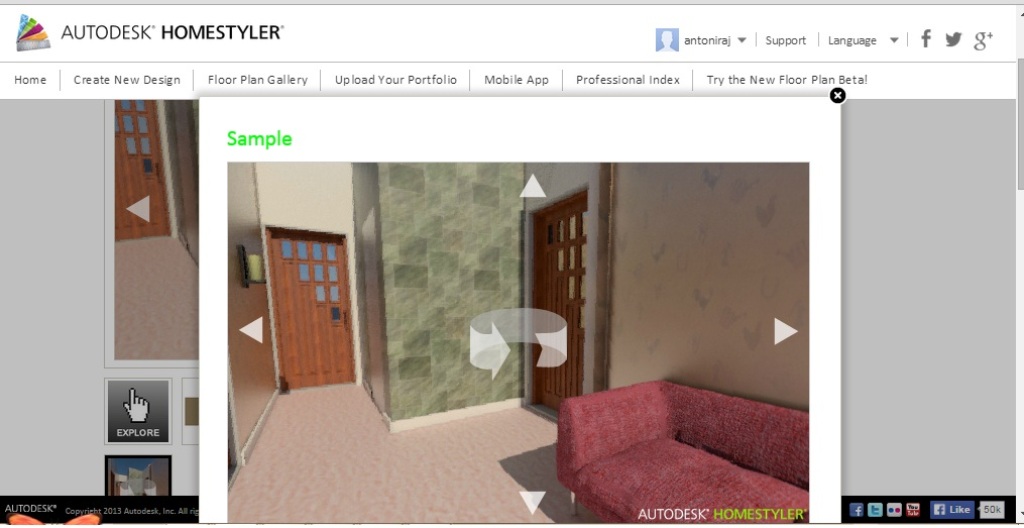
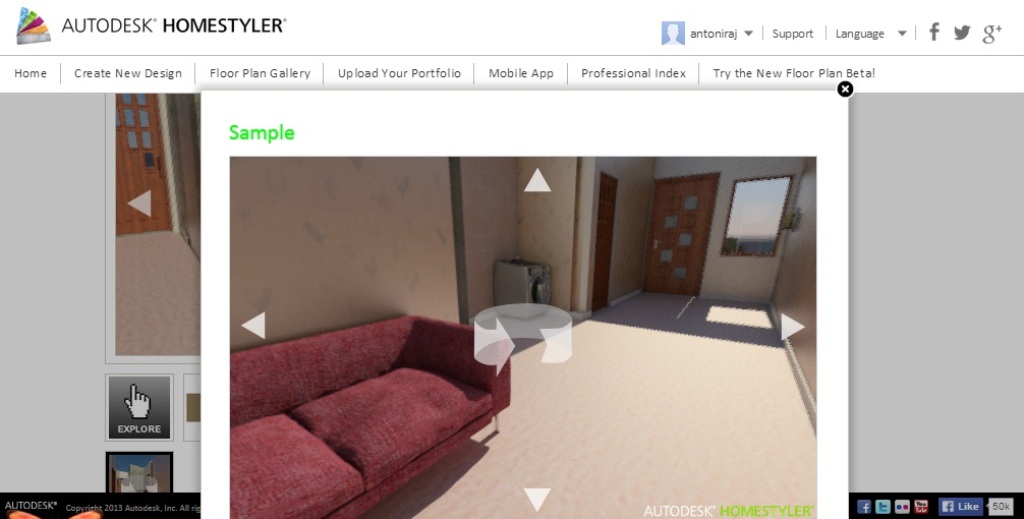
Another interesting option is to have 360 degree panoramic view of your design.
- To create a Panorama, Click Snapshots and select 360 Panorama from the drop down menu.
- In the next page, click "Create your first 360 Panorama"
- Select a location and position the camera from where you want to take 360 panorama view
- You can also select the Environment for the home as we did for Snapshots
- Name your 360 Panorama. This is optional
- Now click create. This may take some time as your Panorama will be processed at Homestyler Lab.
When your 360 Panorama is ready you will get an email notification with a link to your 360 panorama. I have taken a couple of screen shots of the Panorama here. You can view the 360 Panorama of the living room area at the following link
Footnote
.jpg)
You need not be a technically qualified person to create your design in Autodesk Homestyler. The Drag & drop interface is very easy to master and create your floor plan from scratch.
I have created my design in older version of the Homestyler App. Autodesk has released a new Floor plan Beta version which is still under testing. I hope to give it a try soon whenever I find time.