Install Gentoo Linux

This Instructable will walk through the steps to install Gentoo Linux on an AMD64 machine from the official Gentoo Installation CD. The installations will differ slightly for other computer architectures (such as ARM or PowerPC), but the objectives of each step are the same.
By the end of this Instructable, you will have a fully configured Gentoo system installed on your machine's hard drive, with a boot loader.
There are some steps to take before starting this installation guide. It is very important to know the technical specifications and be familiar with your computer's hardware before installing Gentoo Linux, because this knowledge will guide some decisions you will make during the installation. Do some research about your system. Next, establish a wired ethernet connection to your network by plugging an ethernet cable directly from your network router or switch to your machine's ethernet port. Finally you will be formatting a hard drive during the installation. This step will erase all other data on the drive, so make sure that you have a free hard drive that you are willing to use. In order to not mistakenly use a different hard drive, that contains data you want to keep, it is a good idea to disconnect all other drives from your machine during the Gentoo installation.
The exact steps for installing Gentoo may differ between versions of the installation medium, or depending on the machine. If you run into trouble during a step, or become confused, the most helpful resource is the Gentoo Handbook, found at: https://wiki.gentoo.org/wiki/Handbook:AMD64
Acquiring the Installation Medium

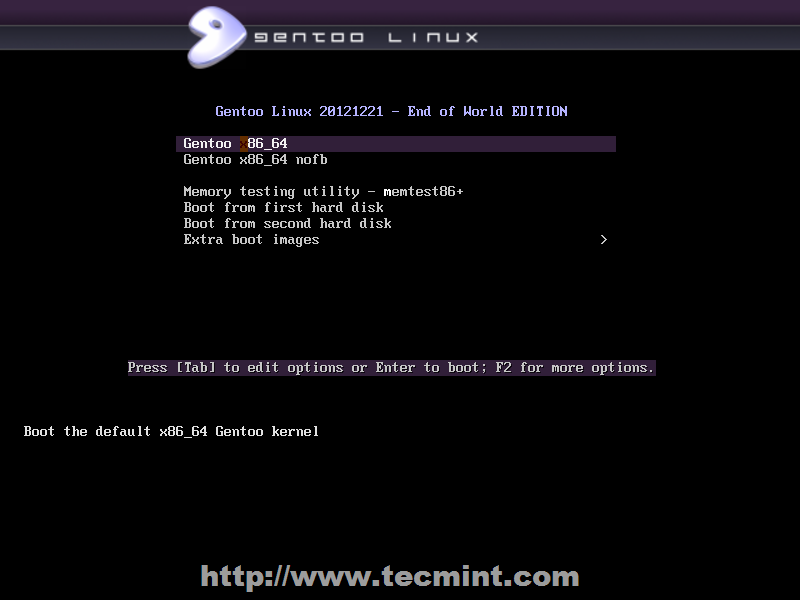
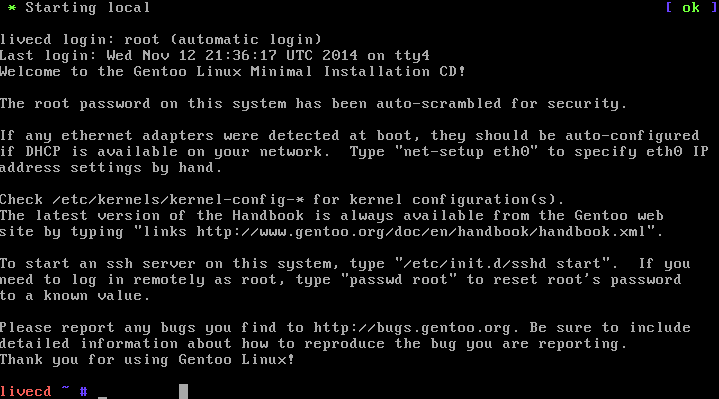
The first step to installing Gentoo Linux is acquiring an environment to install Gentoo Linux from. Gentoo provides an official installation CD image (.iso). The .iso file can be downloaded from
https://www.gentoo.org/downloads/. The file that you will want to download is the AMD64 Minimum Installation CD.
Download this file, then mount it onto a USB flash drive or CD. There are many tutorials and programs that can be found on the web, which assist with mounting .iso files onto USB drives or CDs. This process may be different for different operating systems. If you are running Windows or Mac OS X, or another operating system, search for a tutorial about mounting a bootable ISO to a USB drive or CD.
If you are already running GNU+Linux:
to create a bootable USB flash drive from the .iso image, in the terminal, you must navigate to the directory which you downloaded the .iso image to, then execute, replacing the X's to correctly name the .iso and the location of your USB device:
dd if=./install-amd64-minimal-XXXXXXXX.iso of=/dev/sdX
BE EXTREMELY CAREFUL WHILE RUNNING dd. It has earned the nickname "disk destoryer", because it will permanently overwrite any information on the device given after "of=". Double check that the device you provide after "of=" is the correct device you want to mount the .iso file.
Once the bootable USB flash drive or CD is created, you must restart your computer. Power the computer off. Now is the time to disconnect all hard drives from your machine and only connect the hard drive you wish to install Gentoo on. This will prevent you from accidentally overwriting data that you want to keep. When the computer turns back on, you should see a BIOS boot screen, that will tell you to press a key to select a boot device or boot options. This key is usually ESC, DEL, or F1 but will vary, depending on your motherboard. Quickly tap this key before the screen changes. If you miss your opportunity, you can always power off the computer and power it back on. Navigate through the Boot Device Selection menu or other BIOS menu until you find the option to boot from the USB flash drive or CD drive. Select this, and the Gentoo Installation Image should begin booting on your computer. The computer may beep, and you may see another menu asking what Operating System to boot. Press ENTER, which should select the default option of booting the Gentoo Live Image. Once the Gentoo image has been booted, you should be given the prompt:
livecd ~ #:
For extra help: https://wiki.gentoo.org/wiki/Handbook:AMD64/Installation/Media#Gentoo_Linux_installation_CD
Setting Up a Network Connection
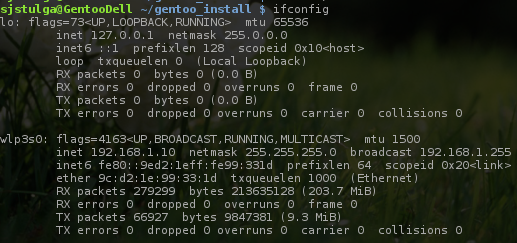

In order to install Gentoo on your machine from the Minimal Installation image, you must have a network connection. The installation medium should automatically detect your device hardware and start the drivers for your network cards. The easiest method to establish an internet connection is to directly connect with an ethernet cable. Plug an ethernet cable from your computer's ethernet port to your network router or switch. This may automatically establish a connection, but it might not. To find out type the following command at your terminal and press enter:
ifconfig
This command should produce a list of the network devices on your machine. Look for a device named "eth0", "eno0", "ens1", "enp5s0", or something similarly named. If you see one of these listings, look for "inet", followed by 4 numbers separated by periods. If you see this, your network device has been given an IP address and should be connected to your network. If you do not see this, try running on the terminal:
net-setup
This will bring up an interactive menu that will walk you through a network setup. Configure the set up to the best of your knowledge. If your network is specially configured and has special needs to establish an internet connection (such as the use of proxies or PPPoE, or to connect over wireless, refer to the Gentoo Handbook at https://wiki.gentoo.org/wiki/Handbook:AMD64/Installation/Networking for instructions). Once this is complete, try running again:
ifconfig
For any trouble connecting to your network, refer to the Gentoo Handbook. Network connection can range from a very easy step that automatically works, to a difficult step requiring time to configure the connection correctly. It helps to be familiar with your network set-up.
Once you are connected to the network, confirm your internet connection by pinging the gentoo website:
ping www.gentoo.org
Wait to see if you receive bytes back. If you are receiving data back, press CTRL+C (holding the CTRL key and tapping C), to cancel the ping. If you do not receive any bytes back, make sure that your network router or switch is properly connected to the internet.
Once you are able to connect to the internet, you can next move on to acquiring more installation materials.
Preparing the Hard Disks
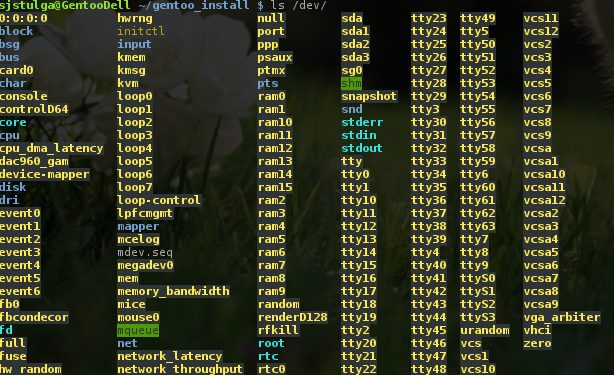
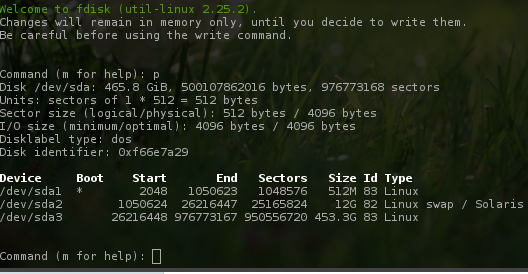
During this step, you will partition and format a hard drive in preparation to house your Gentoo system. Make sure that you do not use a hard drive with information that you want to keep. This step will overwrite all data on the hard drive that you use! Make sure that only the correct hard drive has been connected to your computer, and all other data storage devices have been disconnected. Make sure the drive that you want to use is at least 24Gb in size.
To see the list of devices, run at the terminal:
ls /dev/
This will show a long list of devices, most of which you can ignore. The devices you want to look at will be be labelled "sd*" and "sd*#", such as "sda" or "sda1". Typically, your hard drives will appear as devices that start with "sd", although older systems may use other letters, such as "hda". Each distinct letter following "sd" is associated with a different physical drive, and each number following this is a different partition.
We now want to partition the disk to prepare for the Gentoo system. We are going to use a MBR (Master Boot Record) and create 3 basic partitions, the boot partition, a swap partition, and a root partition. There are many different set-ups for your drive, that you may want to choose if you are experienced with Linux. Some of these options include using UEFI rather than MBR, creating more, specialized partitions, or using logical volumes. We will not cover these set-ups in this Instructable.
To partition the disk, we are going to use a program called fdisk. Start this program by running in your terminal (replacing /dev/sda with the location of your device):
fdisk /dev/sda
This program will give you a prompt. Type "p" and then ENTER, to print out the list of partitions on the drive. If there are listed partitions, delete them by typing "d" and the ENTER, then the number of a partition (they are numbered starting at 1) and hit ENTER. Repeat this until all partitions are deleted. When entering "p" gives an empty list, the disk is clear of all partitions.
Now we want to create the first of our three partitions, the boot partition. This partition is where our boot loader, which the BIOS uses to load the operating system, will reside. Create the partition by entering "n", for a new partition. Then "p" for a primary partition. We will not be using extended partitions. Then enter "1". When asked for the first sector, hit enter to choose the default. Then enter "+256M" for the last sector. What we have just done is created a new partition, numbered 1, that is located at the first open sector on the disk and is of length 256Mb. Type "a", then enter "1". This will set the "bootable" flag for this partition, which tells the machine which partition to boot.
Now we will make the swap partition. The swap partition is used by the Operating System to store temporary files it needs to run properly. It will also be used when the computer hibernates, or crashes. There is some debate about how large the swap partition should be, but a good rule of thumb is 2x the amount of RAM your system uses. Create another partition by entering "n", then enter "2". Hit enter when asked for the first sector again, then "+#G", replacing the # with the number of Gb you want the swap partition to be. Enter "t", then "3". This will set the type of the partition to Linux Swap.
Finally, we will create the root partition. This is where the Gentoo system and all of your data will be stored. Create this partition by entering "n", then "3", then hit enter twice. This will select the default first and last sector, which will, by default, use the remainder of the space on the disk.
Enter "p" at the prompt once more, to print out the list of partitions. This should print out a list with three partitions. Double check the sizes, types, and which partition has the bootable flag. When you are sure that everything is good, enter "w" to write these changes to the disk and to exit the fdisk program.
Now we need to format the partitions. Currently, the disk has empty partitions that the system cannot use. By formatting them, we set each partition up so that the Gentoo system will be able to work with them. The boot partition will be formatted with the EXT2 file system. The swap partition will be formatted with a swap file system. The root partition will be formatted with the EXT4 file system. These are typical choices, but there are more options that you can research. Run the following commands:
mkfs.ext2 /dev/sda1
mkfs.ext4 /dev/sda3
mkswap /dev/sda2
swapon /dev/sda2
Now that the file systems are set-up on the partitons, we want to mount the partitions and begin installing Gentoo onto the disk. To mount them, run:
mount /dev/sda3 /mnt/gentoo
mkdir /mnt/gentoo/boot
mount /dev/sda1 /mnt/gentoo/boot
This will mount the root partition into the directory /mnt/gentoo. The program mkdir creates a new directory, and we are creating one at /mnt/gentoo/ called boot. This is where our boot partition will go, so we mount it there. We are now ready to begin installing Gentoo!
Check out the Gentoo Handbook for more help: https://wiki.gentoo.org/wiki/Handbook:AMD64/Installation/Disks
Installing Gentoo
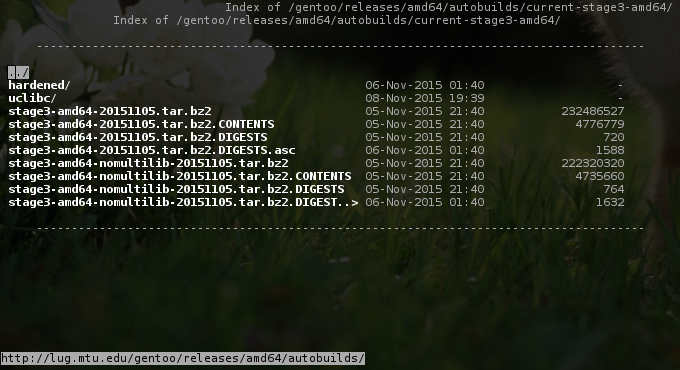
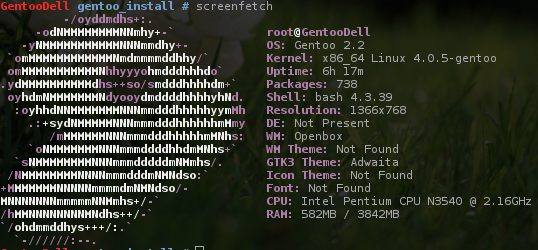
The first thing that we want to do is check the date on the machine. Some parts of the installation rely on the date being correct, and may produce strange results, otherwise. Check the date by executing in the terminal:
date
To change the date, execute, replacing each of the letters in the date code with their correct values (March 29th, 16:21 in the year 2014 would be 032916212014):
date MMDDhhmmYYYY
Once the date is correct, run the following commands to download a copy of the latest stage3 tarball:
cd /mnt/gentoo
links https://www.gentoo.org/downloads/mirrors/
This will open a very basic web browser, that will allow you to navigate a website using the arrow keys, spacebar, and enter. The first thing we will do is select a mirror from the list on the page. Next, once you have selected the mirror, navigate to the releases/amd64/autobuilds/current-stage3-autobuild/. These subdirectories may vary by mirror, but should be similar and simple enough to navigate. Find a list containing a "stage3-amd64-xxxxxxxx.tar.bz2" file. Select the file to download it to your current directory in the terminal. You can quit out of links by typing "q".
Once it is finished downloading, you must unpack the tarball archive, which contains enough of the basic Gentoo system to allow us to install the rest. Unpack it by running:
tar xvjpf stage3-*.tar.bz2 --xattrs
Next we must mount all of the necessary file systems that were contained in this archive. After doing this, we will "chroot", which allows us to begin using this basic Gentoo system. Run:
mount -t proc proc /mnt/gentoo/proc
mount --rbind /sys /mnt/gentoo/sys
mount --make-rslave /mnt/gentoo/sys
mount --rbind /dev /mnt/gentoo/dev
mount --make-rslave /mnt/gentoo/dev
chroot /mnt/gentoo /bin/bash
source /etc/profile
export PS1="(chroot) $PS1"
You are now working from the Gentoo environment on your hard disk! We can begin setting up the rest of the system so that we can boot from it.
Gentoo uses Portage, which is a package manager. This package manager allows you to update and install all of the programs and libraries that your system needs and uses. Portage is unique in that by default, it compiles these programs from source code, while most package managers install pre-compiled binaries onto your system. There are benefits and trade-offs to compiling your own software. One benefit is that your programs will be tailored to your machine and needs. A con is that installing programs will usually take much longer, because compilation is usually a large job for a computer to complete.
We will configure portage and update our system now:
emerge-webrsync
eselect profile set 1
env-update && source /etc/profile
This sets up Portage and tells it what kind of Gentoo environment we intend to run. You can research different profiles and configurations at https://wiki.gentoo.org/wiki/Handbook:AMD64/Installation/Base, but we will just use a generic one.
Now we will install and configure the Linux kernel. This is one of the biggest steps of the installation. The kernel is a very important program that is the basis for the Operating System and controls many of the interactions between programs and the hardware of the machine.
Run:
emerge --ask sys-kernel/gentoo-sources
This will install the source code for the Gentoo kernel on your system. We will now use a tool called genkernel that will automatically configure and compile the kernel for you. One of the biggest benefits to using Gentoo is that you are able to manually configure the kernel. This means that you can hand tailor the kernel to match your machine's hardware. We will allow genkernel to automatically configure the kernel for a generic and wide set of hardware. If you wish to learn about manual kernel configuration, start at https://wiki.gentoo.org/wiki/Handbook:AMD64/Installation/Kernel. First, we will update our file system table, which genkernel will look at in order to help configure the kenrel. Run:
nano -w /etc/fstab
This will open the file in the nano text editor, which will allow you to edit its lines. Edit the file to reflect:
/dev/sda2 /boot ext2 defaults,noatime 0 2
/dev/sda3 none swap sw 0 0
/dev/sda4 / ext4 noatime 0 1
The first column is the block device, the second column is the mount point that it should be mounted to. Close the file and save by typing CTRL+X and then entering "y". Next run genkernel with:
genkernel all
This will start the compilation procedure. This procedure can very well take a long time to complete! Be patient.
When this process finishes, run:
passwd
Then enter a password that you will need to log into your machine again. Be sure not to forget this password, you cannot recover it.
Now we need to install a boot loader, which will allow us to boot back into our Gentoo installation at a later time. The boot loader we are going to use is GRUB2, although there are others, which can be researched at https://wiki.gentoo.org/wiki/Handbook:AMD64/Installation/Bootloader. Run:
emerge --ask sys-boot/grub
grub2-install /dev/sda
grub2-mkconfig -o /boot/grub/grub.cfg
The system is now ready to be rebooted, and you have successfully set up a basic Gentoo installation. Before rebooting, you should look through the Gentoo Handbook for more set up and configuration to your specific needs. Some of these might include setting up a permanent network connection or installing a desktop environment.
When you are finished with any configurations, enter the commands:
exit
reboot
Your system should power off, then boot back up into Gentoo. You can log in with the username "root" and the password that you previously chose. Congratulations on your new Gentoo system! At this point, there are many different paths to take on your system's set up, include choosing graphical environments, web browsers, and any other software you wish to run.
Step 5: Further Research and Configuration
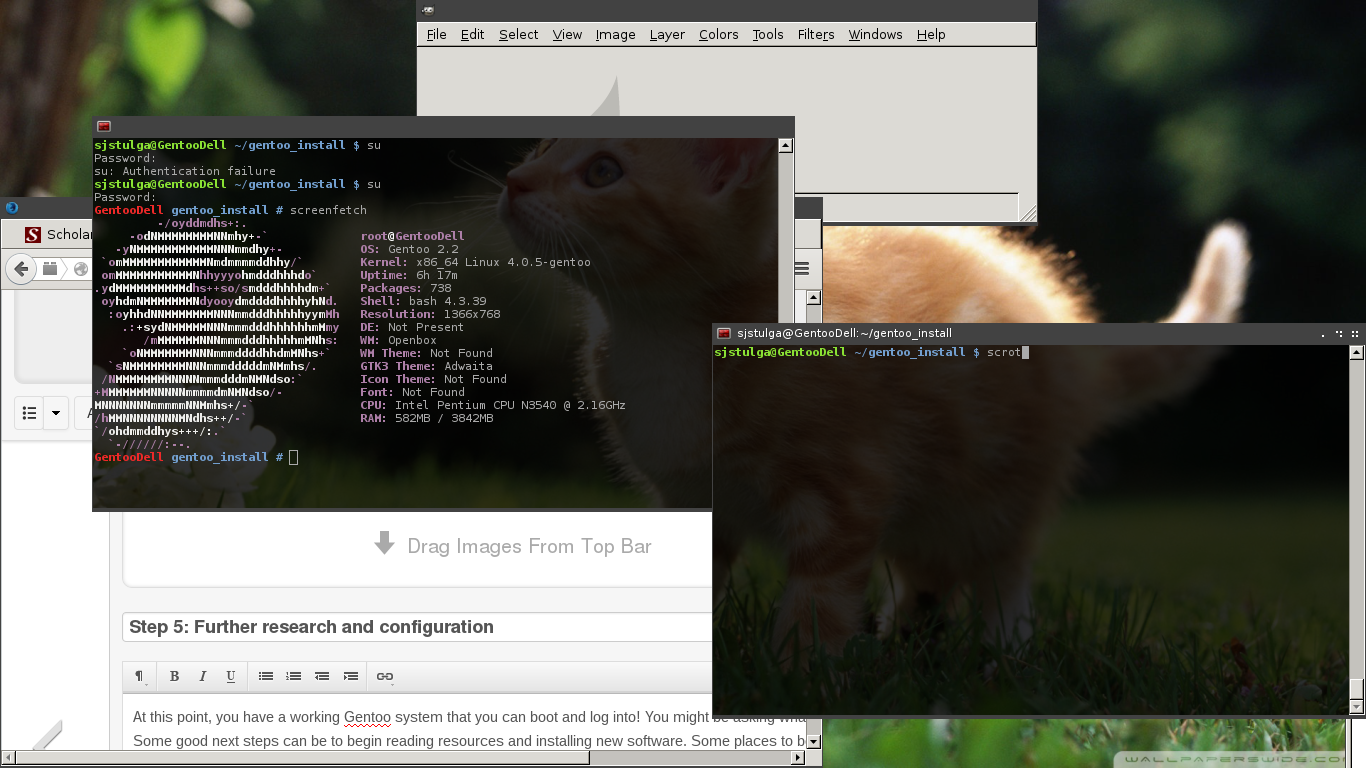
At this point, you have a working Gentoo system that you can boot and log into! You might be asking what now? Some good next steps can be to begin reading resources and installing new software. Some places to begin looking are:
https://wiki.gentoo.org/wiki/Handbook:AMD64/Networking/Introduction
https://wiki.gentoo.org/wiki/Portage