Death Star Cutting Board

In this Instructable I am going to show you how I made this Death Star themed cutting or serving board. This is an idea I had some time ago and thought this Space contest was the perfect opportunity to finish it.
I had some 1/2" thick solid surface material that I thought would be perfect for this project.
Tools, Software and Materials
TOOLS
The tools I used on the project were as follows:
- X-Carve 1000mm CNC Machine by Inventables - https://www.inventables.com/technologies/x-carve?ref=MakingAtHome
- Router Bit - 1/8" Fishtail Spiral Upcut Bit - https://www.inventables.com/technologies/solid-carbide-fishtail-spiral-upcut-bits-1-8-in-d?ref=MakingAtHome
- Router Bit - 1/32" Fishtail Spiral Upcut Bit - https://www.inventables.com/technologies/solid-carbide-fishtail-spiral-upcut-bits-1-32-in-d?ref=MakingAtHome
- Router Bit - 1/4" 2 Flute Spiral Upcut Bit - https://www.inventables.com/technologies/2-flute-spiral-upcut-1-4-shaft-1-4-cutting?ref=MakingAtHome
- Router (for round overs)
- Router Bit - Whiteside Router Bit 2000C Round Over Bit with 1/8-Inch Radius - https://amzn.to/3n6mM9W
- Random orbit sander
- Shop vac
- Tape Measures (my favorite two):
- Fastcap PMS-16 Auto Lock ProCarpenter Tape Measure - https://amzn.to/333fTMN
- or FastCap PSSR16 16 ft Standard Reverse Measuring Tape - https://amzn.to/35eQe6k
SOFTWARE
- Easel Pro Software by Inventables - https://www.inventables.com/technologies/easel?ref=MakingAtHome
- Affinity Designer - https://affinity.serif.com/en-us/designer/
MATERIALS
- Solid Surface Material - One brand of solid surface counter top material is Corian, but there are other manufacturers such as Durasein Solid Surface.
- Various sand paper
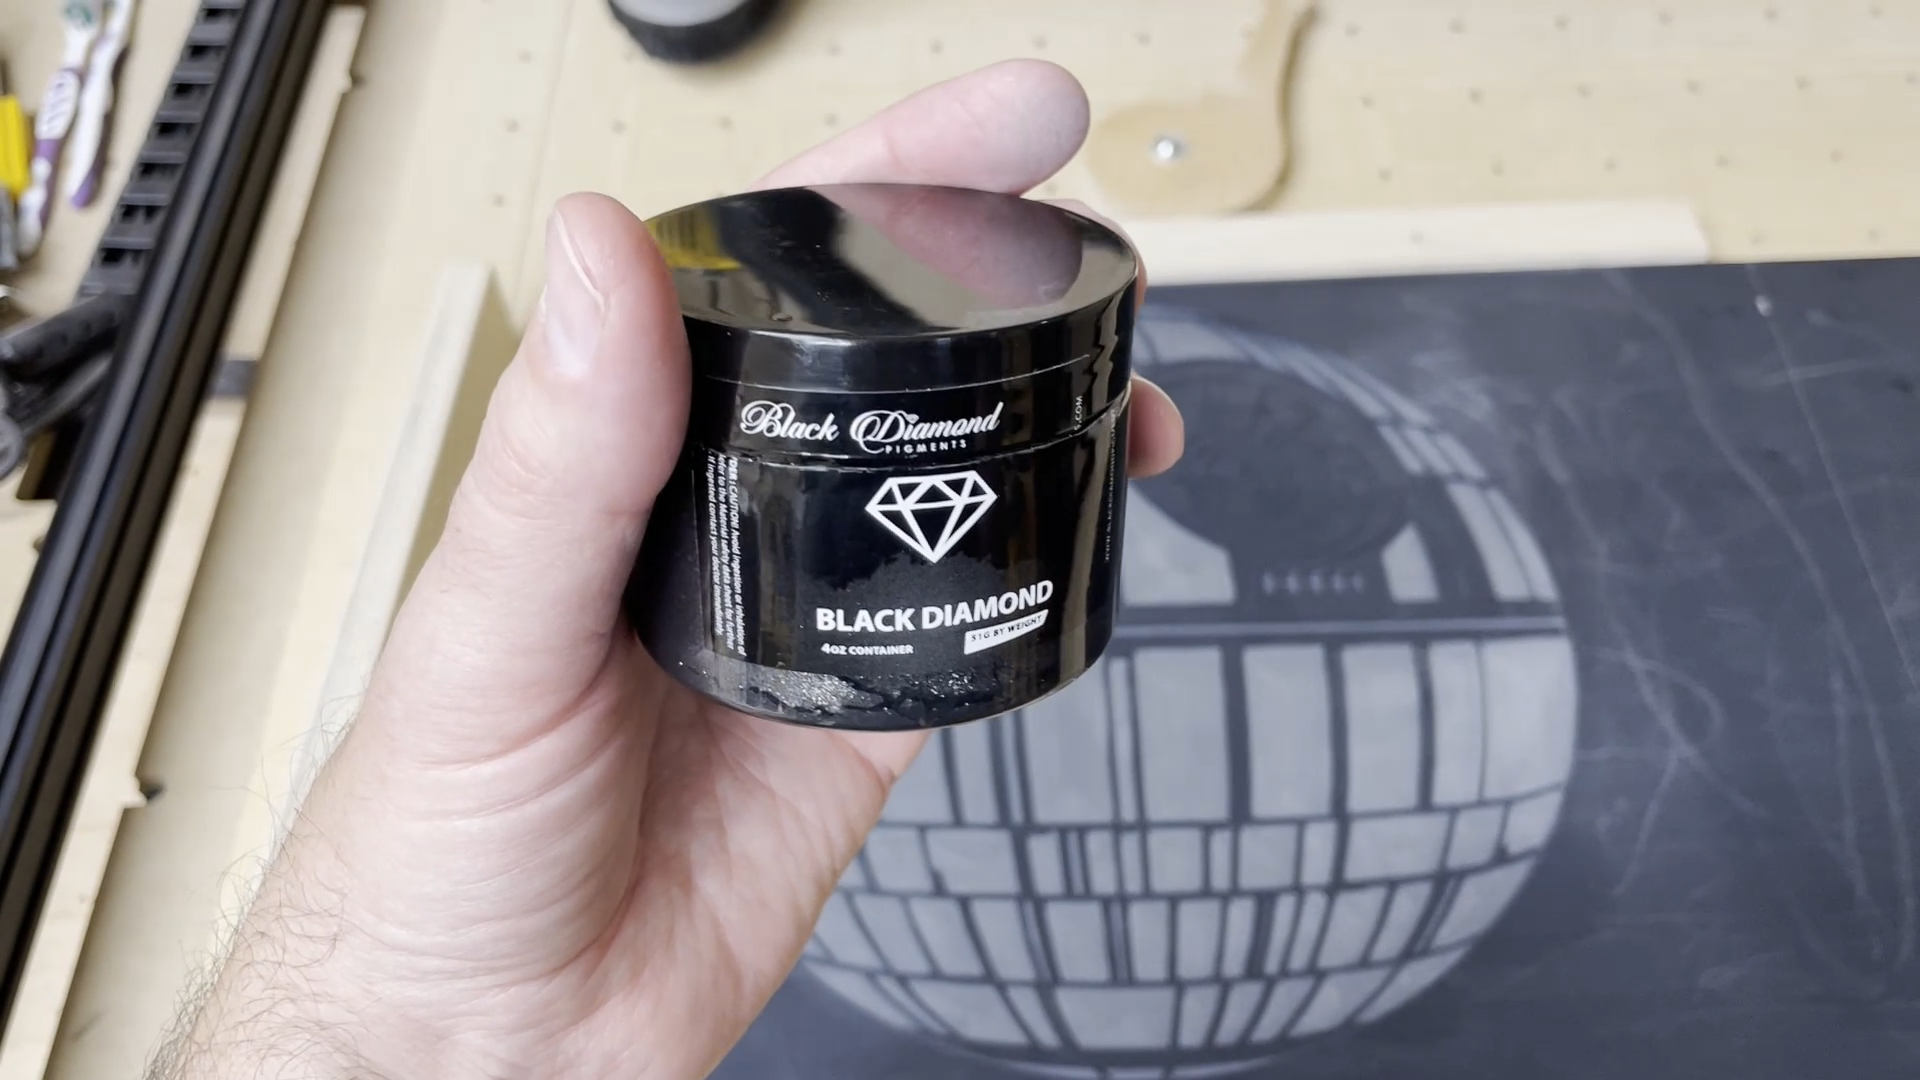
- Black Onyx pigment from Black Diamond Pigments - https://www.blackdiamondpigments.com/products/imperial-black-onyx-42g-1-5oz?_pos=2&_sid=3f844b46b&_ss=r&&sca_ref=720311.3R7VmpIqEs
- Total Boat High Performance Epoxy quart kit (medium speed) - https://amzn.to/3aITVD0
- Odie's Oil Universal Finish - 9oz Jar - https://amzn.to/3vmofwG
- Silicone caulking (to keep epoxy from running off the material)
NOTE: As an Amazon Associate I earn from qualifying purchases.
Other affiliate links may be used on this page, but do not affect pricing of the items.
NOTE: If you plan on using any tool for a project please make sure you are familiar with the tool and all of the dangers associated with it. If you are not familiar with a tool then you should ask someone who is to show you the proper way to use it. A lot of communities have classes at local colleges on the proper use of tools and machinery. There are also local woodworking clubs that offer classes at very reasonable rates for beginners. I highly recommend using these resources for your safety and for the most efficient use of the tool.
SAFETY FIRST
Always wear eye and hearing protection. Always work safe with the proper safety equipment and guards on your tools.
Draw a Pattern
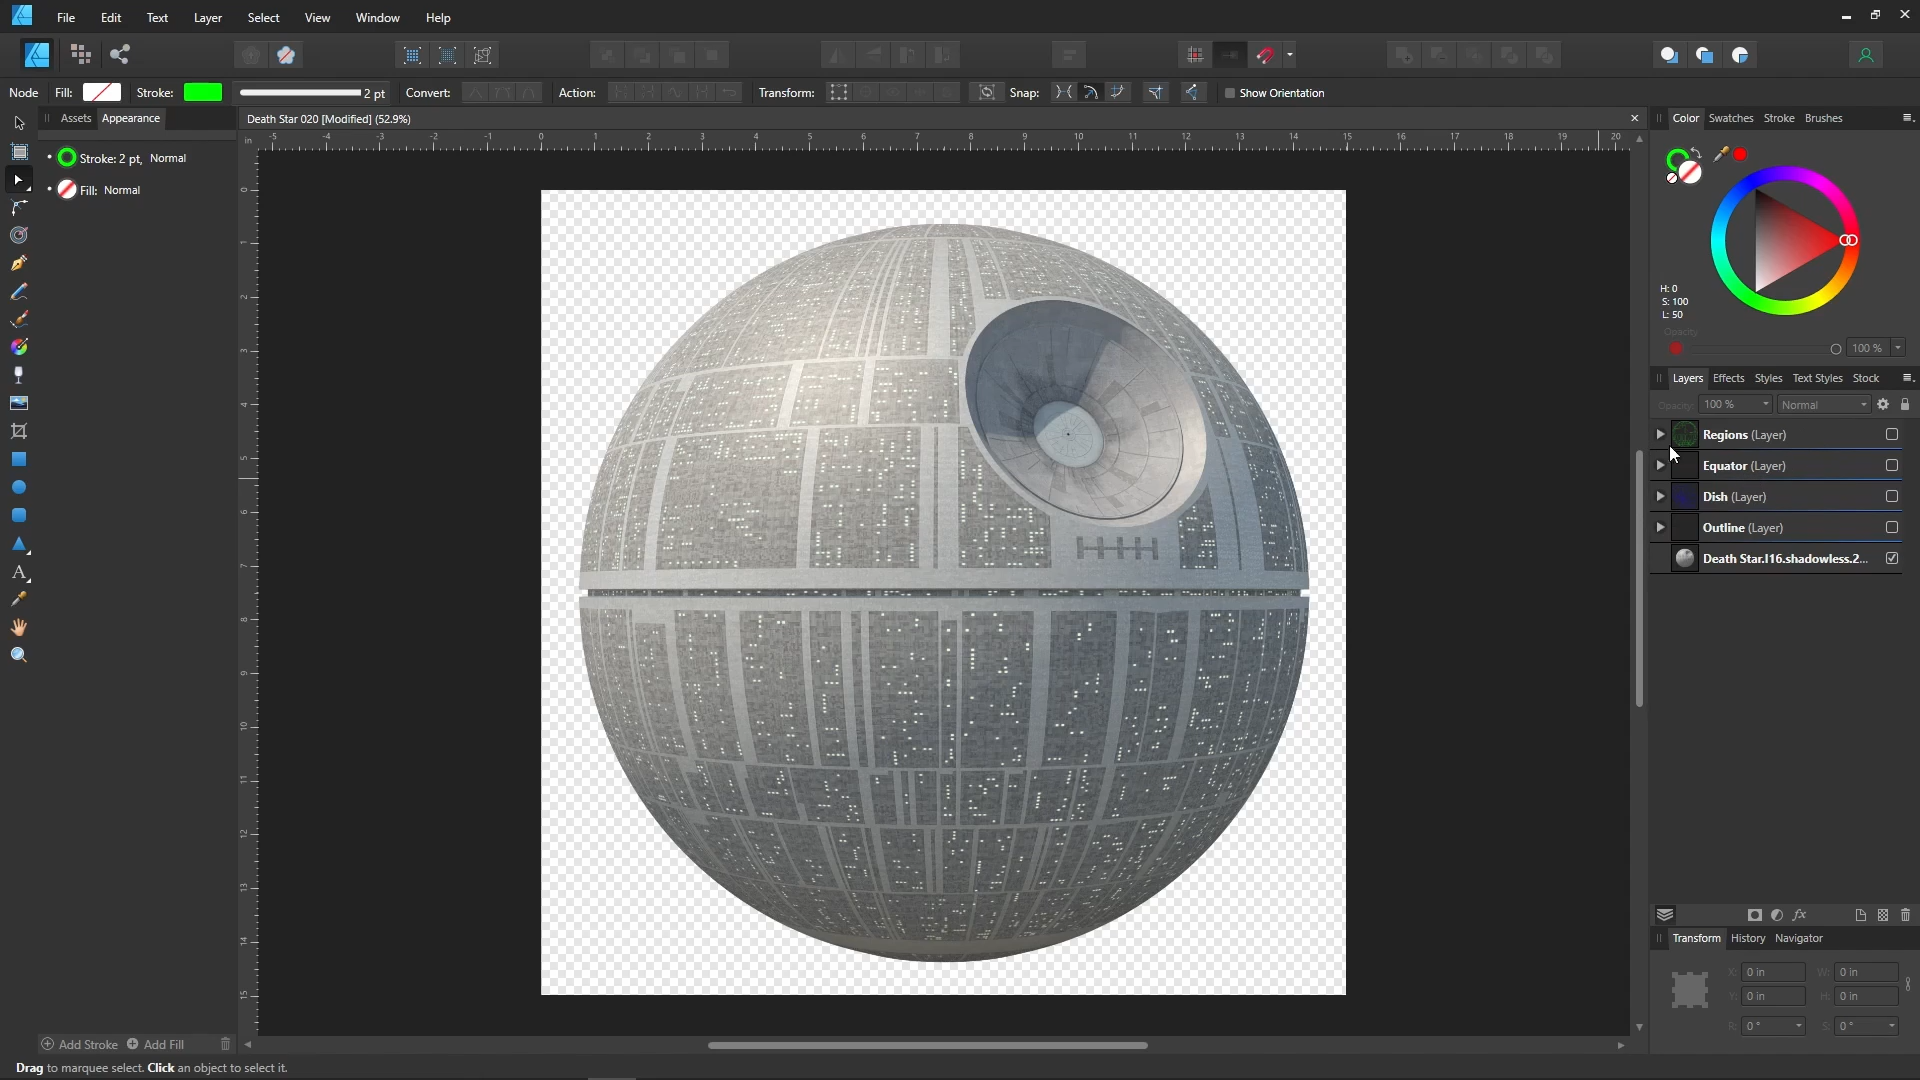
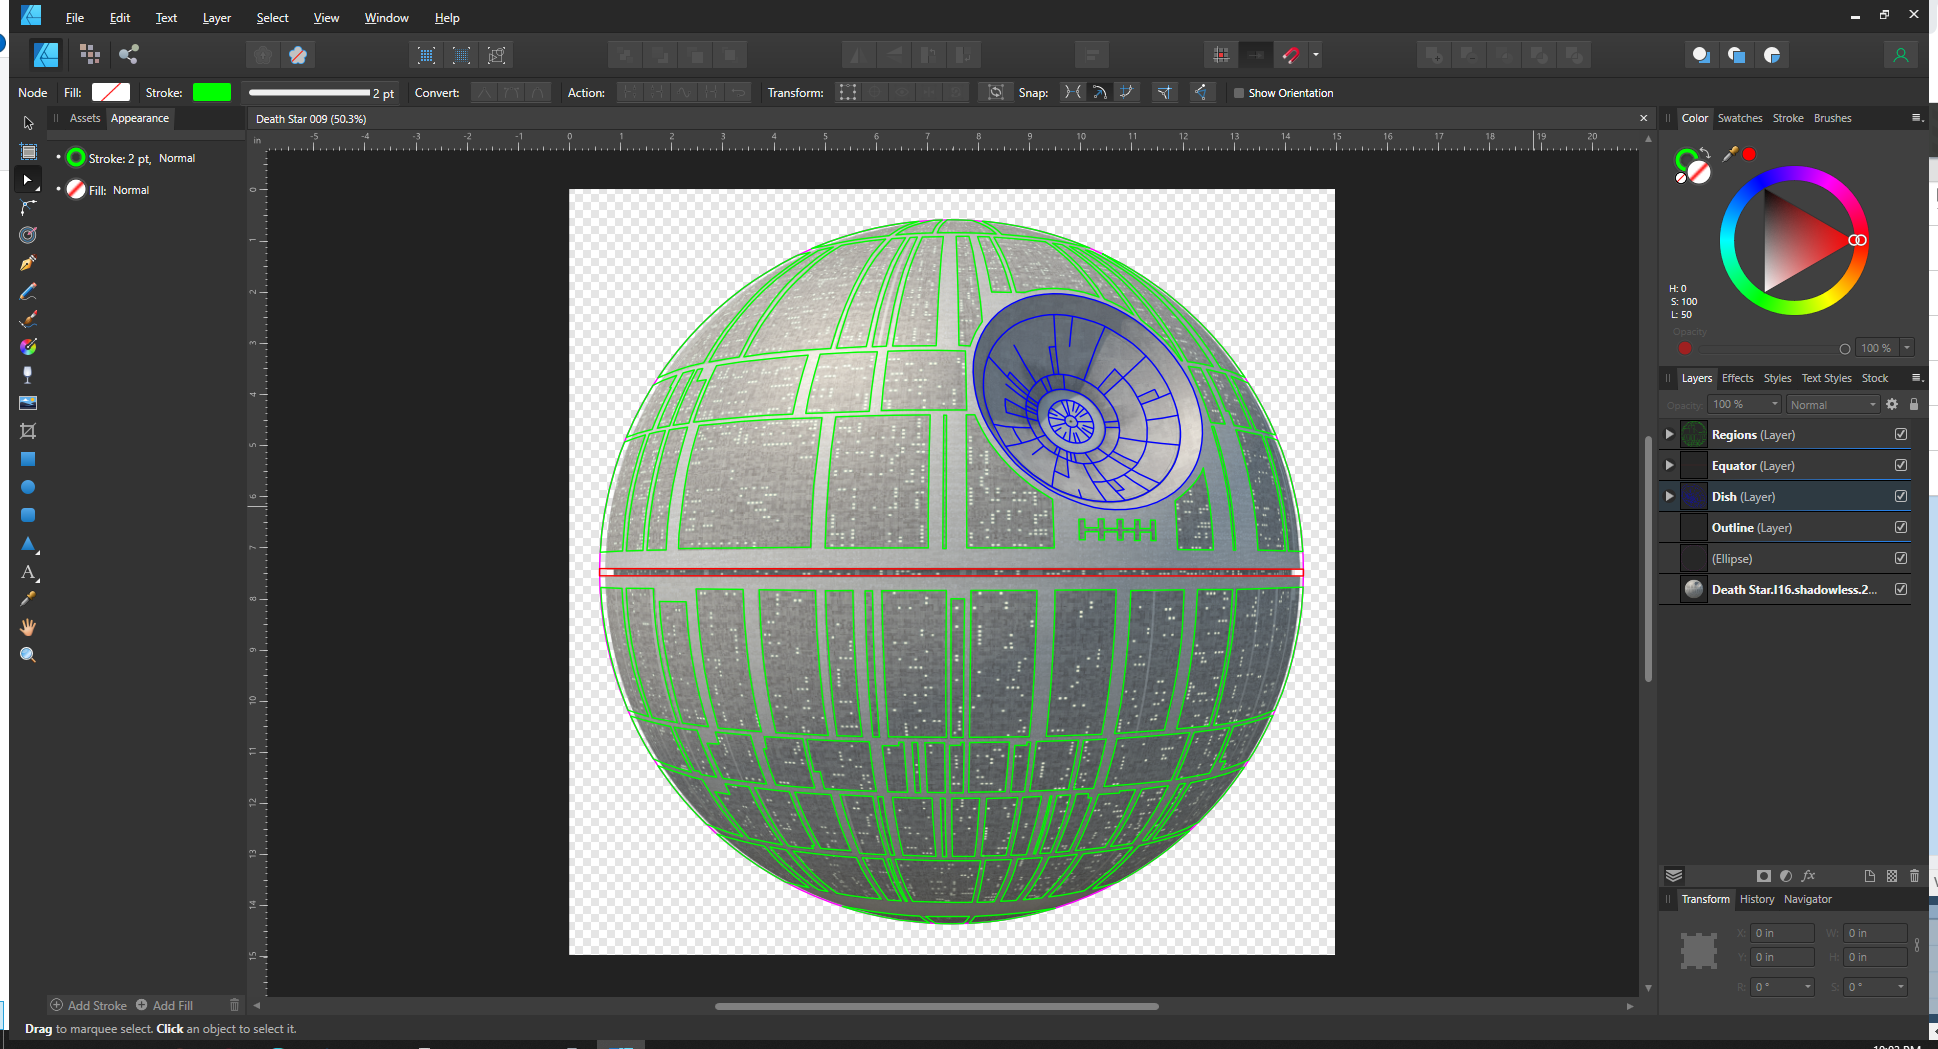
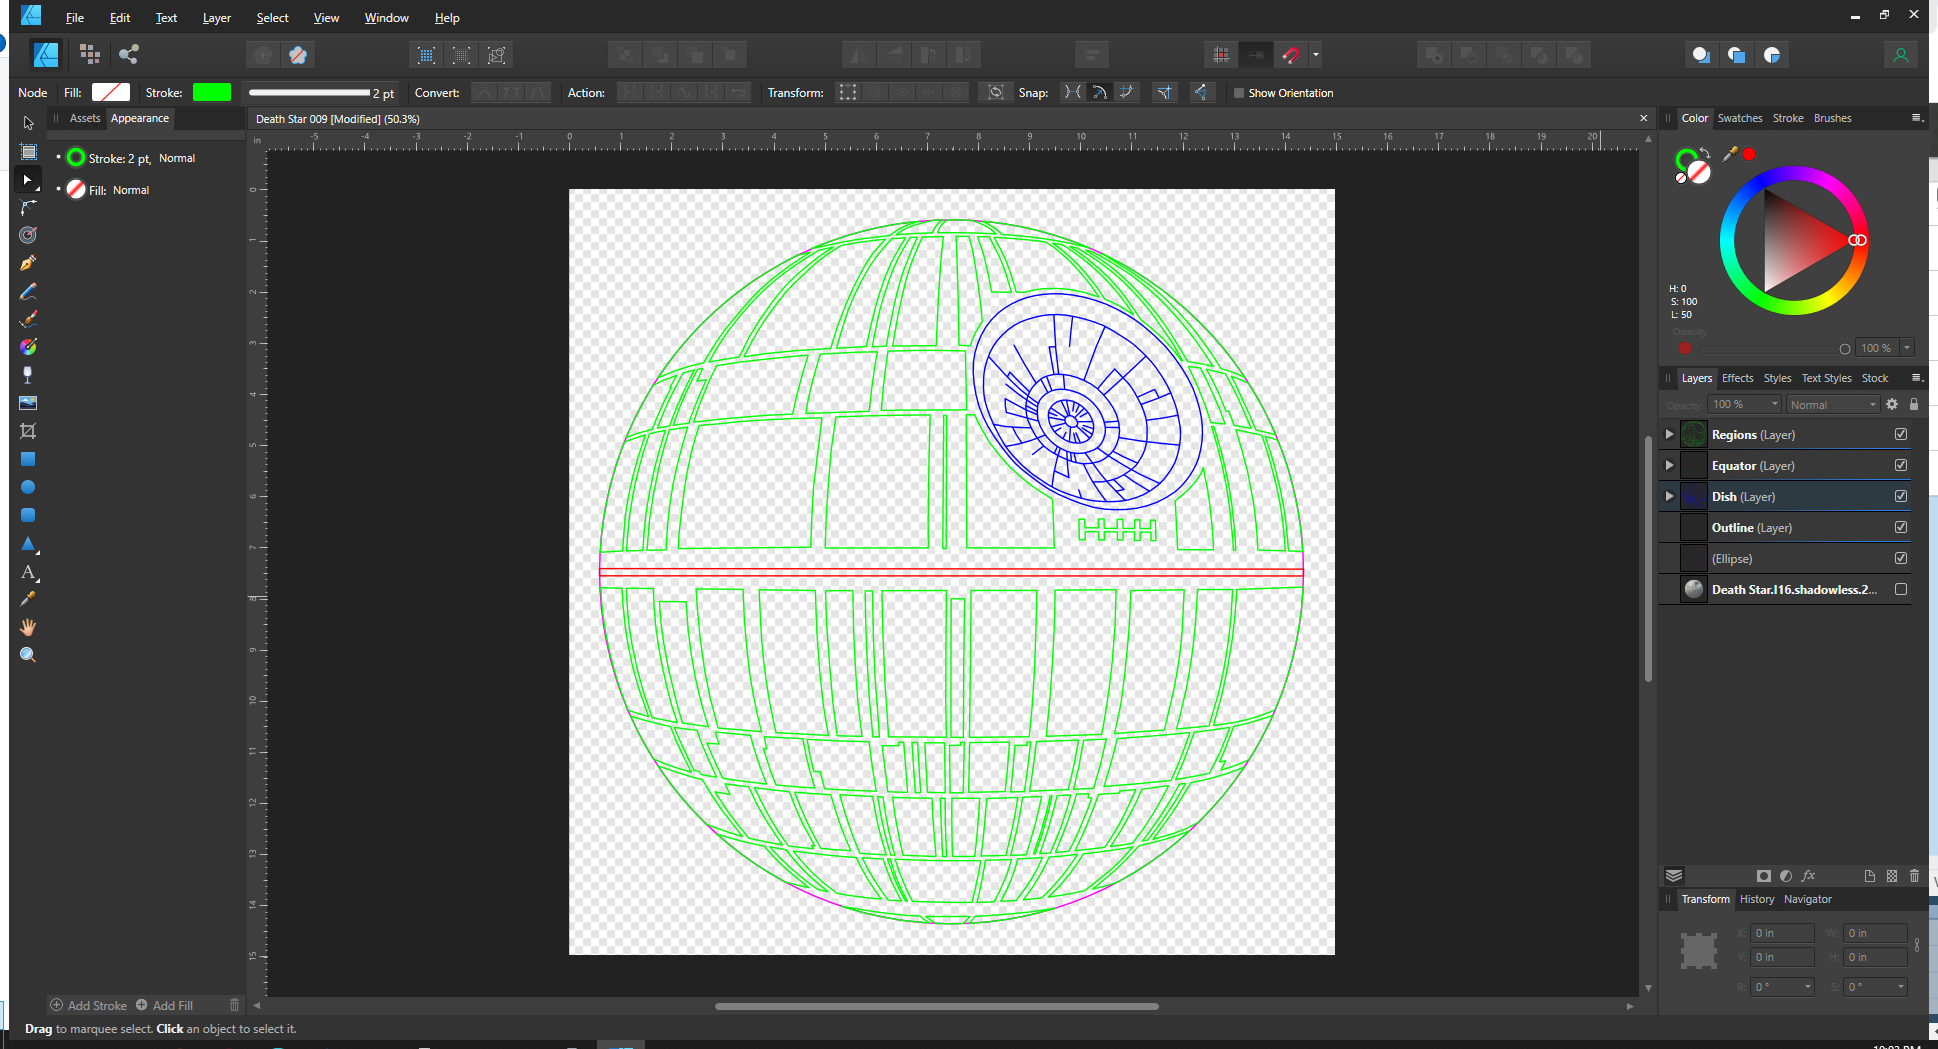
I found a photo online and then used it for tracing the region shapes on the death star.
I used Affinity Designer software to trace the regions using the pen tool. This creates closed regions that can be imported into the Easel software and then turned unto carved pocket areas.
Export to SVG and Import Into Easel Pro
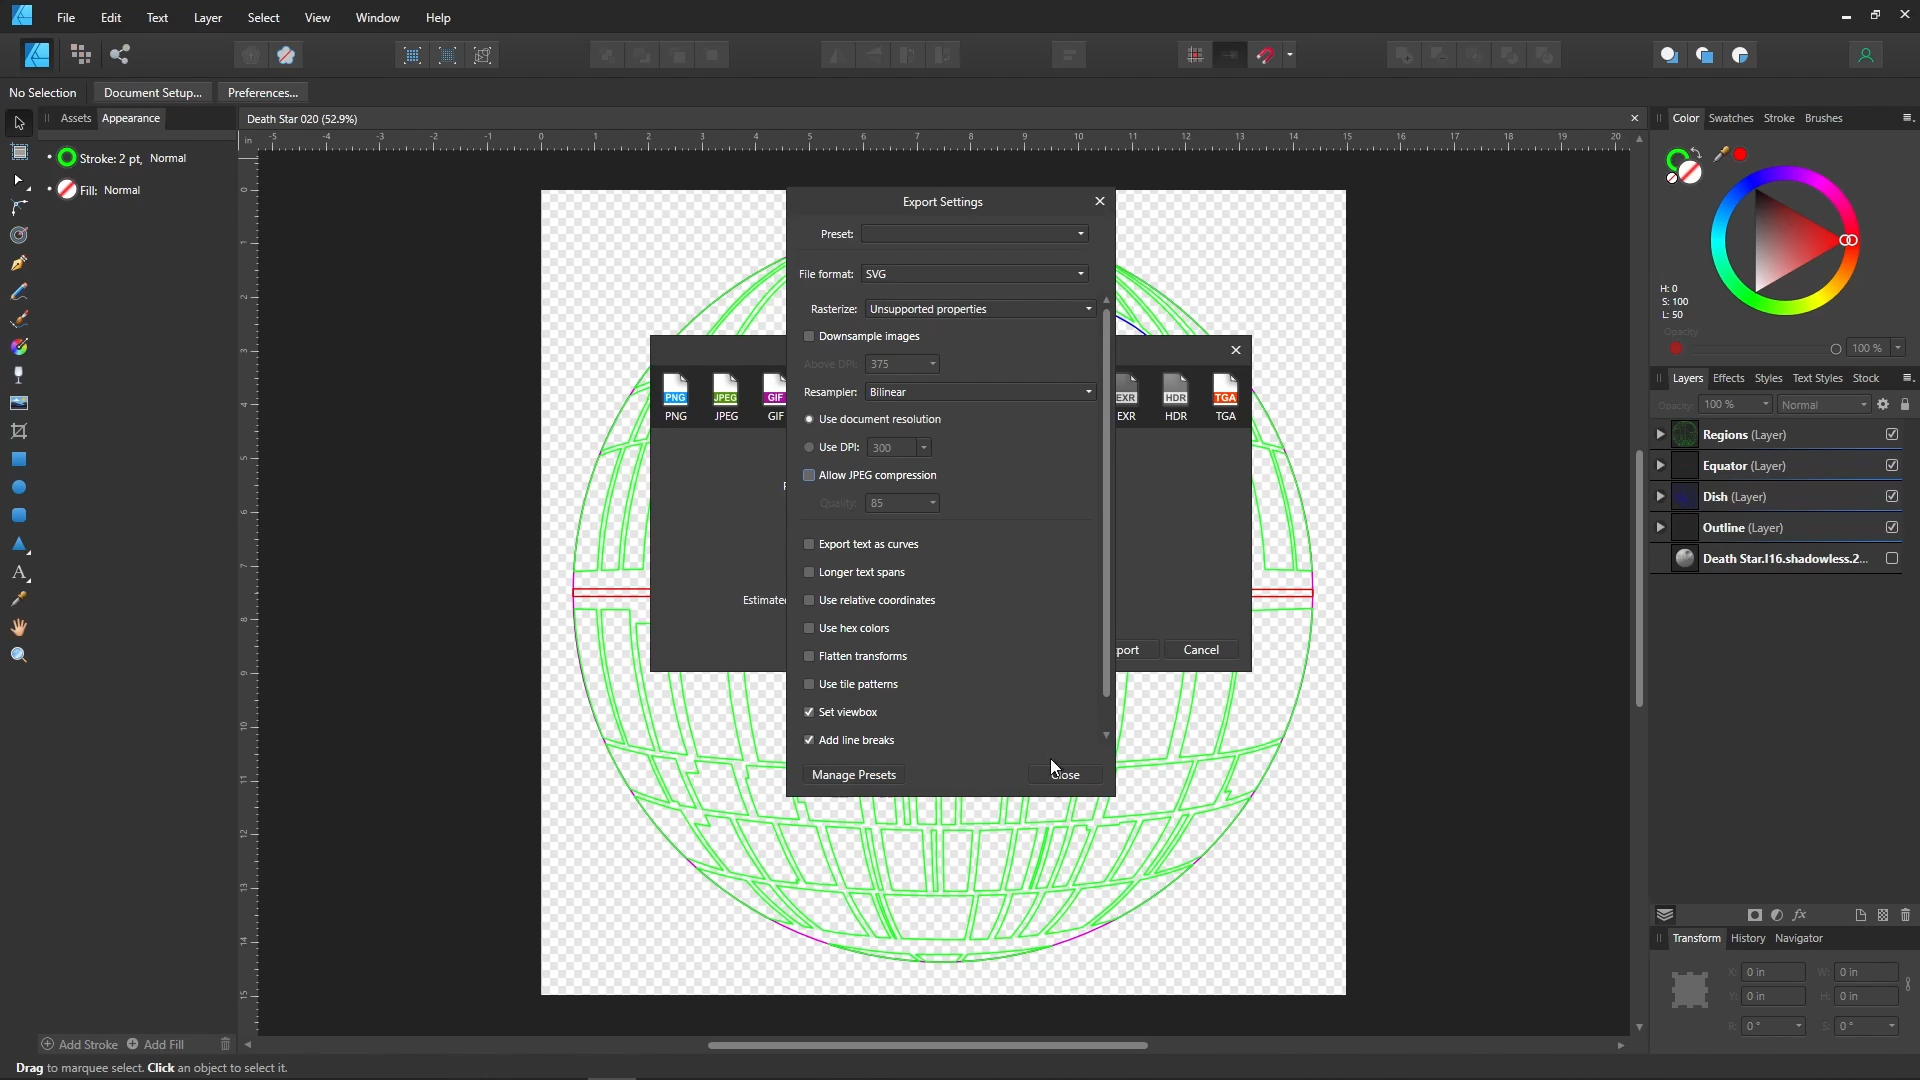
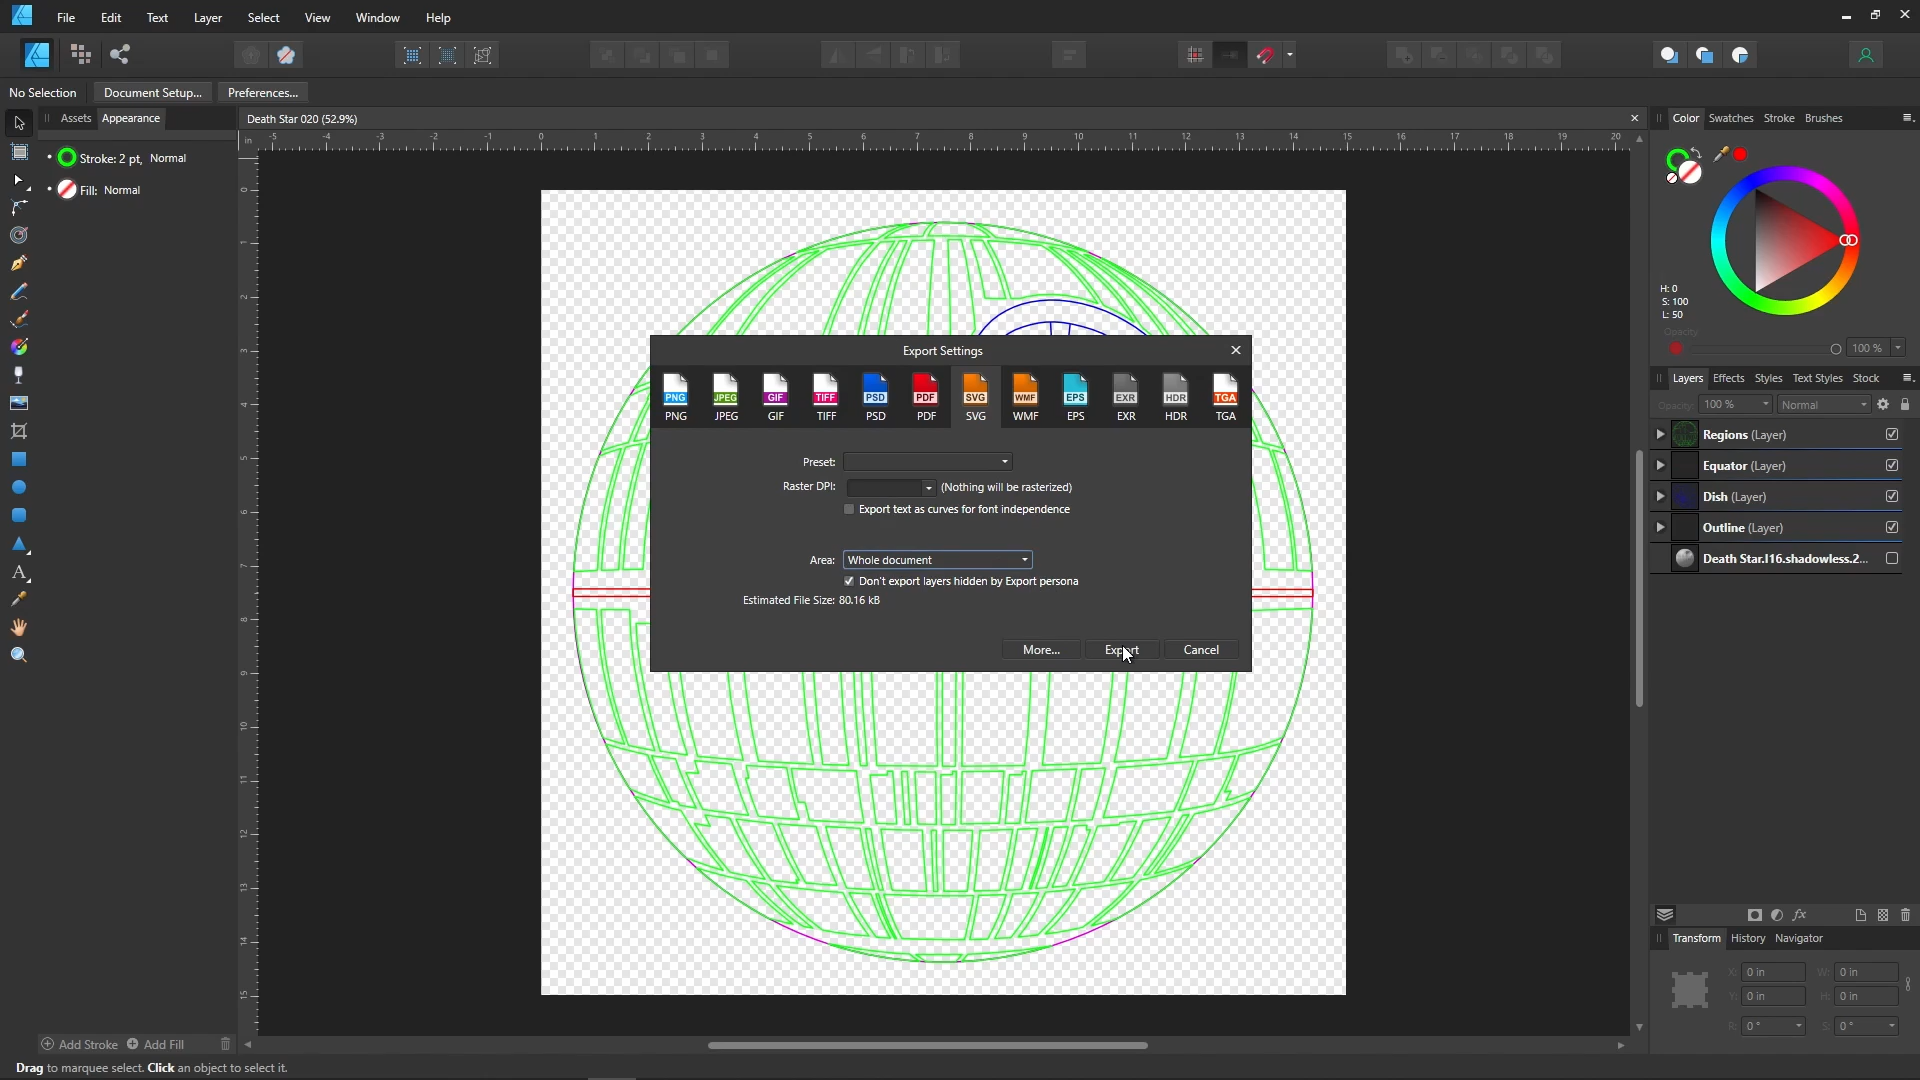
Once I completed tracing all of the elements I exported to an SVG file using the following settings:
- Use "simple" SVG for the export
- Don't include raster images
- No compression
Next you will need to import into Easel Pro software for the X-Carve CNC. To do this you need to click on the import button in the lower portion of the menu on the left side of the screen. This will give you several option. Just select the SVG option.
On the next screen you will need to point to the file and select the appropriate options.
Then select import.
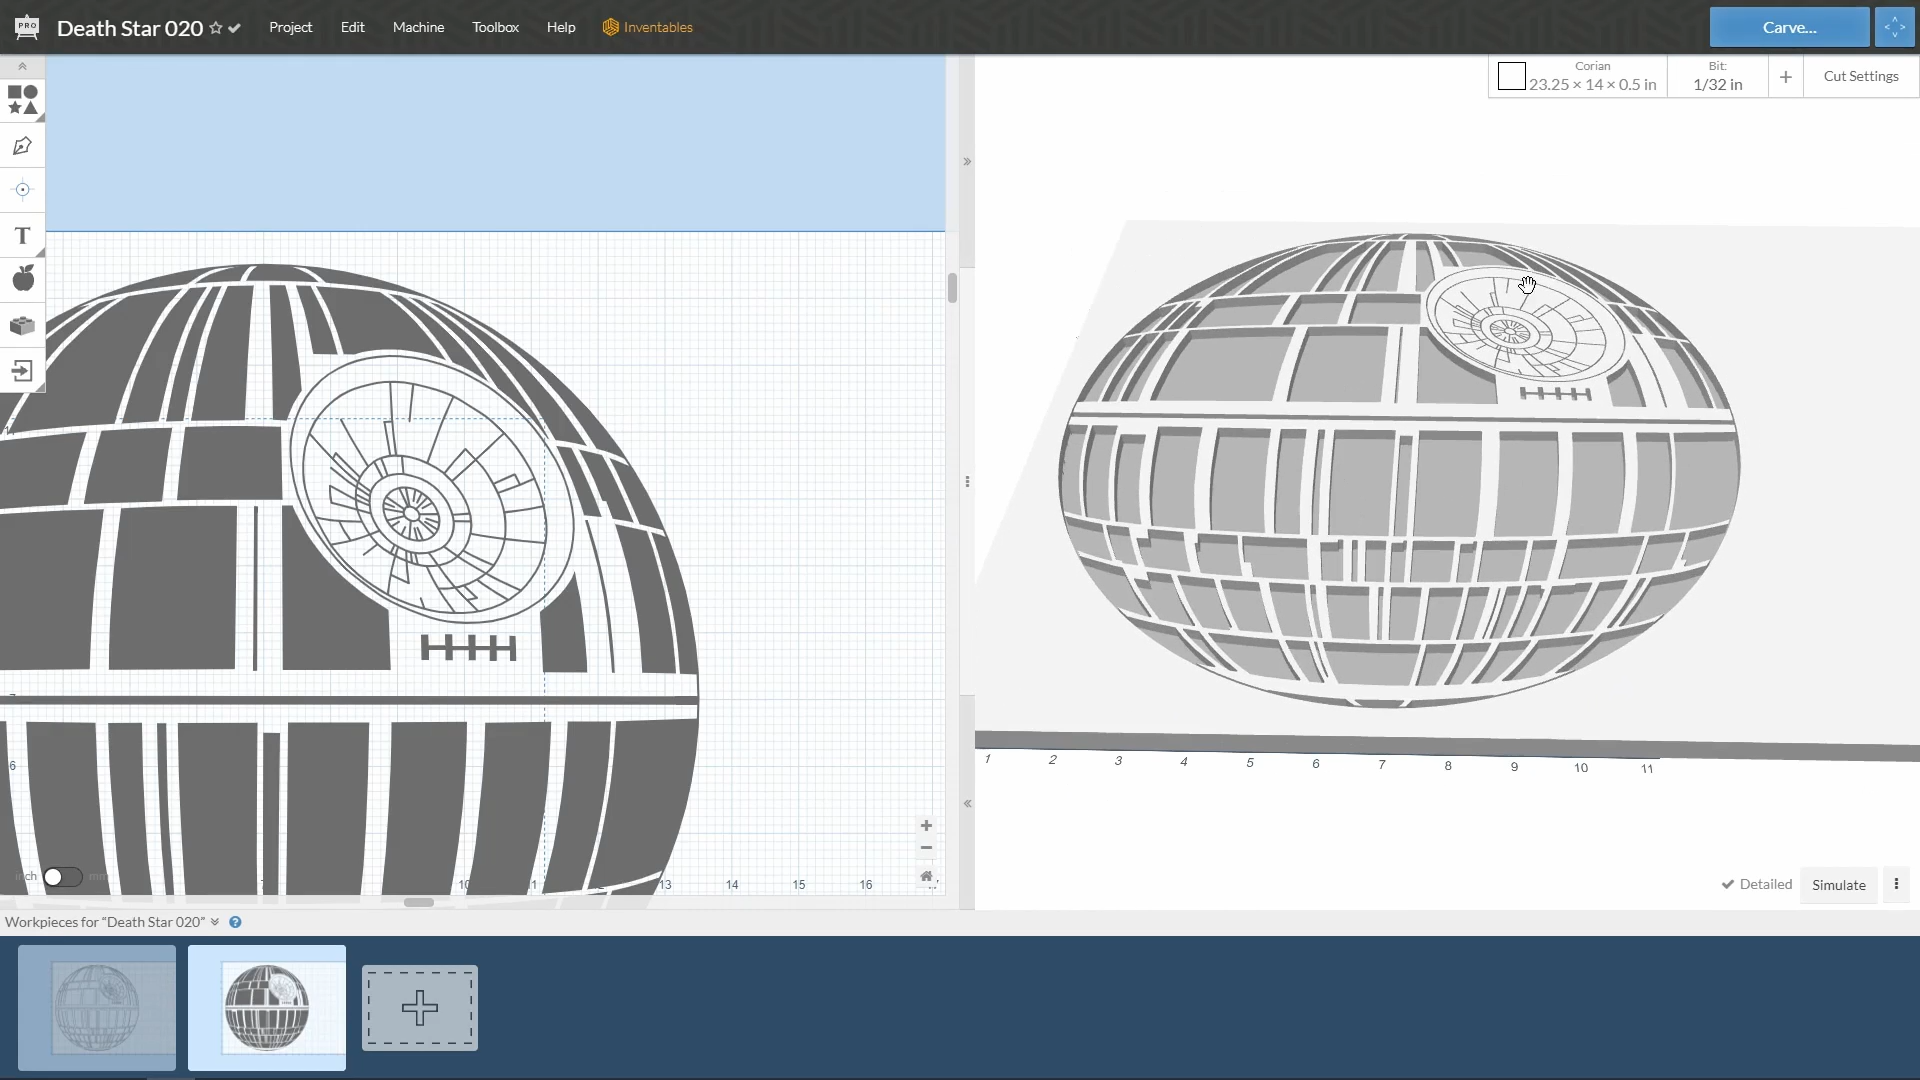
Adjust Size and Placement of Image
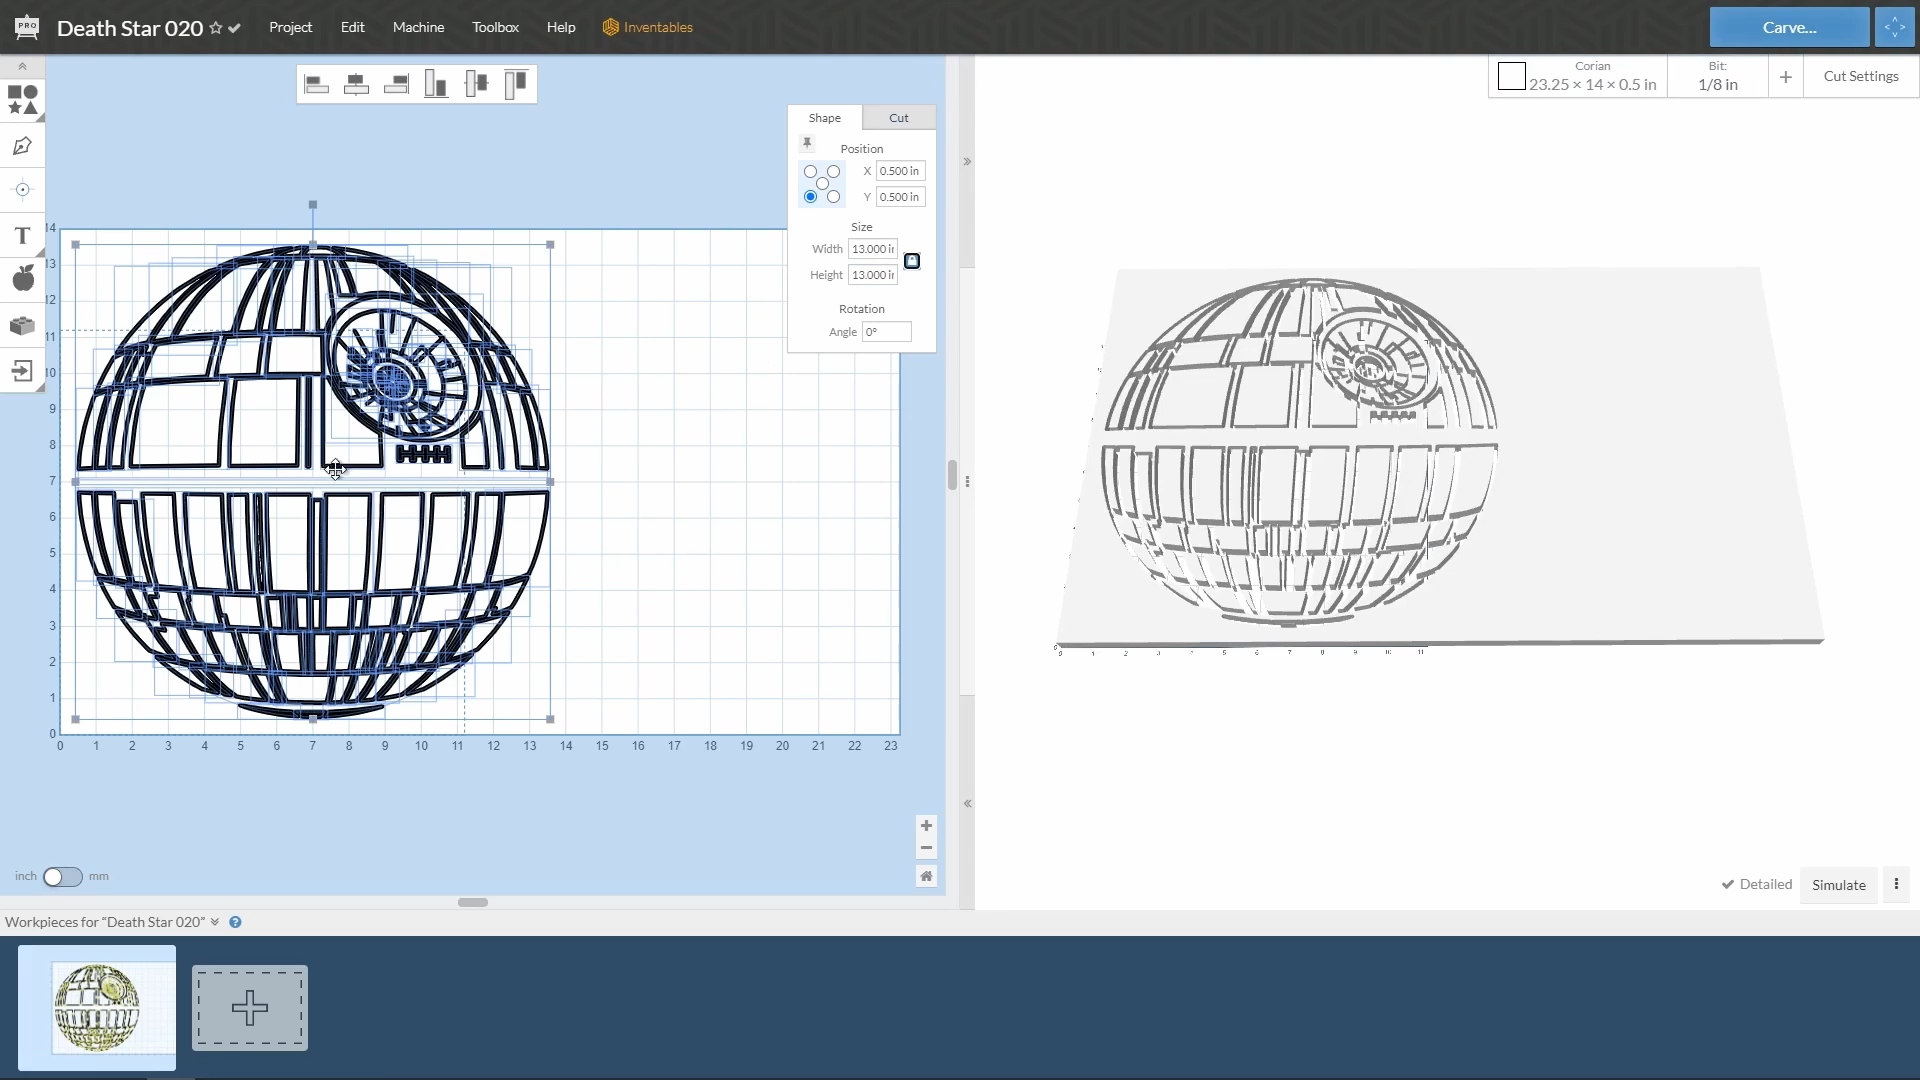
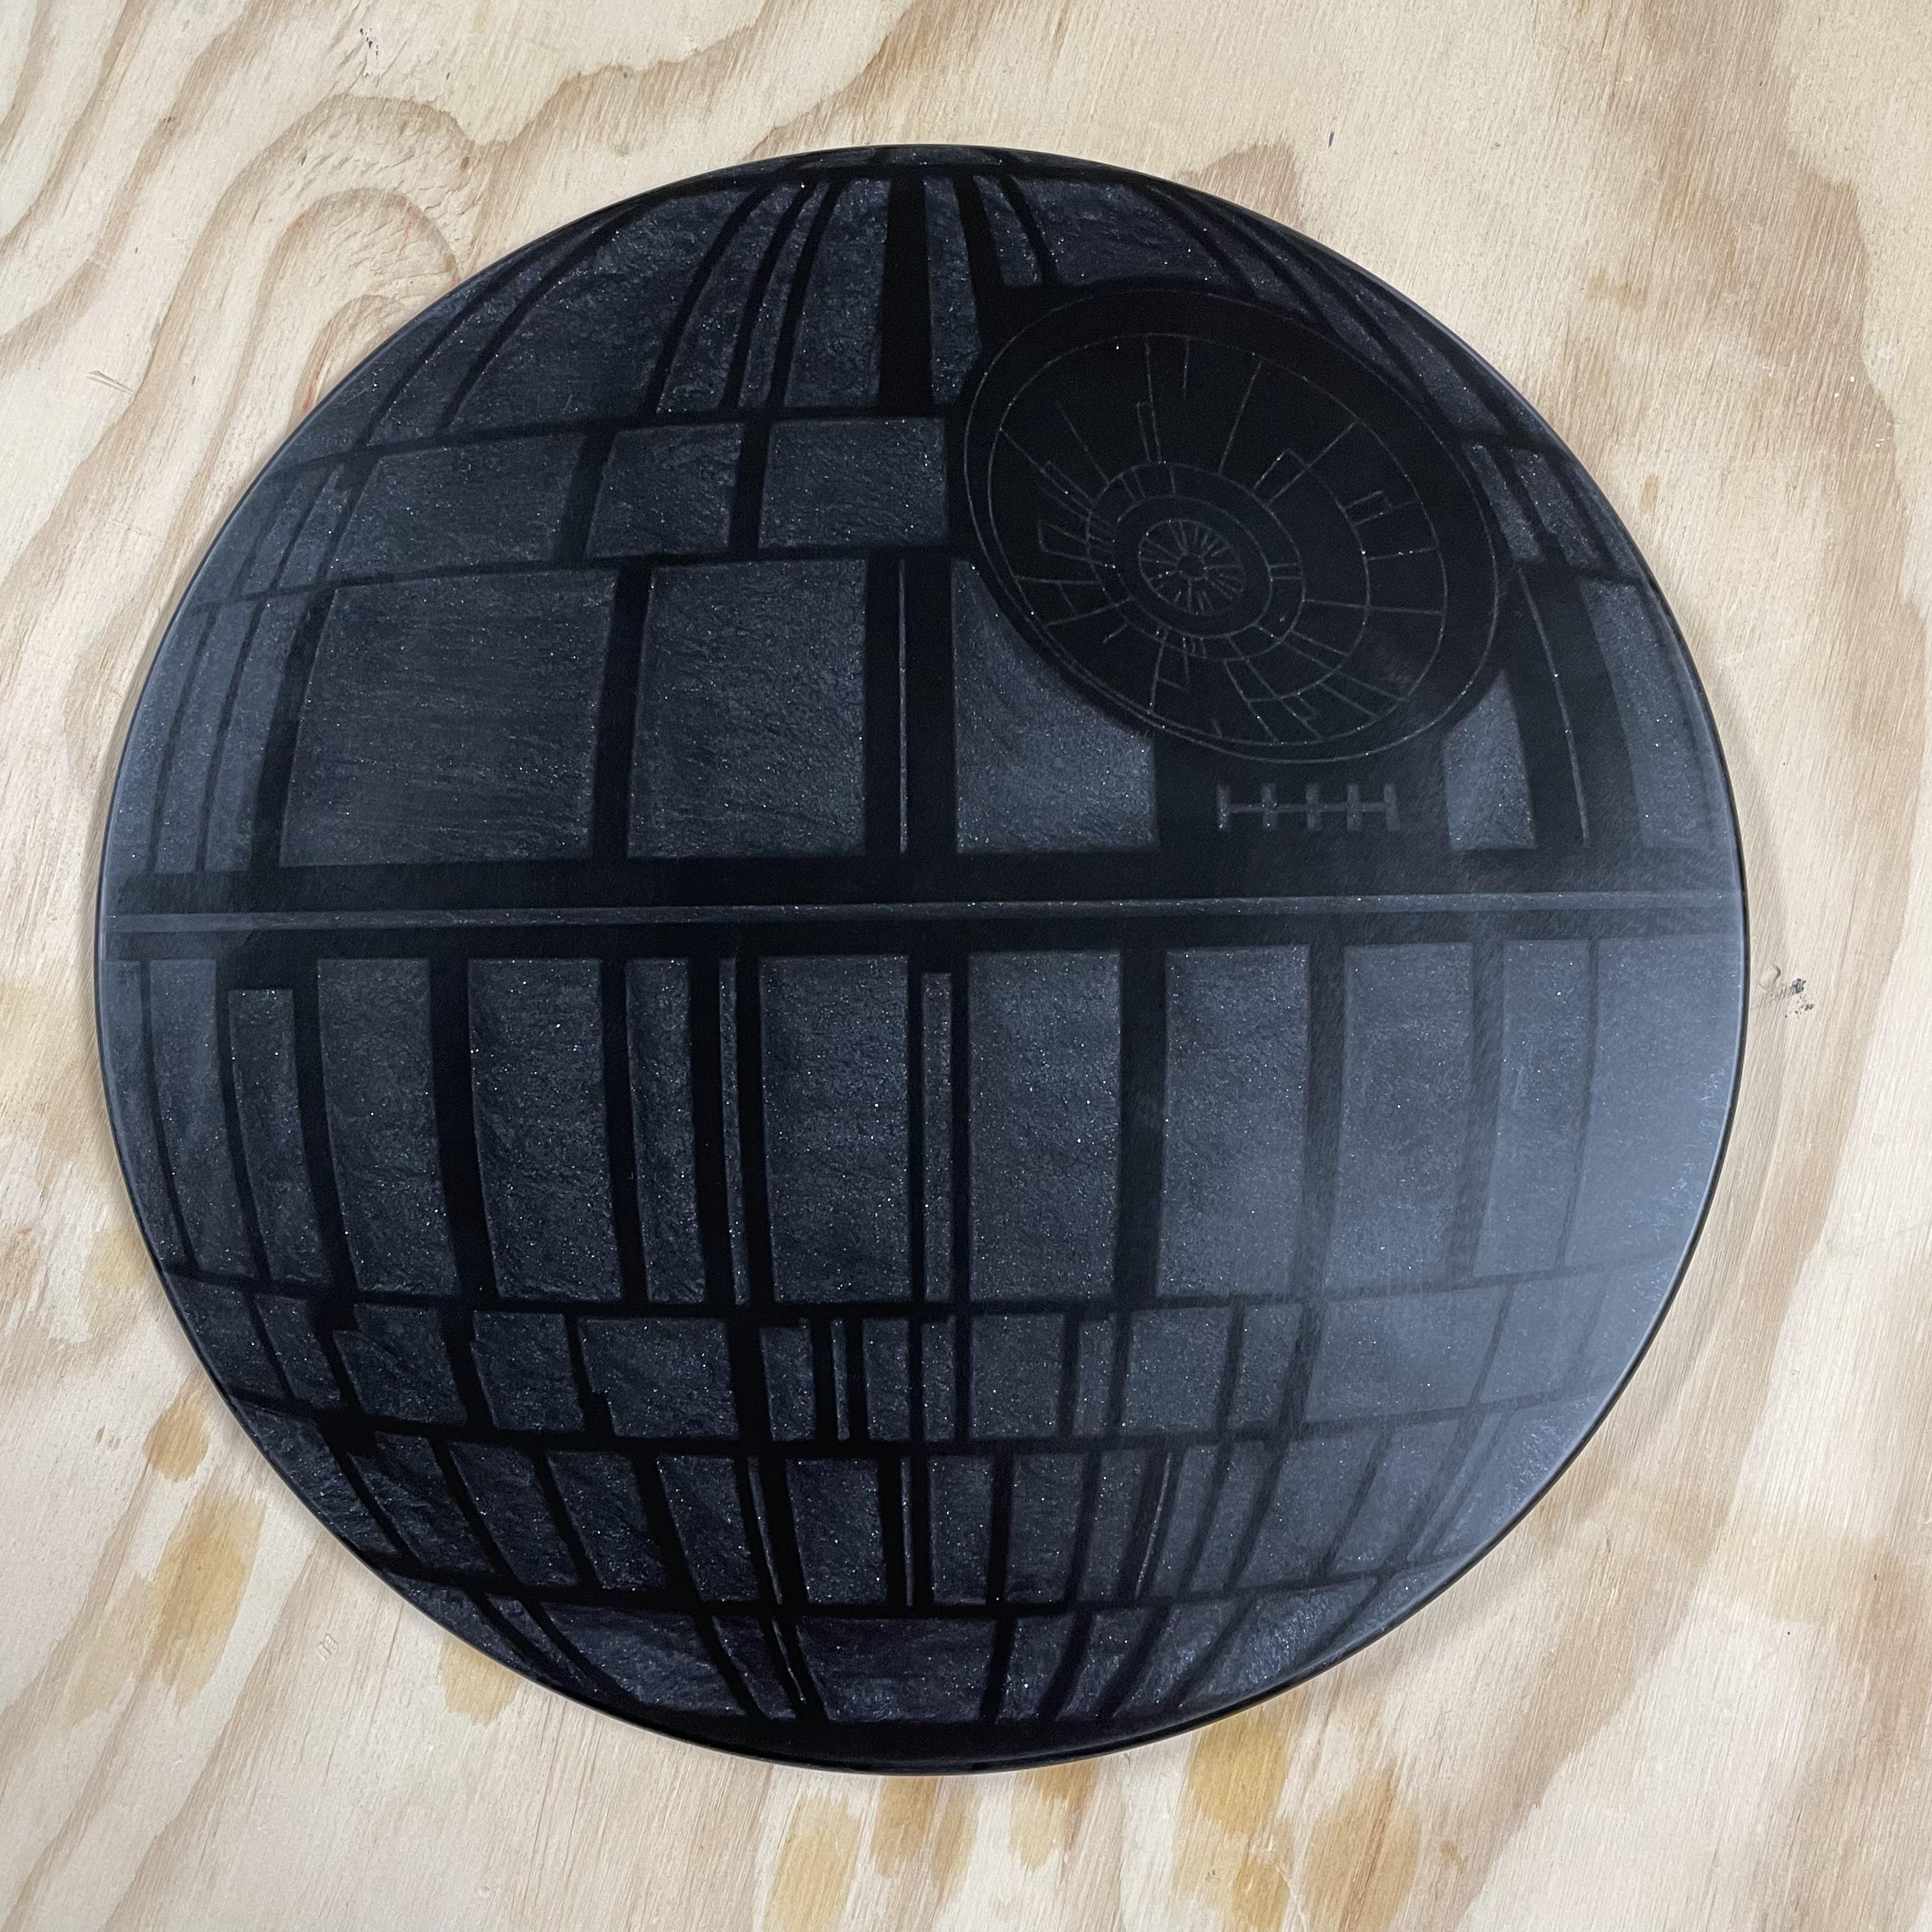
The image will be imported into the lower left portion of the screen. You will need to resize the image to suite your needs. I wanted the Death Star to be 13" in diameter so I selected all and then changed the size of the shape to be 13" wide and tall. It's best to click on the lock icon for the aspect ration before modifying the height or width of the selection so you don't accidentally modify the proportions.
Modify the Carve Areas and Break the Carve Into Sections
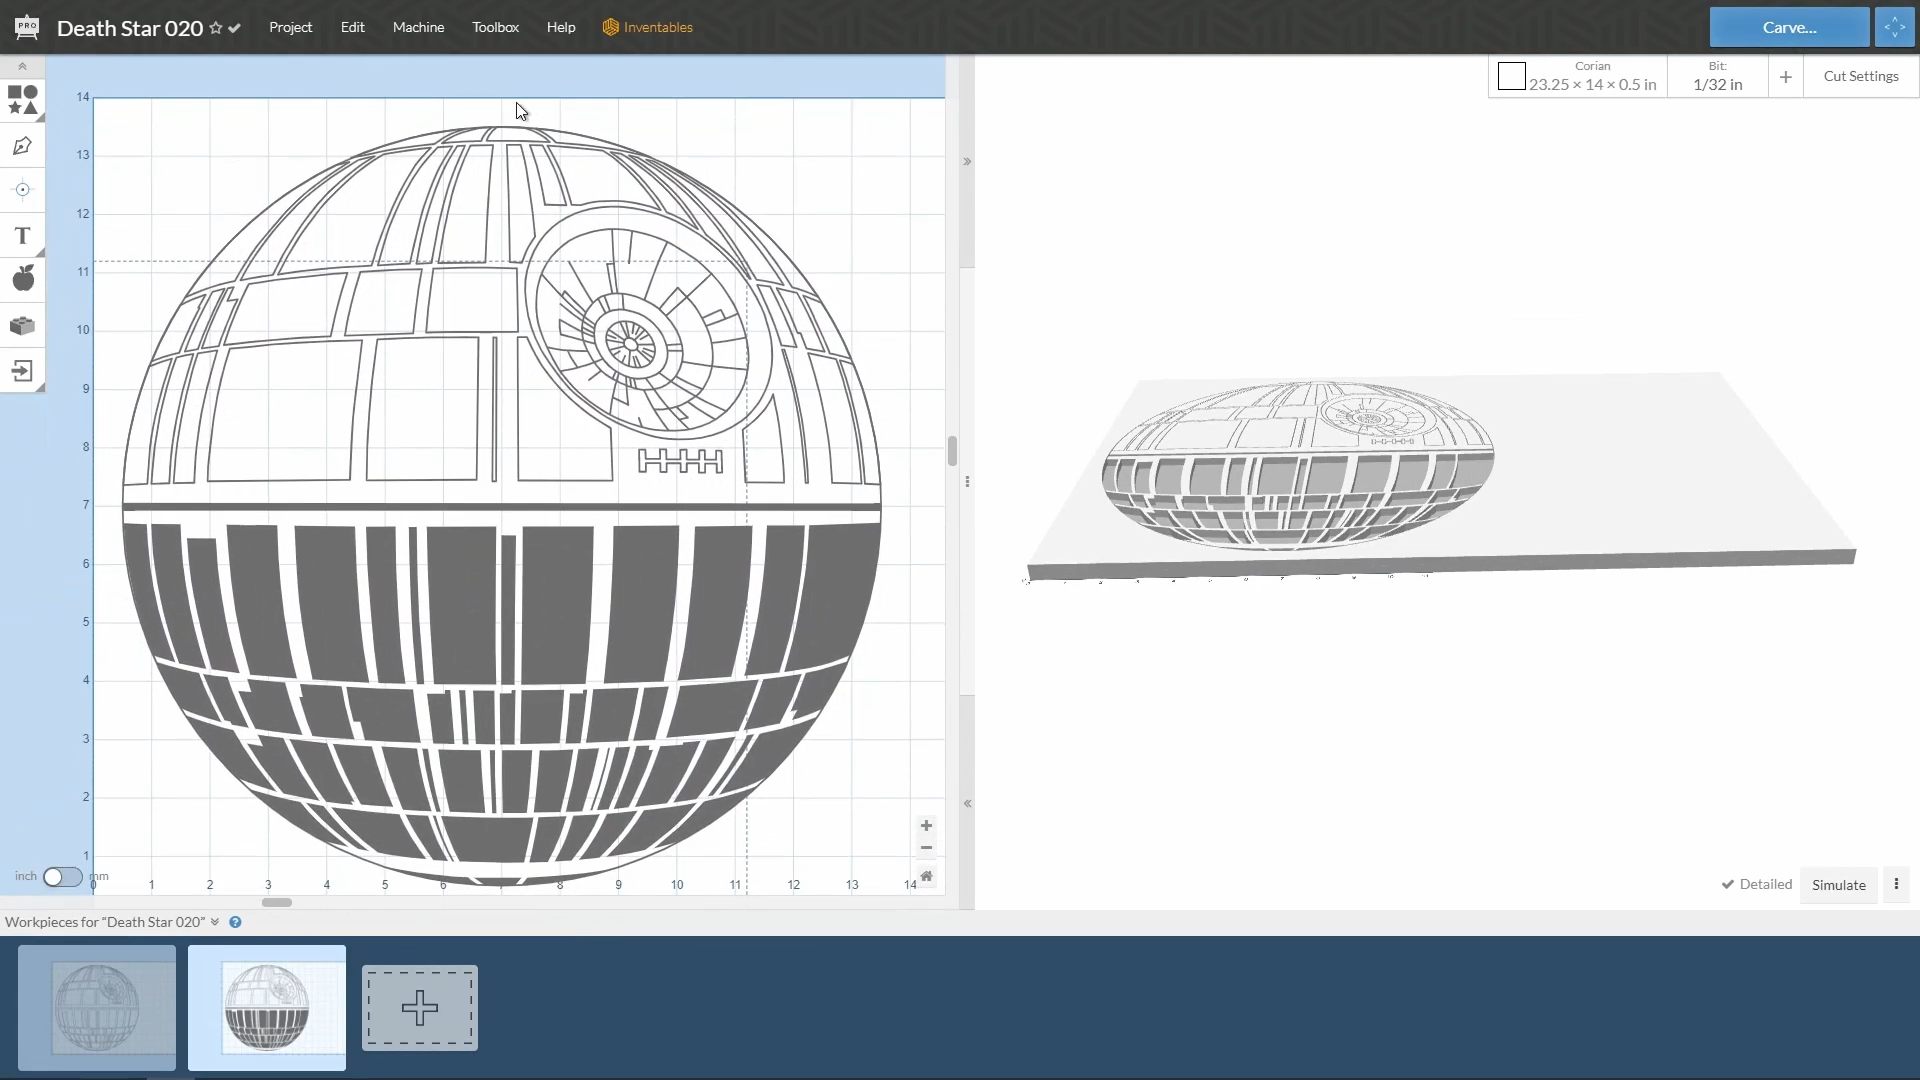
Now we need to manipulate the imported items so the pattern on the surface of the Death Star is carved out at a pocket. I basically select all of the areas to be carved out and set the carve type to "carve a pocket."
I also set the depth of all of the carving areas to 0.08" deep.
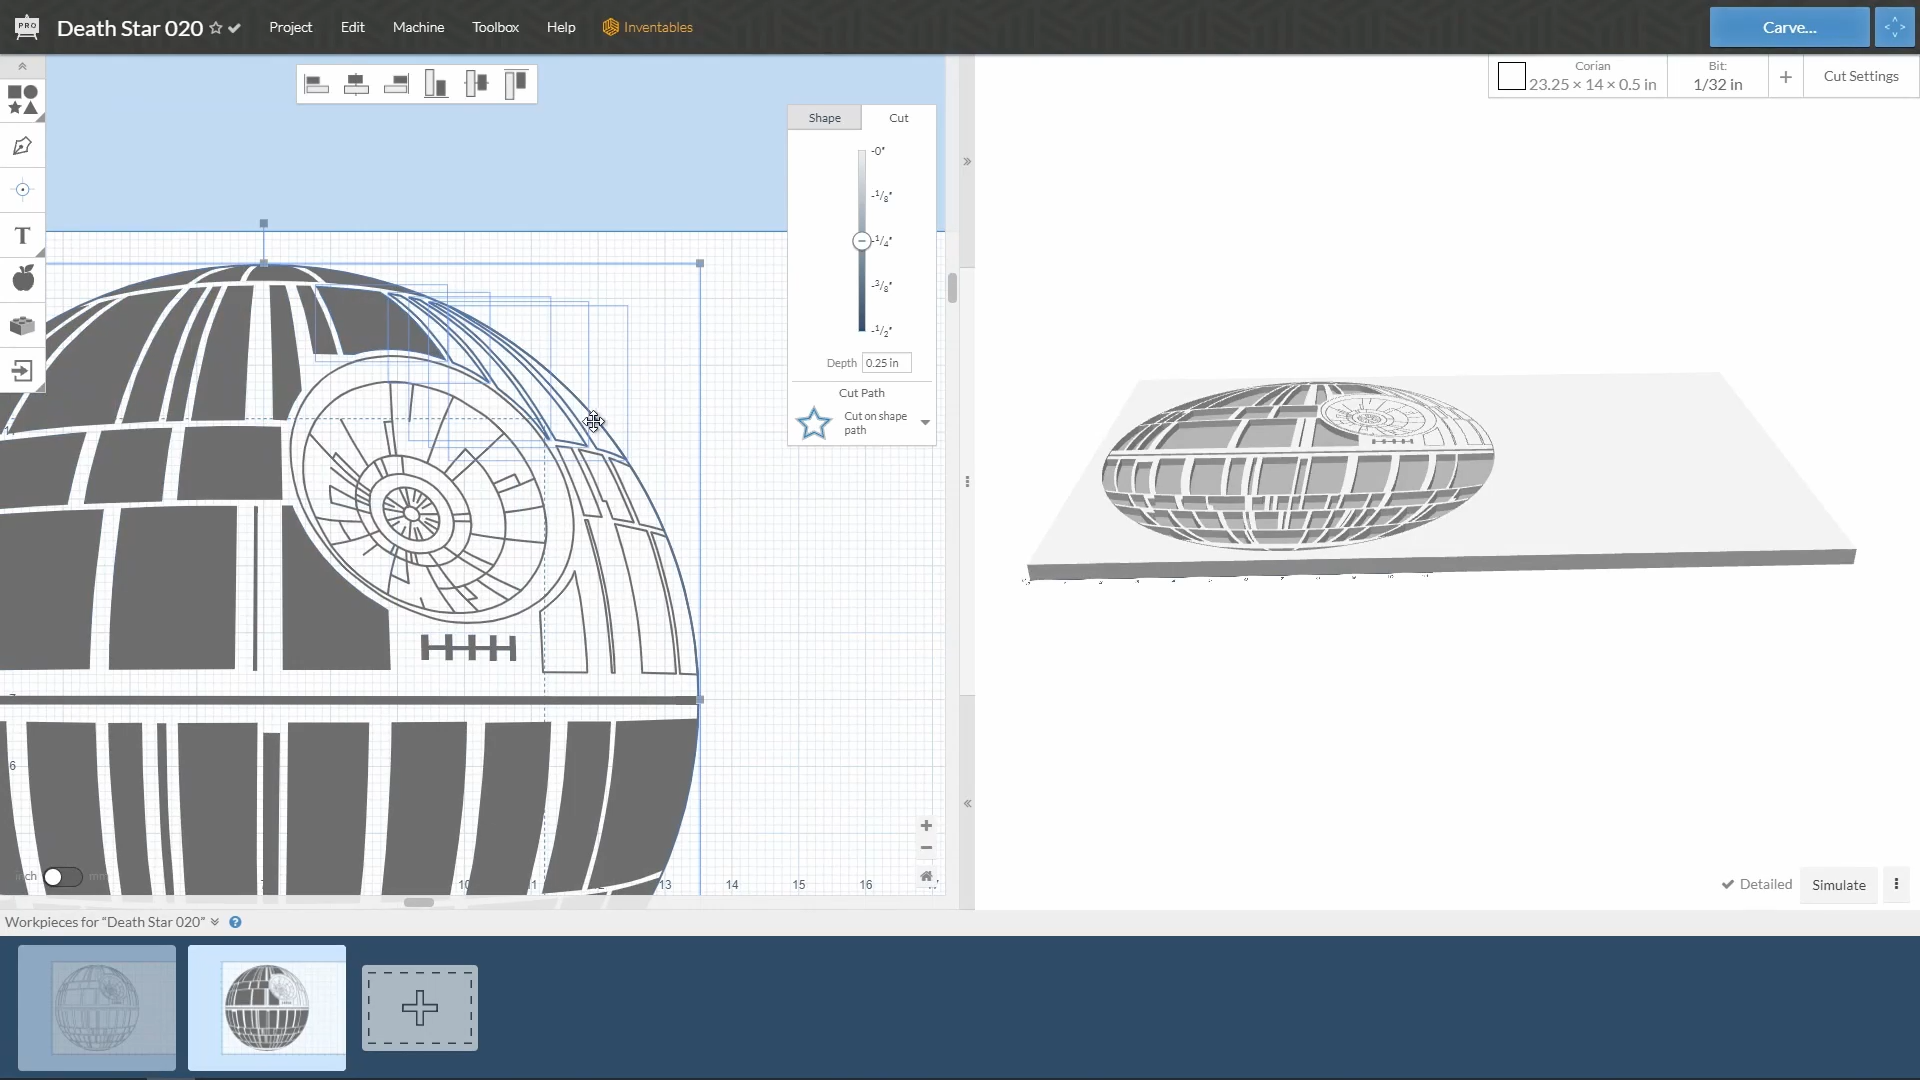
Since we are carving solid surface material with such a small diameter bit it can take quite a long time to carve the material. for this reason I break the carving areas up into 3 separate areas. This helps if you break a bit and need to start a carve over. You would have to have to start carving an area over if you were 90 percent complete and break a bit.
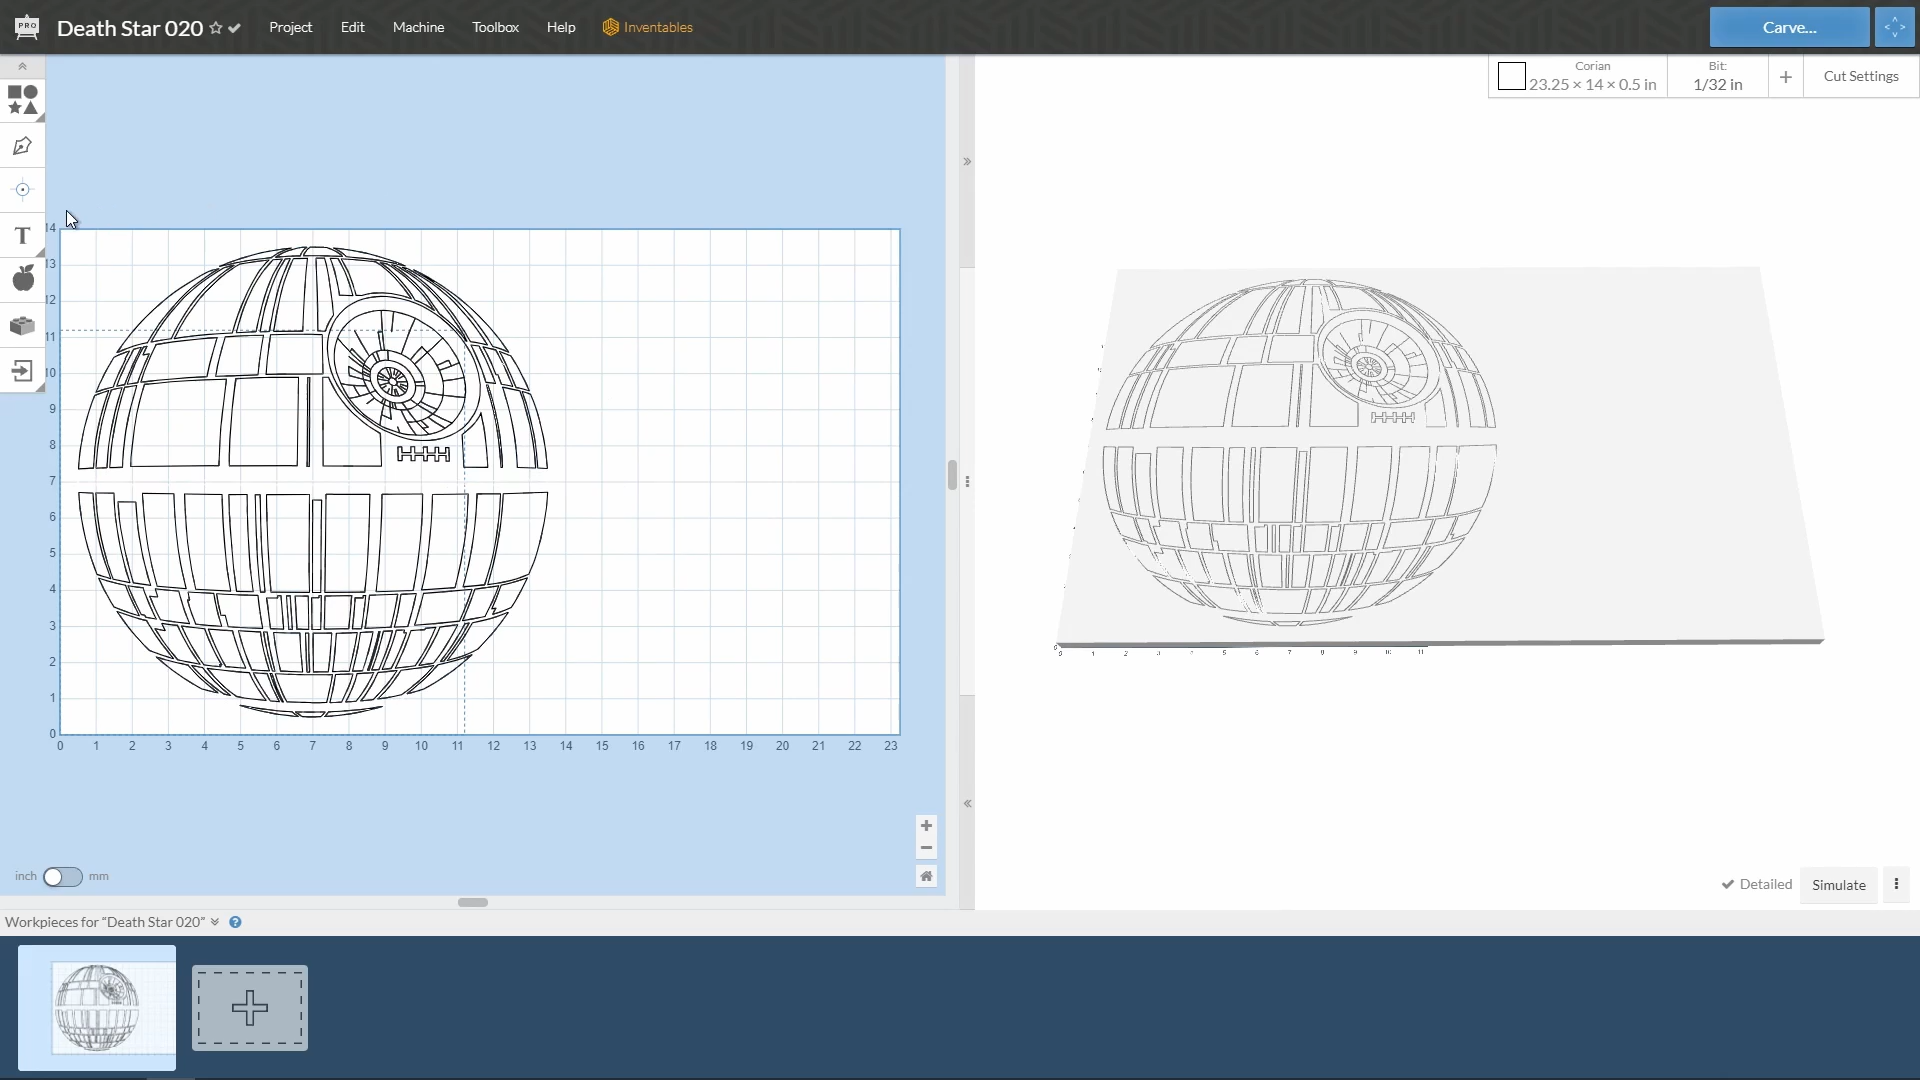
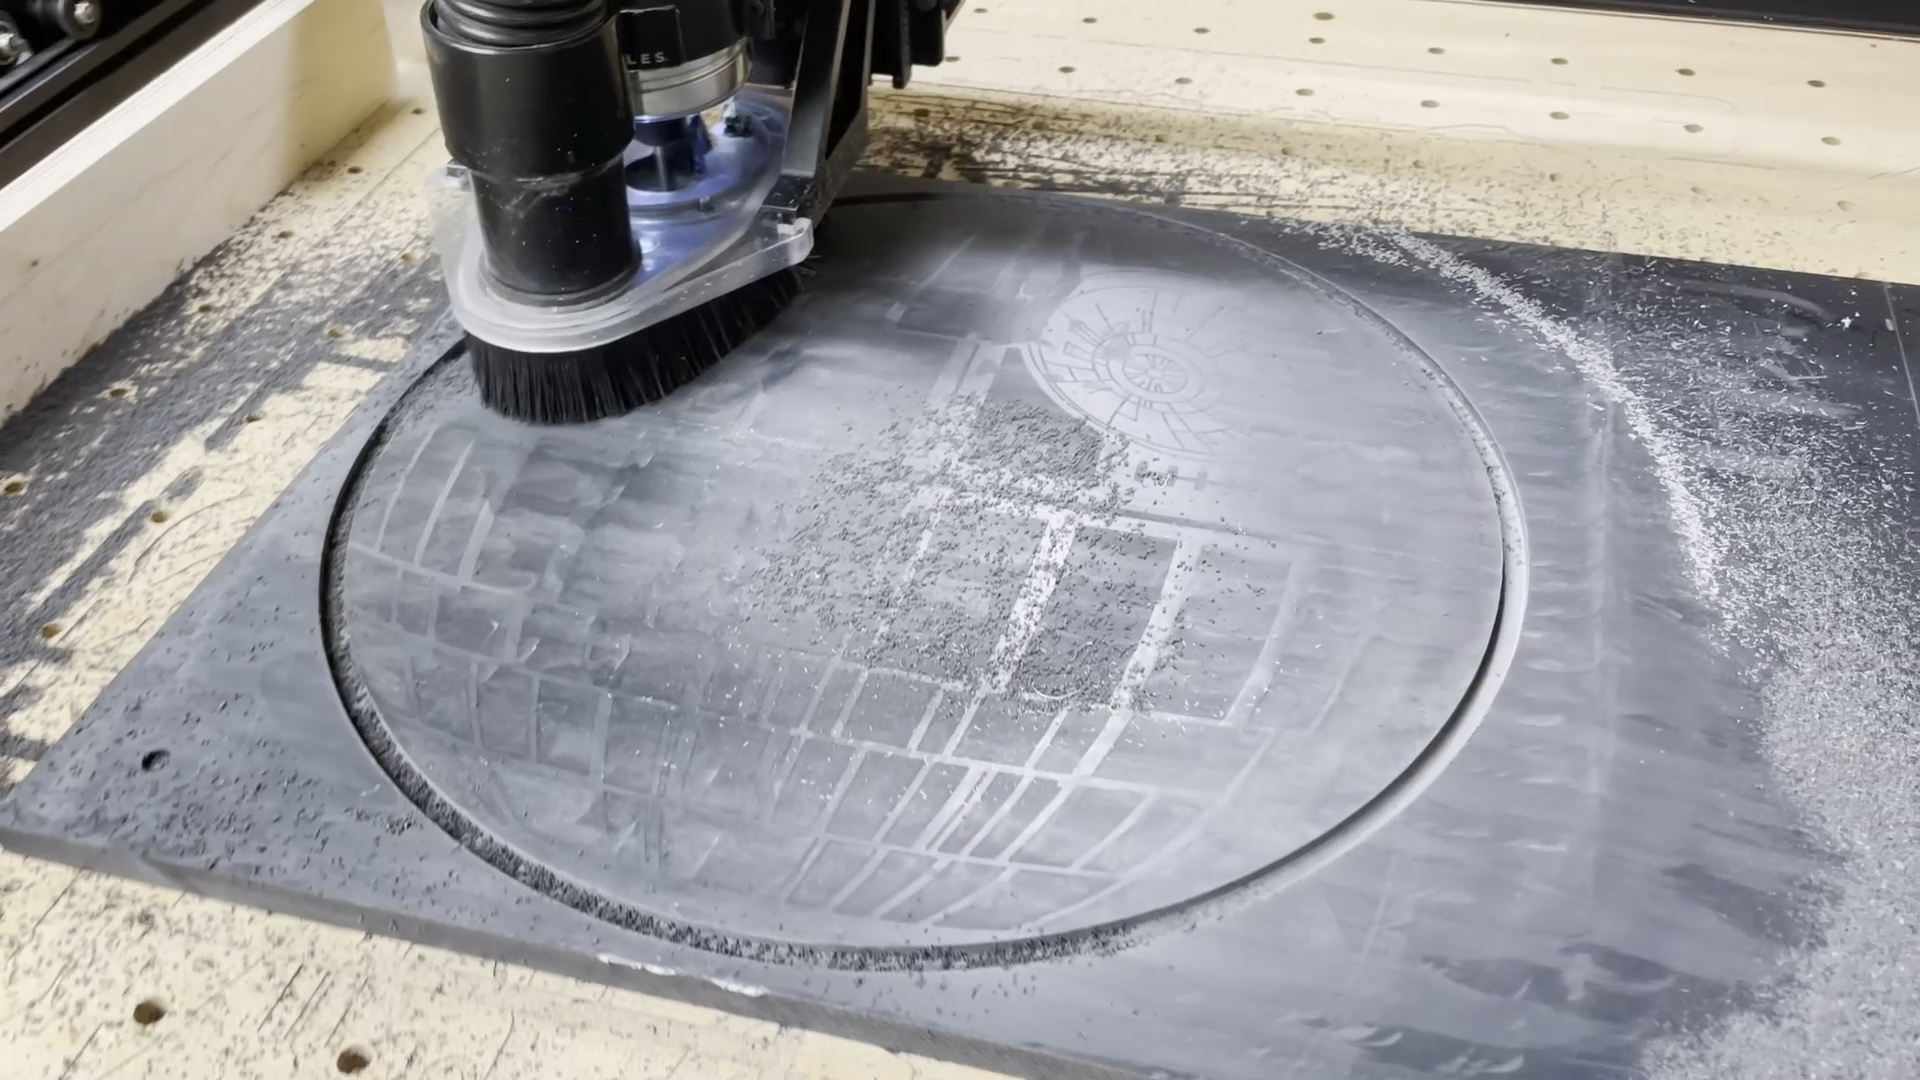
Carve the Sections
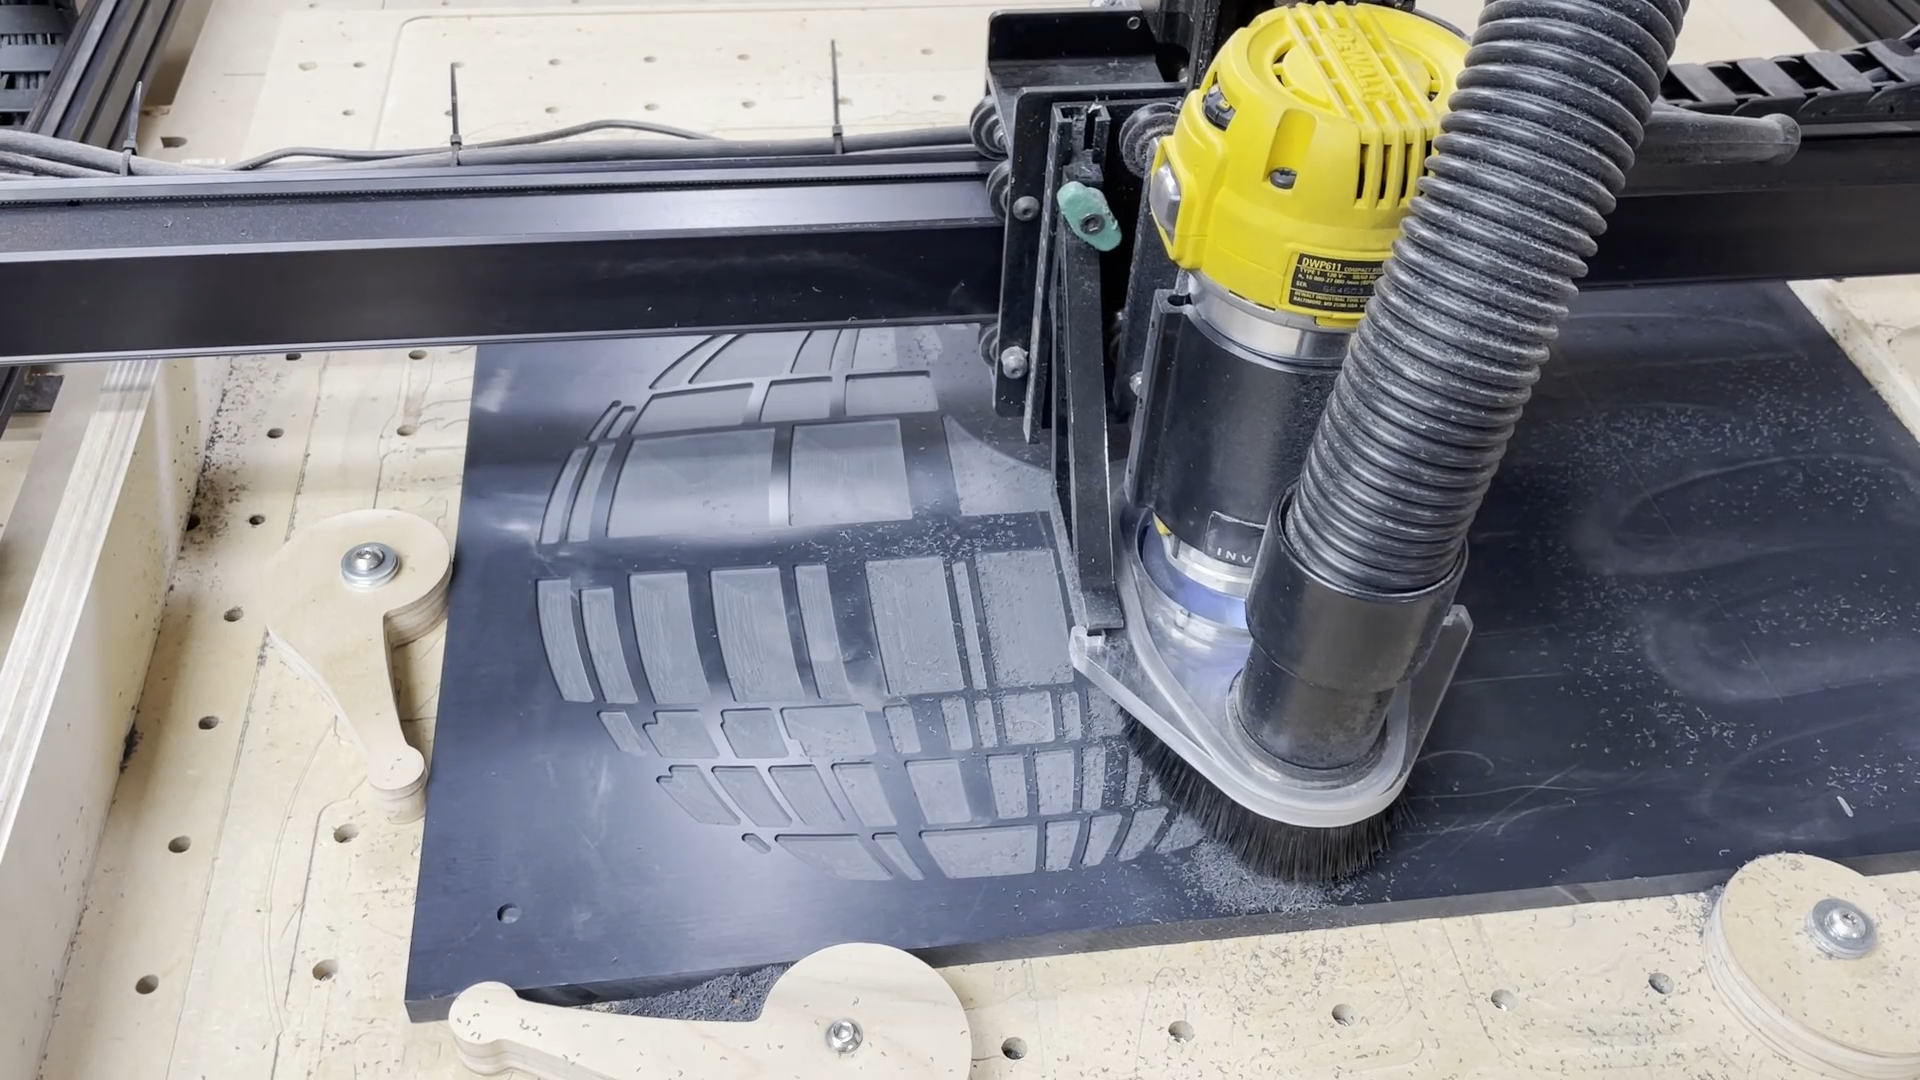
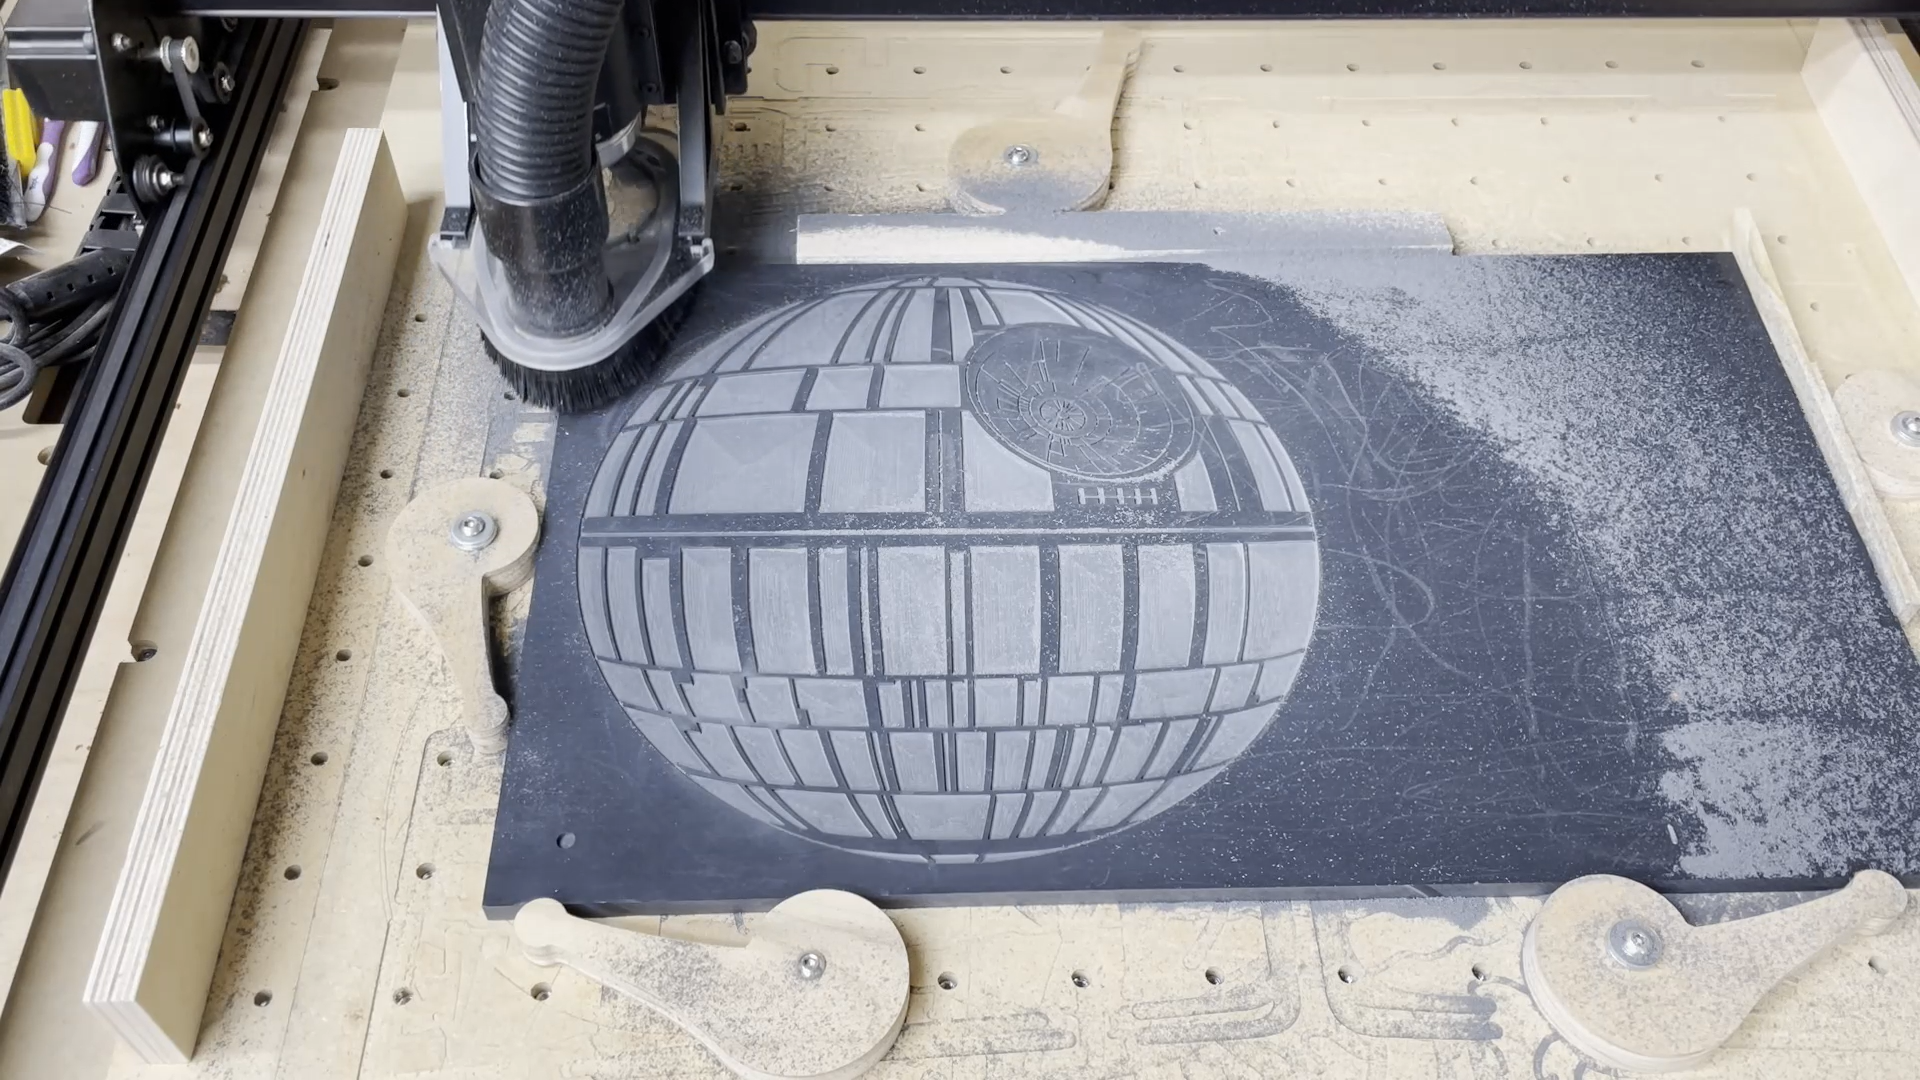
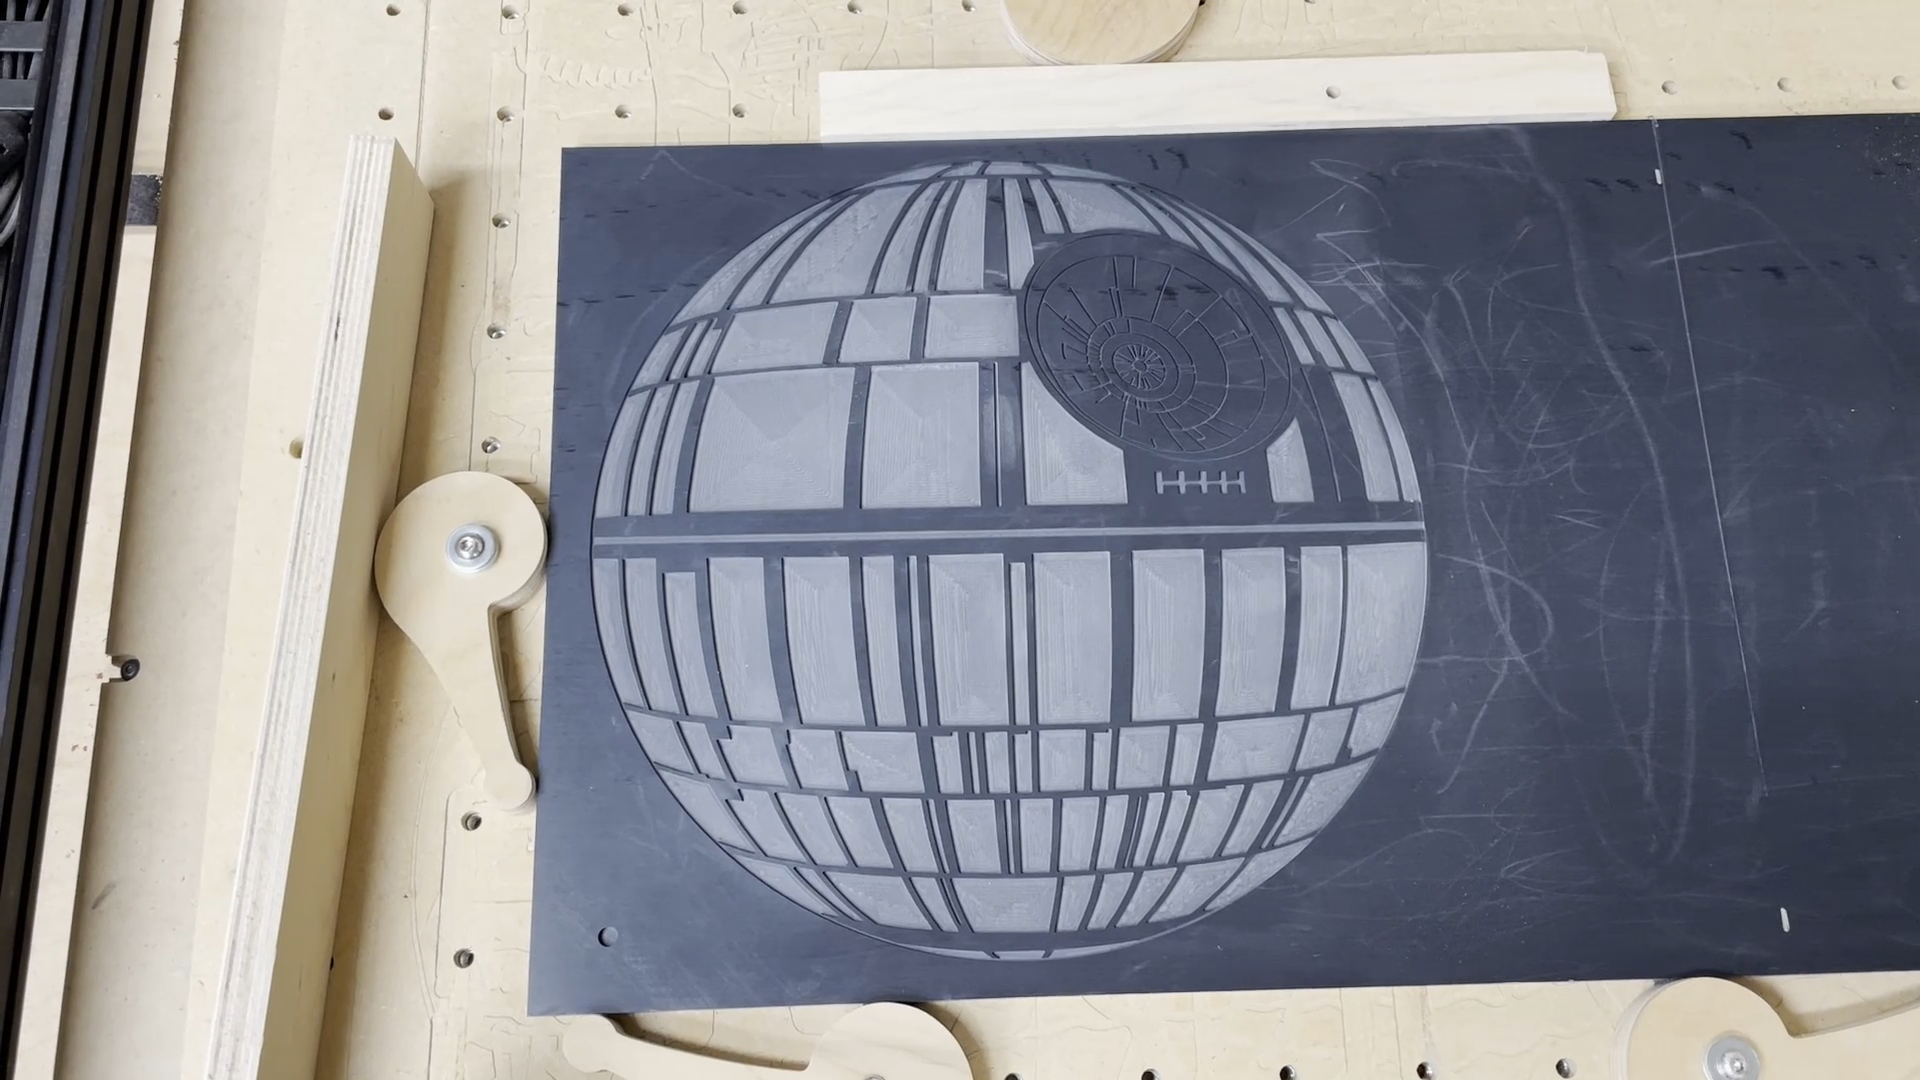
I carved the areas of the cutting board in three separate passes to break the overall carving time up into smaller section.
The roughing bit I used was a 1/8" diameter upcutting bit.
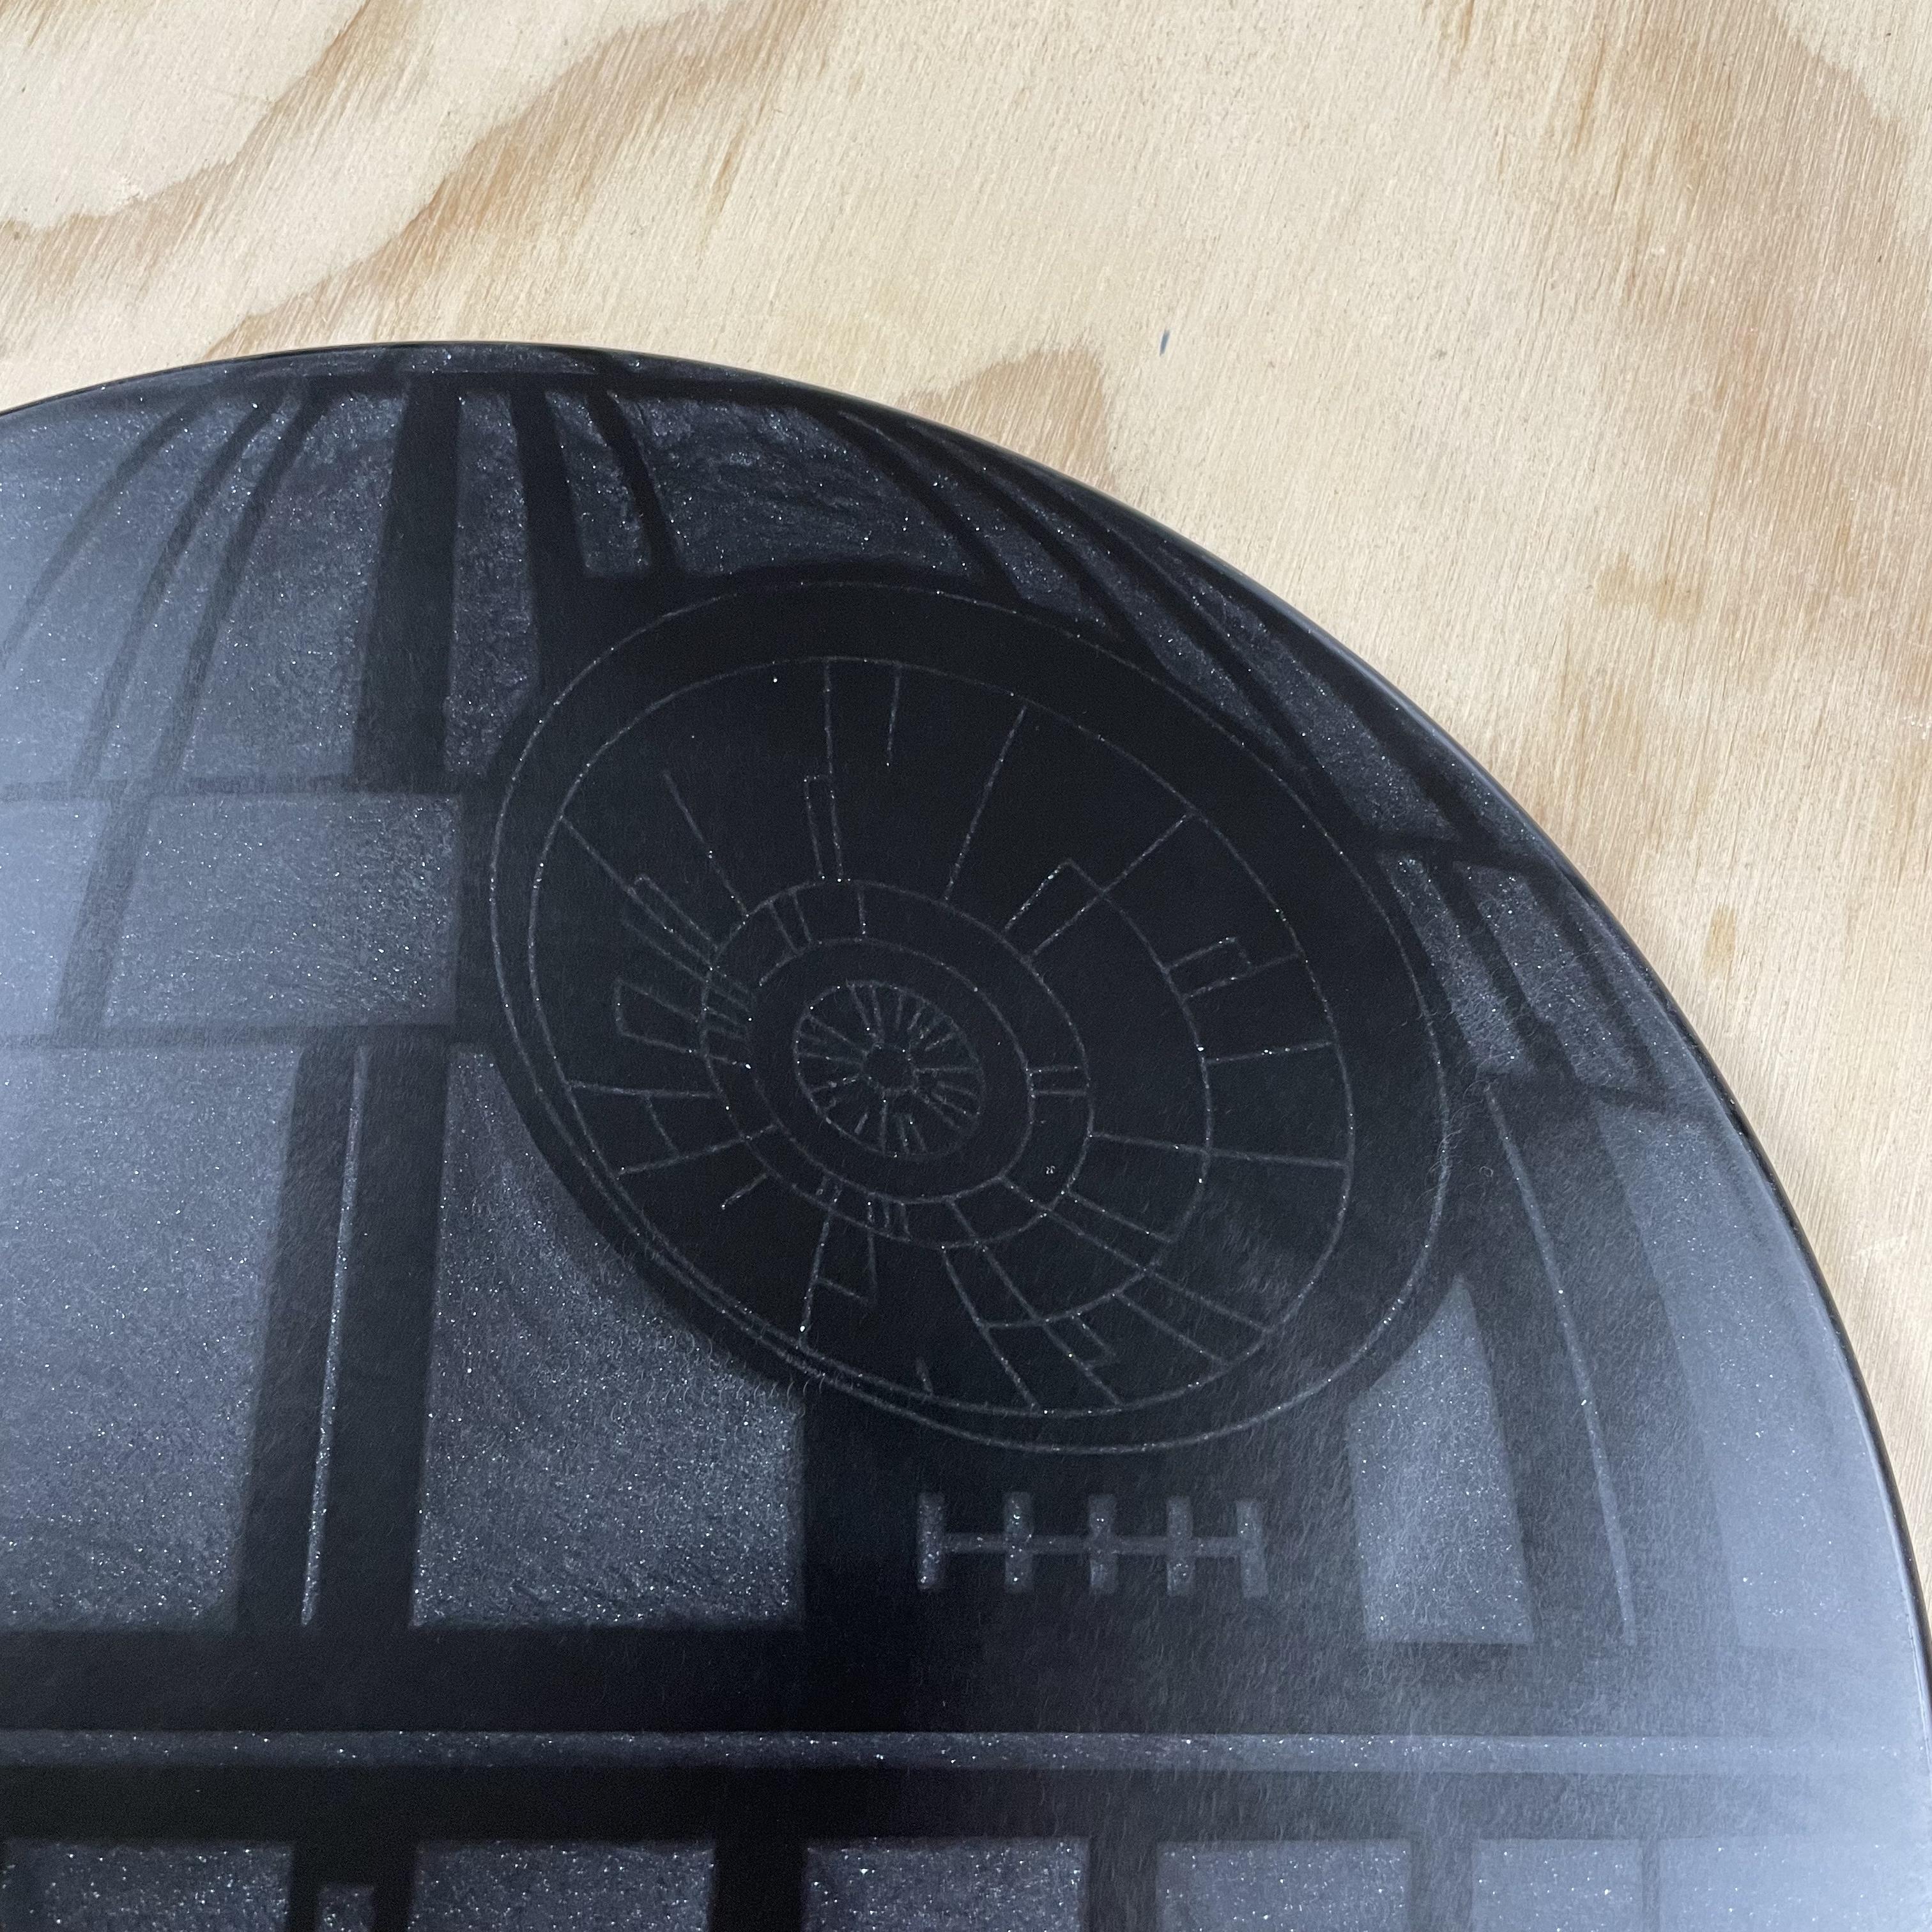
The detail bit I used was a 1/32" diameter upcutting bit.
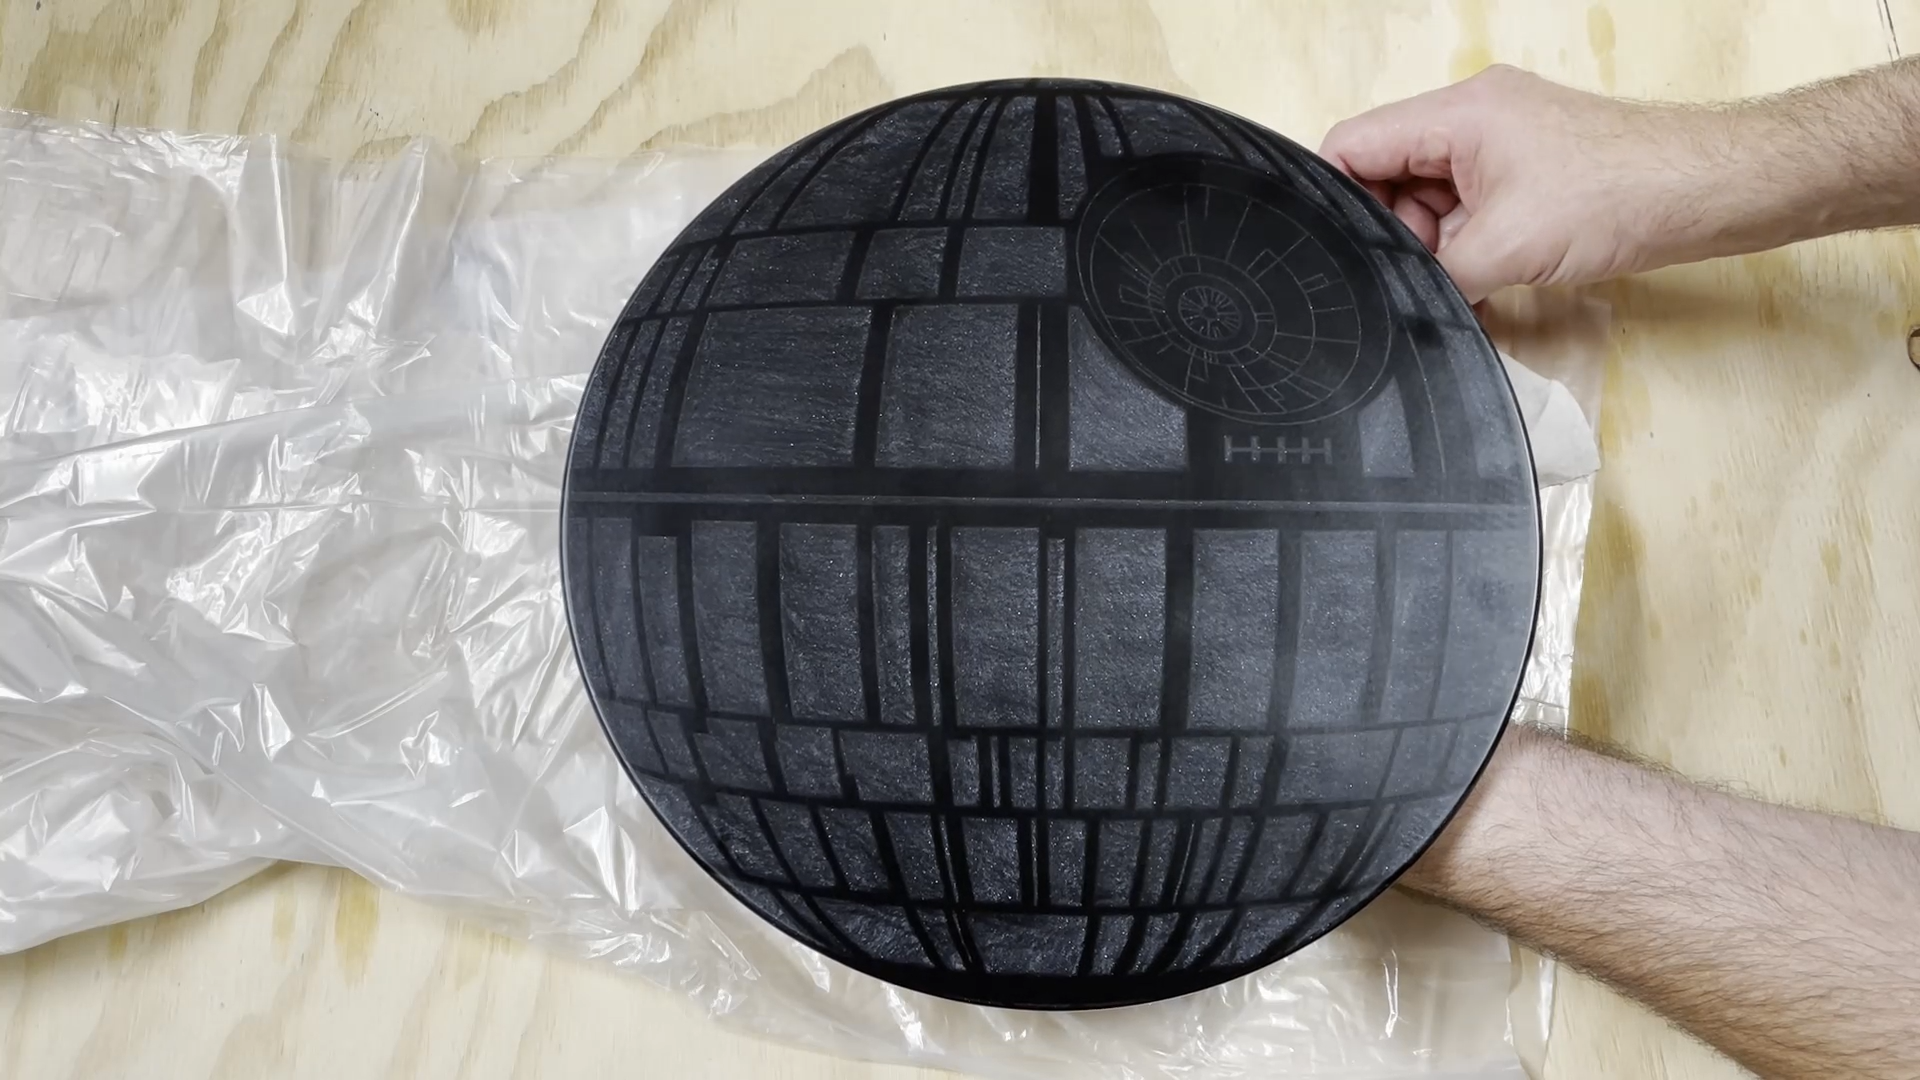
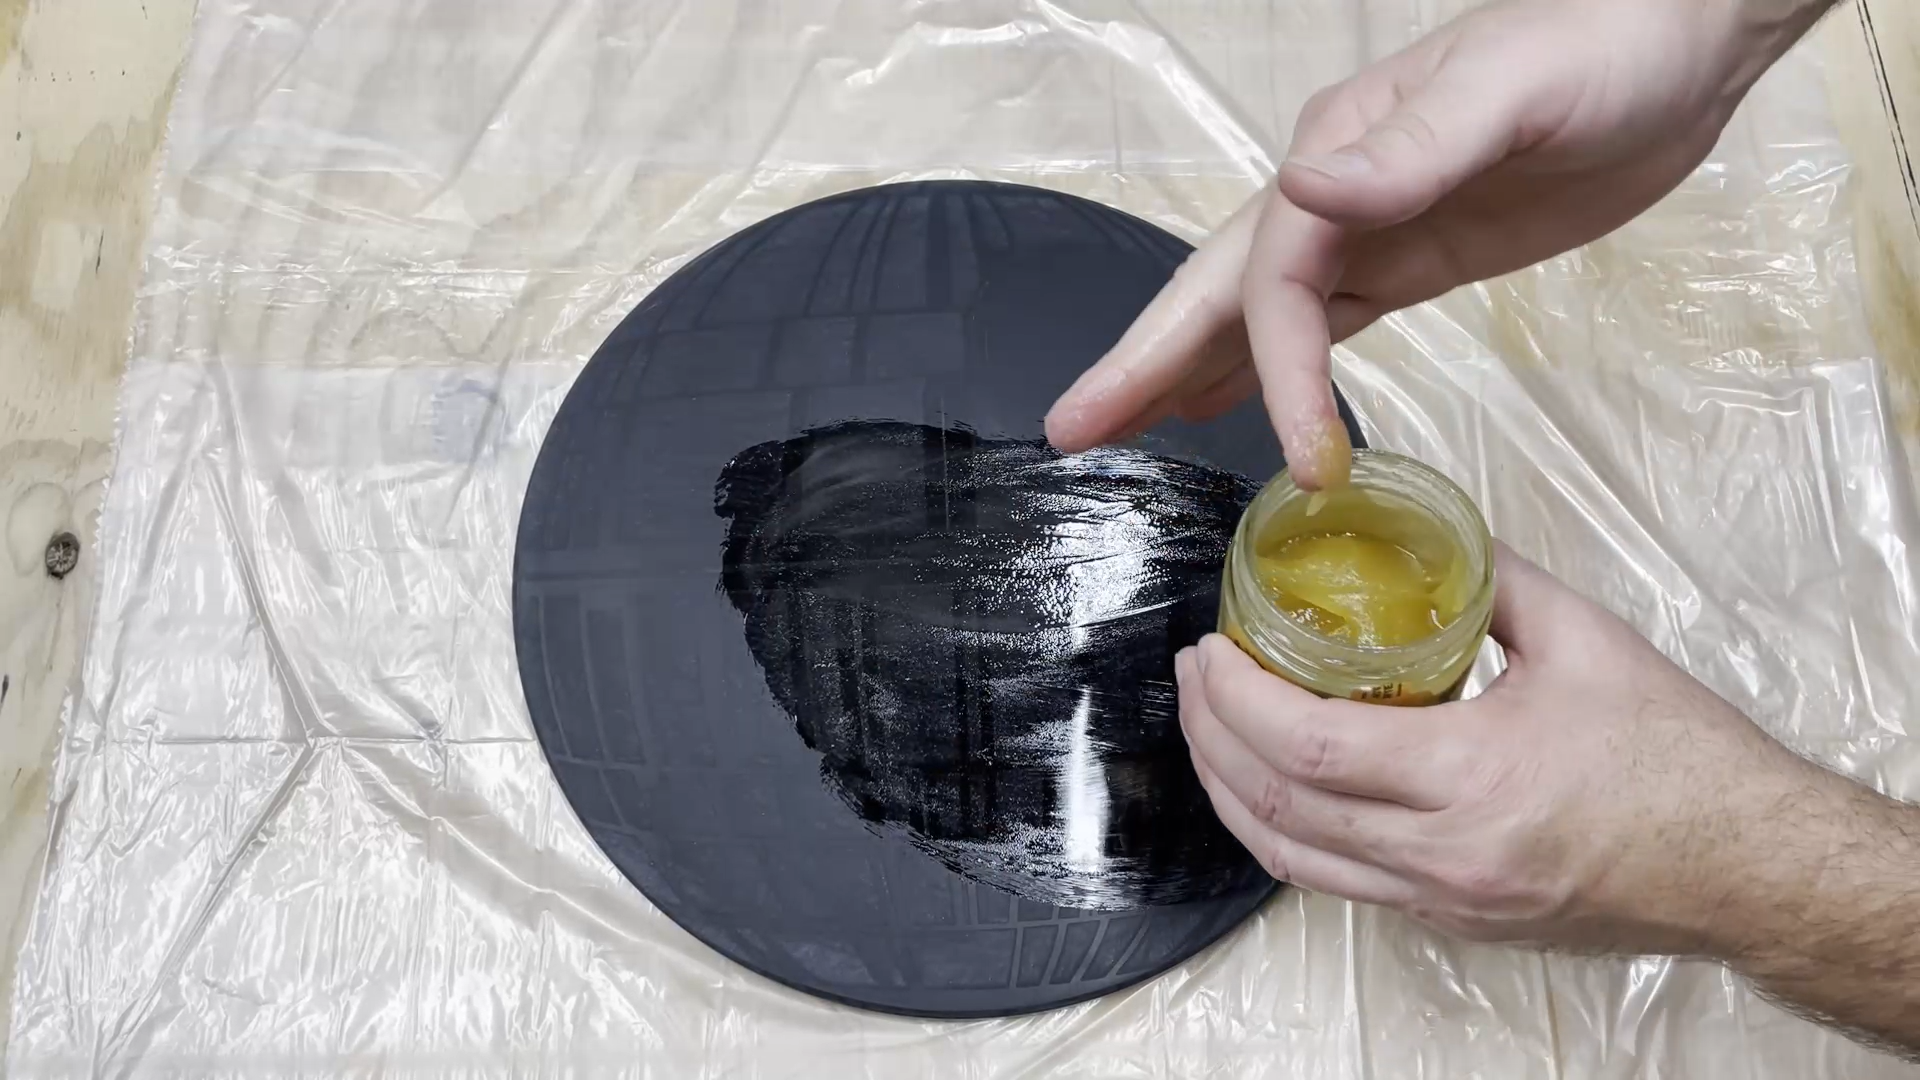
Add Epoxy

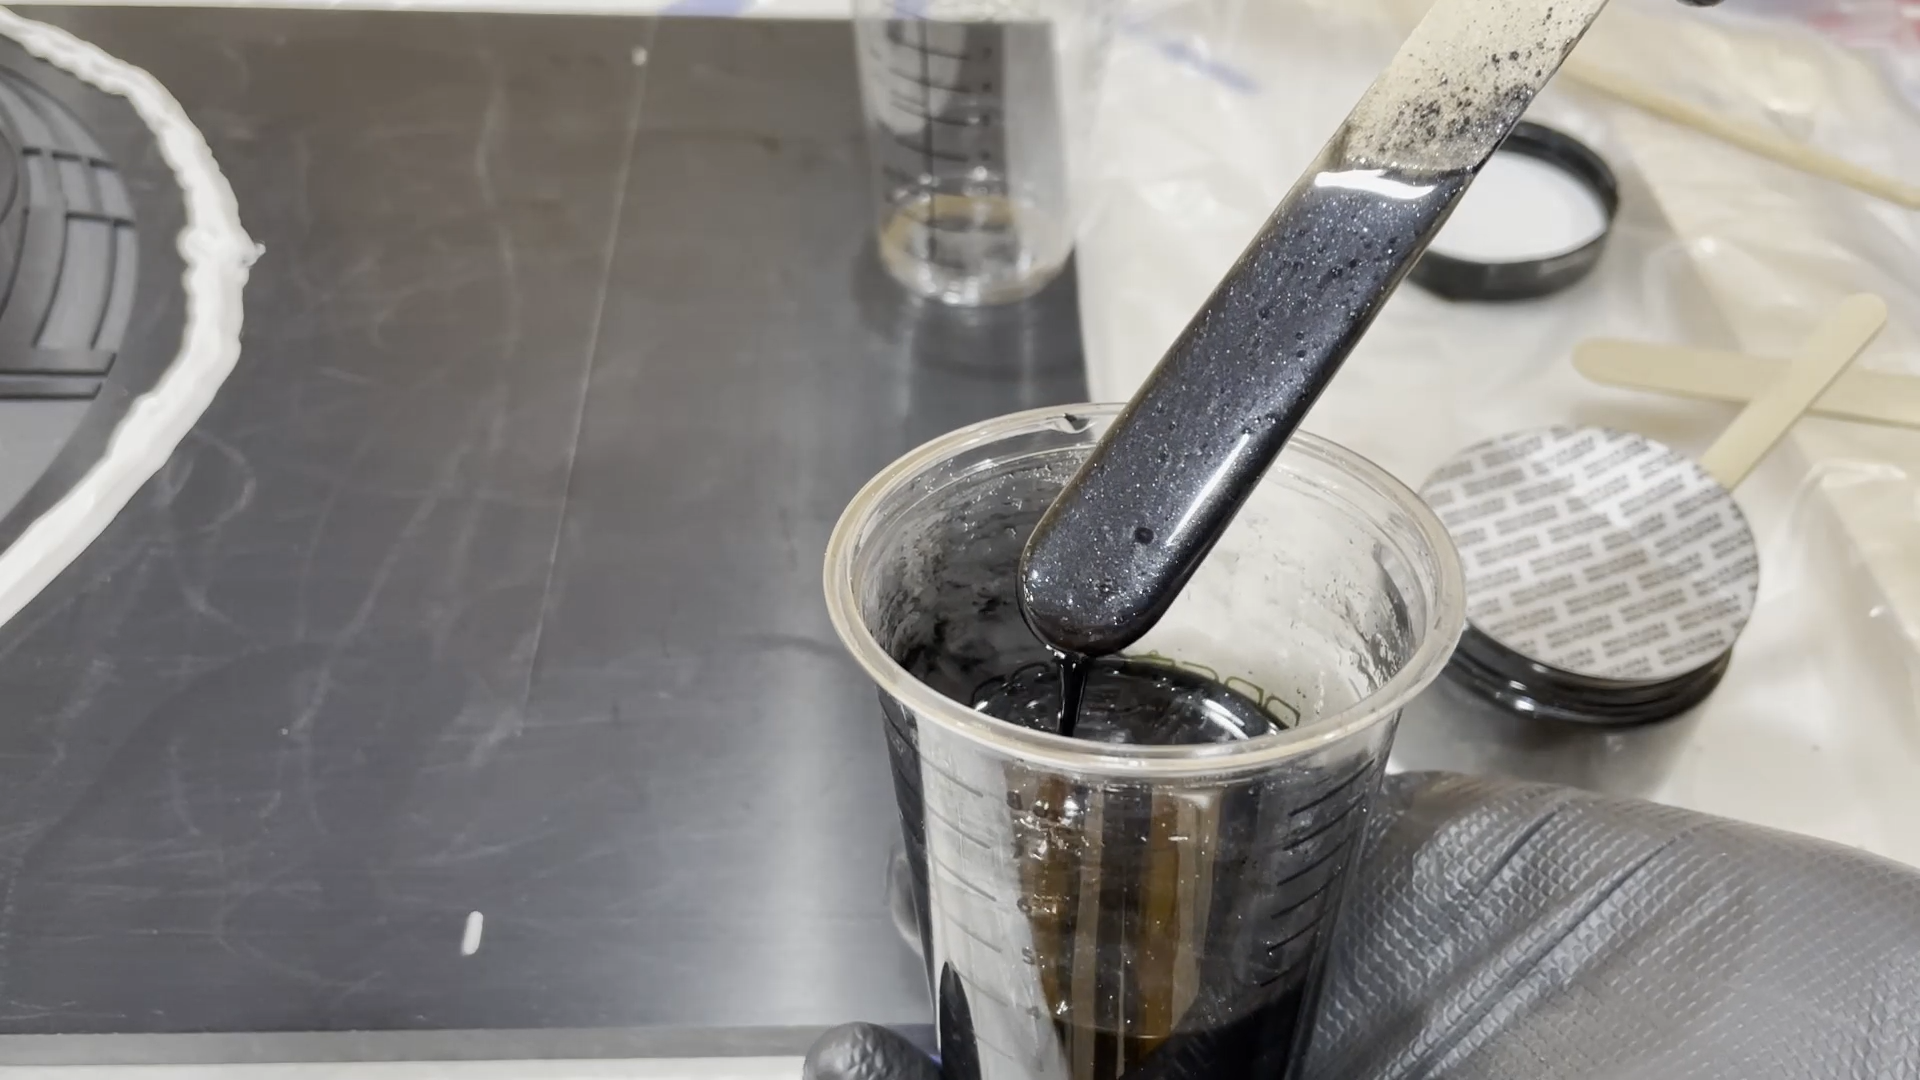
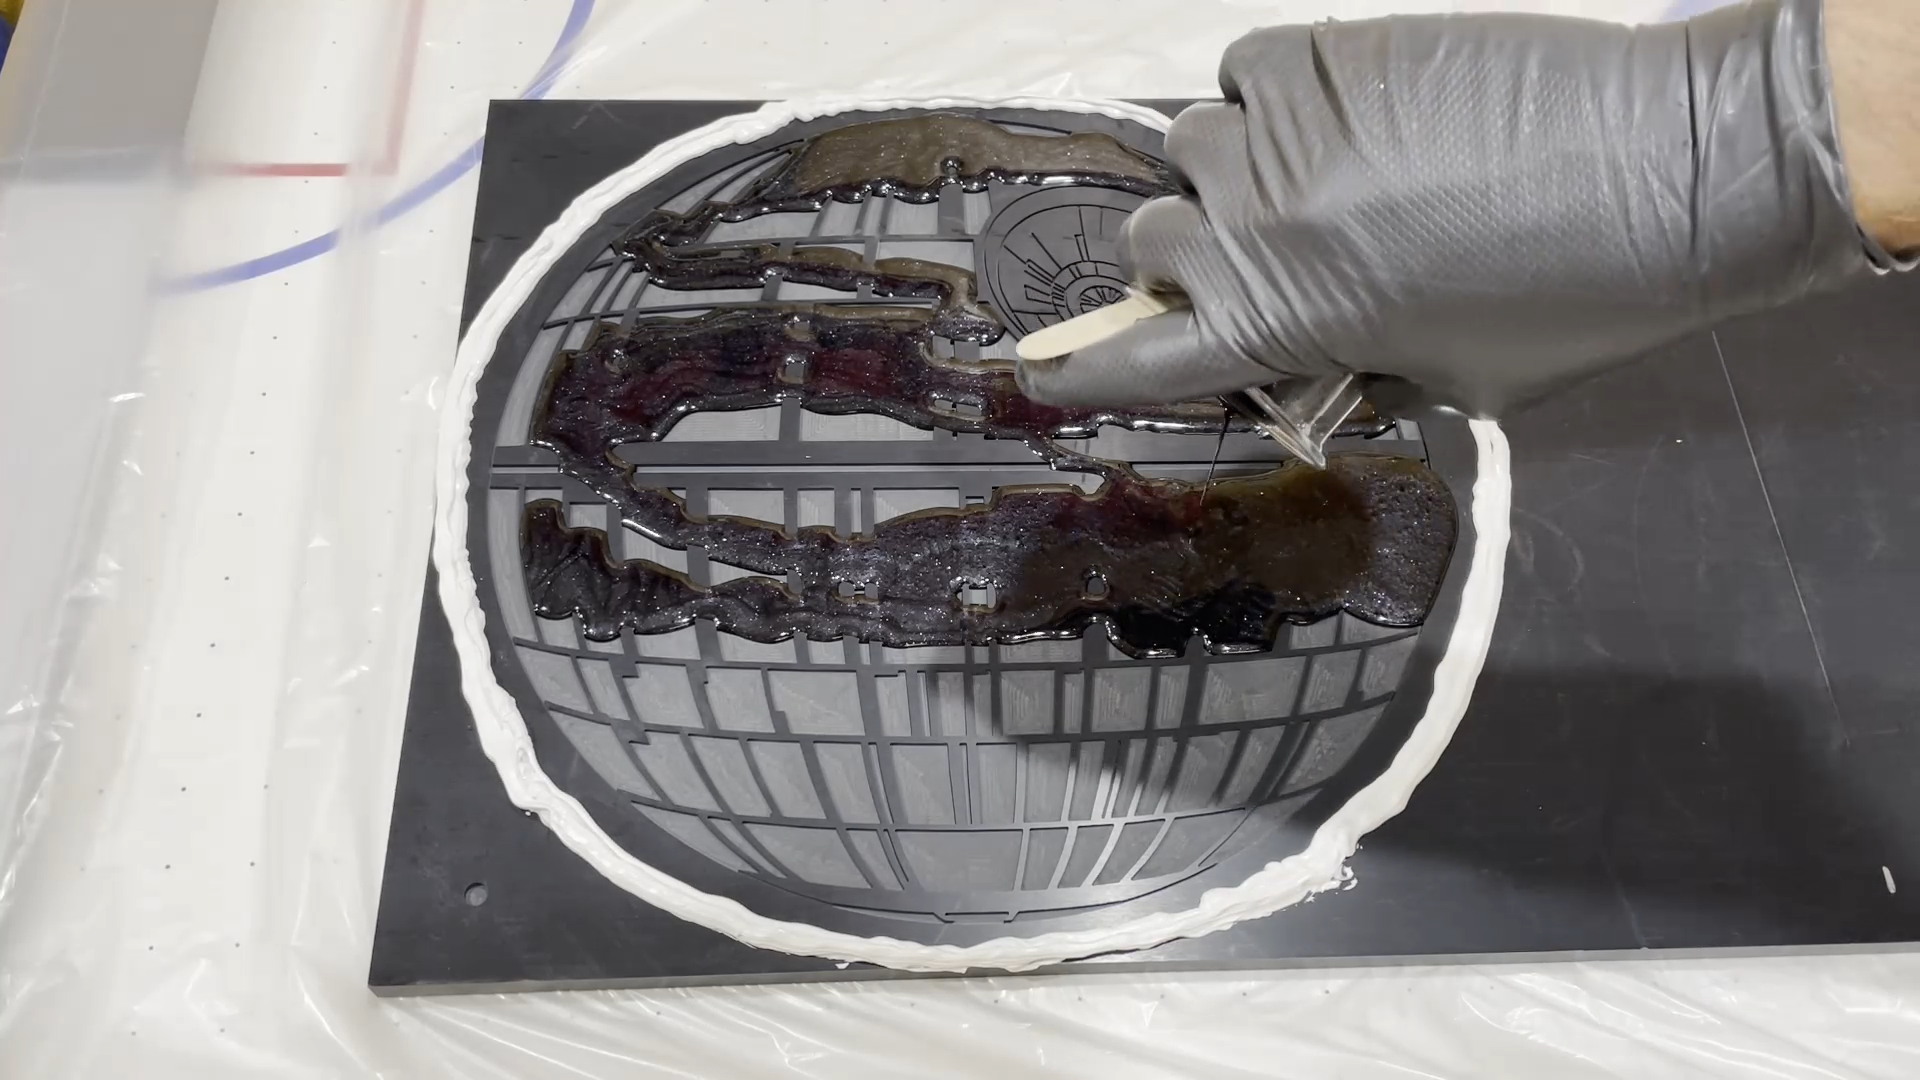
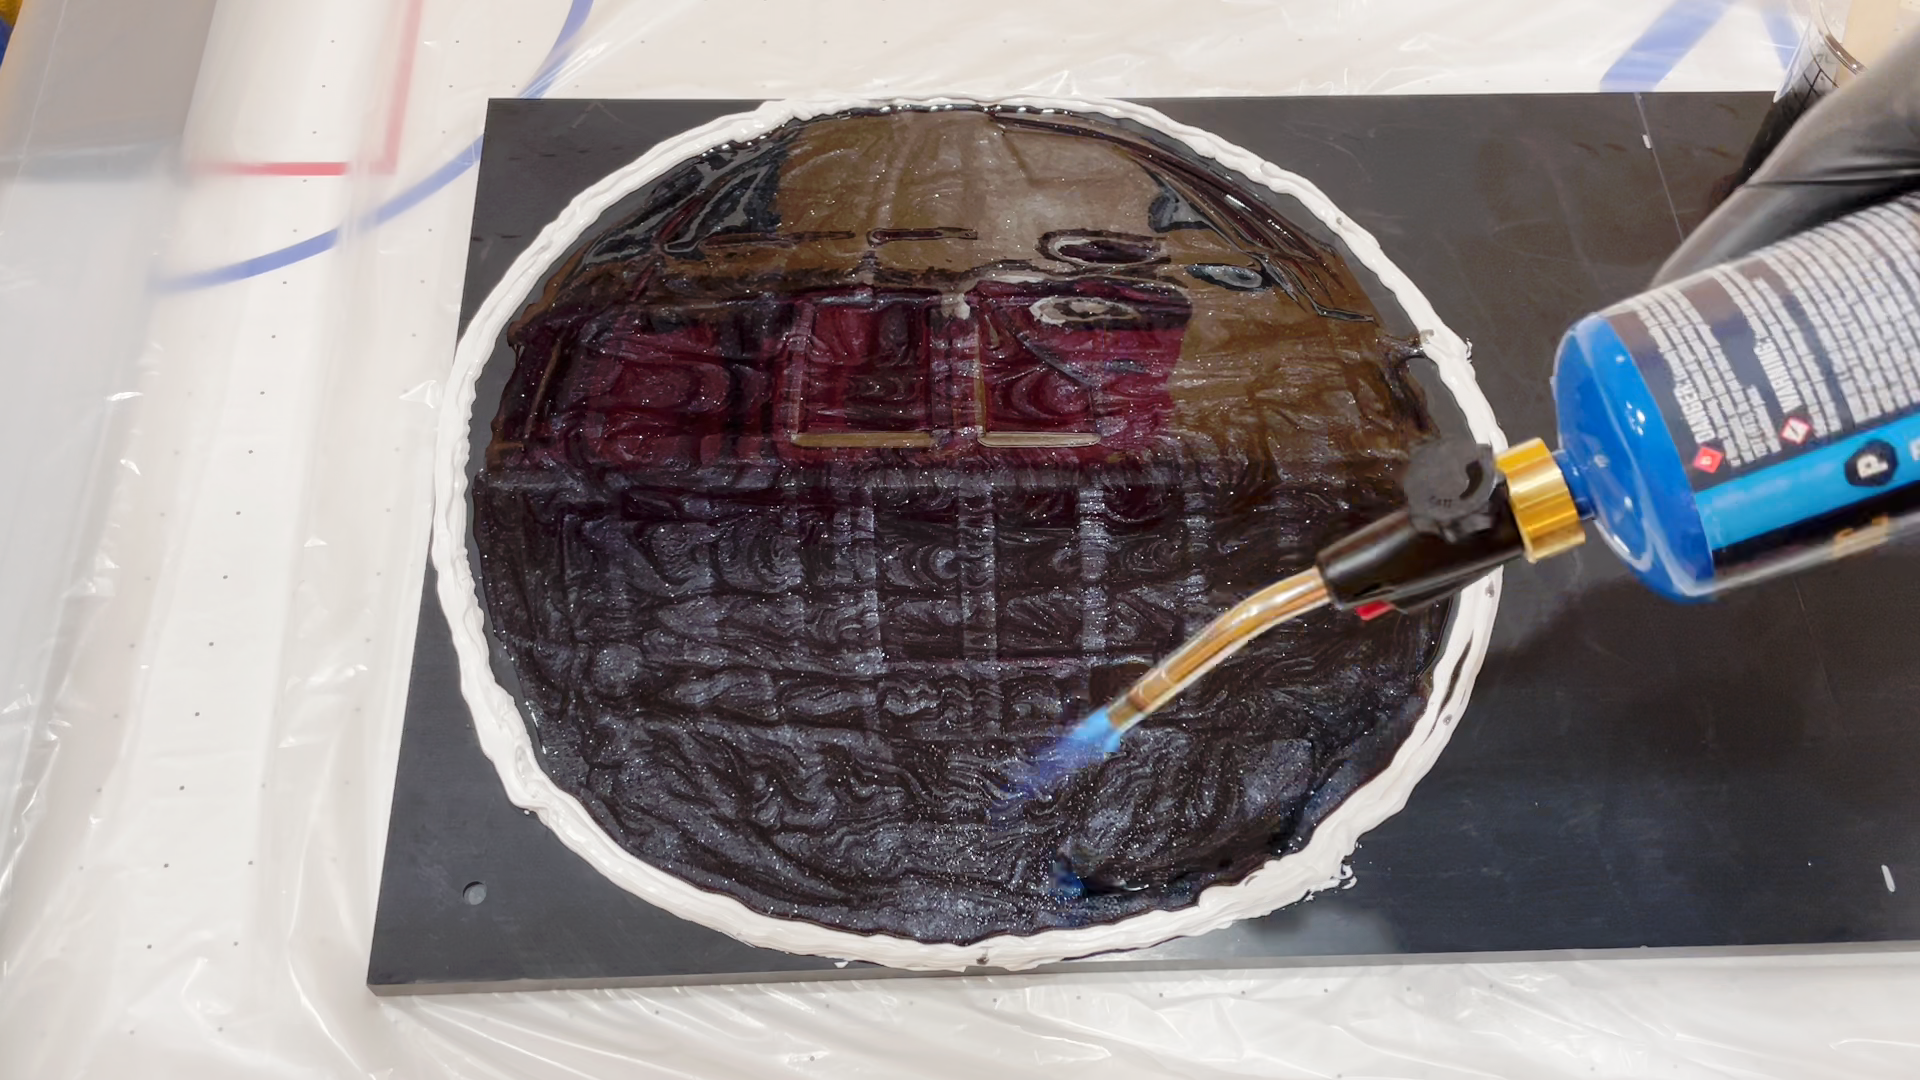
The epoxy I used for this was Totalboat High Performance with medium set time. I also used Black Diamond Pigments Black Onyx powder to tint the epoxy. This pigment has mica flakes and adds a little sparkle to the epoxy.
Flatten the Top
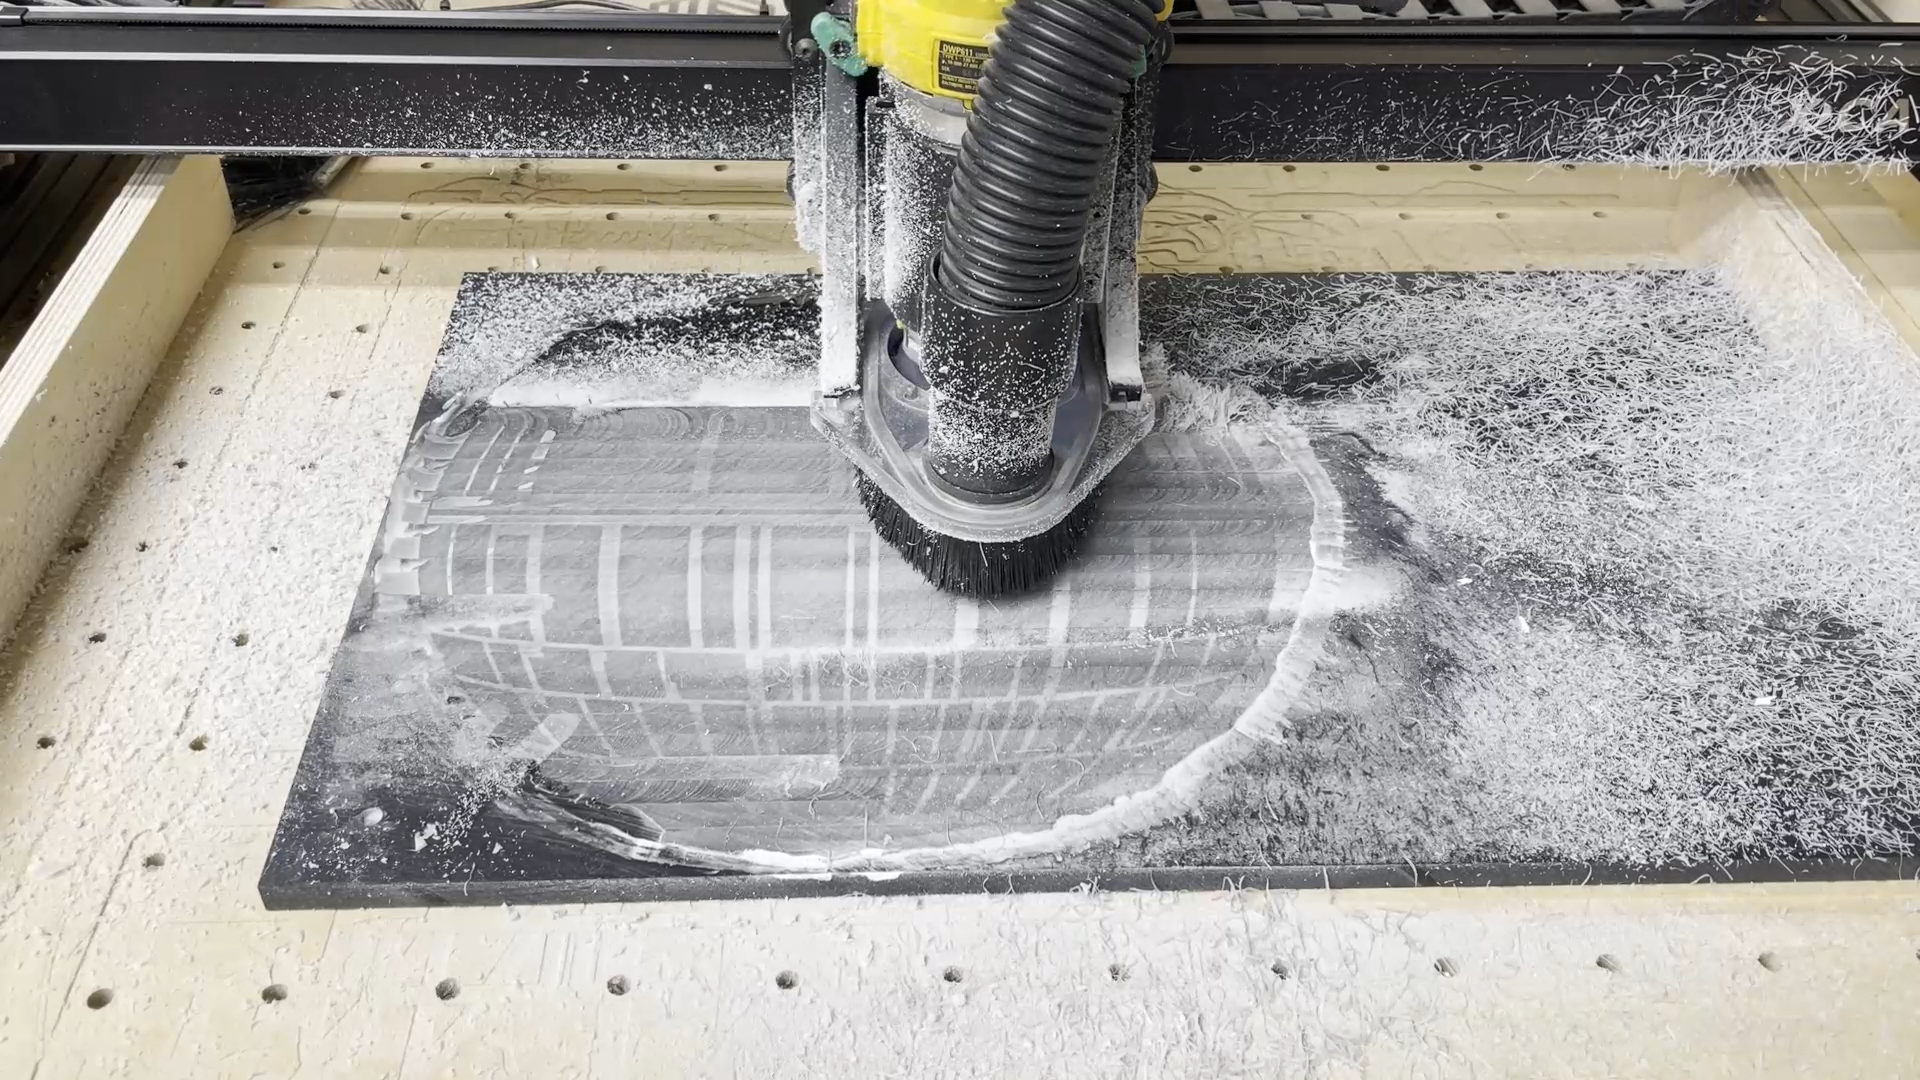
Using the flattening bit I set the zero height of the surface to what I thought was a relatively high spot on the surface of the epoxy covered area.
I then flattened this area using a Z elevation change of 0.01" per layer.
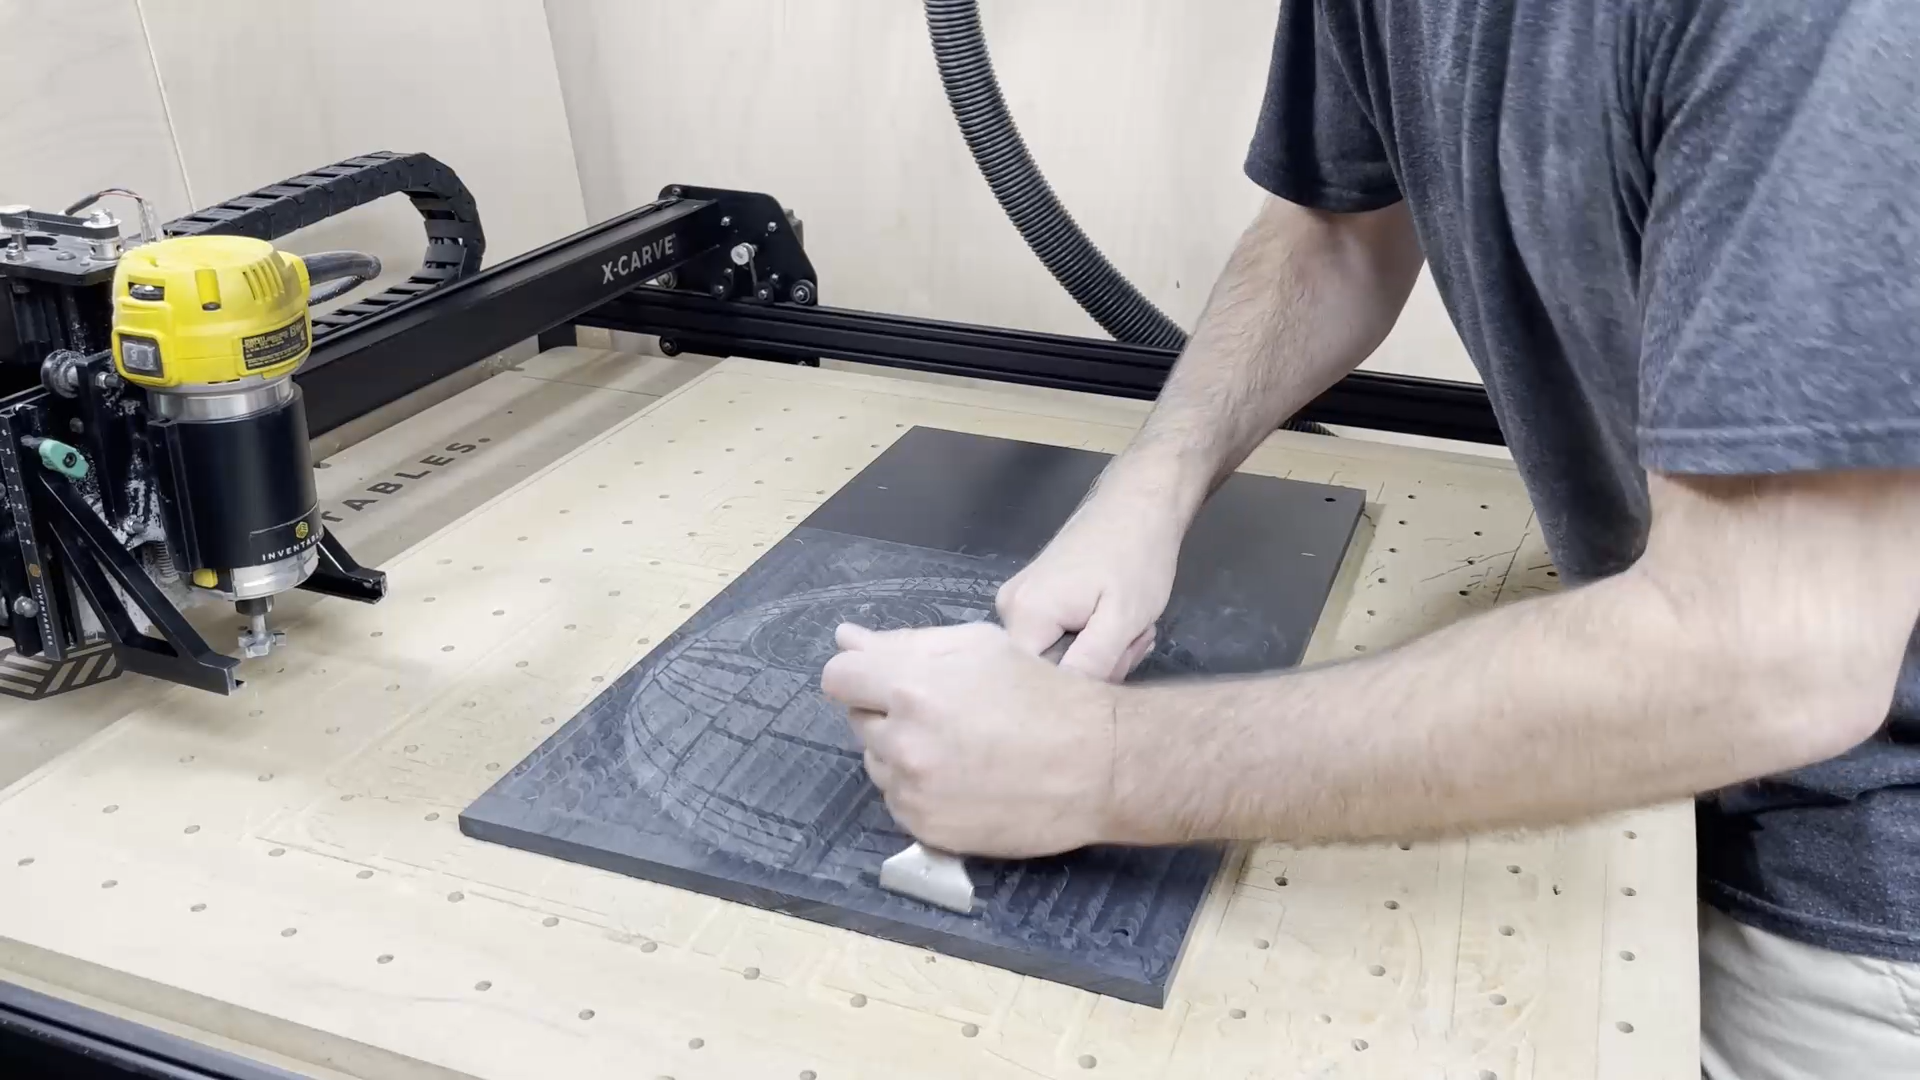
After flattening with the CNC I then used a hand scraper to take out the router marks.
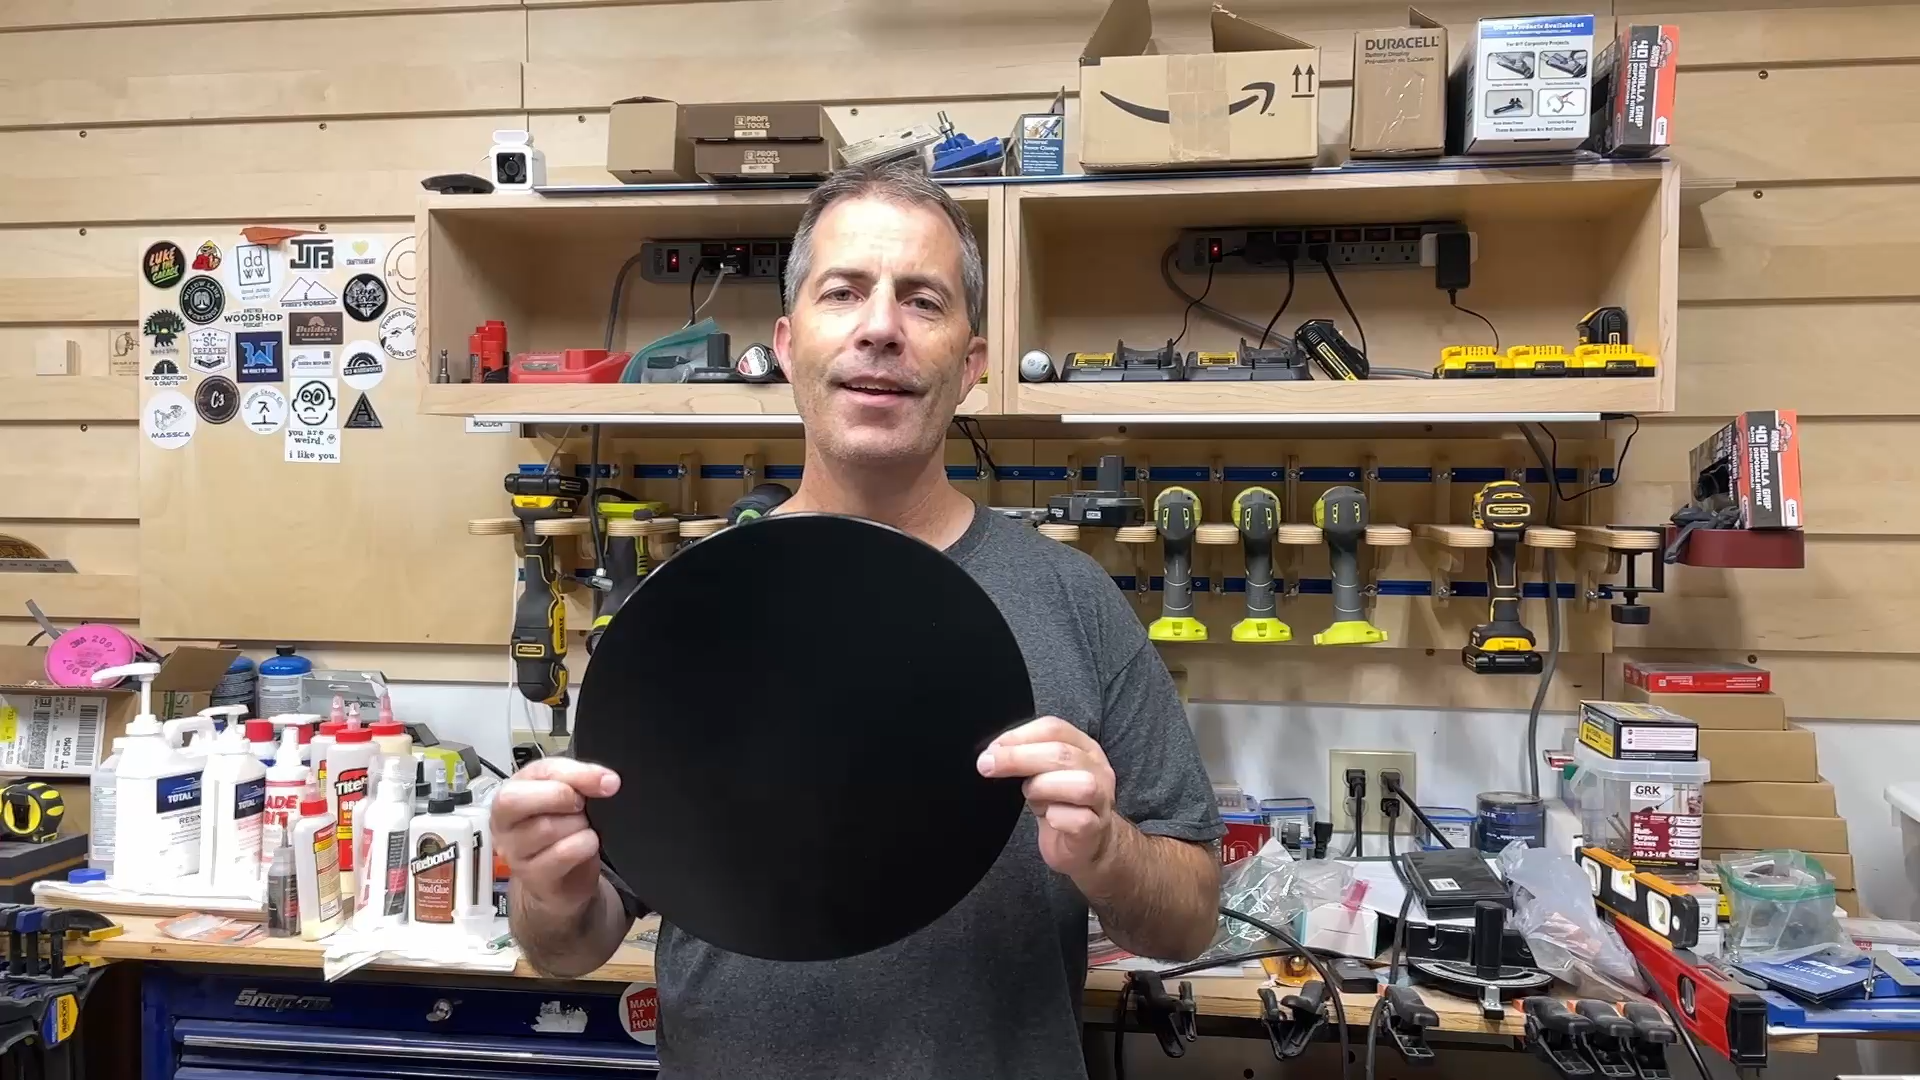
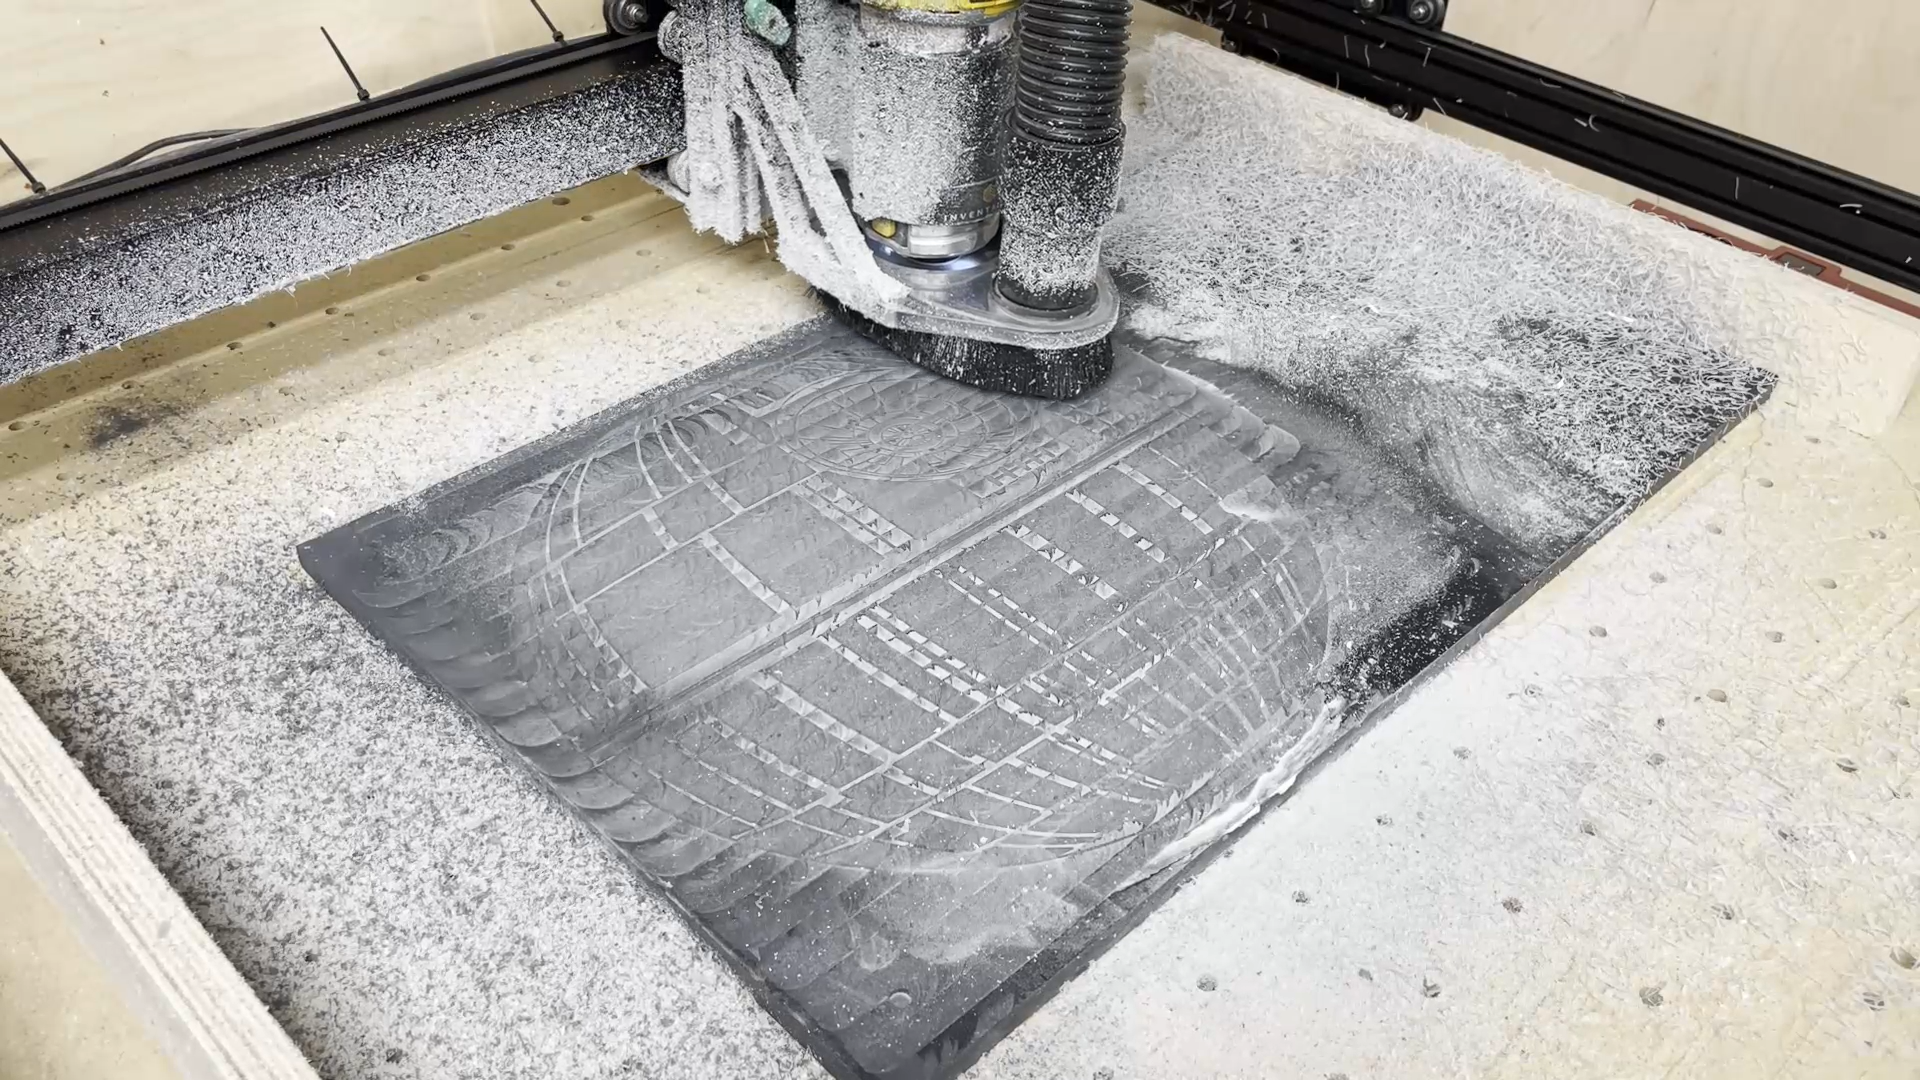
Cut the Outline and Roundover the Edges
Use a 1/4" upcutting bit to cut the outline of the Death Star. I would recommend using the recomended cut setting from the Easel software.
I used a 1/8" radius roundover bit with a guide bearing to round over the edges of the solid surface material. This was done on the router table and only took a couple minutes.
Sand and Polish
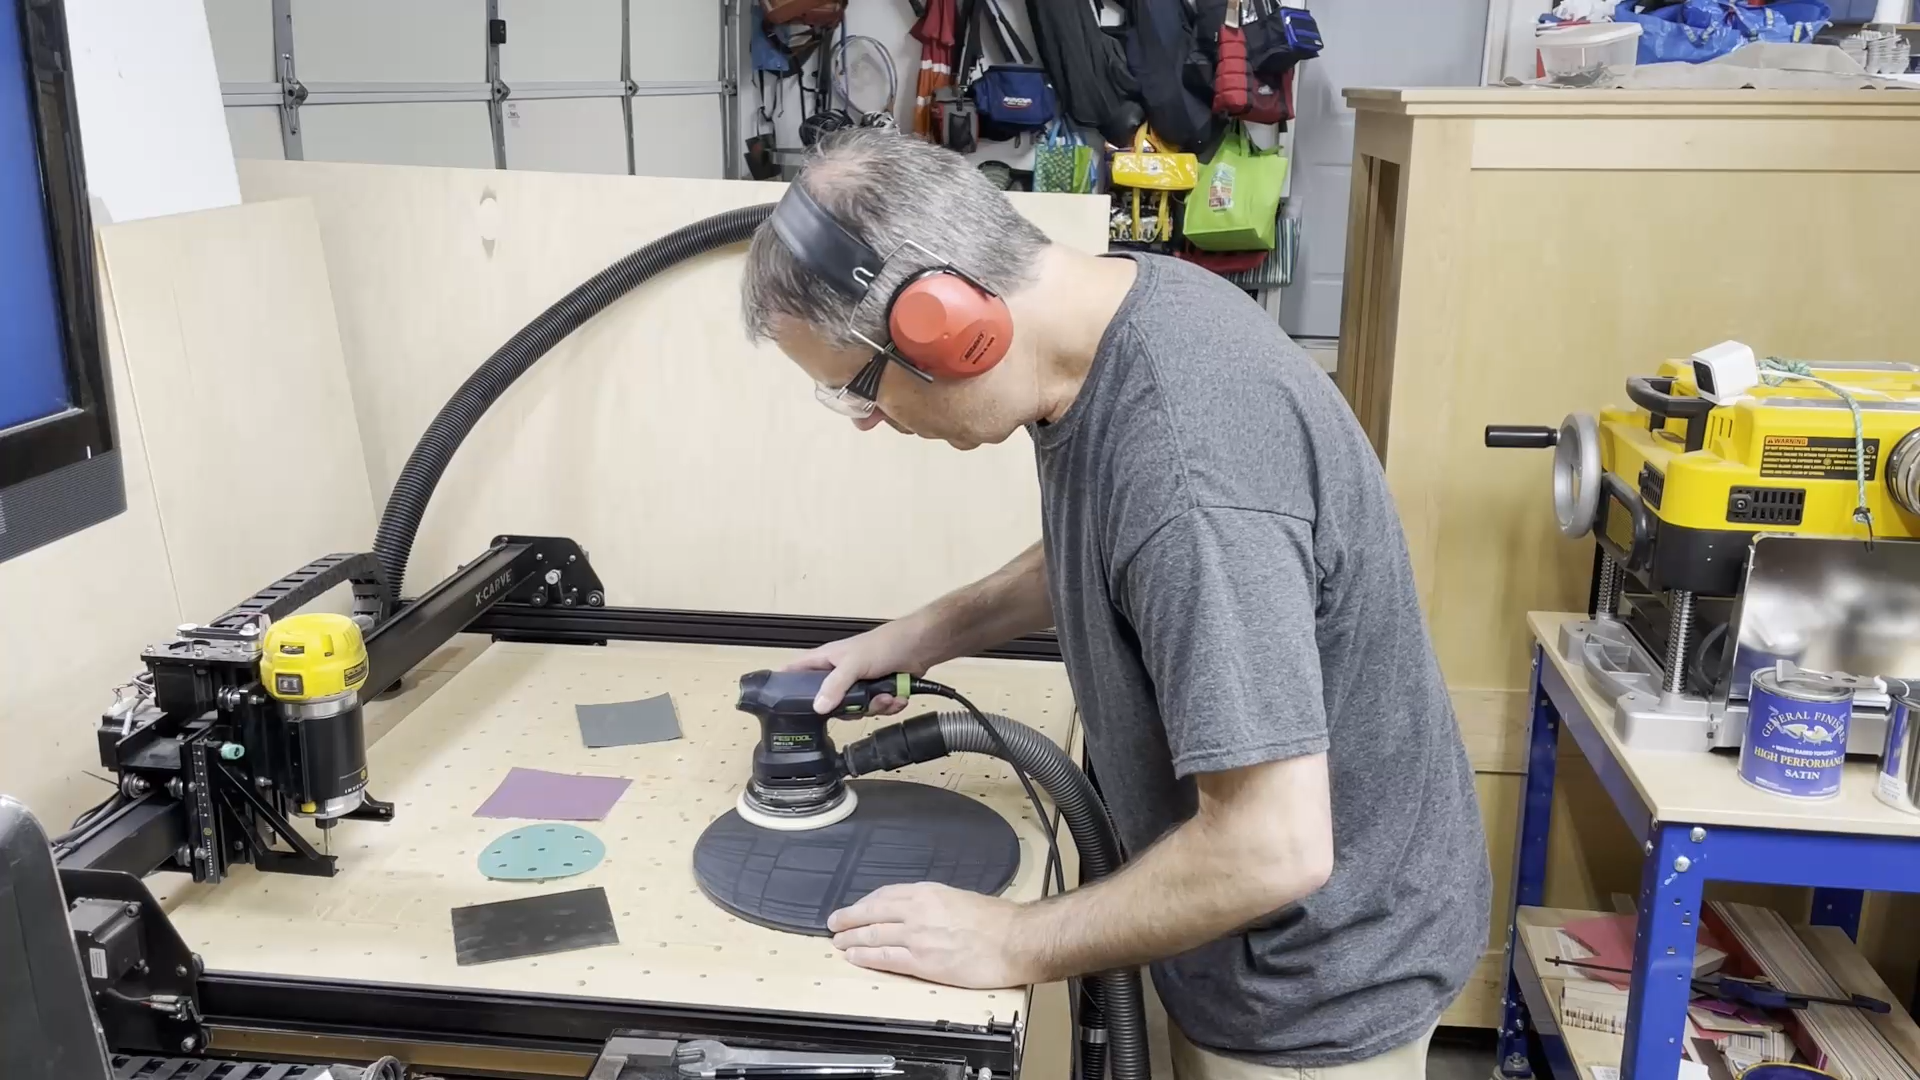

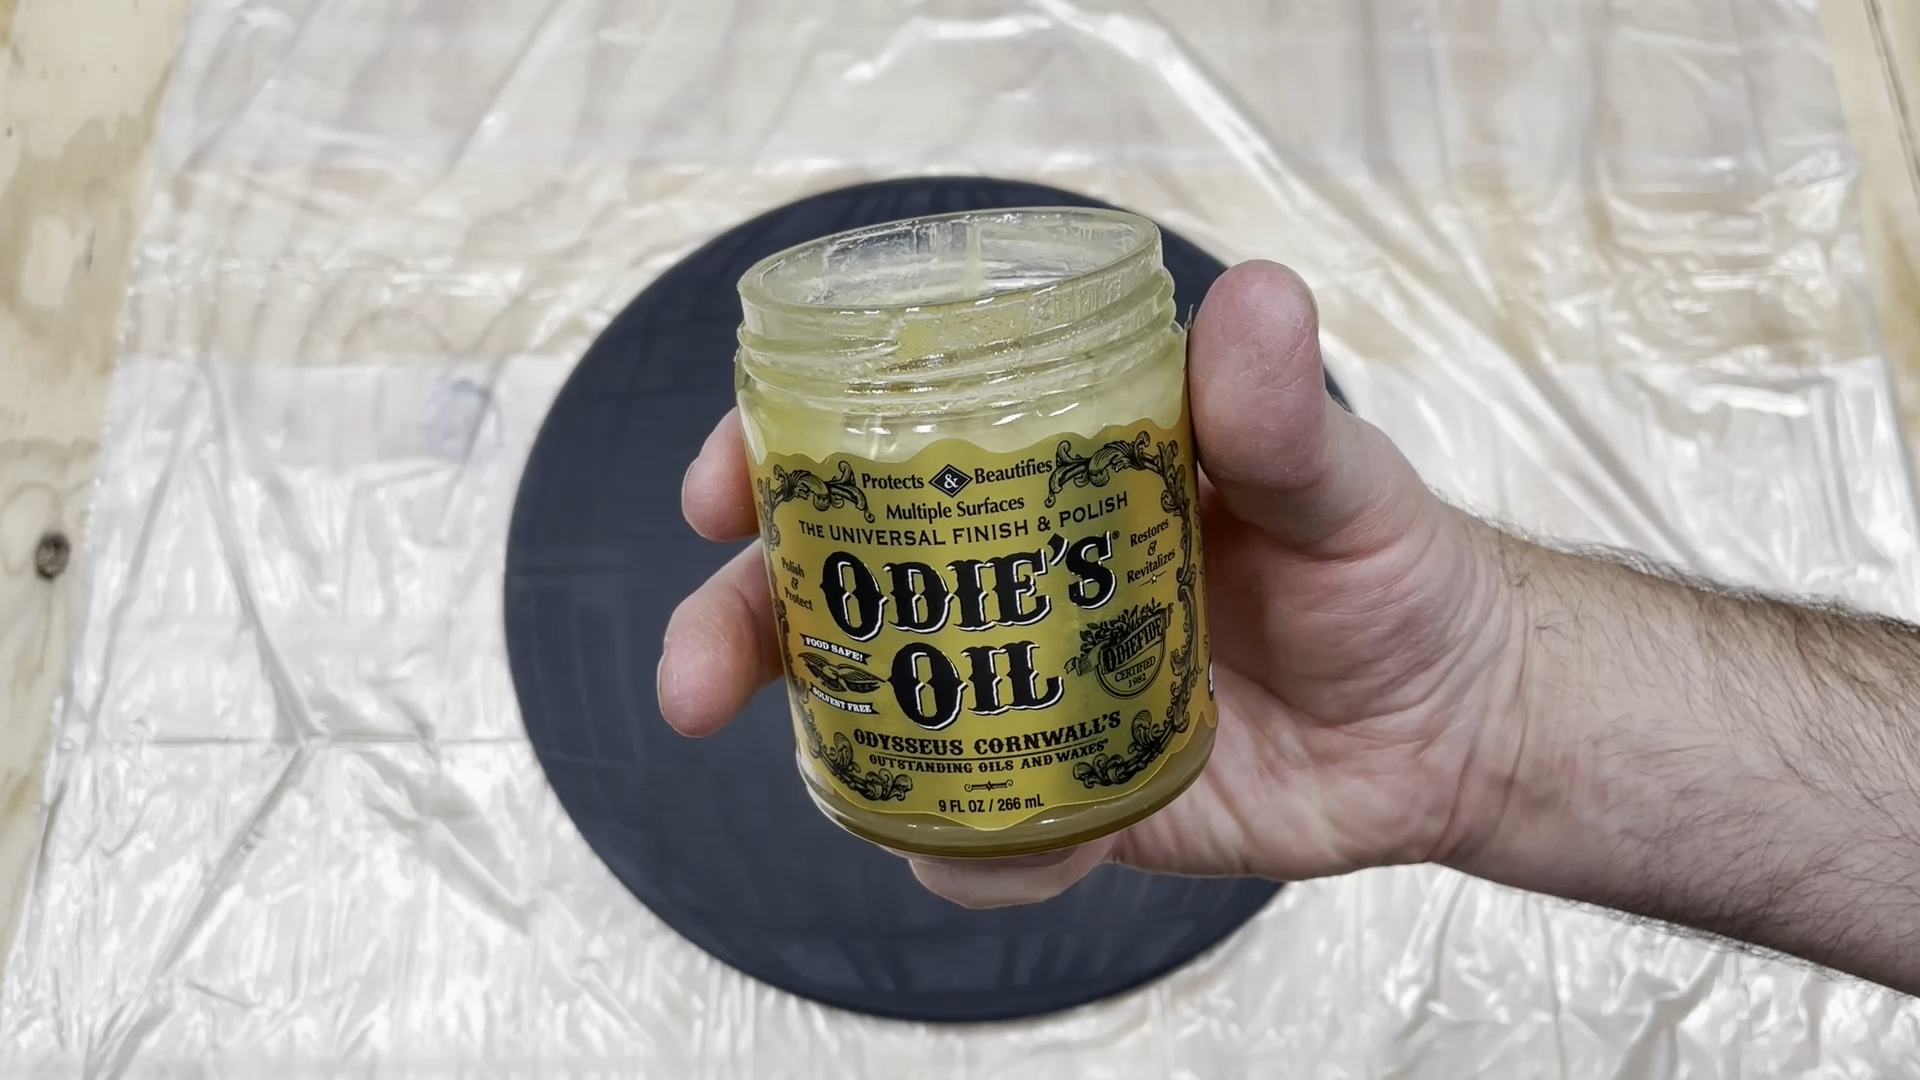
I sanded up to 1200 grit using a random orbit sander. You can probably go a little less than that and still get a nice finish, but I wanted this to feel like glass.
I added a coat of Odie's Oil finish to the serving board once I had everything sanded smooth. The finish is food safe and extremely easy to apply. It gives the serving board a great feel and shine.
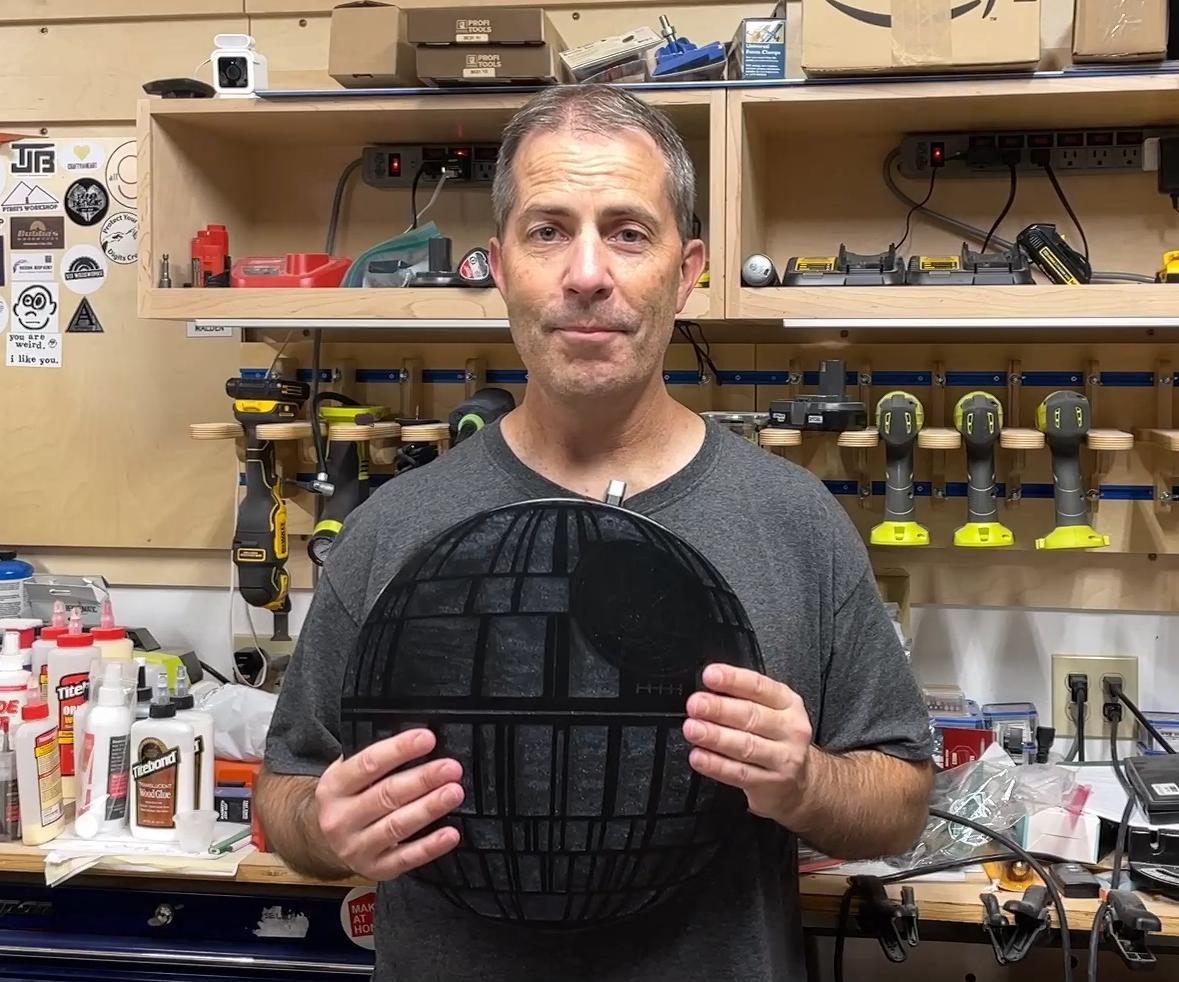
Sit Back and Enjoy What You Created
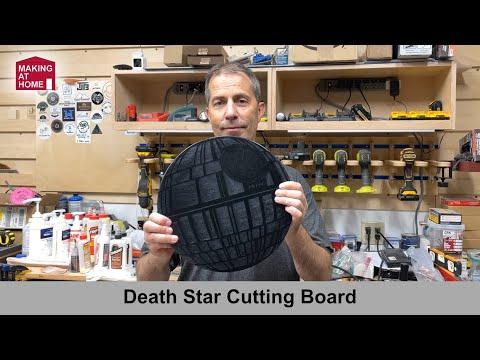
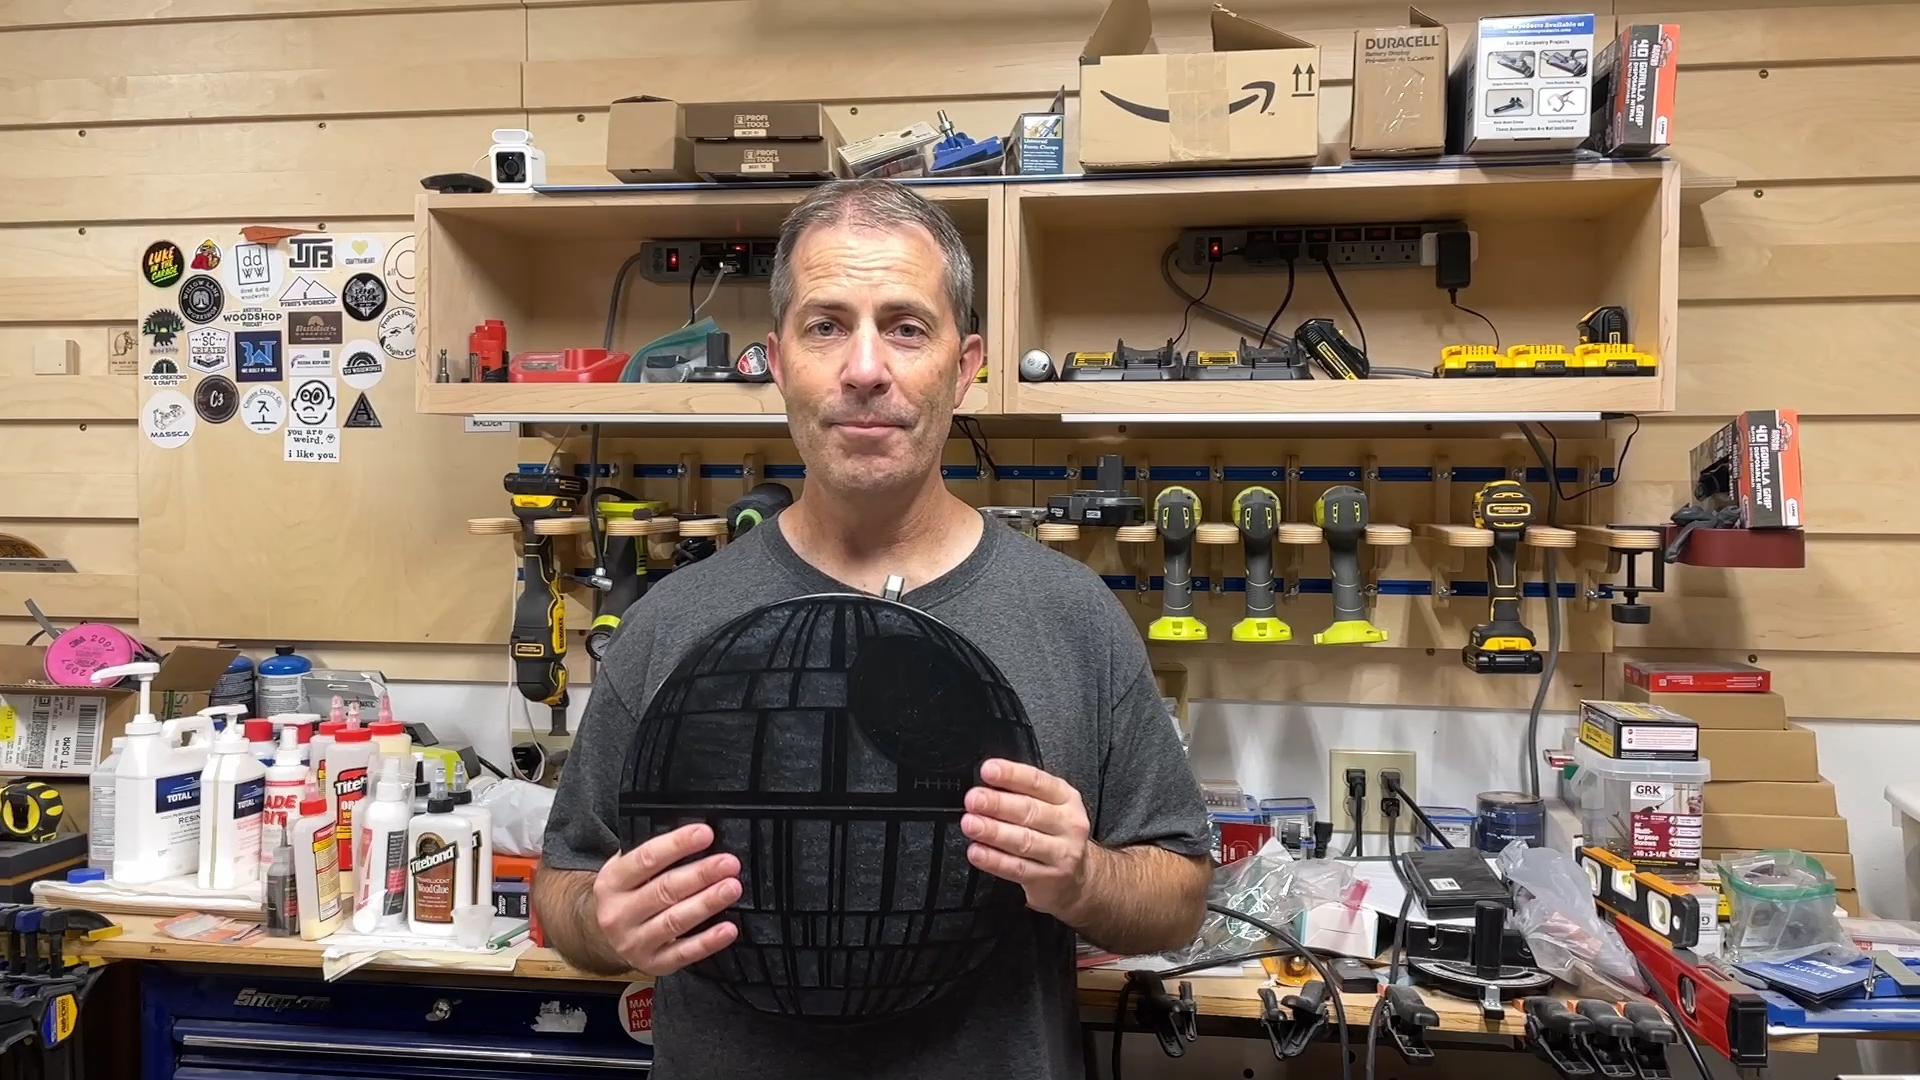
Check it out. You now have a Death Star. How many people can say that?
I really like how this turned out with the black on black appearance. I wish I would have added a little more of the pigment to get more of the mica flakes in the area of the dish. The lines here are only 1/32" across and are a little faint compared to the larger regions that were carved out and filled with epoxy.
Now I just need to find a time to use one of the most deadly weapons in the galaxy. Maybe some cheese and crackers are in order.