Dancer Tutorial
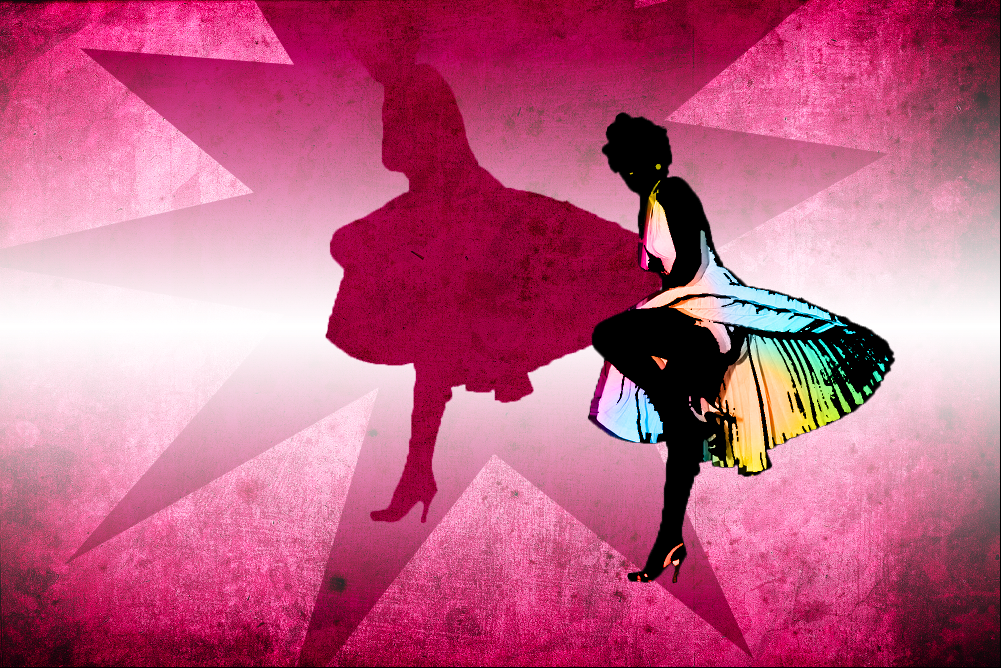
This tutorial will teach you how to make a dancer with cool lighting and color effects in Adobe Photoshop. This example was done in Adobe Photoshop CS4.
Select Images
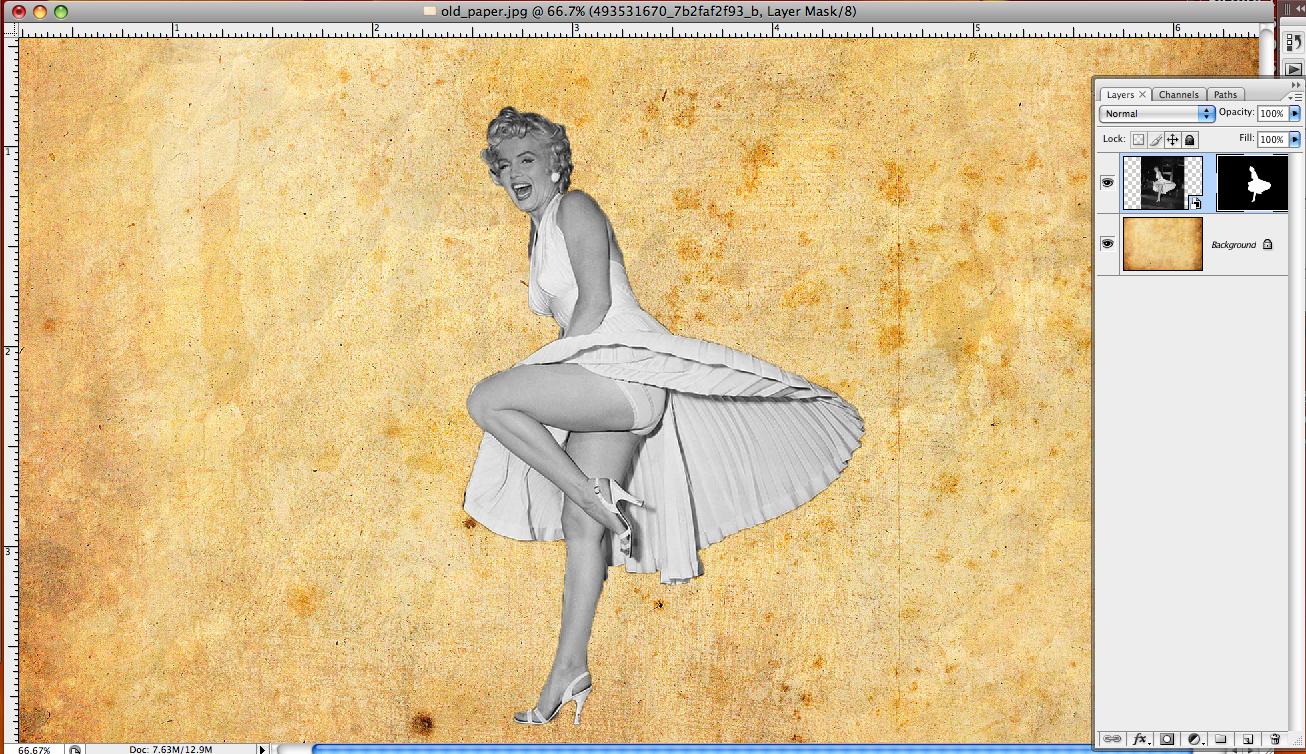
Begin by opening up a photo of the image of a person in movement; also pick a background appropriate to the relation of the photo of the moving person.
I chose an old paper background and changed the color to a maroon color to fit the overall mood of the developing picture.
I chose an old paper background and changed the color to a maroon color to fit the overall mood of the developing picture.
Insert Person

Open up the picture of the moving person, in this case Marilyn Monroe. After opening up the document. Select the black arrow and drag the photo onto the background.
Mask the Background

Mask the background out: Click on the magic selection to select the person. After the image is selected click on the masking button on the bottom of the layers palette that looks like a triangle with a square on it.
Position the Person

Position the picture to the right side. Click on the move tool from the toolbar and move the picture to the middle right of the canvas.
Posterize
Now we need to create a posterized effect. Before we accomplish that we need to duplicate the layer. Once that is done click on the thumbnail of the layer mask then drag it to the trash.
Clipping Mask
Click on Layer up at the top of your toolbar selection and Select> Create Clipping Mask. This is so the current layer to be transparent from the layer below.
Threshold
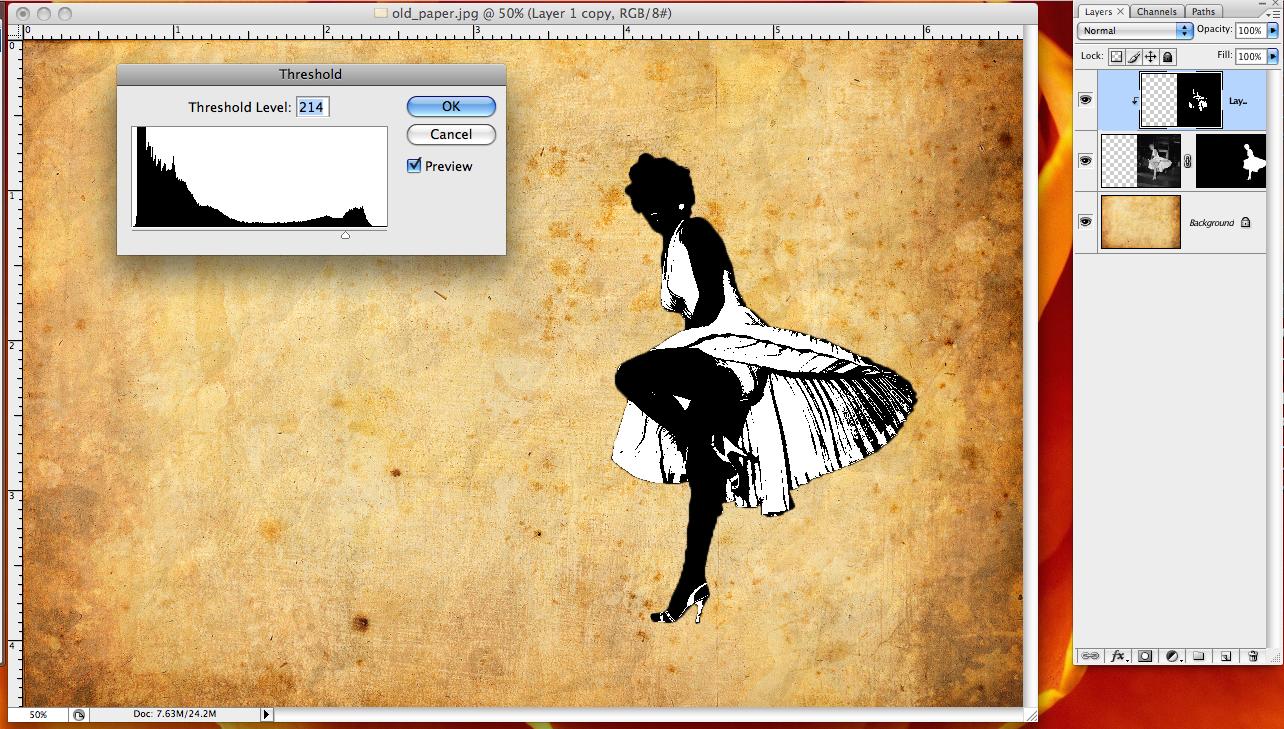
Now that we have set ourselves up we can apply the effect. Go to Image> Adjustments>Threshold. Scroll up and to get the image to be what you desire and press okay. To make the edges smoother we need to go to the Filter>Noise>Median and fix the adjustments like the image below.
Change Blending Mode
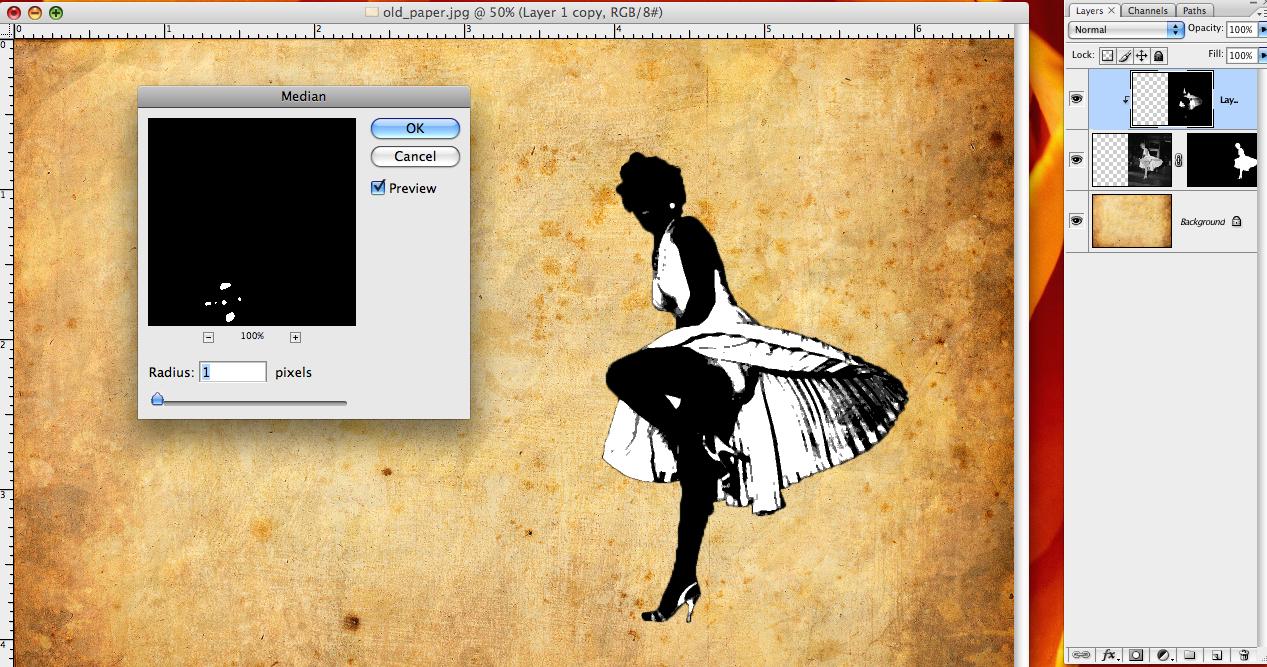
In the layers palette, change the blending mode of the current layer to multiply.
Create a new layer and change the blending mode to COLOR. Then go to Layer> Create Clipping Mask.
Create a new layer and change the blending mode to COLOR. Then go to Layer> Create Clipping Mask.
CMYK Swatches
Next, have your swatches palette in your work area. Click on Window> Swatches. In the palette click on the fly out menu and select any of the PANTONE CMYK swatches.
I chose the pantone color bridge CMYK EC. I used the first three swatches.
I chose the pantone color bridge CMYK EC. I used the first three swatches.
Brush Settings
Click on your Brush tool and set the hardness to 0% and your master Diameter to 862 px. Now select your desired color and flocculate from the three to paint an assortment of colors on your image.
Creating a Spot Light
Creating a spot light. We will use a gradient fill filter. Go to layer> New fill layer> Gradient. Make sure that after painting your color of selection is white. Apply the following settings: Style> Radial. Scale> 150% Angle 90.
Create Shadow
Select the dancer from the first mask in your layer mask thumbnail. By doing this you need to hold the Ctrl key and click on the figure. Select the magic wand and click and hold in the selection and drag it to the selection. Only the selection should be moving and not the layer. You would be moving the selection to the left to mimic a shadow.
Enlarge the Shadow
In the layers palette click on the layer mask thumbnail of the gradient fill layer. Press Delete to delete the slected area. You now should have a shadow. To deselect press Ctrl + D. Now you need to enlarge the shadow by doing this you press Ctrl + T and enlarge the shadow as you wish. Press enter once done.
Gradient Settings
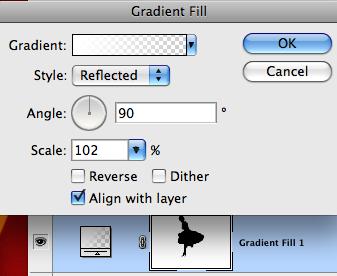
Now we need to double click the gradient fill icon in the layers palette to bring up the menu like shown below. Apply the settings that are shown.
Background Shape

Now we are going to put a shape in the background. To do this you click on your custom shape tool and at the top there is a menu click on the shape that is shown below
Finished!
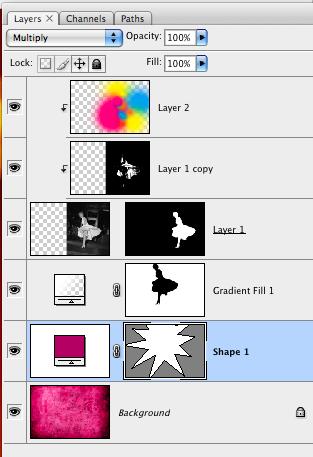

And your done! you just have to drag your last layer underneath the gradient fill layer to set the shape layer to the back.