DIY Turntable Rotating Platform
by Arnov Sharma in Circuits > Assistive Tech
5964 Views, 17 Favorites, 0 Comments
DIY Turntable Rotating Platform
.gif)
.gif)
.gif)


Hey guys how you doing
So here's something revolutionary: a DIY Turntable Rotating Platform created entirely from scratch utilizing a unique PCB and 3D-printed parts.
Because it spins, it is revolutionary. Was this a dad joke, perhaps?
Without getting too funny, this system is propelled by a tiny gear DC motor and is entirely powered by a single 3.7V 18650 Li-ion cell.
With the exception of the changing motor type, I repurposed a PCB from an older project that used a fume extractor. That project functioned similarly to this one.
Because of its torque and operation at less than 5V, the Micro Gear DC Motor is ideal for this project.
Supplies
Following are the materials required in this built-
- Custom PCBs
- Attiny13A
- IP5303
- 1uF 0805 Capacitors
- Vertical Pushbuttons
- USB Micro Port
- Lithium cell Holder
- 10K
- 2R
- AO4406 Mosfet IC
- DC Gear Motor
- 3D Printed Parts
Design


The project's design is simple; the main PCB holds the gear motor from the bottom side. A bearing is mounted on the board's top side and held in place by a bearing holder component.
The motor shaft is attached to the middle portion of the bearing.
On the top side, a table holder component used to hold the middle piece in place rotates together with the motor to maintain proper rotational motion.
Fusion360 was used to model the entire design, and all parts were eventually exported as STL for 3D printing.
3D Printed Parts

Here's the list of parts that we need to print for this built-
- Bearing Holder
- Motor Holder
- Motor Dock
- Turntable Holder
Every part was printed using PLA with a 0.4mm nozzle and a 20% infill and layer height.
Main Circuit

.jpg)
For this project, I'm using a PCB from one of my previous project. It has an onboard power source and an Attiny13A that uses a Mosfet IC to control a load.
The electronics are all housed on the bottom side of the Fume Extractor Project, leaving the top side clear.
One justification for selecting this PCB was that it already had a setup for operating a DC motor that worked without modification. It consists of an N channel Mosfet IC-AO4406 linked to an Attiny13A AVR MCU.
https://www.instructables.com/Overengineered-Fume-Extractor-Project/
Seeed Studio Fusion PCB Service

As for the PCBs of the matrix, they were sent to SEEED Studio for samples.
An order was placed for a white solder mask with black silkscreen, and PCBs arrived in less than a week, which was super fast.
The quality was very good considering the price, which was also pretty low.
The PCB Quality of this FUME EXTRACTOR PCB WAS SUPER!
Seeed Fusion PCB Service offers one-stop prototyping for PCB manufacture and PCB assembly and as a result, they produce superior quality PCBs and Fast Turnkey PCBA within 7 working days.
Seeed Studio Fusion PCB Assembly Service takes care of the entire fabrication process, from PCB manufacturing and parts sourcing to assembly and testing services, so you can be sure they are getting a quality product.
After gauging market interest and verifying a working prototype, Seeed Propagate Service can help you bring the product to market with professional guidance and a strong network of connections.
Next, we prepare for the circuit construction process.
Circuit Construction
.gif)
.gif)
.gif)
.gif)
.gif)
.gif)
.gif)
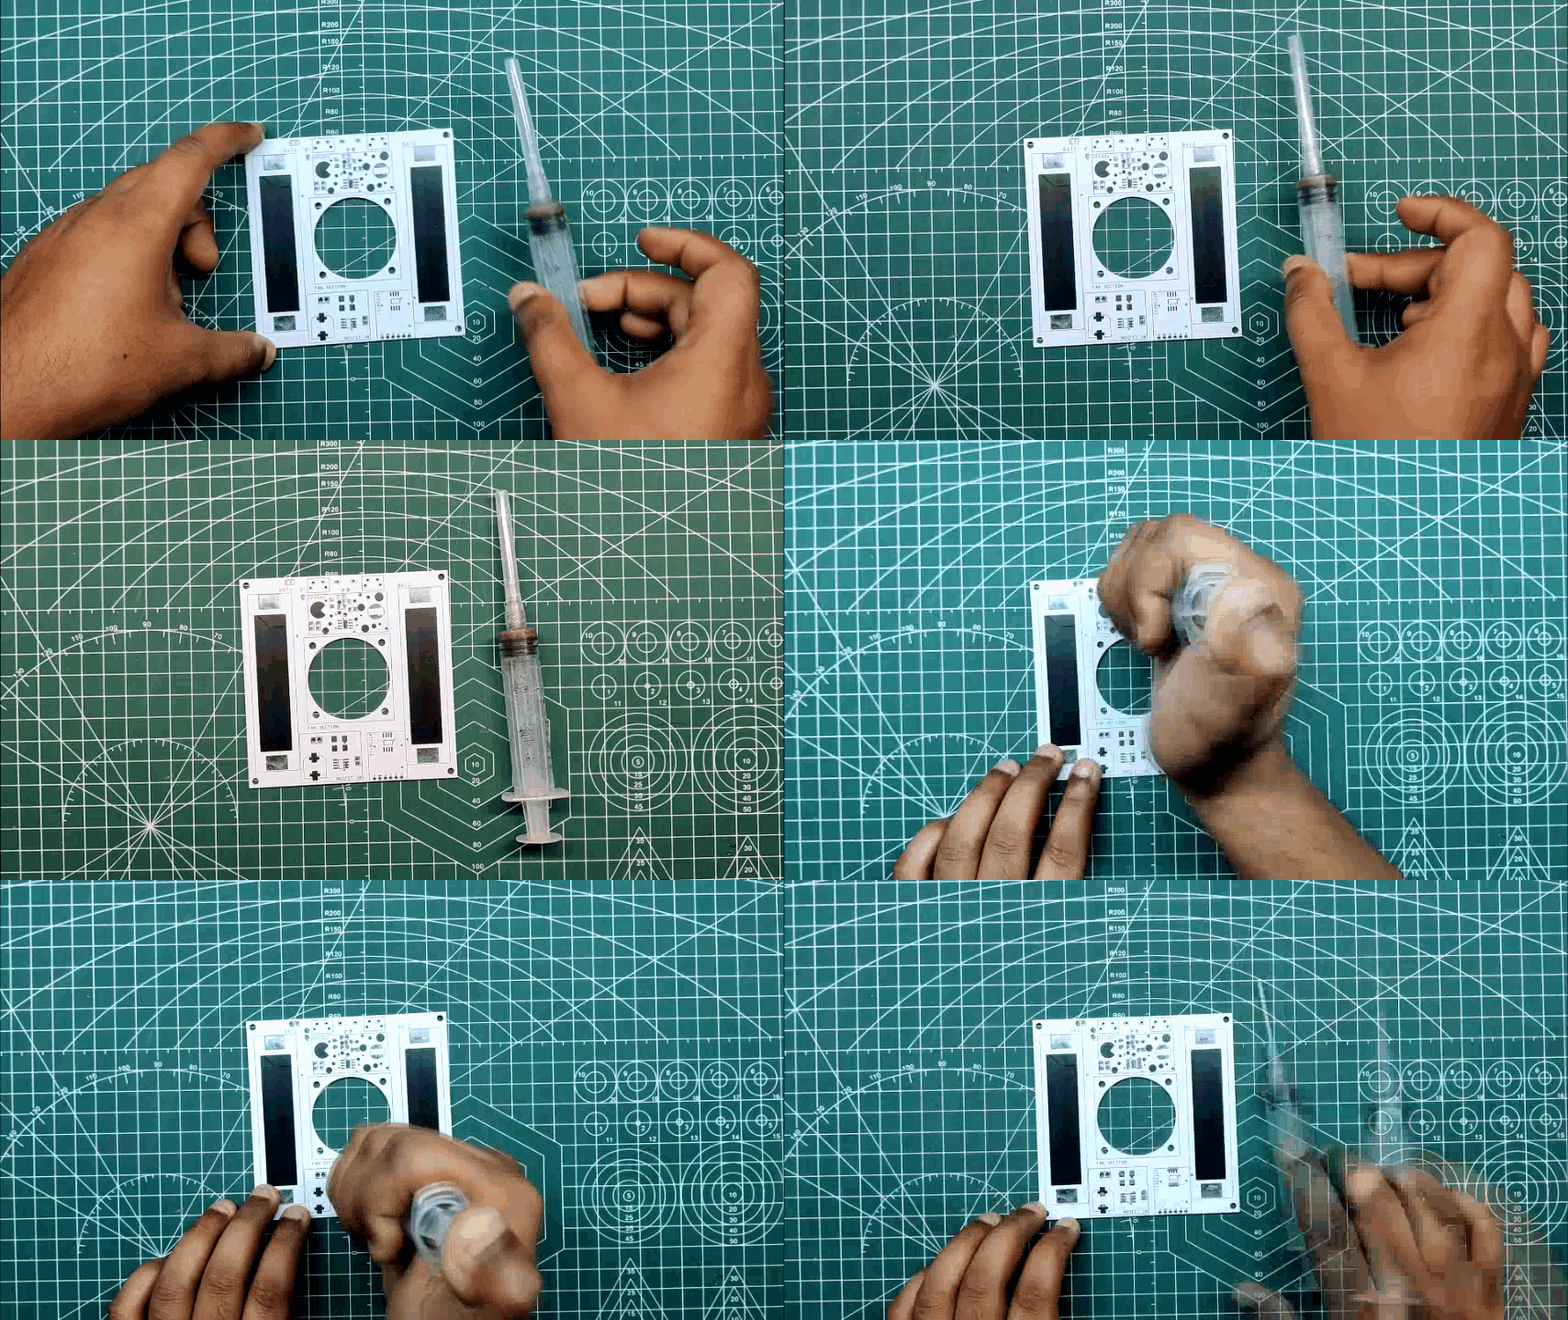
Fume extractor PCB is being used in this project. I have already prepared an article about the assembly of this board, but let's revisit the whole construction process of this board.
- We first apply Solder Paste to each component pad by using a solder dispensing syringe.
- Next, we pick and place all the components in their location by using an ESD Tweezer.
- we carefully lifted the whole circuit board and place it on the Reflow Hotplate for soldering, After a few mins when the hotplate reaches the Solderpaste melting TEMP, all the components will get soldered by this Hot Reflow process.
- Next, we place the remaining components in their place which are Vertical switches, USB ports, and a JST connector for the FAN, and use a Soldering Iron for soldering them.
- Board is now completed.
CODE

Here's the code that I have used in this project.
const int switchPin = 4;
const int FANPin = 0;
int FANMode = 1;

void setup()
{
    pinMode(FANPin, OUTPUT);
    pinMode(switchPin, INPUT_PULLUP);
    digitalWrite(FANPin, LOW);

}
void loop()
{
    if (digitalRead(switchPin) ==LOW)
    {
        FANMode = FANMode + 1;
        if (FANMode == 4)
        {
            FANMode = 1;
        }
    }
    if (FANMode == 1)
    {
        digitalWrite(FANPin, LOW);
        delay(200);
    }
    else if (FANMode == 2)
    {
         analogWrite(FANPin, 100);
        delay(200);
    }
    else if (FANMode == 3)
    {
        analogWrite(FANPin, 50);
        delay(200);
    }
    //delay(200); // see text
}
Attiny13A is flashed with this sketch by using the Arduino as IDE method, you can check out more about this step by watching this video.
Bearing Part Assembly
.gif)
- In order to begin the assembly procedure, we first insert the main bearing into the 3D-printed bearing holding portion. The bearing is simply inserted into the center and pushed into position with a small amount of force.
Motor Holder Assembly
.gif)
.gif)
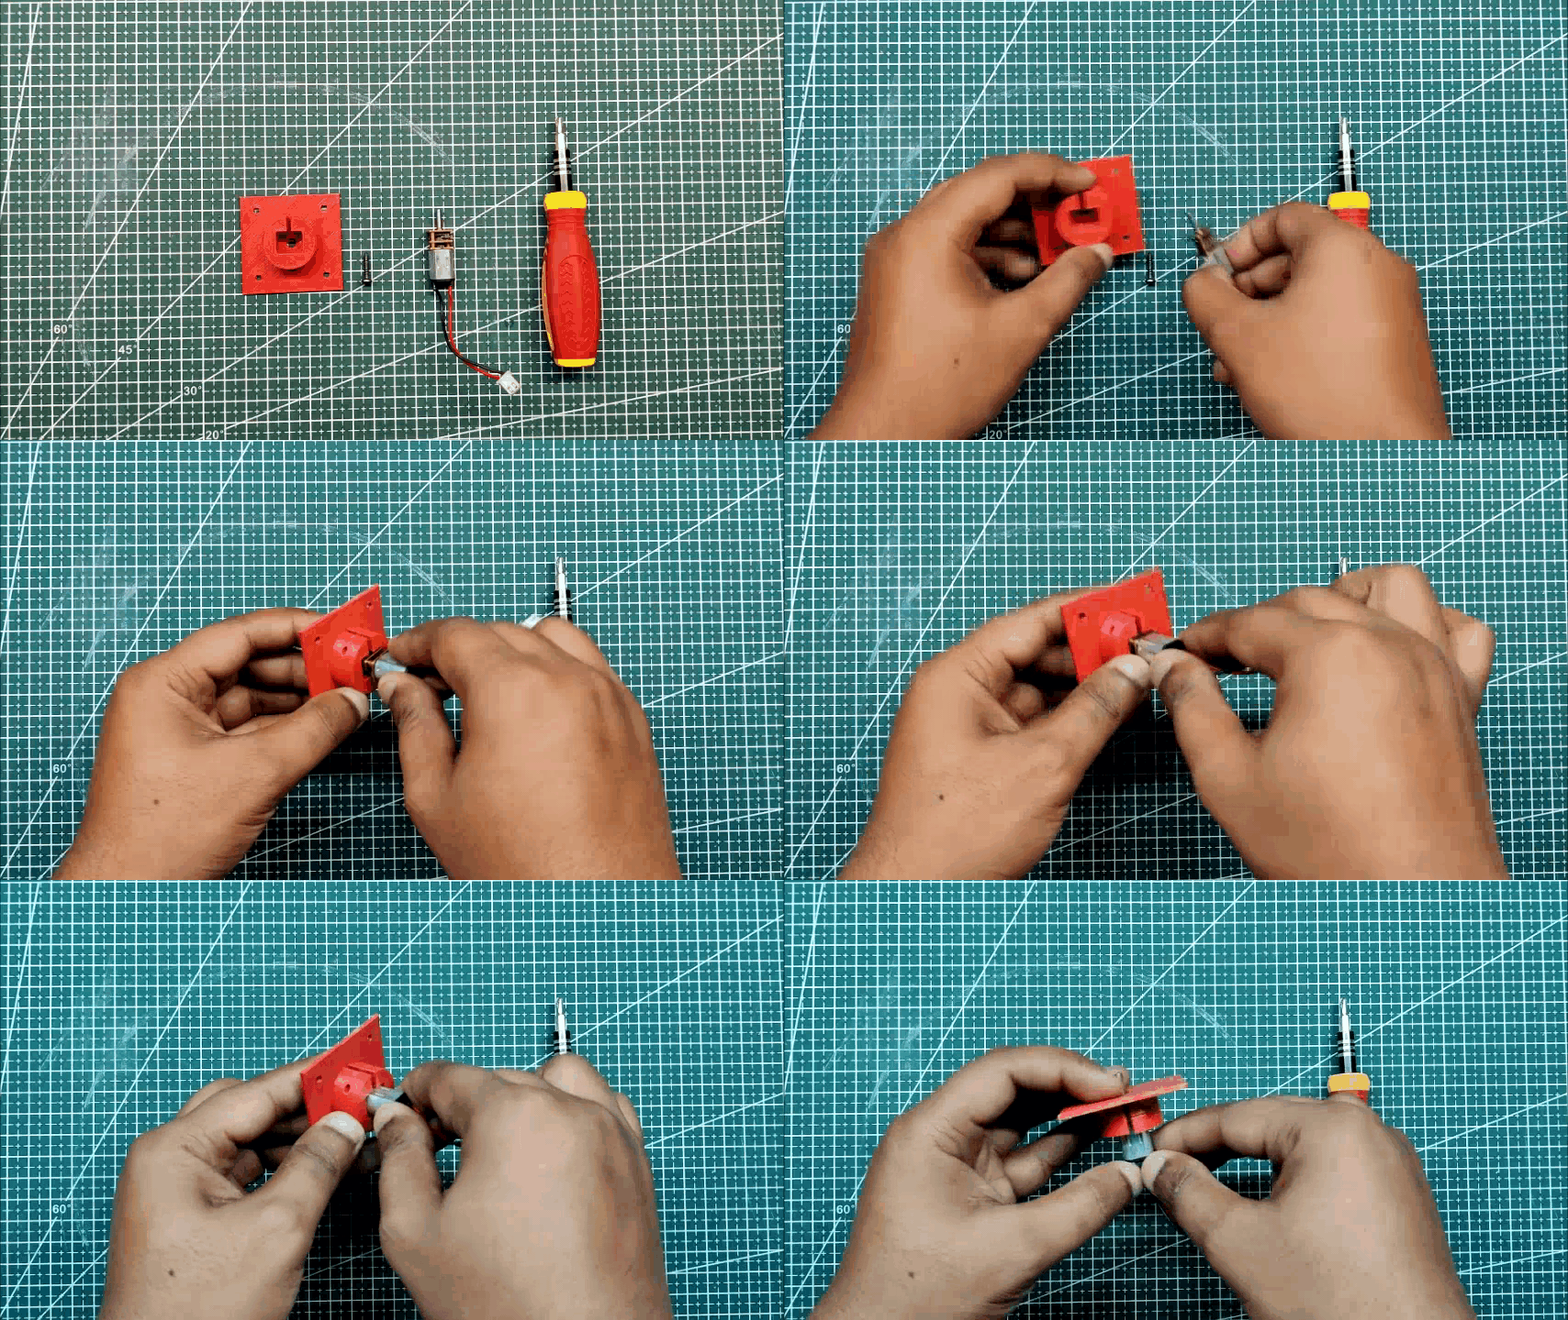
- Next, we add the gear DC motor into the 3D Printed Motor Holder Part and then use an M2 Screw to tighten the Motor Holder part.
Adding Bearing Assembly With Main PCB
.gif)
.gif)
- The Bearing Assembly is now added to the Main PCB using four M3 screws and four PCB Standoffs on the board's bottom side.
- Using four M3 screws, we then attach the Motor Holder Assembly to the board's bottom side.
Adding Motor Dock With the Gear Motor
.gif)
- We attach the Motor Dock to the gear motor shafts after attaching the Motor Holder and Bearing assembly.
- The JST connectors from the Board and Motor are then connected.
Finishing the Assembly
.gif)

.gif)
- Finally, using four M3 screws, we attach a second Fume Extractor PCB to the PCB Standoffs on the bottom side.
- The build is finished after attaching the Turntable Part to the Motor Dock using two M2 screws.
- We add a cover to the turntable holder as the last touch to improve the aesthetics and add items.
Result
.gif)
.gif)
Here is what this build created: a revolving Turntable that can be used to record rotational films of XYZ objects. Like the Raspberry Pi Pico on the Turntable, which I shot briefly.
A lower or higher PWM value can be used in the code to control the turntable's rotation, which was set at 20%.
Conclusion
.gif)
.gif)
The potentiometer that allows the user to adjust the speed of rotation is missing from this project, so the final judgment is that it lacks connectivity and interactivity.
In version 2 of this project, I will be improving the building rotation portion.
Overall, I'm pretty happy with the result. It works, and I'll use it to record rotational videos of small components for upcoming projects.
If you need any help regarding this project, do leave a comment.
Thanks for reading this article, and I will be back with a new project soon.
Peace.