DIY Turbidity Sensor
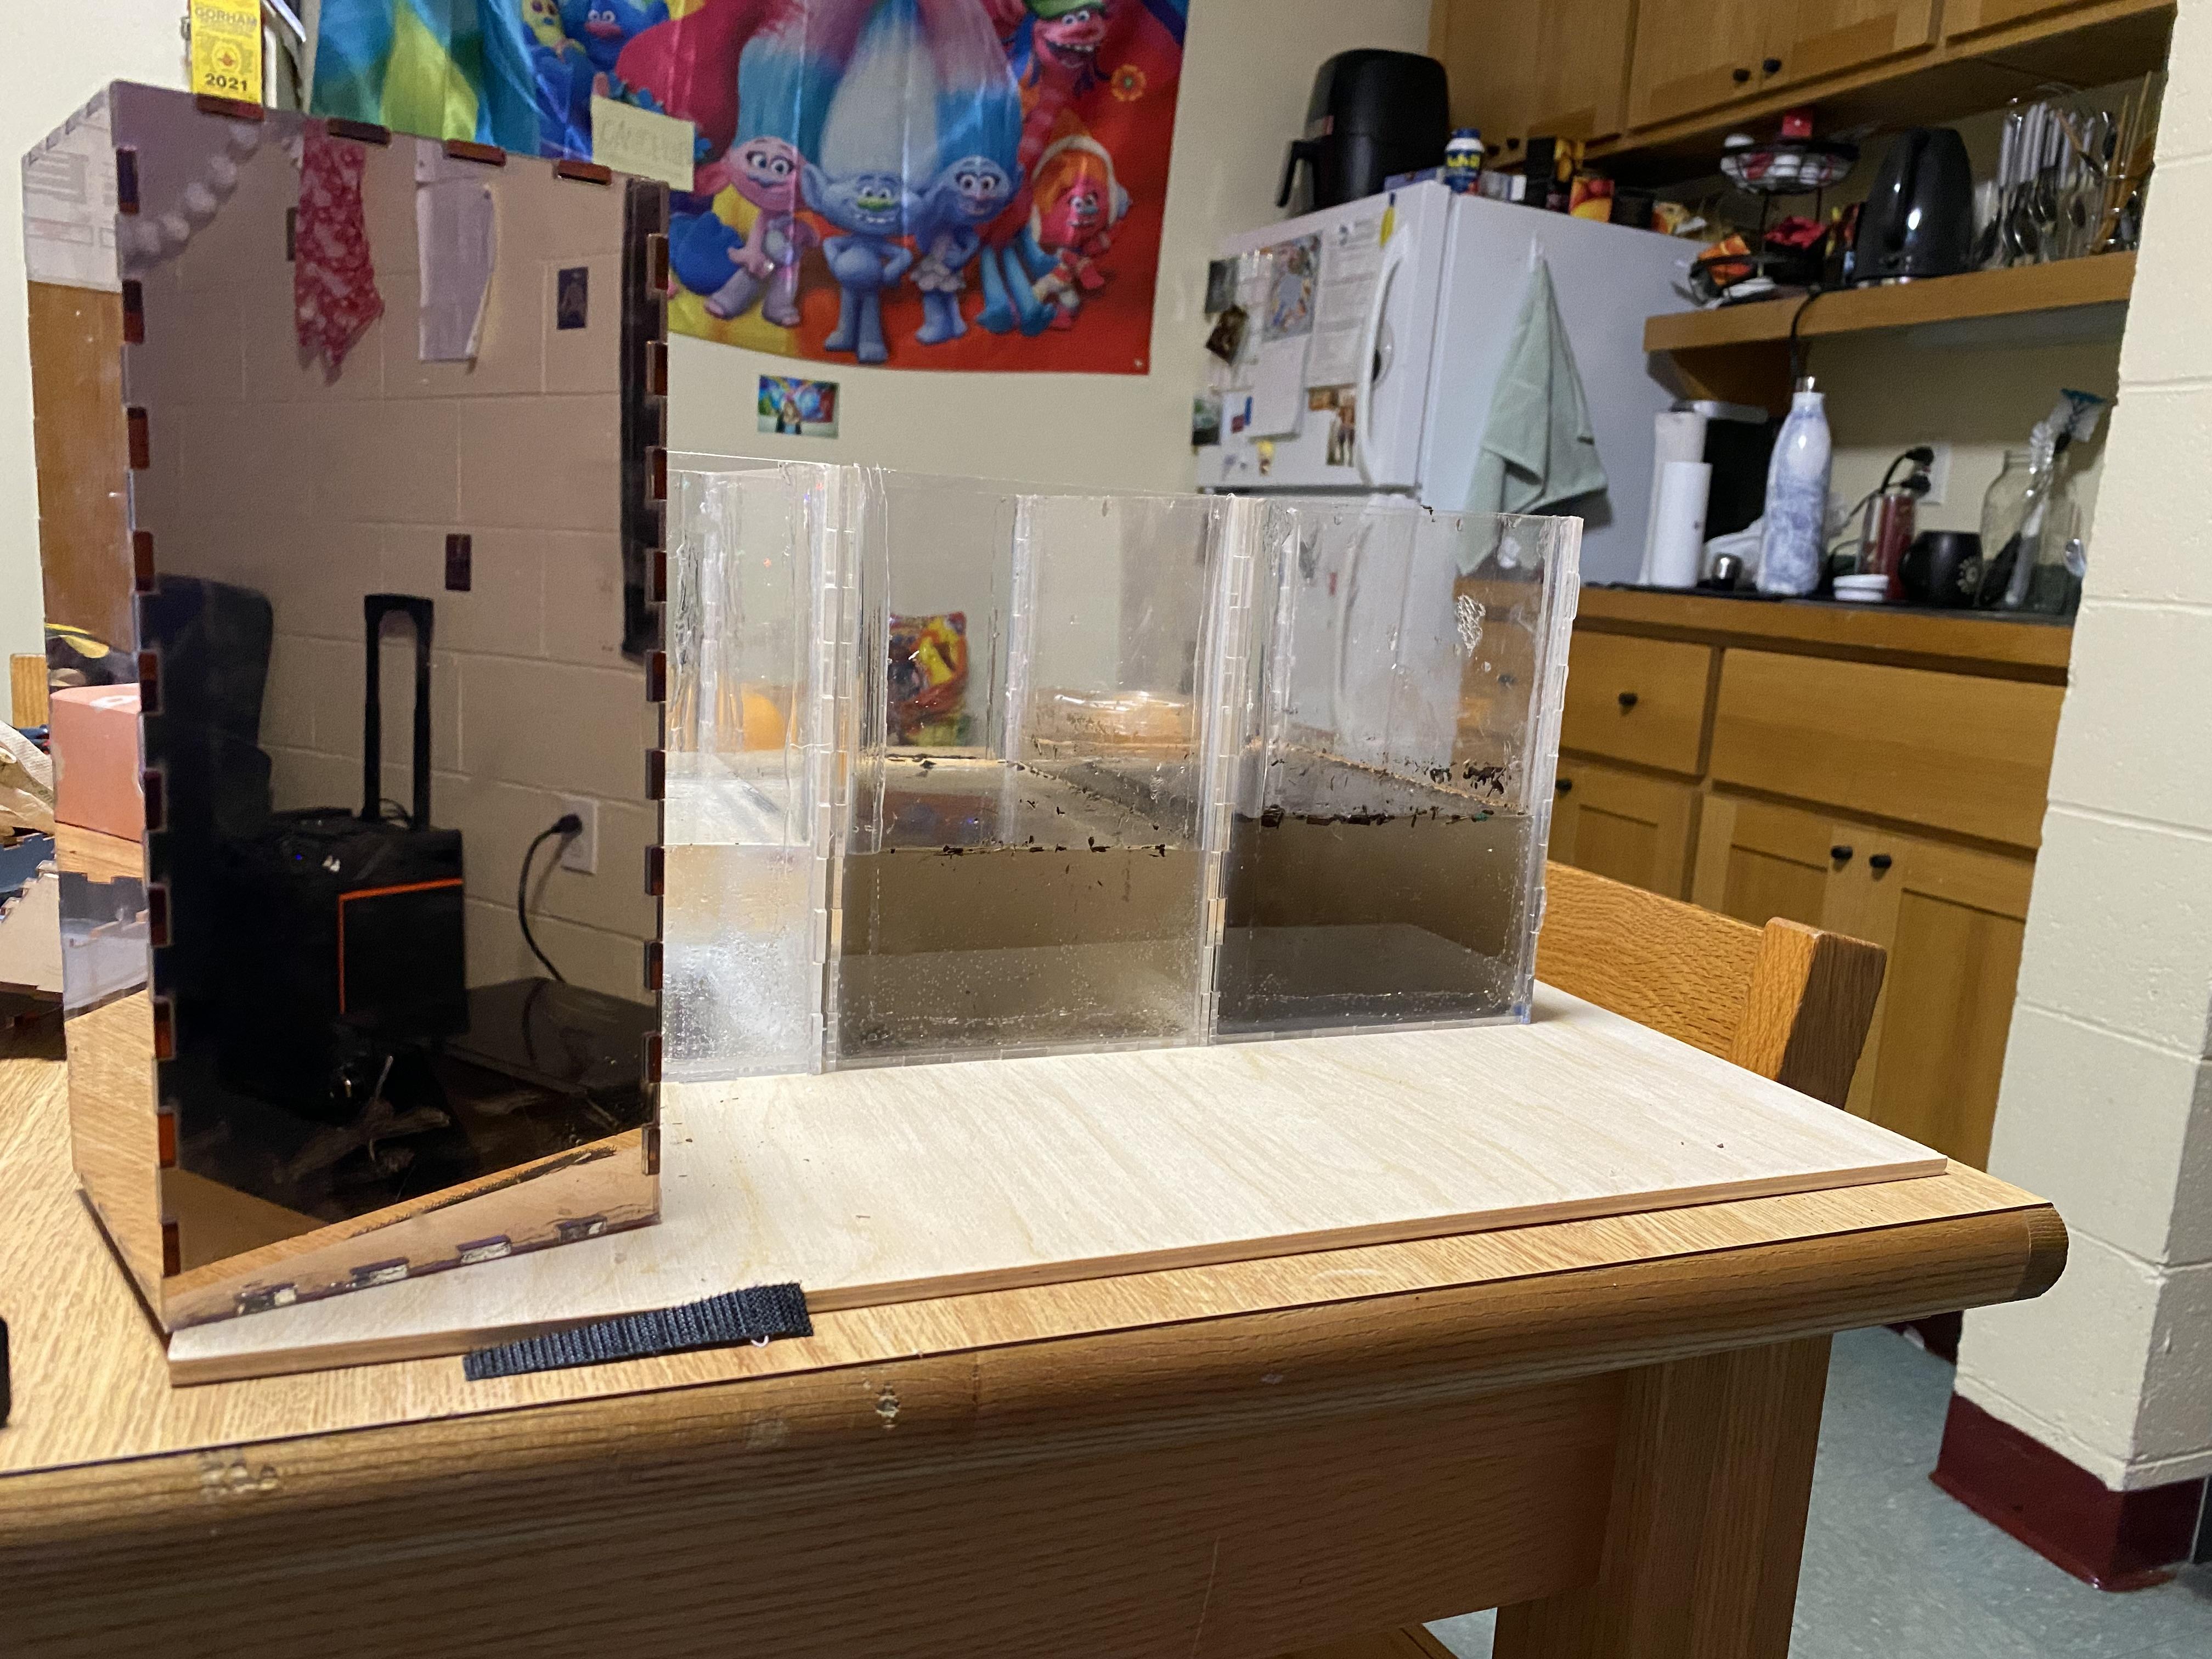
I made a DIY turbidity sensor using an adafruit color sensor that returns a "clear" value on a raspberry pi! The device will send a notification to your phone based on the clarity of the water.
Supplies
-Raspberry Pi
-Adafruit APDS9960 Sensor
-Stemma QT Cable and necessary connector cables
-Button
-Male to aligator wires (2)
-Charging Cable (USB to micro-USB)
-Any mobile device
-Any Waterproof Box
Set Up Your Raspberry Pi
Set up your Raspberry Pi to process Circuit Python and install the sensor library by running:
sudo pip3 install adafruit-circuitpython-apds9960
Set Up a Pushover Account and Create an Application
On https://pushover.net/ , create an account and register your mobile device by logging in on the same account on that device. On your account, create an application named "Flood Sensor."
Make Necessary Files for Push Notifications
Save your user key found on your account home into a file called 'user.key'
Save your application api token key into a file called 'apitoken.key'
Wire Your Circuit!
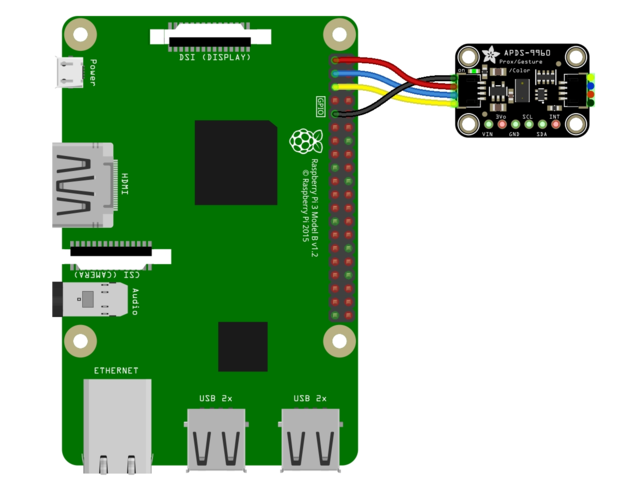
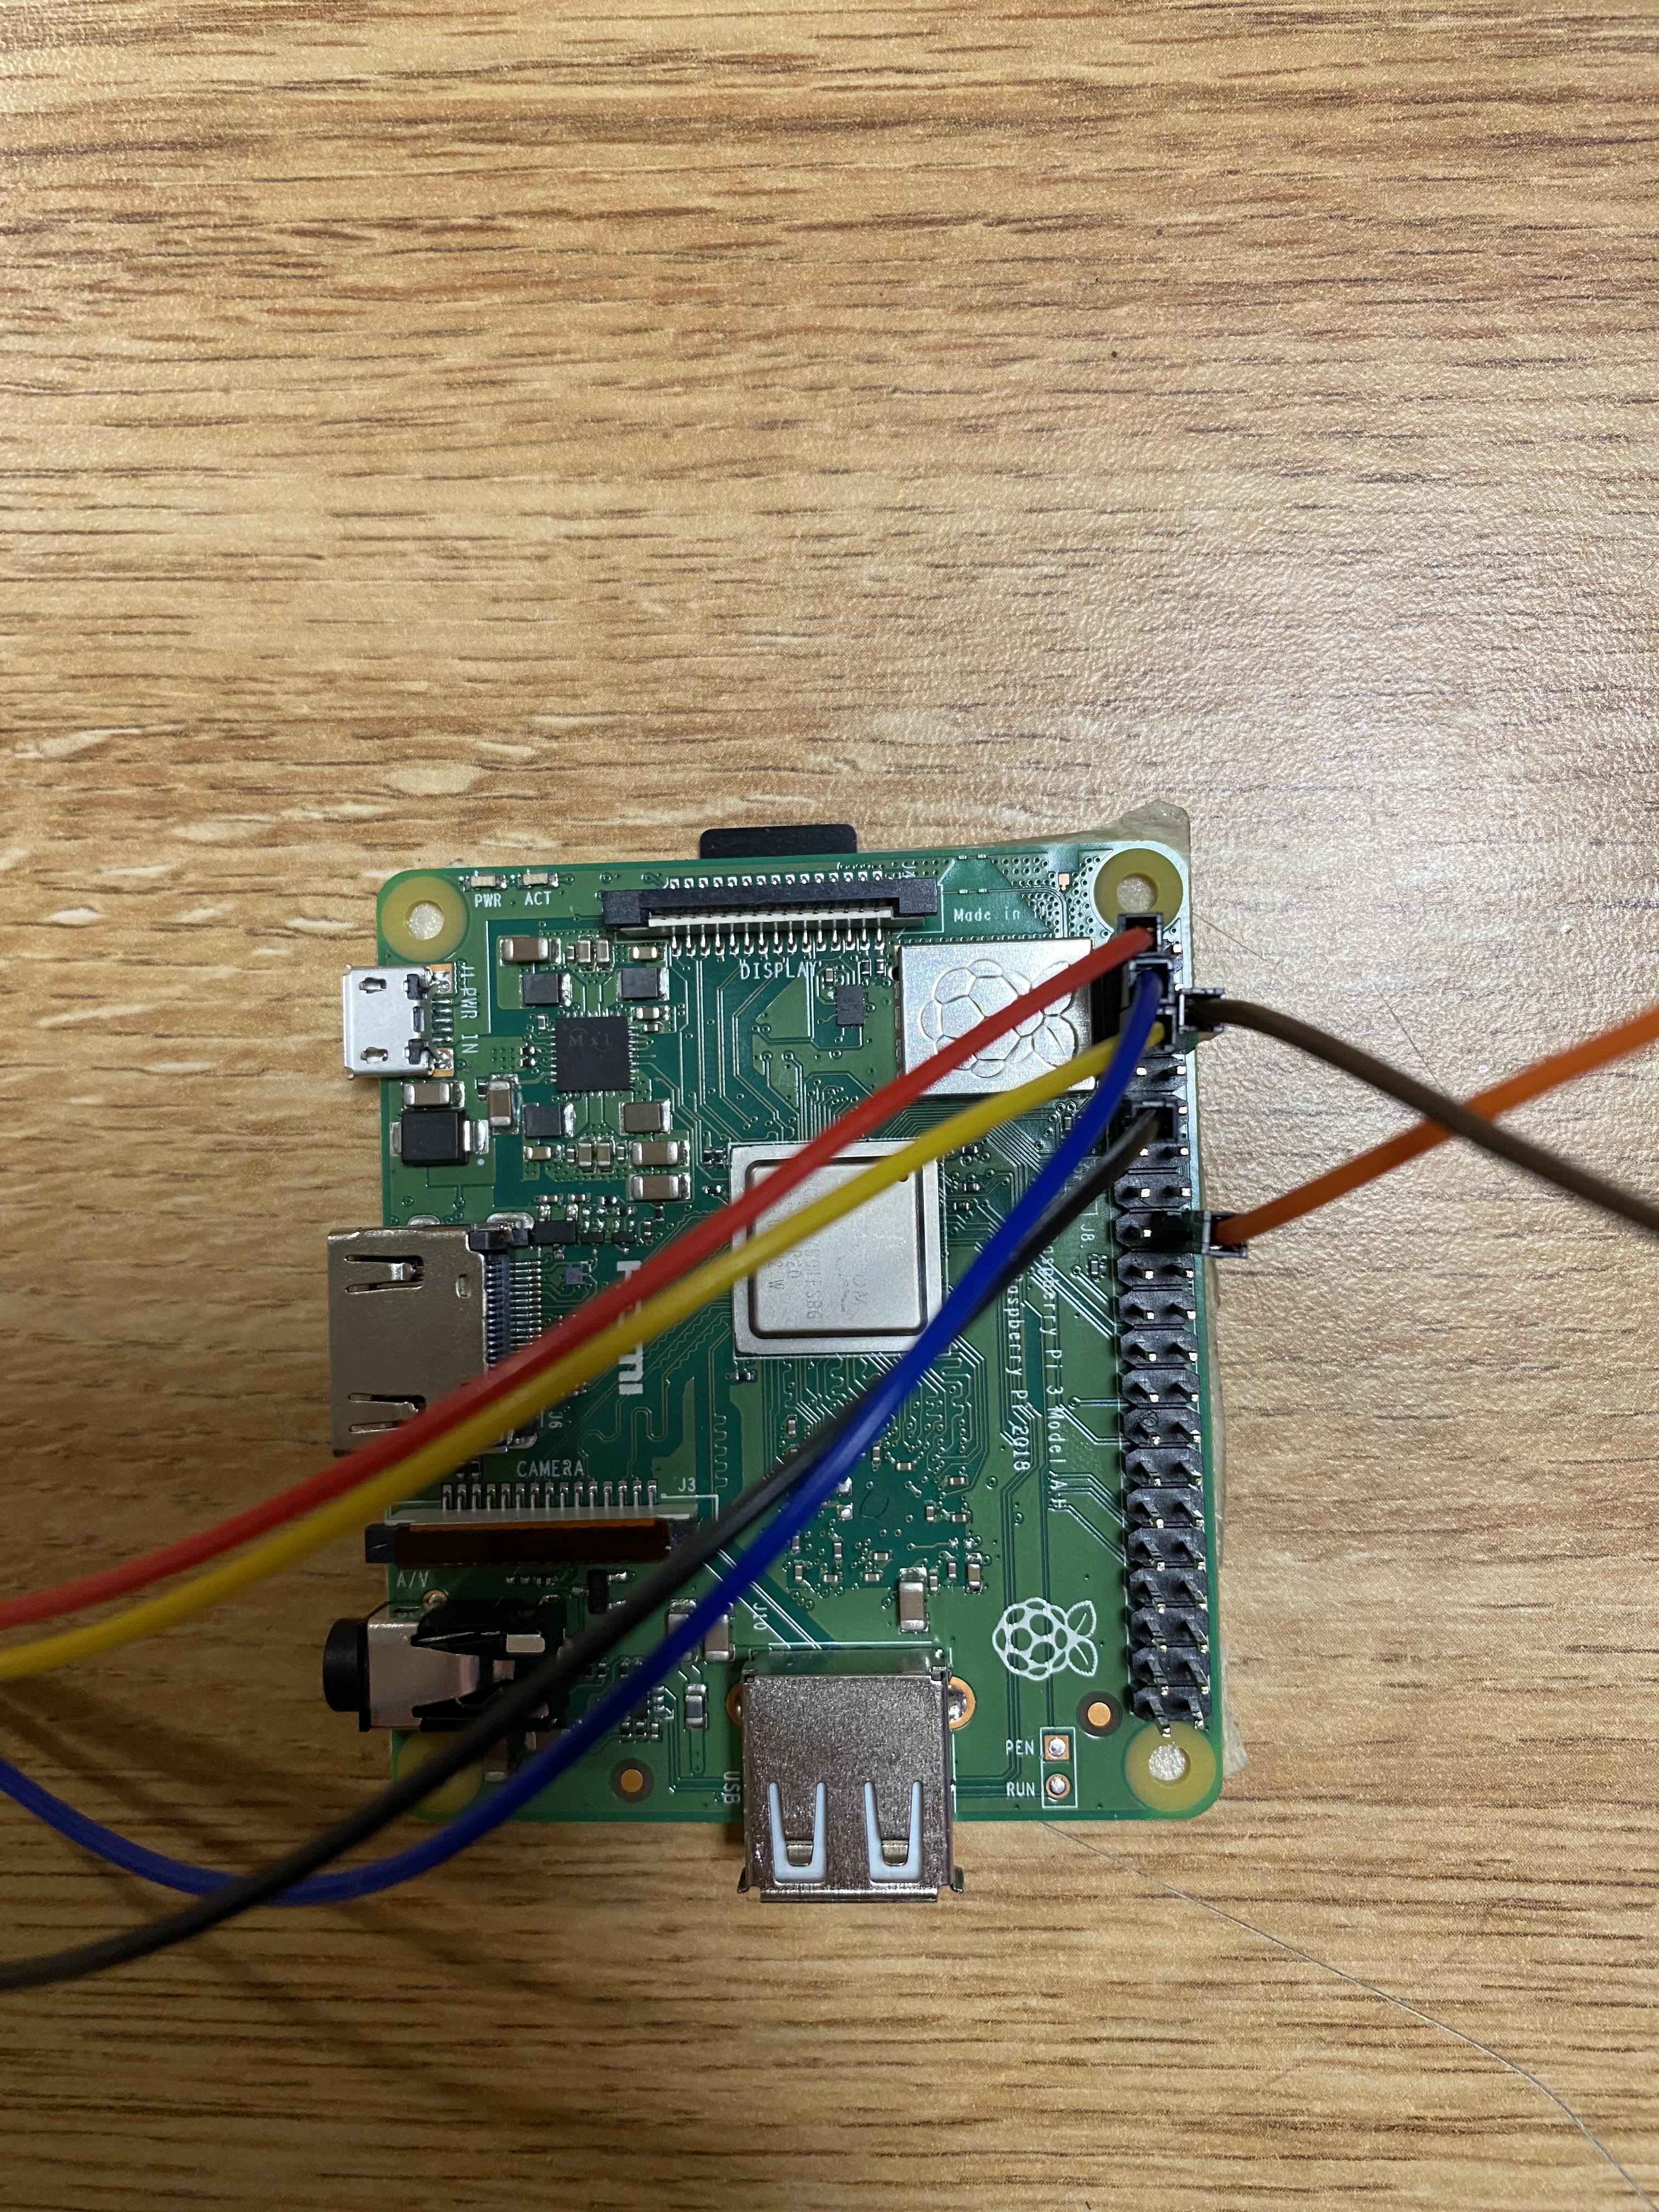
Following the diagram above, connect the sensor to the pi. Connect the button to the board by connecting one wire to pin D23 and one wire to GND. A photo of the final wiring can be seen in the photo above.
Write Some Code!
The code I used can be found at this github link:
https://github.com/tumangaj/WaterQualitySensor/tree/main
Build!
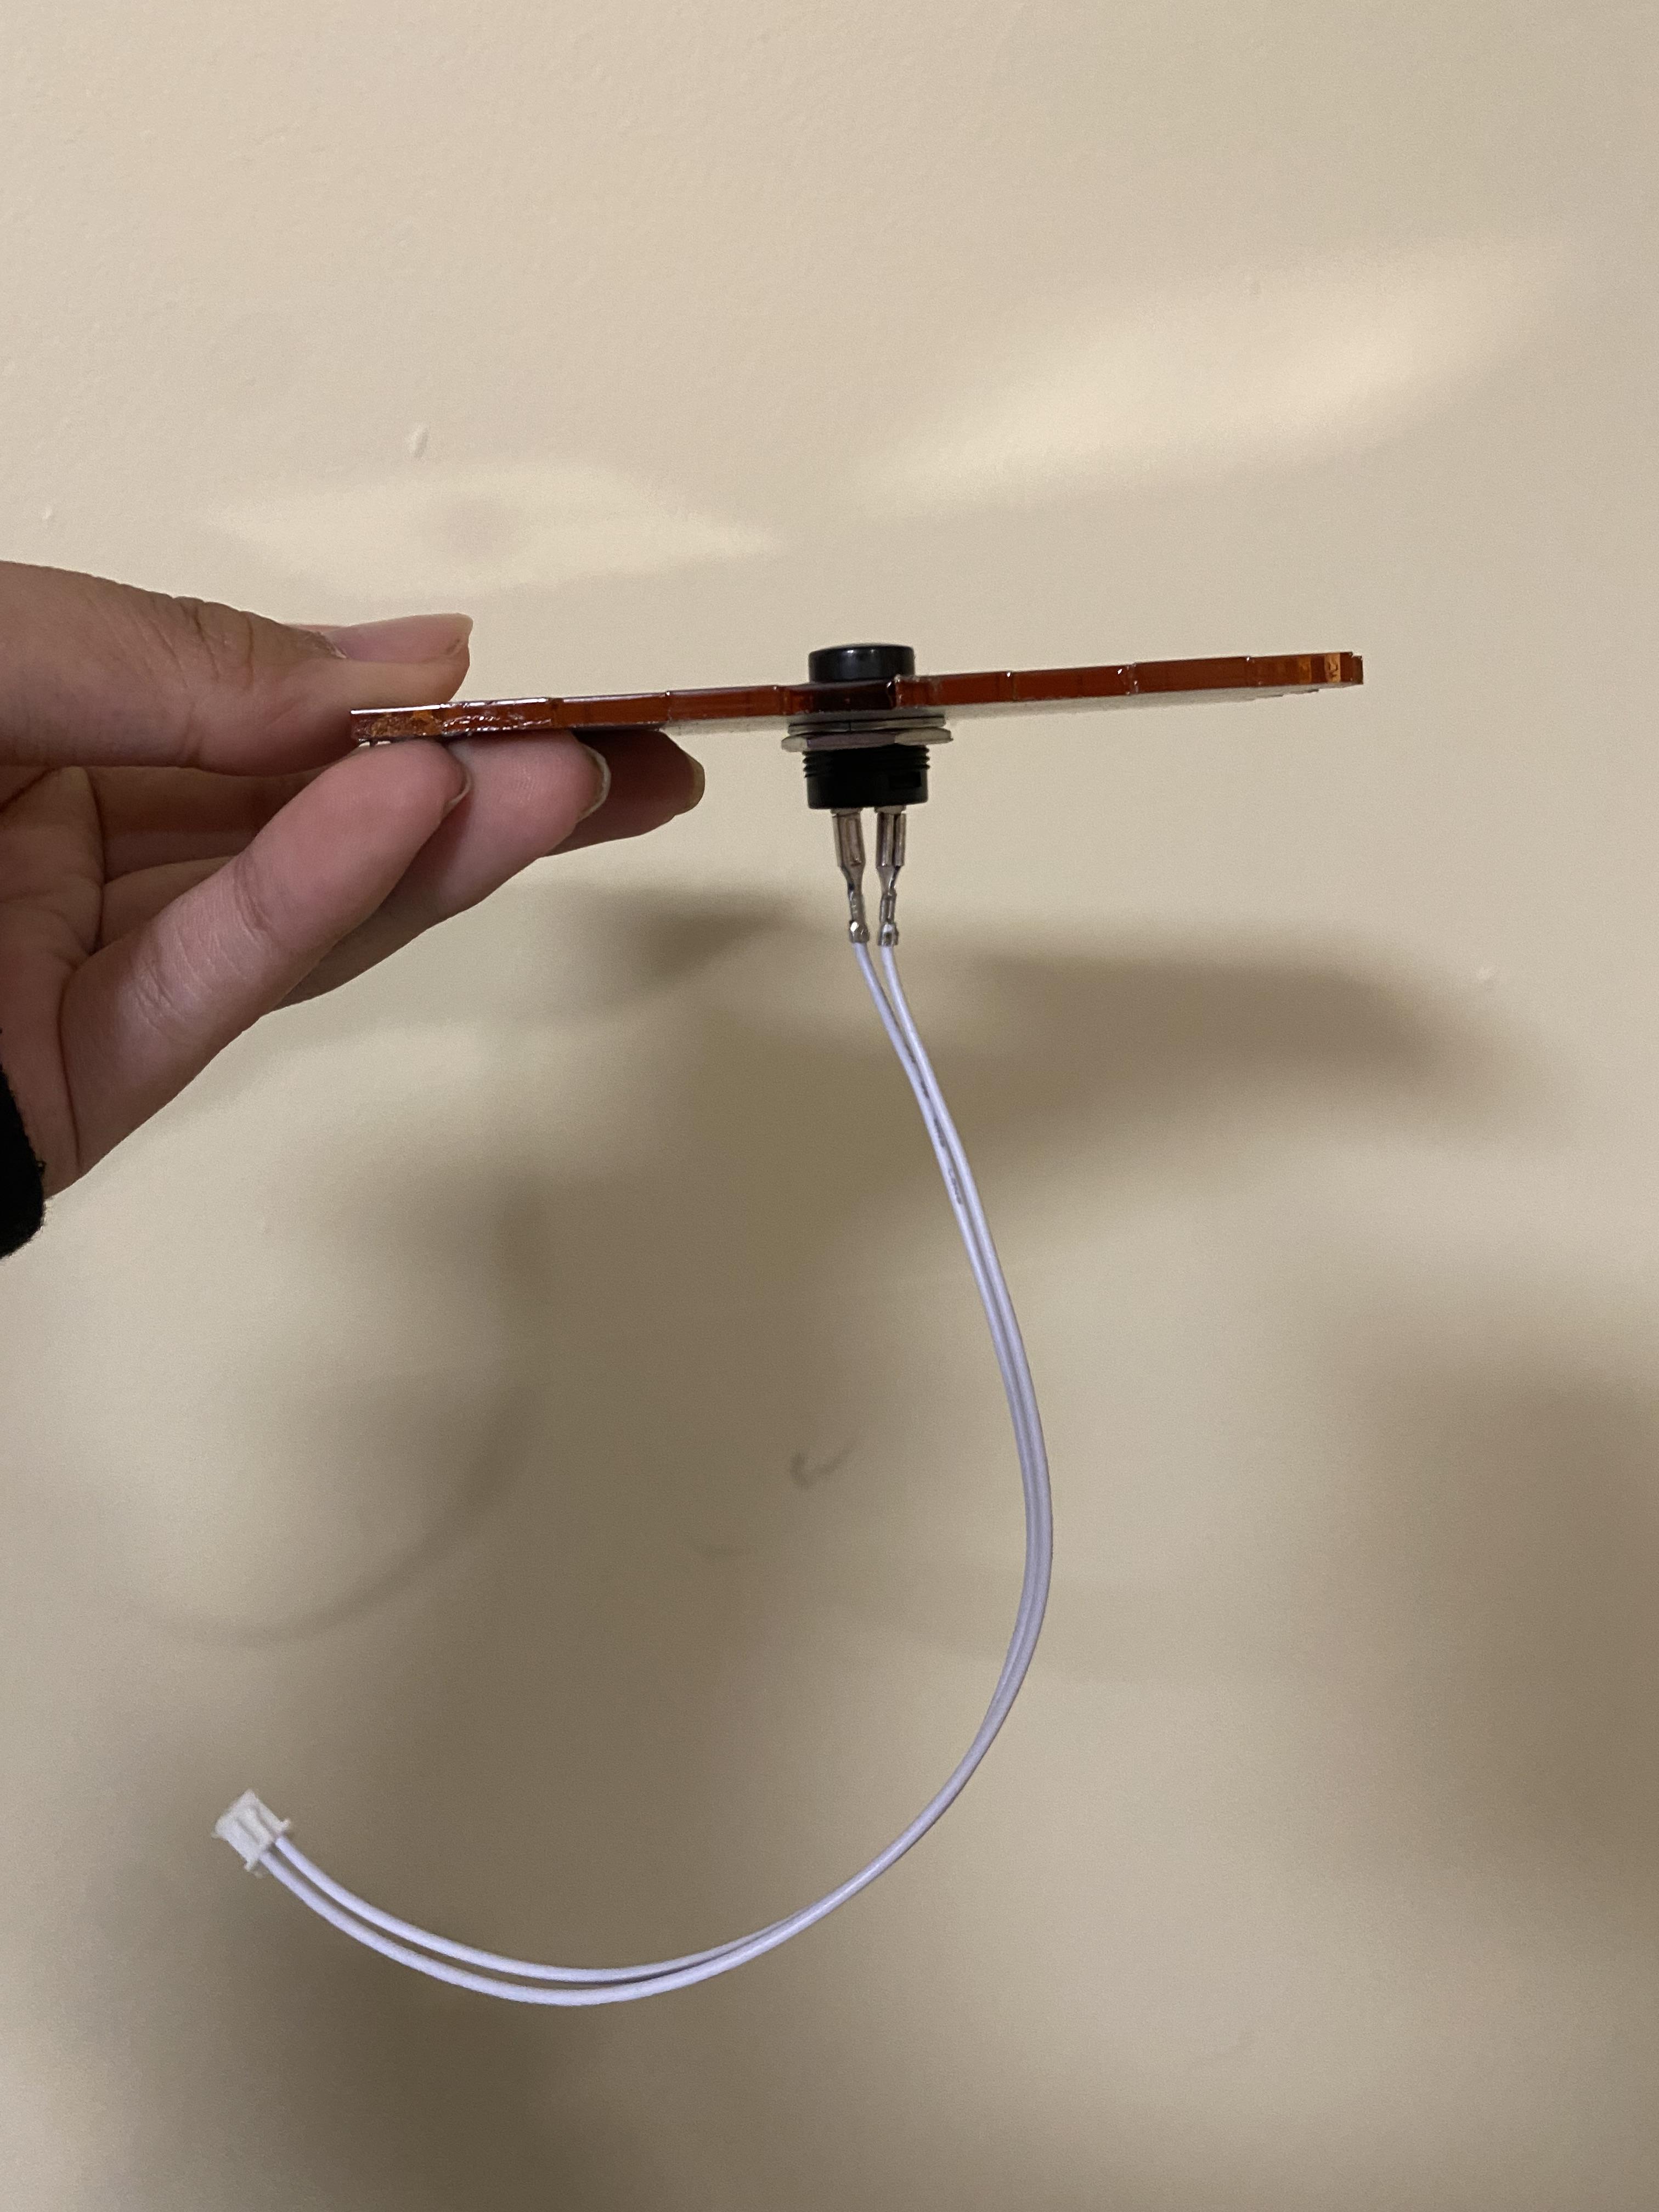
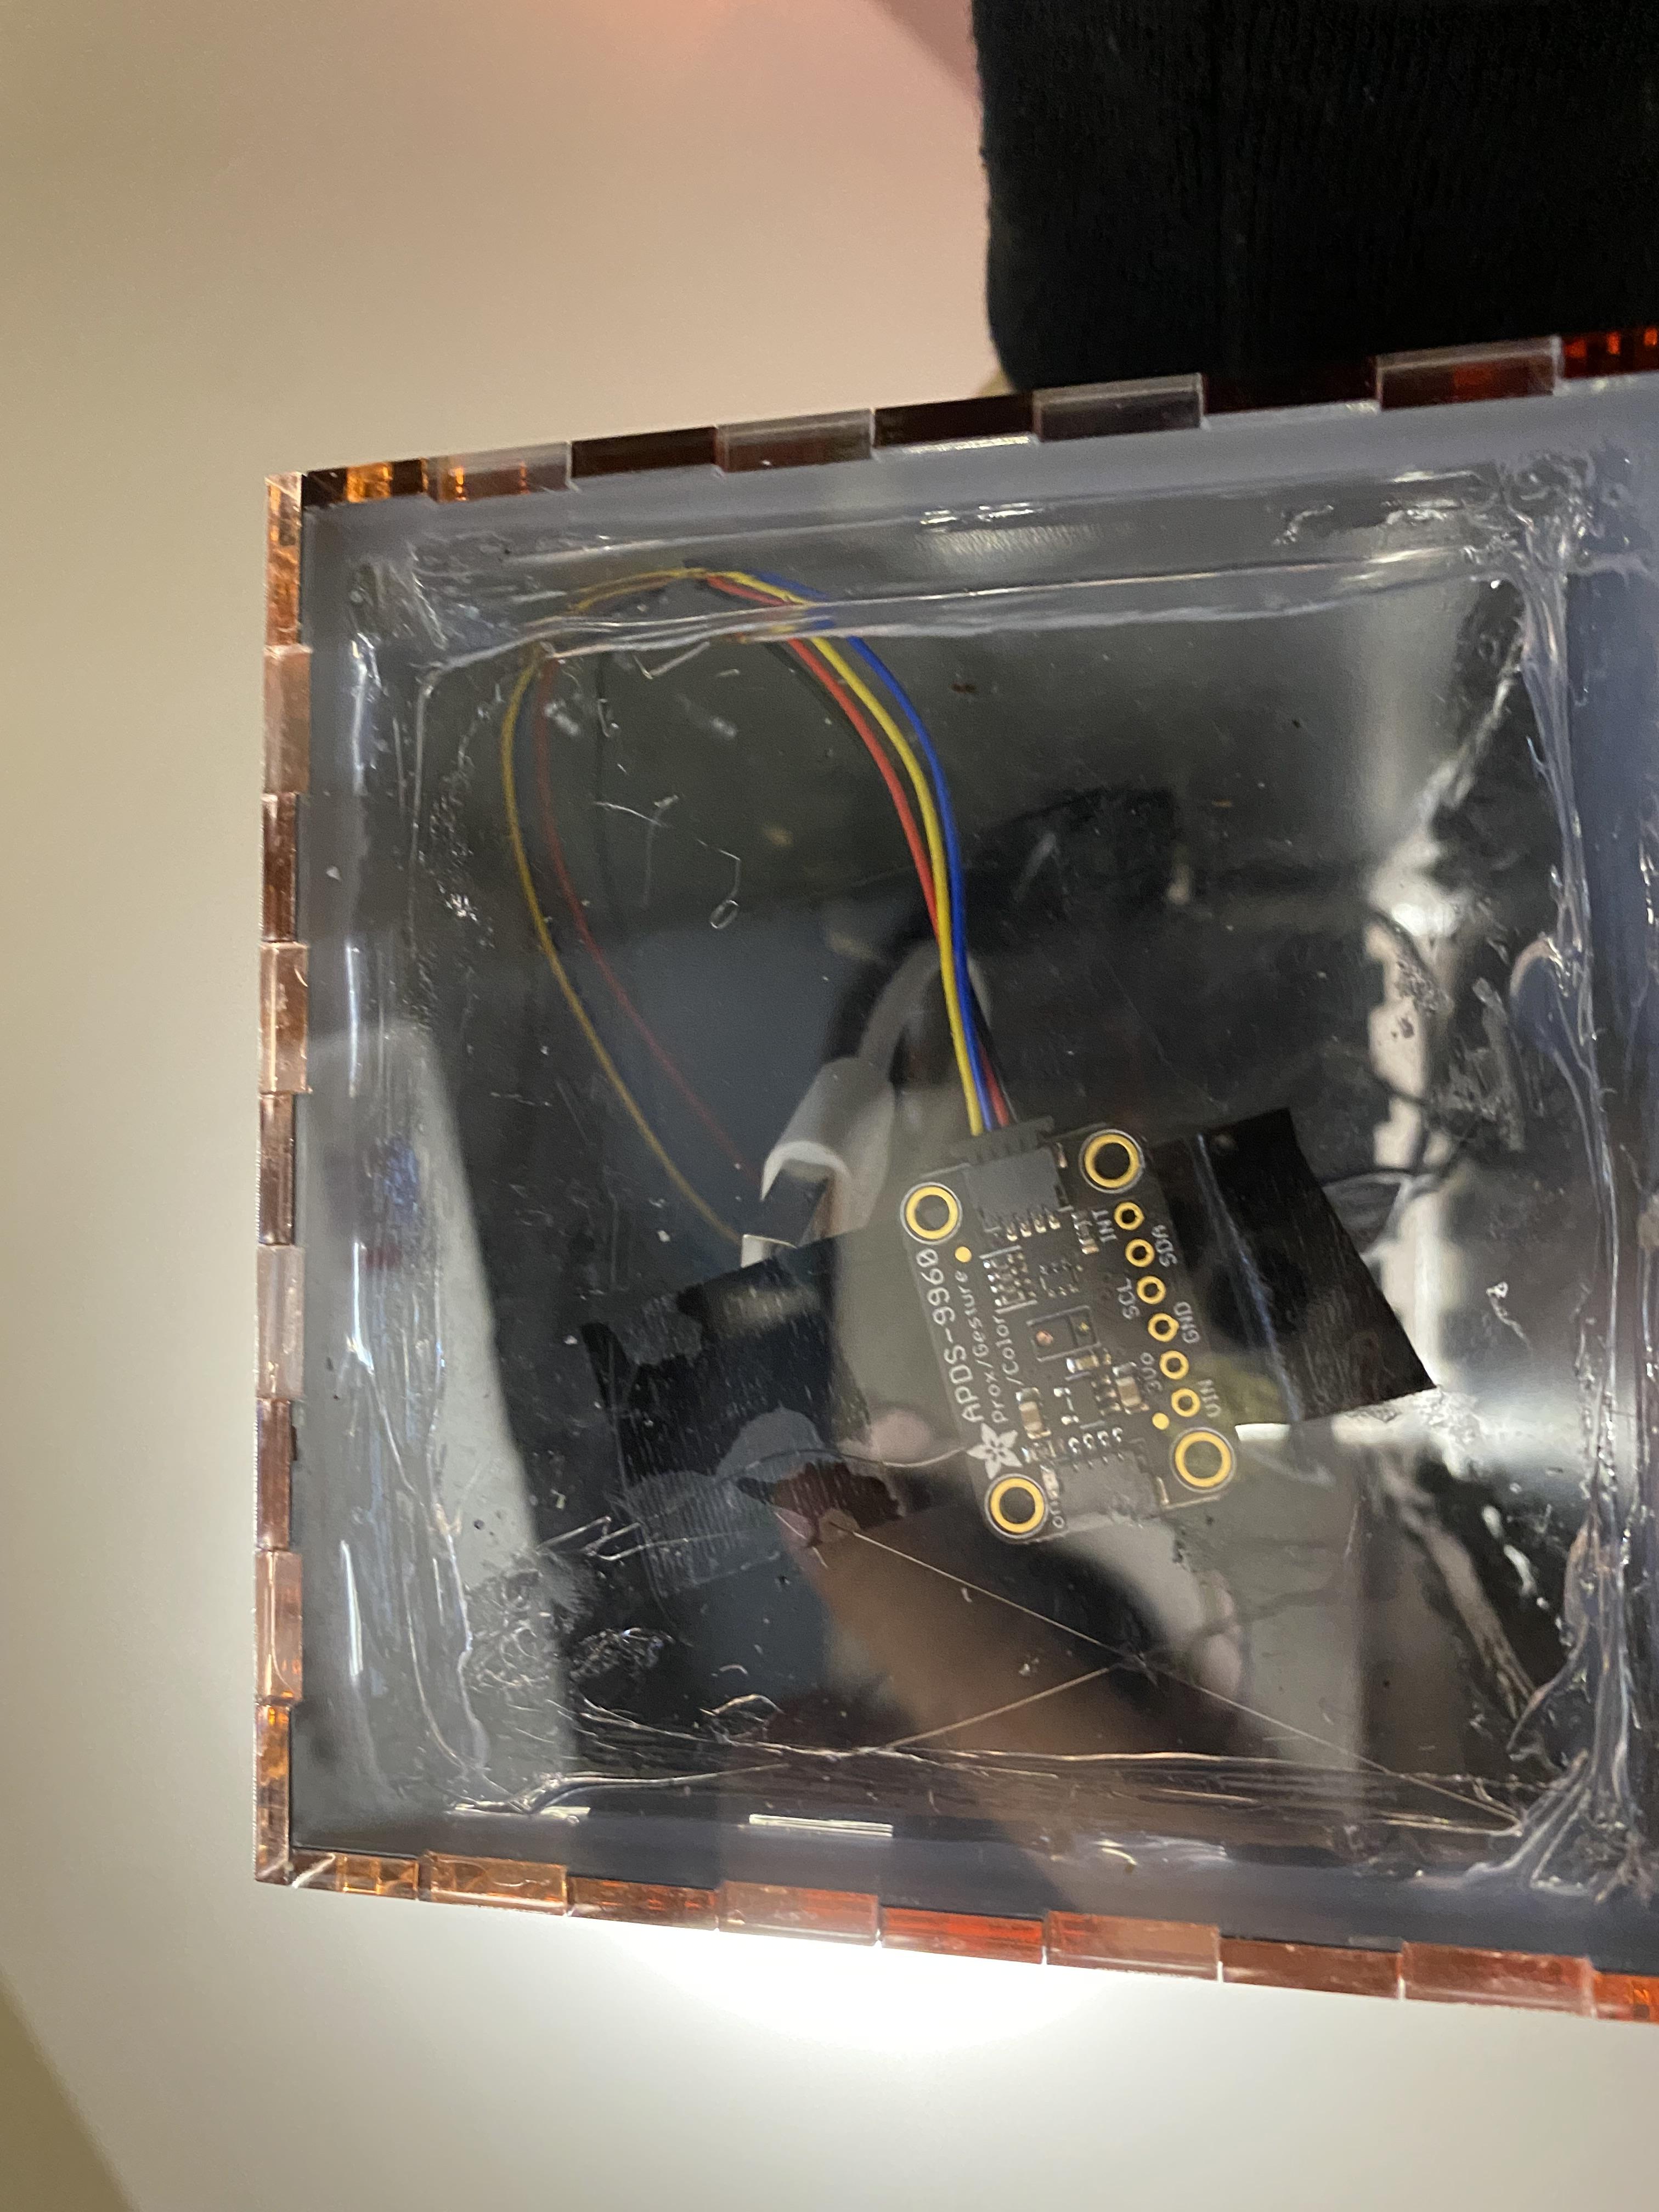
Place your whole circuit into the box, make sure that the sensor can sense things outside of the box. I did this by making the bottom panel of the box clear.
Also make sure that the button is accessible from the outside of the box.
Power the circuit using a portable charger and a charging wire.
Try It Out!
Now, you can place the box into water, and at the push of a button, you will receive a notification that tells you the quality of the water! Great work!