DIY Soap Film Tunnel for Flow Visualization
by BrownUniversityENGN in Workshop > Science
4827 Views, 21 Favorites, 0 Comments
DIY Soap Film Tunnel for Flow Visualization
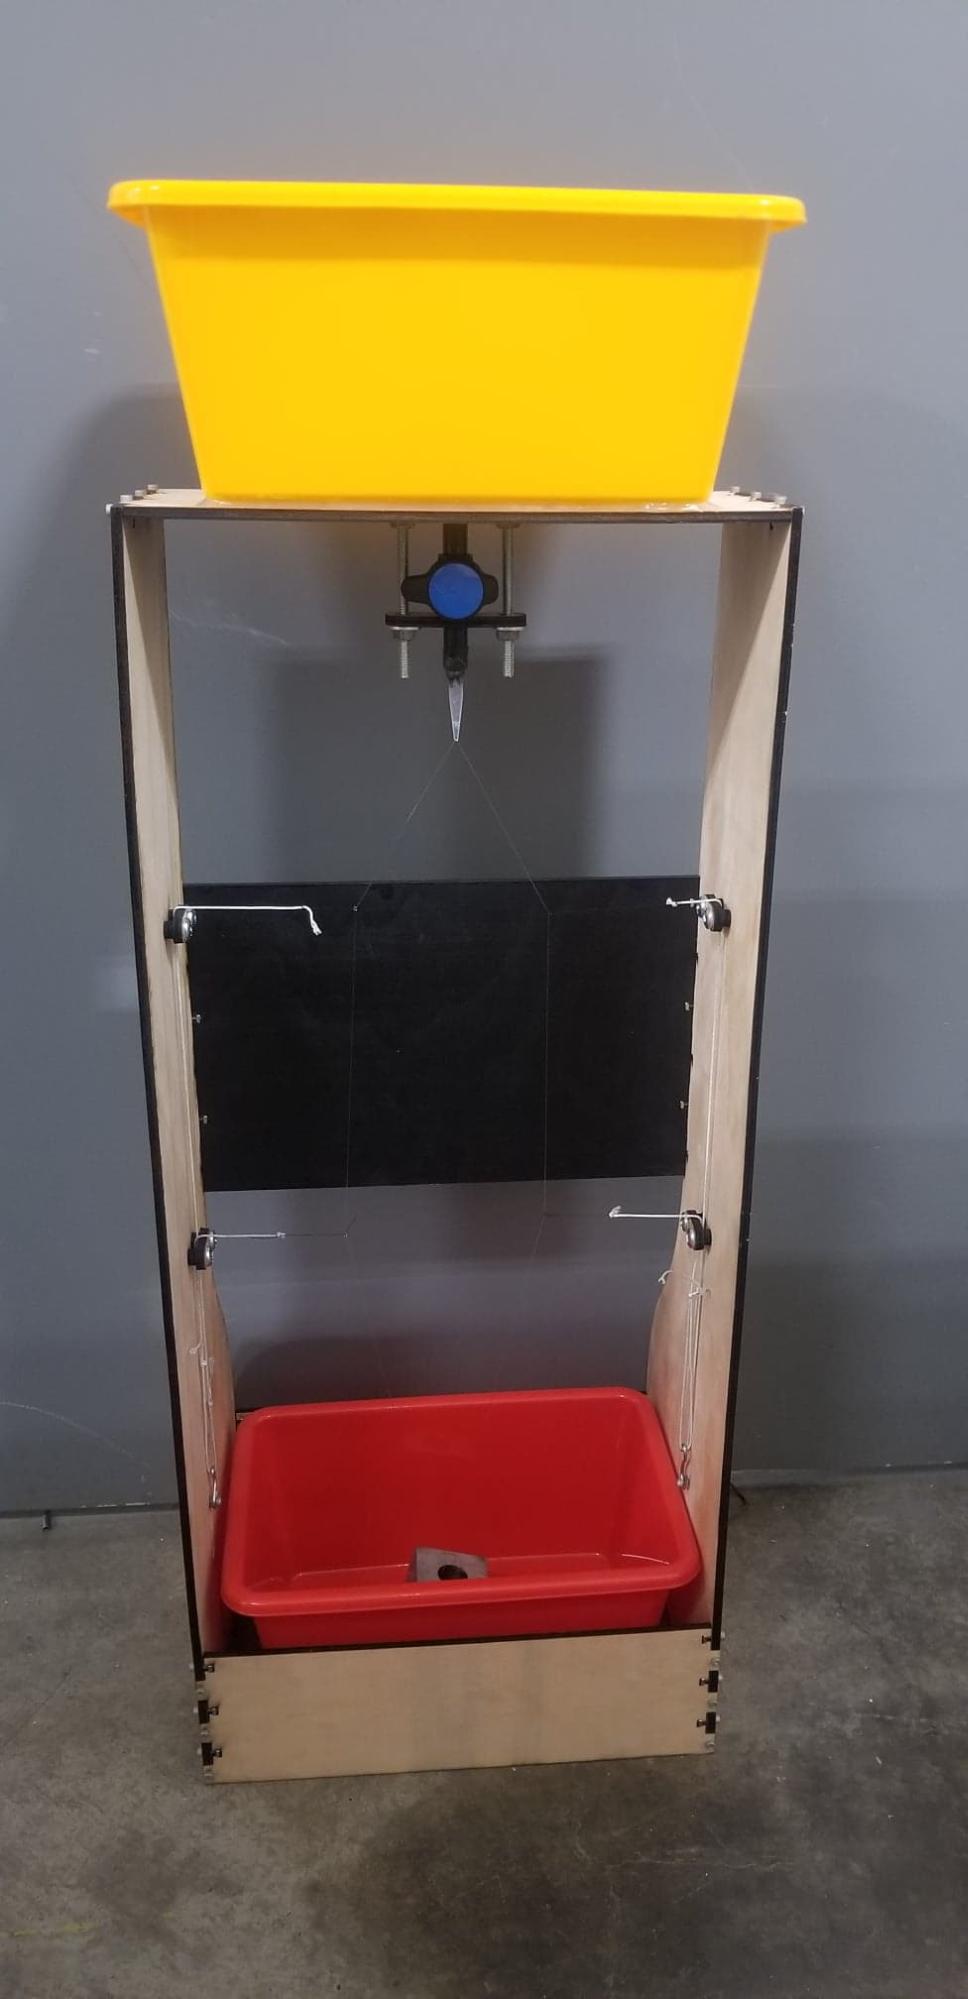
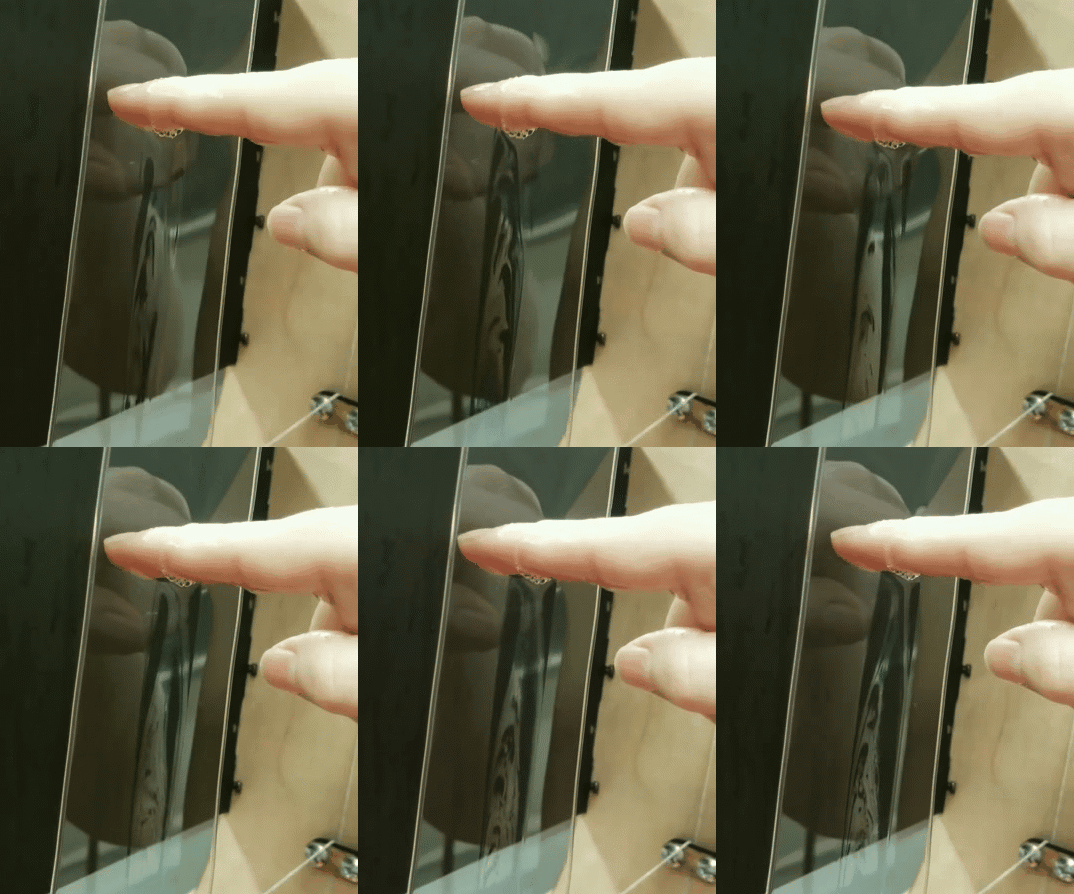
Soap film tunnels use a moving soap film (like a bubble) to produce visualizations of 2-D fluid flow. As a project for a fluid mechanics class at Brown University, we (three engineering students) decided to design and build a soap film tunnel that is easy to construct and is of manageable size and cost. Currently, soap film tunnels are used for laboratory experiments so they are significantly more difficult to make, more expensive and less portable. This design is not made for scientific research, but can get students excited about fluid mechanics. Once you build this soap film tunnel, it is easy interact with and visualize flow around various objects at various flow speeds.
You can learn more about our project and how a soap film tunnel works here:
https://blogs.brown.edu/engn1860rd/group-3-diy-soap-film-tunnel-for-flow-visualization/
What You'll Need
Tools
- Laser cutter
- Drill
- Paint brush
- Allen Key
- Scissors
- Hot Glue Gun (optional)
Materials
- ¼ inch Plywood: 2ft by 4ft Home Depot (4ft by 4ft) $11.23
- Two Storage Bins Amazon (pack of 4) $8.78
- JB Weld Amazon $5.67
- Valve Amazon (½ inch) $5.75
- Micropipette tip McMaster Carr (pack of 100) $4.27
- 5ft of 20 lb nylon cord Home Depot (25 ft) $2.28
- Dish Soap CVS (8 fl oz) $0.99
- Black Paint Amazon (2 Oz, Acrylic) $1.00
- 50 Small Bolts McMaster-Carr (M3 thread, 12mm long, pack of 50) $5.35
- 50 Small Square Nuts Amazon (M3 thread, pack of 100) $8.99
- 8 Medium Bolts McMaster-Carr (¼’’-20 thread, 1in long, pack of 10) $3.91
- 2 Long Bolts McMaster-Carr (¼’’-20 thread, 2in long, pack of 5) $3.42
- 12 Medium Nuts McMaster-Carr (¼’’-20 thread, pack of 50) $2.27
- String and Thread (any small section of thread and string will do) $0
- Weight to pull down cord (practically anything will do for this) $0
TOTAL COST $63.91
If you buy the materials where we bought them (see links in the table) the total cost is $63.91. We encourage you to find as much stuff as you can for free though. The hardware doesn’t have to be the exact same size that we used. See step 2 and the attached hardware pdf if you want to use different hardware.
Additional Optional Materials
- Small extension spring: By keeping tension in the cord with a spring instead of a weight there will be no swaying back and forth of the weight.
- Glycerol: This can help the soap film pop less easily
- Objects to put into the soap film: You can just use your finger or a pen, but you can also be creative and make whatever object you like!
- Magnets: If you want to attach objects to the frame so you don’t have to hold them in the test section, magnets can be a nice way to do this.
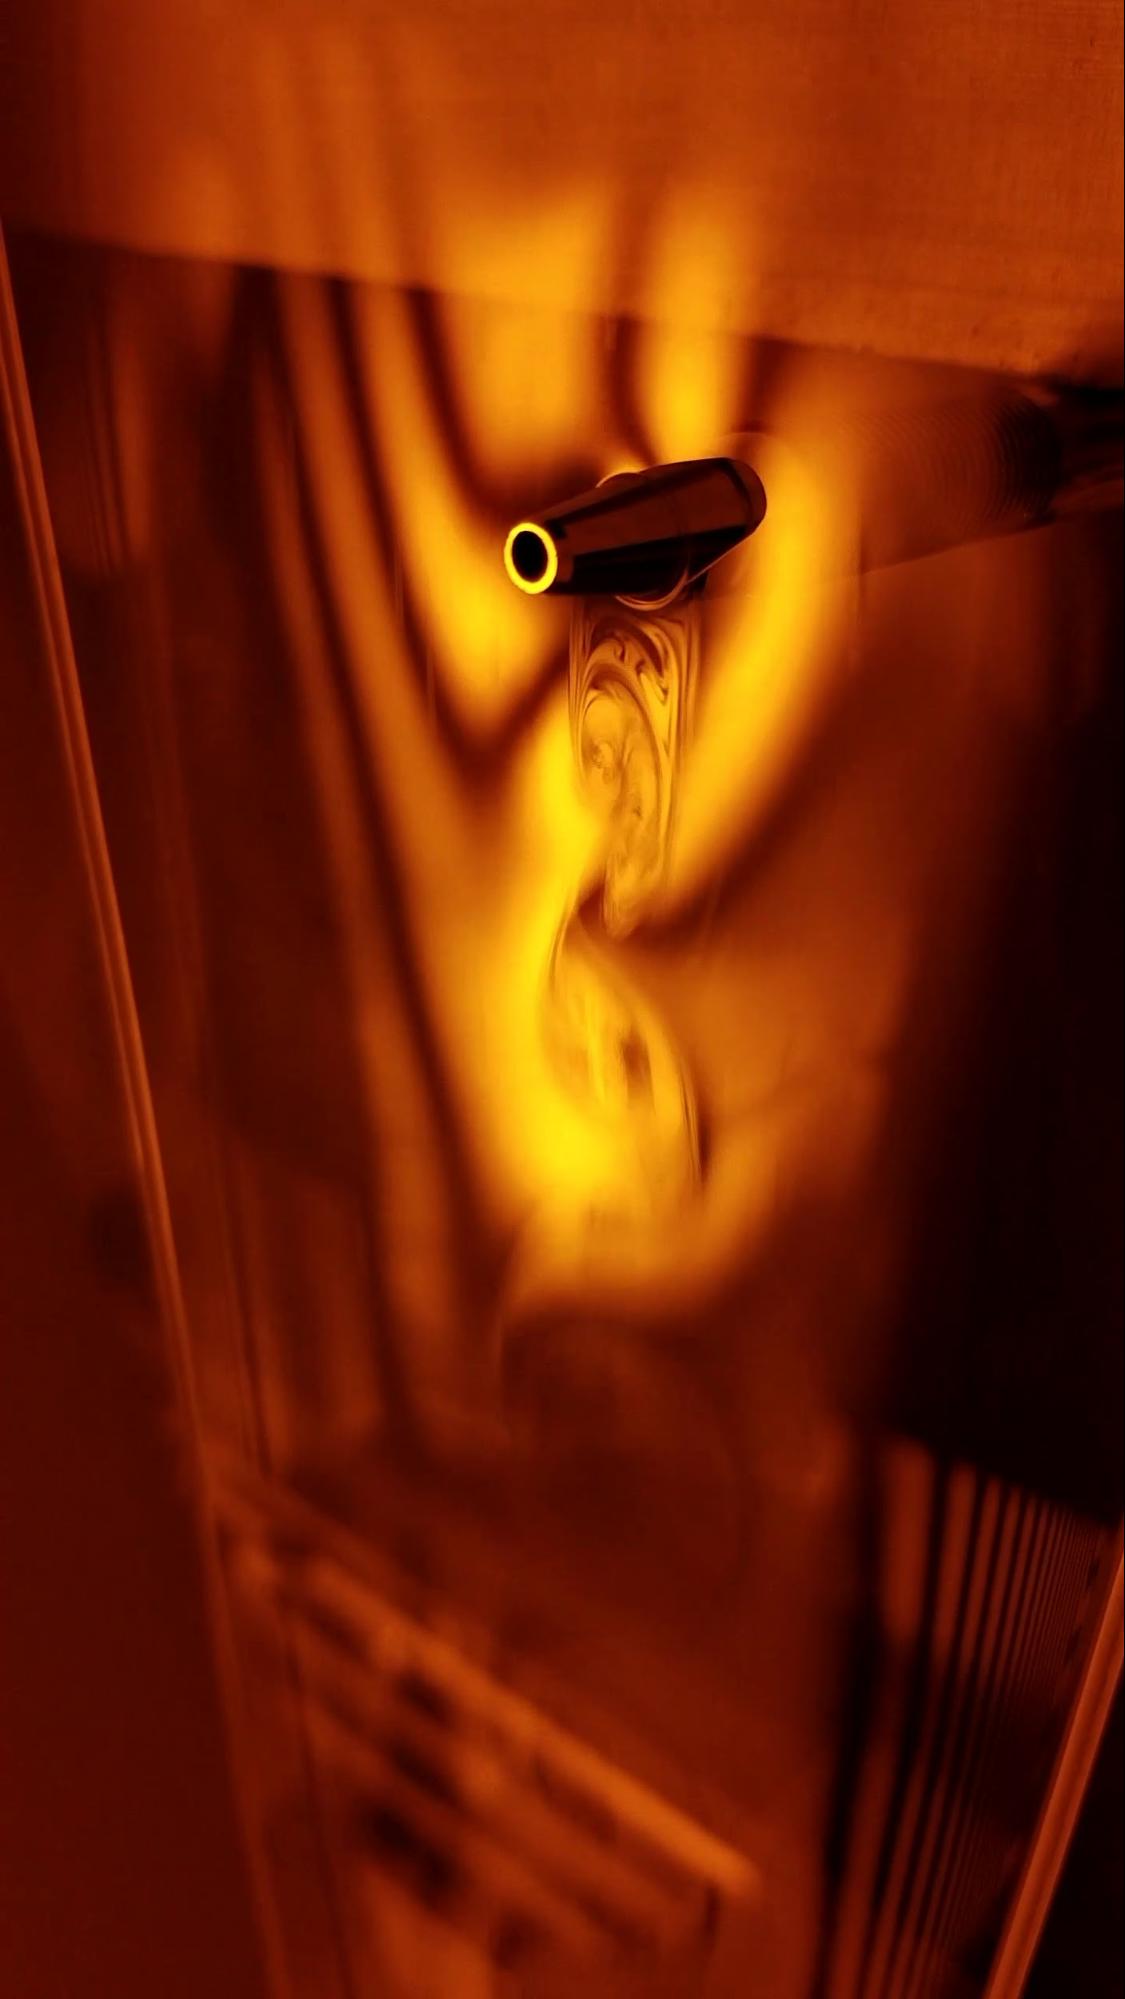
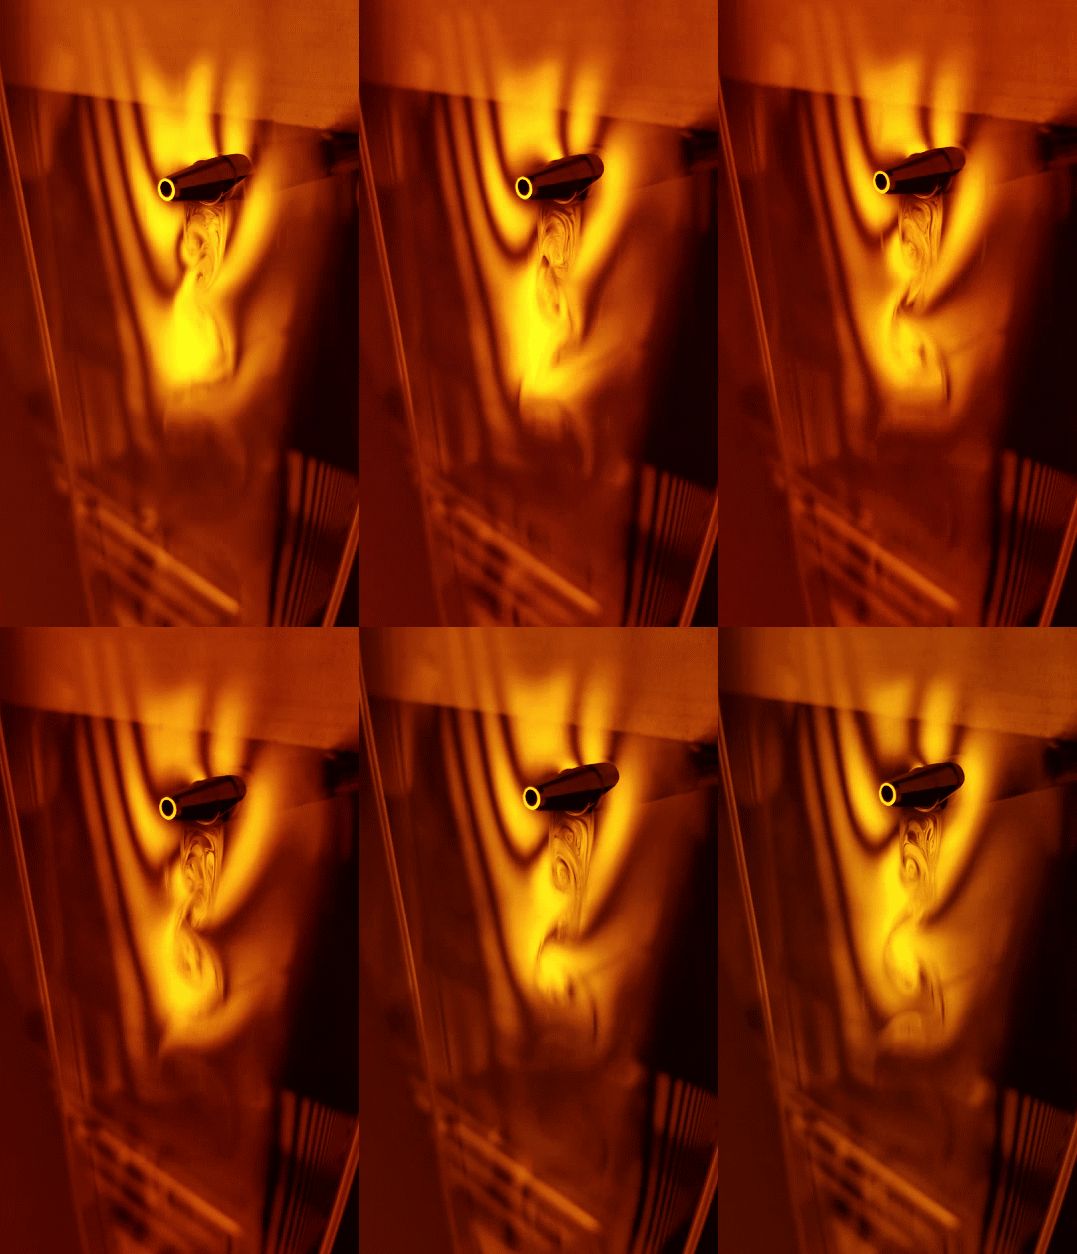
- Low pressure sodium lamp: If you use a low pressure sodium lamp in a dark room with your soap film tunnel you can get really nice visualizations like the images included above in this step.
Downloads
Get Illustrator File to Laser Cut
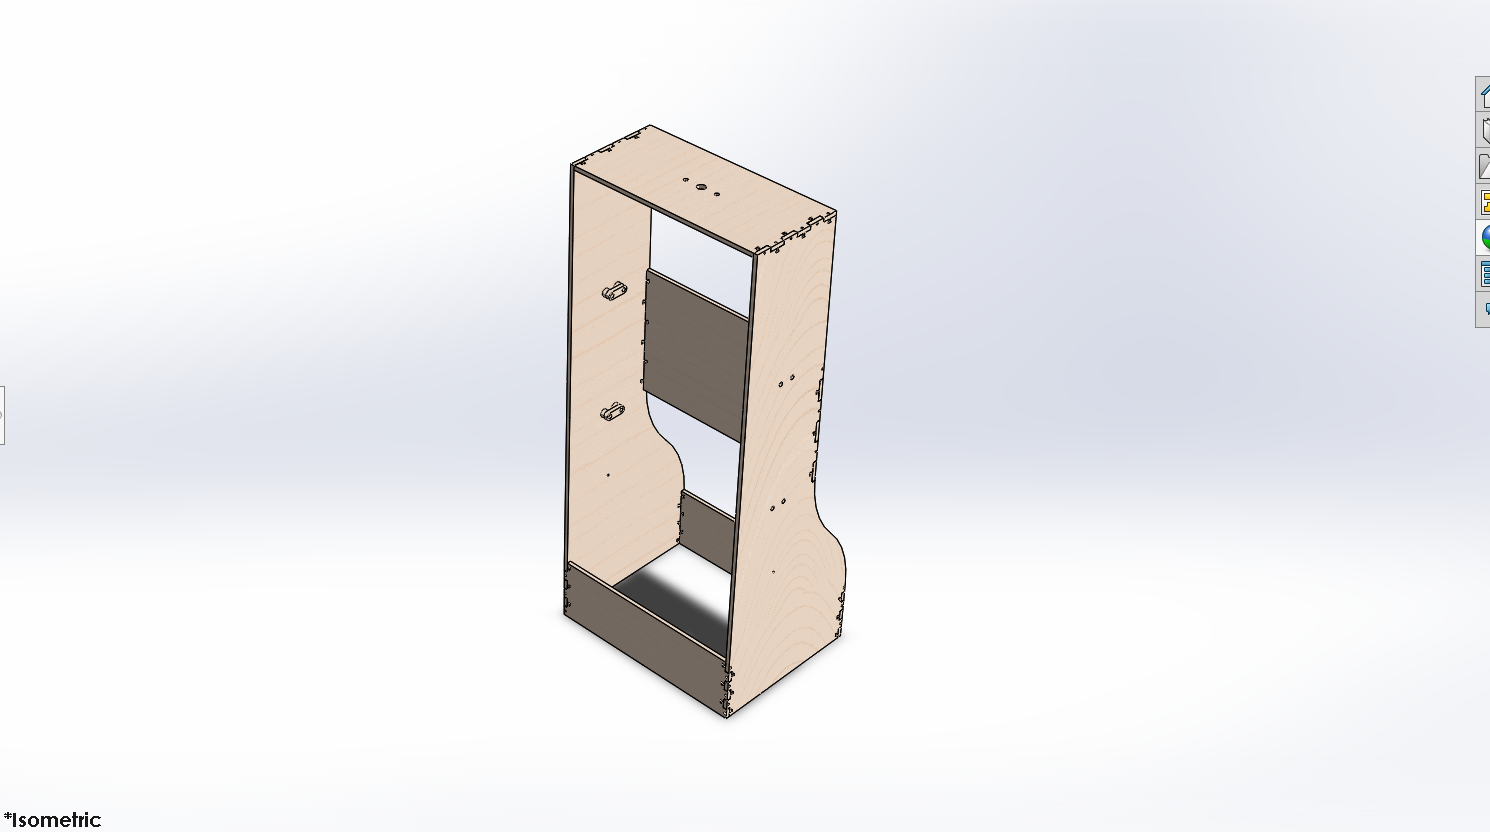
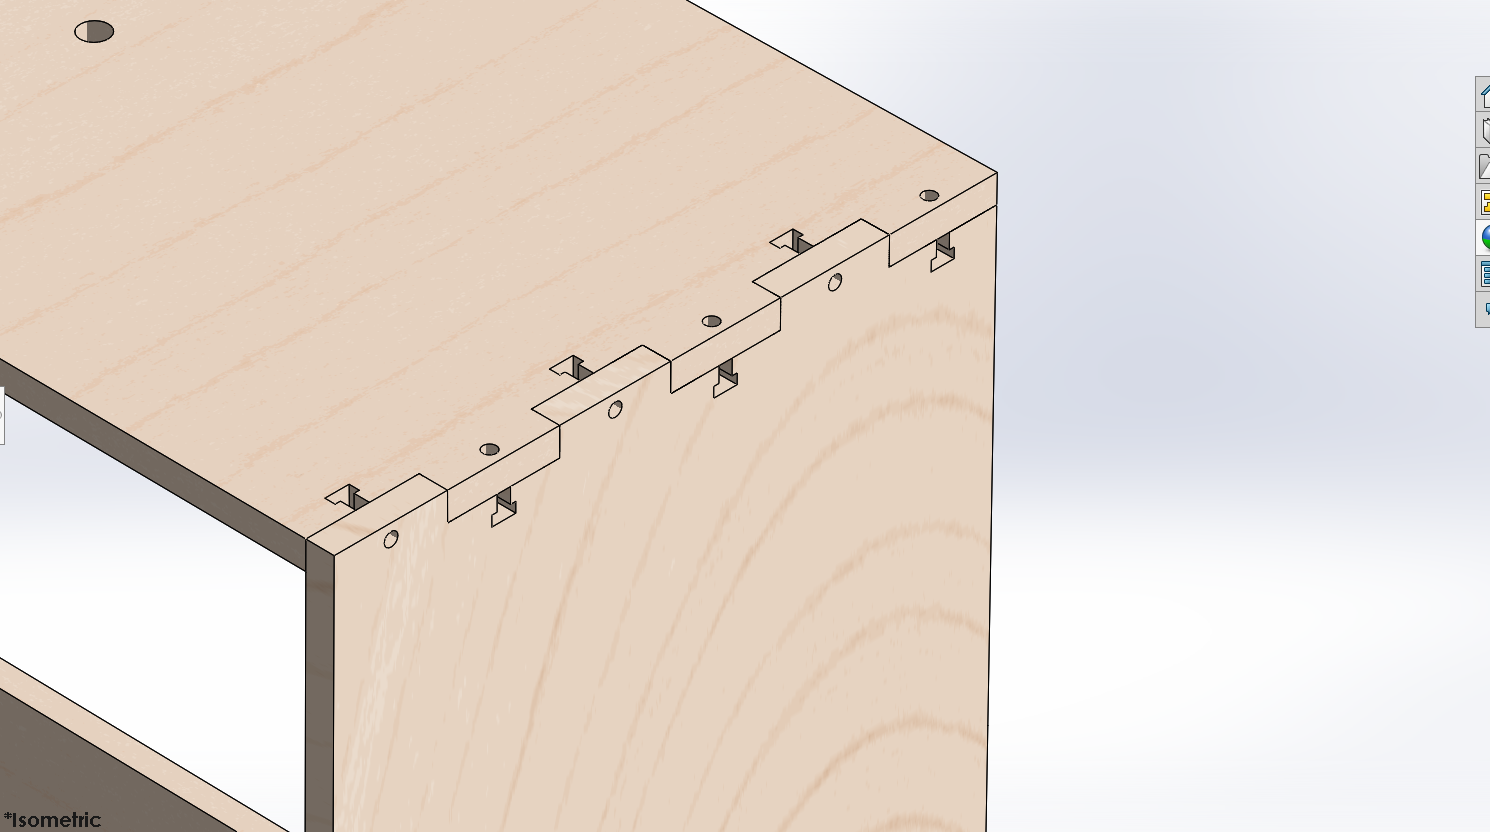

Attached to this step are find five files you can download:
- Final Soap Film Tunnel.SLDASM: This is the SOLIDWORKS assembly
- Soap Film Tunnel Sides.SLDDRW: This is the SOLIDWORKS drawing of the two large side pieces
- Soap Film Tunnel Slats.SLDDRW: This is the SOLIDWORKS drawing of the other pieces
- Soap Film Tunnel Sides.AI: This is the Adobe Illustrator file of the two large side pieces to be used on the laser cutter with a piece of wood that is 18 by 32 inches
- Soap Film Tunnel Slats.SLDDRW: This is the Adobe Illustrator file of the other pieces to be used on the laser cutter with a piece of wood that is 16 by 24 inches
If you are happy to use the same frame dimensions as we did and you are also using ¼’’ thick wood and hardware with the same critical dimensions as us (these are shown in red in the hardware pdf), then you can simply use the Illustrator Files on the laser cutter and skip the rest of this section.
If you are using wood or hardware of different dimensions (or you want to change the size of the frame) keep reading to see how you can get your Illustrator File to laser cut with.
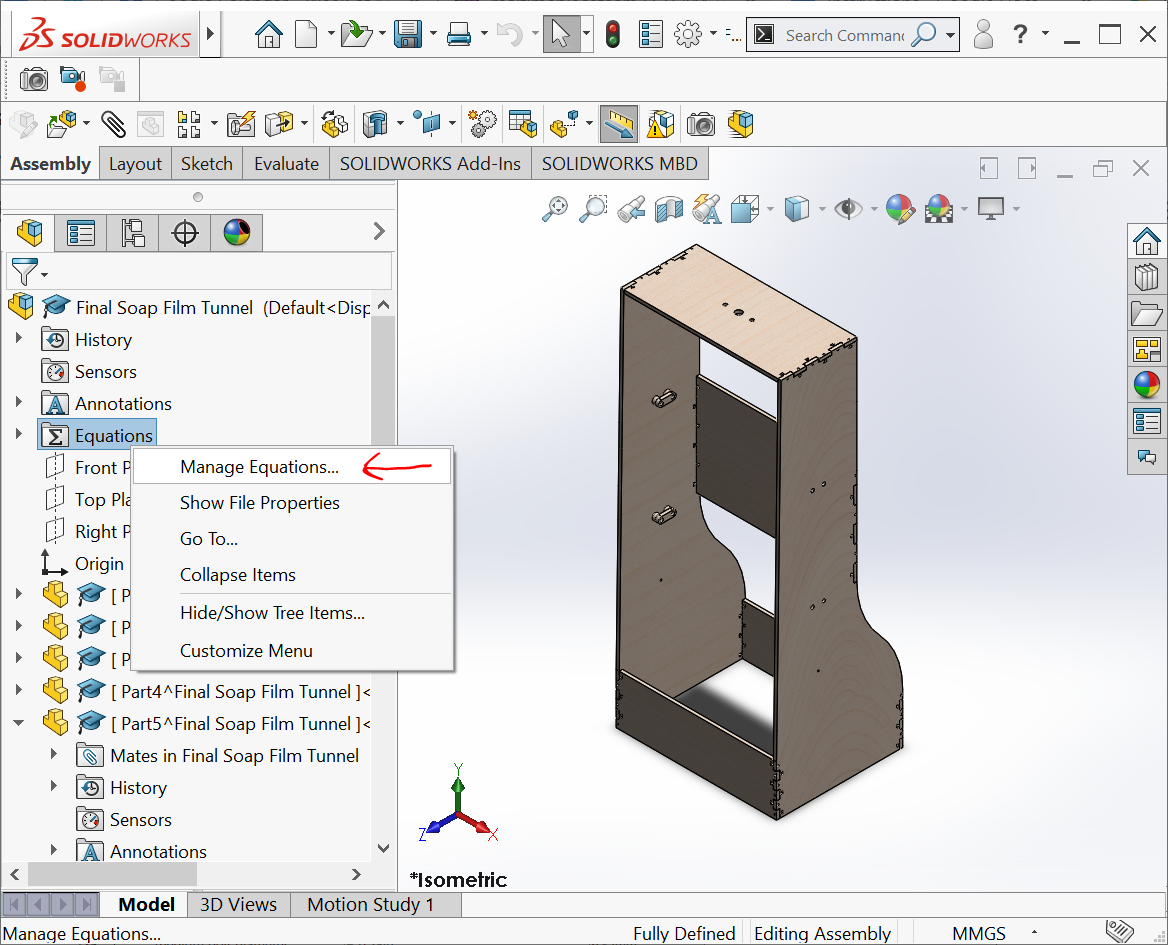
- Open the SOLIDWORKS assembly called: Final Soap Film Tunnel.SLDASM
- Right click on ‘Equations’ in the feature manager design tree and select ‘Manage Equations…’ , as in the third attached image.
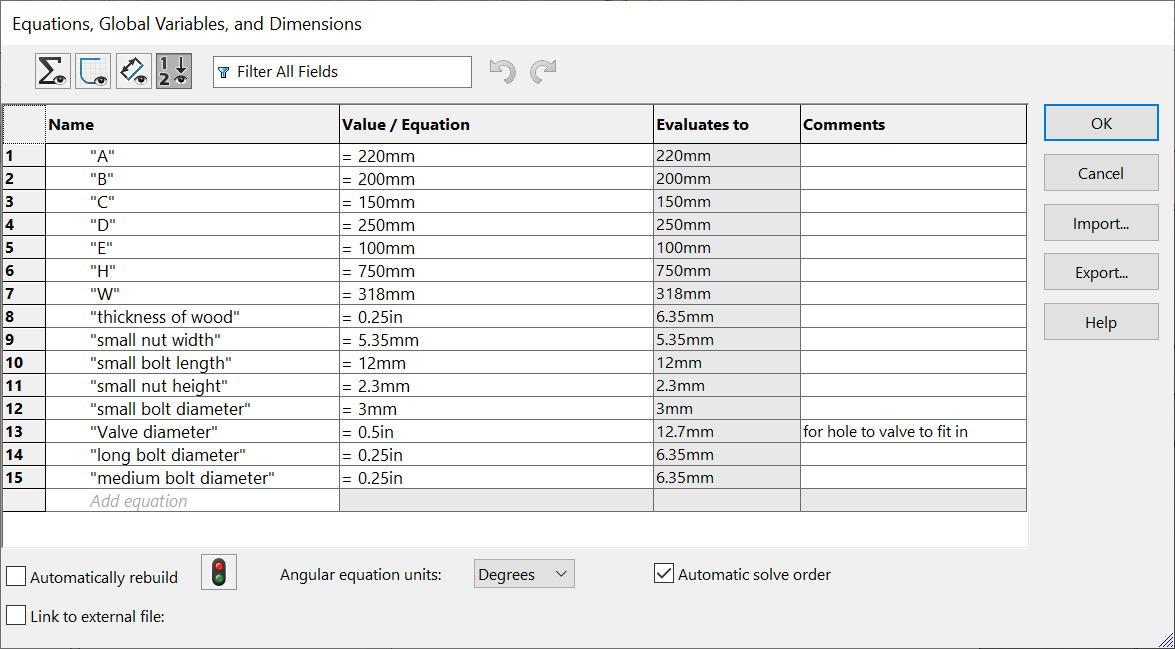
- The Equation manager window will open and should look like the fourth attached image.
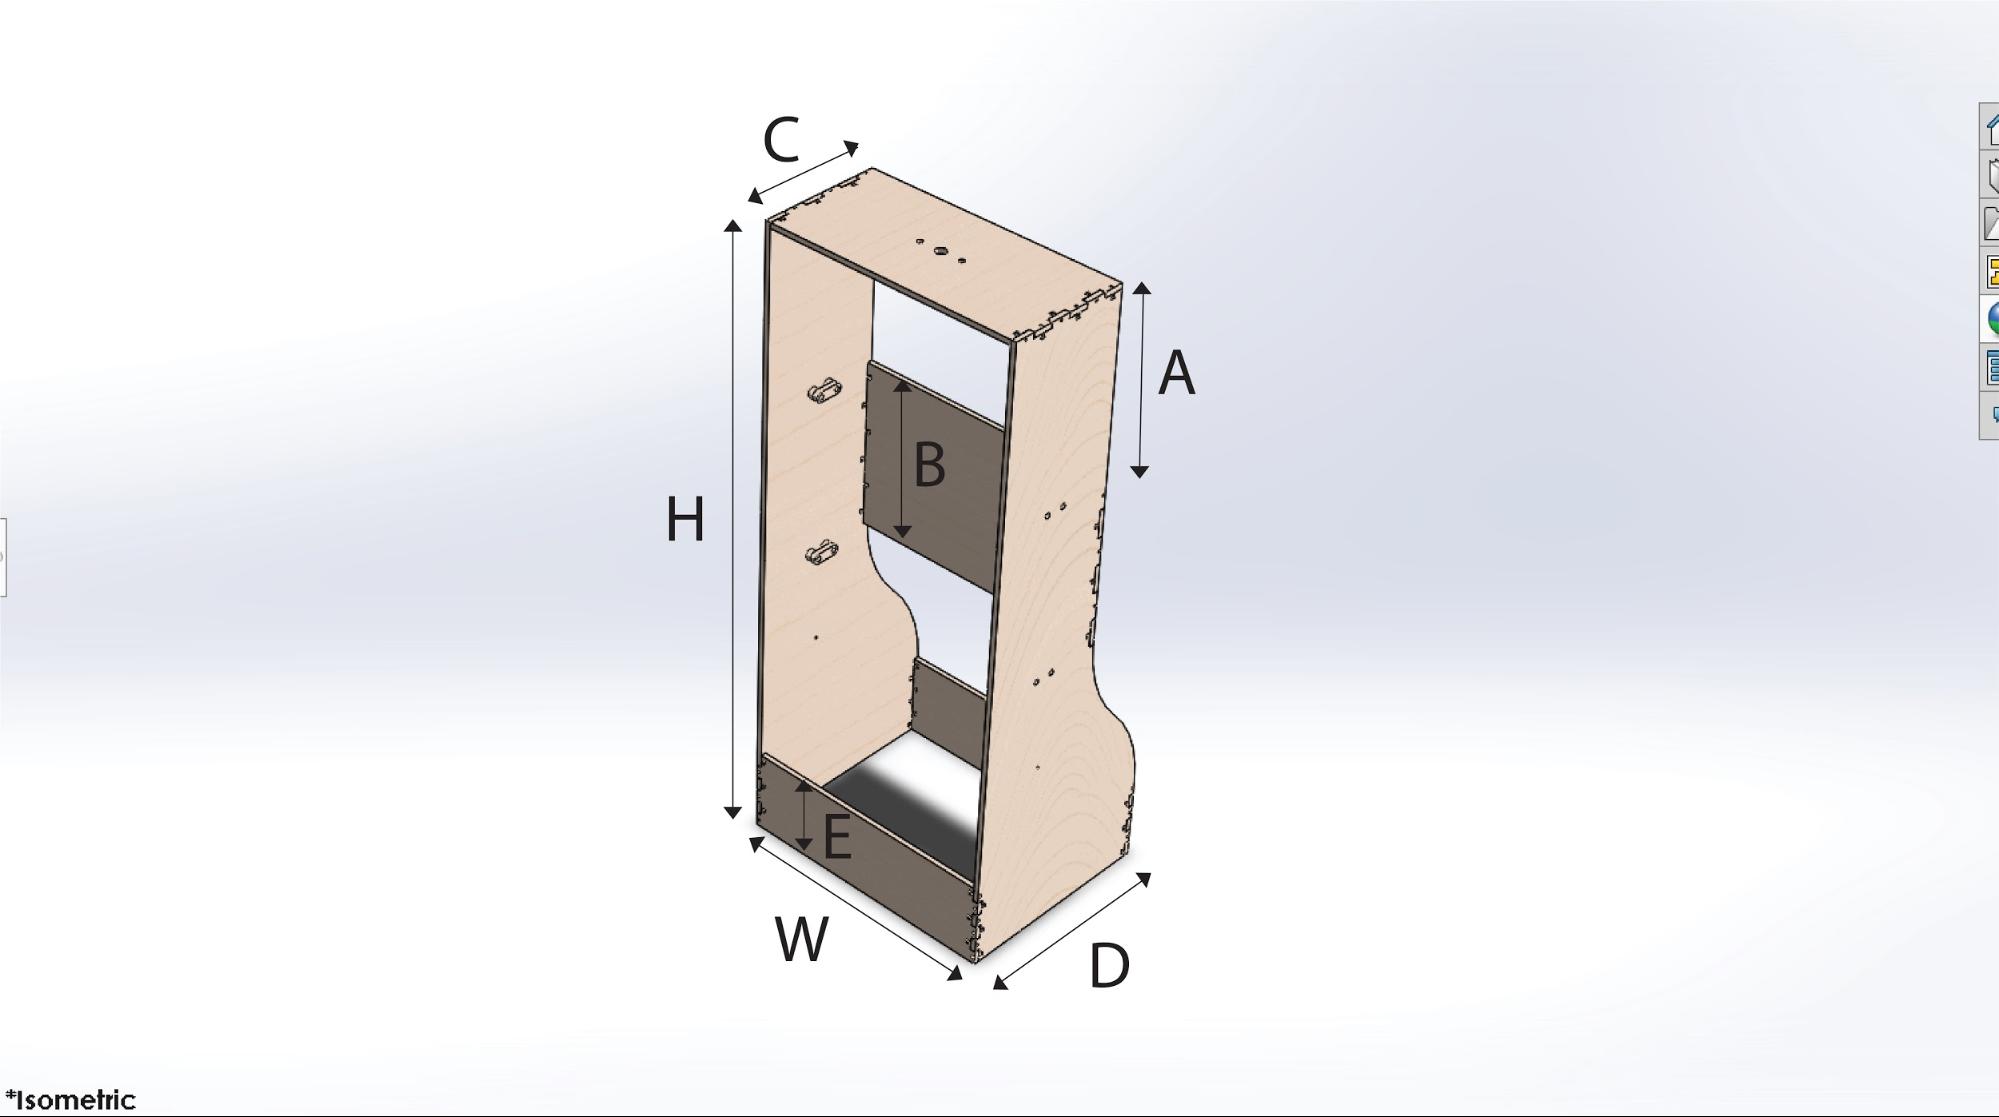
- Double click in the ‘Value / Equation’ column to change any values you like. Remember to refer to the hardware pdf when changing hardware dimensions to make sure your hardware is suitable. You can also change the capital letters to change the size of the frame. These letters are defined by this diagram in the fifth attached image.
- When you are done adjusting these dimensions click ‘OK’ and watch the graphics update. If you are getting errors make sure that your dimensions make sense and work within the criteria on the hardware pdf.
- Once you are happy with your assembly, save and close it.
- Next open the SOLIDWORKS drawing called: Soap Film Tunnel Sides.SLDDRW
- This drawing should have updated with your dimensions. If it no longer fits on the page that means you might need a piece of wood larger than 2ft by 2ft and a laser cutter larger than 18 by 32 inches. If you have this and you want to increase the size of the SOLIDWORKS drawing you can do this right clicking on ‘Sheet Format 2’, selecting ‘Properties’ and then adjusting the Custom Sheet Size.
- If it looks good then go to ‘File’ and select ‘Save As’, as in the sixth attached image.
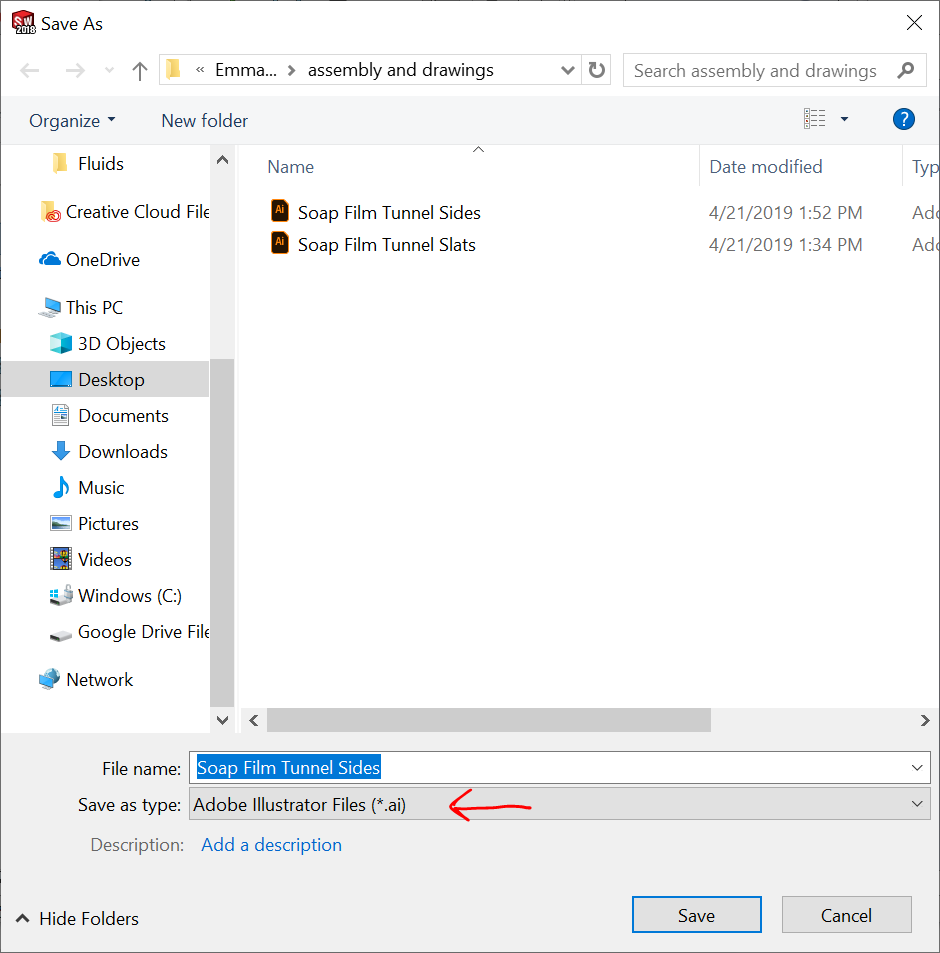
- Change the file type to an Adobe Illustrator File and then save it, as in the seventh attached image. This is the file you can use on the laser cutter.
- Save and close the SOLIDWORKS drawing. Repeat steps 7-11 but with the drawing: Soap Film Tunnel Sides.SLDDRW
Laser Cut the Frame
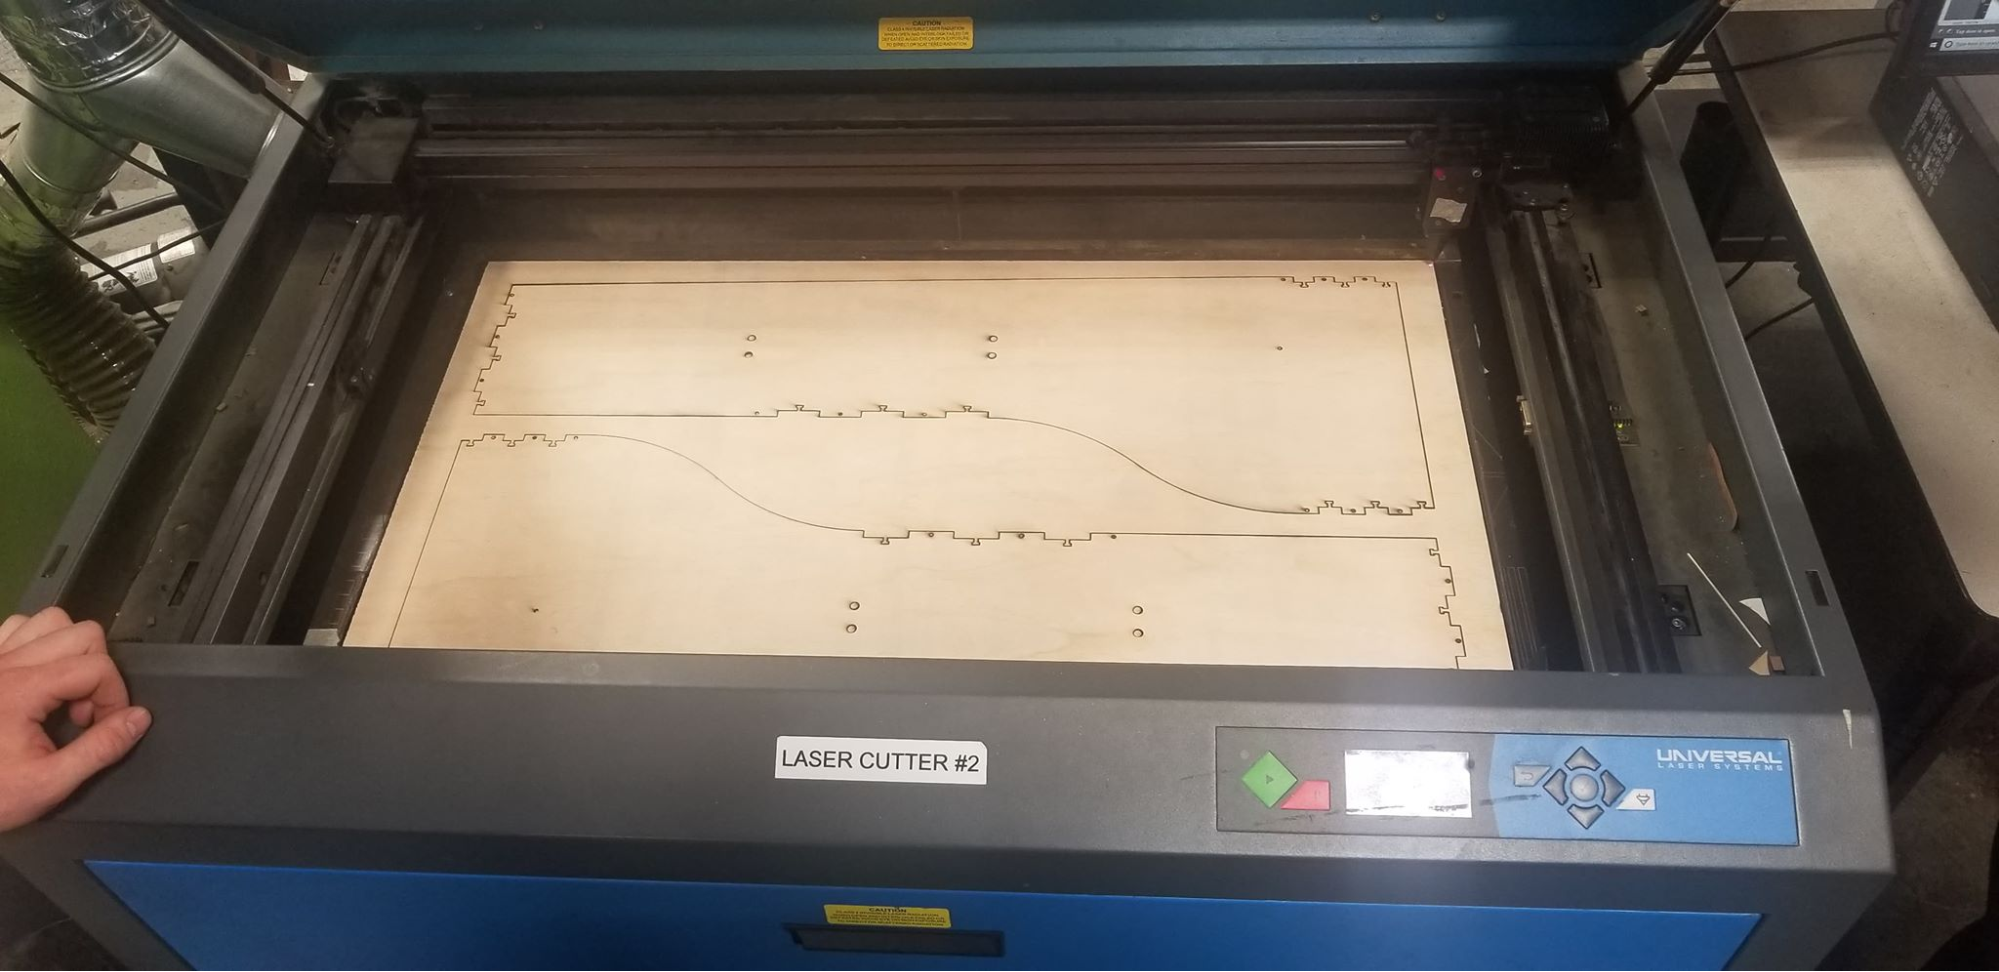
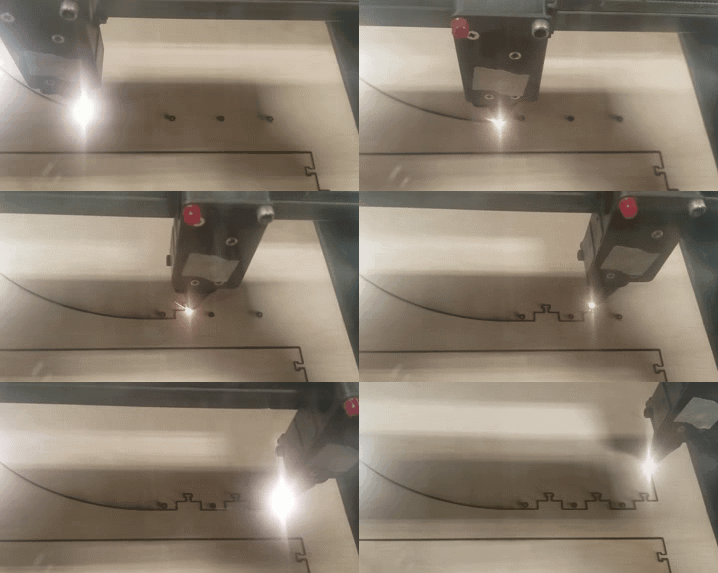
Now that you have your Illustrator Files you can use them to laser cut the frame. Take your 2ft by 2ft piece of wood and cut it into two pieces: a 18’’ by 32’’ piece and a 16’’ by 24’’ piece.
- Laser Cut “Soap Film Tunnel Sides.AI” onto the 18’’ by 32’’ piece.
- Laser Cut “ Soap Film Tunnel Slats.AI” onto the 16’’ by 24’’ piece.
If you need some instructions on how to use a laser cutter, click here for a tutorial.
Paint the Frame
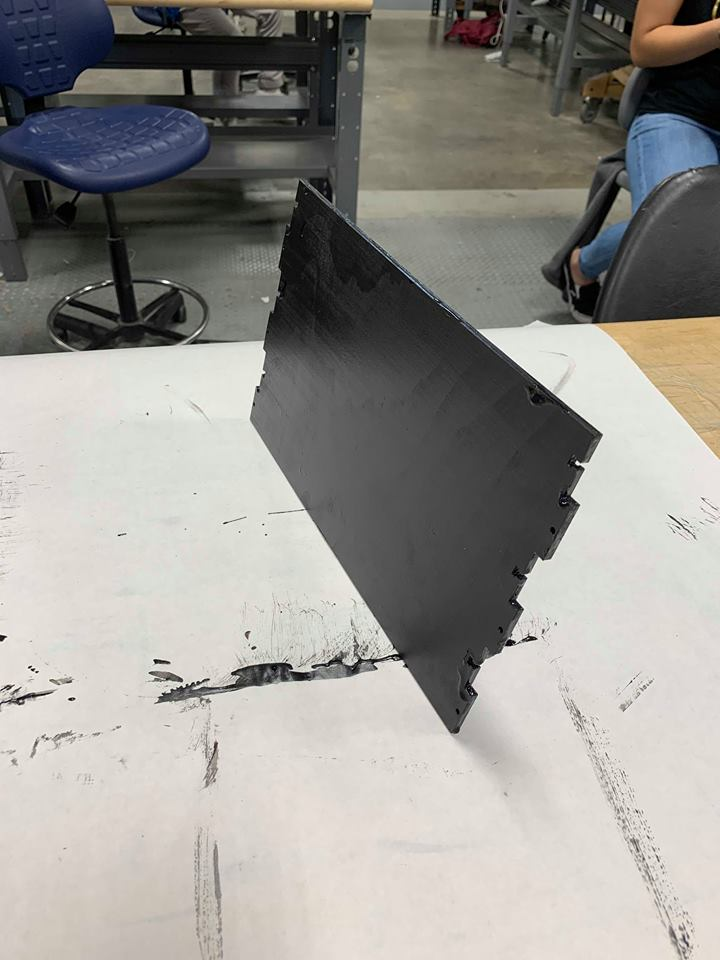
Paint the piece of wood that goes behind the test section black. This will make it easier to visualize the flow in your soap film.
While you wait for this to dry, feel free to continue with the other steps.
Assemble the Frame
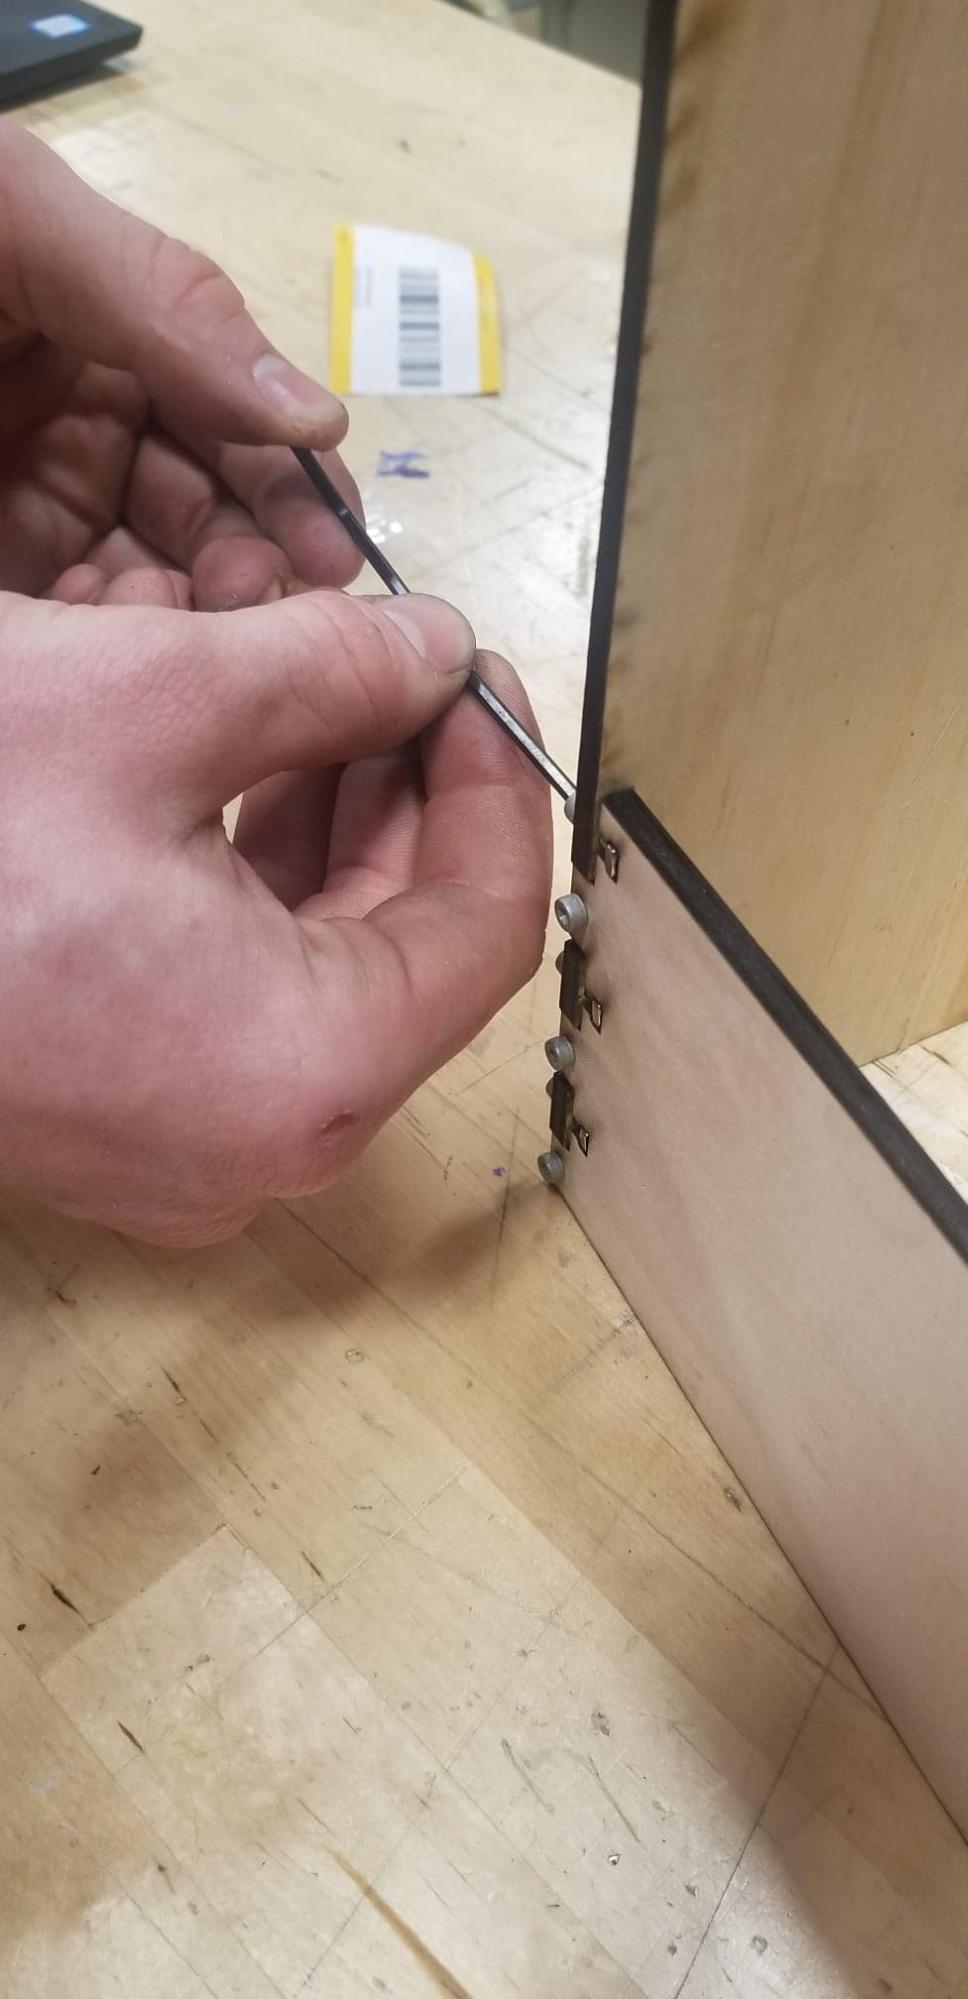
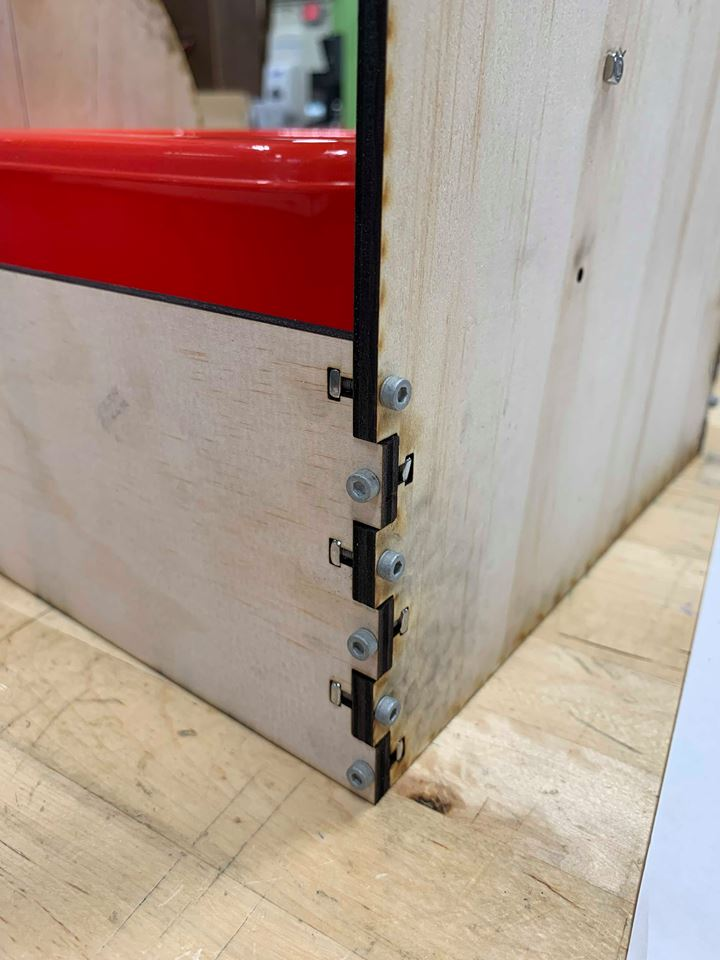
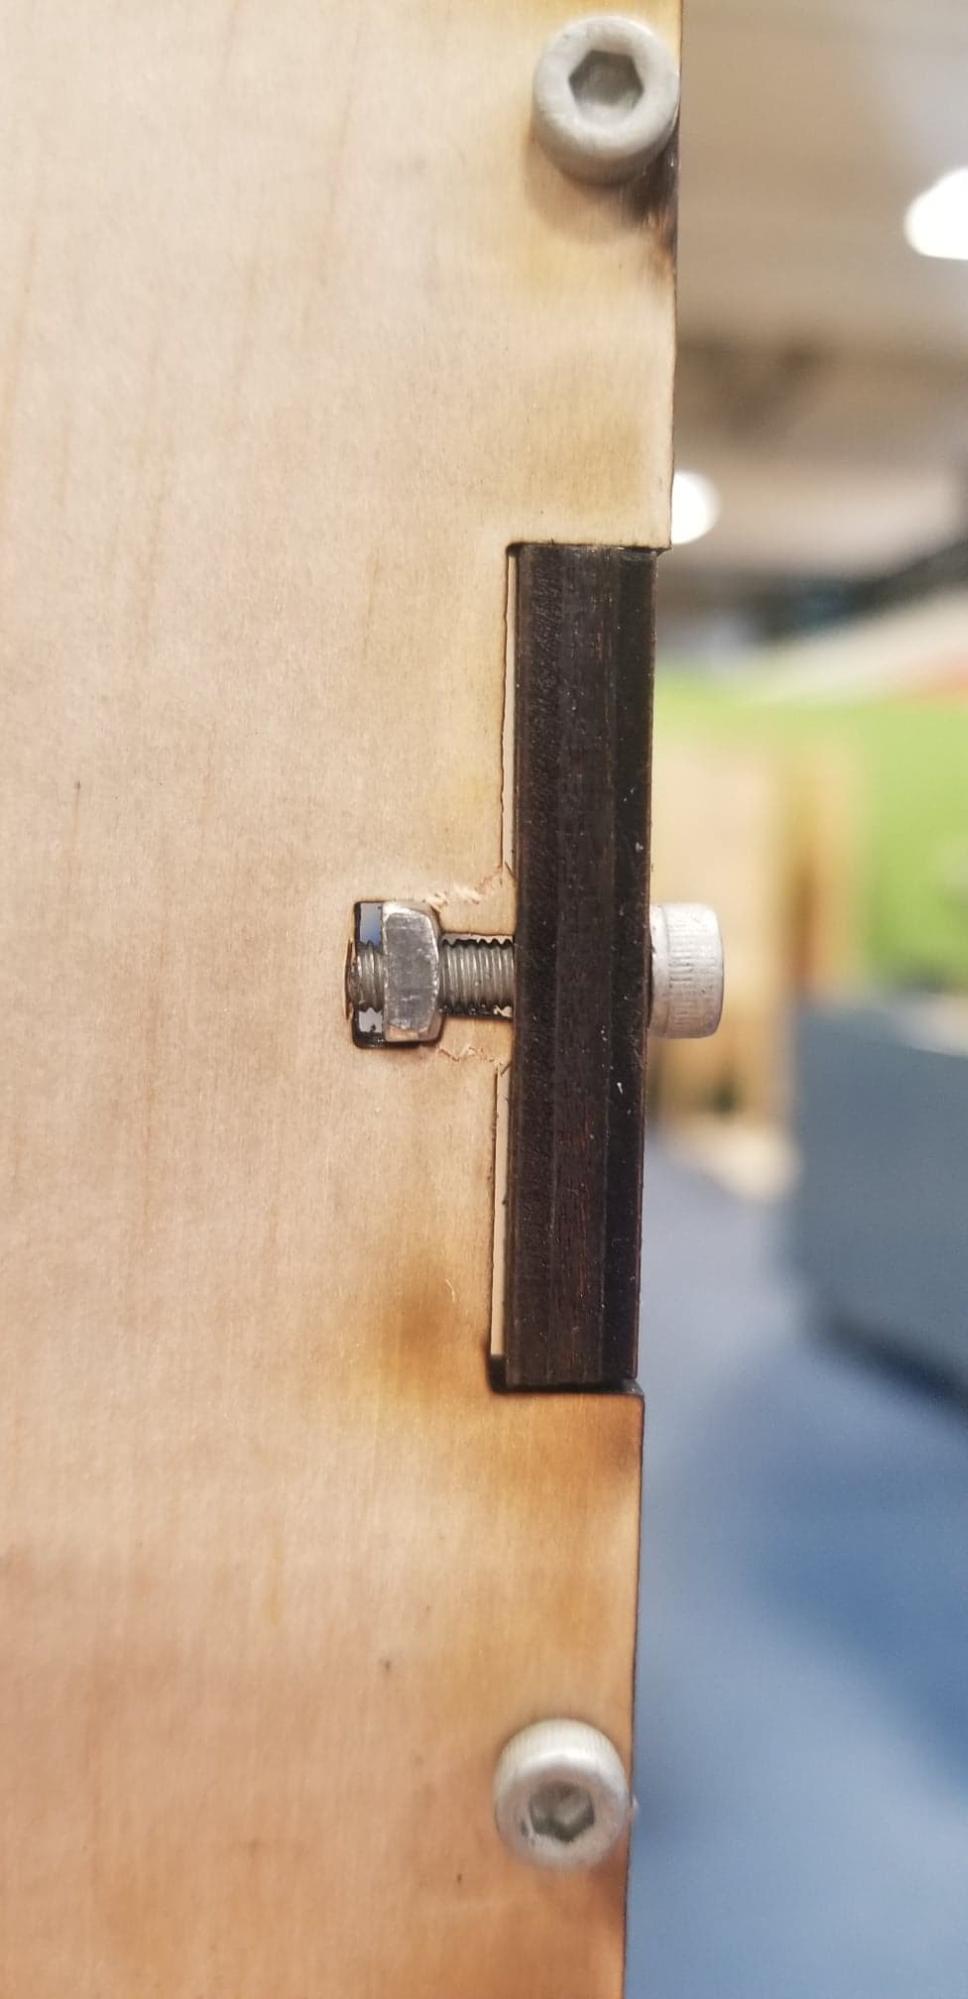
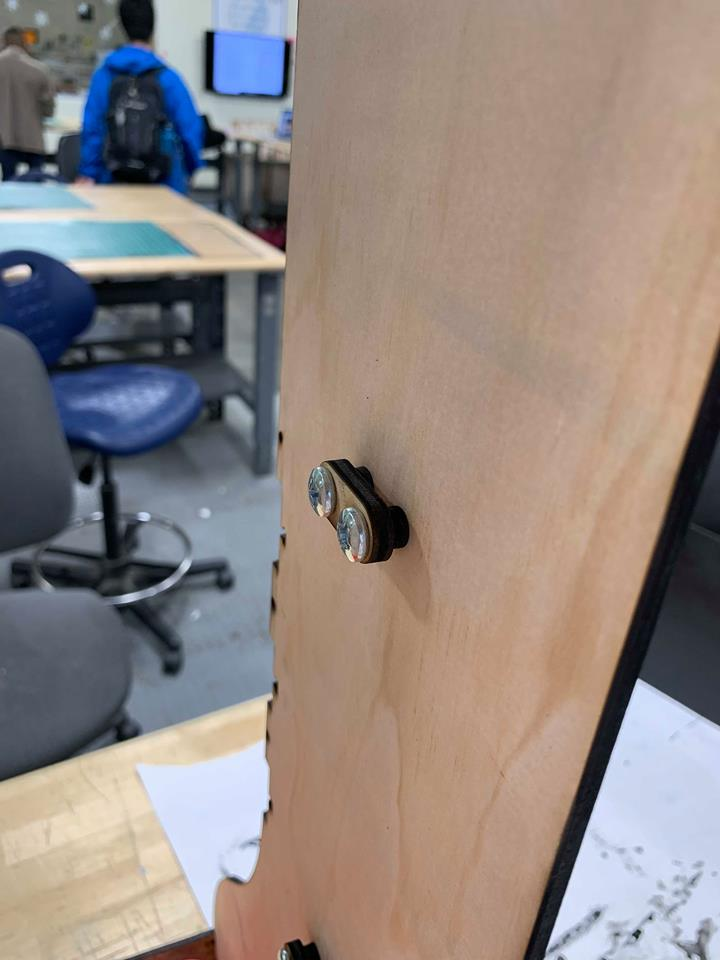
Now you have everything ready to assemble your frame!
Attach the finger joints with the small nuts and bolts, then tighten them with an allen key (see third image attached to this step), but don’t tighten too much as you might crack the wood.
Use the medium nuts and bolts along with the small laser cut pieces as makeshift U bolts, like the fourth image.
Assemble the Nozzle
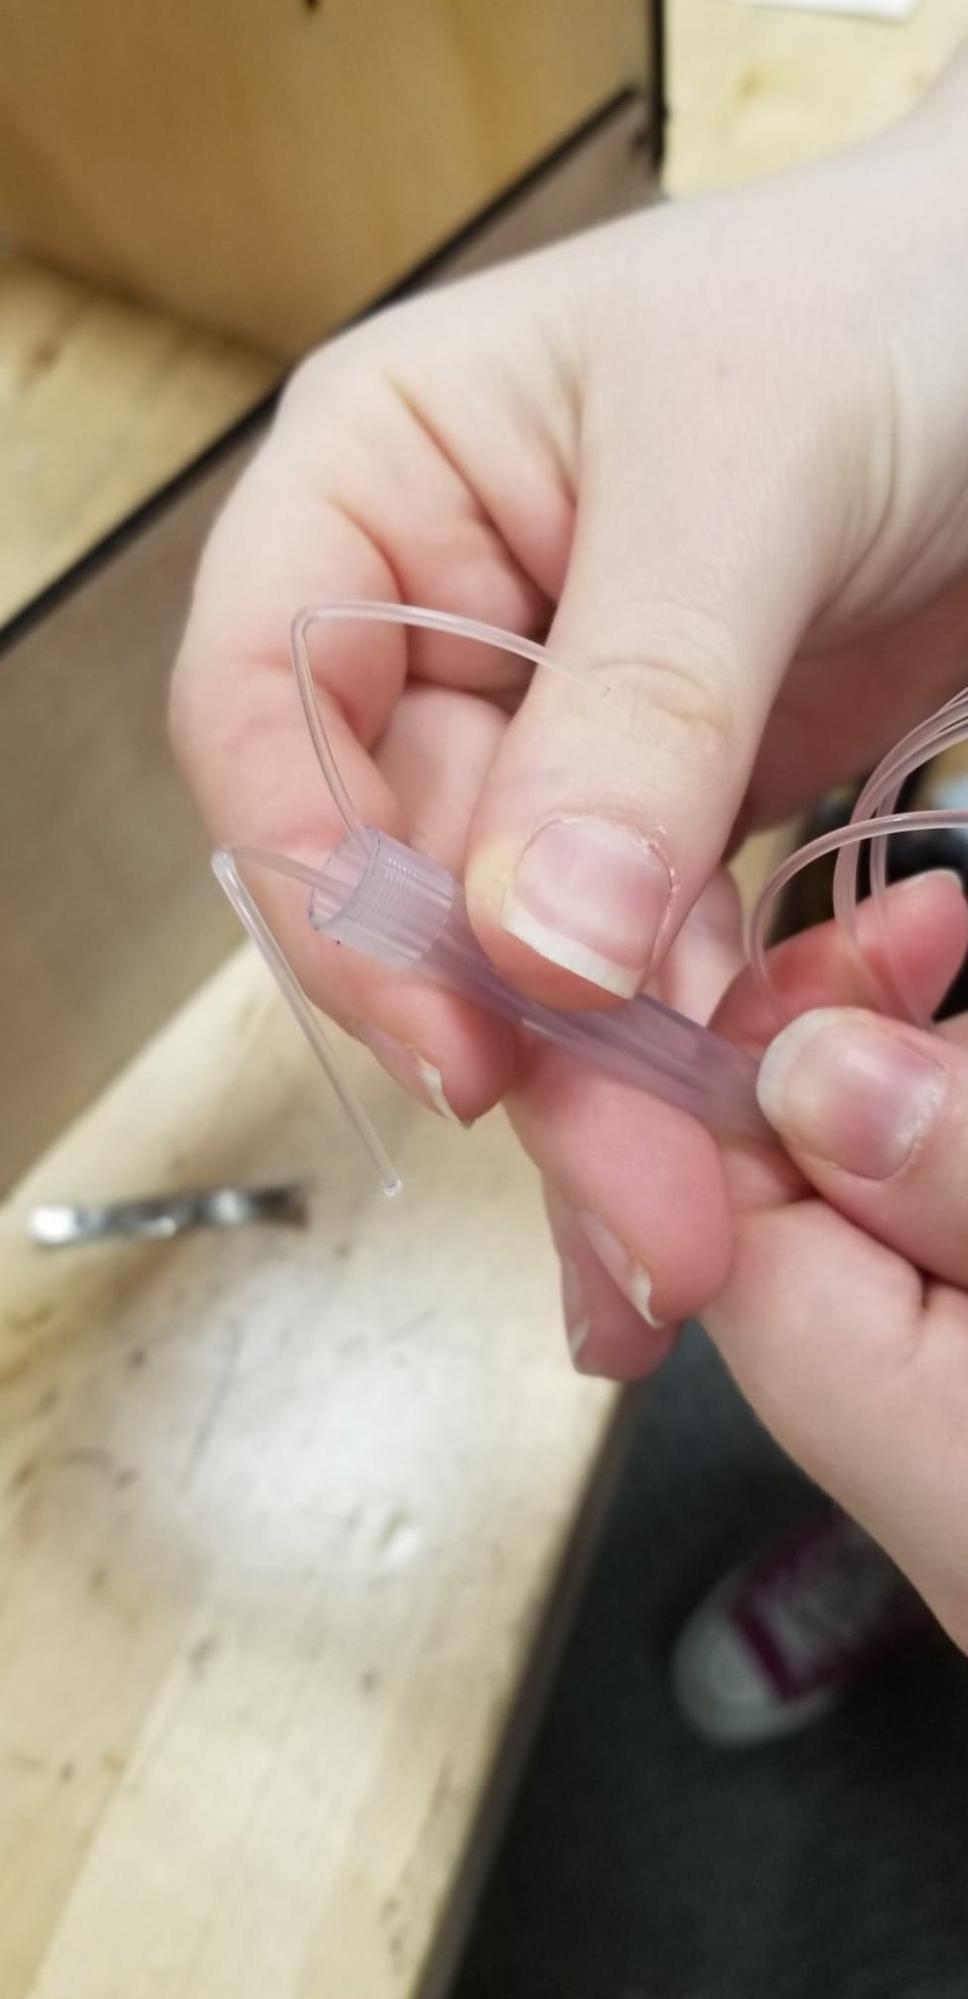
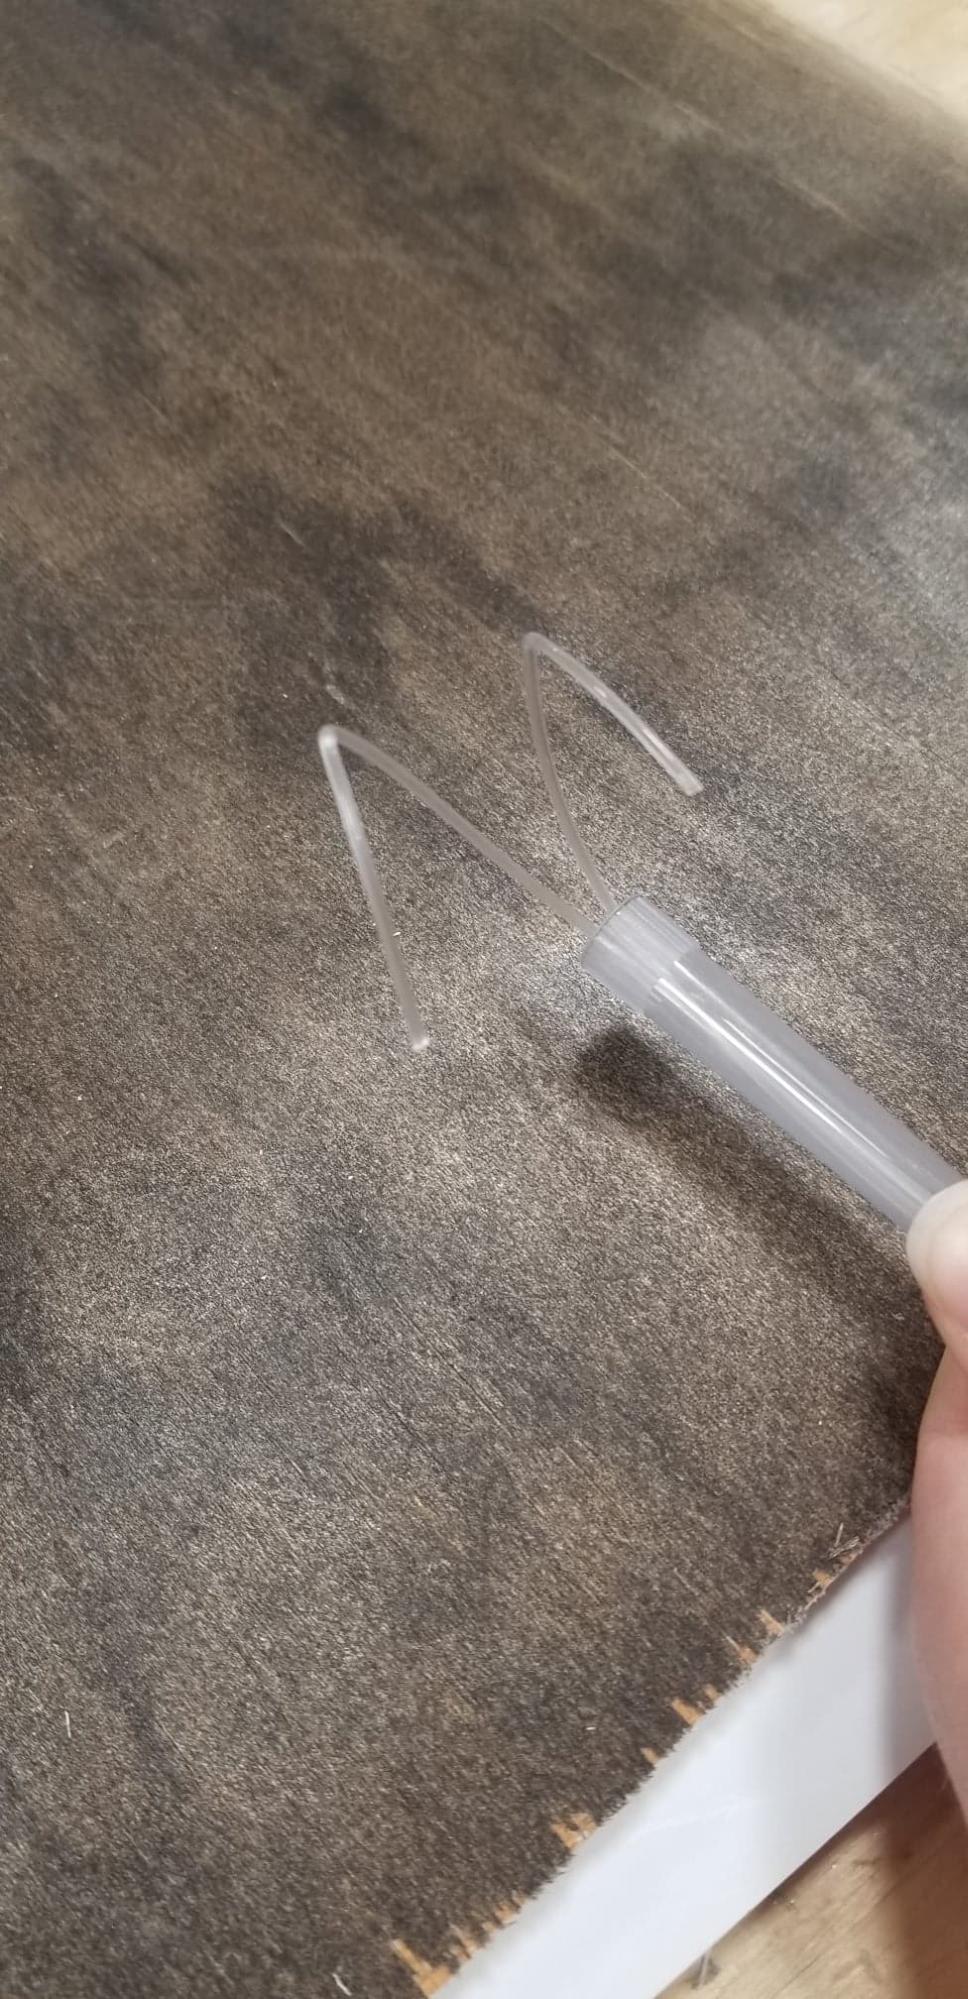
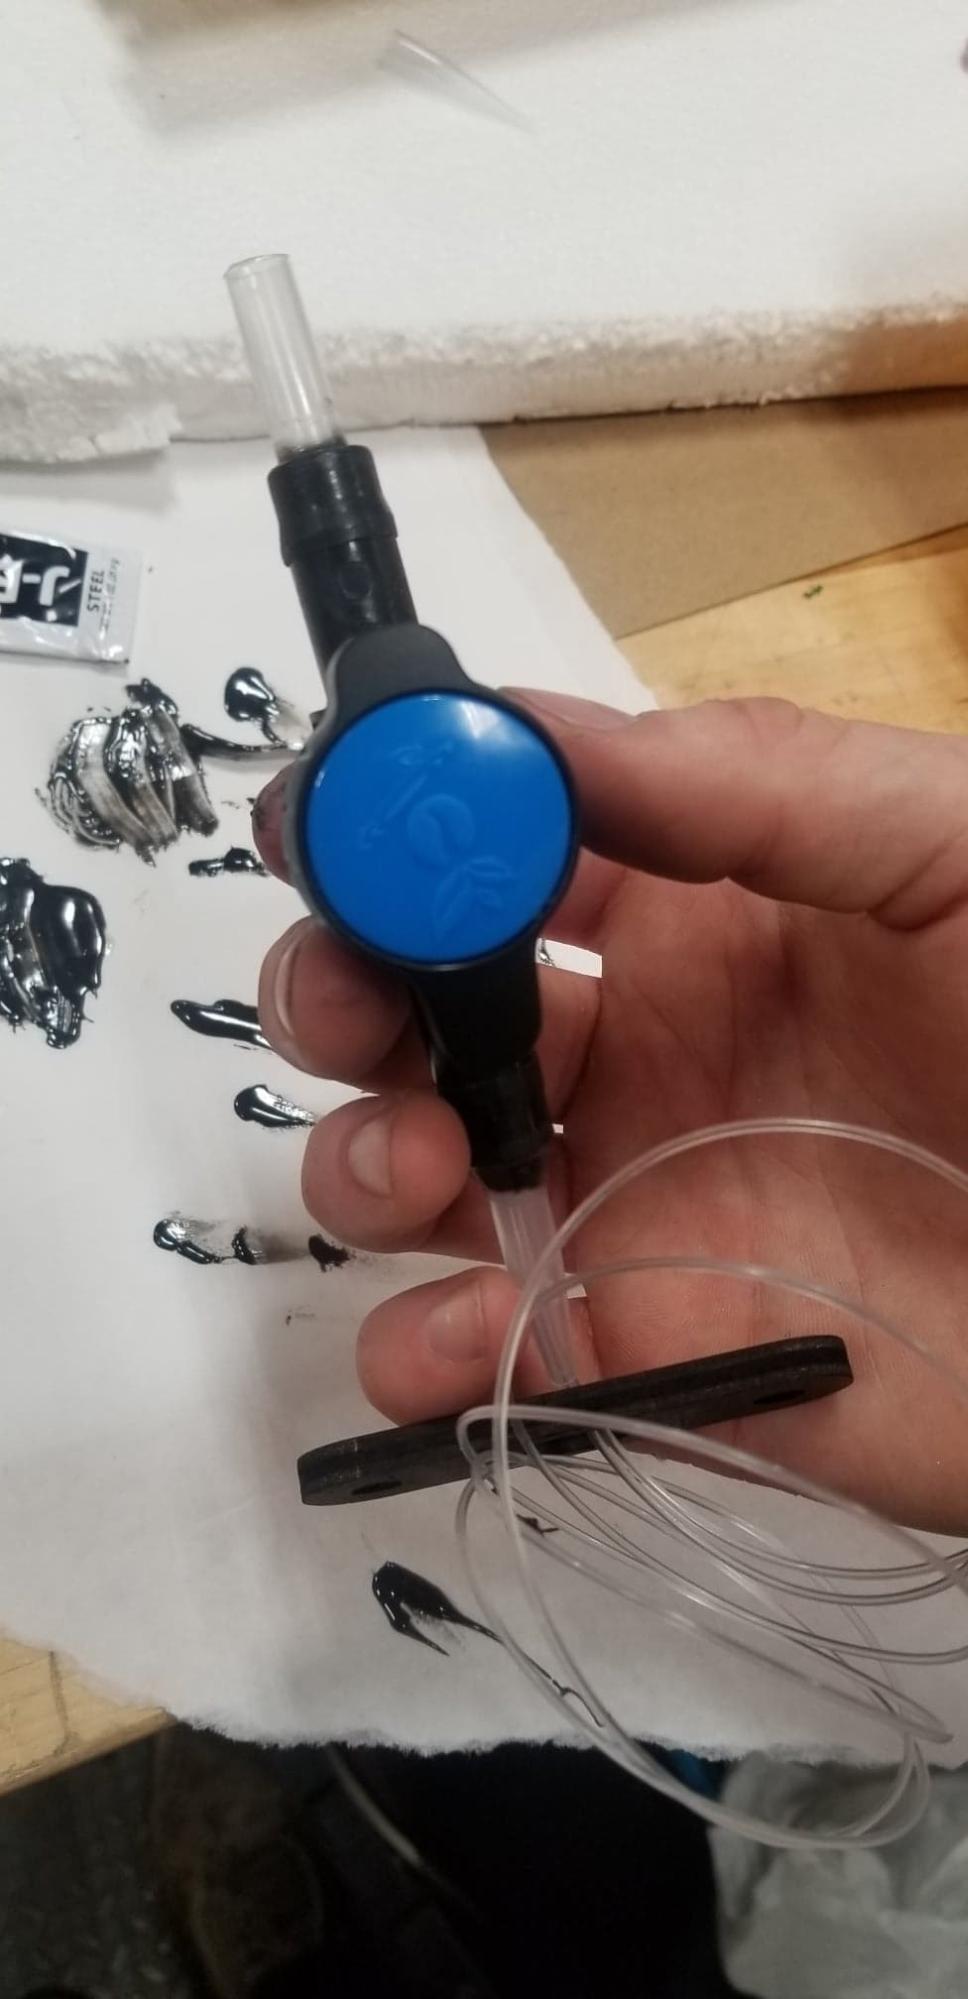
Cut a piece of nylon cord double the length of the soap film tunnel and thread both ends through the micropipette tip. In order for the cord to fit you will need to cut the end of the micropipette to make the opening larger.
Crimp the ends of the cord so they stick out like the first and second images attached to this step.
Next use JB weld to attach the micropipette to the nozzle. If you need to extend your nozzle to be higher you can attach half of another micropipette tip to the other end like the third image attached to this step.
Drill and Attach the Bucket
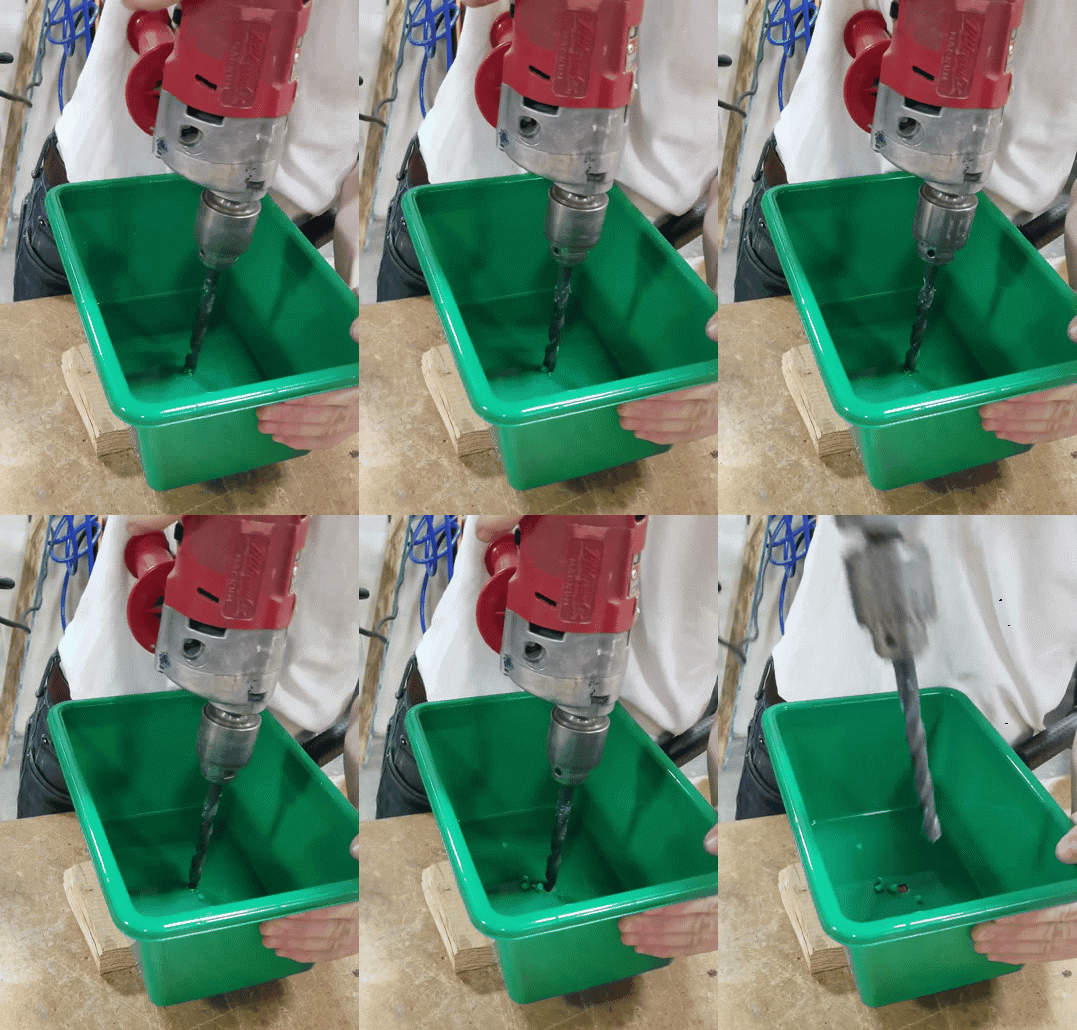
Next you need to drill a hole in the centre of your bucket large enough for the nozzle to stick up into it. Be careful when doing this. The first two times we tried, our bucket cracked and make a hole bigger than we wanted like in the GIF attached to this step.
In order to not have your bucket crack, I recommend drilling as slowly as you can and starting by drilling the hole with a smaller drill bit.
Once your bucket has the hole it in you can either use a hot glue gun or JB weld to attach it to the frame. Then use JB weld to seal the nozzle to the bucket.
Tie on the String
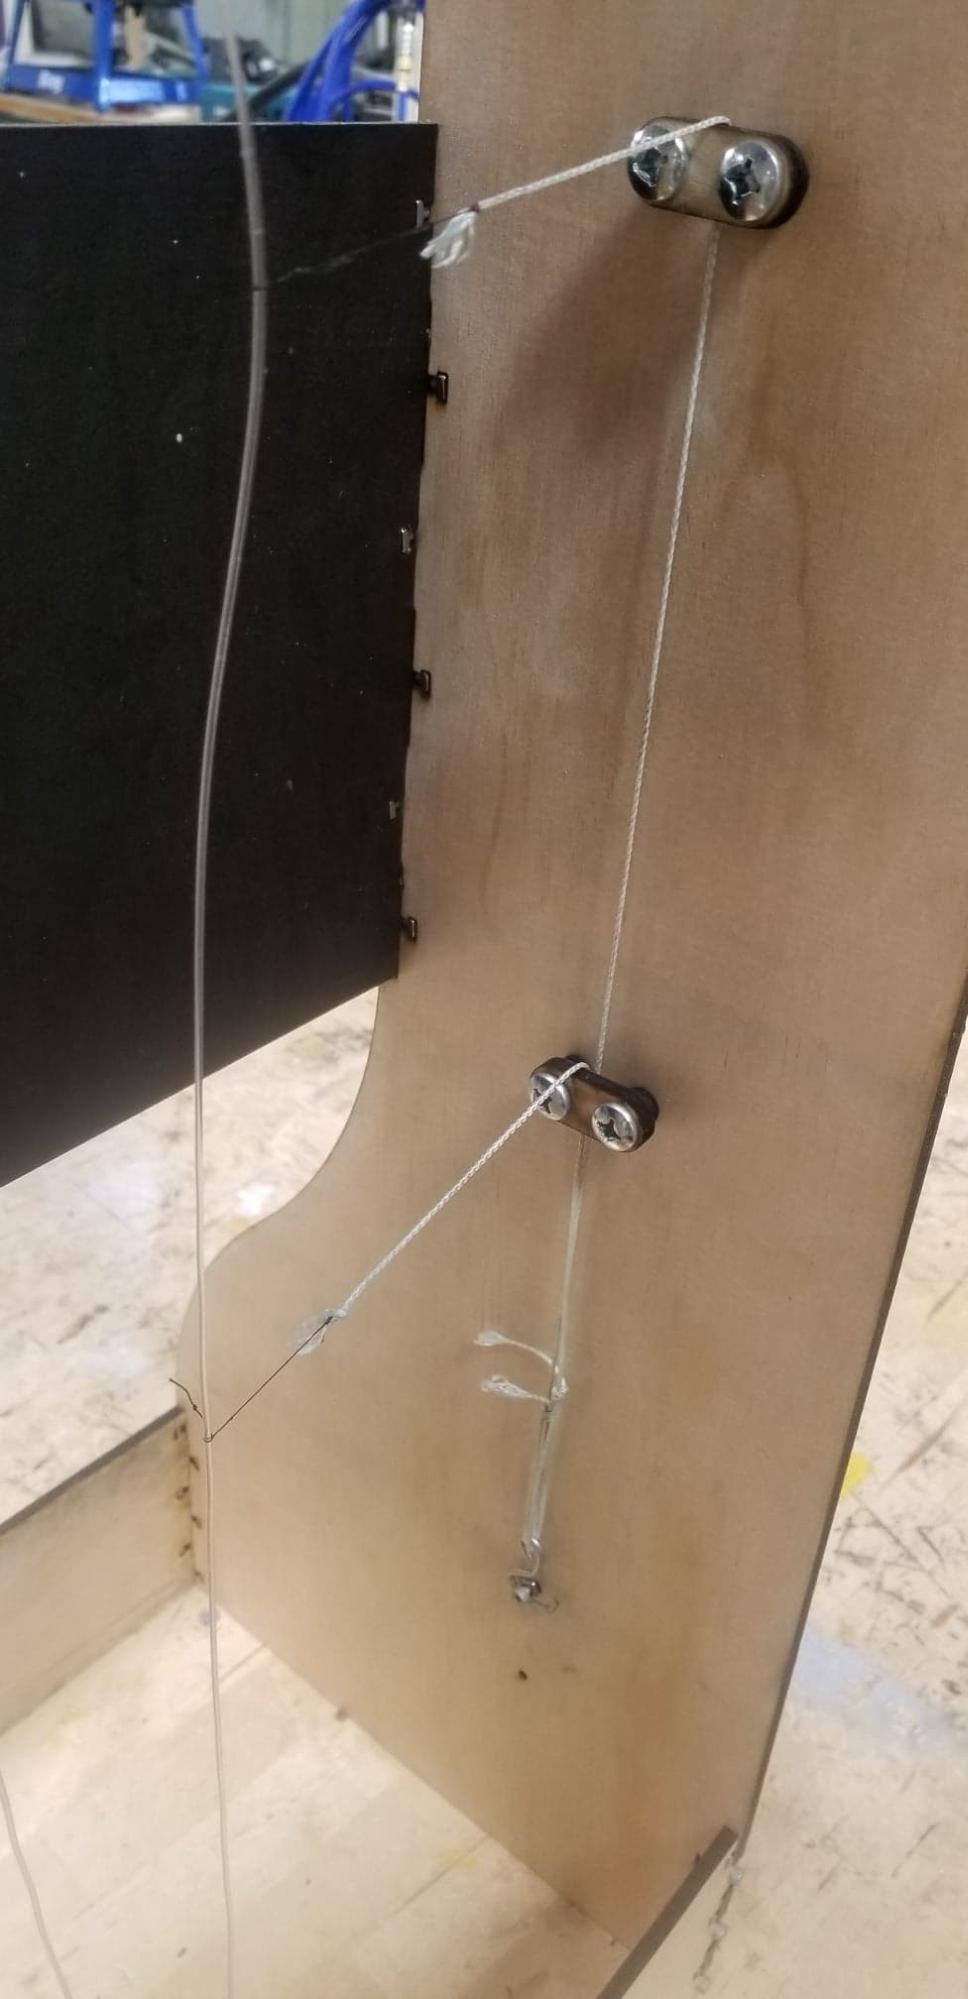
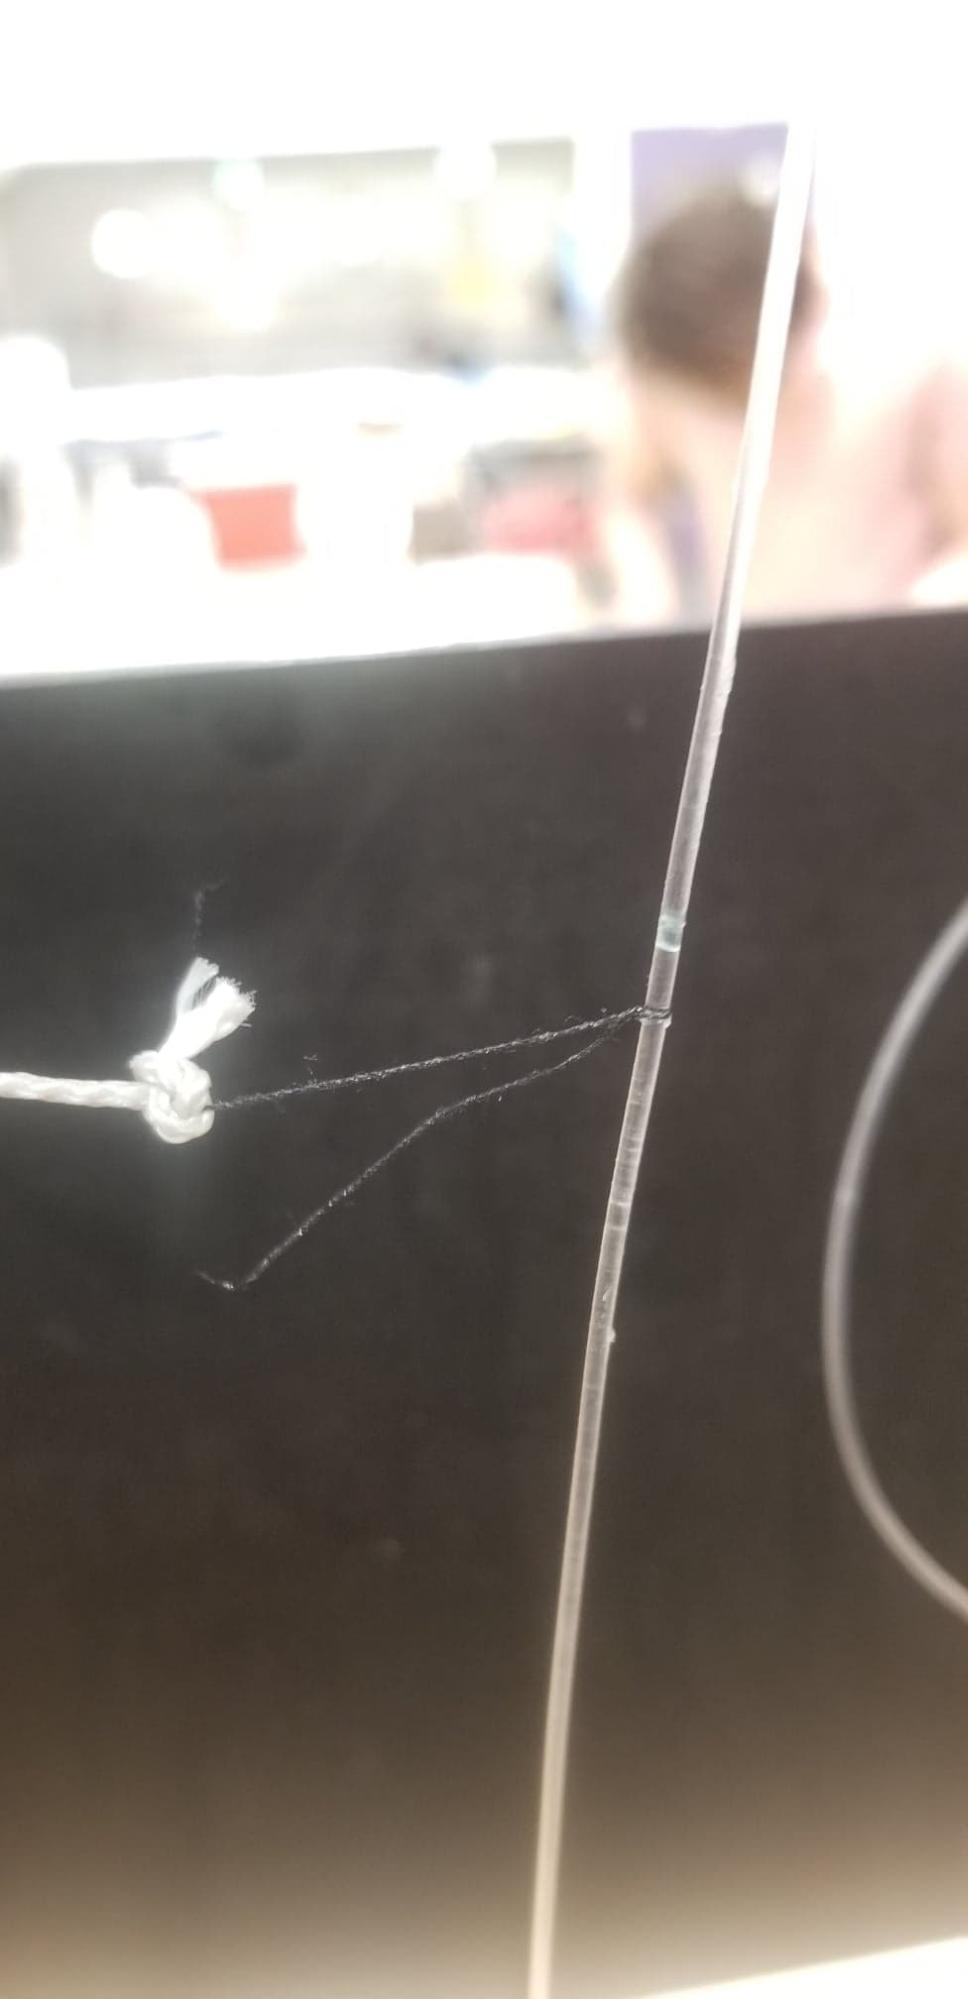
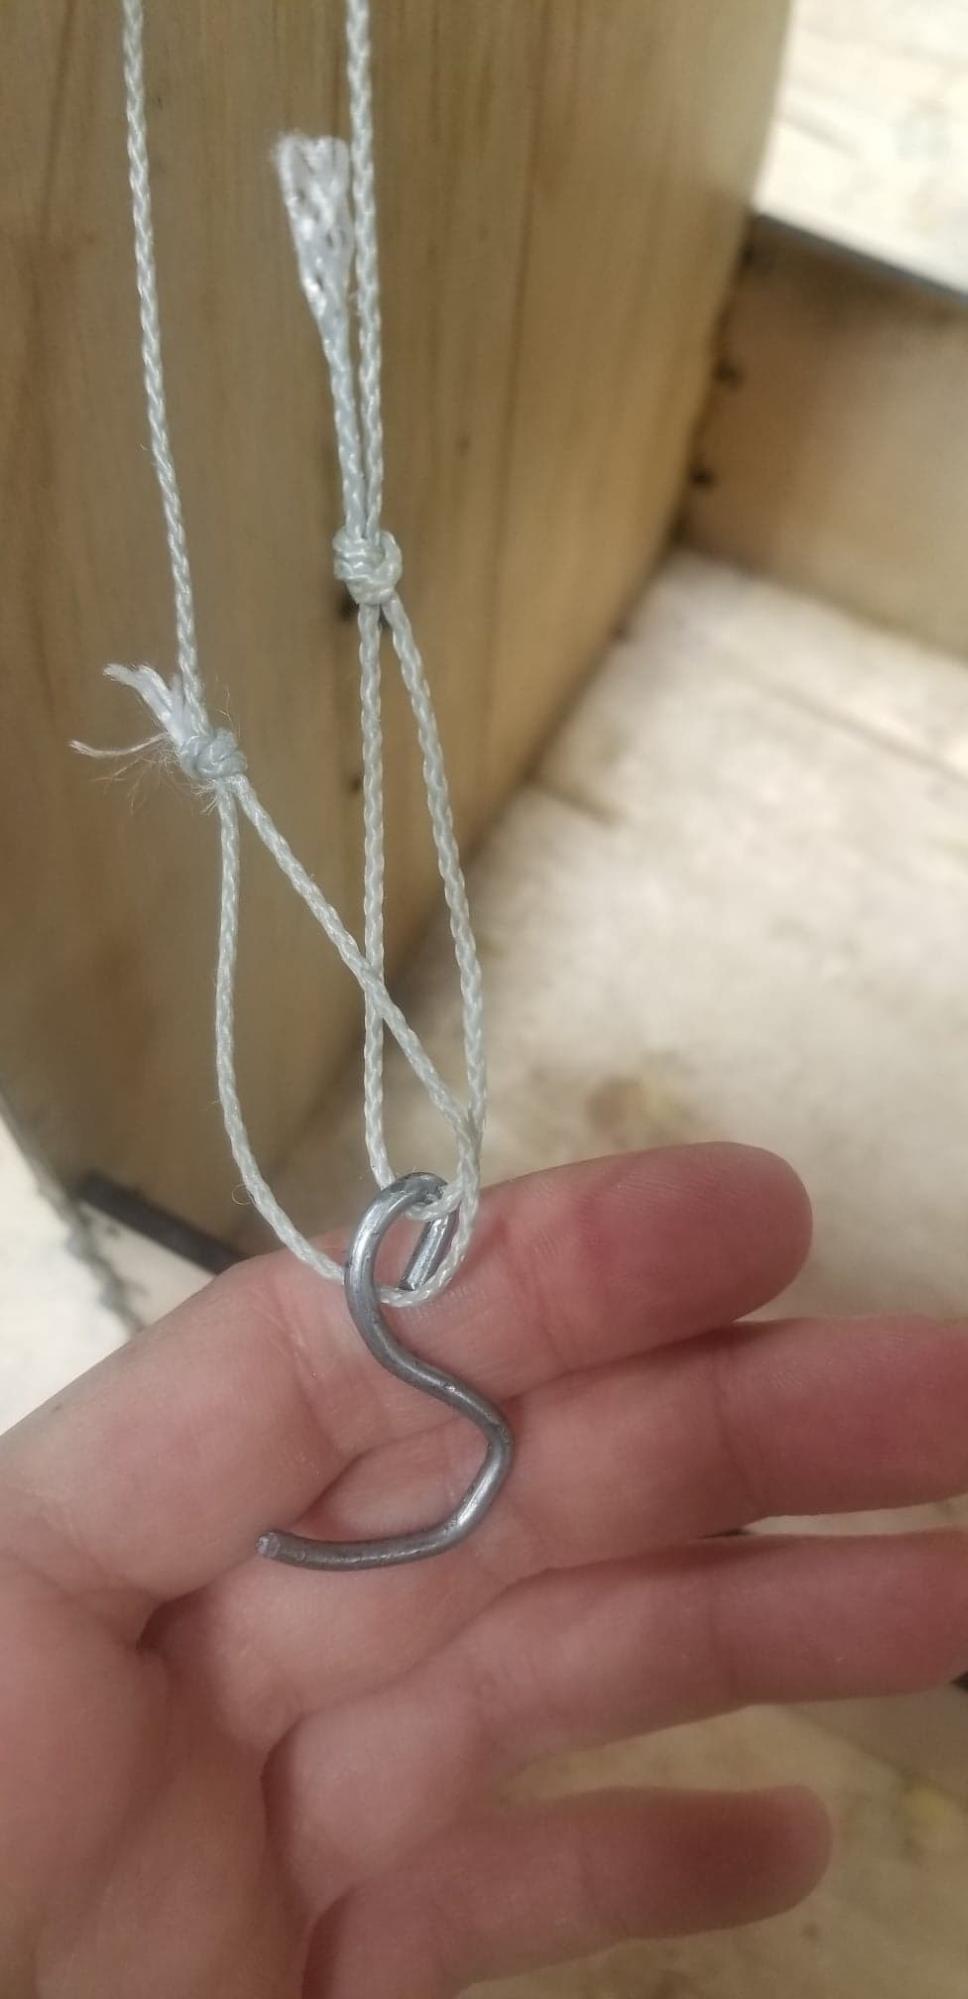
Now it is time to attach the strings. It is best to tie thread to the nylon cord and then some thicker string to the thread. This way the soap film is not broken up by a large knot and the thicker string is easier to deal with.
We used a Halyard Hitch Knot to attach the thread to the cord, a Fisherman’s Knot to attach the thread to the string and then a Slip Knot at the other end of the string. Having a Slip Knot makes it easy to adjust the size of the test section, which is very useful.
We attached the slip knots to a hook (which we made some out of a coat hanger); although you don’t have to do this since you can attach the hooks directly to the bolt.
Weigh Down the Cord
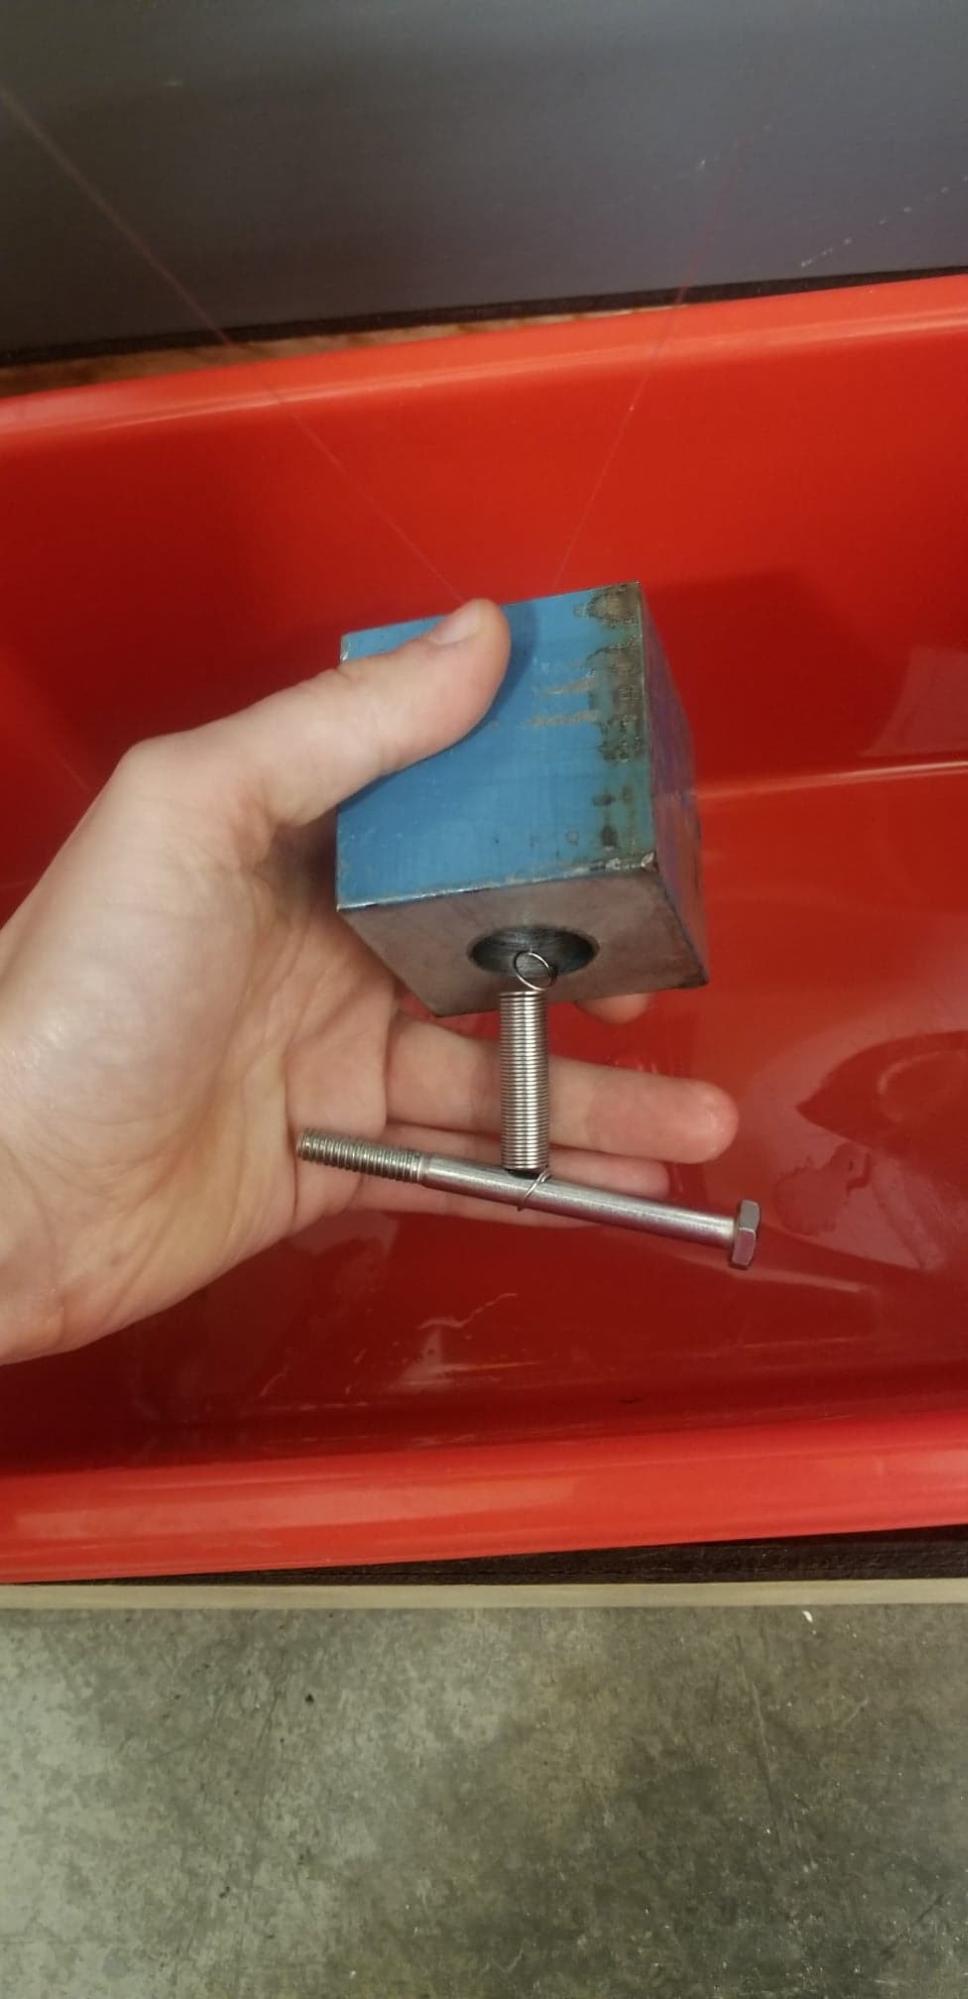
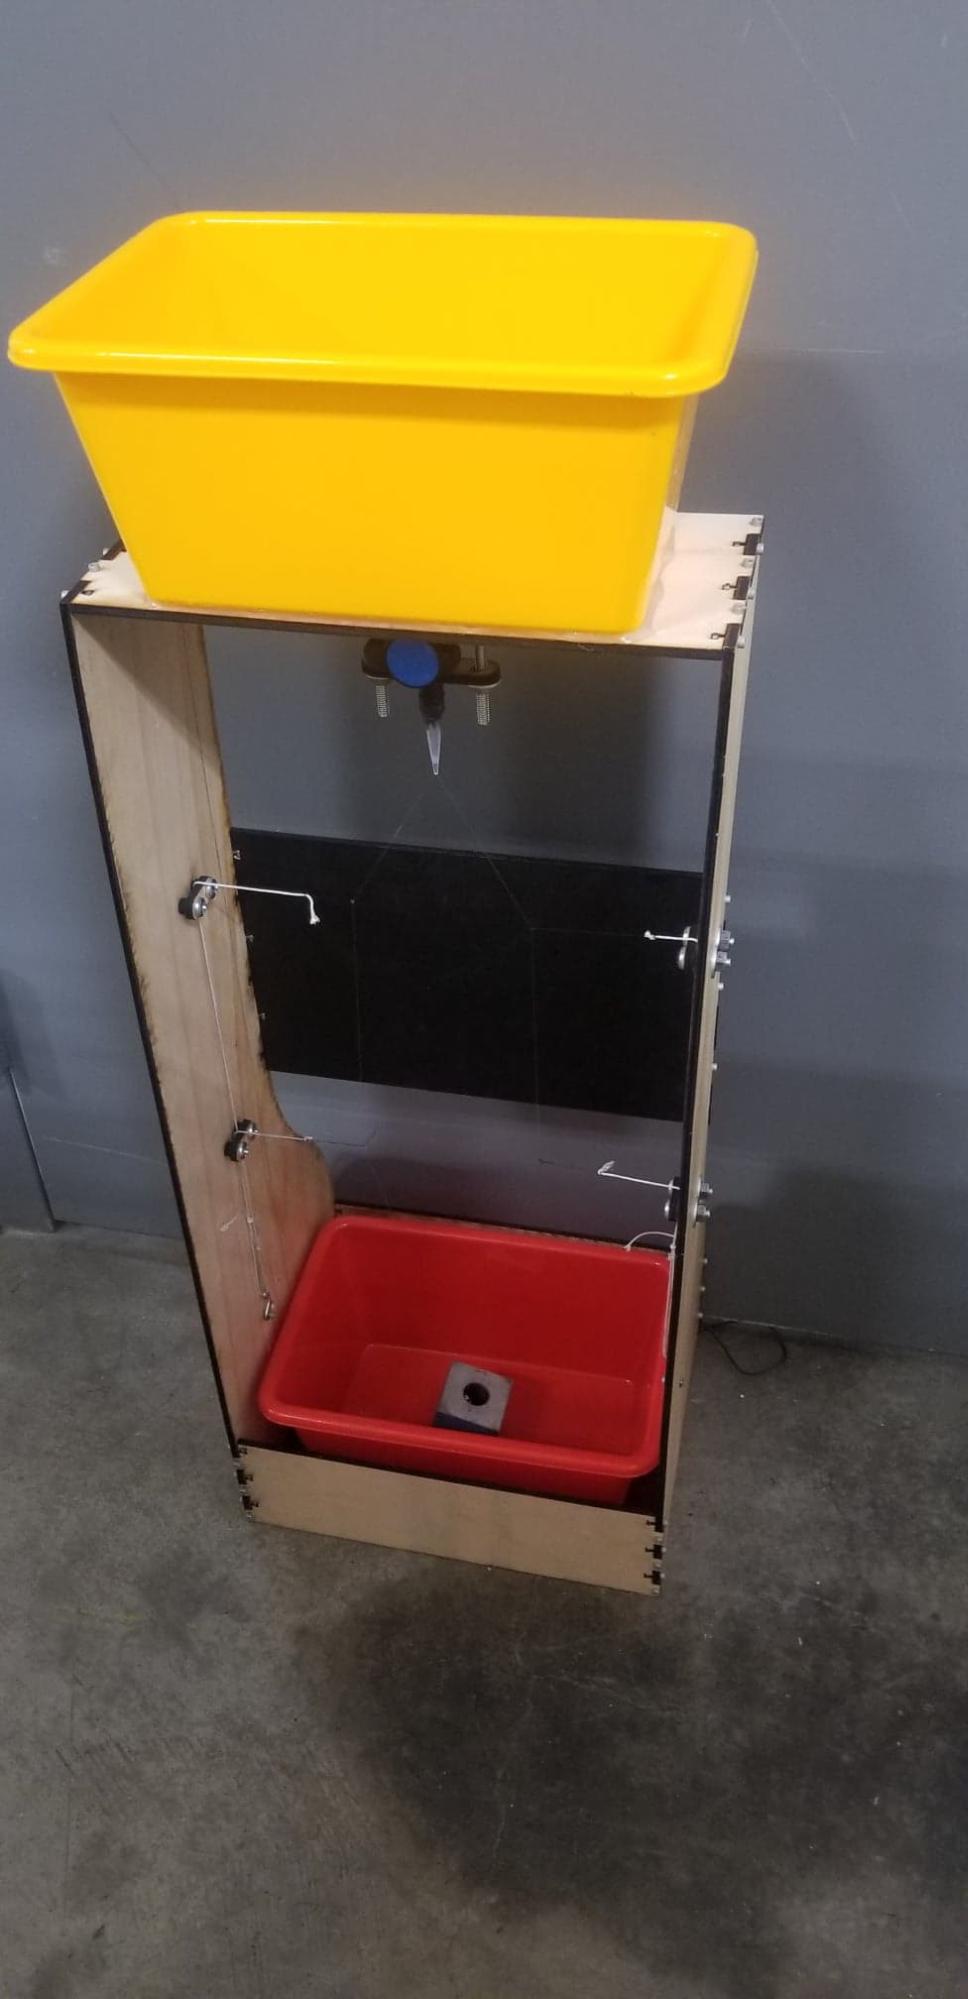
You need to weight down the cord so that it has tension it it. To do with you can attach any reasonable weight to the bottom. It is not necessary, but we attached a spring to the cord which was held down by a mass like in the first image attached to this step.
The spring was a nice way to keep tension in the cord since with the weight resting in the bottom of the bucket it will not sway back and forth.
Now your soap film tunnel should look like the second image attached to this step and be ready to go!
Mix Together the Fluid
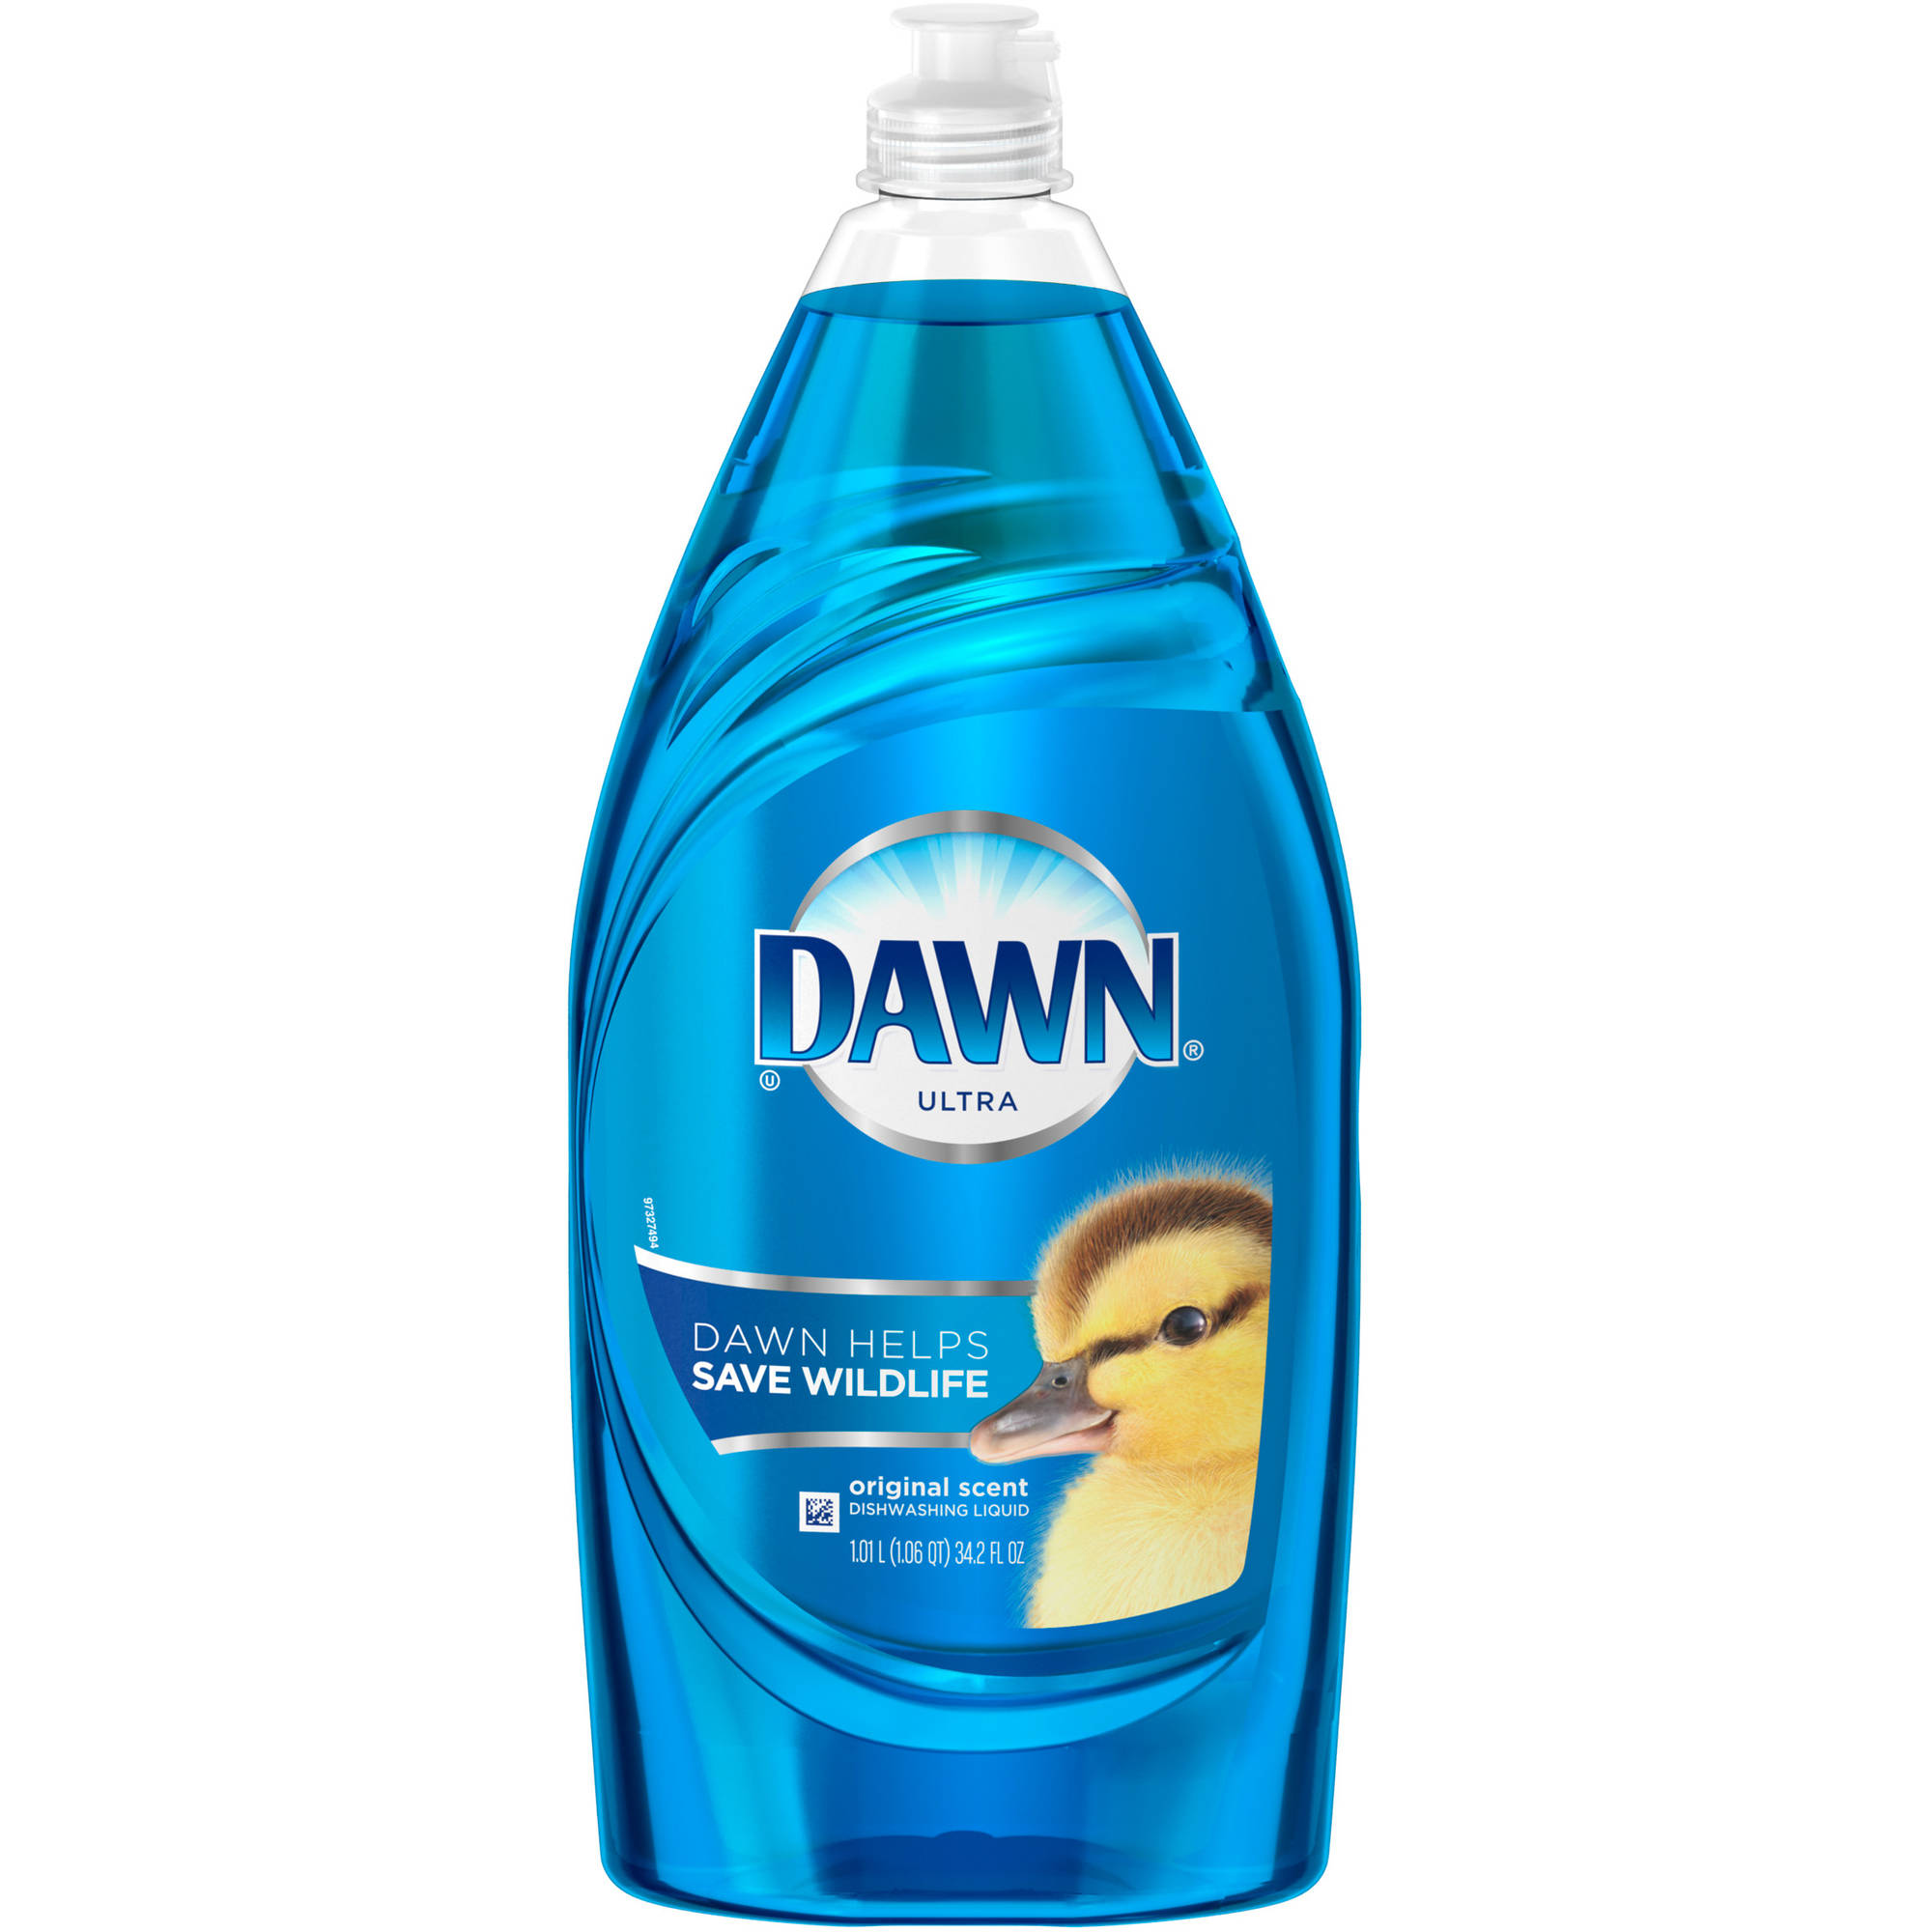
Now you are ready to make your soapy water! We recommend 1 cup of Dawn Dish soap to every 4 cups of water. If you like you can also add Glycerol to your fluid which will make your bubble pop less easily.
Test It Out and Have Fun!
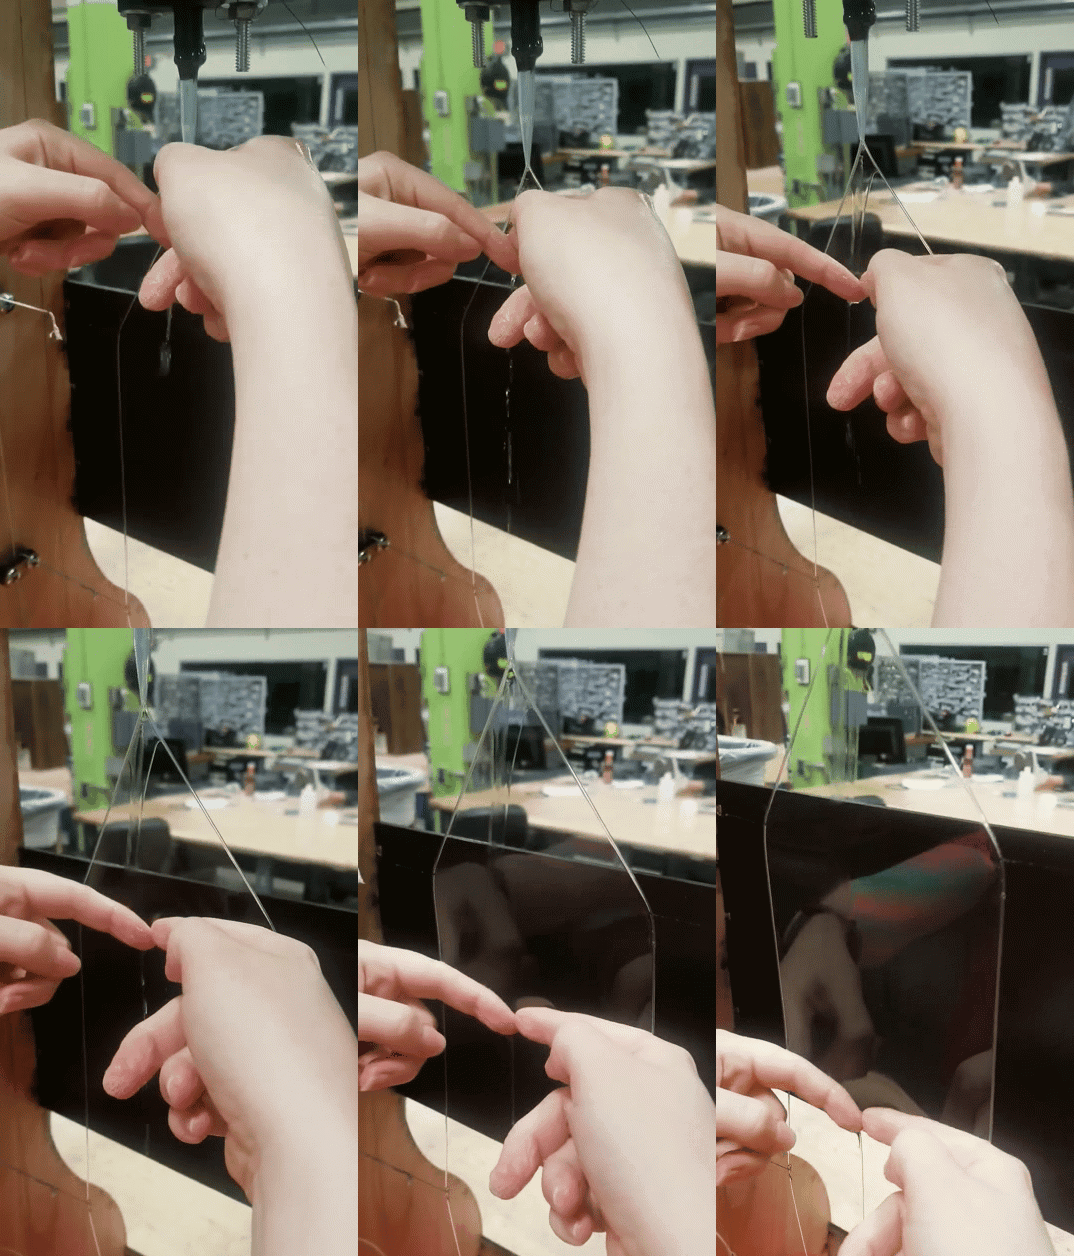
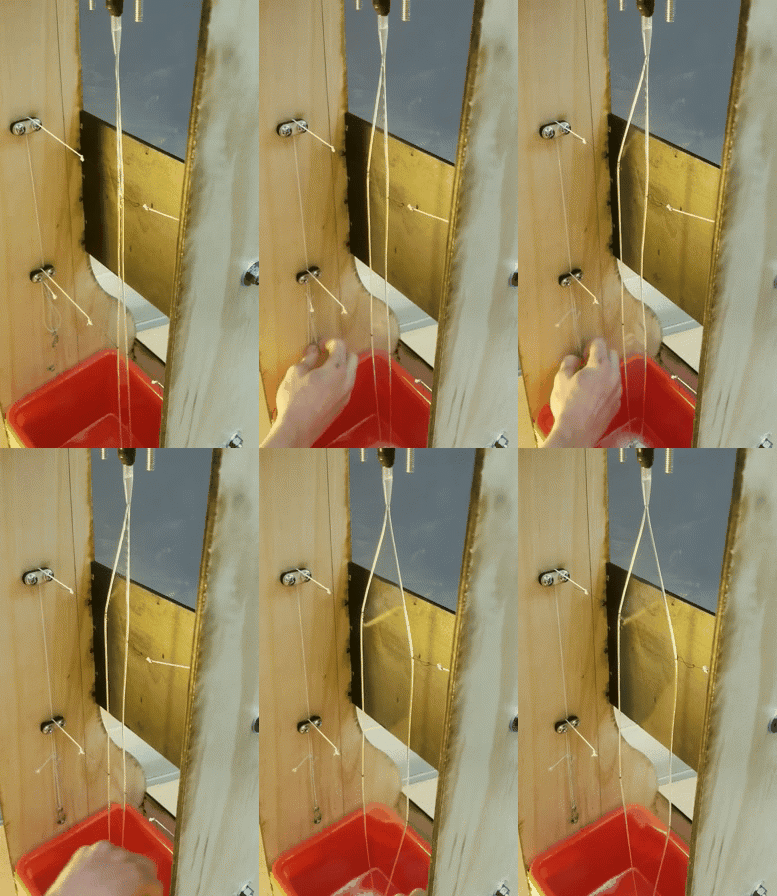
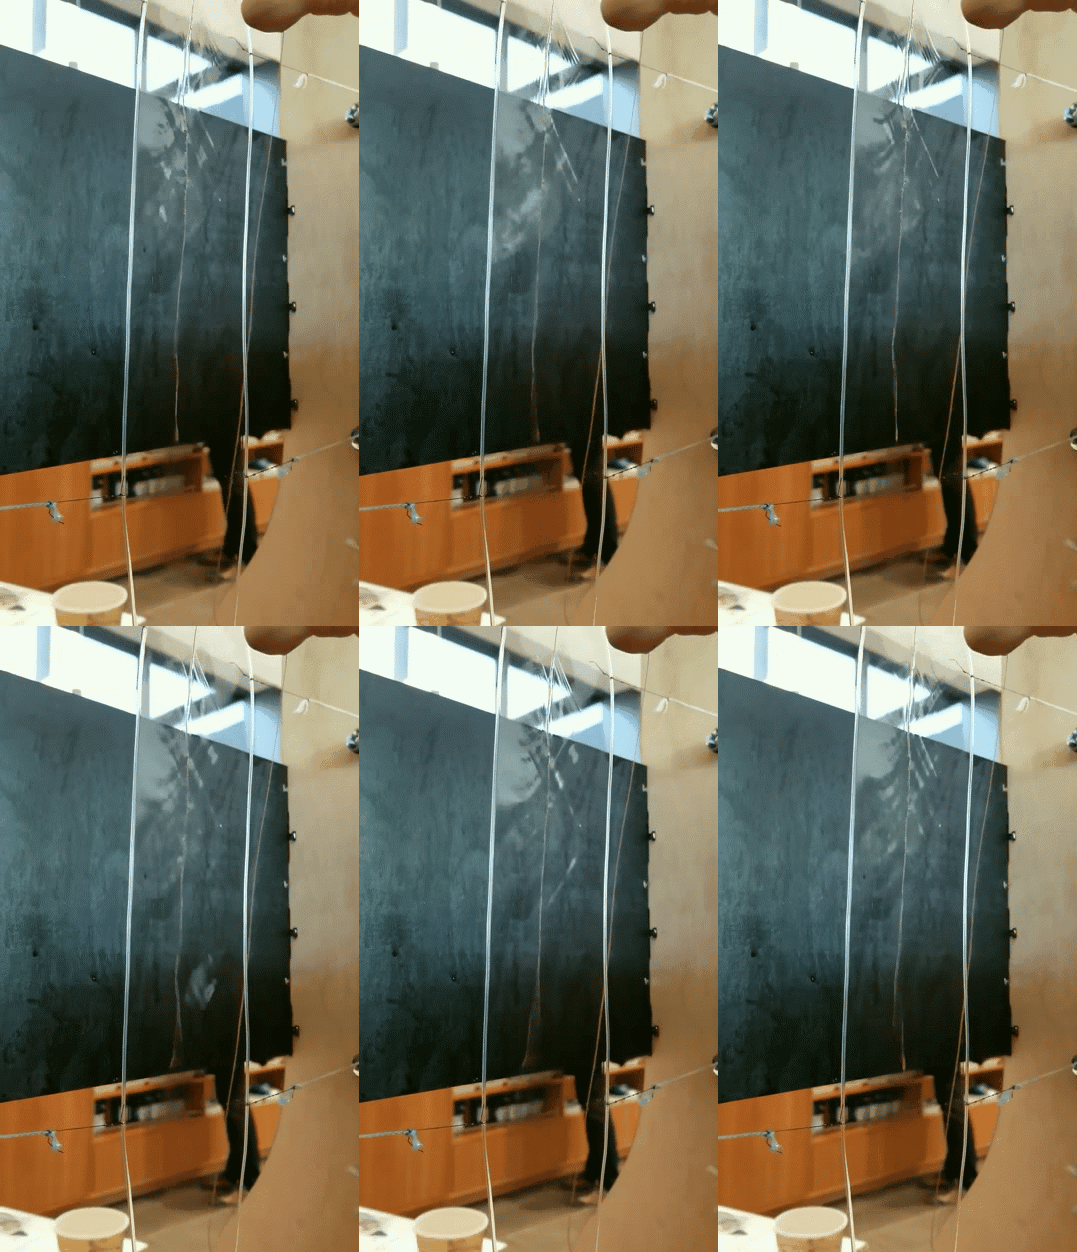
Time to make your first soap film! You can make your soap film by dragging your fingers over the cord (first image) or by having the film form on it’s own while the cords are close together and then attaching the strings to the bolt to open it up (second image).
Now you can experiment with putting various objects into the test section, adjusting the flow rate and seeing what sort of flow visualization you can get. If you want you can also add a magnet to the black background of the frame and then use it to hold objects in pace without you having to hold them. Another fun thing to try is putting some thread into the soap film and seeing if you can get the thread to oscillate back and forth like a flag in the wind. You can read about that phenomena in this paper.
Let us know what you think in the comments below and especially if you decide to make your own soap film tunnel!