DIY Rocket
I'm currently attending Piedmont Hills High School in the 2023-24 school year.
This is an easy and accessible way to make a rocket that is designable by you! However, I would highly encourage my design because it flies pretty far :)
Supplies

- A standard piece of 8.5 x 11 inches paper
- Foam sheets
- 3D printer and Fusion360
Roll Up the Paper
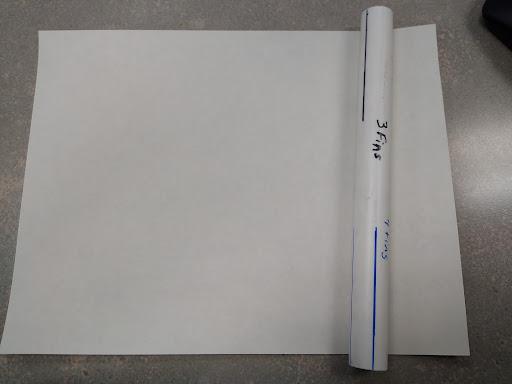
Roll the paper in the hotdog direction. Then tape it.
Cut the Foam Sheets Into Fins

If you do not have foam paper, you can absolutely use cardboard to do this step.
These could be a triangular shape, oval-ish, and even an octagon! However, I cannot guarantee that the octagon shape would work.
Depending on the number of fins you want, you might want to use 2 scissors at once.
I'm kidding :p. The statement above this sentence is absolutely not true! Although I would like someone to try and tell me...In a safe manner of course :]
The fins serve as a stabilizer for the rocket while it's moving through the air. If your rocket spins while it is flying, that means that your fins are doing a good job :)
Design Your Rocket Head
Now we are going to use Fusion360 to CAD model a custom head for our rocket.
You do not have to follow the following steps if you have your own design, but this is a rough guide for how you would design your own.
Design Your Rocket Head (pt.1)
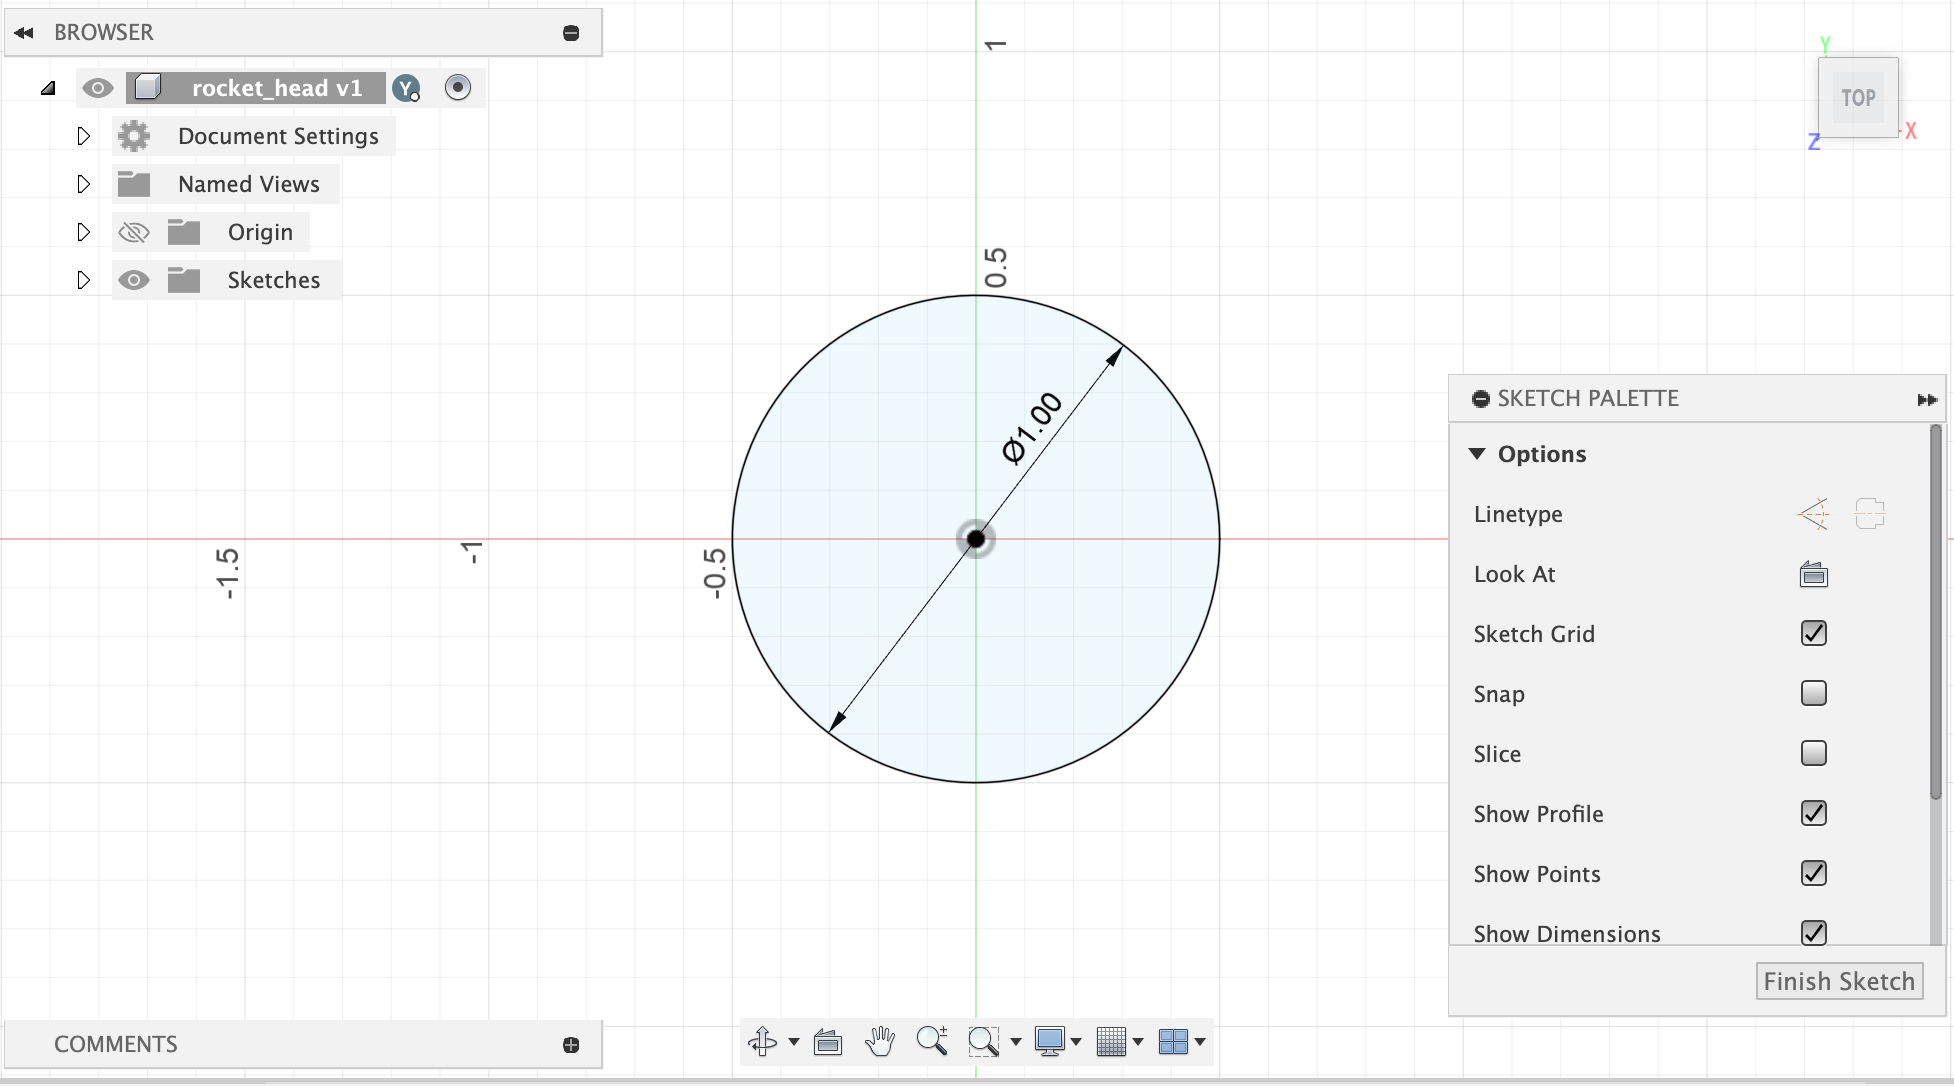
First, I sketch a circle that has the diameter of the paper roll that we made in the first step.
For me, it was 1 inch.
Design Your Rocket Head (Pt.2)
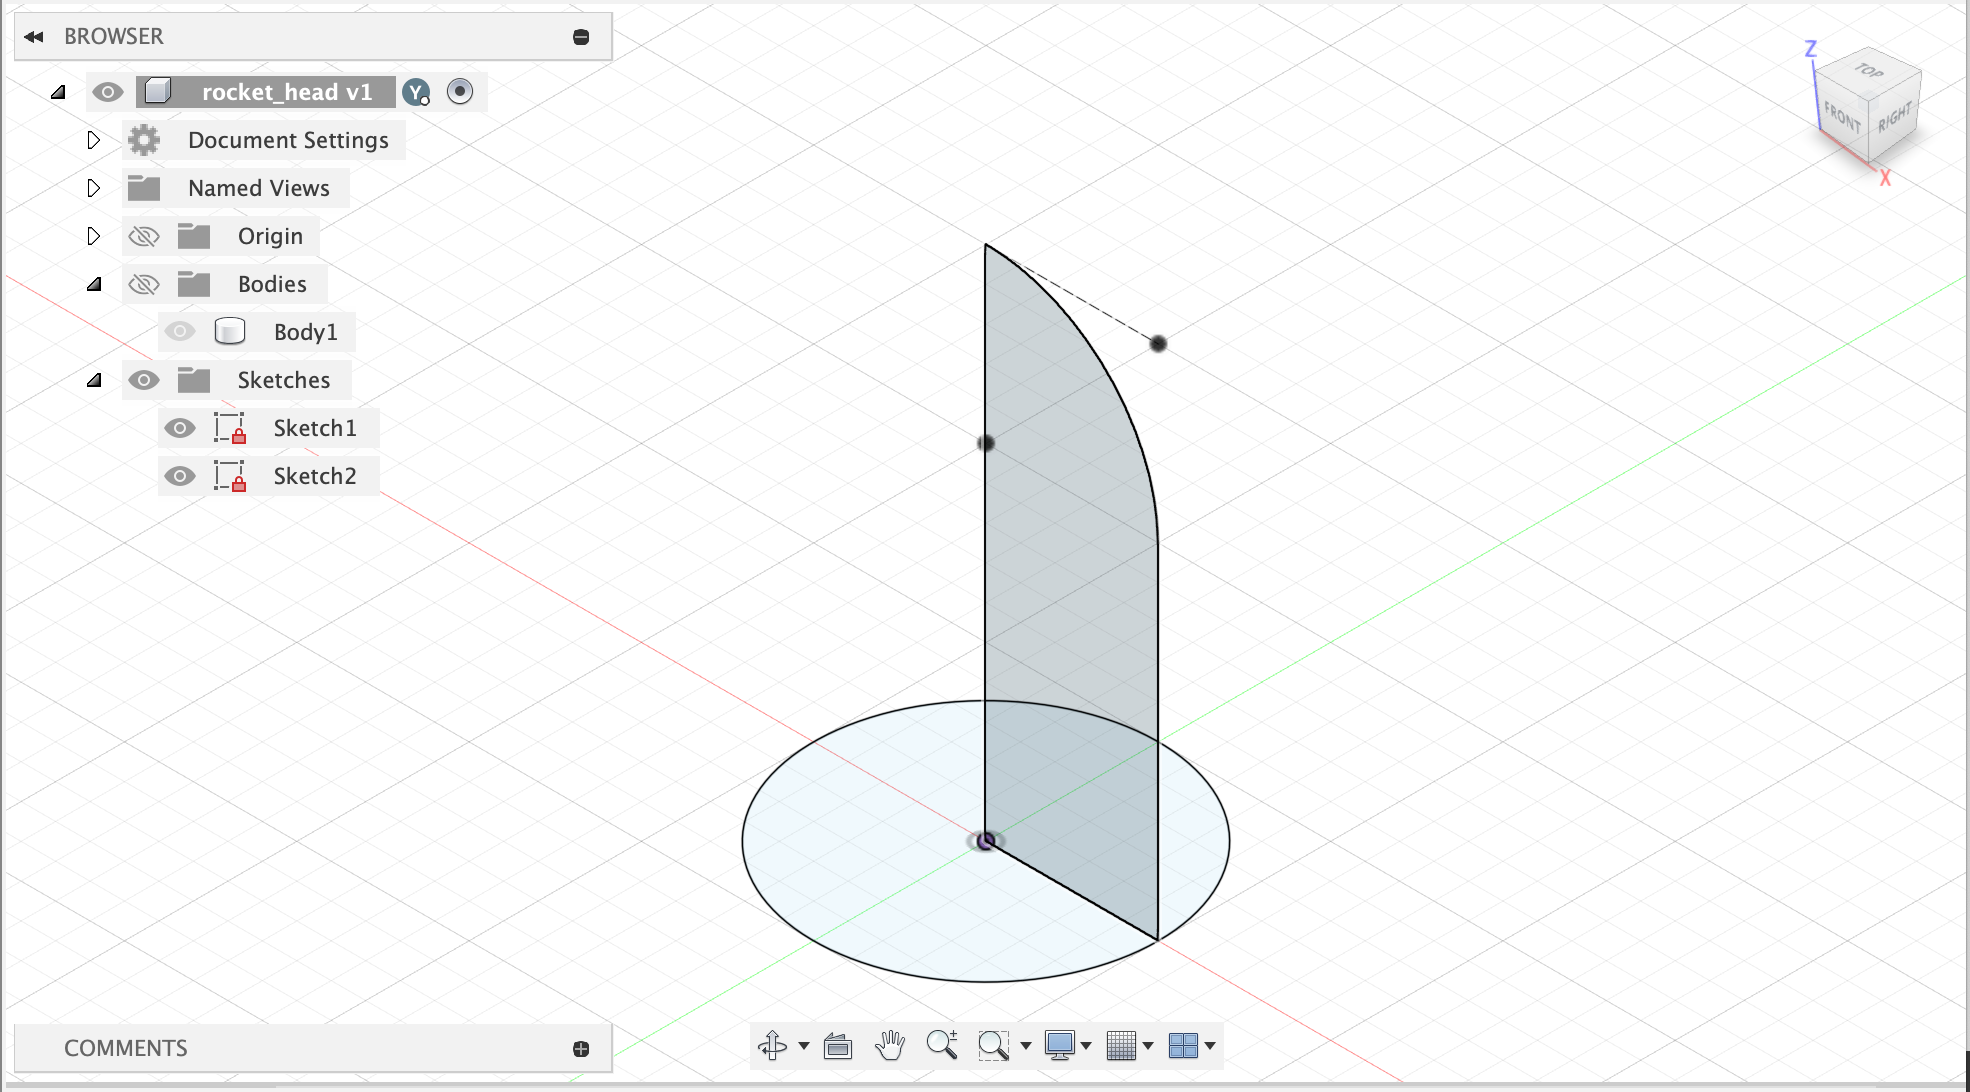
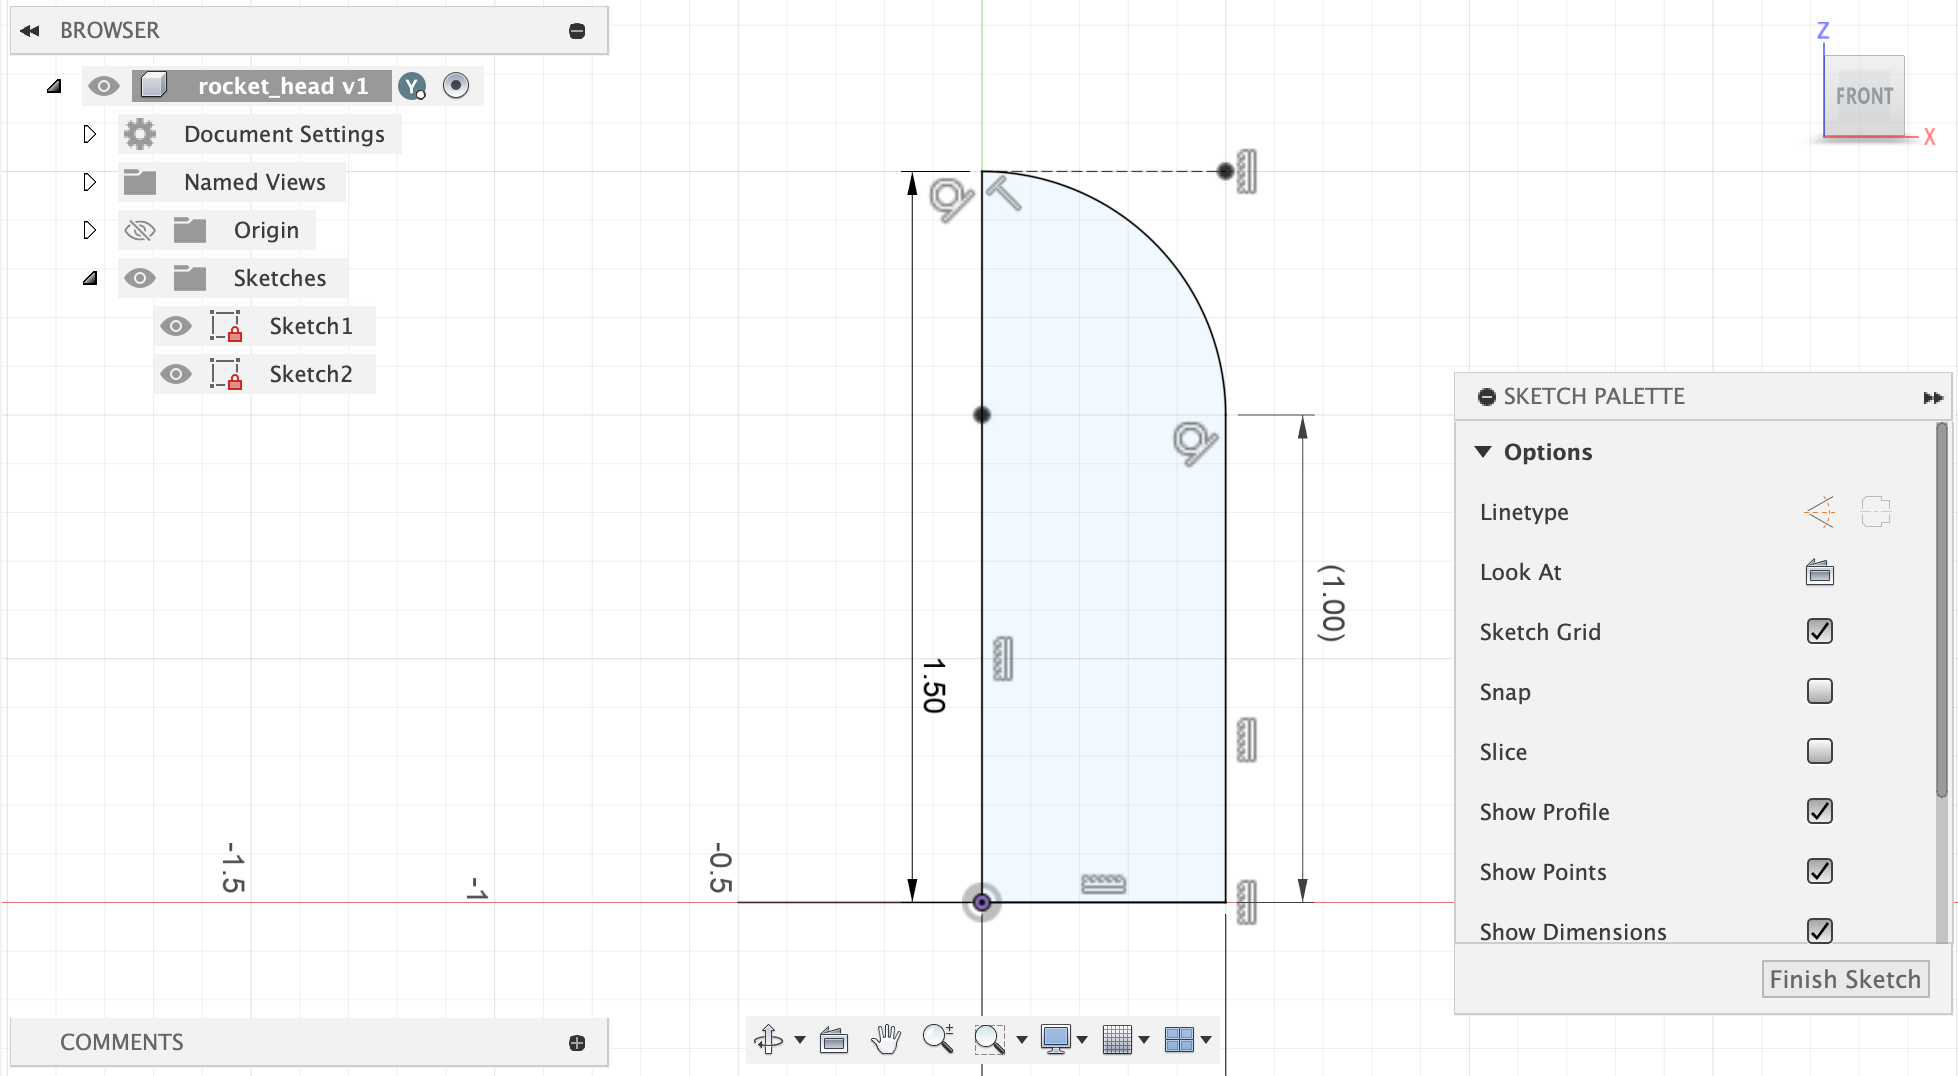
Then on the perpendicular plane to the circle, create a new sketch, then design!
For the next step, we are going to revolve it (the circle is just a guide) so make sure to keep that in mind when making your own sketch.
Design Your Rocket Head (Pt.3)
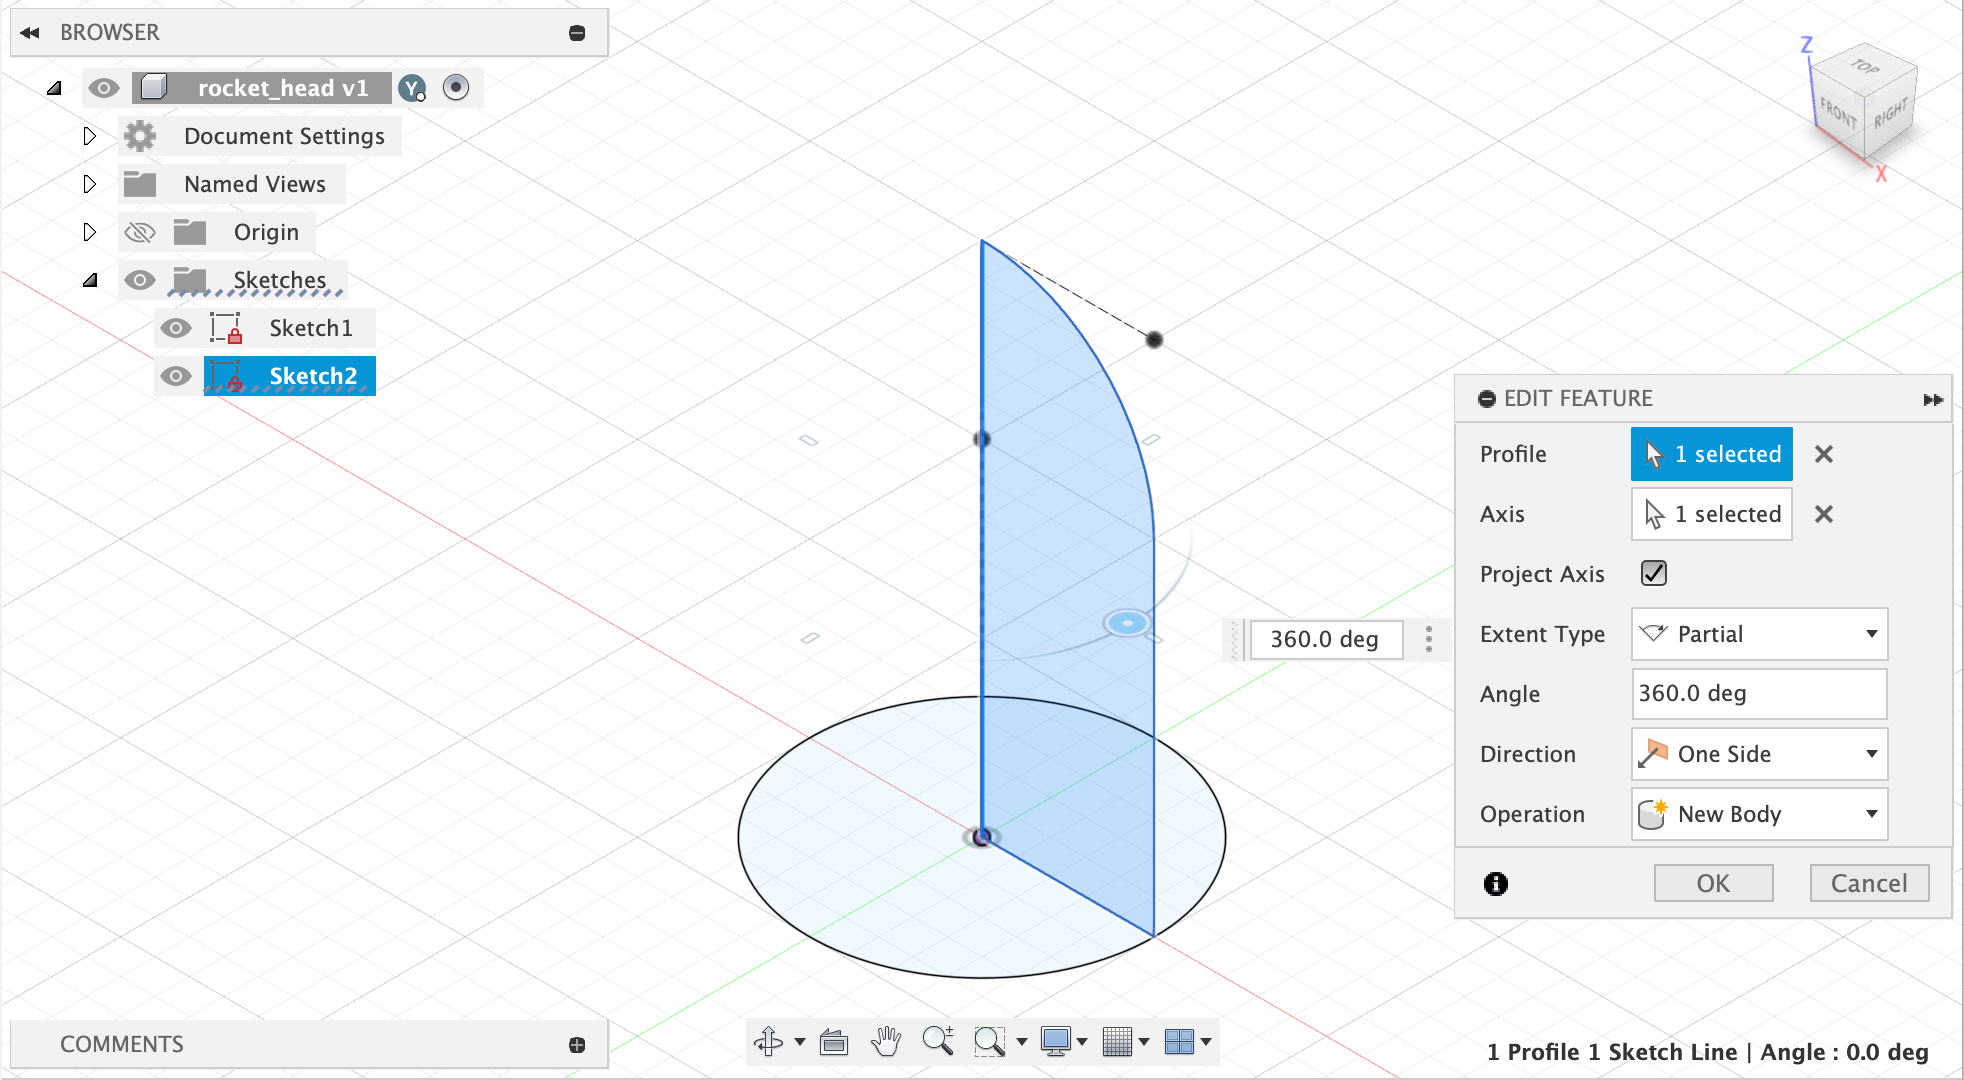
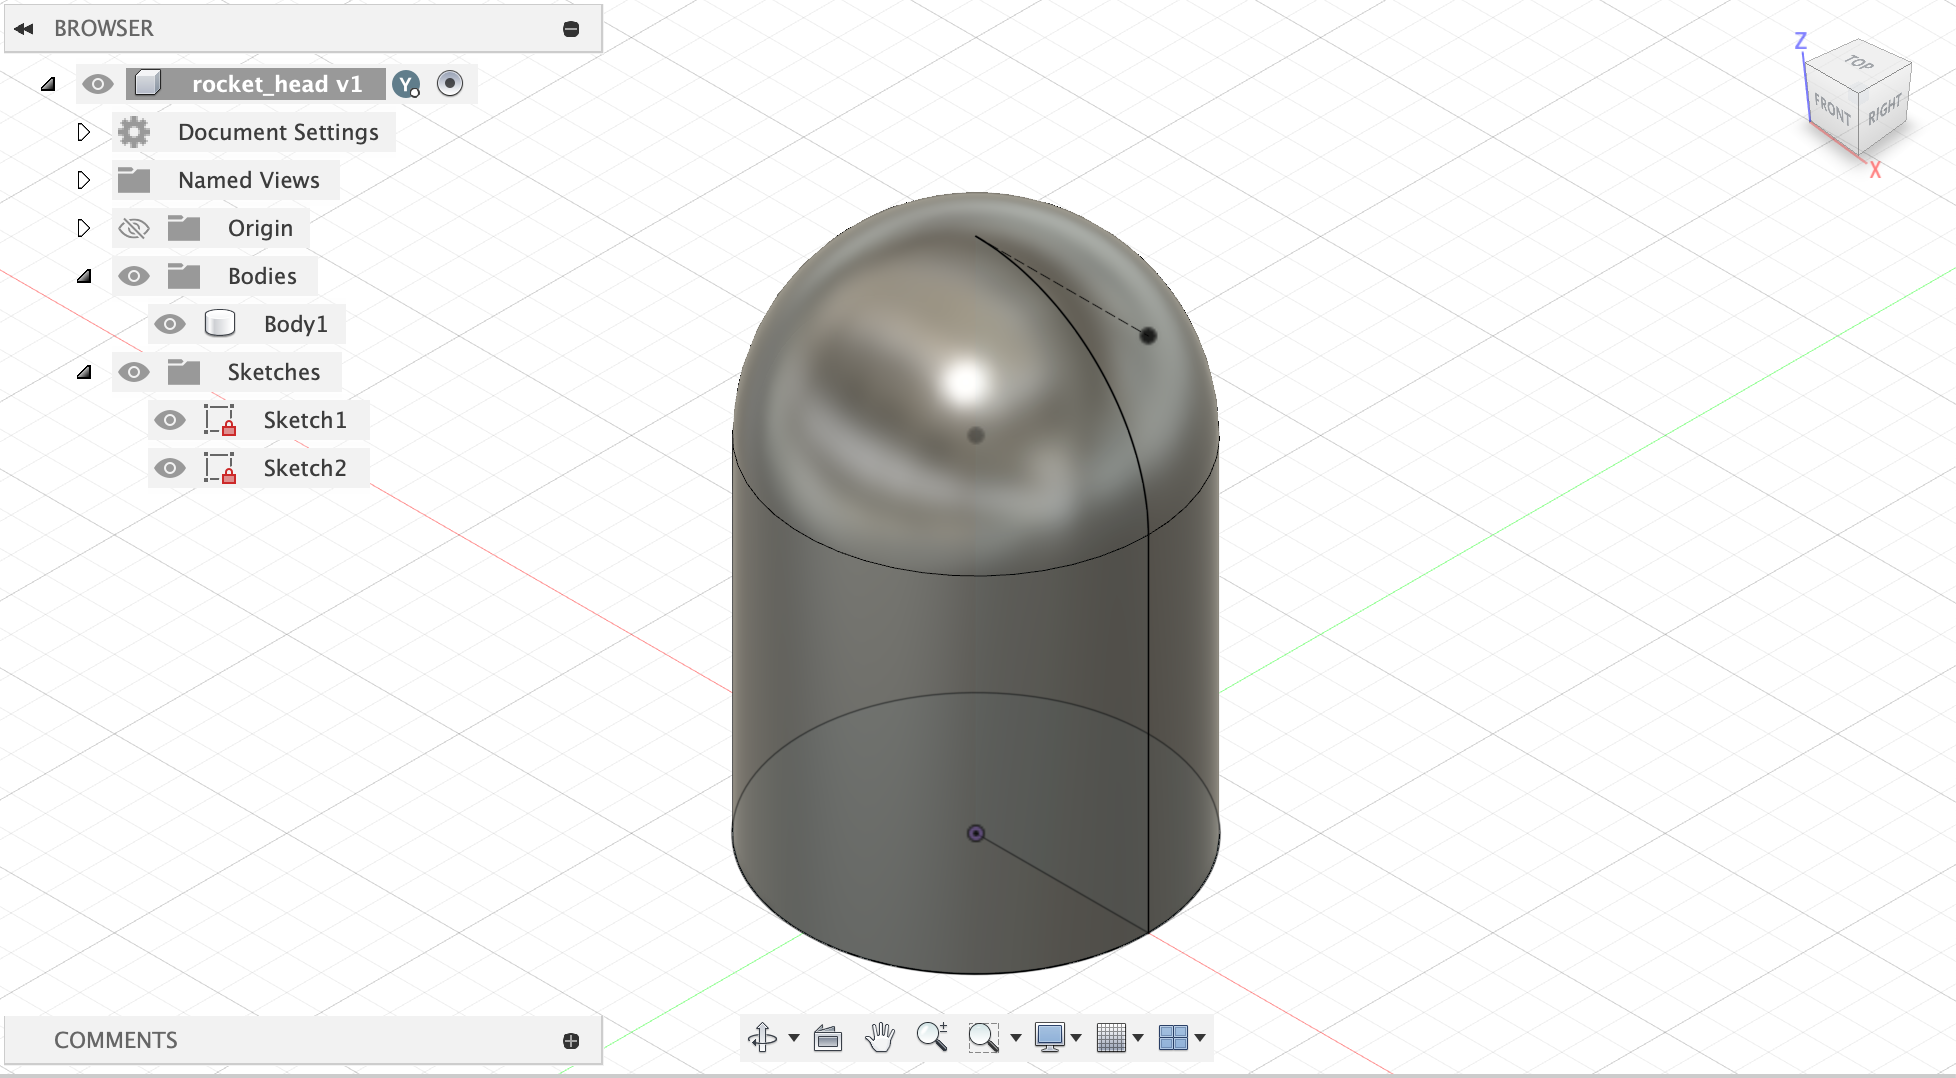
Use the revolve tool for 360˚ and you're done with designing!
3D Printing Your Rocket Head (pt.1)
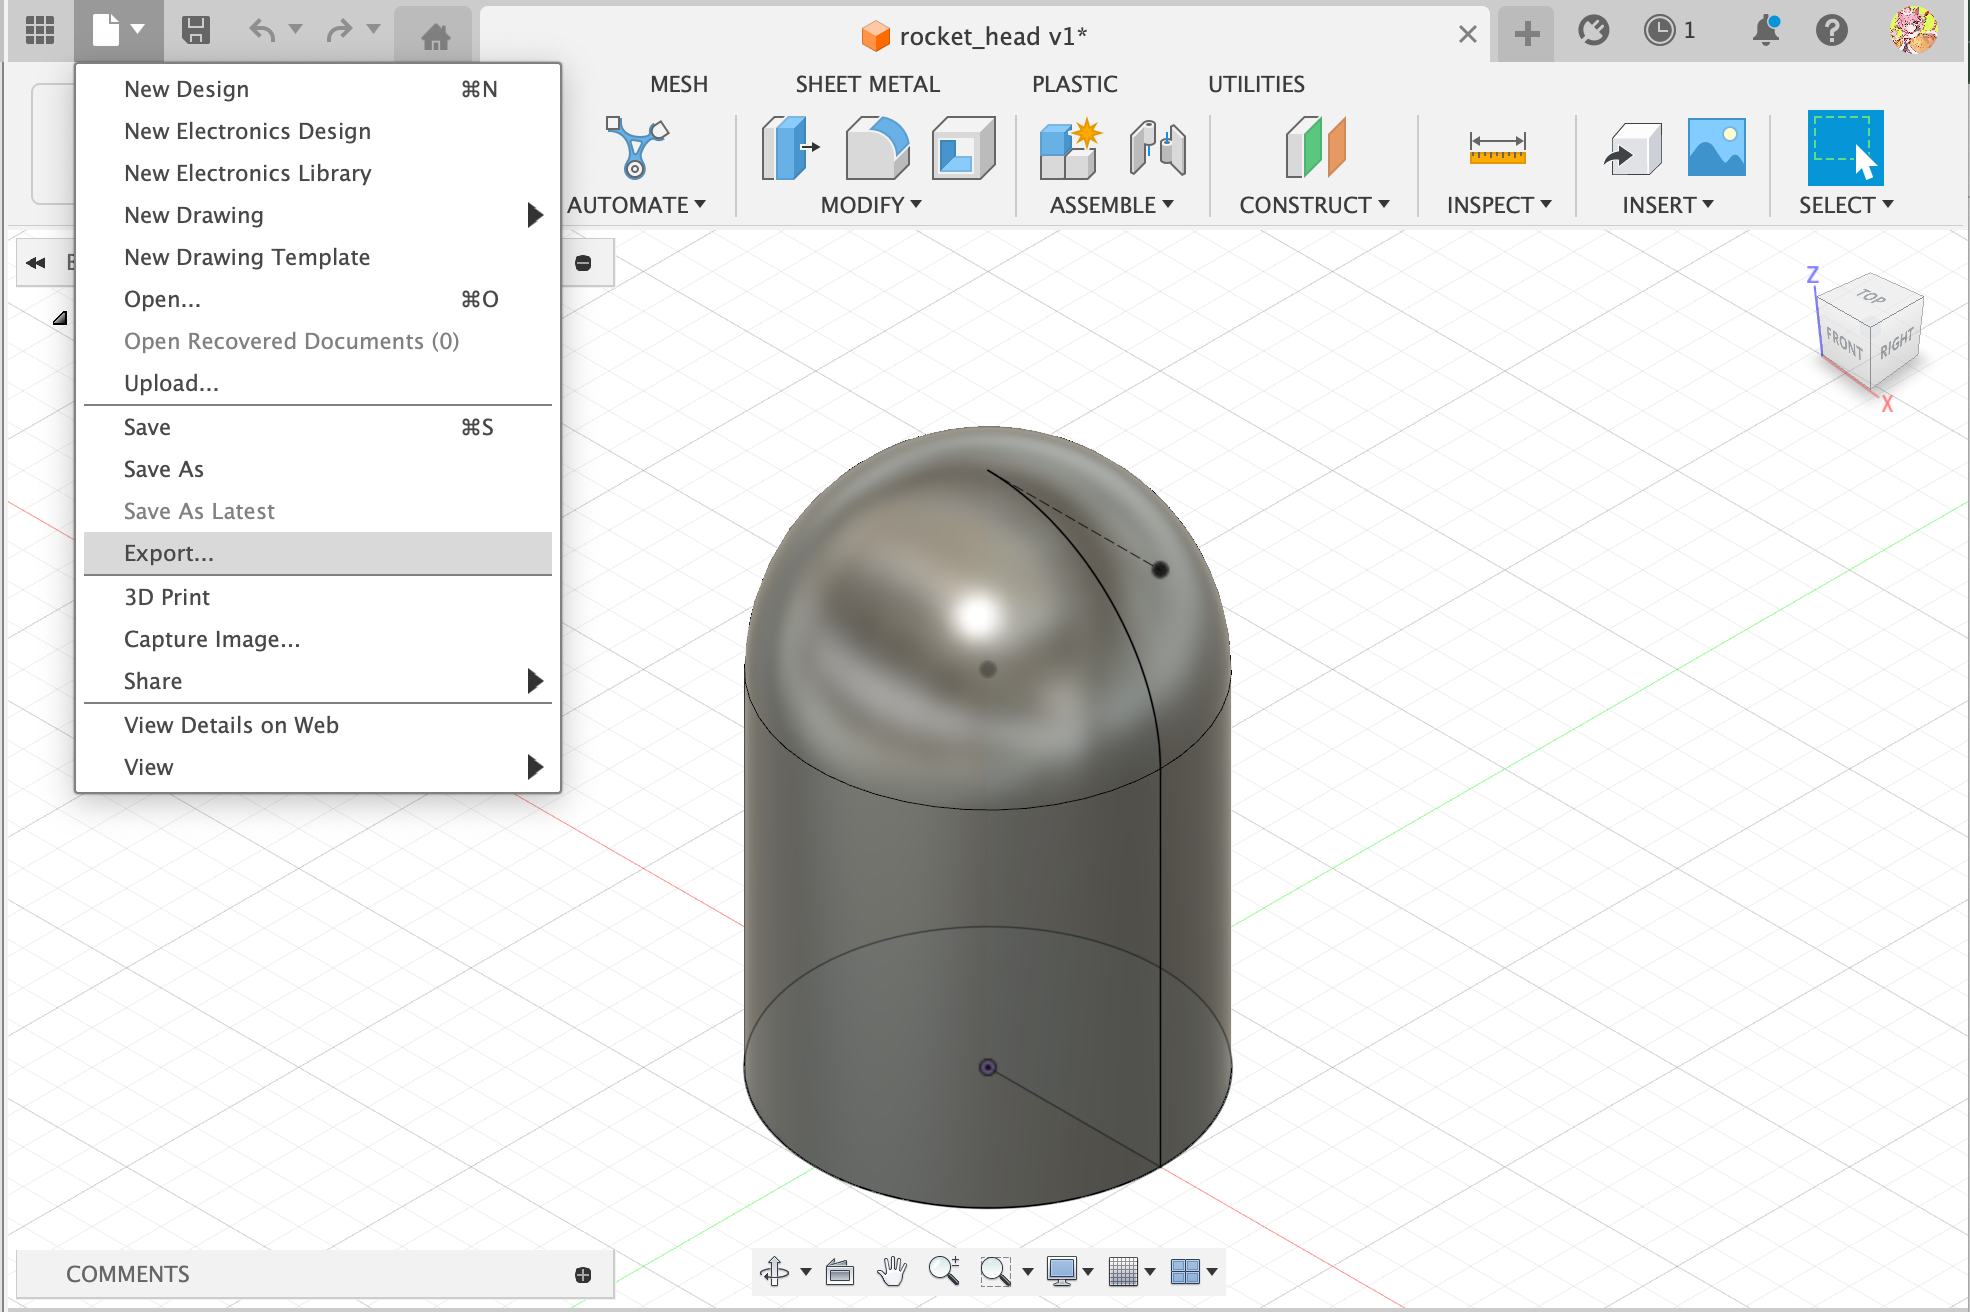
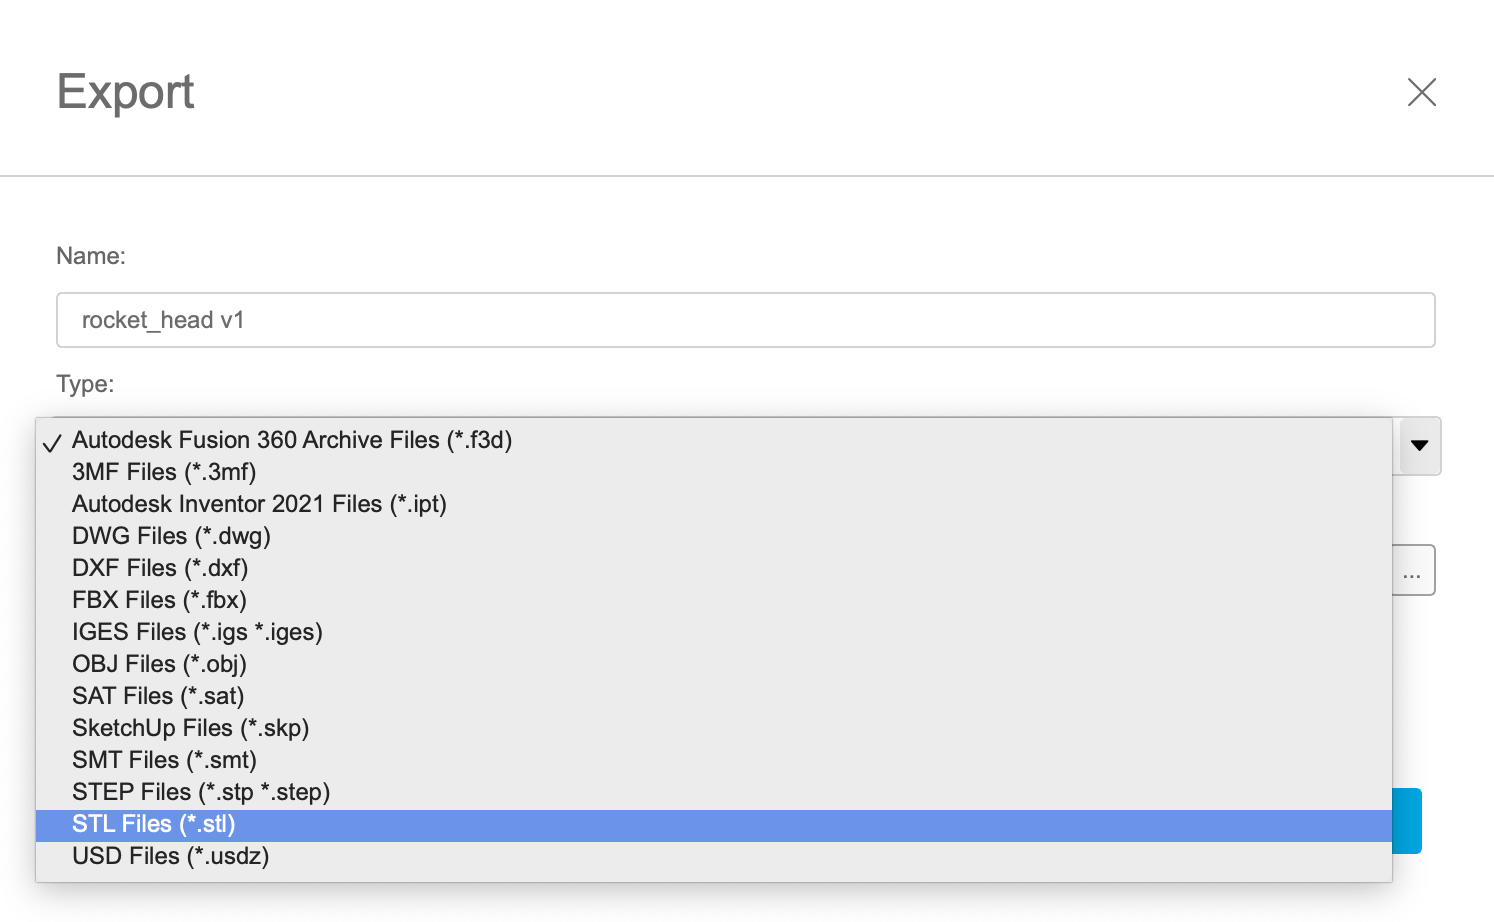
Go to File >> Export and a window should pop up.
Then, choose the file type to be ".stl" and save it in a folder that you know where to find.
I've attached my design's STL and Fusion360 file in this step.
3D Printing Your Rocket Head (Pt.2)
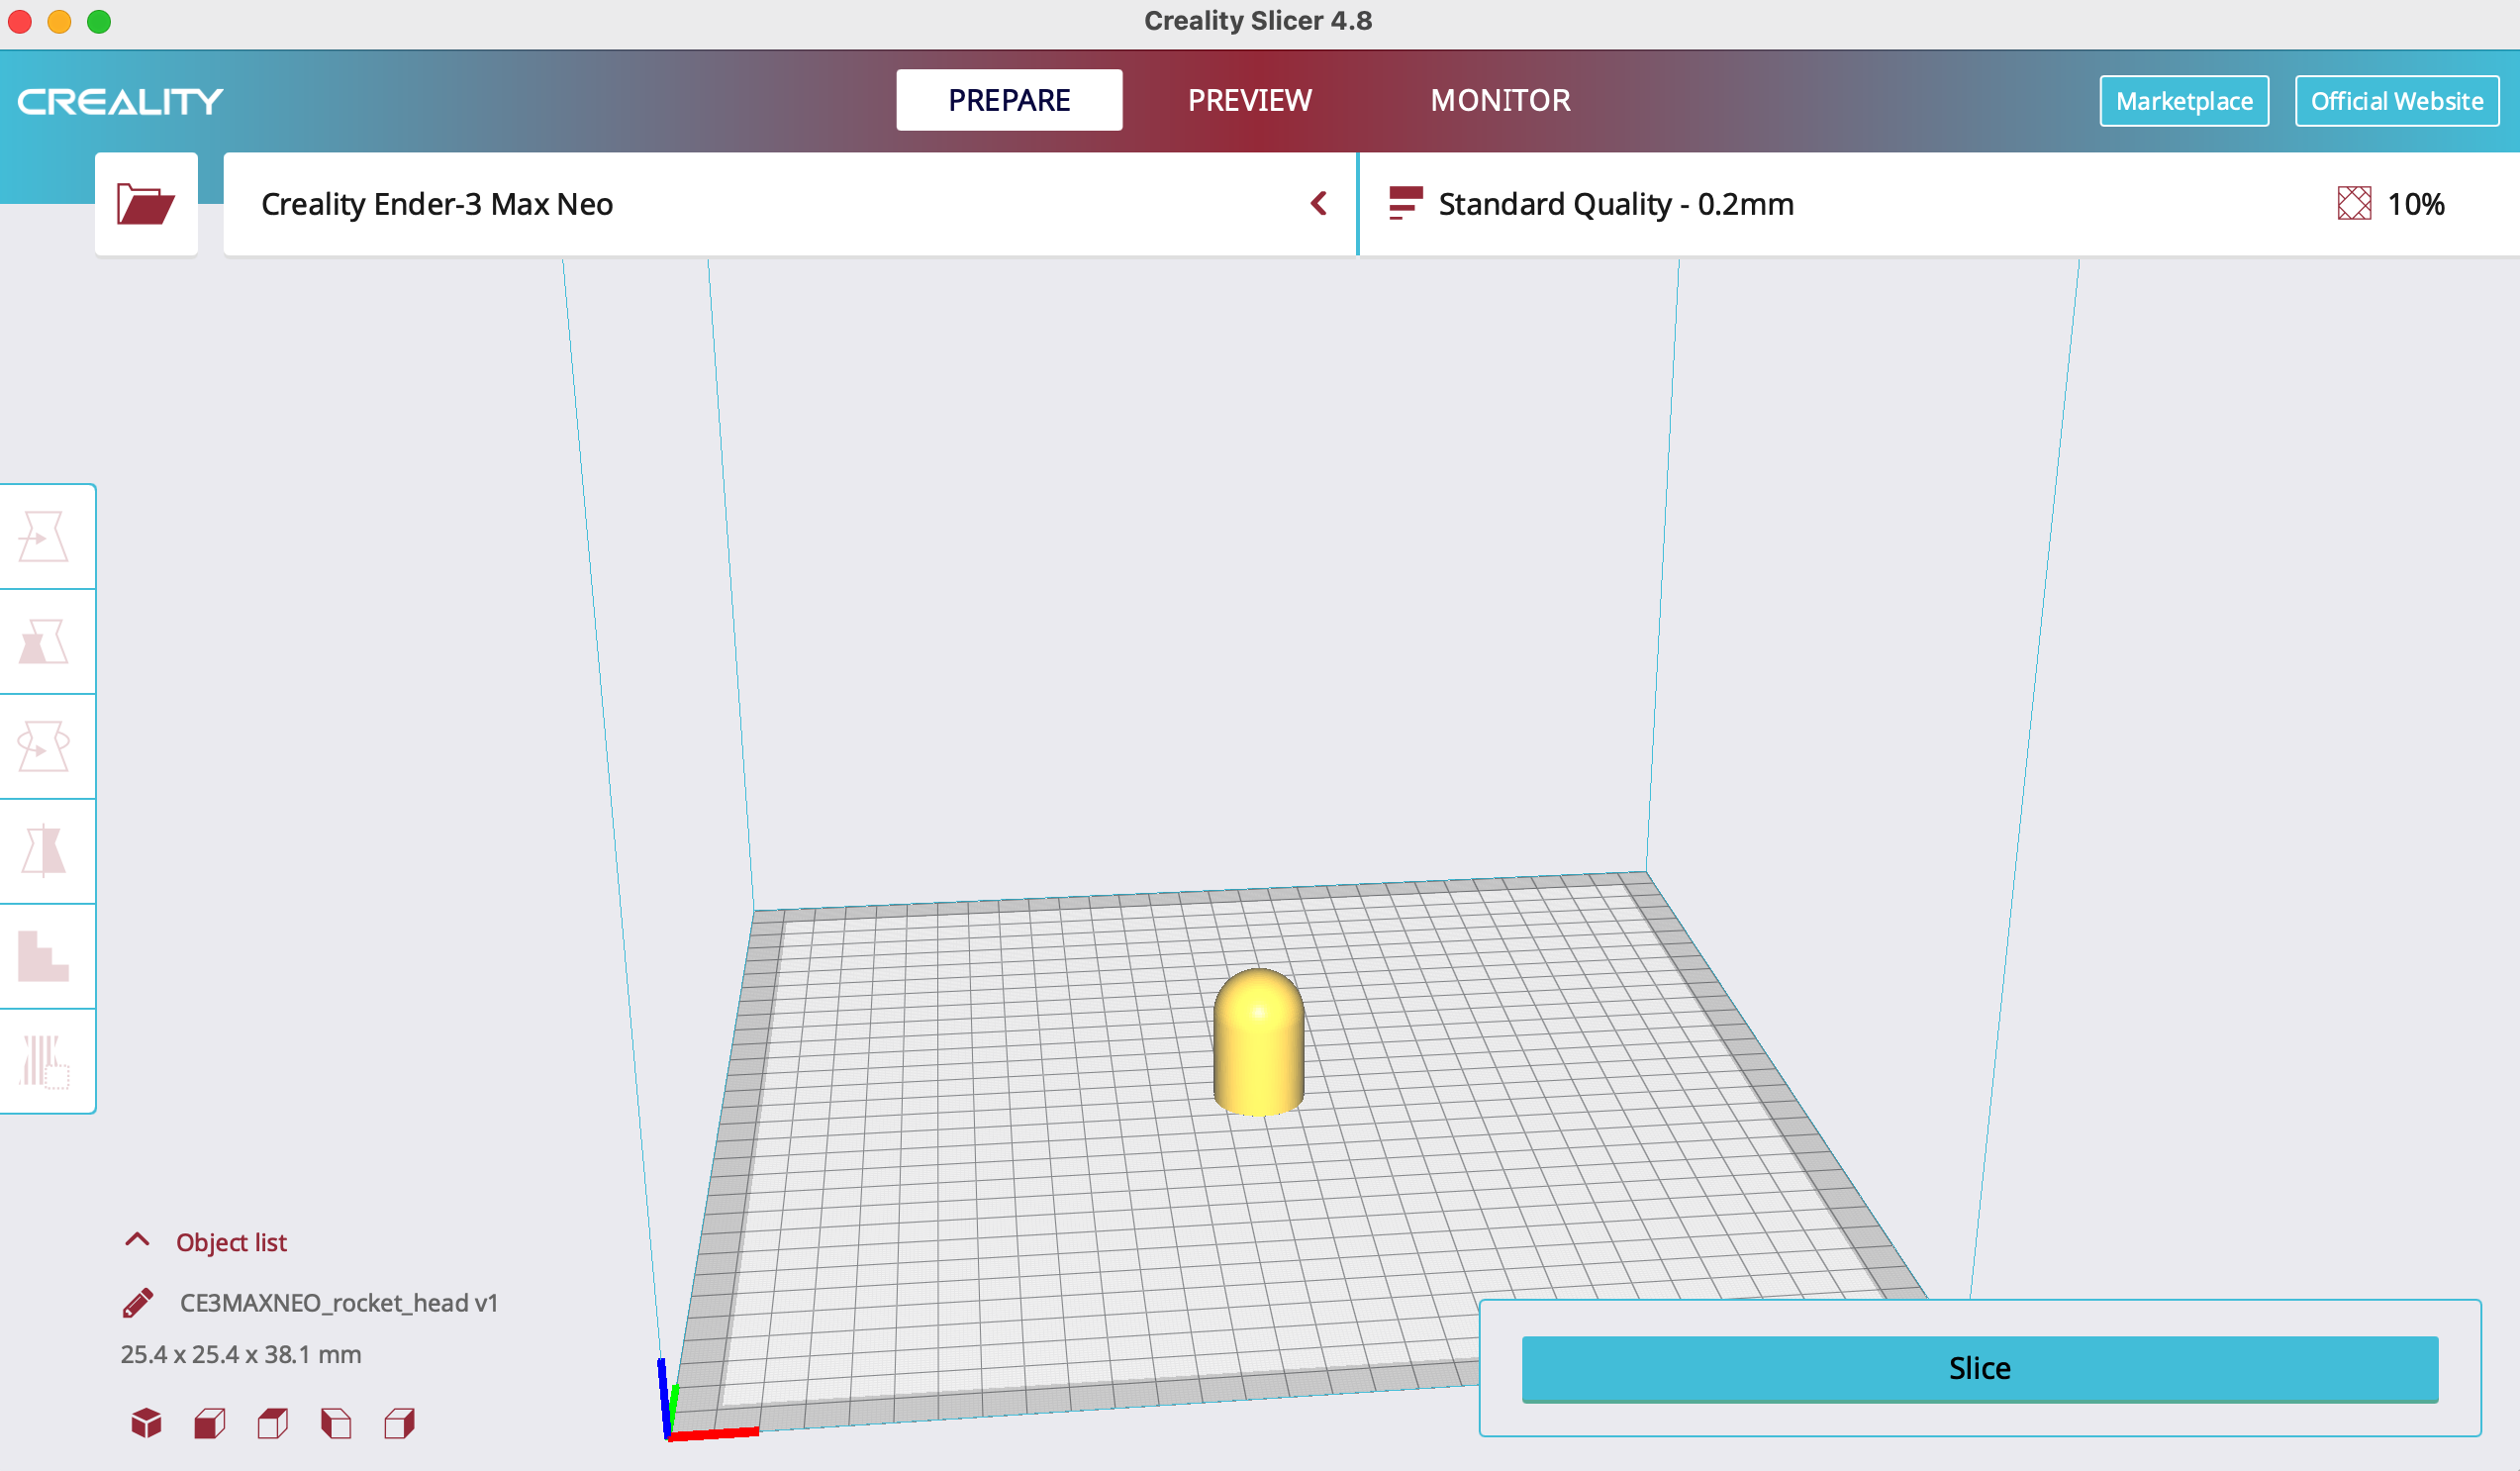
Drag the STL file into a slicer application. The application will vary depending on the printer you have. If you do not know, make sure to search on Google for this type of information. I find that YouTube videos are pretty spot on!
After I'm satisfied, I'll export the file into a USB, insert that into my printer, and print it.
Assemble
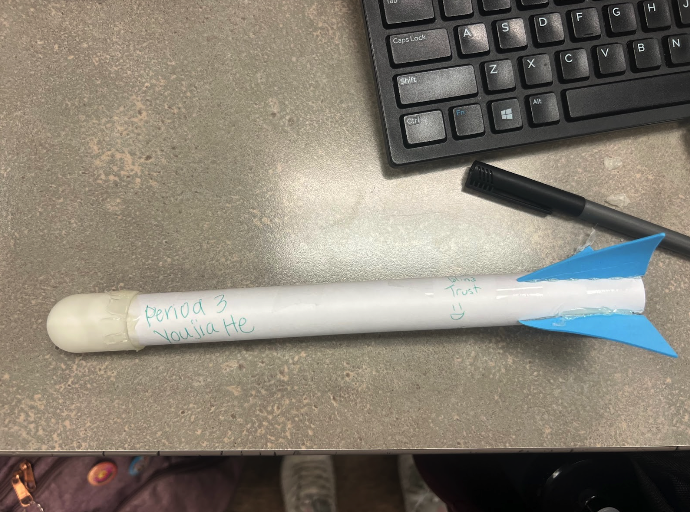

For this rocket, it is best to use hot glue to assemble all the pieces instead of tape. And then you're done!
My teacher had a special contraption that shot the rockets for 40 PSI at 45 degrees (I would like to tell you how to build it but that's an enigma I have yet to solve). My rocket traveled 62 yards, which was quite impressive if I do say so myself!