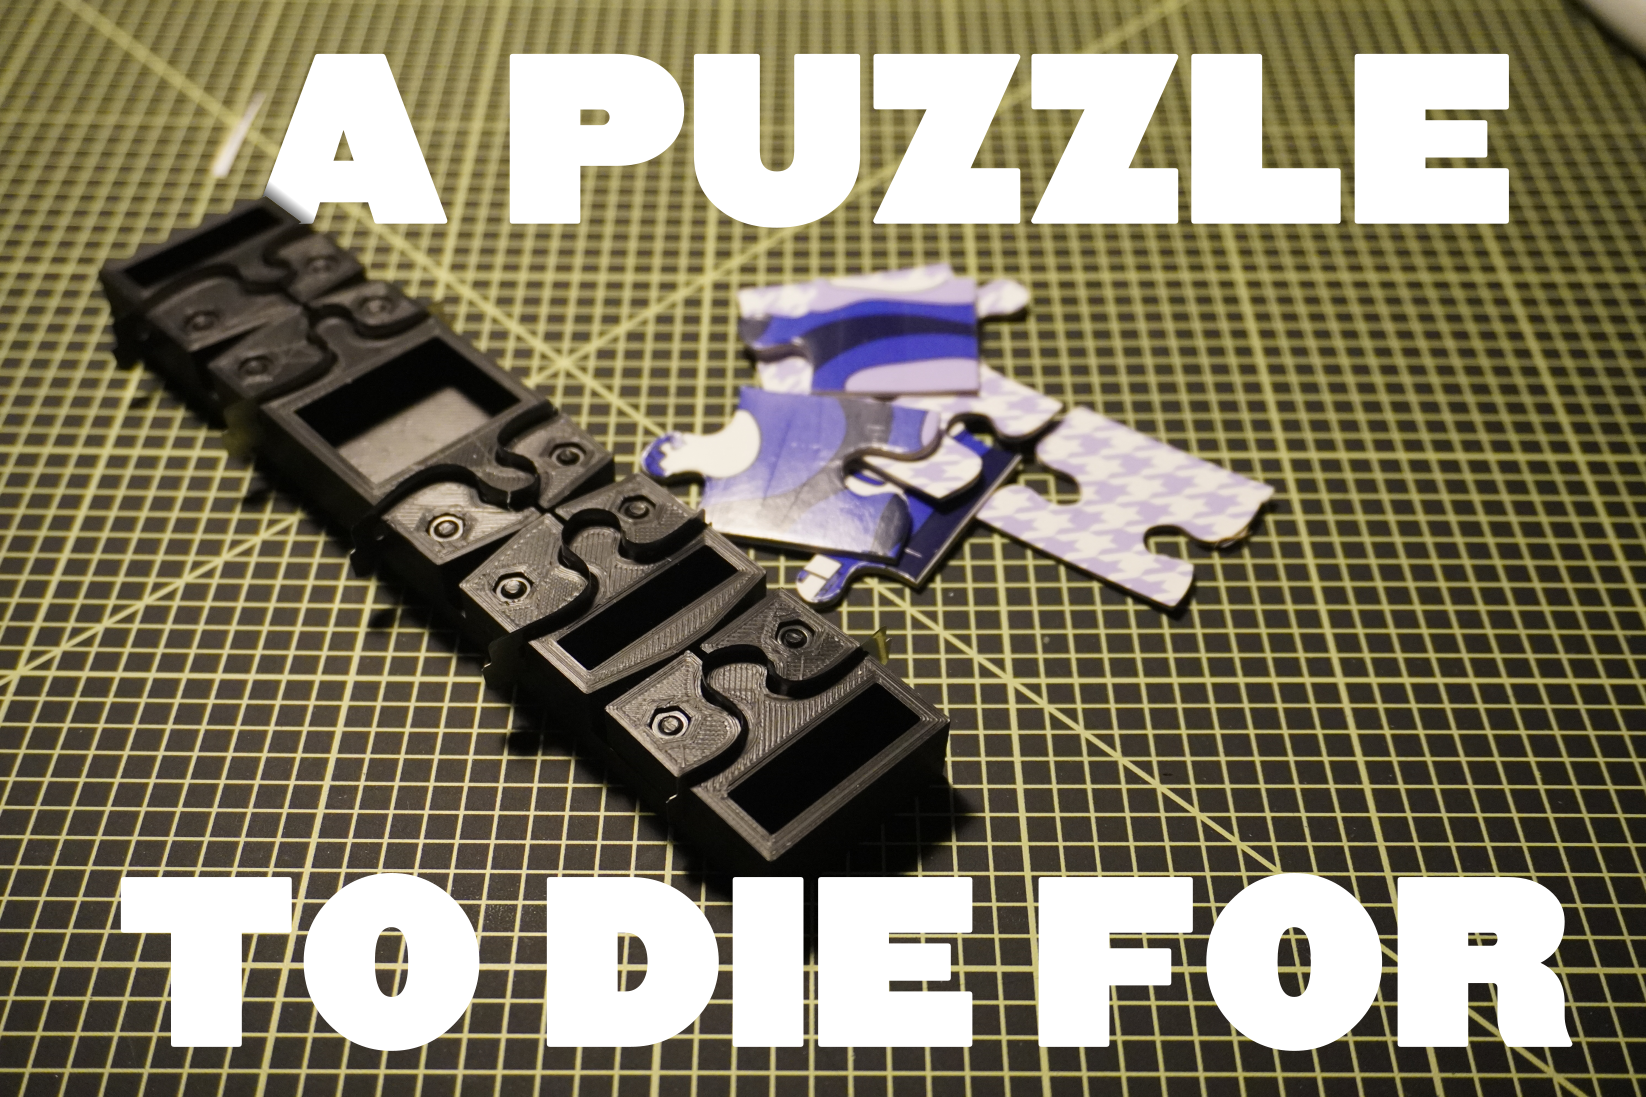
DIY Puzzle Die for Truly Custom Cardboard Puzzles
1410 Views, 14 Favorites, 0 Comments
DIY Puzzle Die for Truly Custom Cardboard Puzzles
.gif)
If you have ever wondered how the likes of Ravensburger are manufacturing their jigsaw puzzle, you might have stumbled onto a few images or videos describing the process which, funny enough, does not involve any jigsaws. In fact, those companies cut the cardboard puzzle with a die and press technique, cutting the male and female part of each puzzle pieces. This process might look rudimentary at first, but it is both fast and extremely precise compared to other techniques. Notably, compared to the usual DIY jigsaw puzzle route which usually involve using a laser cutter, the puzzle die technique does not leave a chard mark and has almost no kerf loss (kerf loss is the material loss due to the thickness of the tool such as laser width or saw blade thickness)
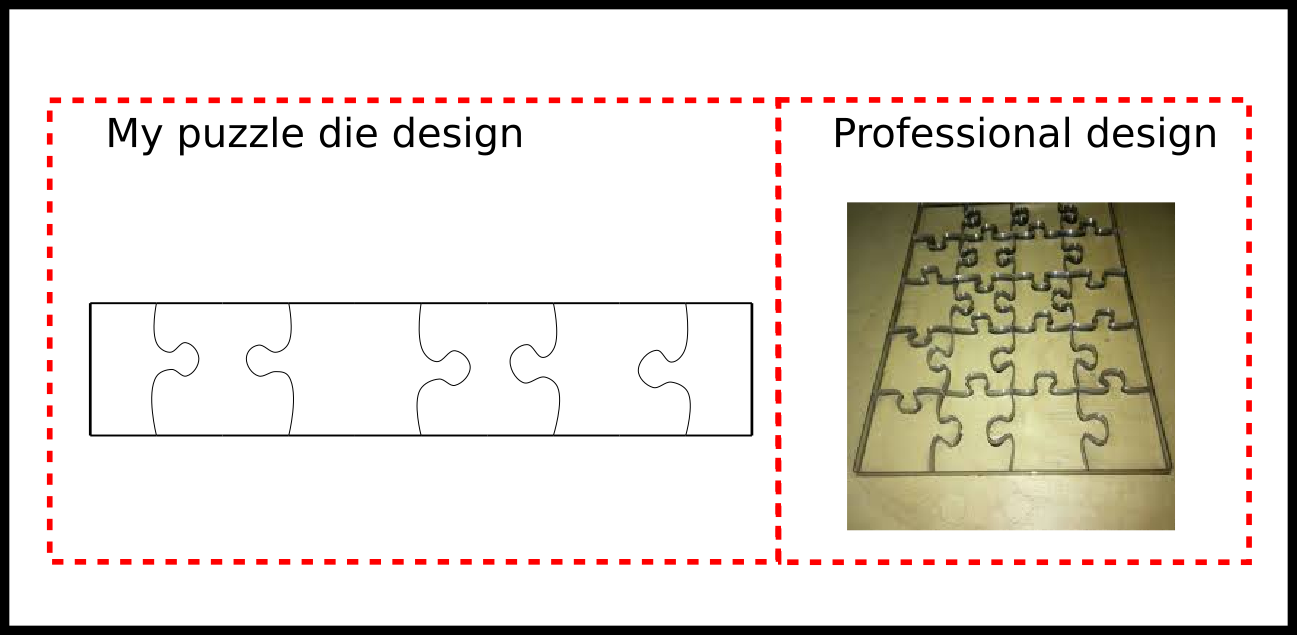
Nowadays, anyone can design a picture and have it professionally die cut so… why did I try to build my own jigsaw puzzle die ? While using the services of a company to have your pictures turned puzzle, you only have a limited number of shapes to make your puzzles and I had 2 ideas of puzzles that I could not have had made, this Instructables describes one of those 2 ideas (I will probably eventually write another Instructables describing the 2nd more challenging idea).
The puzzle die I am describing in this Instructables is made of razor blades pressed into shape in a 3D printed PLA razor blade holder. This project can be dangerous as it is ridiculously easy to cut yourself on the razor blades (do not ask how I know that) so use caution !
Do you know the “secret” on how to finish a jigsaw puzzle?
· Step 1: start with the edges
· Step 2: fill in the rest of the puzzle => Done!
In this instructables, I try to design a puzzle making process that eliminates one of the aforementioned steps:
· Step 1: start with the edges =>Done !
Supplies
3D printer
Wood glue
Long razor blades (62mm)
10mm M3 screws with nuts x10
Compacted cardboard (I used an amazon thick envelope)
Printer
Computer with Inkscape & FreeCAD (both software are free)
Rotary cutter and a ruler
Designing the Puzzle Die in Inkscape

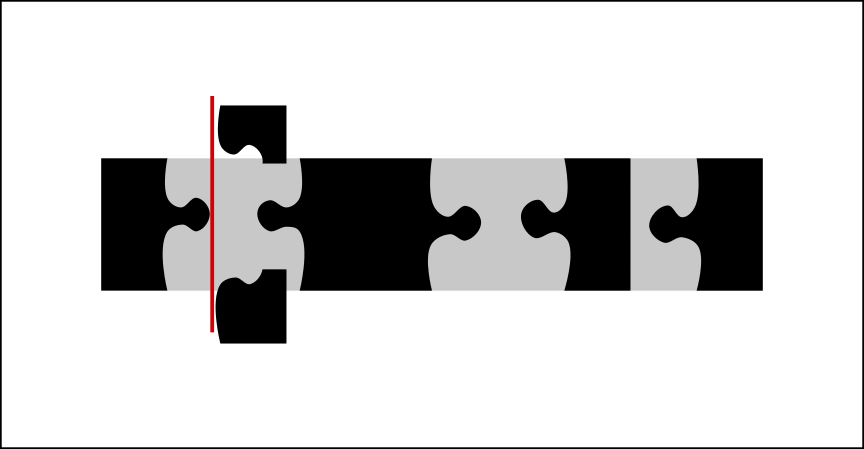
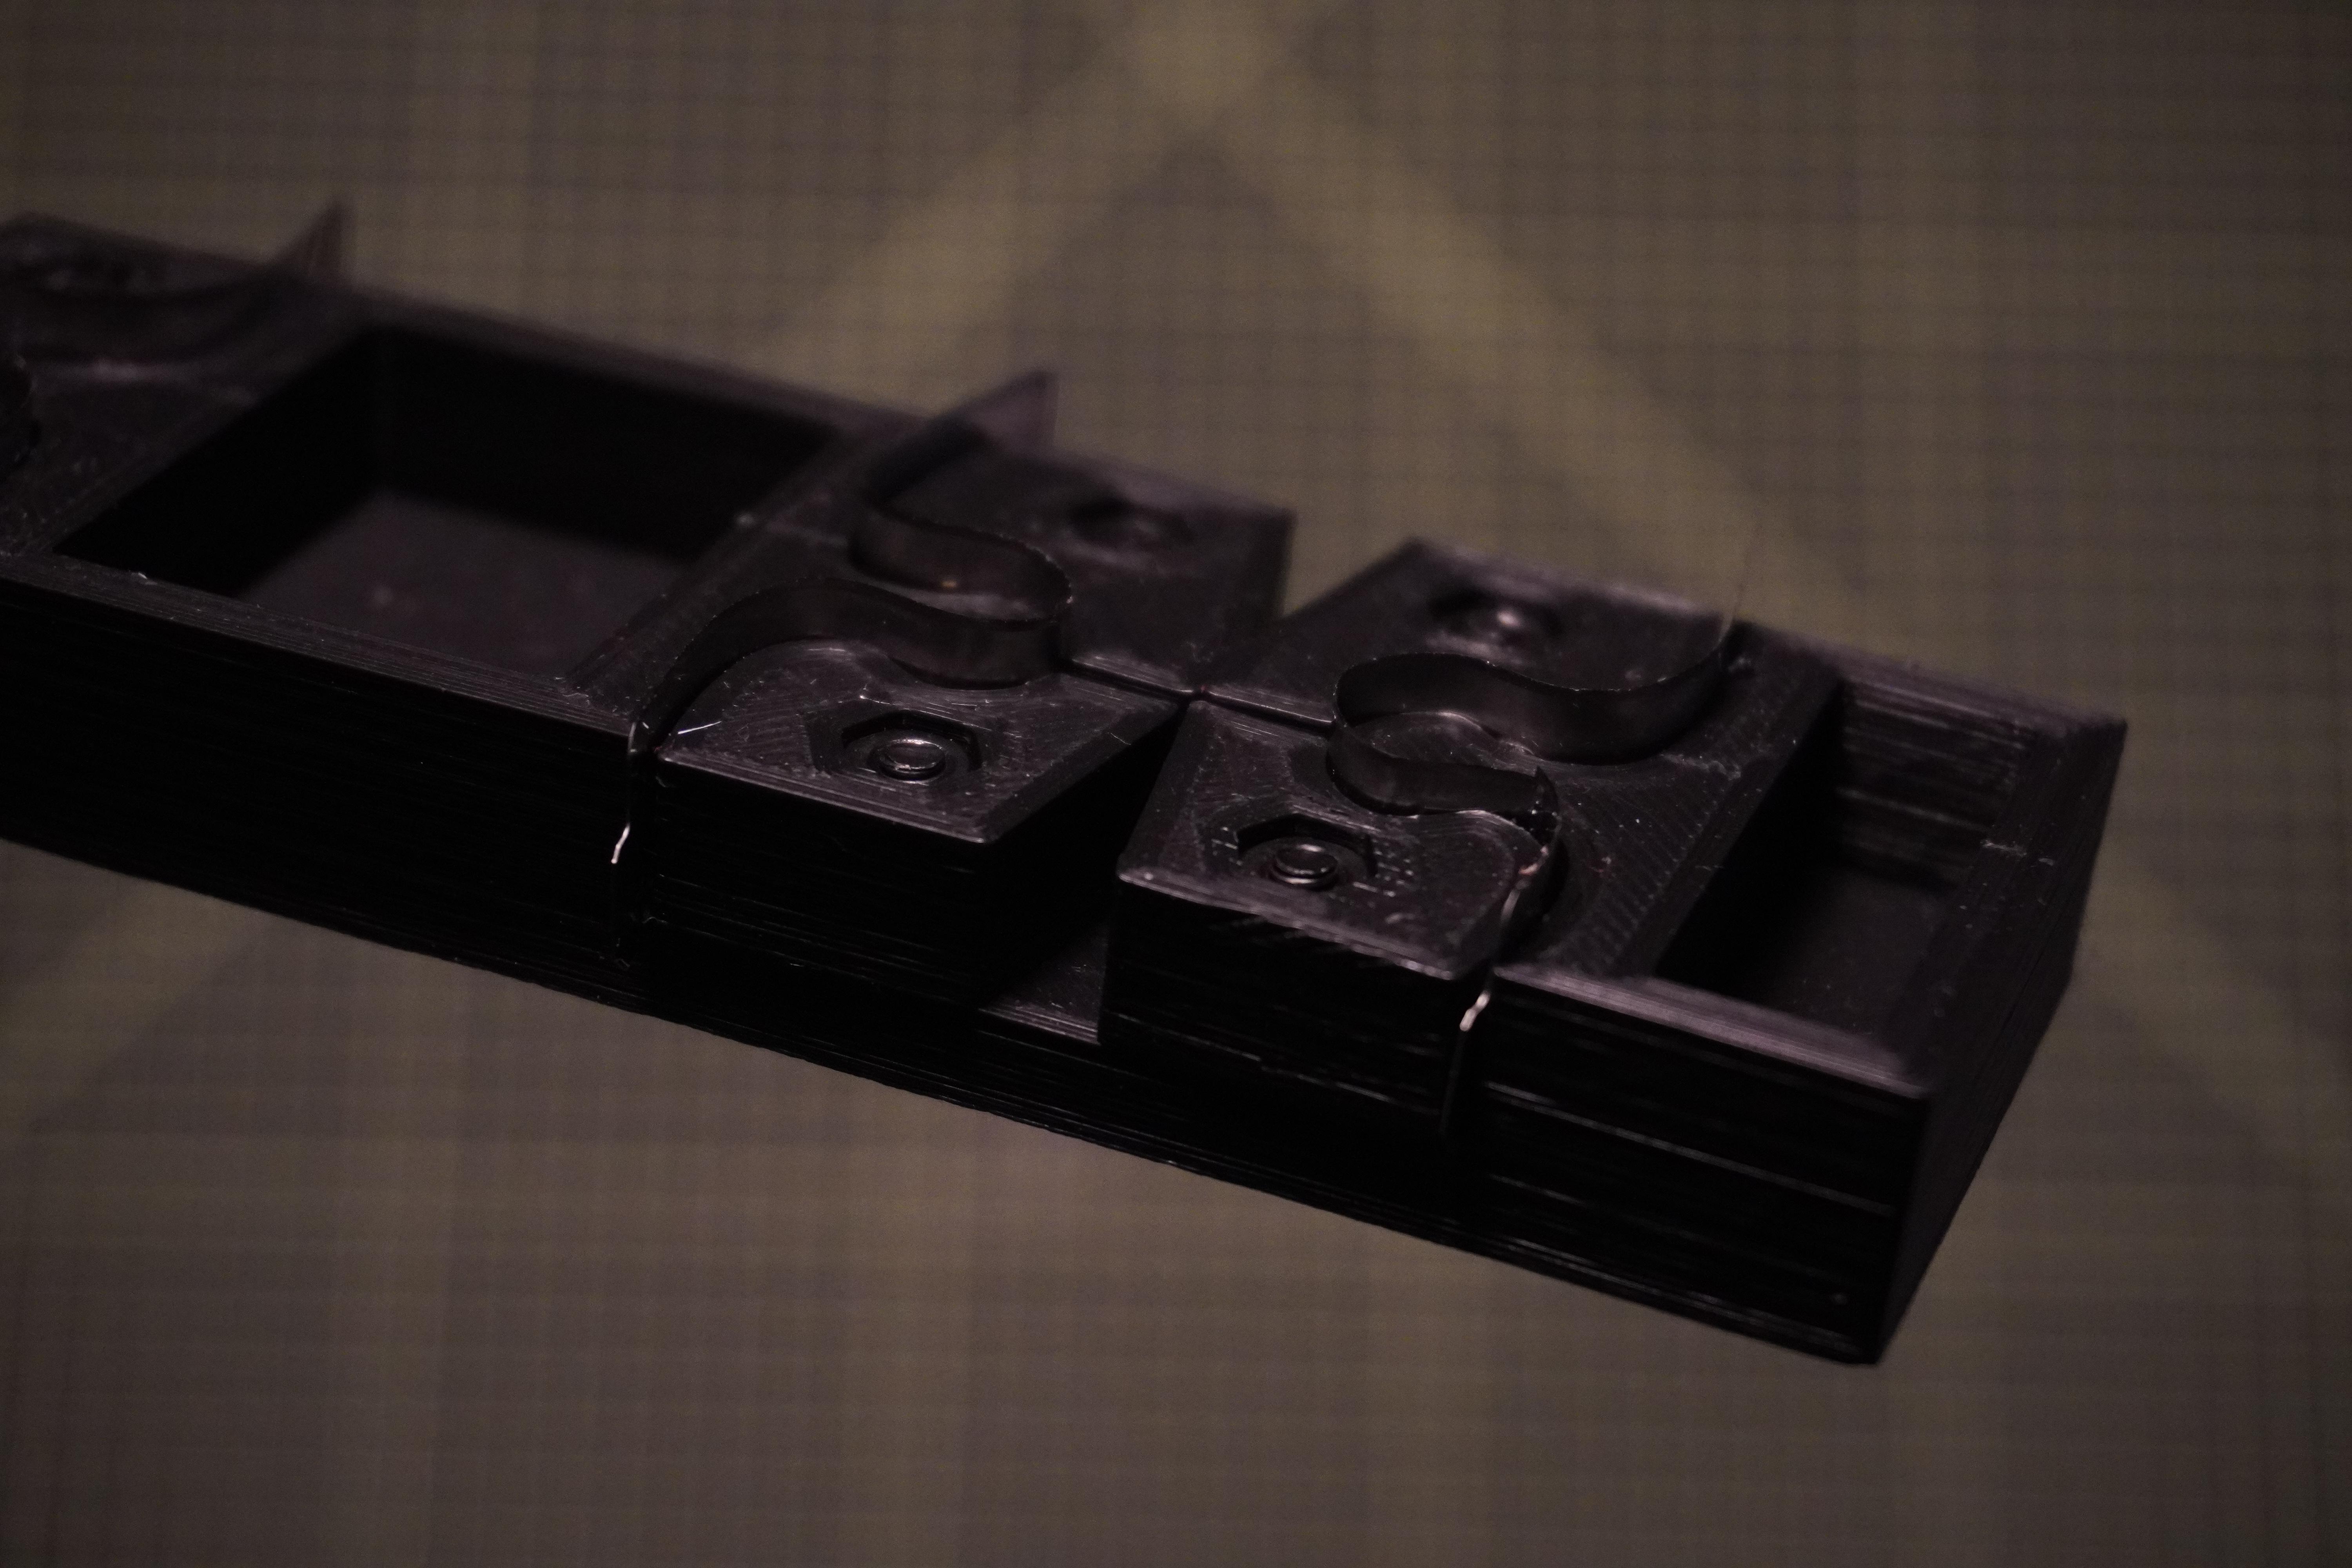
The goal of this first step is to design in Inkscape the cut profiles of the puzzle pieces, in the die we are making, we have a male piece and a 2 part female piece (see picture) that wraps around the male piece pushing and shaping the razor blade in the correct profile. In addition to shaping the razor blade in a unique puzzle piece profile, the entire assembly holds the razor blade through friction.
In this section, I am going to comment the pictures but all the information are already on the pictures
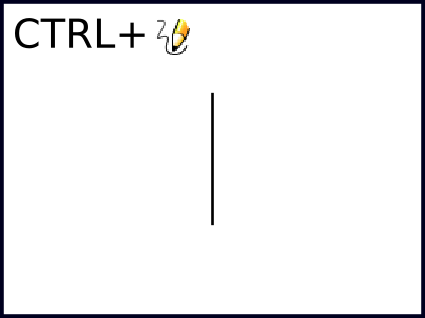
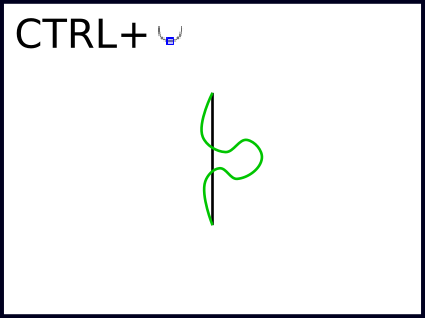
- Trace an exactly vertical line (use the freehand tool whilst pressing CTRL) , 35 mm in height (after drawing the line, you can adjust its height on the "height of selection" top bar)
- Use the Bezier curves tool to trace approximately the profile of the puzzle piece with both extremity nodes of the green line coinciding with the extremity of the black line
- Use the "edit path by nodes" tool to select all the nodes (except extremity nodes) on the green path and click on "make selected nodes smooth"
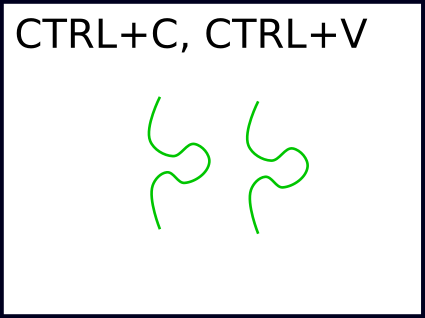
- Duplicate the the profile
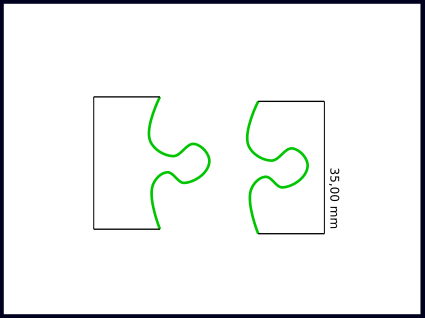
- Close the 2 profiles with the small sides being exactly 35mm/2=17.5mm and the side opposite the puzzle profile exactly 35mm, the idea being that if you completed the puzzle, you would end up with a square piece 35*35mm
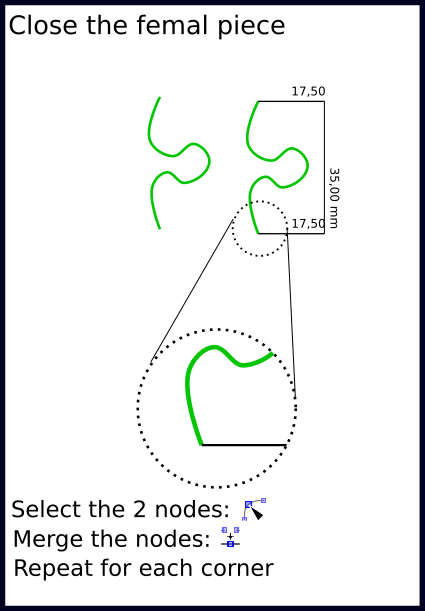
- To actually close the parts; select the coinciding nodes on each corner, use the "edit path by nodes" tool and then the "join selected nodes" tool
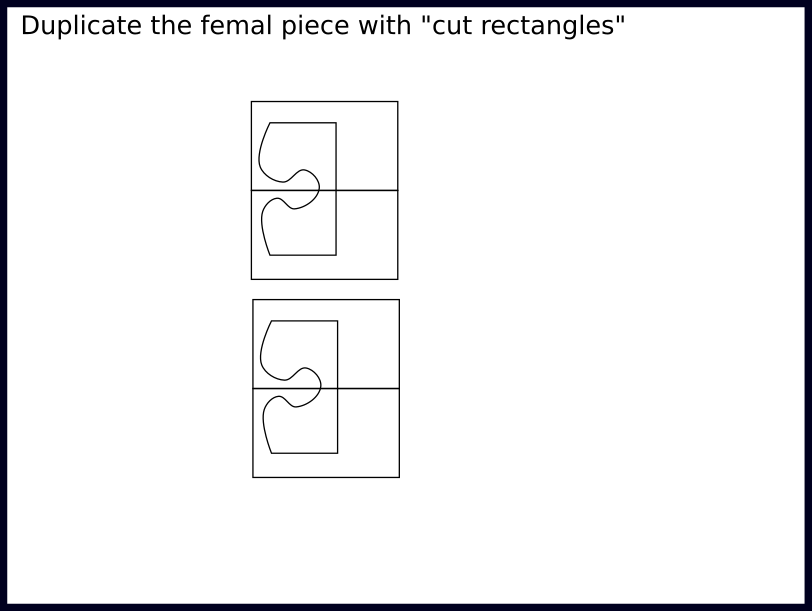
- Duplicate the female piece with "cut rectangles"
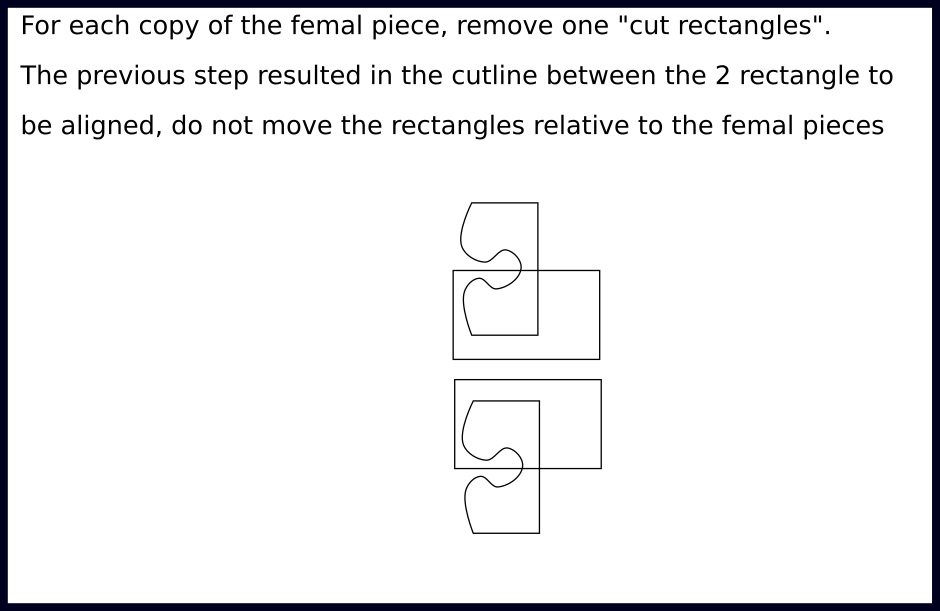
- For each copy of the female piece, remove one "cut rectangles". The previous step resulted in the cut-line between the 2 rectangle to be aligned, do not move the rectangles relative to the female pieces
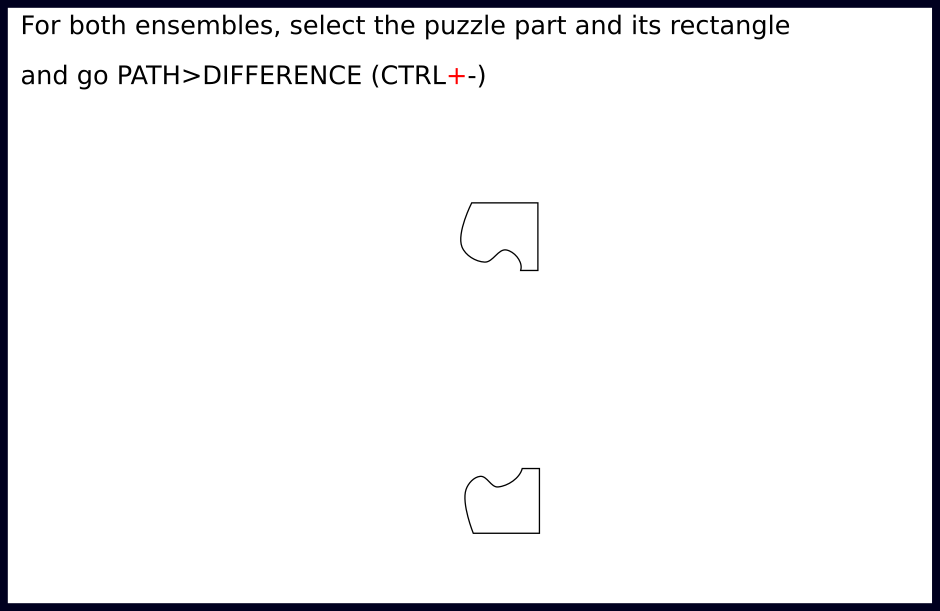
- For both ensembles, select the puzzle part and its rectangle and go PATH>DIFFERENCE (CTRL+-)
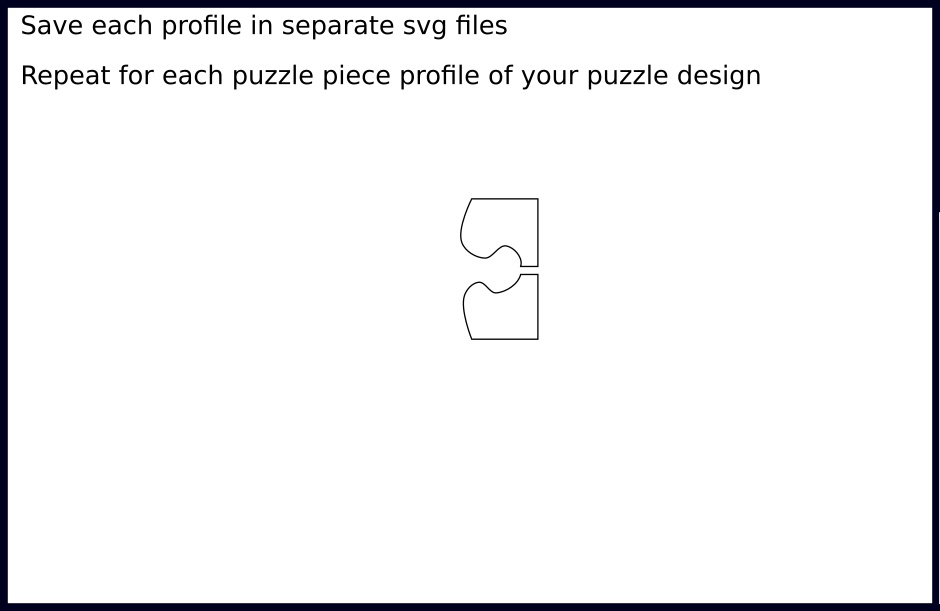
- Save each profile in separate svg files. Repeat for each puzzle piece profile of your puzzle design
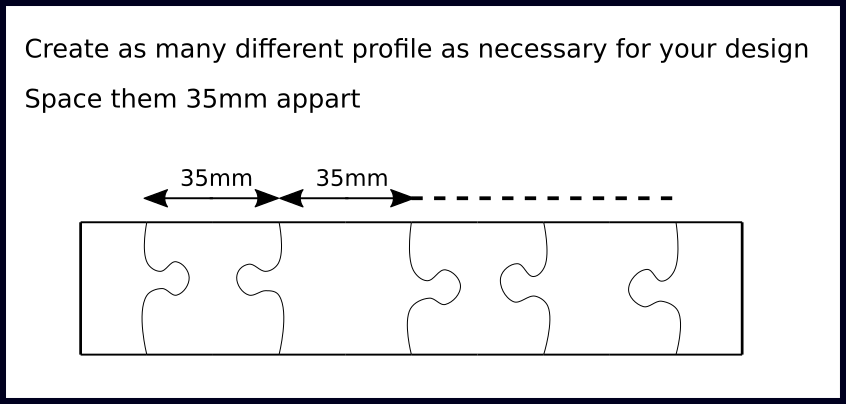
- Create as many different profile as necessary for your design and space them 35mm apart
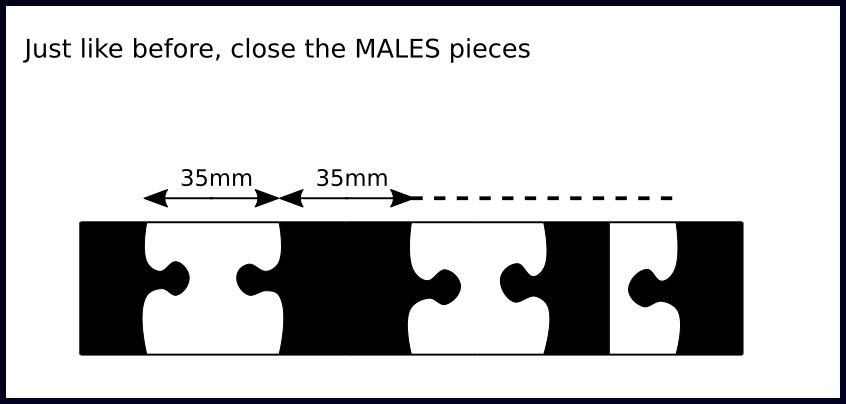
- Just like before, close the MALES pieces
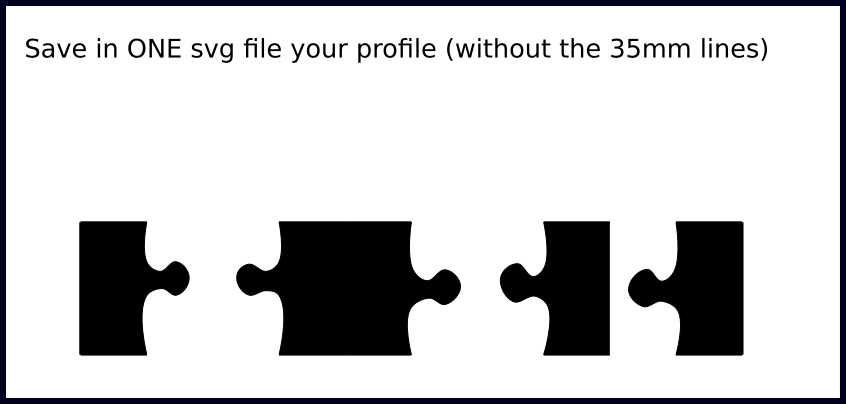
- Save in ONE svg file your profile (without the 35mm lines)
And that is it ! Congratulation, we are done with Inkscape, lets move on to designing the actual 3D model of the puzzle die
Designing the 3D Model of the Die in FreeCAD

The goal of this second step is to design the 3d model in FreeCAD of the puzzle die using the shapes that we have just created in Inkscape. These 3D printed parts have the function of shaping the razor blades in unique puzzle profiles as well as holding all the razor blades
The images speak for themselves, but here is a quick recap picture by picture:
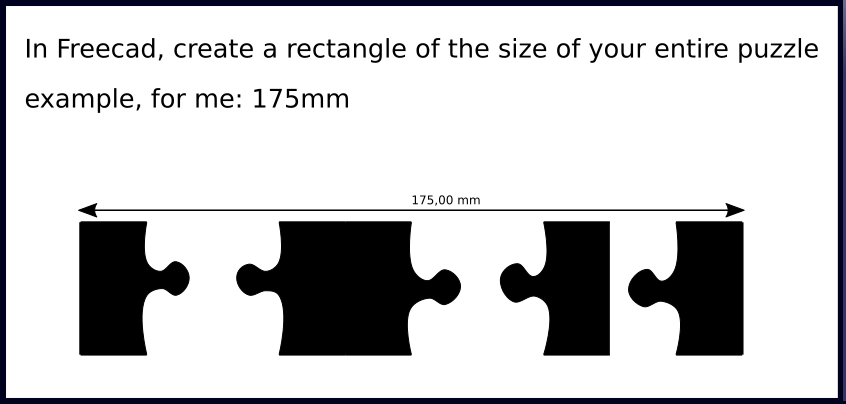
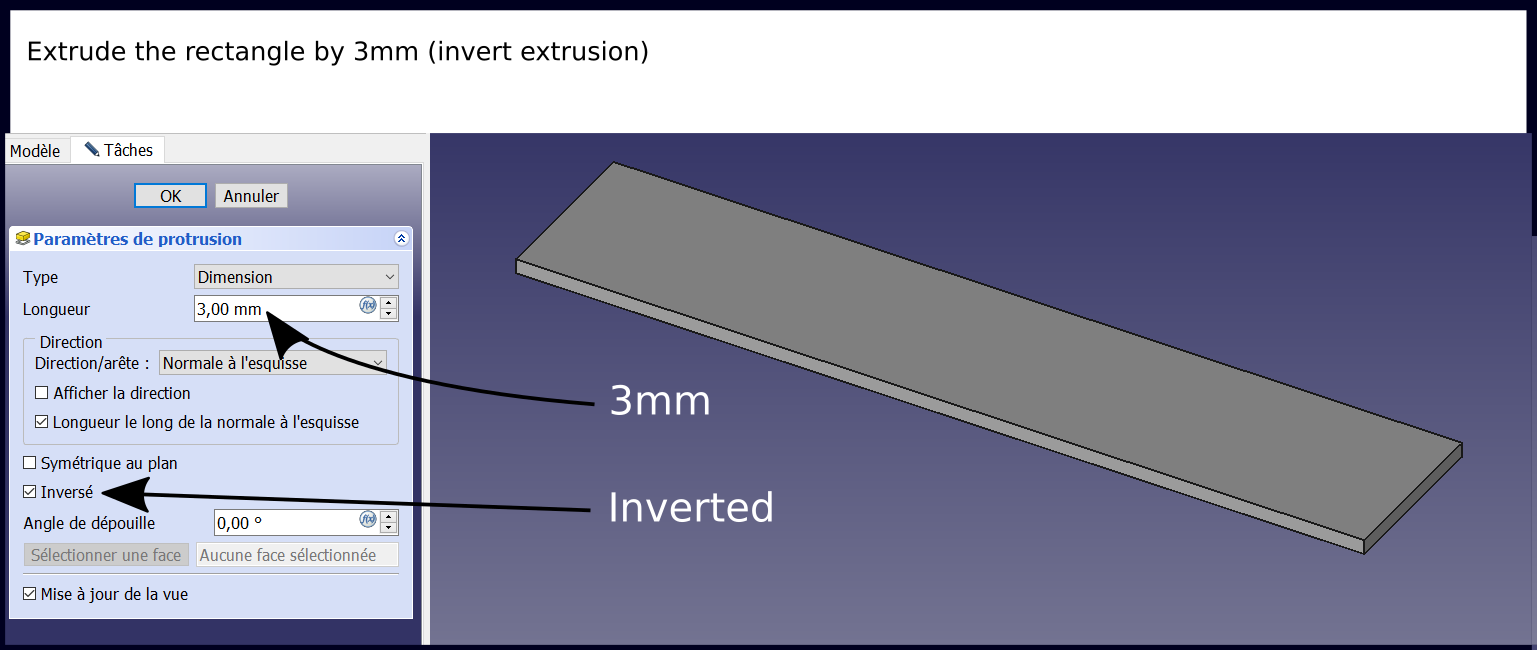
- In Freecad, create a rectangle of the size of your entire puzzle. Example, for me: 175 * 35 mm (keep in mind that the die should fit in one piece on the printing bed of your 3D printer)
- Extrude the rectangle by 3mm (invert extrusion)
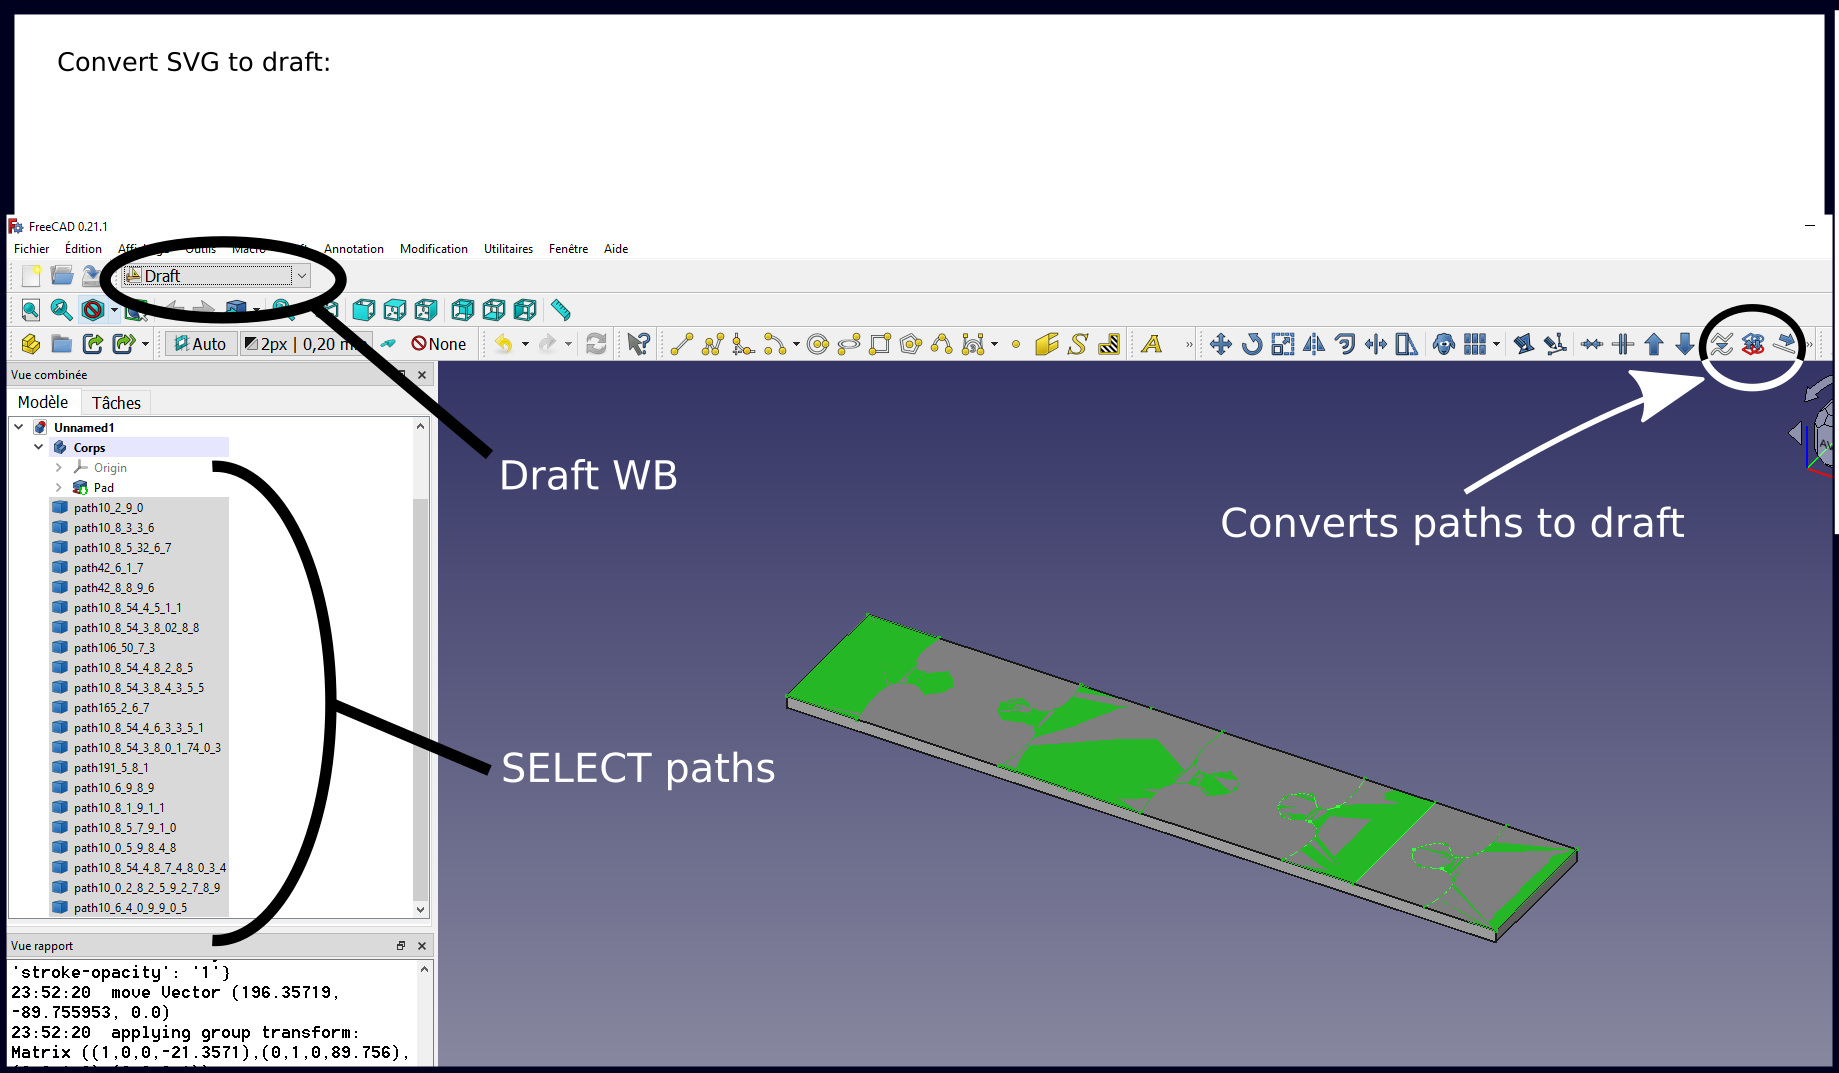
- Import the male SVG (import SVG as geometry)
- Convert SVG to draft:
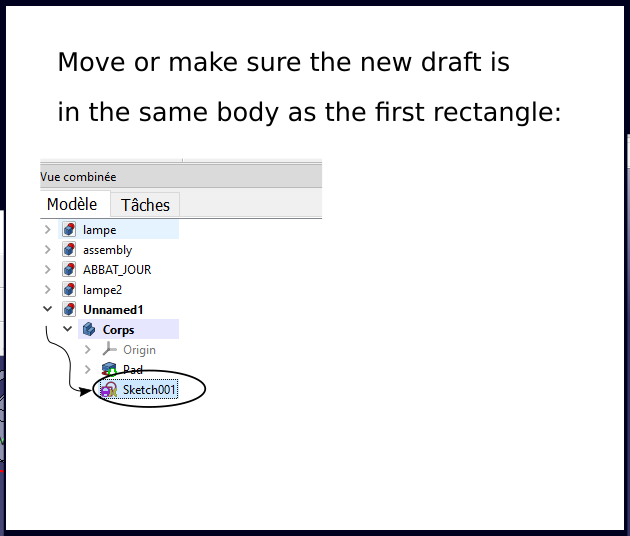
- Move or make sure the new draft is in the same body as the first rectangle
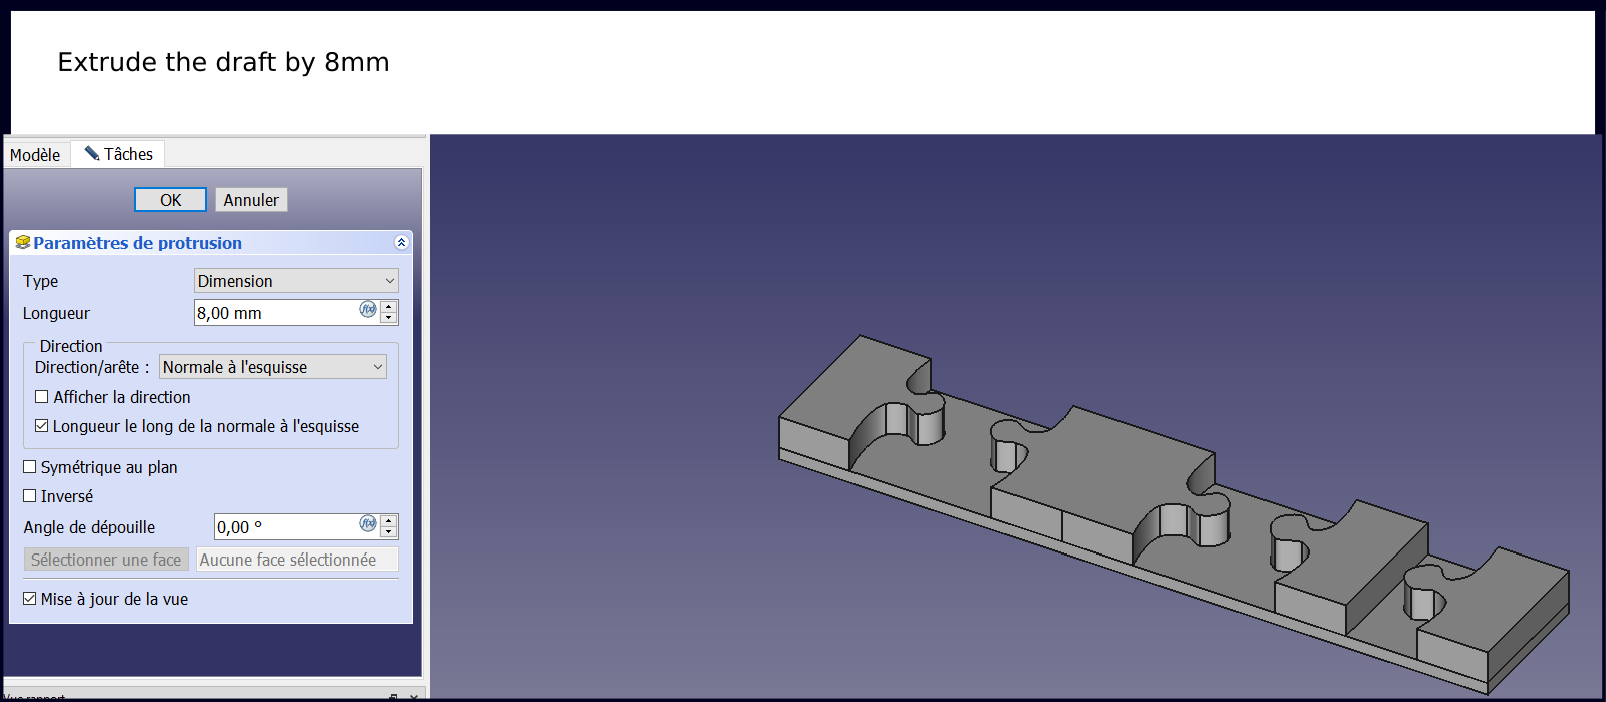
- Extrude the draft by 8mm (the blades are 12mm in height, we want to have the sharp side of the razor blade protruding form the holder just enough to be able to cut trough 2 or 3mm cardboard hence 12-3=8mm extrusion for the razor blade holder)
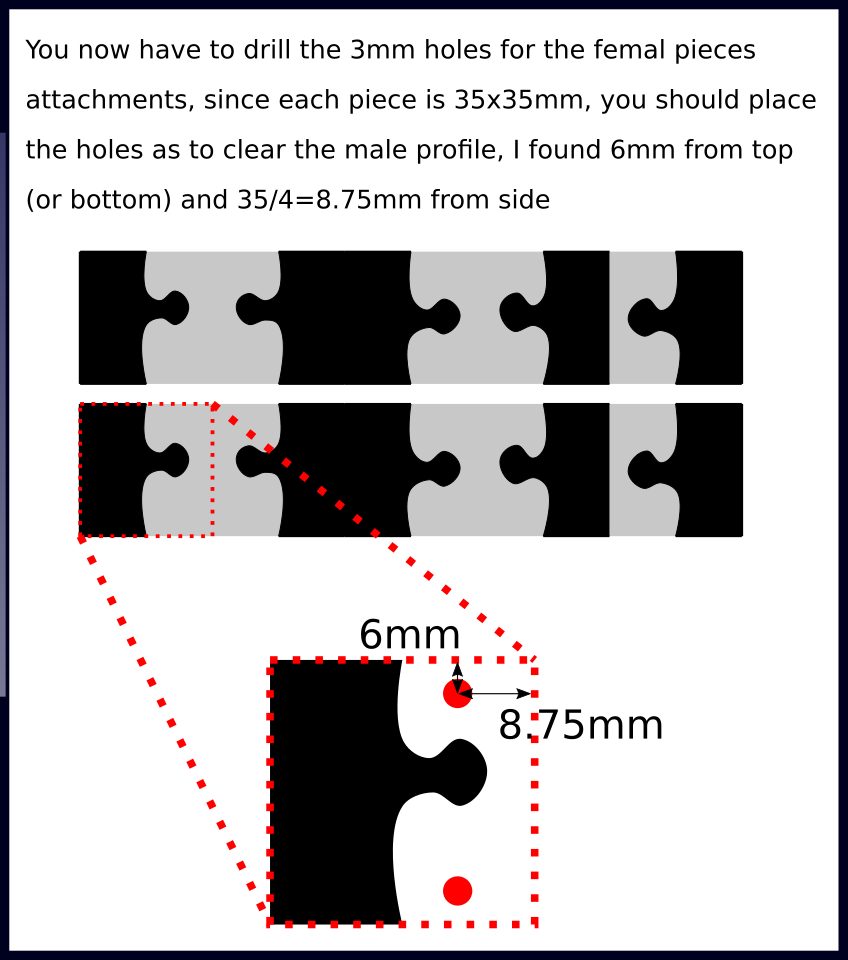
- You now have to drill the 3mm holes for the female pieces attachments, since each piece is 35x35mm, you should place the holes as to clear the male profile, I found 6mm from top (or bottom) and 35/4=8.75mm from side
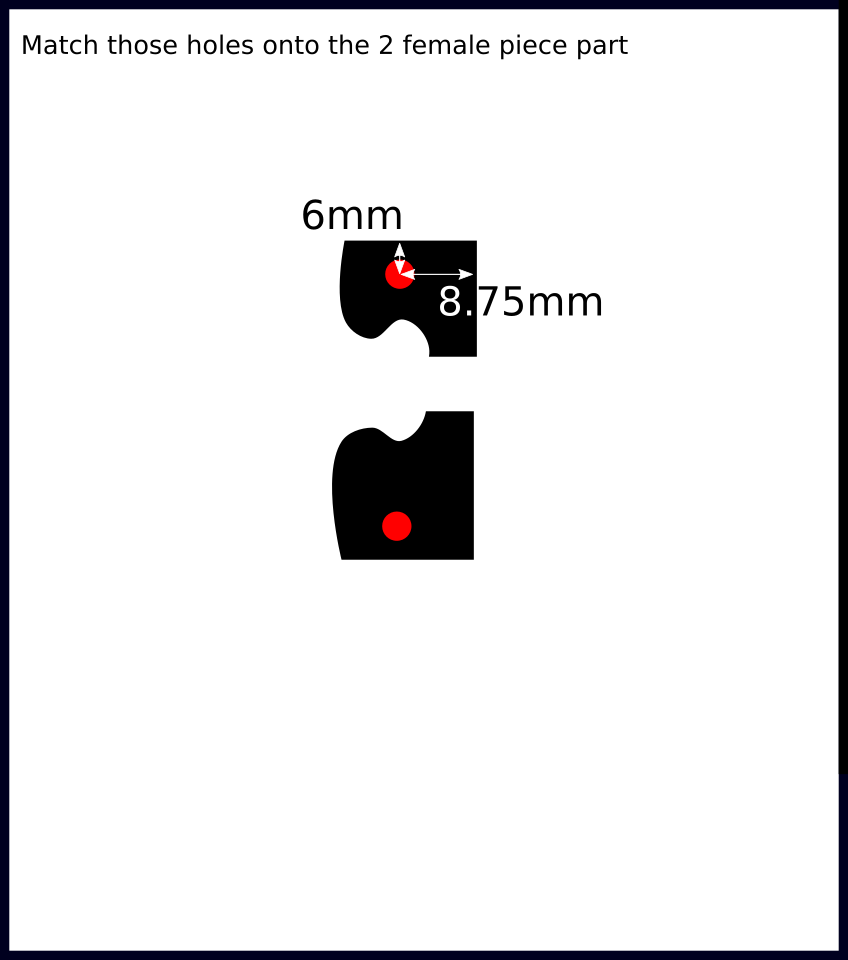
- Match those holes onto the 2 female piece part
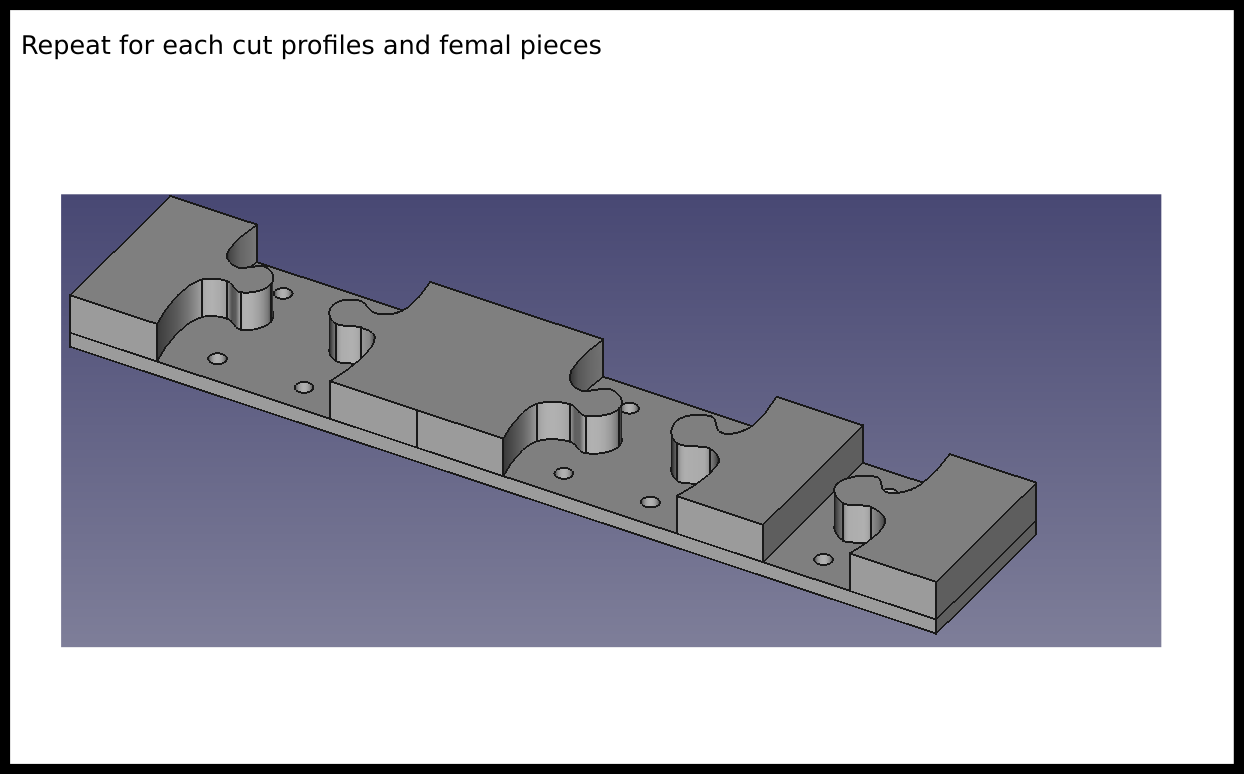
- Repeat for each cut profiles and female pieces
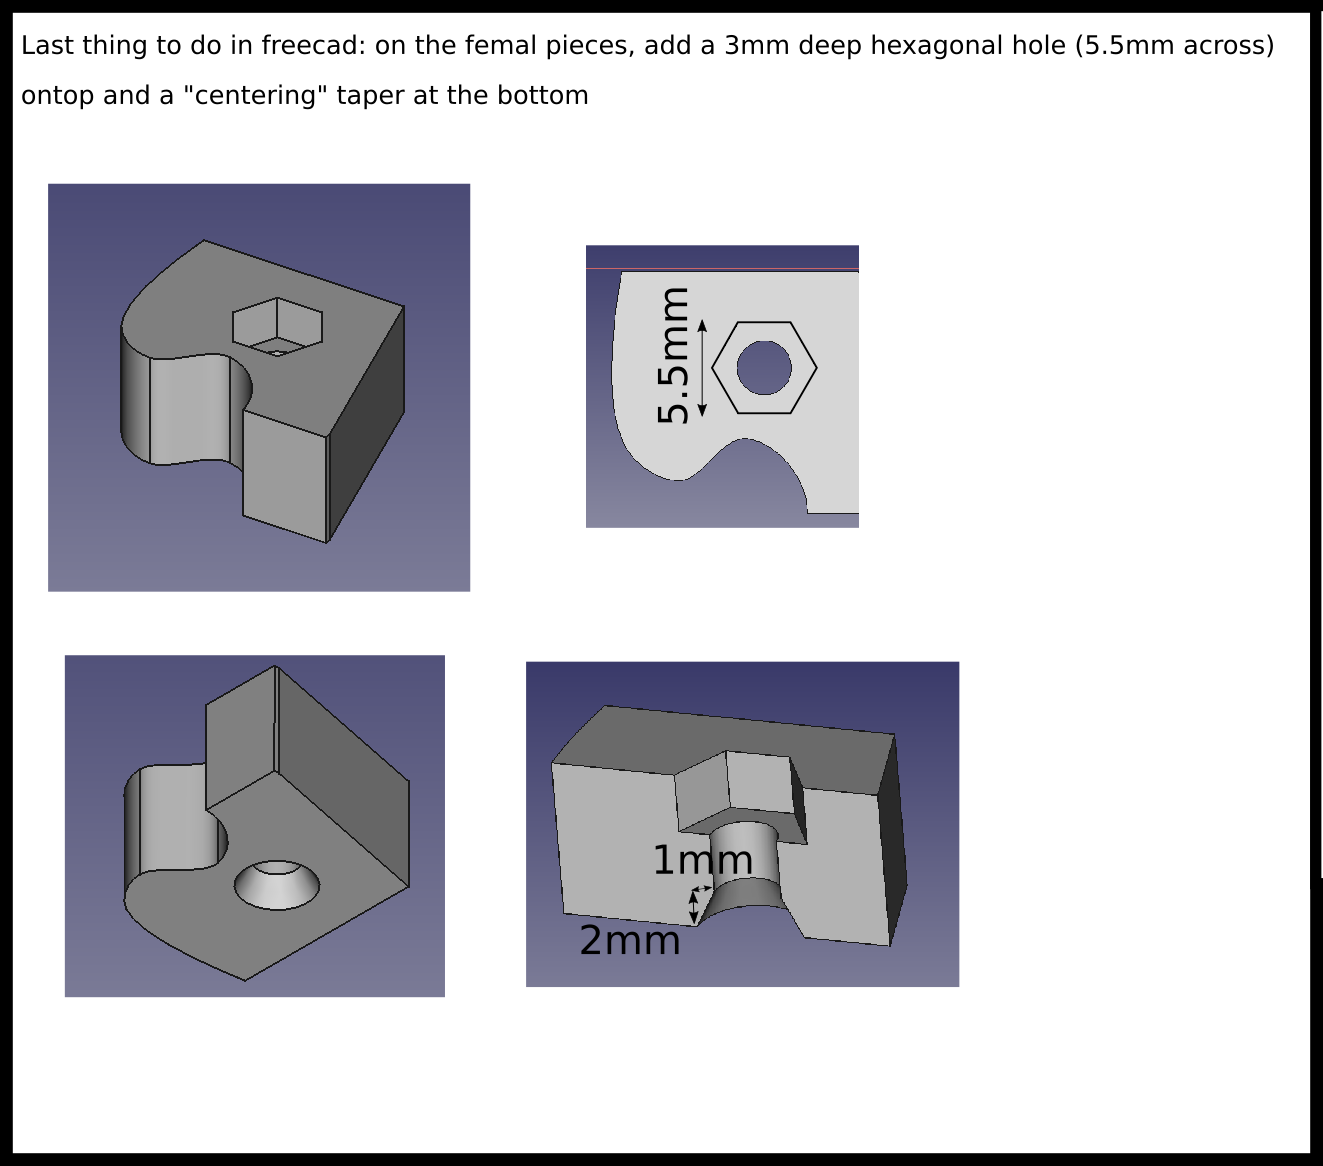
- Last thing to do in FreeCAD: on the female pieces, add a 3mm deep hexagonal hole (5.5mm across) atop and a "centering" taper at the bottom, repeat step for each puzzle profile
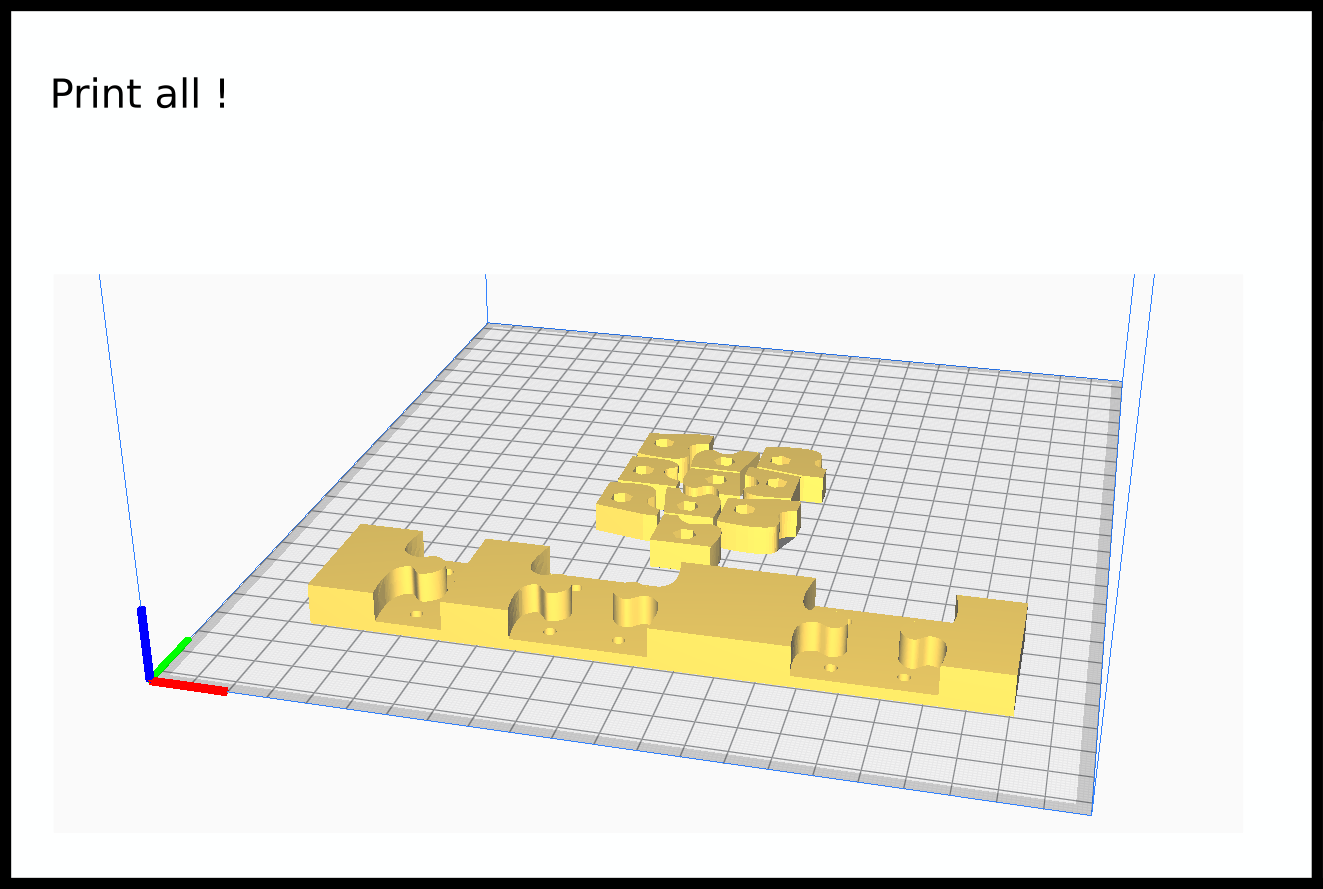
- Use your favorite slicer and print all the pieces !
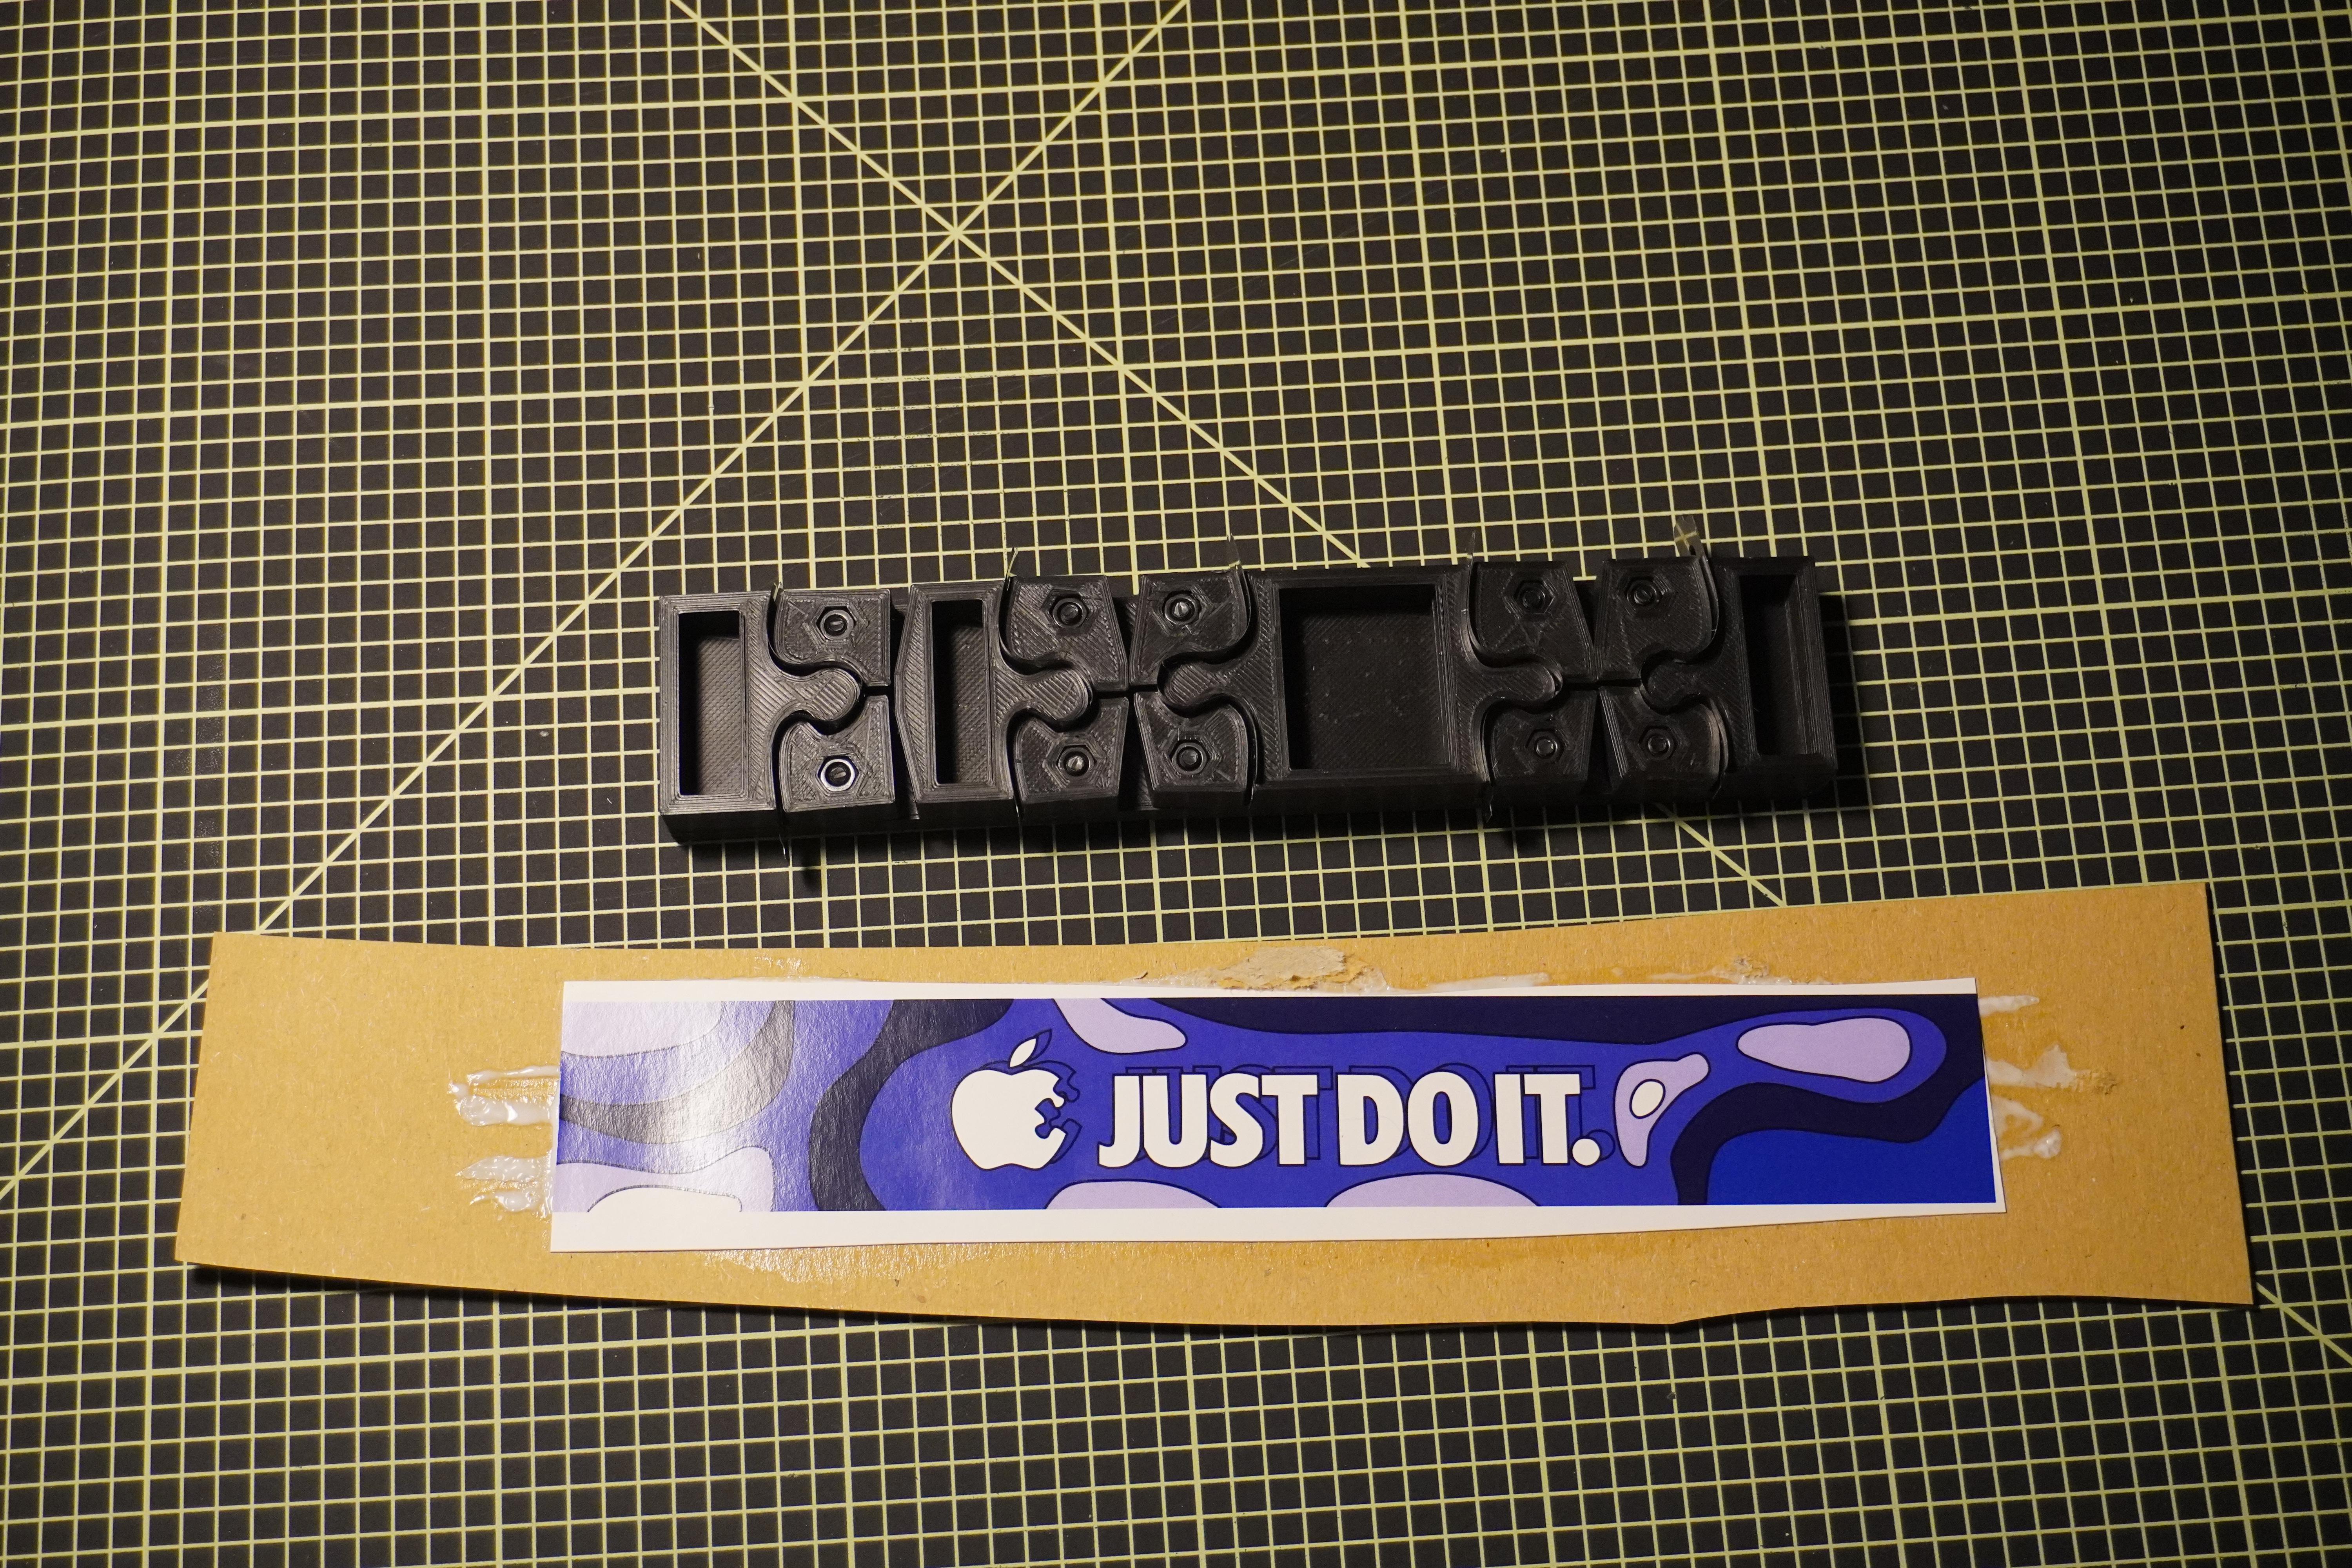
Assembling the Puzzle Die
.gif)
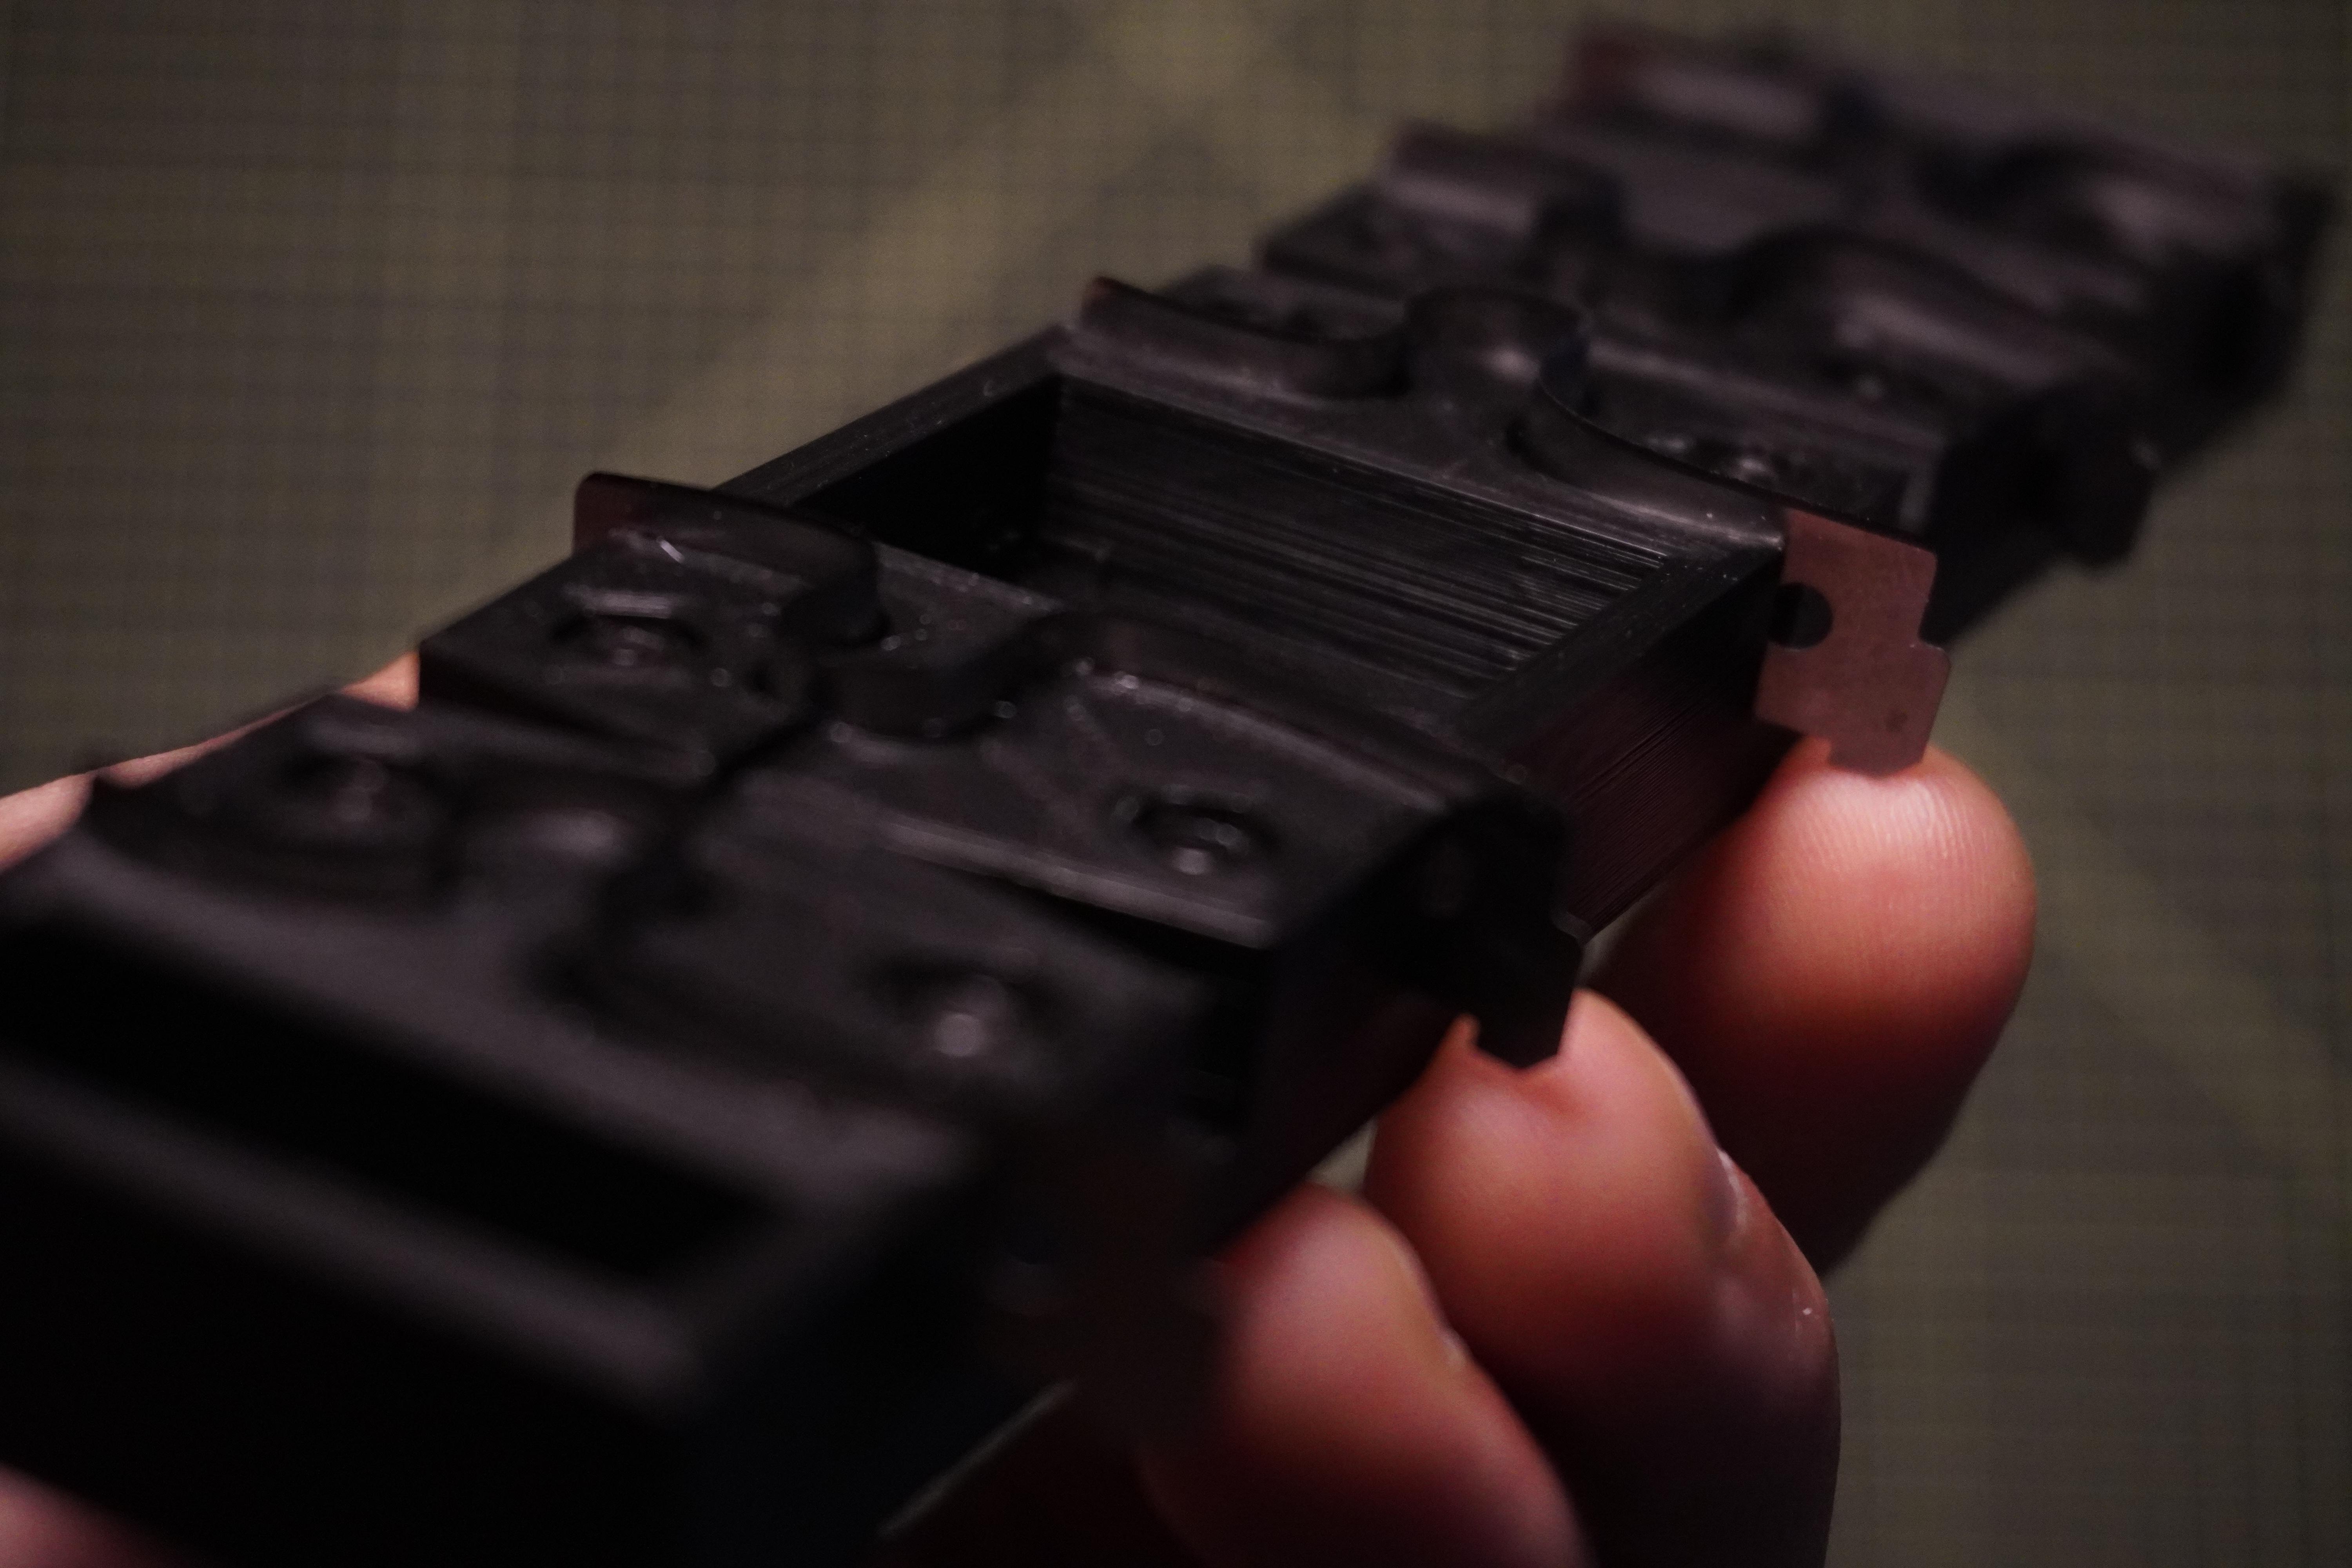
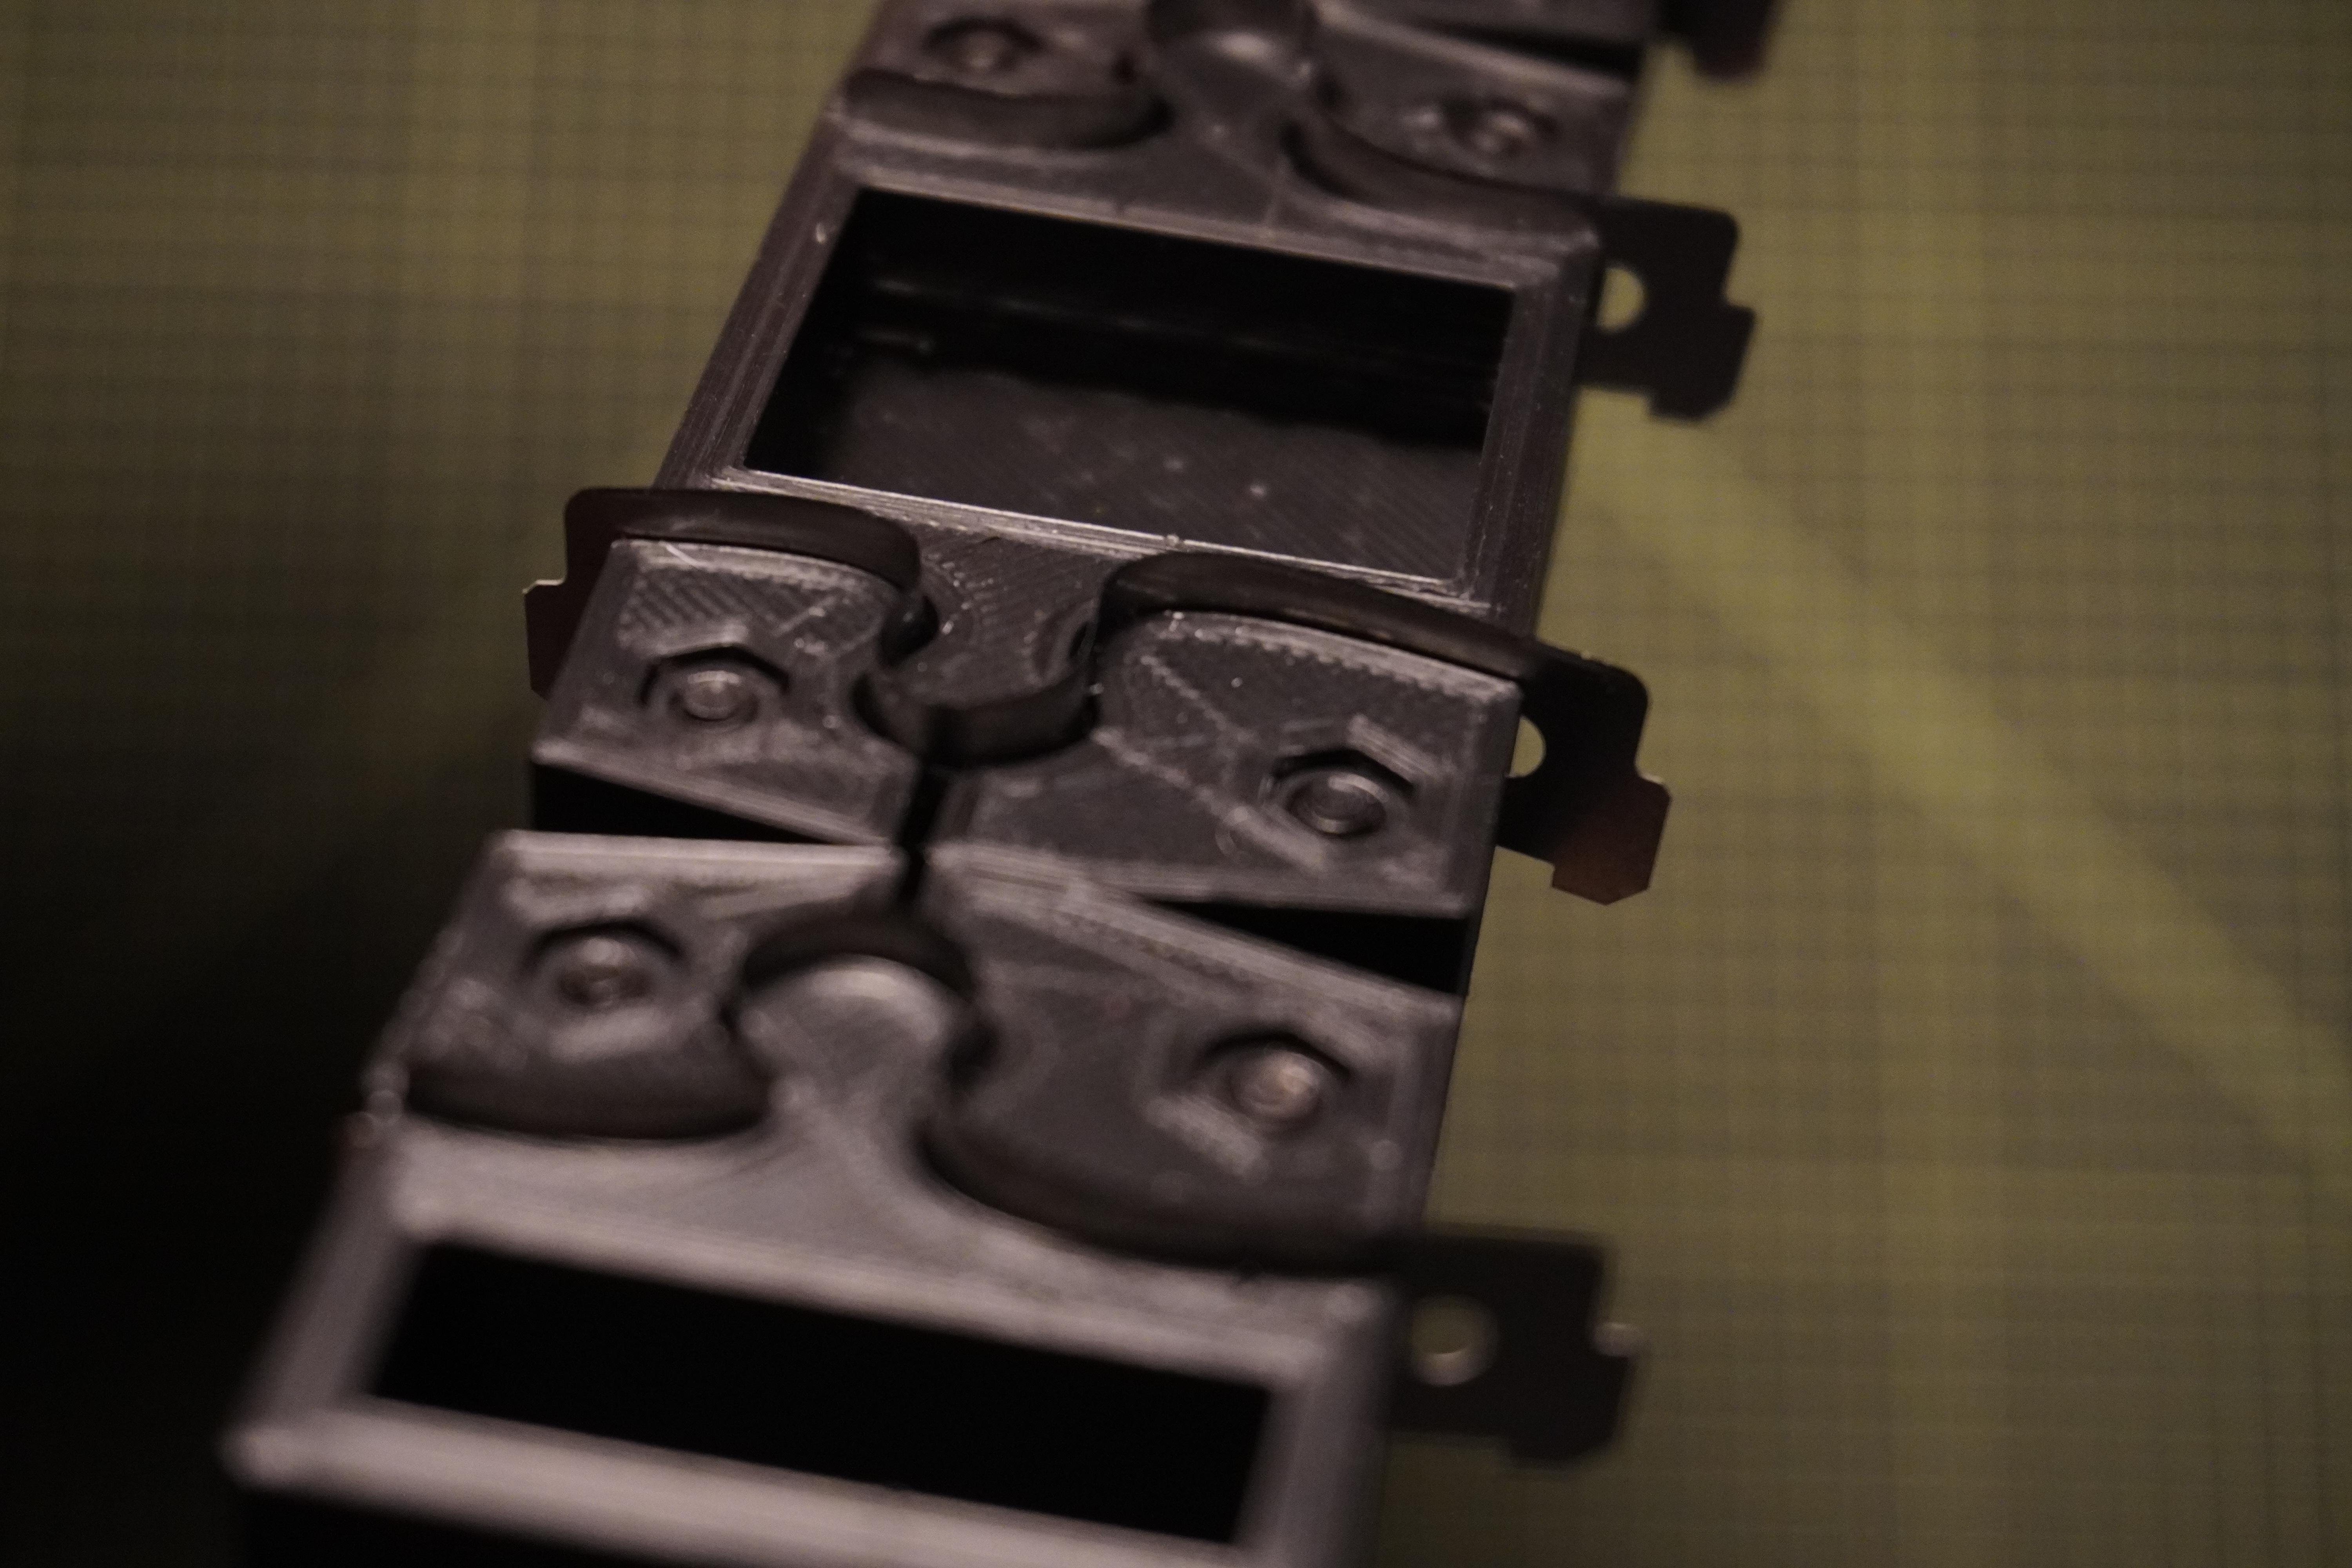
For each puzzle profile, place the razor blade (in red in the animation) sharp side up, squeeze it with the female pieces and maintain them in place with a screw inserted from the bottom of the die.
Making the Puzzle Blank
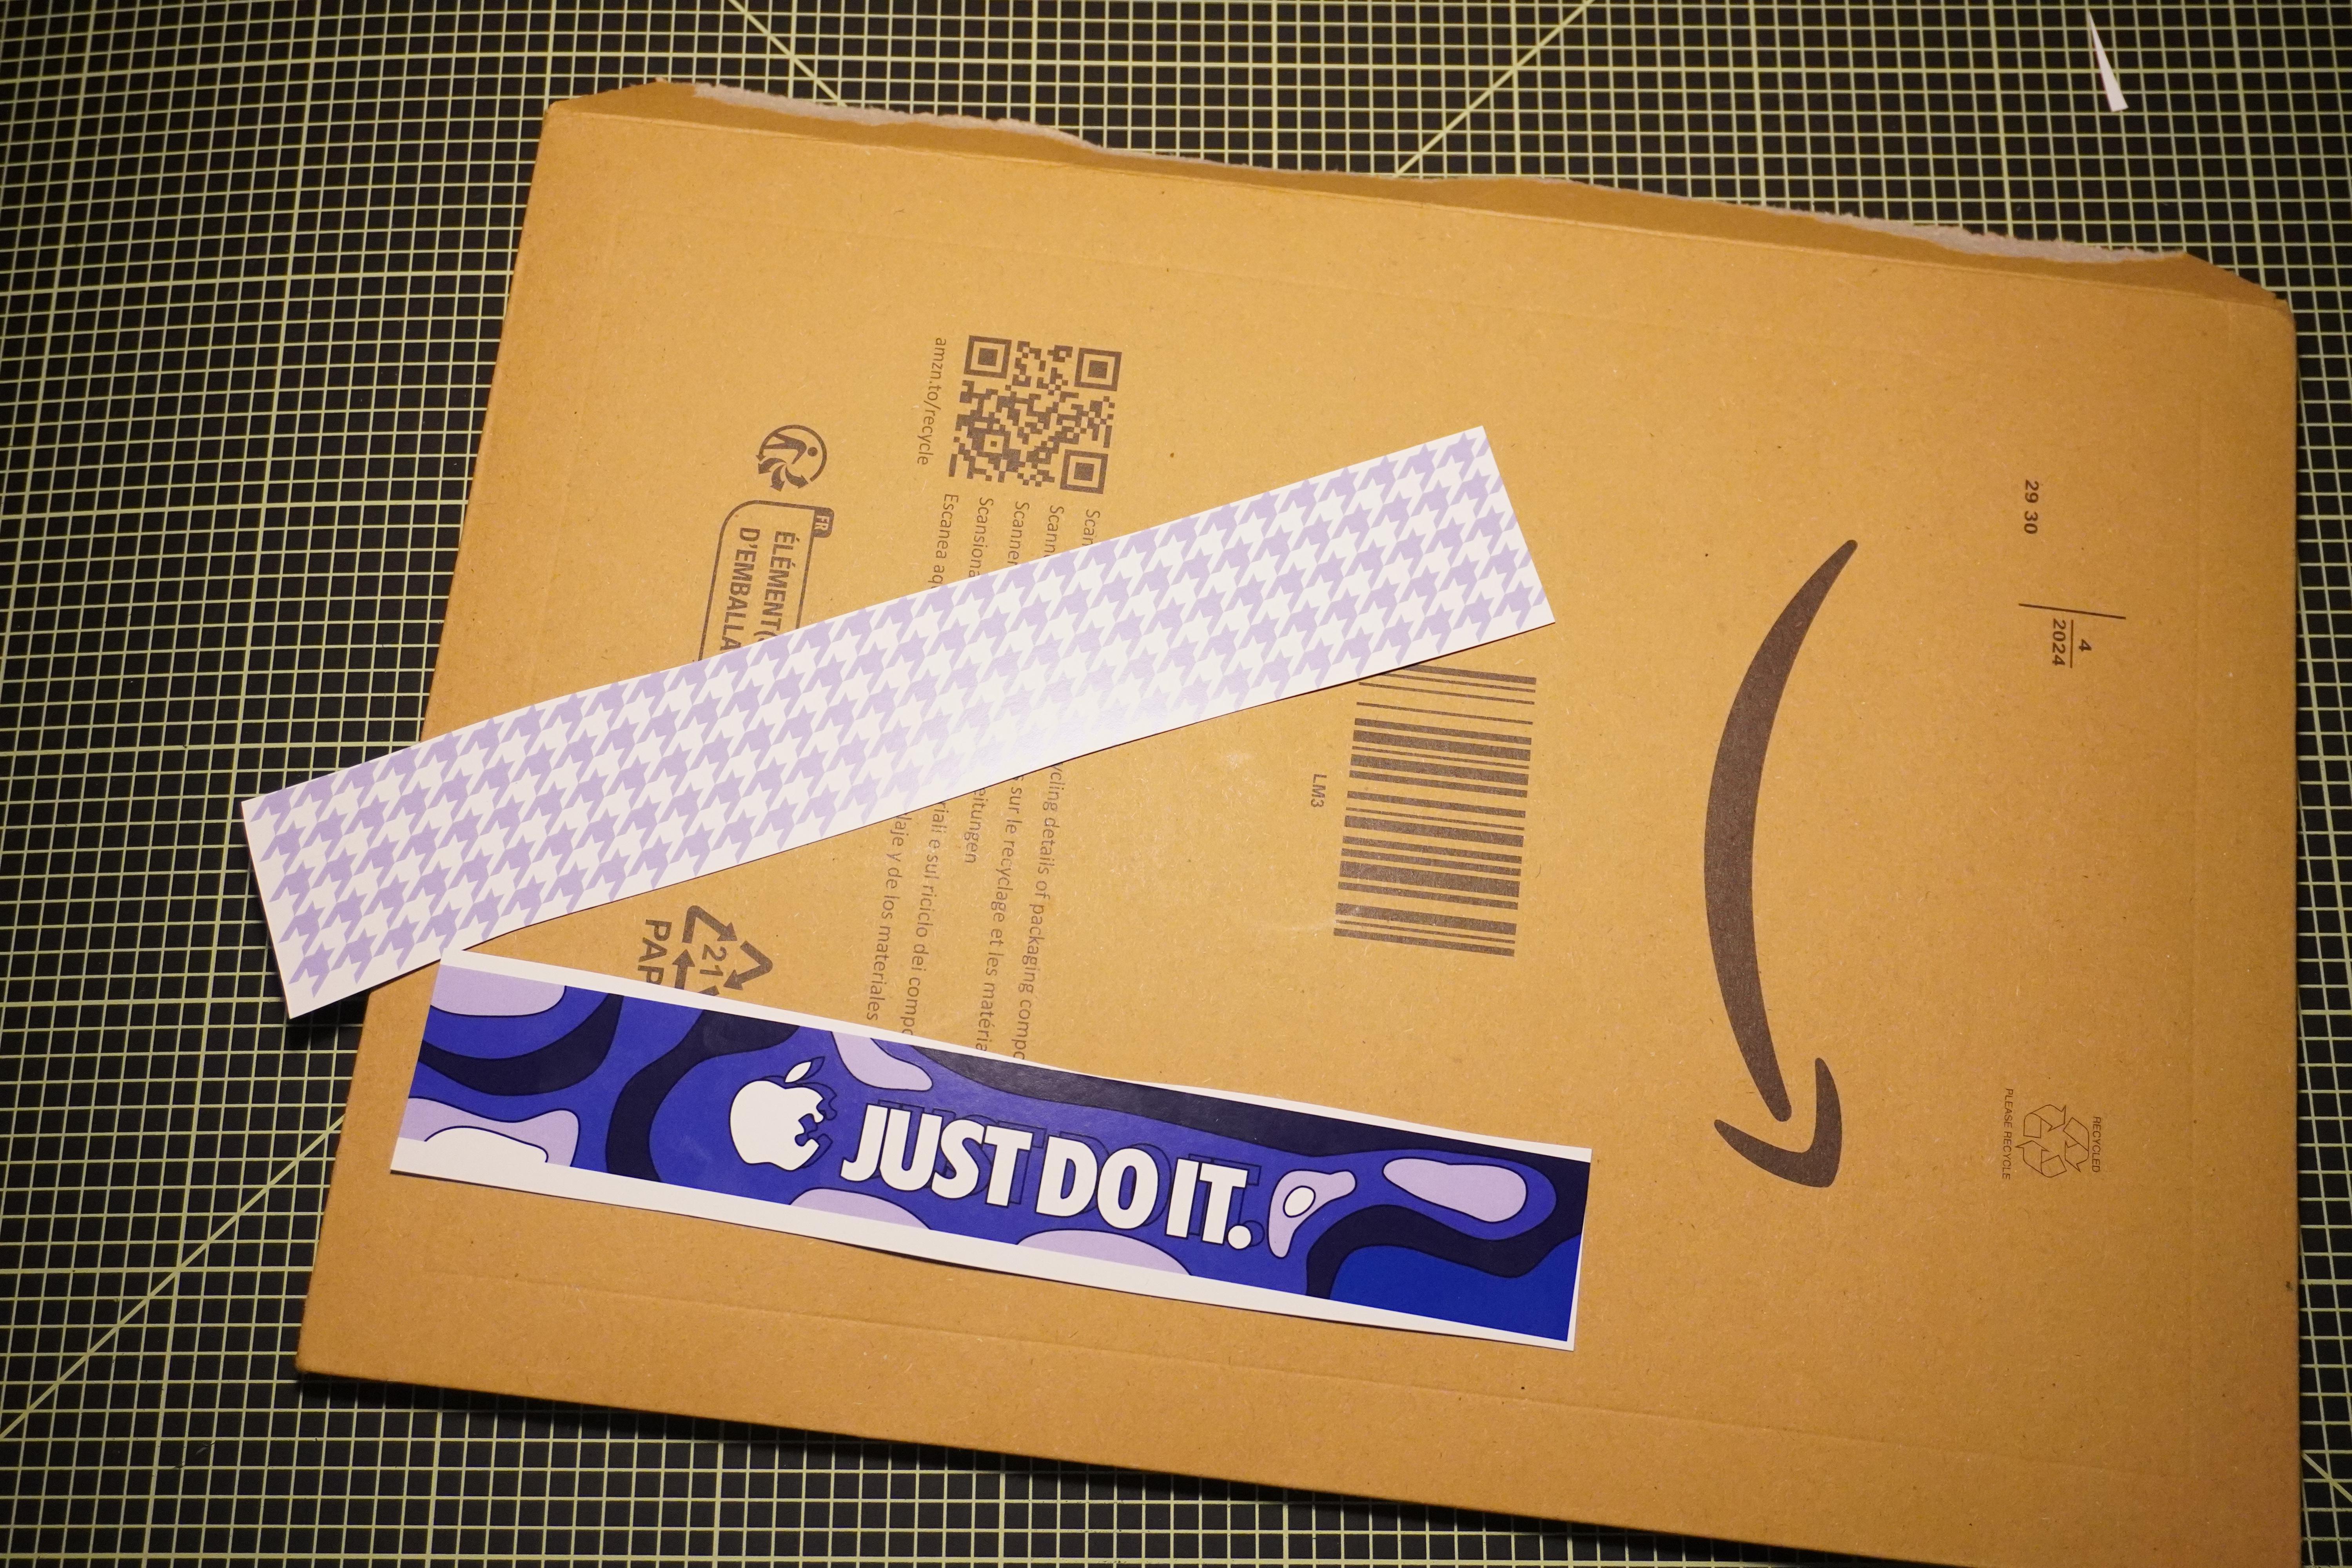
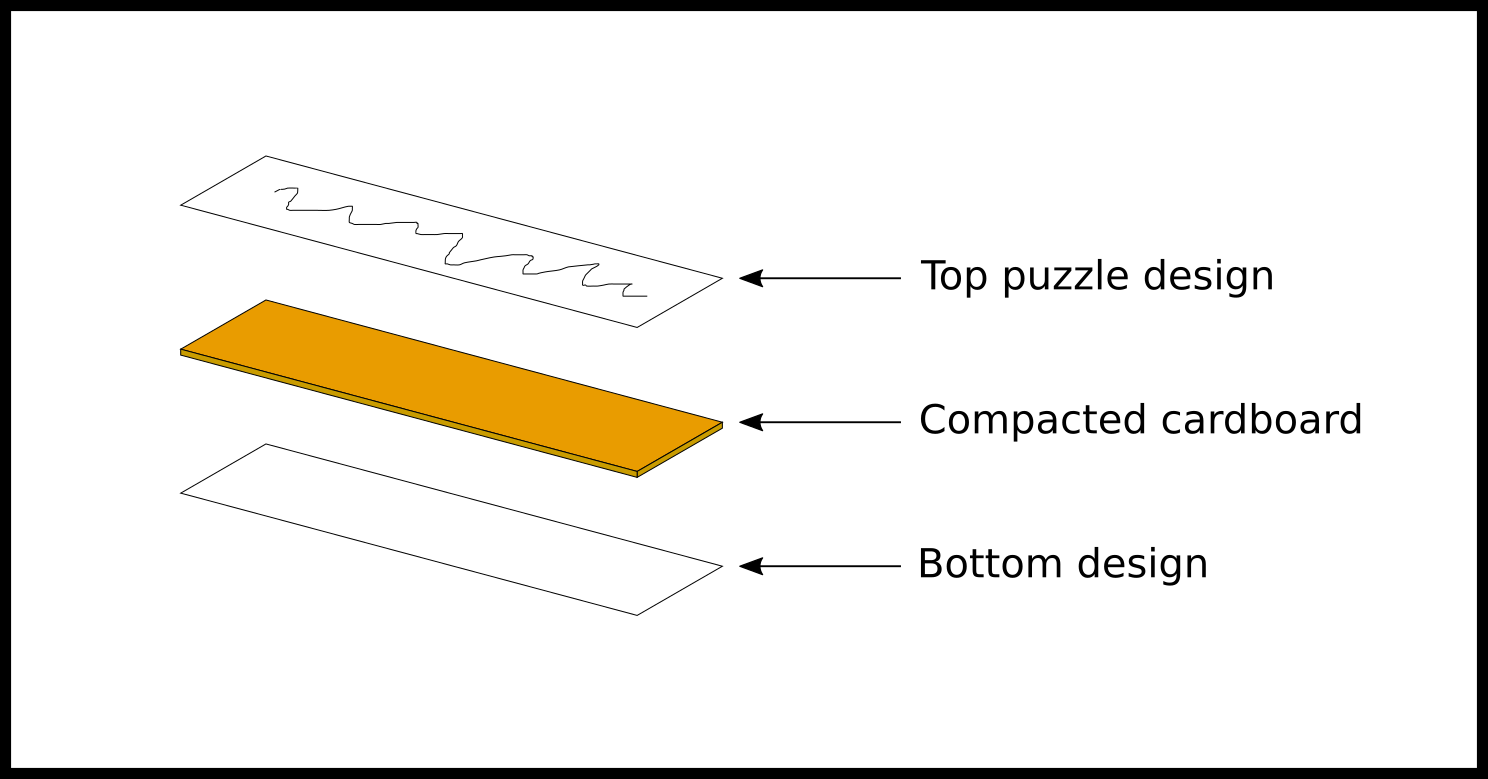
The puzzle is cut out of puzzle blank which is just a thick (2-3mm) piece of compacted cardboard with a design on it.
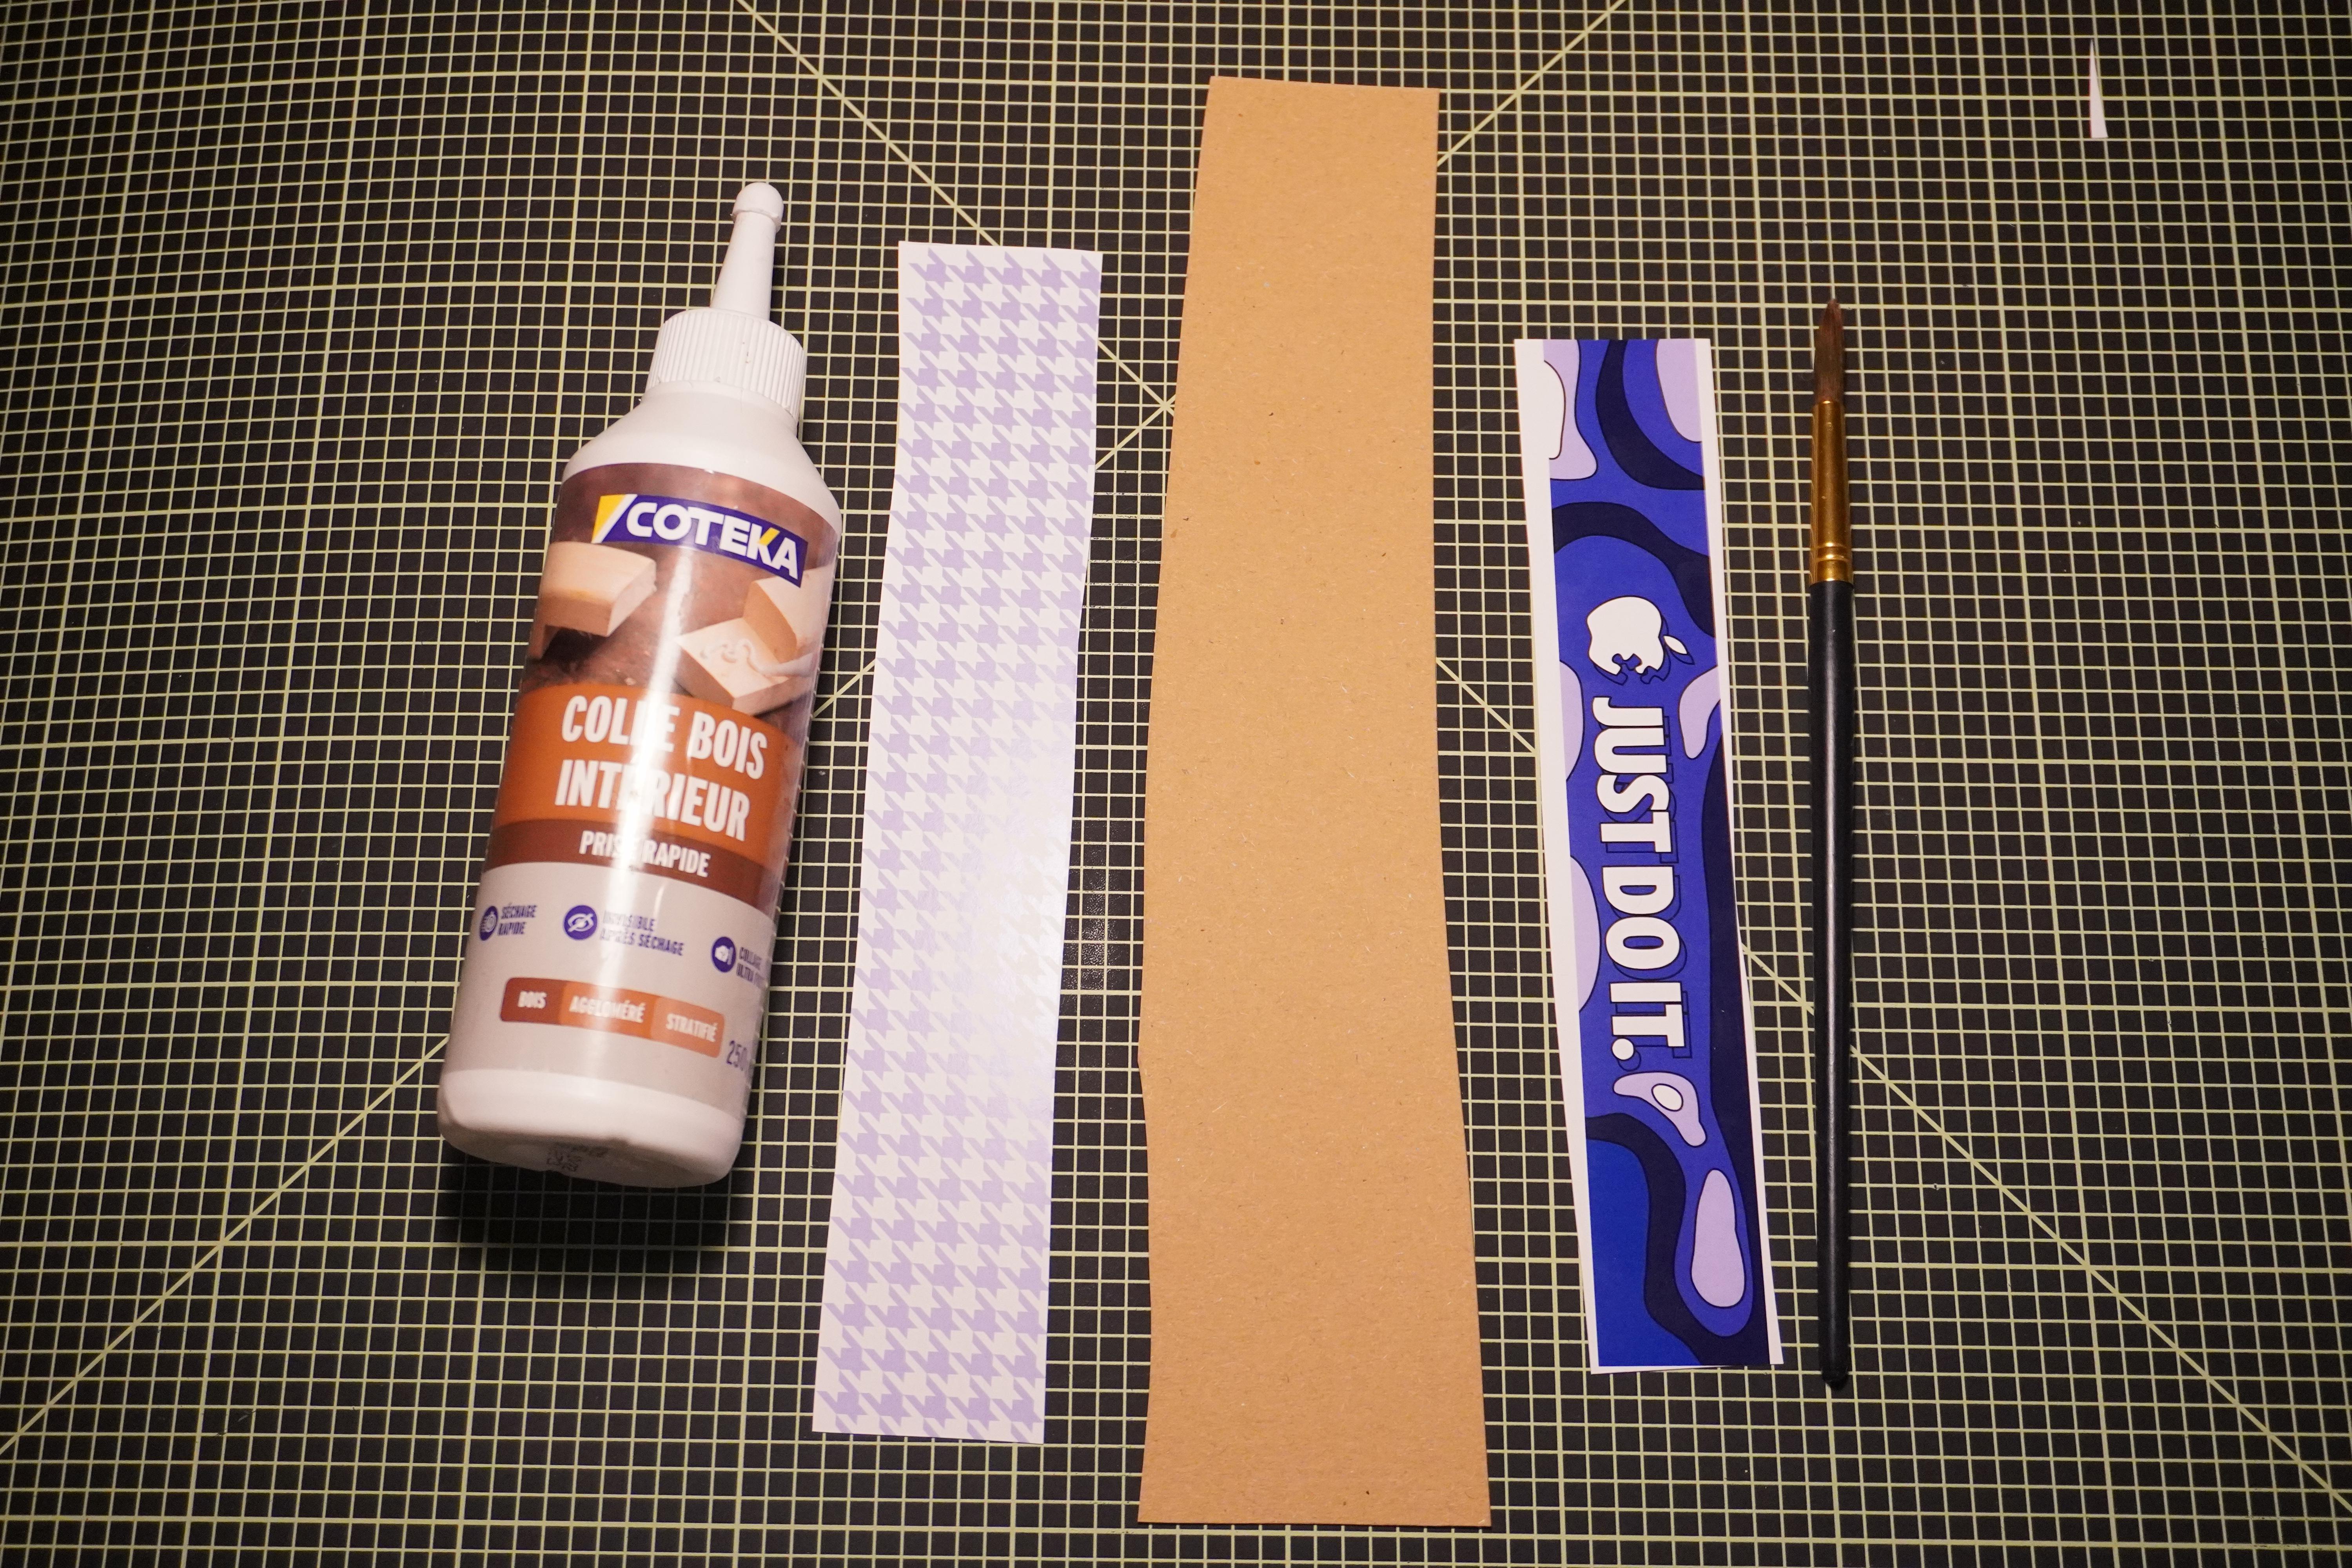
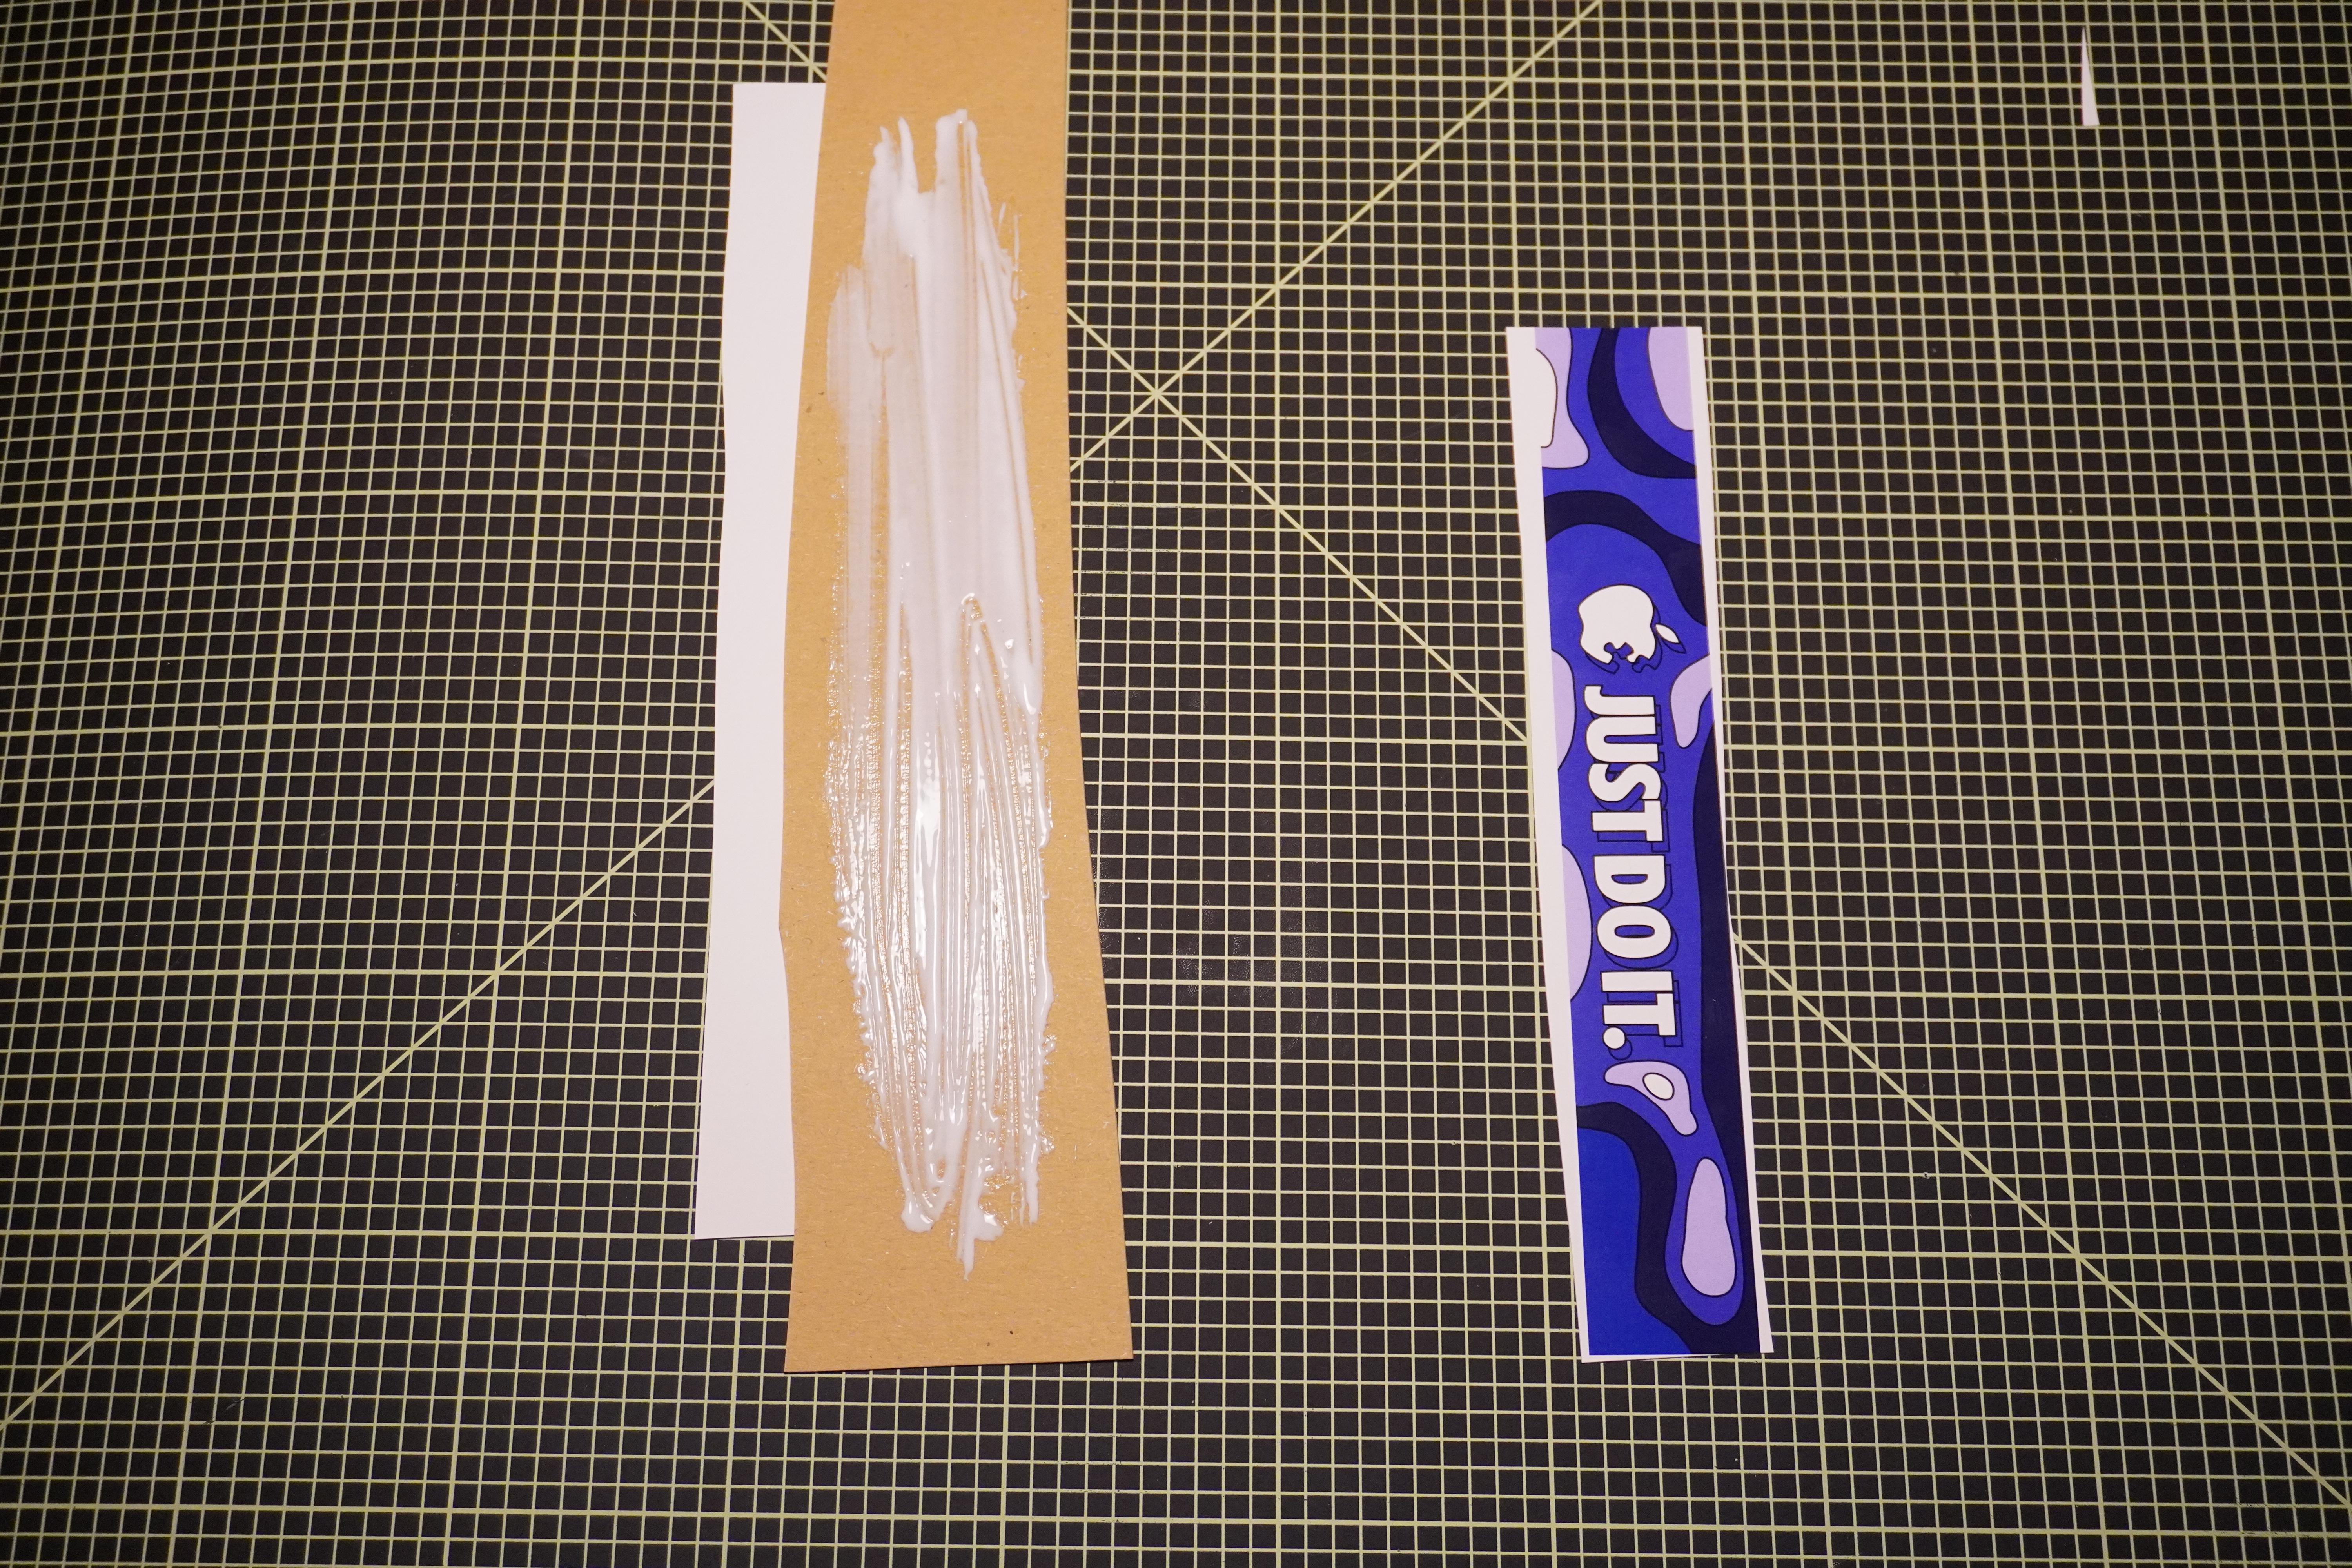
To make the process possible with the toot that I have, I chose to make a 3 ply blank composed of a heavy paper on top on which the design is printed, a thicker compacted cardboard (amazon envelope) core and a bottom layer made out of the same heavy paper as the top layer. I chose to print on the back layer a houndstooth pattern but you can choose whatever you want, leaving it blank or putting another design for example.
The layers are glued together with wood glue mixed with a tiny bit of water applied with a paintbrush. The layers are pressed together under some heavy objects.
(Note that just like plywood, you should try to make the layered puzzle blank out of an odd number of layers to prevent warping as much as possible)
Pressing and Finishing
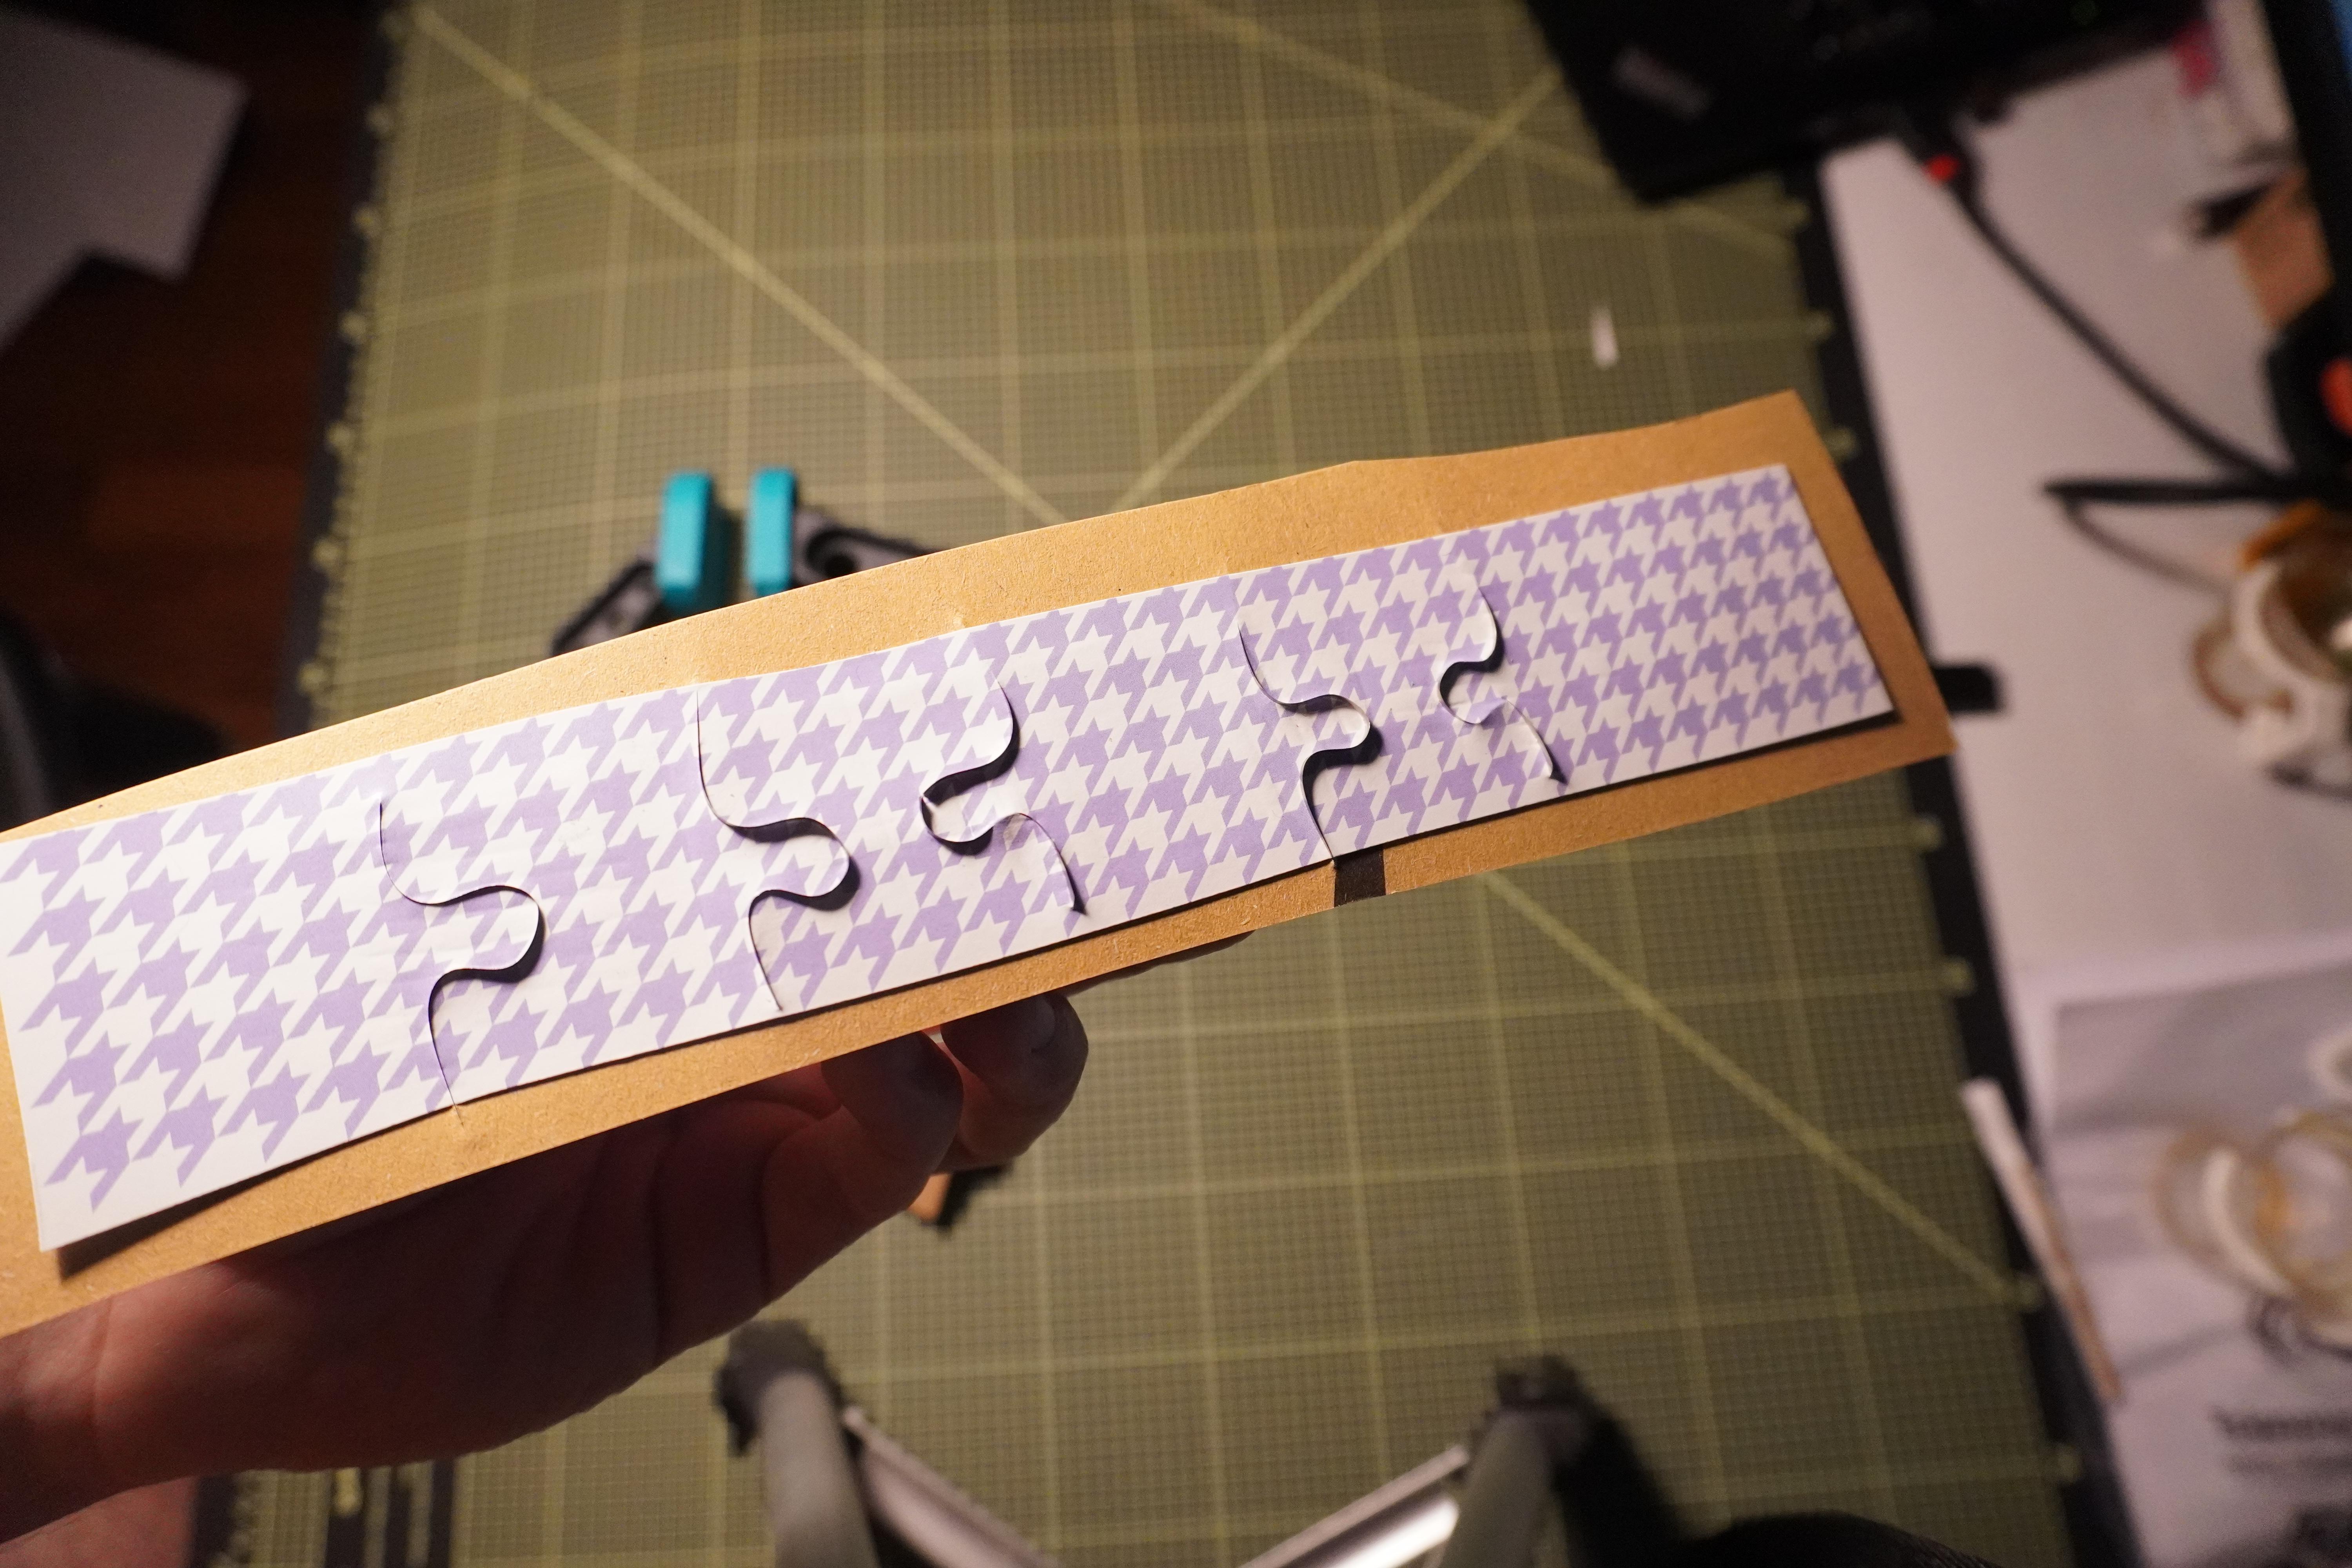
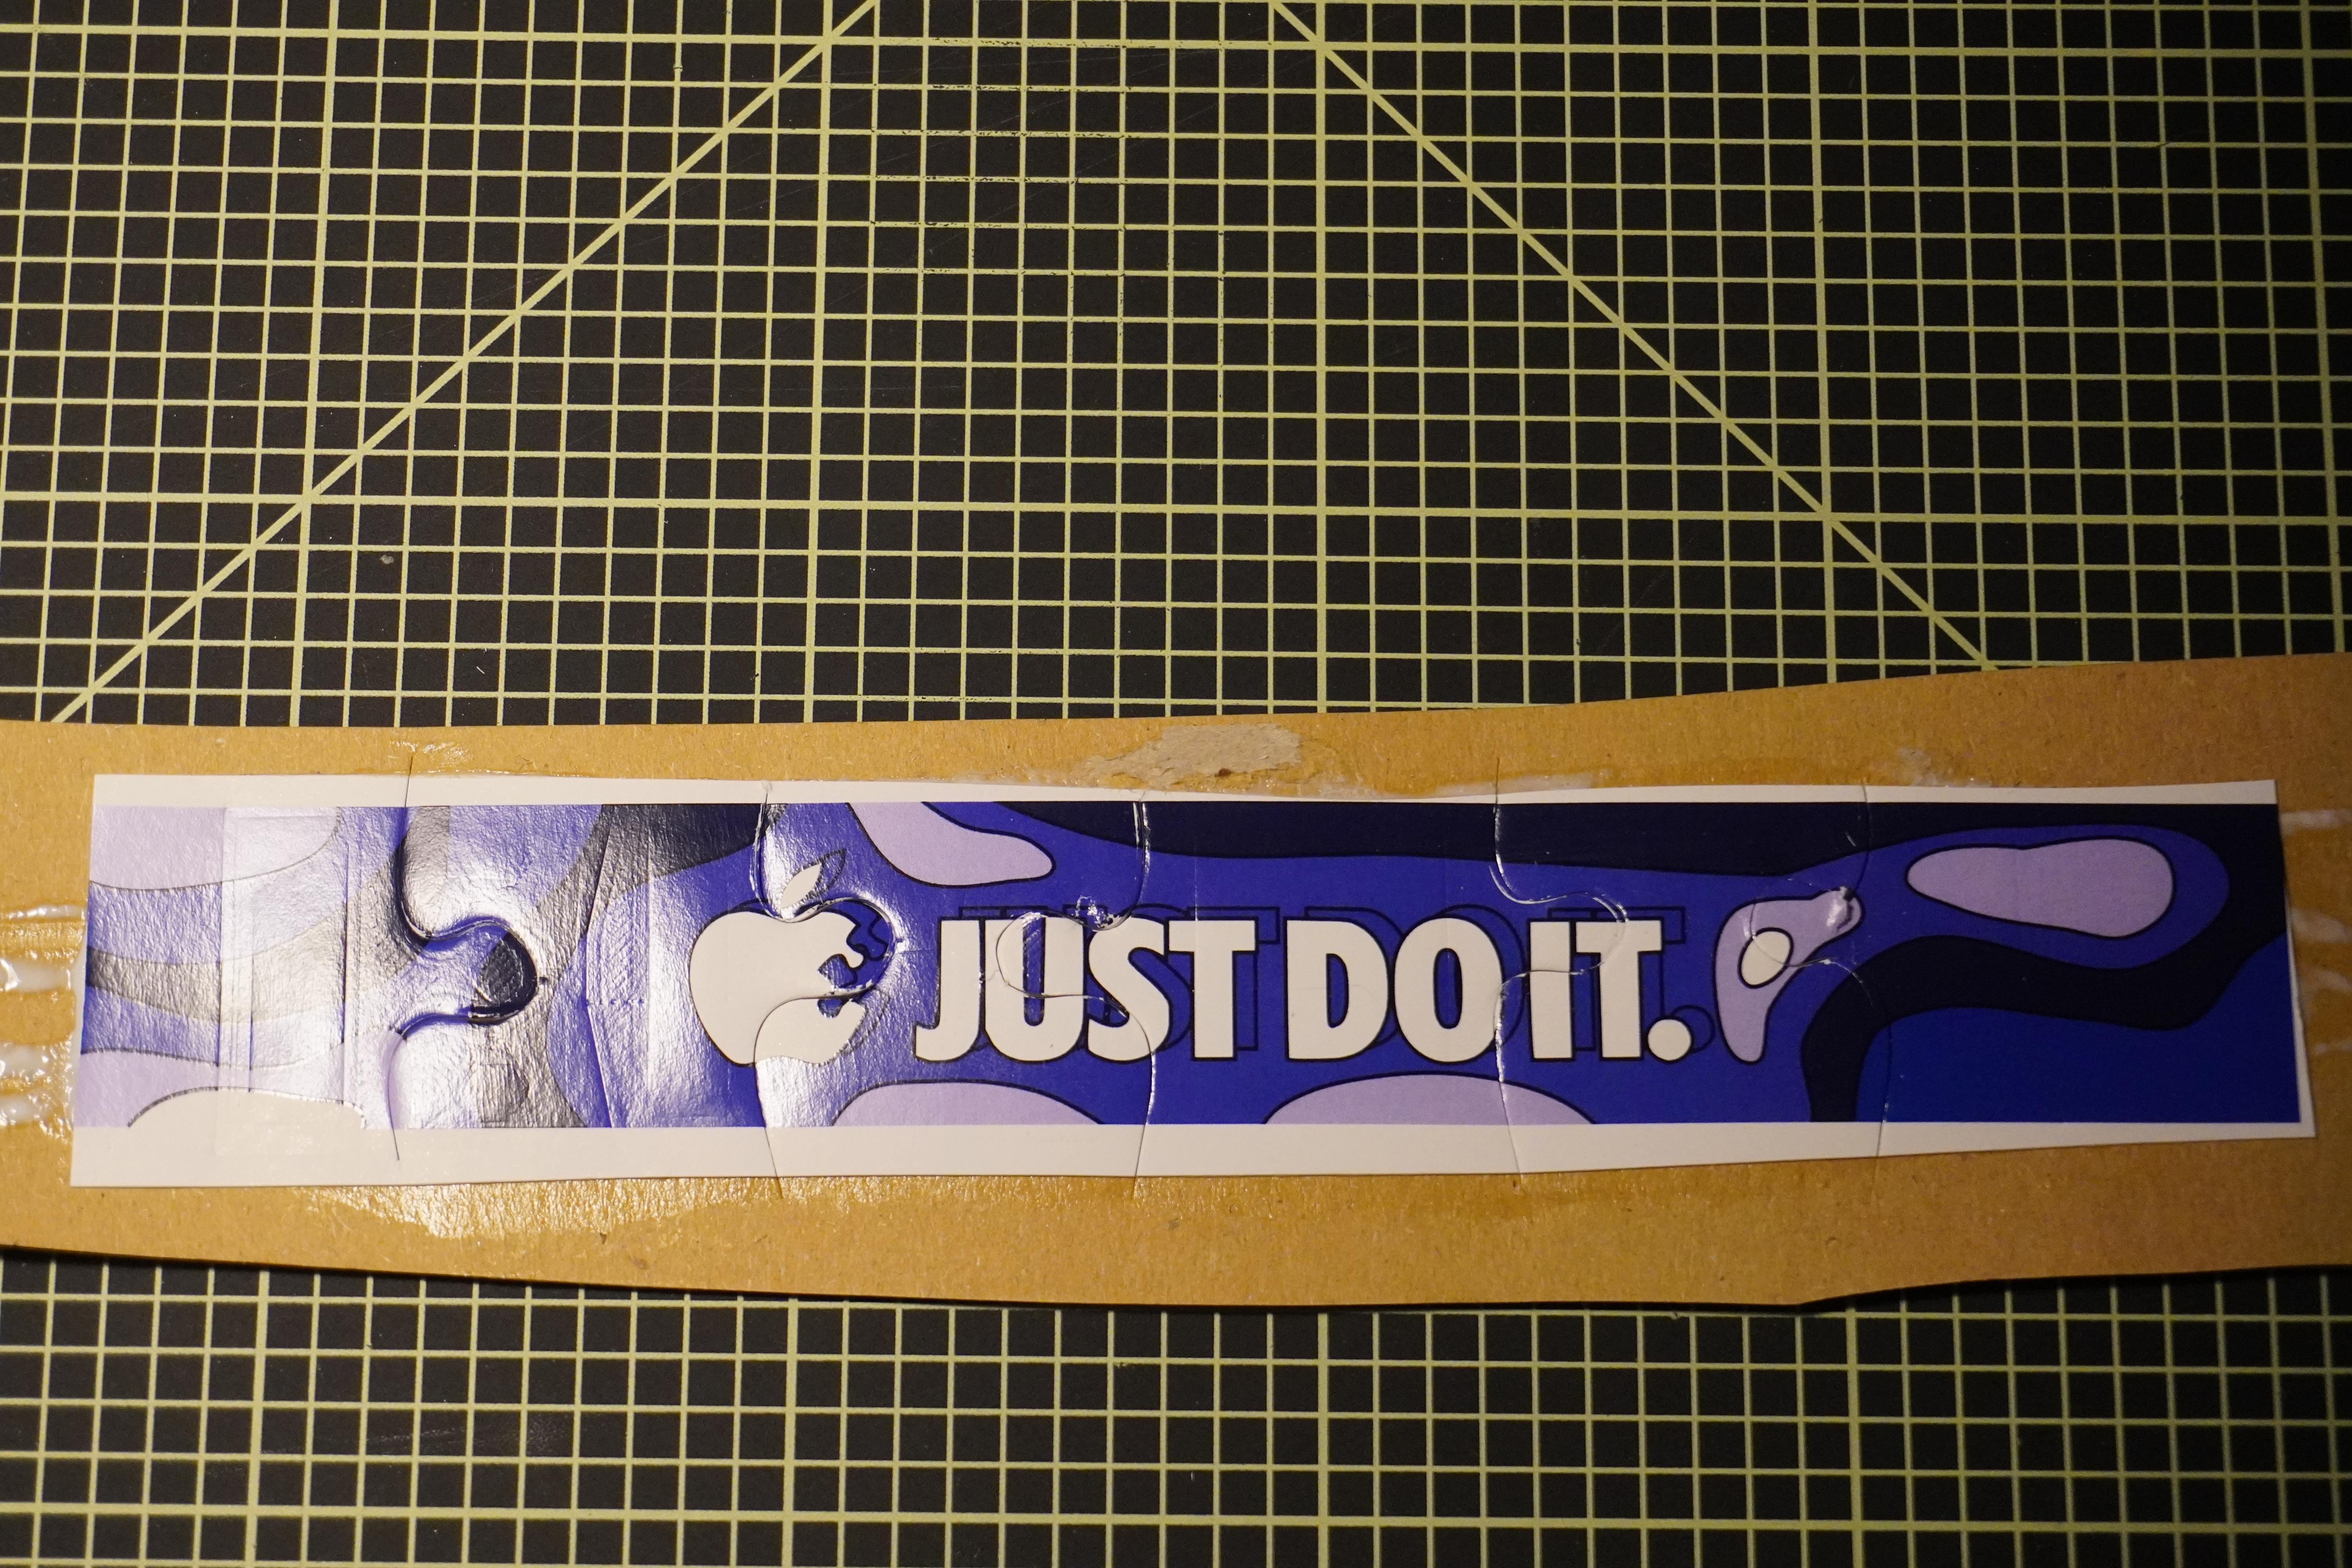
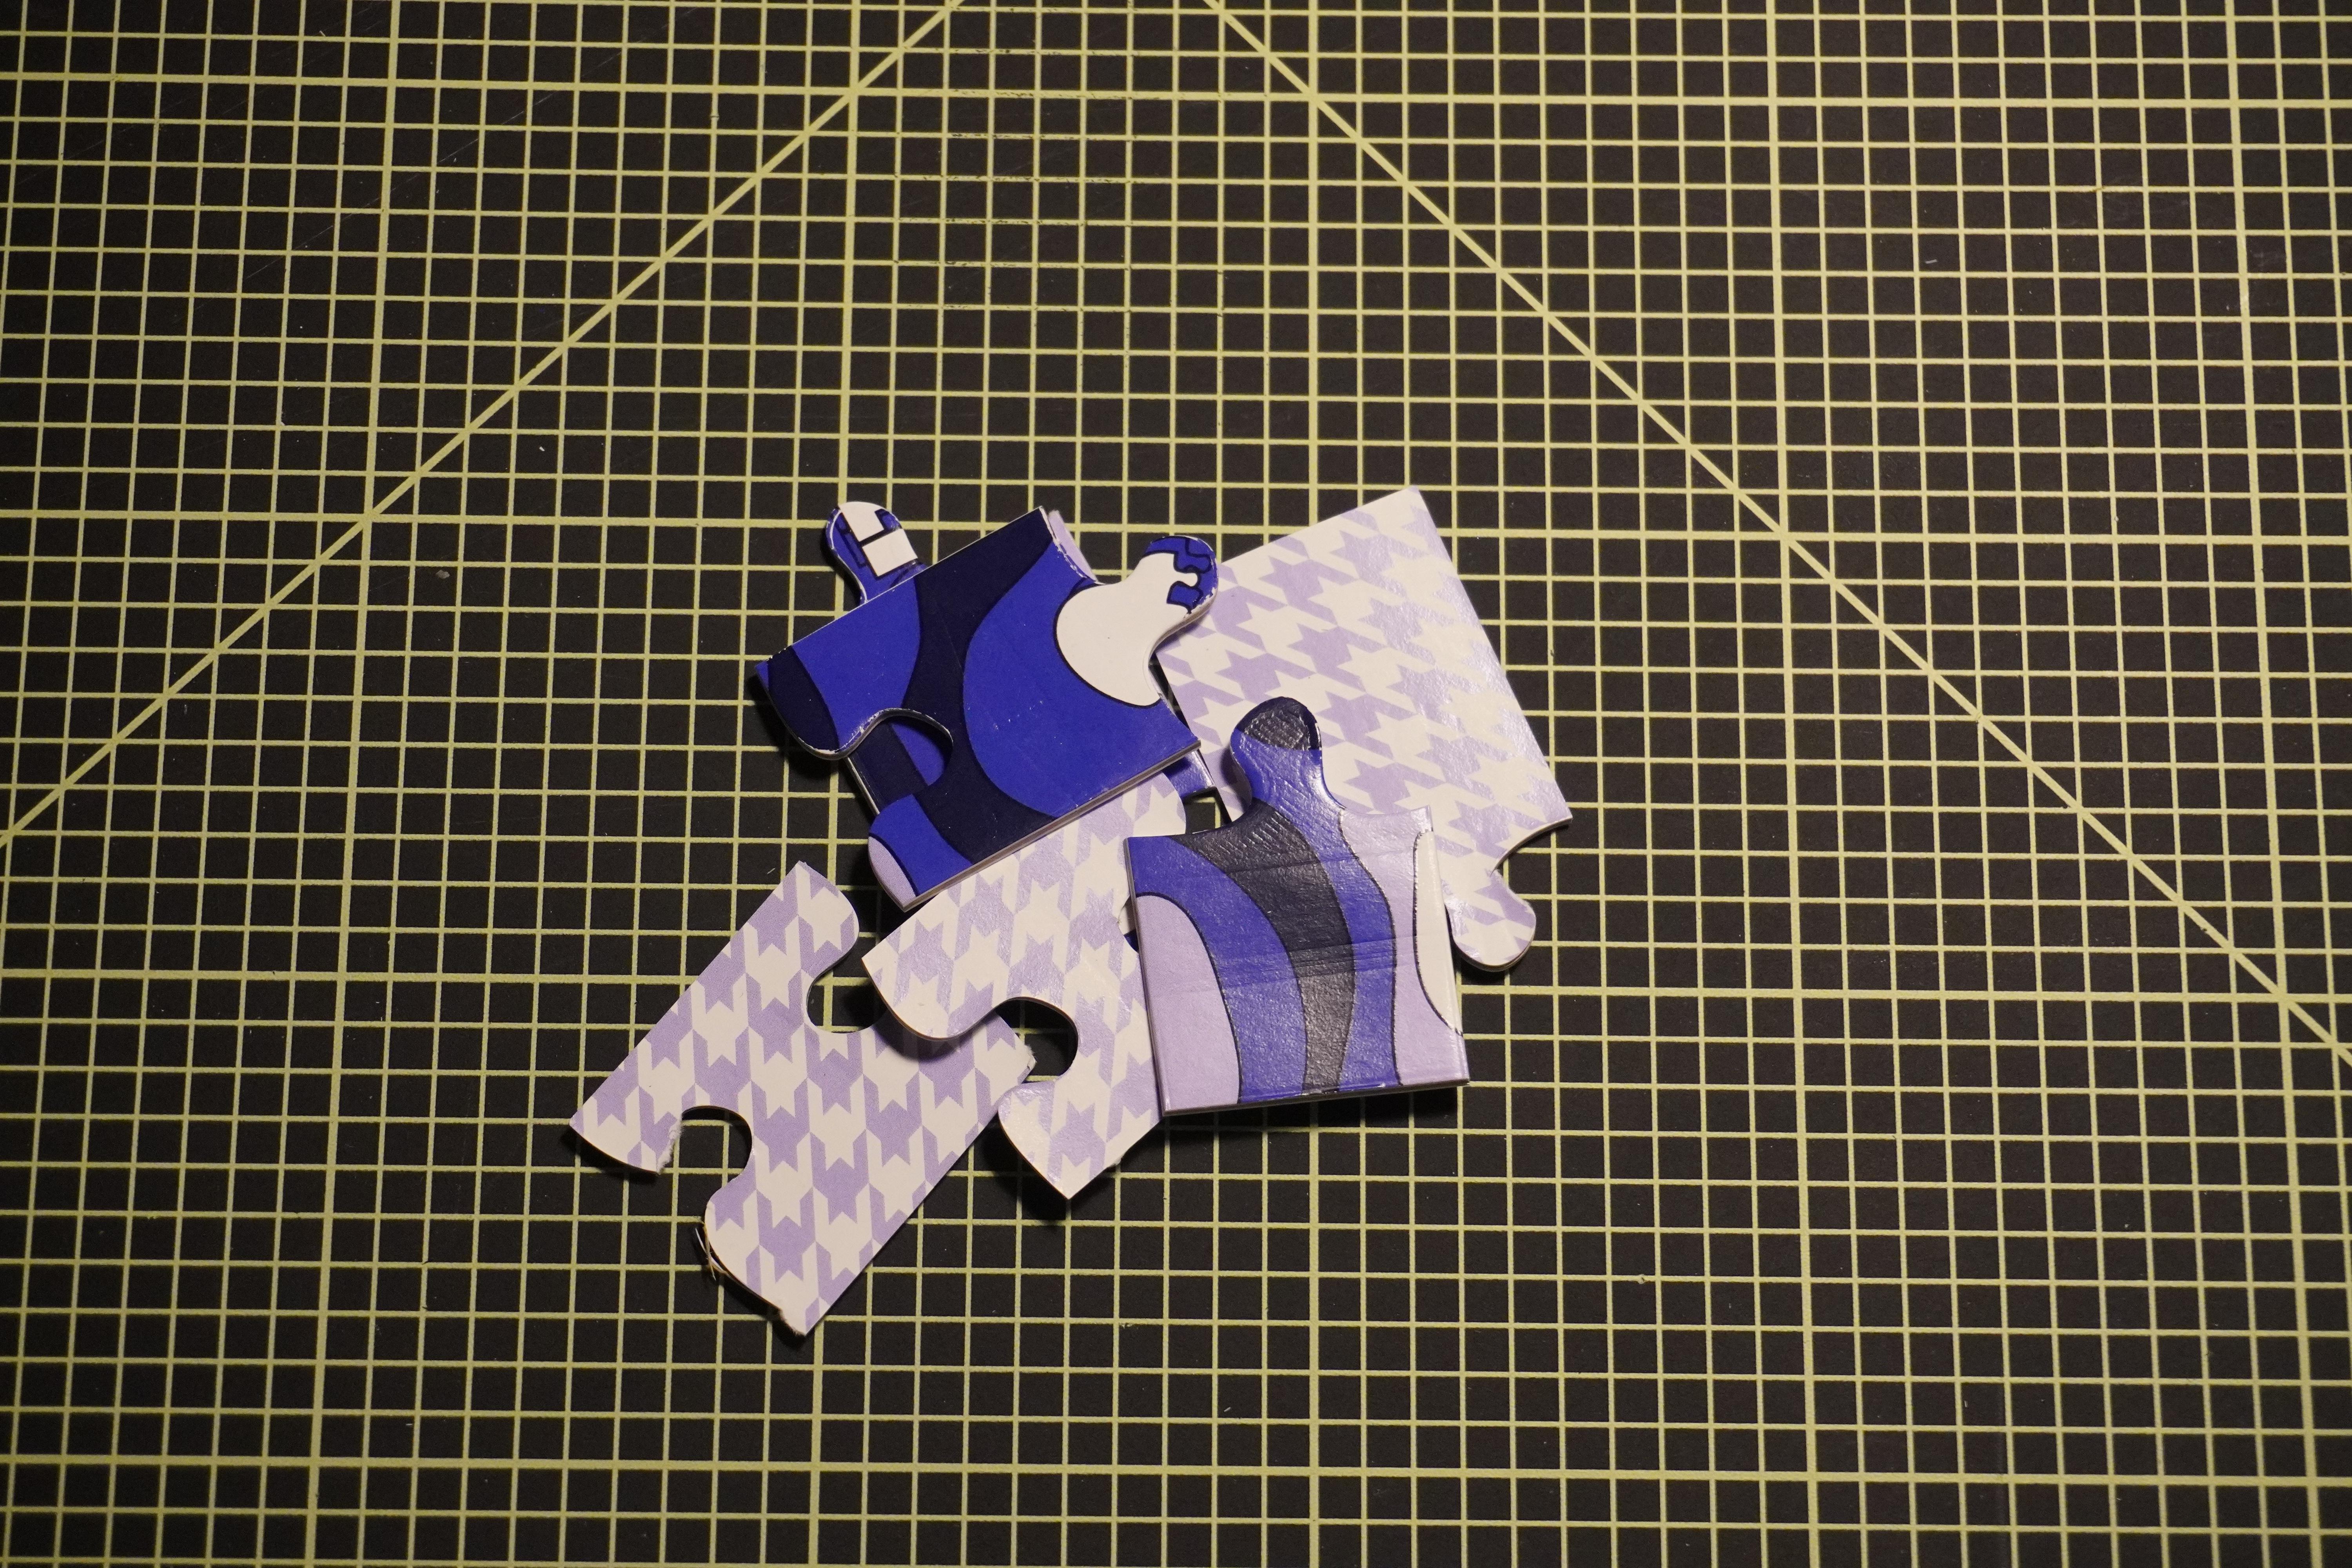
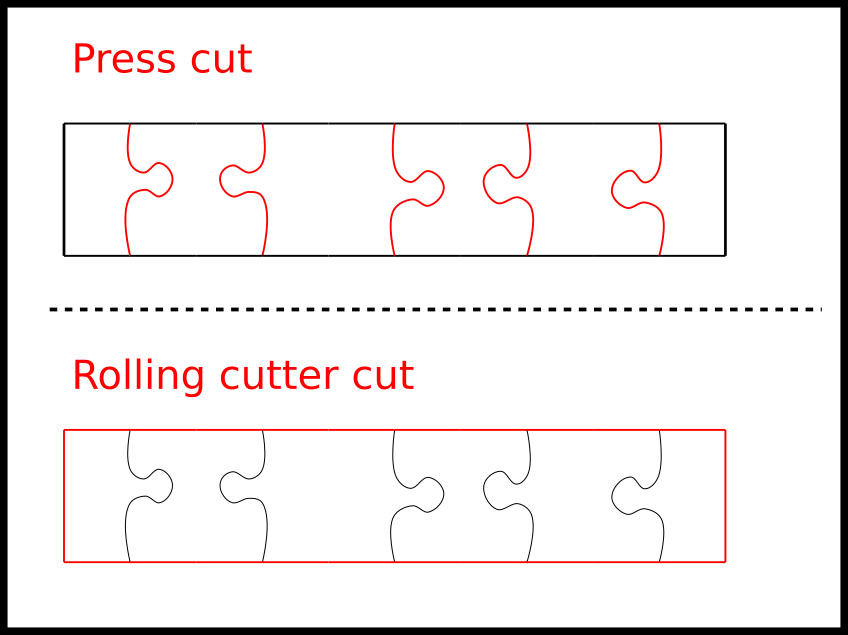
The puzzle blank is pressed between the puzzle die and a cutting mat with the help of a clamp (it does take quite some force to cut through the 2-3mm compacted cardboard)
After this a rotary cutter and ruler is used to cut the outside edges of the puzzle
OUTRO

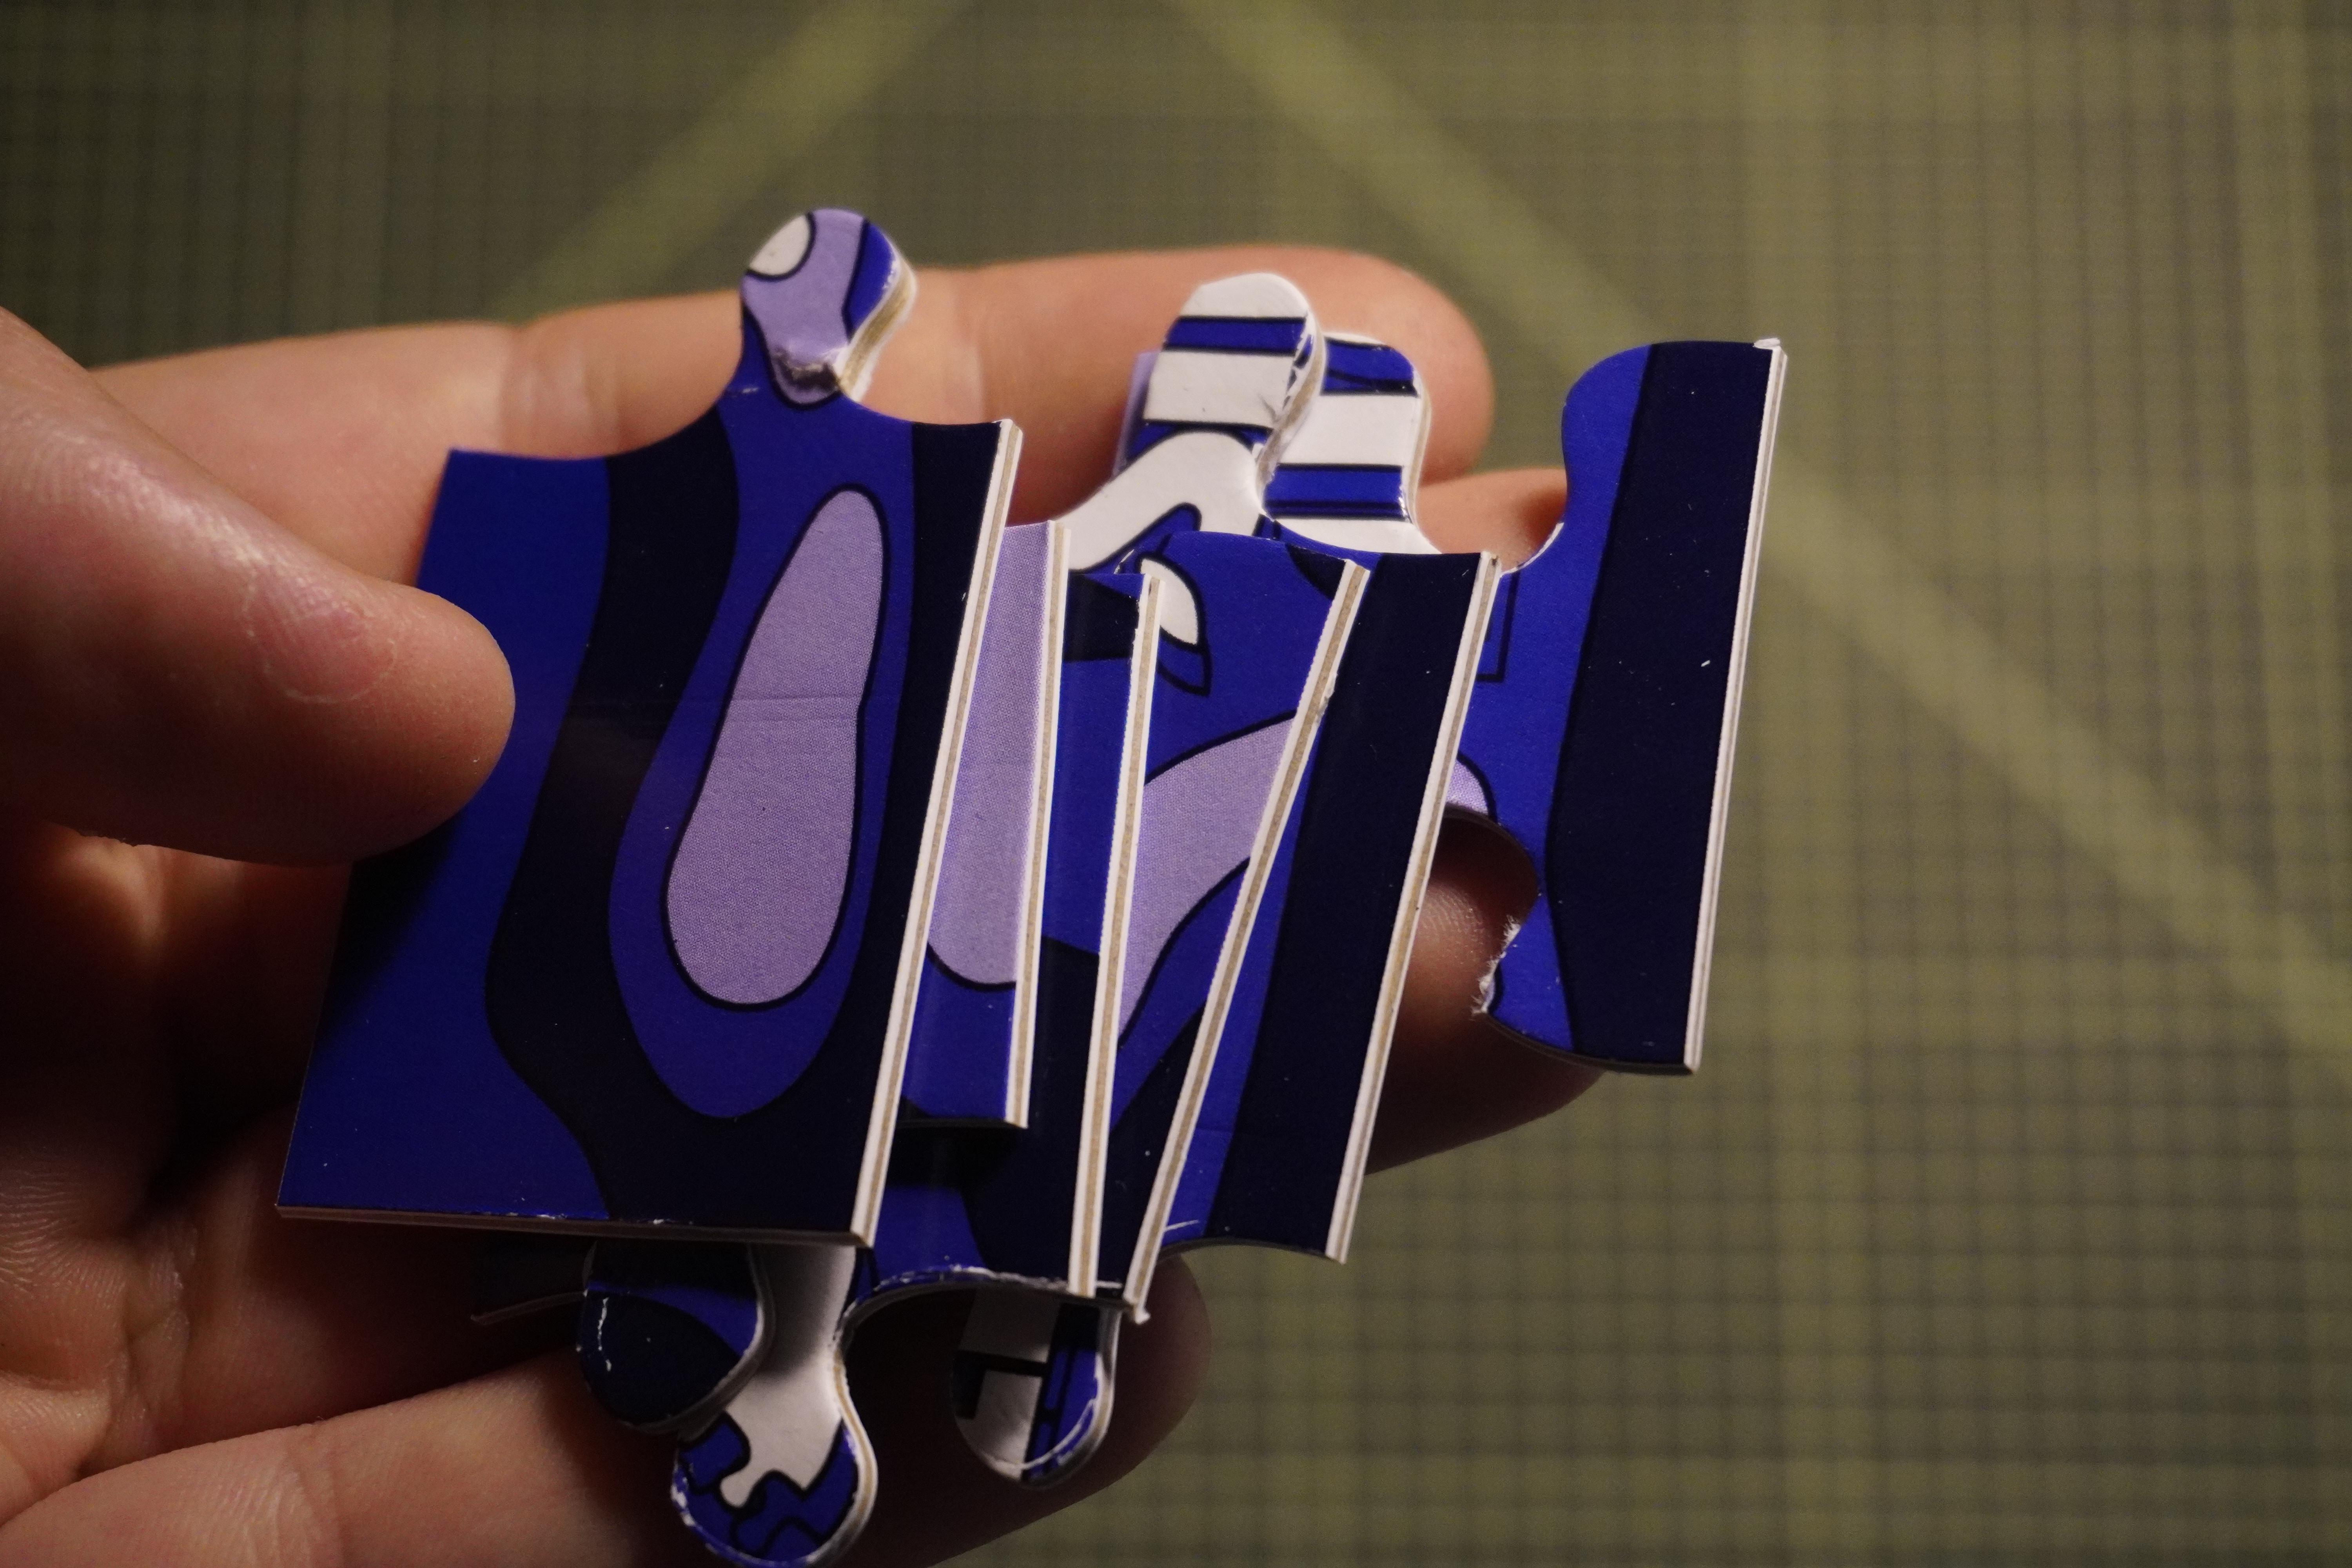
And voilà ! You now have a (single edge) cardboard puzzle made completely DIY !
I actually do like using a laser cutter to cut puzzles, but this instructables was an experiment on how to make a puzzle looking more like something made with the traditional high volume technique. The edges of the pieces are particularly interesting as the edges are to flat with the face of the puzzle but dips ever so slightly just like a professionally made puzzle. In addition, the side of the piece with the layers showing is, in my opinion, quite good looking !