DIY Project Note Taking Station
by Tjiani Lucht in Workshop > Woodworking
915 Views, 28 Favorites, 0 Comments
DIY Project Note Taking Station


Some of you might agree with me that having notes, drawings, sketches, etc. from different projects mixed is annoying. I disliked it to the point that I just wouldn’t make them anymore at all. If only there was a way I could get A5 size paper sheets that are separated yet easy to bind together.
We’re all makers here, and what do makers do best? Make solutions to their problems. So that’s exactly what this project is. This project is a paper holder to hold A5 sheets of paper. You’re not stuck to a single type of paper either. As long as it is A5 or A4 size (you can cut A4 in half to get A5) it’ll fit! This gives you the most freedom when taking project notes, with the worries of having a bunch of different projects all mixed up.
Supplies
Parts
Listed below are all the materials/ parts you’re going to need to build this project yourself. The links that I’ll be providing are from local distributors so you most likely won’t be able to purchase them directly, but it will make it easier for you to find alternatives.
Wood Plank: Link
This wooden plank is the base for the entire project. Every other part will be mounted to this board.
Gold 3D Printer Filament: Link
At first I wanted to use brass to make the finishing accents out of. I didn’t have the tools to make brass look good and I recently purchased a spool of golden filament so I chose this instead.
Rubber Pads: Link
The board on its own will slide around, these small rubber pads make sure that it doesn’t when you’re writing on it.
Paper: Link
You’re going to need something to write on, aren’t you?
Pen: Link
You’re going to need something to write with, aren’t you?
Tools
In this section I’m going to list the tools I used to make this project. I tried to keep the expensive power tools to a minimum. I wanted to make sure that the largest amount of people possible will be able to make this project.
Clamps: Link
You are going to need a fair number of clamps and you’re going to need some big ones as well. These are used to make sure that the wooden planks you’re trying to glue together will stay together nice and flat.
Paint Mixing Sticks: Link
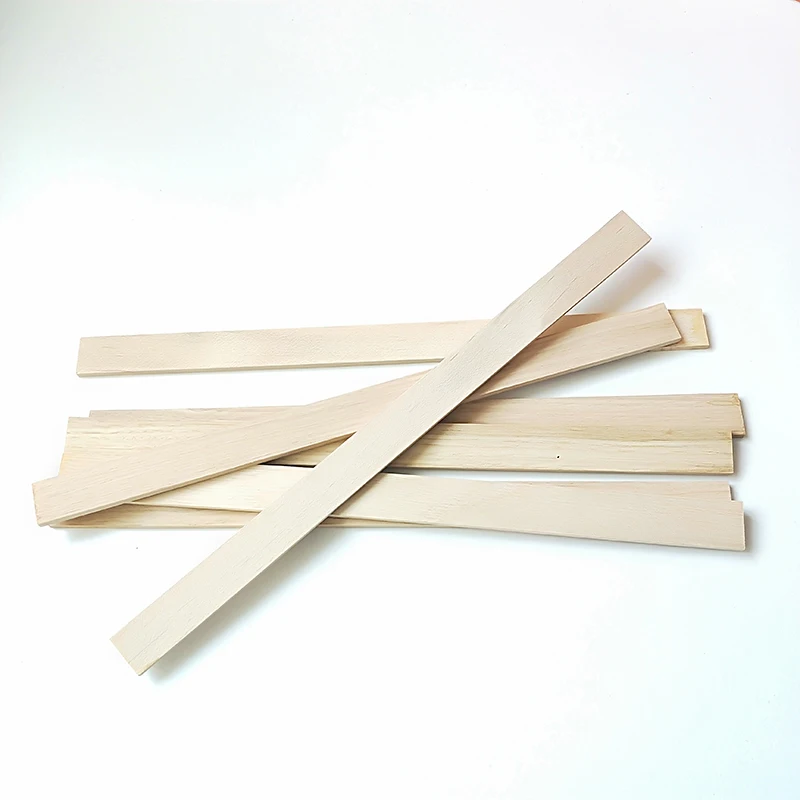
I used these paint mixing sticks to clamp the wood together. I didn’t want the wood bowing under the pressure of the side clamps pressing down.
The tools above aren’t necessary if you decided to use a cutting board as a base instead of making your own.
Saw: Link
The saw I used is your basic wooden handsaw. Because the wooden plan isn’t that thick it’s not so difficult to make straight cuts.
3D Printer: Link
The 3D printer is used to make the golden accent pieces. At first I wanted to make these parts out of brass but that would have made the project vastly more expensive.
Drill + Drill Bits: Link
For this project 2 holes will need to be drilled. These two holes are made for the pillars that hold the paper in it’s place.
Random orbital Sander: Link
I used this tool to sand all the parts of the board flat. This could have been done with sandpaper but that would have taken a very long time.
Paint Roller/ Fiber Cloth: Link
These are used to apply the wood stain. A paint roller will give you the best result but if you don’t have one at hand you can use a fiber cloth to apply it to the wood. This is what I ended up doing.
Scraper Spatula: Link
This is one of those scraper spatulas you get with every 3D printer. If you have a 3D printer you most likely have one of these as well.
Rubber Bands: Link
Rubber bands were used to hold accent pieces in their place while the glue died. This way I was 100% sure that they stayed in the right place while drying.
Paper Cutter: Link
Because I bought A4 size paper I needed to cut every sheet in half. Tearing the paper in half would have left ugly tear lines and cutting the paper with a knife would have taken an eternity.
Consumables
Super Glue: Link
Some of you might hate it but I used superglue to glue all the 3D printed parts to the wooden base. It was by far the easiest and best looking way to attach them together.
Wood Glue: Link
Because this plank isn’t wide enough it will have to be cut and glued together to create a board. If you’re not in the mood or don’t have the means to glue the planks together you can use a wooden cutting board instead. It is practically the same, you just have to cut and finish it.
Wood Stain: Link
The wood type I used was nice and soft but it was too light in color for my liking. I wanted to make something that matched my desk in color. Luckily you can give wood a darker shade quite easily with wood stain.
Prototype


Before you start buying expensive materials it’s generally a good idea to build a low cost prototype of your project. I did this by cutting a piece of cardboard a little larger than a piece of paper and I jammed two small pieces of copper wire through it on the paces that the pins will go. This prototype has given me a few insights. The first one is that I didn’t want the base board to be too high. If it was it would be really uncomfortable to write on. Because of that I immediately knew that a cutting board wouldn’t work for me.
The second thing I realized is that I needed a place to place my pen. It’s not enough to just have place to keep the paper. You need a pen within arms reach at all time as well. Having to get up and look for a pen will destroy your momentum.
The third and last insight I gained was that the light weight was a good thing. At first, I figured I wanted to add metal rods at either end to increase the weight so it wouldn’t slide around, and it would feel more premium. That extra weight would make it more cumbersome to move it from location to location thus making it more cumbersome to flesh out your ideas.
Wooden Board Assembly


So you’ve got yourself a nice looking beam of wood? That’s great to hear, now we’re going to cut it. I know you’re nervous, but you shouldn’t be! If you have access to a table saw I’d suggest you use it. This way you are able to get perfect cuts across different cuts. This will save you some headache in the finishing process.
I however don’t have a table saw big enough. The other power tools I had at my disposal weren’t right for the job. That is why I went and dusted off the old hand powered wood saw. I was afraid that my cuts would be crooked and not straight at all! When I made my first cut, I was pleasantly surprised at how straight it all was. One thing I need to tell you is to let the saw do its job. Don’t force the saw through the wood, just push and pull it. Chose the orientation you want the wooded planks to have. I chose for the planks to go from top to bottom. This decision was made because it would mean that the number of cuts I had to make was minimized (thus minimizing the chance of errors). Plus, it makes the whole board look more like a cohesive whole.
After you’ve cut all the pieces breathe a sigh of relieve that scary part is over. Now we’re going to glue the planks together to create a board. This is the reason you’re going to need those big clamps. Those big clamps are going to squeeze the board together while the little clamps and paint sticks keep all the boards on equal level. Place all the planks in the orientation you chose for them. Glue the sides that you want to attach to each other and press them together. At this point some excess glue will get pressed out from the joint. Just wipe that away and place 2 paint mixing sticks on either side. This way you will have a nice sandwich that will keep all the planks level with each other. Clamp these mixing sticks together with the small clamps. When you’ve do that it’s time to bust out the big clamps. These will clamp the wooden planks together perpendicular to the direction of the planks. When you clamp down on these a lot more excess wood glue will drip out. Wipe that away too and let it dry overnight.
Once the glue has dried remove all the clamps. You might find that the paint mixing sticks have been glued to the wooden board. You know when I said the scary part was over? I lied. This is kind of scary as well. You’ve got to slowly and somewhat carefully pry the mixing stick off of the wooden board. I would recommend doing this on a table so you don’t bend the board too much and break the glue seams.
Now that you’ve managed to get those off the scary part is over, I promise.
Board Finishing


Now that you’ve made the rough board it’s time to make it look pretty. You might have seen that the glue has left visible “stains” on the wood. These stains are just dried glue on the surface. You can easily remove them with some sanding. You want the board to be as flat as possible. Because of that I’d suggest you use a sanding block if you’re going to sand it by hand. If you don’t have one and don’t want to buy one you can 3D print one yourself. There are a lot of good designs on thingiverse. Like you I kind of hate sanding, it takes so long and is physically intensive. Because I had a random orbital I decided this was the perfect time to use it. Because a random orbit sander has a large flat plane it’s pretty great at sanding surfaces flat as well. It’s a win win!
Now that all the faces of the board have been sanded mostly flat and the glue stains have been removed it’s time to stain the board. Normally you would do this with a small paint roller to ensure that you have equally thick layers. I however didn’t have a paint roller and I wasn’t in the mood to buy one. I found out that a Fiber cloth can be used to paint it as well. You’ll have to be more careful that you spread the wood stain evenly or you’ll get… stains funnily enough.
At this point you should have a nice-looking wooden board made out of planks. The last thing you have to do is drill 2 holes in the board. Getting precise measurements for those holes is going to be difficult. What I suggest you do is place a page of paper in the location you want the stack to be in. When the piece of paper and the wholes are in the right place mark the center with a pencil. These are the places you’ll have to drill the hole. The holes I needed to drill were 6mm but yours may vary. Measure the size before you start drilling! When drilling the holes make as sure as possible that they’re straight. The best way to assure a straight hole is to use a drill press, however not everybody has access to one.
Accent Pieces


Now that the board has been completed it’s time to make all the accent pieces. The first pieces you’ll have to make are the two pins that go through the holes and hold the paper in place. I simply 3D printed 2 6mm pillars that were 27mm high. You can also make these out of brass without too much effort since you only need to cut a brass bar to length. When you’ve made the pillars, you simply glue them in place with a little bit of cyanoacrylate glue.
The next accent piece are the bumpers that keep the exposed wooden edges hidden. At first, I only wanted to cover up the sides that I cut but after I placed the first pair of bumpers there, I decided to bumper up all the side. These bumpers are just rectangles with a 45-degree chamfer. These bumpers cover the entire face they’ll be glued on. Again with cyanoacrylate glue.
The last accent piece will be the mounts that hold the pen into place. These were added in the last stage of the making process. At first, I wanted to carve a cavity in the wood for the pen but I didn’t have the tools or experience. These pen holders were specifically designed to hold the “Pilot Juice Up 03” pen. Theses were snapped to the pen, at this point a little cyanoacrylate glue was applied and the pen and holders placed in the right place.
All the 3D models were made in FreeCAD to give the most people access to them. All these parts were glued on one at a time and held down with rubber bands. This was done to make sure all parts were in the right place and would stay there while the glue was drying.
Paper Cutting

You’re almost there! All you have to do now is cut the paper to the right size if you decided to buy A4 sheets (I did, they were way cheaper!). Because A5 is just A4 divided by 2 it was rather easy to cut the sheets to size. Just fold the paper sheet in double. This way you get a nice line where the center is. Place that folded line in the cutting groove of the paper cutter and just drag the knife along that line. It’s that simple. Repeat about 25 times and you have a nice stack of A5 paper.
At this point you just have to place the paper and the pen in the holder and you’re done! Ready to take notes, make sketches and drawings.
Mistakes

At the end my Instructables pages I like to reflect on the project and see what I’ve learned and what I can improve on next.
The first thing that I can improve on is sanding. When sanding the sides of the wooden board I managed to make it a little crooked. Well, not that all the planks were the same length so I had to sand them to roughly the same length. What I could do next is make all the planks a little too long, glue them together and sawed them all at once to the right length.
If you're interested in the build process of my projects while they're going on you can follow me on Instagram at @tjdetlev. I hope you enjoyed the Instrucables and that it has inspired you to make your own project.