DIY Metronome
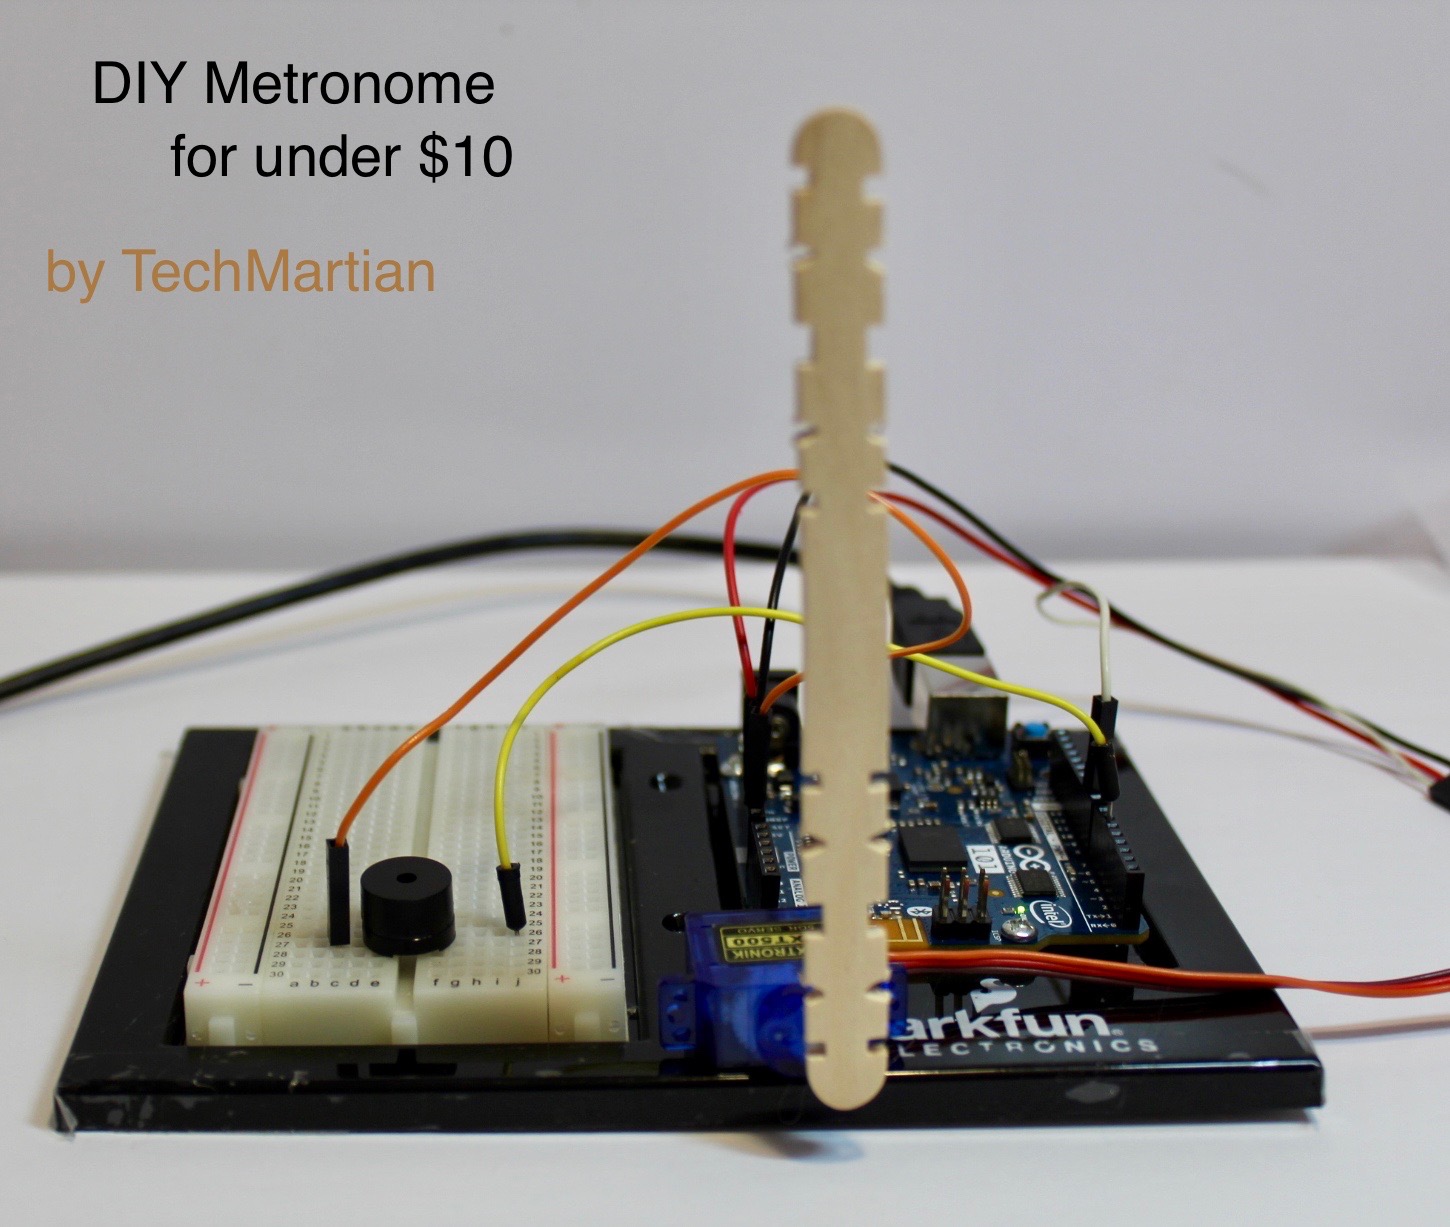
A metronome is a device that produces an audible beat—a click or other sound—at regular intervals that the user can set in beats per minute (BPM). It is typically used by musicians when practicing on a musical instrument in order to play at a regular pulse. Most metronomes have both an audible click sound synchronized with an inverted pendulum swing.
This uses the Arduino's built in timer to calculate when the next beat is to be played, and adjusts the servo motor to swing the inverted pendulum, as well as give the buzzer the signal to make a 'click' sound.
BoM
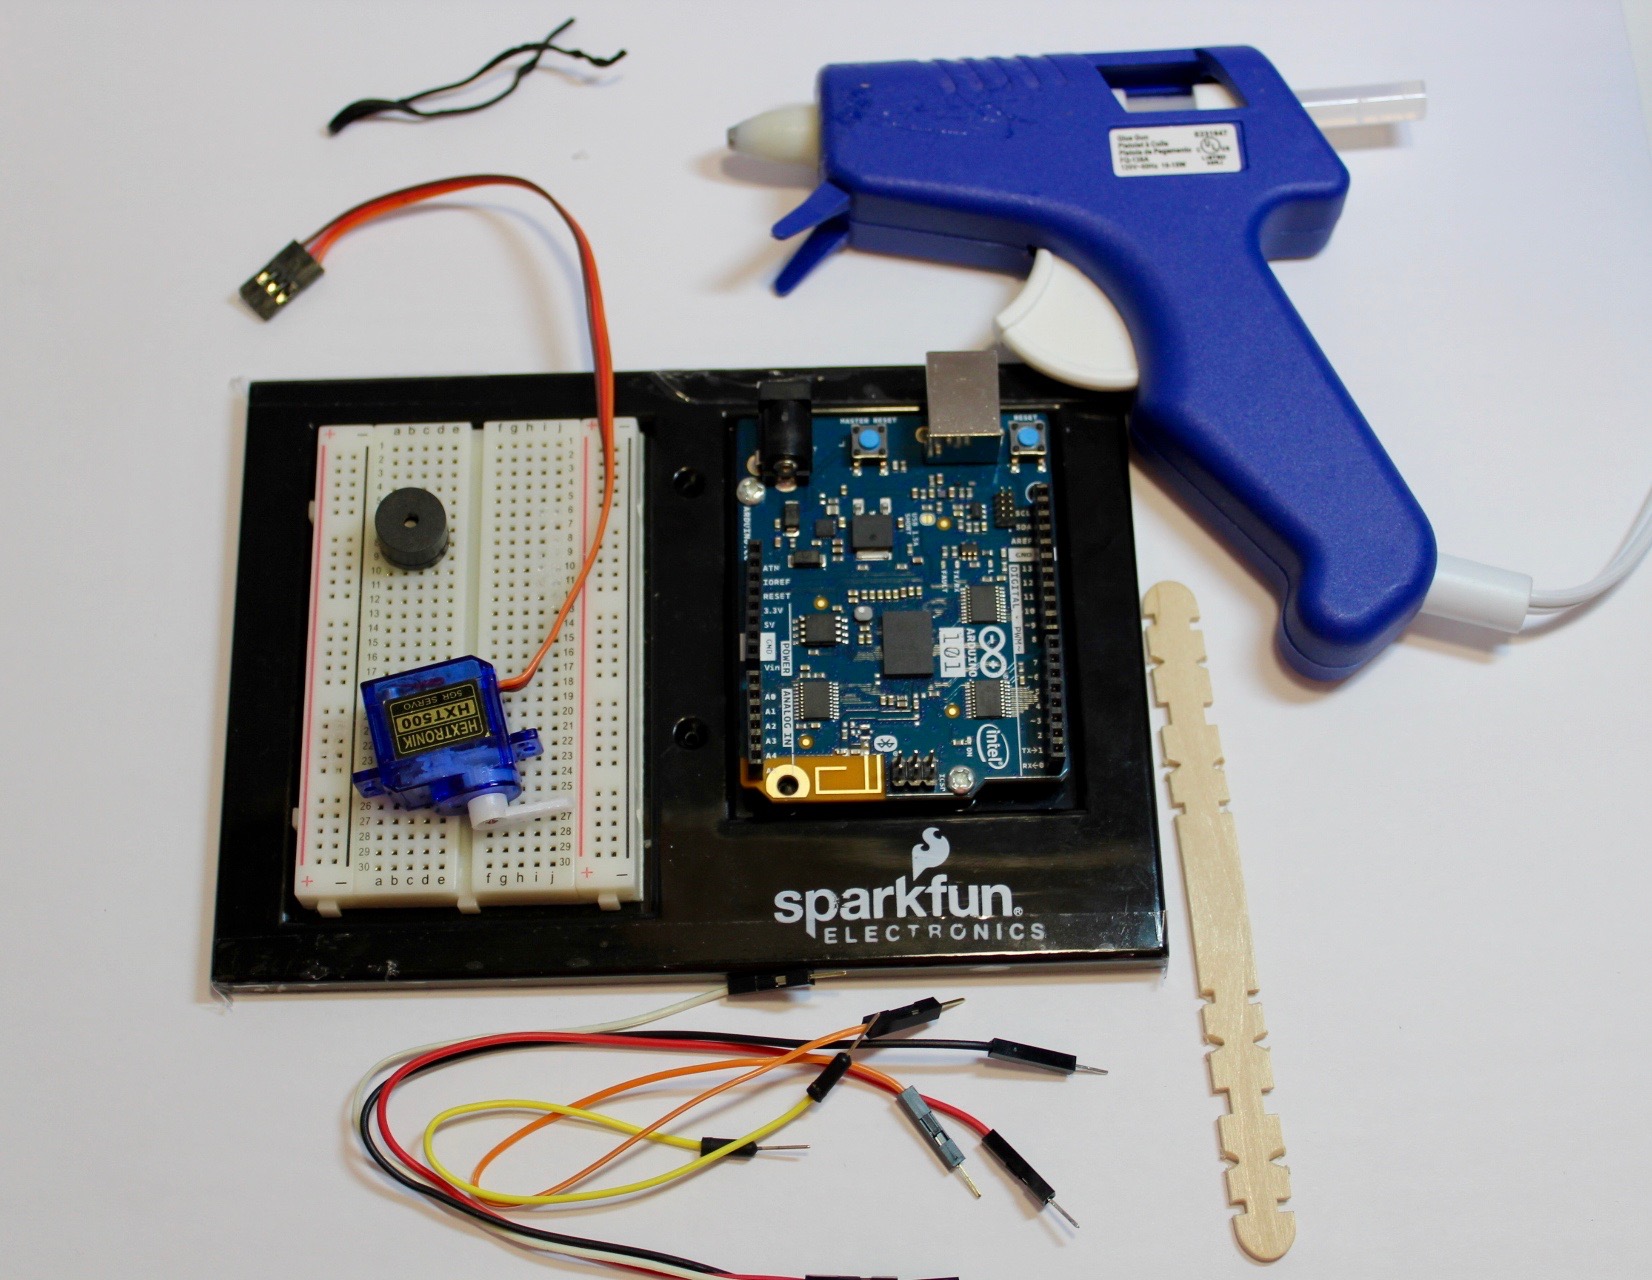
- Arduino 101 or Uno
- Buzzer
- Servo Motor
- Popsicle Stick
- Jumper Wires
- Hot glue and Hot glue gun
- [Optional] Breadboard
- [Optional] Tie wire
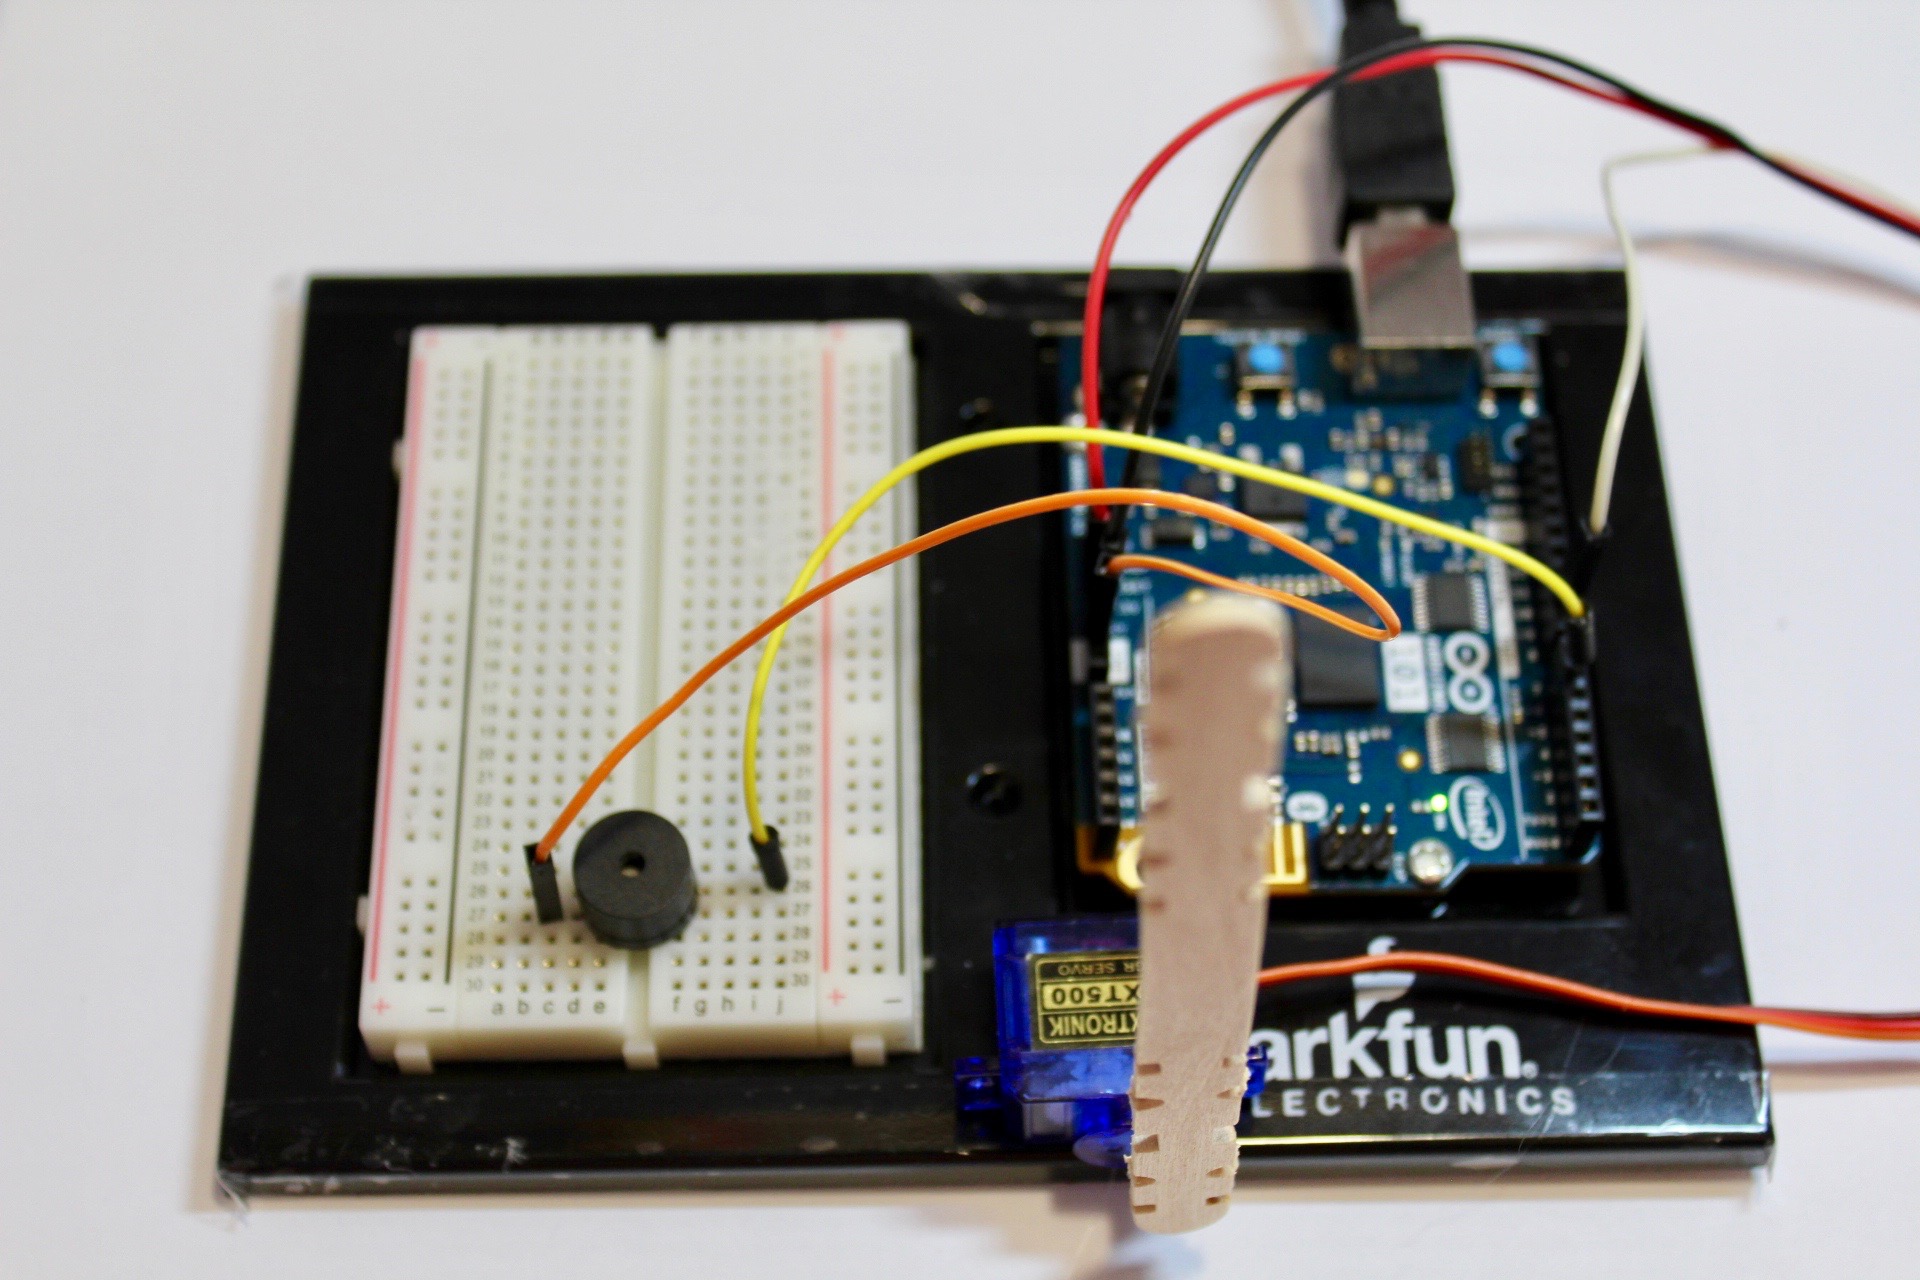
Connecting the Buzzer
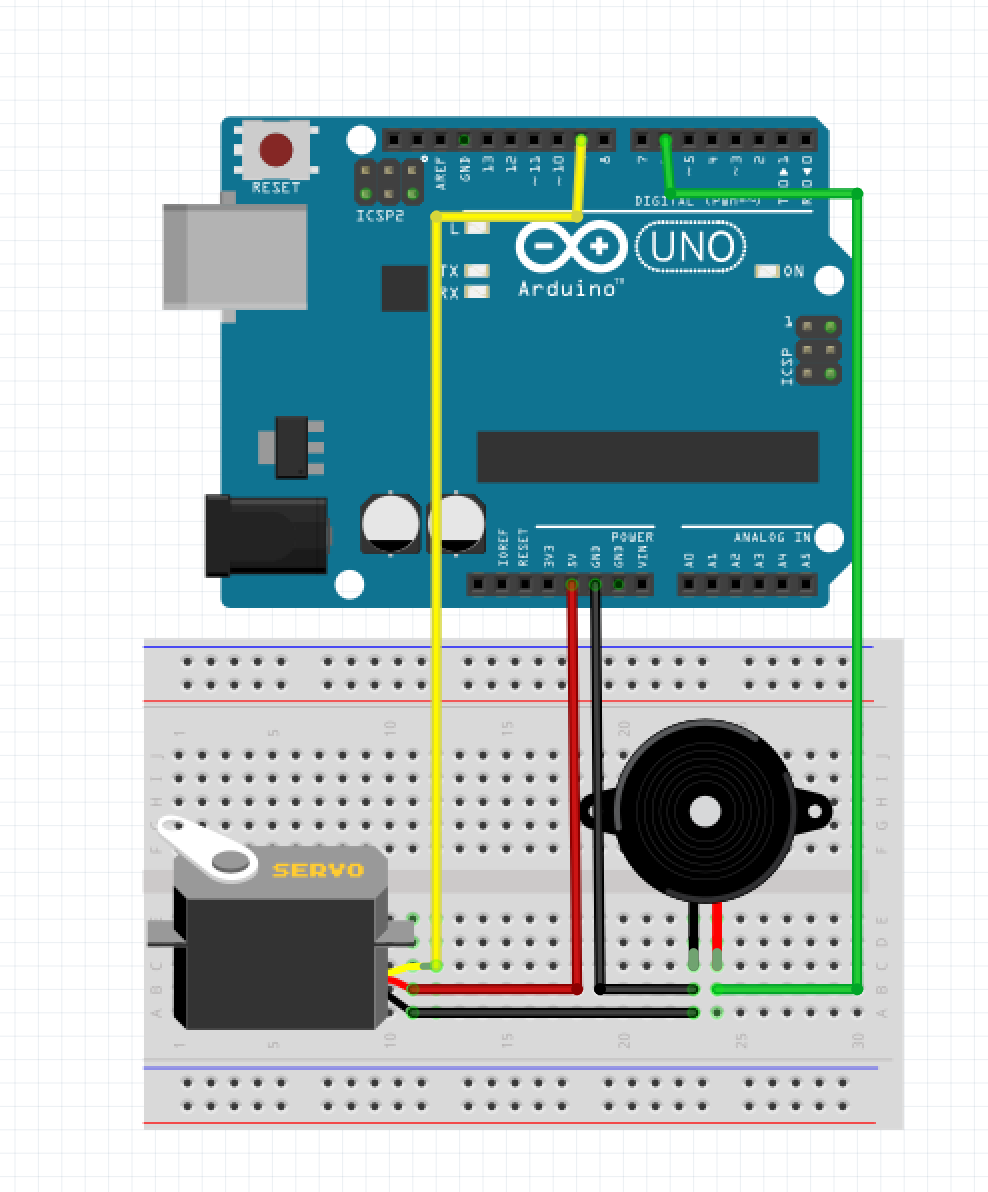
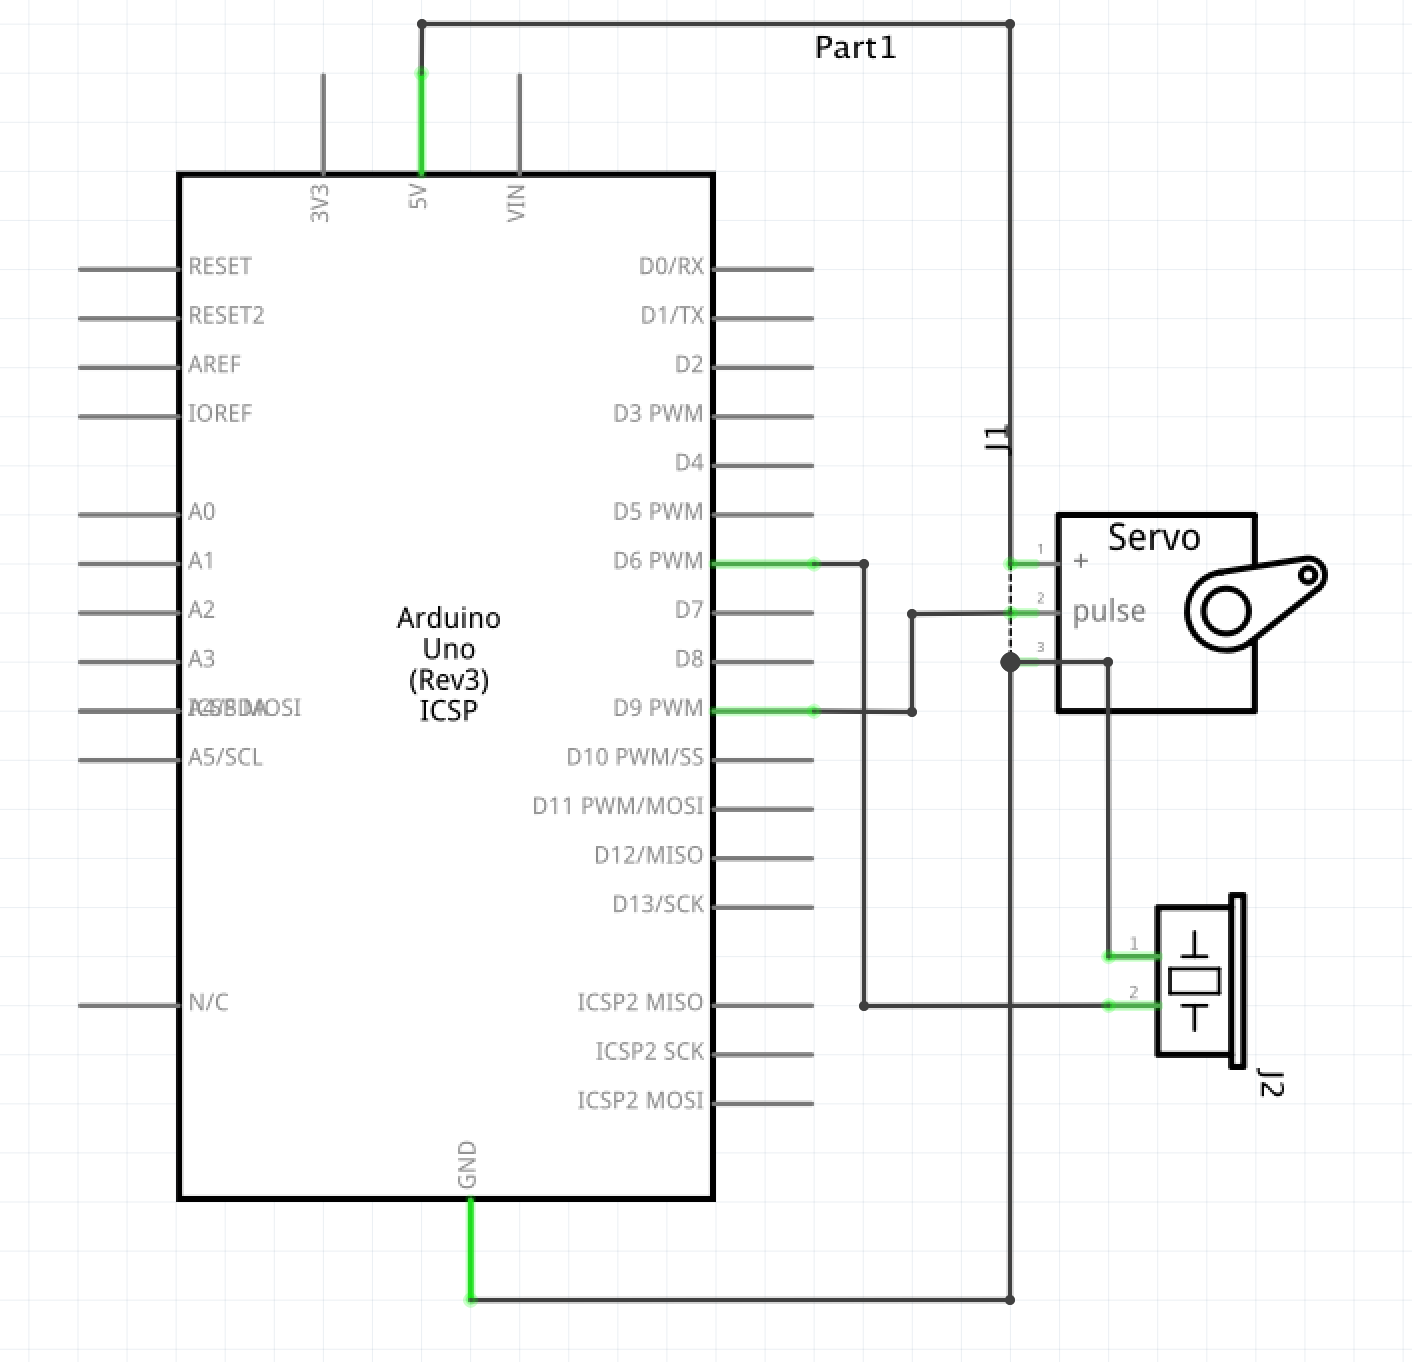
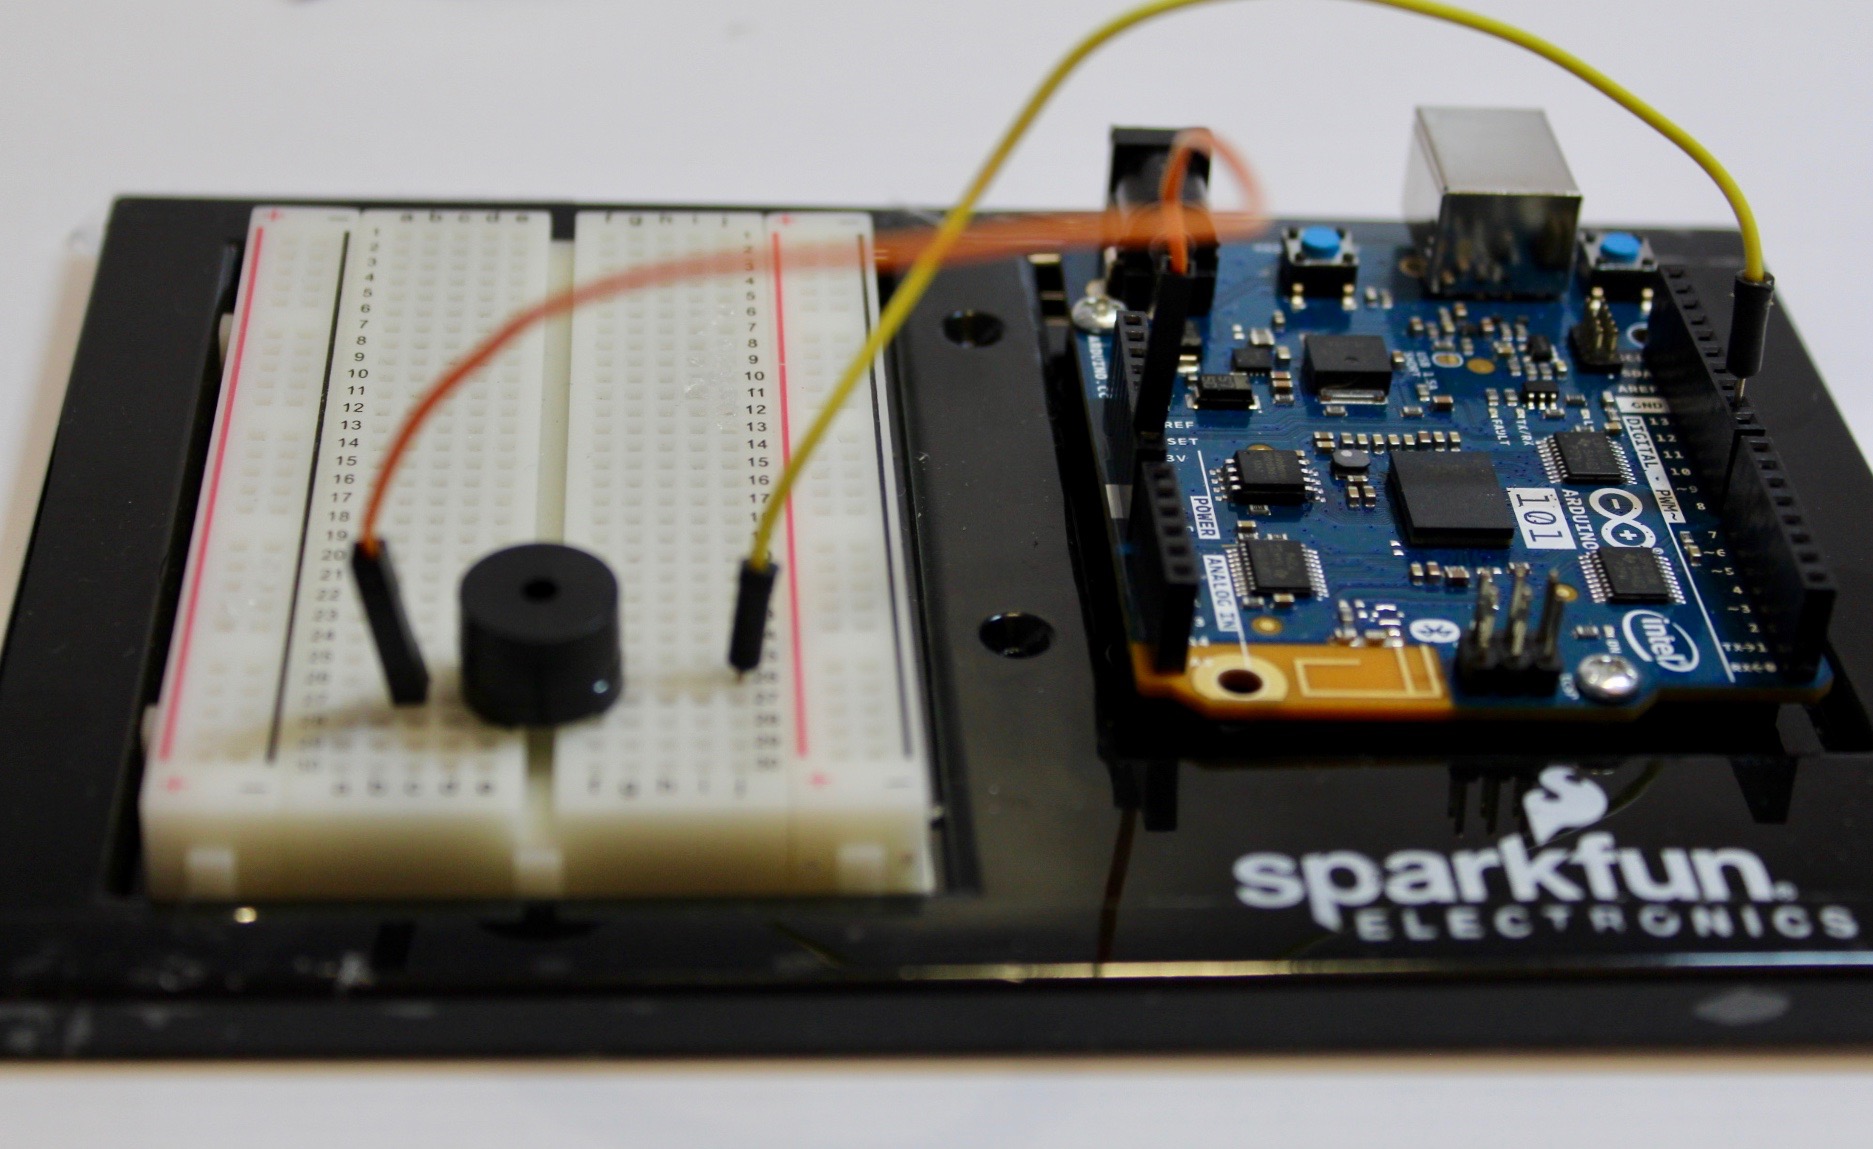
- Connect one of the buzzer pins to pin 6 on the Arduino with a yellow jumper wire.
- Connect the remaining buzzer pin to the GND pin on the Arduino with an orange jumper wire.
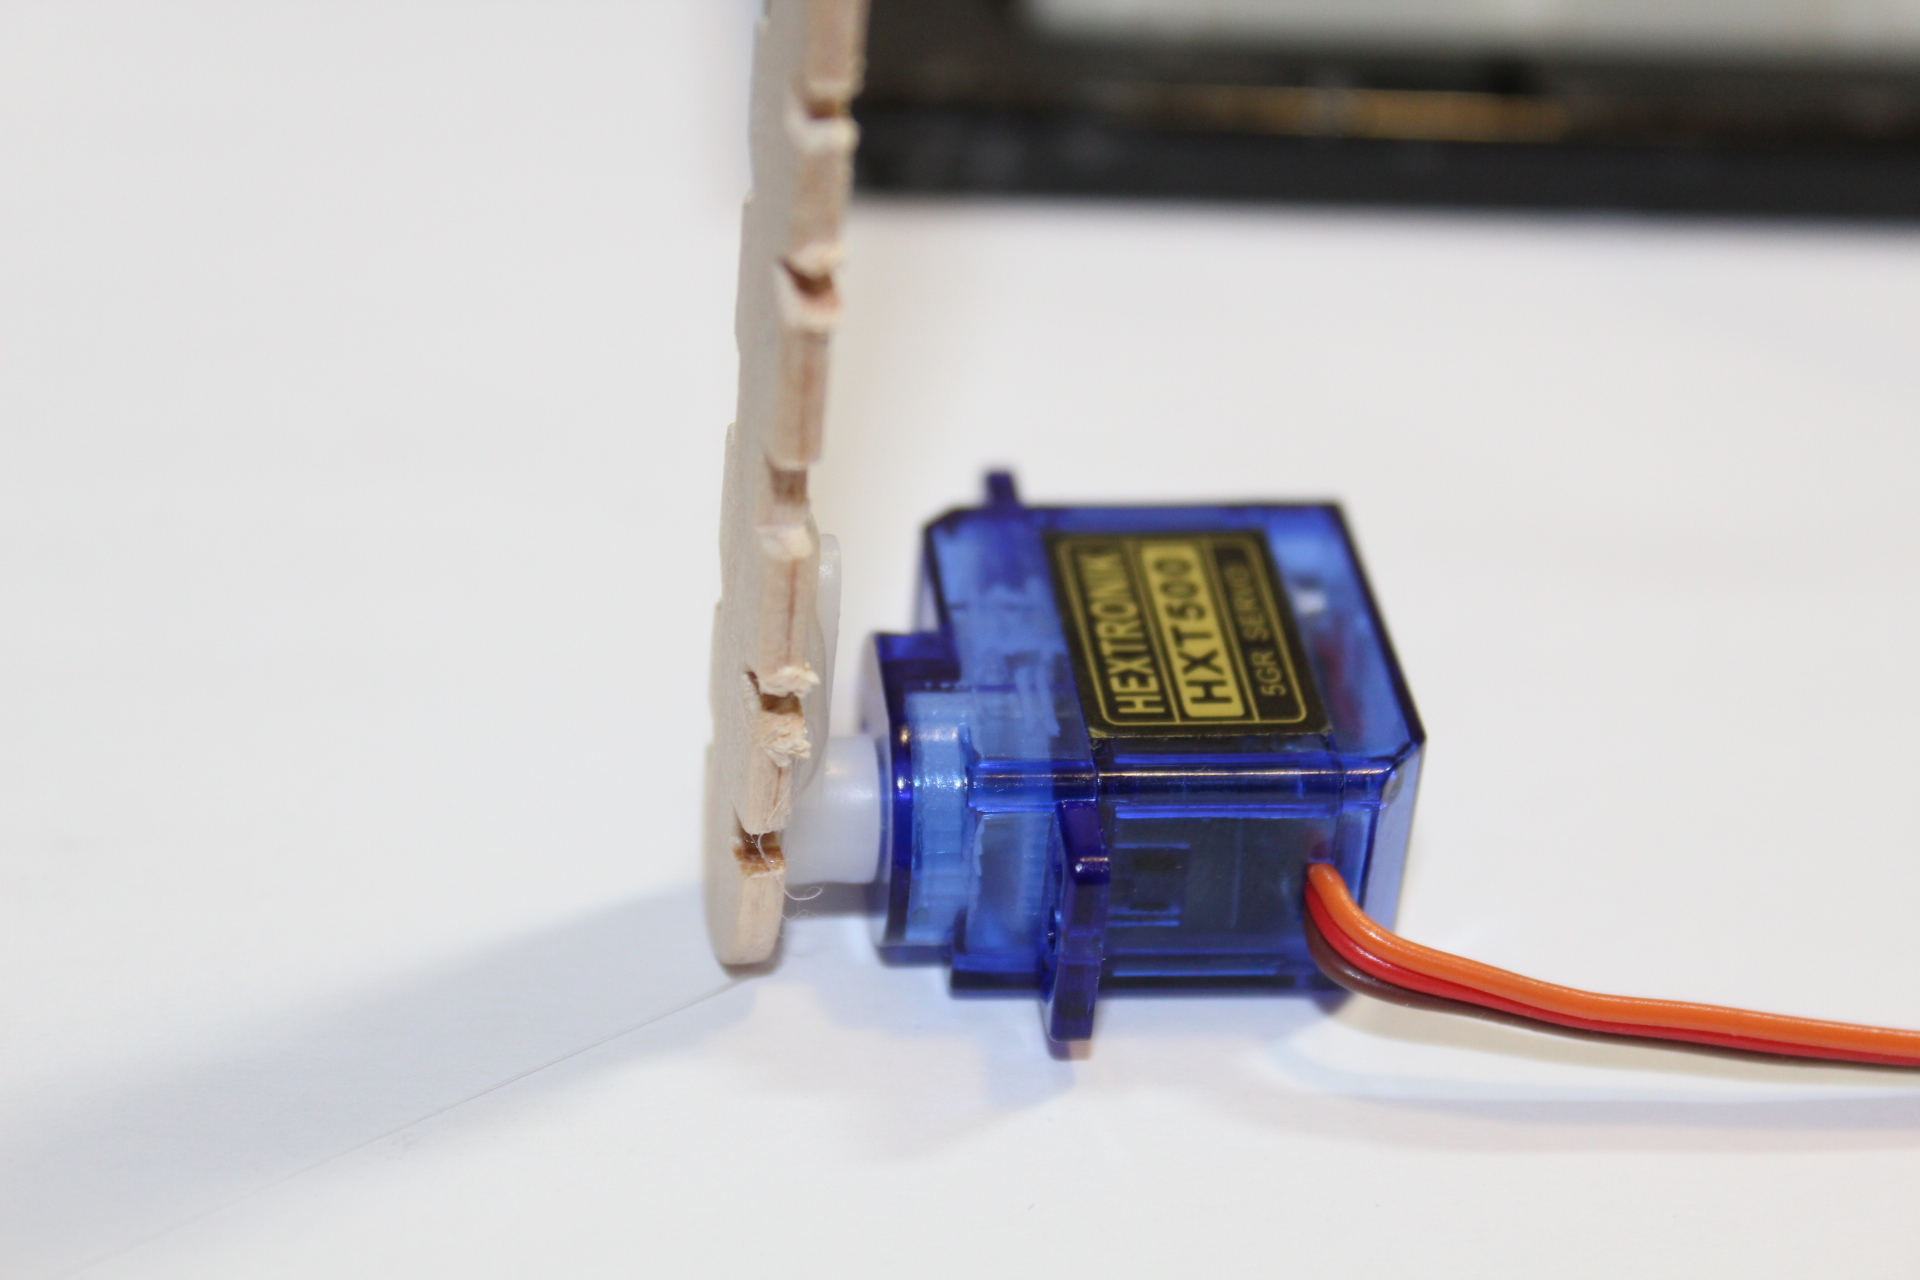
Wiring the Servo Motor
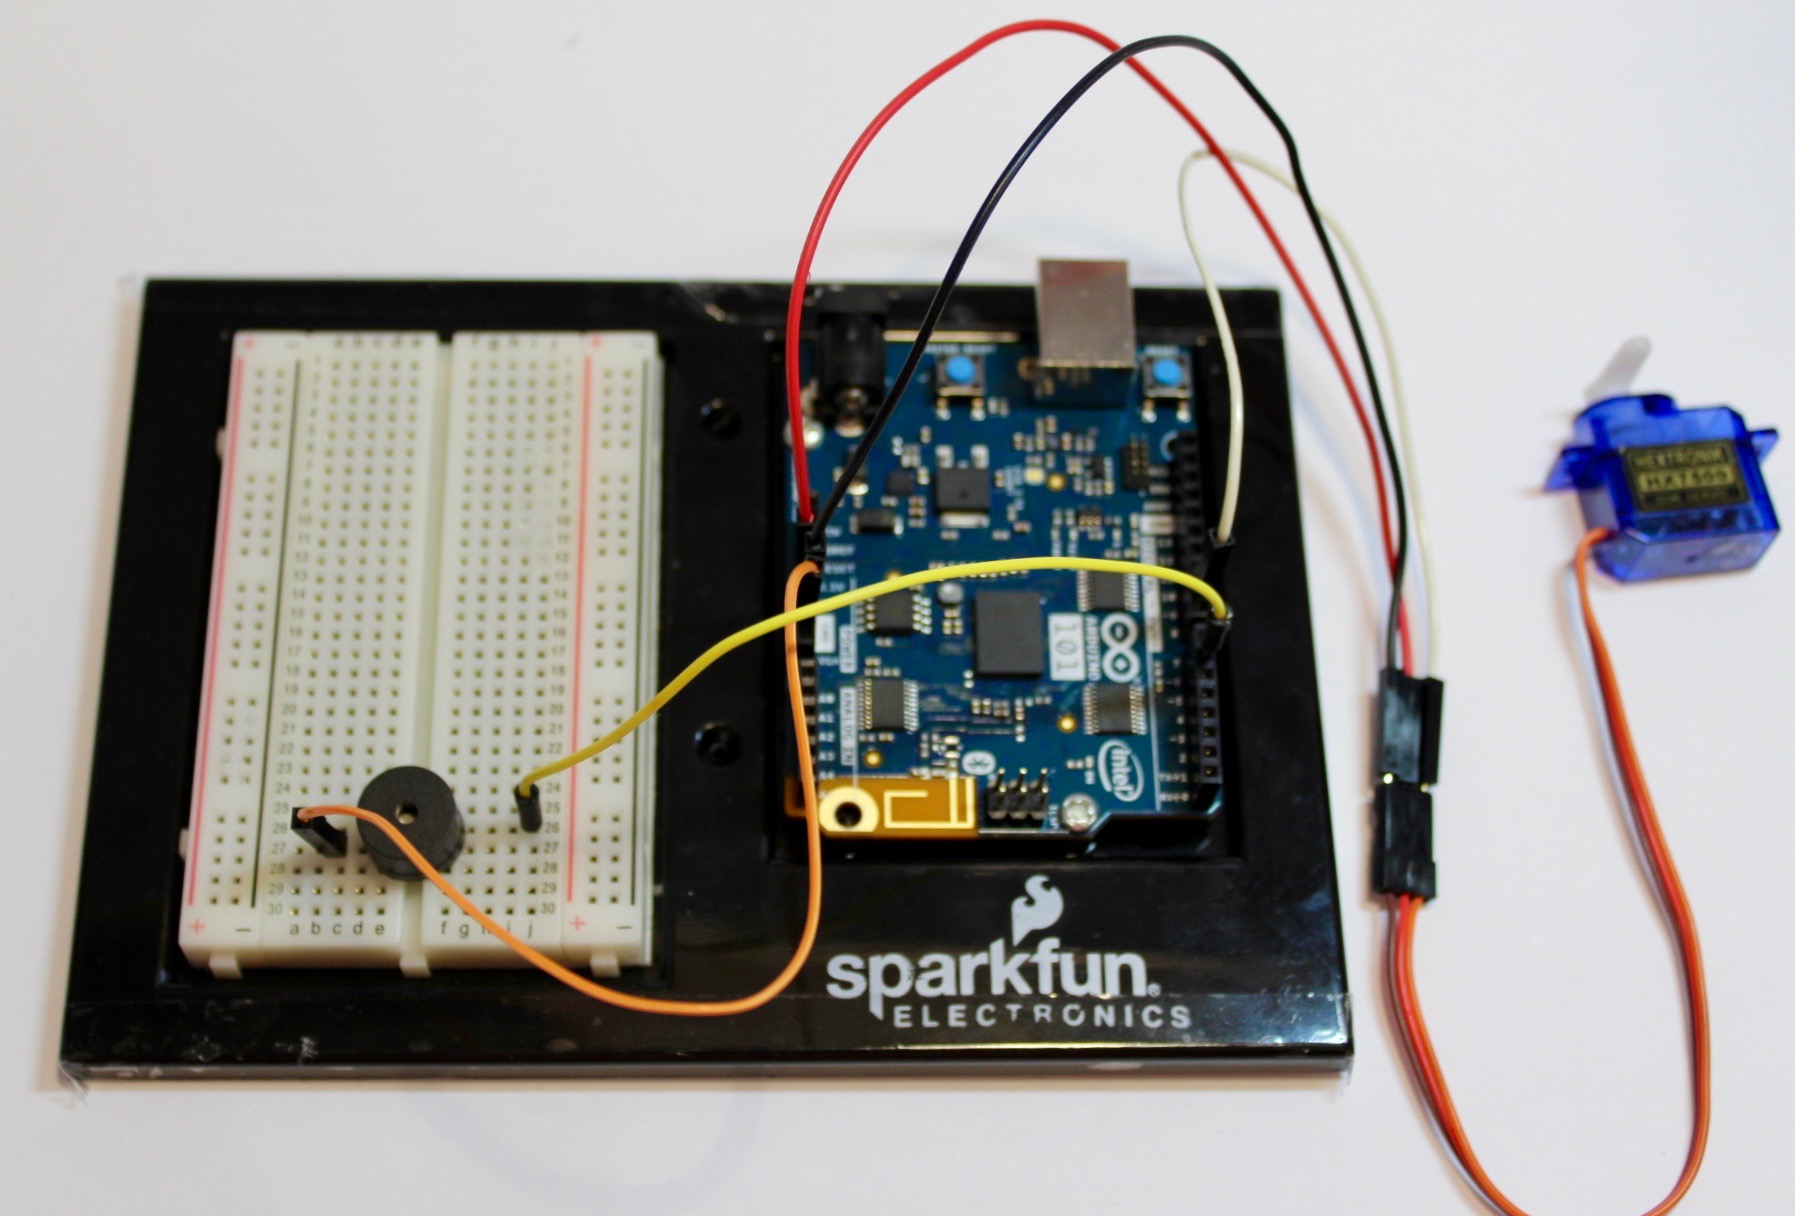
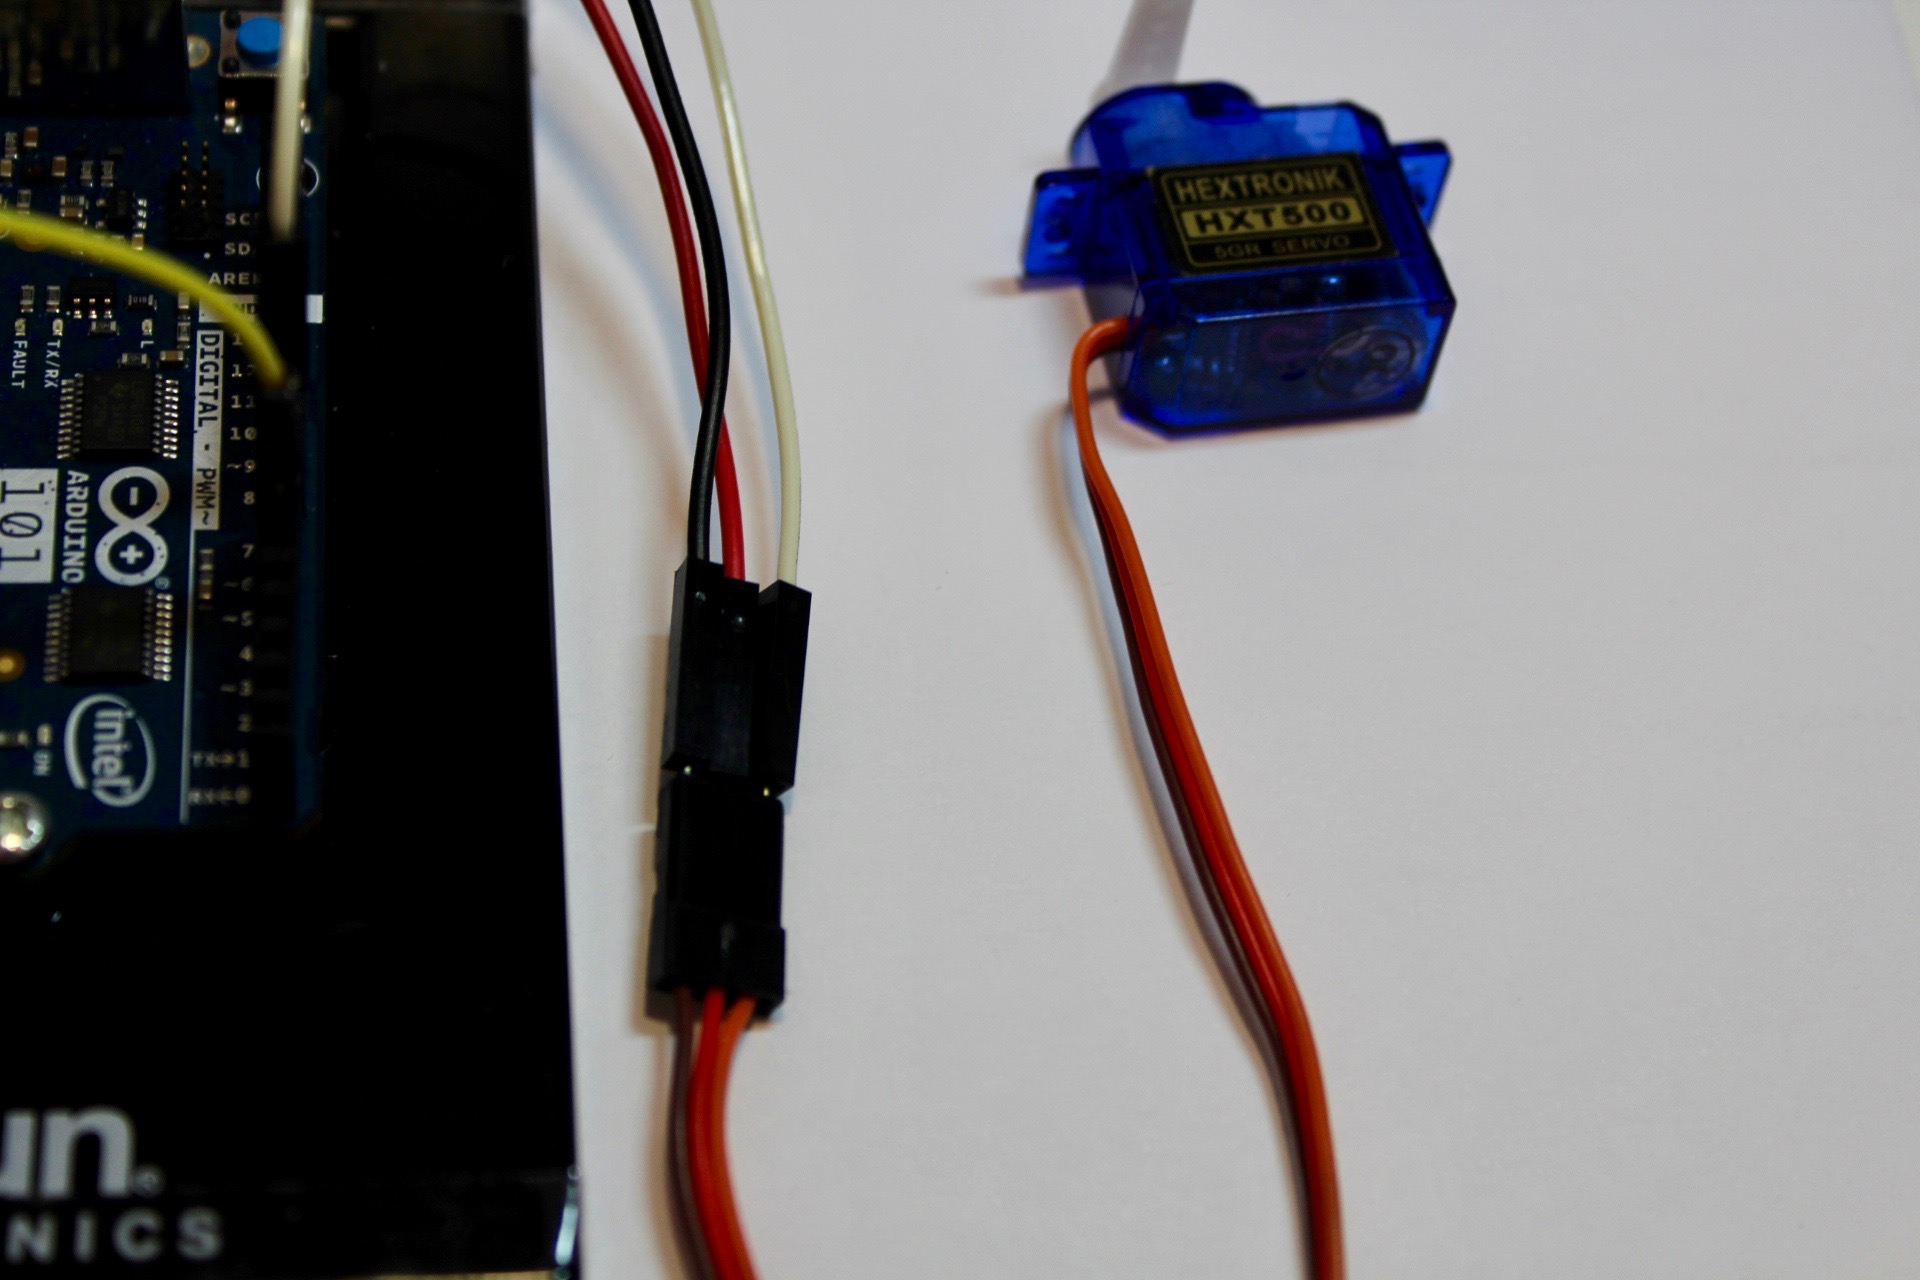
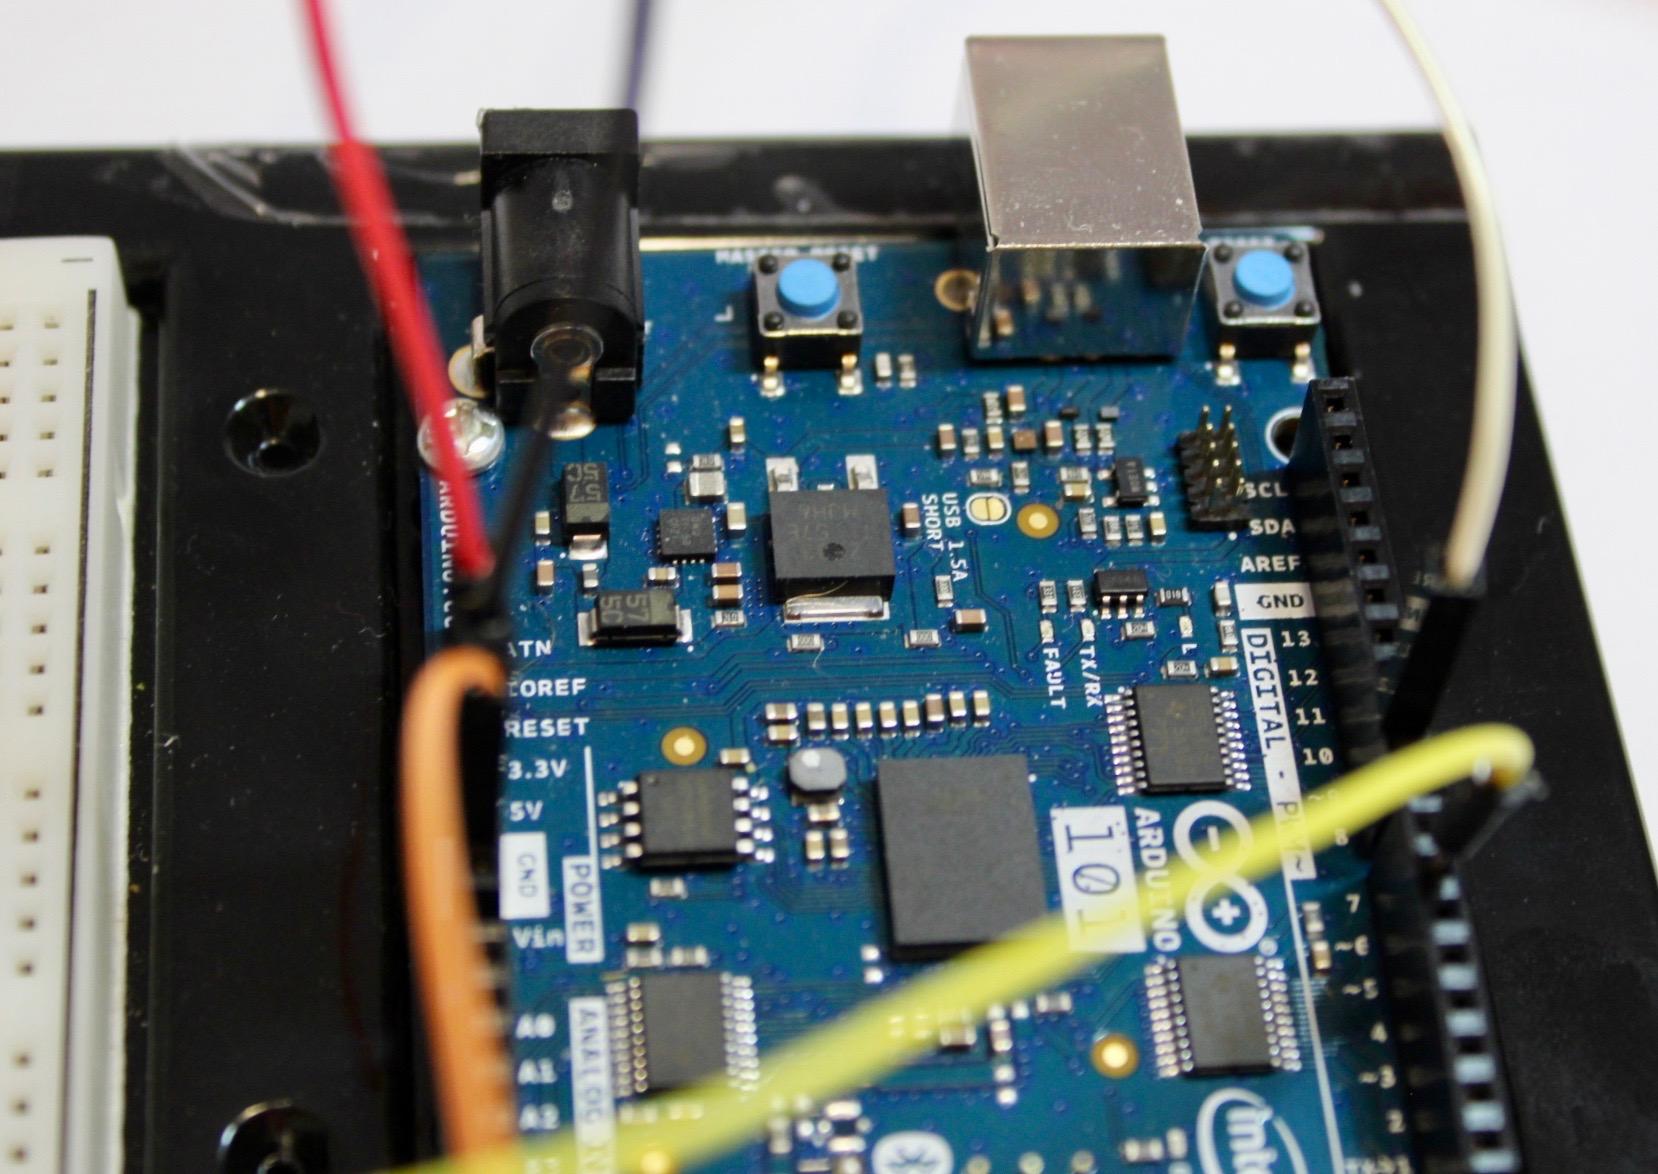
- Connect the brown pin from the servo motor to the GND pin on the Arduino with a black jumper wire.
- Connect the red pin from the servo motor to the 5V pin on the Arduino with a red jumper wire.
- Connect the orange pin from the servo motor to the digital pin 9 on the Arduino with a white jumper wire.
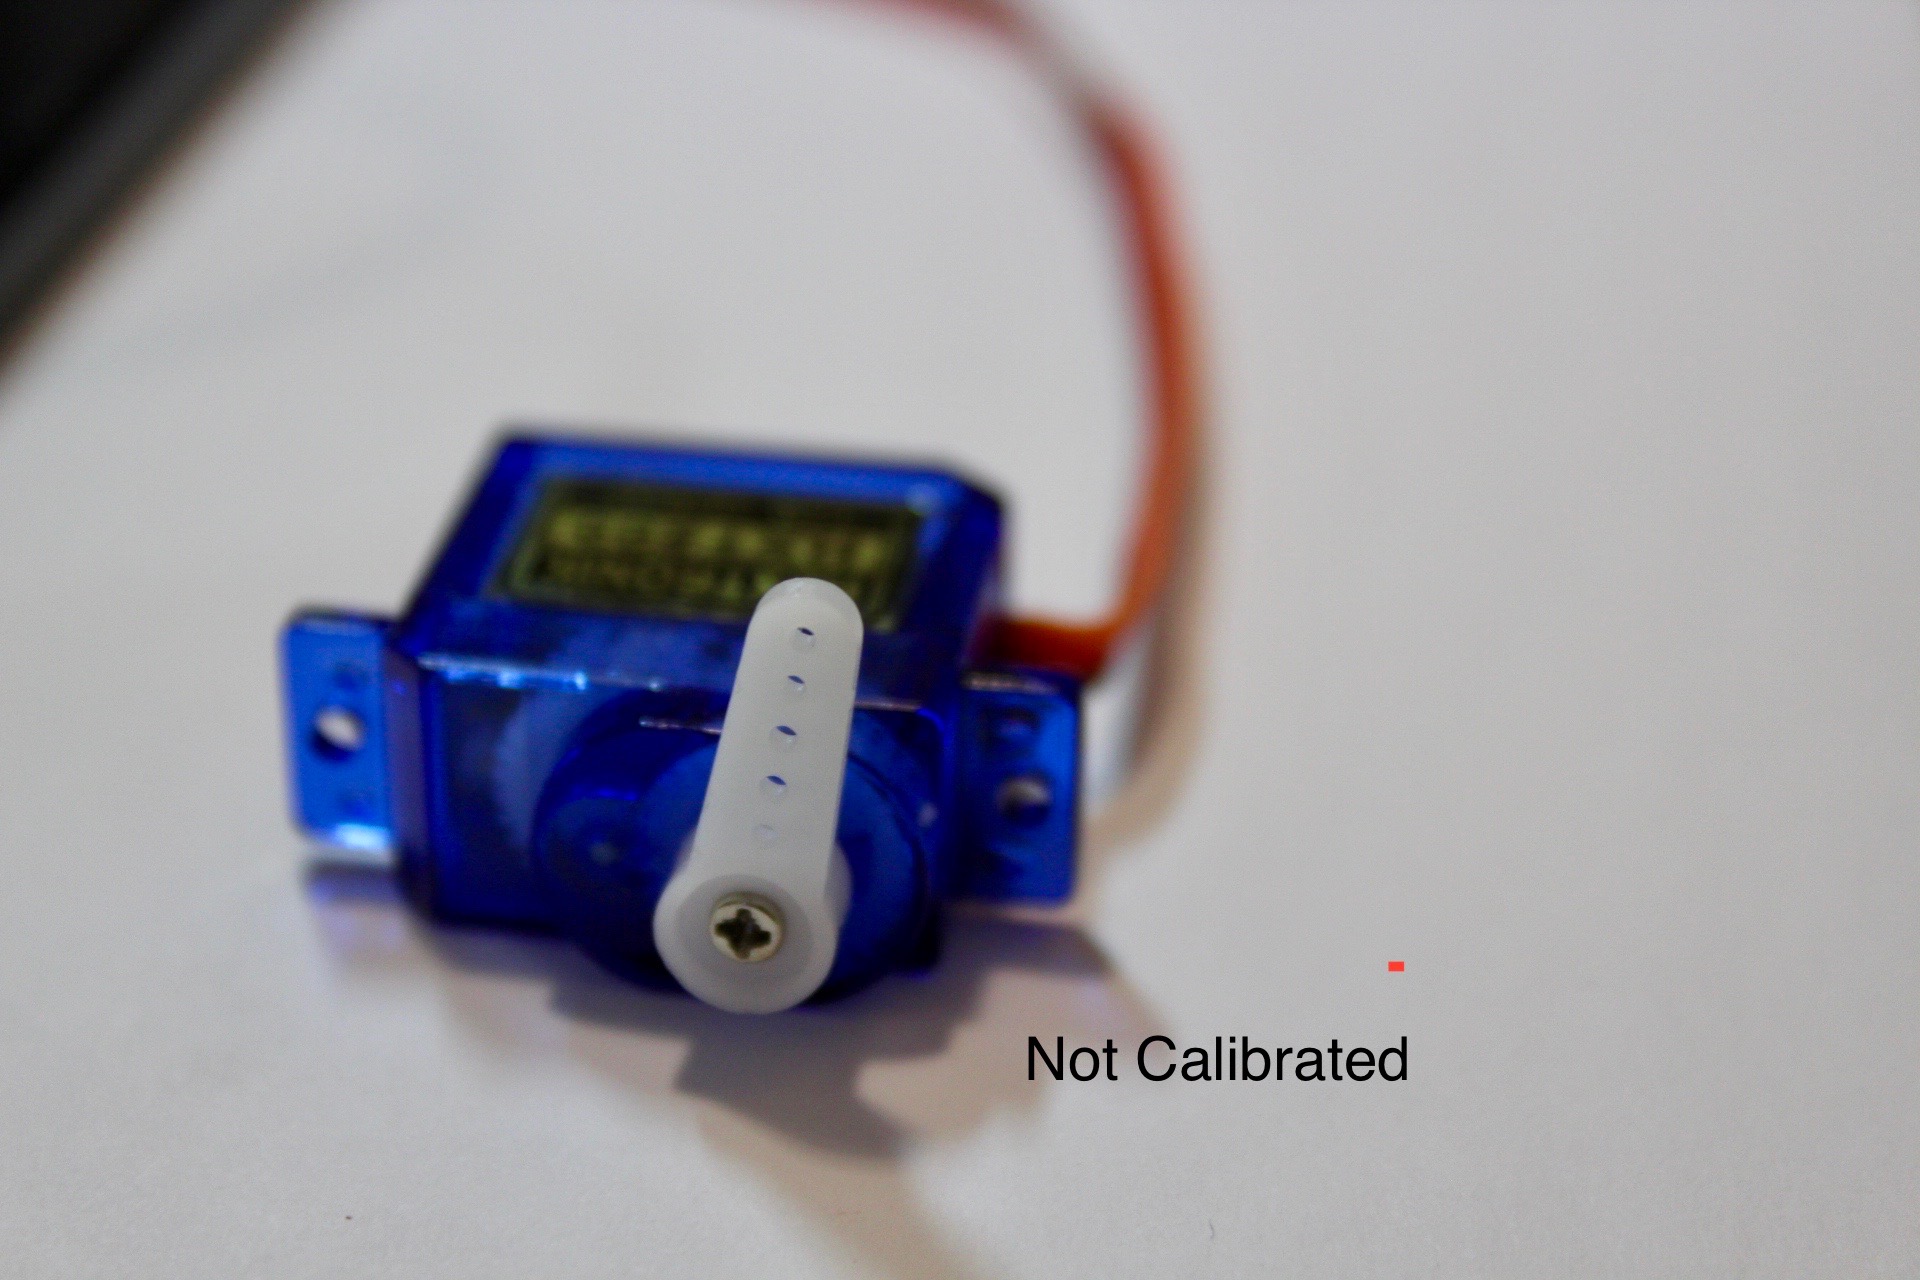
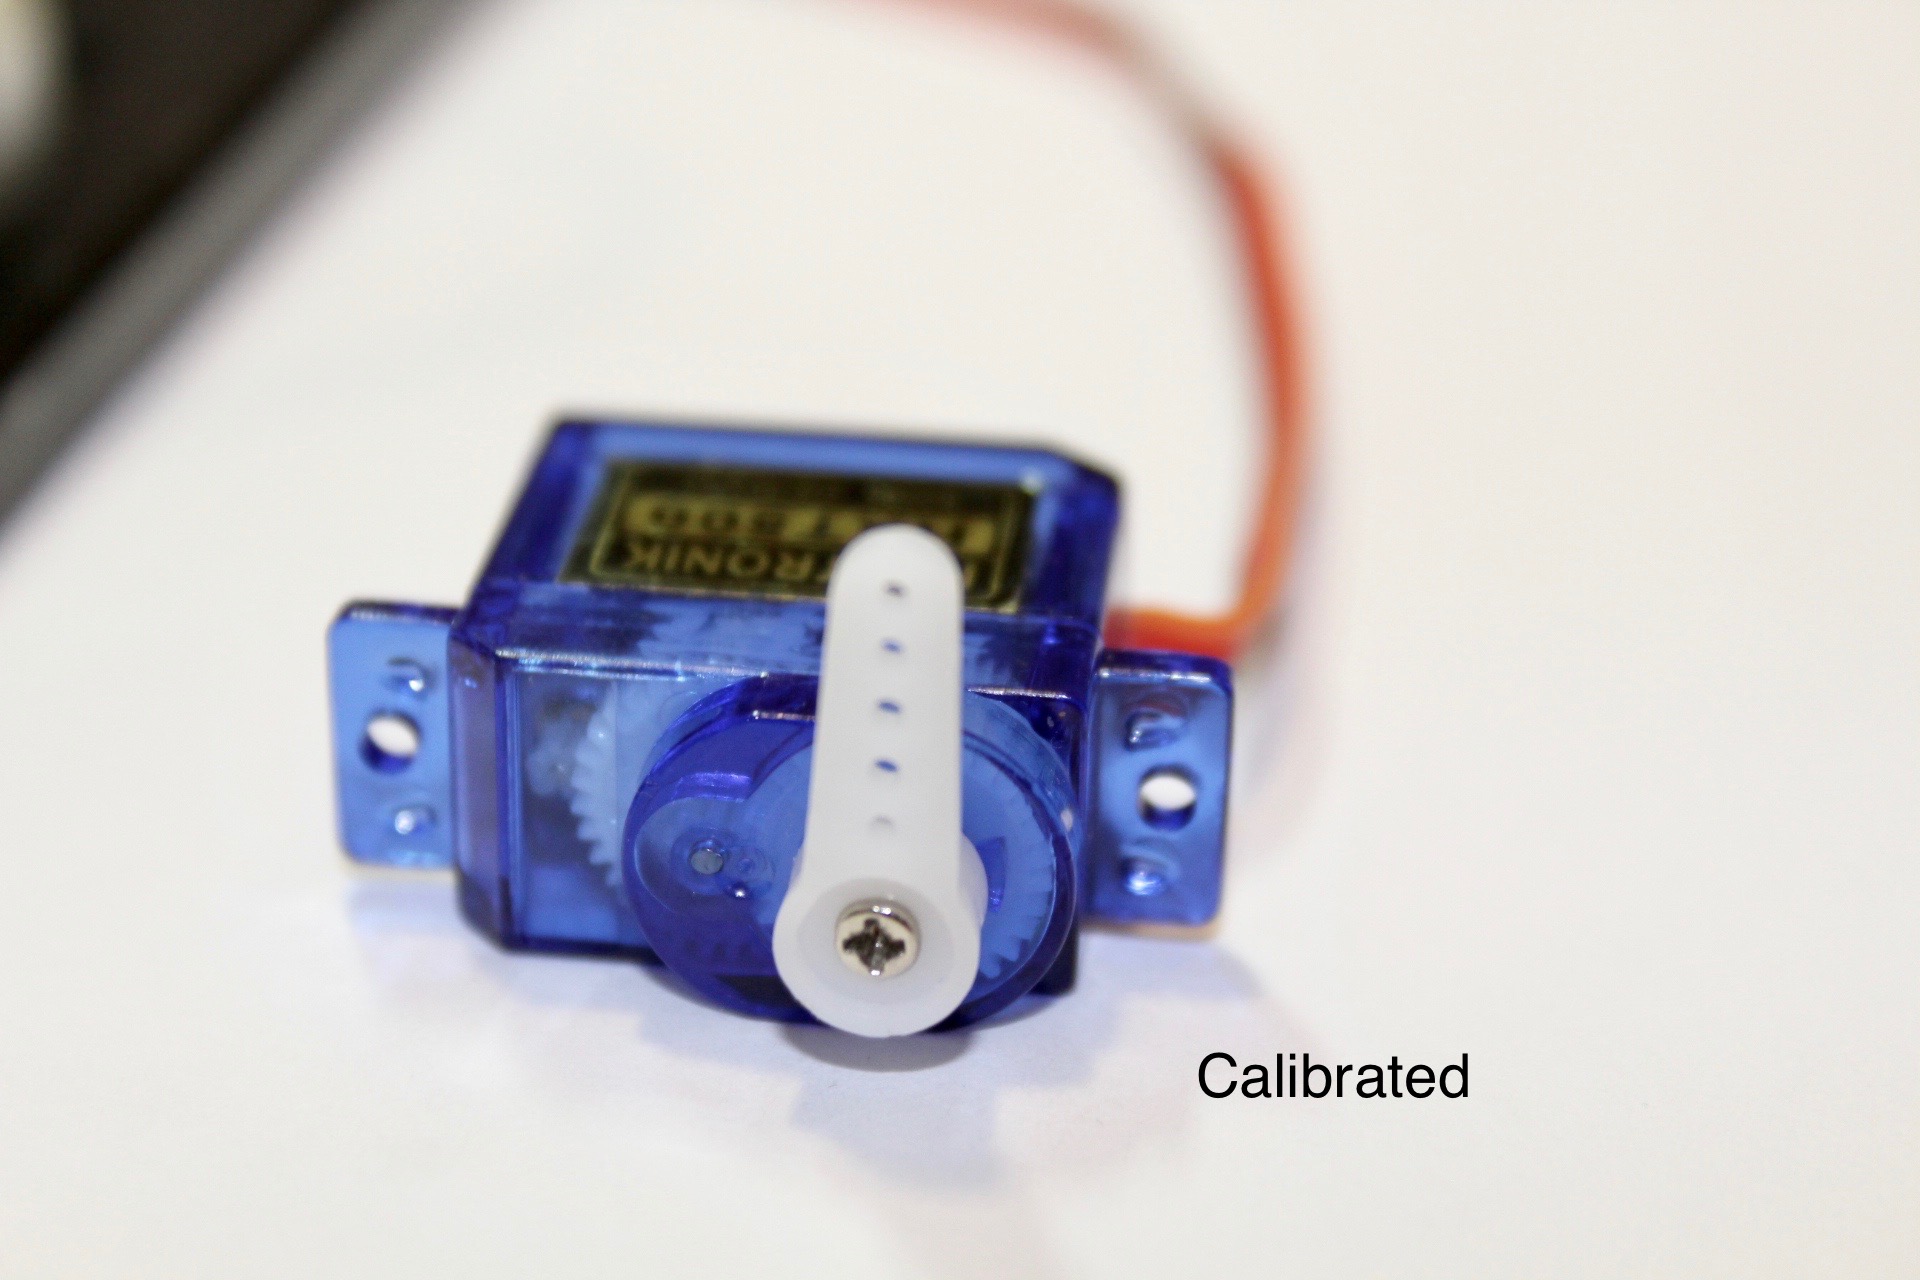
Calibrating the Metronome
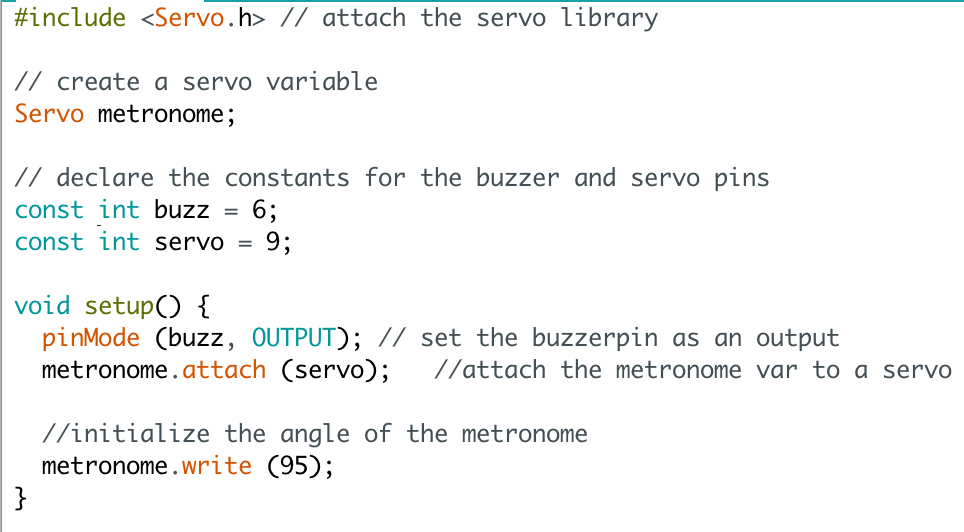
#include // attach the servo library
// create a servo variable
Servo metronome;
// declare the constants for the buzzer and servo pins
const int buzz = 6;
const int servo = 9;
void setup() {
  pinMode (buzz, OUTPUT); // set the buzzerpin as an output
  metronome.attach (servo);   //attach the metronome var to a servo pin
  //initialize the angle of the metronome
  metronome.write (105);
}
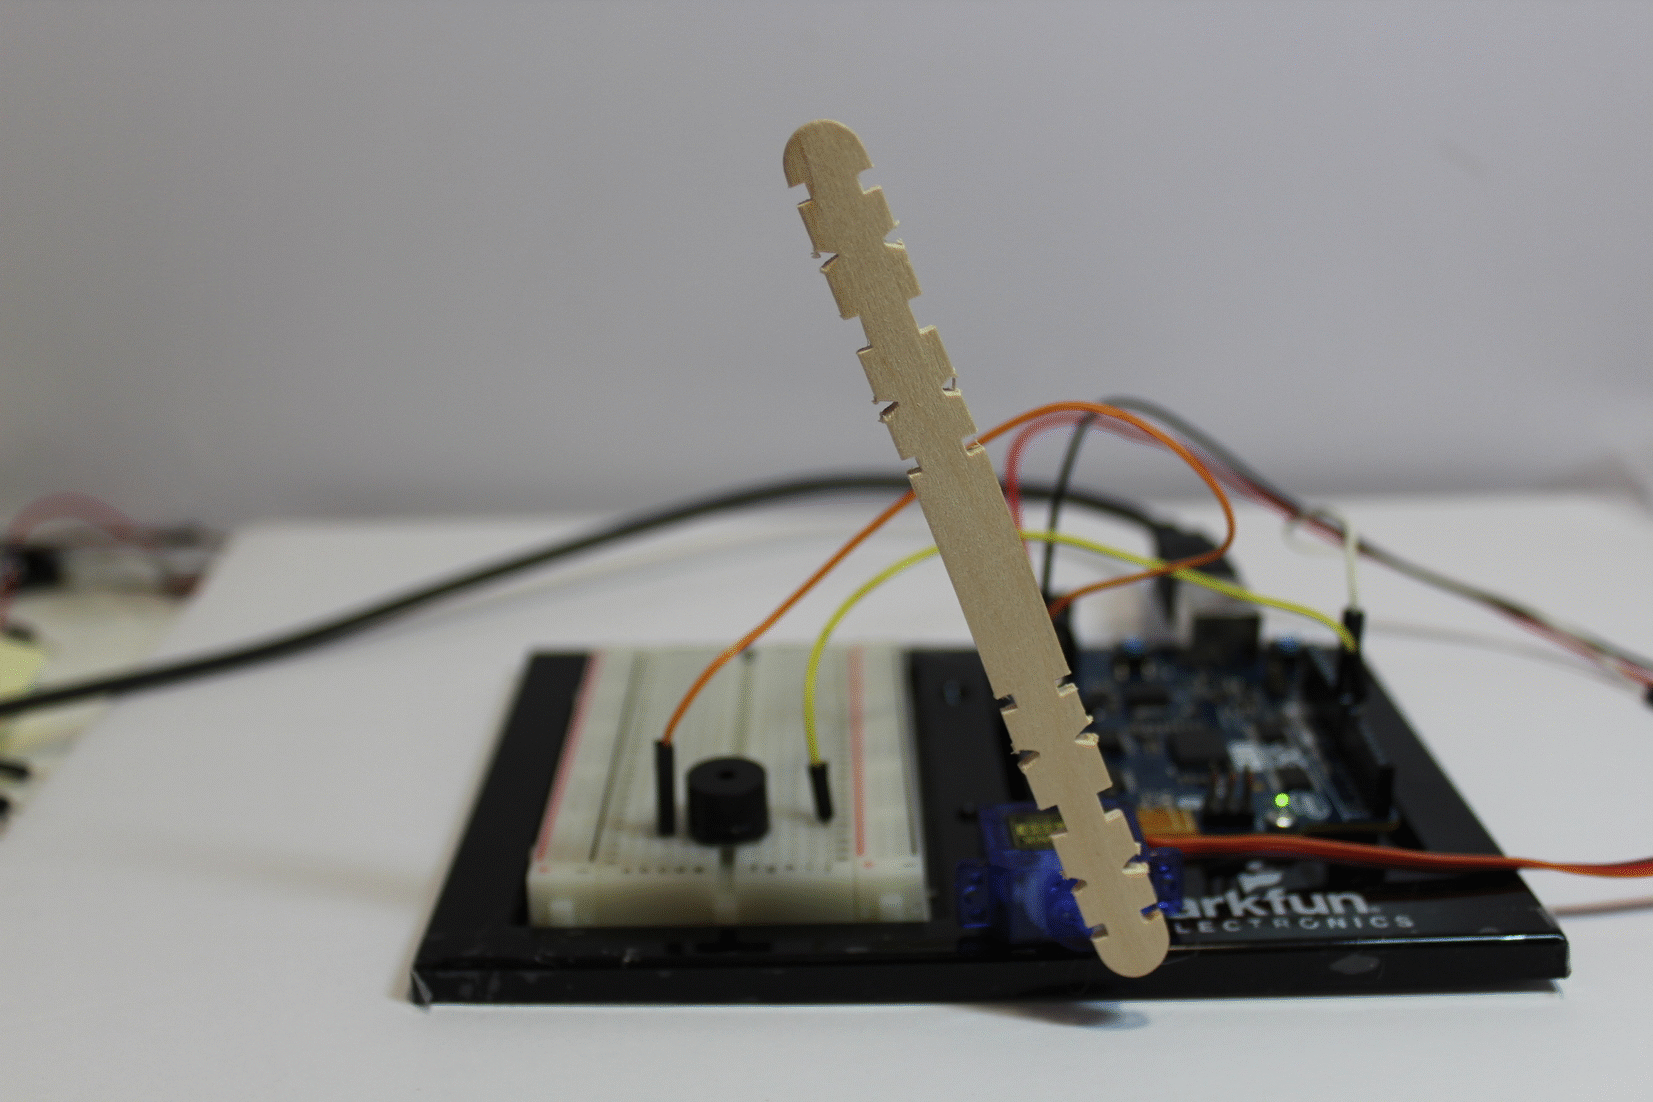
Gluing the Metronome
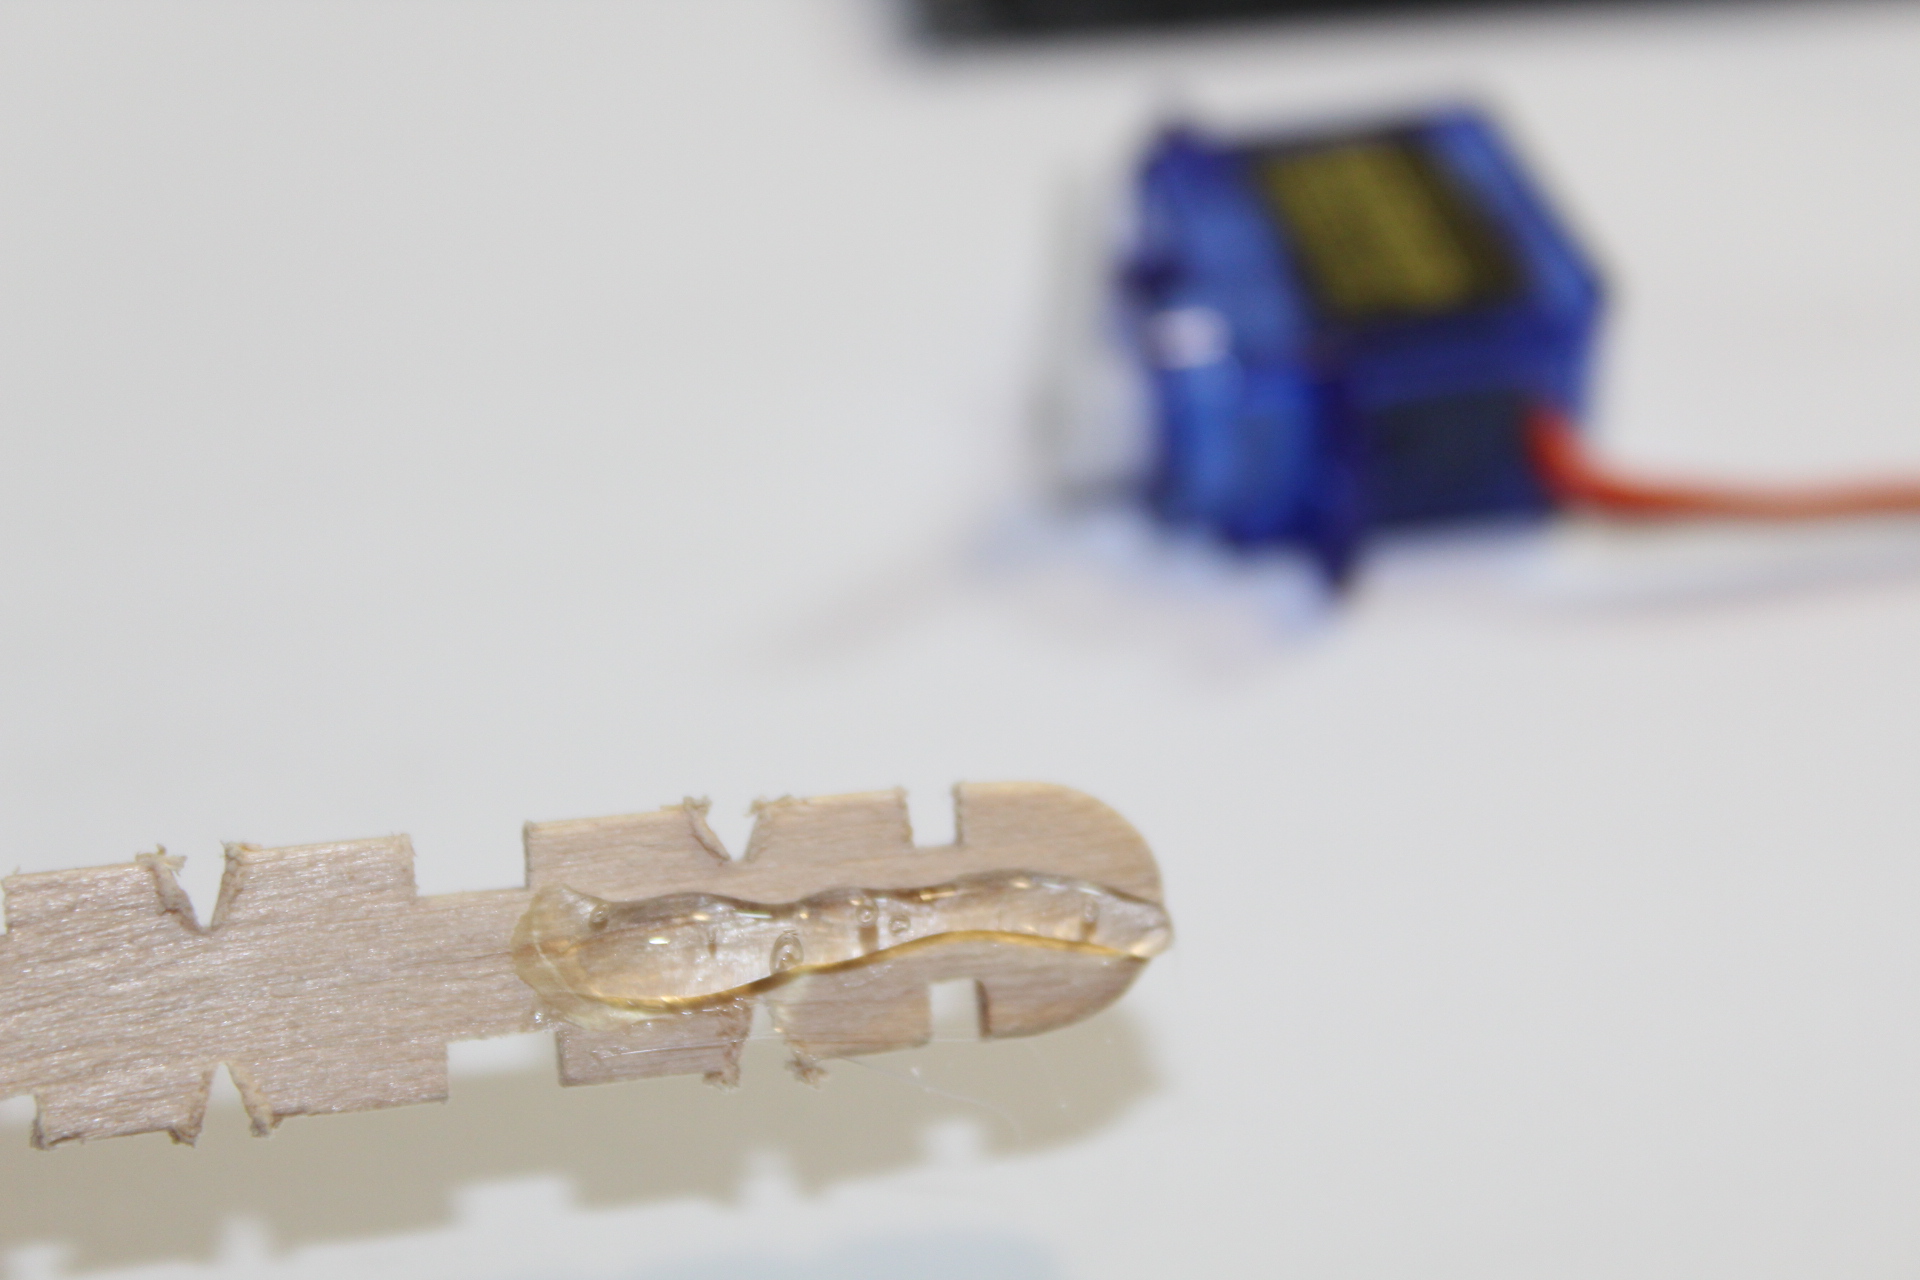
- Once the servo arm has been calibrated such that it is 90 degrees from the horizontal, take a piece of popsicle stick and apply glue on the bottom, then stick it parallel to the servo arm.
- Glue the servo motor long side down, onto a flat surface, I chose my Arduino 101 chassis for this.
Coding
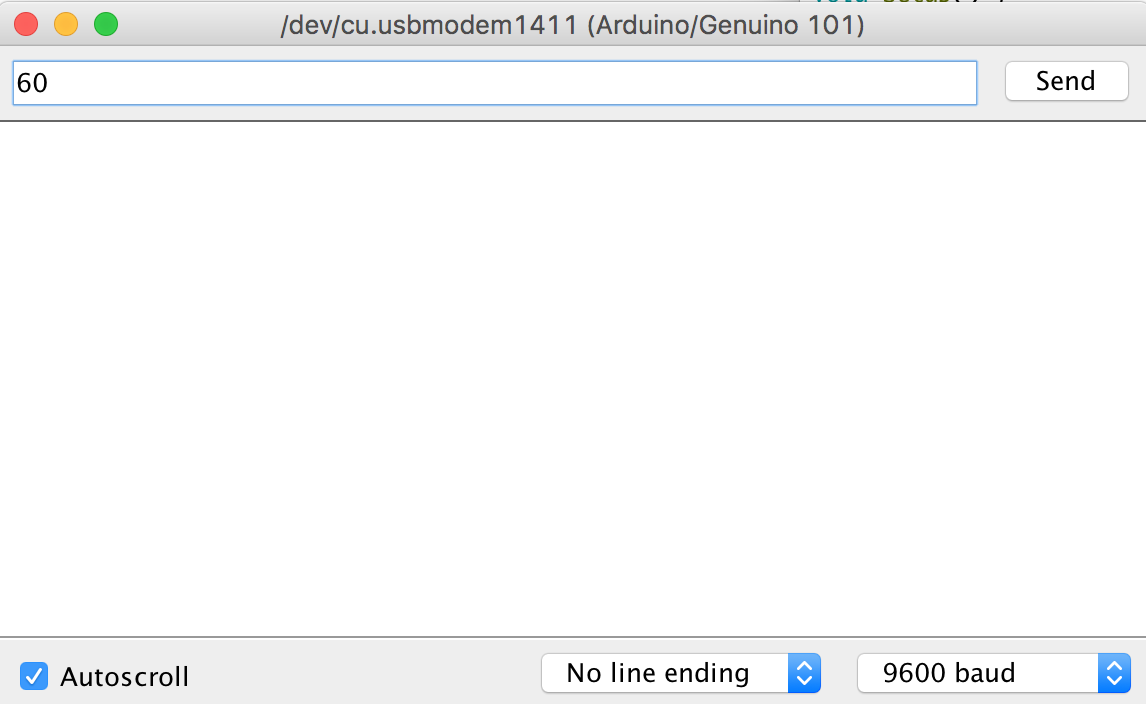
You can input the bpm of your metronome in serial monitor and send it off to the Arduino. I opted for a serial monitor signal as opposed to a trim knob since accuracy and precision is important for a metronome, thus sending a known number is more important than an arbitrary analog signal.
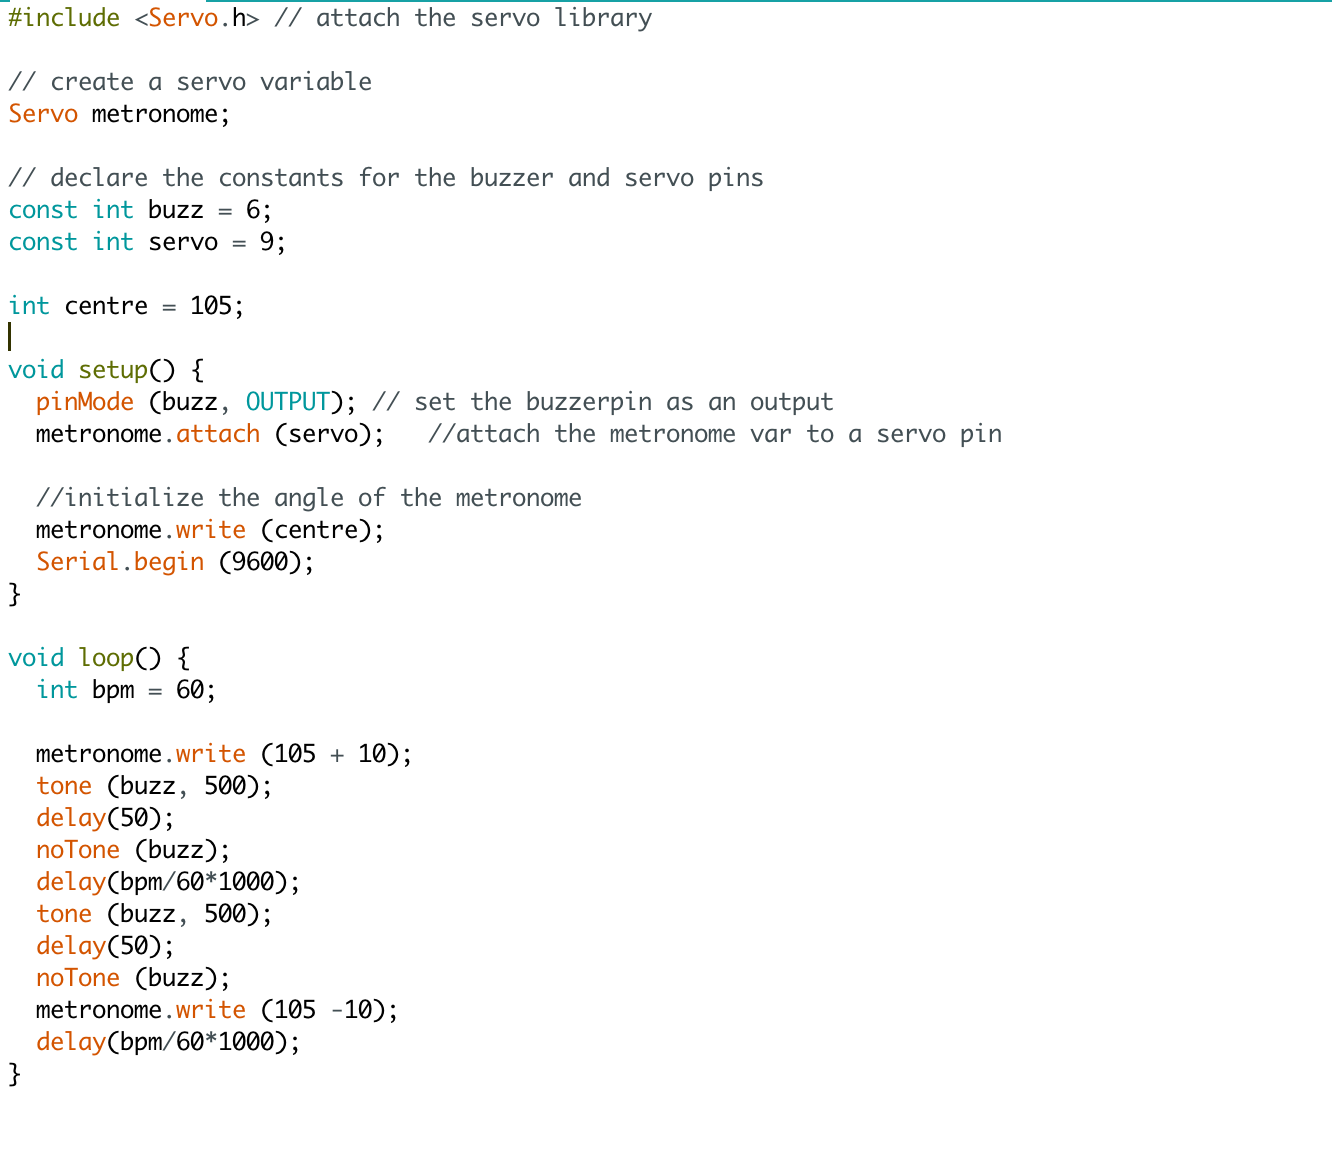
#include <Servo.h> // attach the servo library
// create a servo variable
Servo metronome;
// declare the constants for the buzzer and servo pins
const int buzz = 6;
const int servo = 9;
int centre = 105;
void setup() {
  pinMode (buzz, OUTPUT); // set the buzzerpin as an output
  metronome.attach (servo);   //attach the metronome var to a servo pin
  //initialize the angle of the metronome
  metronome.write (centre);
  Serial.begin (9600);
}
void loop() {

 int bpm = Serial.read();
  metronome.write (105 + 10);
  tone (buzz, 500);
  delay(50);
  noTone (buzz);
  delay(bpm/60*1000);
  tone (buzz, 500);
  delay(50);
  noTone (buzz);
  metronome.write (105 -10);
  delay(bpm/60*1000);
}
Downloads
Done!
Open serial monitor and enter the BPM you want, and play some music to the beat of the metronome!