DIY Mason Jar Lamp


Hey, Guys in this instructable I am sharing with you my recent make, A DIY Silhouette Mason Fairy Jar.
This lamp is really an Awesome to have in your bedroom. I added a Custom quotation using a vinyl cutter which I love the more and signifies the war we go through our lives, especially I have been last whole year after my accident
- Here is the List of Material Used :
- Mason Jar: https://amzn.to/2PYuH7u
- Fairy Light: https://amzn.to/2yEE8Cv
- Frosted Spray Paint: https://amzn.to/2Axk6v5
- Magnets: https://amzn.to/2qg352G
- Reed Switch: https://amzn.to/2yBRMGA
- Heat Shrink: https://amzn.to/2AvVXVv
- Soldering Iron: https://amzn.to/2D7sLGX
- Vinyl Sheet: https://amzn.to/2D7t2tt
- Vinyl Cutter: https://amzn.to/2EQWMfX
Cleaning the Jar


The First step is to clean the Jar. The cleaning is necessary for a good adhesion of the paint. I used Colin spray to clean the Jar. Spray gently and using a paper towel wipe it thoroughly. Make sure there are no dust spots.
Also, make sure that no smudge is present. Oil smudges are likely to get on the jar from fingers, so after cleaning try to avoid touching the sides.
Frosting the Jar


The light won't look beautiful until the clear jar is diffused. The diffused jar will scatter the light and make it soft thereby making the light, pleasing for eyes.
To achieve the diffused look for a glass, I used the easy method. I used Rust-oleum Frosted Glass Spray.
This spray turns any clear glass surface into a frosted spray one.
Coloring the Lid


Now it was time to make the Lid.
I choose Golden Color for this project.
I had a can of Abro Golden Spray, so I have used it coat the lid with that.
You can apply some glitter also if you want, I like this way of golden look.
I sprayed 2 coats of the Abro golden spray to achieve a shiny look.
Adding a Magnetic Switch


Now you could skip this step, this step will convert normal fairy light into magnetically turntable Light.
To make it turn On by magnet we need to use something called Reed Switch.
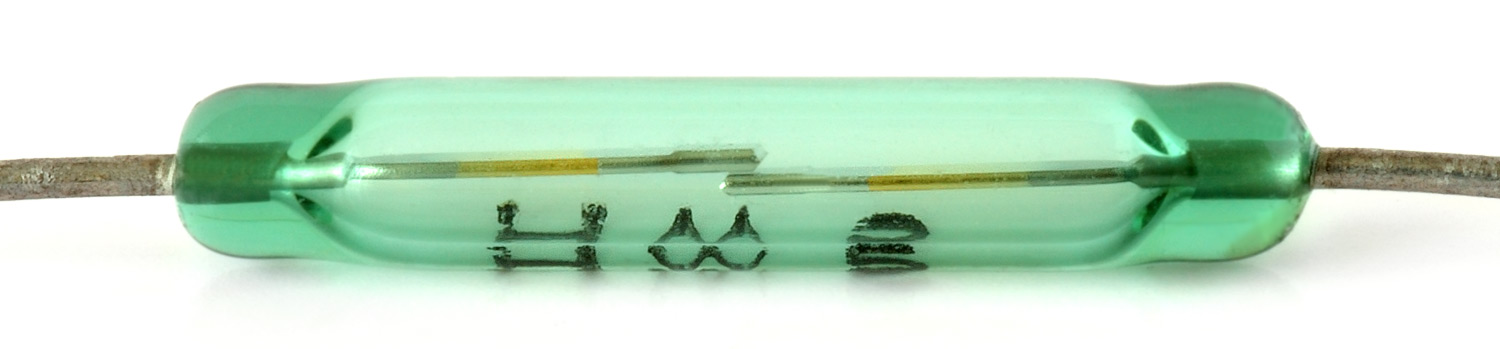
What is Reed Switch?
The reed switch is an electrical switch operated by an applied magnetic field.It consists of a pair of contacts on ferromagnetic metal reeds in a hermetically sealed glass envelope. The contacts may be normally open, closing when a magnetic field is present, or normally closed and opening when a magnetic field is applied.
 Adding the Reed Switch
The reed switch is connected in series with the battery and the magnet is placed on the Lid. Whenever the Lid is closed. The magnet comes near the reed switch and activates the circuit , turning on the Lamp.
Placing the Light


Now I wanted to make the light in a circular pattern, so I used some PVC pipe left over from the https://www.instructables.com/id/5-DIY-Hot-Wire-St... project. I wind up, the light around the PVC pipe. Then slowly took out the PVC pipe so that I am left with a circular pattern. of fairy light.
Then it was time to drop the light in the jar, Carefully place the Light the way you like it.
Adding the Custom Quotes


Now, this step is totally on your choice, I personally prefer Quotation. You might light Graphics On a lamp.
I will say how to convert both into vinyl. For that, you will need a Silhouette cutter or a VInyl Cutter Machine.
I don't have one yet. But if you guys vote for me I can win one and put into a good use.
If you guys want you can also donate me to make more project just like this
DONATE https://goo.gl/T1Zqie
Adding Your Brand Logo


The last step was to add the brand logo. I have my logo printed from a printing company Nothing special Just Sticker. You can add the Instructables Sticker too on it. Basically, it's Branding your Work on the Internet. also, it makes the lamp look like not homemade, rather bought from the shelf.
Enjoy Your Light


I hope you enjoyed the build, how does it look ??
I love it and use it near my bed, makes my night cozy. and warm.
BTW guys if you like this project and want to get updates on what's cooking in the workshop follow us on Facebook. https://www.facebook.com/makewithrex
Instagram https://www.instagram.com/makewithrex/
and
Subscribe us on Youtube https://www.youtube.com/prajjwalnag