Lit-O-Pane (Full Color Edge-Lit Photo!!!)
22329 Views, 180 Favorites, 0 Comments
Lit-O-Pane (Full Color Edge-Lit Photo!!!)
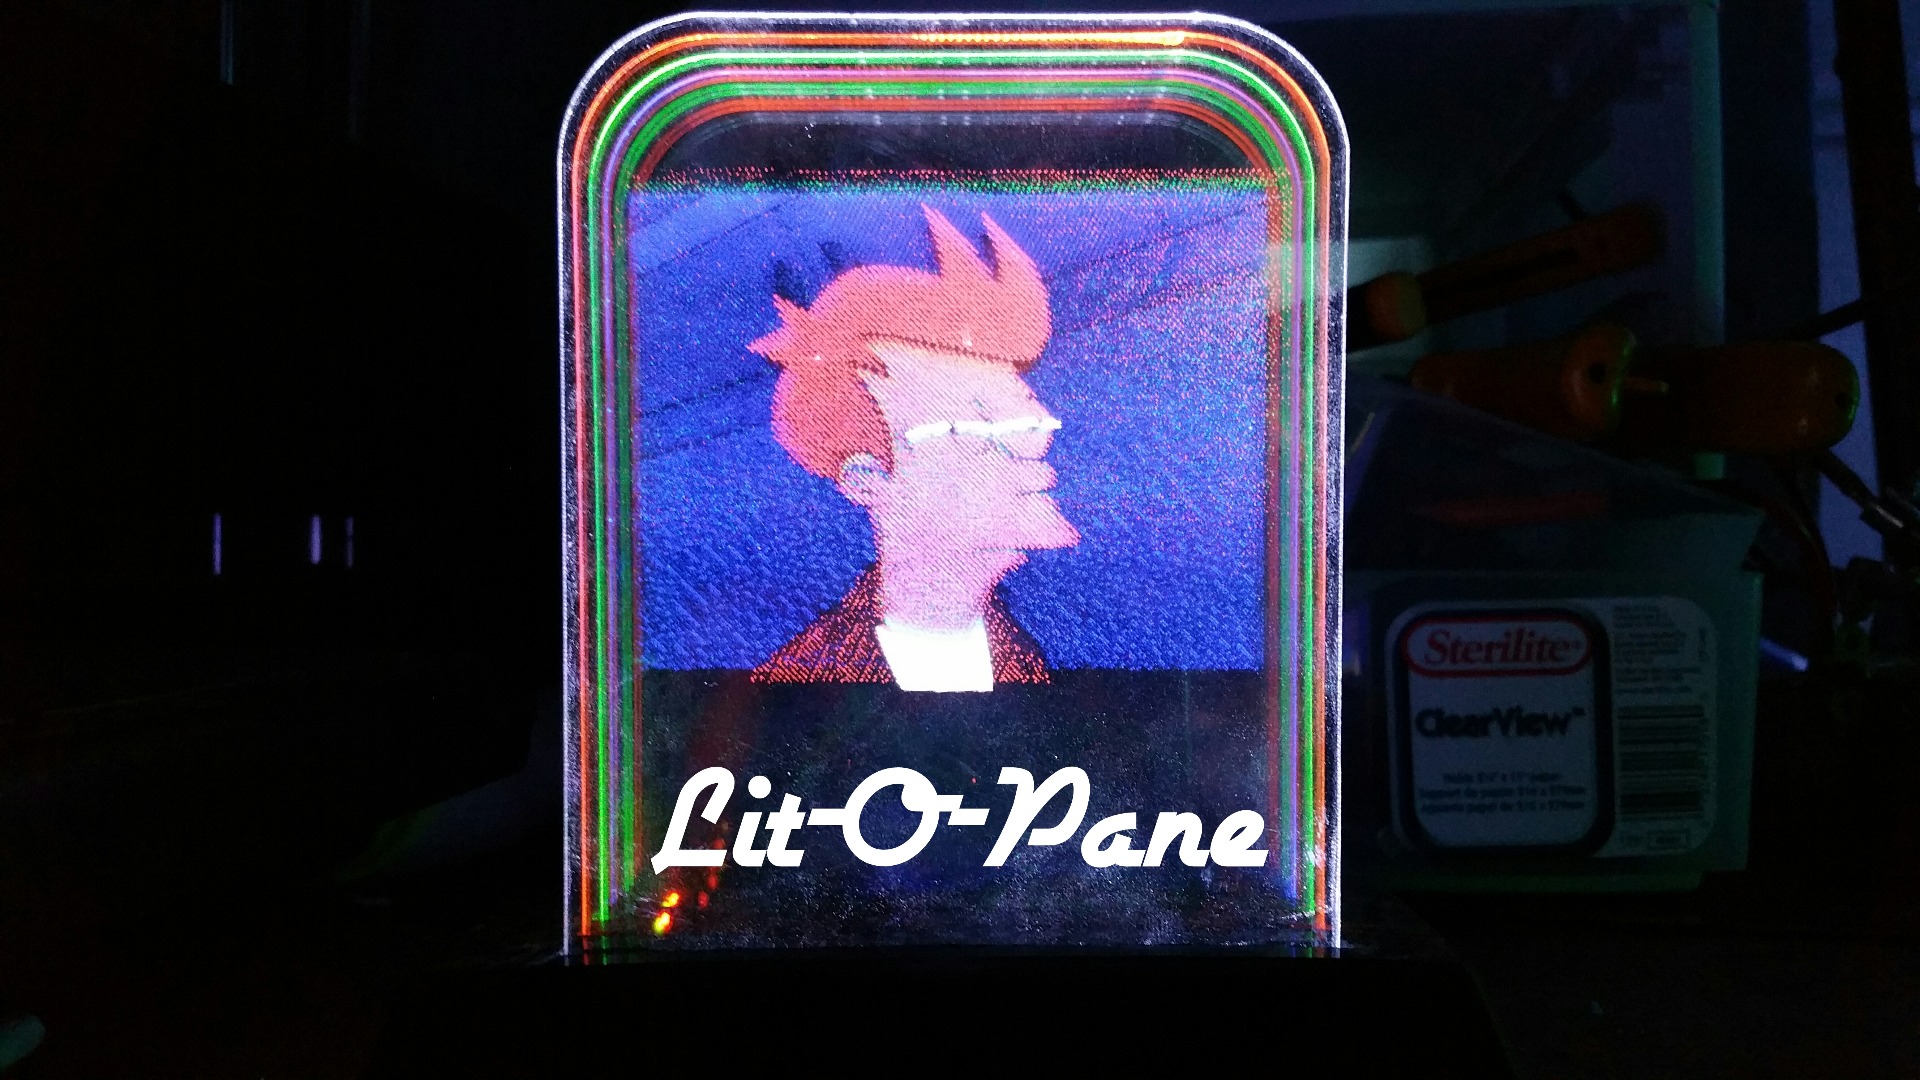
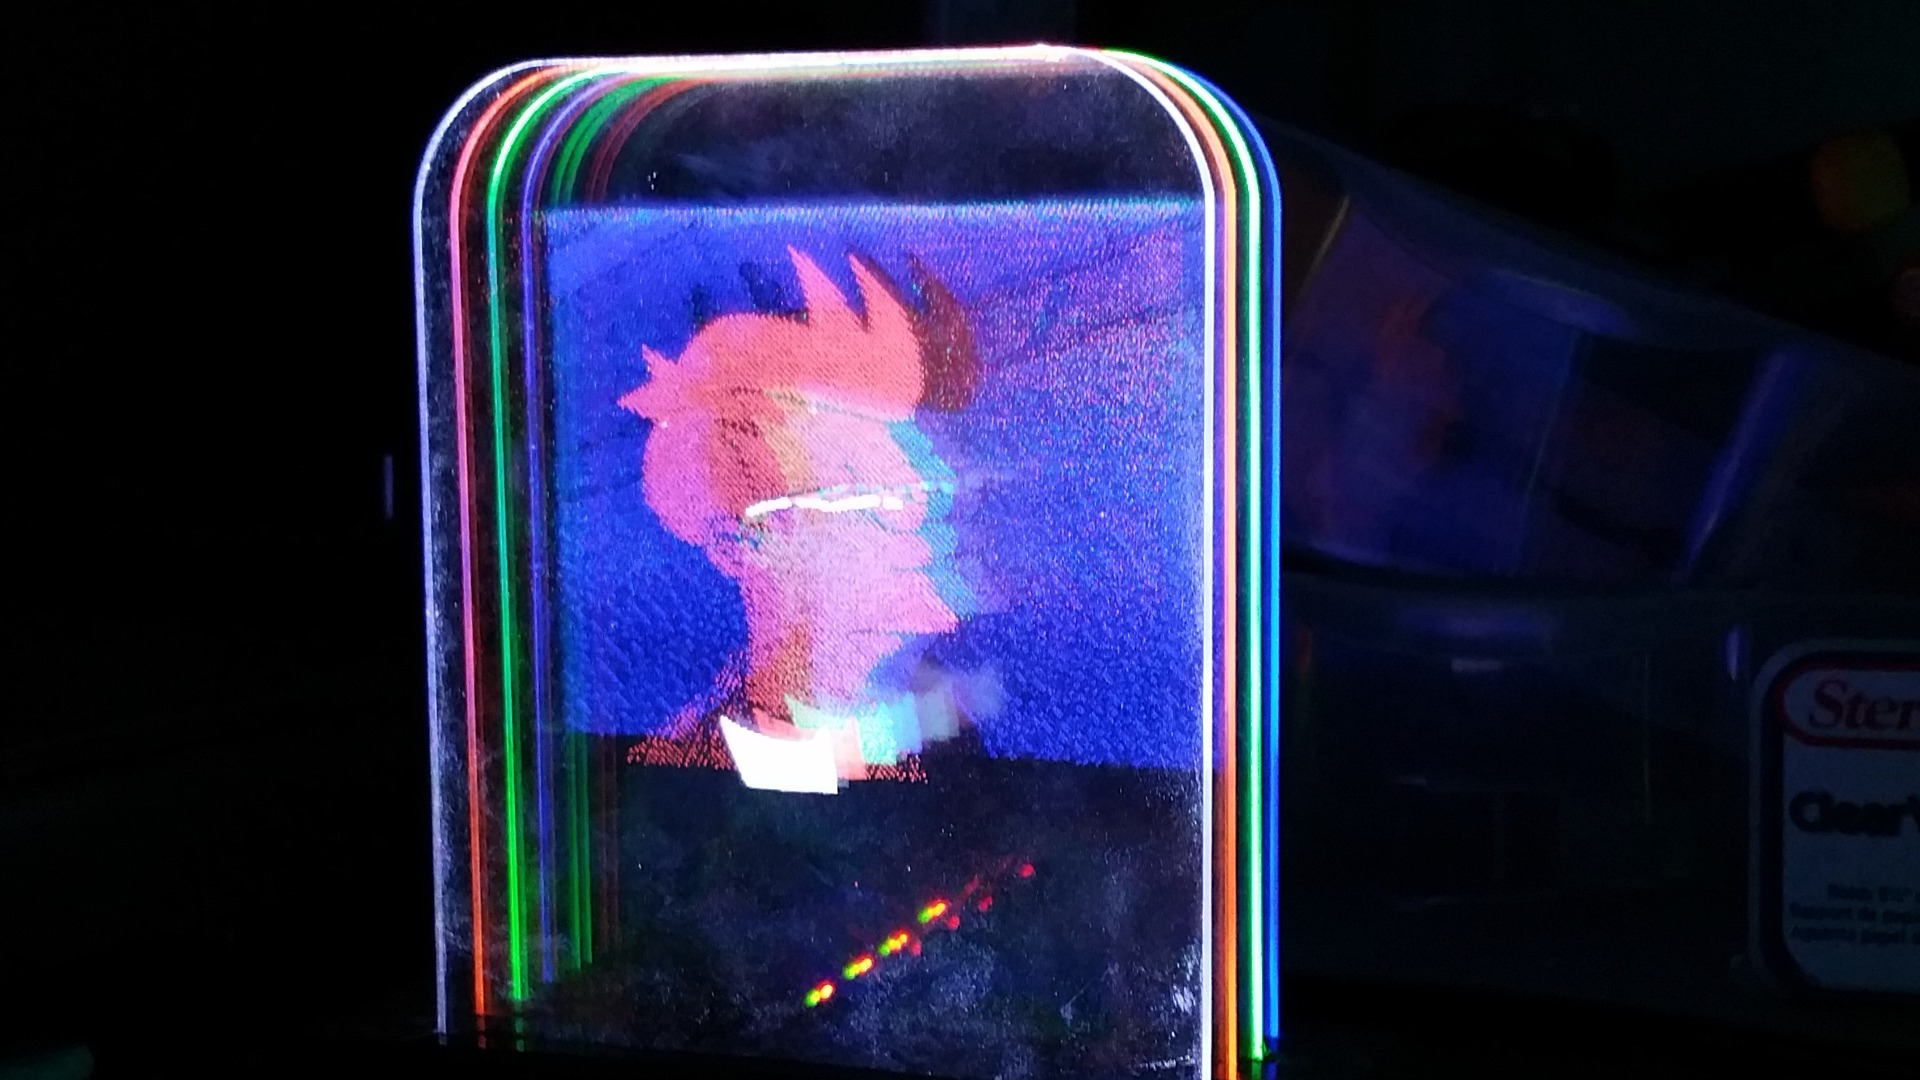
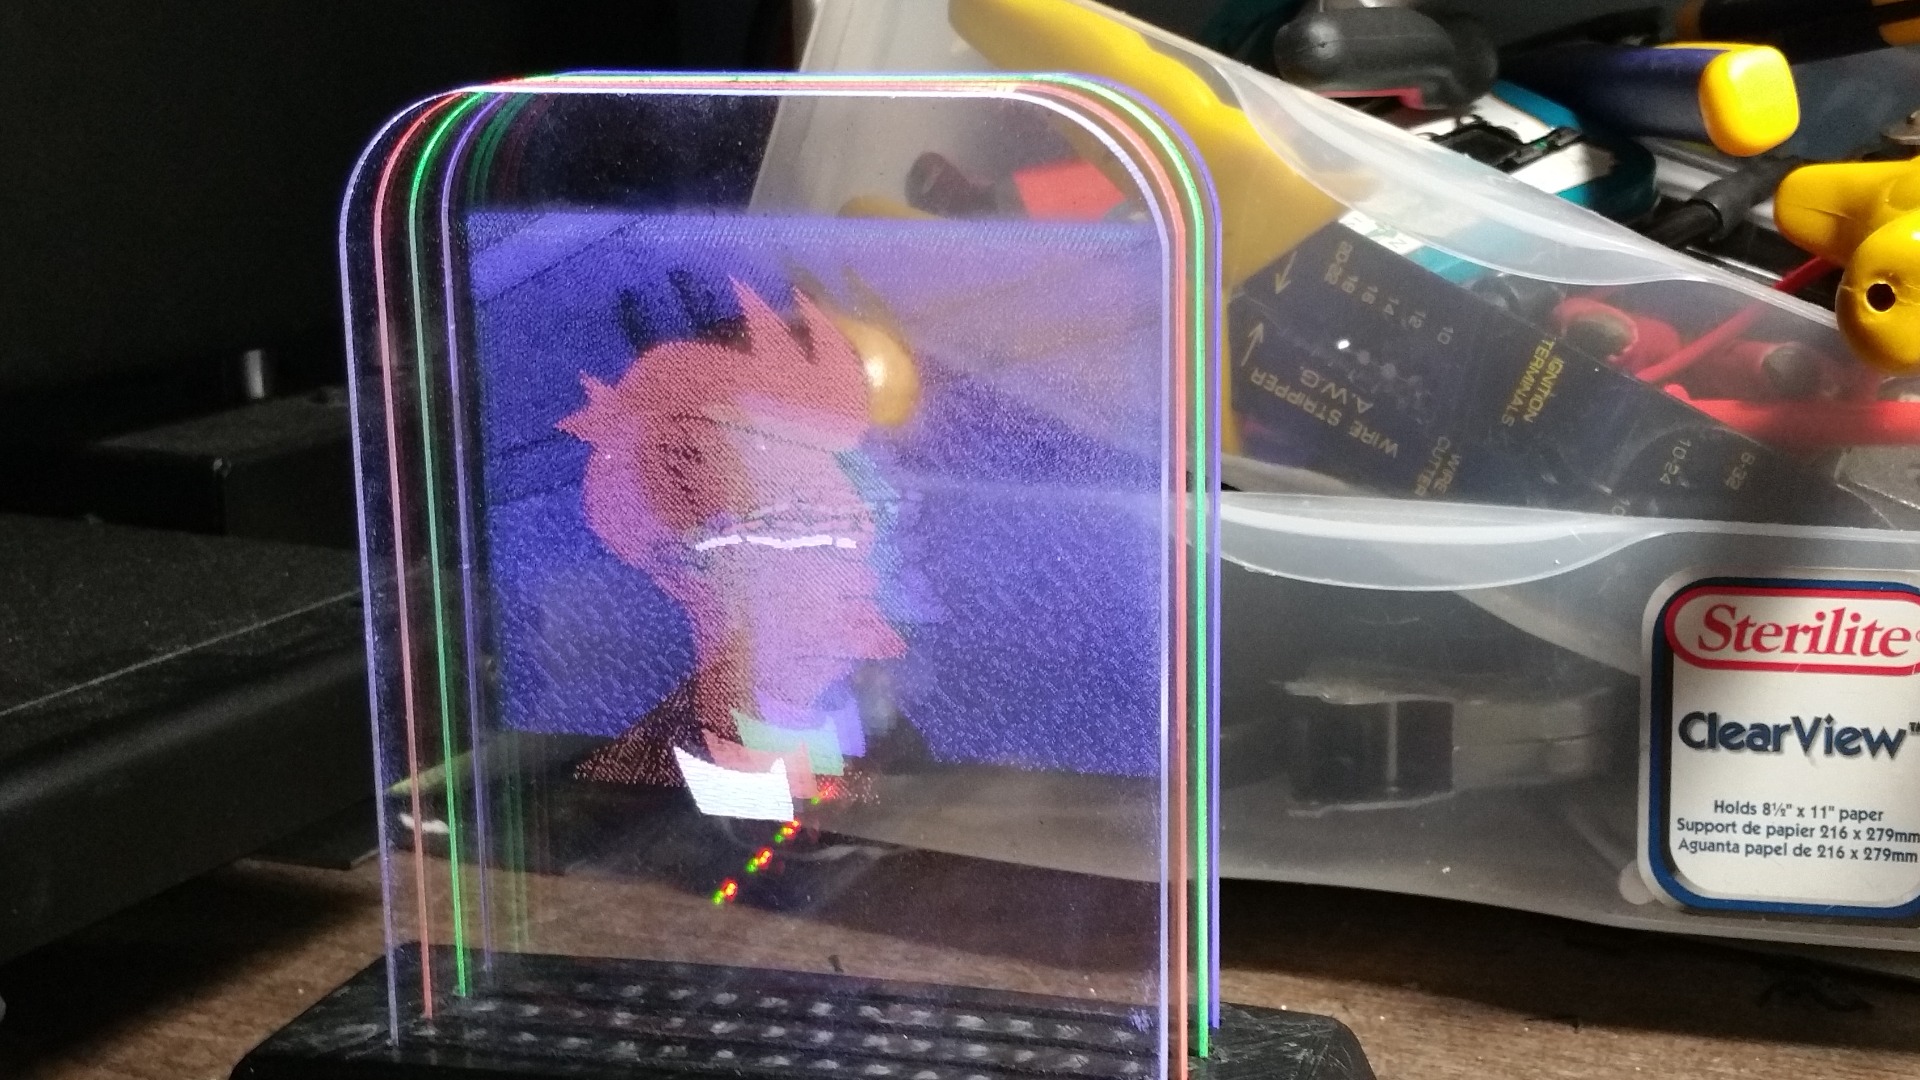
It Started With An Idea
TL;DR Why not create a full color edge-lit display, so that you can convert any image into an awesome full color edge-lit lithopane. Also, I made a lot of mistakes, and learned some things. No easy access to laser cutter so bothered friend to cut them. Skip to the next step for the instructions.
I always thought Edge-lit signs were really cool. Just etch a piece of glass or plastic and light it from the edge using some leds. You could make the sign as intricate and detailed as you want, as you don't have to rely on other limiting factors of led signs, like the diameter of the leds. You also don't need to worry about the power consumption like you would for a large led display or sign. They also just look really awesome!
One thing about edge lit signs however is that you can usually only use one color (based on the color of leds around the edge). Doing some research I have found some versions with multiple colors, but they usually print logo's on the plastic and light them up with white led's or use 2 pieces of plastic for 2 specific colors in a logo. I wanted to go further!
Why not separate a photo into it's Red, Green and Blue colors. Then combine them inline to create a full color light up photo. Since White light can be created with only Red, Green, and Blue colors, we should only need those 3 colors, plus Black. For the Black layer, we will use some black paper or maybe some plasti-dip on the very back.
So how to go about this. Red, Green, and Blue will be easy to create, but what about all the other colors? Well if you have ever played with some RGB Leds or Neopixels, you know that by adjusting the level of each channel, you can create many different colors. I wasn't sure how it would actually turn out though, so I had to just give it a try.
I had alot of trial and error, but I will show you my mistakes and assumptions, so you don't make them. This is very much an experiment, so if you think you can make it better, then please do! I would love to know if anyone else has success with this! Share your results!
Problems?
Since this is a bit of trial and error, I was bound to have some problems with my theory, but here are some questions and problems that I faced from the start.
How do I manipulate the photos? (I found alot of useful information and tutorials on GIMP)
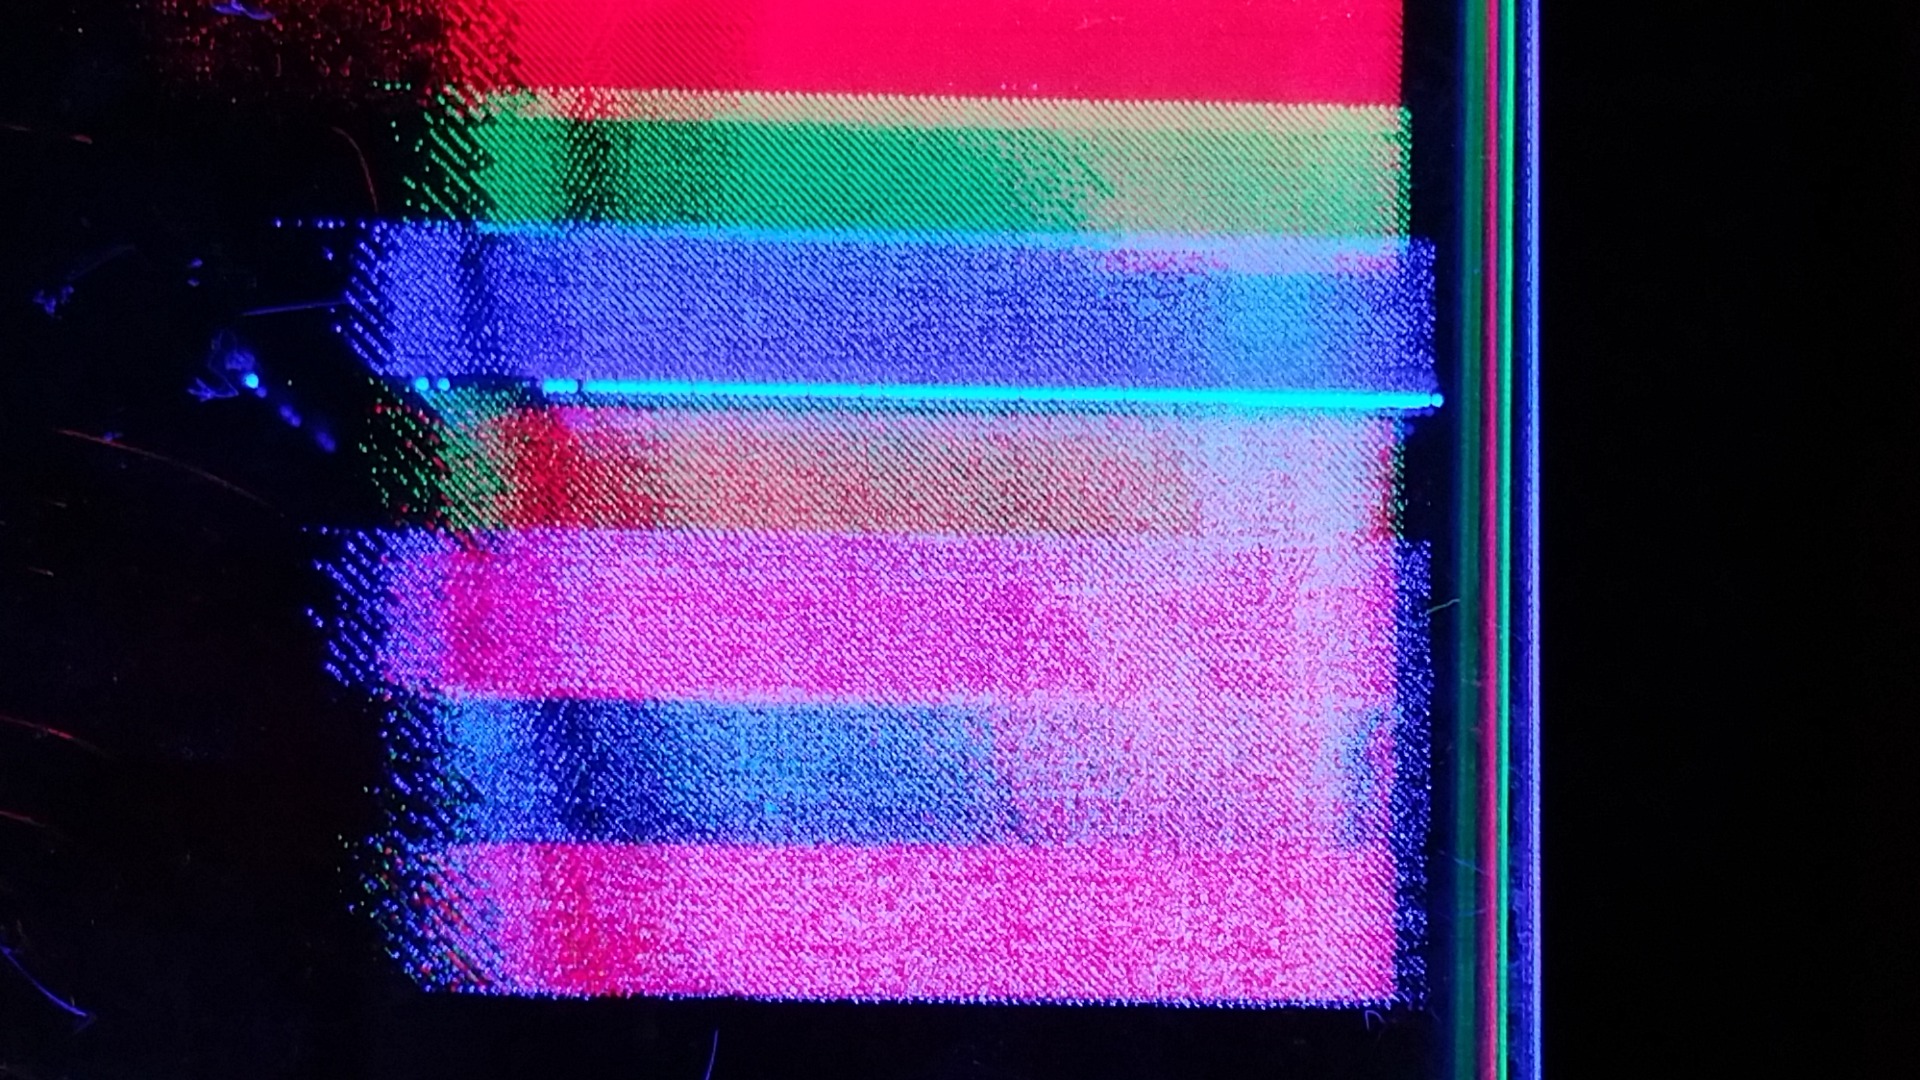
How well will the other colors turn out? (I decided that even with my limited access to a laser cutter, I should probably start with a test image to see what colors show up more than others)
Will the colors from the back pane still be visible from the front? (I wasn't sure, but eventually found a method that seemed to work, and some that didn't)
Will the Red, Green, and Blue colors blend together? (Sorta, but we have to use some special filters. White was a little tricky however)
Parallax......How will the image and colors look with gaps between each pane of acrylic? (This method is very sensitive to the viewing angle, but it looks awesome from all angles!
No Laser Cutter! (This is a big one!!! I don't own a laser cutter, and my Makerspace doesn't currently have one either. Luckily I have a friend who built his own, but it is fairly hard to get access to, especially when you are doing many iterations and making many mistakes. Overall, it took 3 months from idea to this being posted)
Tools and Materials
Tools
- Access to a Laser Cutter/ Engraver
- Access to a 3D printer (may be optional. Be creative!)
- Soldering iron and solder
- Wire Strippers
- Computer (kind of a given, but just making sure)
Software
- Gimp (image editing software) Download Here
- Inkscape (May be optional. I used it for creating the outline for each acrylic panel. You can use my template if you prefer.) Download Here
- Arduino (May be optional, but based on my experiments, I eventually needed to use an arduino) Download Here
- Laser Cutter software (This varies based on your laser cutter. Use whatever is compatible for the laser cutter you use.)
Materials
- Clear Acrylic sheet 1/8" (Also known as plexiglass. You can use a different thickness, but this is what works with my 3d model for the base)
- Plastic for 3d Printer (any plastic should work)
- WS2812B Led strip aka Neopixels (I recommend getting Neopixels. 1 Meter will be more than enough.) You can buy Neopixel led strip here
- Wire (this is to connect the led strips together)
- Double Sided Tape (only needed if your led strip doesn't have adhesive backing)
- Arduino Board (any arduino should do, but I only had an arduino mega, so that's what I used) This Arduino Uno will work great.
- 2.1mm Female power jack (needed for connecting power to the arduino and led strip) I used this one
- 5V power adapter (to power the arduino and leds) This one will work
- Aluminum Tape *optional* (In case you want to coat the inside of base with something reflective. I didn't, but it's an option)
Get Started
.png)
.png)
.png)
Template
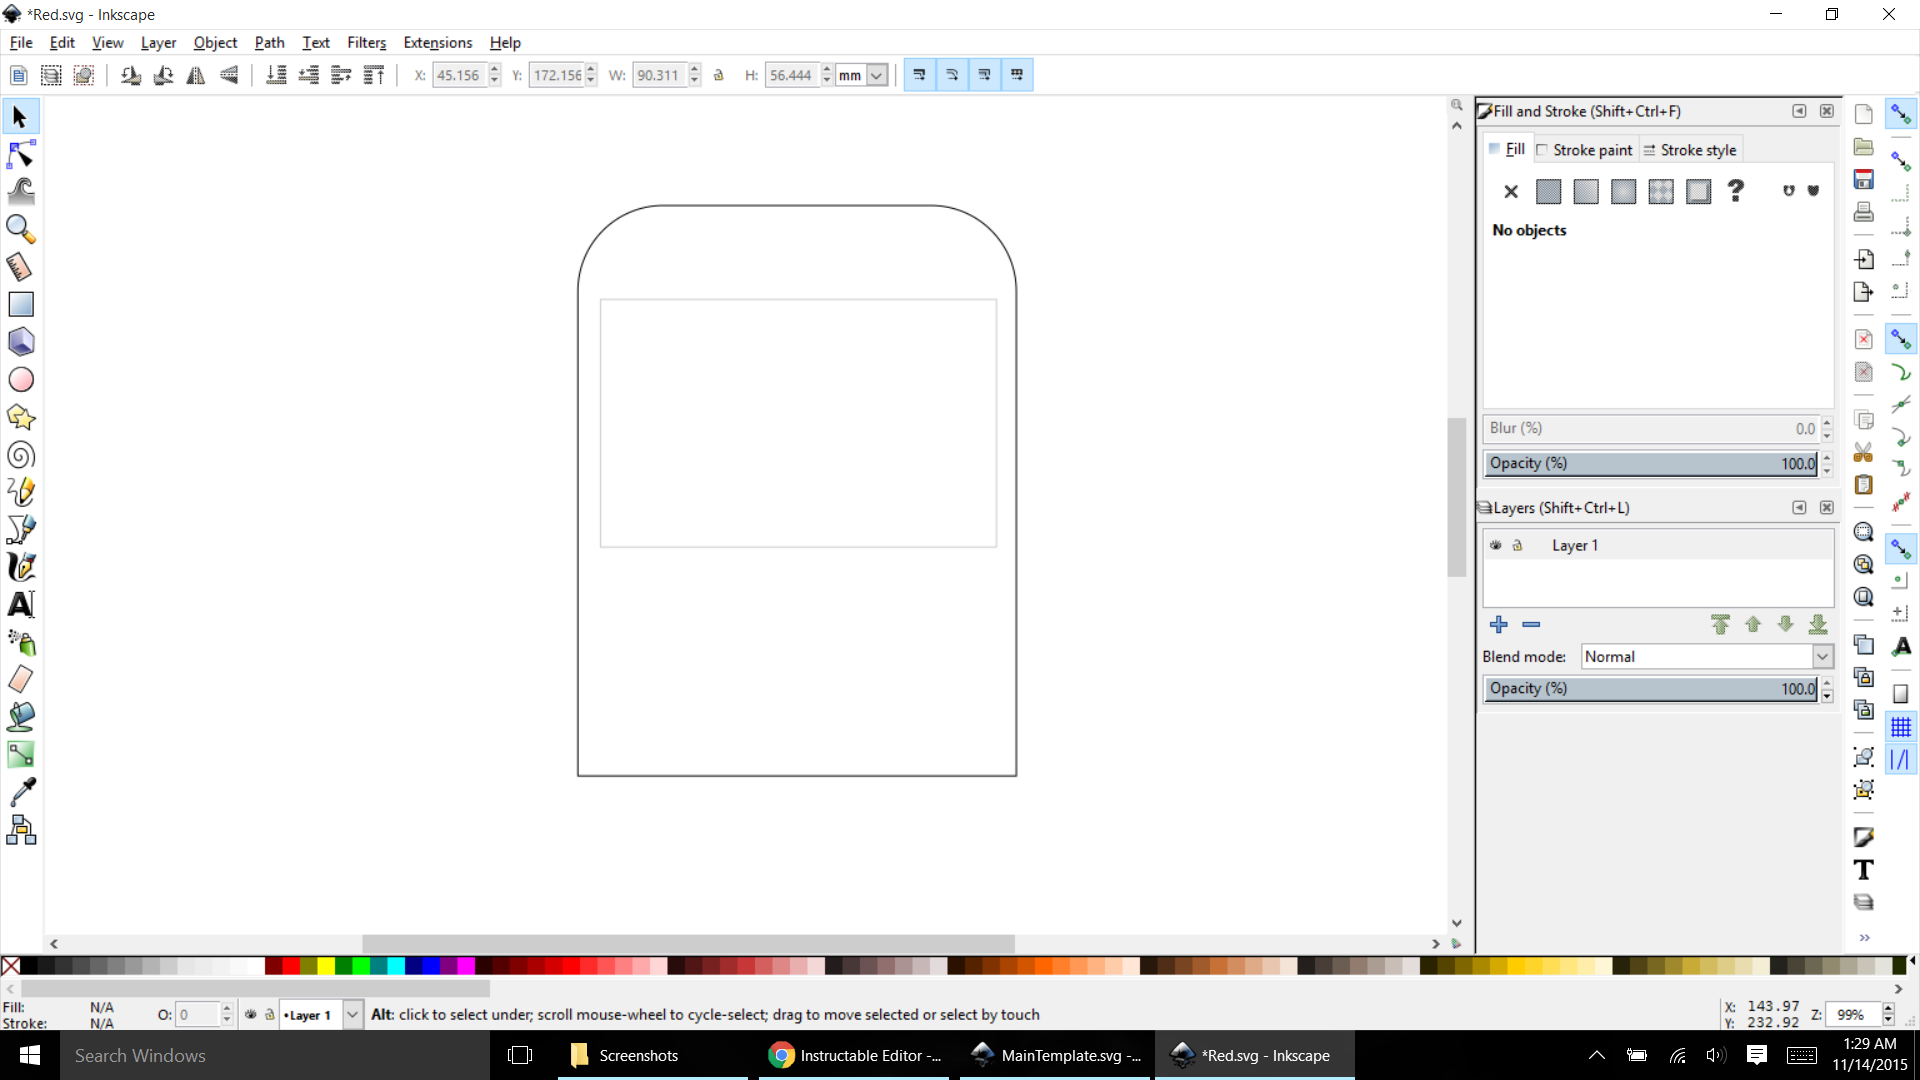
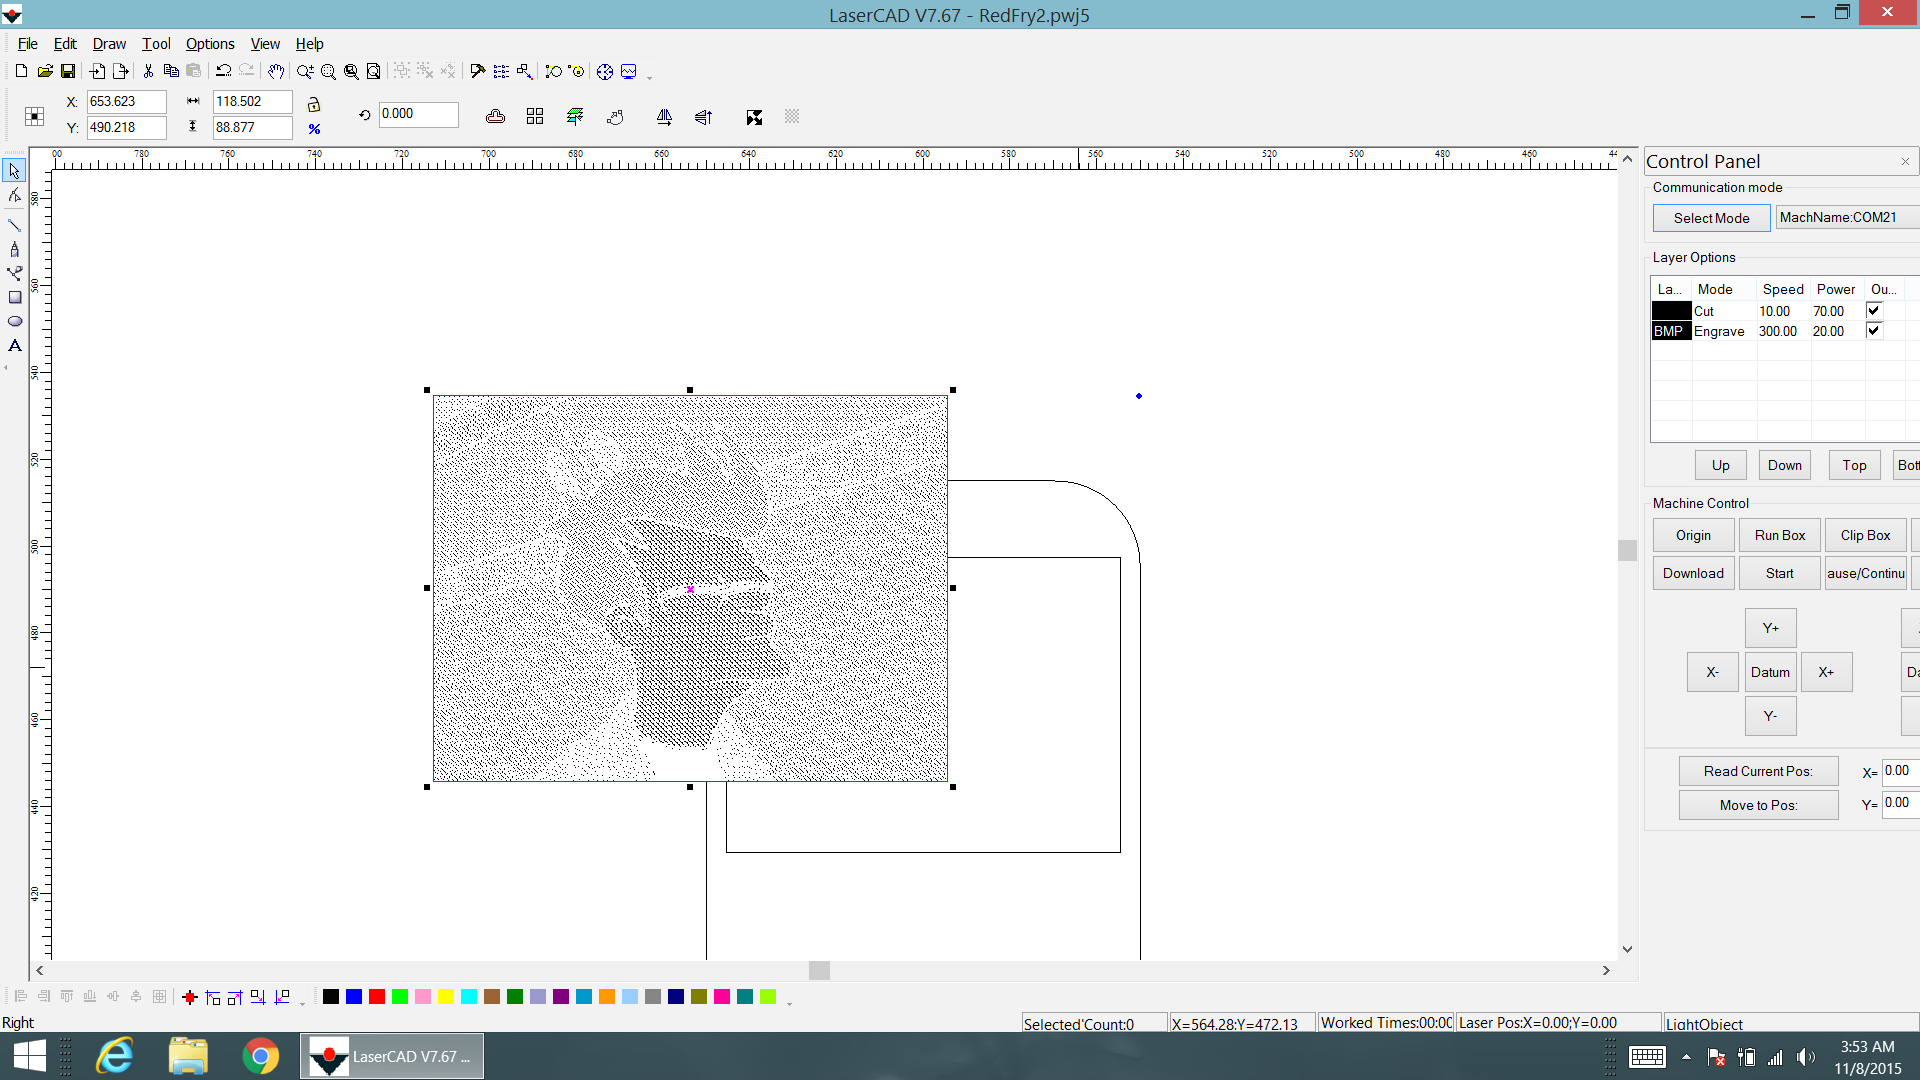
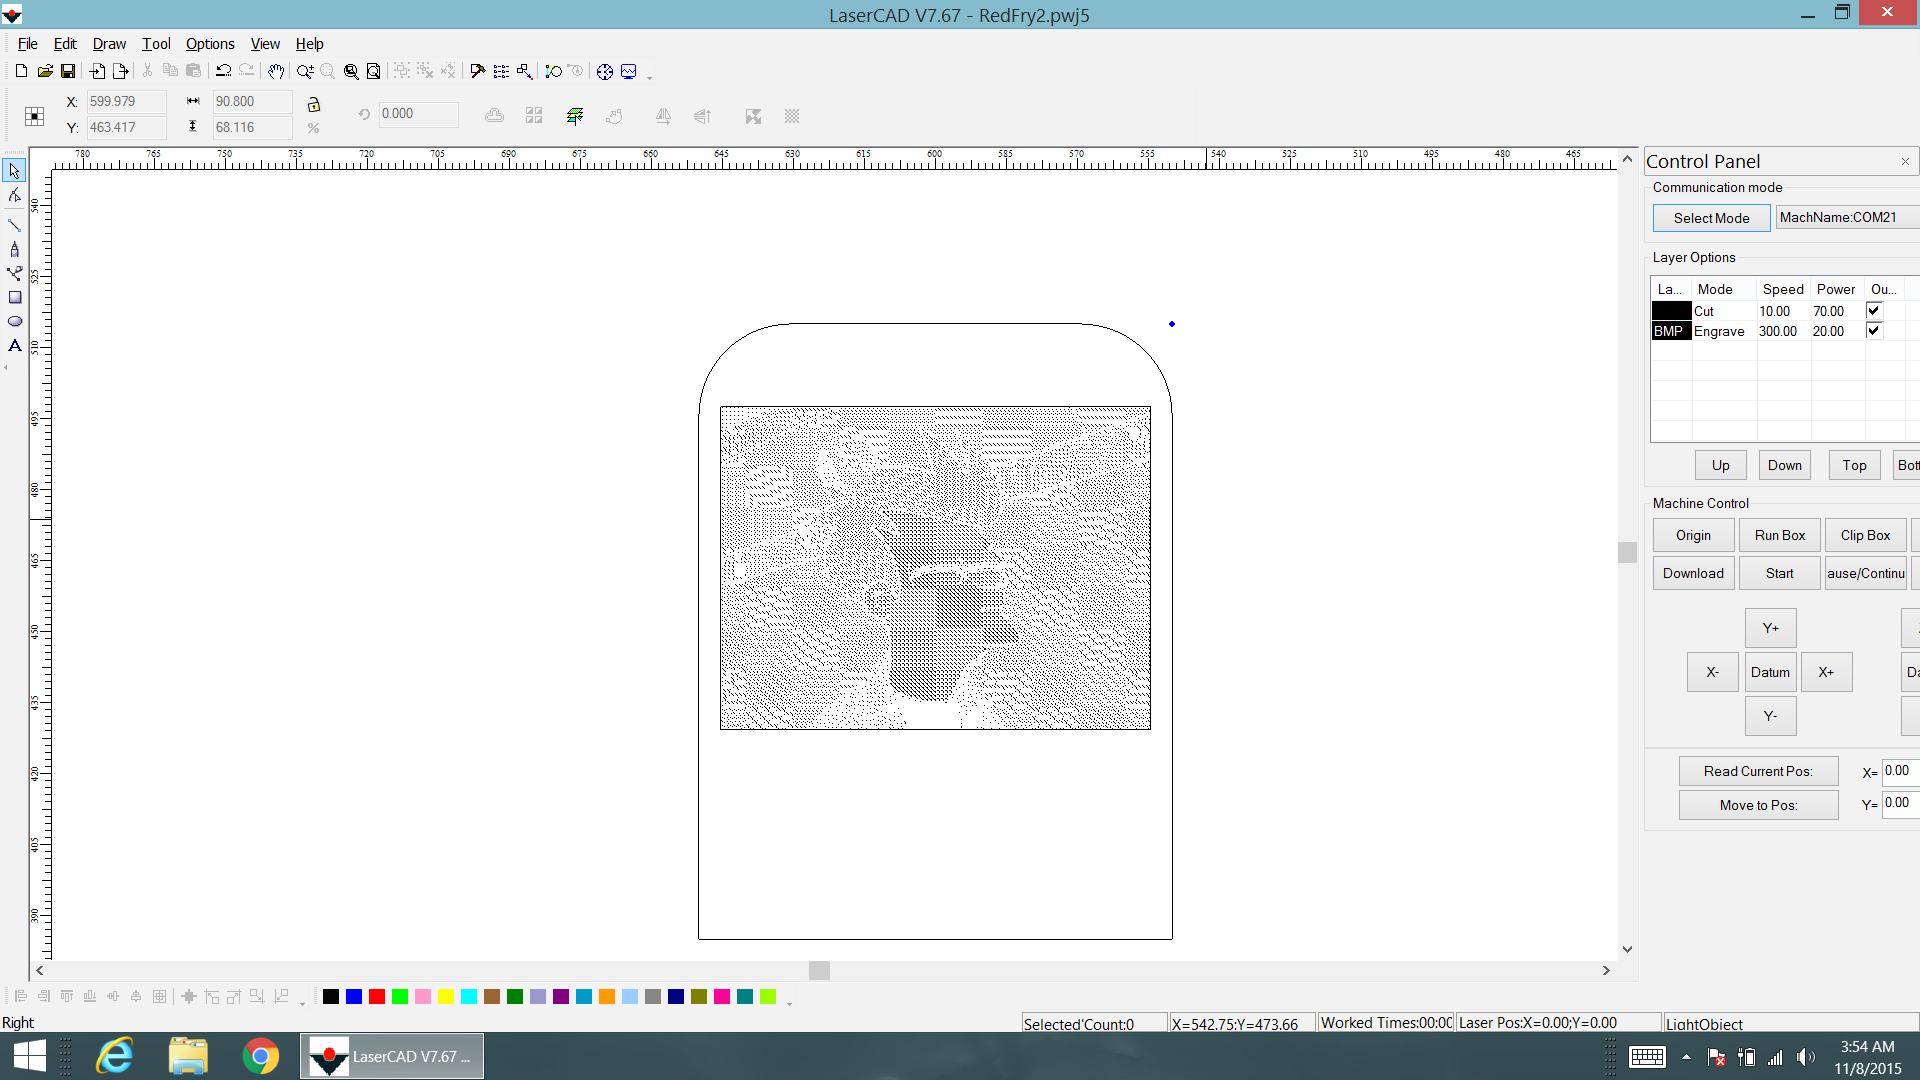
The laser cutter software I was using wouldn't allow me to import the image and vector outline in the same file, so the first thing I did was create a template in Inkscape and then inserted the photos later inside the laser cutter software. Depending on the software you use, this may not be a problem.
So to create the main template I used Inkscape. This is not a tutorial on how to use Inkscape however, but there are already many awesome tutorials. Here are just a few I simply made an outline that would be cut and then made a box around where I would place the image in the laser cutting software. I deleted the image outline before I sent it to the laser cutter.
You can use my template and insert your own image if you would like, or you can create your own. It is also compatible with the 3d model of the base.
Images with the color White
One thing I learned is that the color White doesn't really show up well. If your image does have any White, then we will add a fourth layer to our Lit-O-Pane for White. I will go over how to do the Red, Green, and Blue color version first, and then show you how to add a white layer. I would recommend making it with a white layer though.
Preparing Your Image
.png)
.png)
.png)
.png)
.png)
.png)
.png)
.png)
.png)
.png)
.png)
.png)
.png)
.png)
.png)
.png)
RGB
This is how to modify the image for the Red, Green, and Blue layers. If you have or want to have the color White in your image, then I will show you how to add the White layer in the next step. If you plan to use any white in your image however, you will need to do that step first and then come back to this step for the other colors. I still recommend reading this first to get a general idea of the process however. Sorry for the confusing process, but I have been doing this over the course of a few months and have been making up the process as I go.
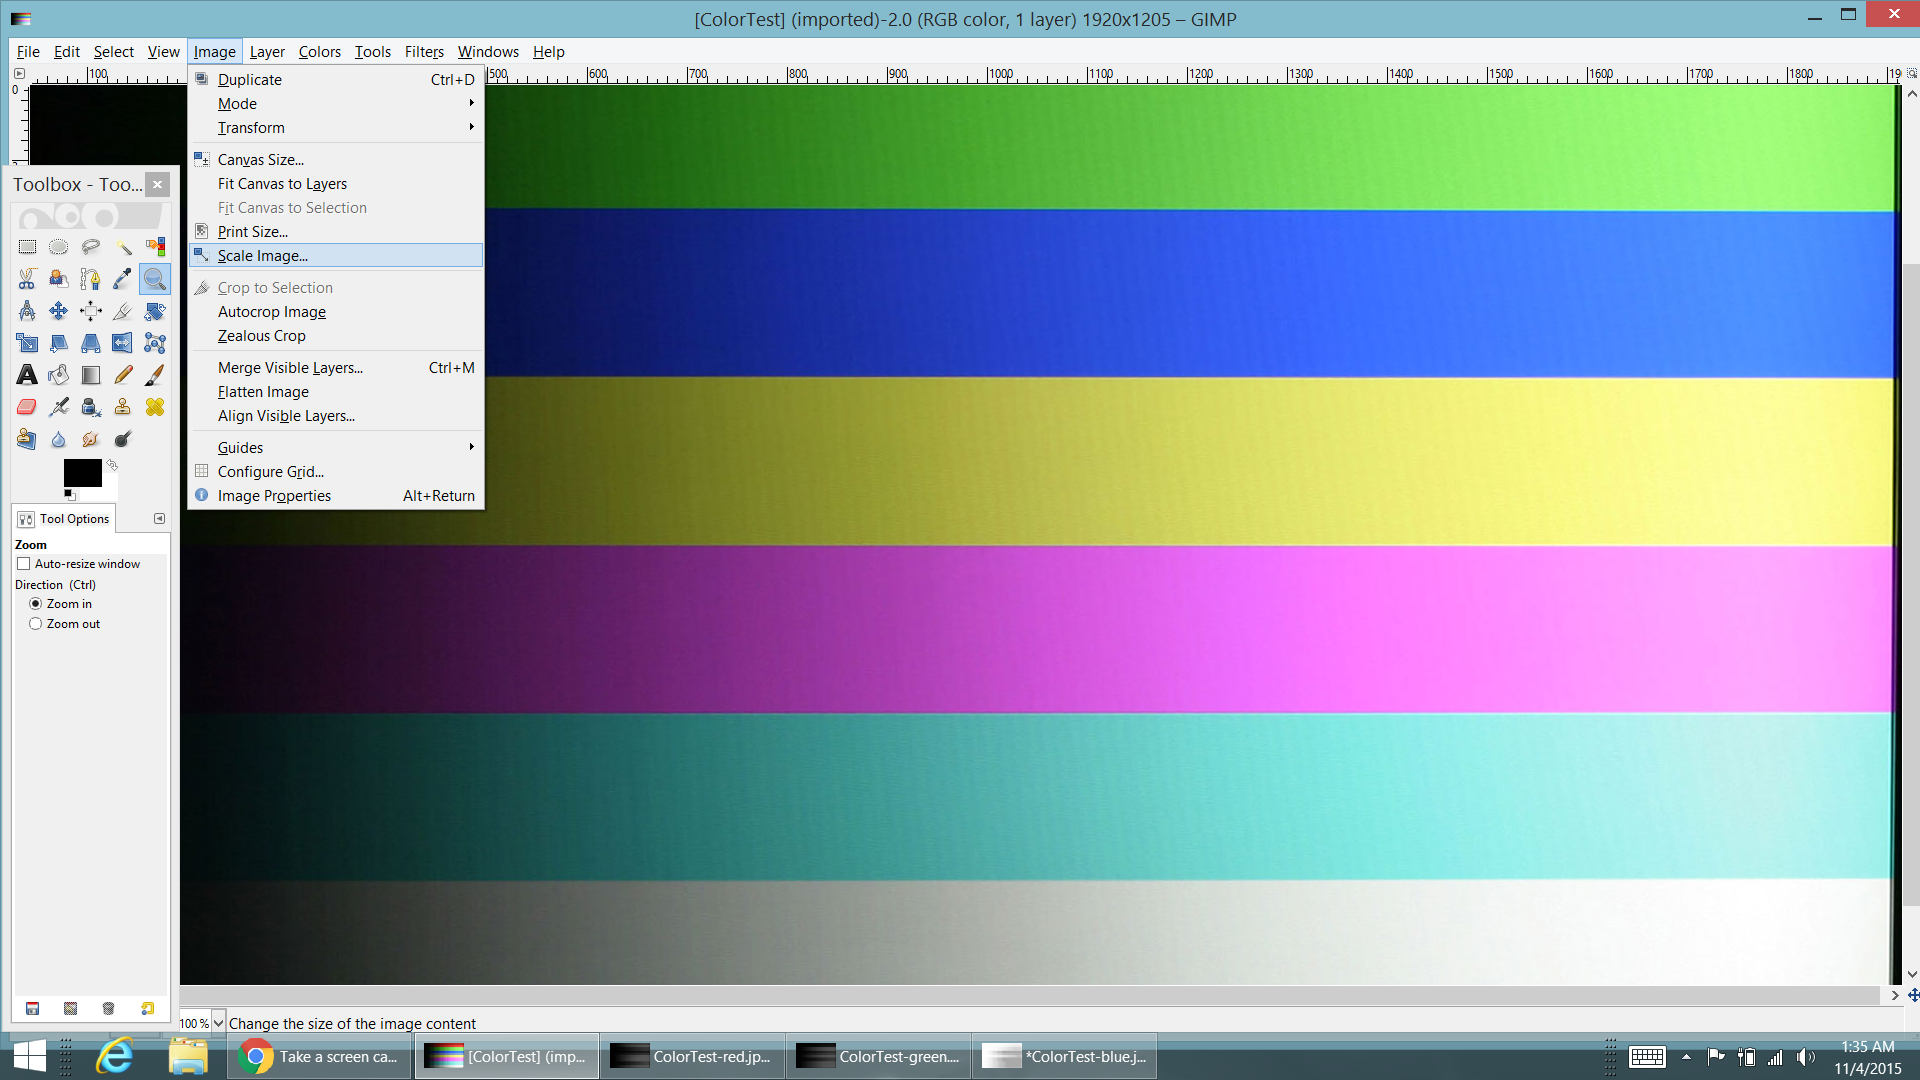
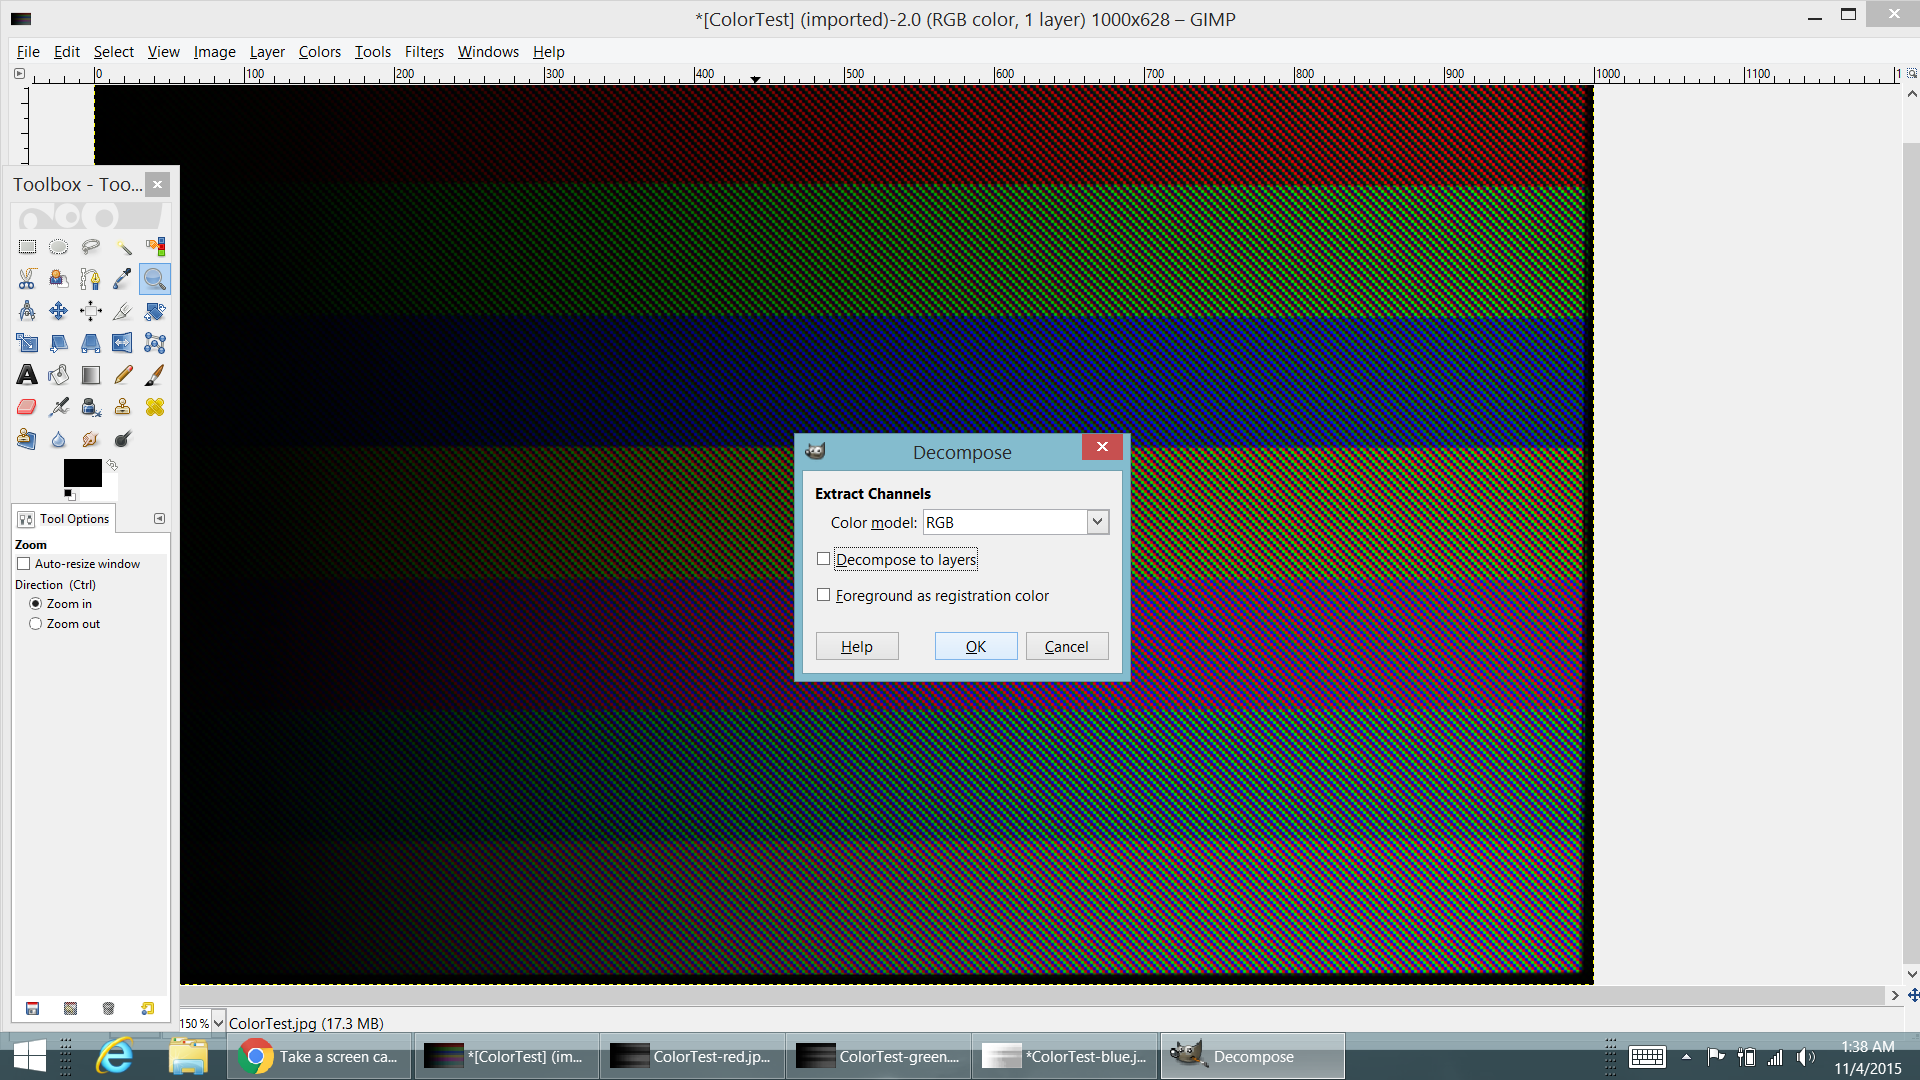
- First lets import the image you want to use in GIMP (here I am using a color test image to see what colors show up)
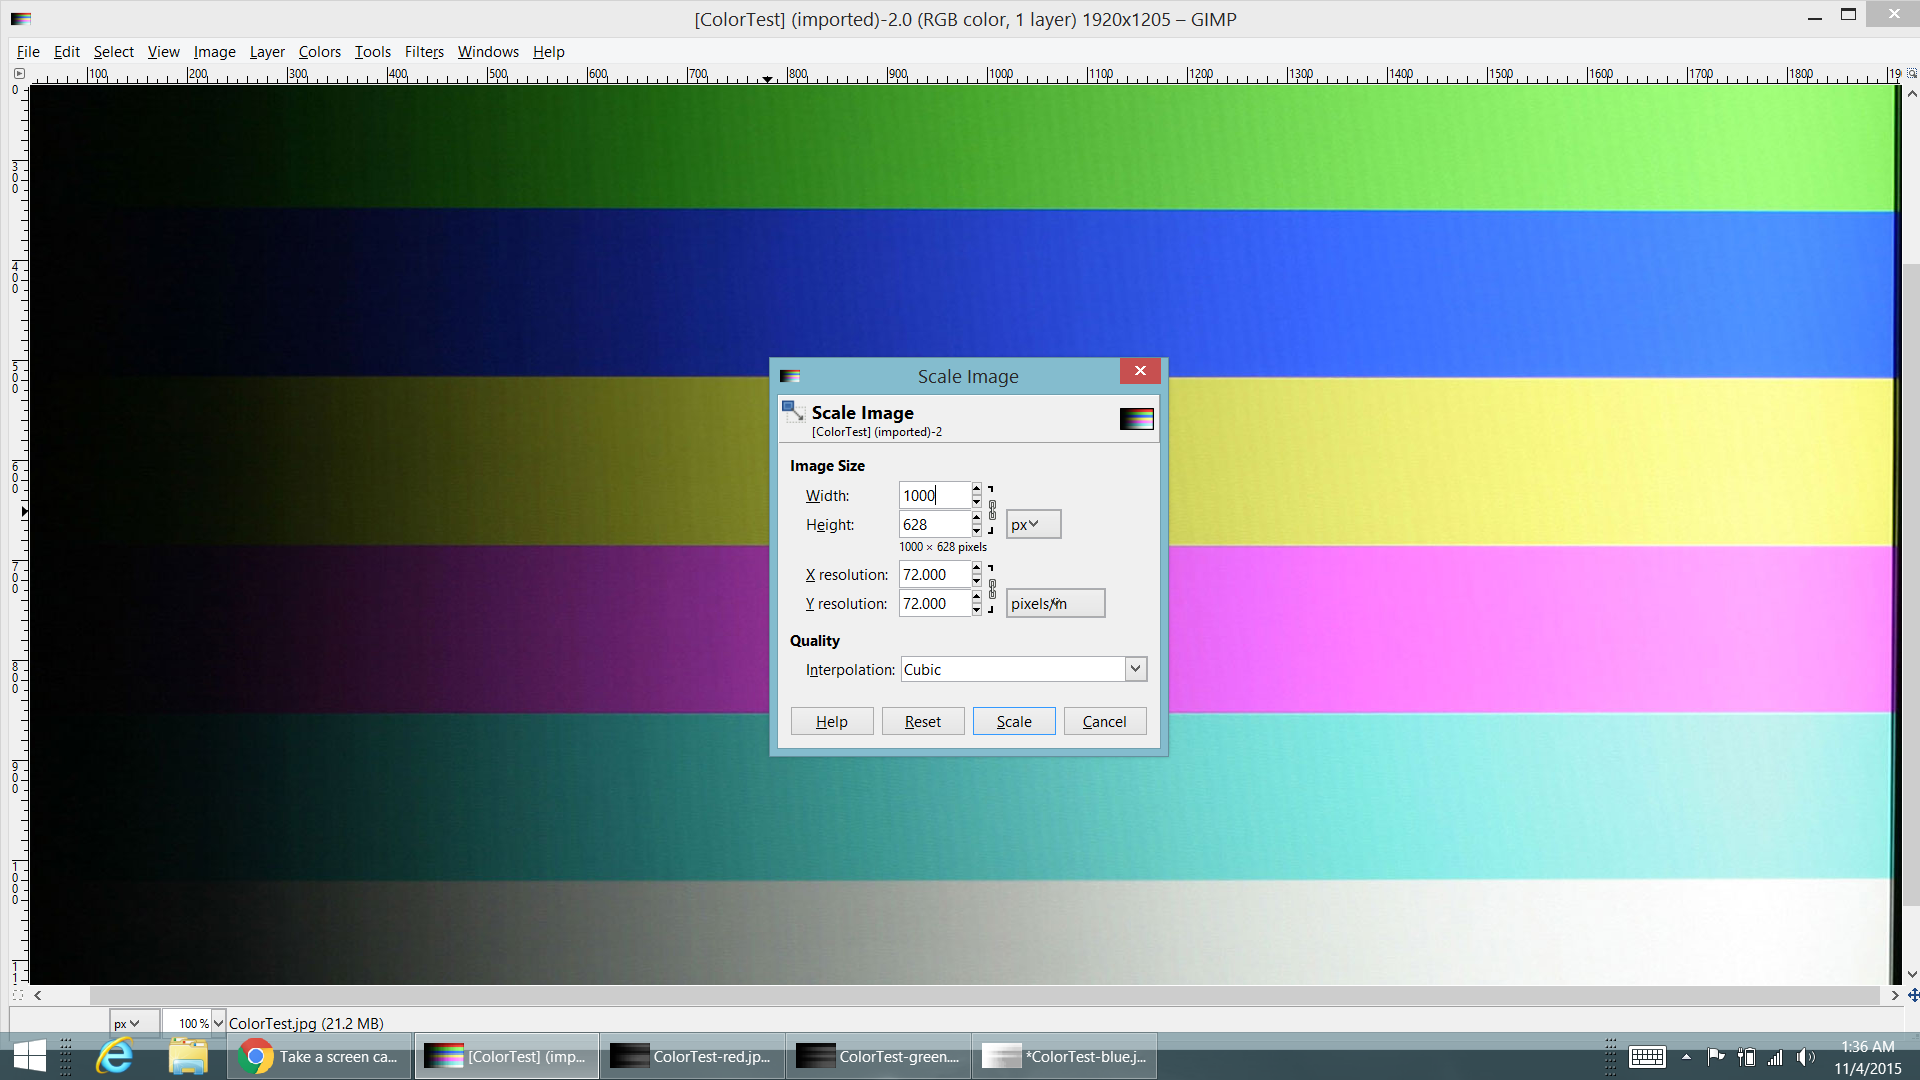
- Lets resize it. Go to Image/ Scale Image and set the resolution you want. I chose a fairly low-res image as some of the filters we will use later will act differently with a higher resolution.
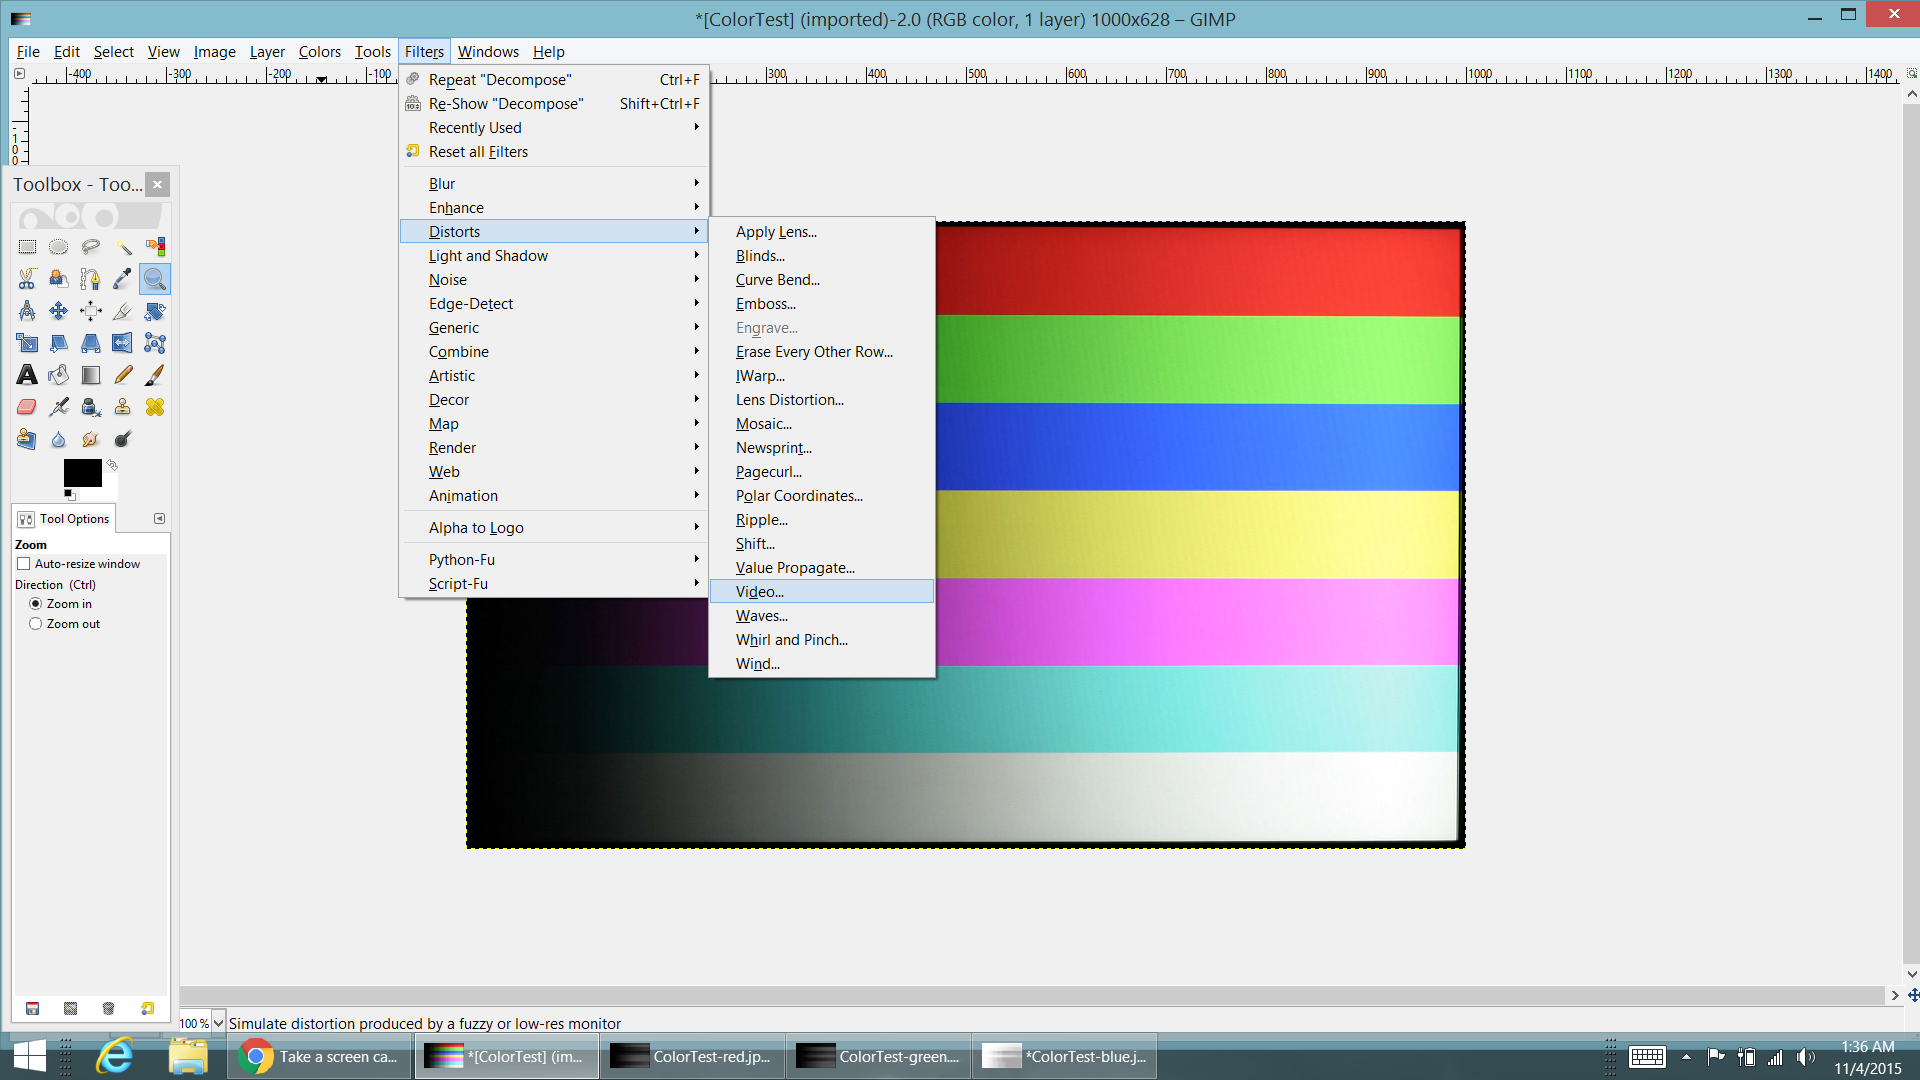
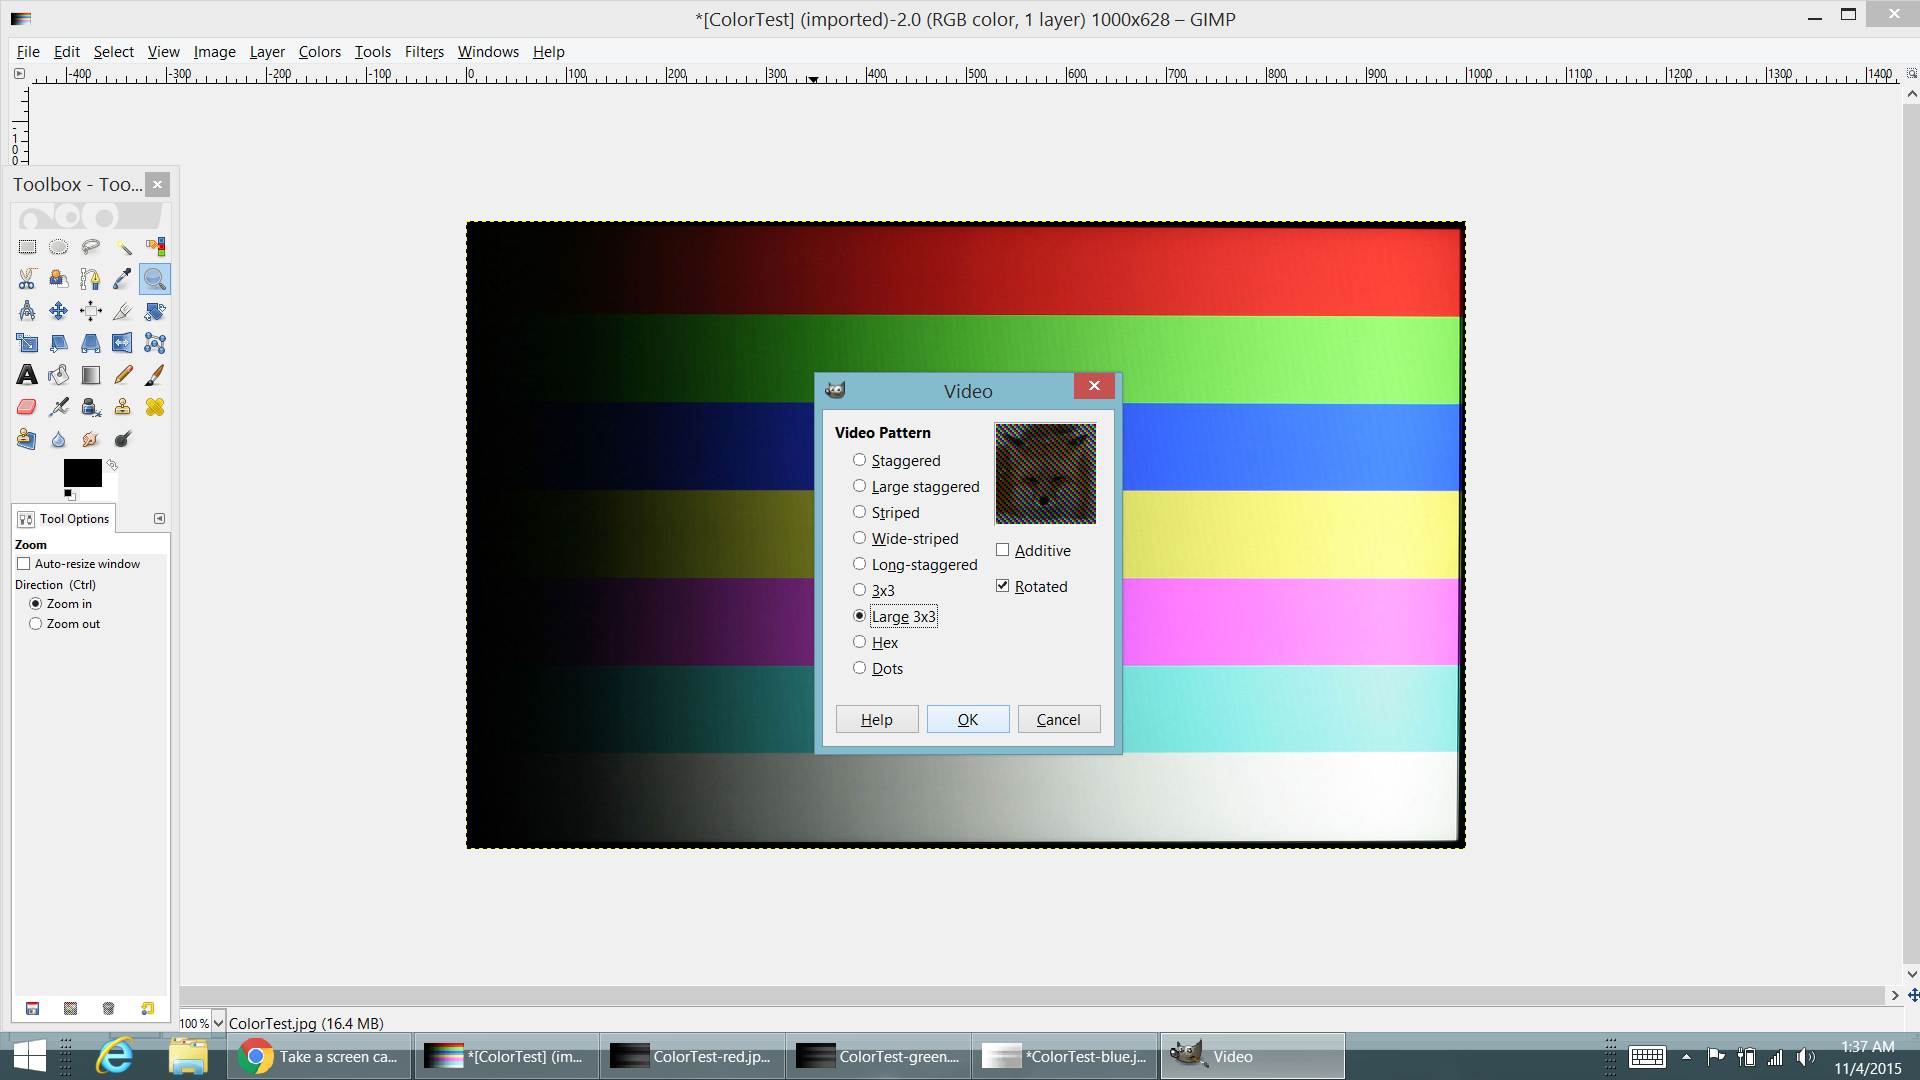
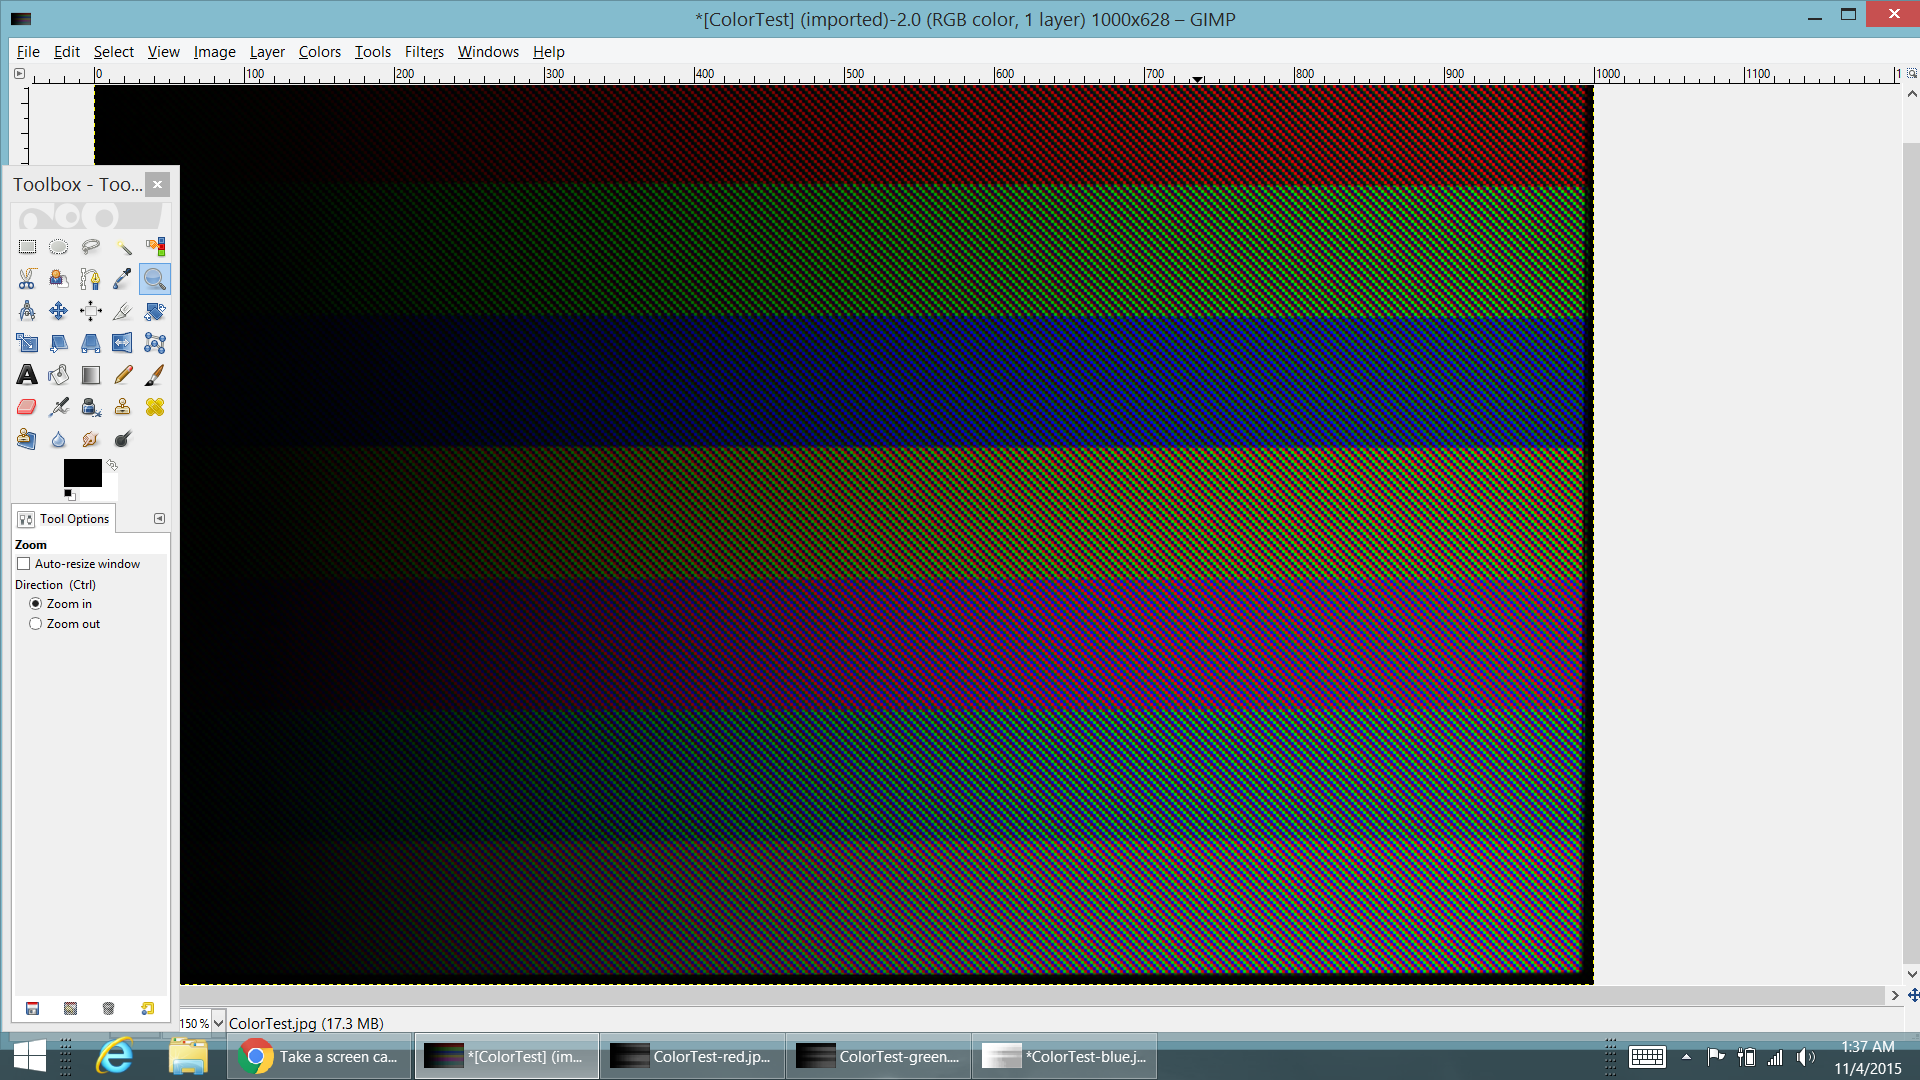
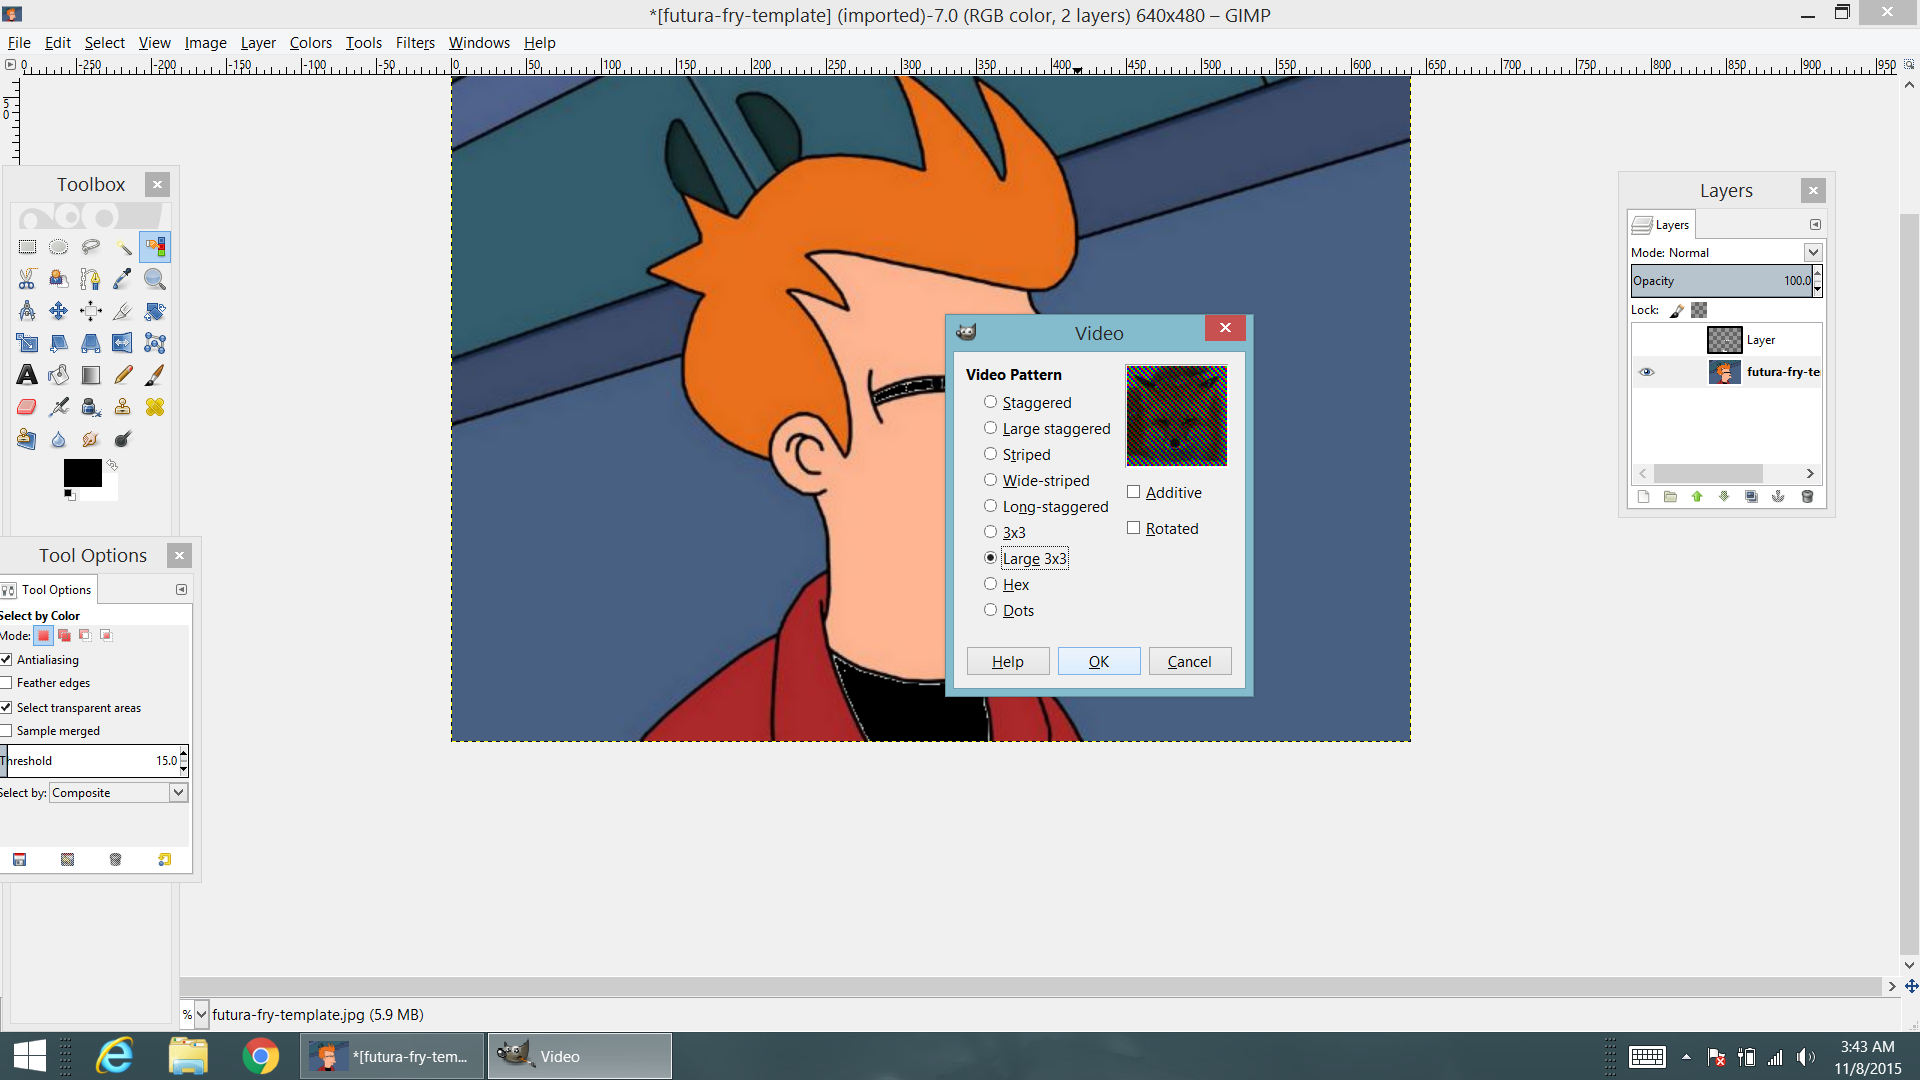
- Now lets go to Filters/ Distorts/ Video. This will create an image with separate red, green, and blue "pixels". Very similar to your TV. You may not need to use this filter and may only need to "dither" the images. I did this just to make sure that none of the red, green, and blue areas overlap in the final Lit-O-Pane.
- Now select what way you want the "pixels" to look. I used "Large 3x3", but you can experiment. Make sure "Additive" isn't selected!
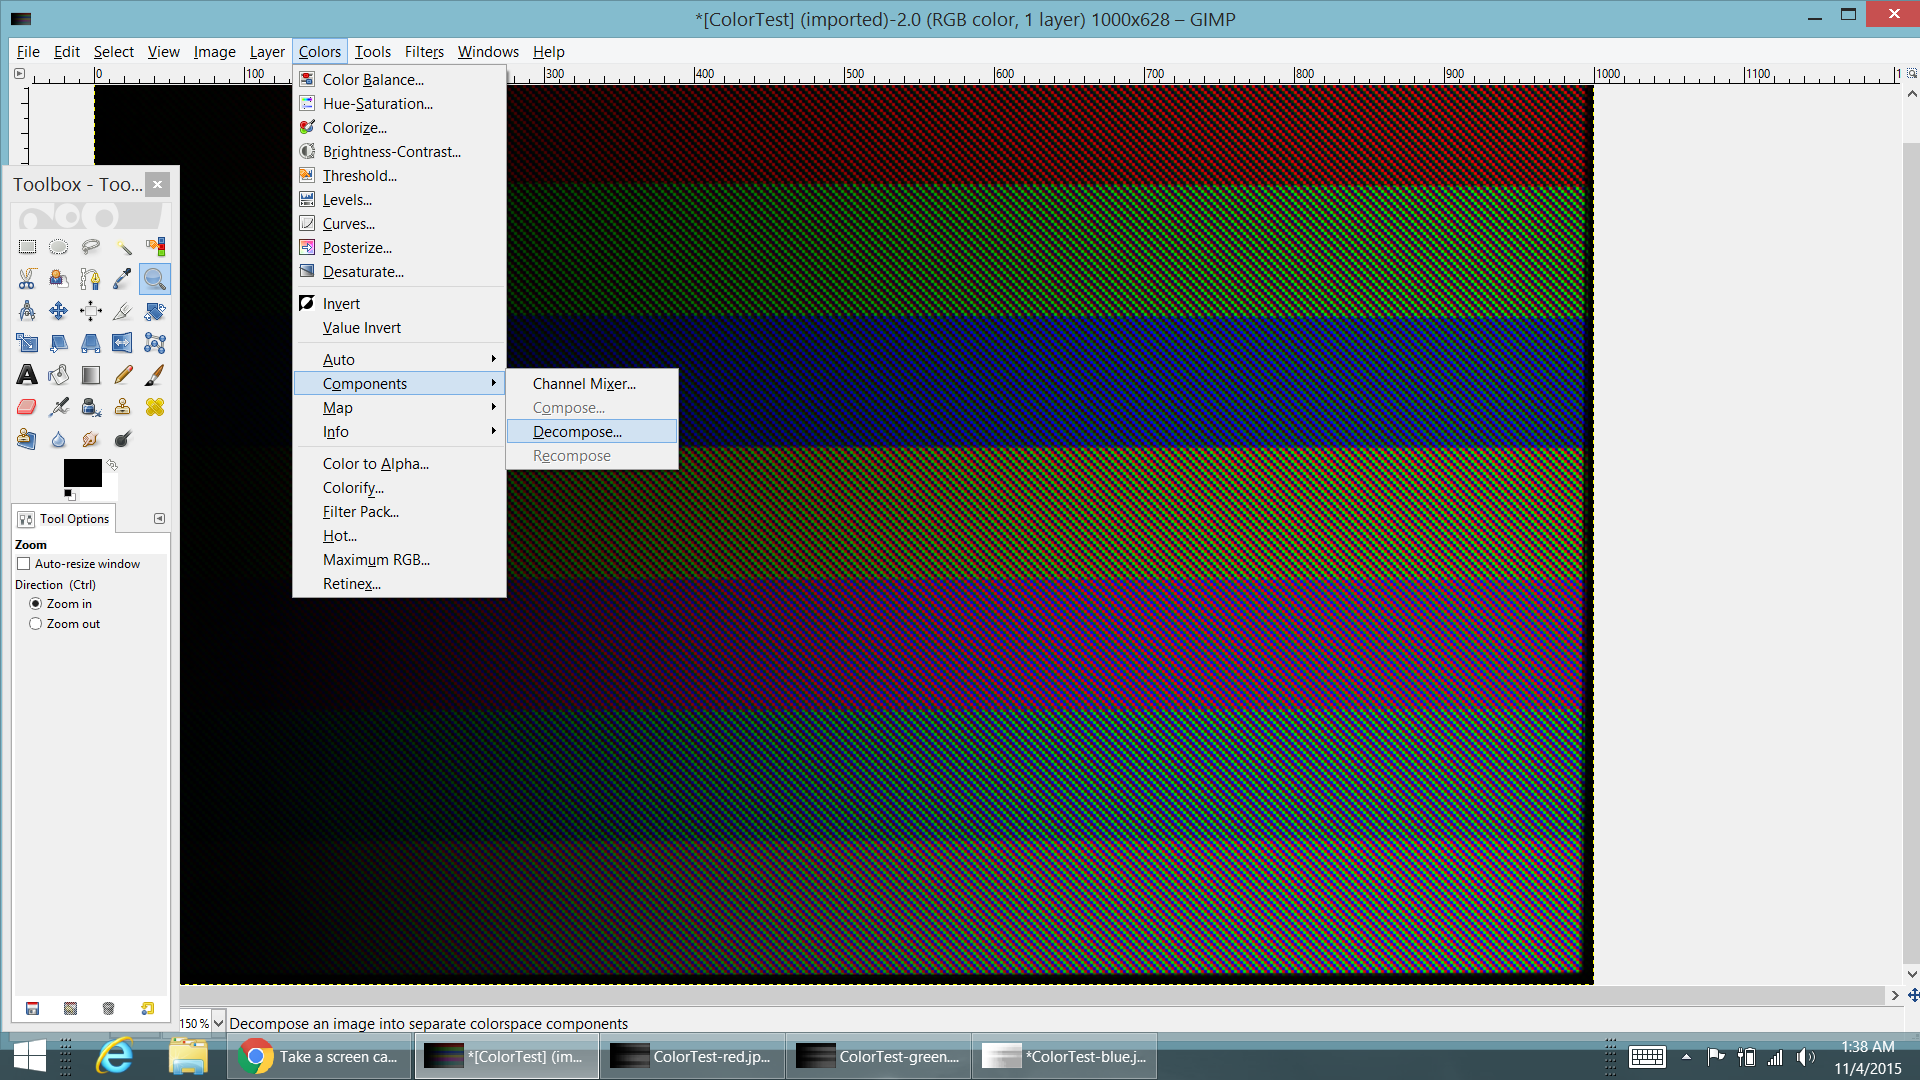
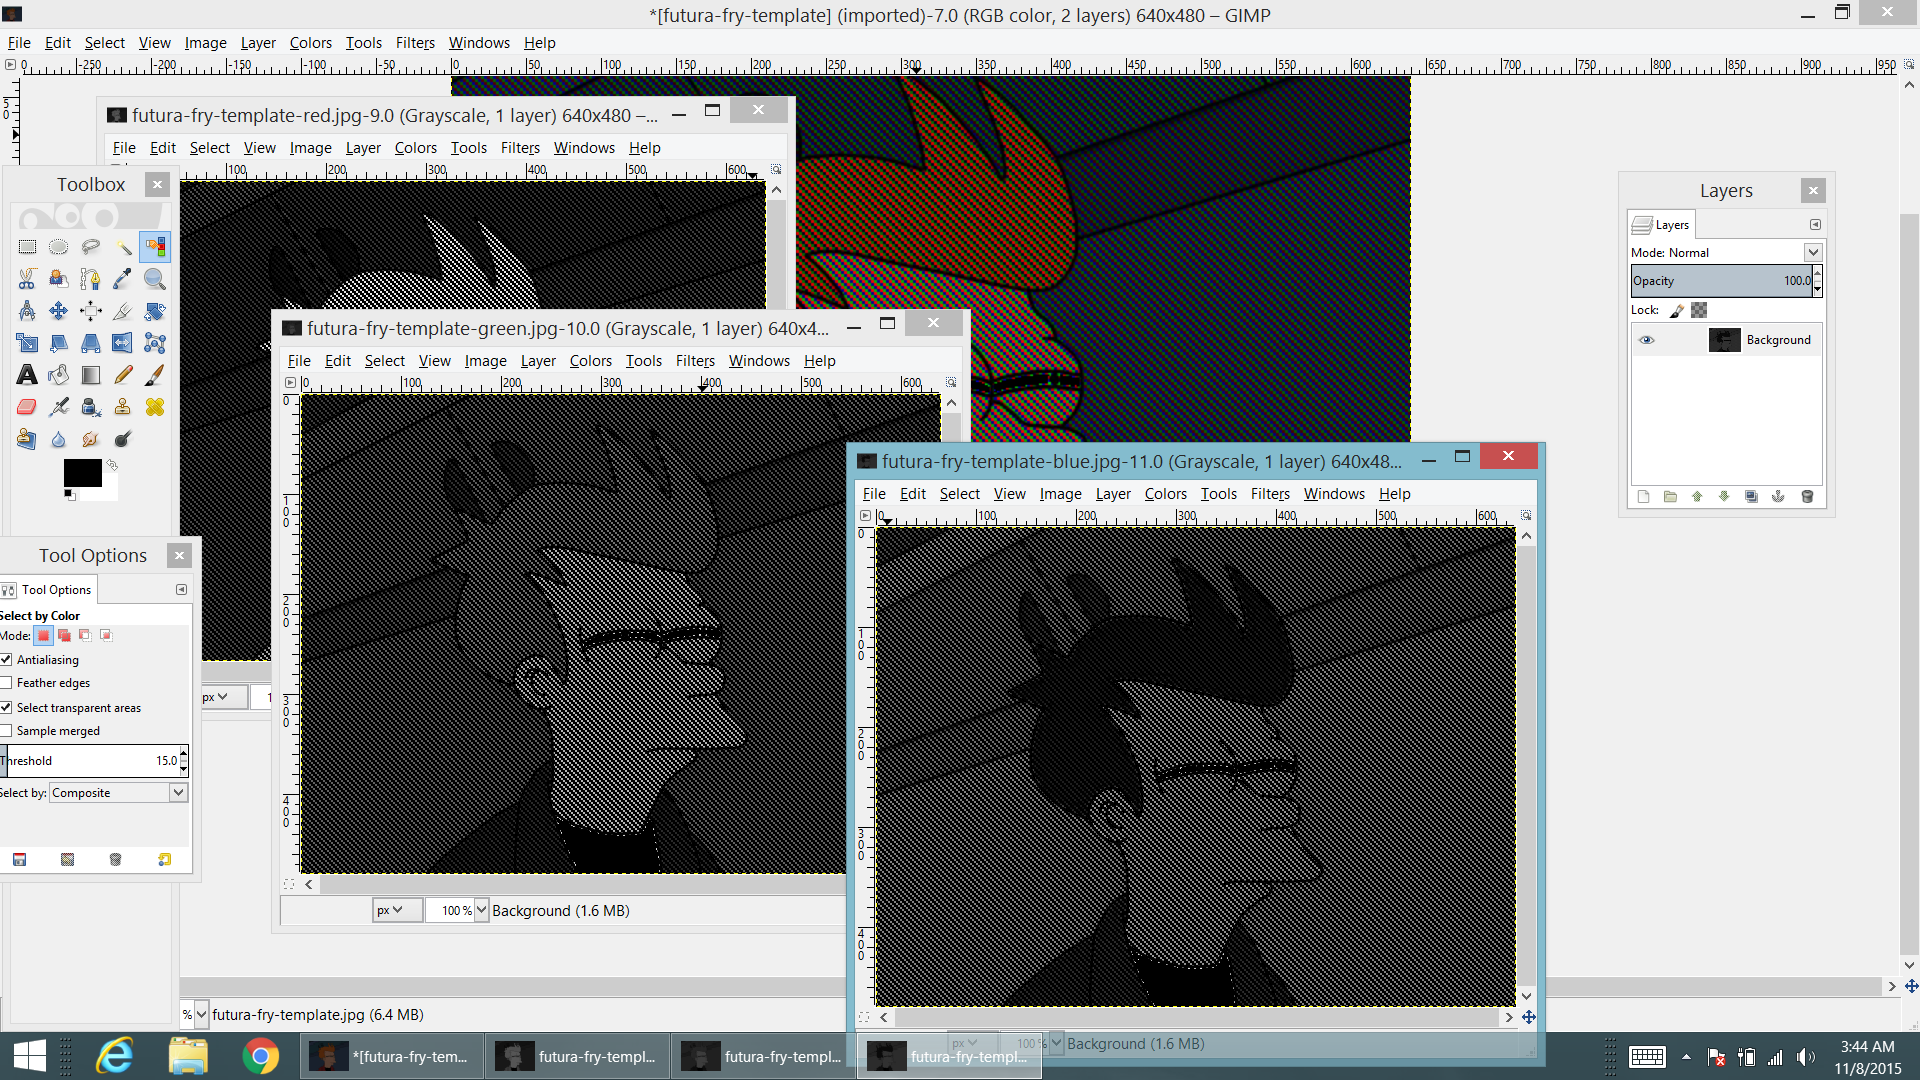
- Now let's separate the image into its RGB components. Go to Colors/ Components/ Decompose. Select RGB as your "color mode" and De-Select Decompose to layers.
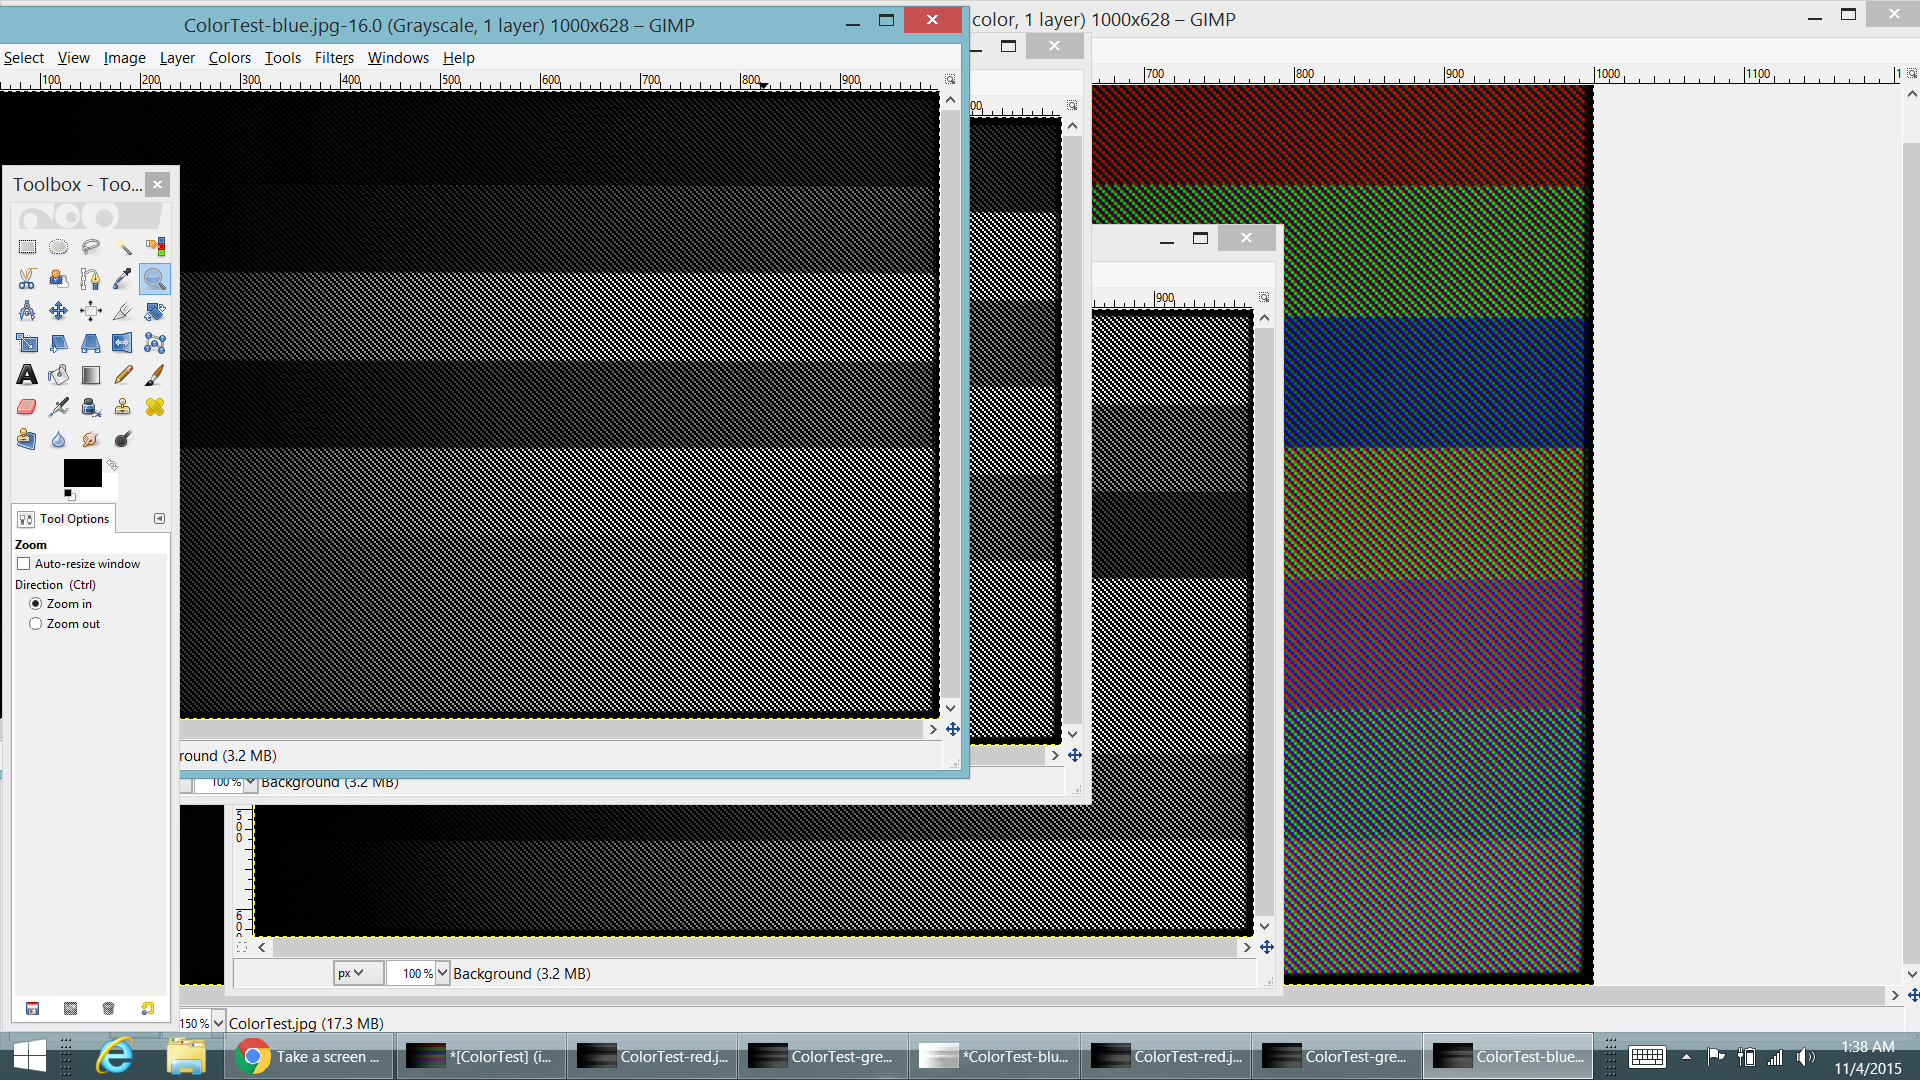
- You should now have 3 separate windows pop up. Each of these windows represents that color in the image. We will now modify each photo individually, but keep an eye on what color you are working with and save them accordingly.
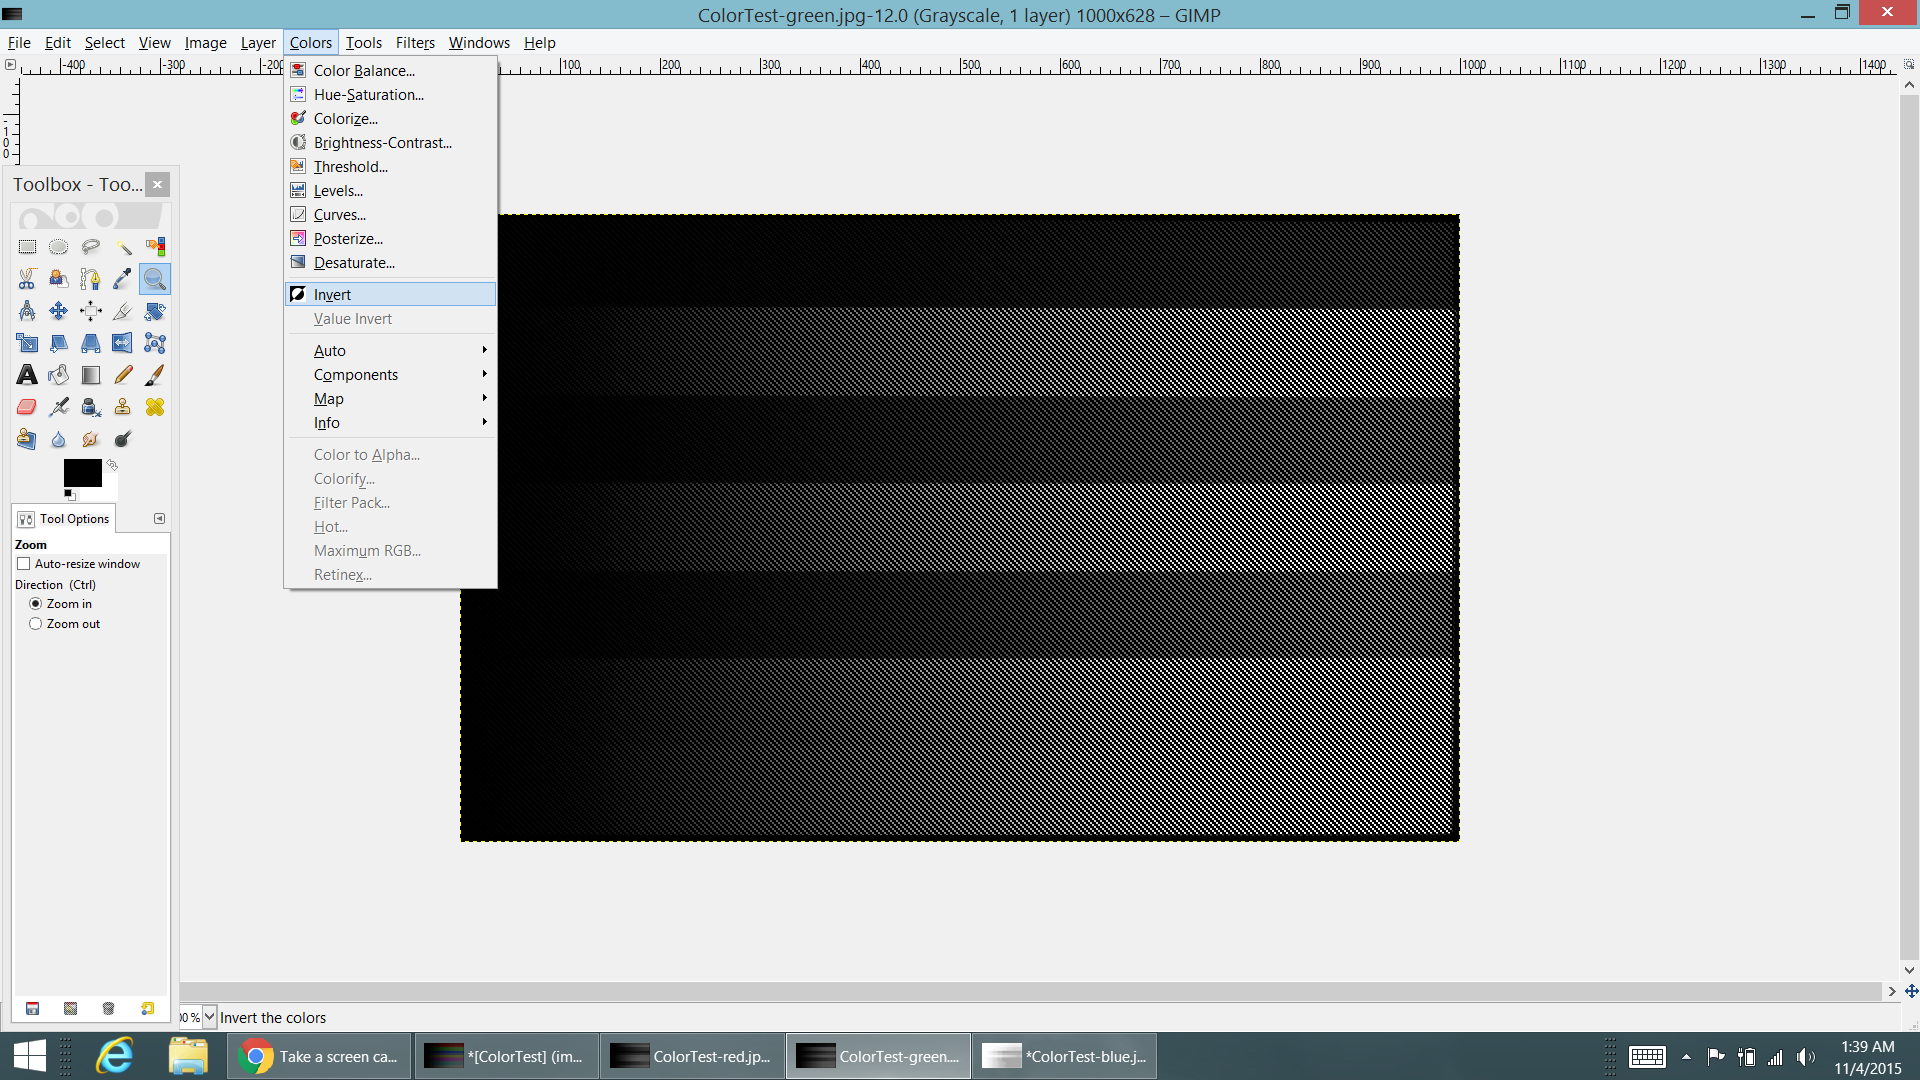
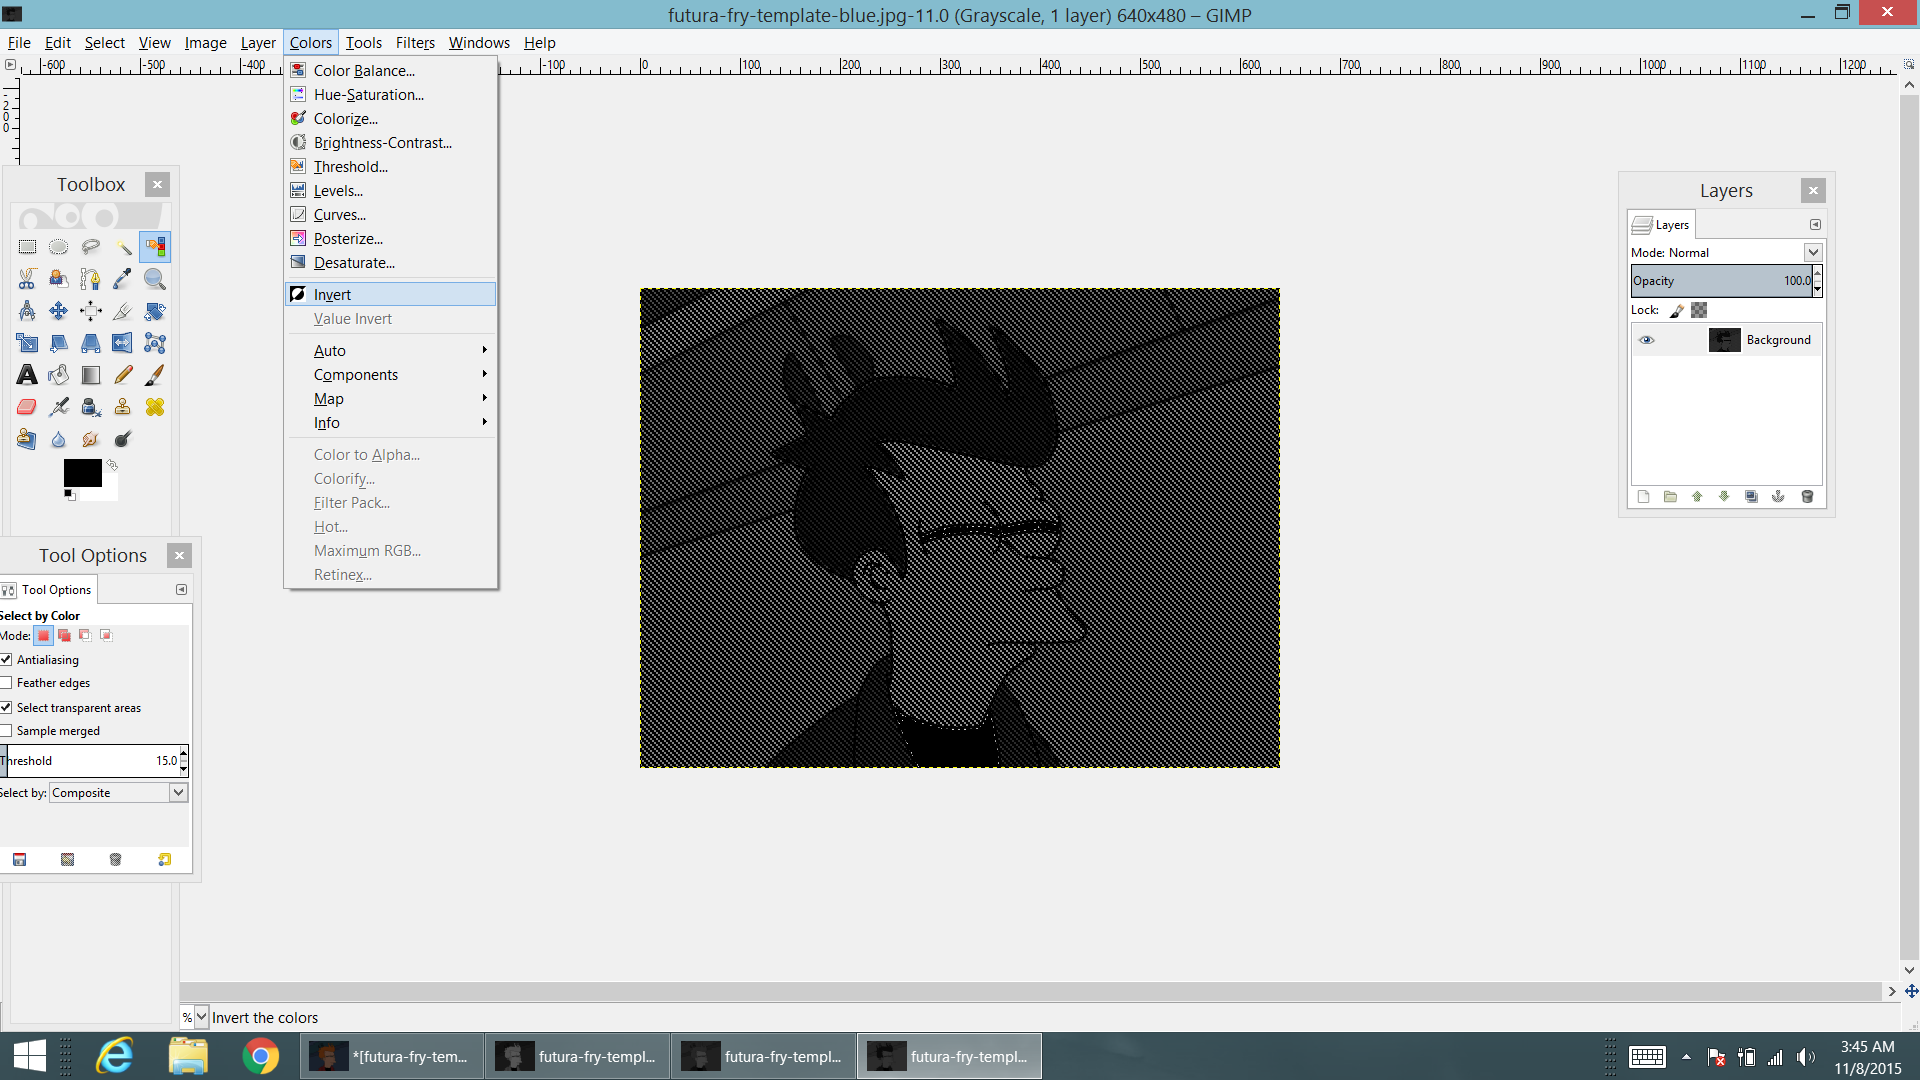
- Lets take one of the photos which should be in black and white (a grey scale representation of that color in the original image) and invert the colors. Go to Colors/ Invert. We need to do this because our laser cutter software will etch everywhere that it is black. So, wherever it is etched is the area that will show that color in the final Lit-O-Pane. We are basically making it a "Negative".
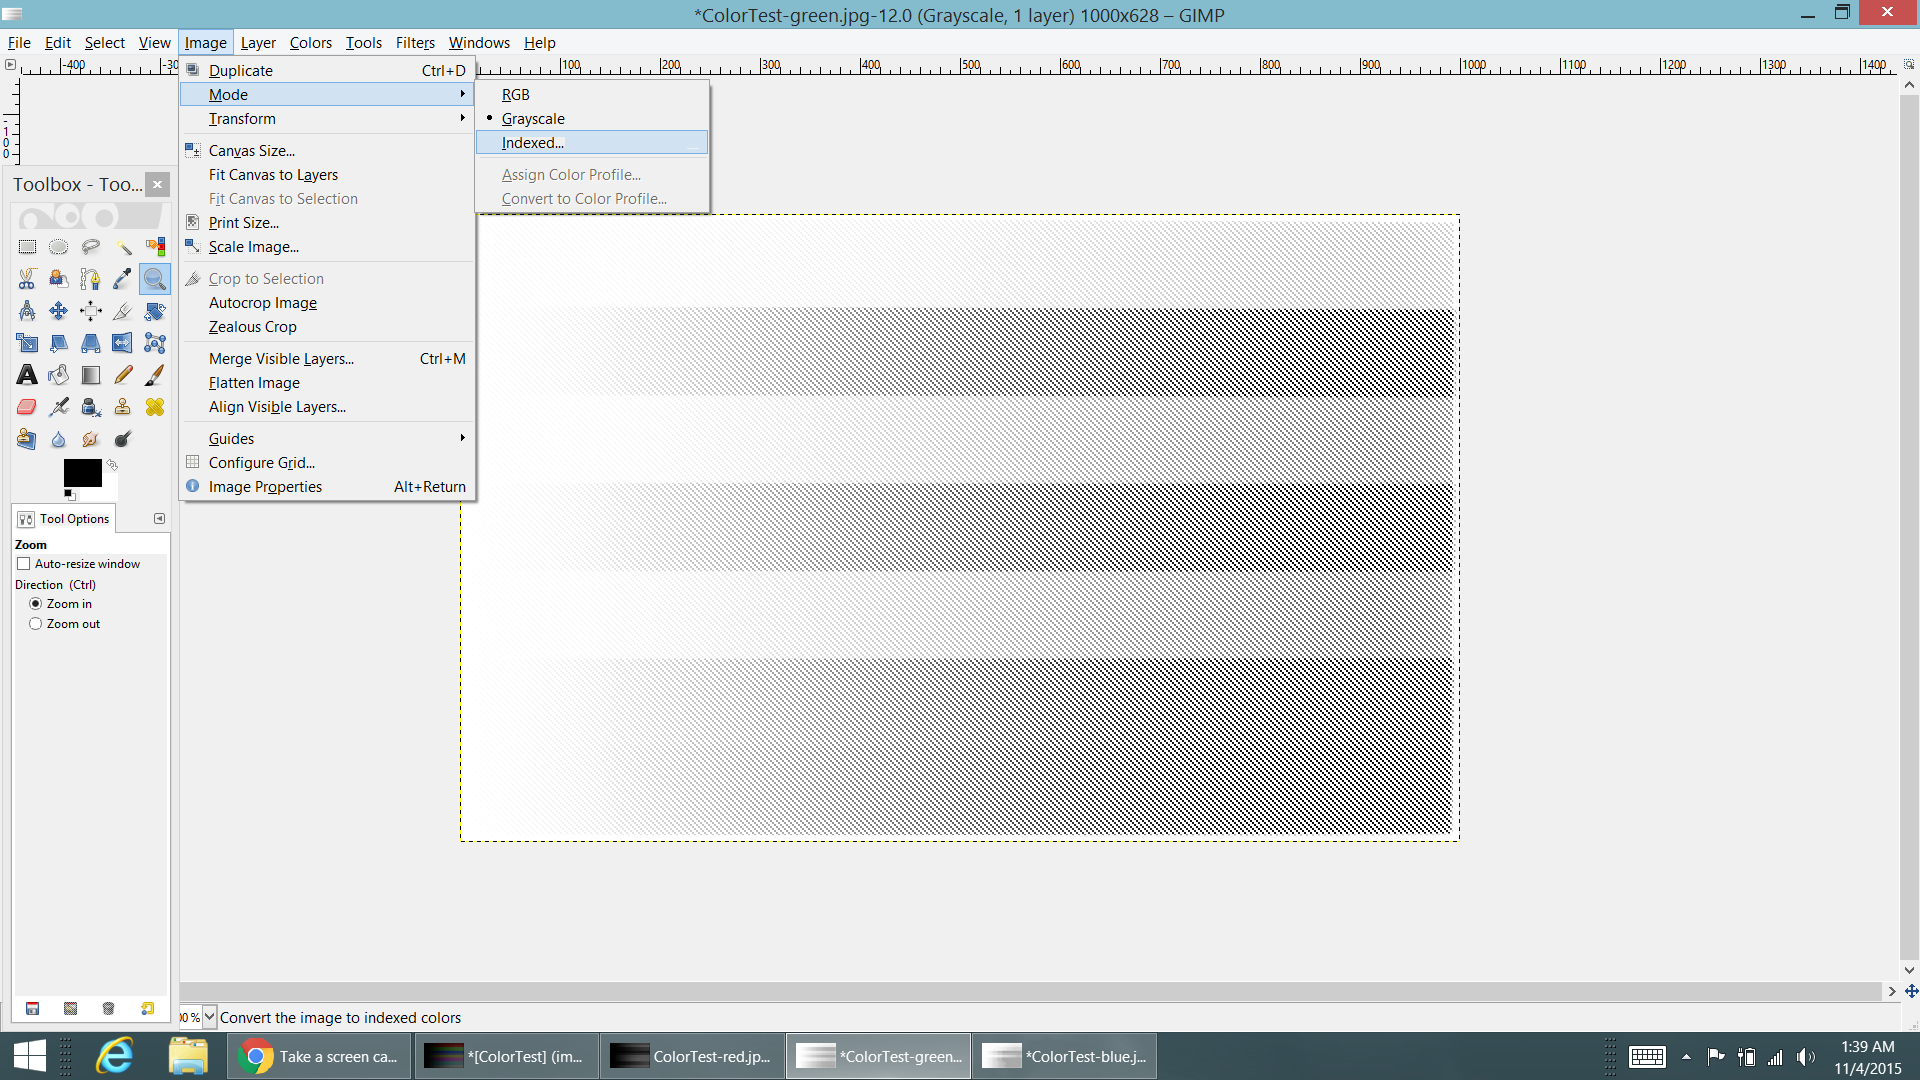
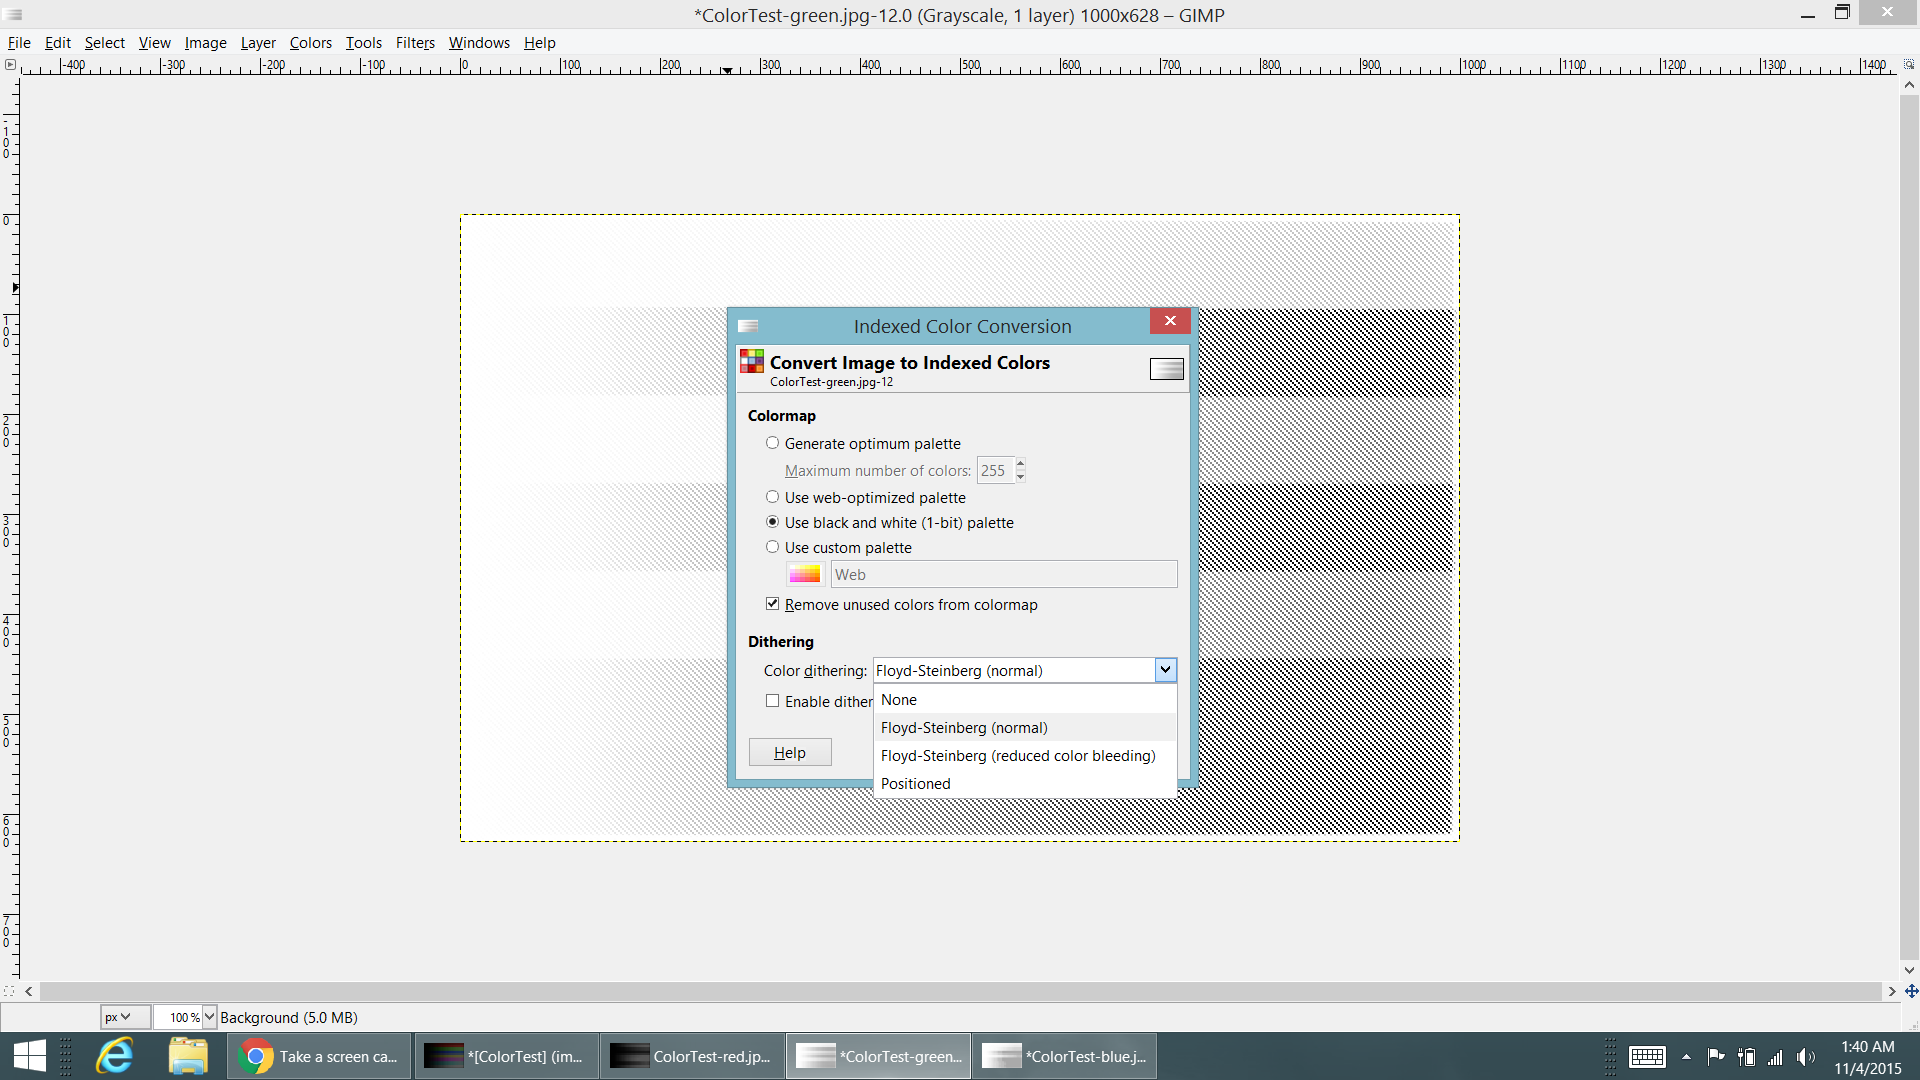
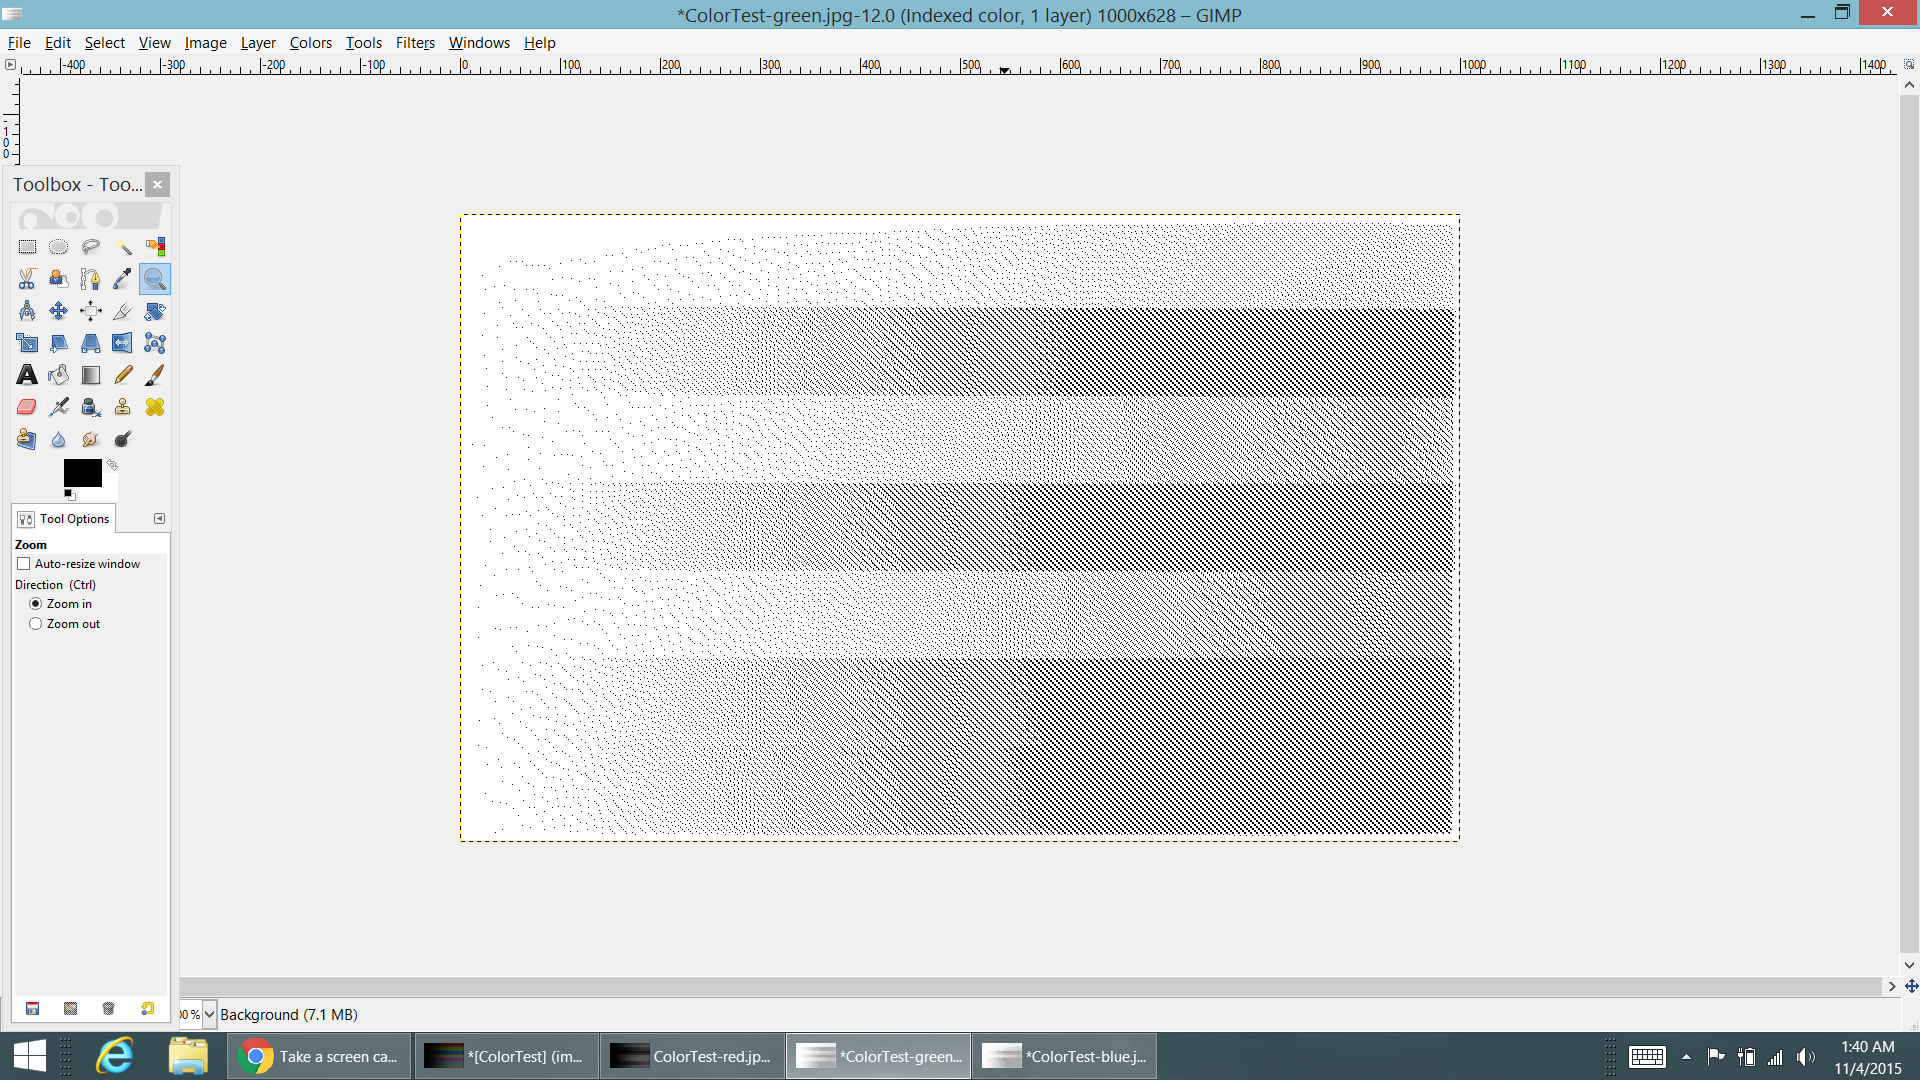
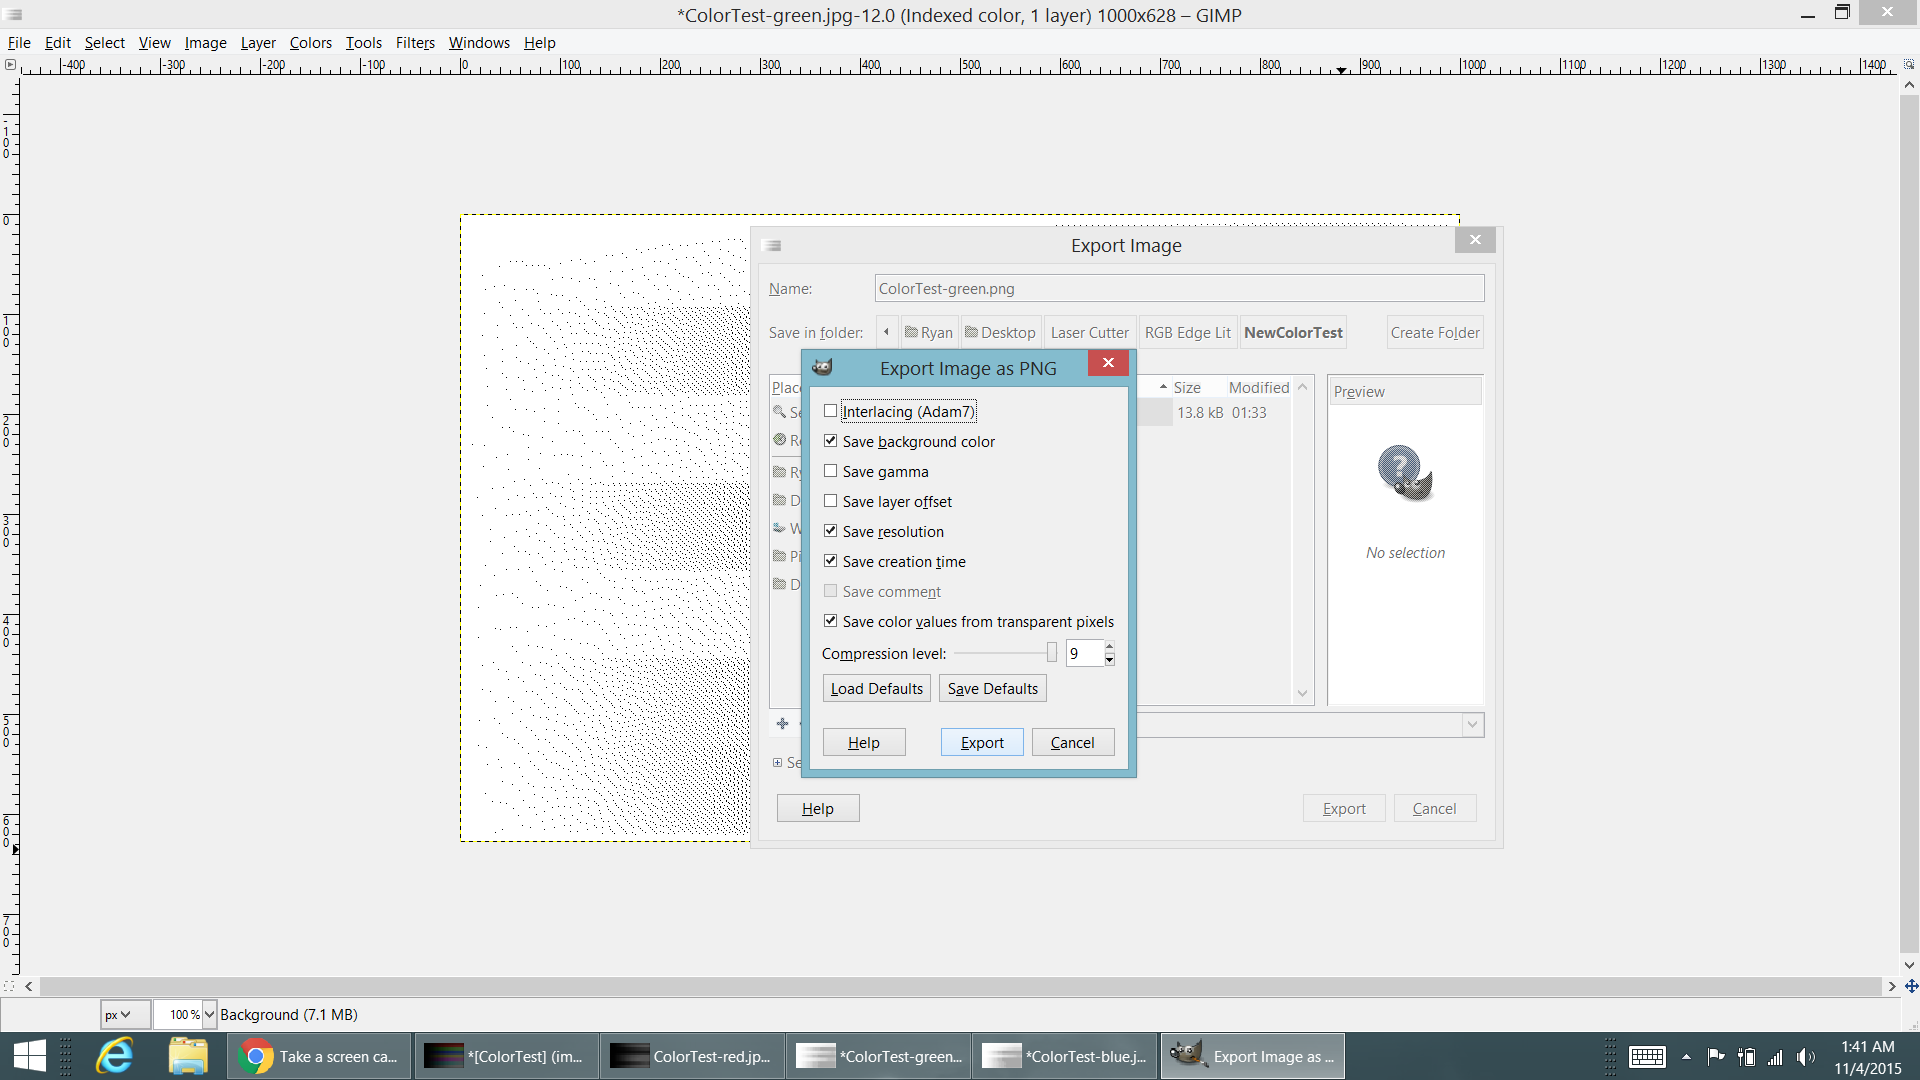
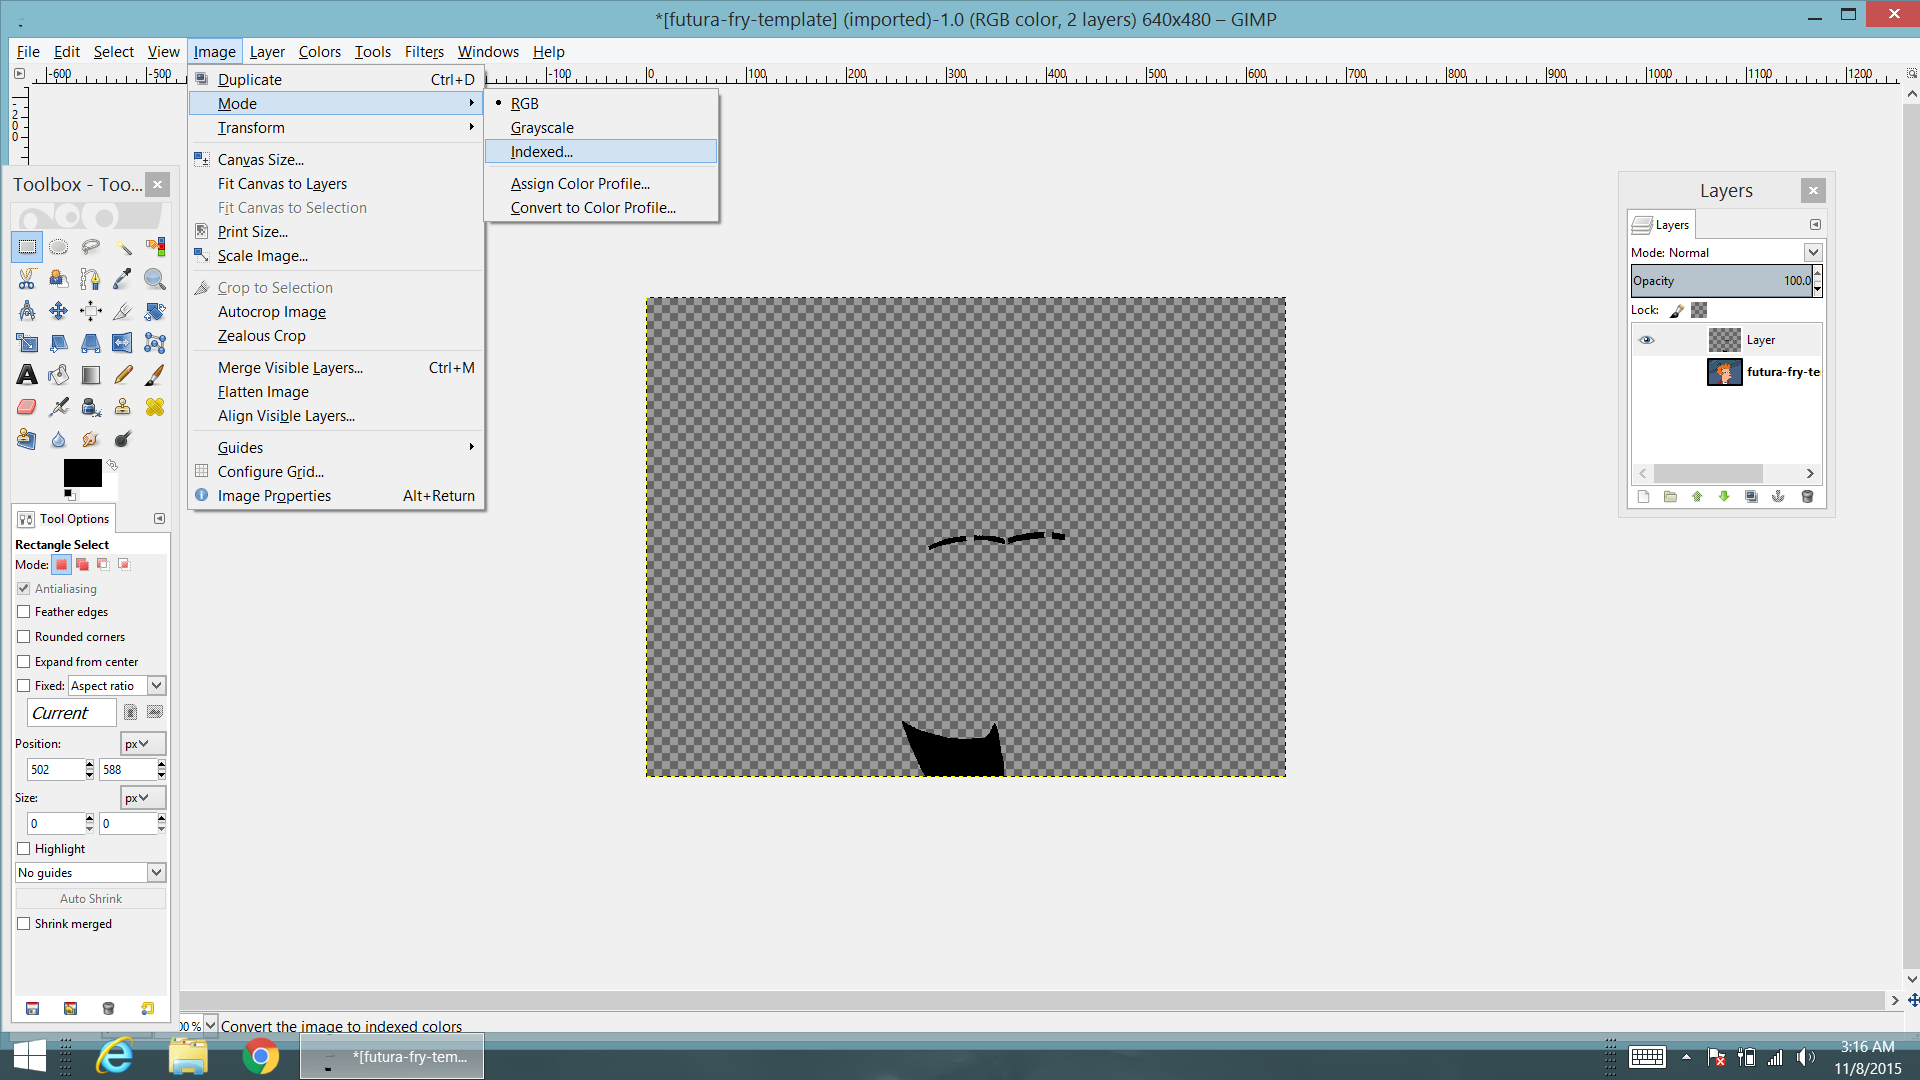
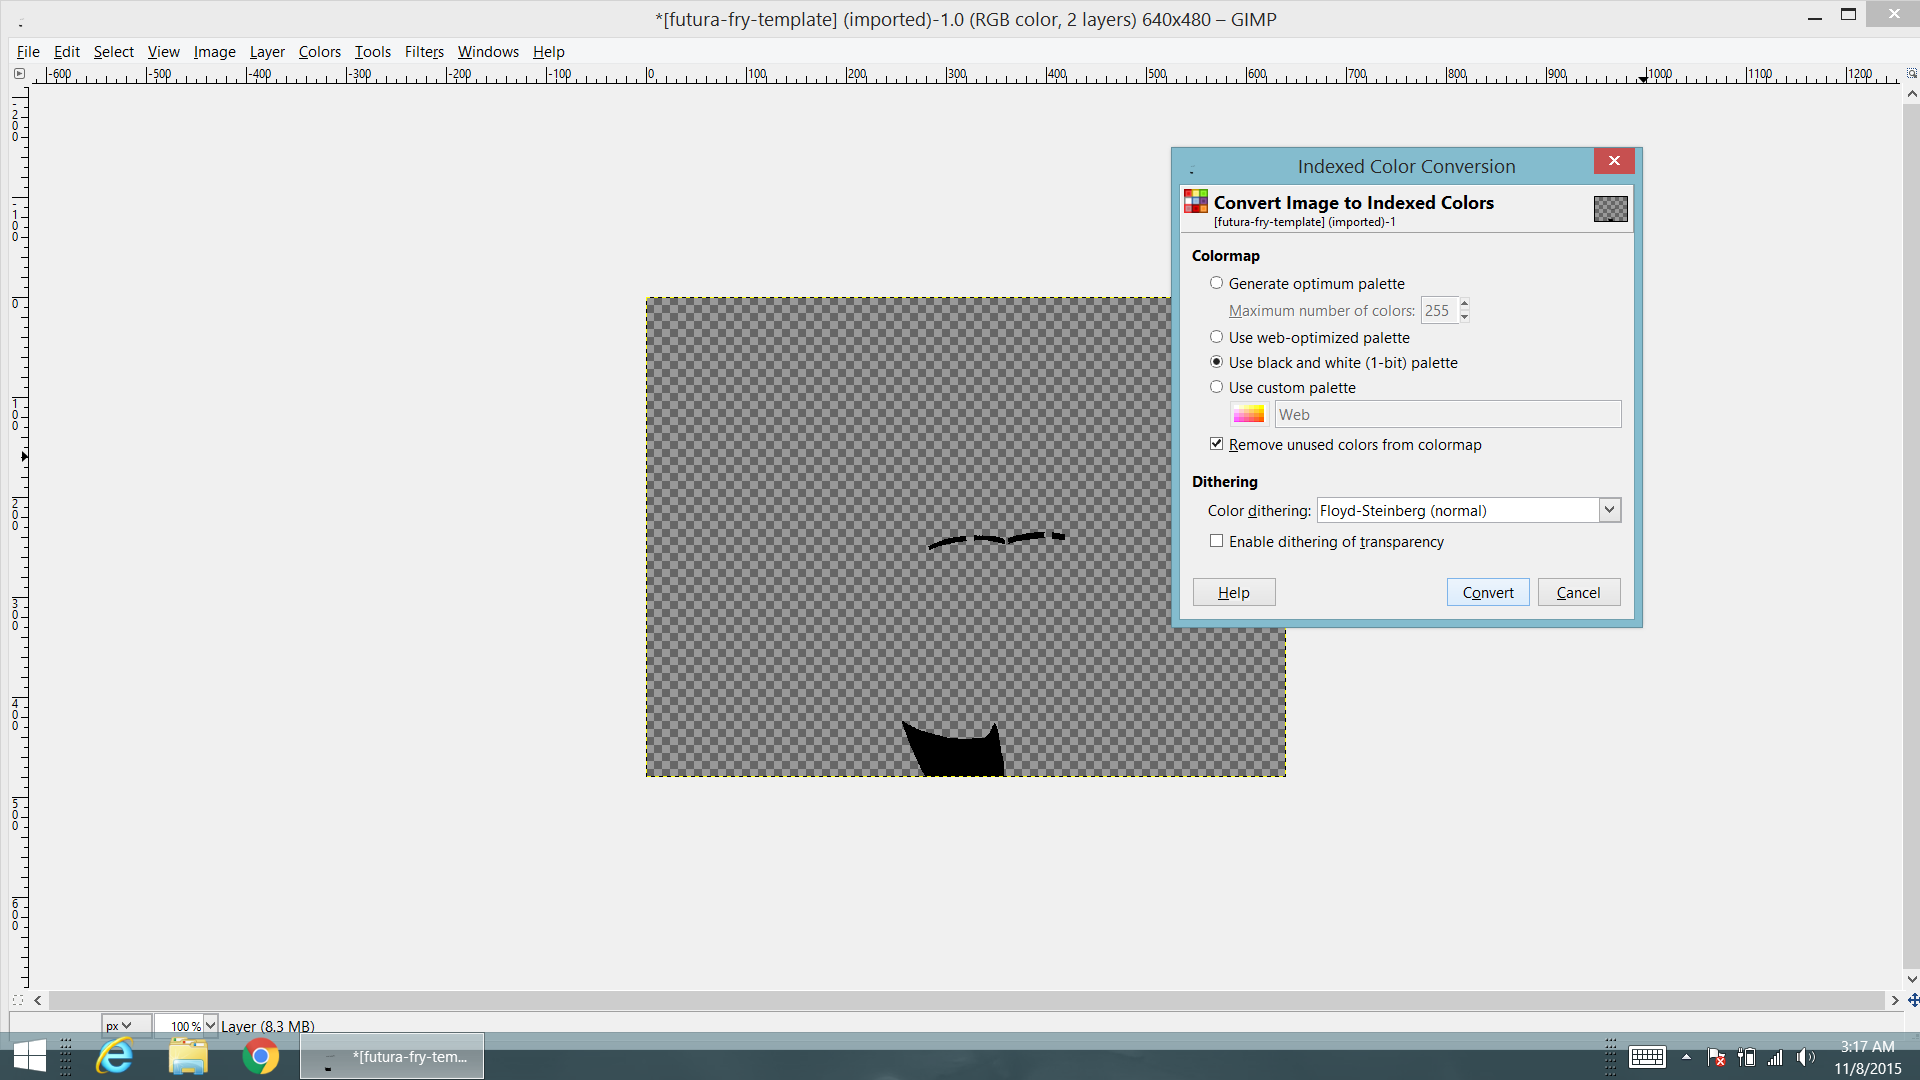
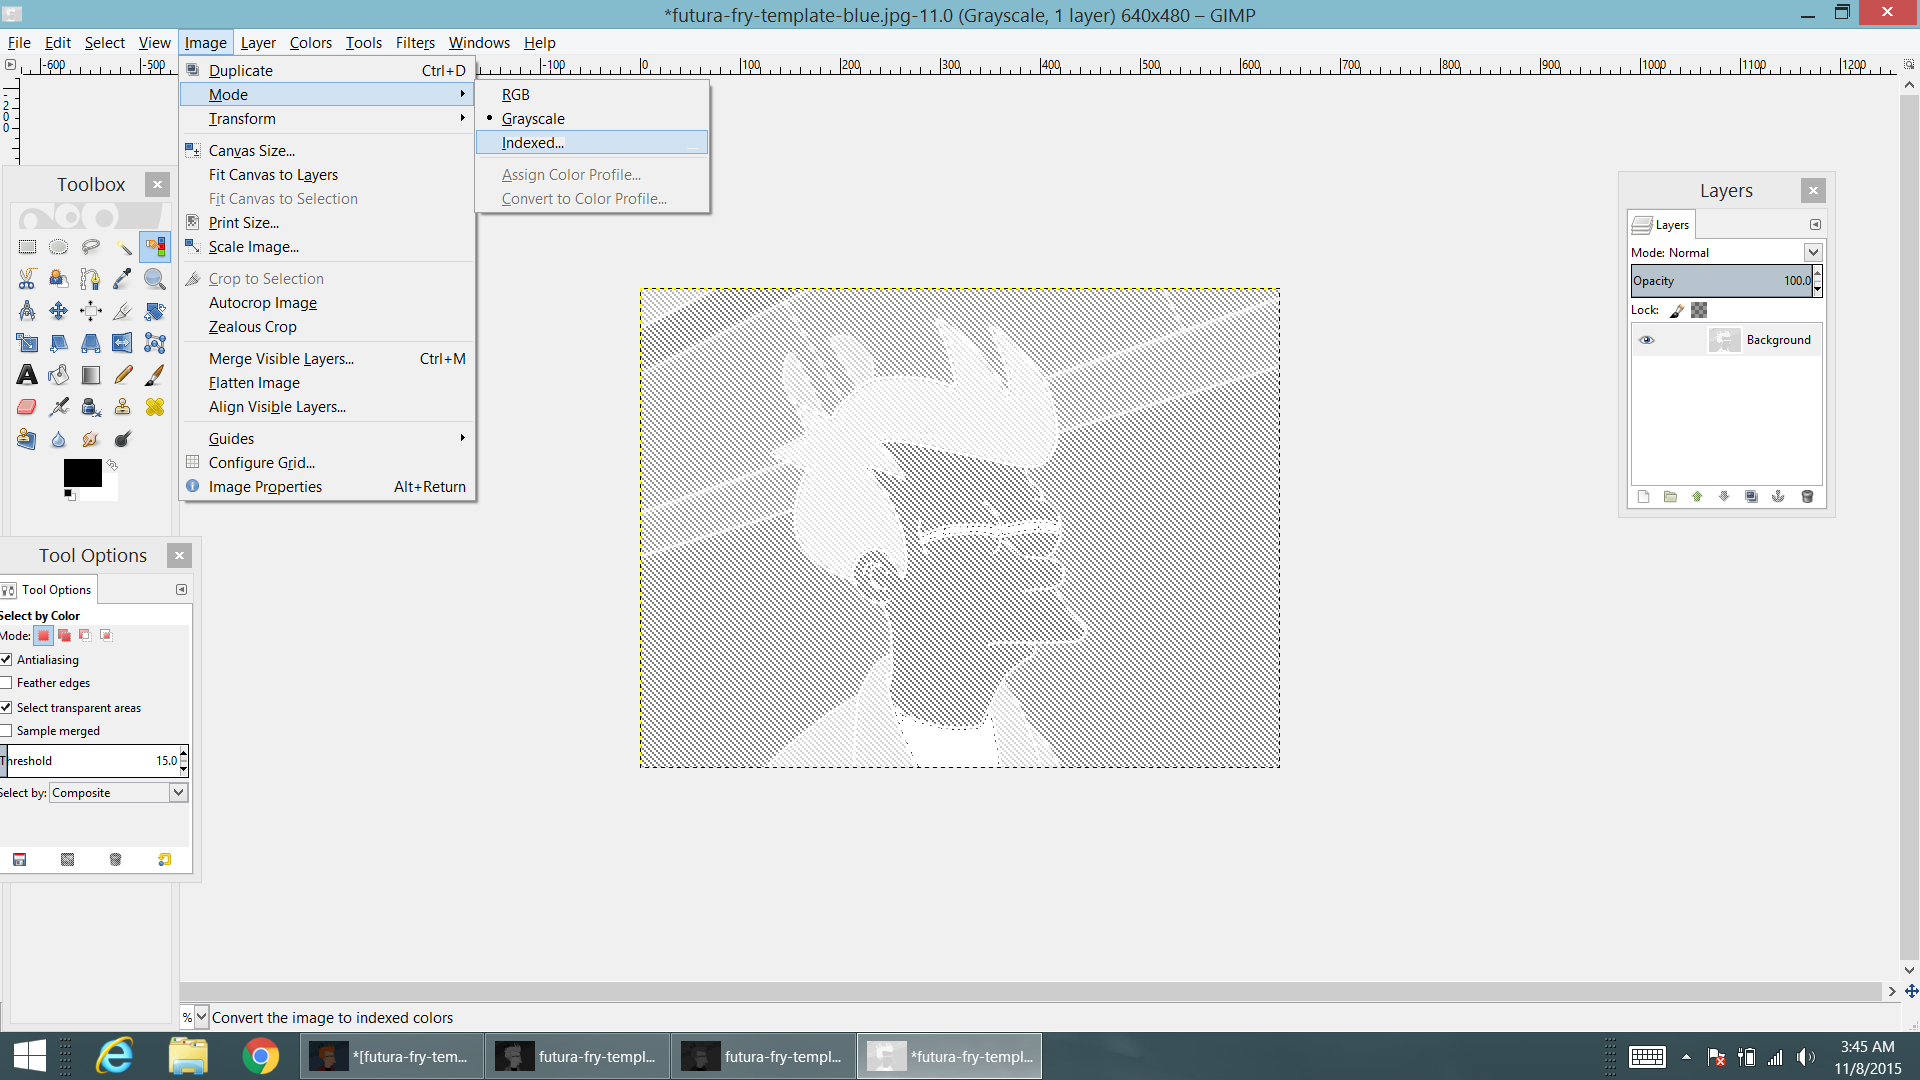
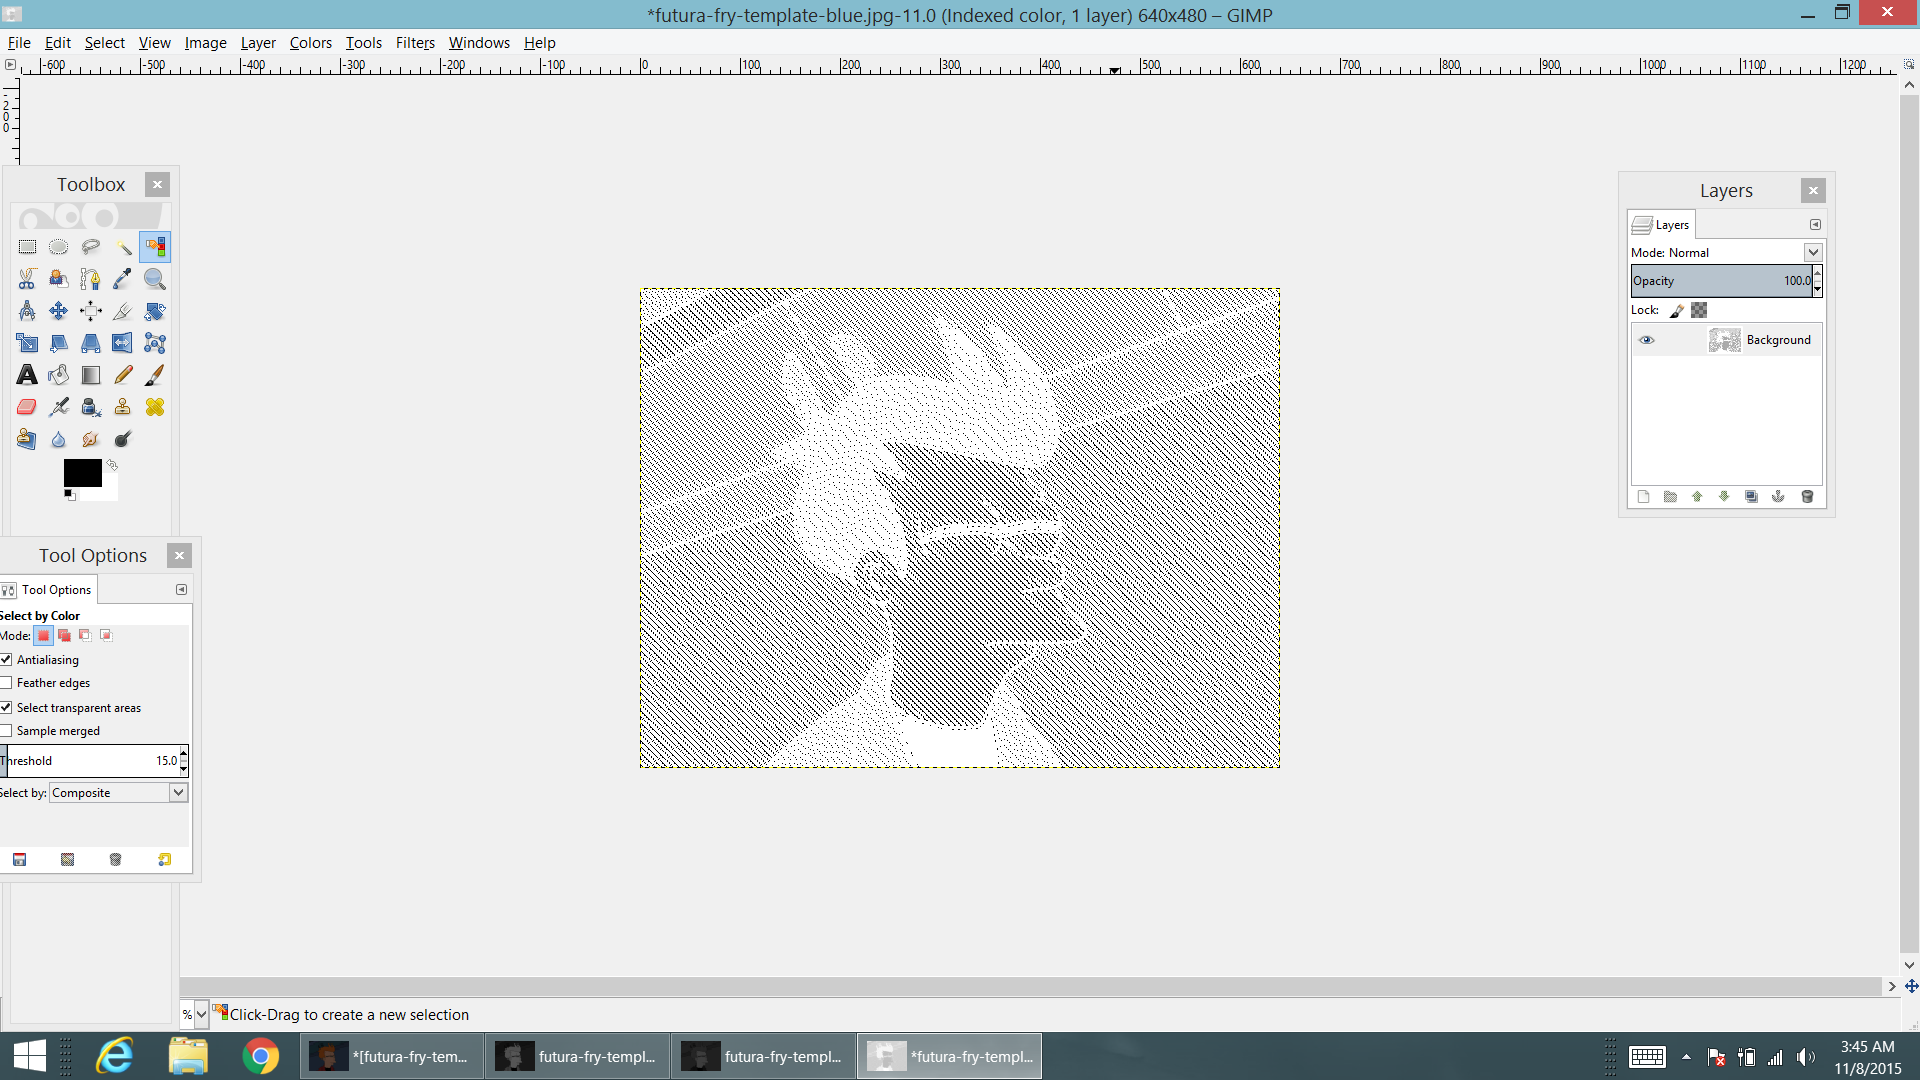
- Now we need to "Dither" the image. Go to Image/ Mode/ Indexed. Then select Use Black and White (1-bit) Palette. Next go to Dithering and from the drop down menu select Floyd-Steinberg. Any setting will work, they just leave slightly different results. Laser cutters don't really do well with grey-scale images. Dithering will turn the grey-scale image into a pure black and white image that varies the intensity by using more or less "dots". This is why I said you may not need to use the "video" filter, as this may provide enough separation between the "pixels" that it would not be needed. I didn't have enough time to test this though.
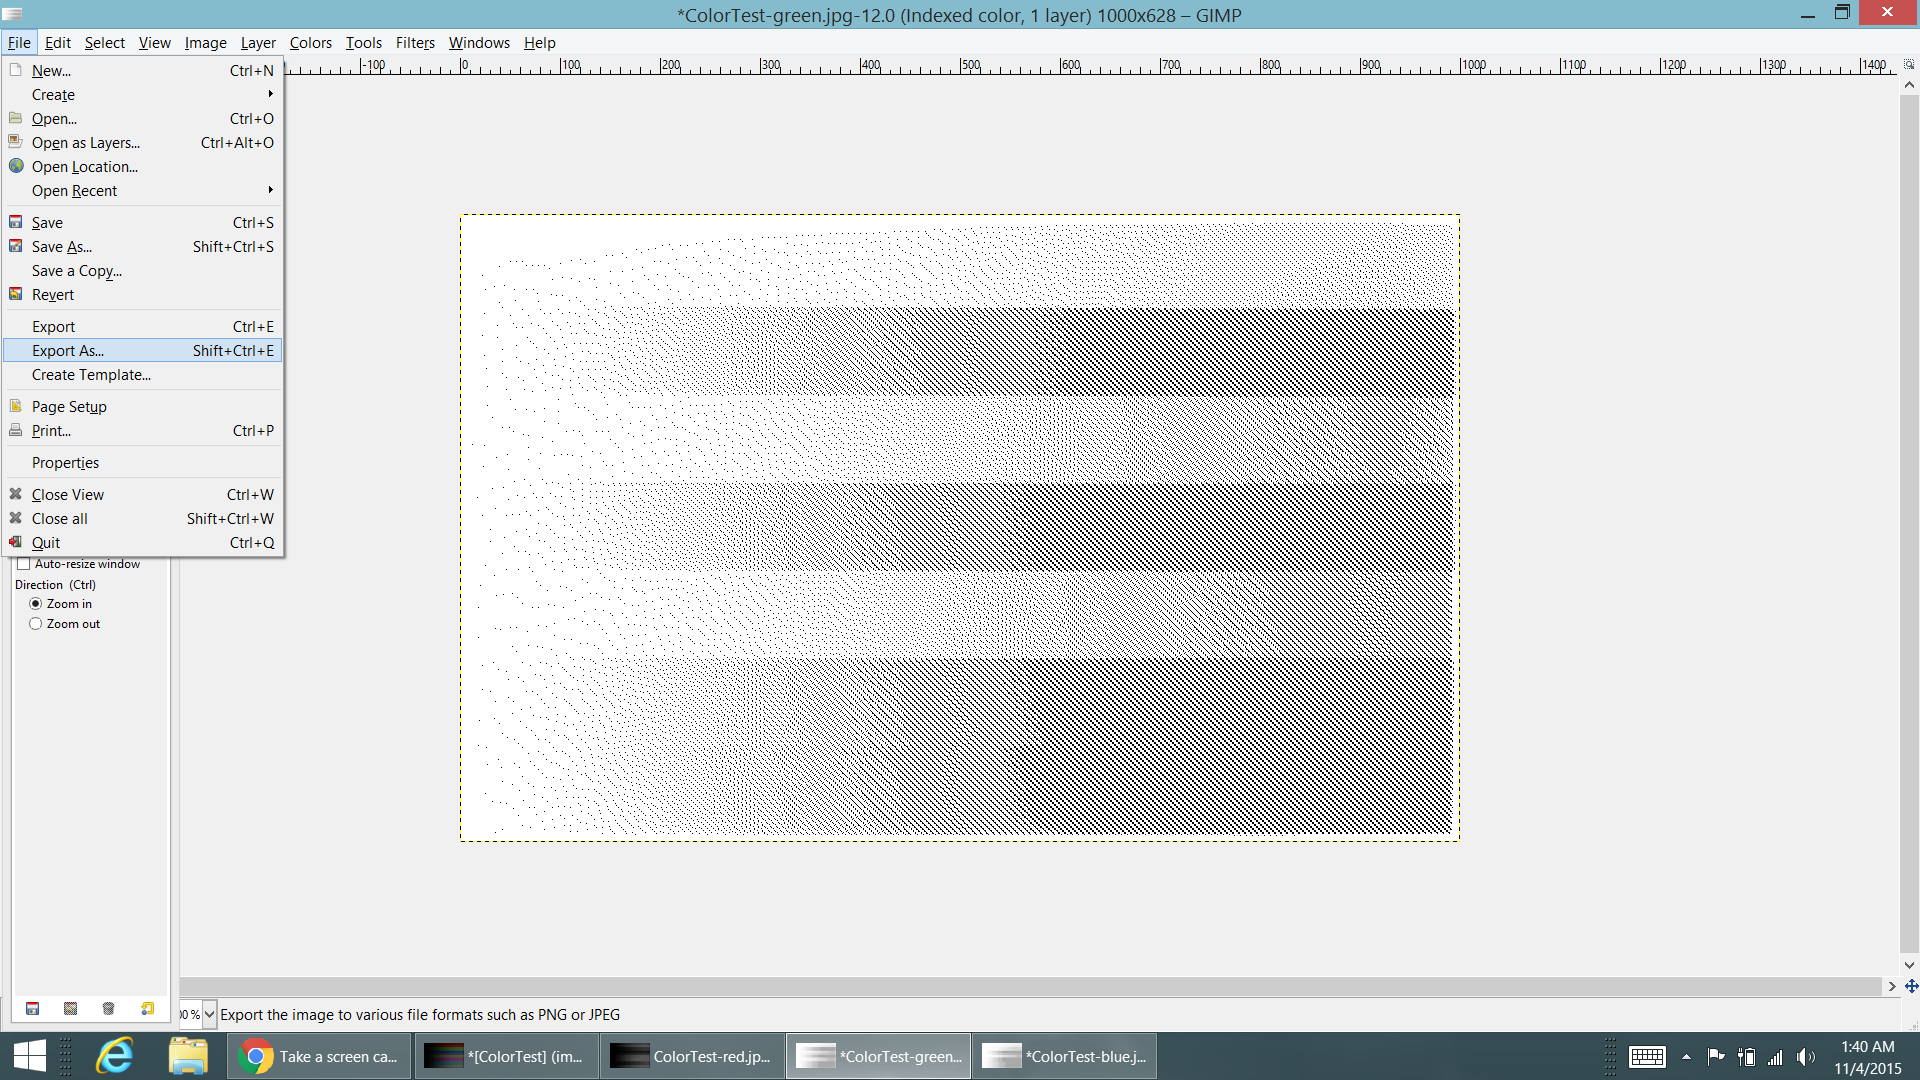
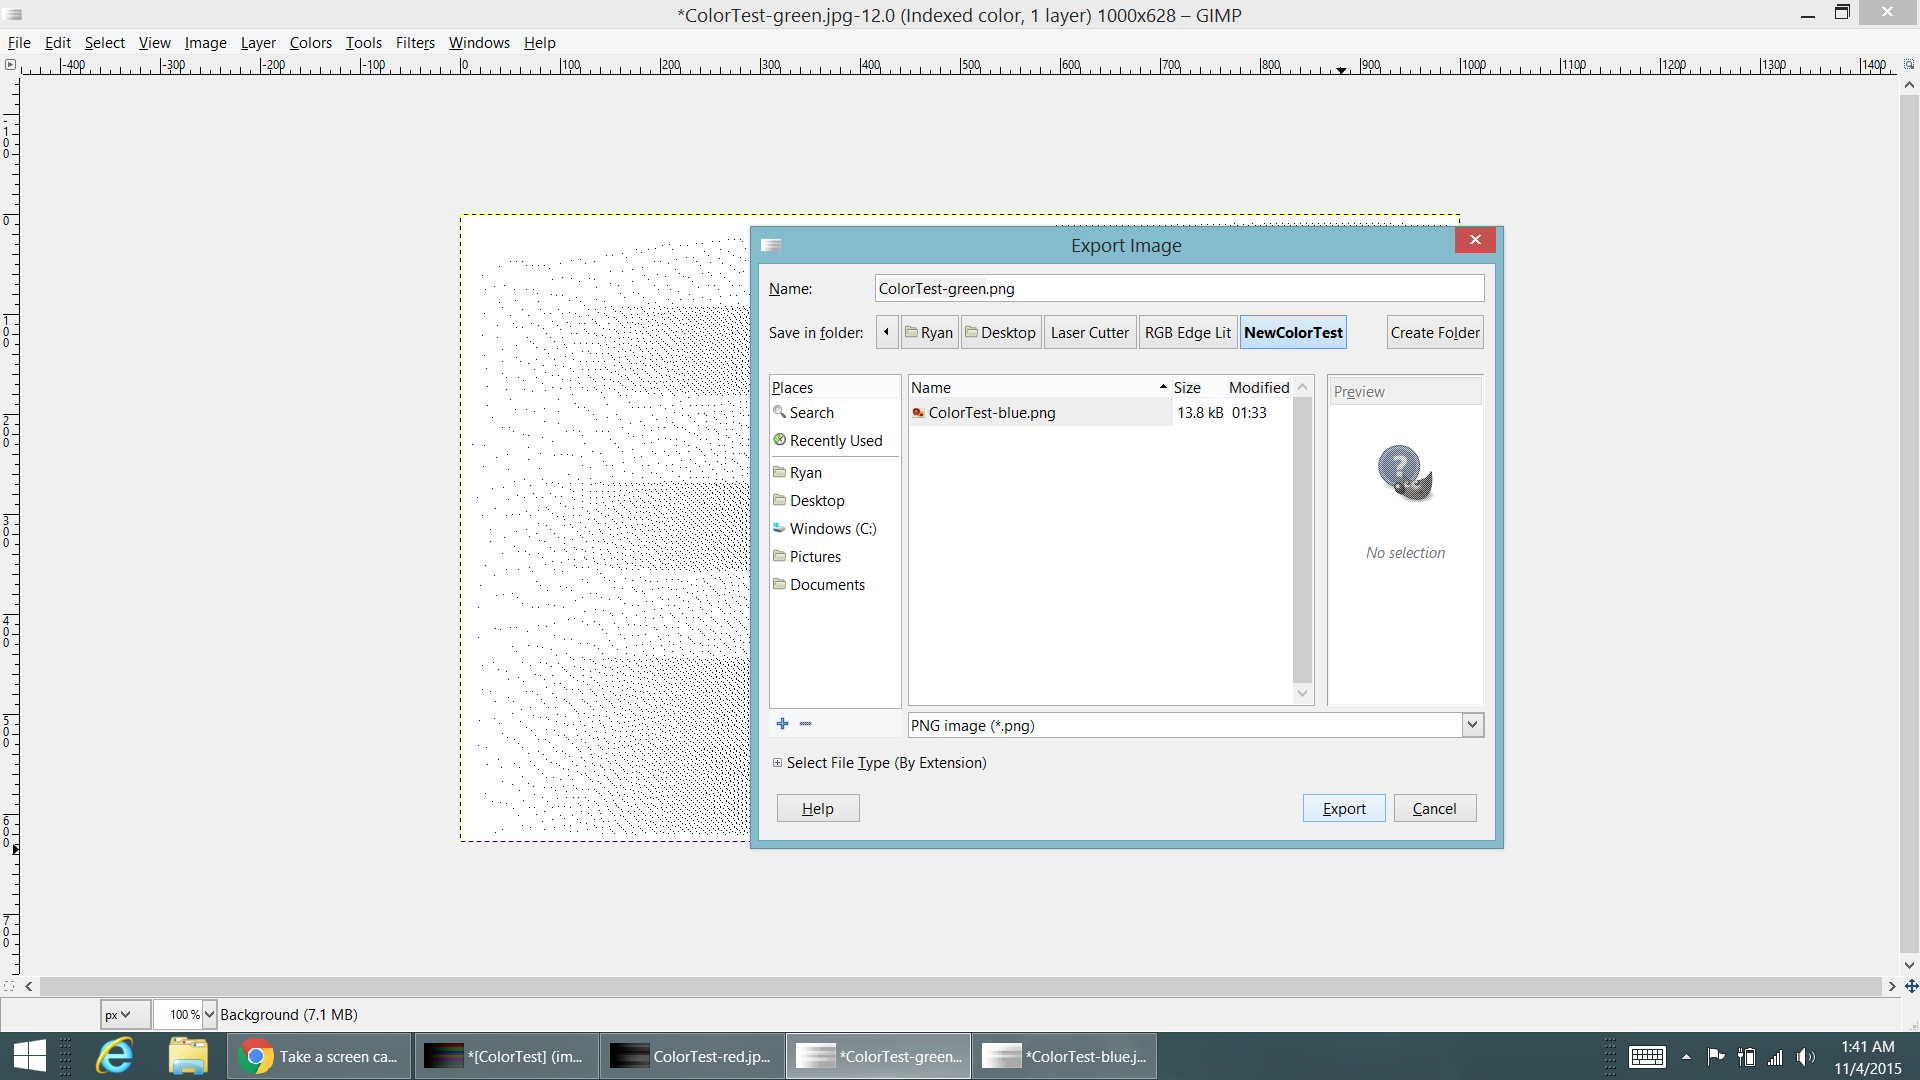
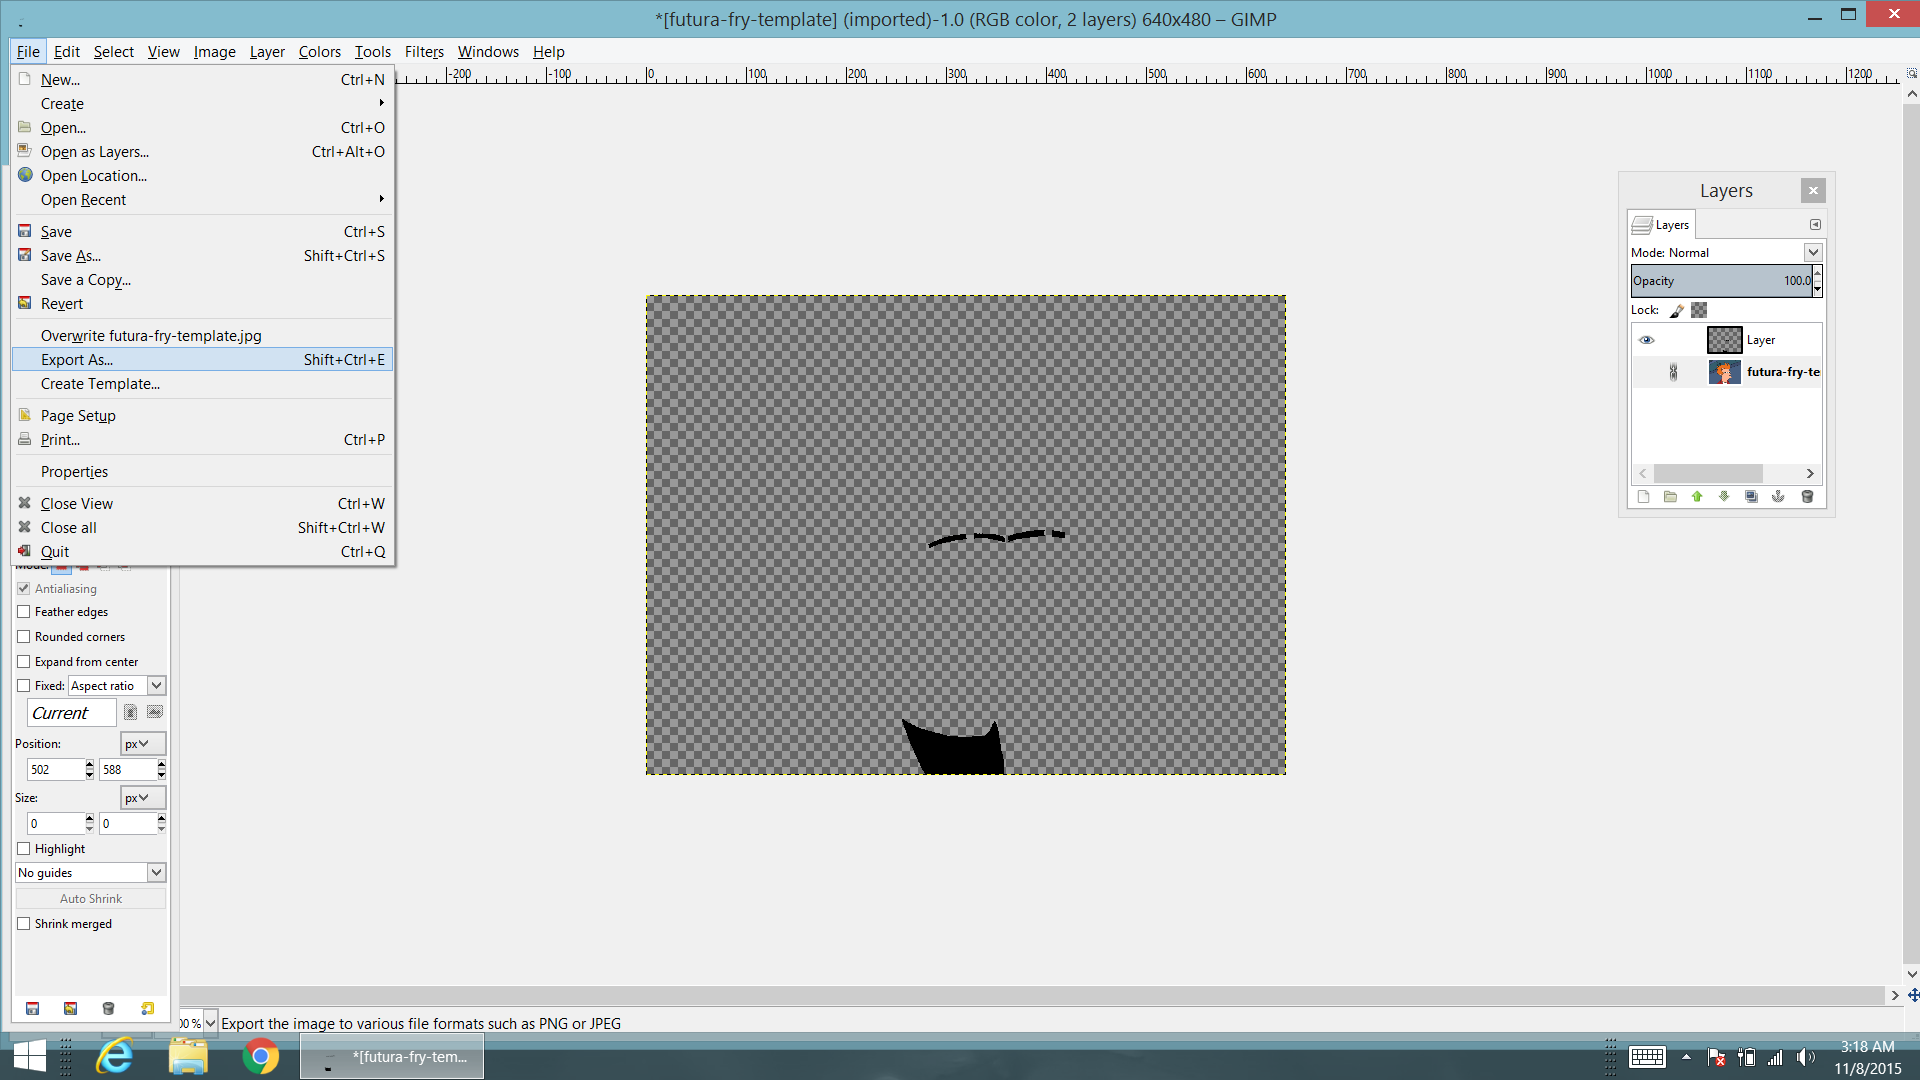
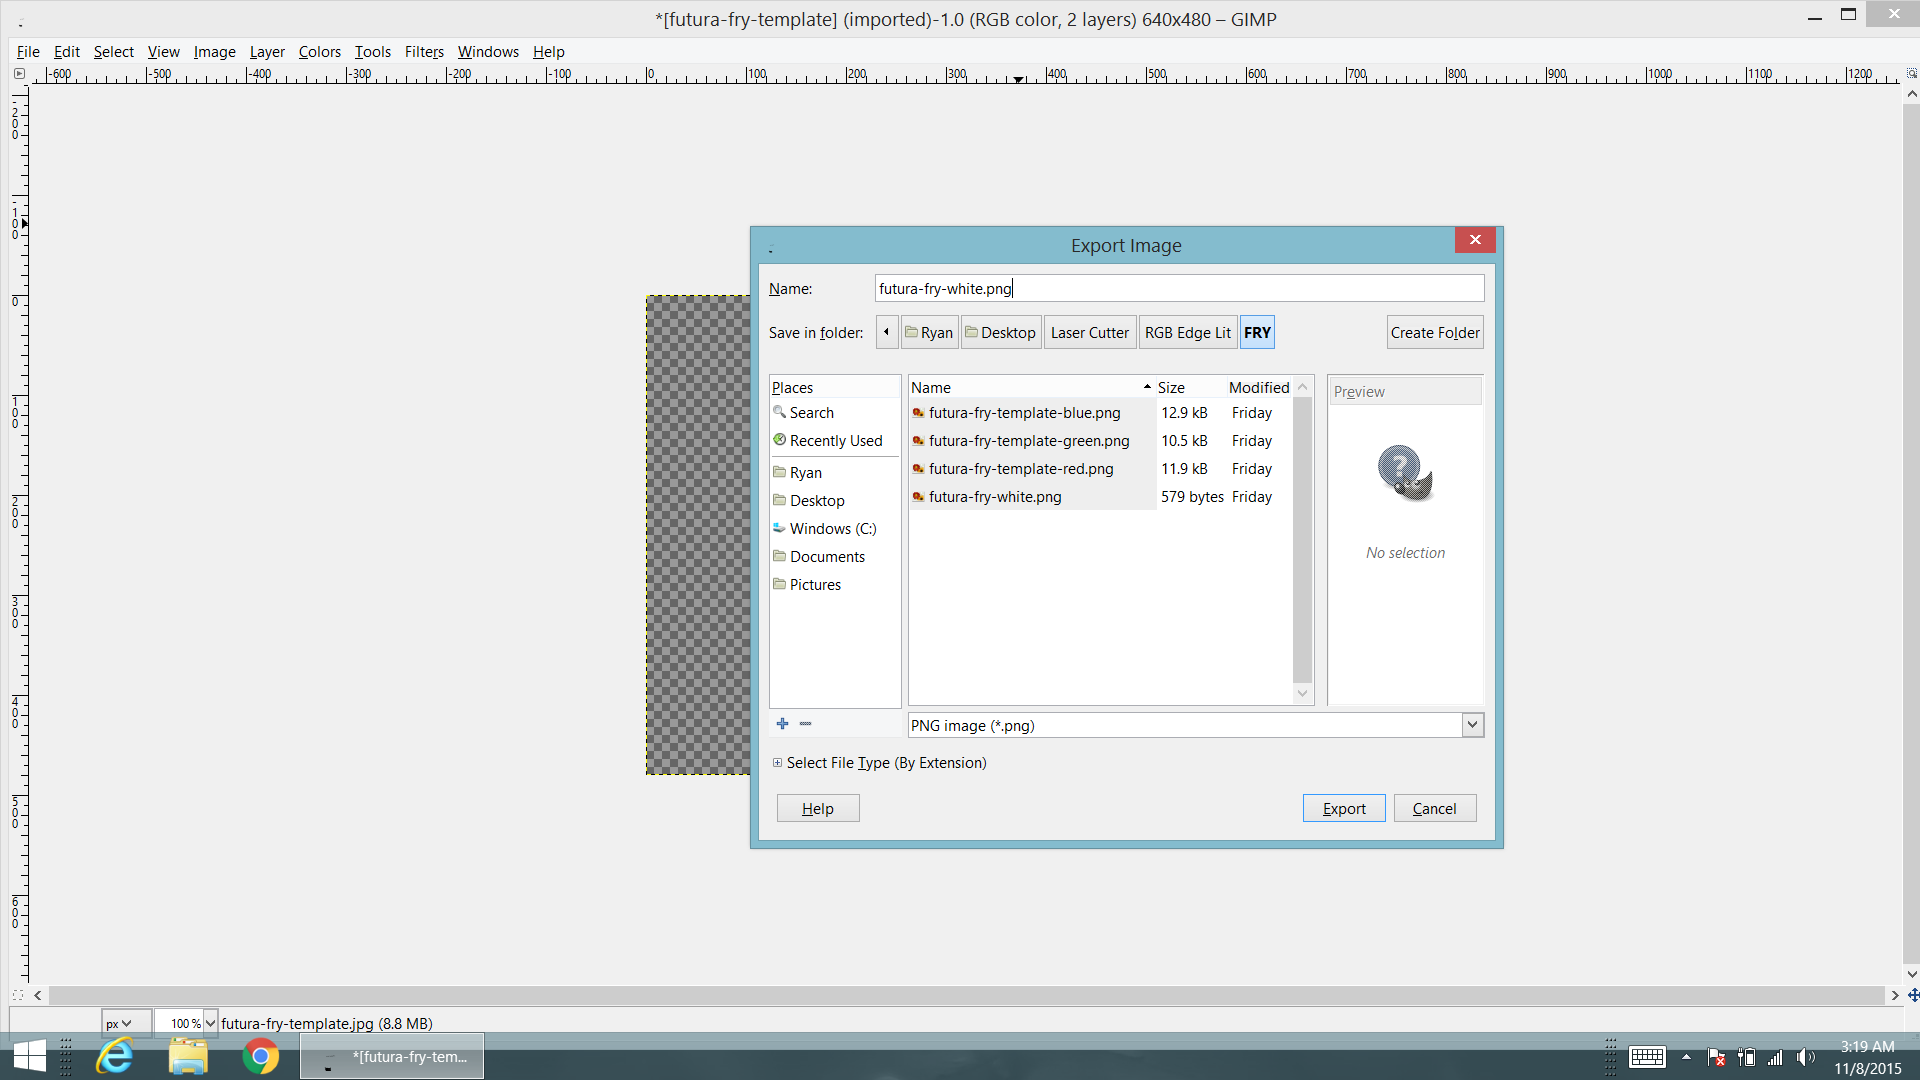
- Now we can export it. Go to File/ Export As.. and save it to whatever file format is compatible with your software. For me I exported it as a PNG.
- Repeat. Now just repeat for the other two colors. Keep track what filename you save them as. You don't want to get them mixed up.
Adding White (For the 4 Panel White Version)
.png)
.png)
.png)
.png)
.png)
.png)
.png)
.png)
.png)
.png)
.png)
.png)
.png)
.png)
.png)
.png)
.png)
.png)
.png)
.png)
.png)
.png)
.png)
To get the color white in our Lit-O-Pane we will need it to be it's own separate image that we will then etch out. We need to do this because my assumption of the Red, Green, and Blue colors combining to make White, didn't really work out in this application. That's fine though, we will just have 4 layers instead of the 3.
- First lets start by opening the image in GIMP.
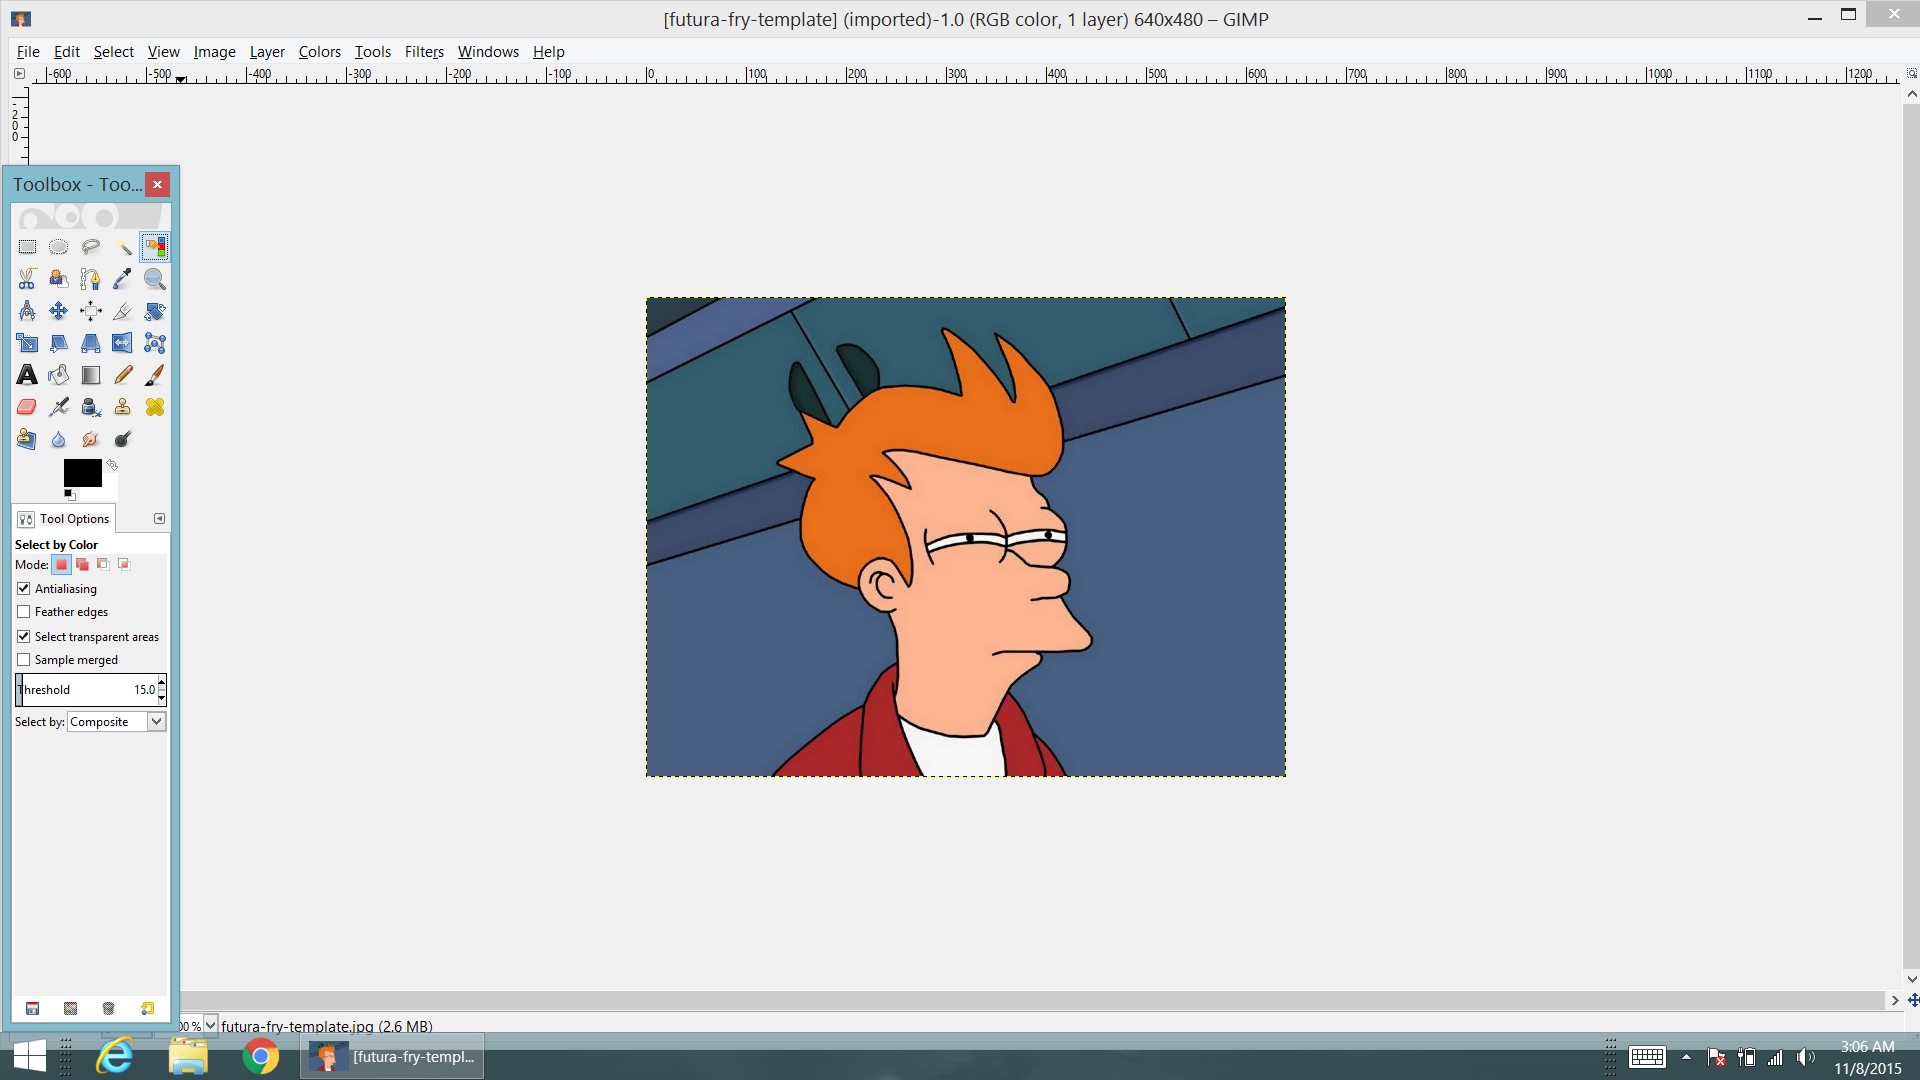
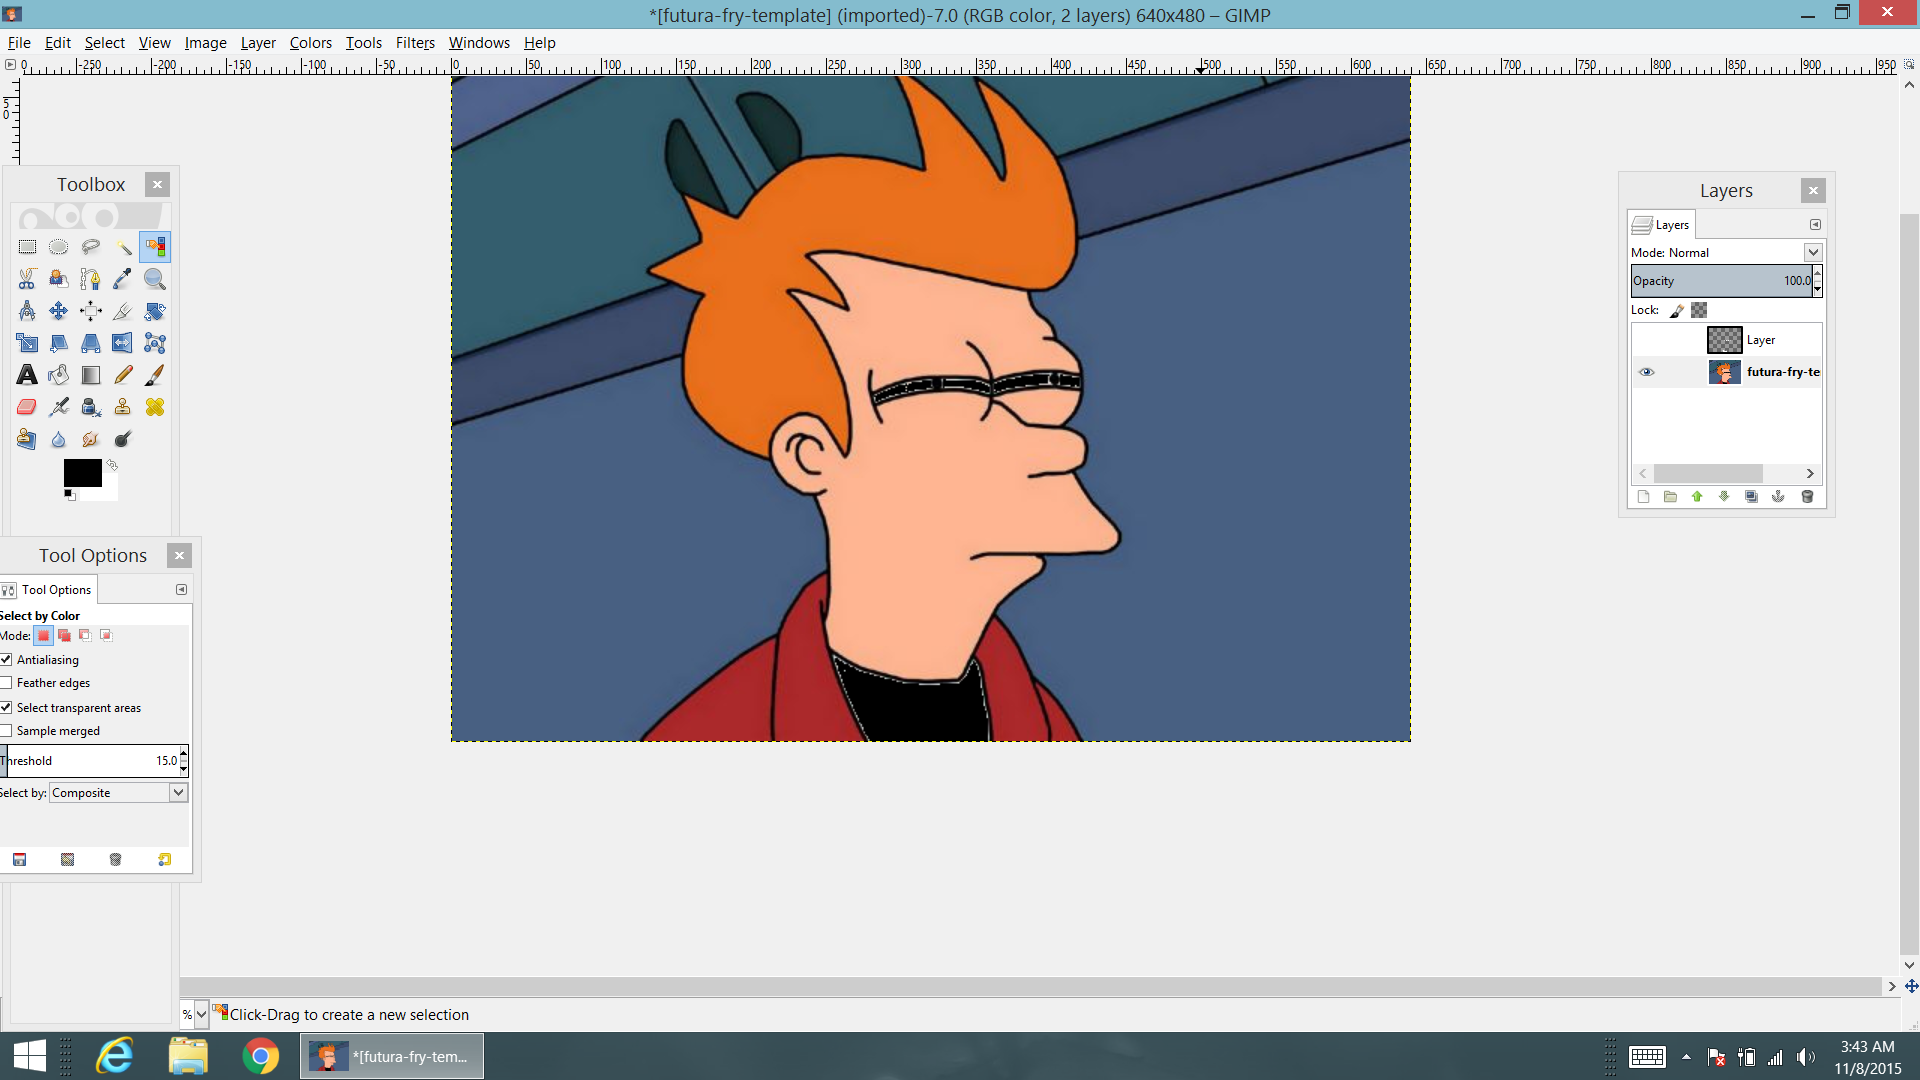
- Next lets select the Color Picker tool. It's the one with the RGB bar and finger. See the first picture.
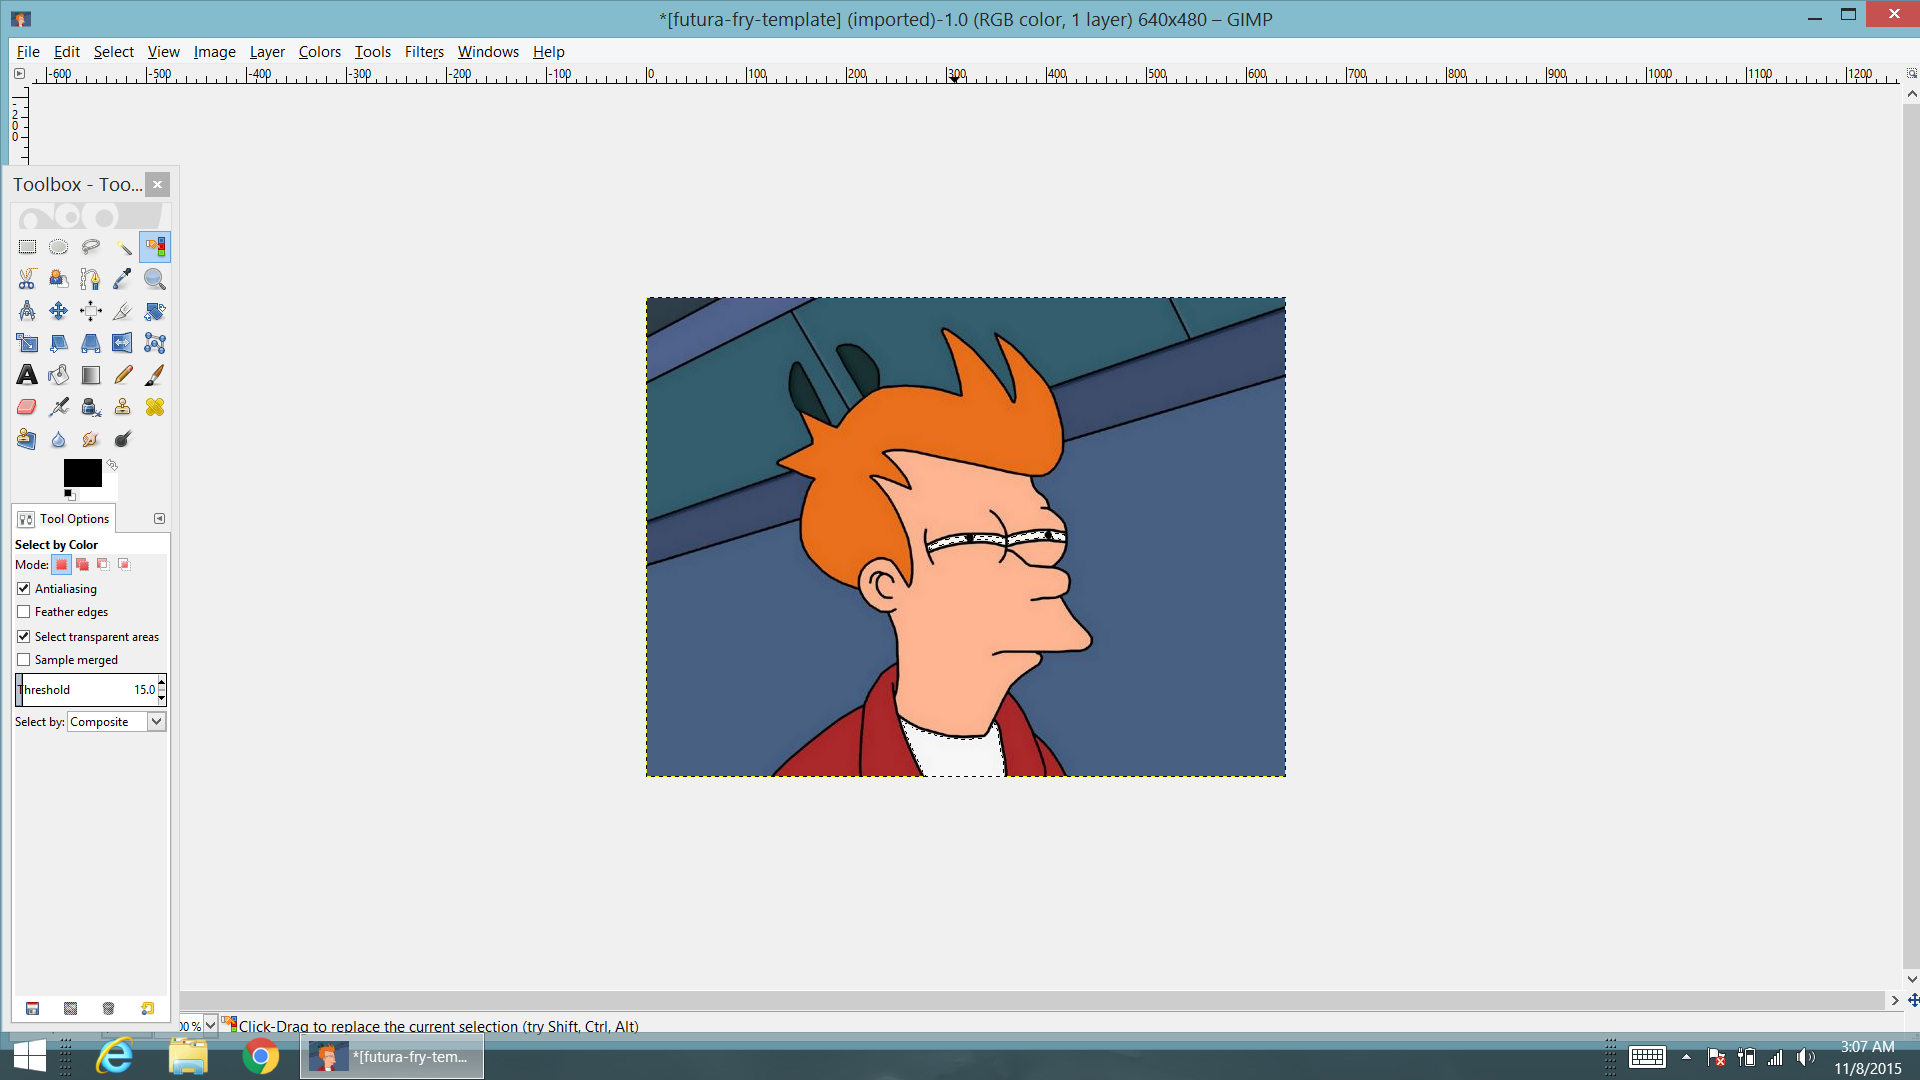
- Next lets select something that is the color White in our image. It should now have a dotted line around it, which shows what is selected. I am using an image with very little white, but your selection may be much larger or more detailed.
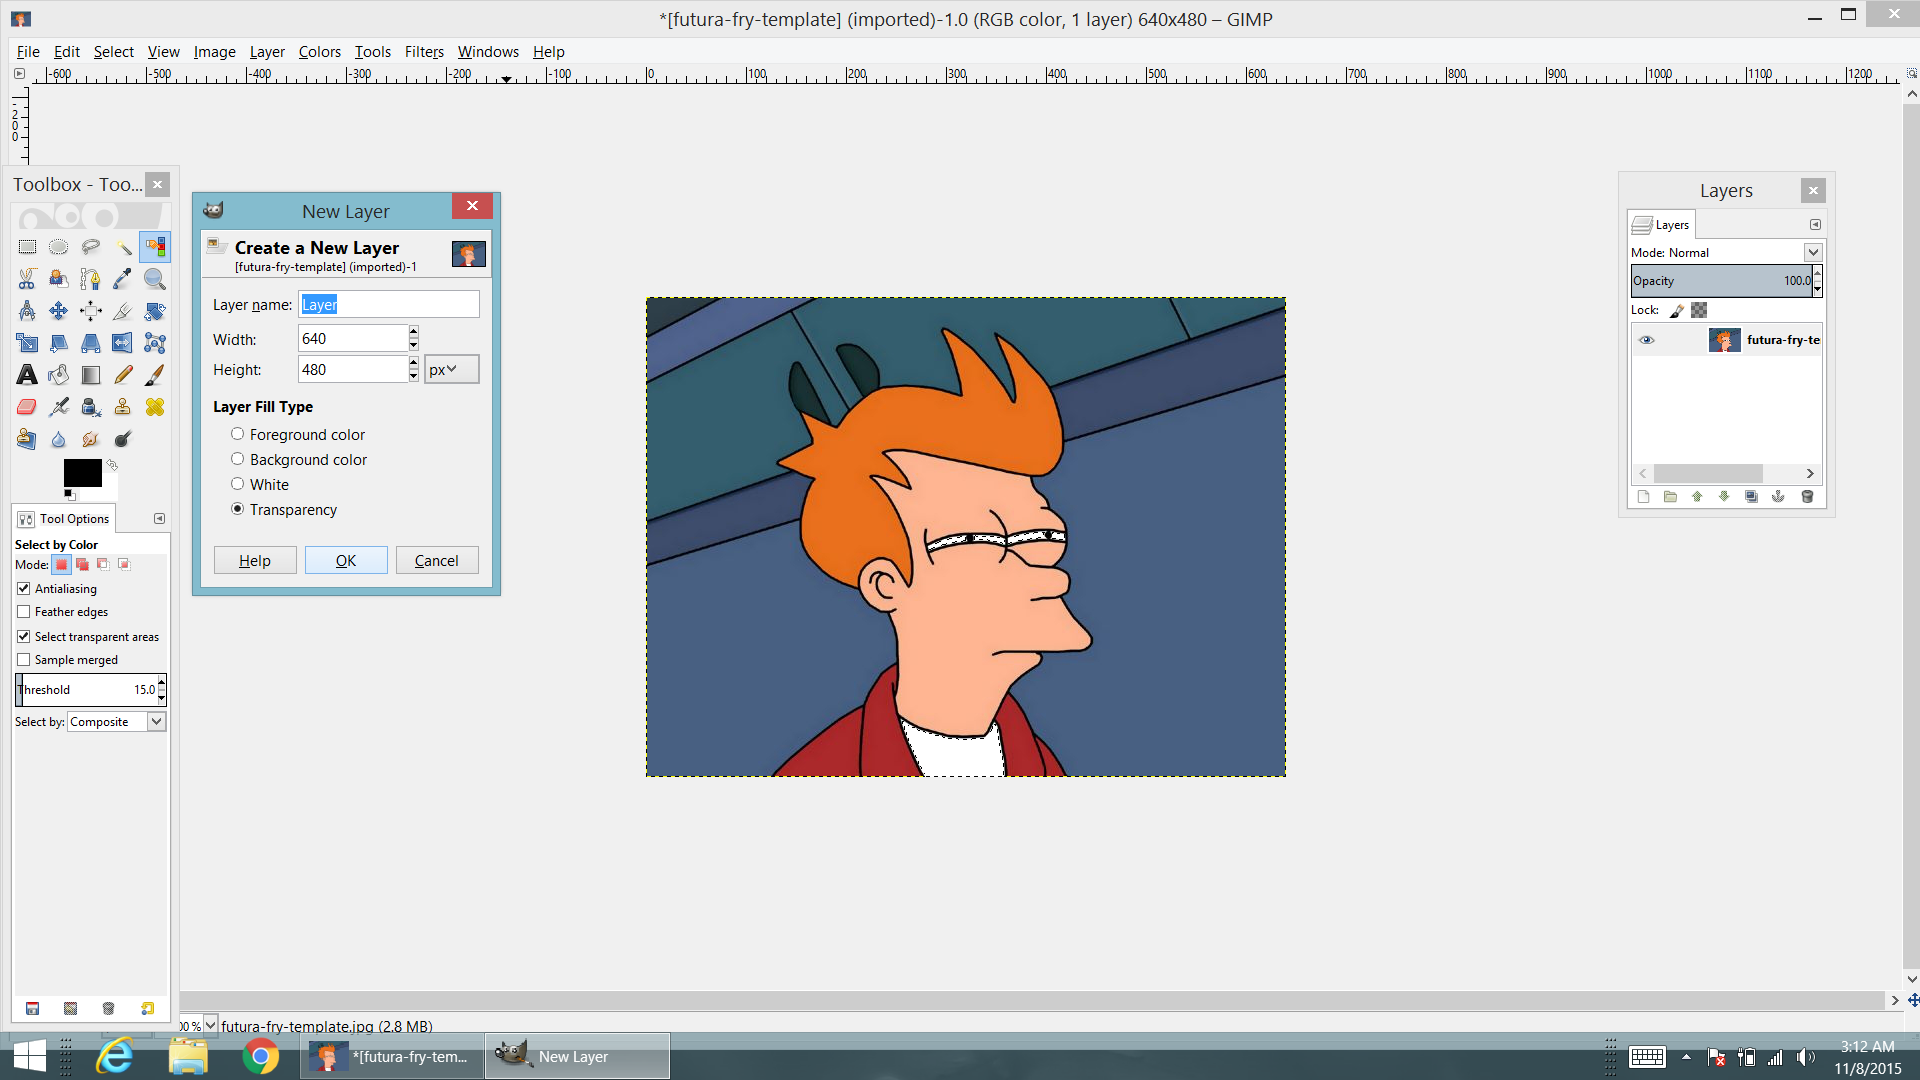
- Next lets create a new Layer. Go to Layer and select New Layer. You can name it whatever you like, but might as well call it "White". Make sure that the Layer Fill Type is set to Transparency.
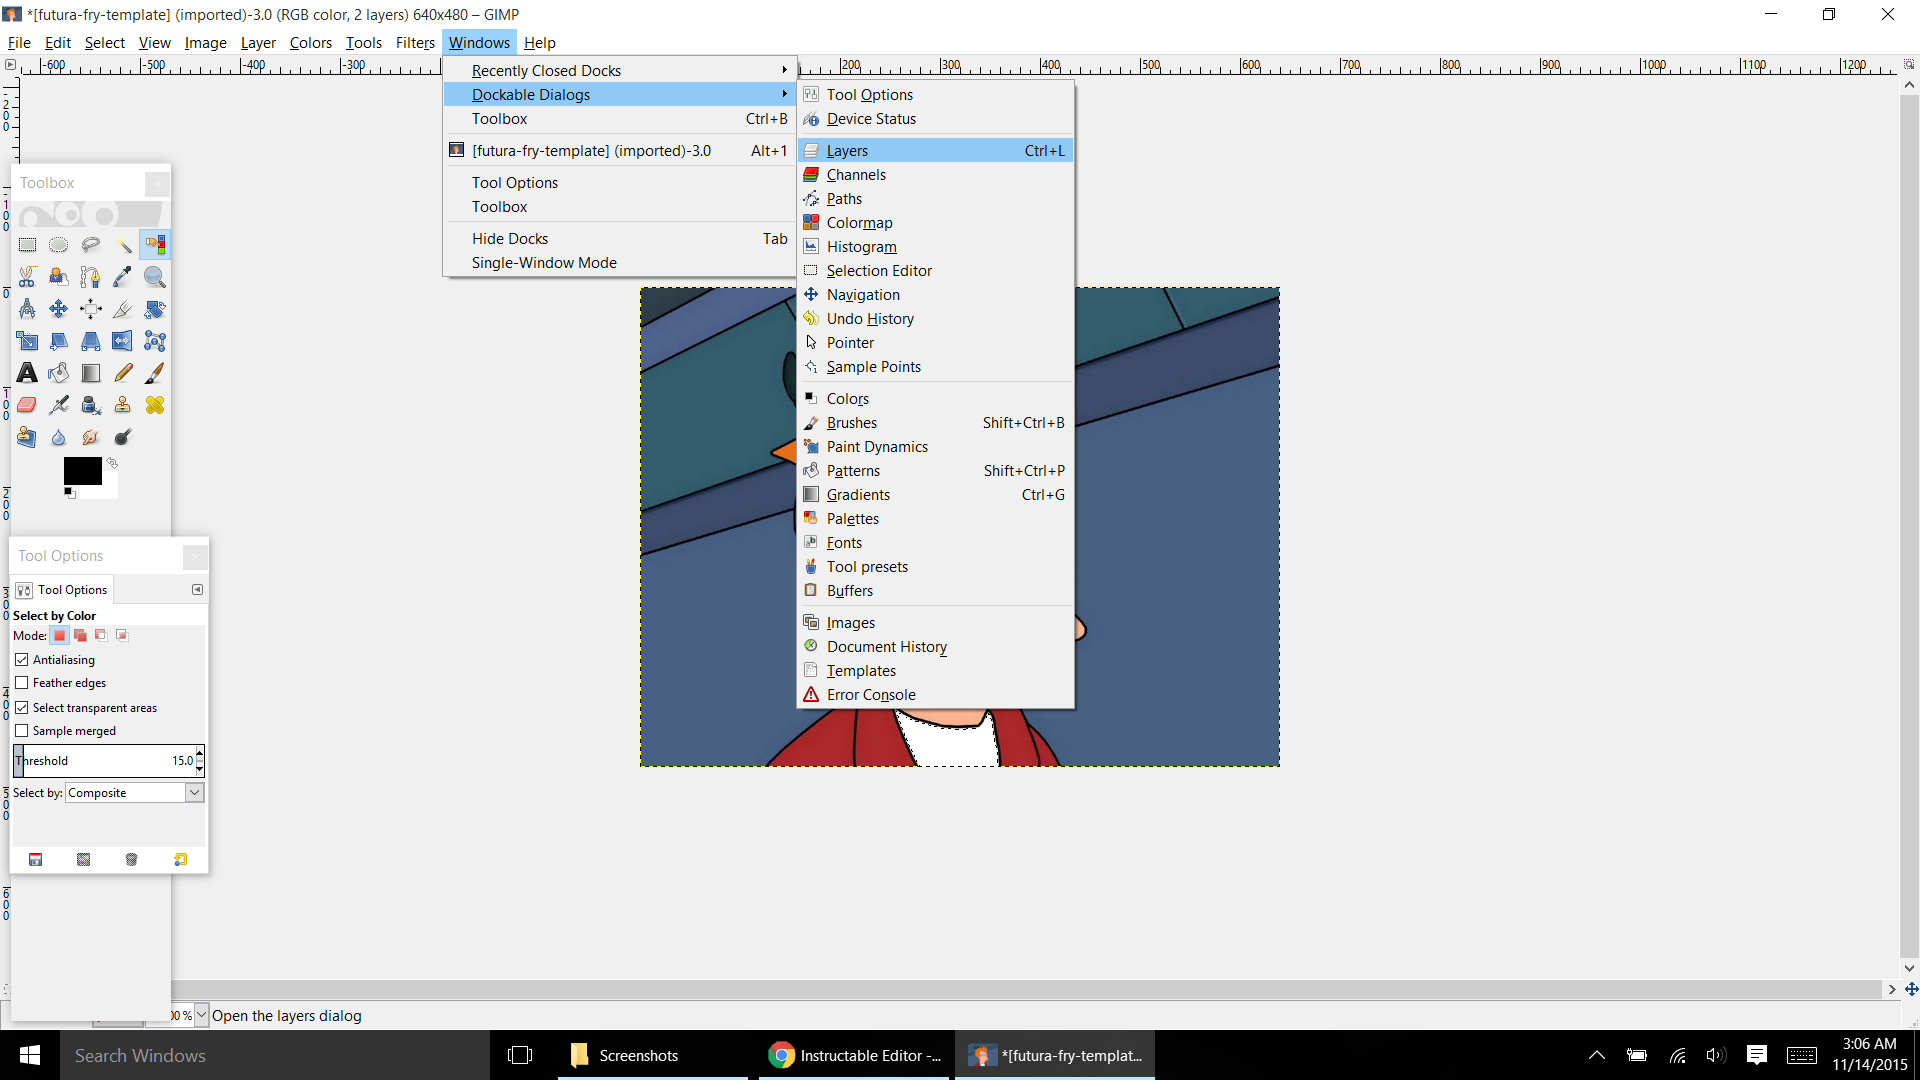
- To view the layer go to the top toolbar and select Windows/ Dockable Dialogs/ Layers. We should now have a window showing our layers.
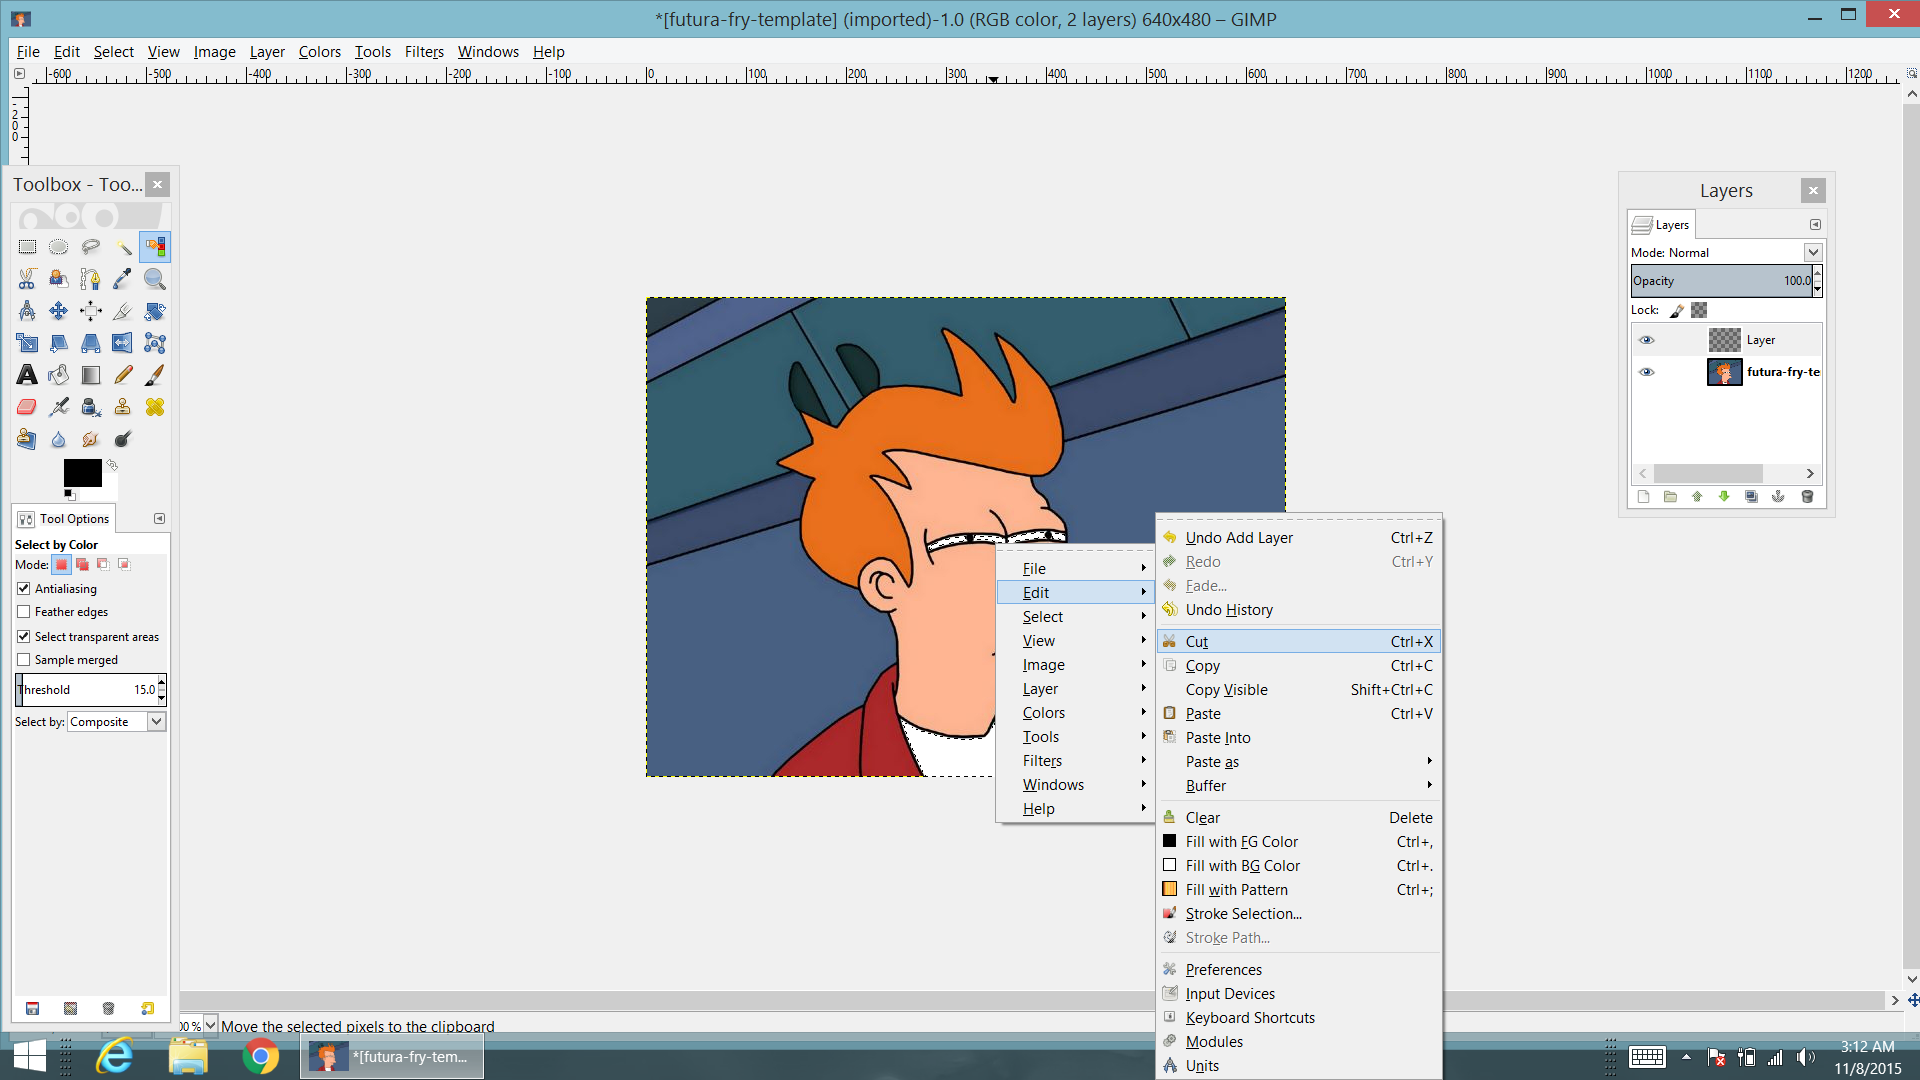
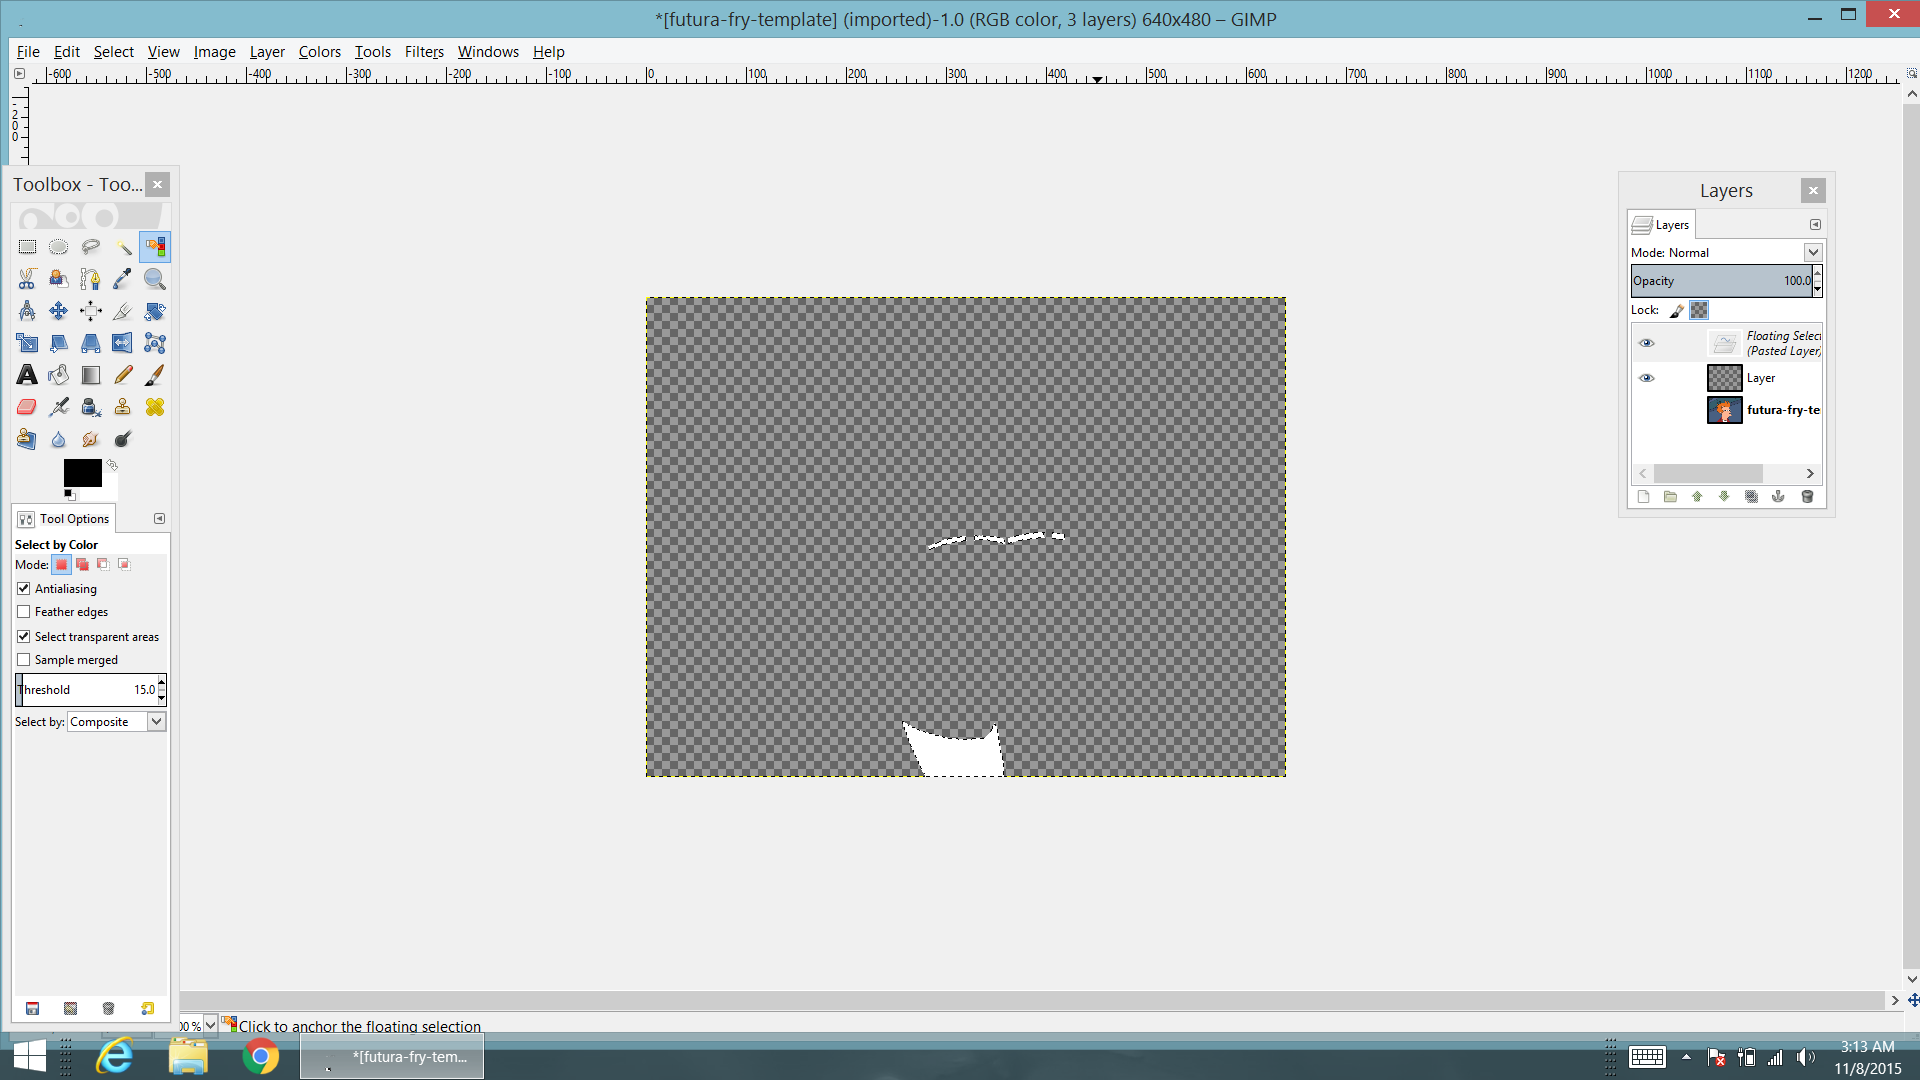
- Next lets make sure the White area is still selected and Right Click select Edit/ Cut.
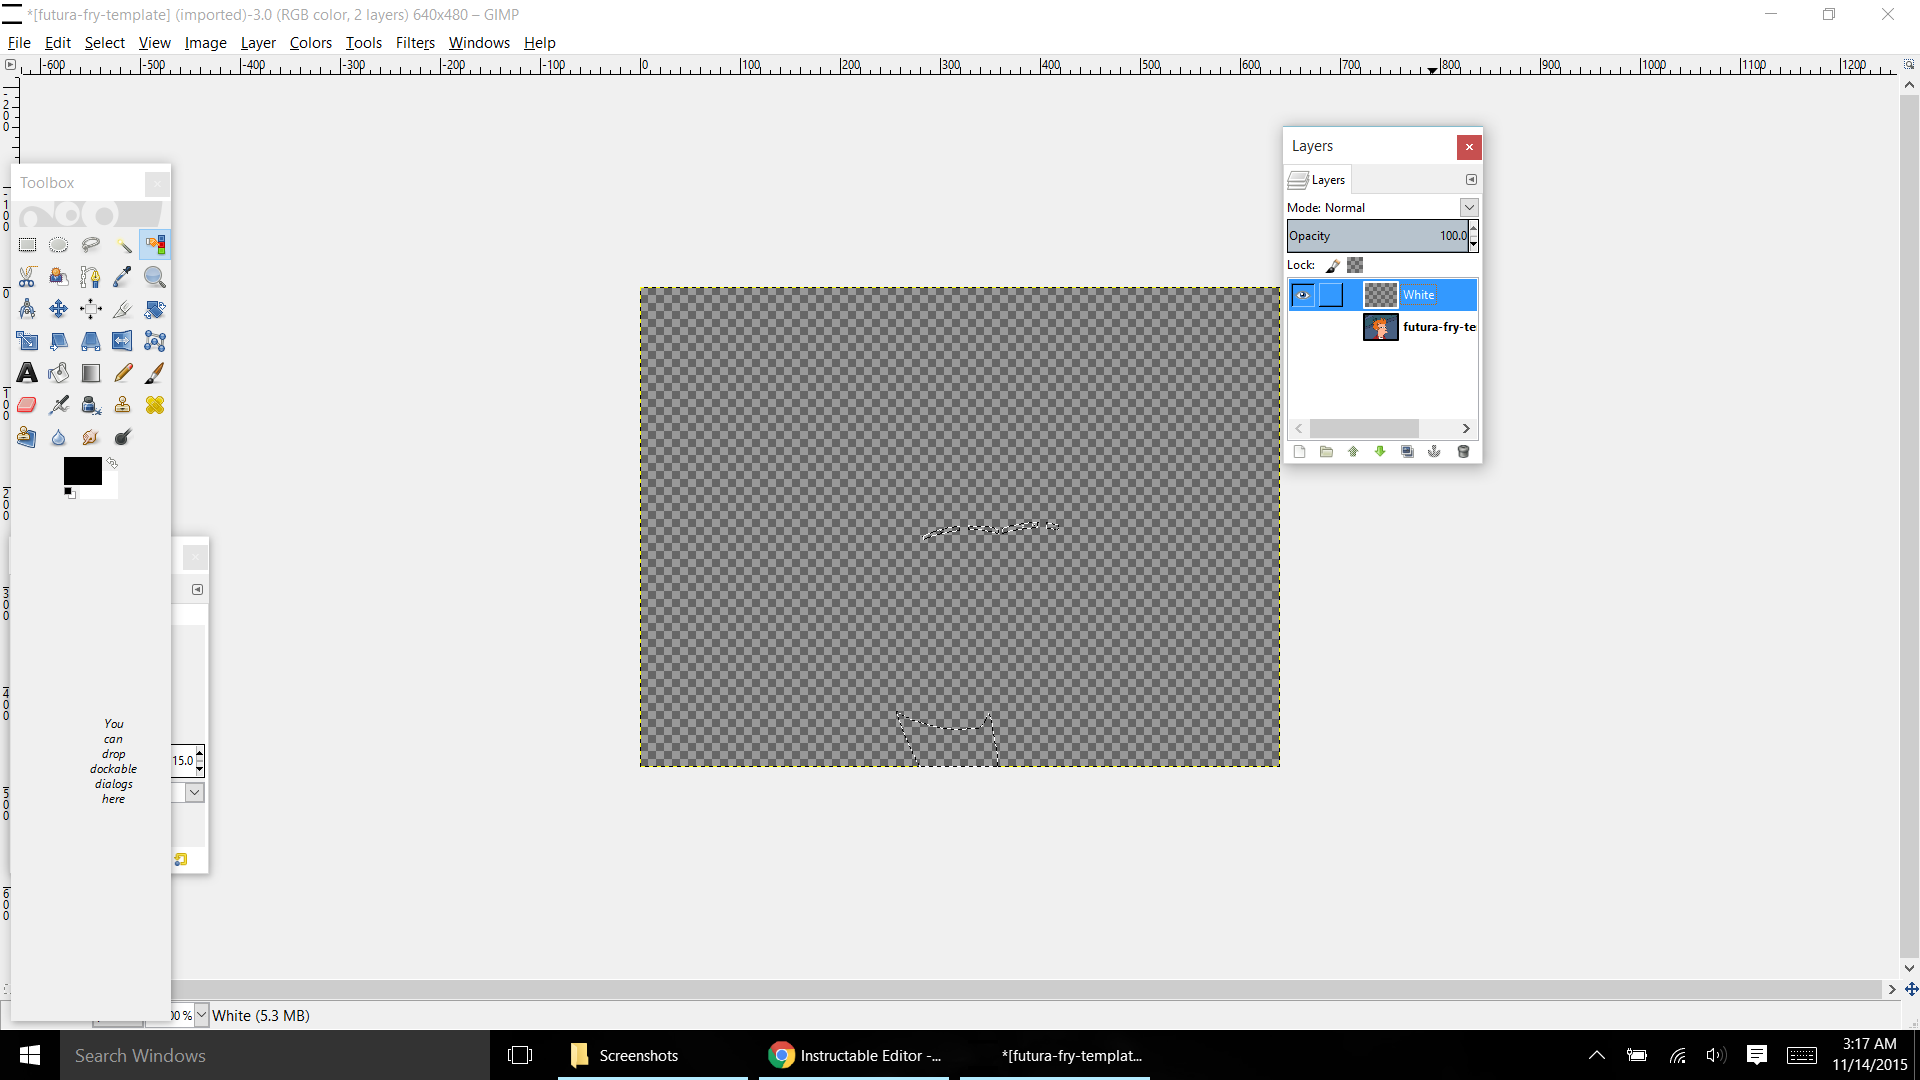
- Now lets go to the layers window and hide the other layers by clicking they "eye shaped" icon next to them.
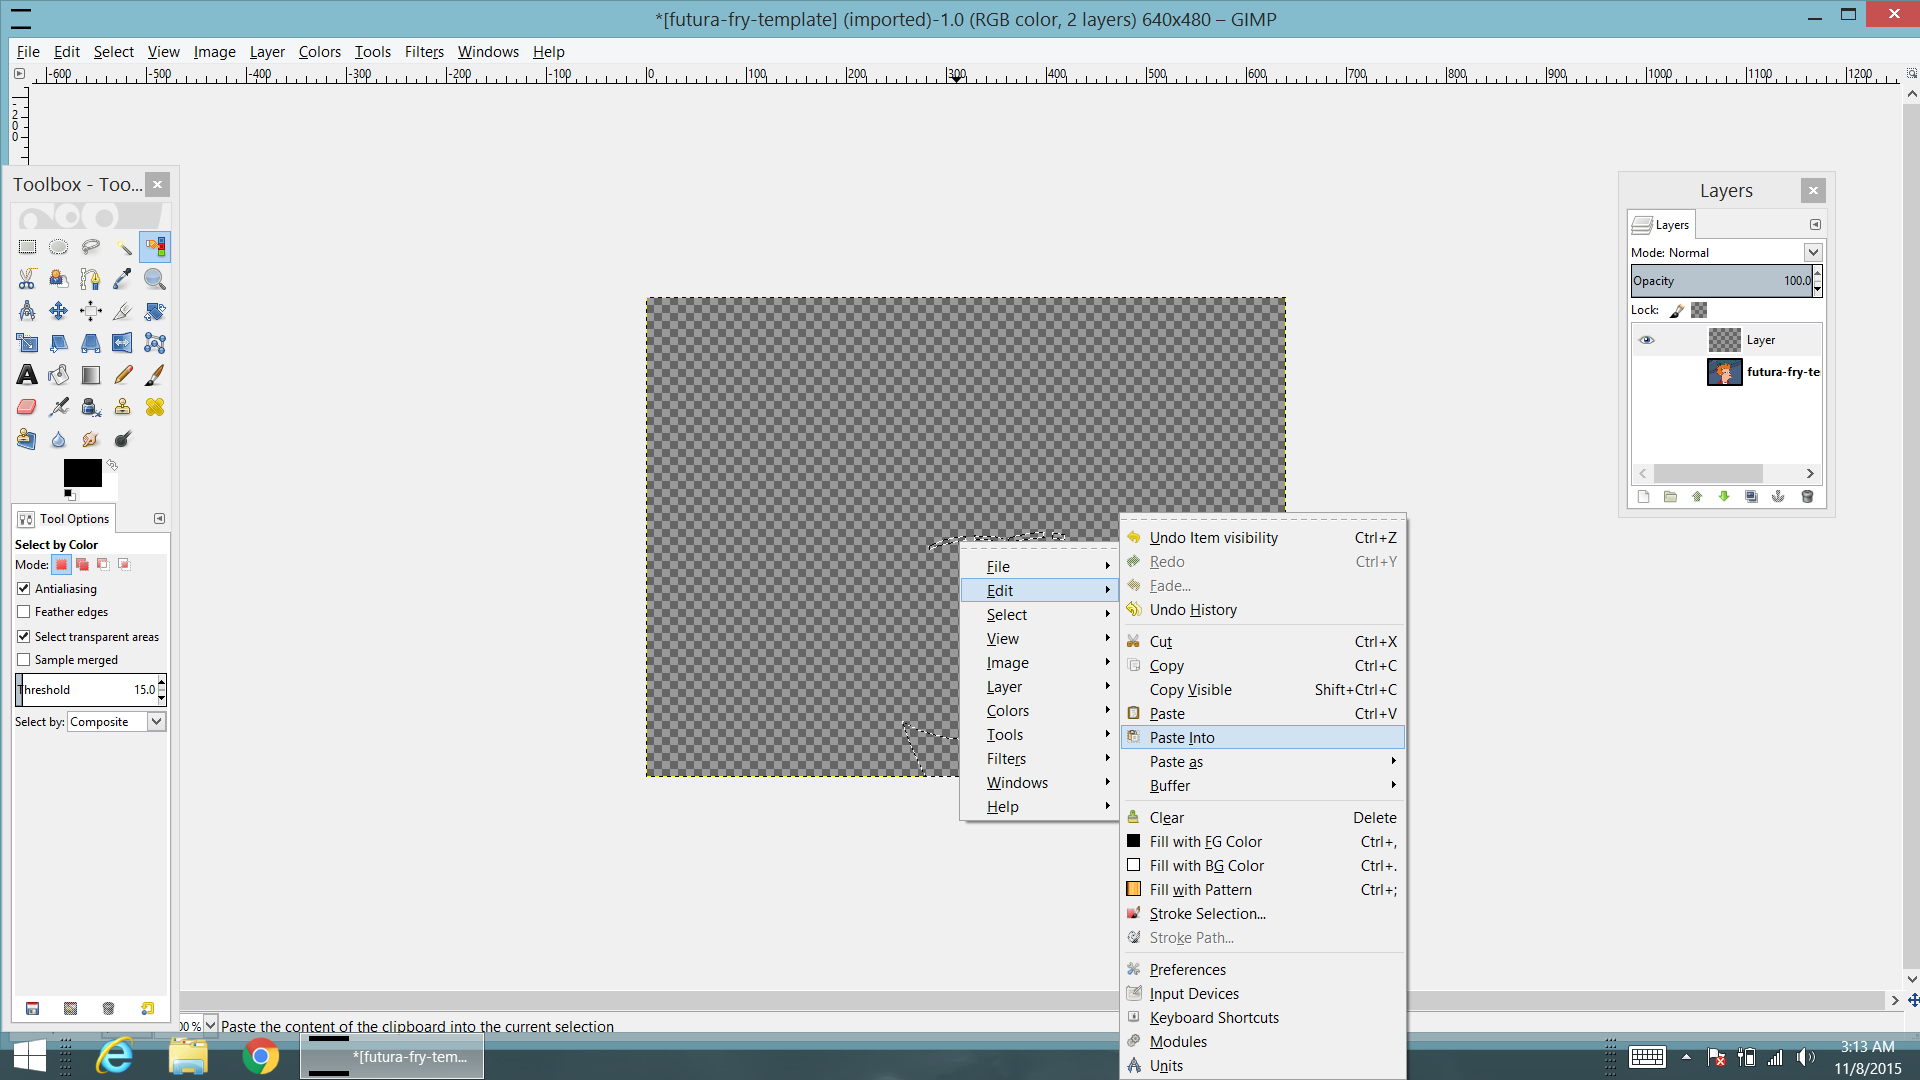
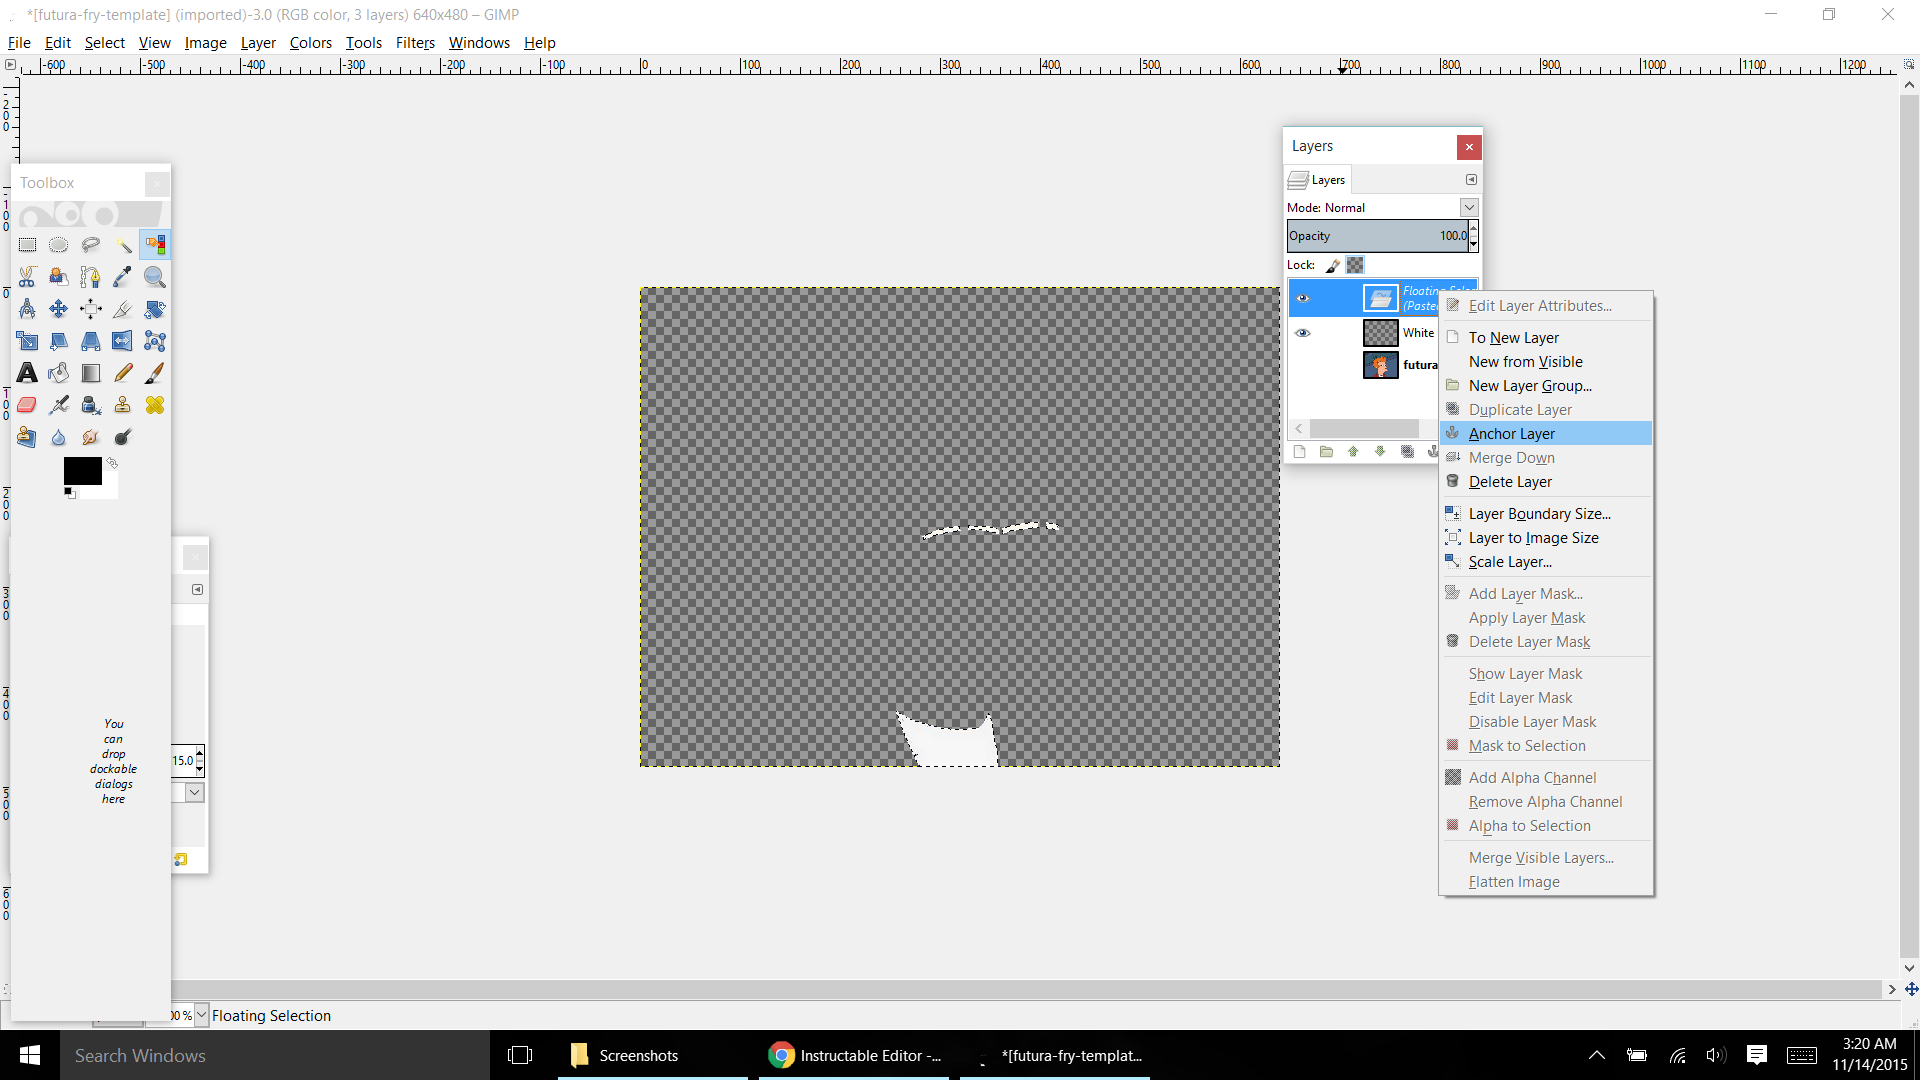
- Once they are hidden Right Click again and select Edit/ Paste into. This will paste it into the vissable layer and another layer will pop up.
- Right Click on that new layer and select Anchor Layer. This will then merge it into the layer we made earlier.
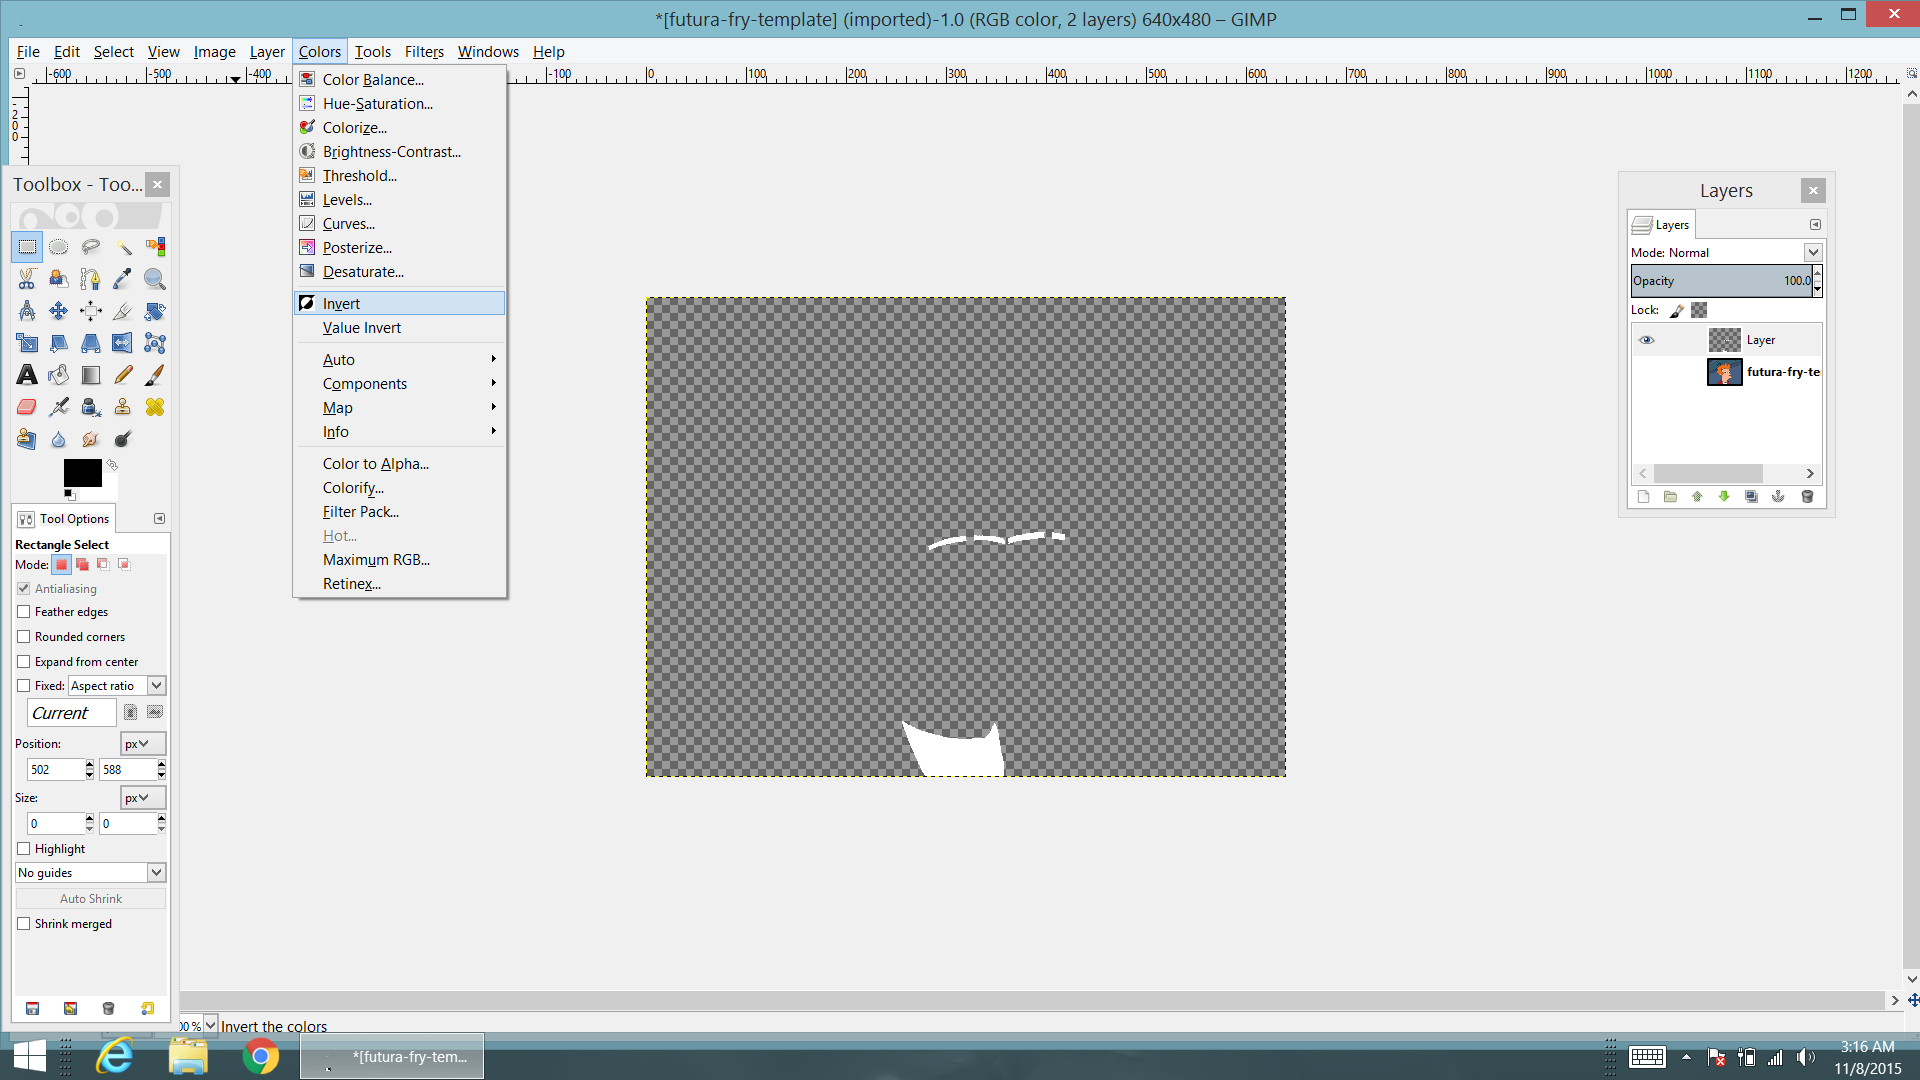
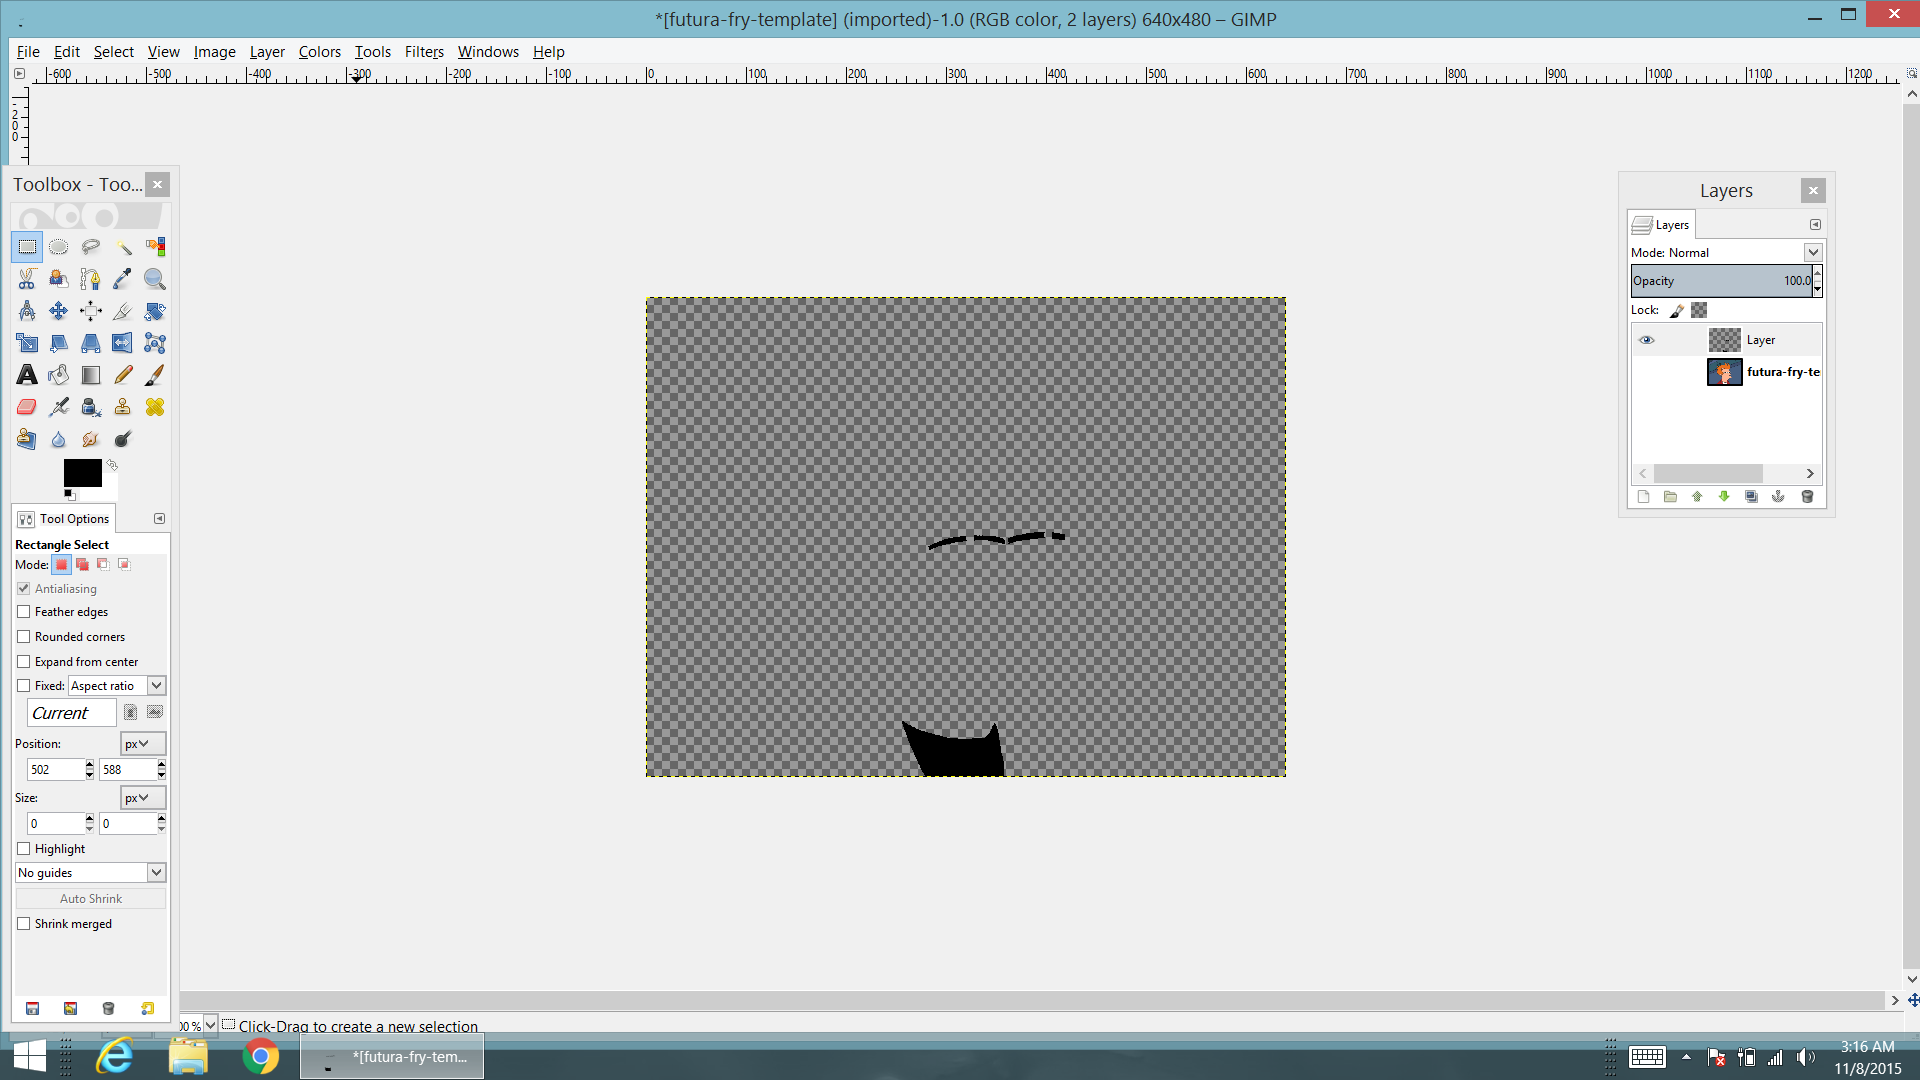
- Now lets go to Colors and select Invert.
- Now we can go to Image/ Mode/ Indexed and dither it like we did the other colors.
- Select Use Black and White (1-bit) Color Palette and choose Floyd Steinberg just like we did with the other colors. It might not look any different, but I think that's because the image I used only has one shade of white, or that the color picker tool only chose that single shade of white. You may have different results and may not have to use this step.
- Now we can export this layer by going to File/ Export as and using the file type that is compatible with your software.
I didn't do this for my version, but it may be wise to do these following steps, especially if you have your white layer in the back.
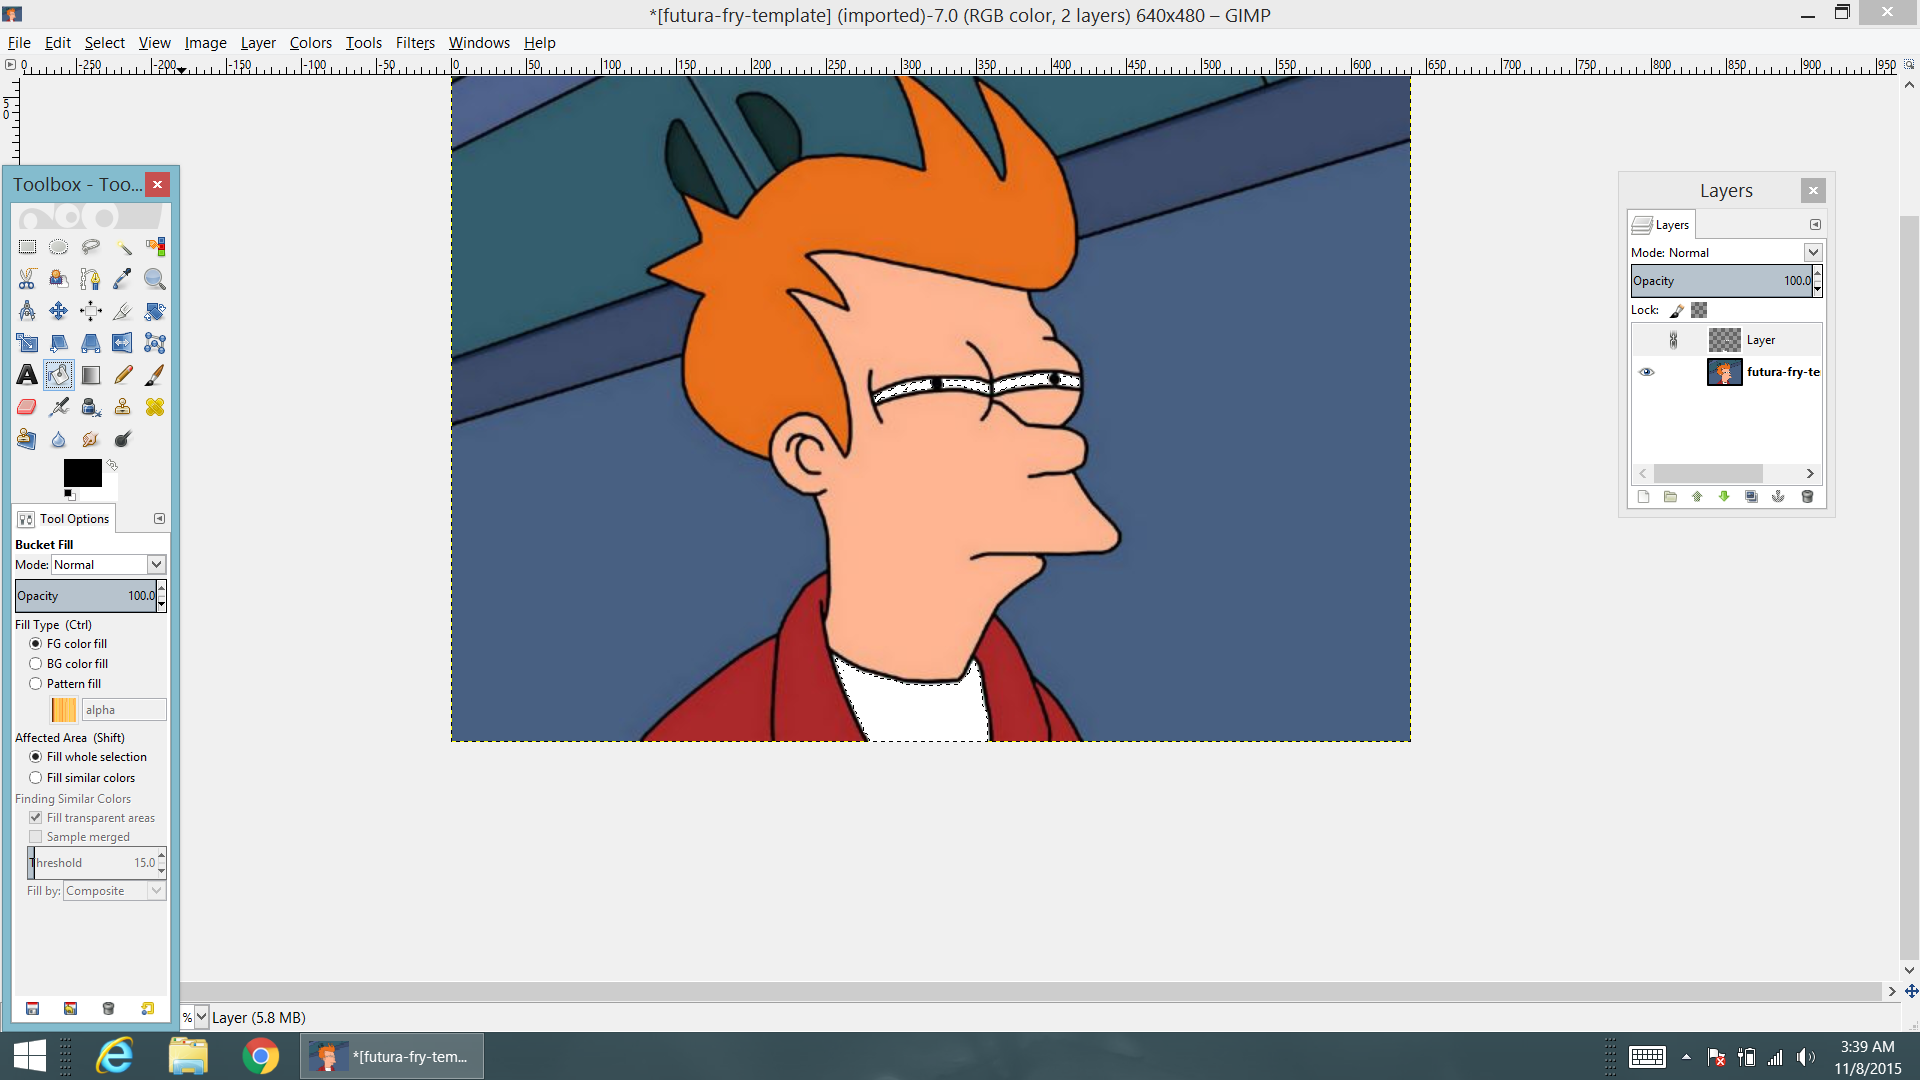
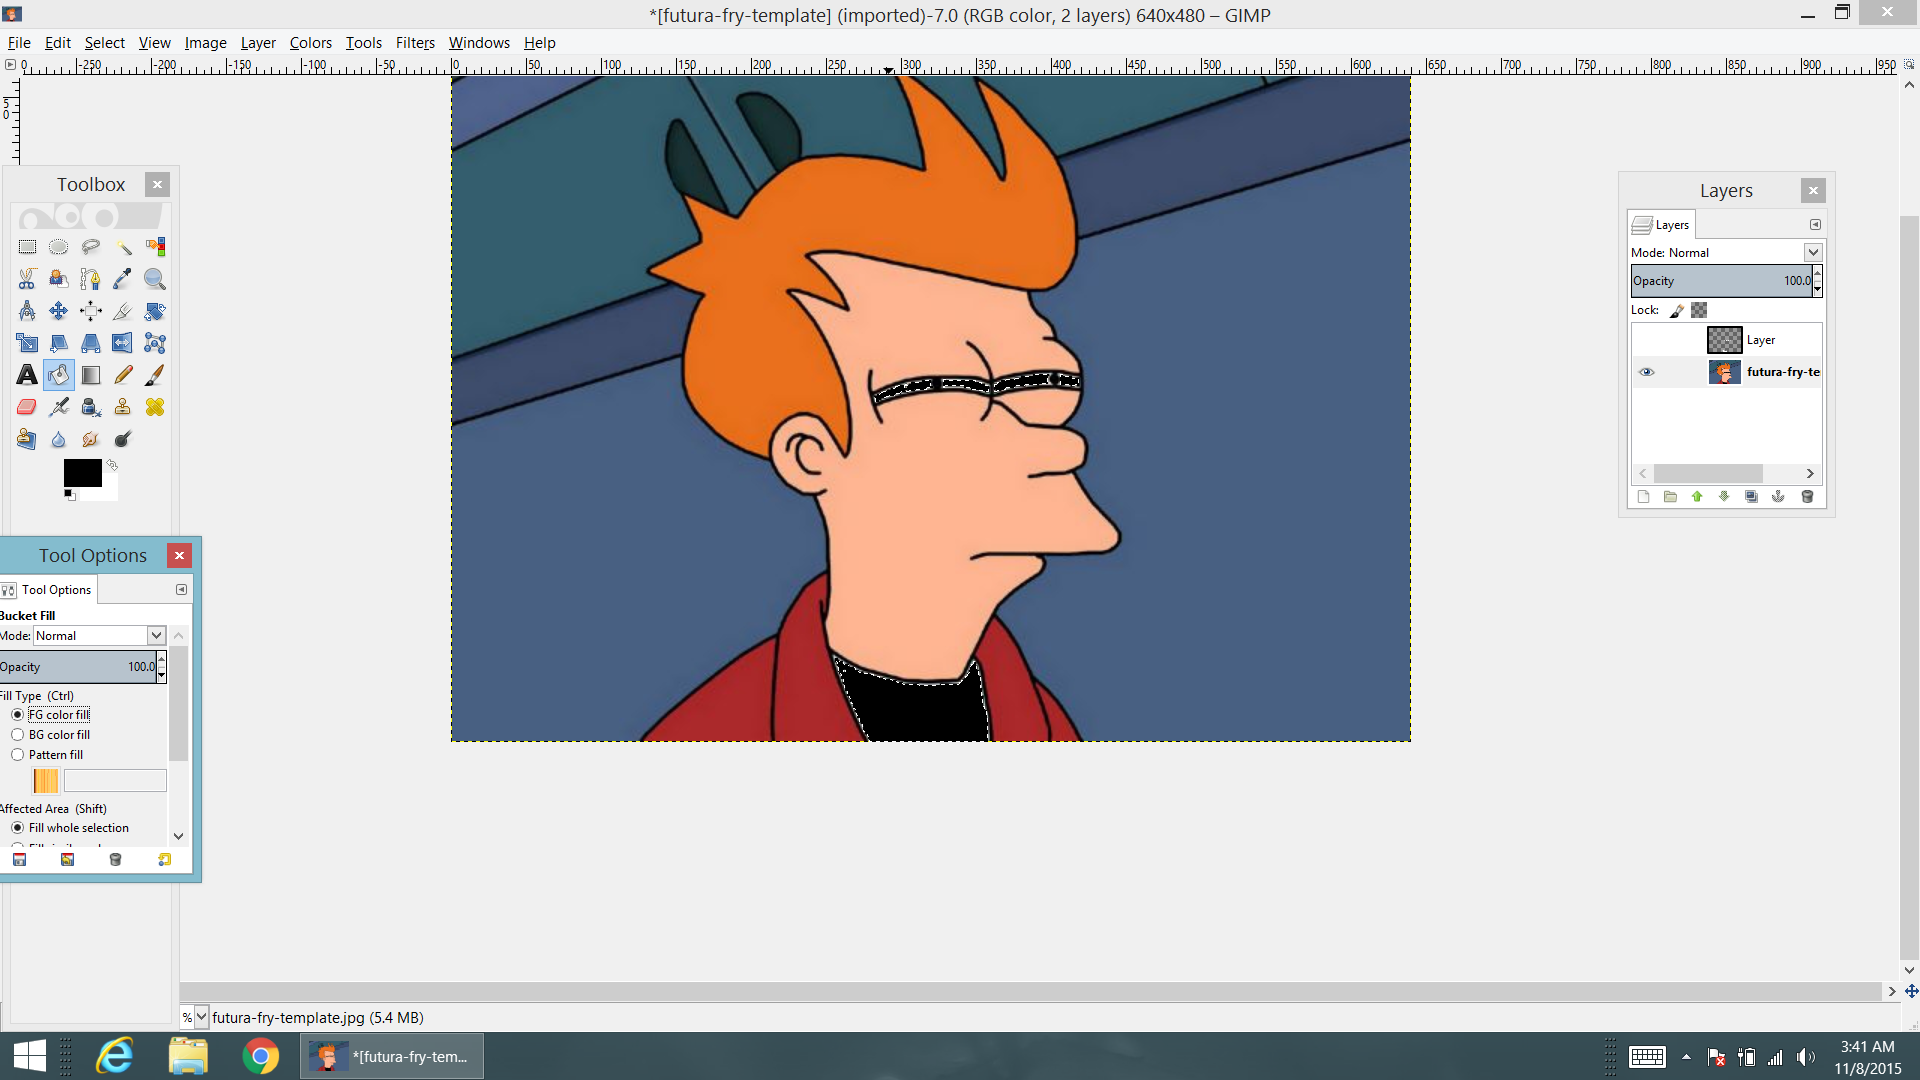
- Lets select the White areas of our photo again with the color picker and select the Paint Bucket from the toolbox and fill in all the white areas with Black. This will make the white color essentially "invisible" to the other layers when we modify the other colors. This should hopefully let the laser ignore these areas so that it doesn't etch in these areas on the Red, Green, and Blue layers.
(There may be easier ways of getting rid of the white areas, but I still have a lot to learn in GIMP, and this is what I was able to come up with so far. If you have any suggestions, you can put them into the comments.)
Now we can process the other colors like we did before. If you are not sure how, then see the previous step.
Laser Cutting Time!
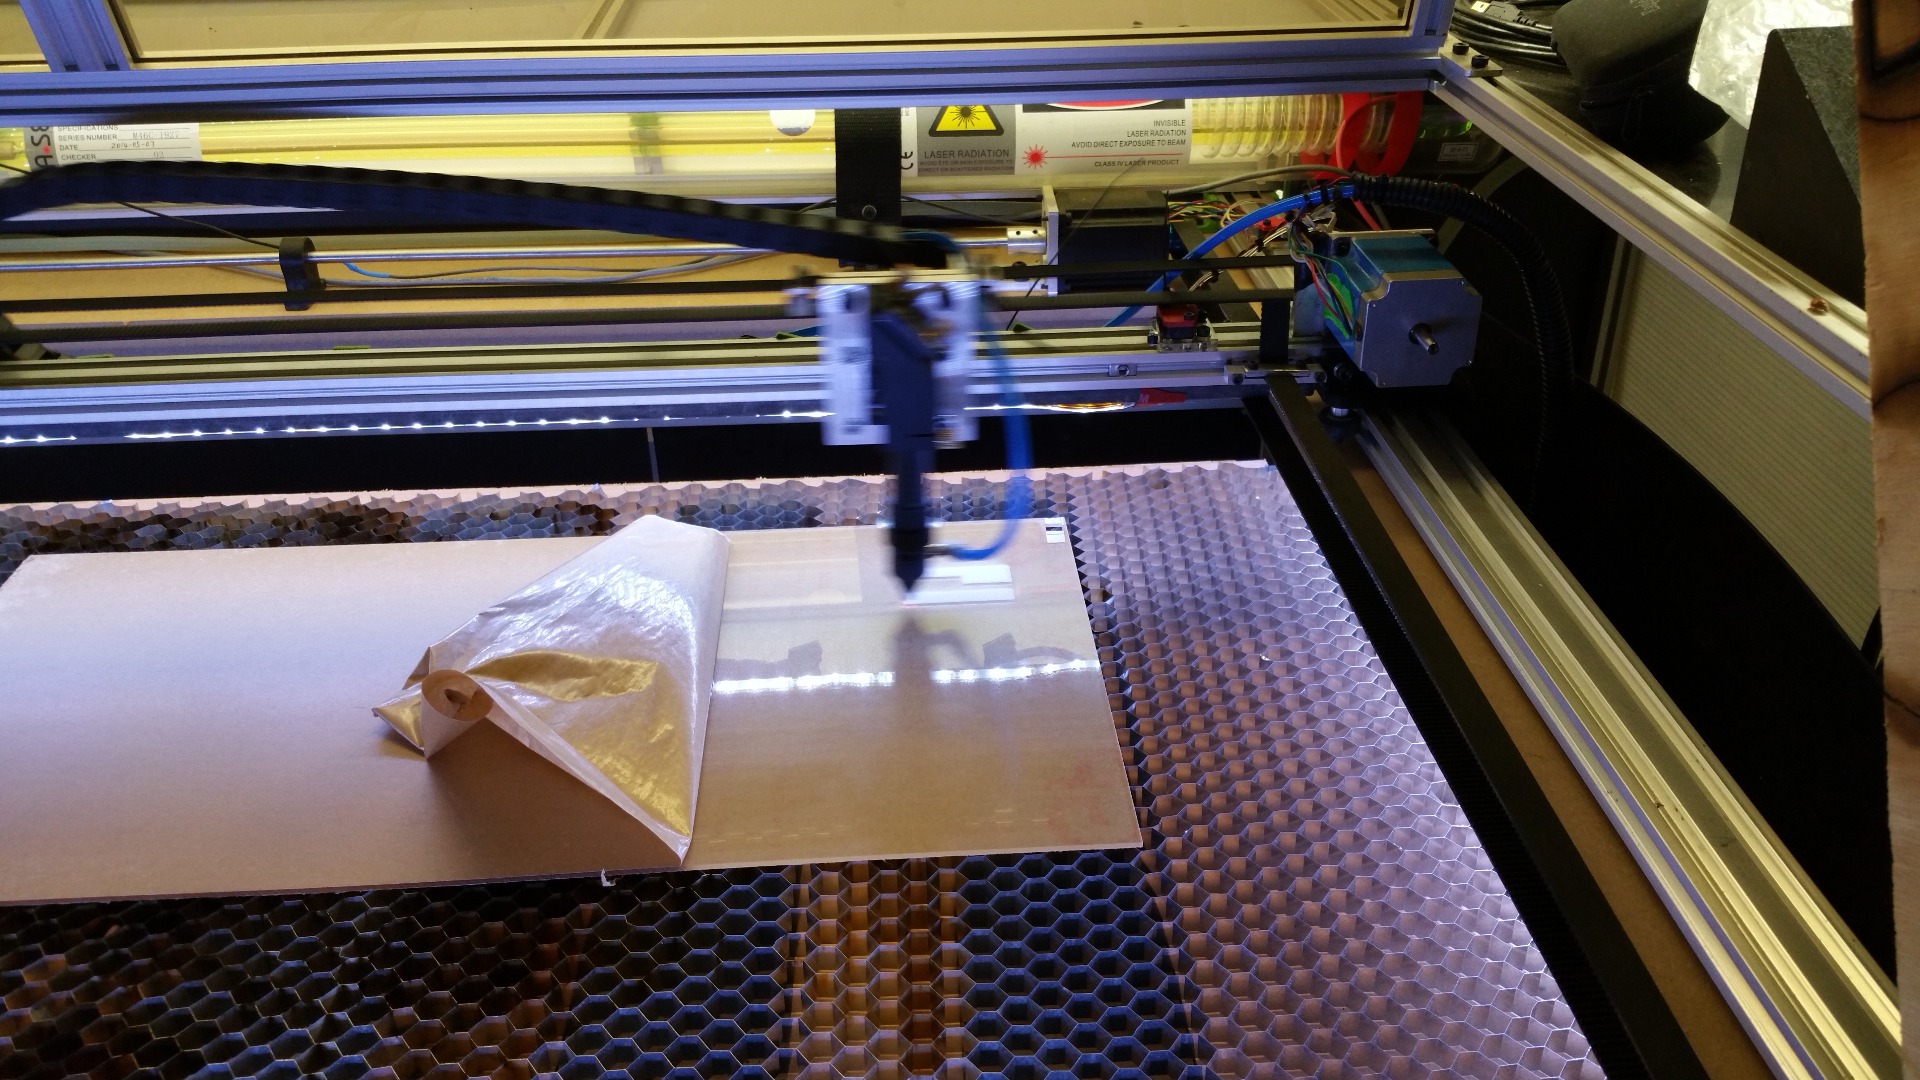
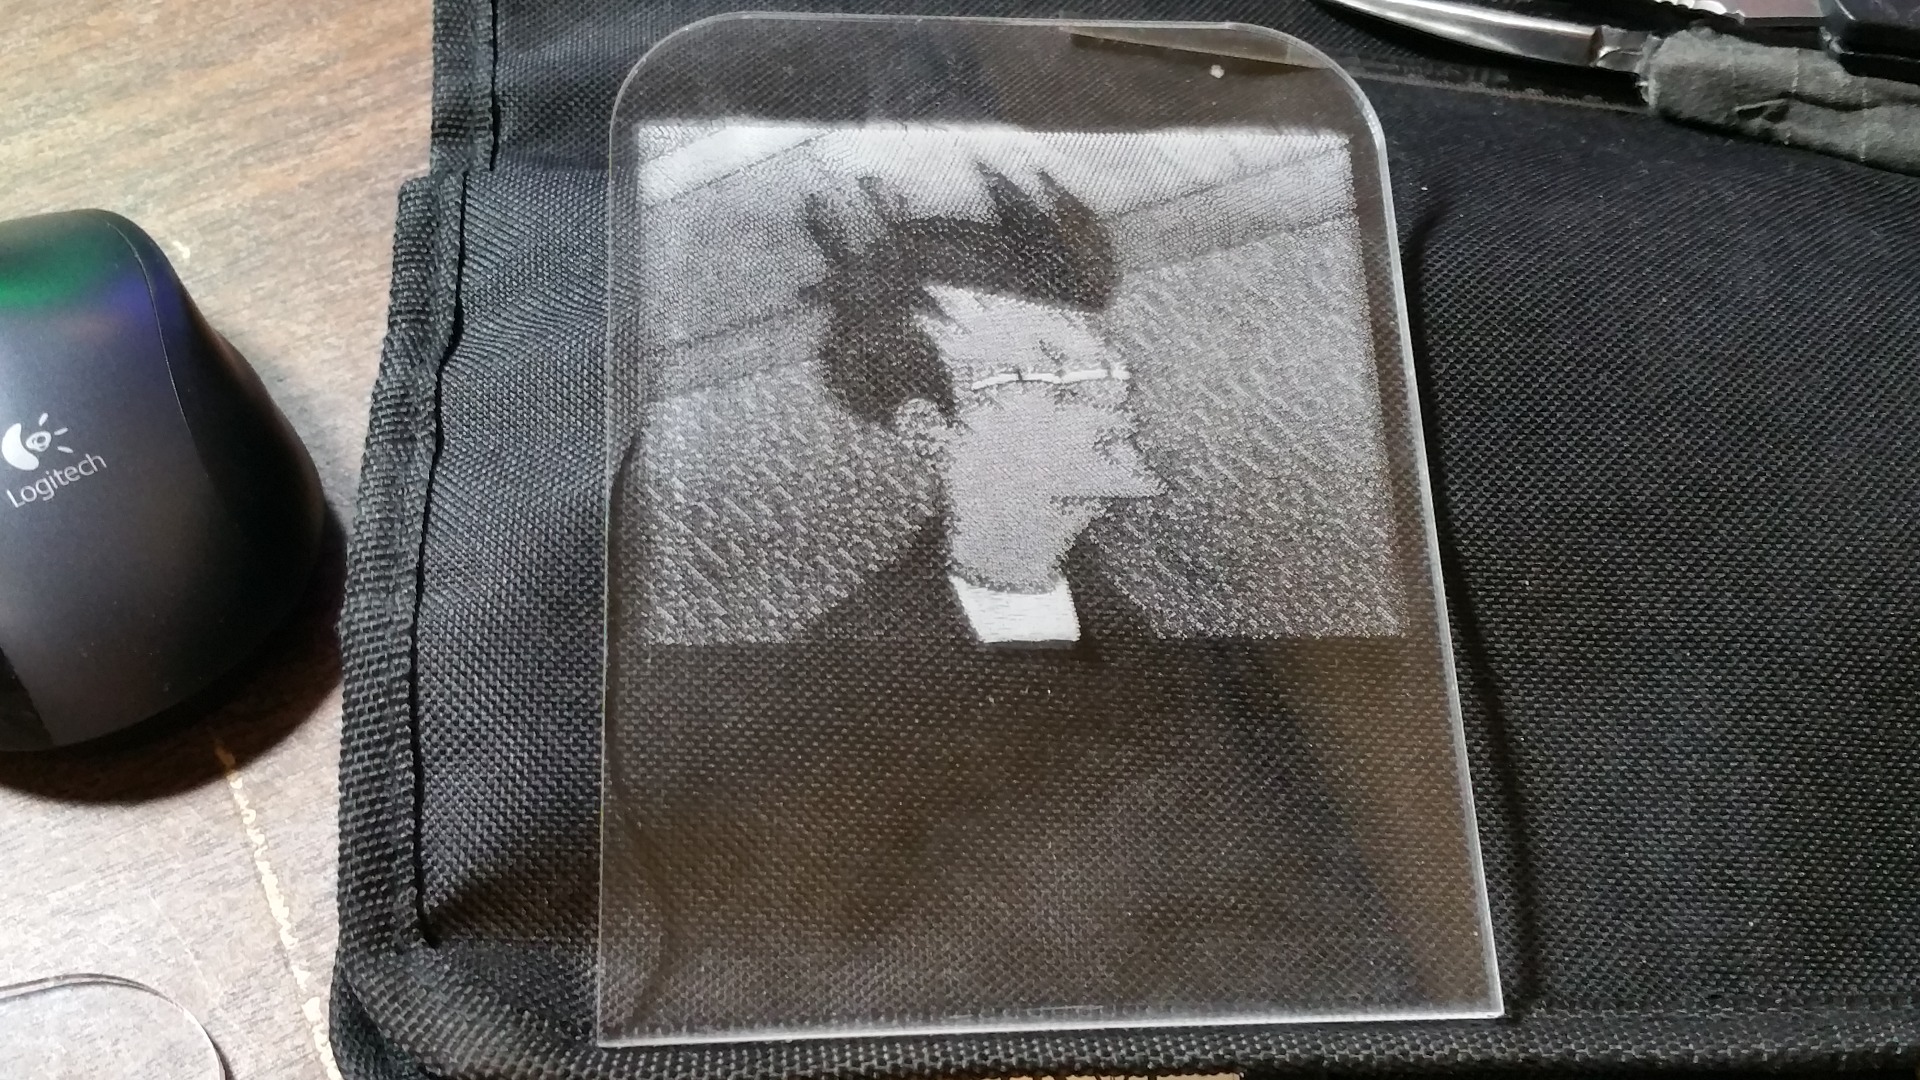
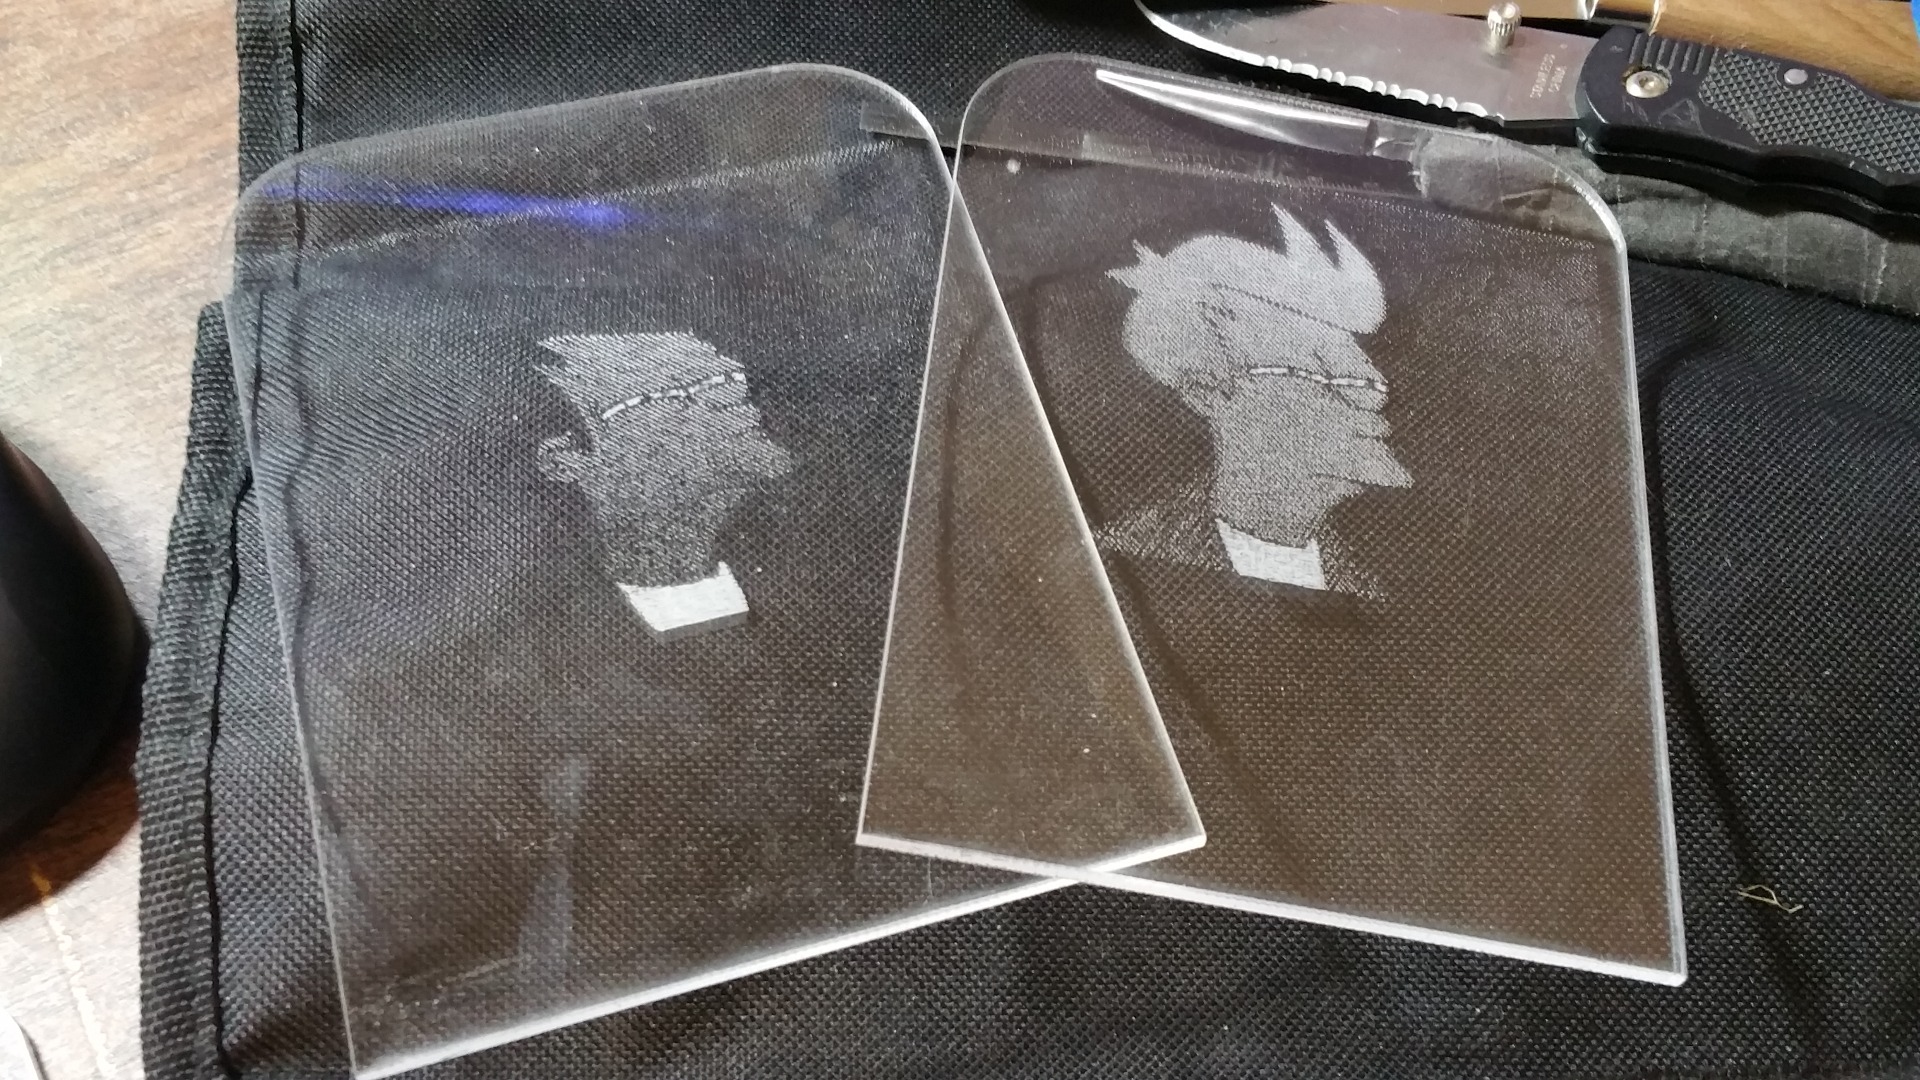
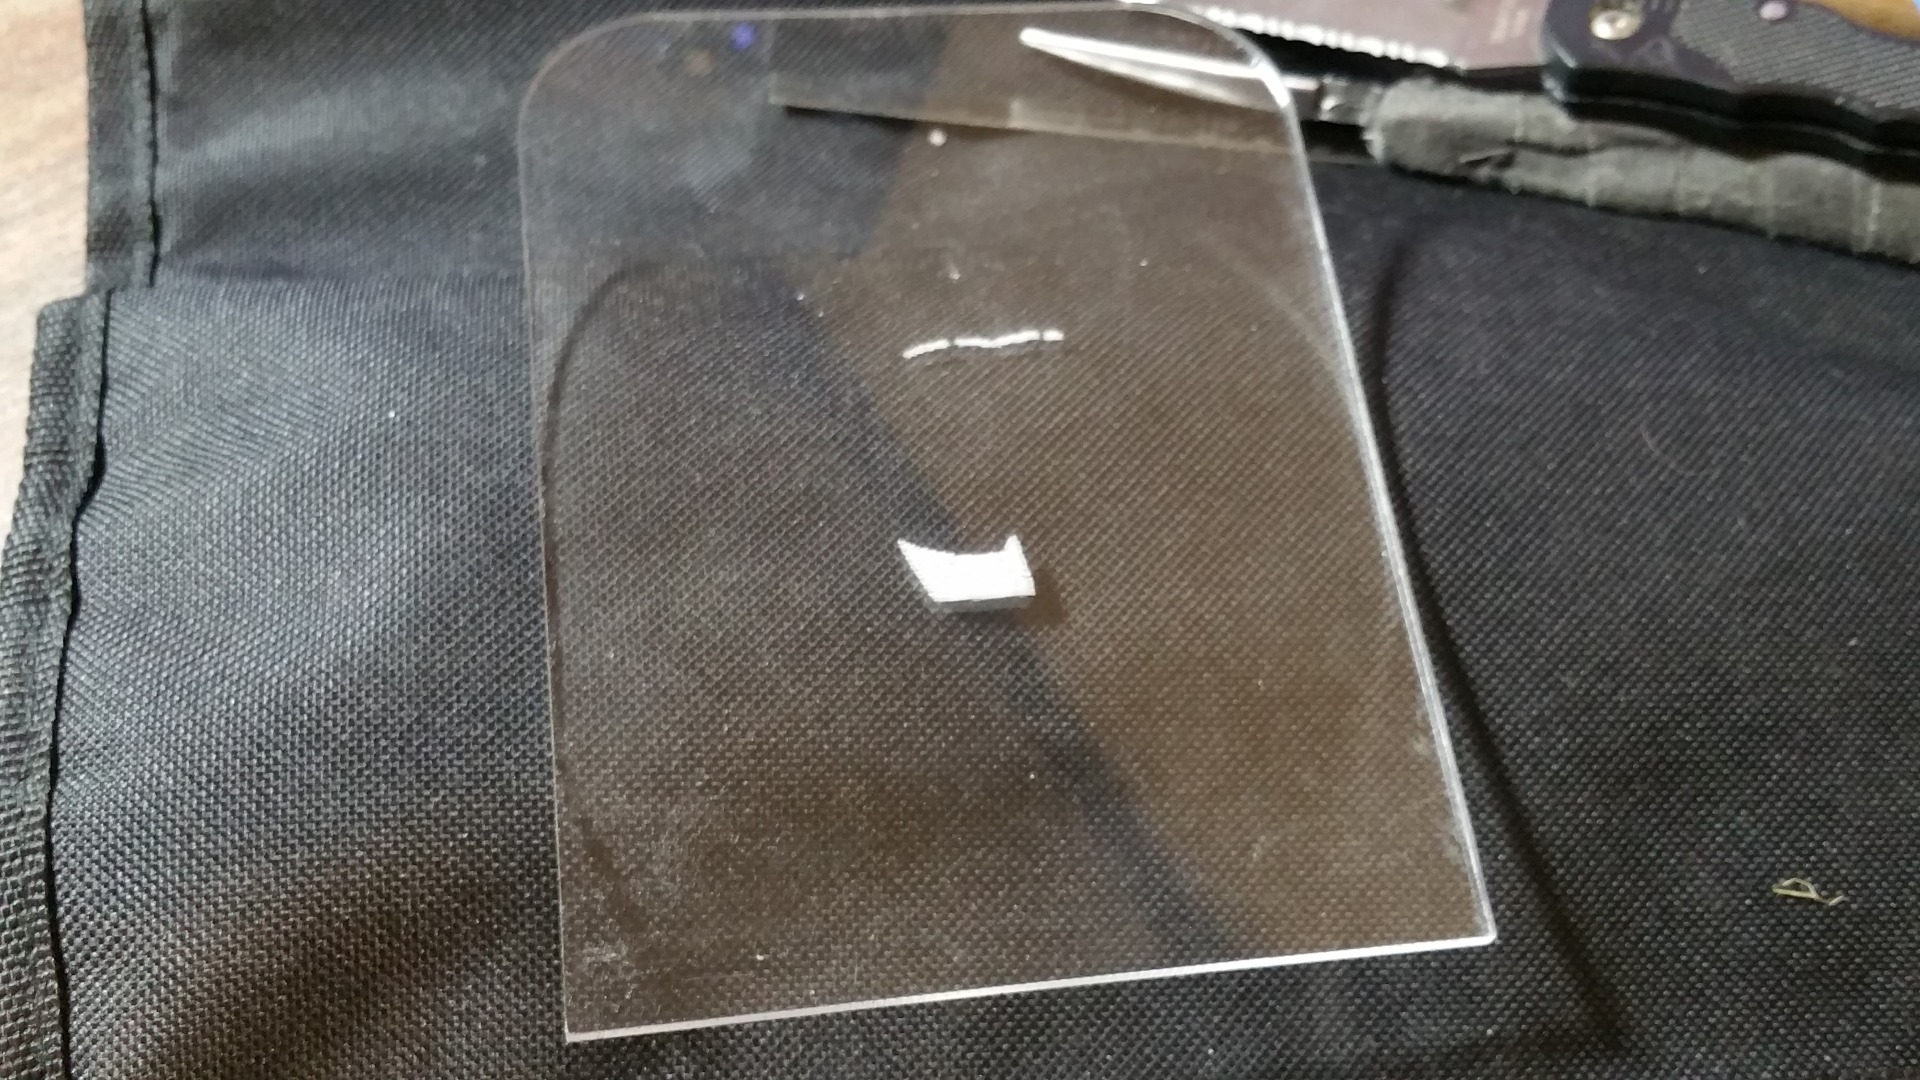
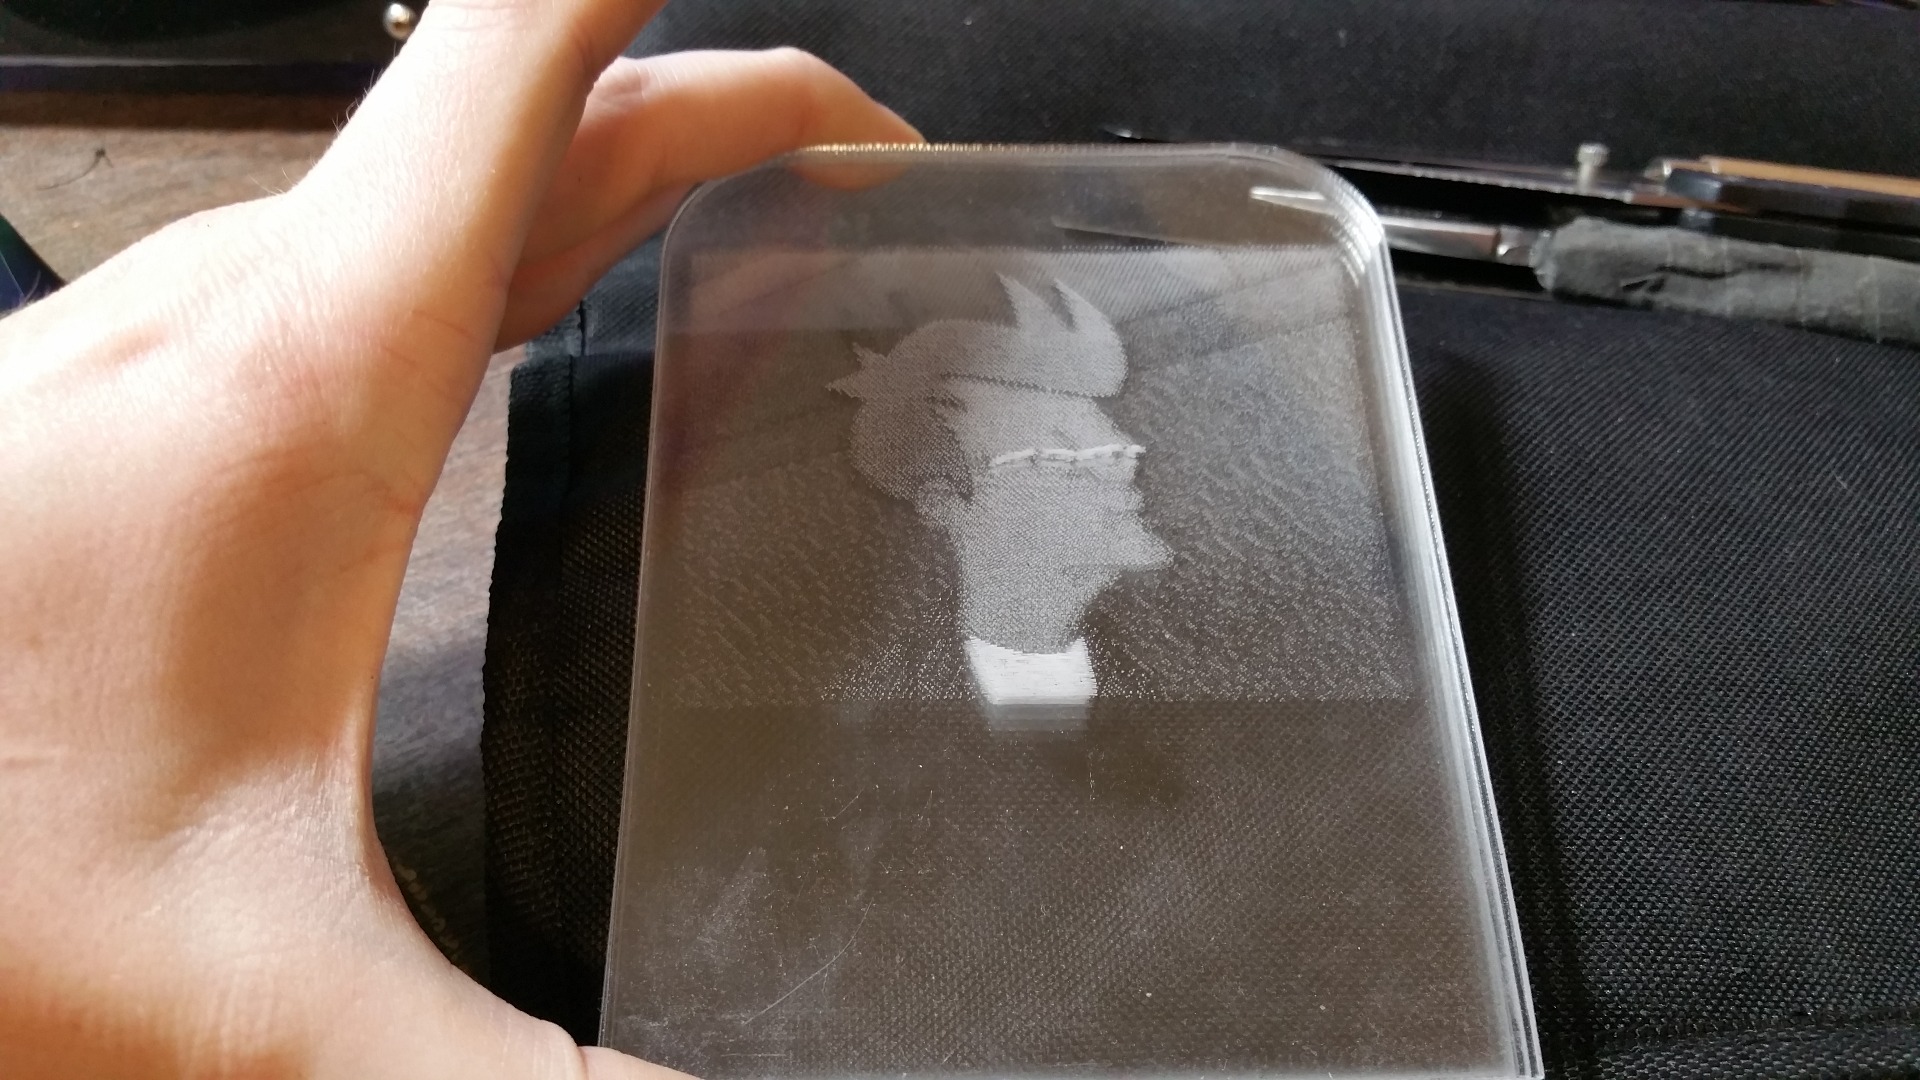
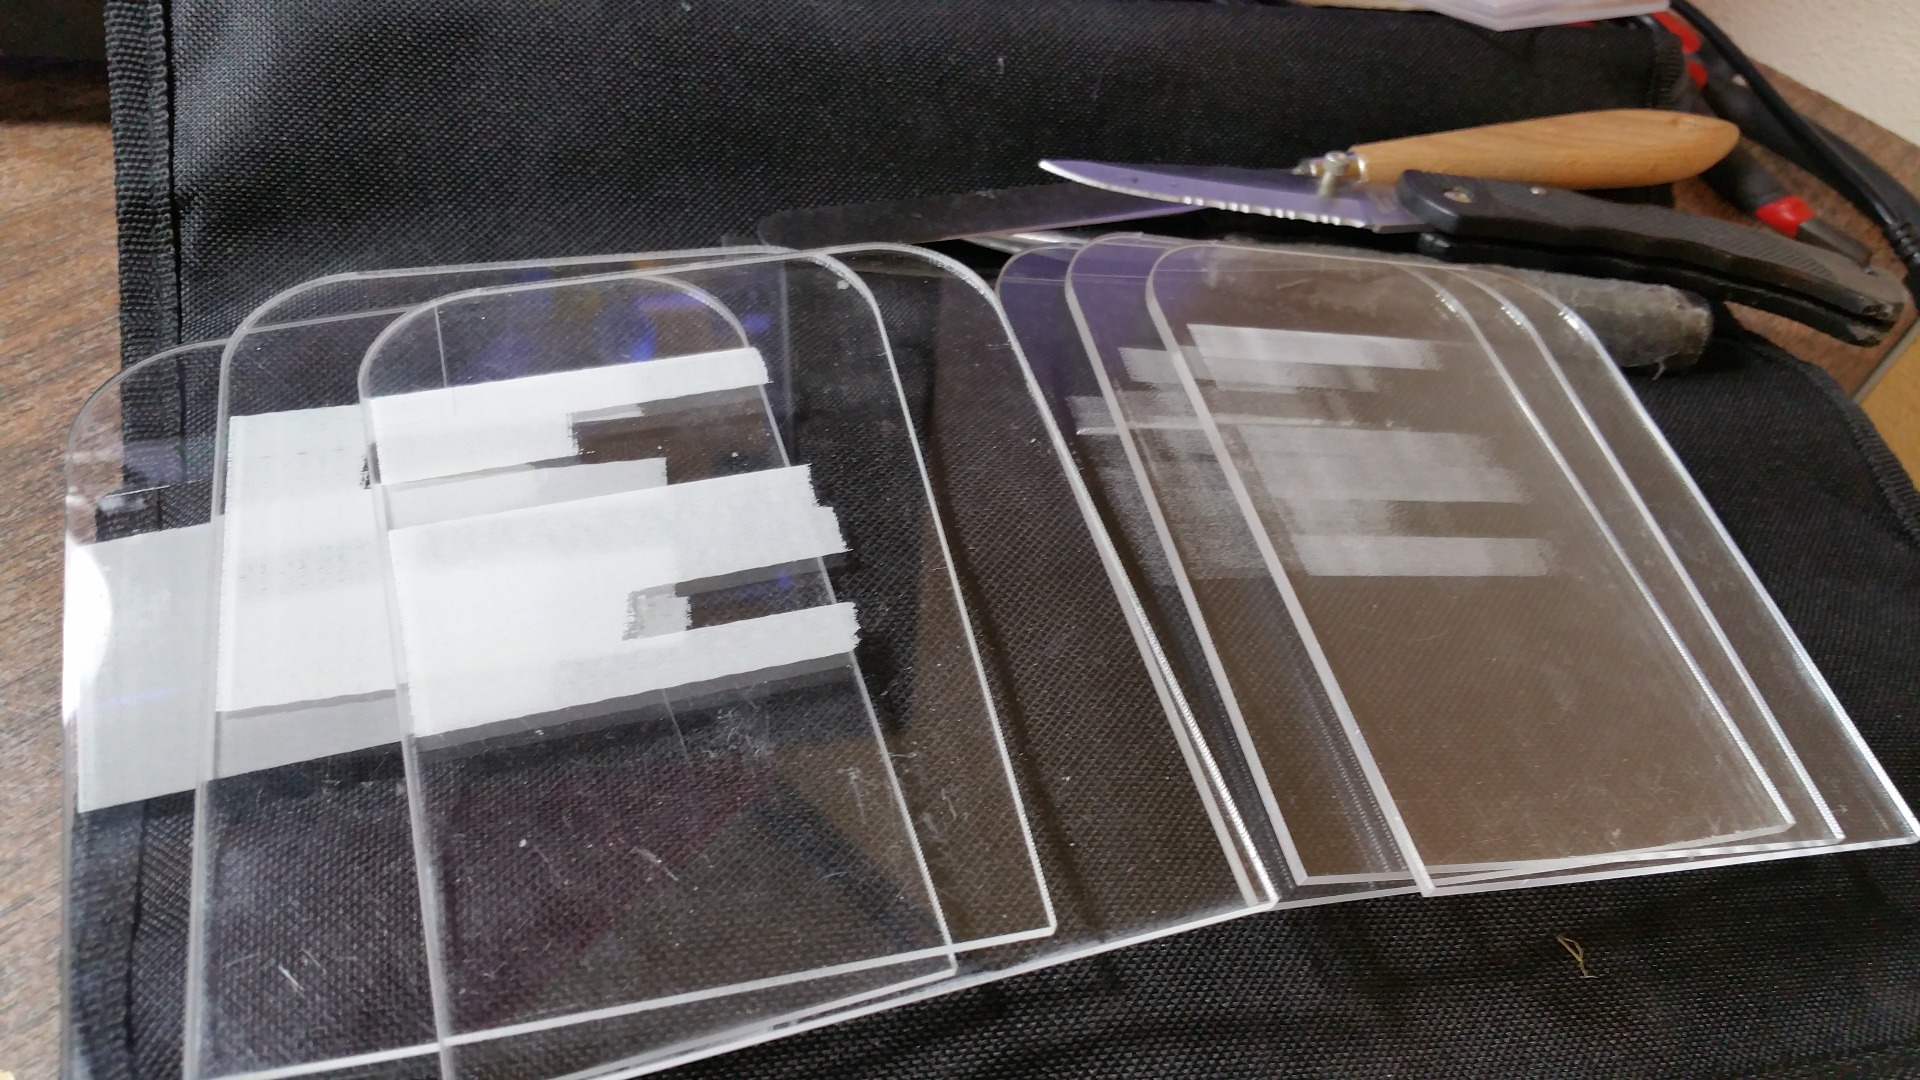
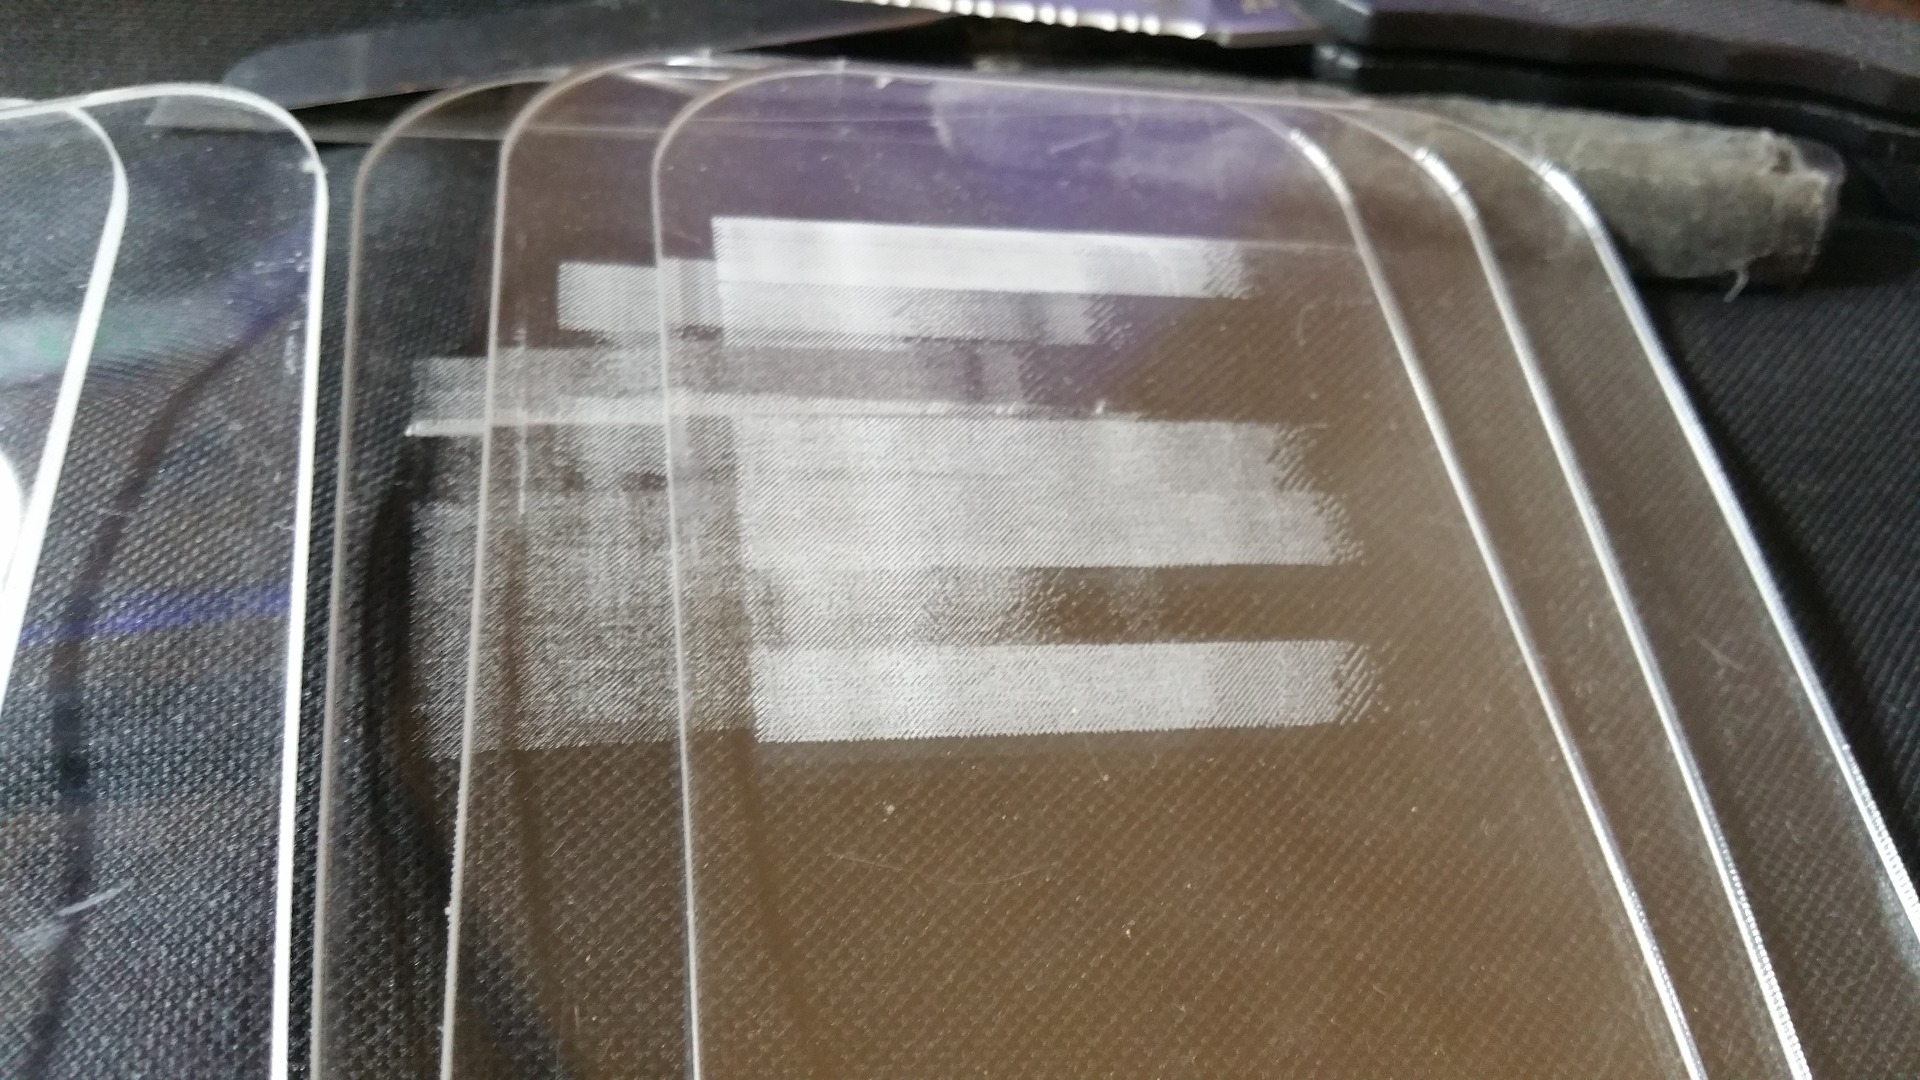
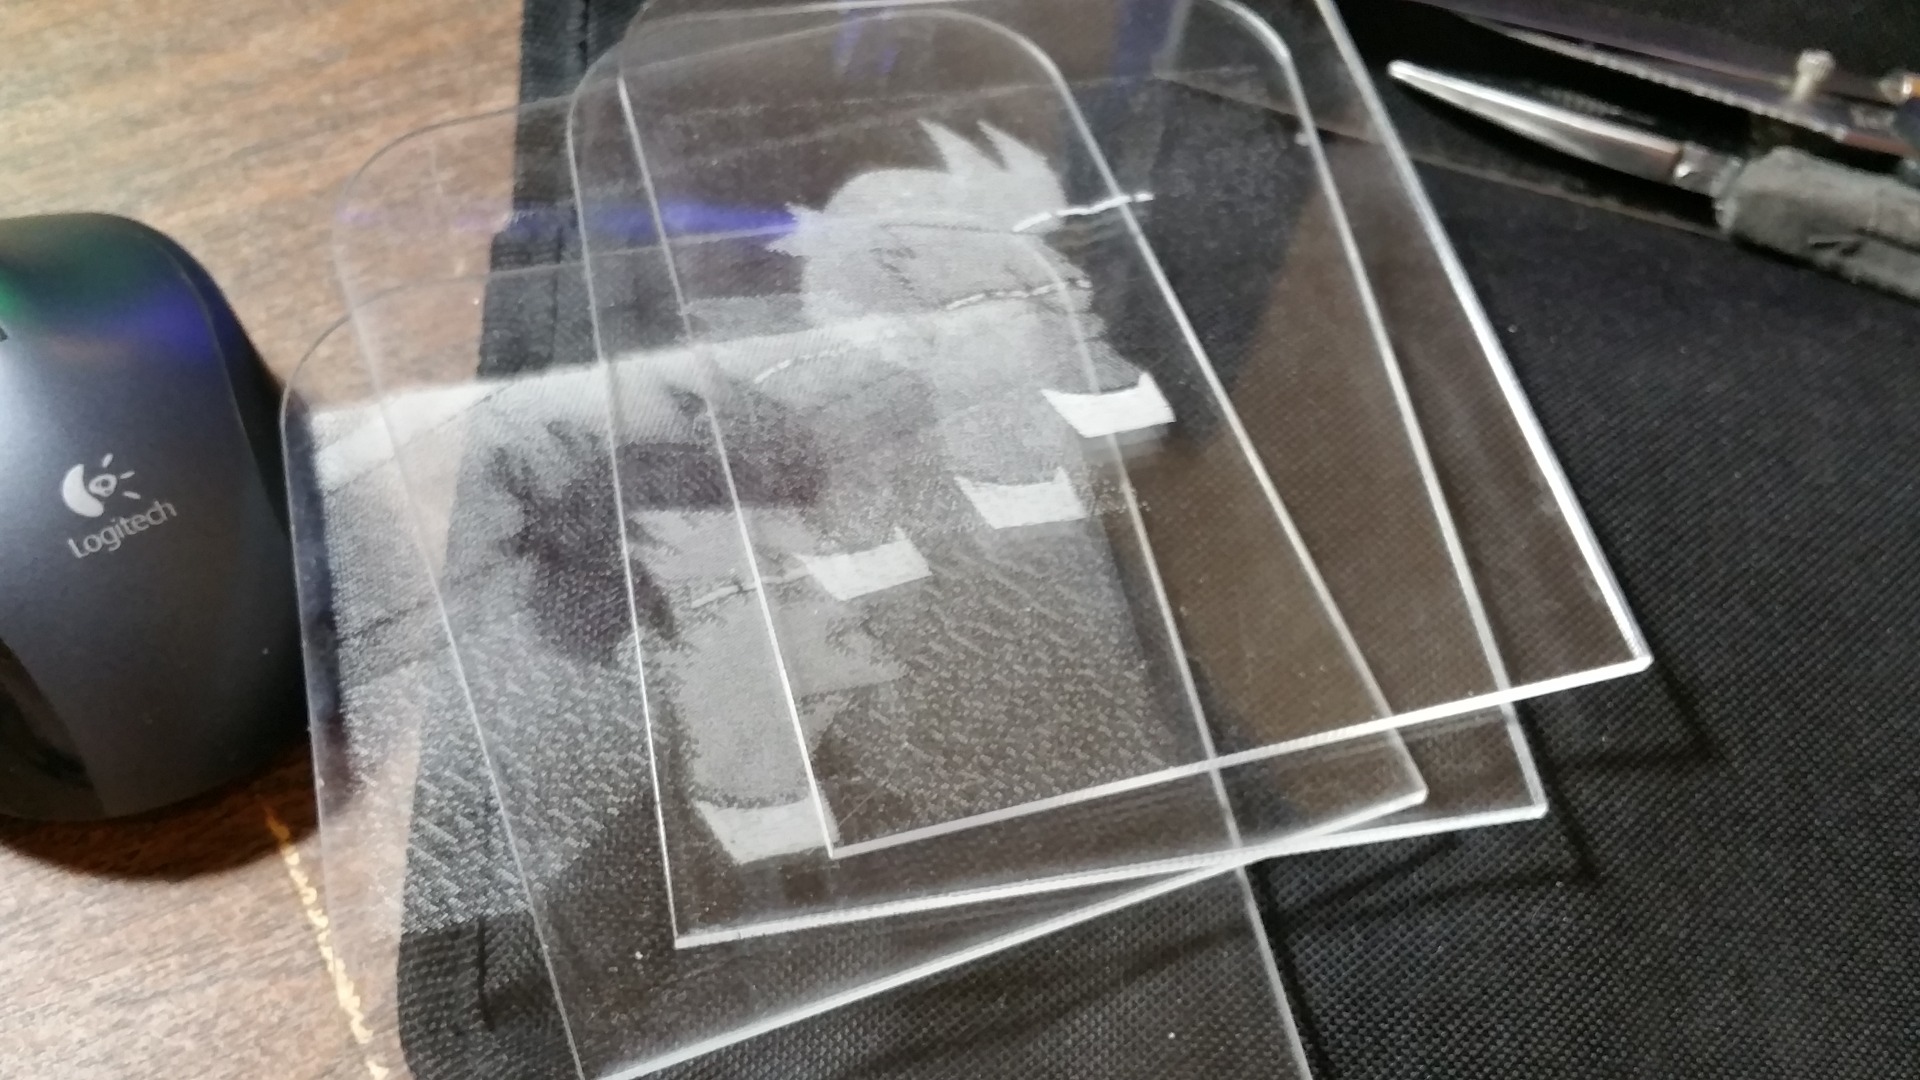
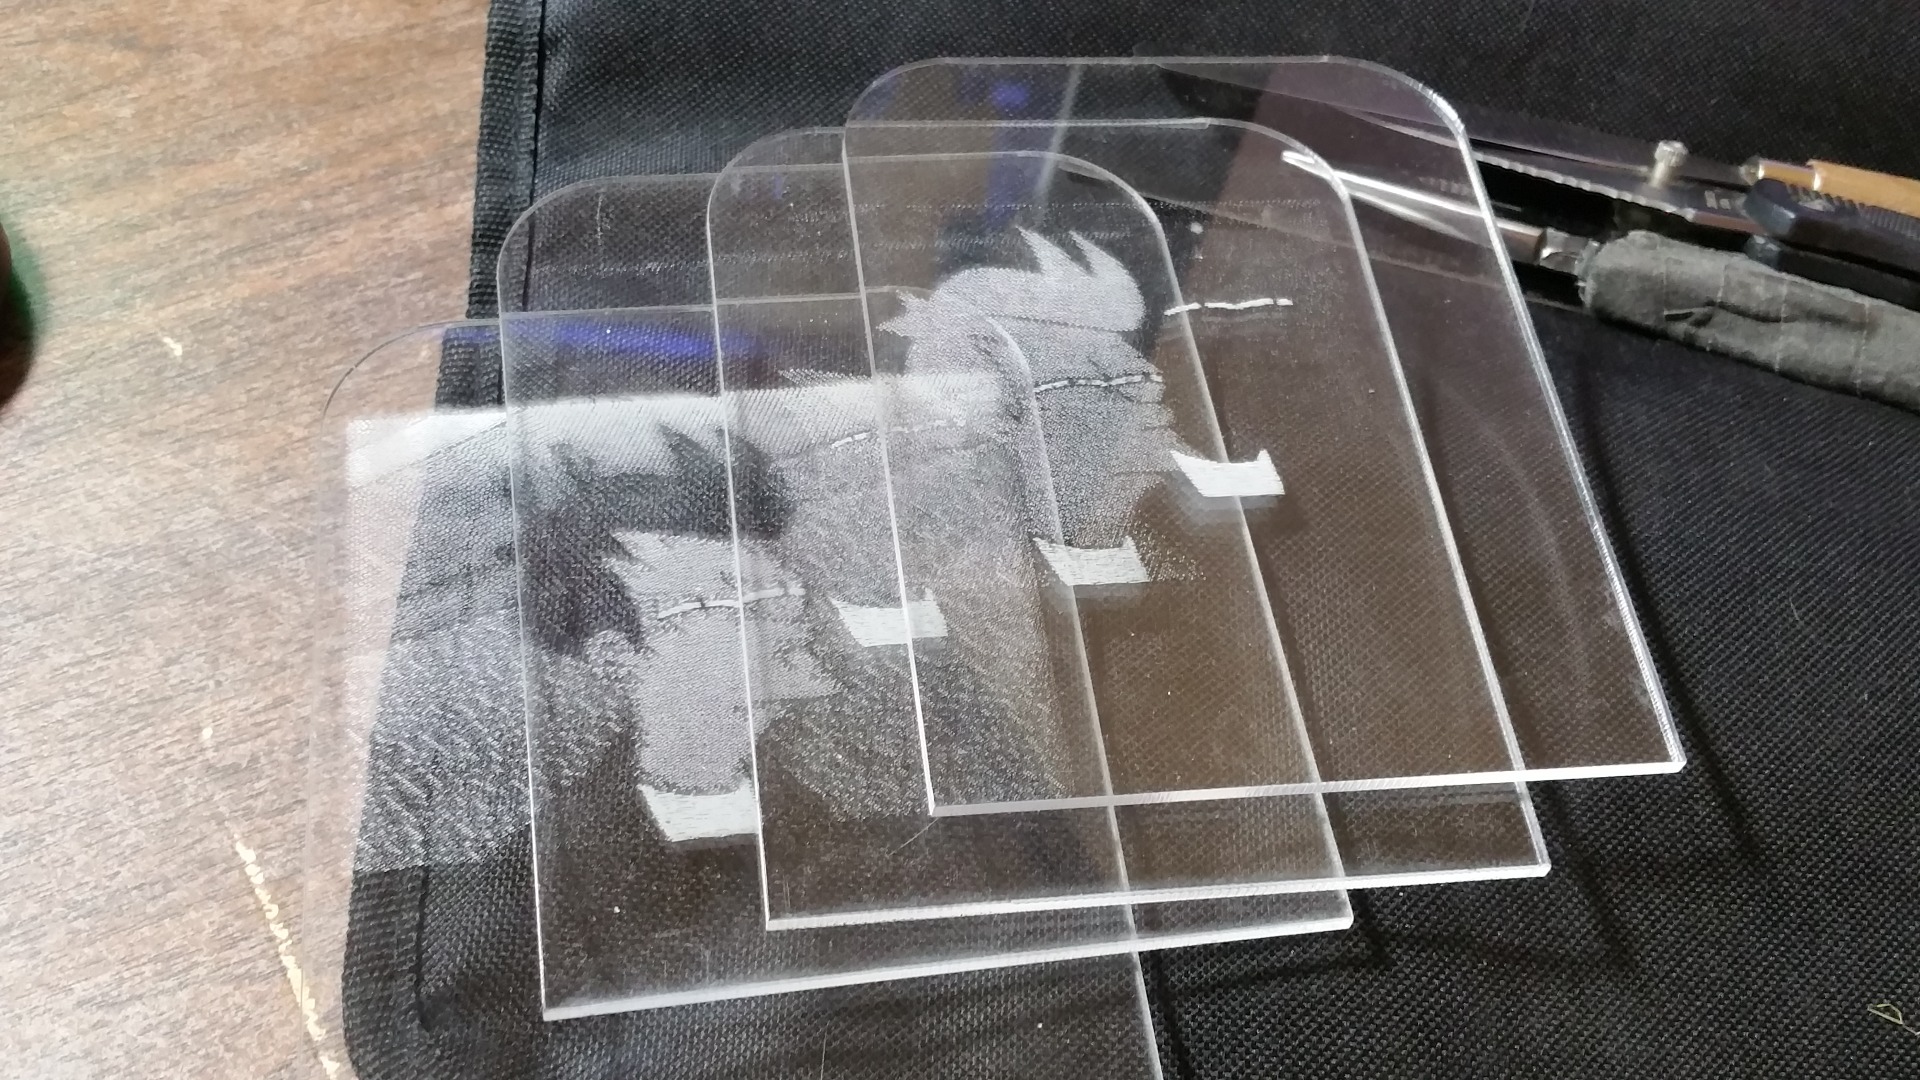
As I mentioned earlier, I don't have easy access to a Laser Cutter. I could have gone through services like Ponoko (which I have used before), but it would have taken a long time to do with my iterative process. I wasn't sure what would work at first, so being able to re-design it and laser cut it was crucial. Luckily my friend built a Laser Cutter a little while back, and he has been able to cut these out for me. He is a busy man, so I really appreciate his patience with this project, especially over this past month.
Now that I have figured out the process, getting these cut through a service like Ponoko shouldn't be too much trouble. If you don't have access to a Laser Cutter, I highly recommend them! You will have to prepare it for their service, but there are some great Instructables to help you with that. Here are a few
All in all, it took about 10 minutes per cut out.
I will post the files that I used at the end.
Electronics
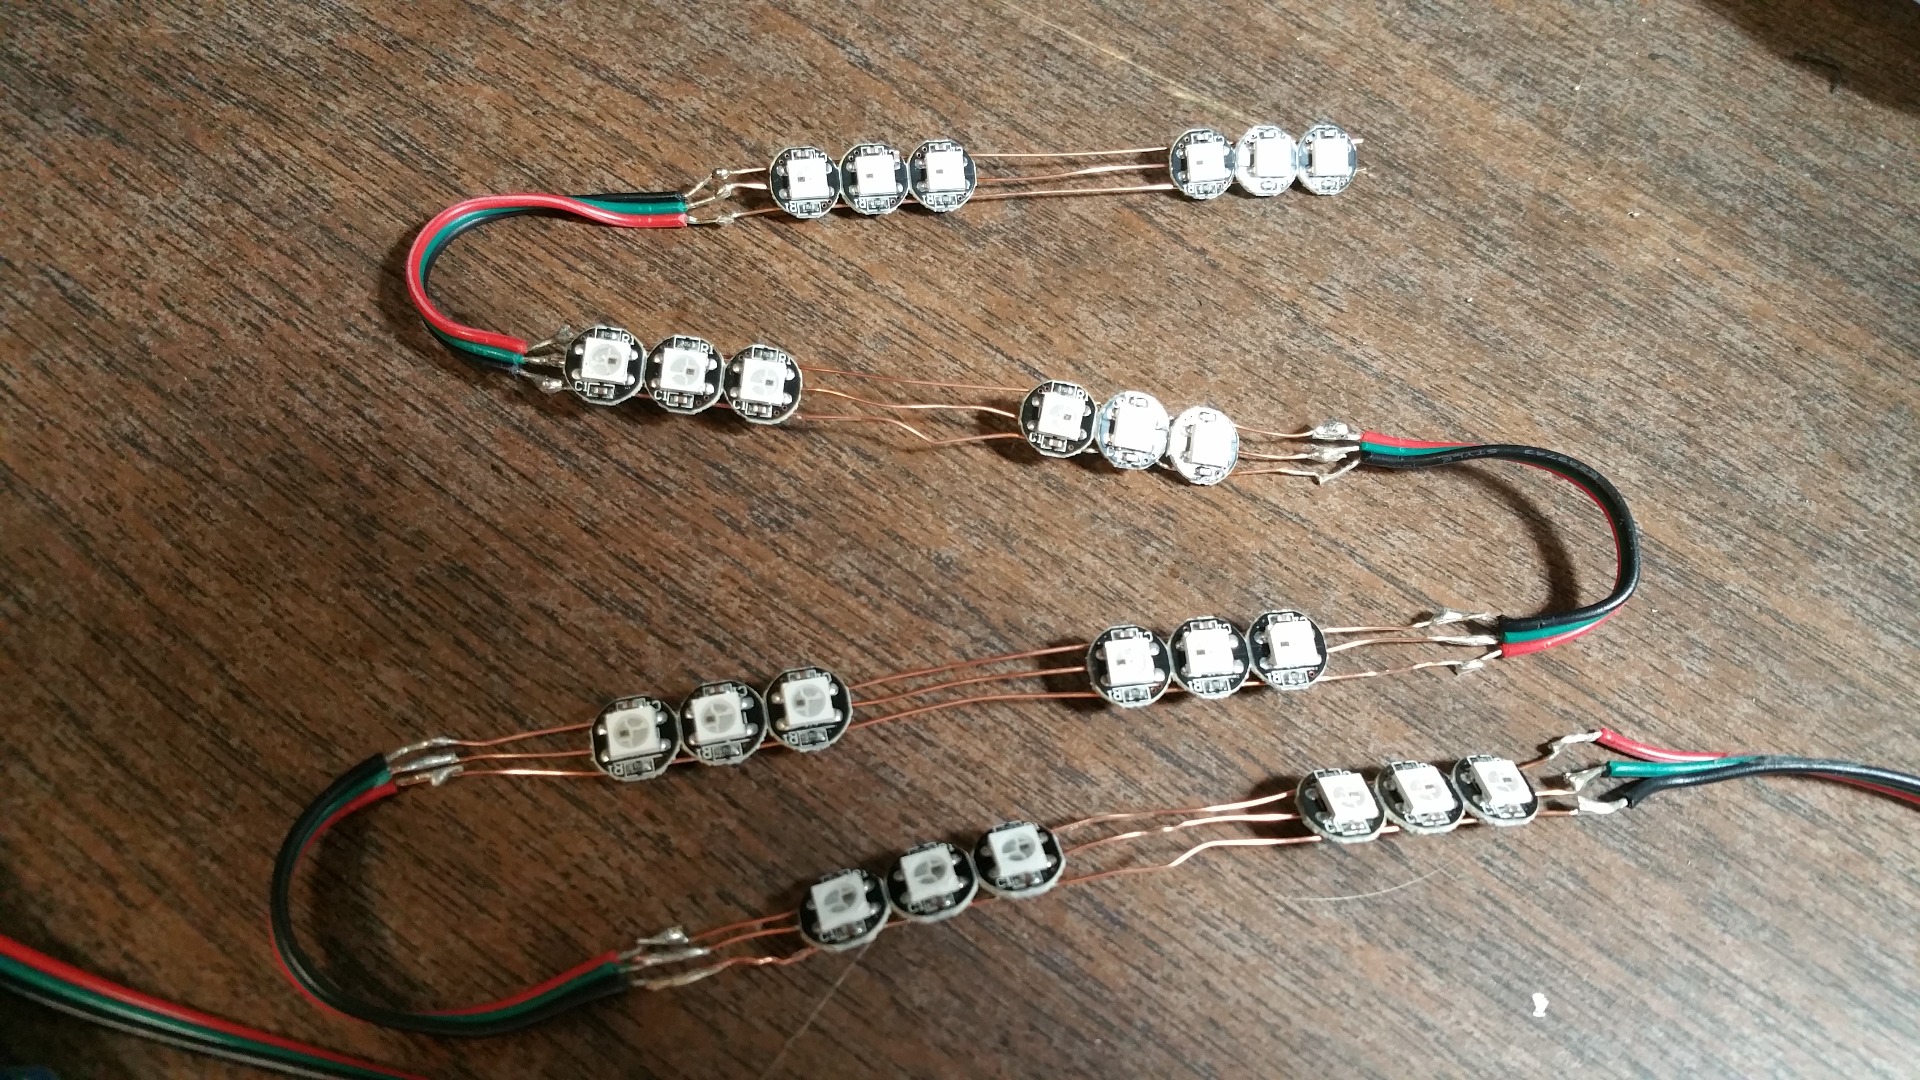
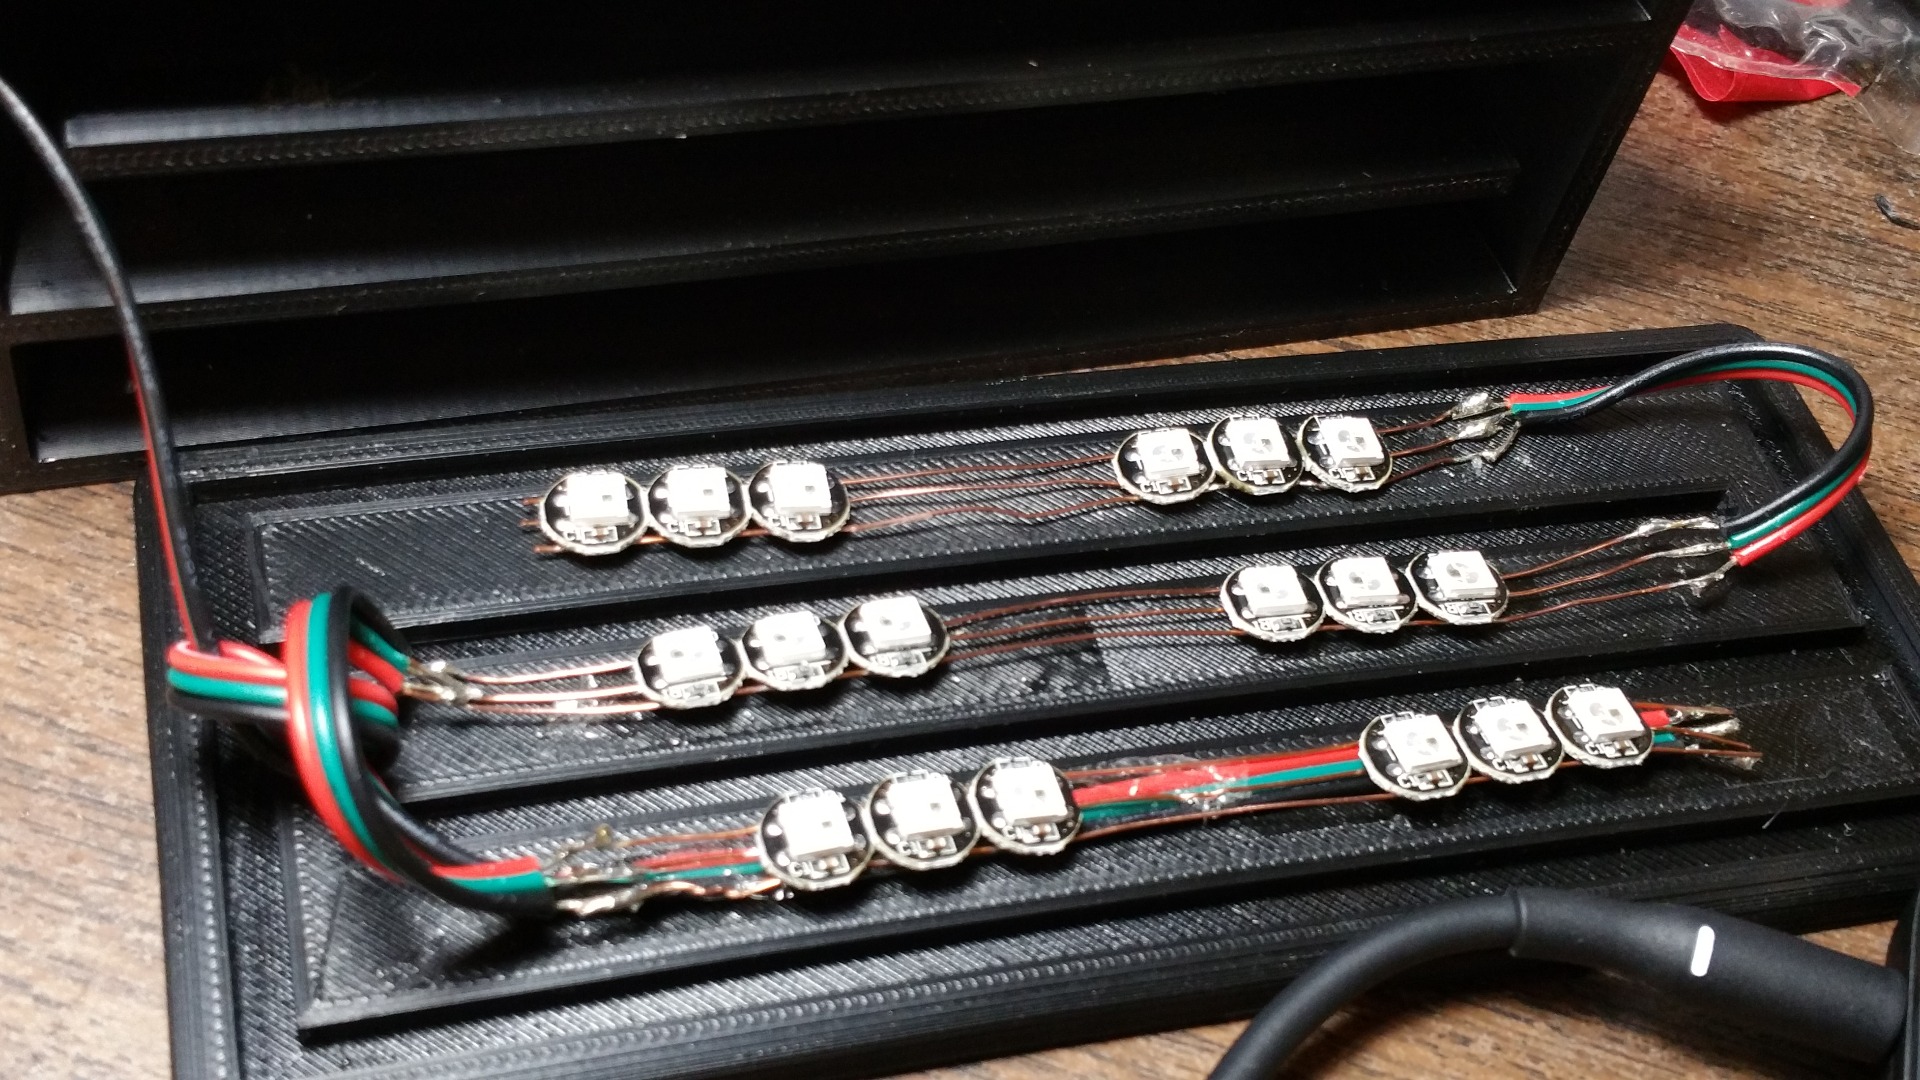
Wiring
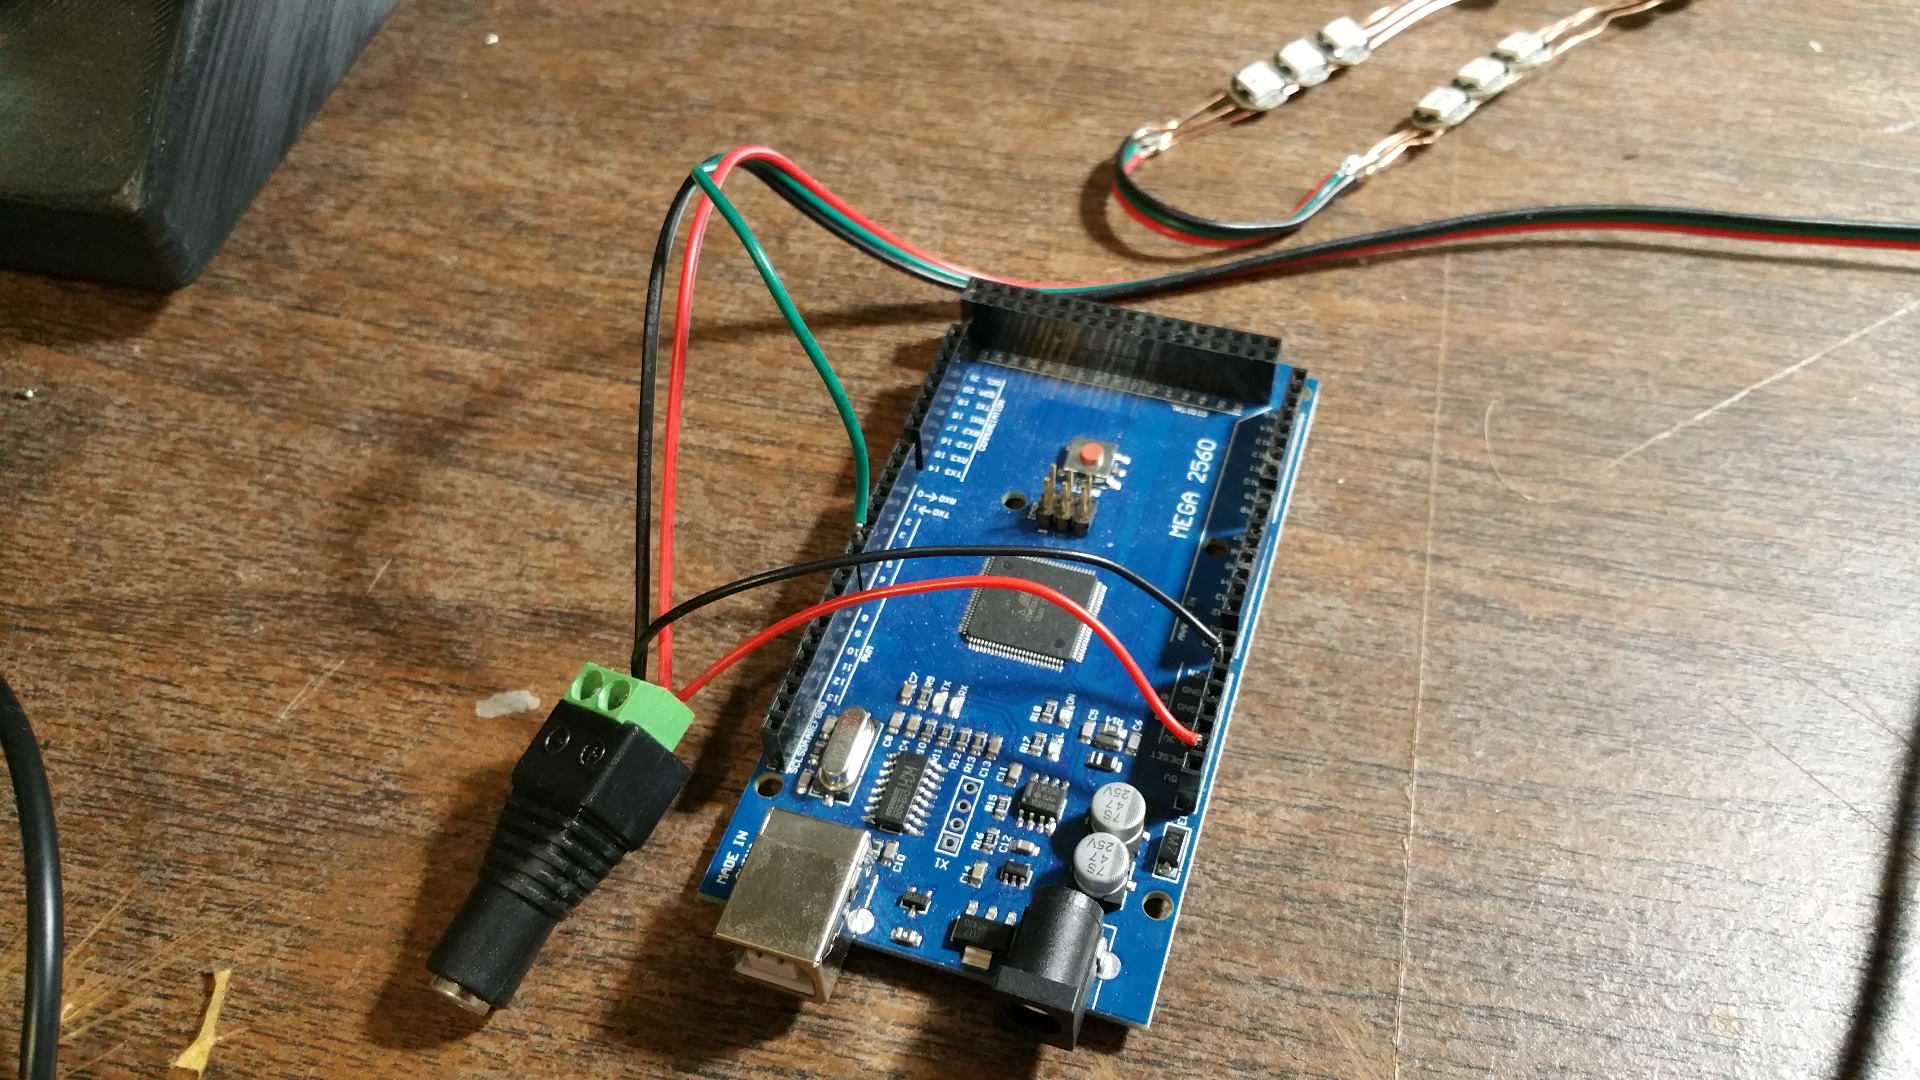
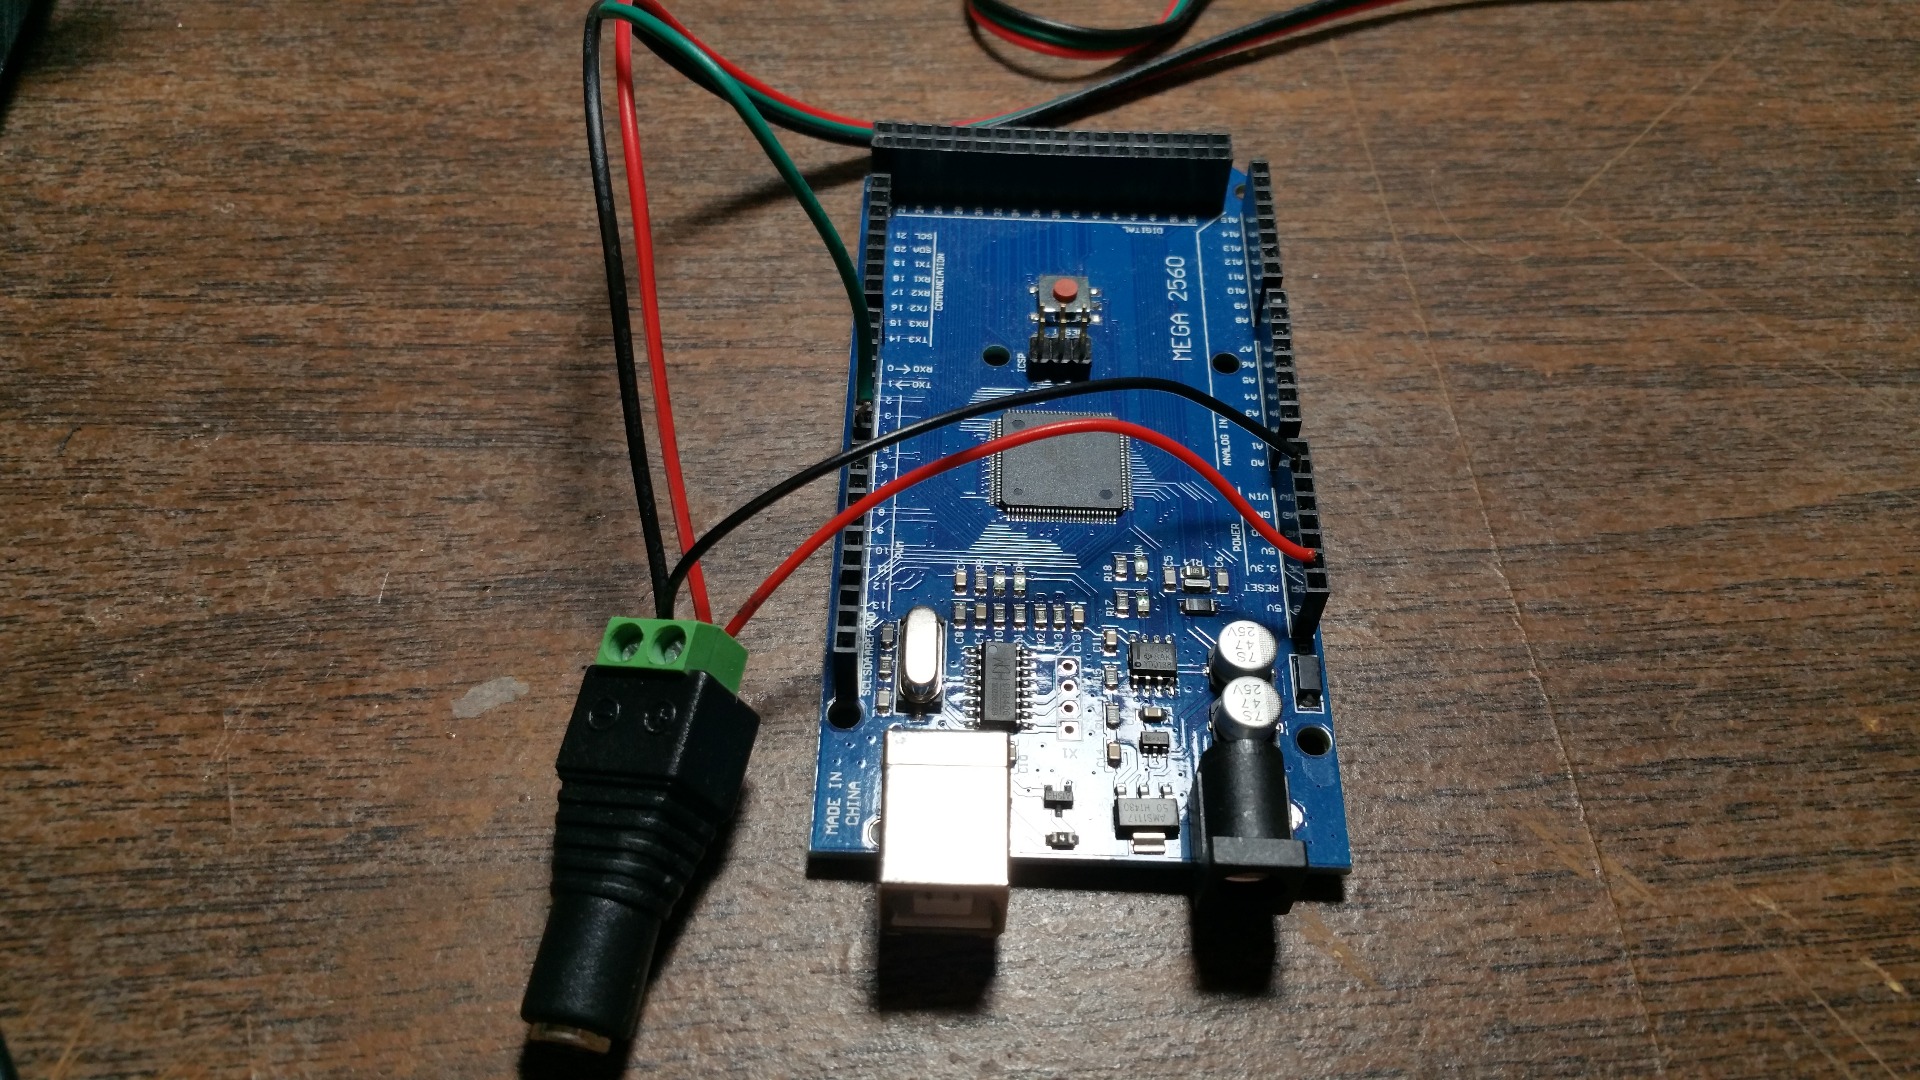
I am sorry that I don't have a wiring diagram for this, but if you have ever worked with an arduino, then it is pretty straight forward.
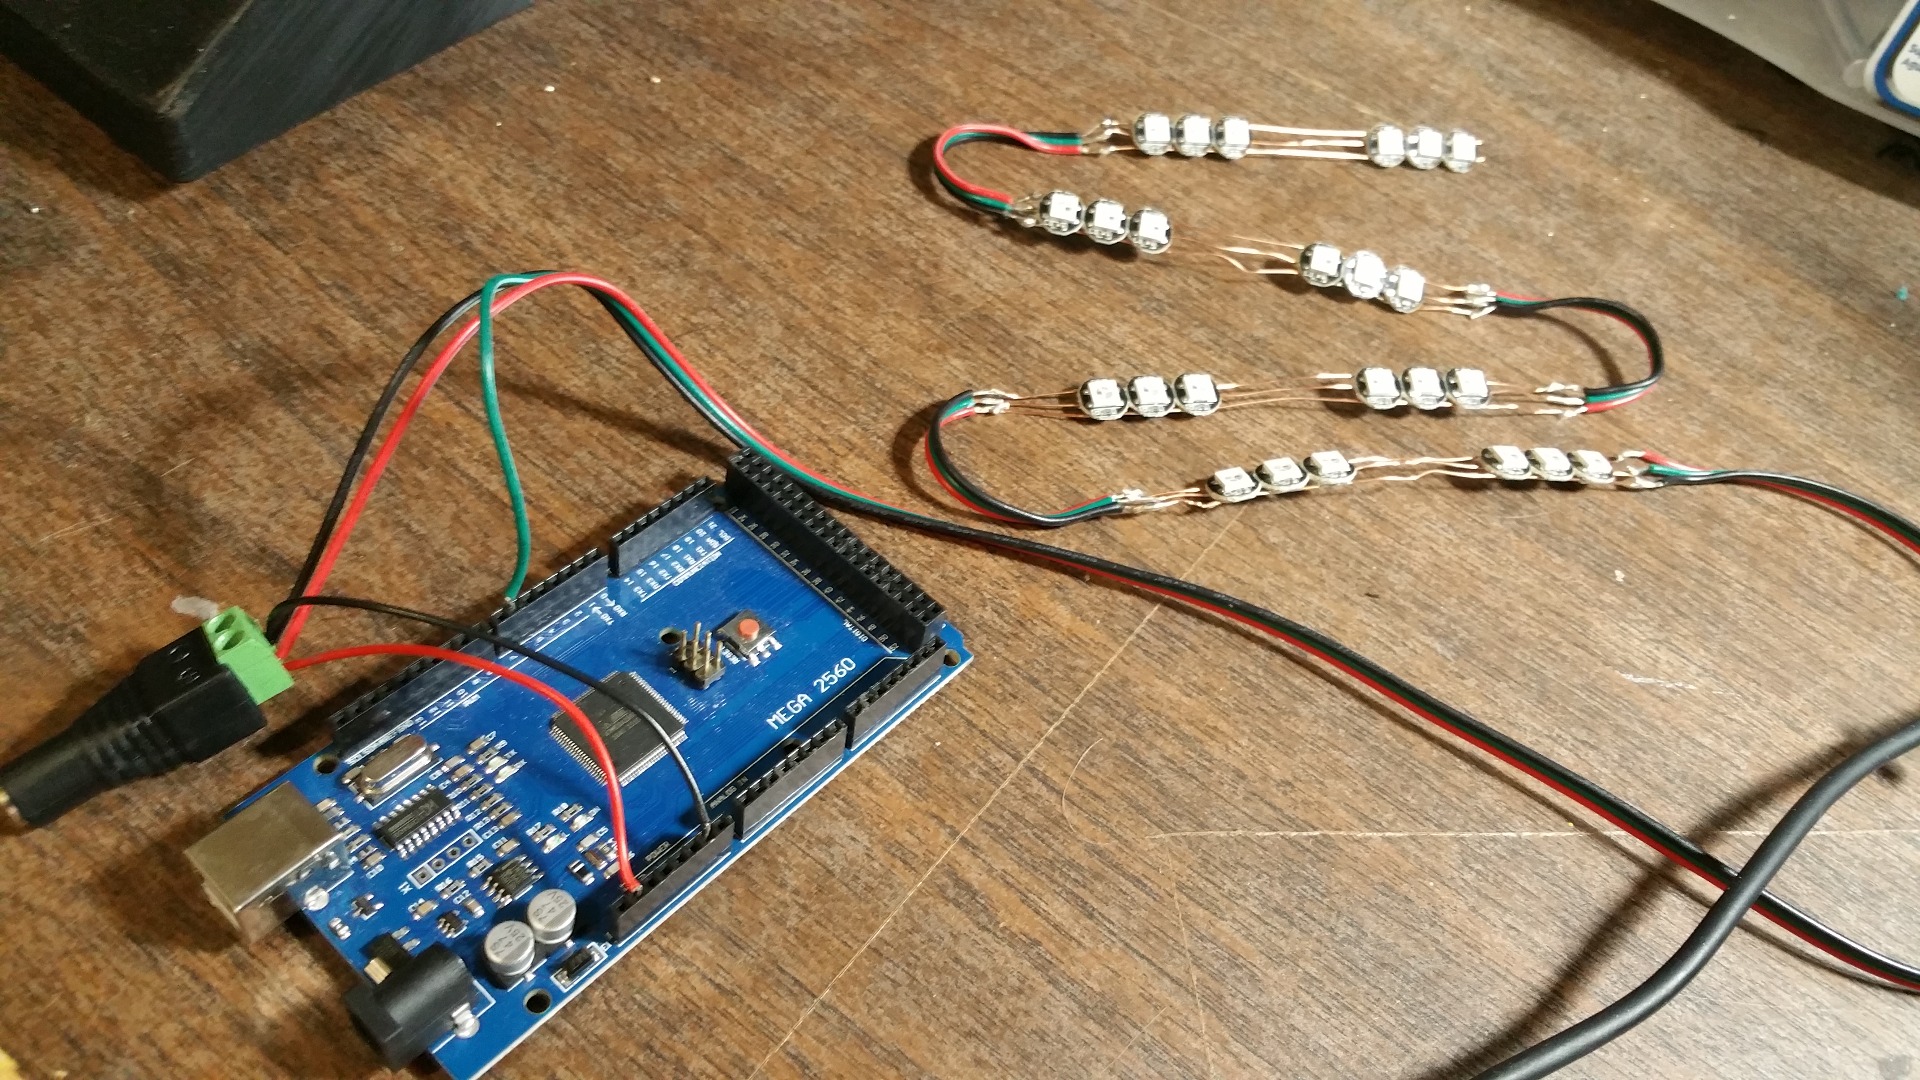
For the electronics I used some Neopixels connected to pin 6 of an arduino through a 500 ohm resistor. The power came from a 5v regulated wall adapter to a 2.1mm power adapter with screw terminals I bought from Adafruit. I wired the positive lead from the neopixel to the positive screw terminal of the adapter, and the ground (negative) pin to the negative terminal on the adapter. I also added another small wire from the positive terminal on the adapter to the 5V pin on the arduino, and the negative terminal from the adapter to the ground (GND) pin on the arduino. (I am not sure if this is ideal since basically I am bypassing the power regulator on the board and supplying 5V directly to the 5V pin. The arduino I am using runs on 5V but you will need to adjust your wiring based on what arduino you use.) You should also add a capacitor across the 2 terminals to help smooth out the power a bit. 1000uf 6.3v or higher will work. Since I have a total of 24 neopixels and each one can draw up to 60ma each, I needed a power supply that could supply at least 1.45 amps at 5V. It also needs to be regulated, especially if you bypass the voltage regulator on the arduino! Under NO circumstance have the positive and negative leads plugged into the arduino when you are programming it! Also make sure the power is unplugged from the connector as well. Last thing you want is for the neopixels to draw 1.5 amps through your usb port of your computer!!!!!
Neopixels
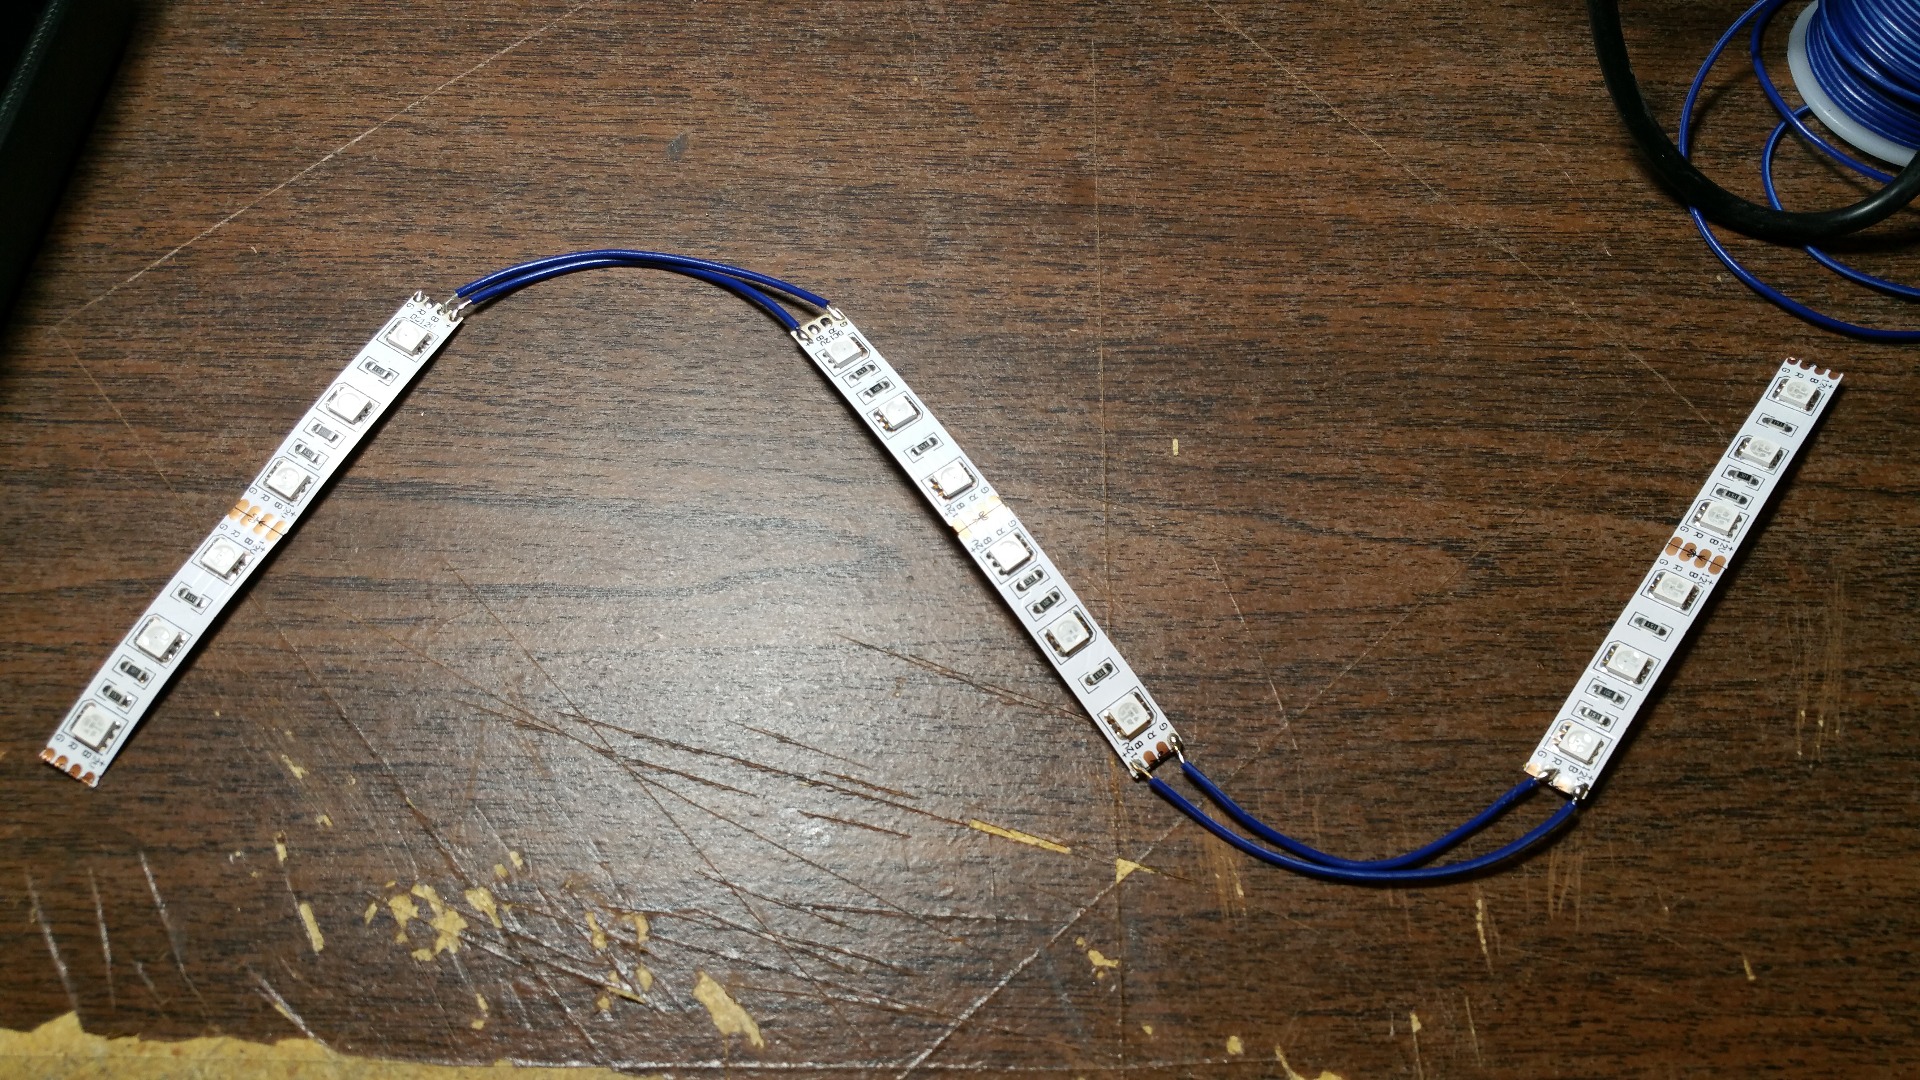
I used some spare neopixels that I had left over from another project, but I would recommend just getting a neopixel strip. You don't need a high density led strip unless you are dealing with a very large Lit-O-Pane. The number of pixels you use for each segment will depend on your design as well. You can just see see how many will fit and then cut the strip at the closest "cut point". Once you have all 4 strips cut to length, you will need to solder them back together with some wire that is bent at 90 degrees. This will allow you to bend the strip into a snake-like pattern, but still address them like a continuous neopixel strip.
Arduino
I used an arduino mega just because I had that lying around, but an arduino uno will work just fine.
Under NO circumstance have the positive and negative leads plugged into the arduino when you are programming it! Also make sure the power is unplugged from the connector as well. Last thing you want is for the neopixels to draw 1.5 amps through your usb port of your computer!!!!!
Case
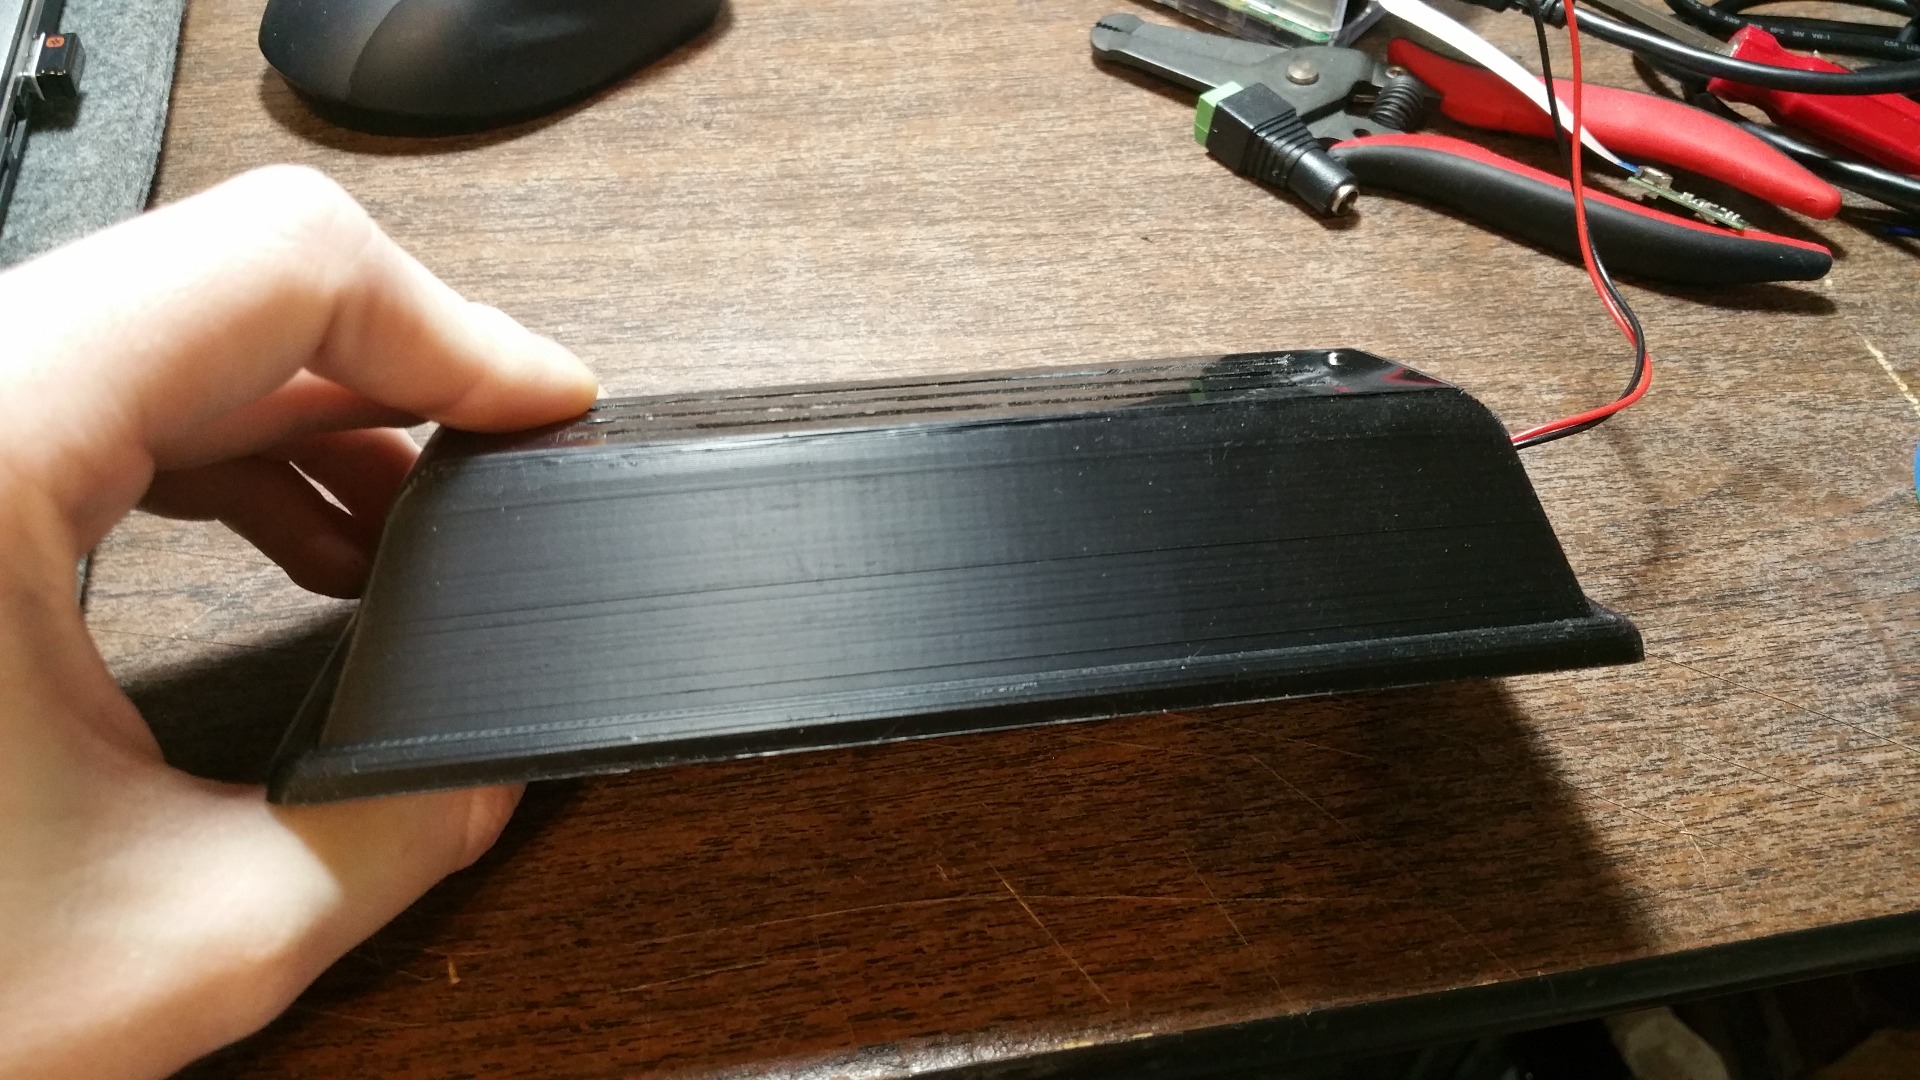
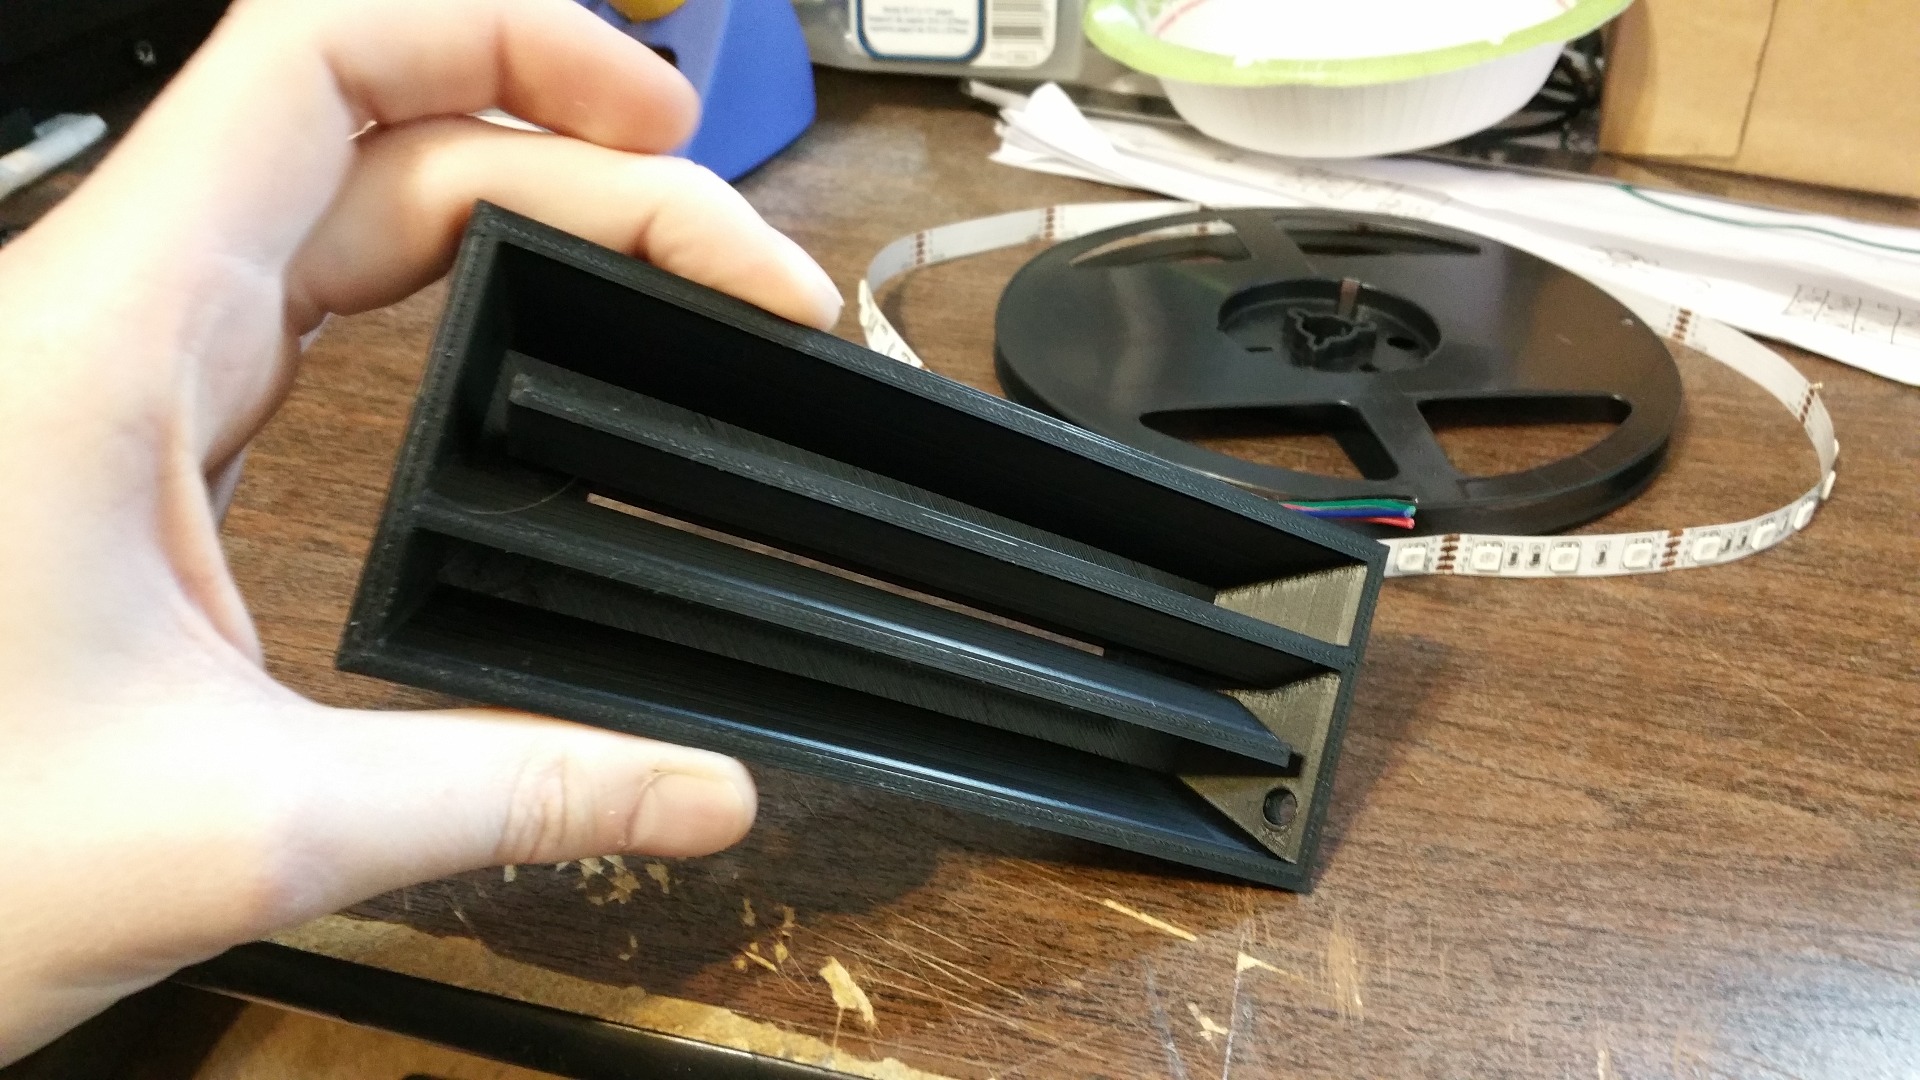
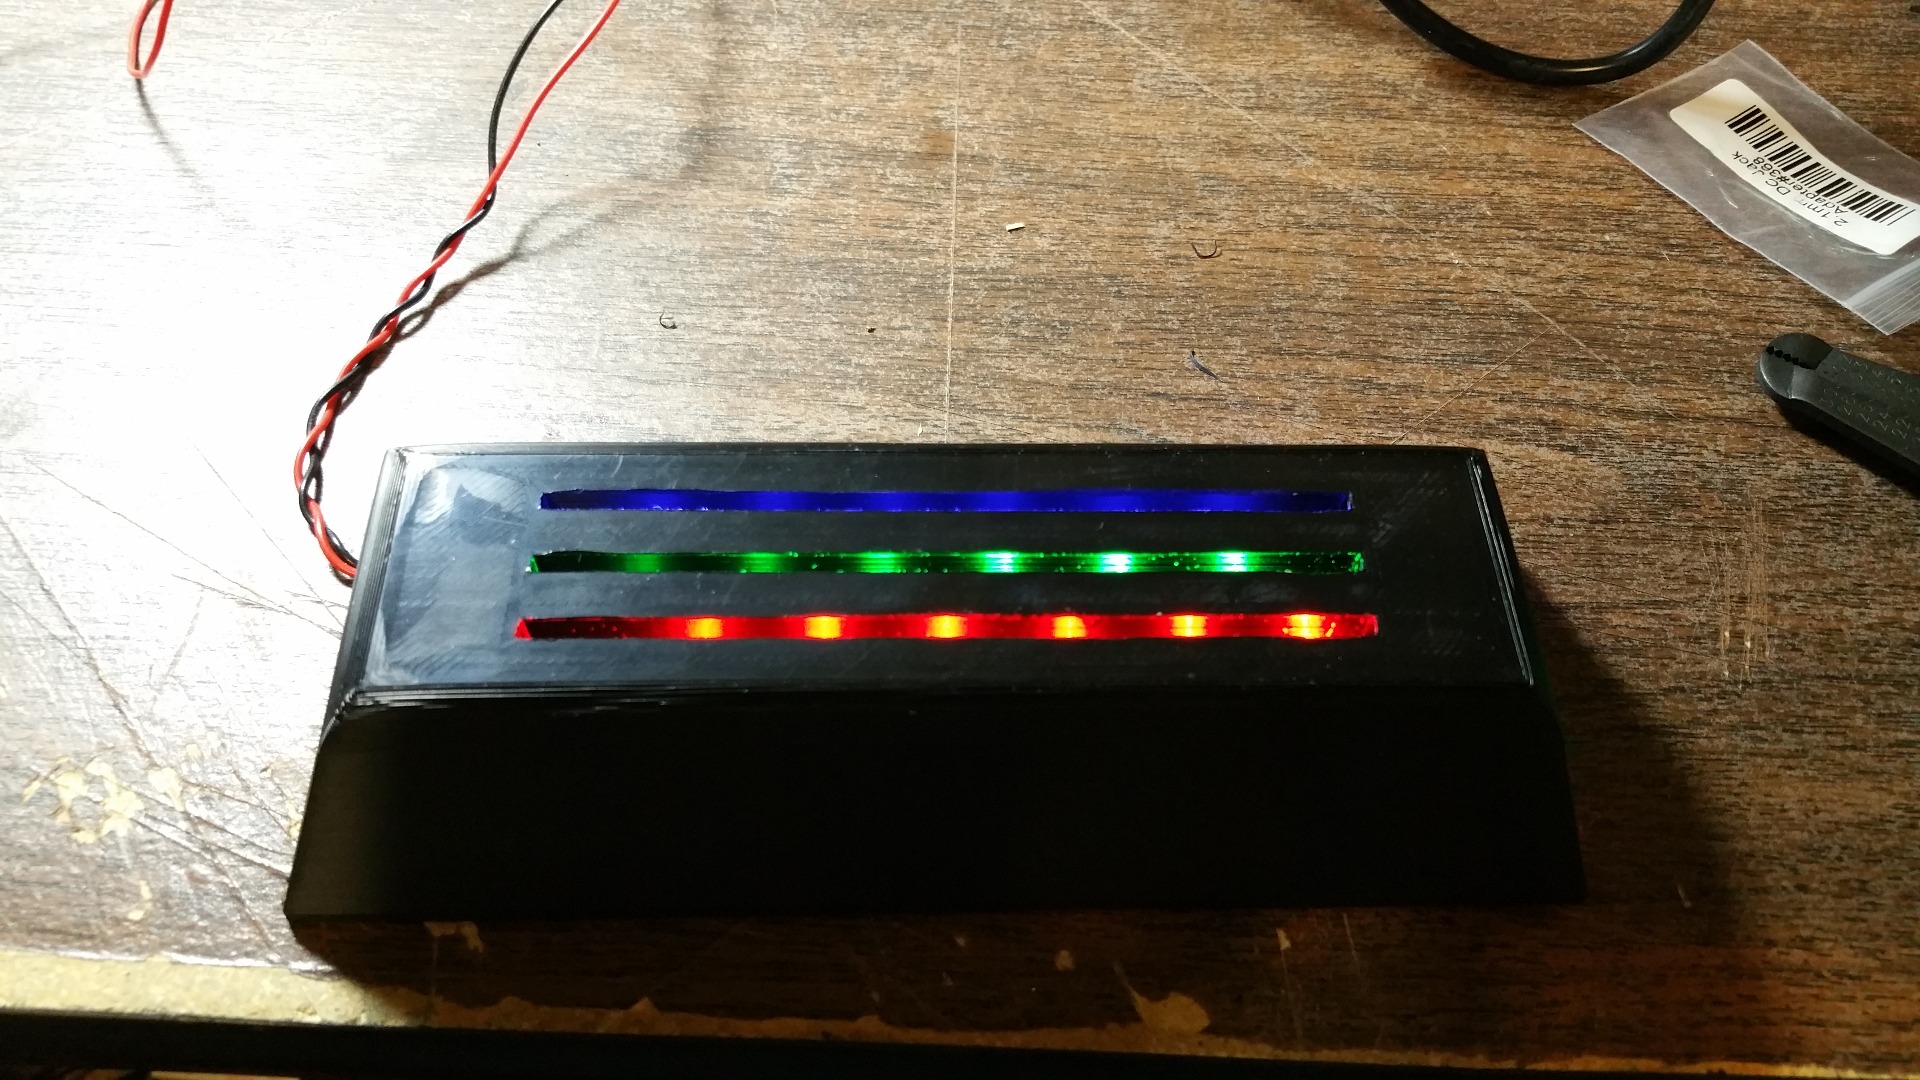
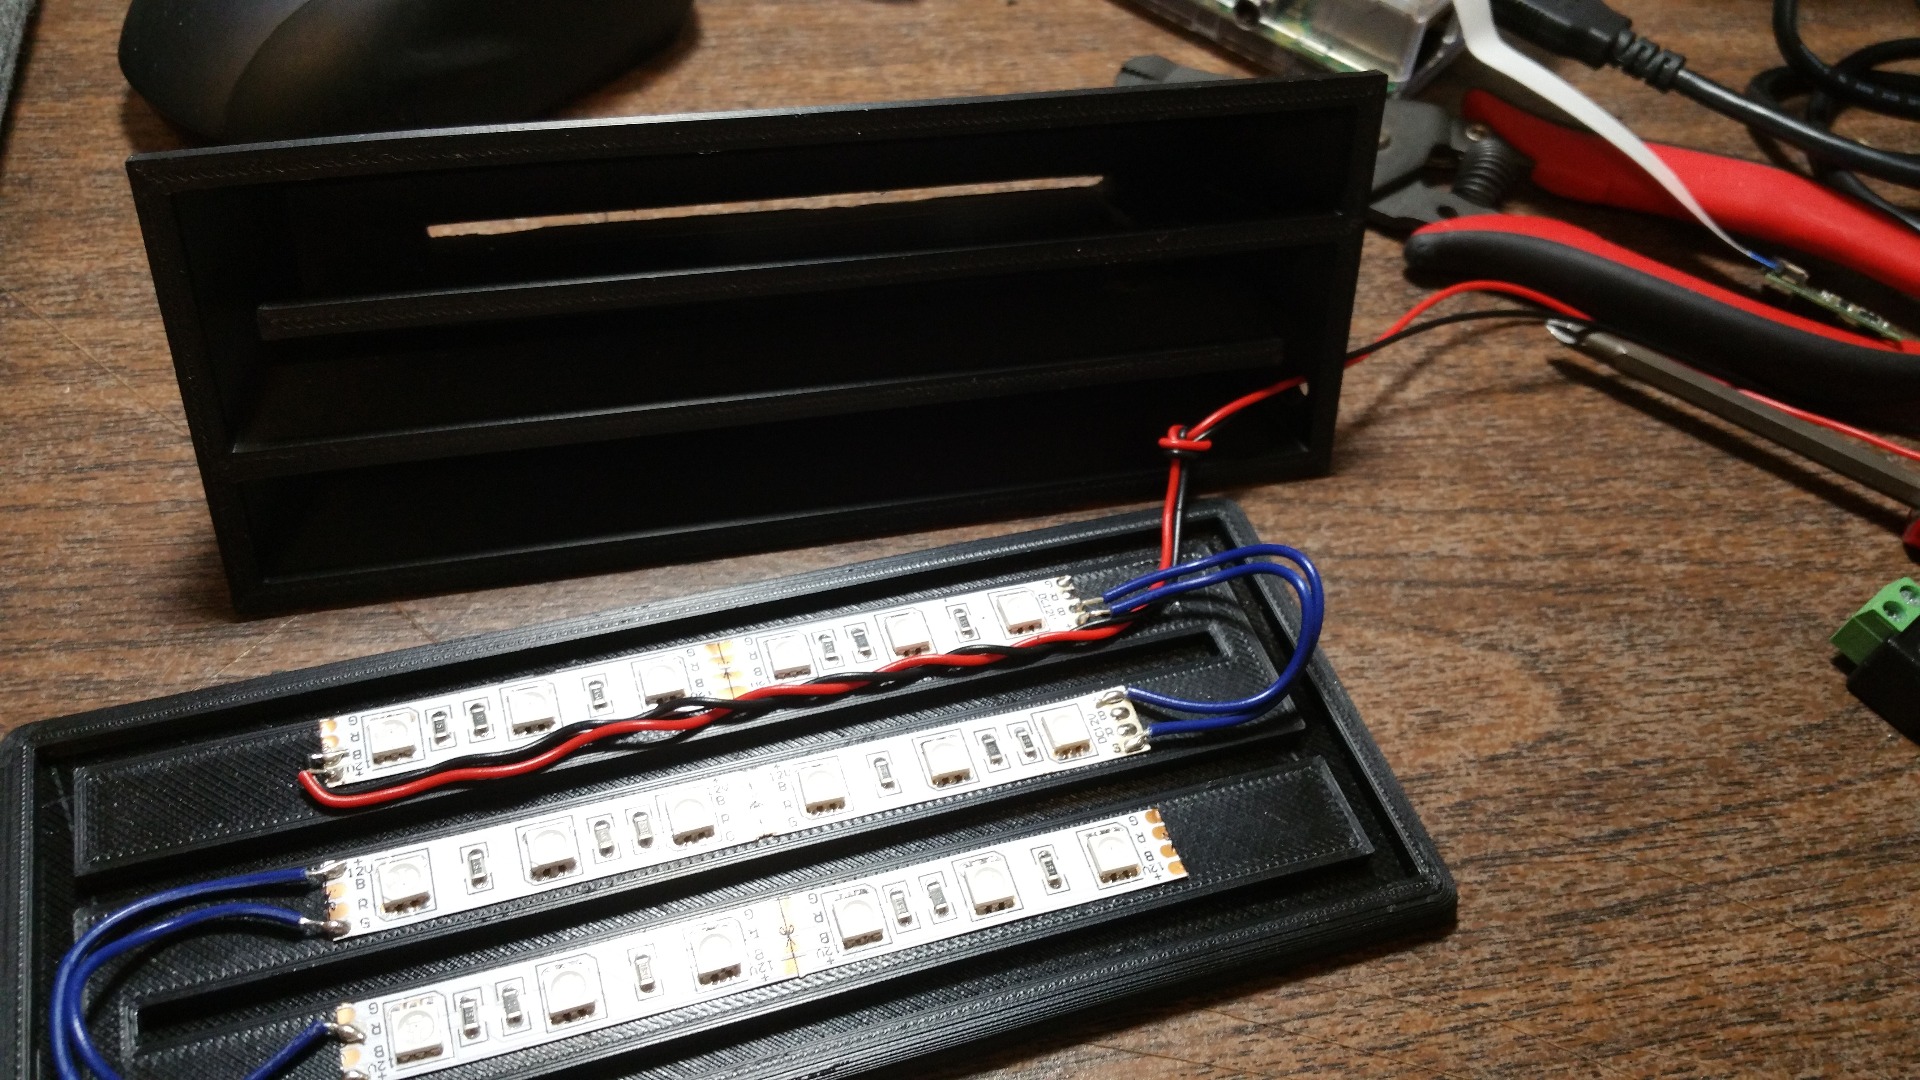
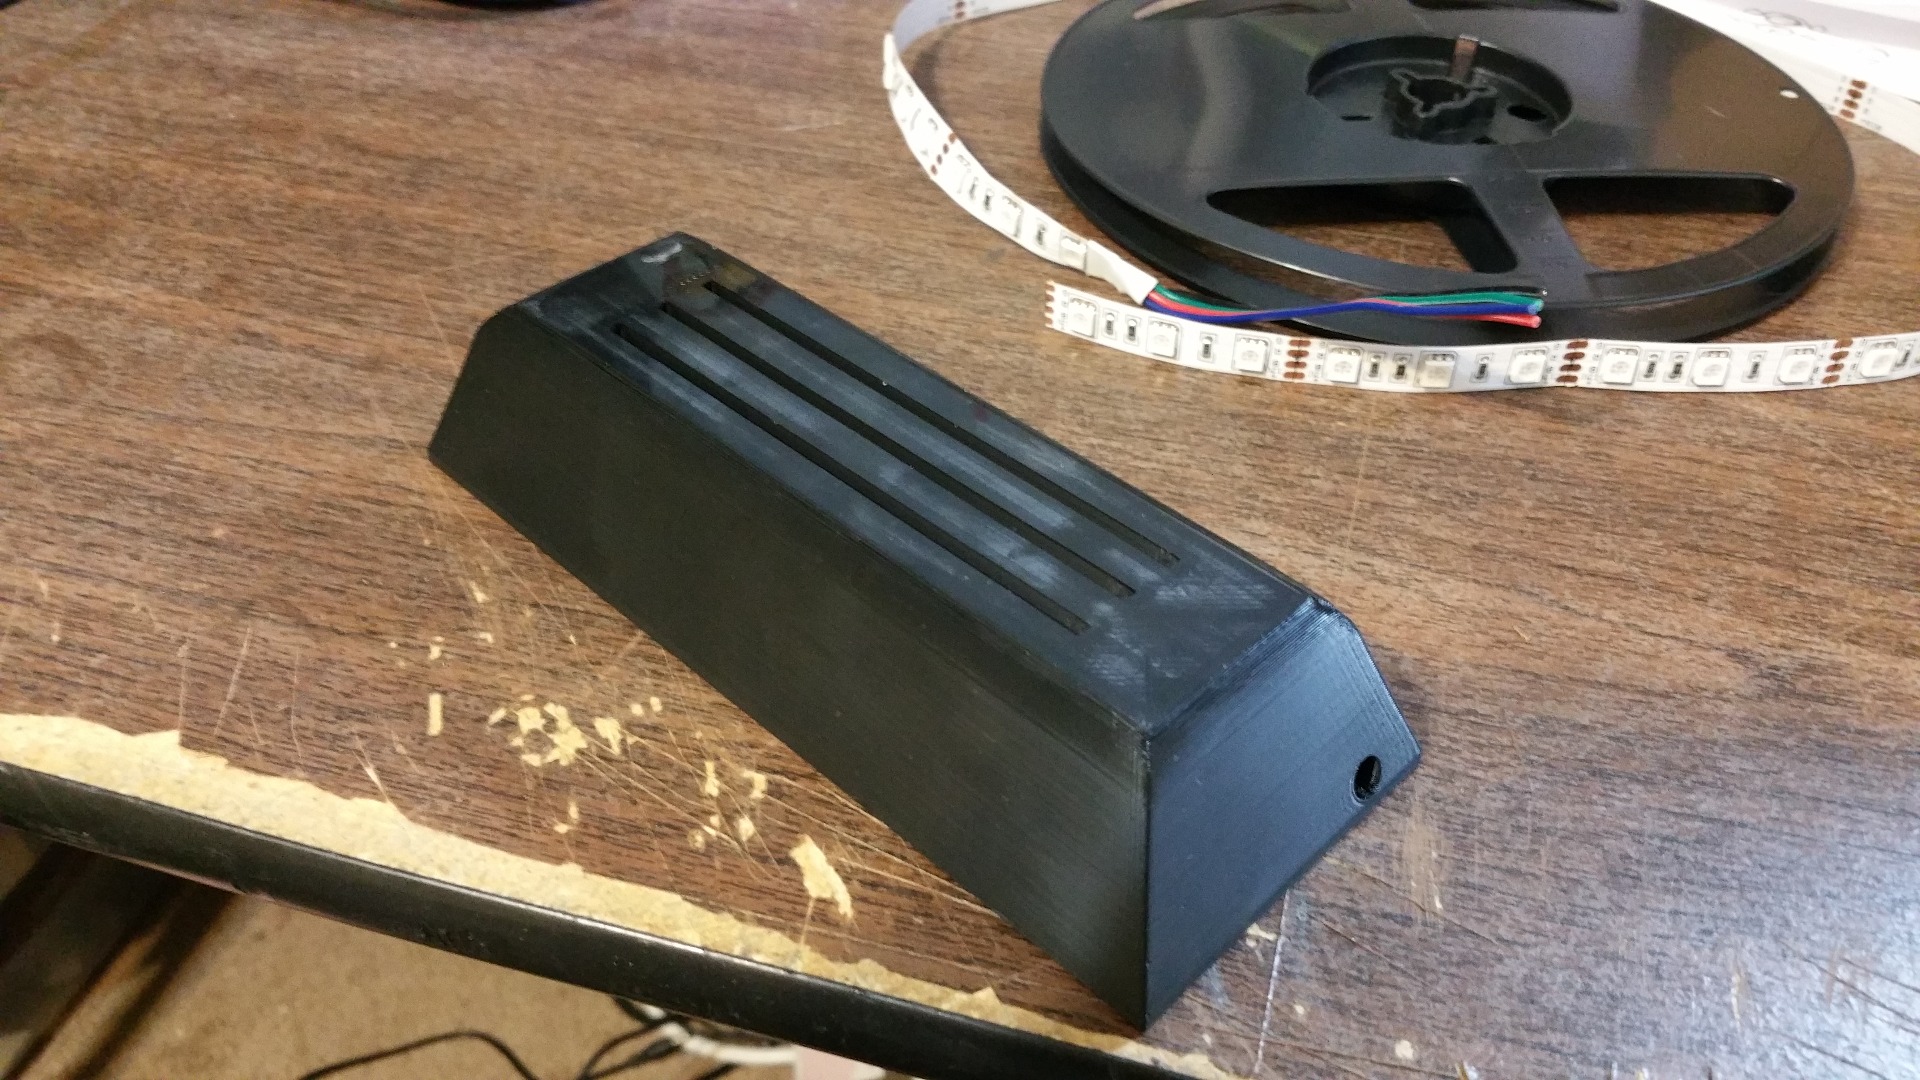
3D Printed Case
I modeled my case and 3d printed it. The one in the photo's is the one with only Red, Green, and Blue, however my version with a White panel as well, looks almost identical. There is a hole in the case to route the power out. I would suggest tying a knot on the inside to act as some strain relief. I attached the neopixels with some double-sided tape, but if your neopixel strip has an adhesive backing, then you won't need to use any. Another thing that you can do which I haven't tried yet, is to cover the inside of the case with some aluminum foil tape to act as a reflector. Just make sure not to short out any of the leads on the neopixels.
I will post the 3d models on the last step
Other type of case (if you don't have access to a 3D Printer)
The case I used was 3d printed, however you don't have to 3d print it, anything will work as long as it seperates the light from each segment, and holds the acrylic in place. Also leave room for power to come in. Be creative!
Programming the Arduino
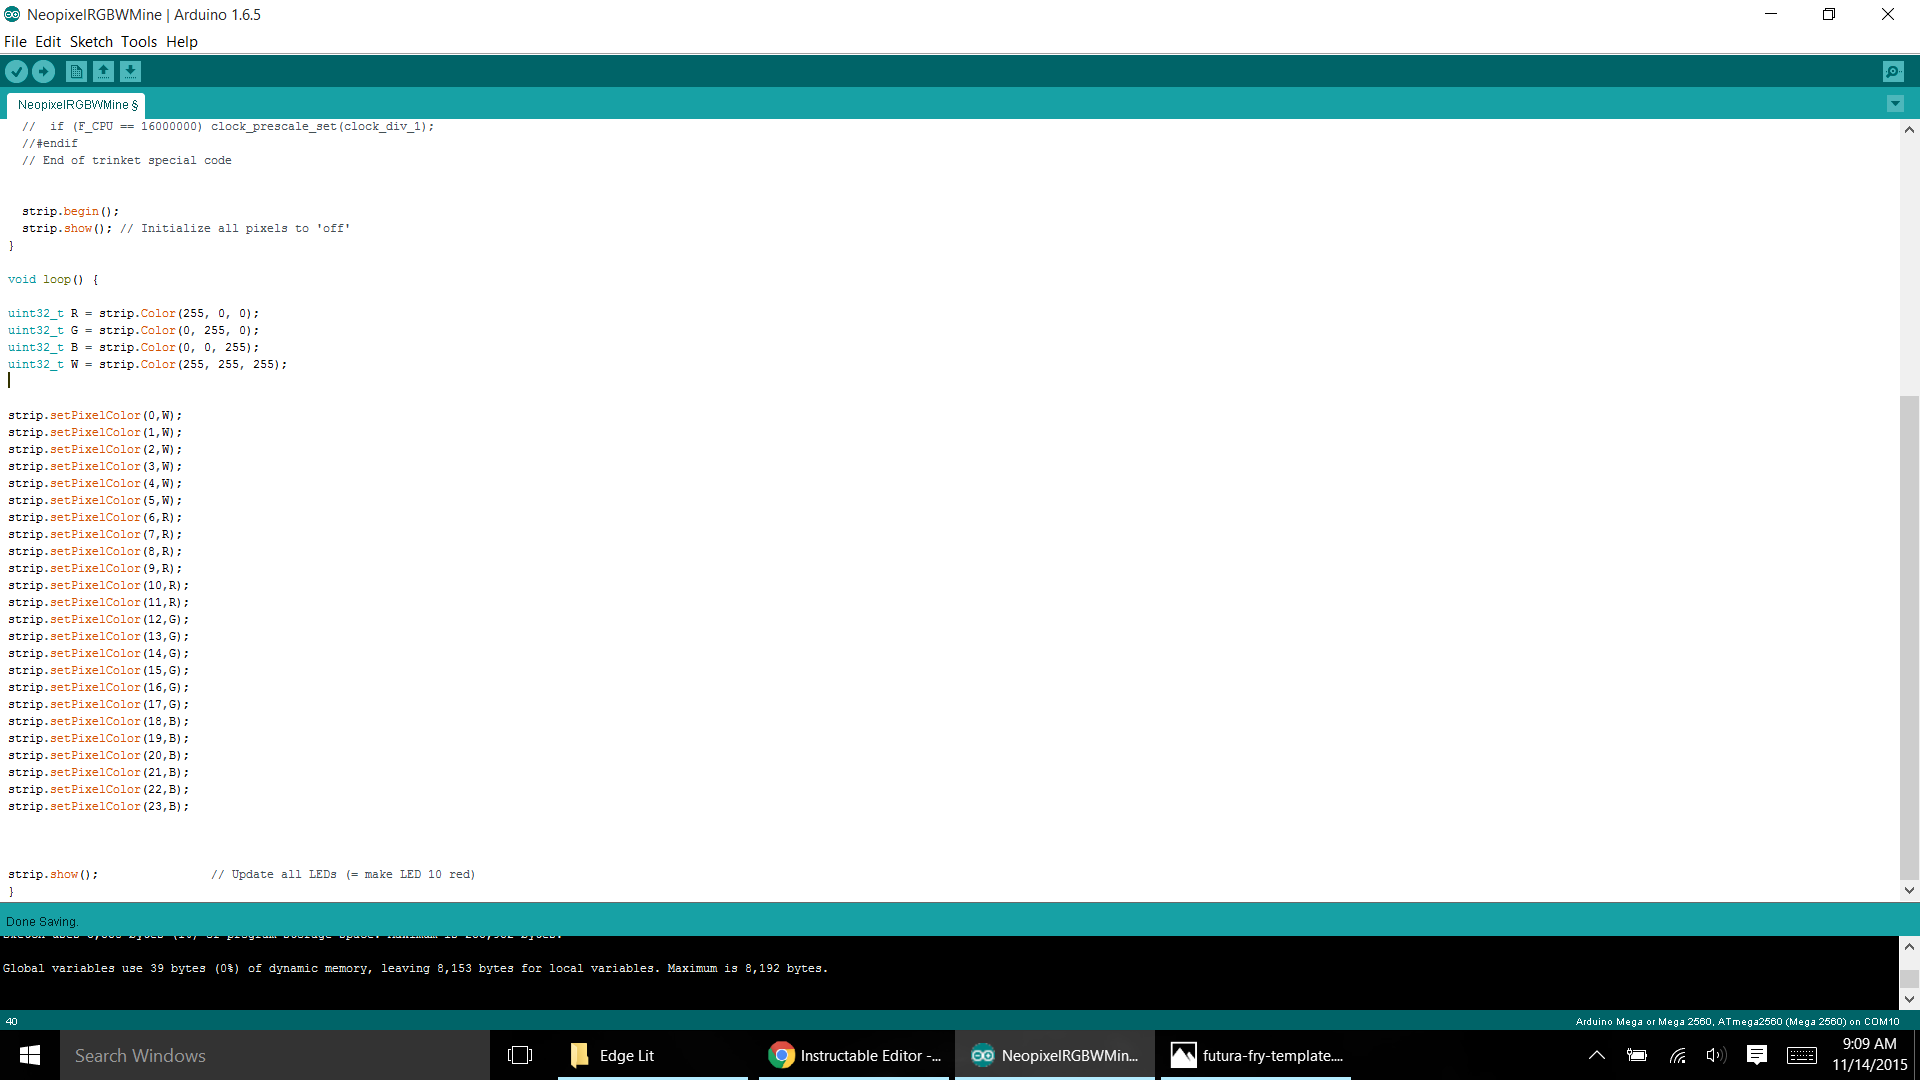.png)
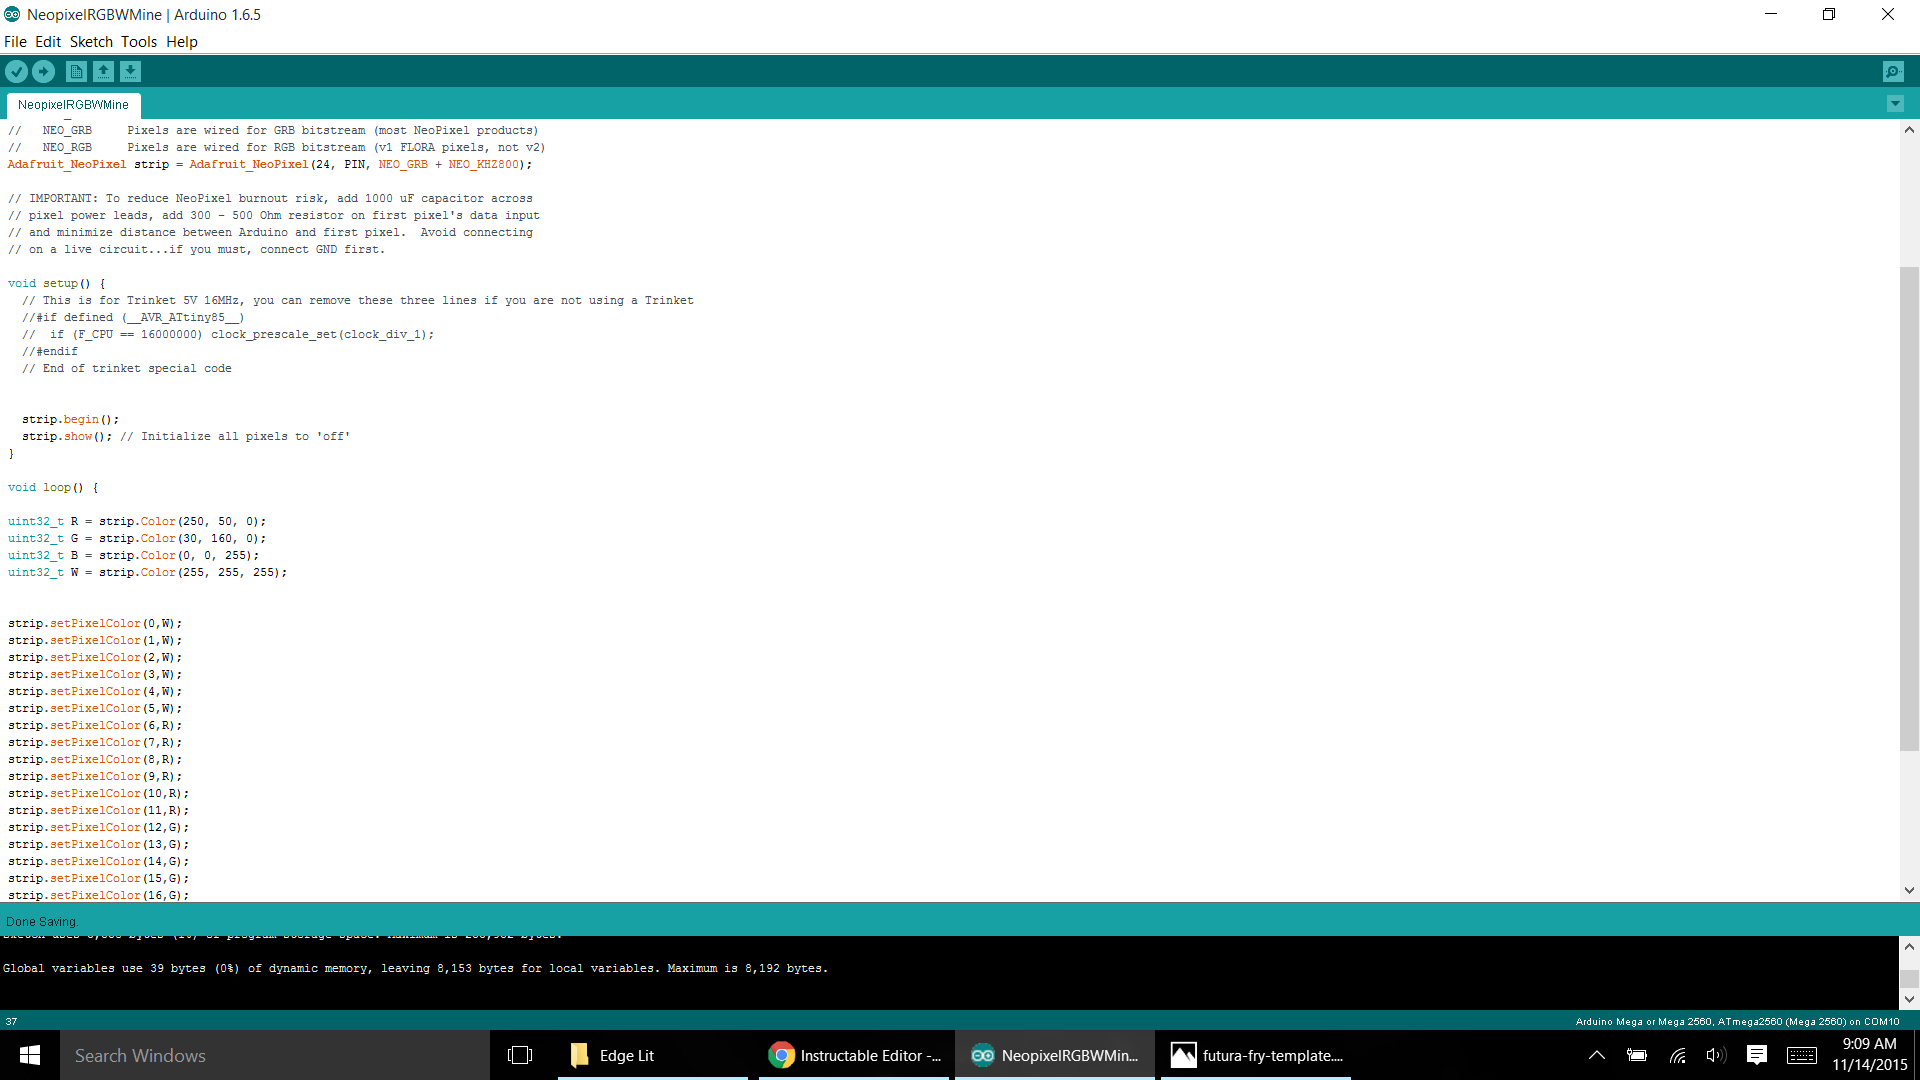.png)
One thing that I am not is a computer programmer. I know enough to get by with an arduino, but there is still much to be desired with this code. I modified some example sketches from the adafruit neopixel library. It does work however.
You will need to modify this sketch a little bit to work with your setup, but I will walk you through it.
#define PIN 6
This is the first line we need to modify. this specifies which pin will write to the neopixels. It needs to be a PWM pin on the arduino, but lets just leave this at pin 6 for now. You likely won't need to change it.
Adafruit_NeoPixel strip = Adafruit_NeoPixel(24, PIN, NEO_GRB + NEO_KHZ800);
Here we just need to define how many pixels we have in total. I have 24, so it says 24 there, but you can change this to however many pixels you have.
void loop() {
uint32_t R = strip.Color(255, 0, 0);
uint32_t G = strip.Color(0, 255, 0);
uint32_t B = strip.Color(0, 0, 255);
uint32_t W = strip.Color(255, 255, 255);
These lines define the color output for each color that we assign. These are key for fine-tuning the colors later! The numbers represent how bright each color will be in that pixel. You set the number between 0 and 255, 255 being the brightest, and 0 being off. It is labled like this (Red, Green, Blue), so as you can see above R = strip.Color(255, 0, 0); the number representing Red is set to 255 and the other colors set to 0. Notice how White sets all the colors to 255, that is as close to white as we will get without a dedicated white led strip, but it works well enough.
strip.setPixelColor(0,W);
strip.setPixelColor(1,W);
strip.setPixelColor(2,W);
The 24 lines that look like this designate what pixel in the string is what color. Since I have 24 neopixels, I have 24 lines like this that set each color to each neopixel. We number them from 0 however and go up to 23. So for instance Neopixel number 2 is set to the color White (which we can then fine-tune above), but Neopixel number 22 would be set to R for Red.
Hope that makes since, and I am sure someone out there can write up something better. If you do, share it in the comments!
I will post the arduino sketch on the last step
Under NO circumstance have the positive and negative leads plugged into the arduino when you are programming it! Also make sure the power is unplugged from the connector as well. Last thing you want is for the neopixels to draw 1.5 amps through your usb port of your computer!!!!! Final warning :(
Put It All Together!
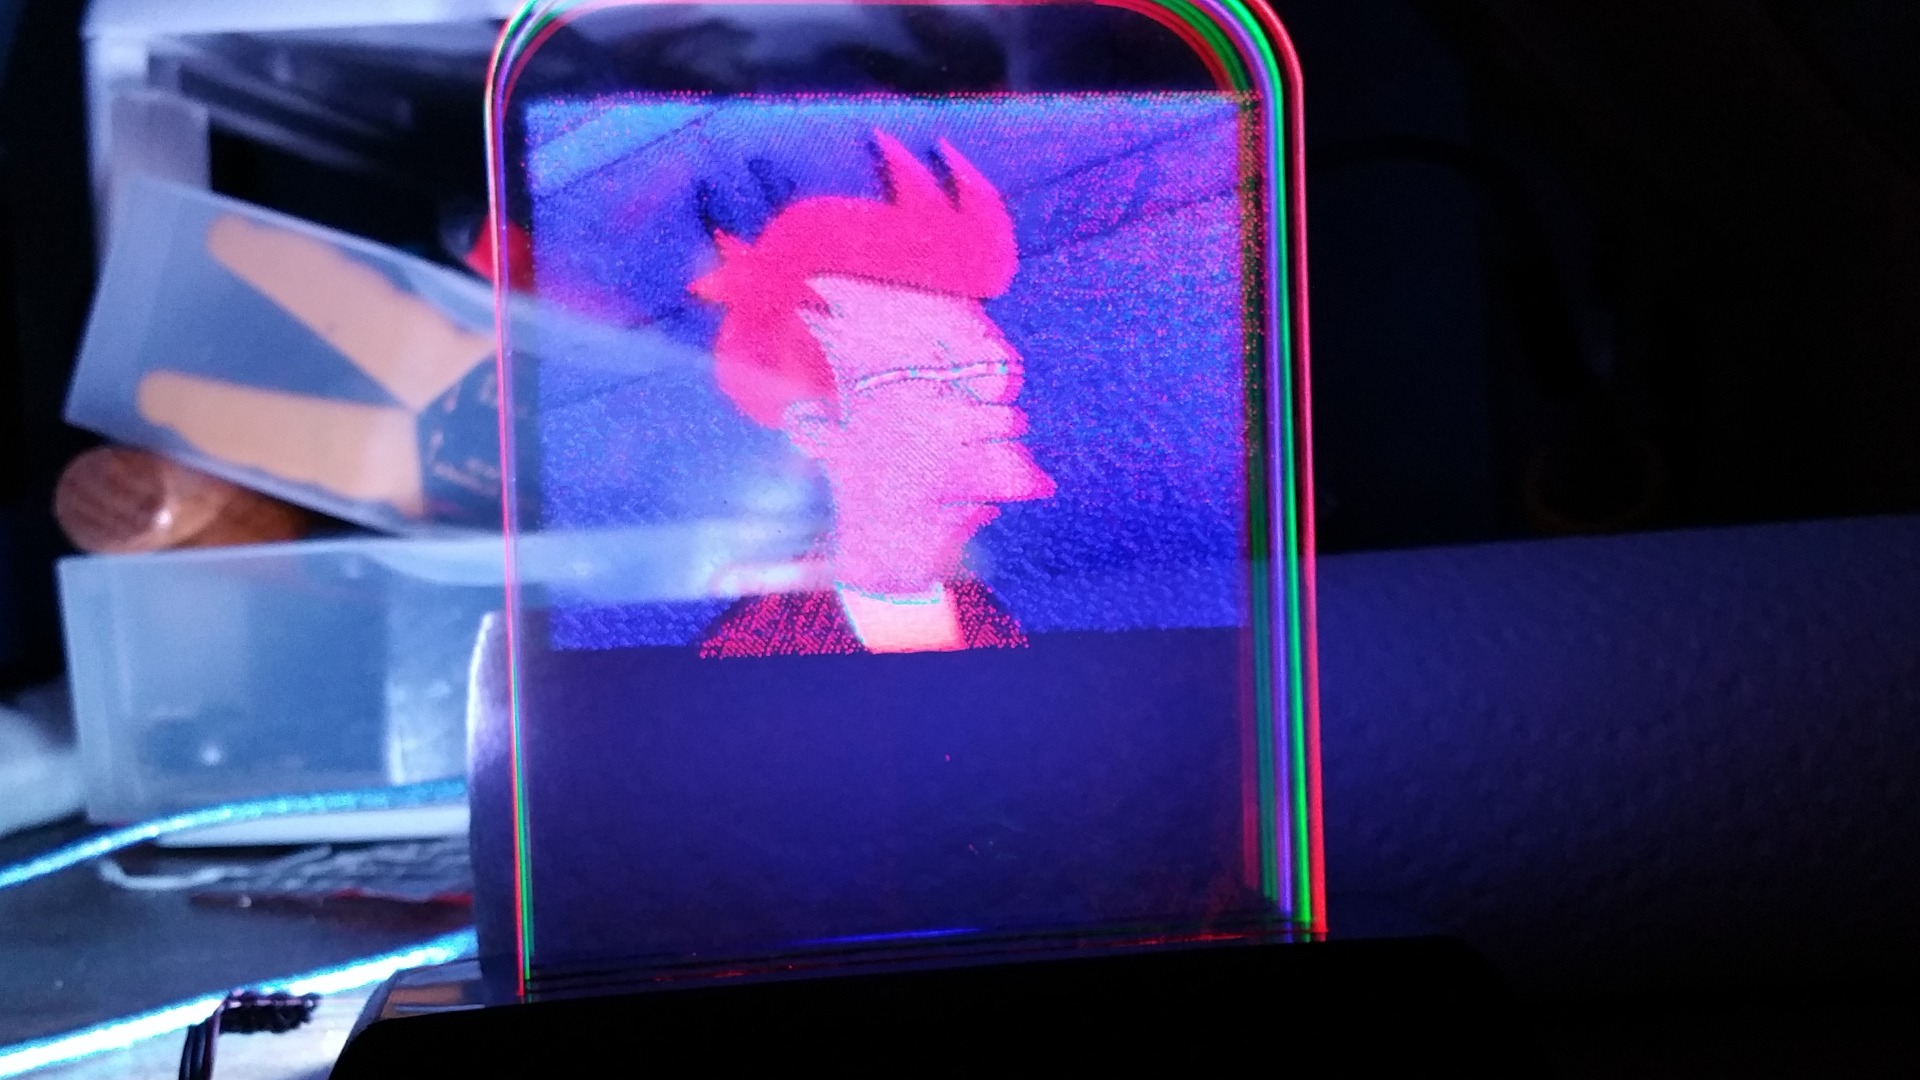
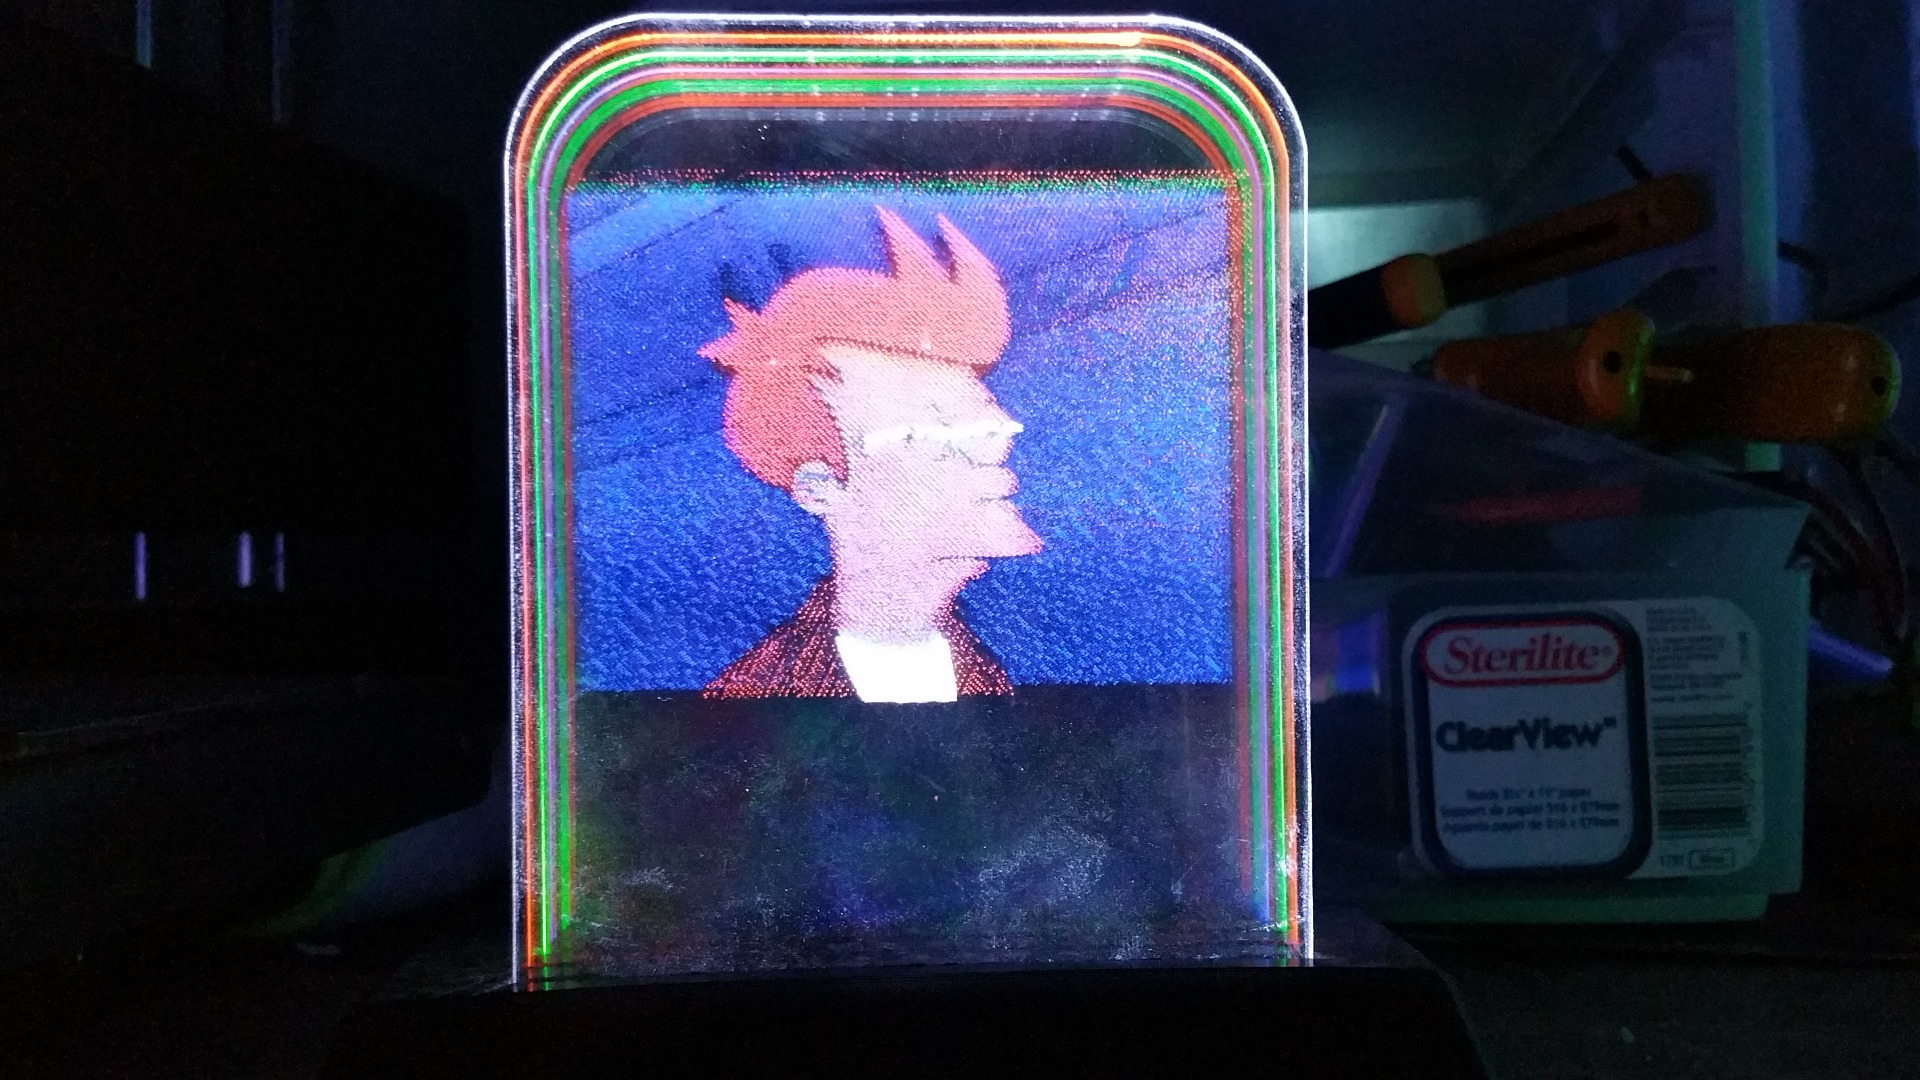
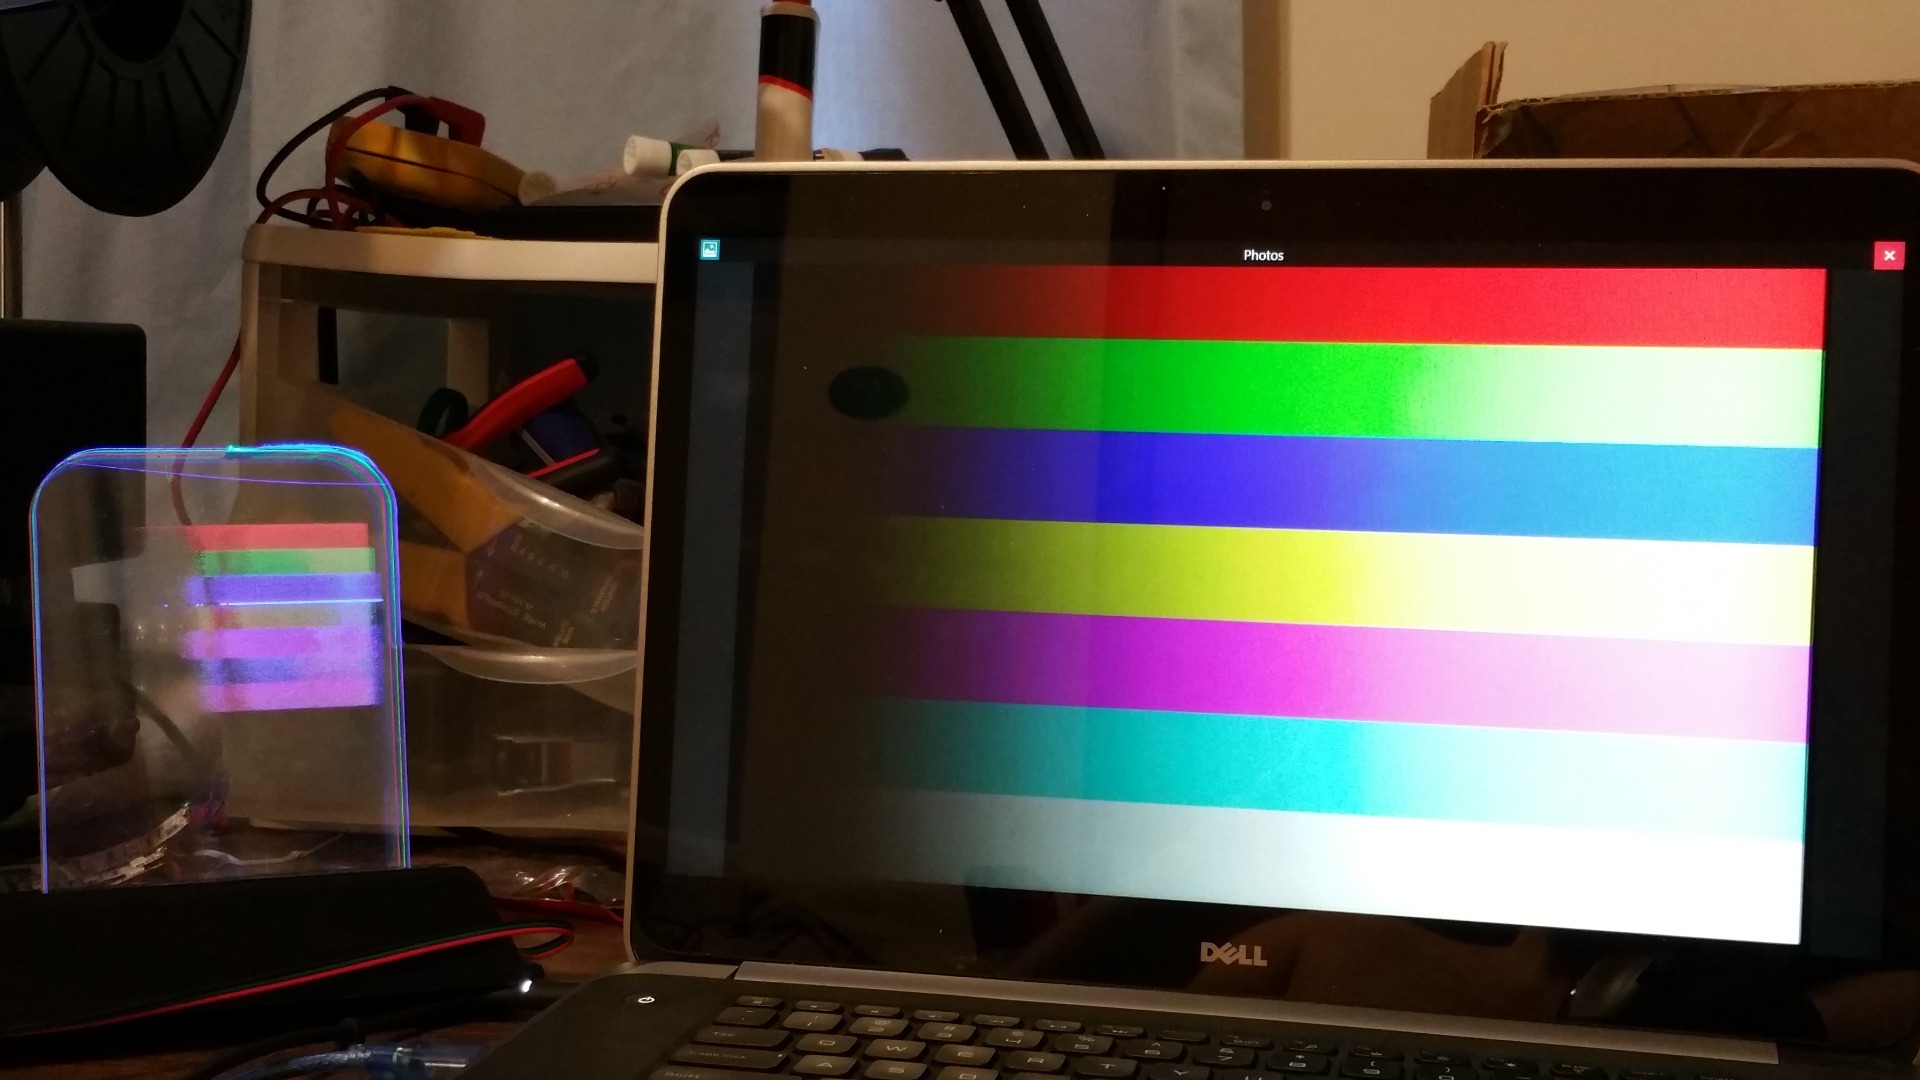
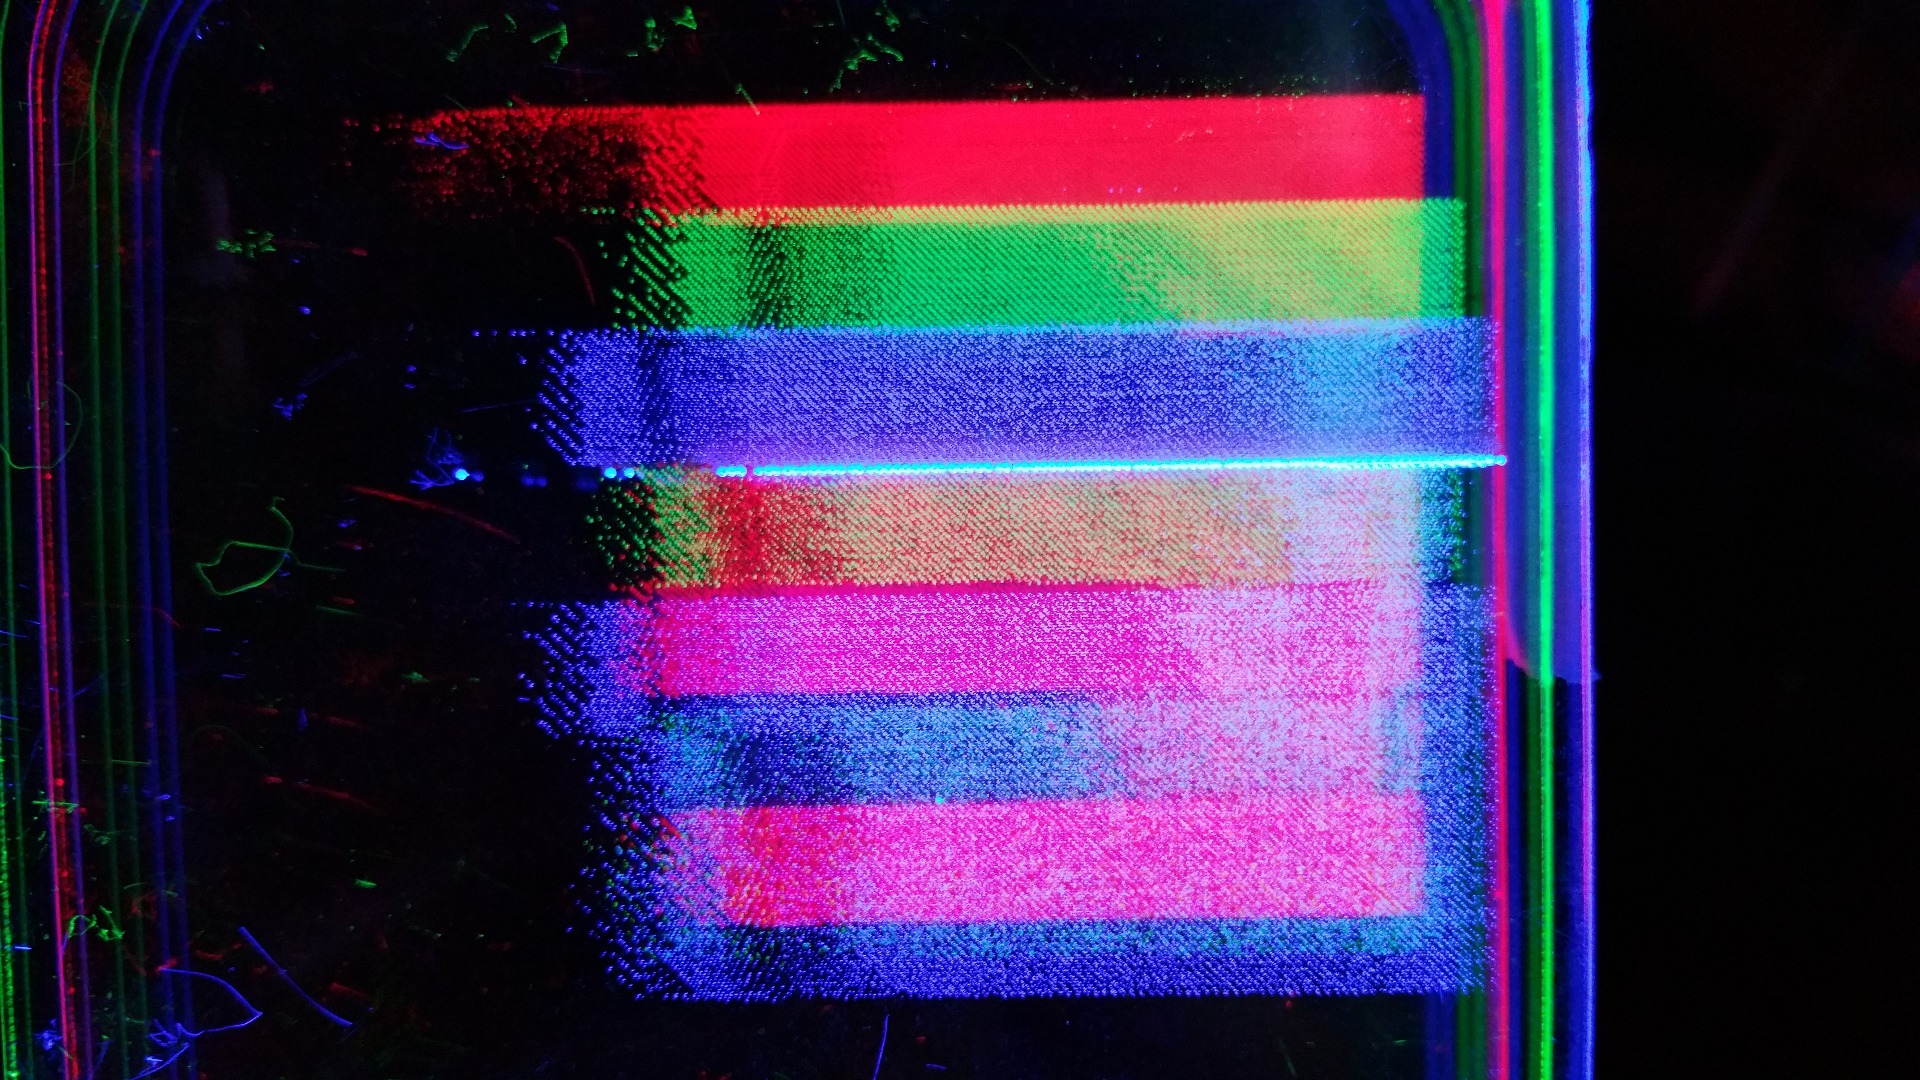
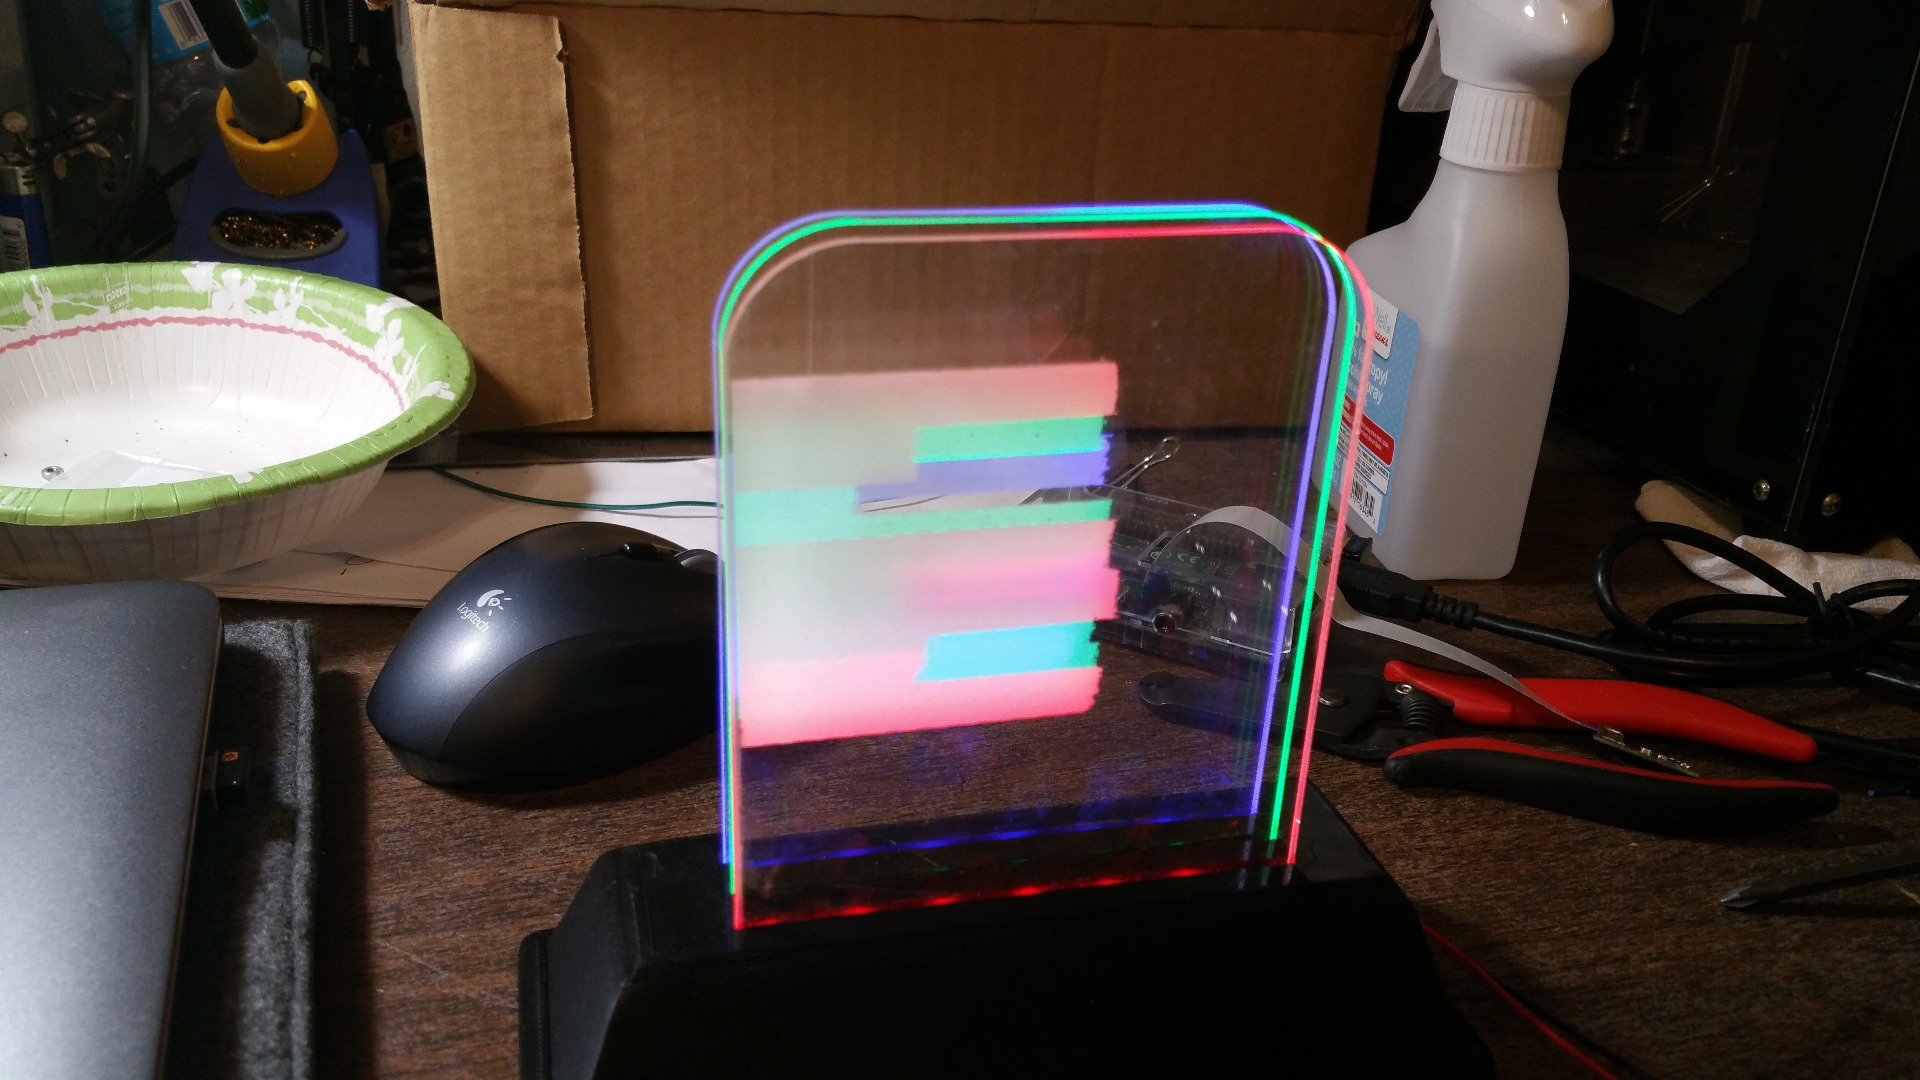
Finally!
Lets put it all together now! Make sure everything is wired up correctly and there aren't any short circuits. Insert the Acrylic panes into the base, making sure you put the correct color in the correct slot. Now power it up!
I know, it doesn't look perfect. Don't worry though, that's why we are going to fine-tune it a bit!
Tuning
The colors will almost certainly not be perfect from the start. Every image is different, and each neopixel is slightly different, so we will need to adjust the colors a bit. That's why we used neopixels, and why I showed you how to adjust the colors in the previous step. It is a bit of trial and error to get the color just right, but as long as you know what color is off in your image, you can correct the two colors that create the desired color. So if yellow is looking a bit orange, then lower the Red value a bit or raise the Green value. Remember you only have to do this once! Another key tip is to not be afraid to add a little Green or Blue to the Red neopixels, or add some Red to the Green or Blue neopixels! It helps with some minor differences, though you shouldn't need much. I wouldn't add more than 50 out of 255 to any color. If you need to add more than that, then it is probably an issue with the etched images.
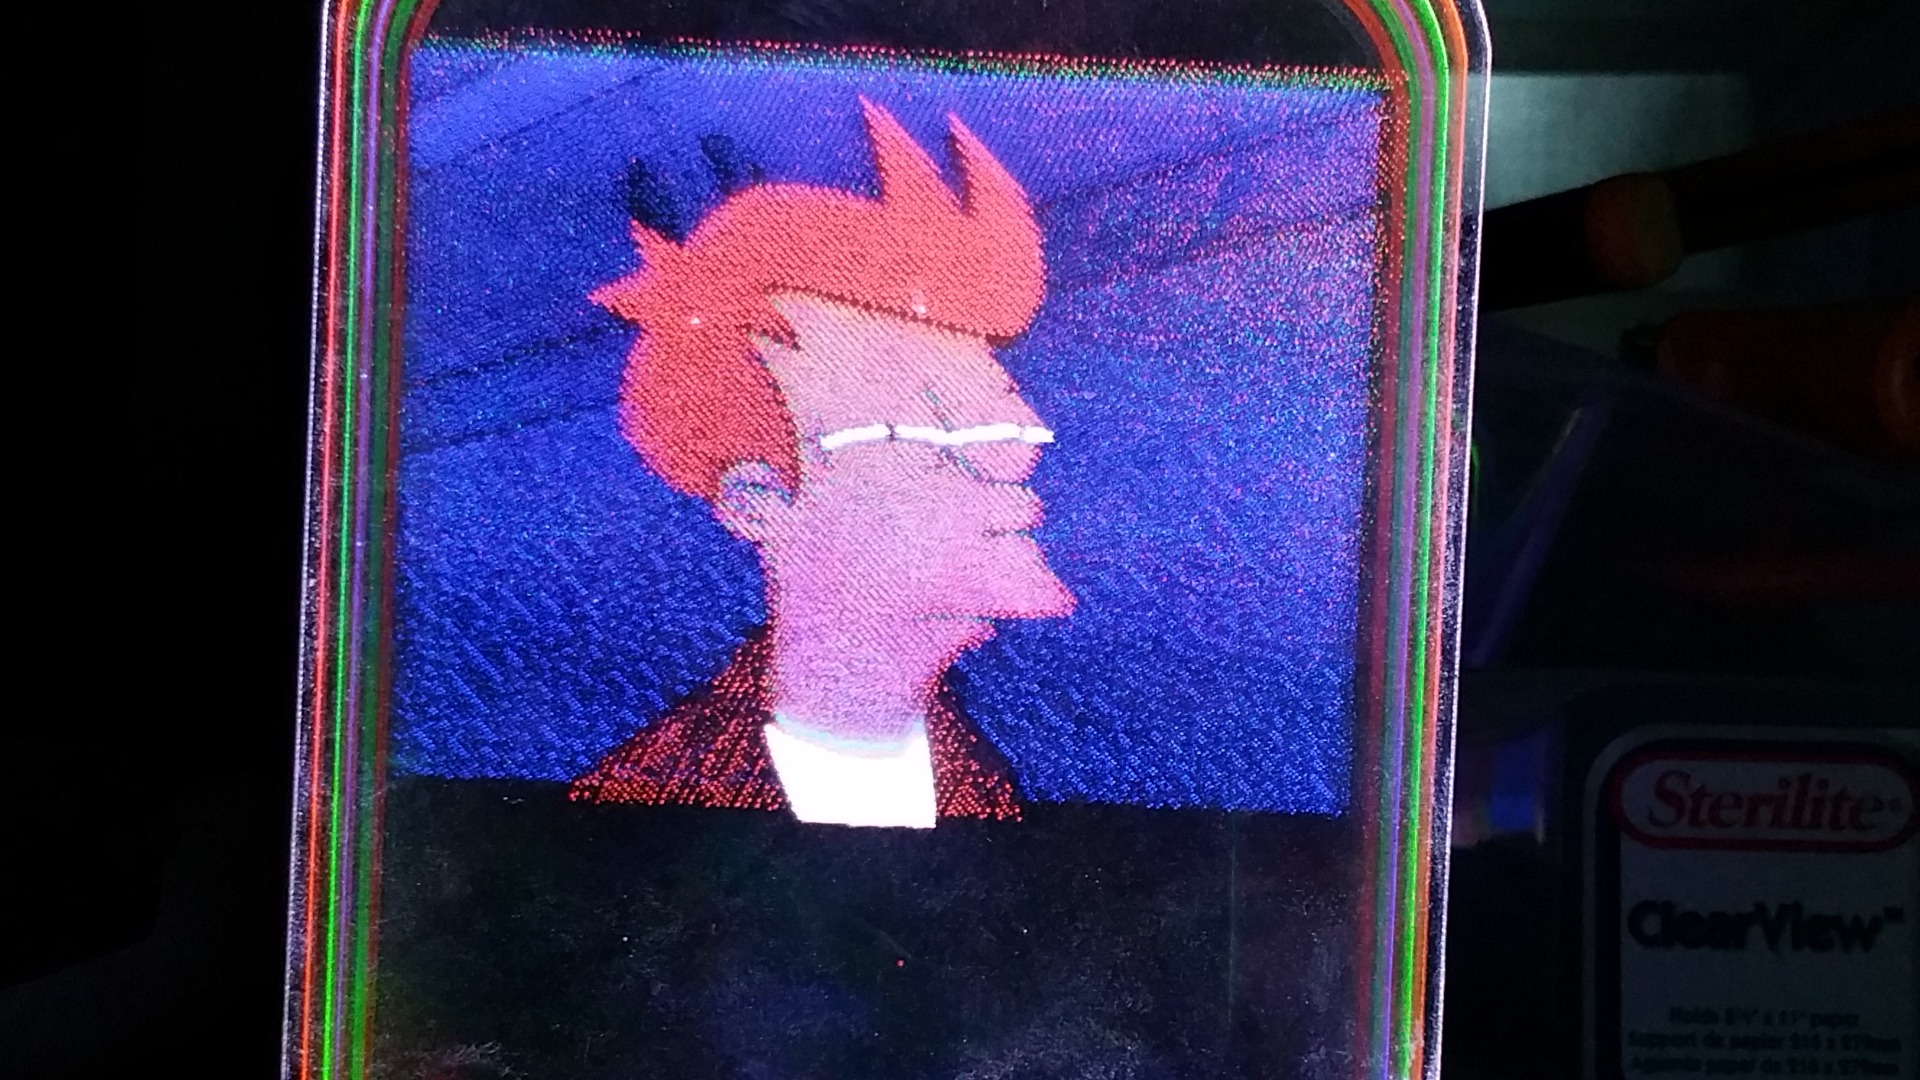
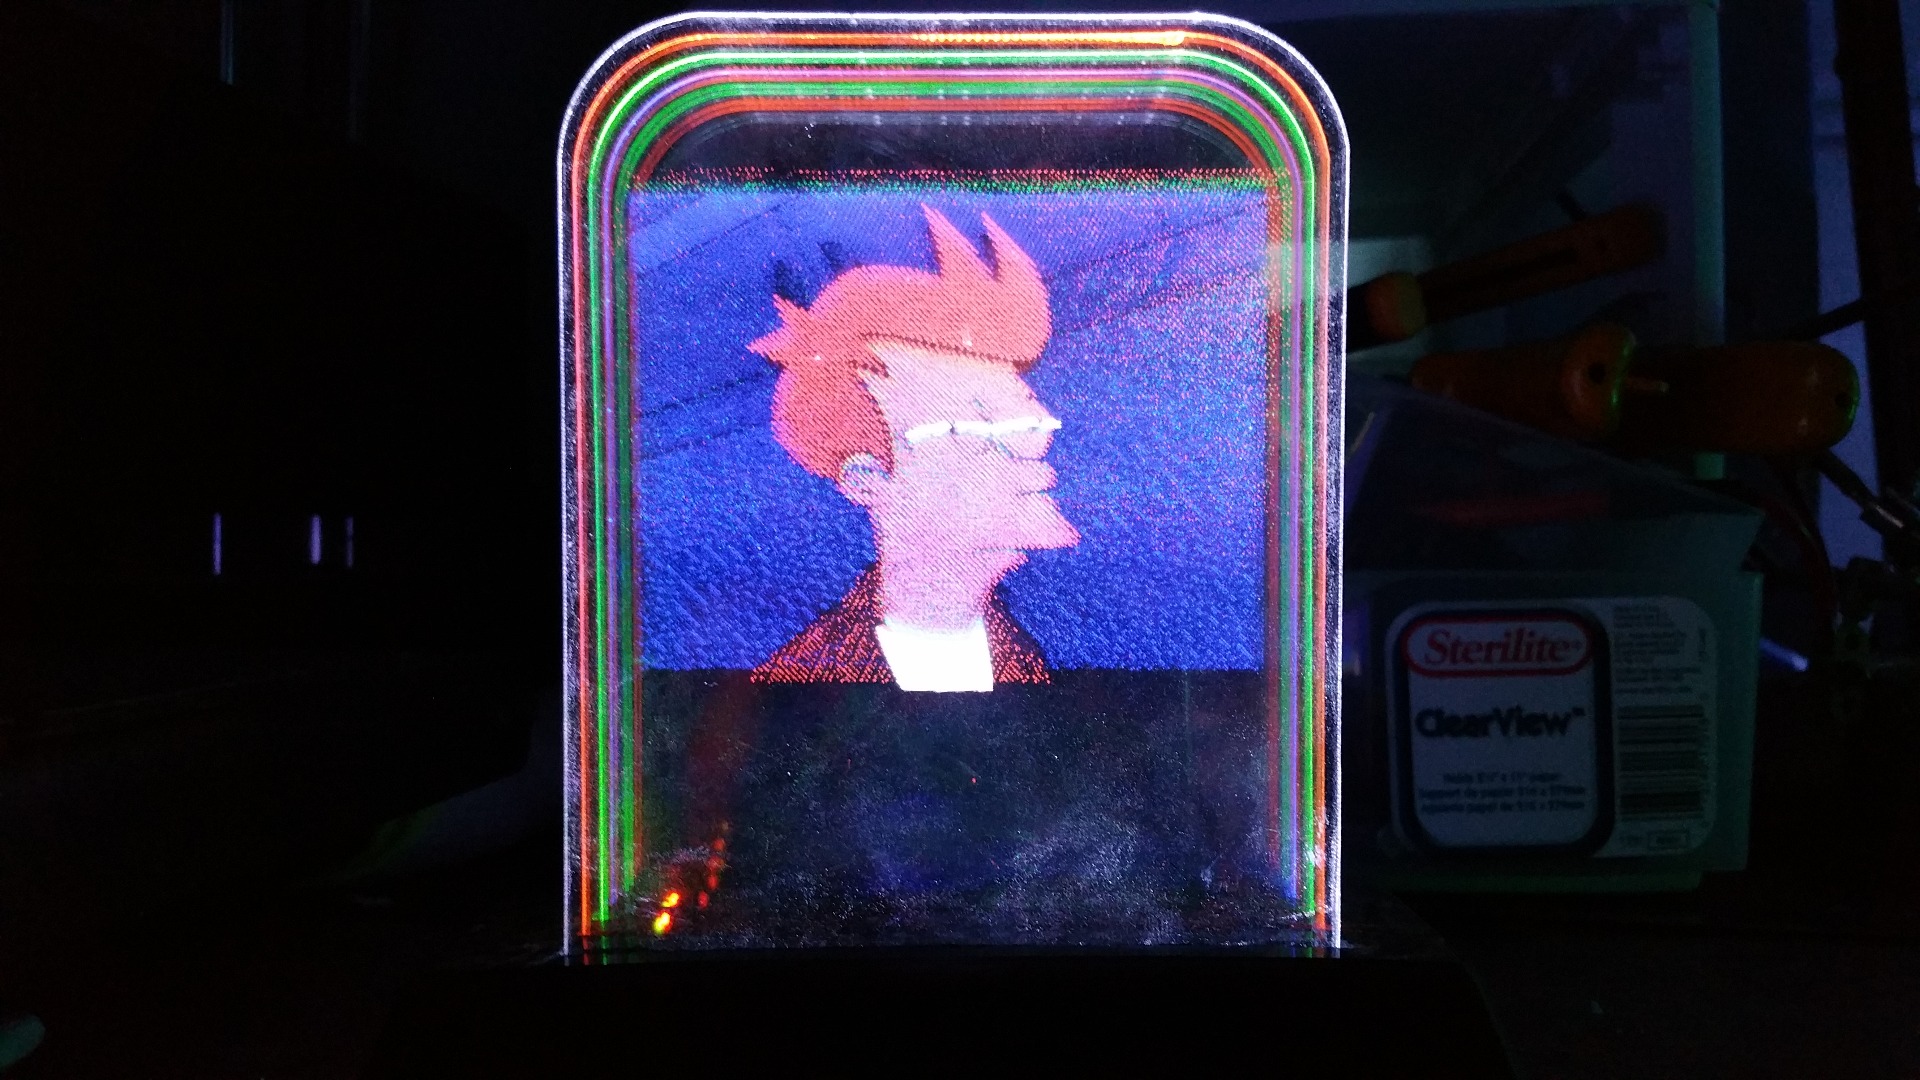
Also you might want to try re-arranging the order of the panels. If you have a very bright panel, it might wash out the colors from the other panes. For my version with Fry I put them in order from W,R,G,B from front to back, however W,B,G,R might work best for yours. Again, it depend's on your original image.
Fail!
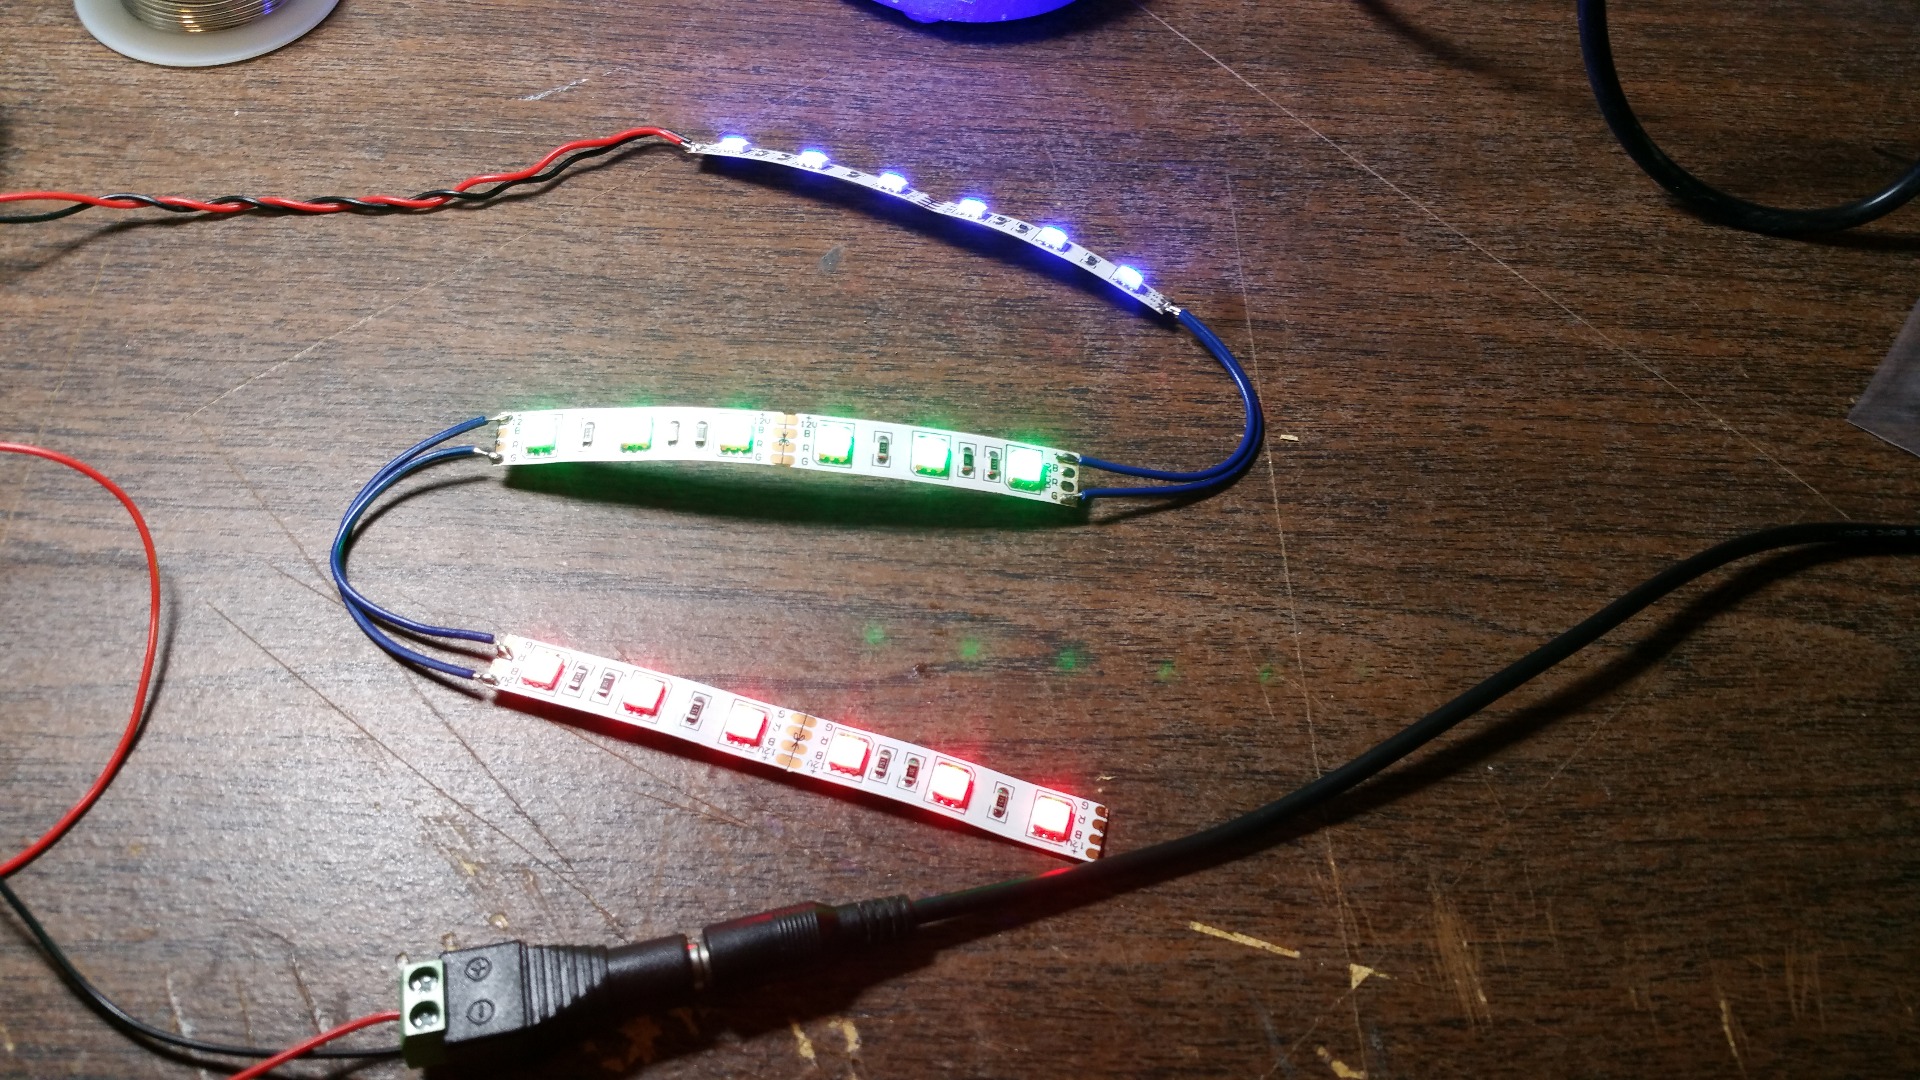
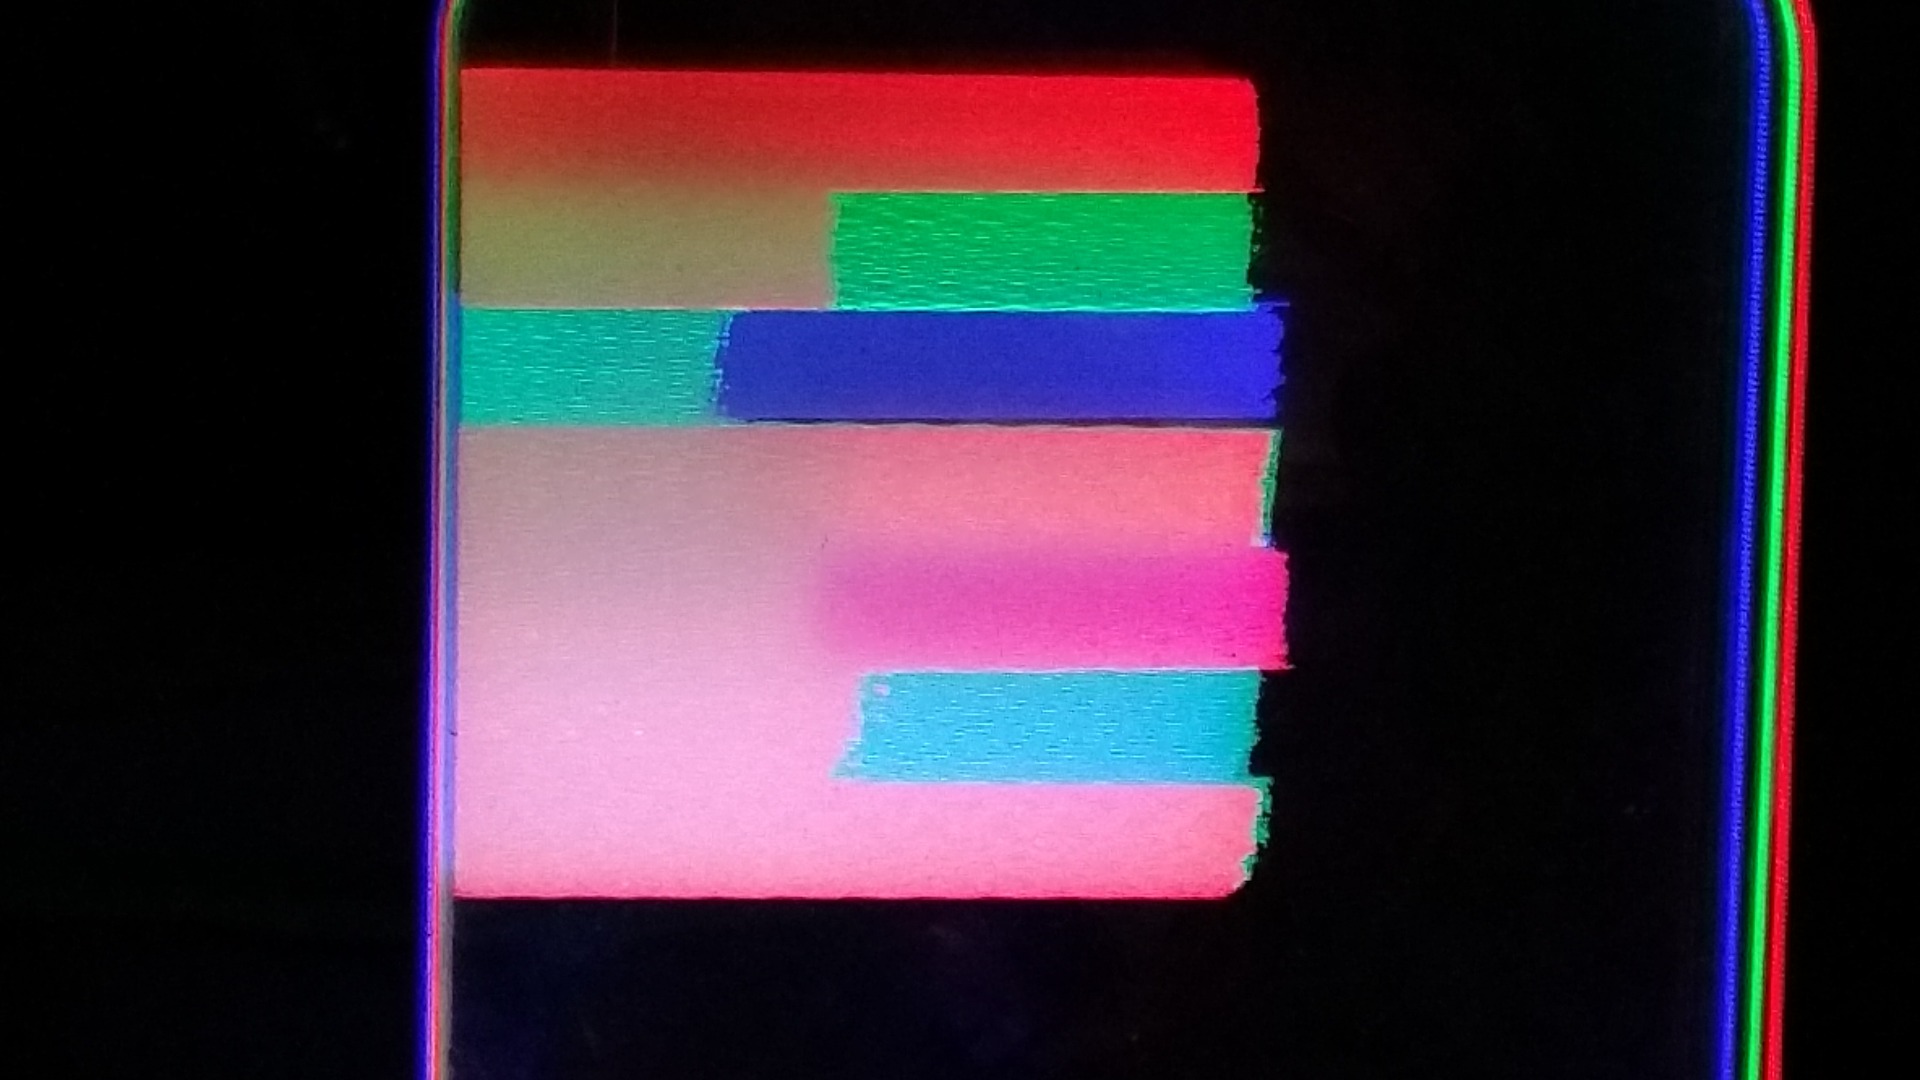
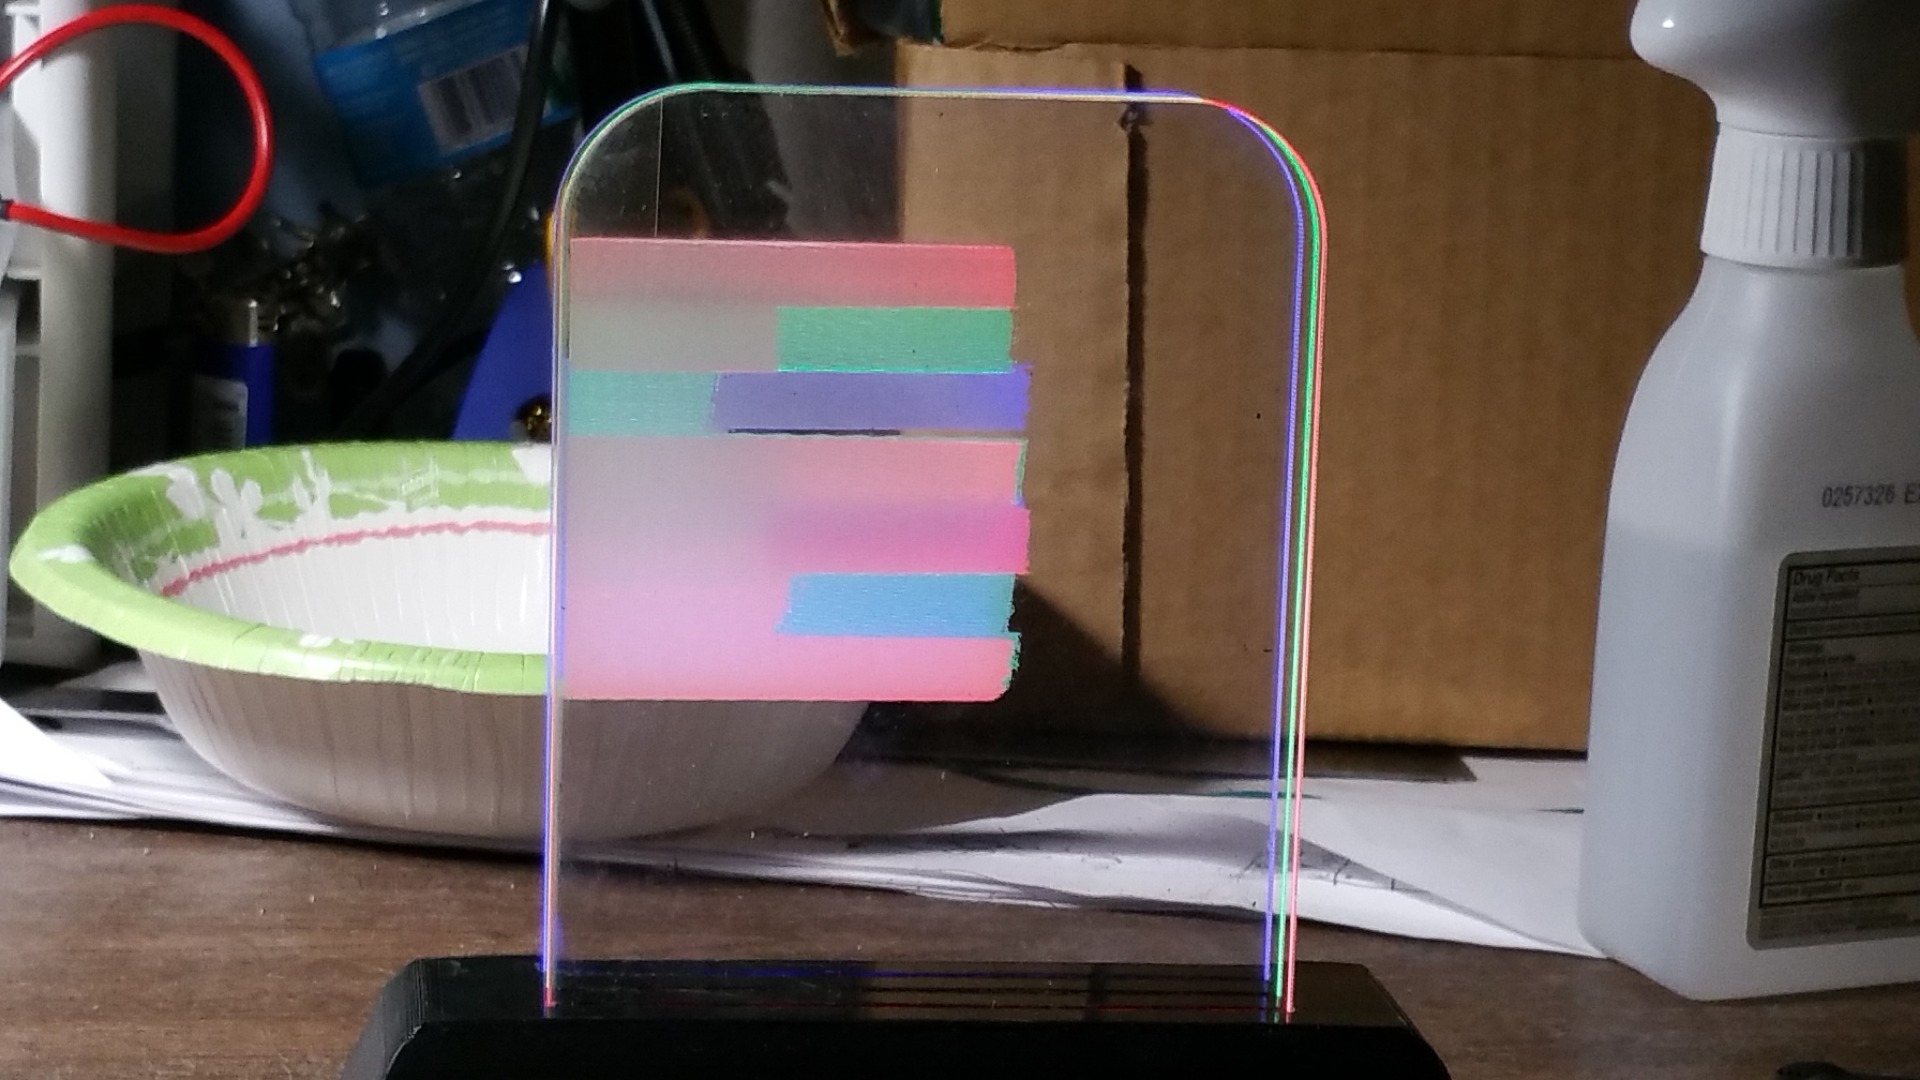
Some things I tried that didn't work
Regular RGB led strip
I first tried just wiring up a normal rgb led strip so that they were hard-wired for that specific color. The problem with that is that you can't fine tune the brightness of each color, which is critical to make it look right.
Without the Filtering and Dithering the image
As you can see, my first attempt just involved throwing the images to the laser cutter. That didn't work out so well! They didn't blend well and the pane in the front blocked out a lot more light of the pane in the back. Also it was a standard grey-scale image, and the laser cutting software just etched it all the exact same, and cut off the colors at weird points.
Files
Here are all the files used for this project.
RGB Version stl's These are the stl files for my failed RGB version.
WRGB Version Stl's These are the stl files for my Fry version
Arduino Sketch You guessed it. This file contains my arduino sketch.
Fry Images and Template This file contains the separate Red, Green, Blue, and White png files along with the outline template that I created in Inkscape. The Images are separate from template because I had to align them manually in the Laser cutting software. You may not need to do that, but that's why they are separate.
Special thanks again to my friend Joe for cutting these out for me!
I hope you enjoyed this Instructable! Keep experimenting with this! I would love to see what people come up with!