DIY Laser Cut Rigid Heddle Loom - Part 2: Weaving With the Rigid Heddle Loom
by TheInterlaceProject in Craft > Fiber Arts
17650 Views, 187 Favorites, 0 Comments
DIY Laser Cut Rigid Heddle Loom - Part 2: Weaving With the Rigid Heddle Loom

Welcome to The Interlace Project!
Our mission is to make weaving more accessible by designing open-source weaving looms.
Rigid Heddle Looms are a great introduction to weaving and the skills you learn are all transferable to other types of looms. Easy to set up and use, this loom comes with a 5dpi* rigid heddle but has been designed to work with Ashford SampleIt Loom Reed (10"/25cm) for additional flexibility.
*dpi = Dents Per Inch - number of spaces (dents) per inch in a reed or rigid heddle.
What is Weaving?
Weaving is a method of creating cloth from two sets of yarns or threads interlaced at right angles. The lengthwise threads are called the warp and the sideways threads are called the weft . Cloth is usually woven on a loom , a device that holds the warp threads taut and in parallel to each other while weft threads are woven through them.
The warp threads are passed through the eyes of the heddles and these are used to move the warp threads up and down.
The weft threads are wound or wrapped onto a shuttle which is passed back and forth through the shed - the gap created between the warp threads when they are raised or lowered.
The beater is used to push the weft yarn into place.
In rigid heddle weaving the beater and heddles are combined into a single tool. The warp threads pass alternately through the eye of a heddle and through a space between the heddles, so that raising the shaft will raise half the threads (those passing through the heddles), and lowering the shaft will lower the same threads—the threads passing through the spaces between the heddles remain in place.
Parts of the Rigid Heddle Loom

Tools and Materials

DIY Laser Cut Rigid Heddle Loom - constructed as per instructions in Part 1
DIY Laser Cut Rigid Heddle - constructed as per instructions in Part 1
Stick Shuttle - included in cutting file for DIY Laser Cut Rigid Heddle Loom - Part 1
Reed/Heddle hook - included in cutting file for DIY Laser Cut Rigid Heddle Loom - Part 1
Scrap of 3mm MDF
Medium sized g-clamp
Medium sized f-clamp
Yarn for weaving
Warping the Loom


Place the loom with the back towards the end of a long table - the table length will determine the length of your weaving so if you want a longer piece you may have to use another surface as well. Slide the end of the loom off the end of the table and position the dropped end against the edge. Try to position the loom so that the midpoint of the warp beam is centred along the table edge.
Warping the Loom

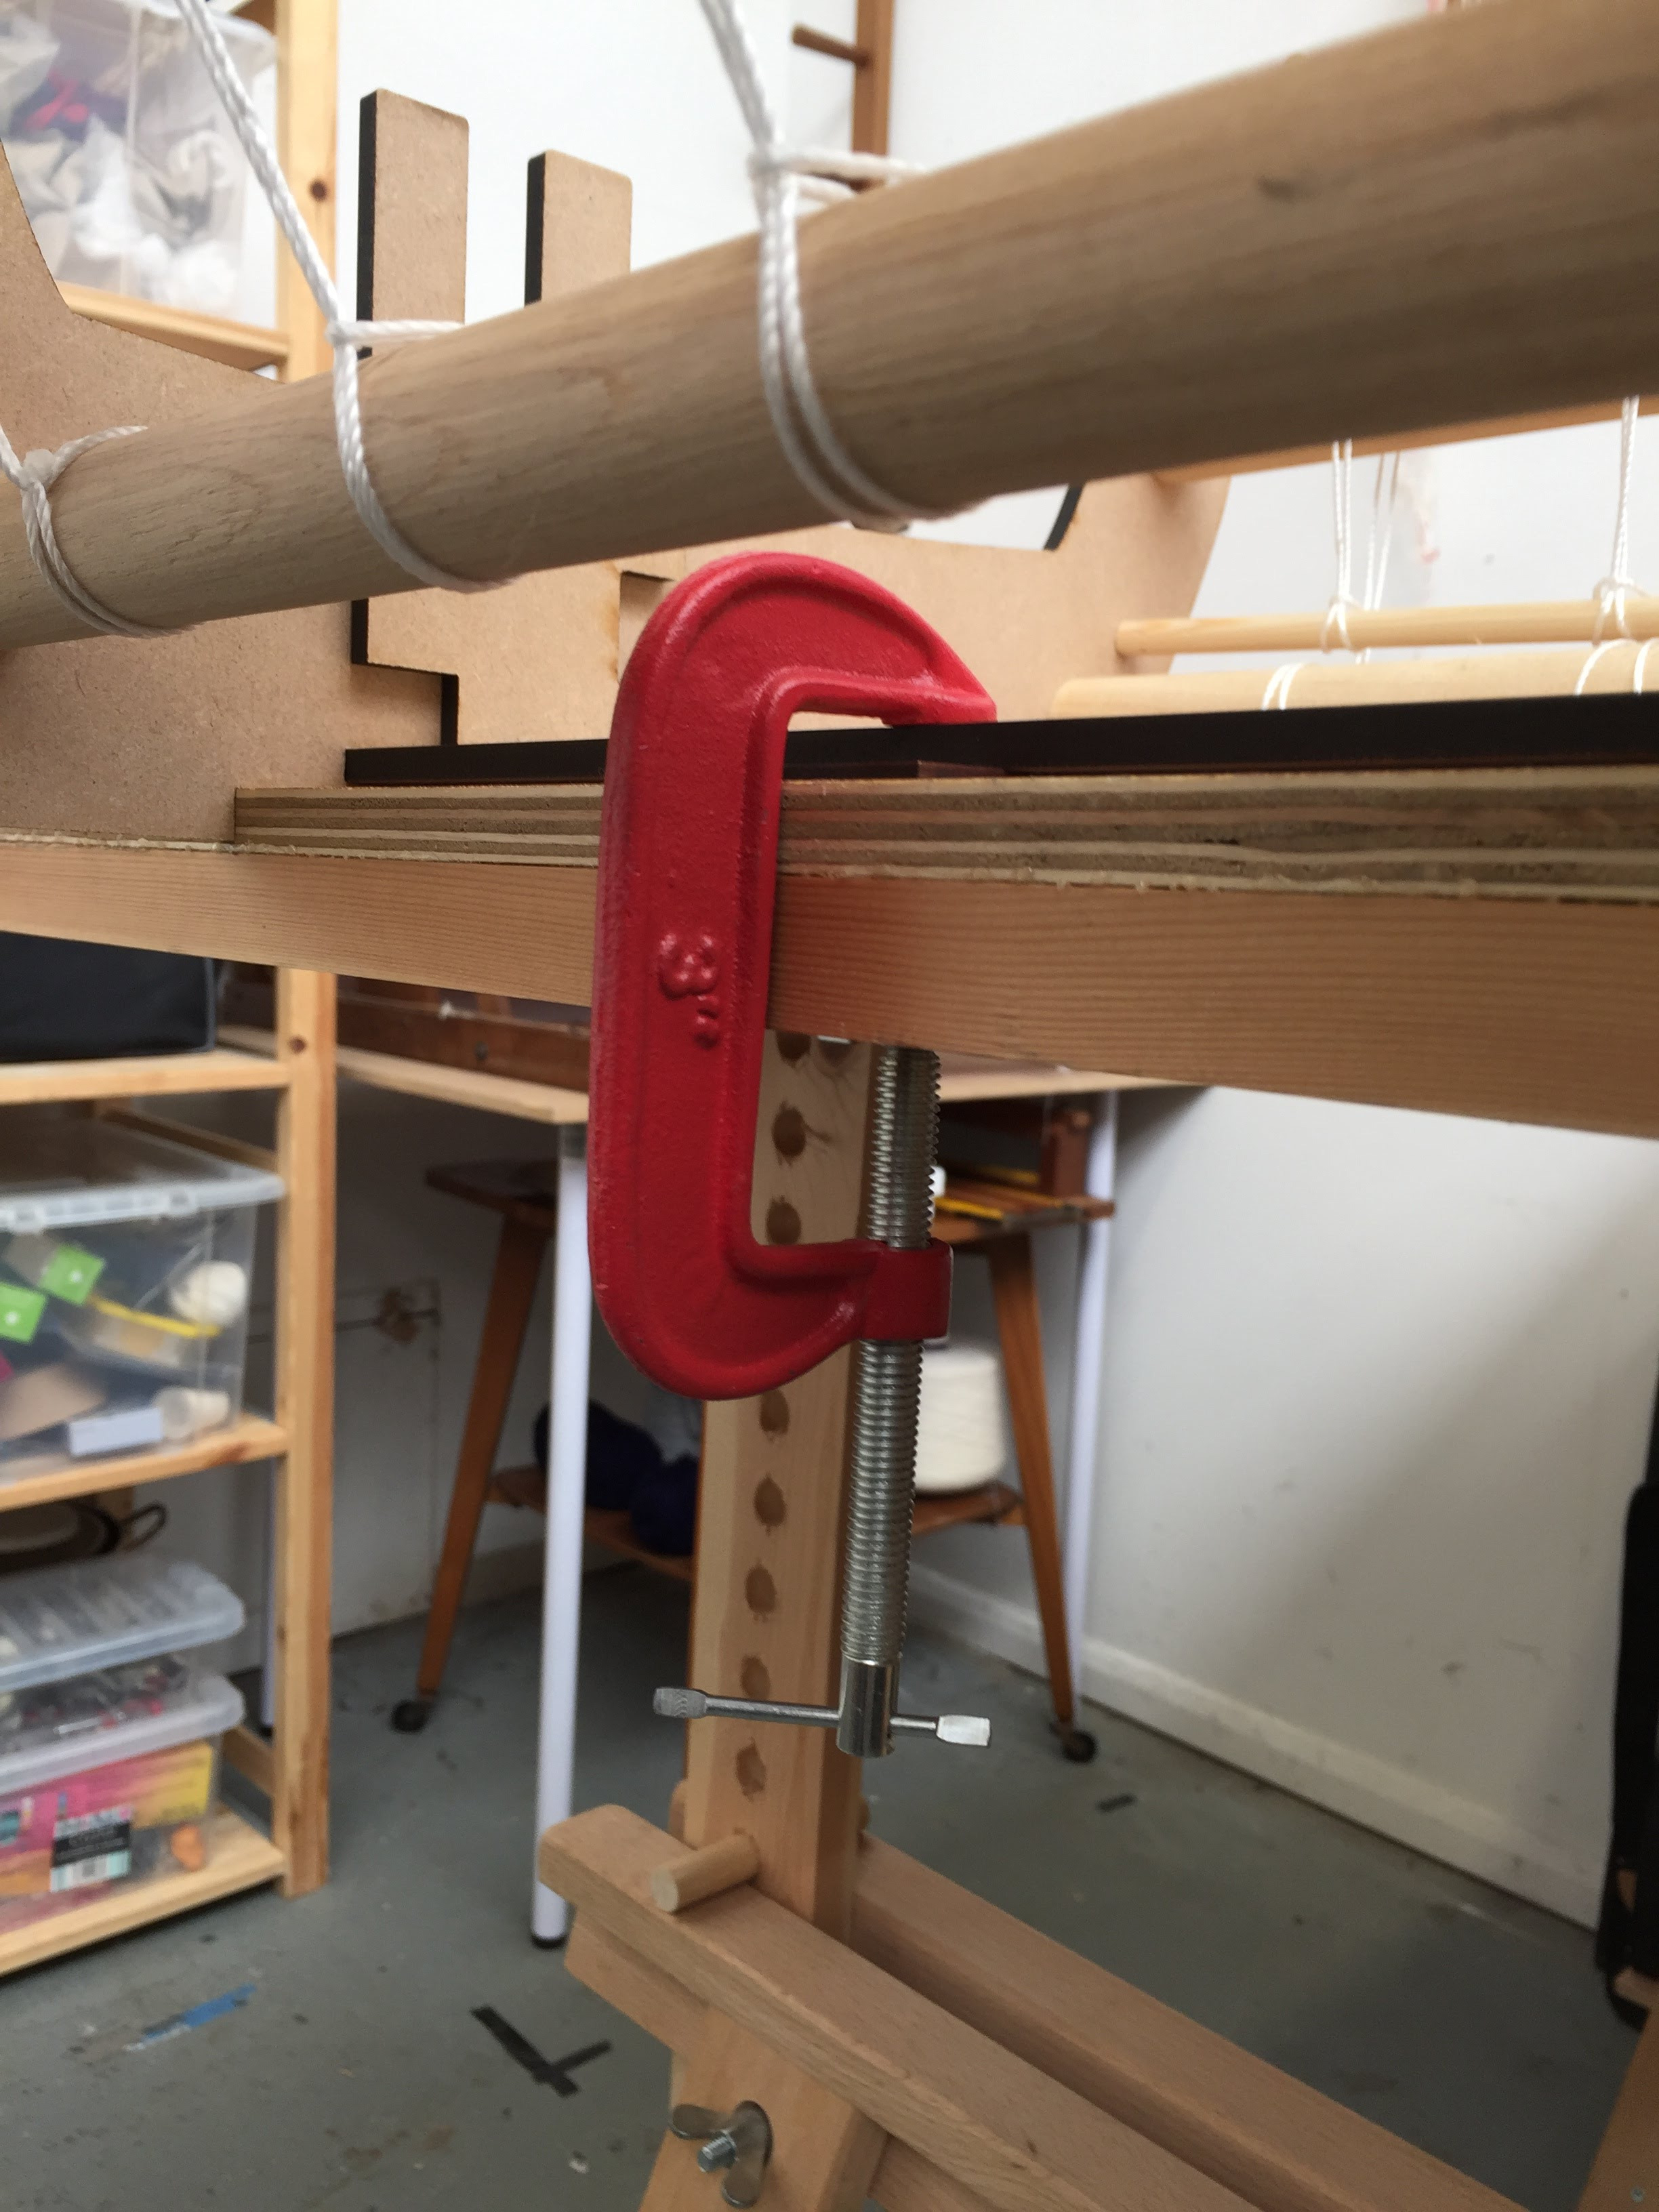
Slide a piece of scrap MDF under the base of the loom and secure it to the table using the g-clamp.
Warping the Loom


At the opposite end of the table, position the f-clamp at the midpoint of the table edge and secure.
Warping the Loom

Place the heddle onto the heddle block in the raised position and secure it using some rubber bands.
Warping the Loom
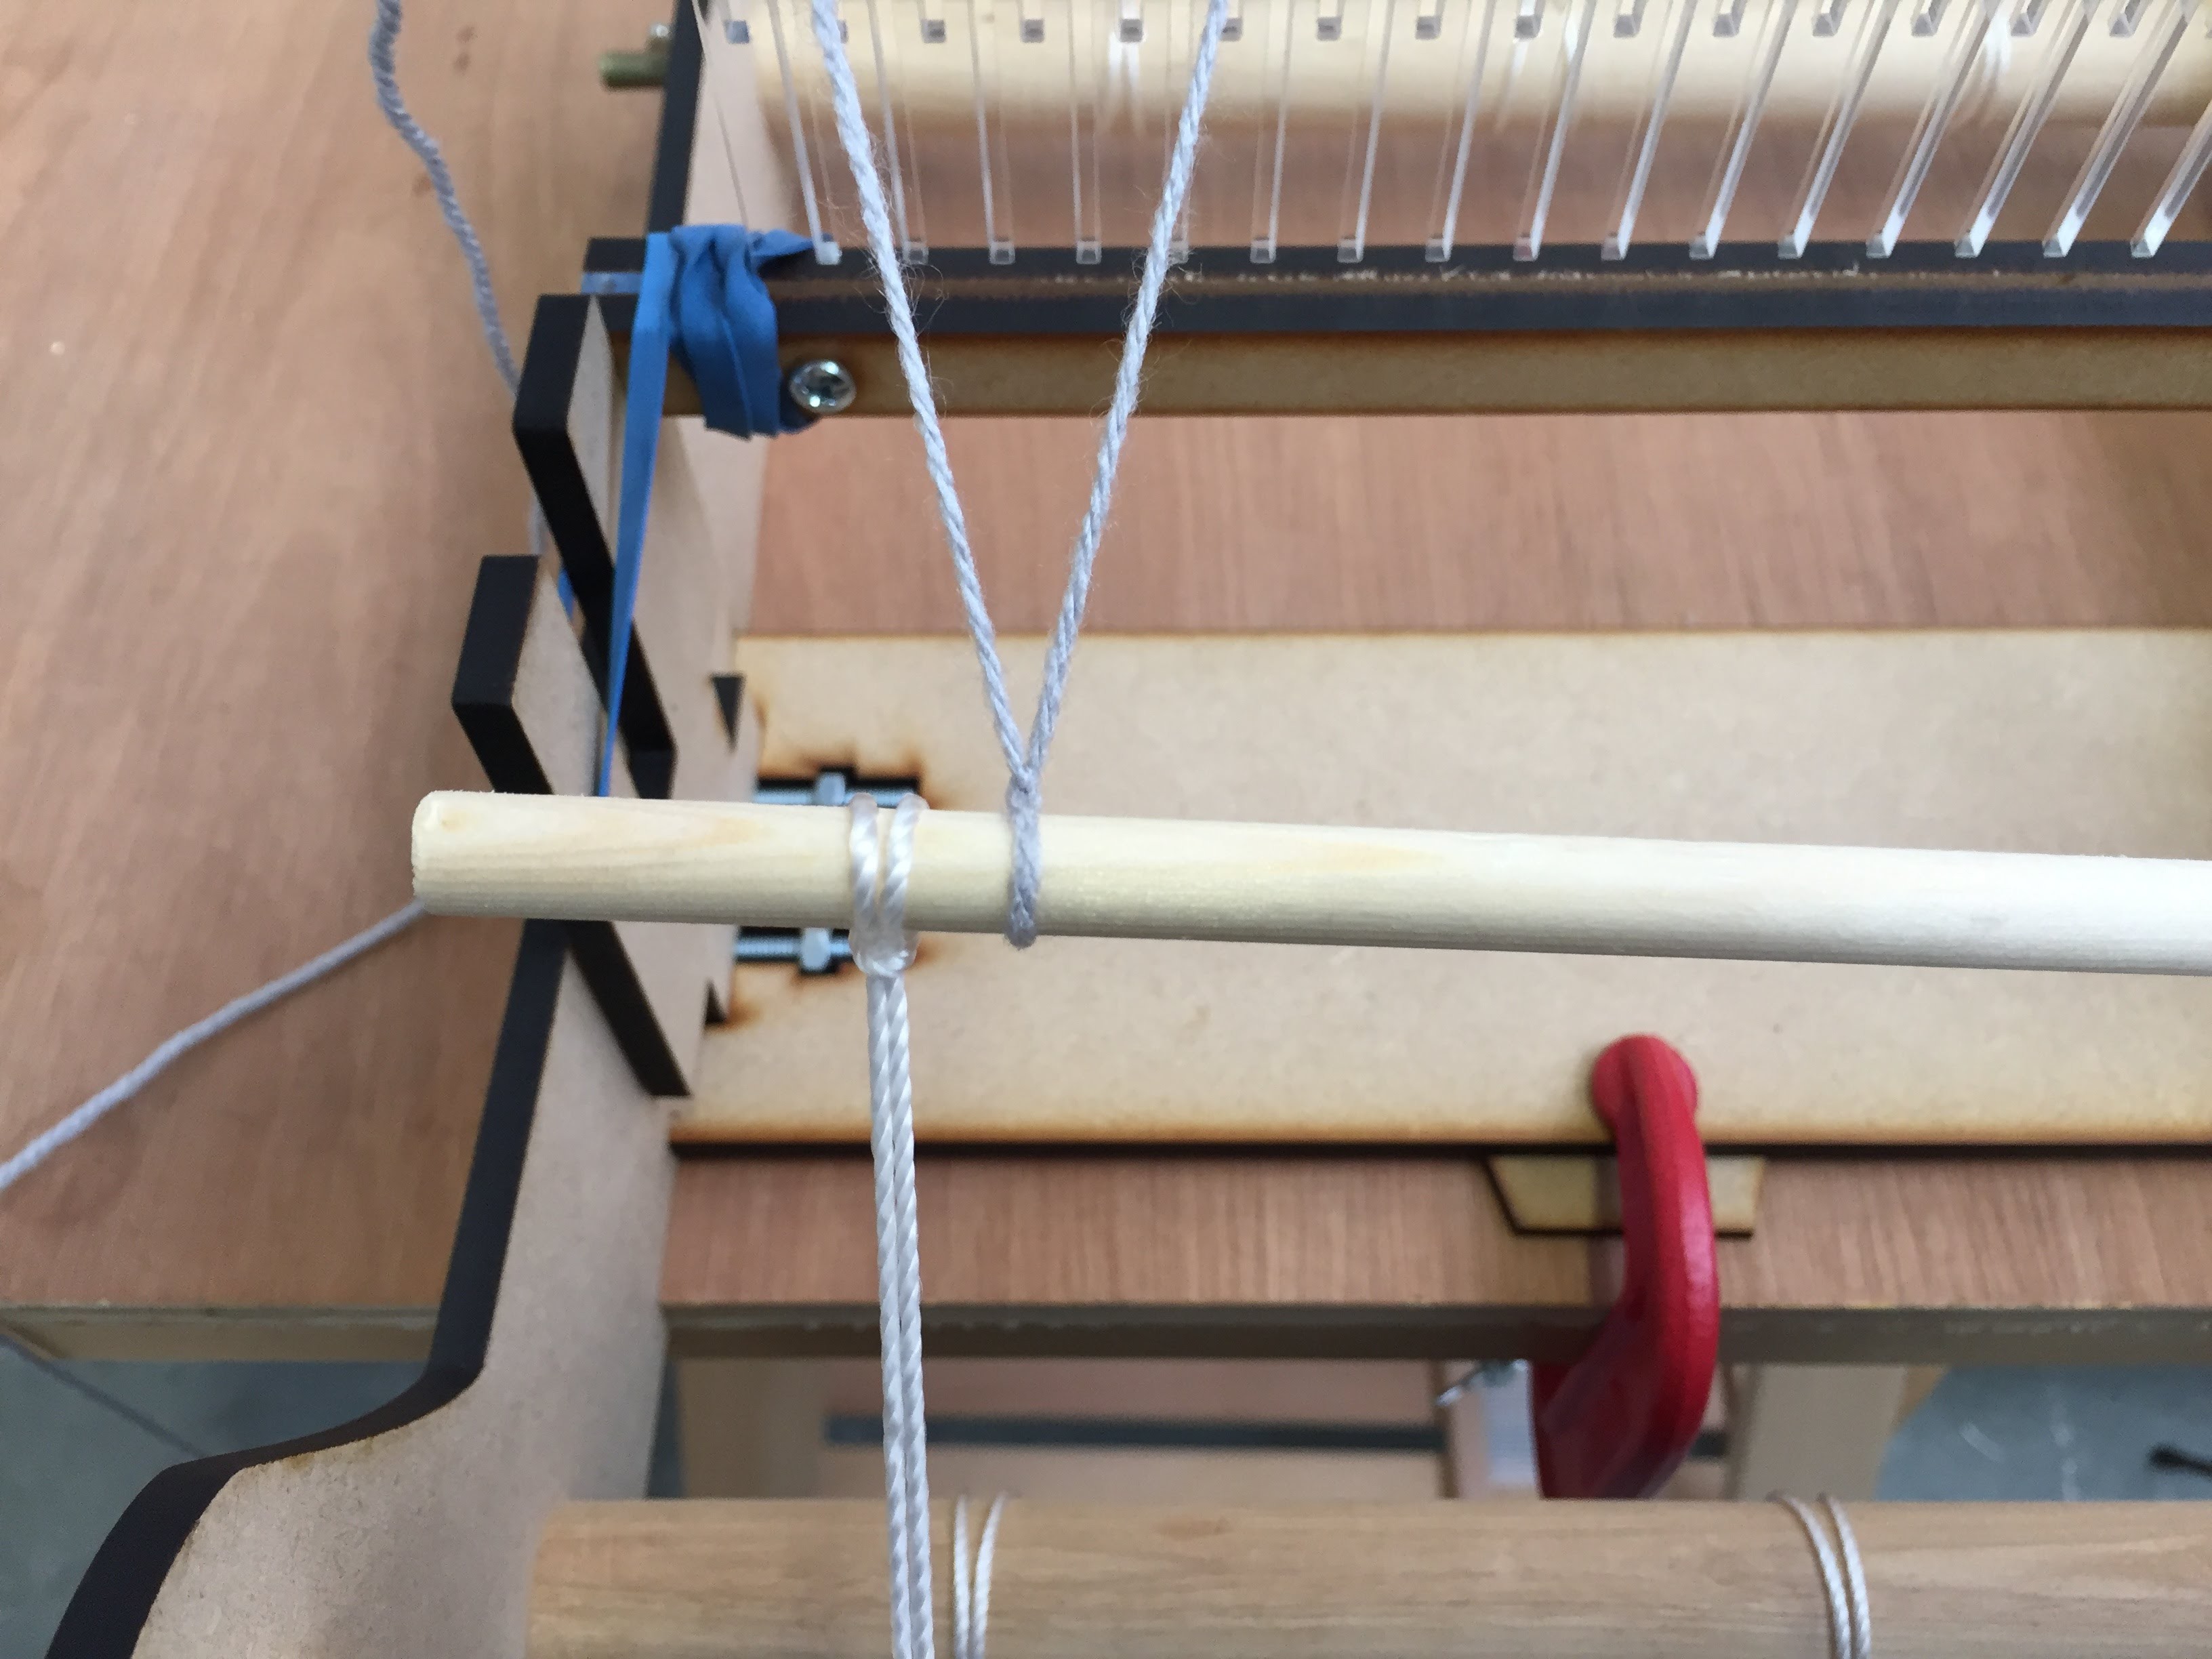

Select the yarn for your warp and tie onto the Back Apron Rod using a double knot - be sure to leave at least 15cm of yarn at the end. Place the ball of yarn into a container below the edge of the table to prevent it rolling away as you warp the loom.
Warping the Loom


Pull the Back Apron Rod over the Back Beam of the loom, then using the Heddle Hook pull the yarn through the first slot of the heddle (decide the width of your weaving before you begin to warp and be sure to count the number of warp ends you will need from the middle to each end of the heddle).
Warping the Loom


Pull this loop to the end of the table and wrap it around the f-clamp.
Warping the Loom


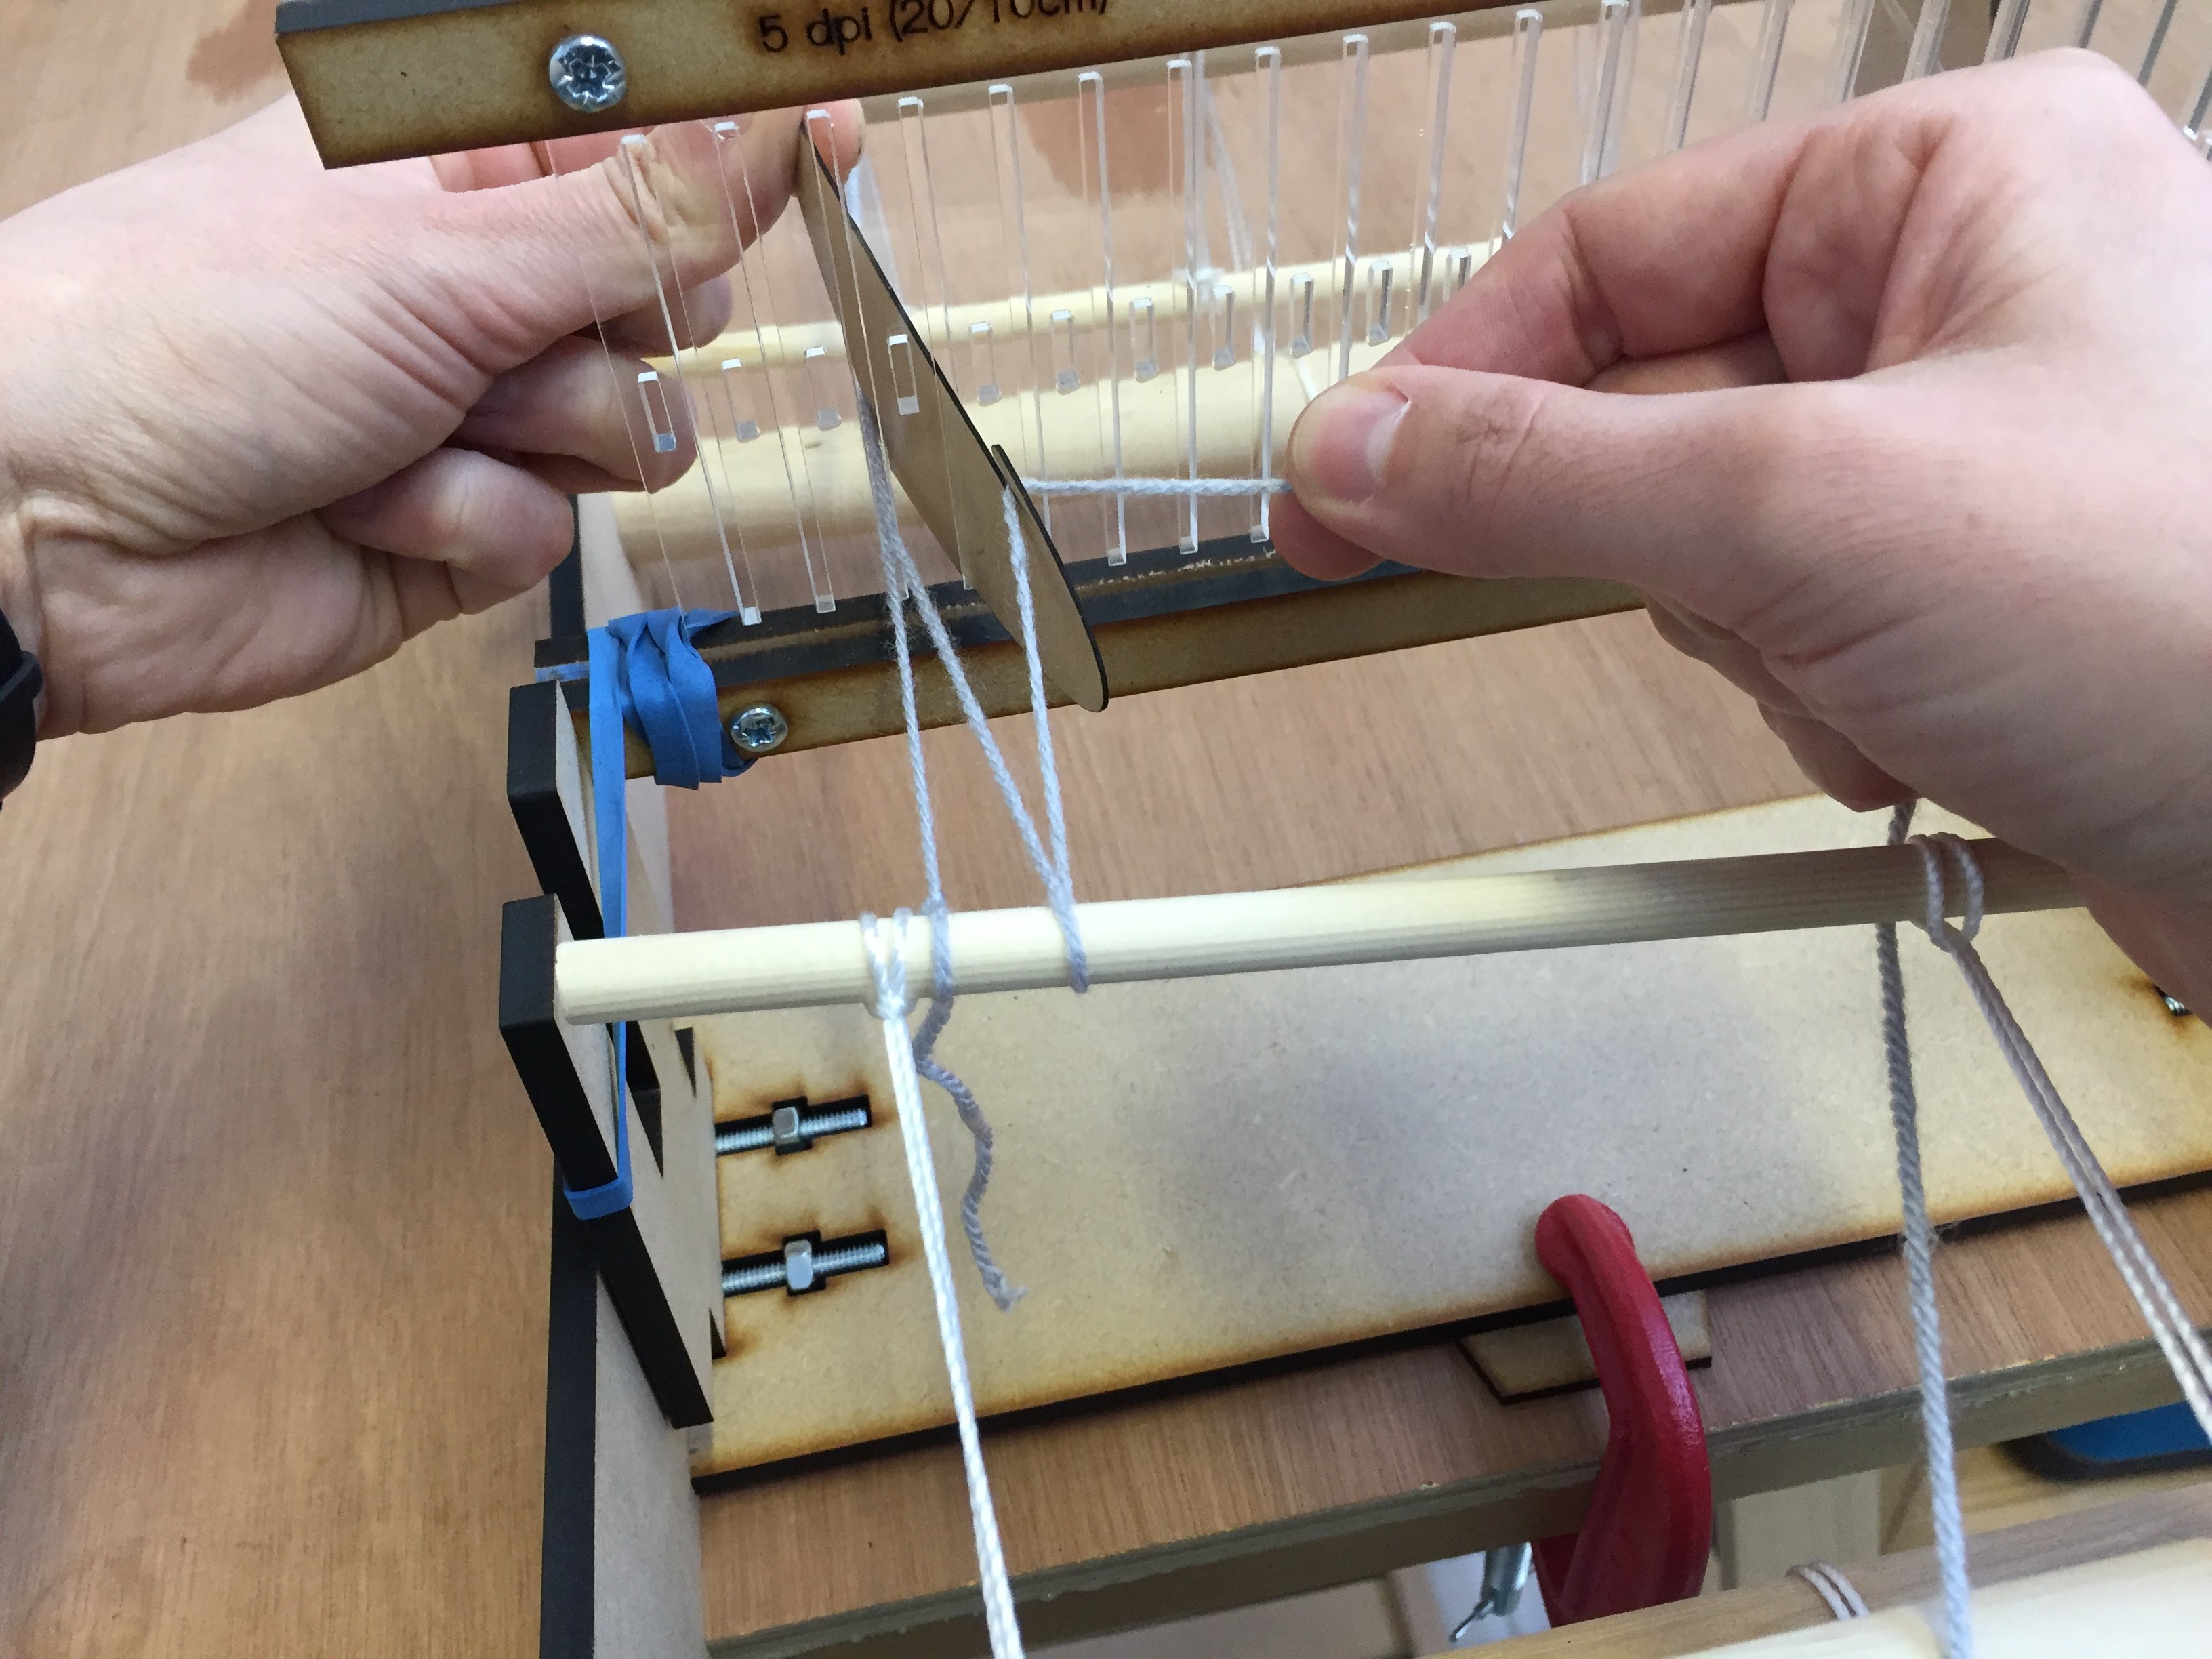
Come back to the loom and pull the loop taut.
To the right of the first knot, take the warp thread over and back under the apron rod.
Use the hook to pull the loop through the next slot in the heddle.
Warping the Loom


Wrap the second loop around the f-clamp, pull taught and wrap the yarn around the apron rod - this time going under and over.
Warping the Loom


Repeat the process of pulling the yarn through the next slot, wrapping it around the f-clamp and around the apron rod until your have filled all the slots needed for your weaving - note that the yarn should alternate between going over and under, then under and over, the apron rod.
Warping the Loom

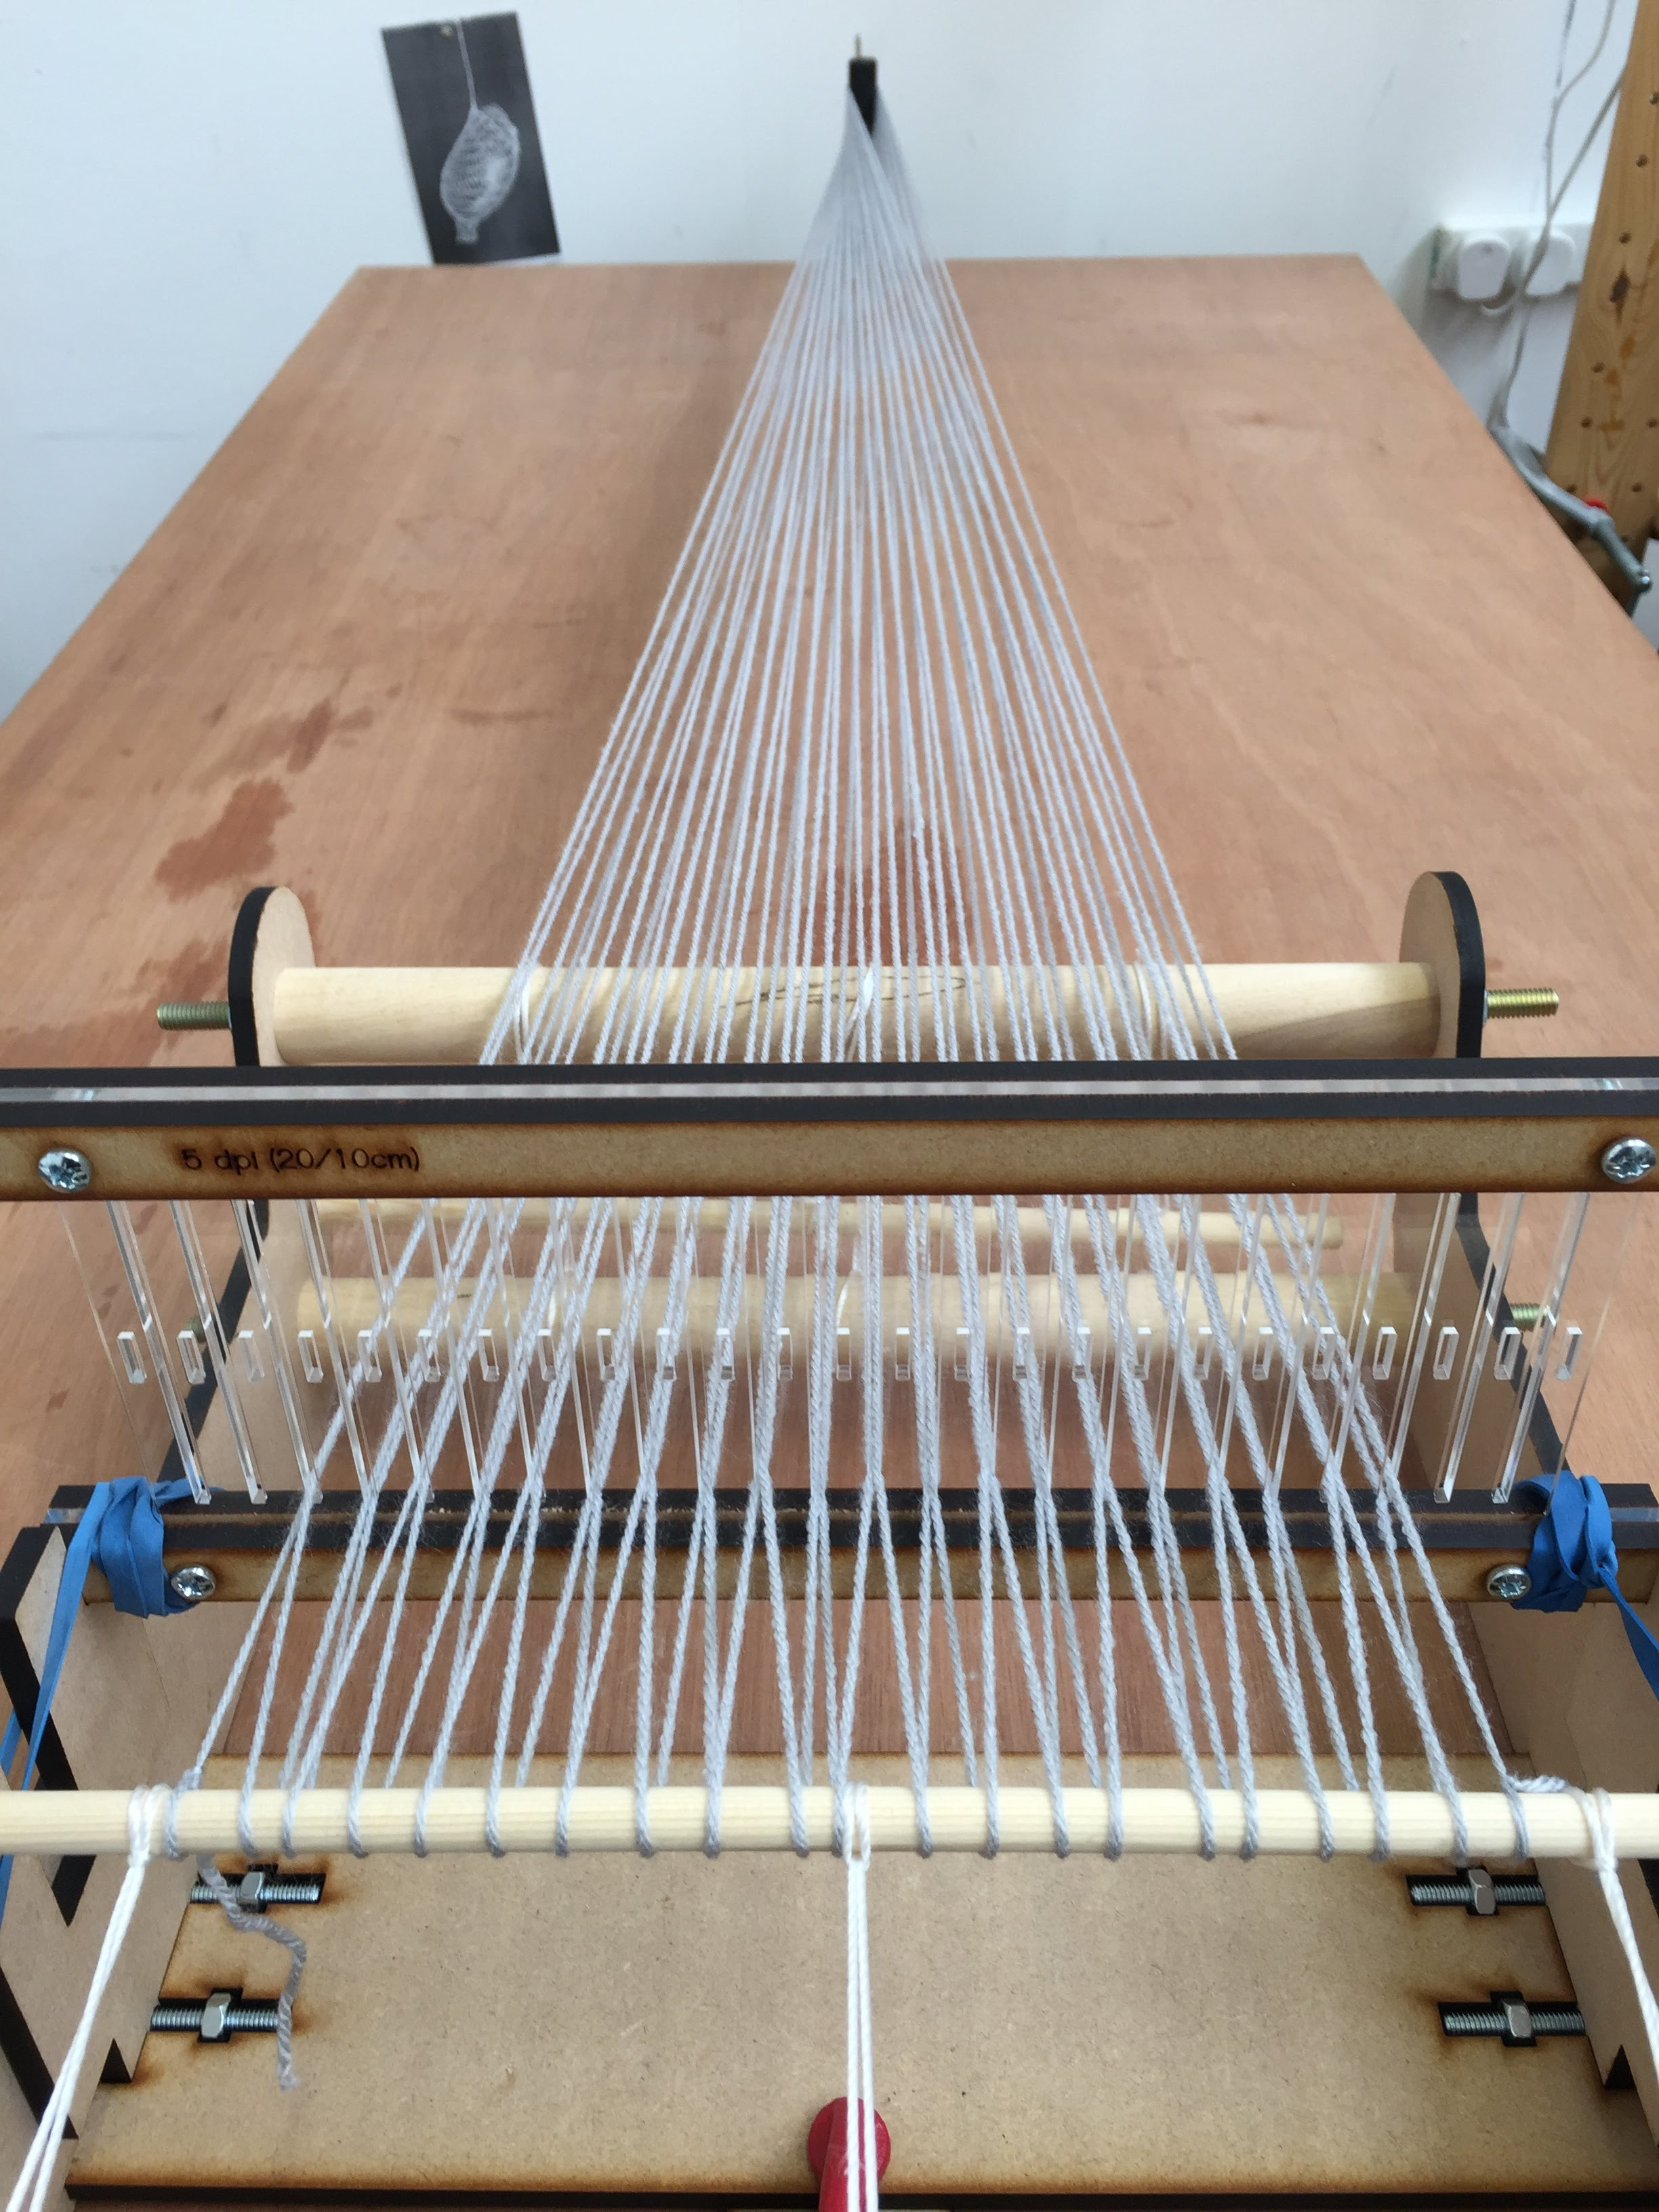
When you have filled all the slots needed, tie the last warp end to the apron rod and cut off the ball of yarn (leaving at least a 15cm tail).
Make sure the warp loops are alternating between over/under and under/over and are evenly distributed along the apron rod. You may also need to adjust the tension evenly across the warp loops.
Winding


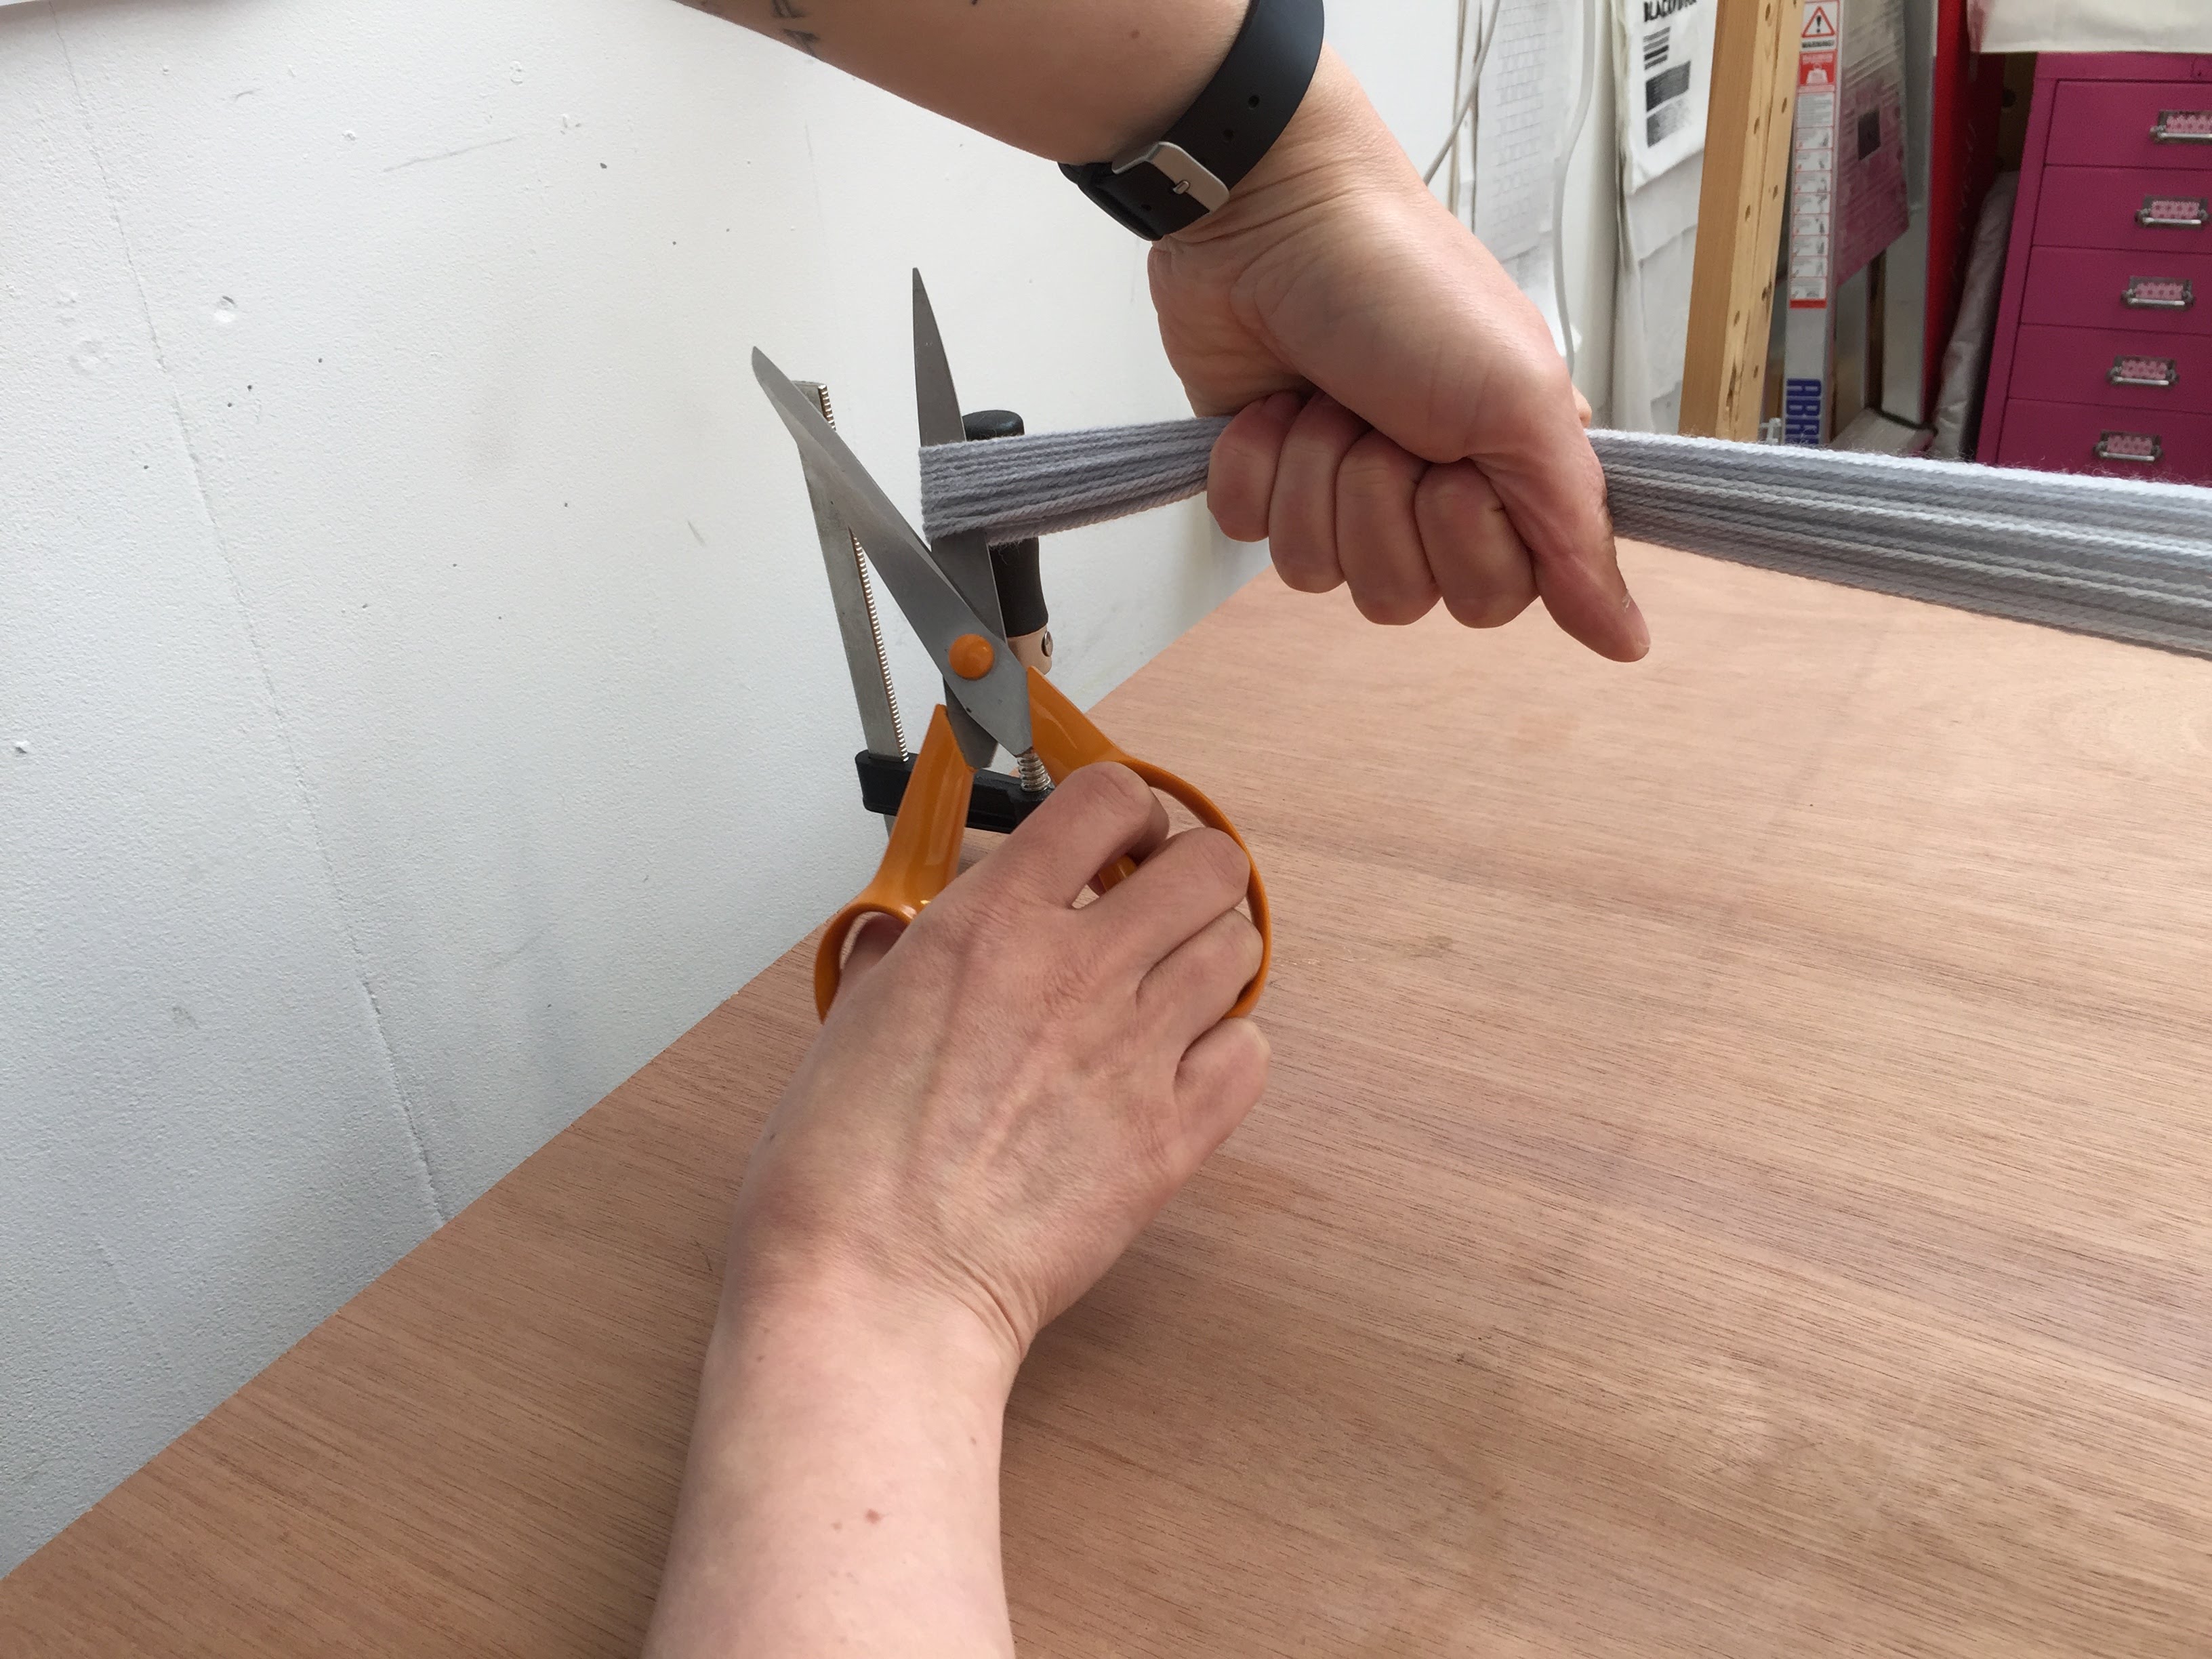
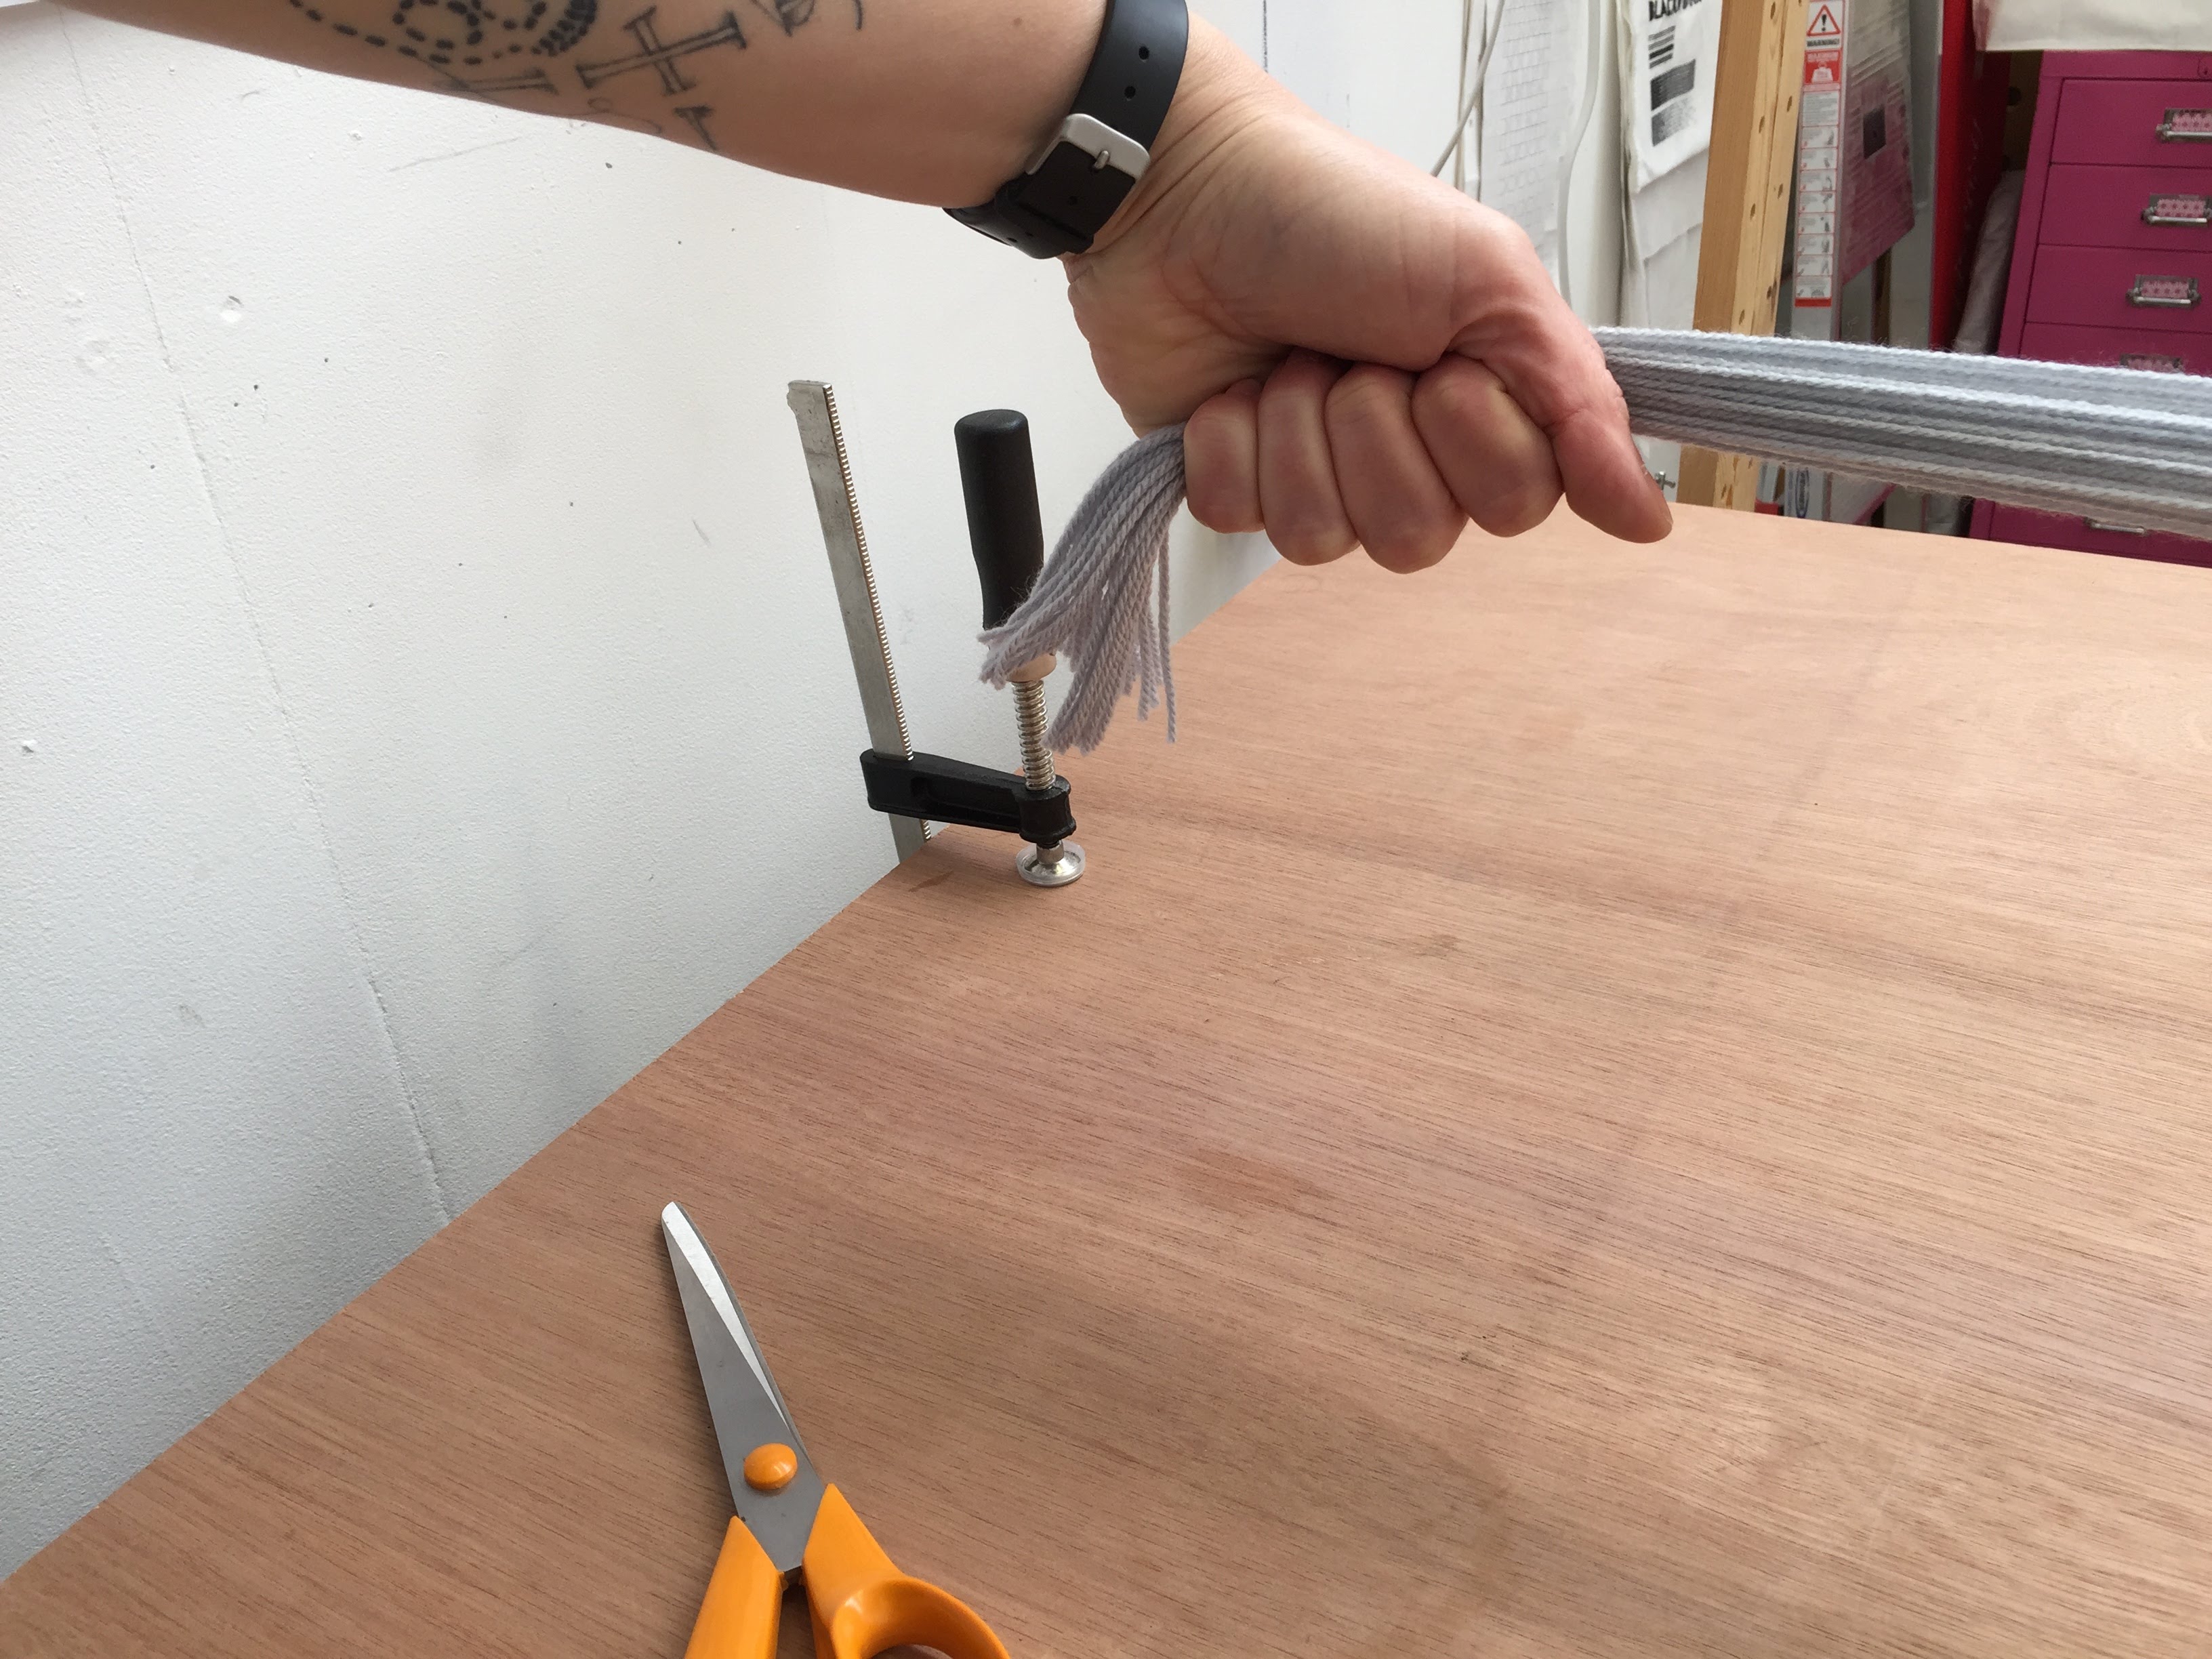
Carefully lift the bundle of warp threads off the f-clamp and cut through the bunch of loops - be sure to keep the bundle of threads taut.
Winding

Keeping the warp threads under tension, move your hand so that you are holding the bundle of warps yarns just in front of the loom.
Winding


Loosen the wingnuts on the Warp Beam and carefully begin to turn the Warp Beam towards you, being sure to keep hold of the bundle of warp threads - it’s helpful to stand to the side of the loom to do this.
Winding


Begin to wind the warp threads onto the Warp Beam. Once the yarns have wrapped around the beam once, insert a strip of paper between the layers of the warp threads.
Winding


Continue winding the warp threads onto the warp beam, inserting a strip of paper between the layers on each turn.
Winding

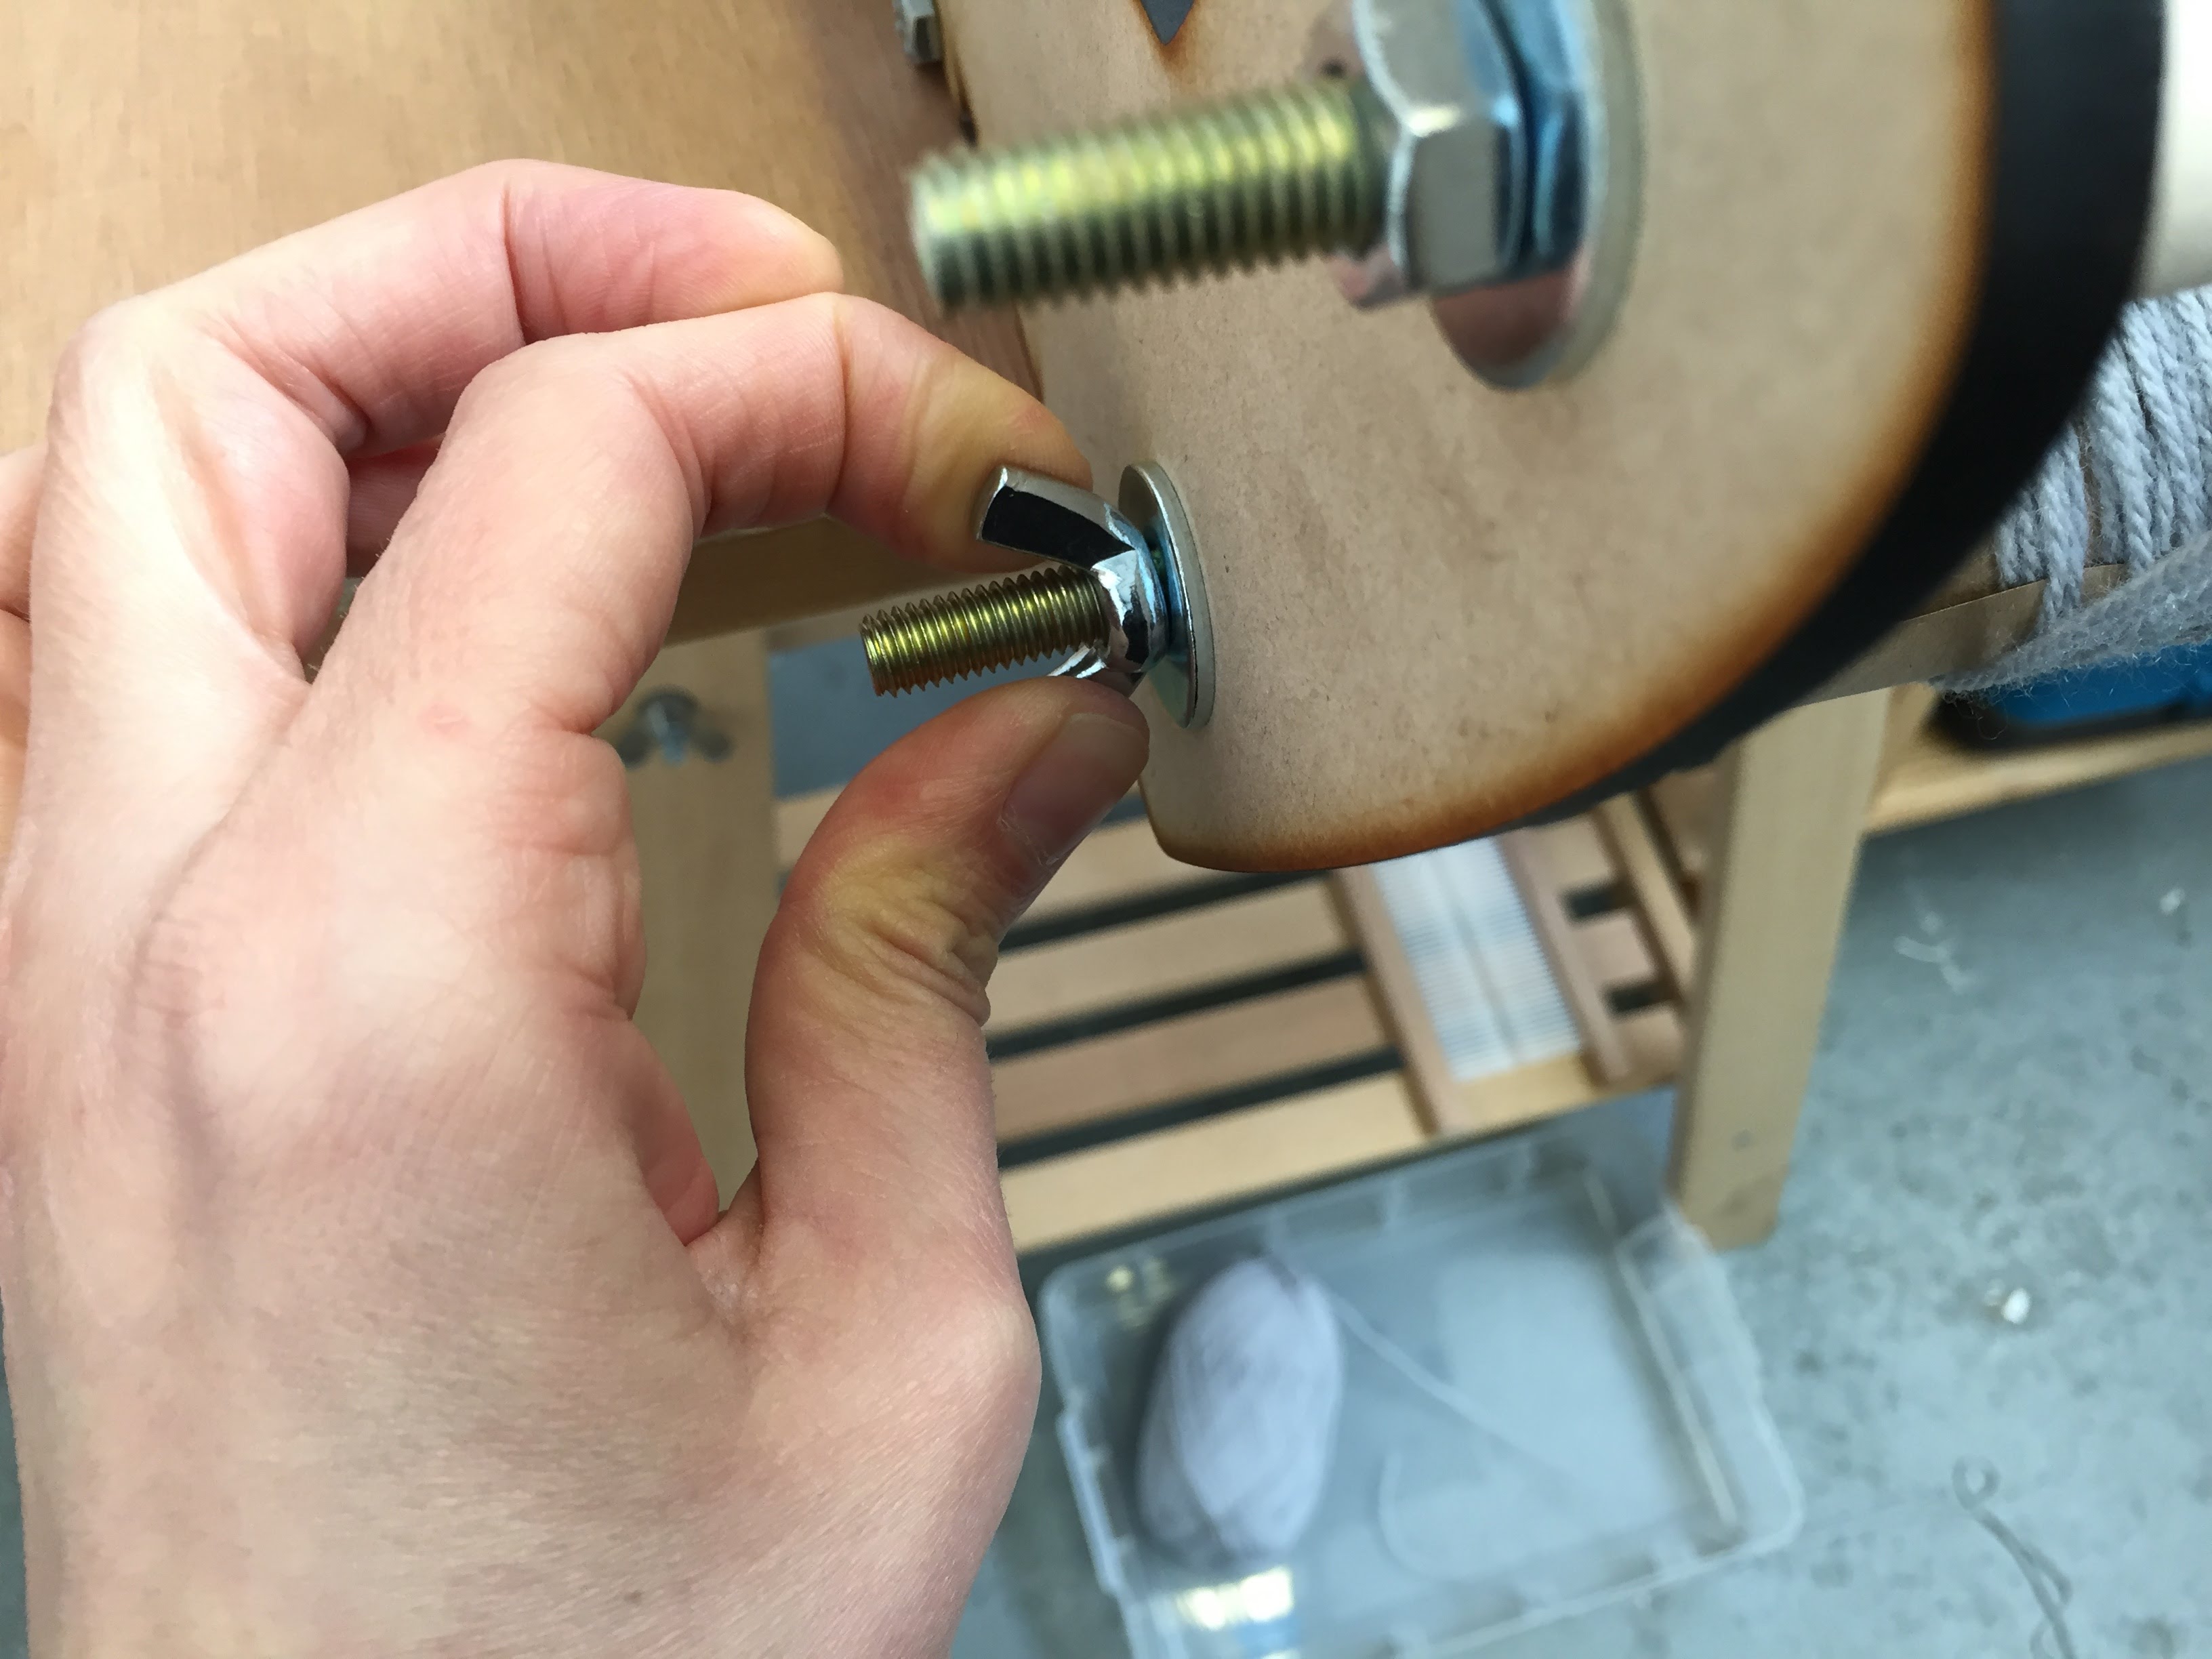

Wind the warp threads onto the Warp Beam until there is around 15cm yarn left in front of the heddle and tighten up the wingnuts on the Warp Beam.
Threading the Heddle

Unclamp the loom and move it so the front is facing you.
Threading the Heddle

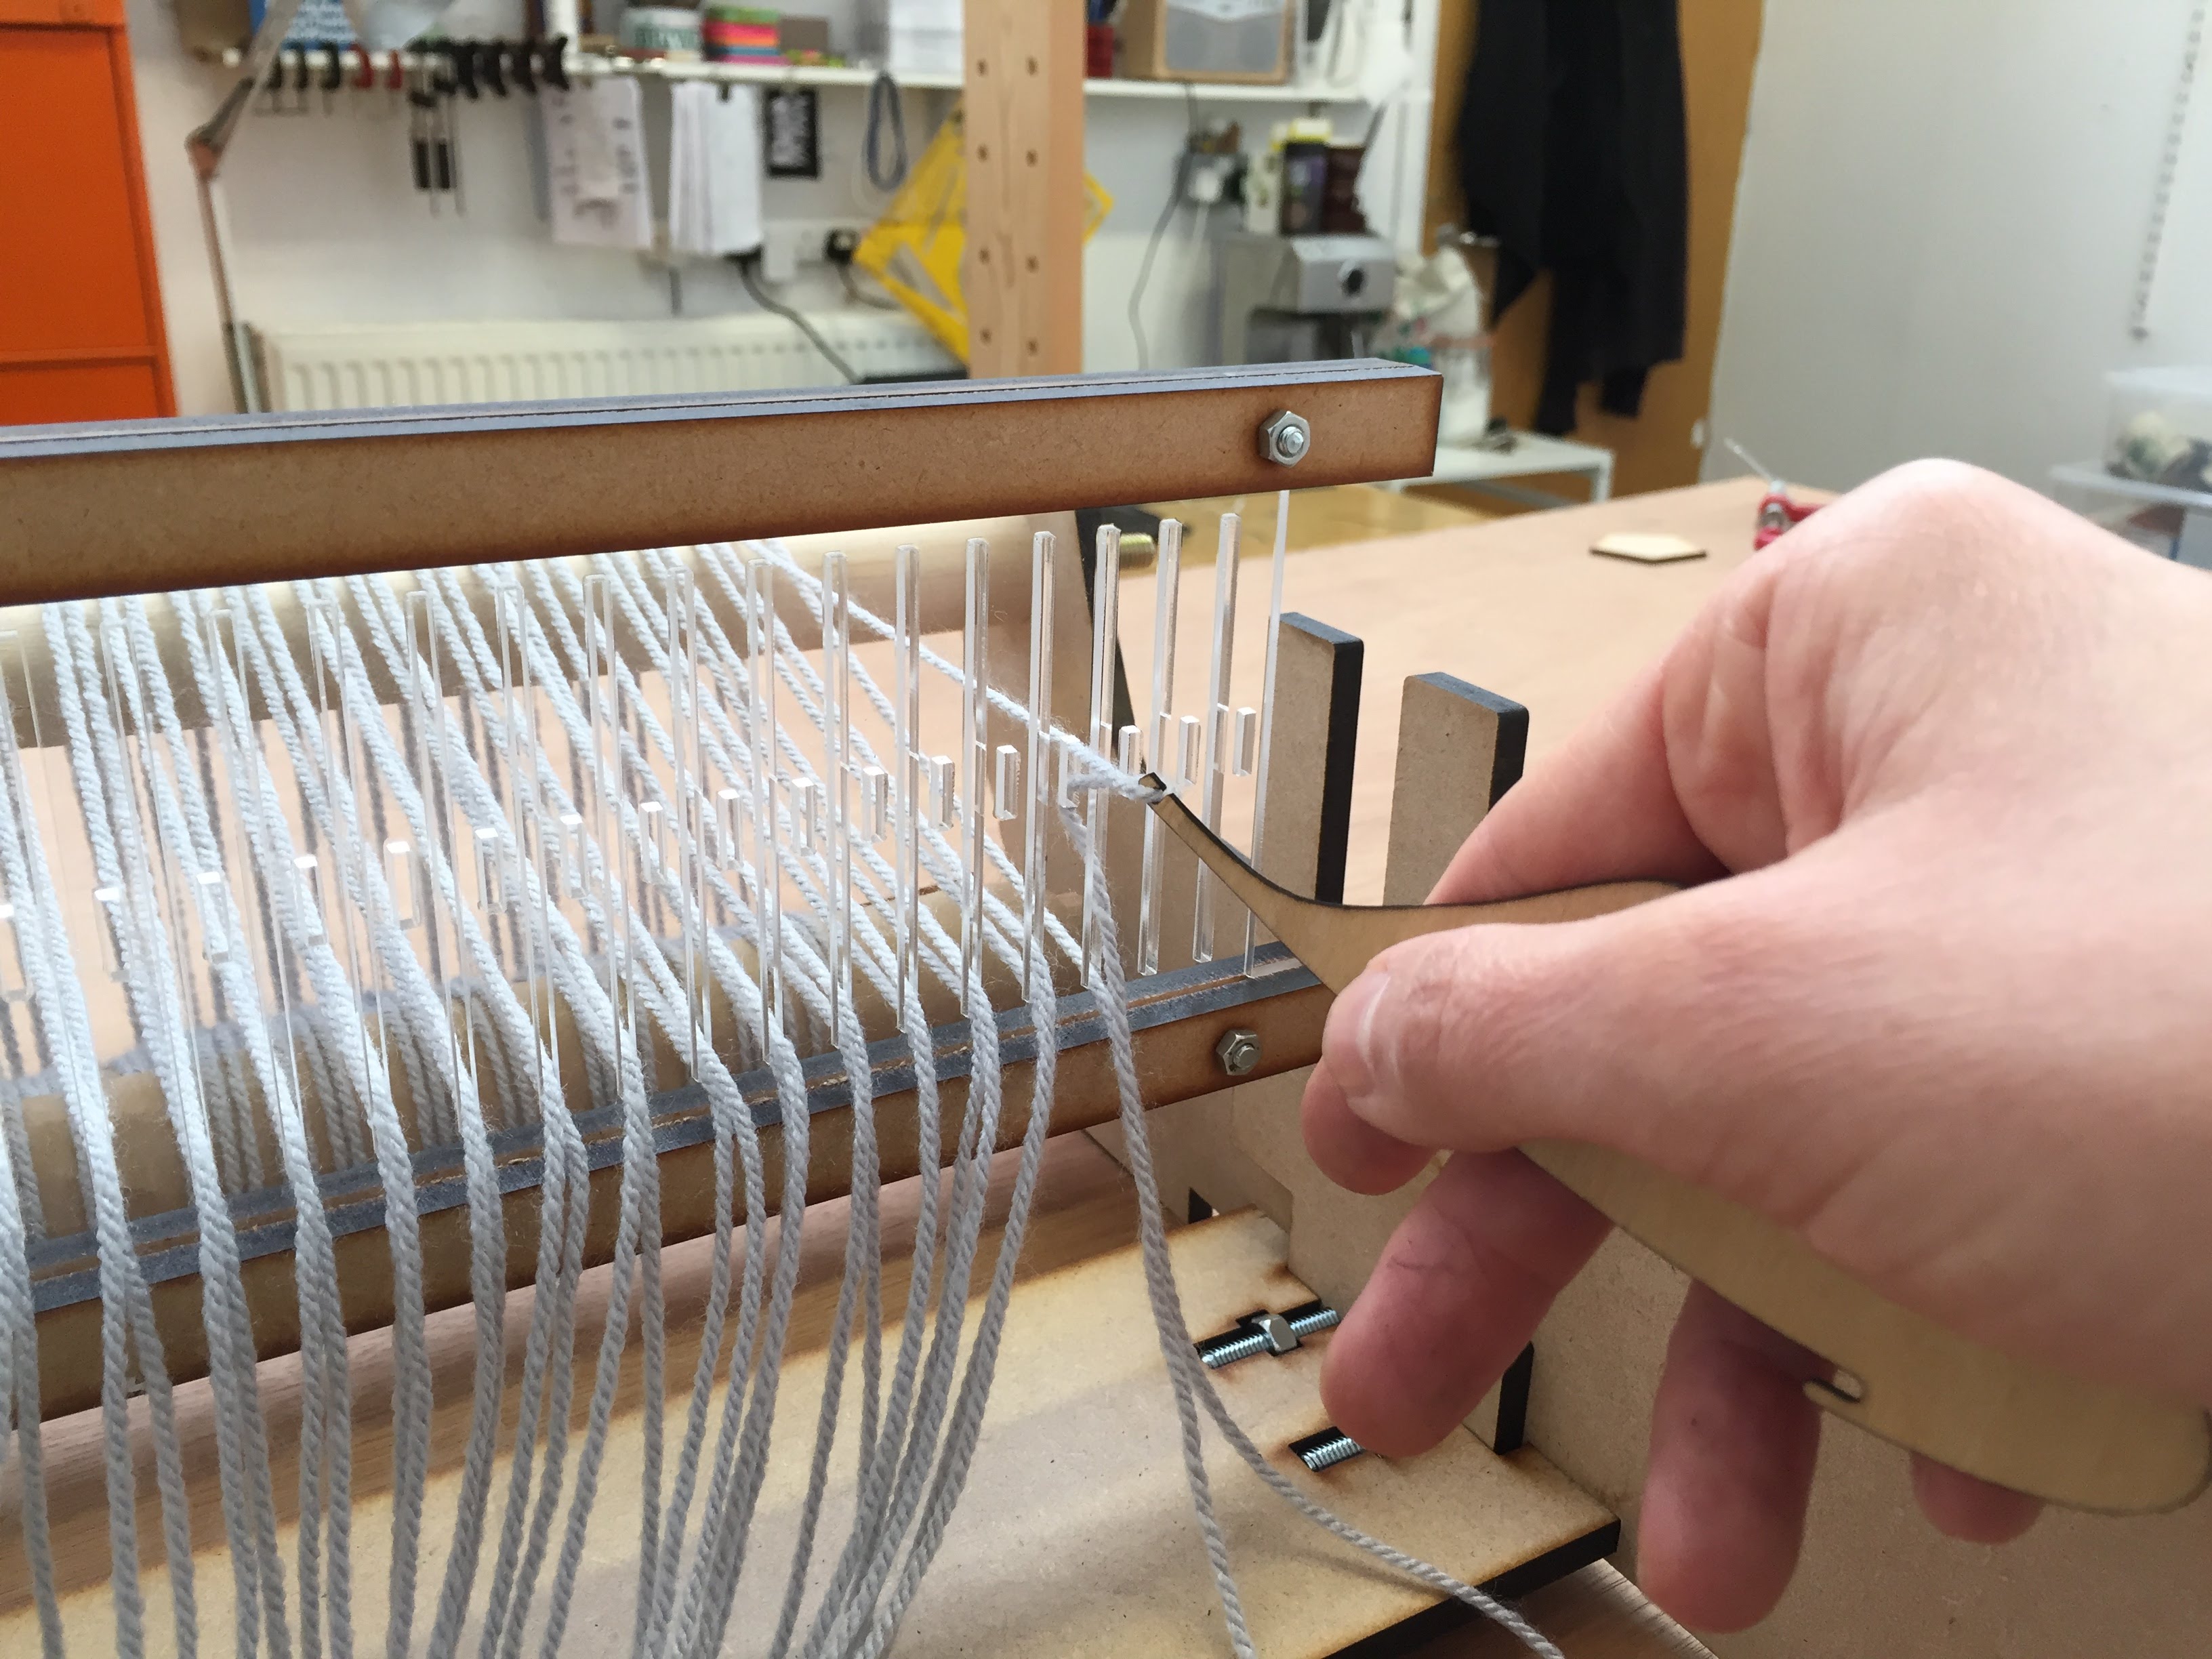
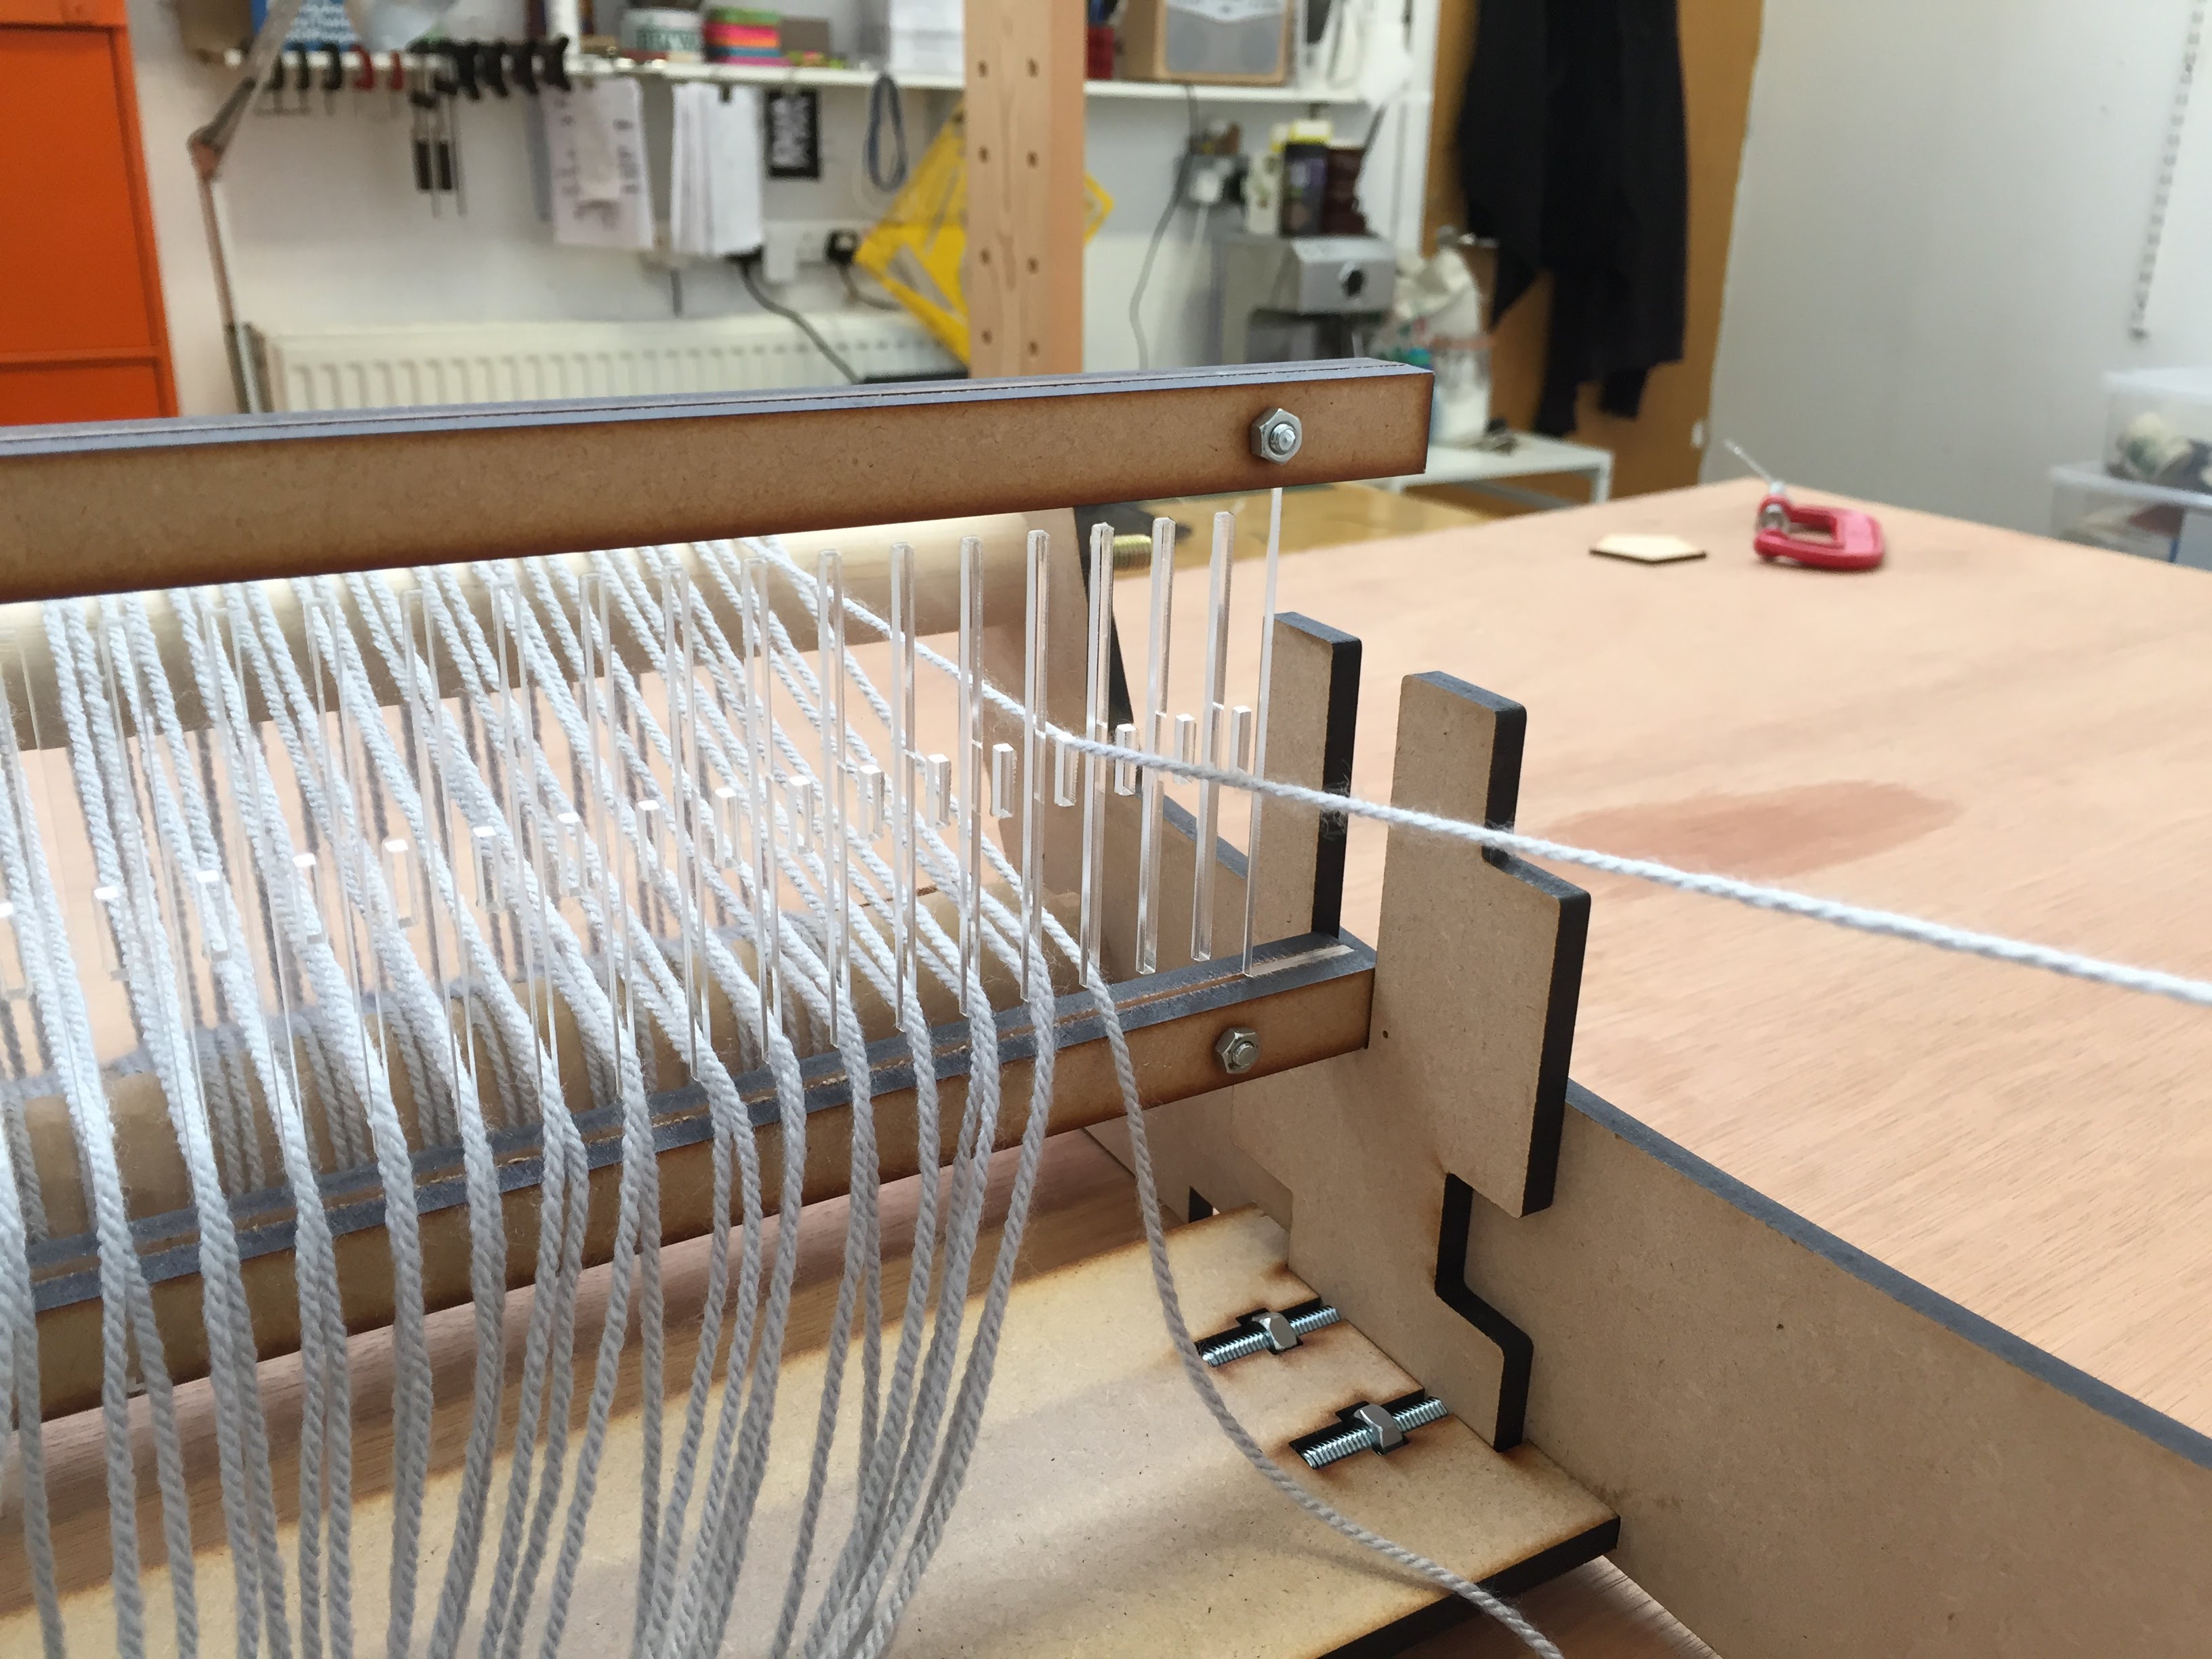
Beginning at the right side of the heddle, use the Heddle Hook to pull one of the yarns in the rightmost slot (dent) through the smaller hole directly to the left of it. Be sure that you are pulling the the correct yarn through according to the order they lay on the Back Beam - you don’t want to twist the warp yarns behind the heddle!
Threading the Heddle


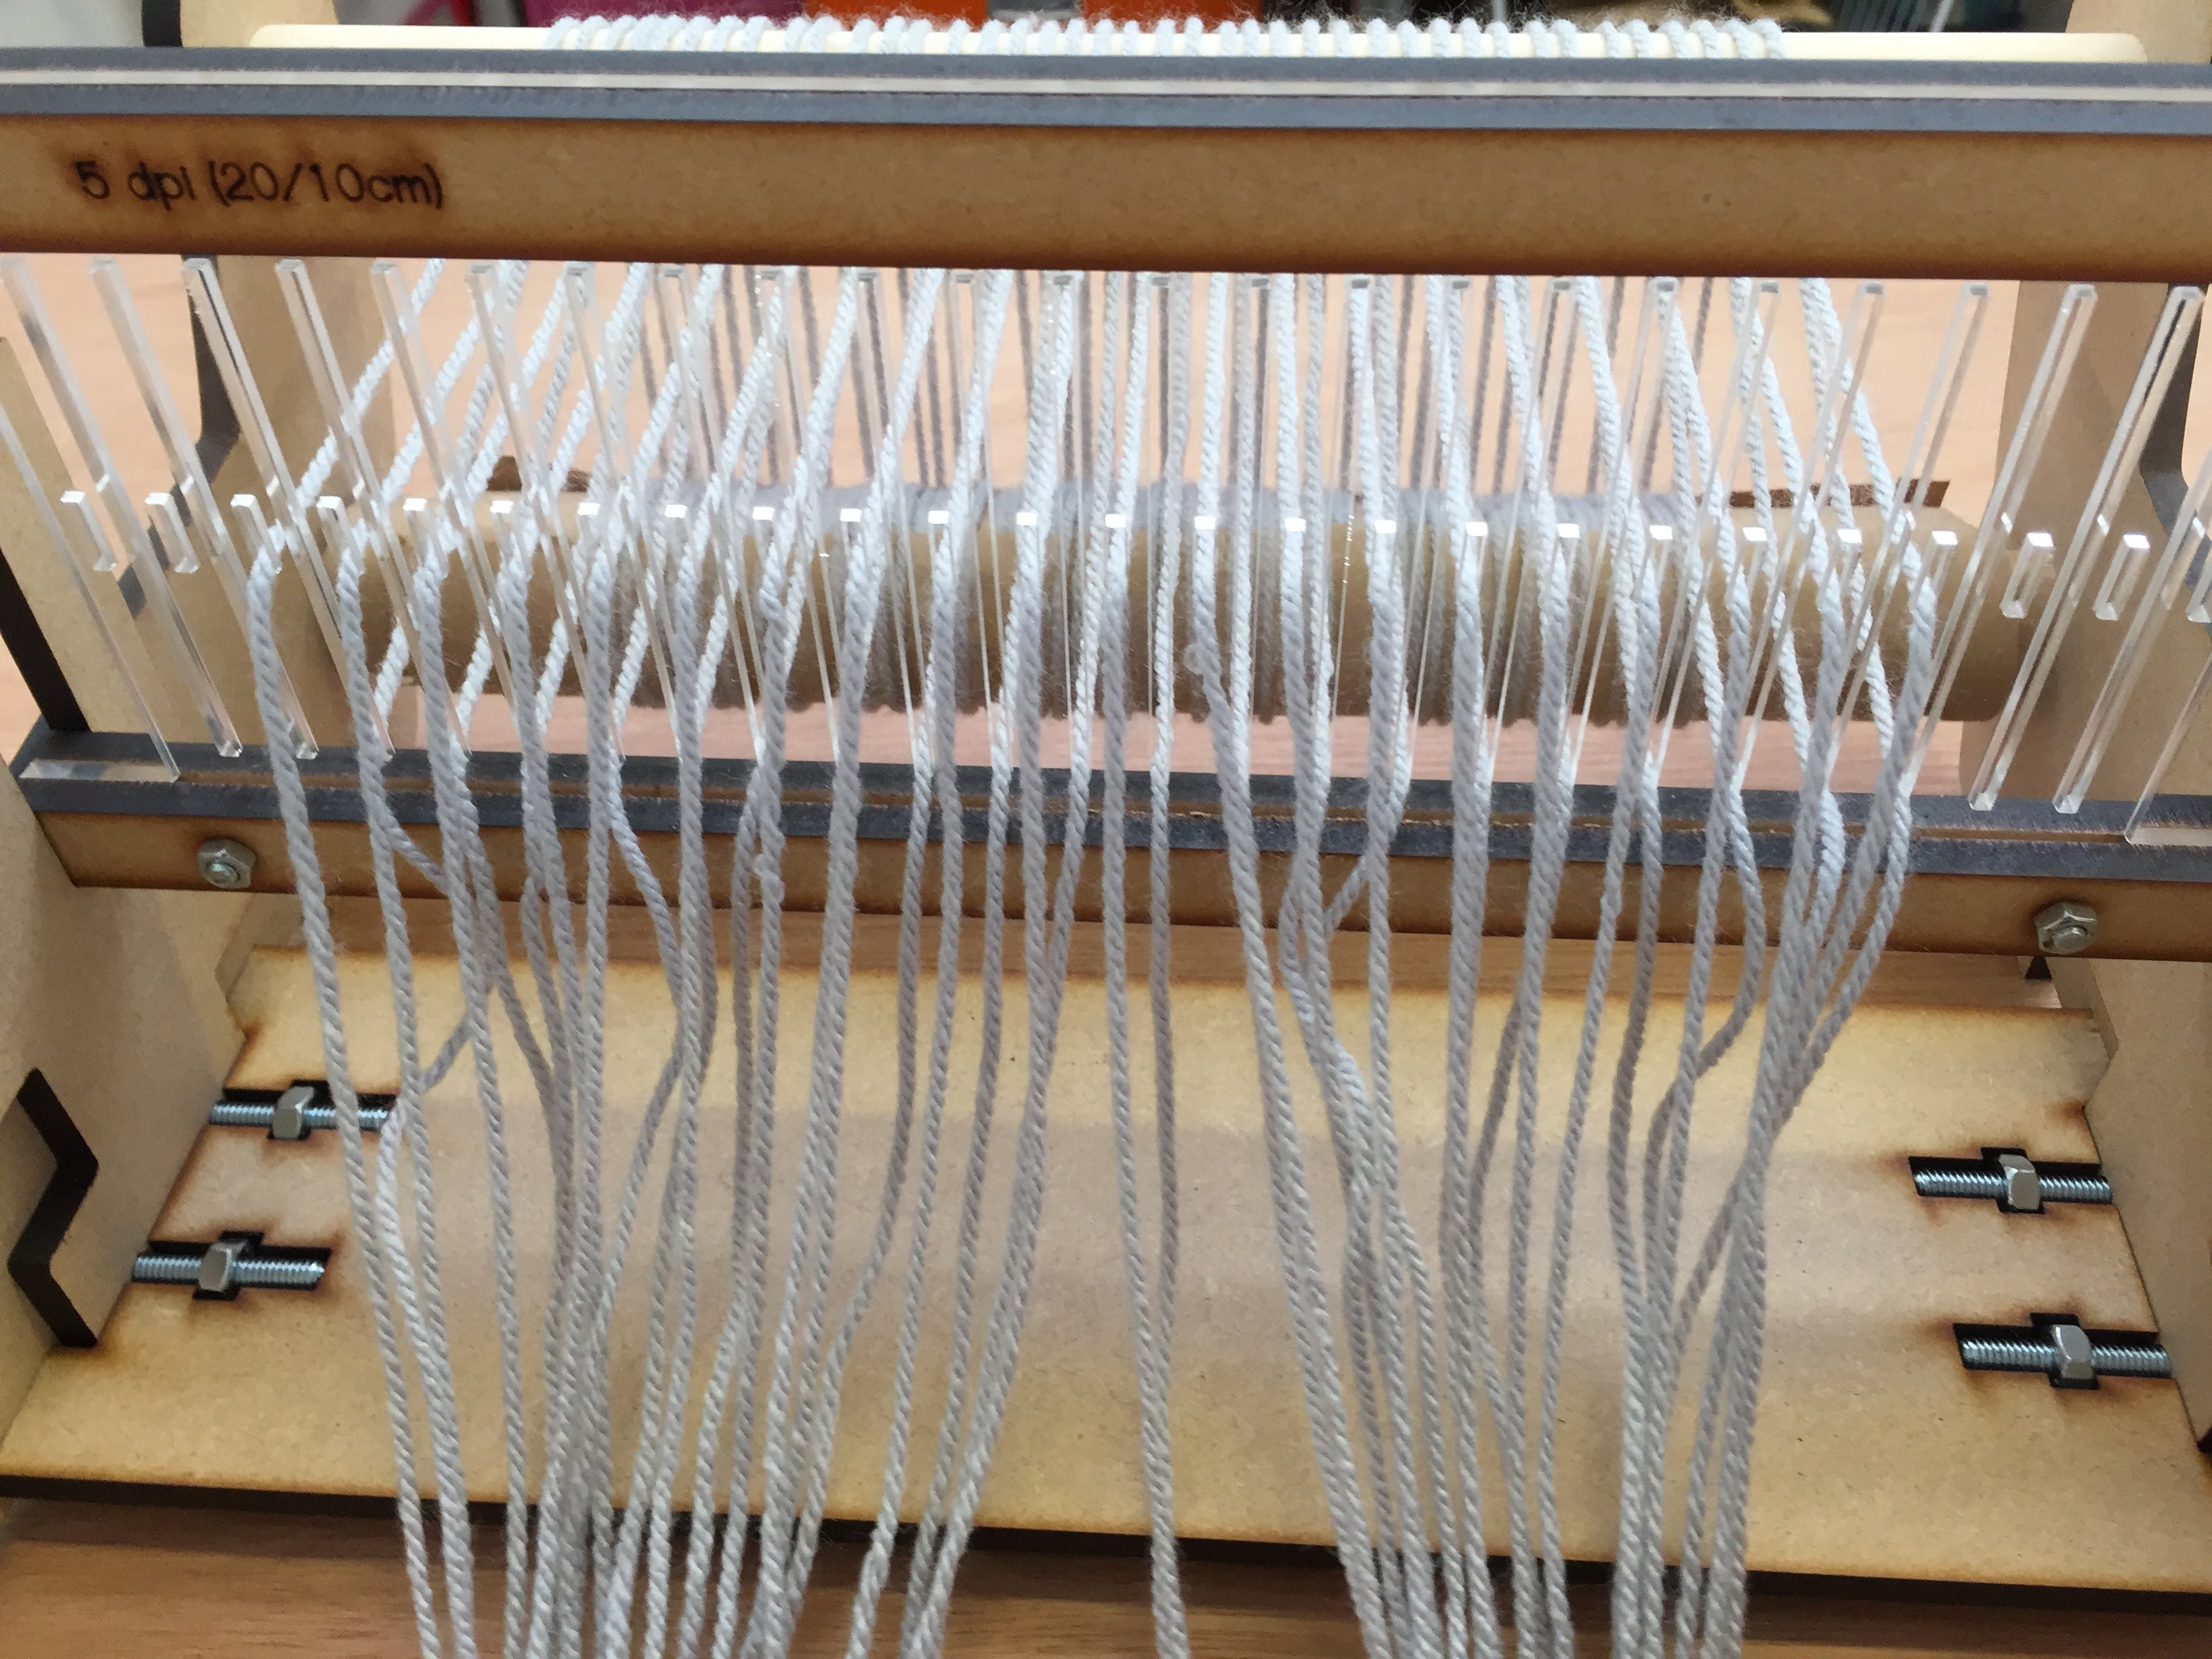

Repeat the process, working left to right, until each slot (dent) and hole (eye) has a single warp thread pulled through it - double check that you have threaded the warp threads in the correct order according to how they lay on the Back Beam!
Tying On


Pull the front apron rod over the Cloth Beam, remove the rubber bands from the heddle and place it in the neutral position (the long vertical slot in heddle block). Next, divide your warp threads into groups of 8.
Take the middle group of threads and split these into two groups of 4, pulling them over and under the Front Apron rod on either side of the central apron cord.
Tie the two groups of 4 together in a square knot over the 8 threads.
Tighten the knot by pulling the ends towards the heddle and then apart.
Tying On


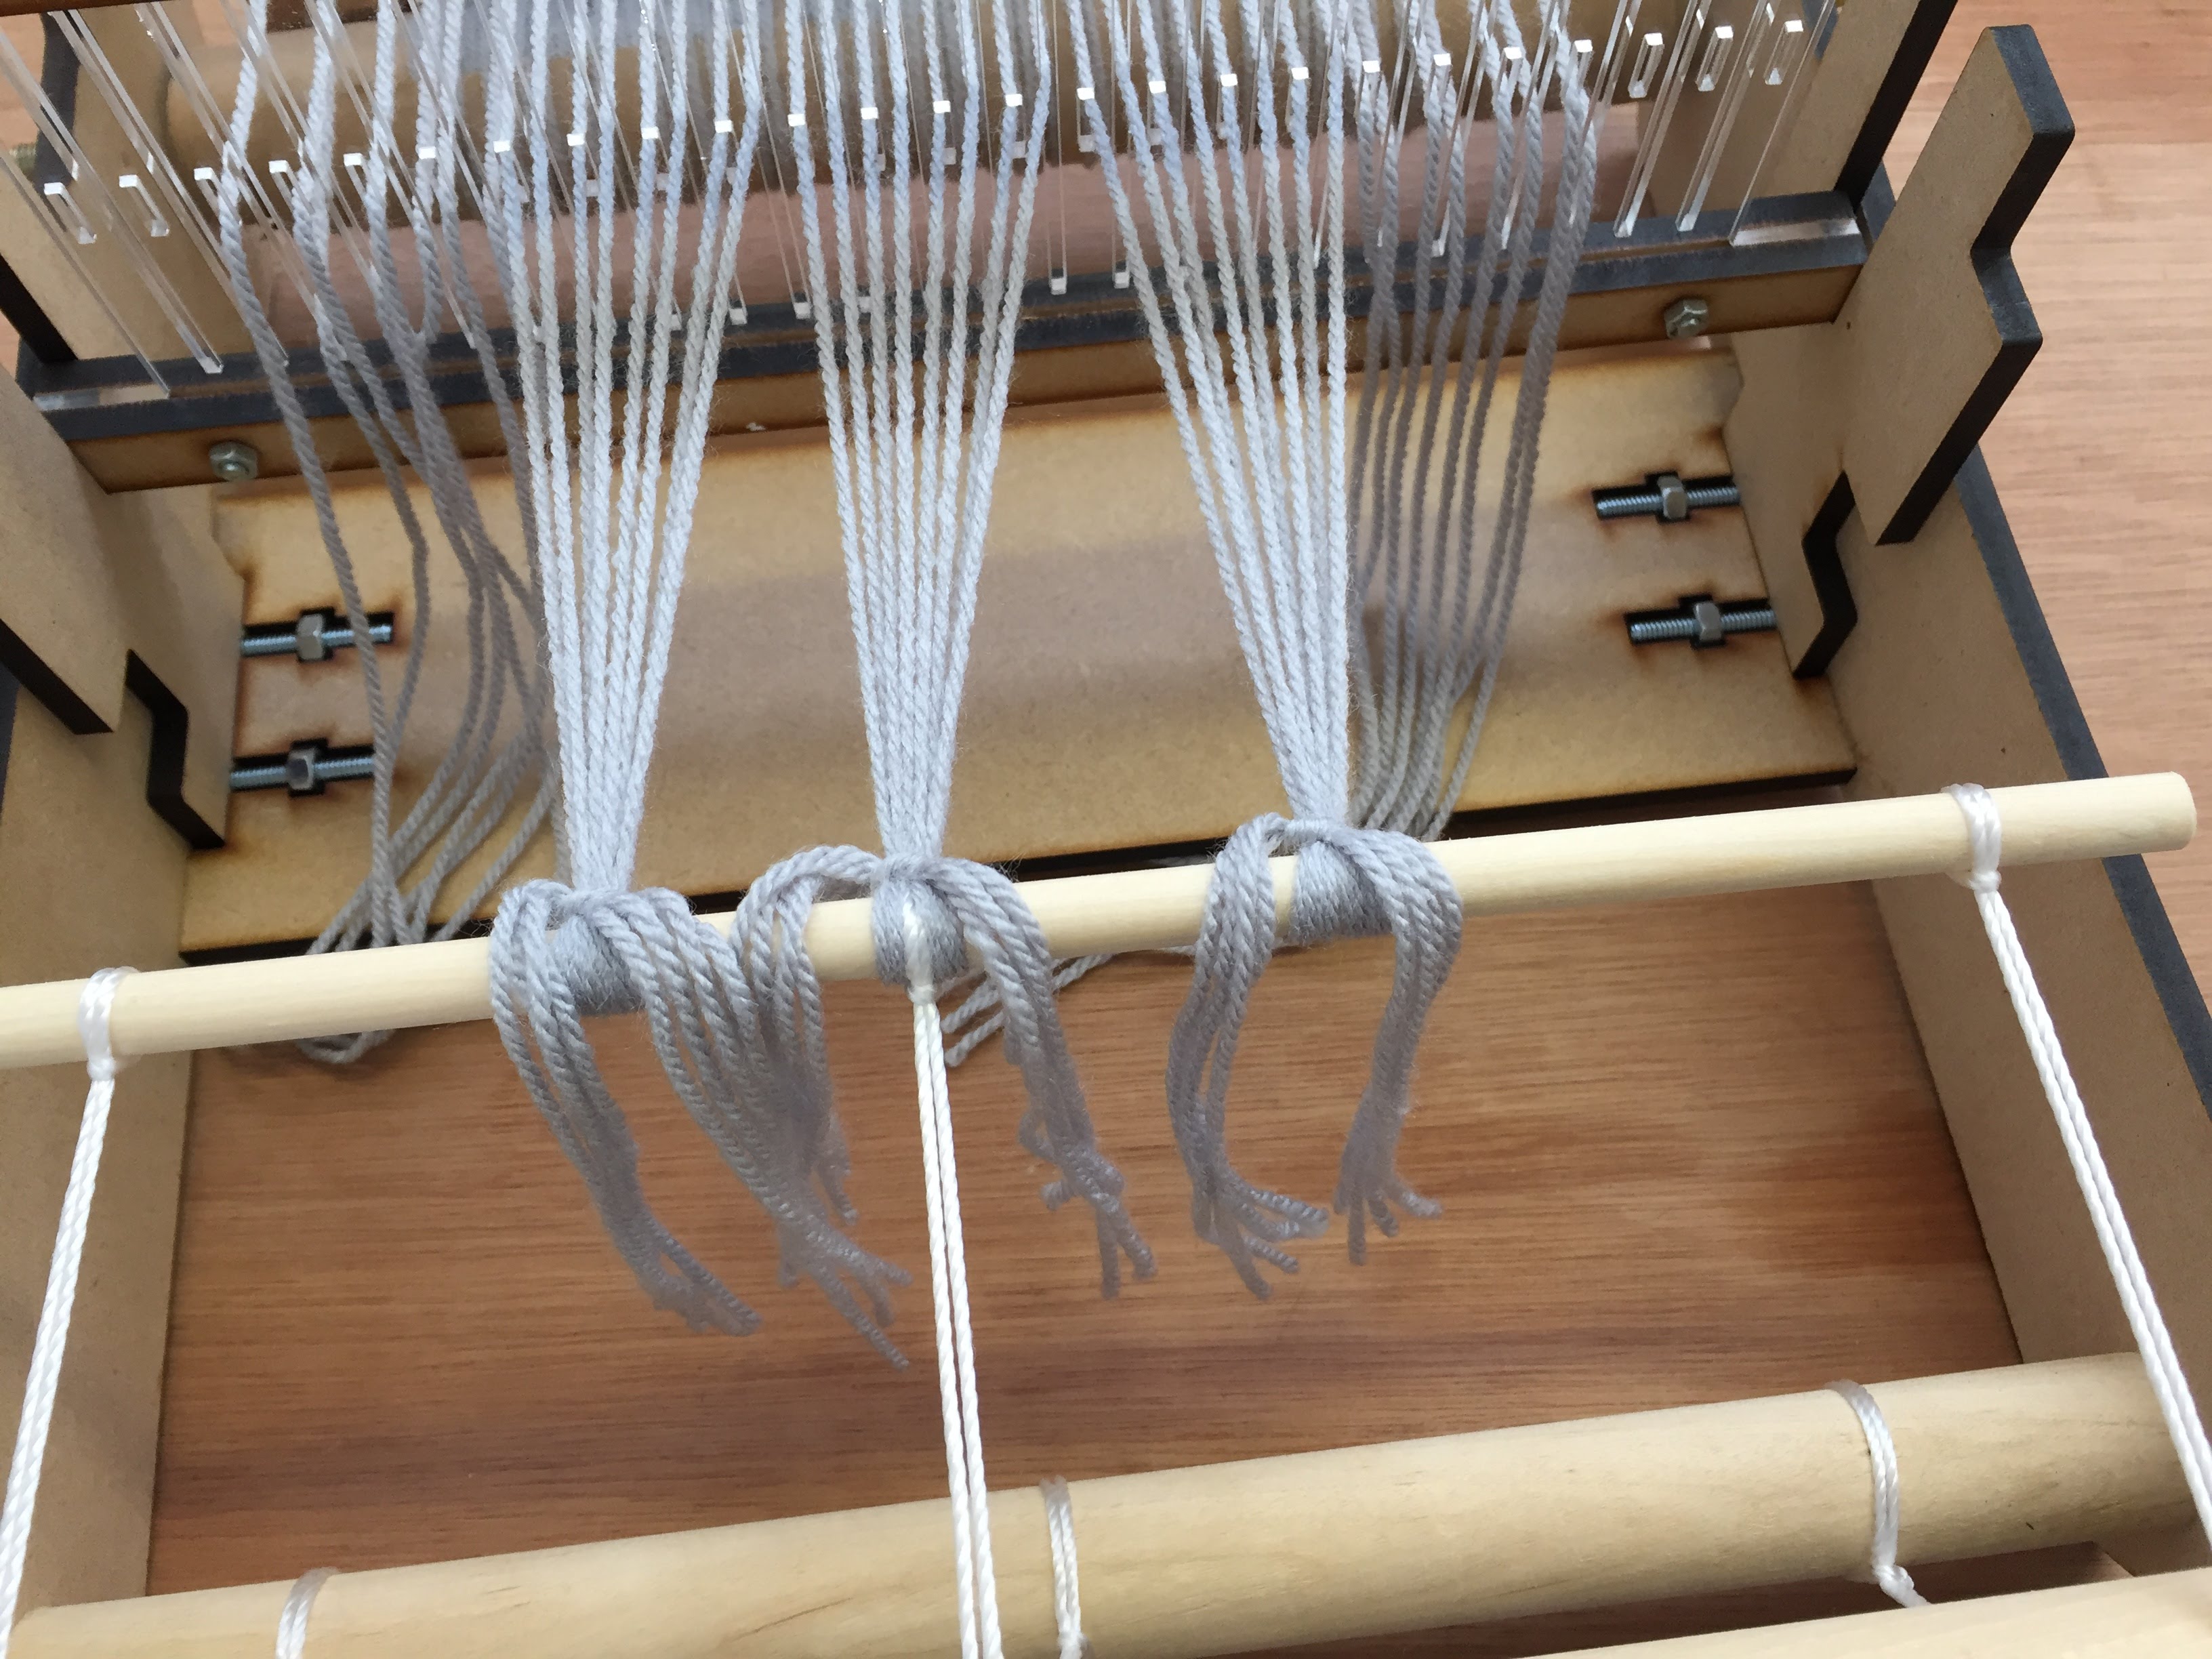
Repeat the process, working with each group from the middle out. Make sure that the warp threads stay in order, twists will cause uneven tension.
Tying On


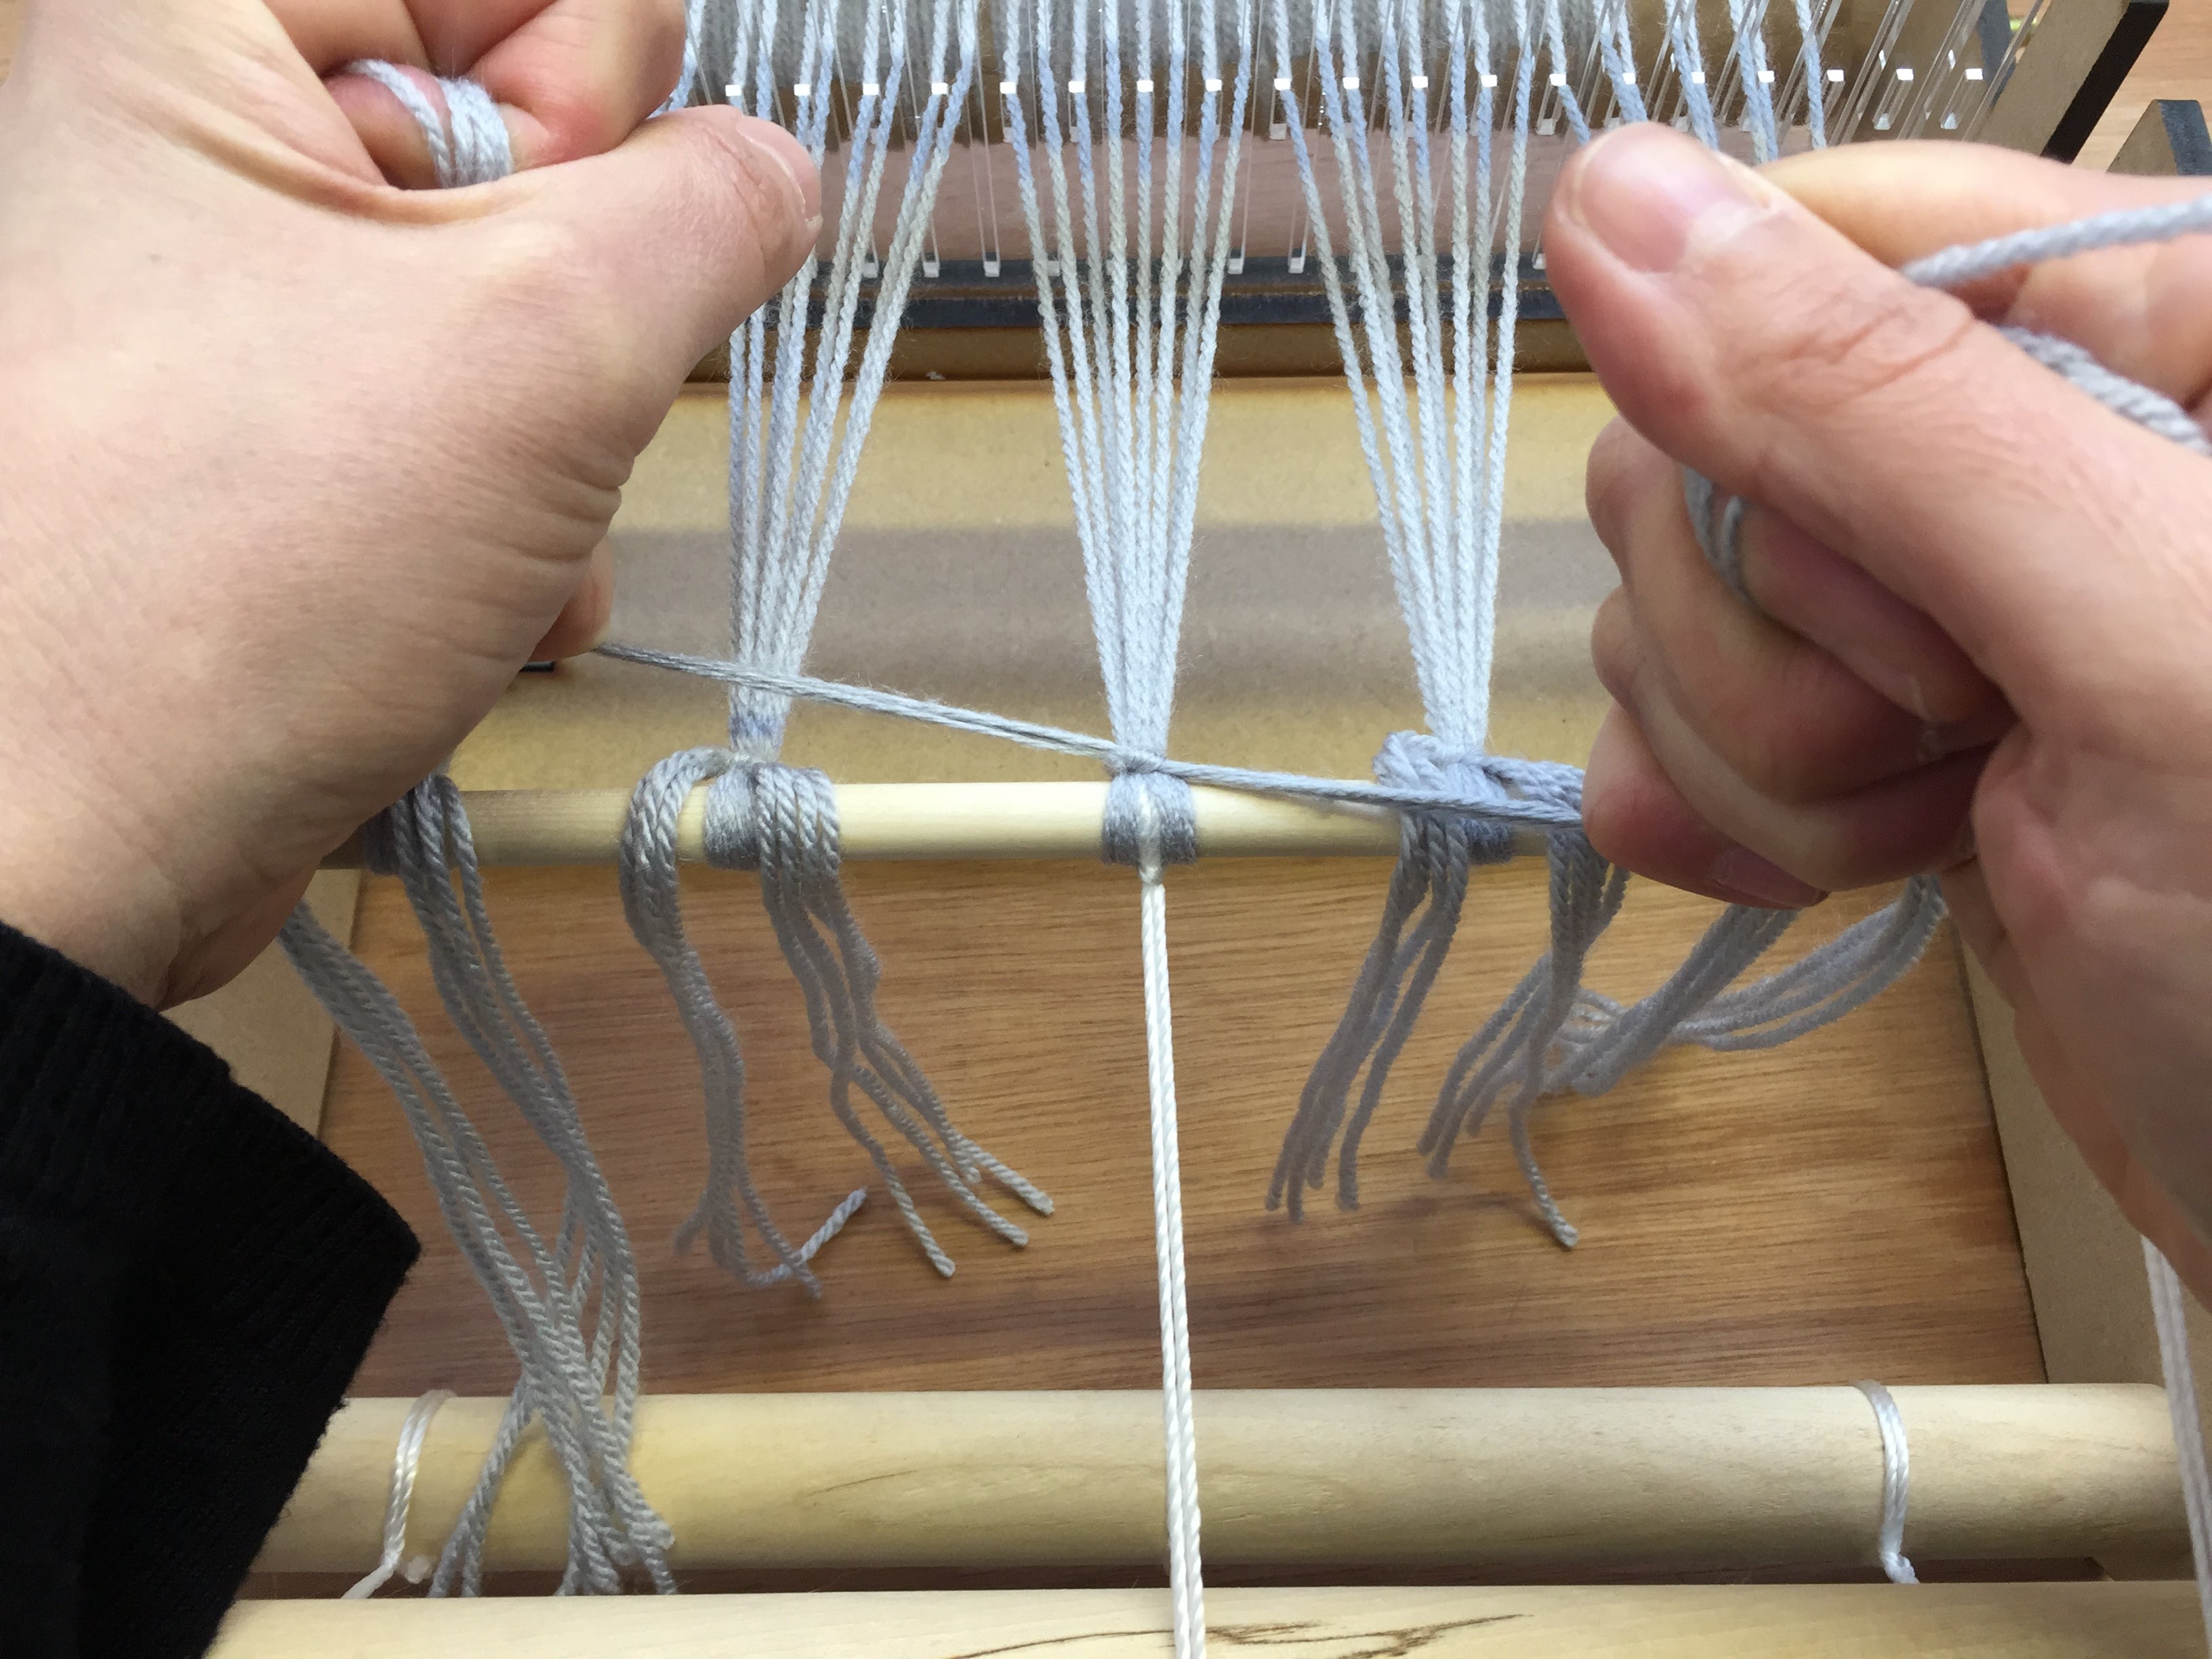
Working from the middle out, tighten each group so they are all evenly tensioned and secure with double knot.
Tying On

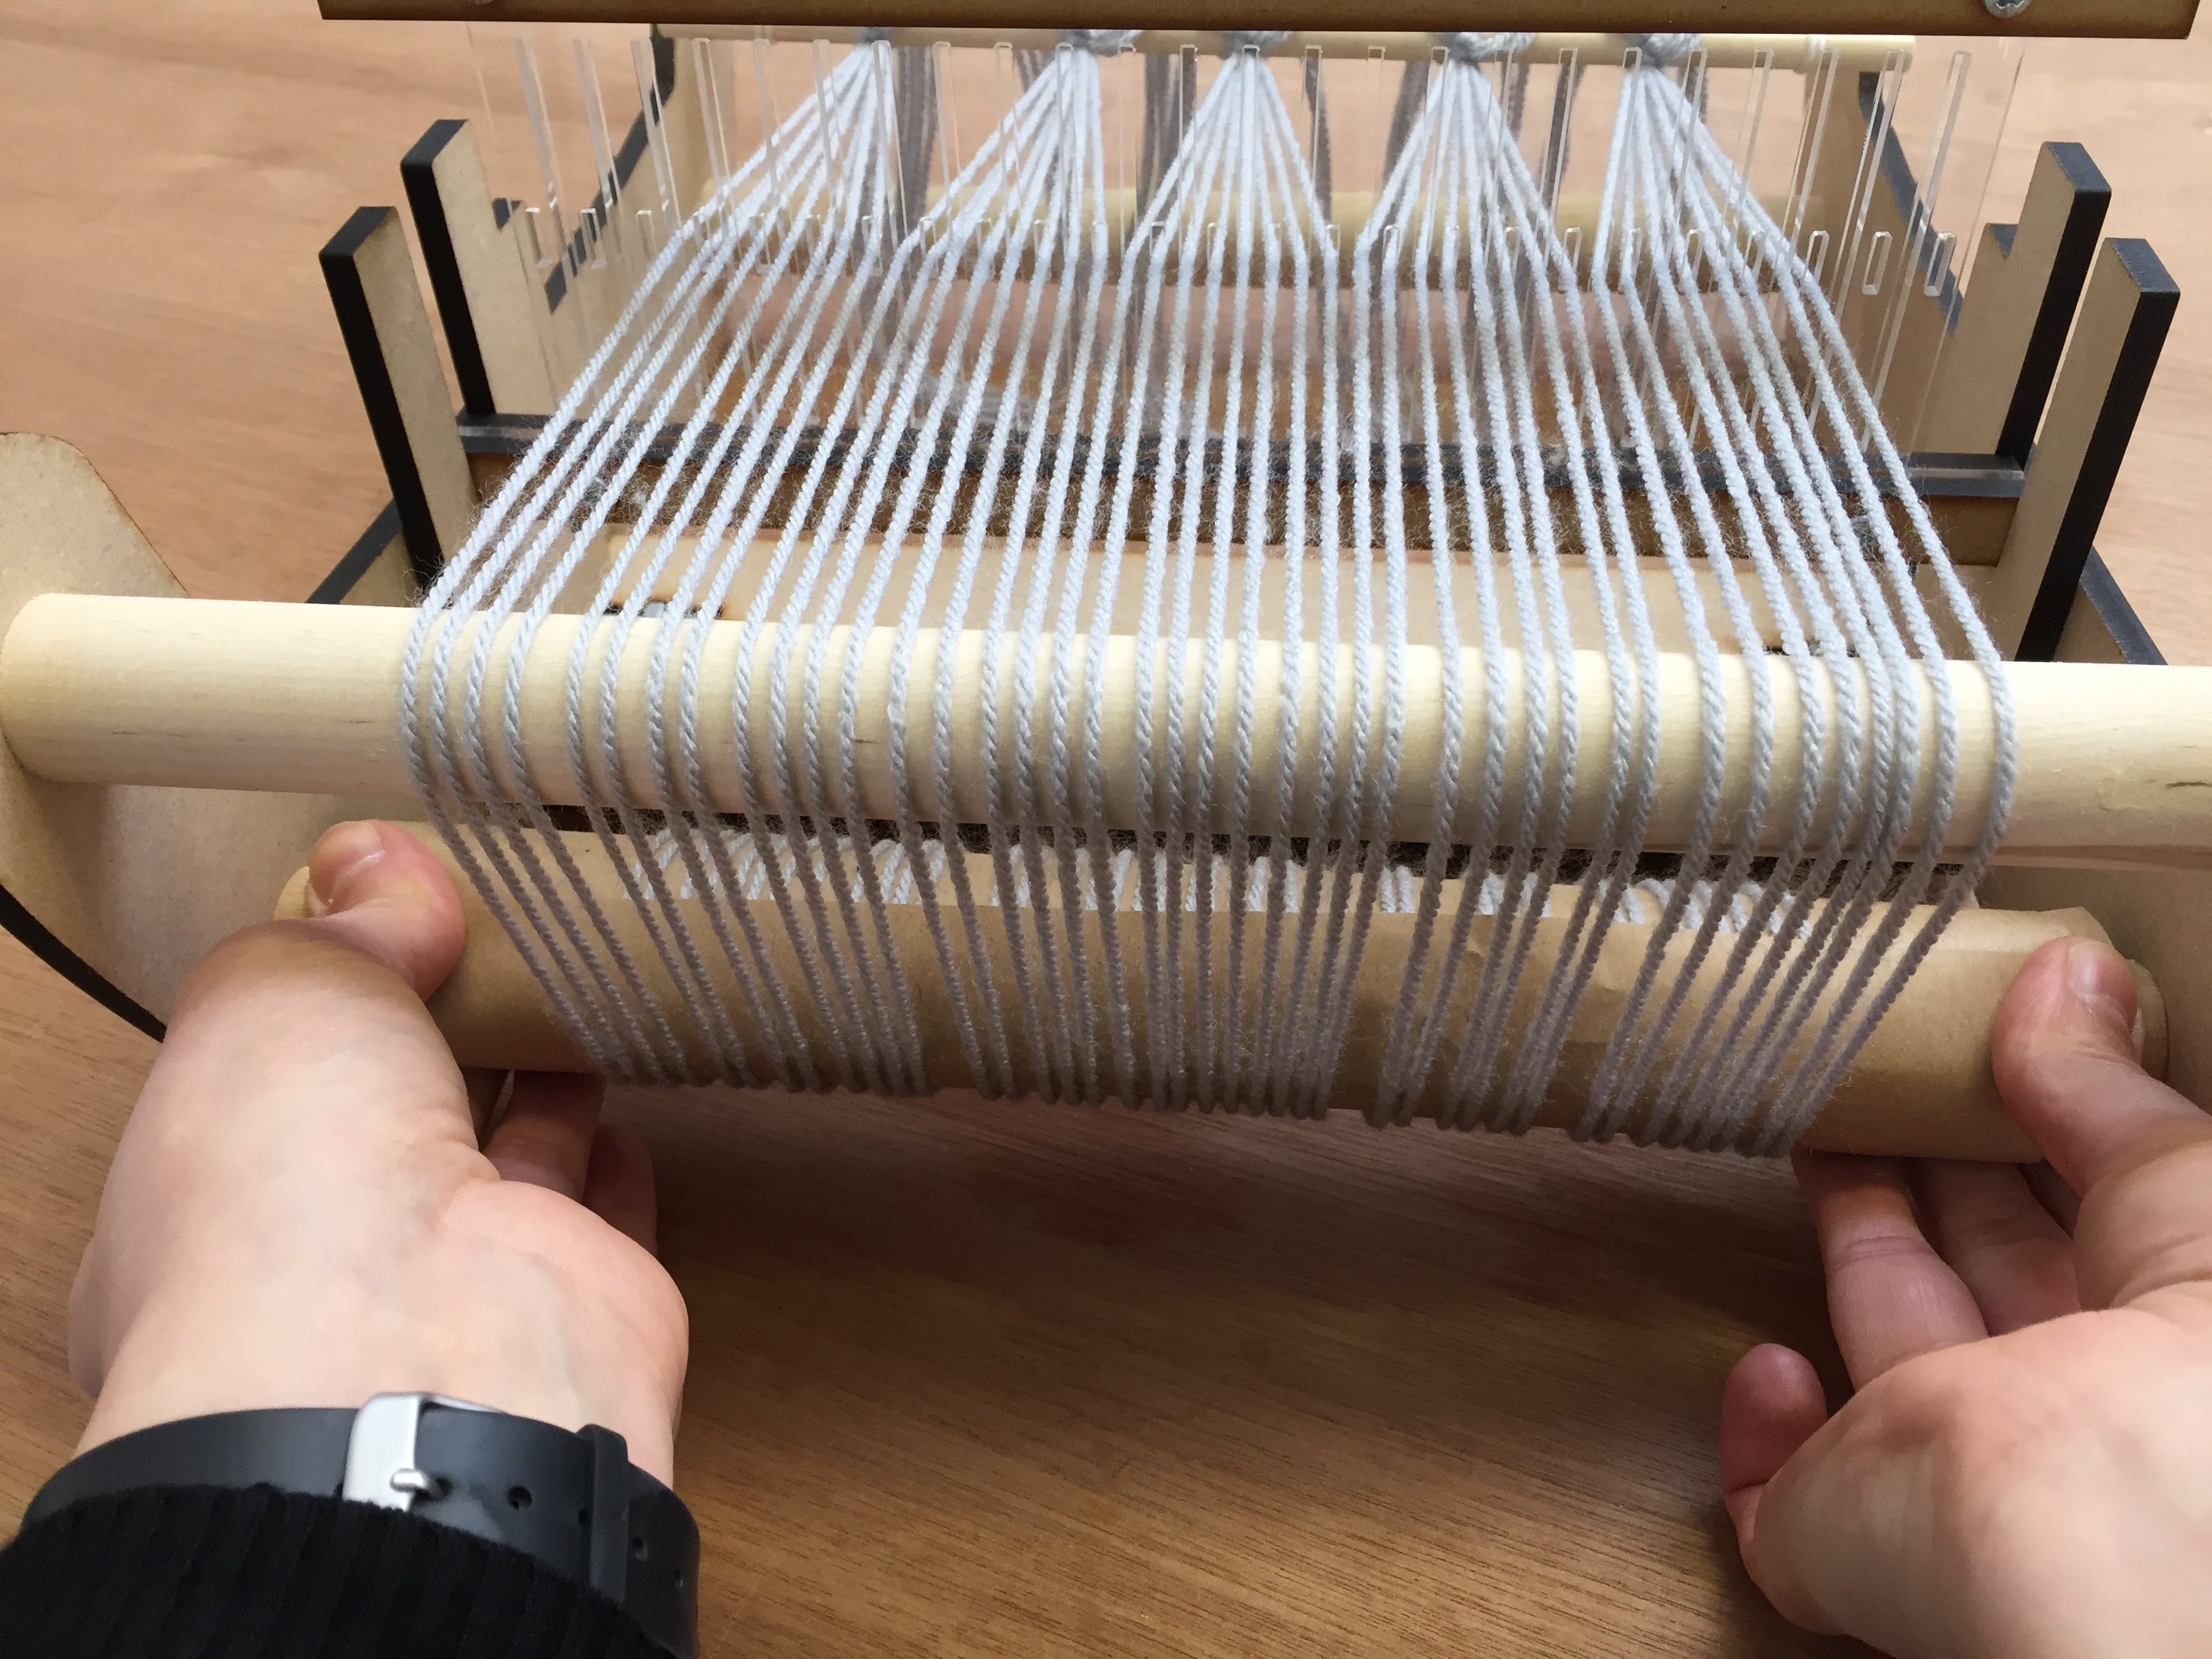

Loosen the wingnuts on the Warp Beam and gently turn it so the warp threads slacken. Secure the Warp Beam by tightening the wingnuts.
Tying On


Loosen the wingnuts on the Cloth Beam and and gently turn it so the Front Apron strings begin to wind onto the beam. This should bring the front Apron Rod towards the Front Beam and tension the warp - you want the strings to be evenly taut but not too tight or you will have difficulty moving the heddle. Secure the Cloth Beam by tightening the wingnuts.
Winding the Shuttle


Pinch your weft yarn in the middle of the Stick Shuttle. Wind the yarn onto the shuttle lengthways between the notches at either end.
Begining to Weave


Cut 3 - 4 length of twill tape or strips of scrap cloth slightly wider than the width of your weaving.
Begining to Weave


Raise the heddle into the up position and push one of the twill tape strips through the gap between the warp threads (this gap is called the ‘shed’) - you might want to use the shuttle to help guide the strip through.
Begining to Weave


Pull the heddle towards the front of the loom, pushing the tape into place - this will begin to spread the warp threads.
Begining to Weave
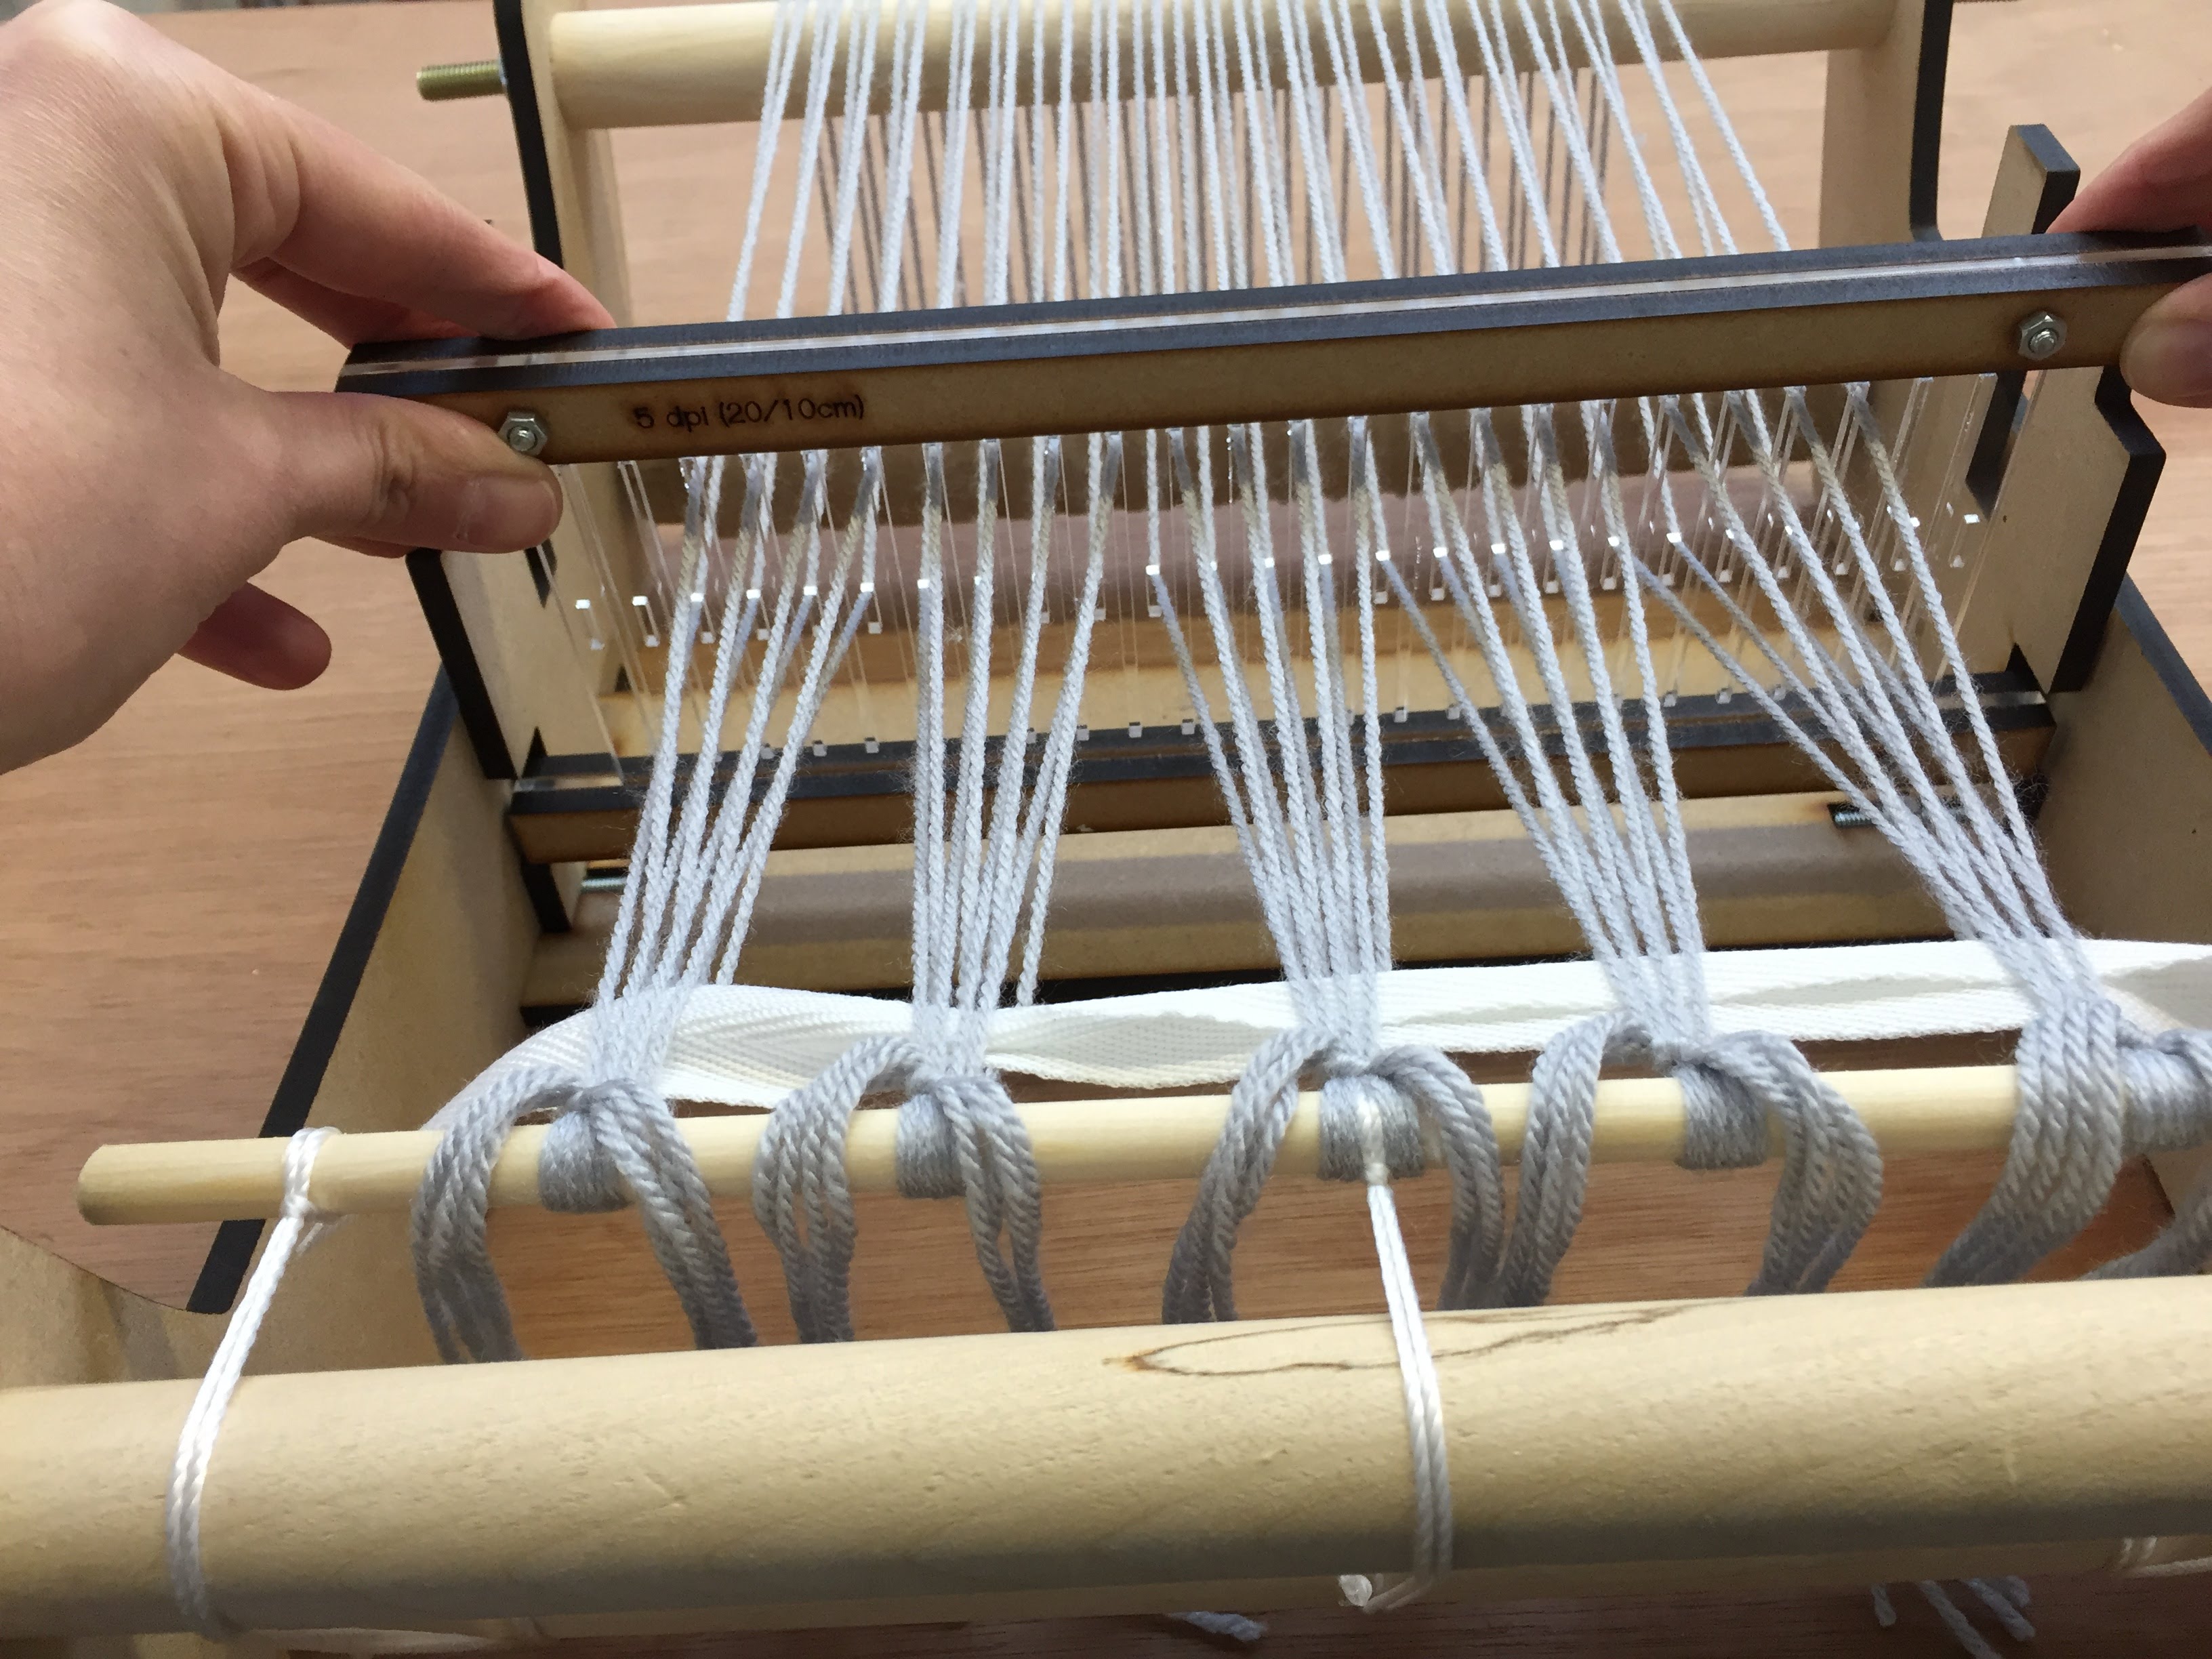


Lower the heddle into the down position and insert the next twill tape through the shed.
Beat the tape into place by pulling the heddle towards the front of the loom.
Repeat the process, alternating between raising and lowering the heddle until you have all four strips of tape in place - the warp threads should now be evenly spaced in line with their positions in the heddle.
Begining to Weave
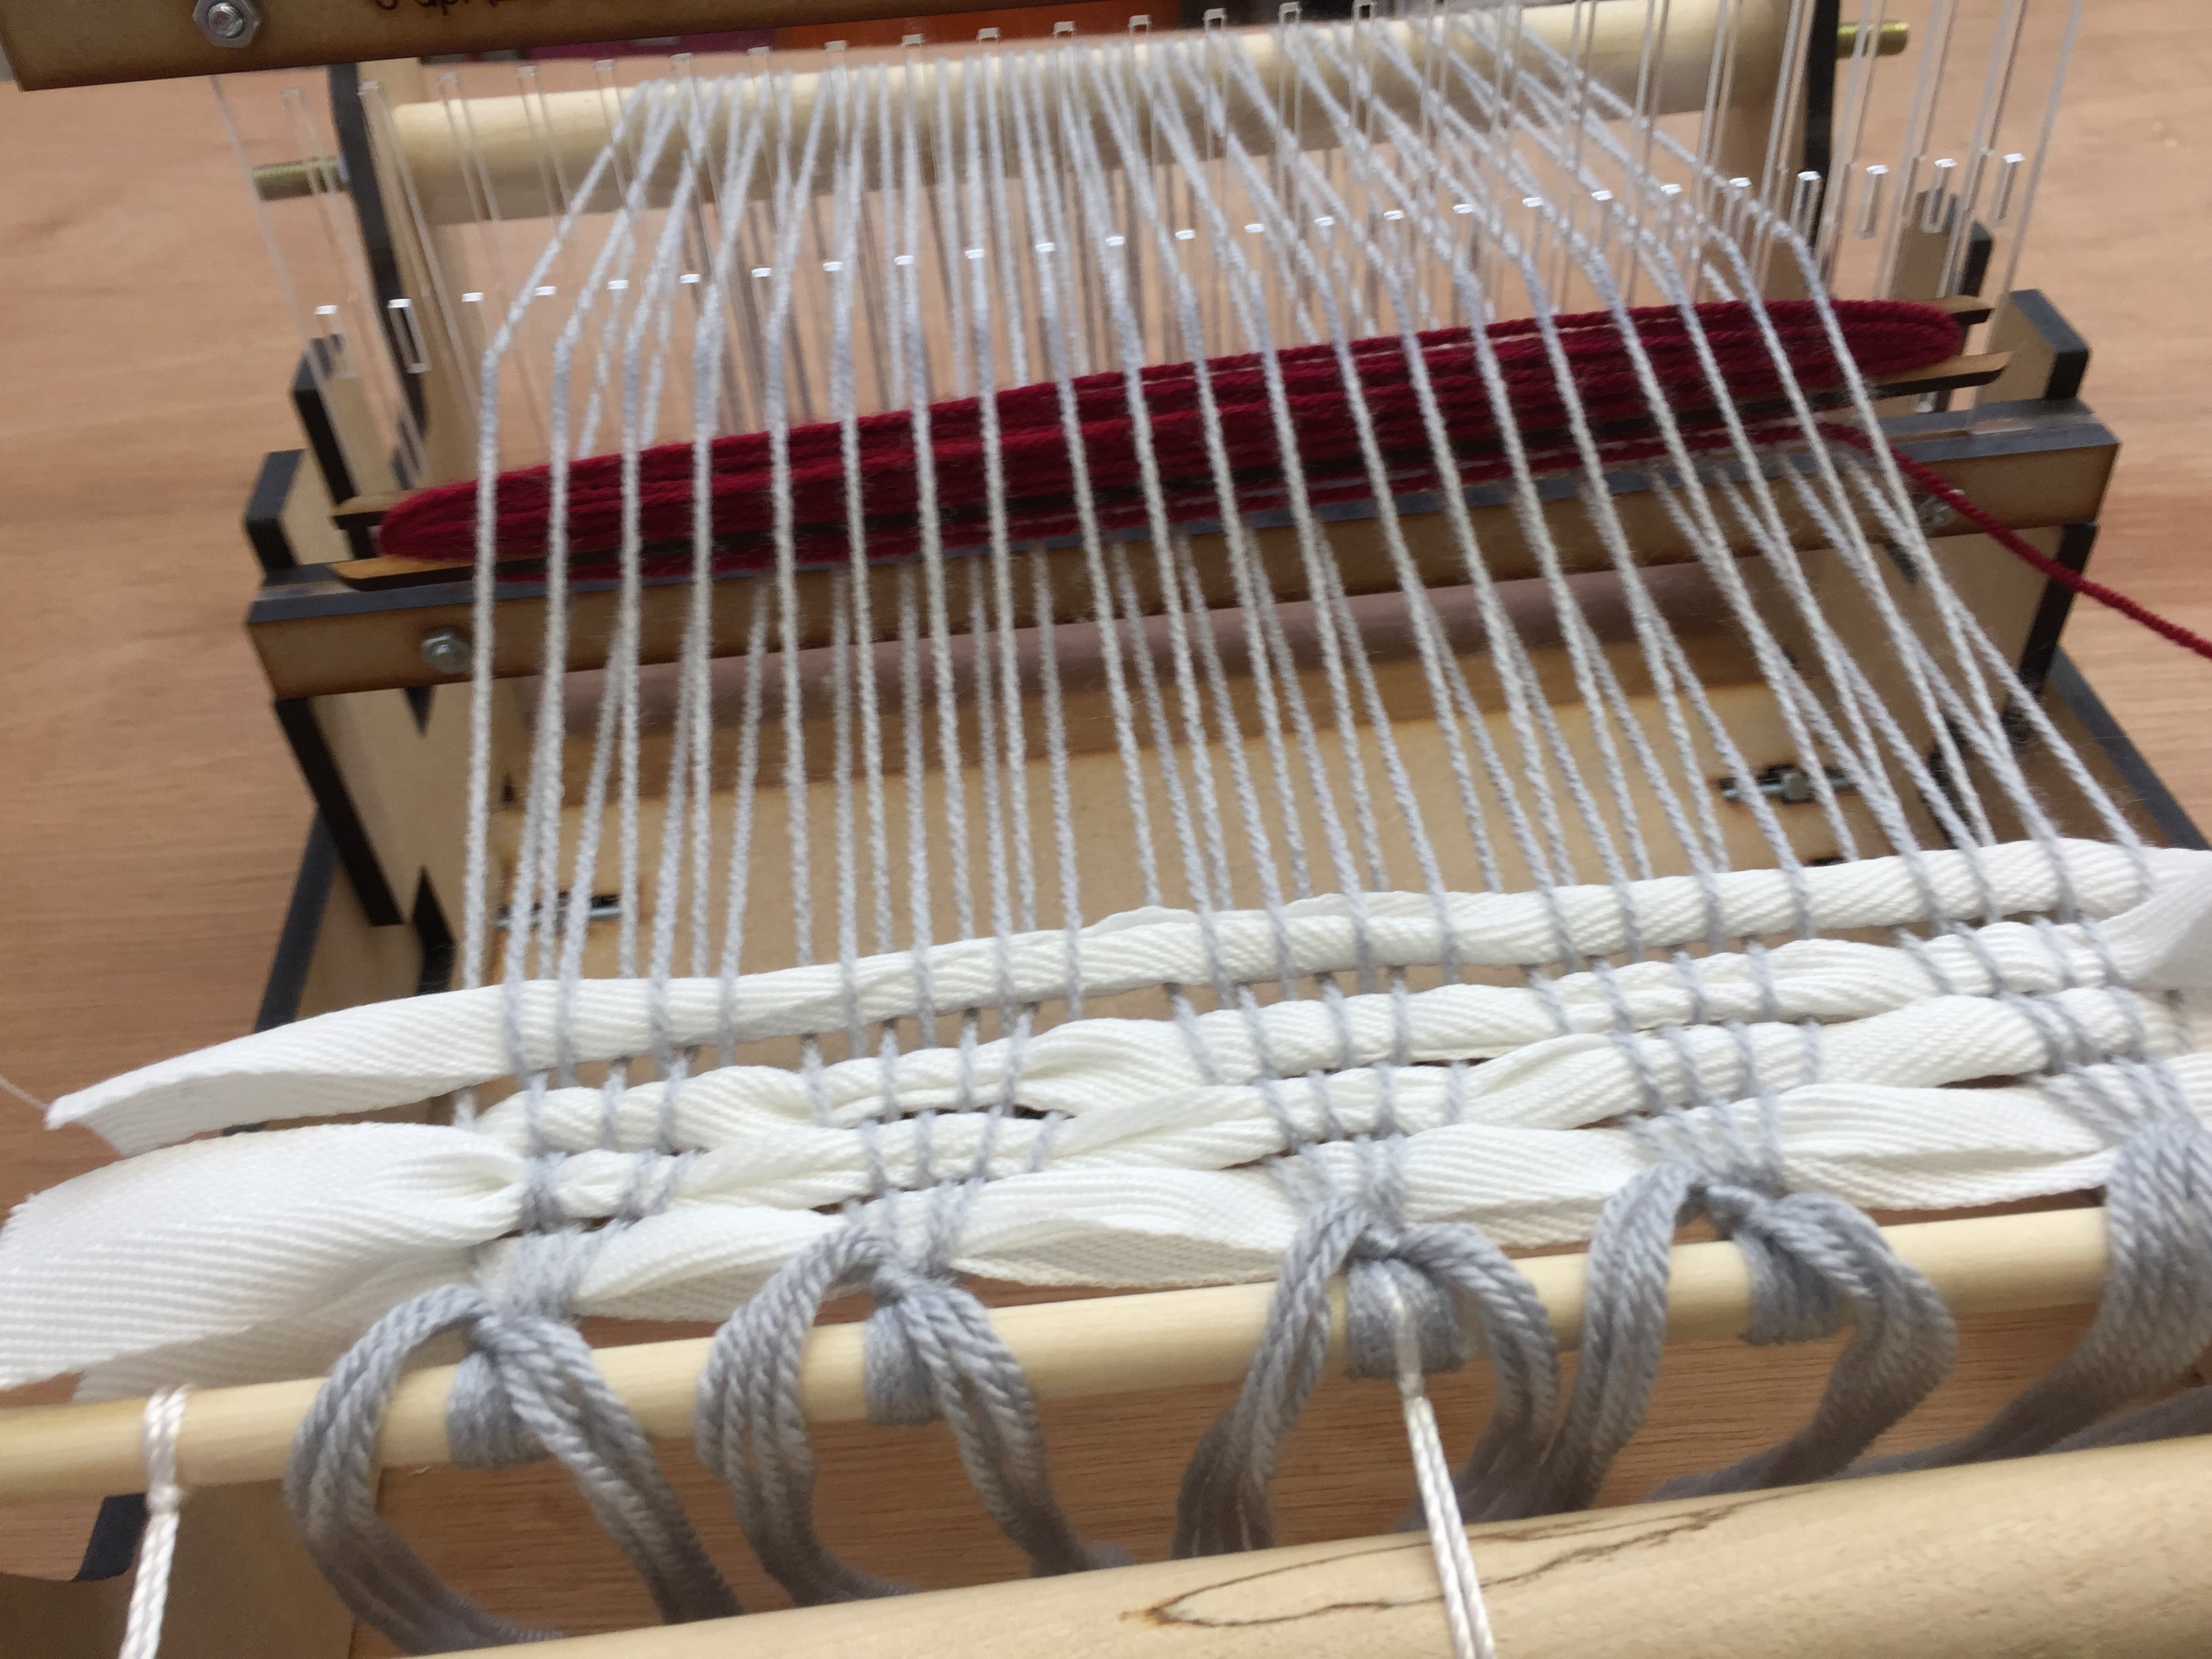


After inserting all four of the tape strips, the heddle should now be in the up position. Unwind roughly 100cm of weft from the shuttle and push the shuttle completely through the shed - you should have a length of weft yarn between the warp threads with a tail of at least 50cm left at the end (this will used to secure the weaving later).
Pull the heddle towards the front of the loom to beat the weft into position.
Begining to Weave


Move the heddle to the down position and push the shuttle through the shed in the other direction. Make sure the selvedge (the edge of the warp) doesn’t get pulled in as this will distort the weaving.
Beat the second weft into position by pulling the heddle towards the front of the loom.
Begining to Weave
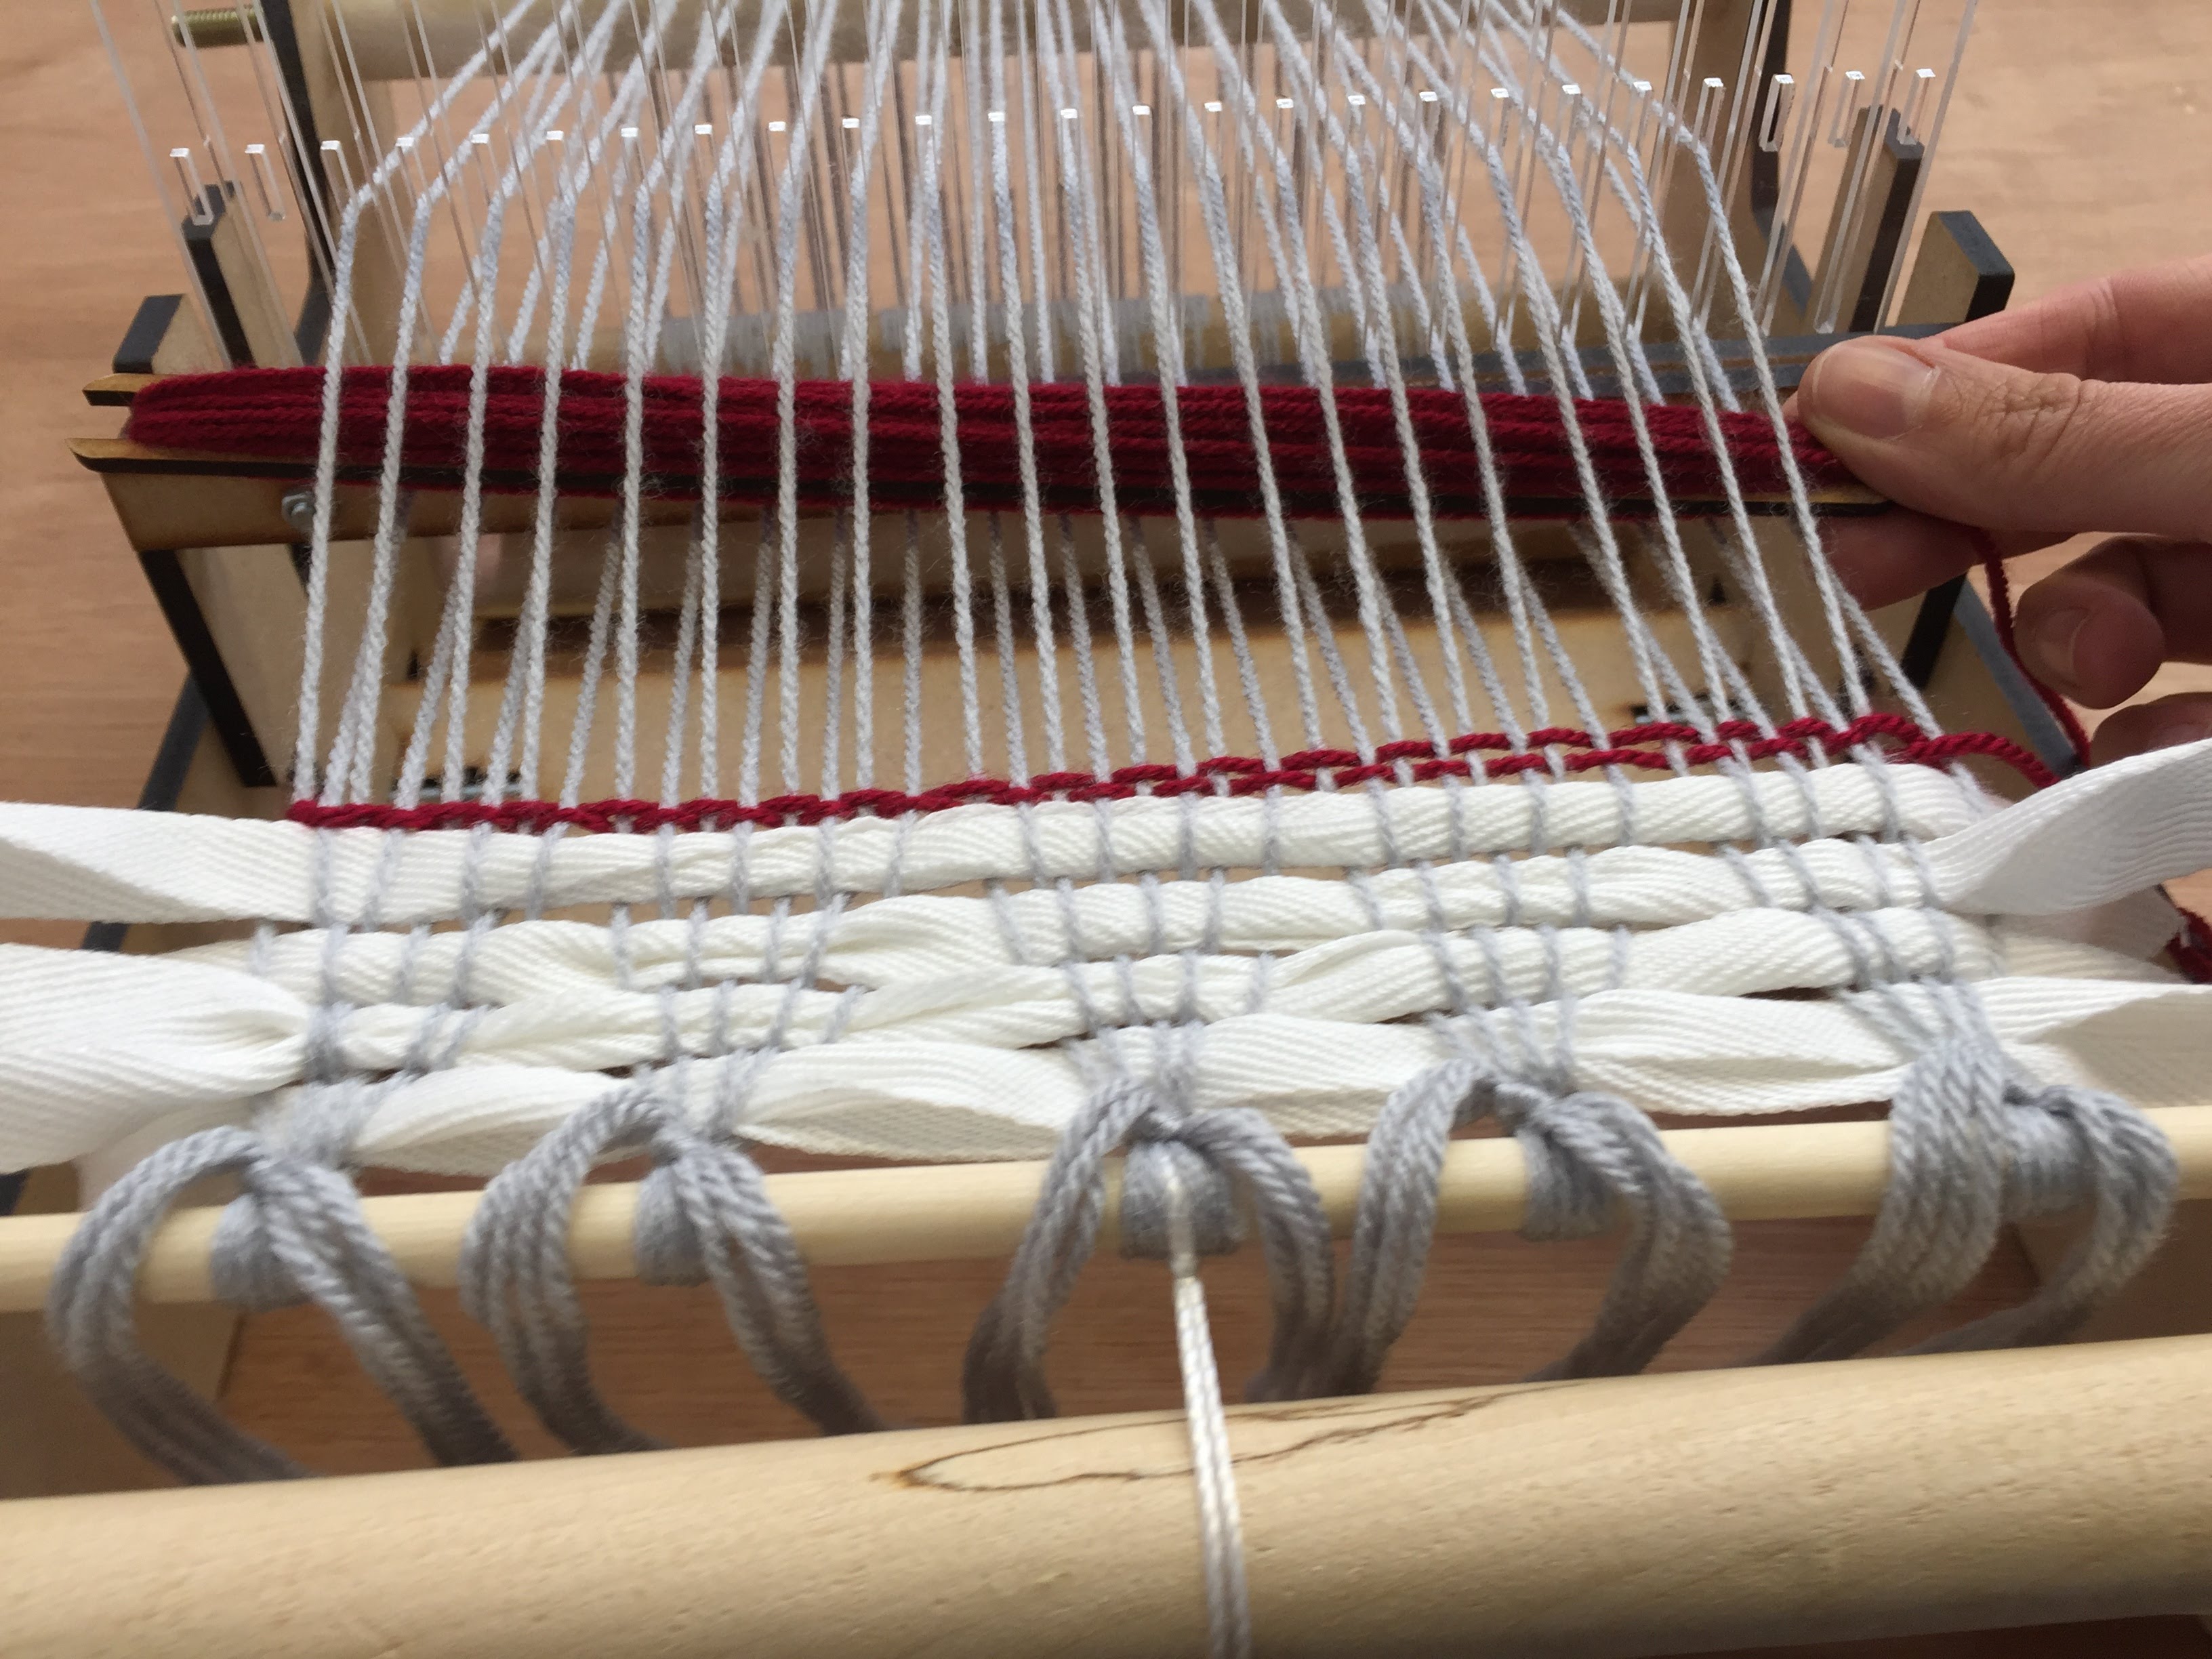


Repeat the process of raising and lowering the heddle, pushing the shuttle through and beating the weft threads into position.
Securing the Weave


There are several ways to secure the weaving to prevent it from unravelling. The following method leaves a decorative fringe of warp threads when the weaving is taken off the loom.
Thread the tail end of the weft thread on a large tapestry needle. Below the first row of the weave, insert the needle under the first 4 warp threads.
Securing the Weave


Pull the thread through and insert the needle back under the weaving between the first two rows of the weft and the first four warp threads.
Securing the Weave


Pull the thread through and insert the needle under the next 4 warp threads below the first row of the weave.
Securing the Weave


Pull the thread through and insert the needle back under the weaving between the first two rows of the weft and the second four warp threads.
Gently pull the thread through. You should see the groups of warp threads being secured together in small bunches.
Securing the Weave


Continue along the weaving, securing the warps ends in groups of four by inserting the needle under the warp threads below the first row of the weave, bringing the needle back up between the first two rows of the weft and the four warp threads and gently pulling the loop to bring the warp together.
Securing the Weave


When you reach the final group of warp threads, insert the needle below them and under but do not pull the loop closed.
Insert the needle back through the loop created around the final 4 warp threads and pull closed to secure the end.
Advancing the Warp


As you continue to weave, you will find that the shed gets too tight to pass the shuttle through as the weaving gets nearer the heddle. At this point you need to wind the warp on.
Place the heddle in the neutral position. Loosen the wingnuts on the Warp Beam, roll the beam towards the heddle to gently slacken the warp threads and then tighten the wingnuts. Loosen the wingnuts on the Cloth Beam, roll the weaving onto the Cloth Beam and tighten the wingnuts.
Changing Weft Threads

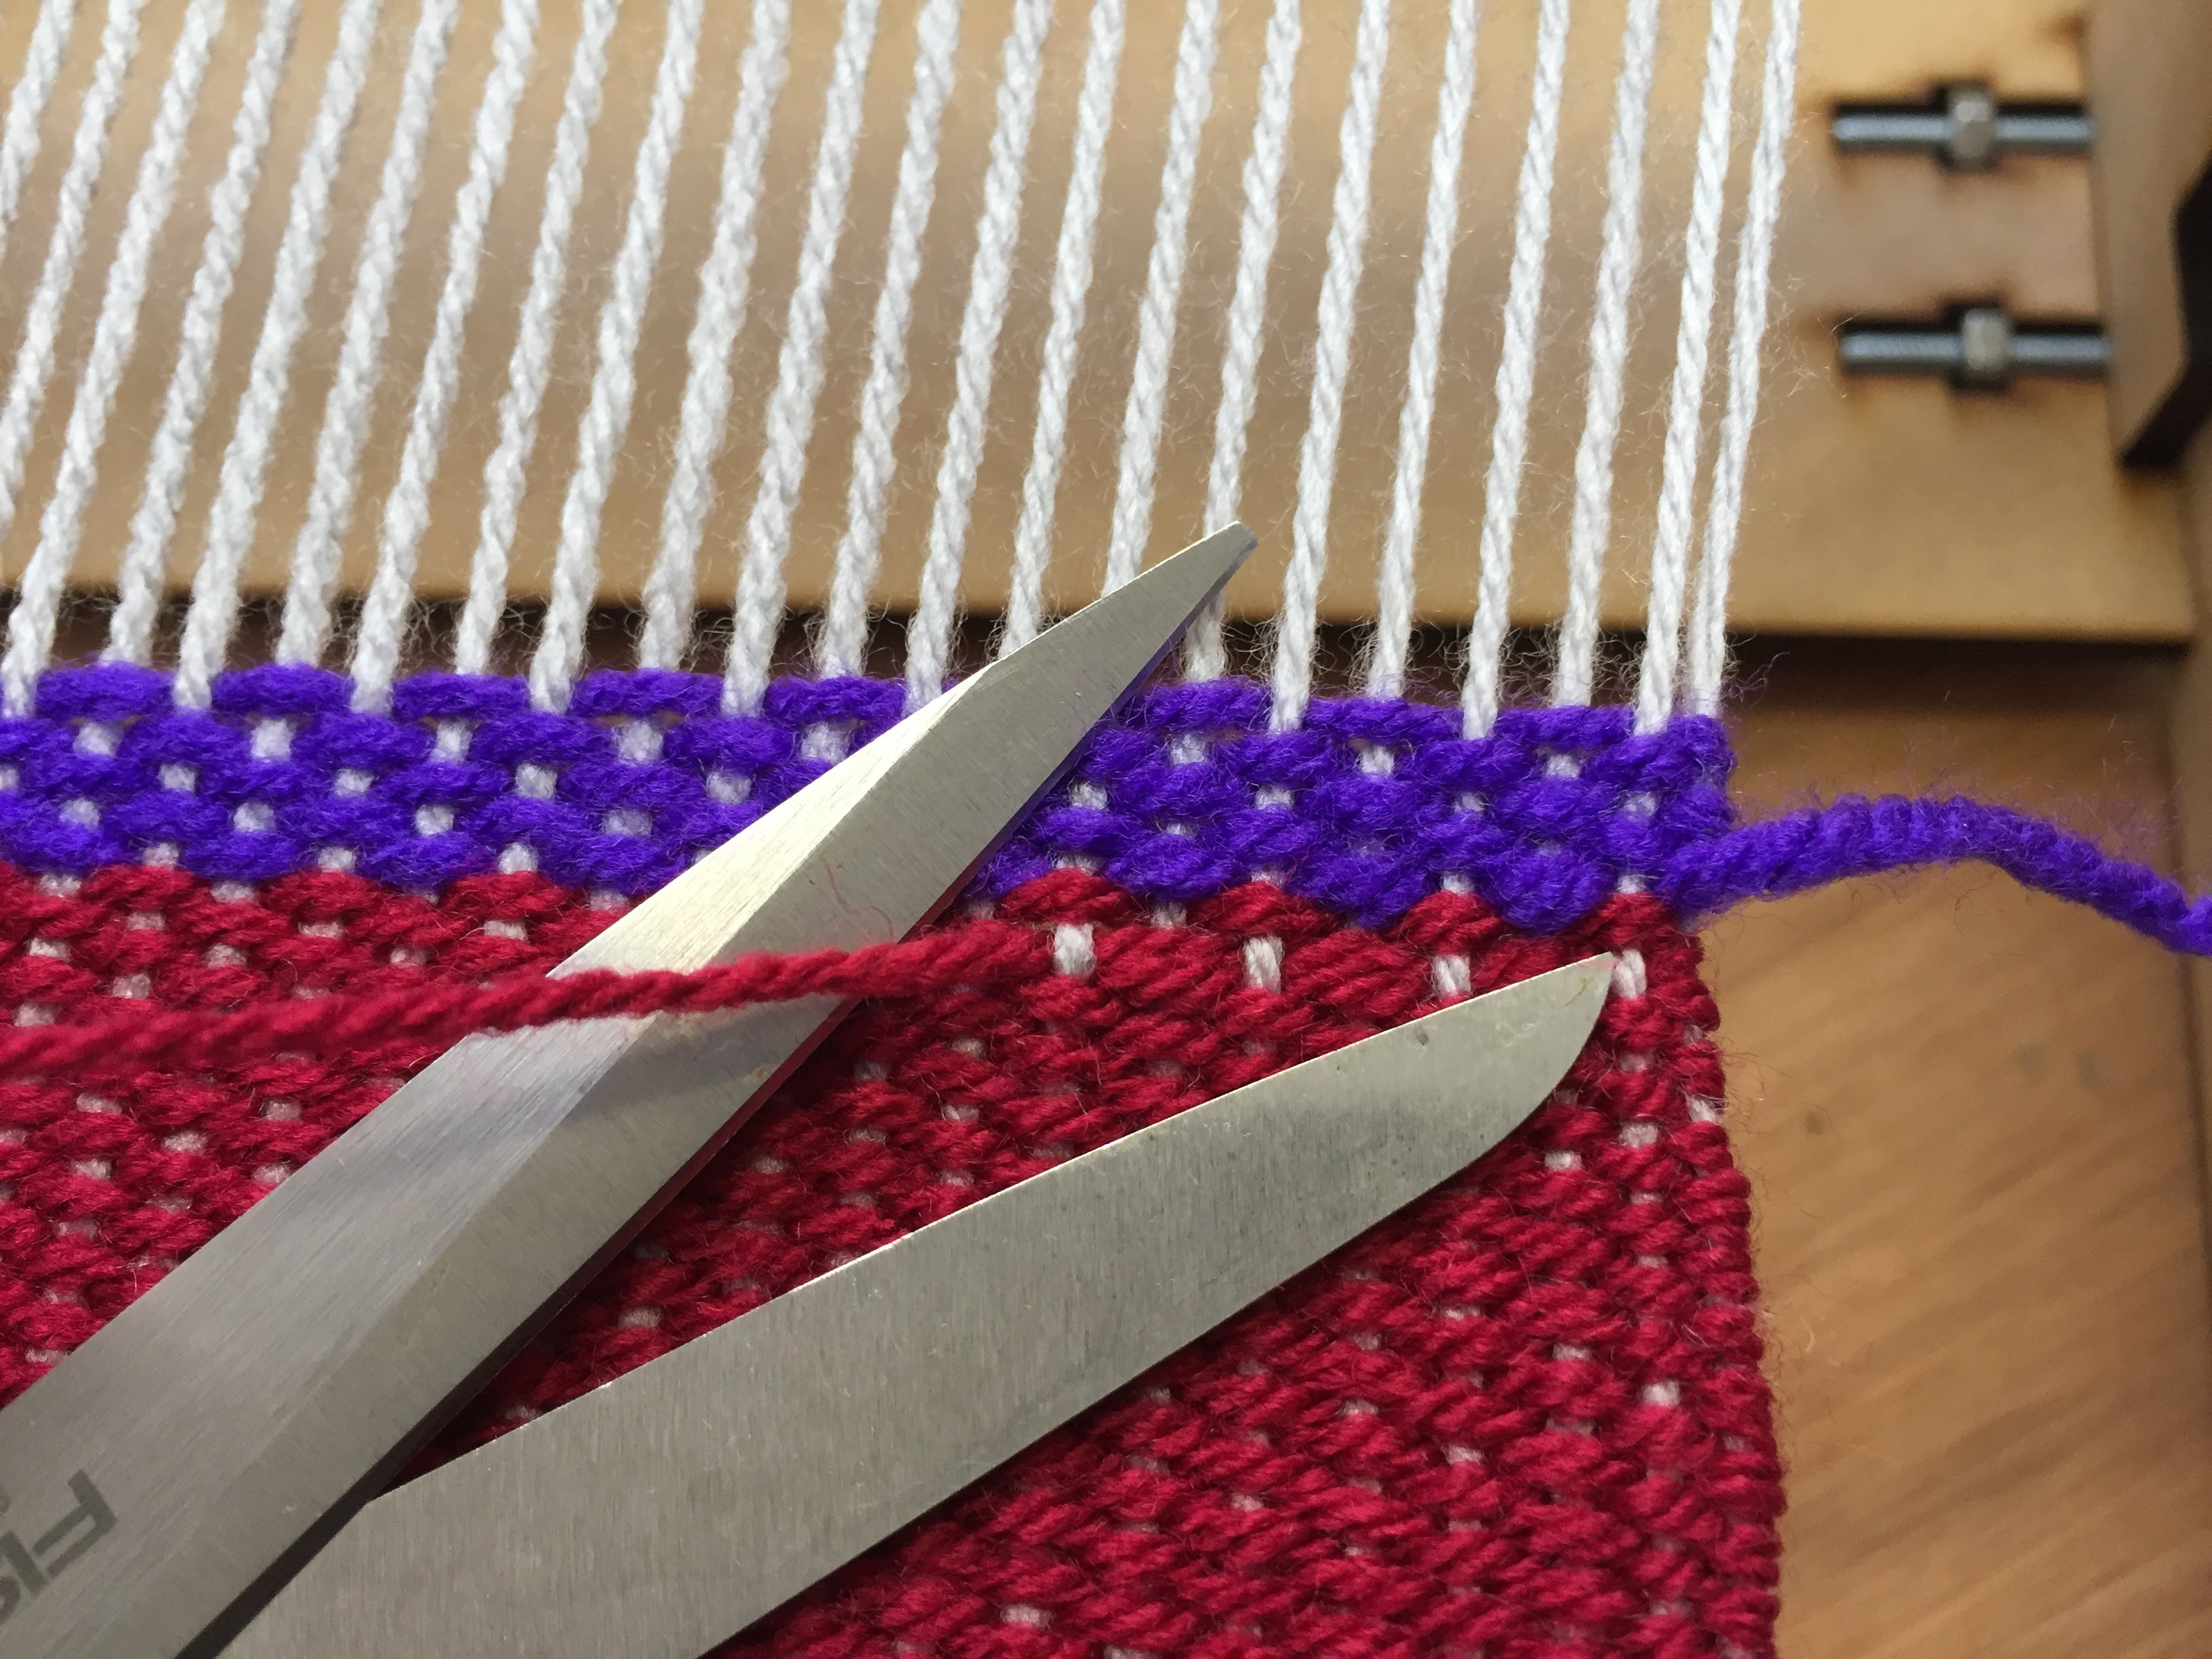

If the shuttle runs out of yarn or your decide to change to a new yarn, leave a 15cm tail at the edge and begin weaving with the new yarn (leaving a 15cm tail) until you have four of five rows of the new weft woven.
Thread the old weft end onto a large tapestry needle and insert the needle below the last row of the old woven weft across several warp threads, alternating the warp from the row above.
Trim the tail.
Changing Weft Threads


Thread the tail of the new weft yarn onto the needle and insert it just above the first row of the new woven weft across several warp threads, alternating the warp from the row below.
Trim the tail.
Removing the Weaving


When you have finished weaving, secure the warp threads at the end in the same manner as you secured them at the beginning (see Securing the Weave).
Cut the warp threads at the end of the weaving, leaving a fringe, then unwind the weaving from the cloth beam and cut the warp threads between the strips of twill tape to leave a fringe.