DIY Home Photo Setup
by Pretty Idiot Productions in Circuits > Cameras
70350 Views, 387 Favorites, 0 Comments
DIY Home Photo Setup
Dirty, Cheap, Decent DIY Setup for better ebay and Instructables photos.
I used a Canon Point and Shoot, and a Tripod!
I am NOT a professional photographer (nor do I play one on TV).
Necessity is the Mother of invention... and MacGyver is its Dad!
I used a Canon Point and Shoot, and a Tripod!
I am NOT a professional photographer (nor do I play one on TV).
Necessity is the Mother of invention... and MacGyver is its Dad!
The Stove
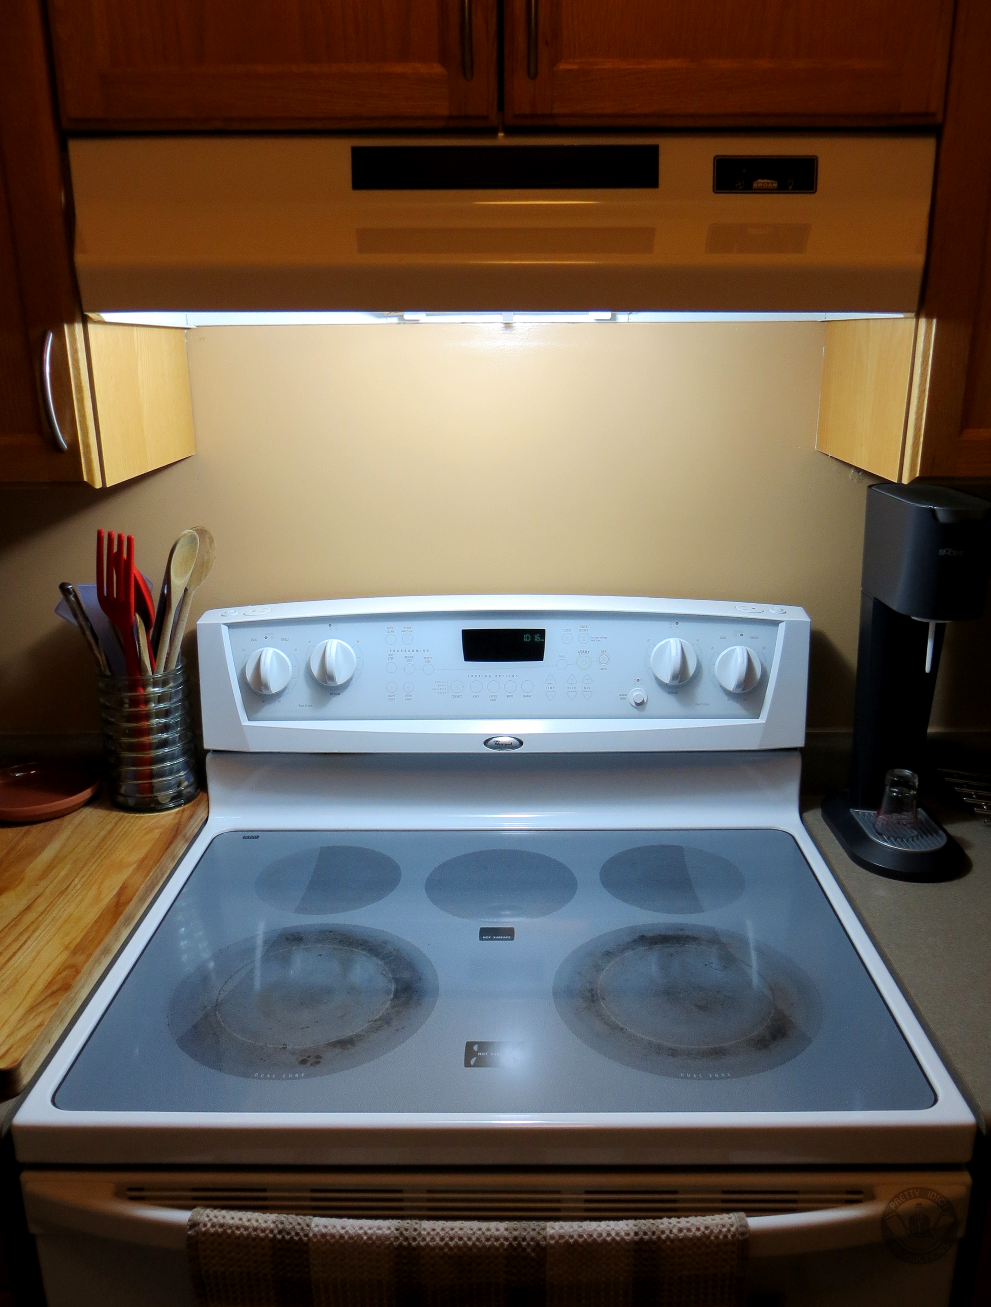
Almost everyone has one of these at home (A Stove), and if you're really fancy, or living in accordance to strict building codes, then you also have a hood* over that stove.
*The hood is that thingy up top with the sucky part (Fan) and bright bit (Light).
*The hood is that thingy up top with the sucky part (Fan) and bright bit (Light).
The Bits and Pieces
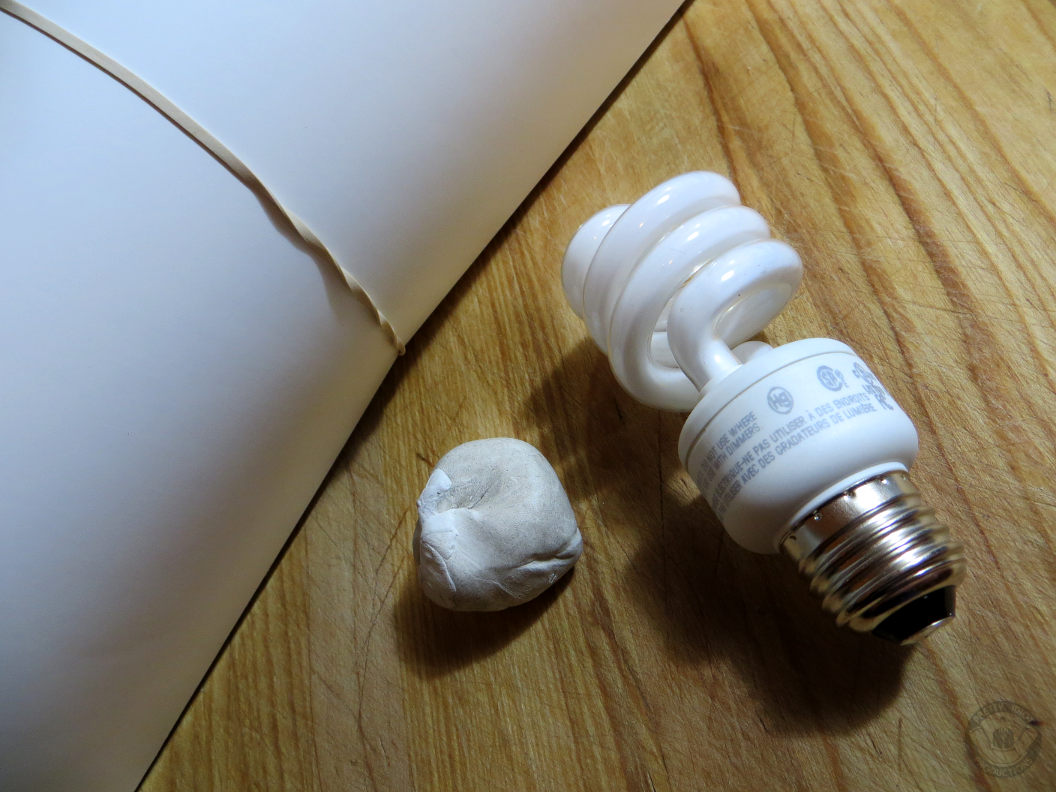
Get yourself some plain white Bristol Board.
Some of that re-usable sticky tacky stuff that you can safely stick posters to walls with... or some gum.
One CFL (NOT Football) with a daylight colour temperature of 5000k - 5500k
(just look for whatever you can find which will give you the whitest light possible)
Some of that re-usable sticky tacky stuff that you can safely stick posters to walls with... or some gum.
One CFL (NOT Football) with a daylight colour temperature of 5000k - 5500k
(just look for whatever you can find which will give you the whitest light possible)
The Setup
IT IS NOW VERY IMPORTANT THAT YOU MAKE SURE THAT THE STOVE IS OFF, IT IS COLD, AND NO ONE NEEDS TO USE IT!
and then...
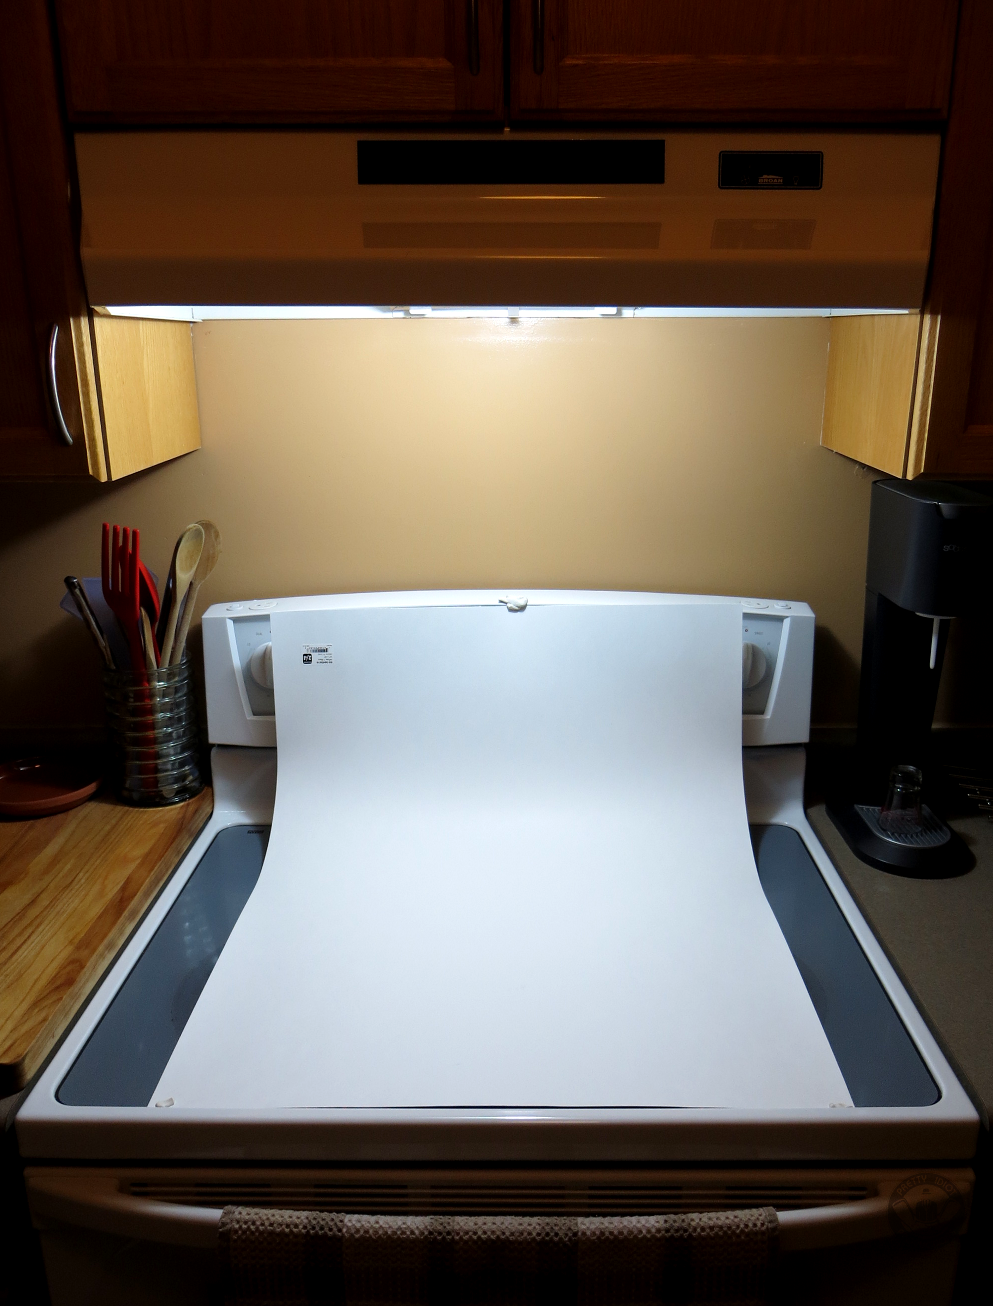
Screw the new white bulb into the hood.
Lay the Bristol Board over the stove top allowing for the natural curve* as the board goes up the back, and keep it in place with that sticky stuff wherever you need it.
*The natural curve in the board is needed to give the illusion of an endless flowing white background.
OoOoH AaAaH!!!
and then...
Screw the new white bulb into the hood.
Lay the Bristol Board over the stove top allowing for the natural curve* as the board goes up the back, and keep it in place with that sticky stuff wherever you need it.
*The natural curve in the board is needed to give the illusion of an endless flowing white background.
OoOoH AaAaH!!!
The Subject
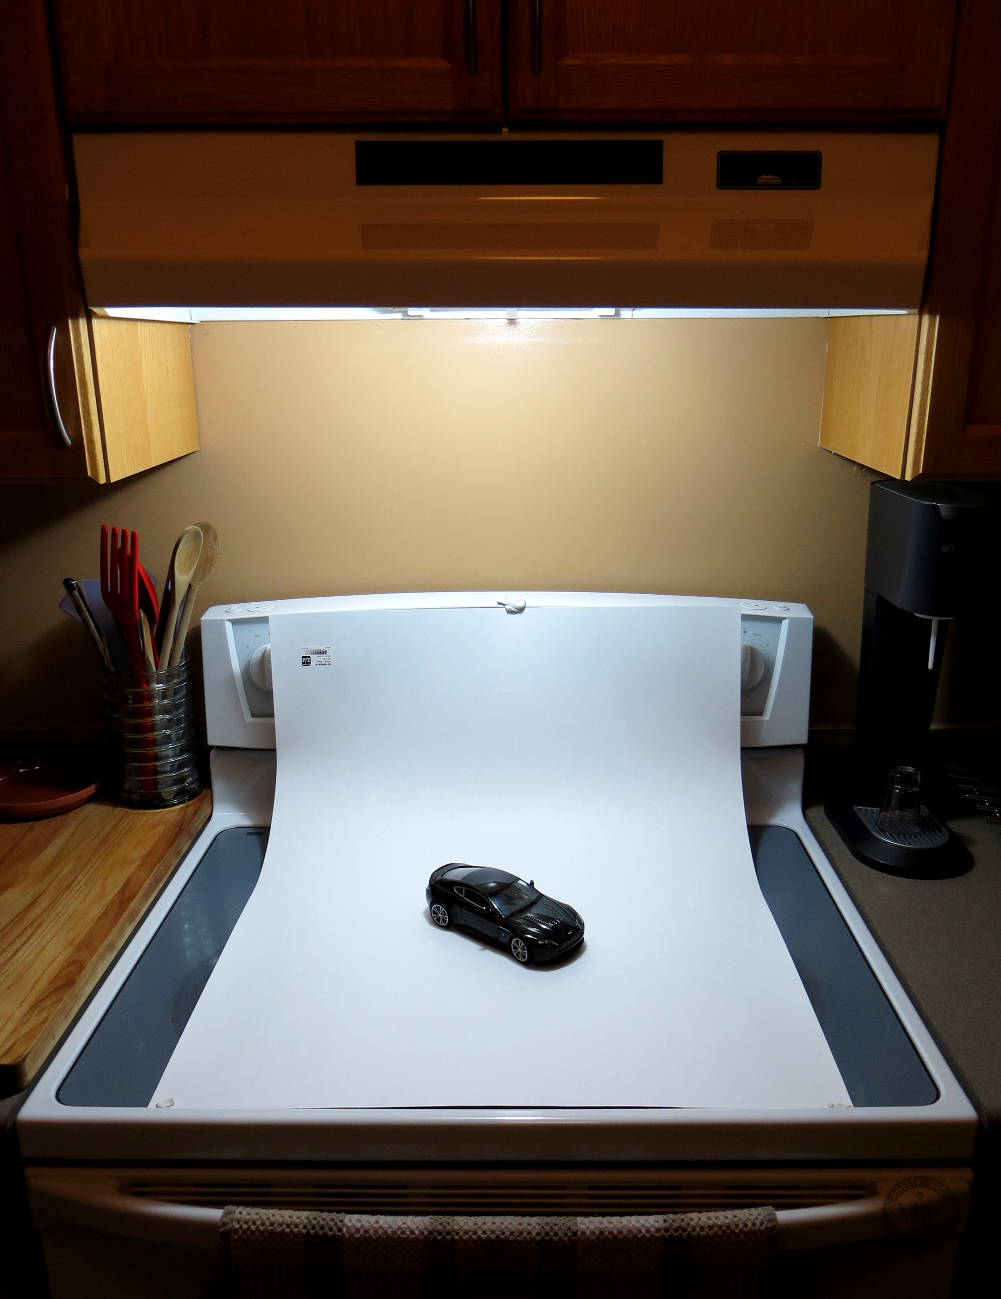
Place the subject of your photograph in the middle of the board, under the light.
Pretty self explanatory really... if you think about it.
Pretty self explanatory really... if you think about it.
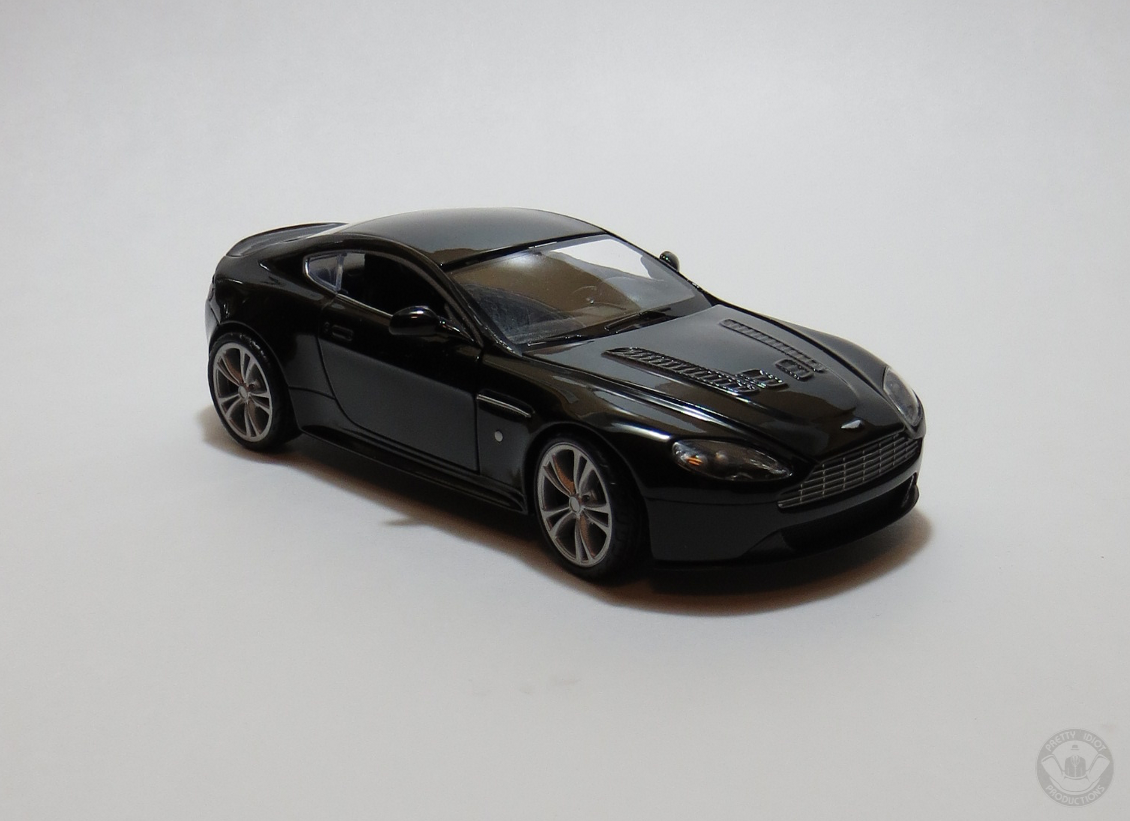
To keep it simple, keep your camera settings on AUTO, so it's less for you to think about and change... and...
CLICK!
Take your photo.
Seriously though... this pic right here is good enough for posting. It's lit well enough and the most important point is... IT'S IN FOCUS!
CLICK!
Take your photo.
Seriously though... this pic right here is good enough for posting. It's lit well enough and the most important point is... IT'S IN FOCUS!
The Tweaks

If the photo needs tweaking a little, then edit it with photo editing software such as GIMP (which is a free download, and easy enough to figure out)
The Contrast and Brightness was tweaked a bit here, with a little white to fill in a few nasty spots.
The Contrast and Brightness was tweaked a bit here, with a little white to fill in a few nasty spots.
The Tweaks... Continued
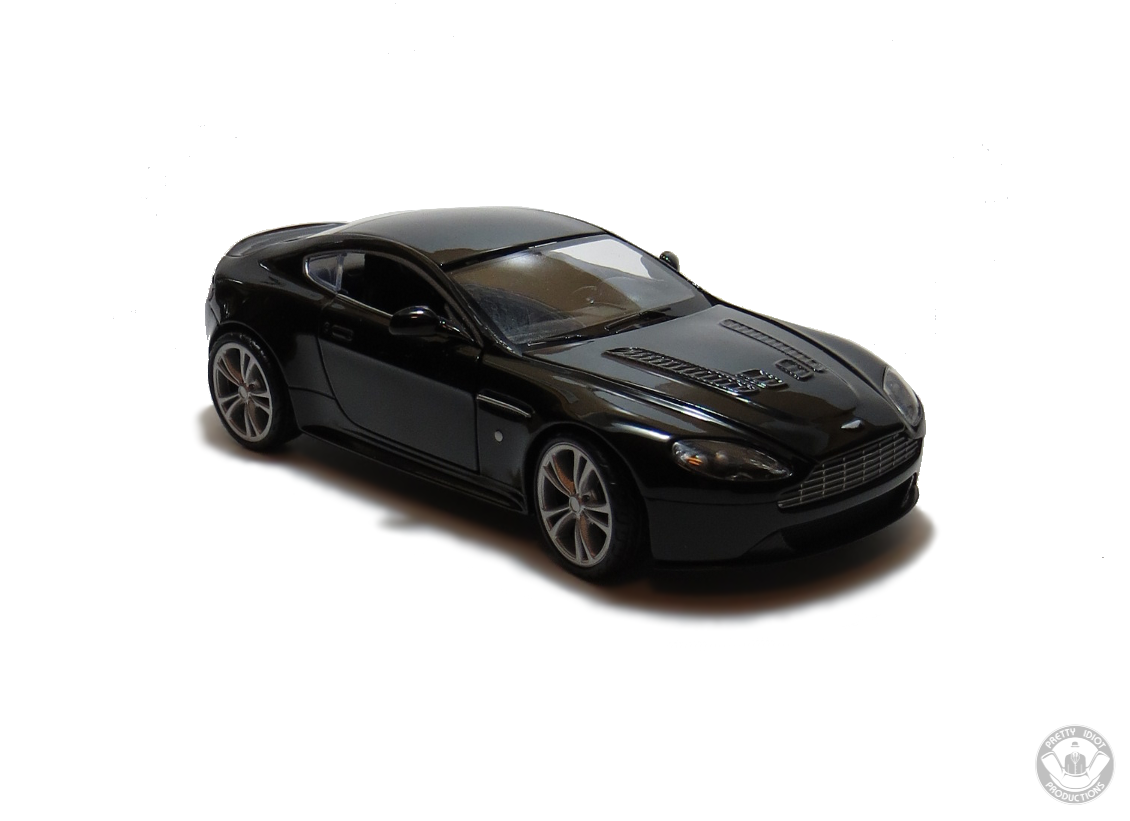
The Shadow underneath the car was too harsh, so I softened it up with a little selective blur.
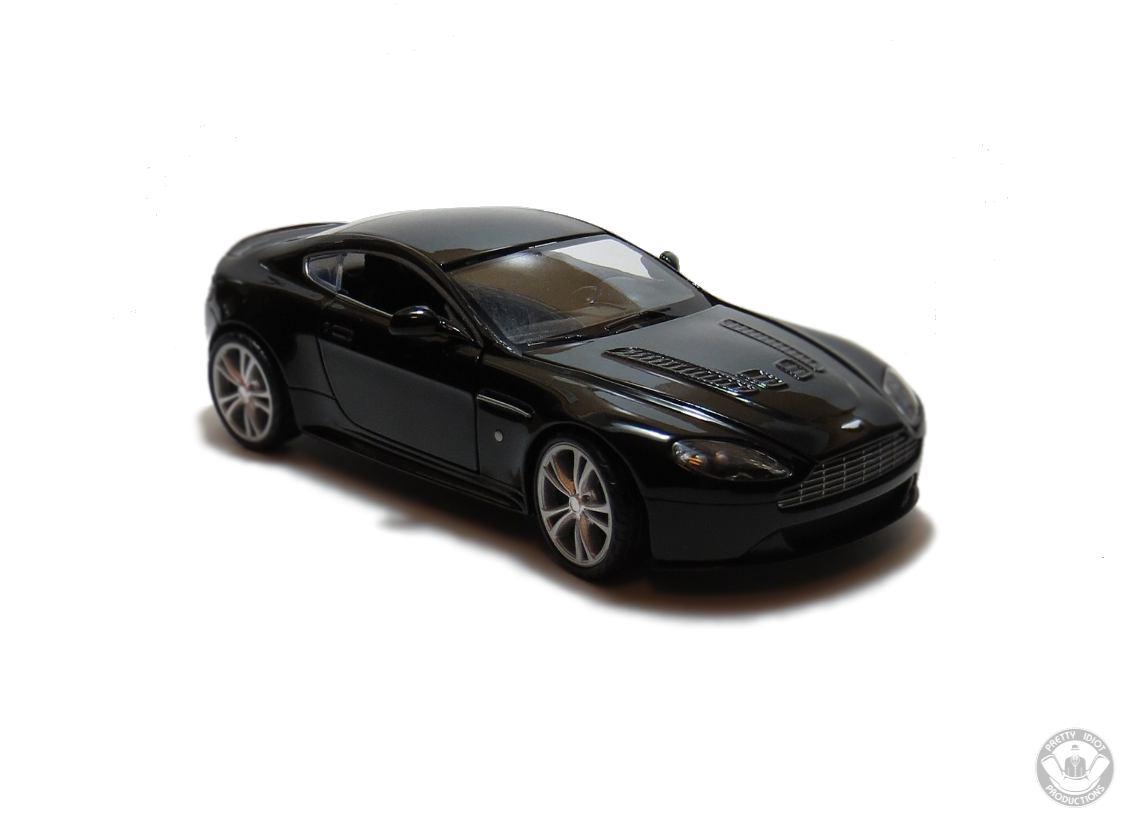
The Money Shot

Then I went a little further (you don't have to) and added a little soft glow, highlights, and depth.
There you go!
Alright... let's just all agree that if you're gonna post some pics... at least try to make sure that they're in focus!
There you go!
Alright... let's just all agree that if you're gonna post some pics... at least try to make sure that they're in focus!