DIY Filament Dry Box
by earldanielph in Workshop > 3D Printing
56461 Views, 324 Favorites, 0 Comments
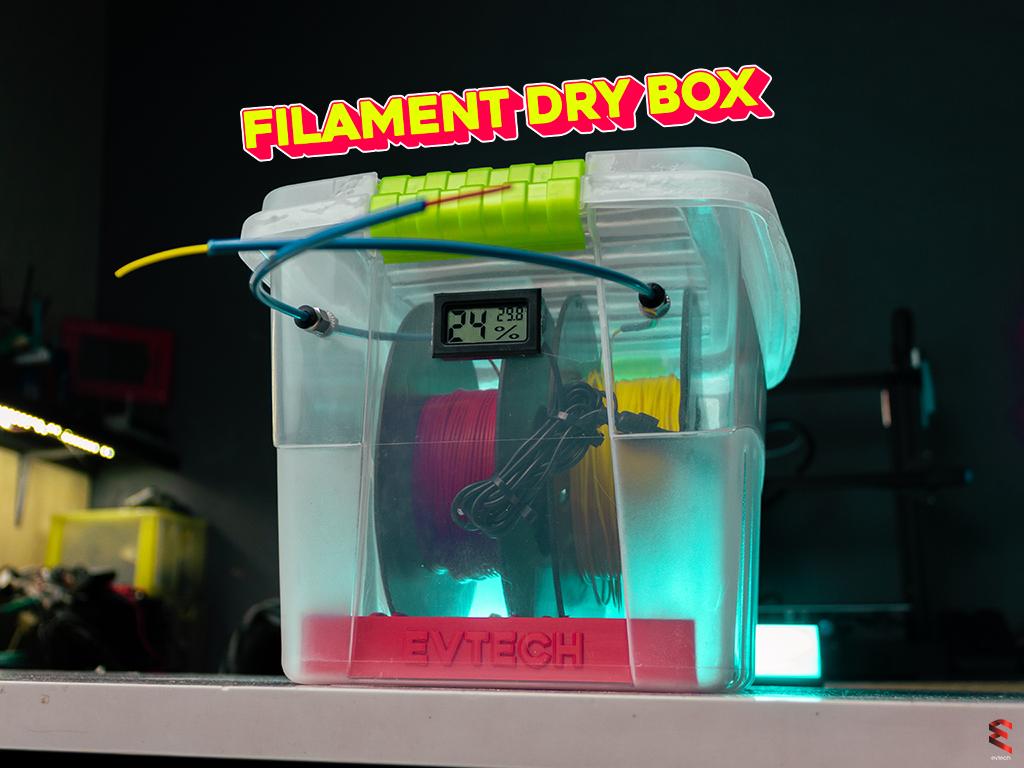
DIY Filament Dry Box

For today's project, we are going to create a Filament Dry Box!
The Problem!
We all know that if the filament absorbs moisture from the air, this can lead to failed prints and nozzle clogs.
But today, we are going to create a dry box that not only prevents it from being exposed to the air but can also dispense the filament to the 3D printer.
VIDEO TUTORIAL:
What are we waiting for? Let's get right into it!
Supplies

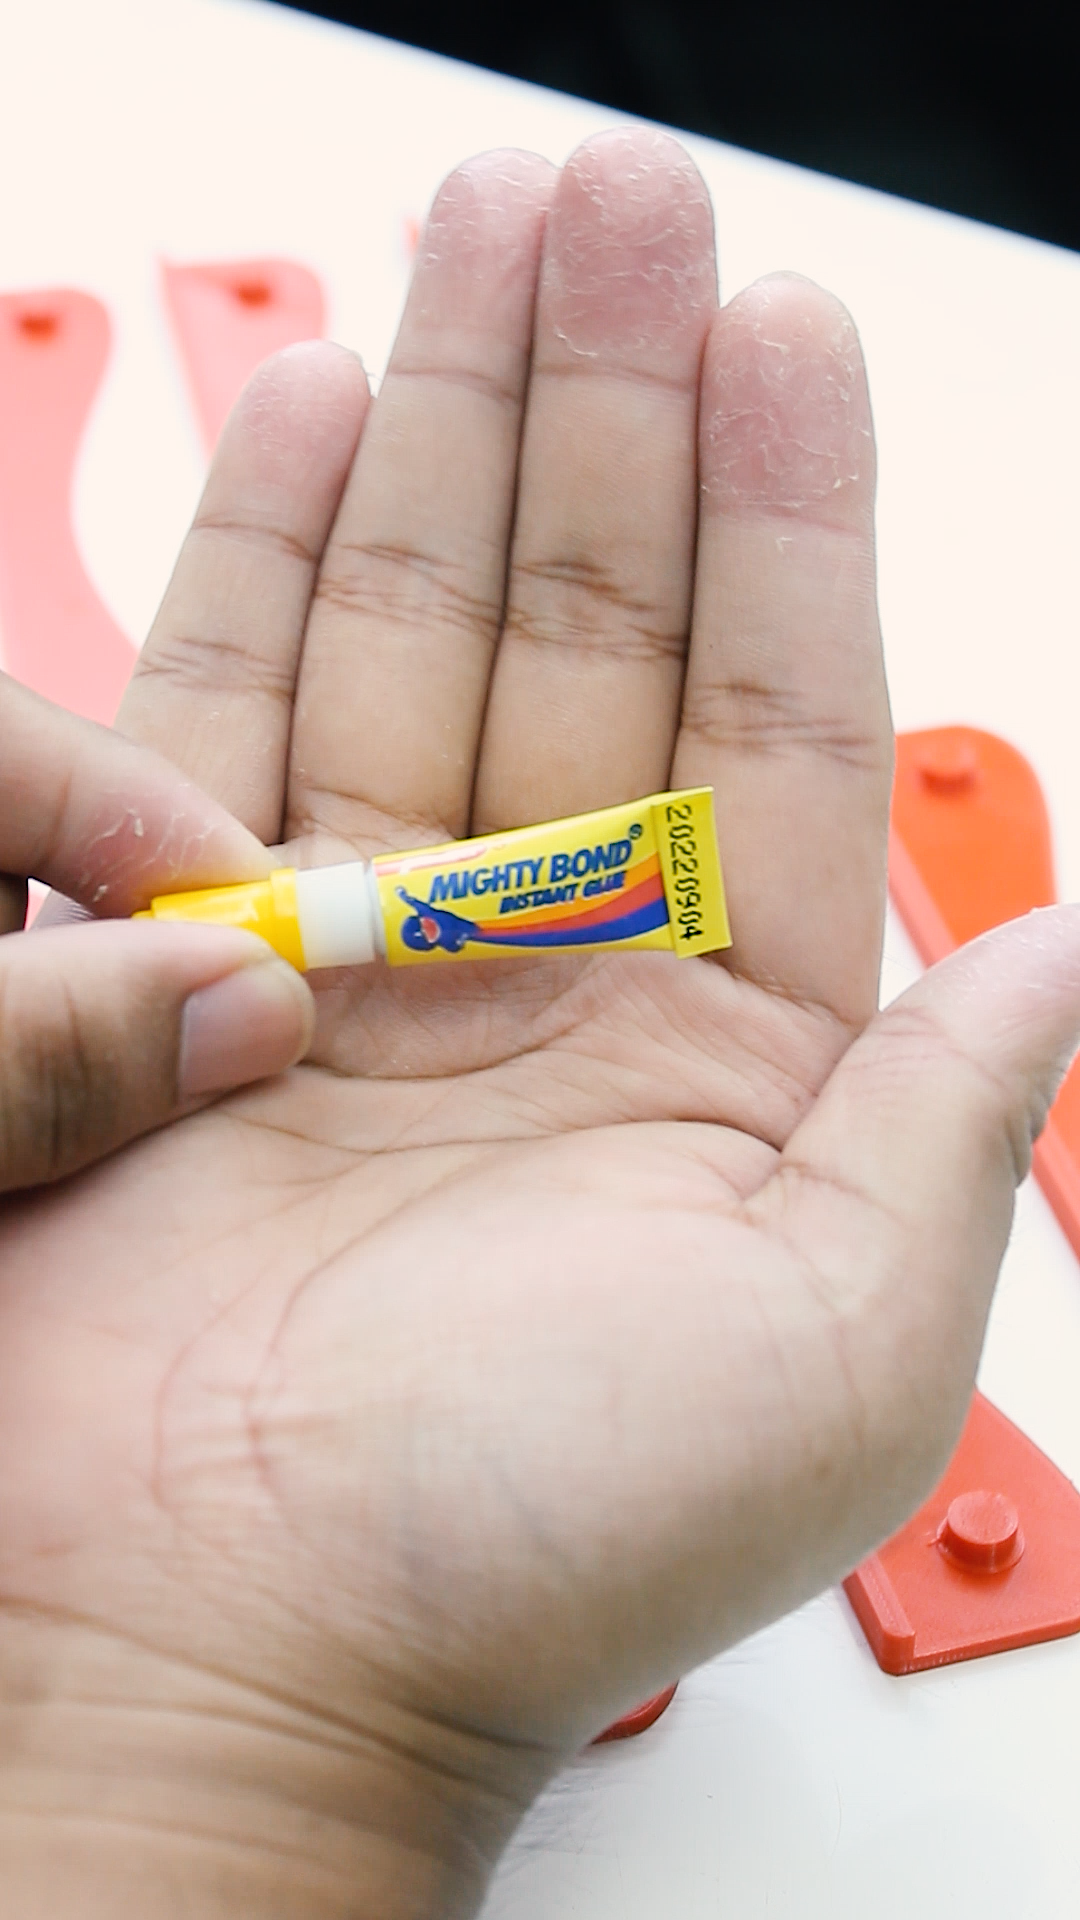

Let's start with the things you will need: a PTFE tube, pneumatic fittings, silica gel, a 608 bearing, silicone sealant, a mini LCD humidity and thermometer meter, adhesive, a container box, and a 3D printer to print the 3D models.
3D Print Some Parts
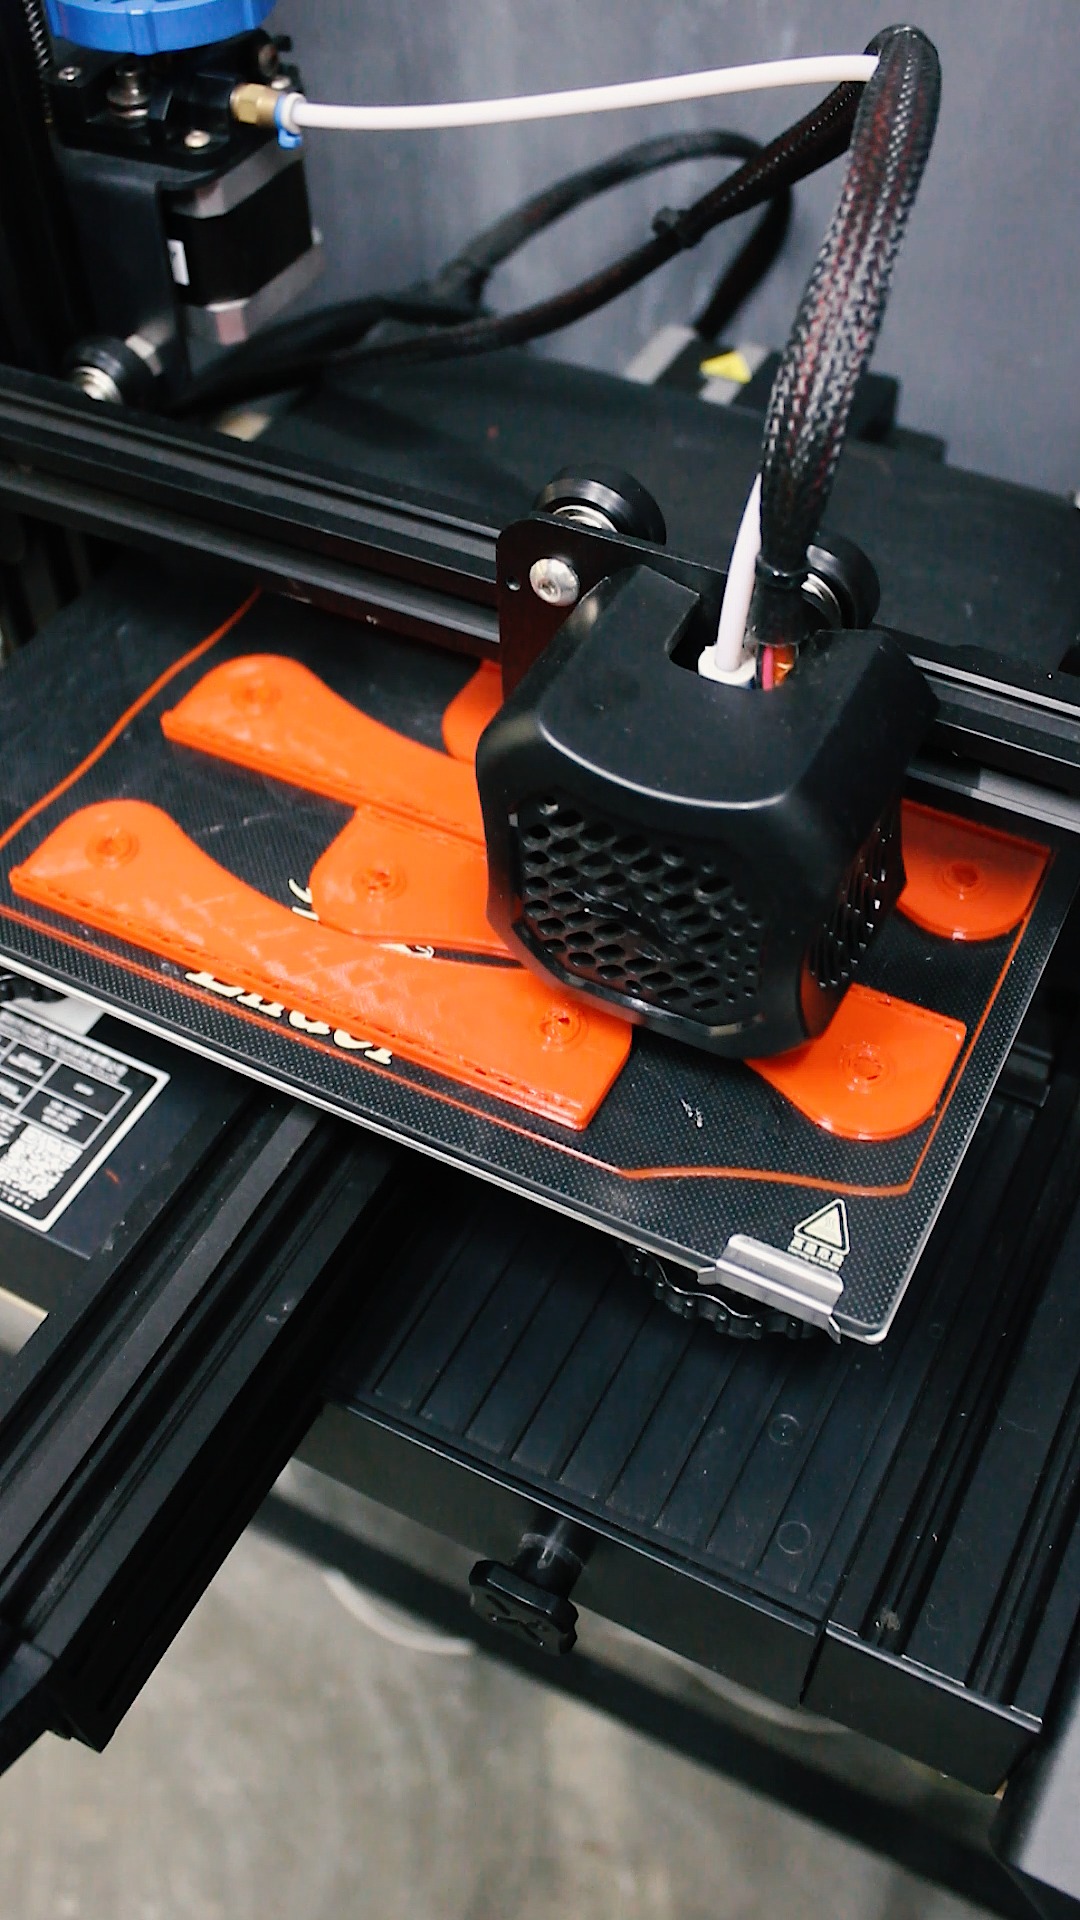
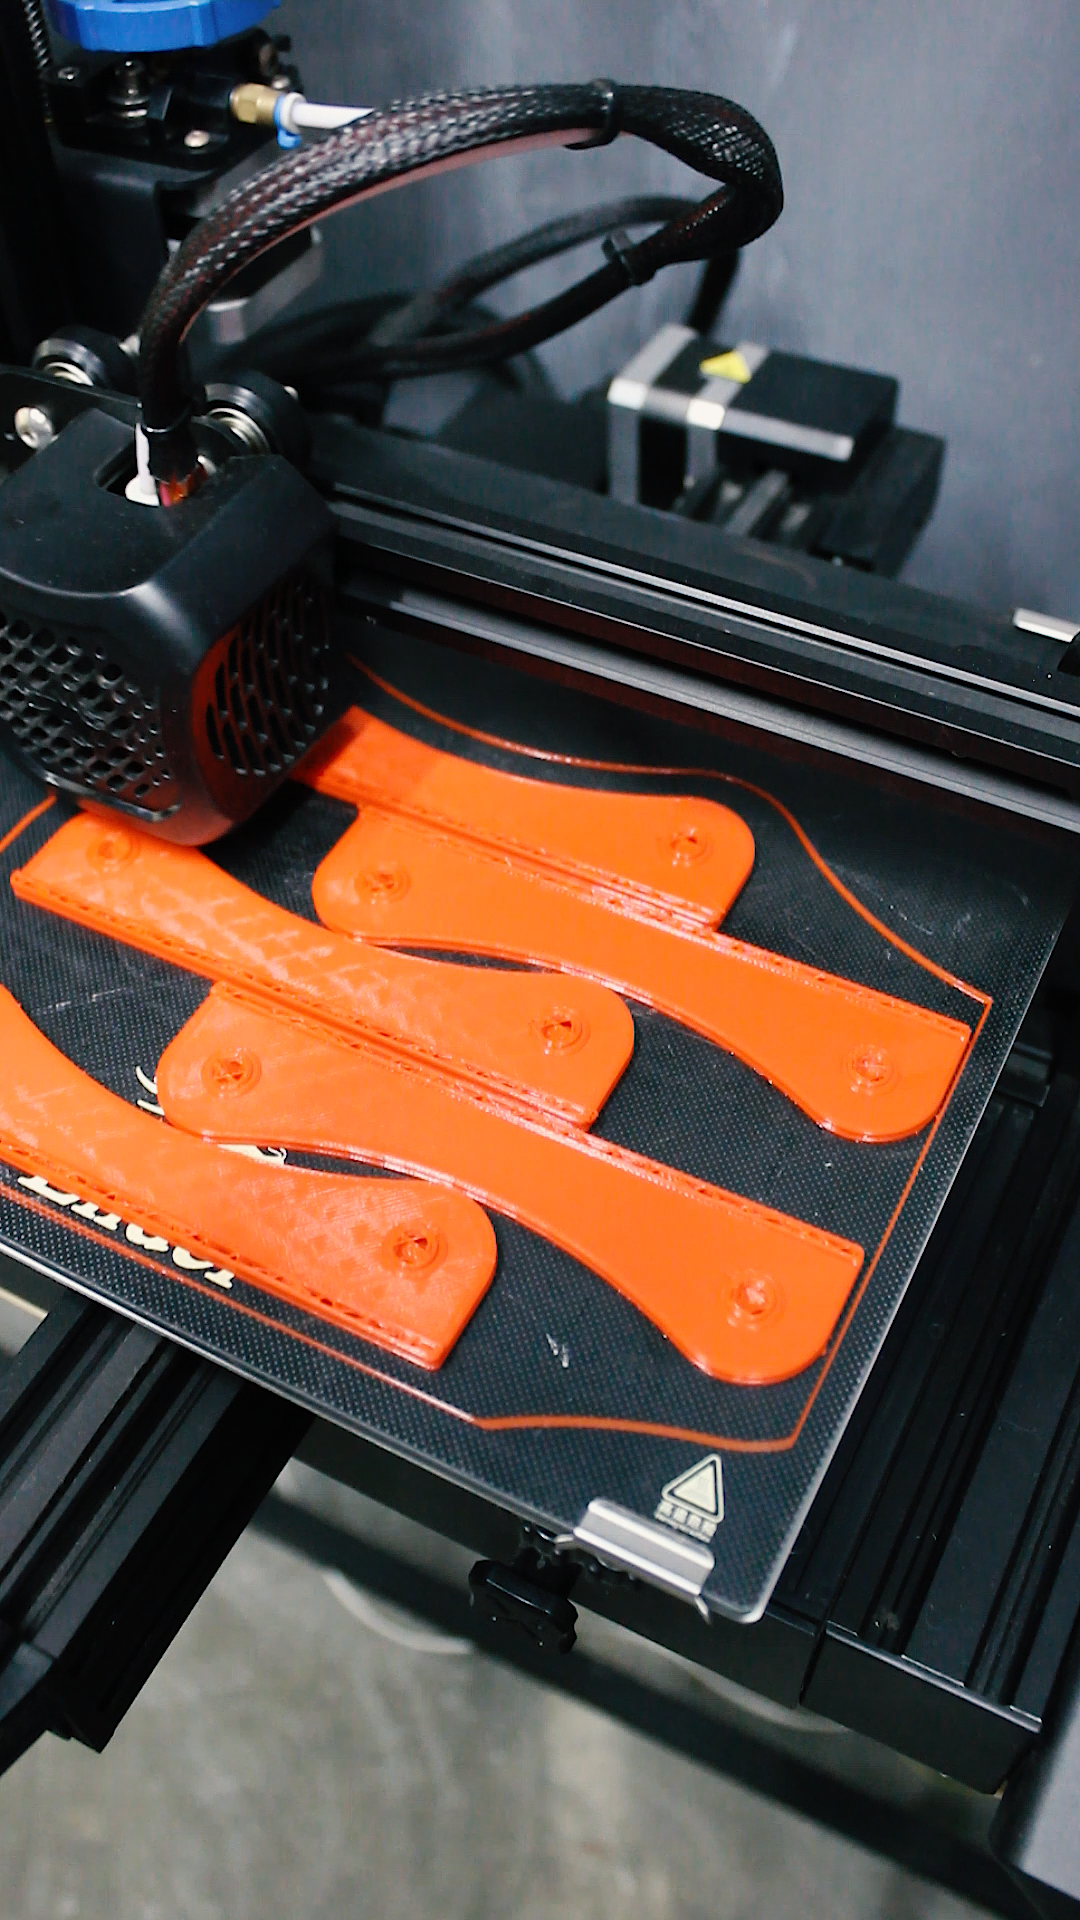
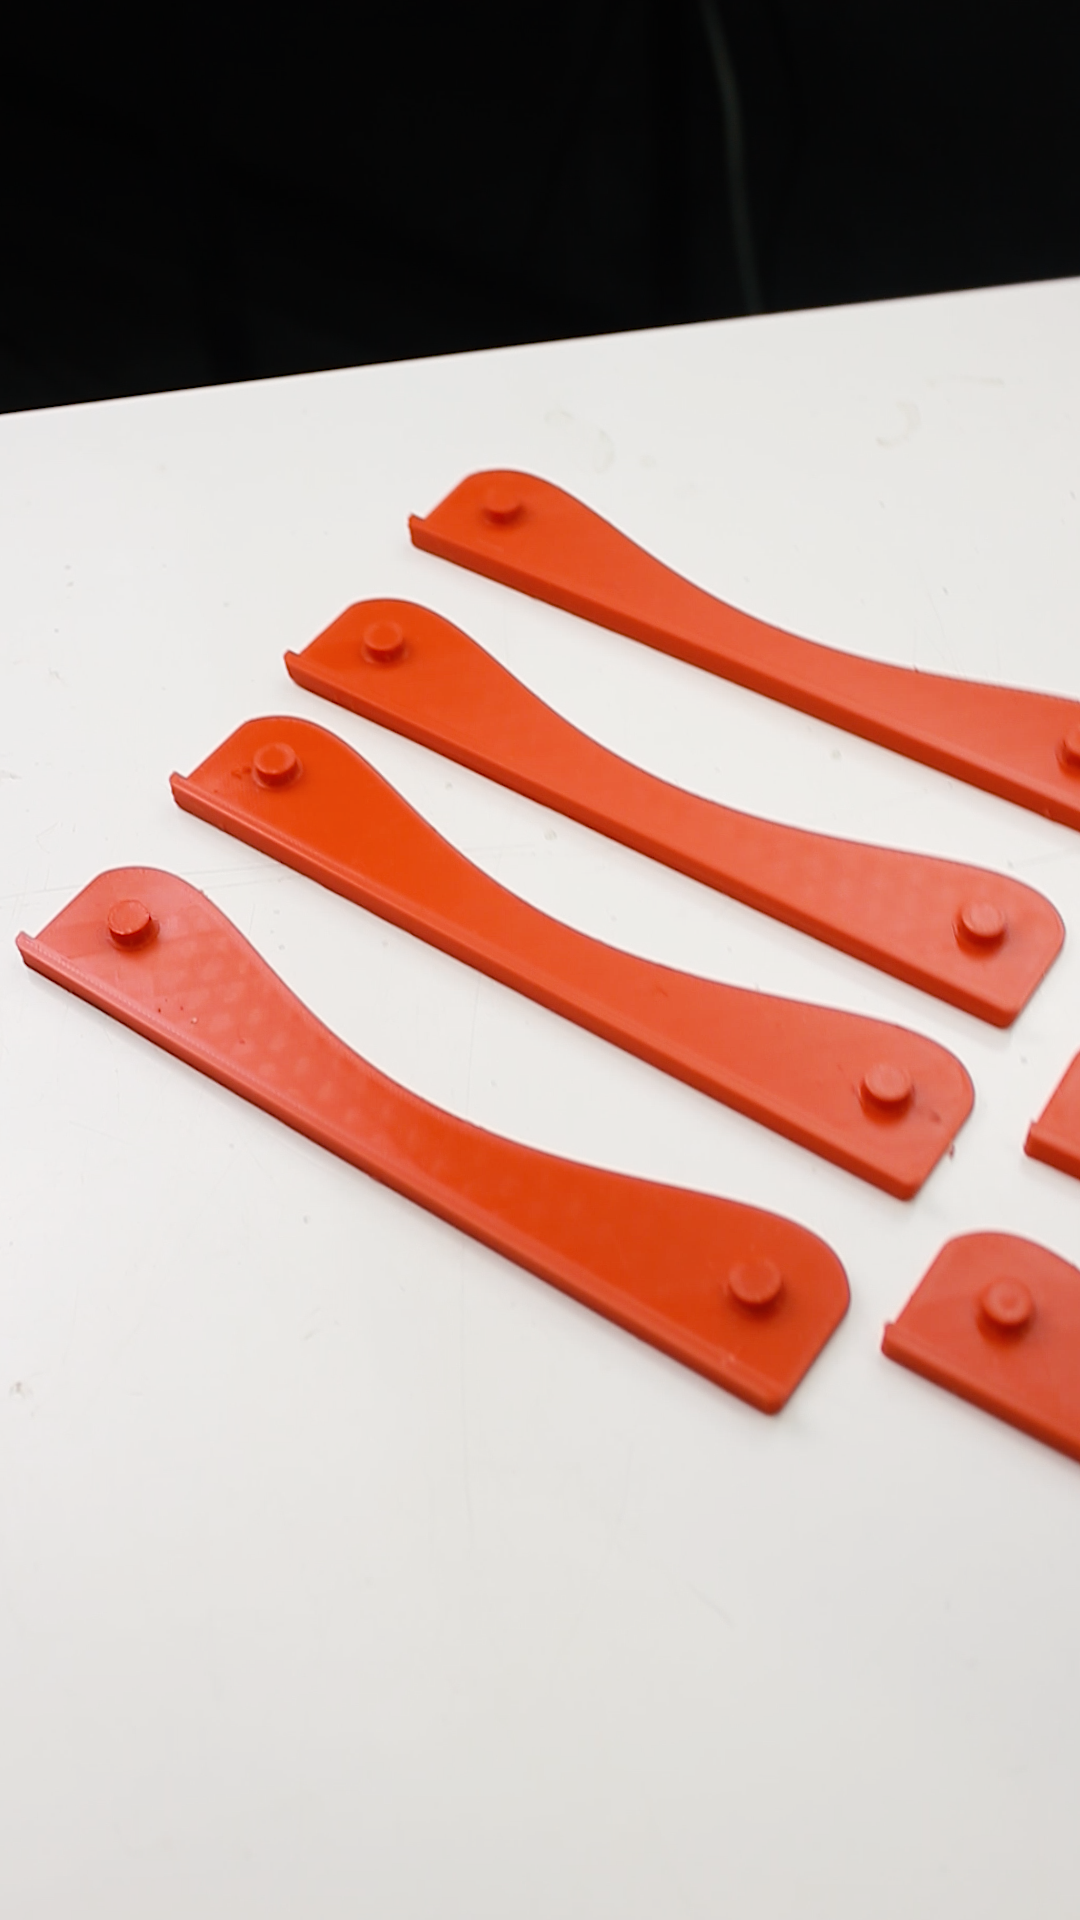
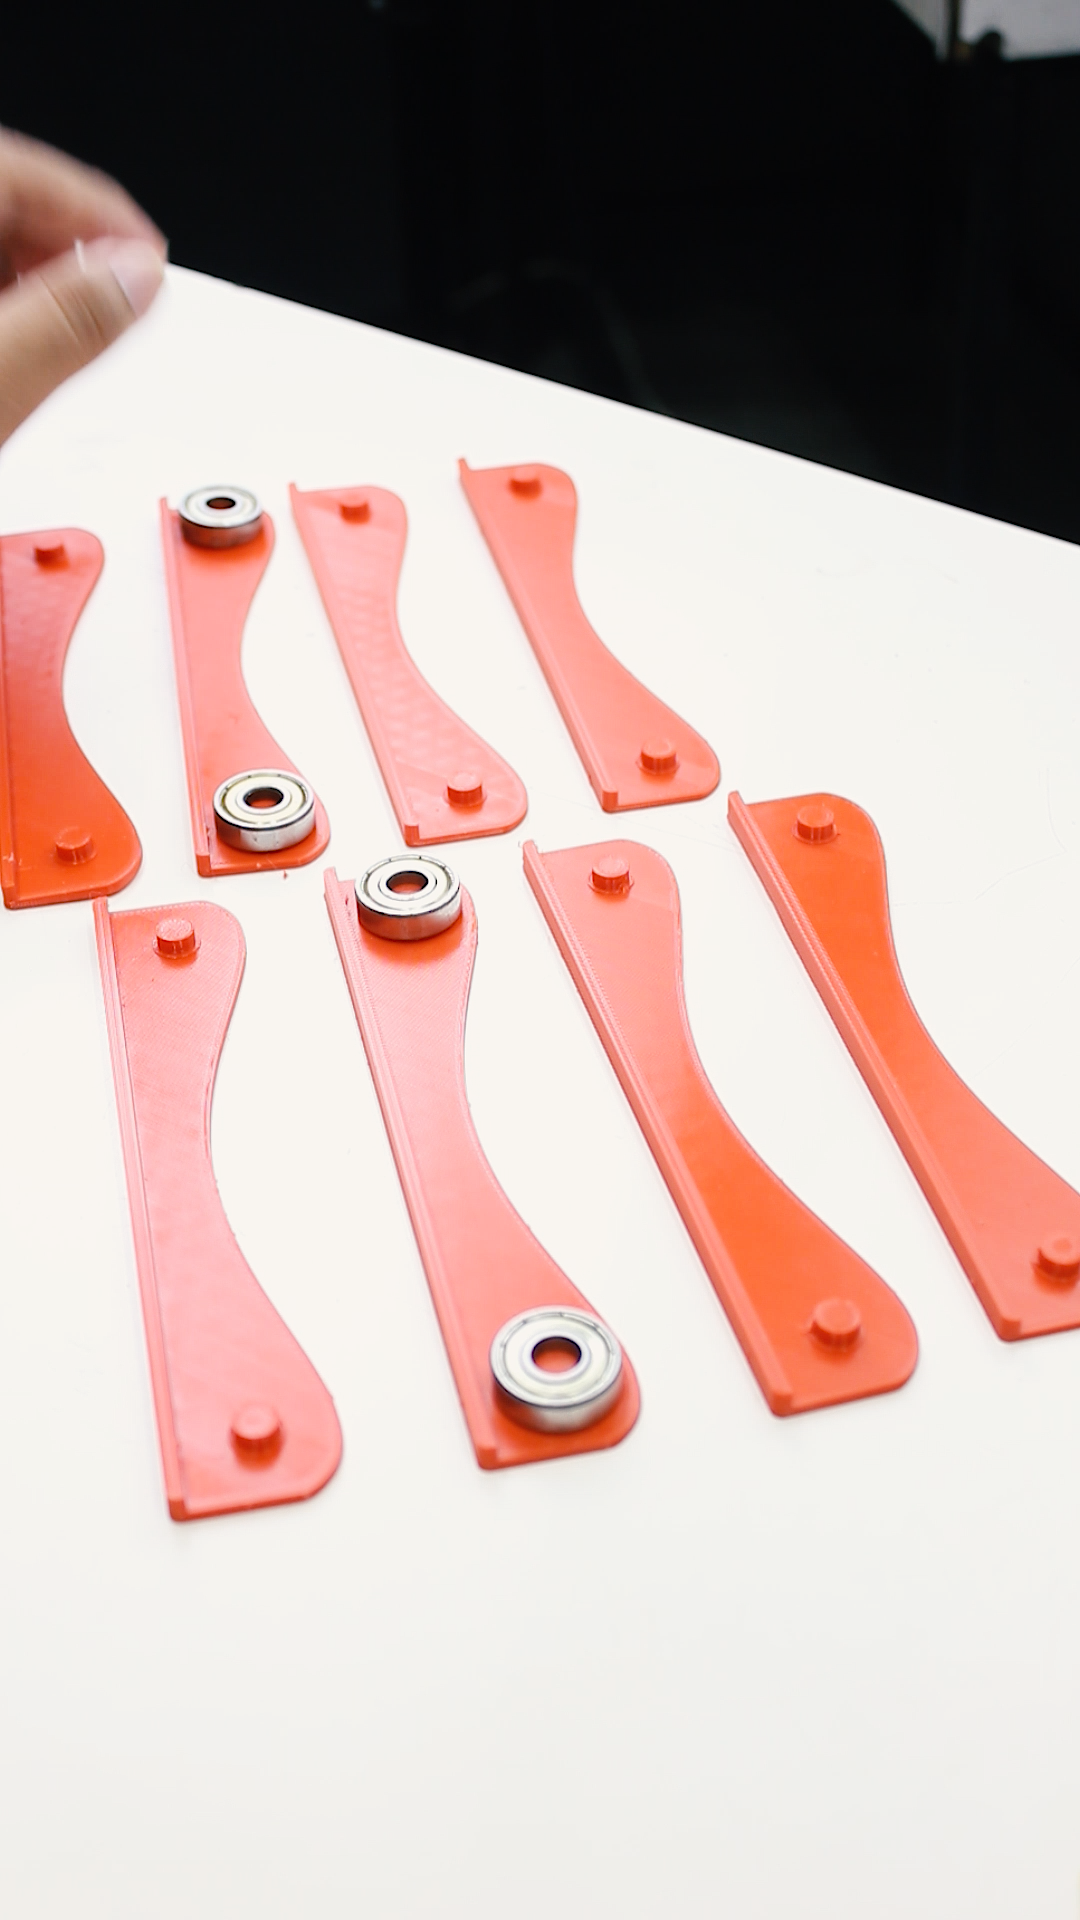
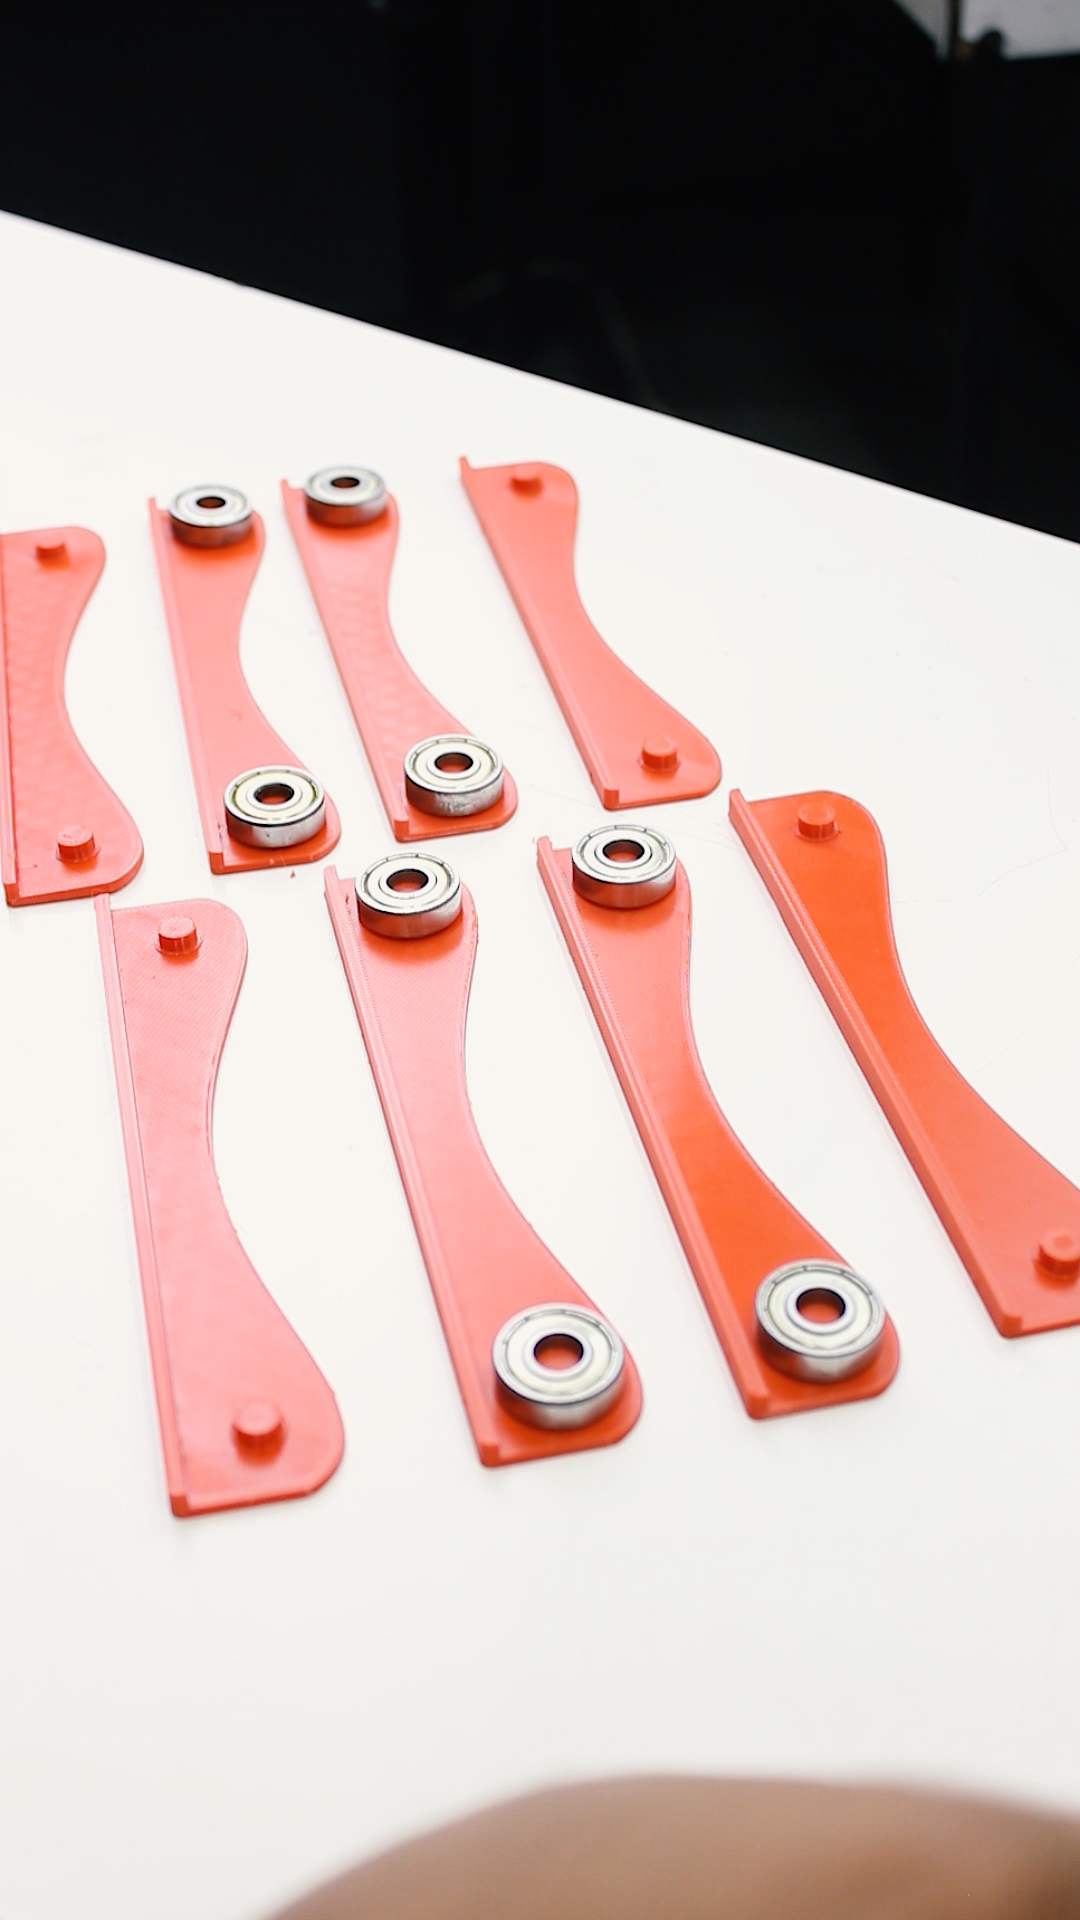
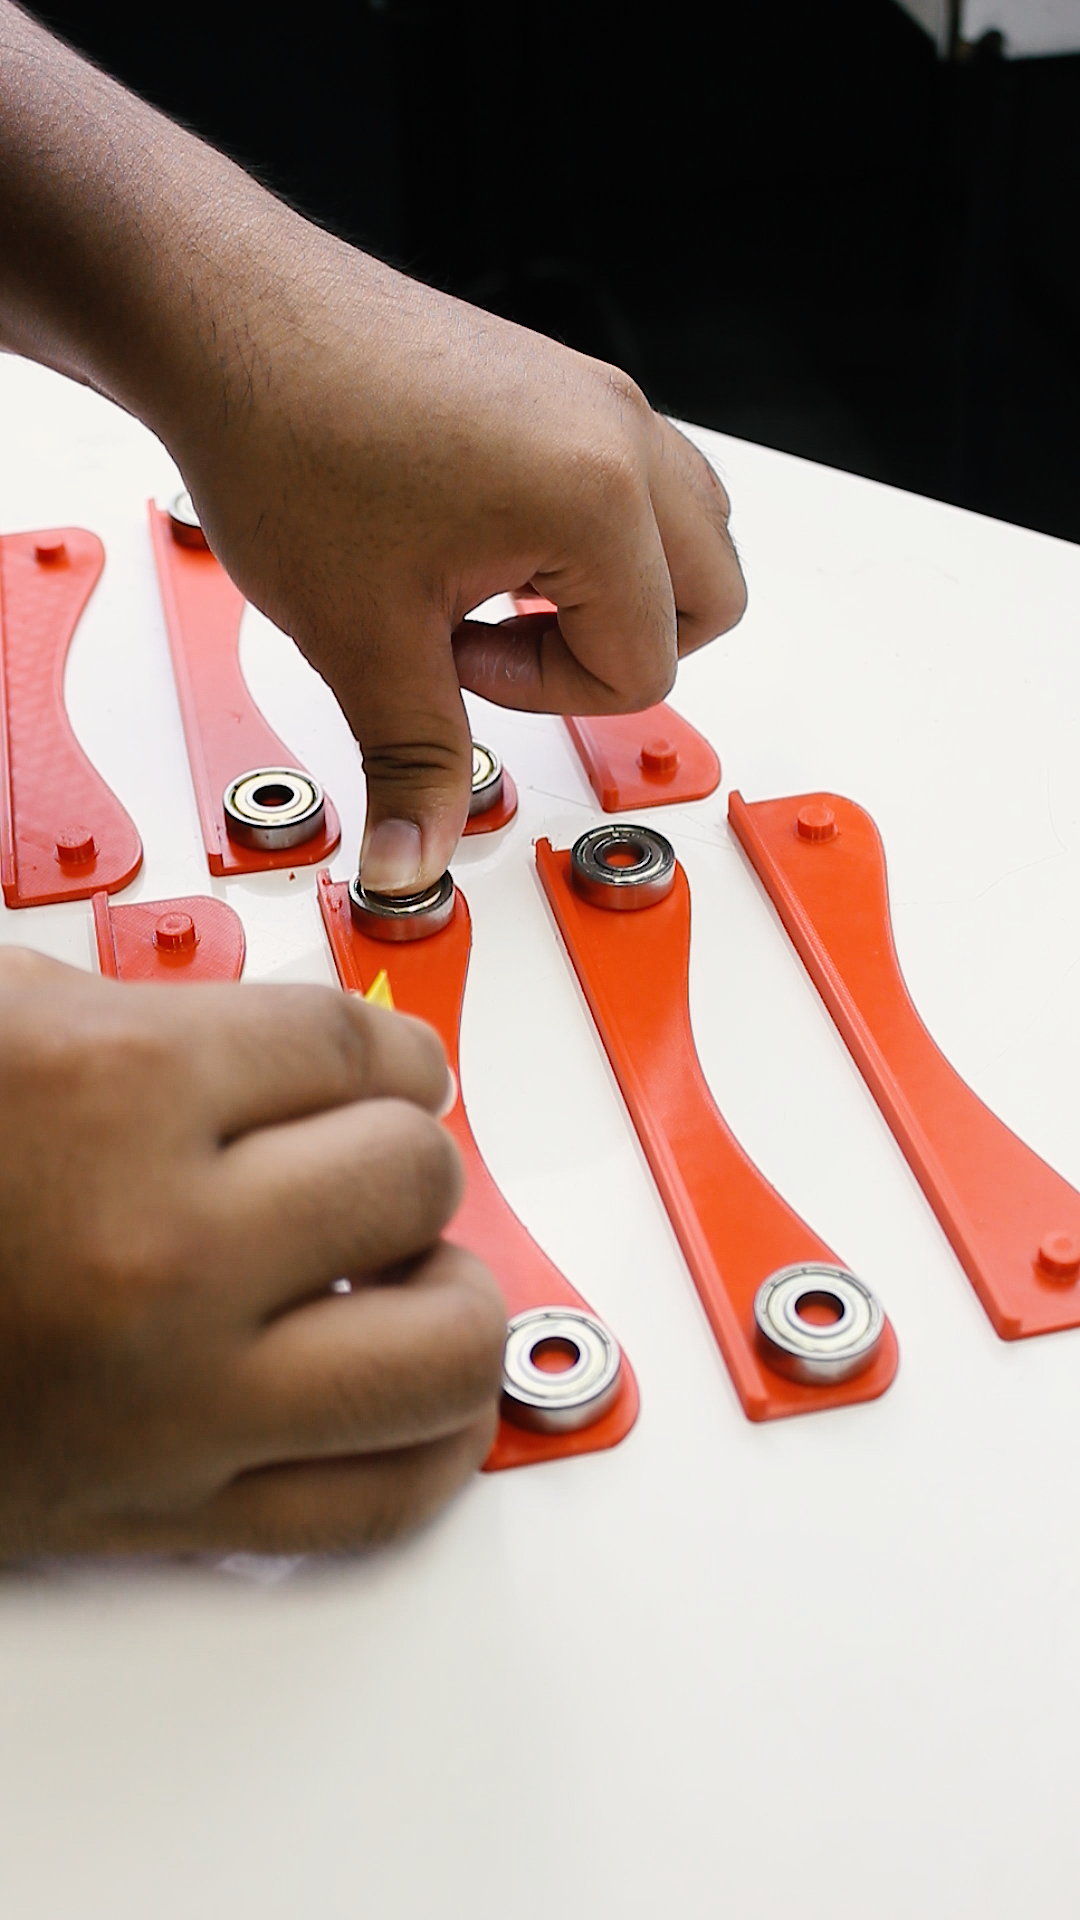
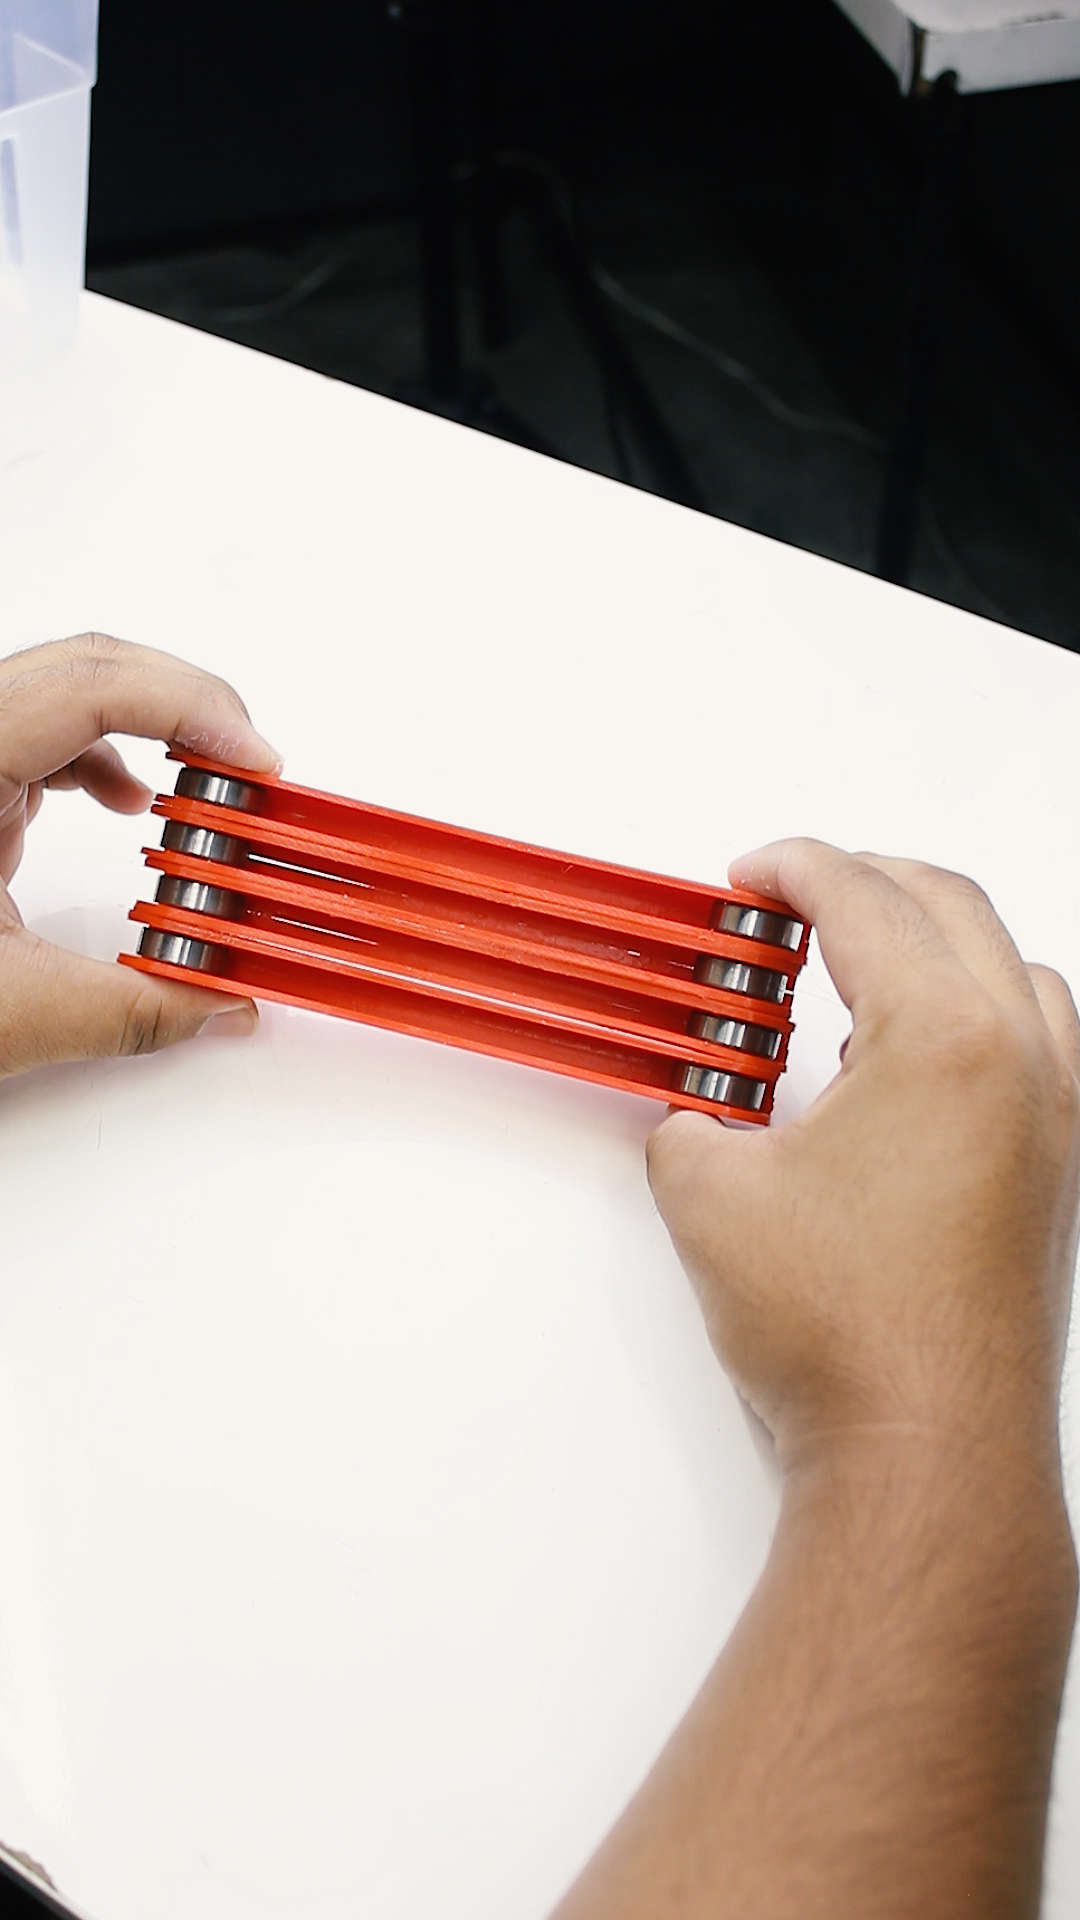
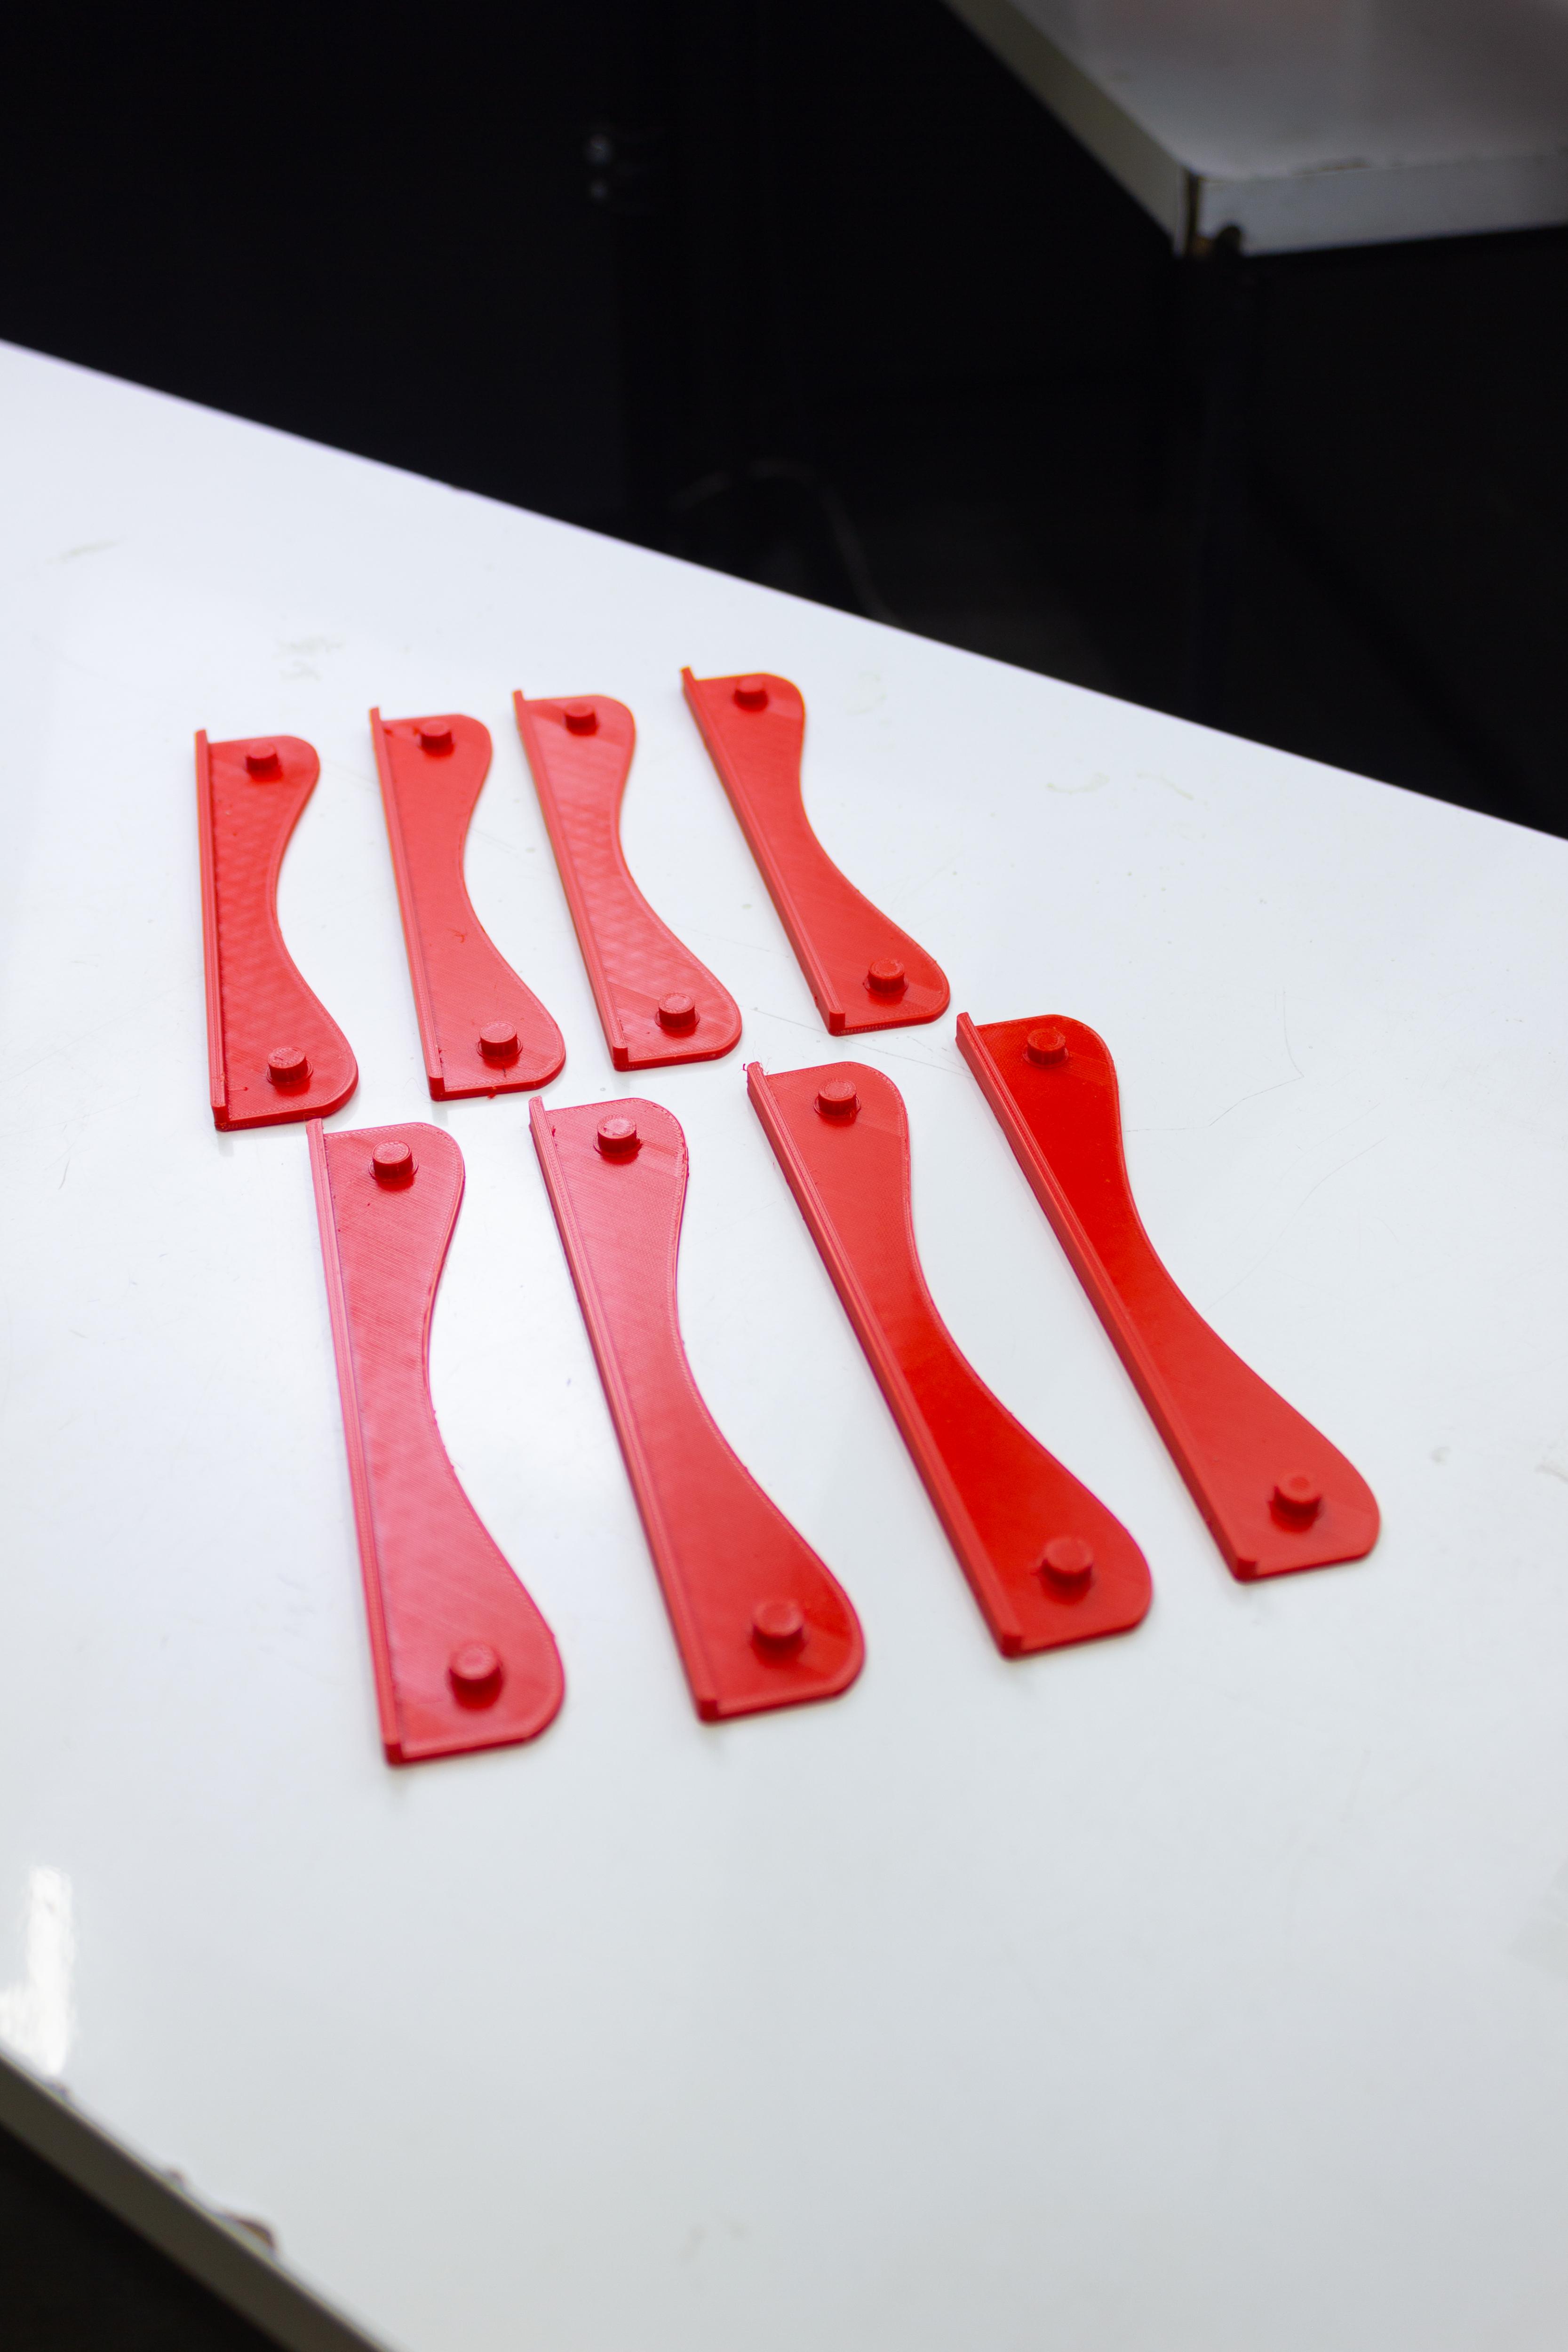
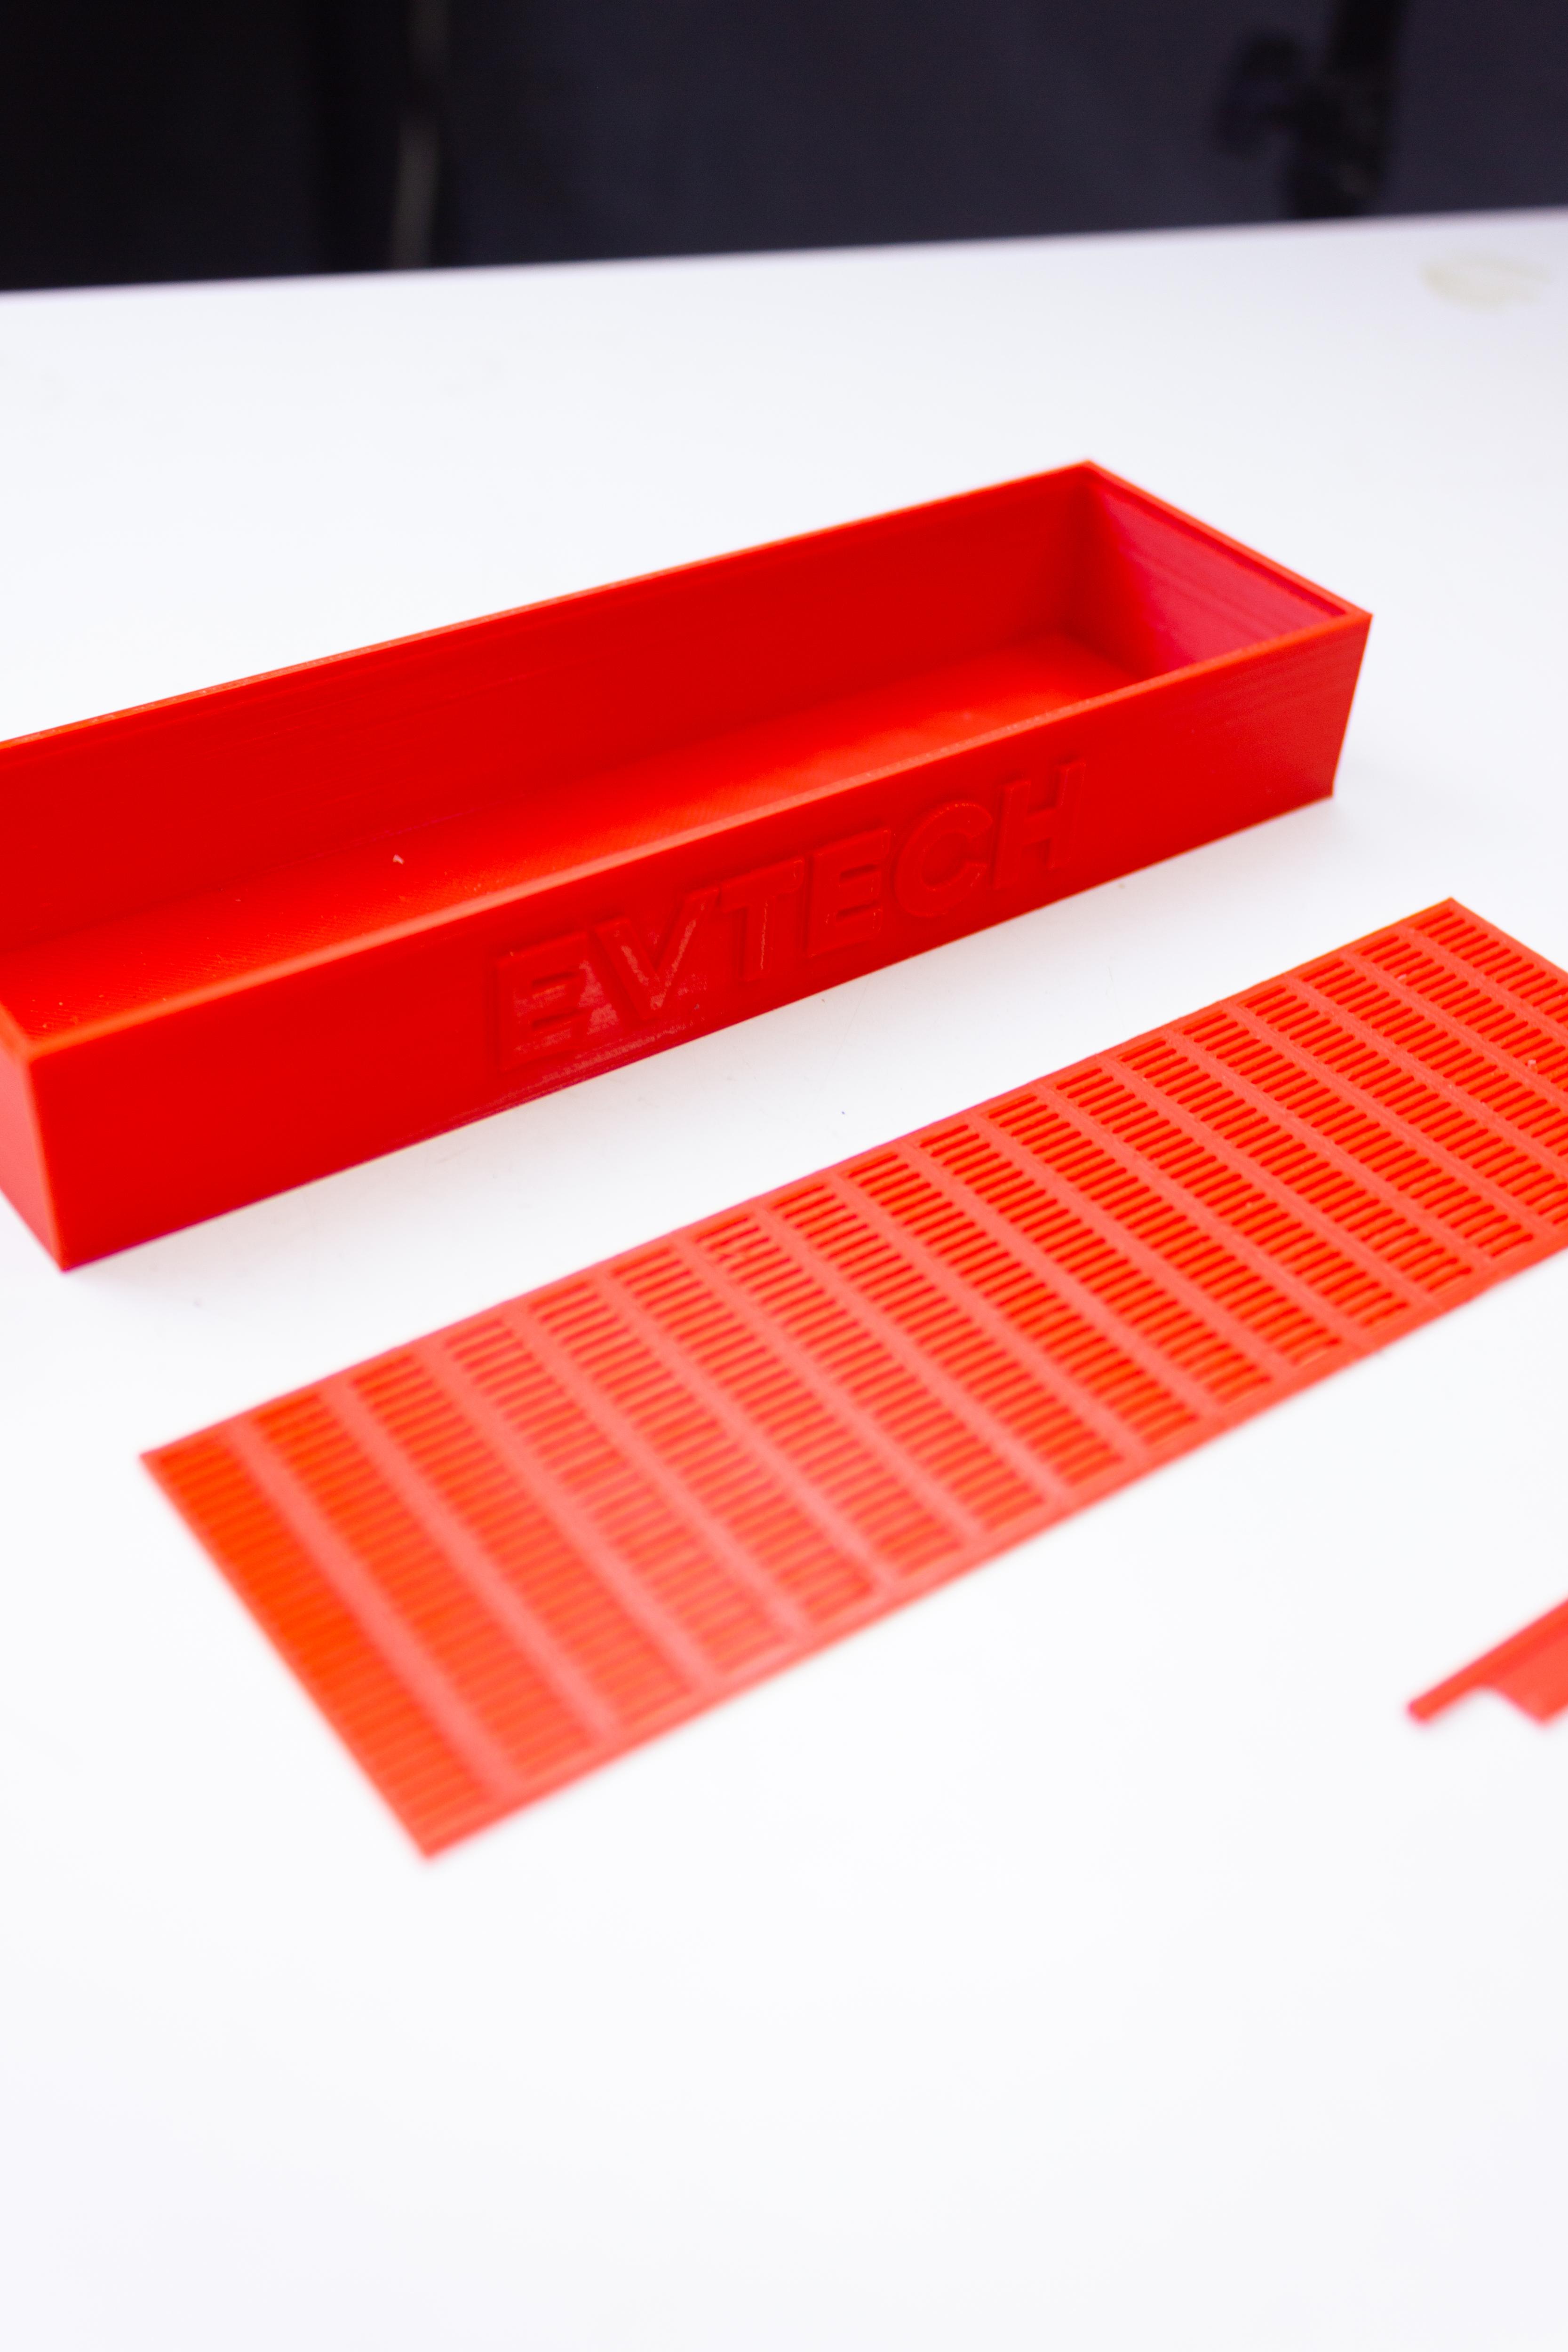
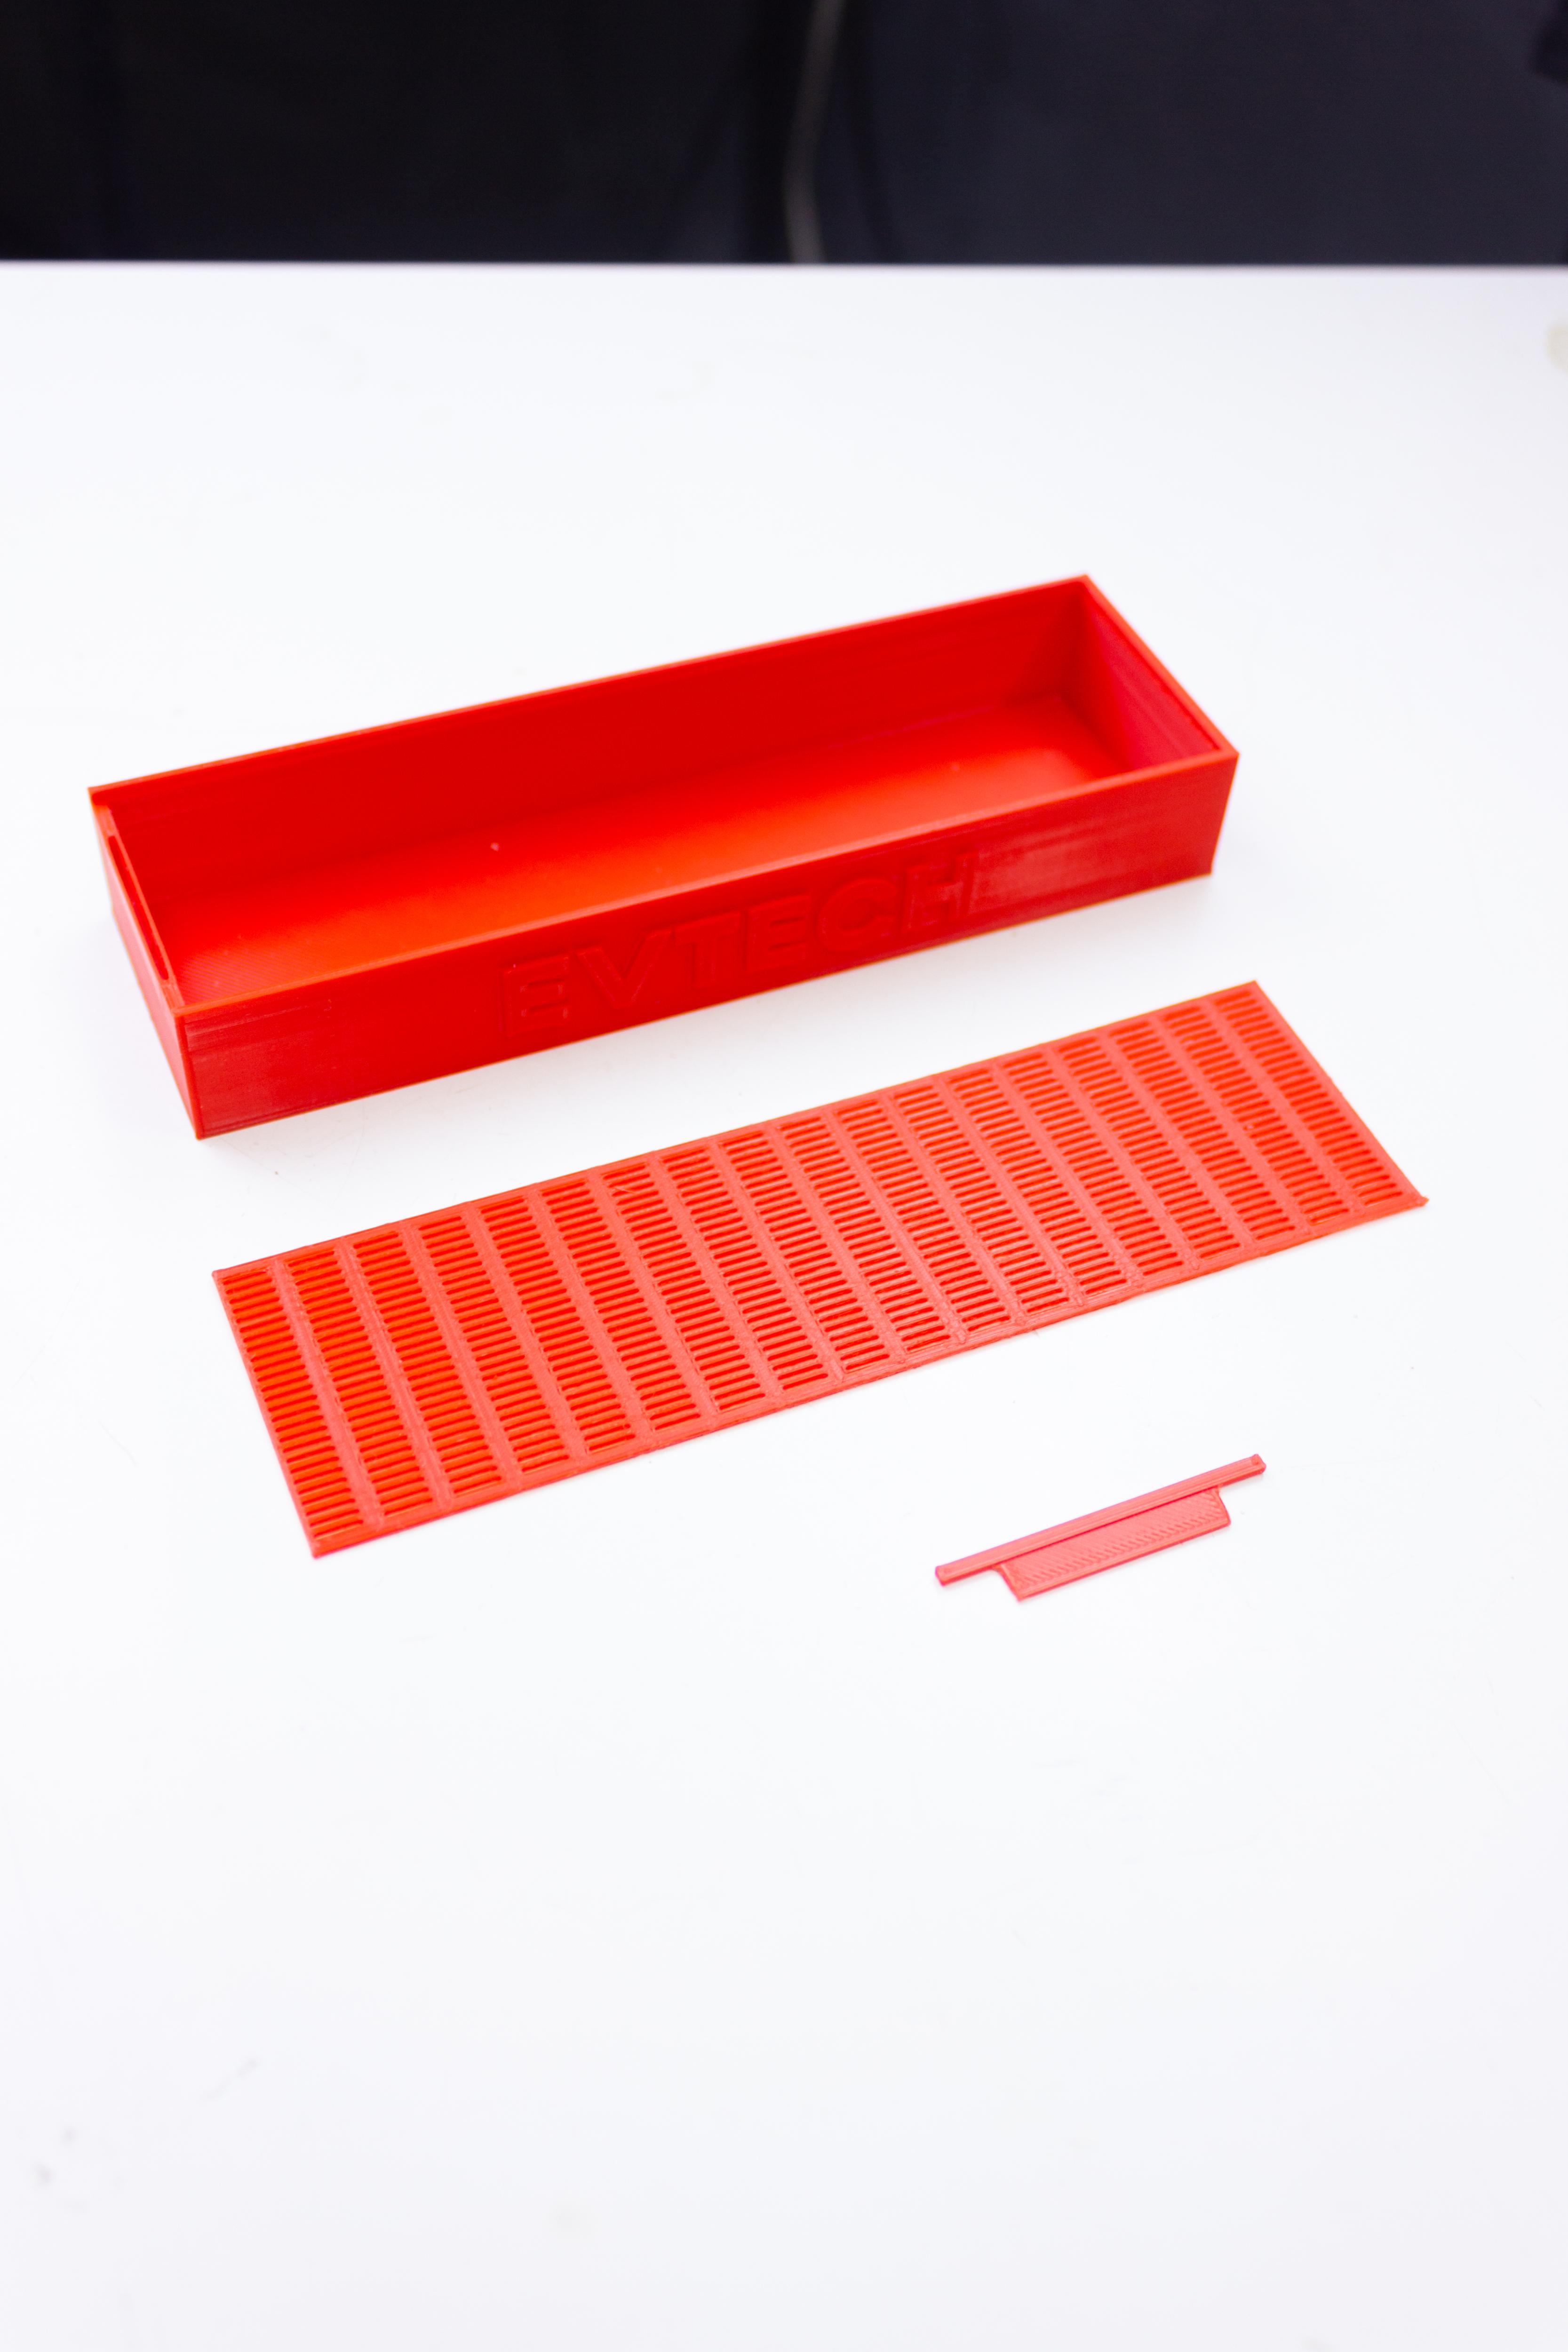
The first thing we need to do is to print this spool holder that is inspired from our generous friend on Thingiverse! Followed by printing the silica gel enclosure.
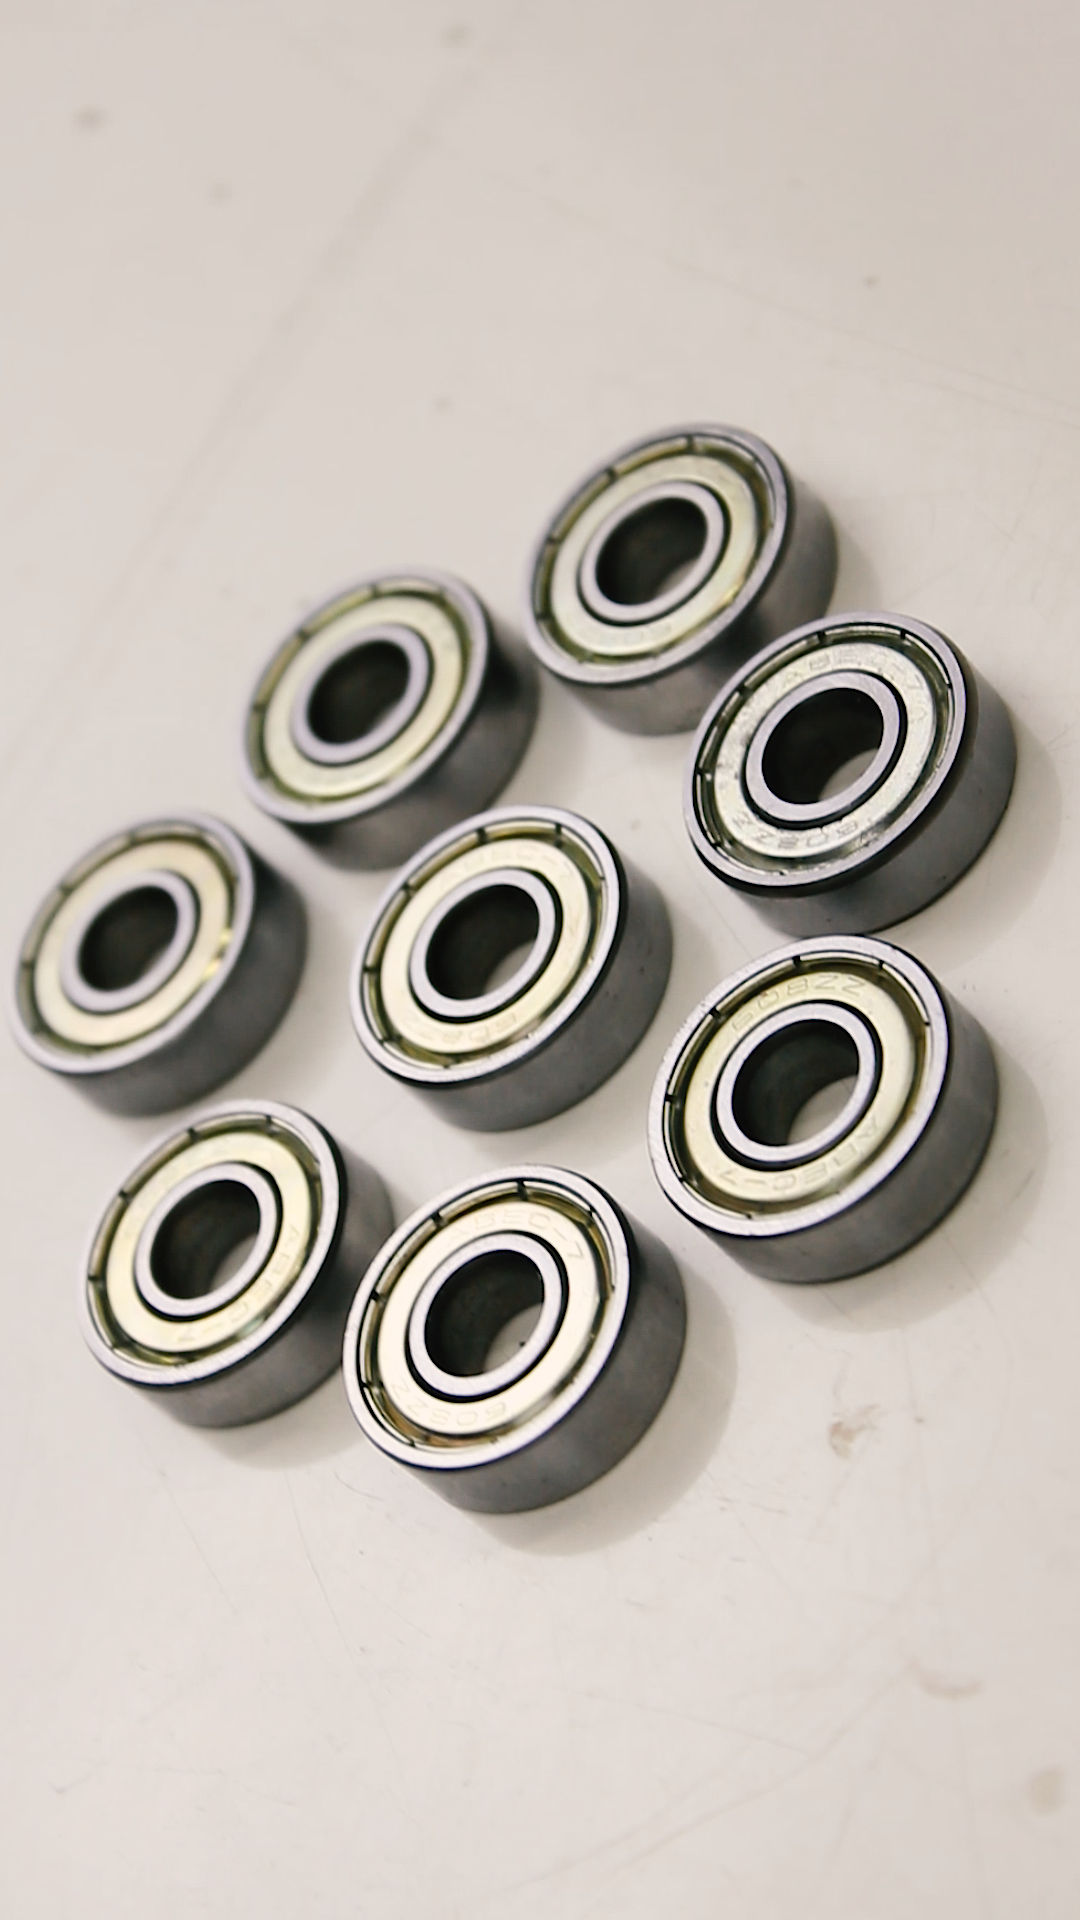
After 3D printing the spool holder, we should insert 2 pcs of 608 bearing in each pair of spool holder. After that, using adhesive, we will assemble the spool holder like a sandwich (hmmm). Repeat this process to generate a total of 4 pairs of spool holders.
Thingiverse Link: ( https://bit.ly/3SVOrvY )
3D Model of Modified Spool Holder
3D Model of Silica Gel Enclosure
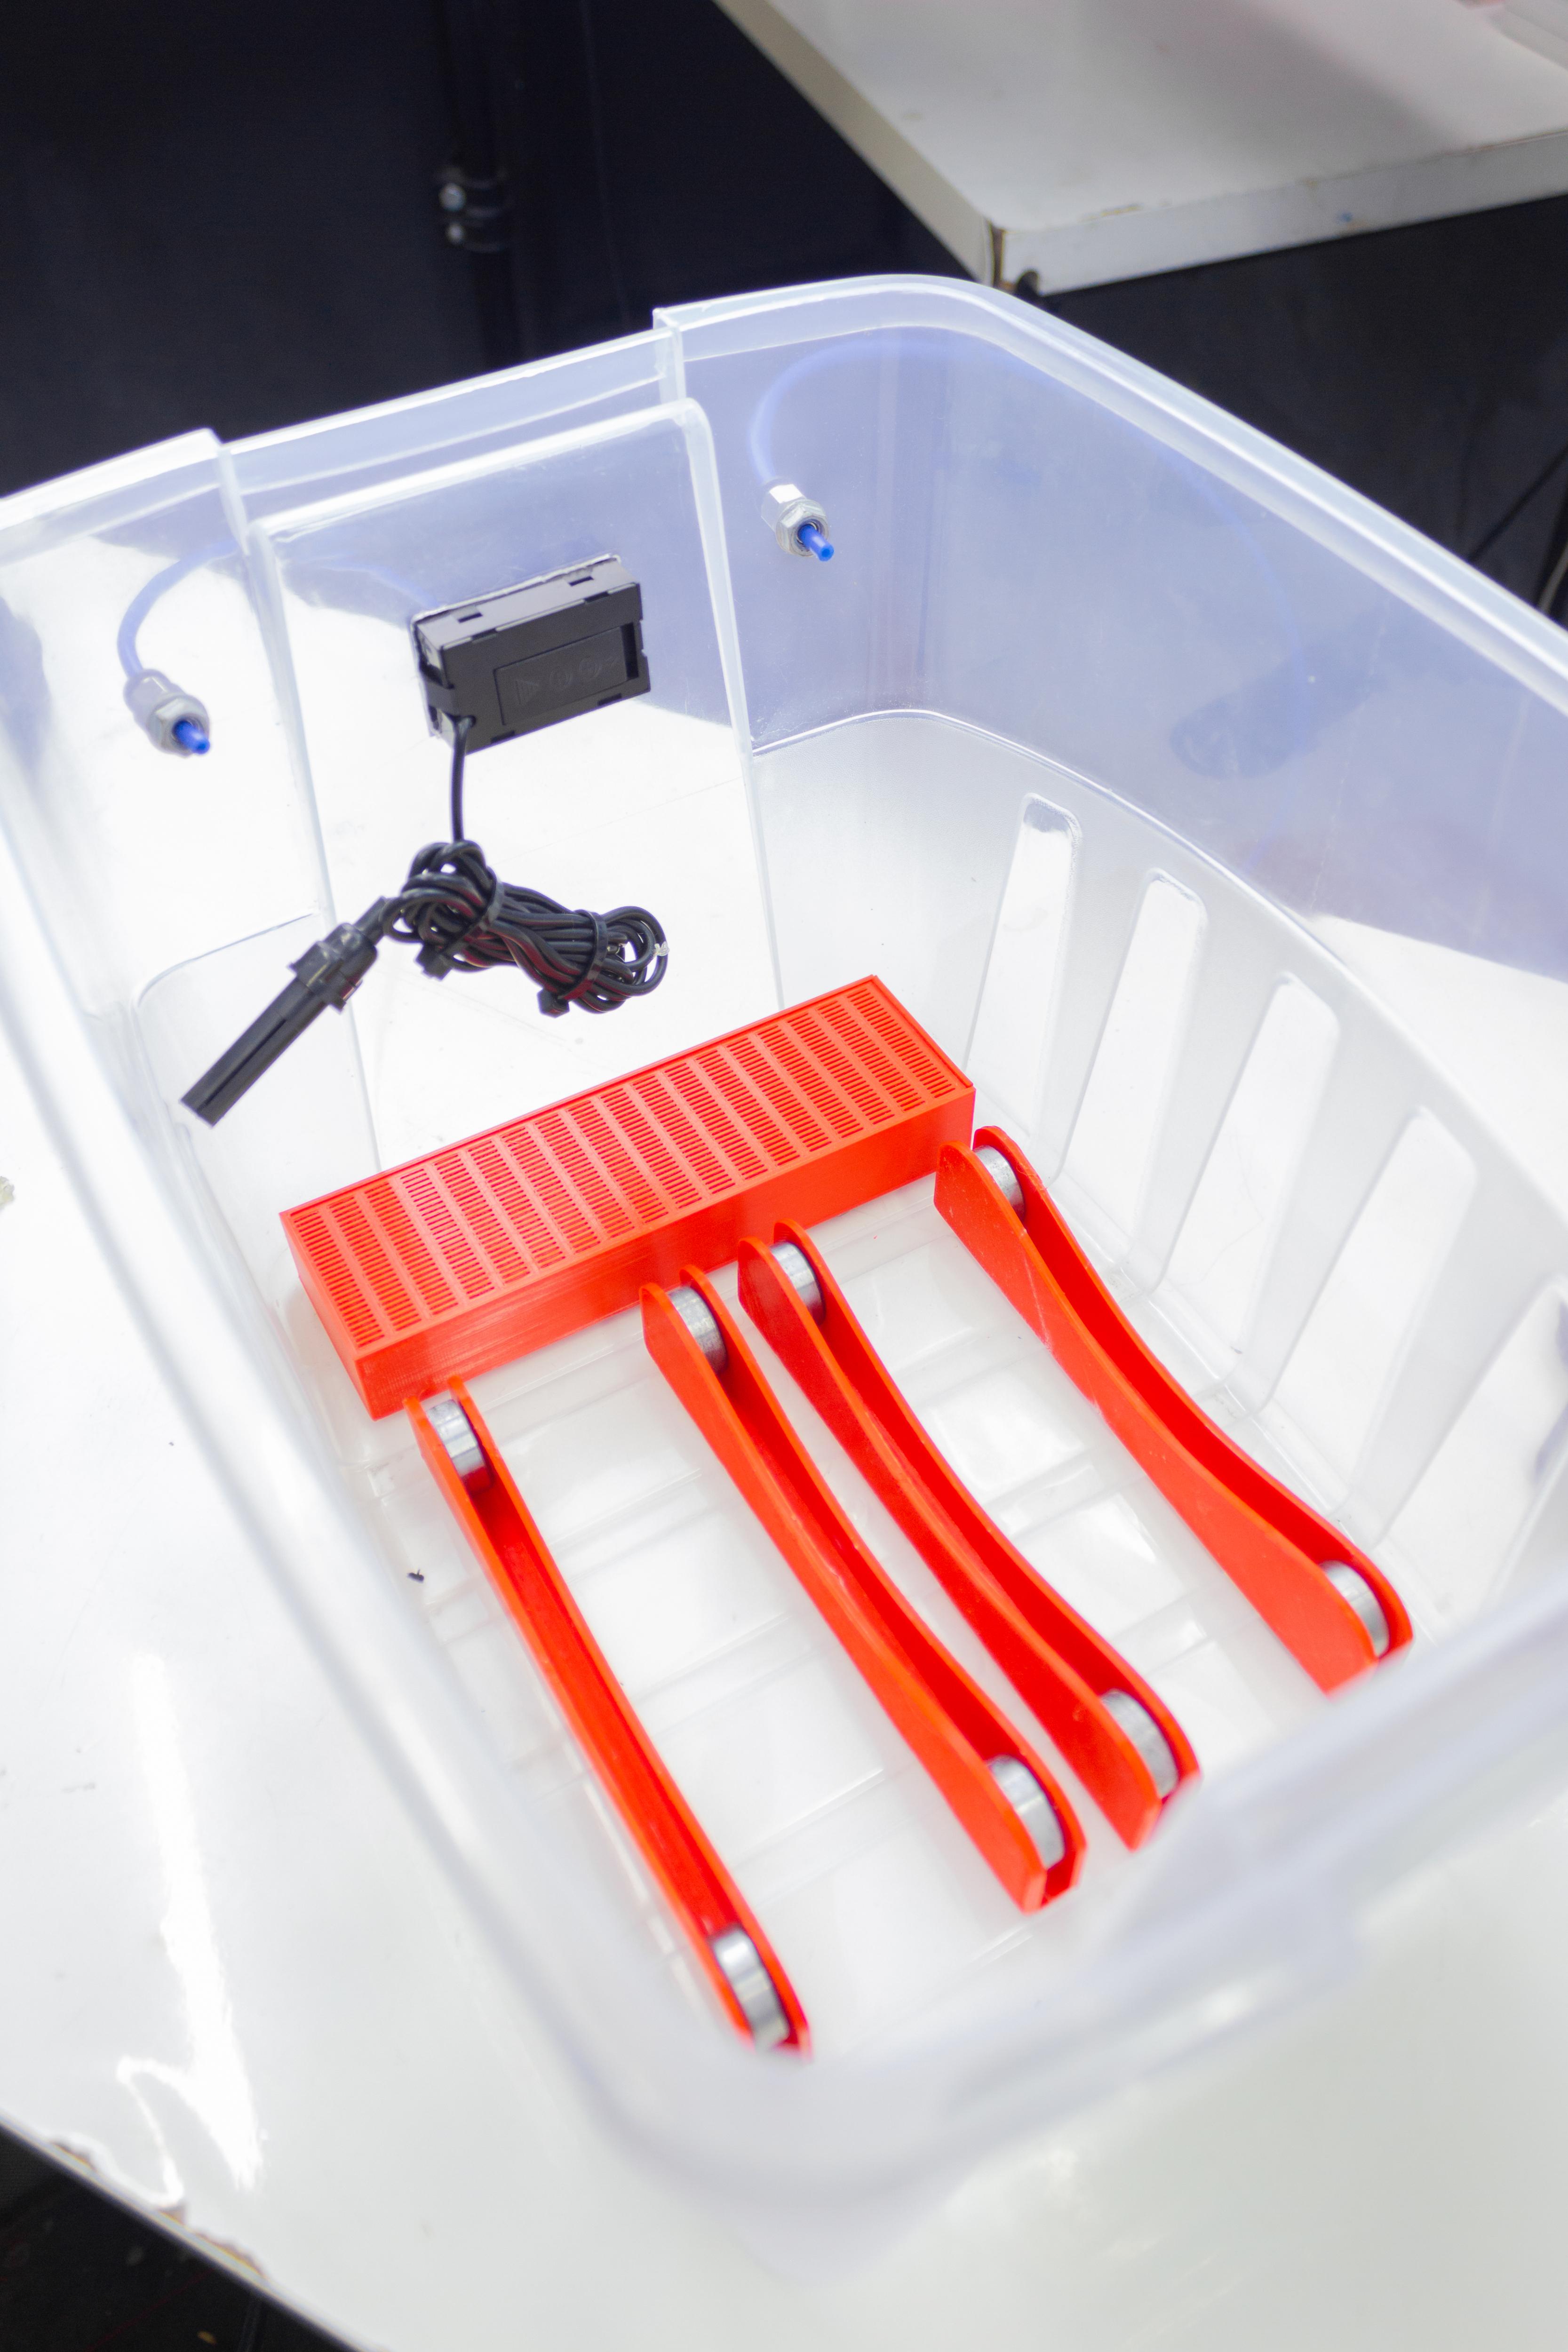
Installing Mini LCD and Pneumatic Fittings
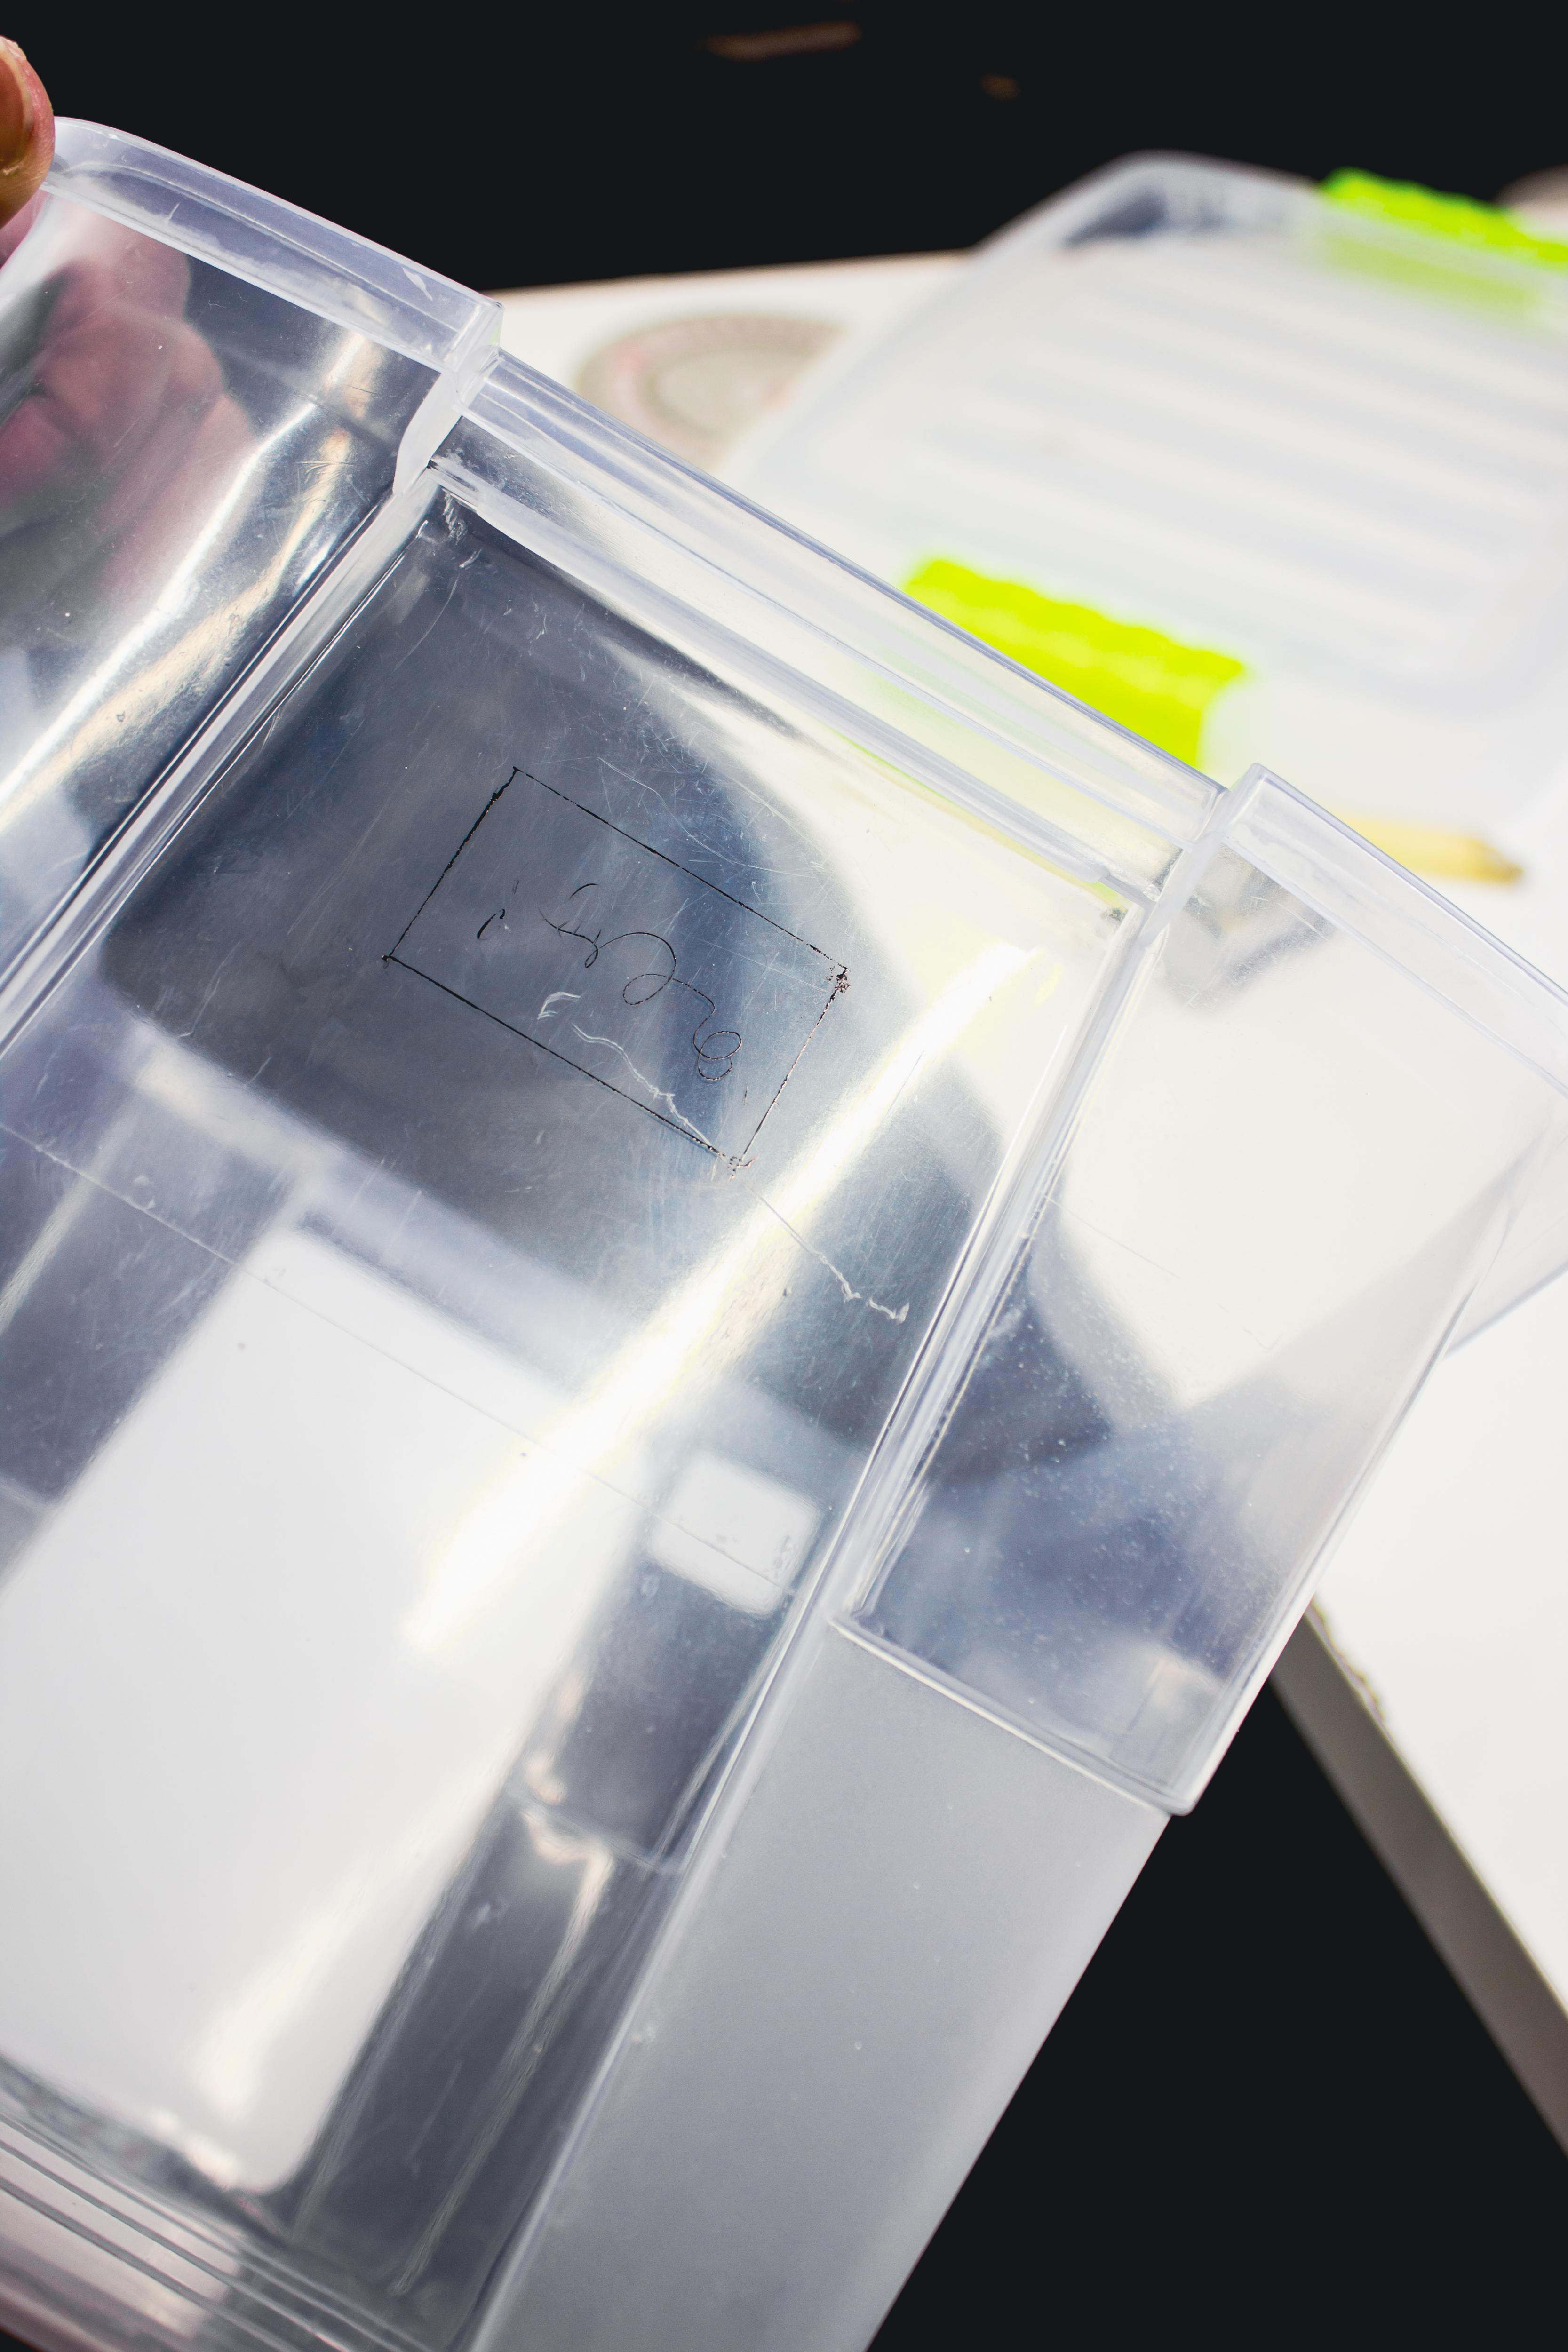
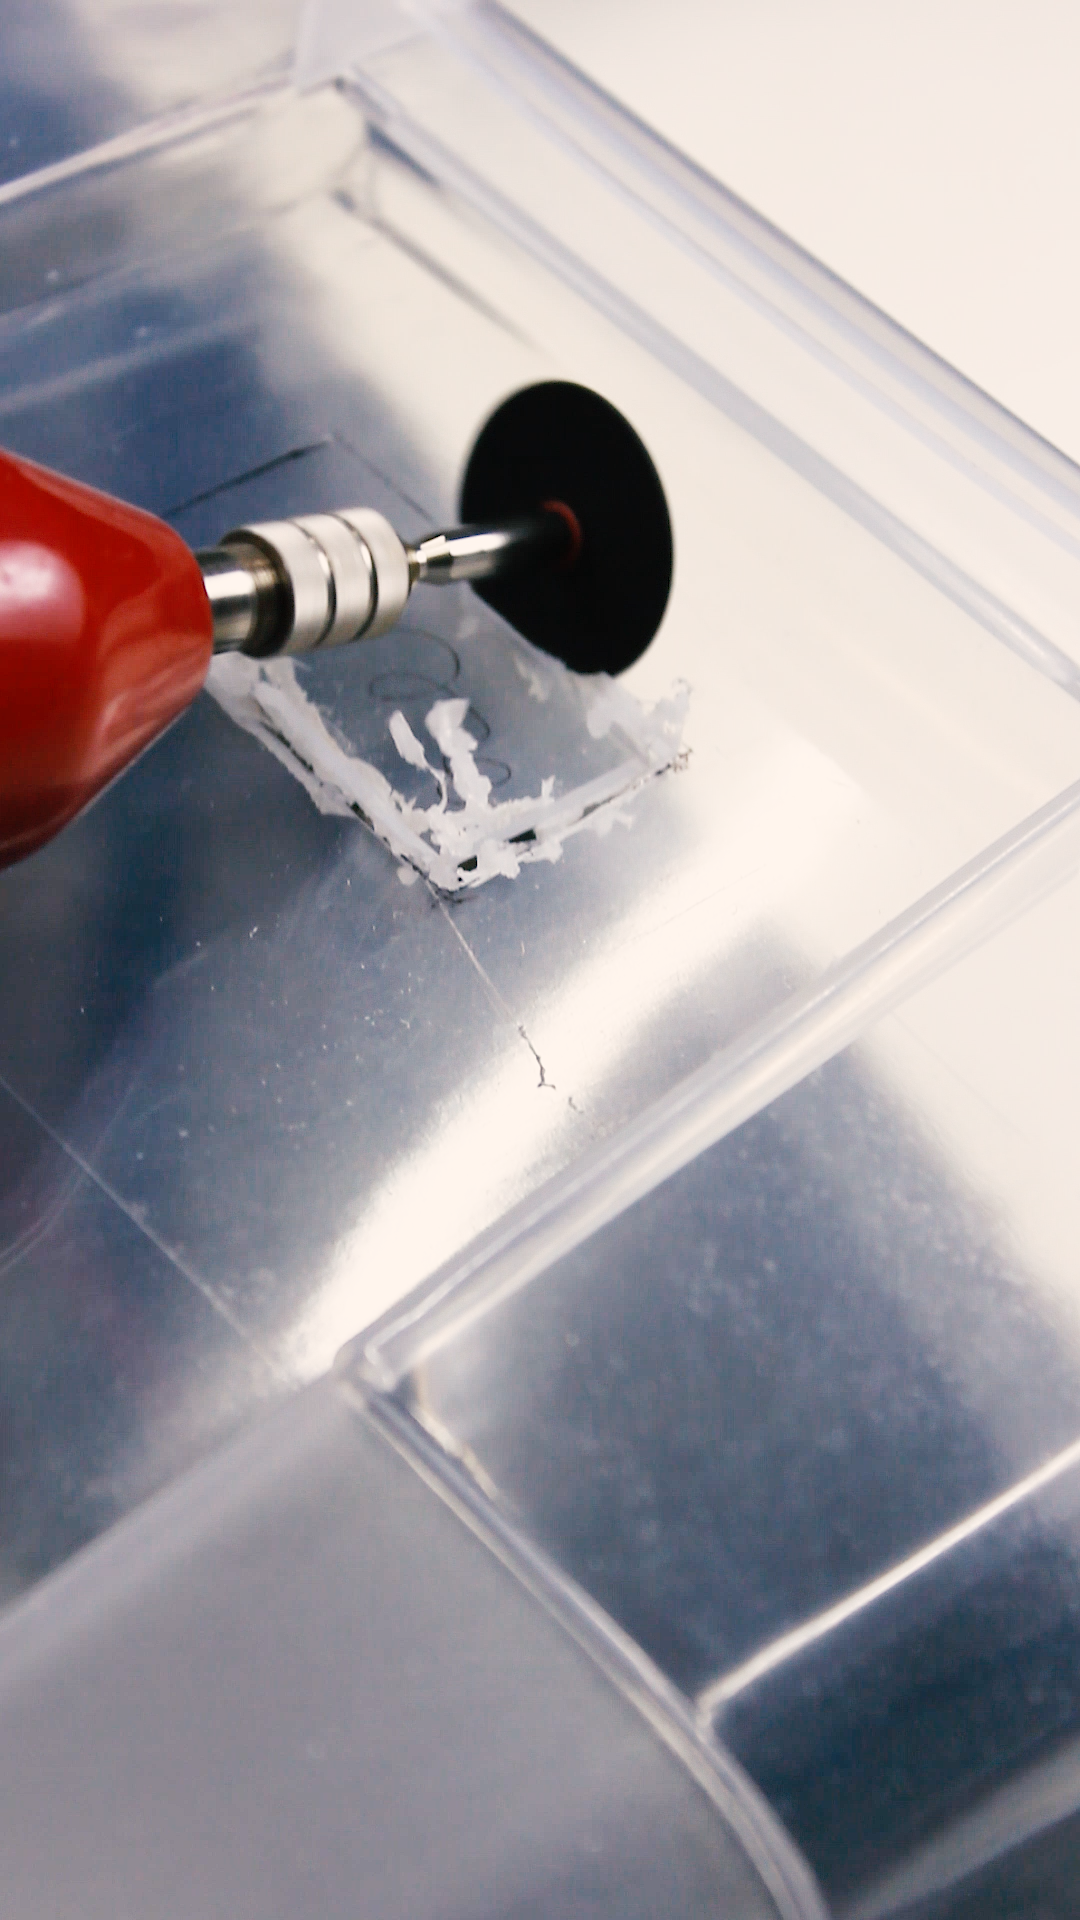
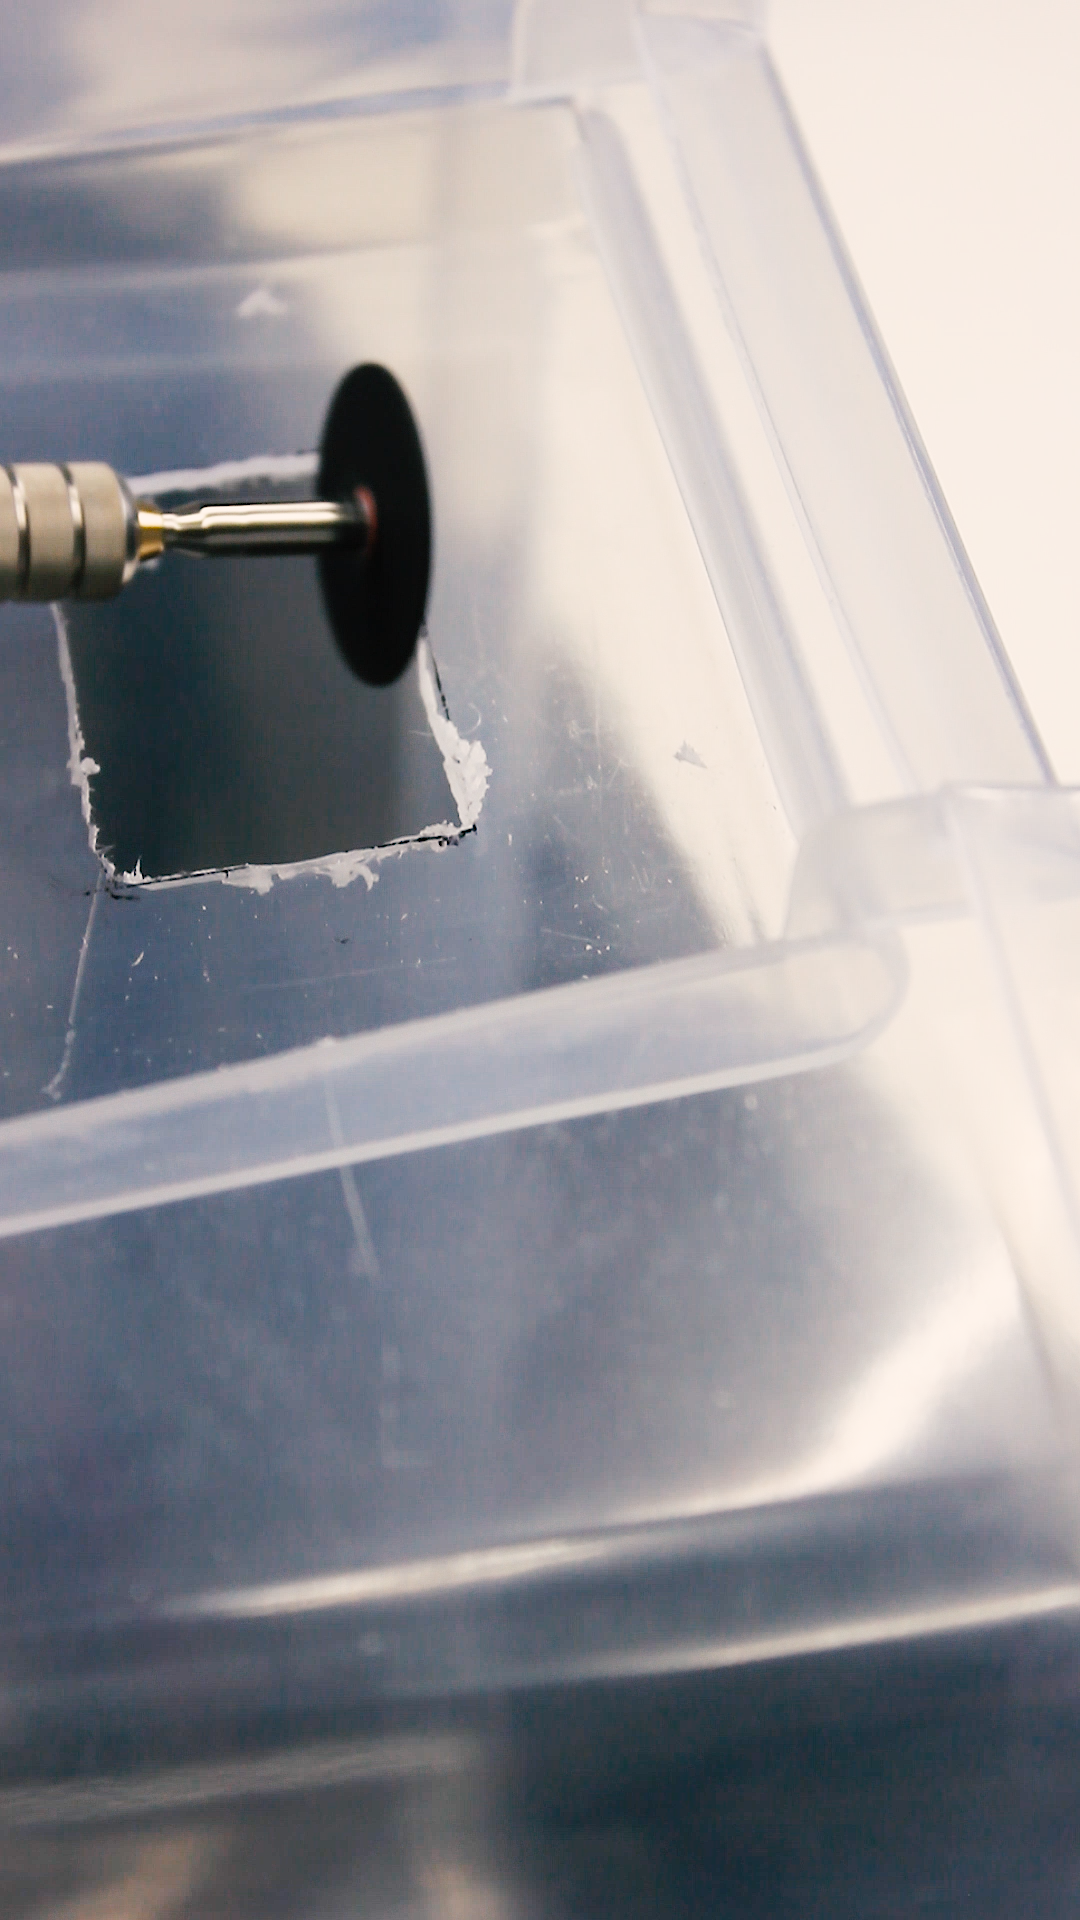
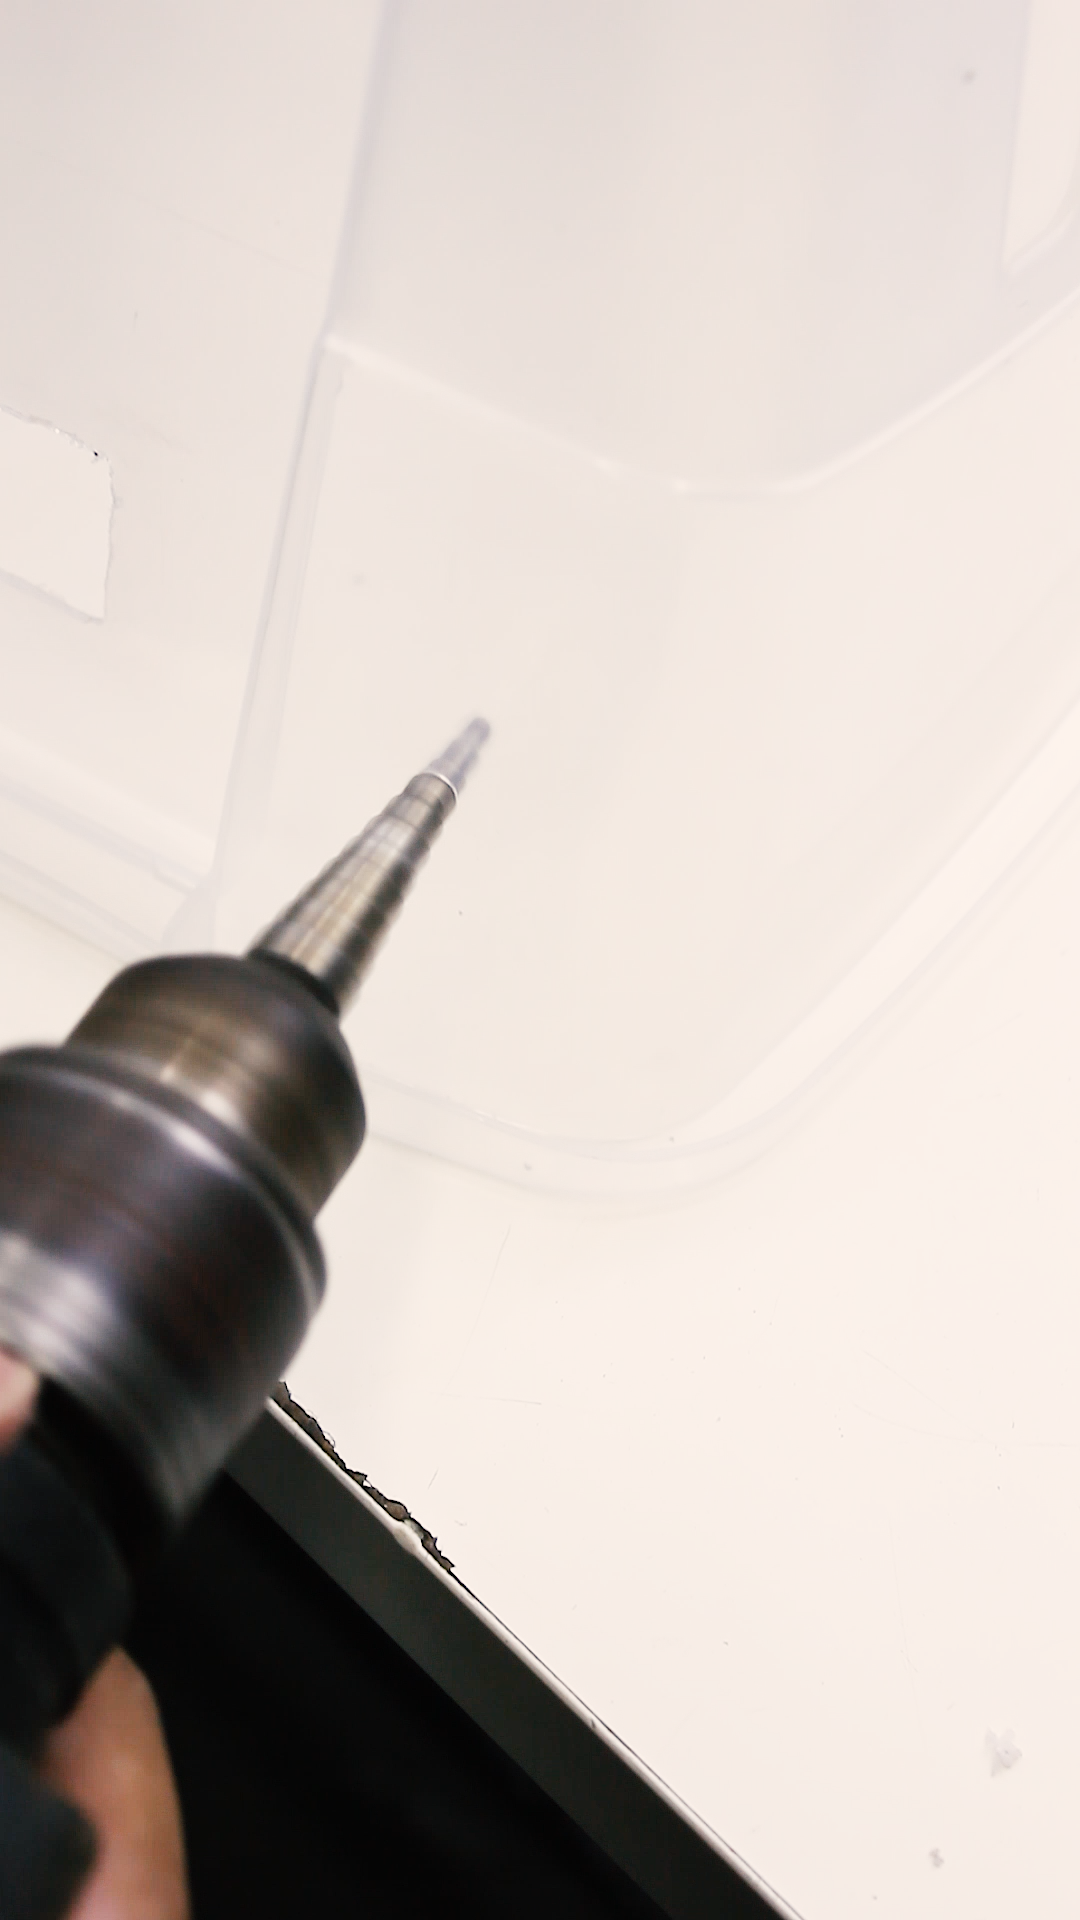
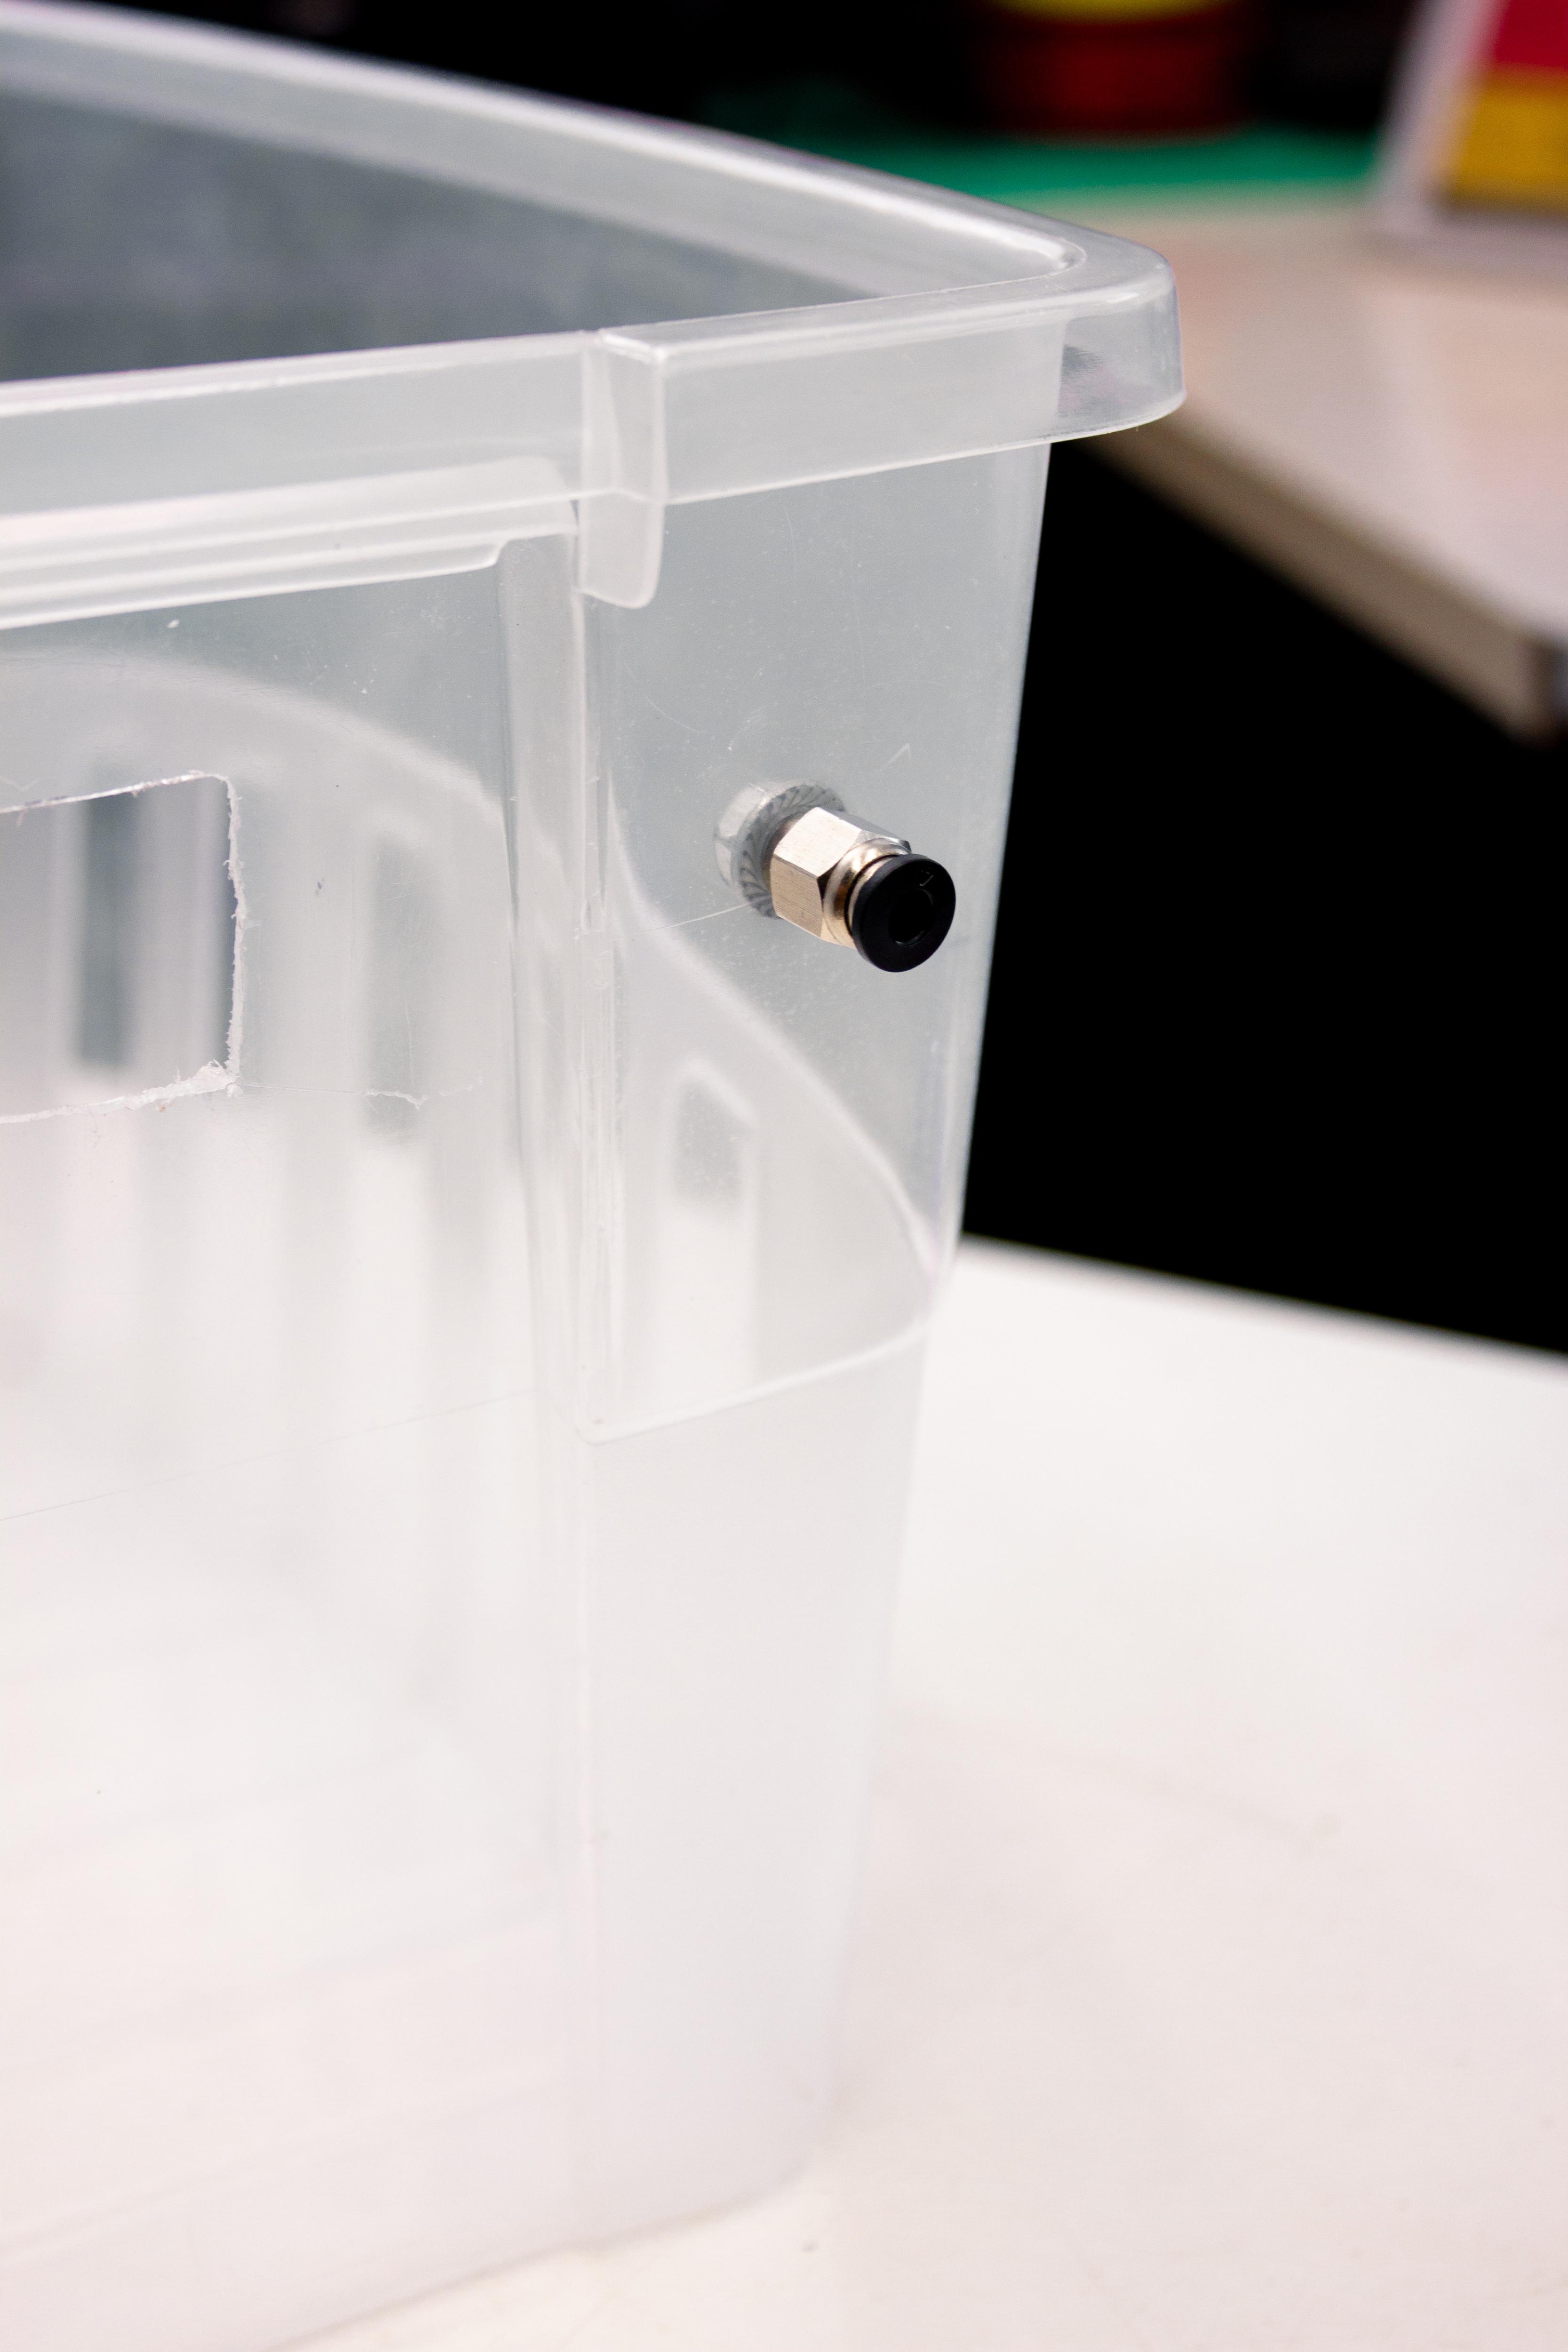
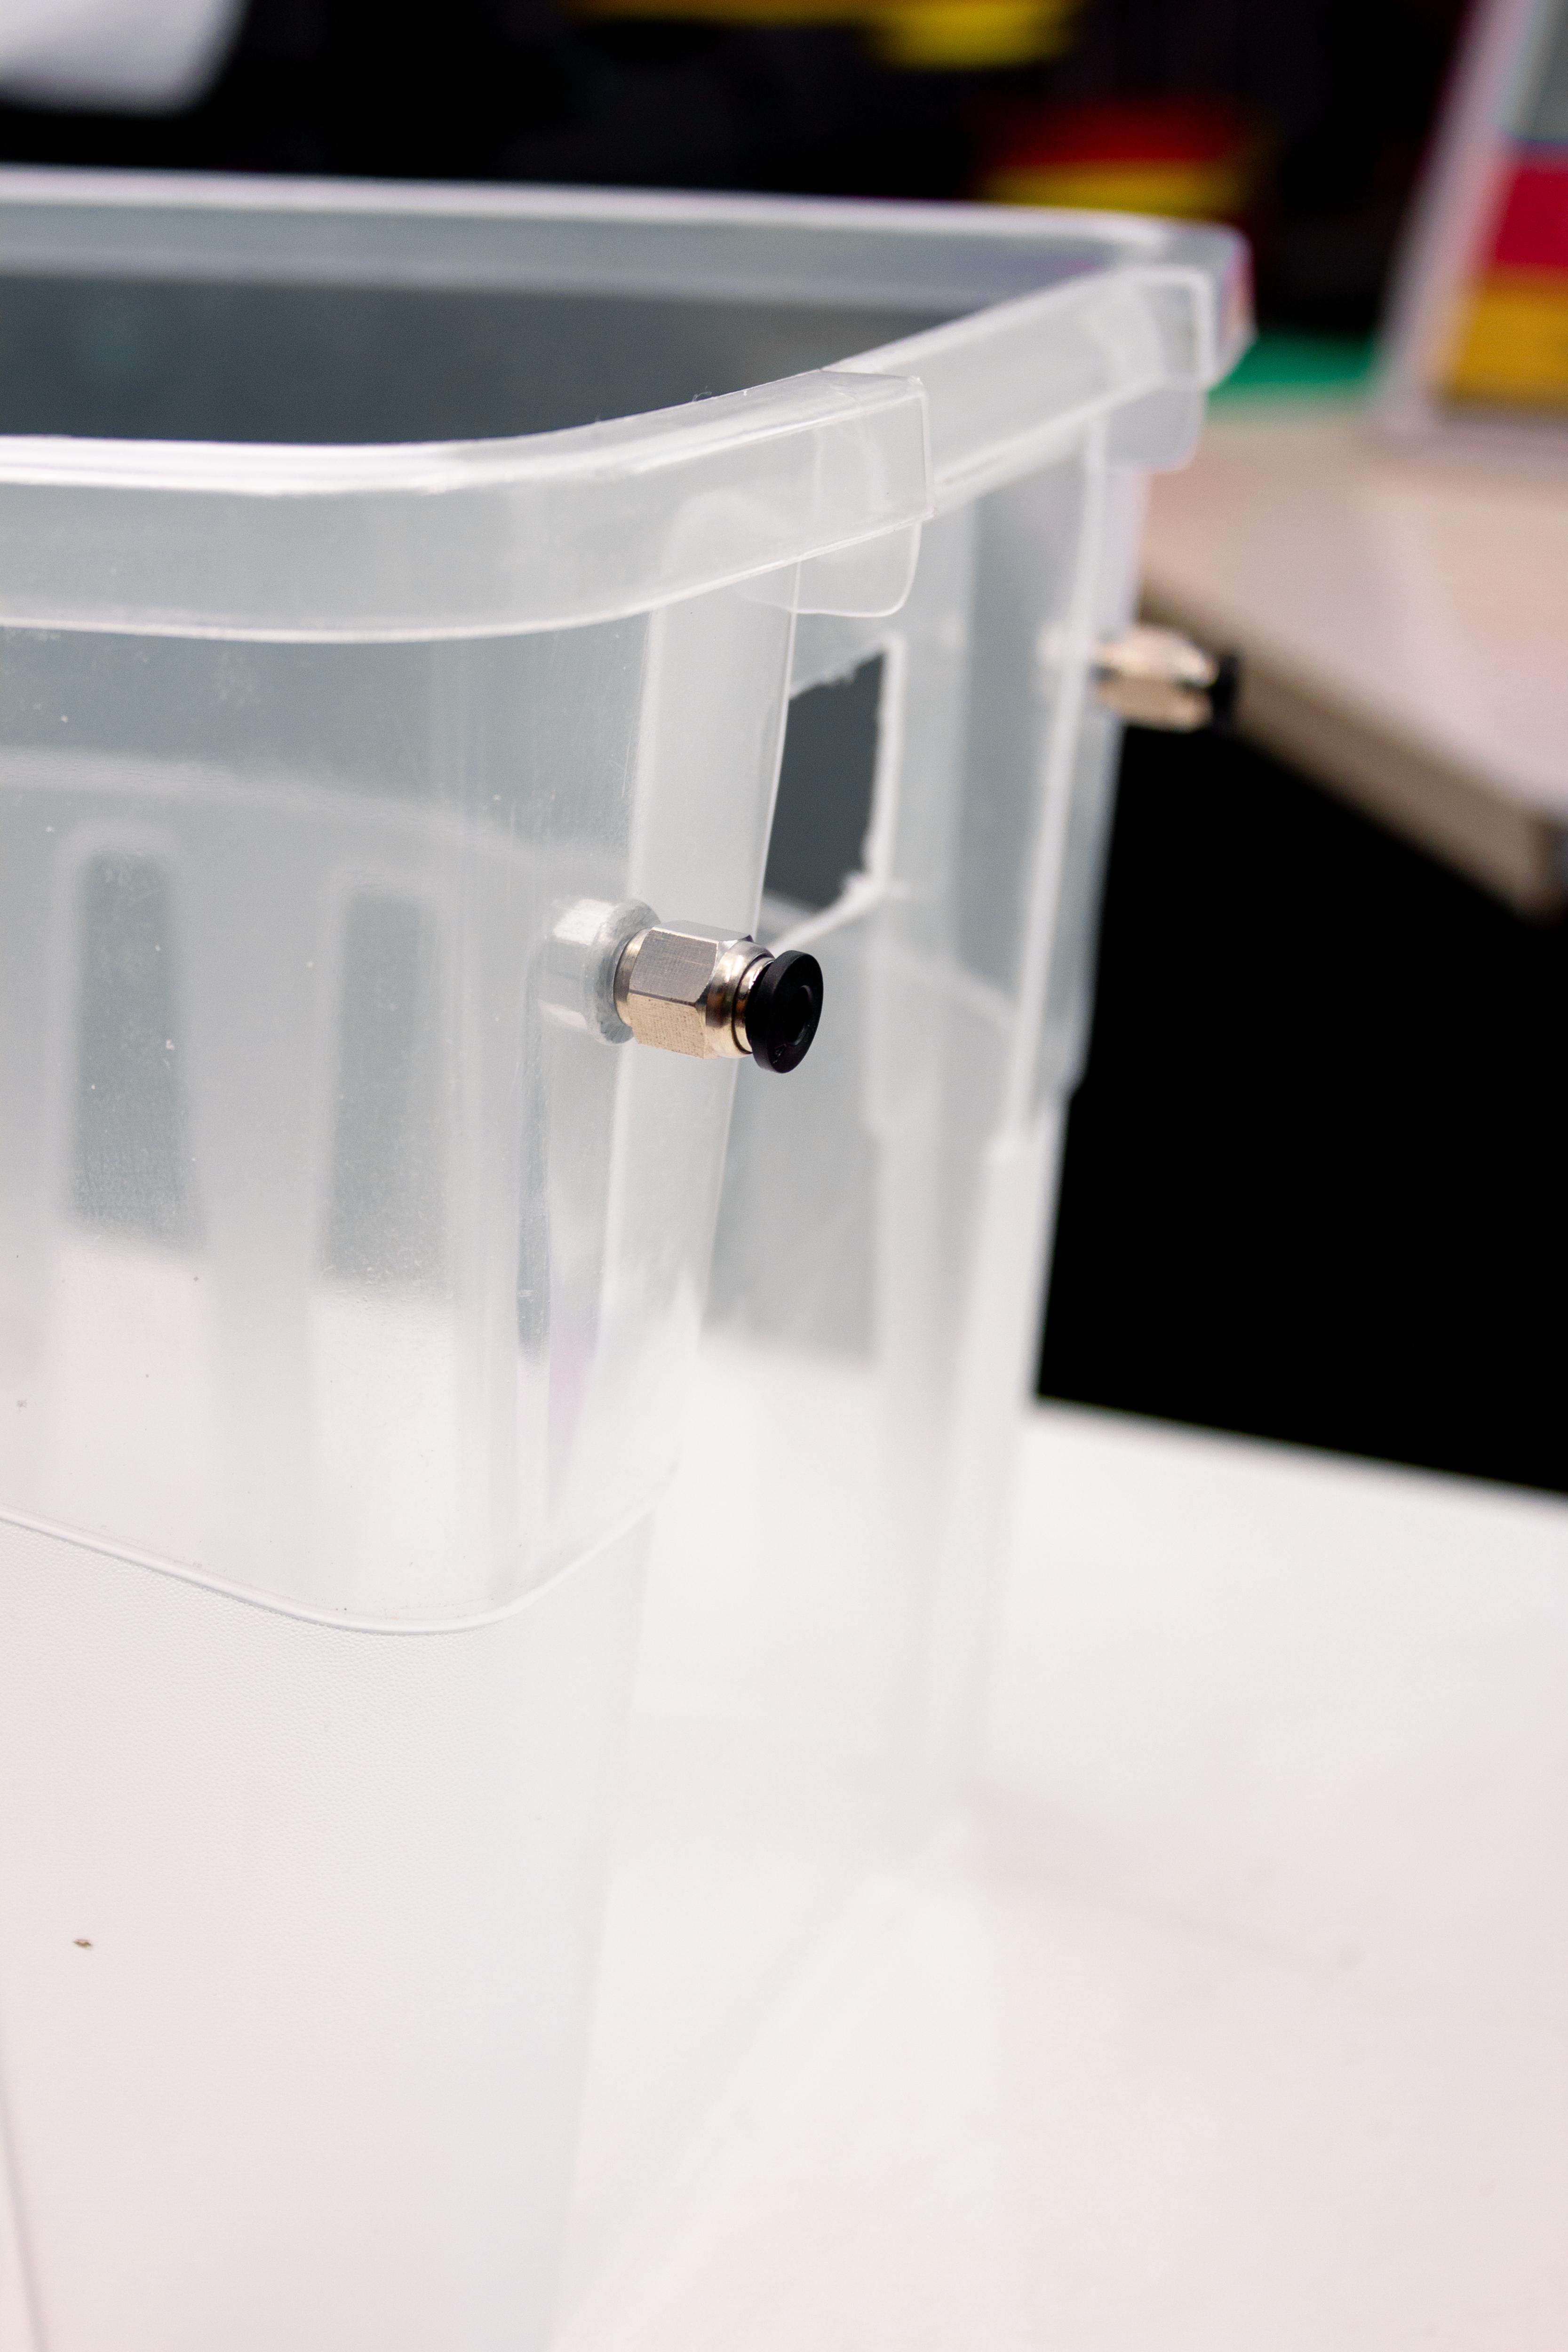
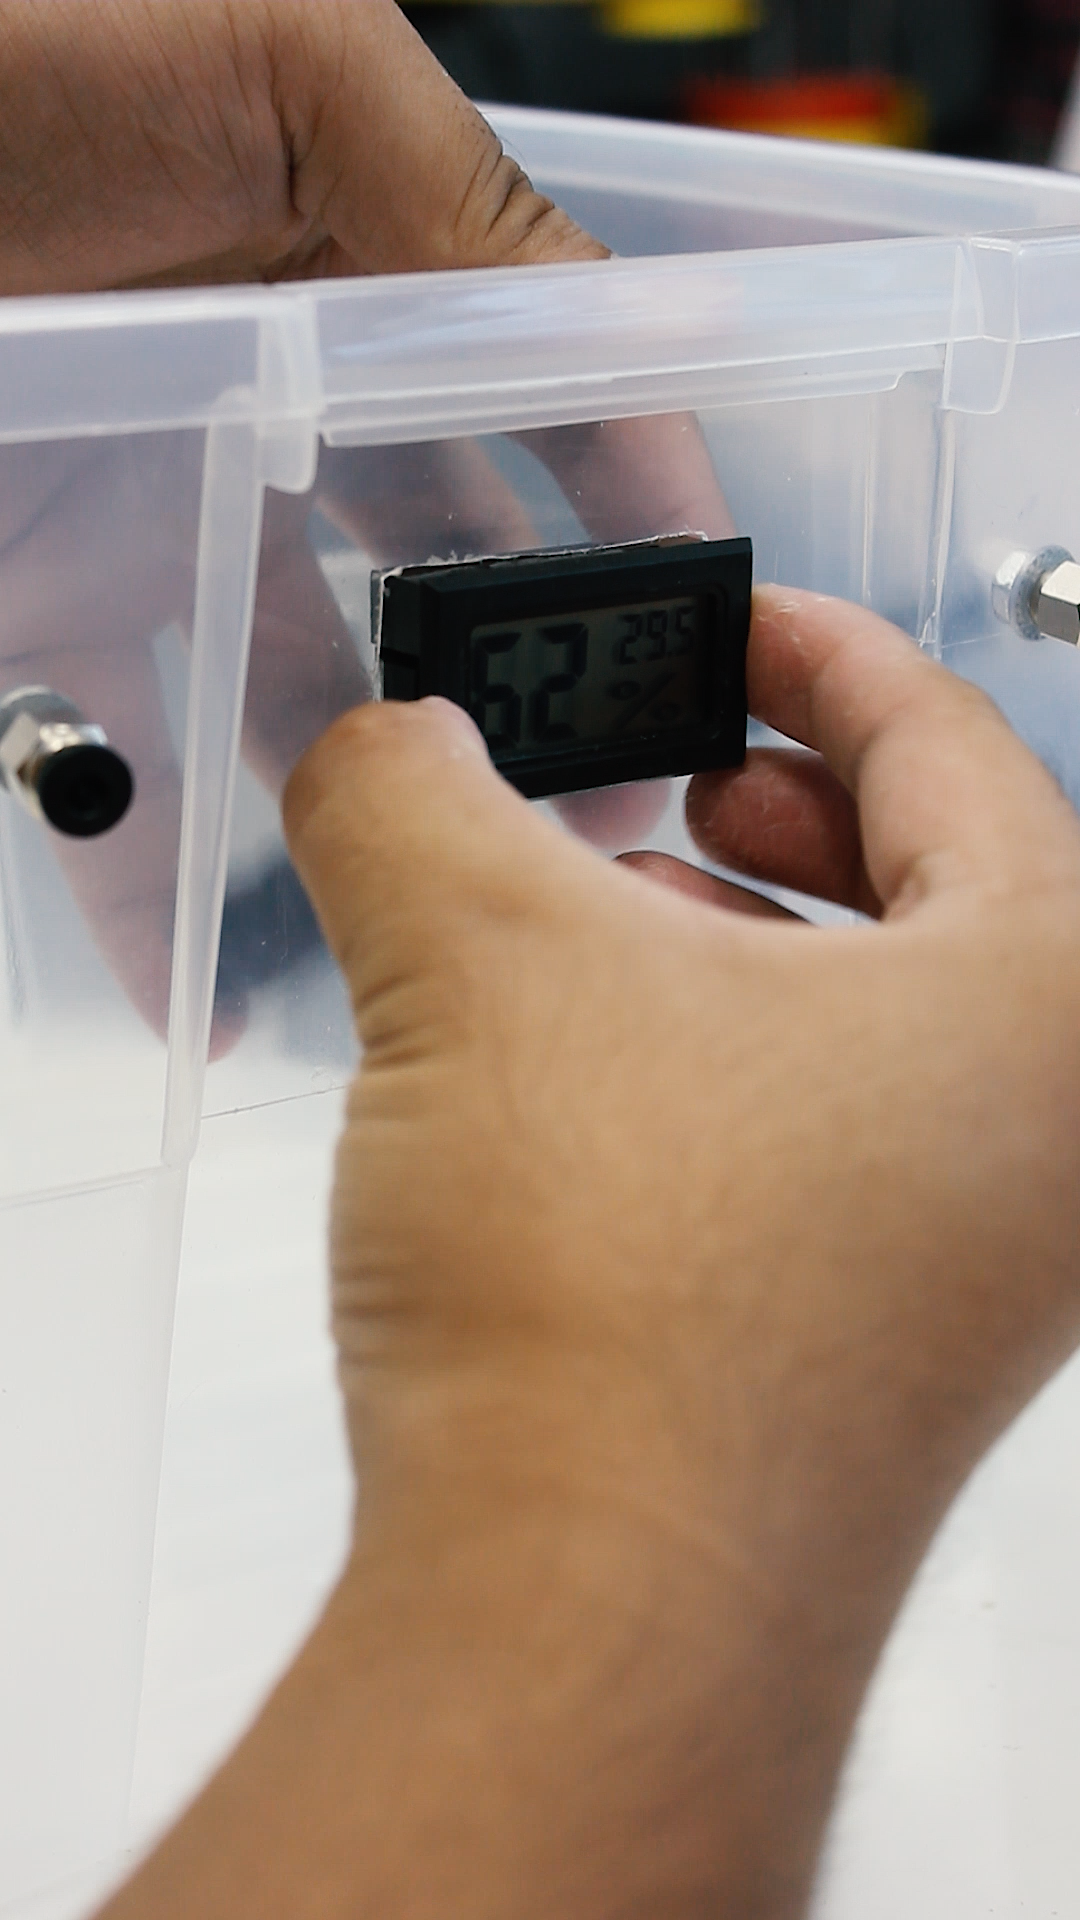
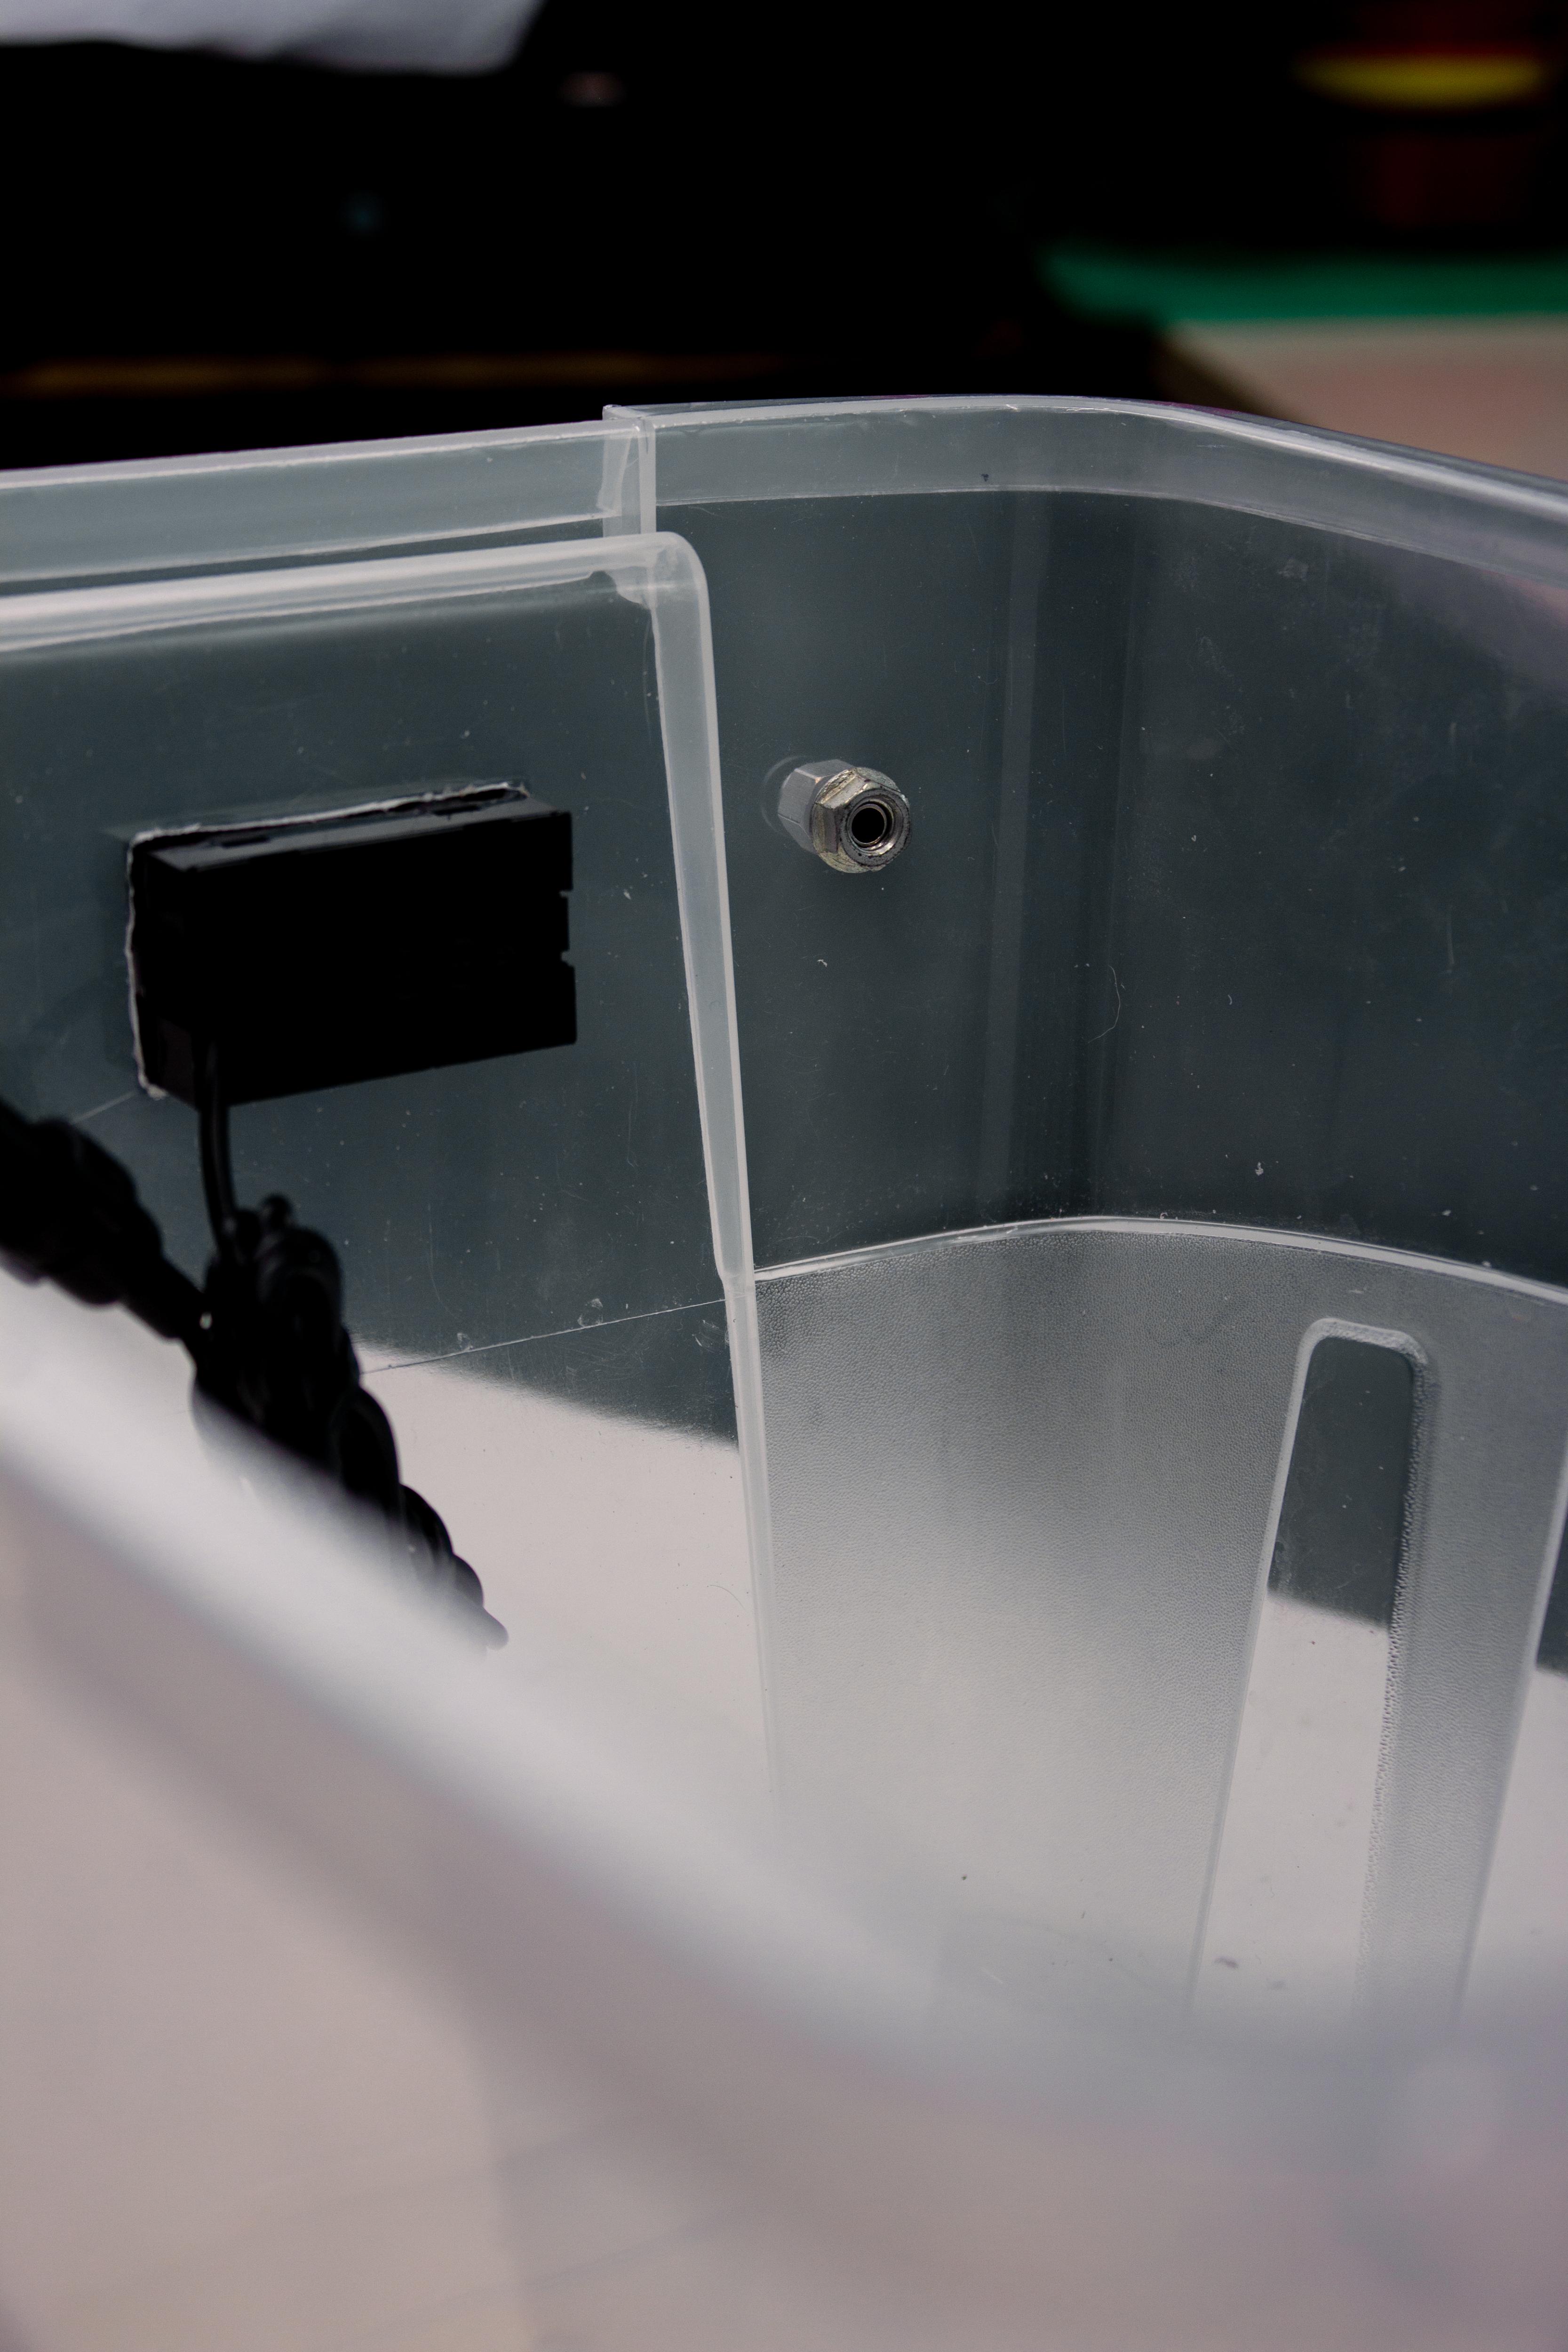
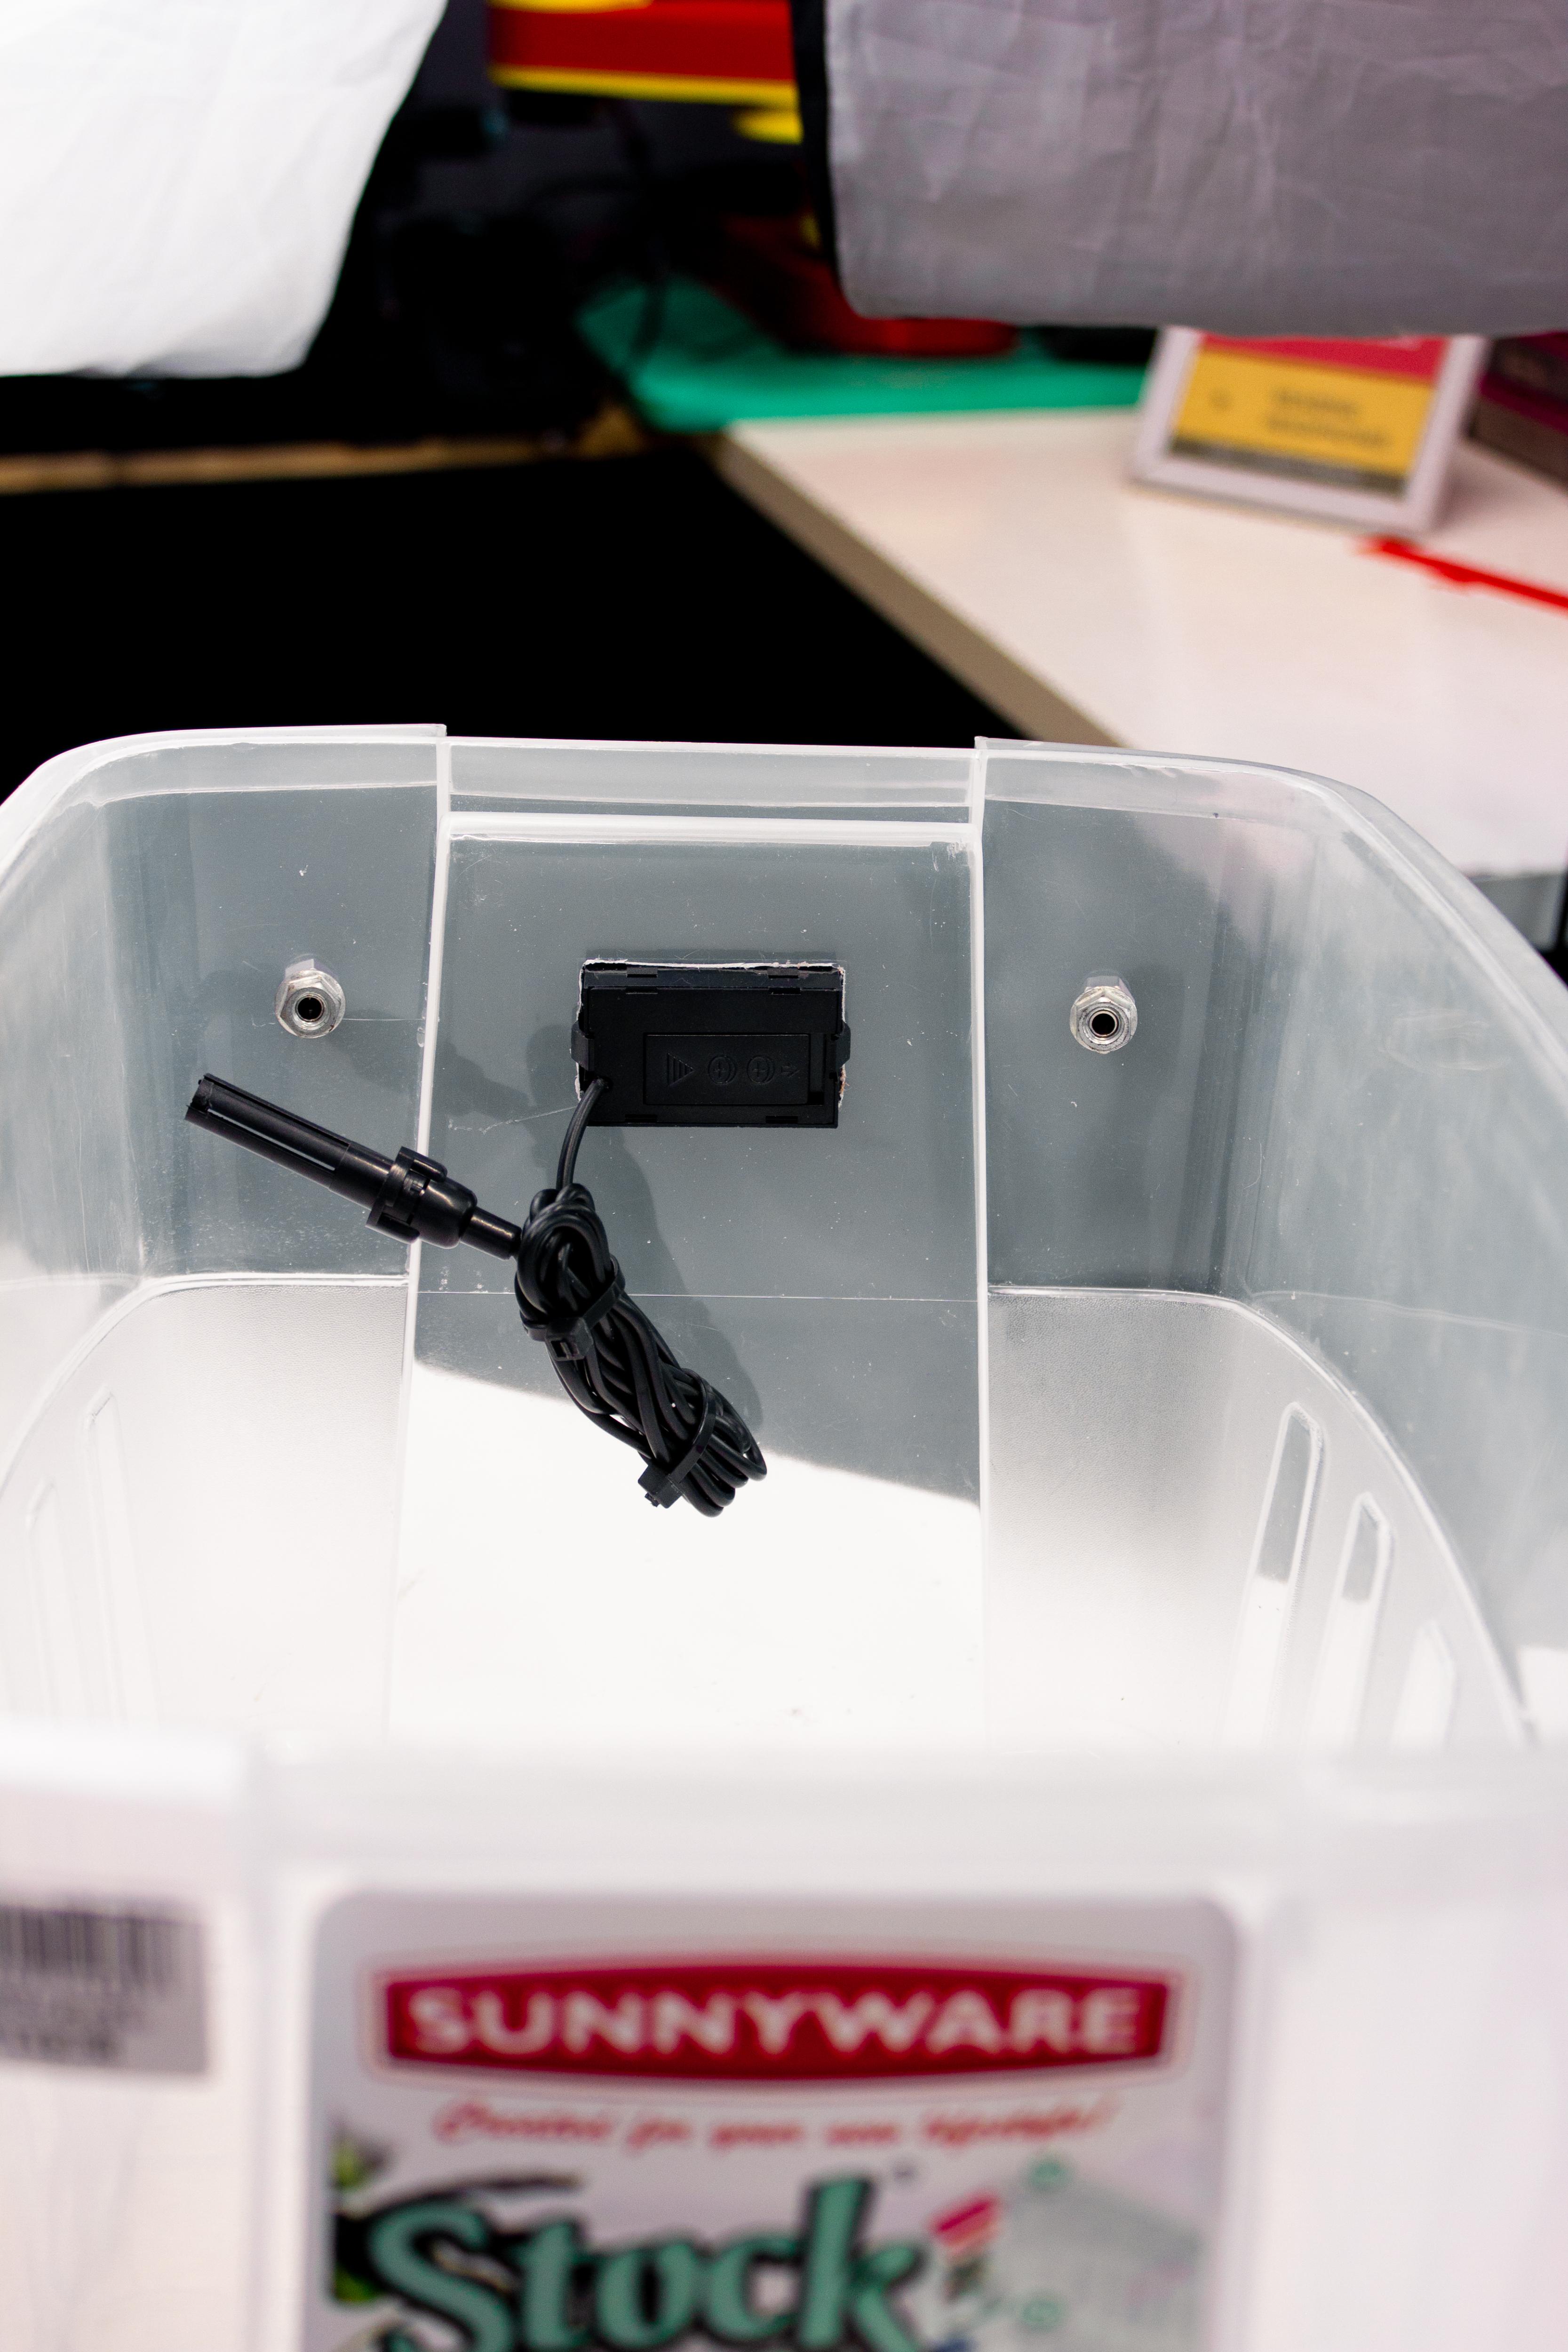
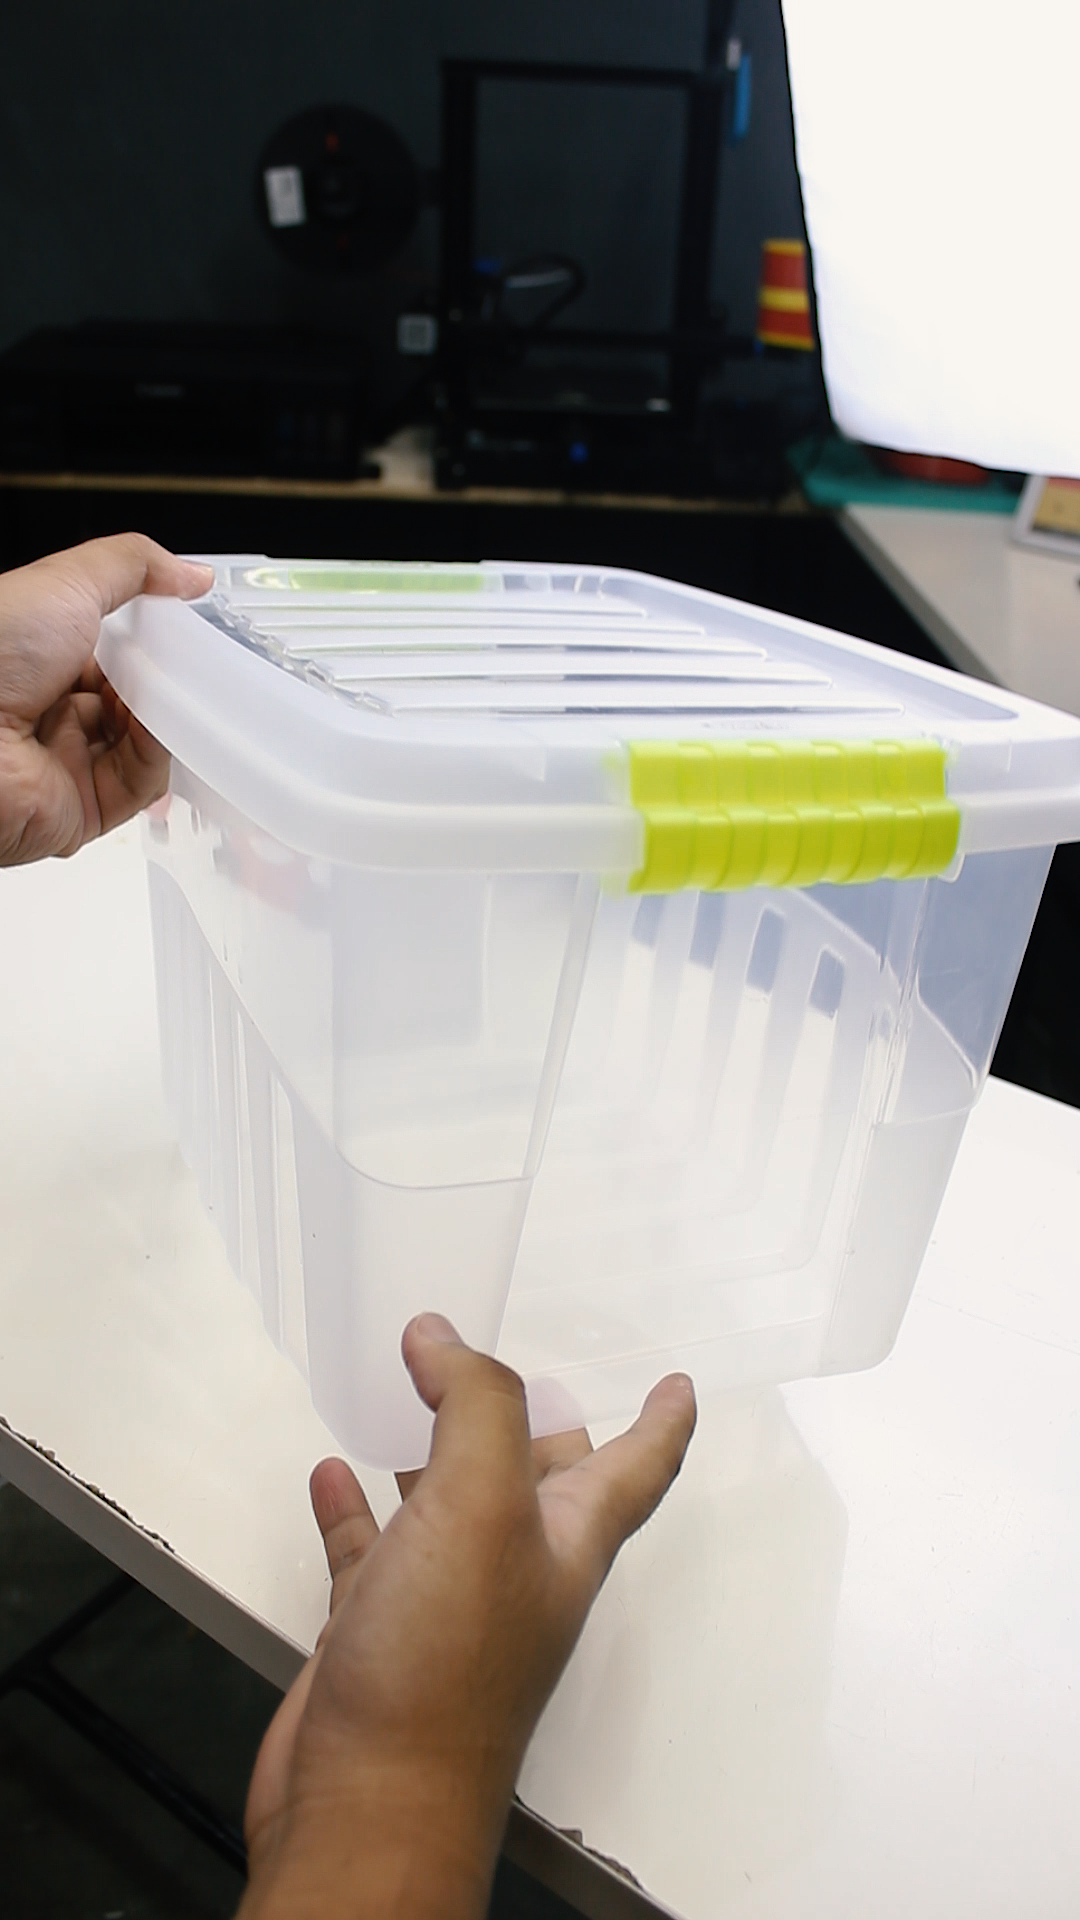
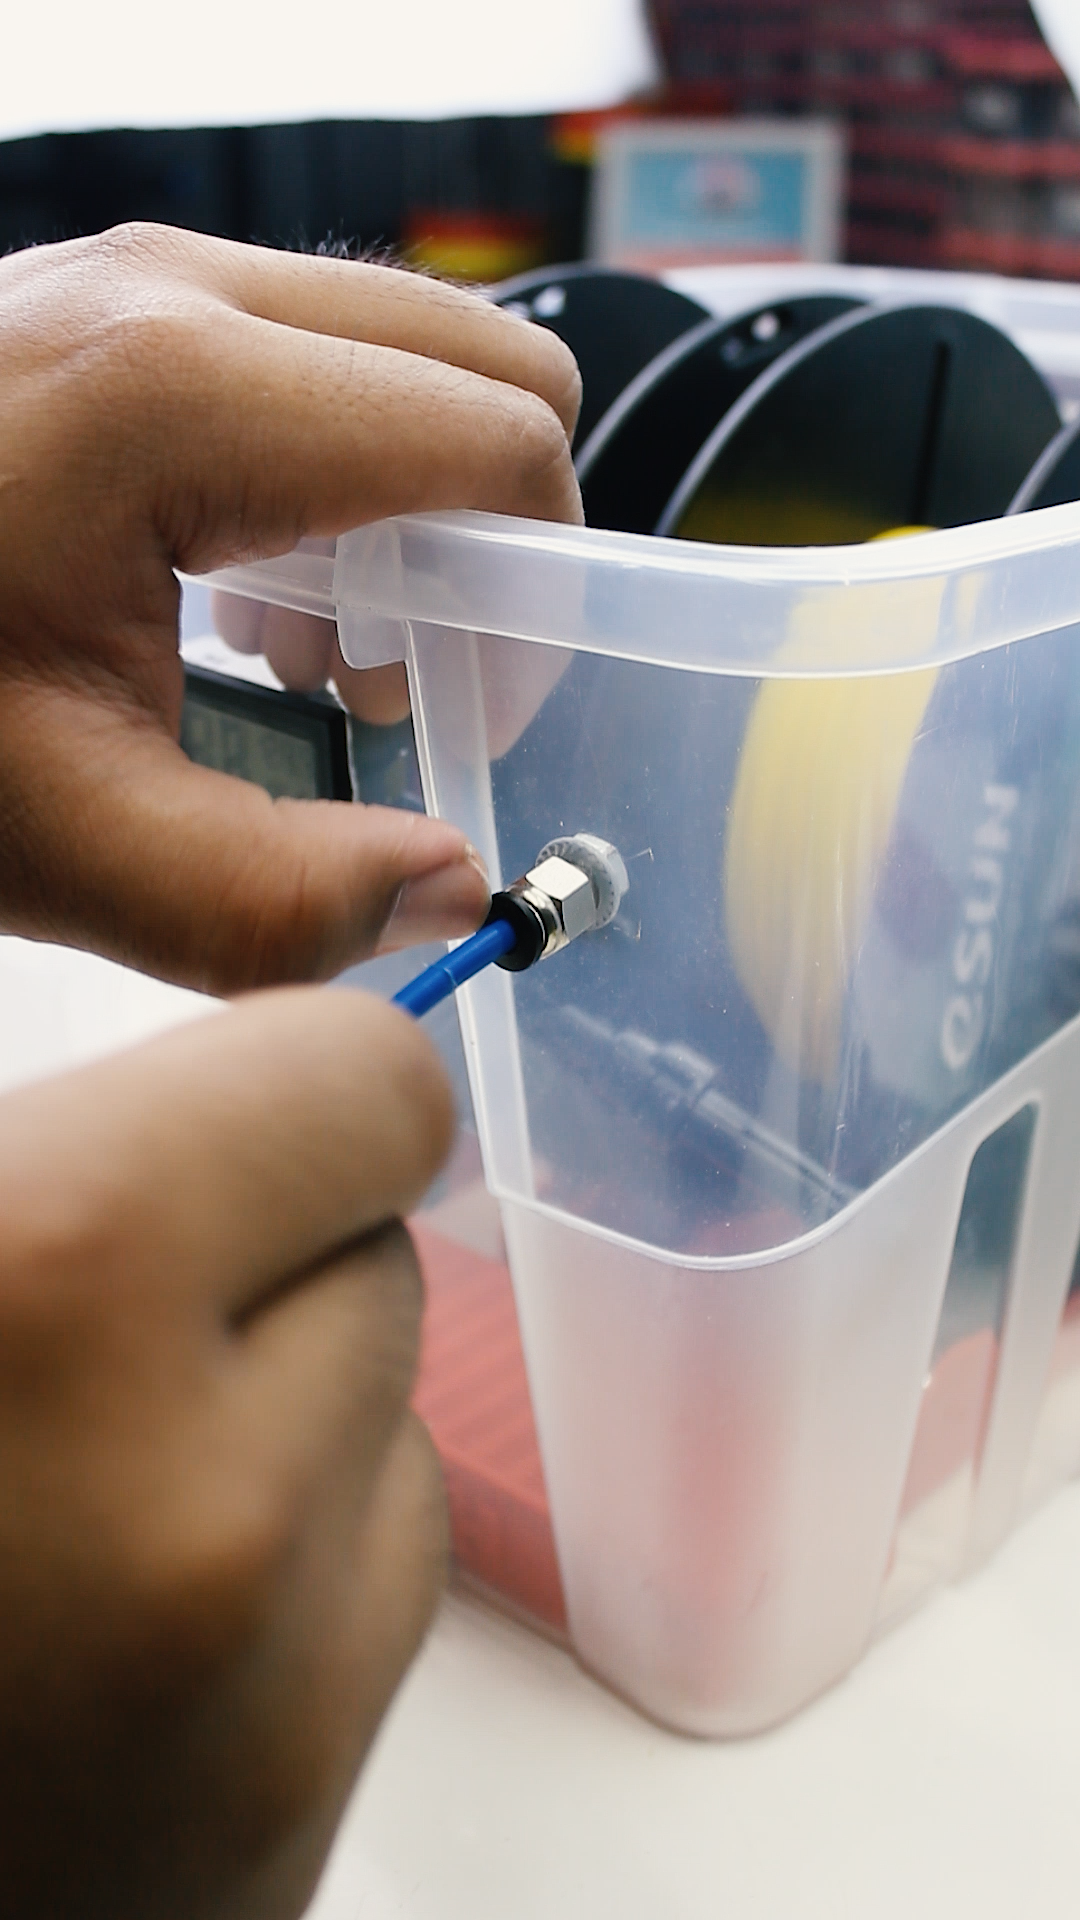
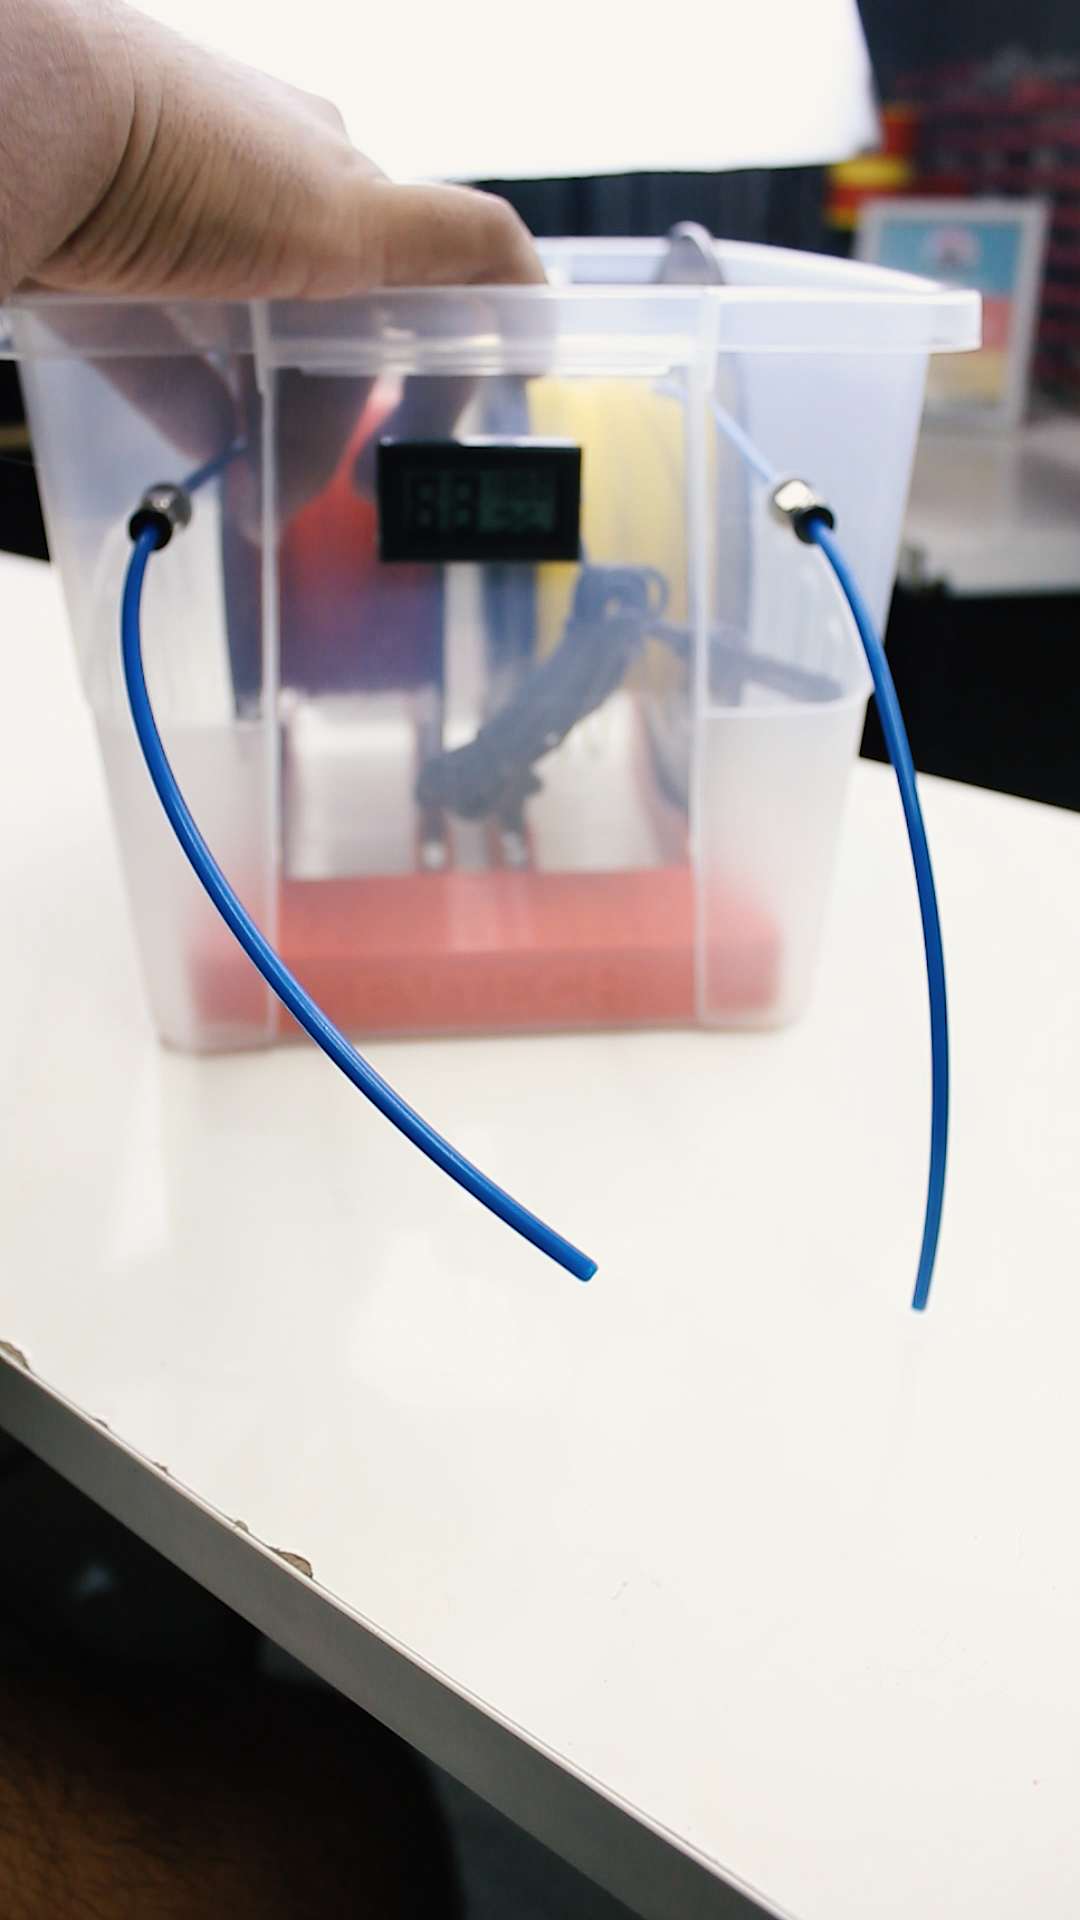
Next, we need to create a hole for the LCD and the pneumatic fittings in the container box. To do that, I first get the dimensions of my LCD and mark the container where I am going to cut, using my mini grinder. After doing that, I grab my drill to create a hole for the pneumatic fittings.
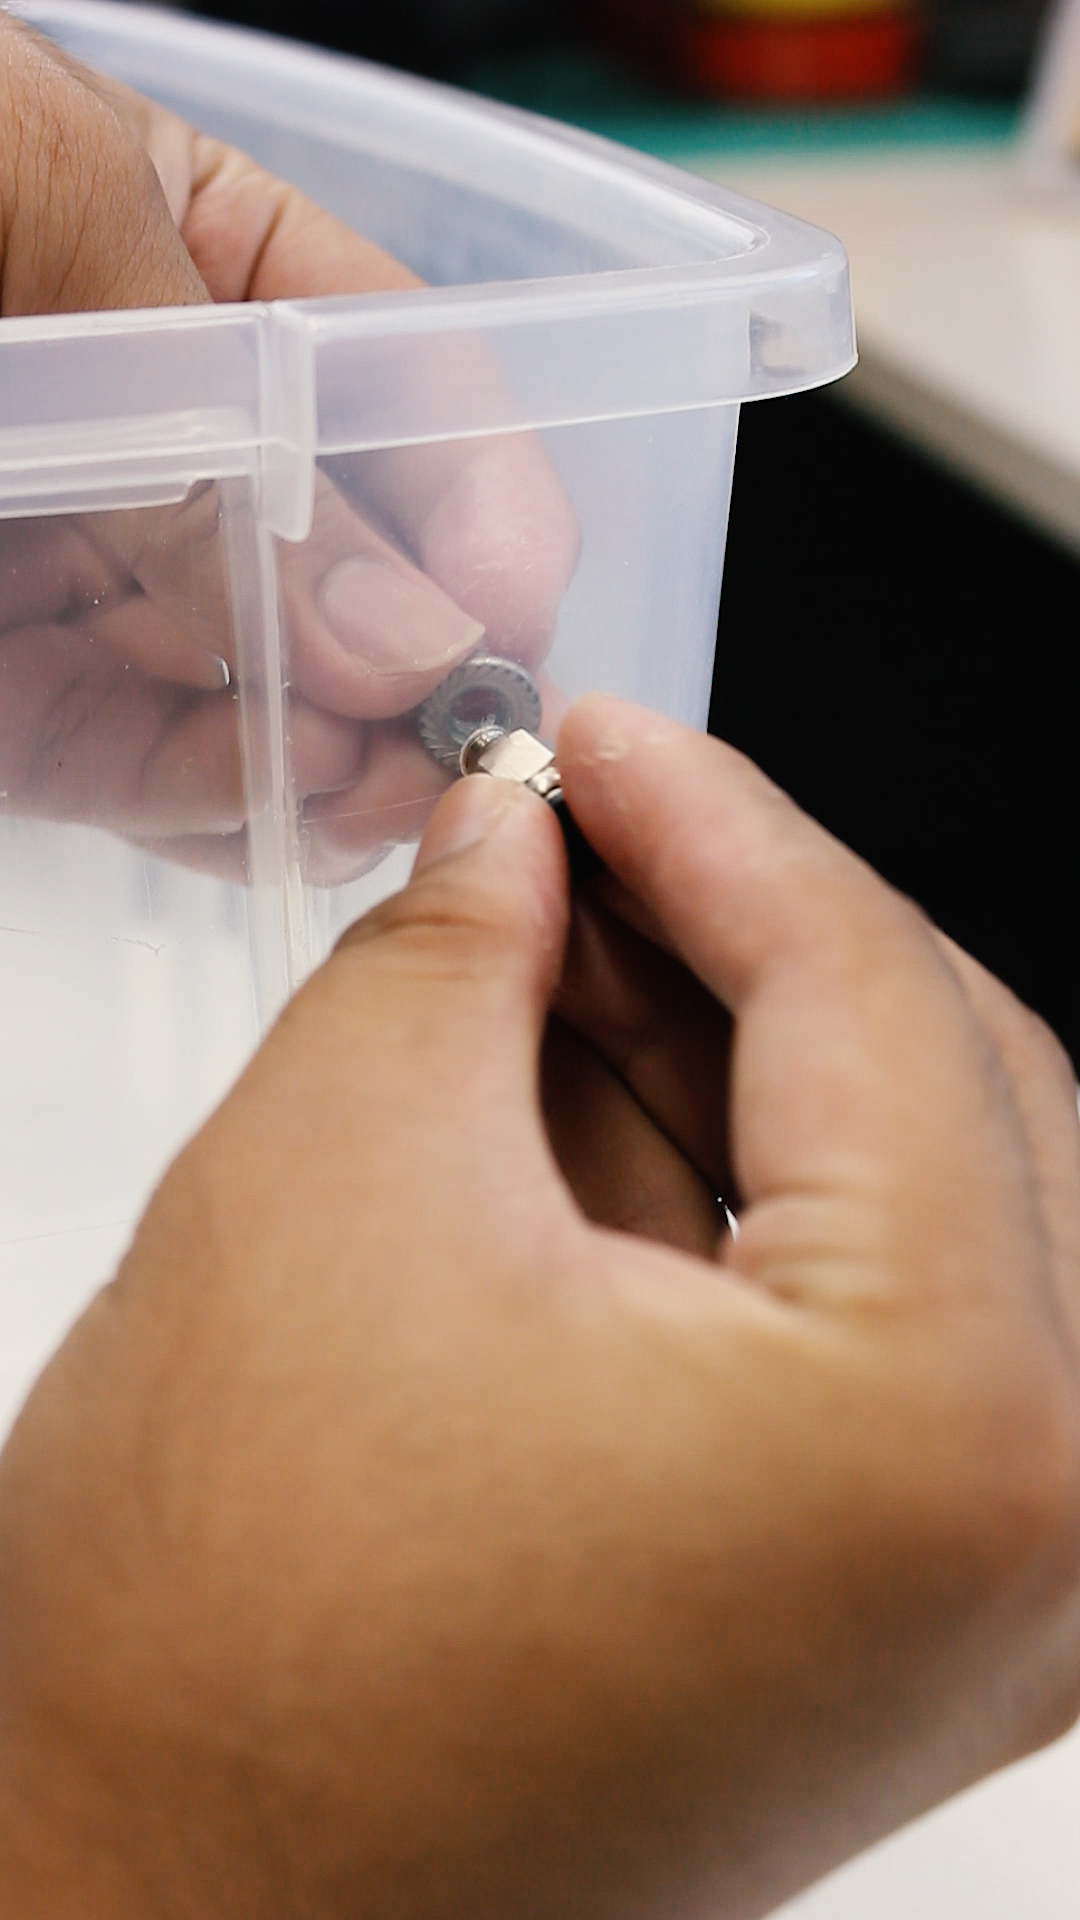
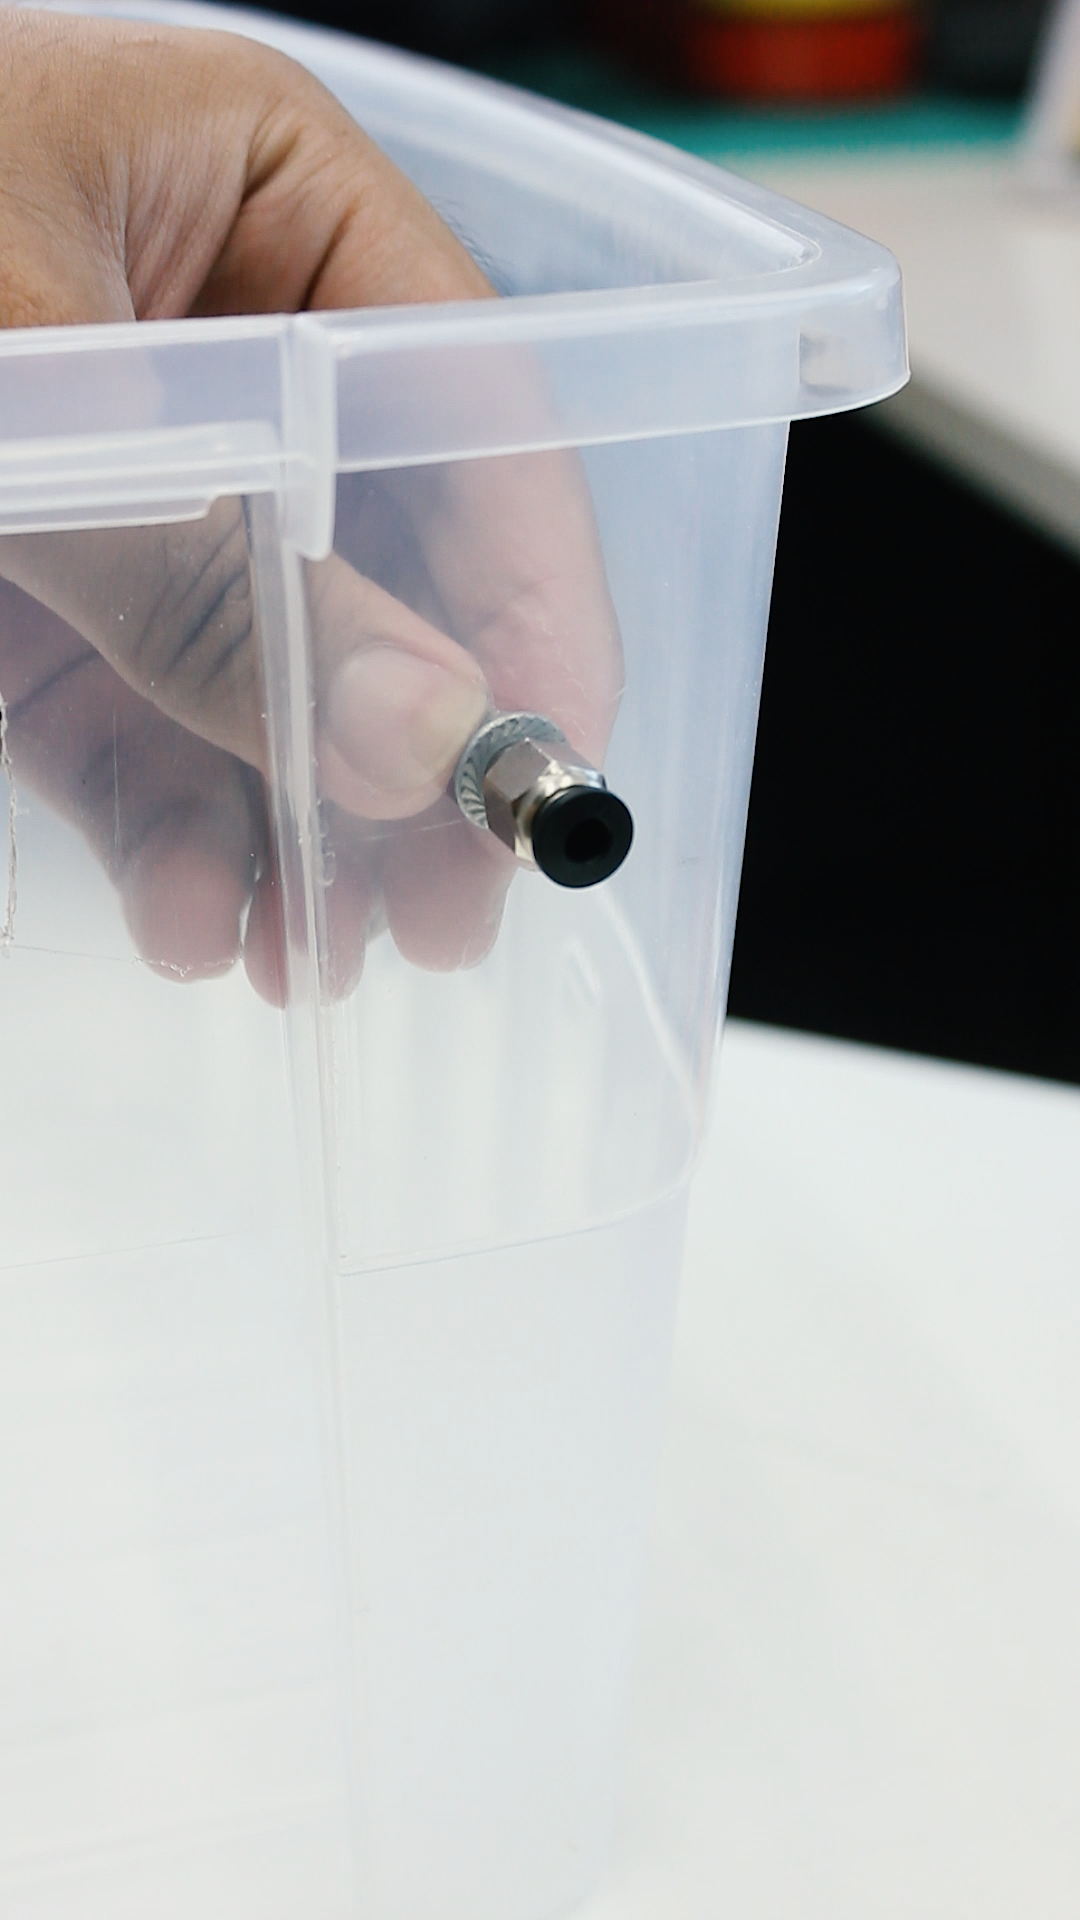
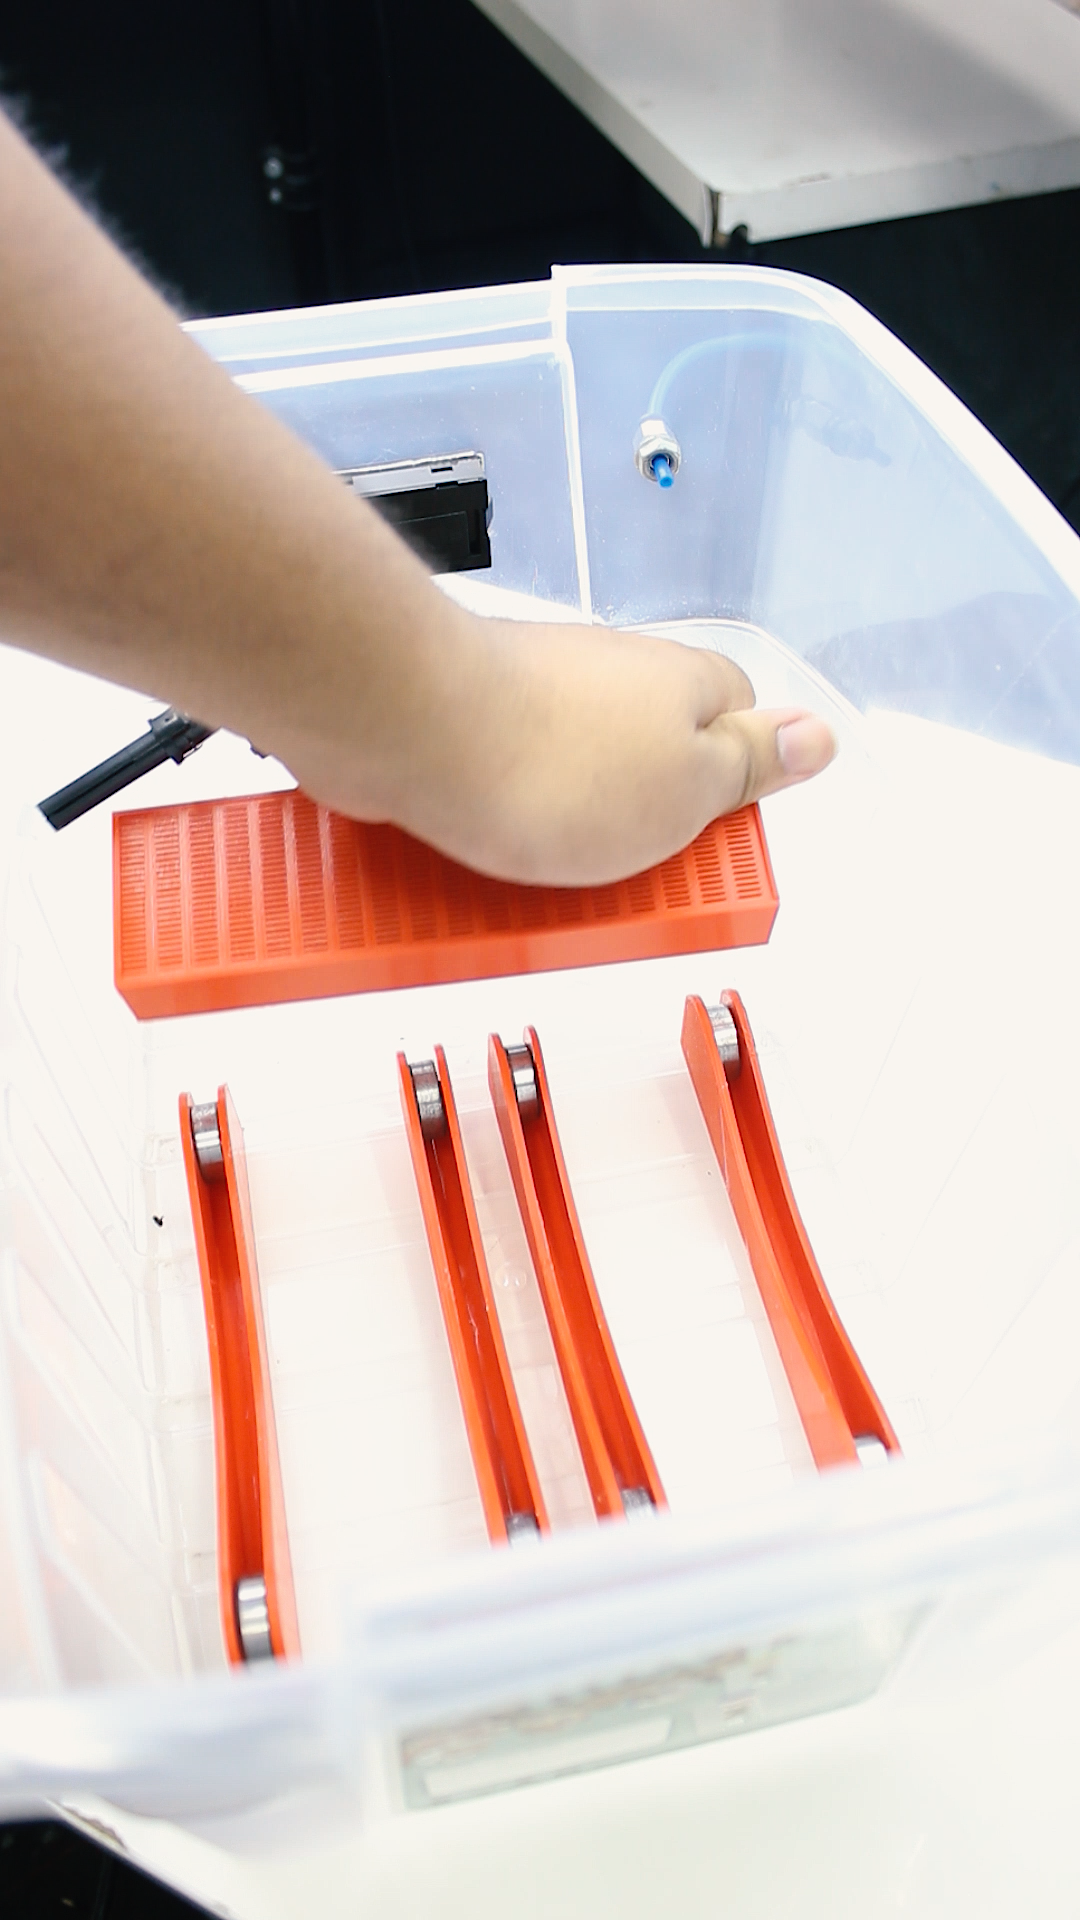
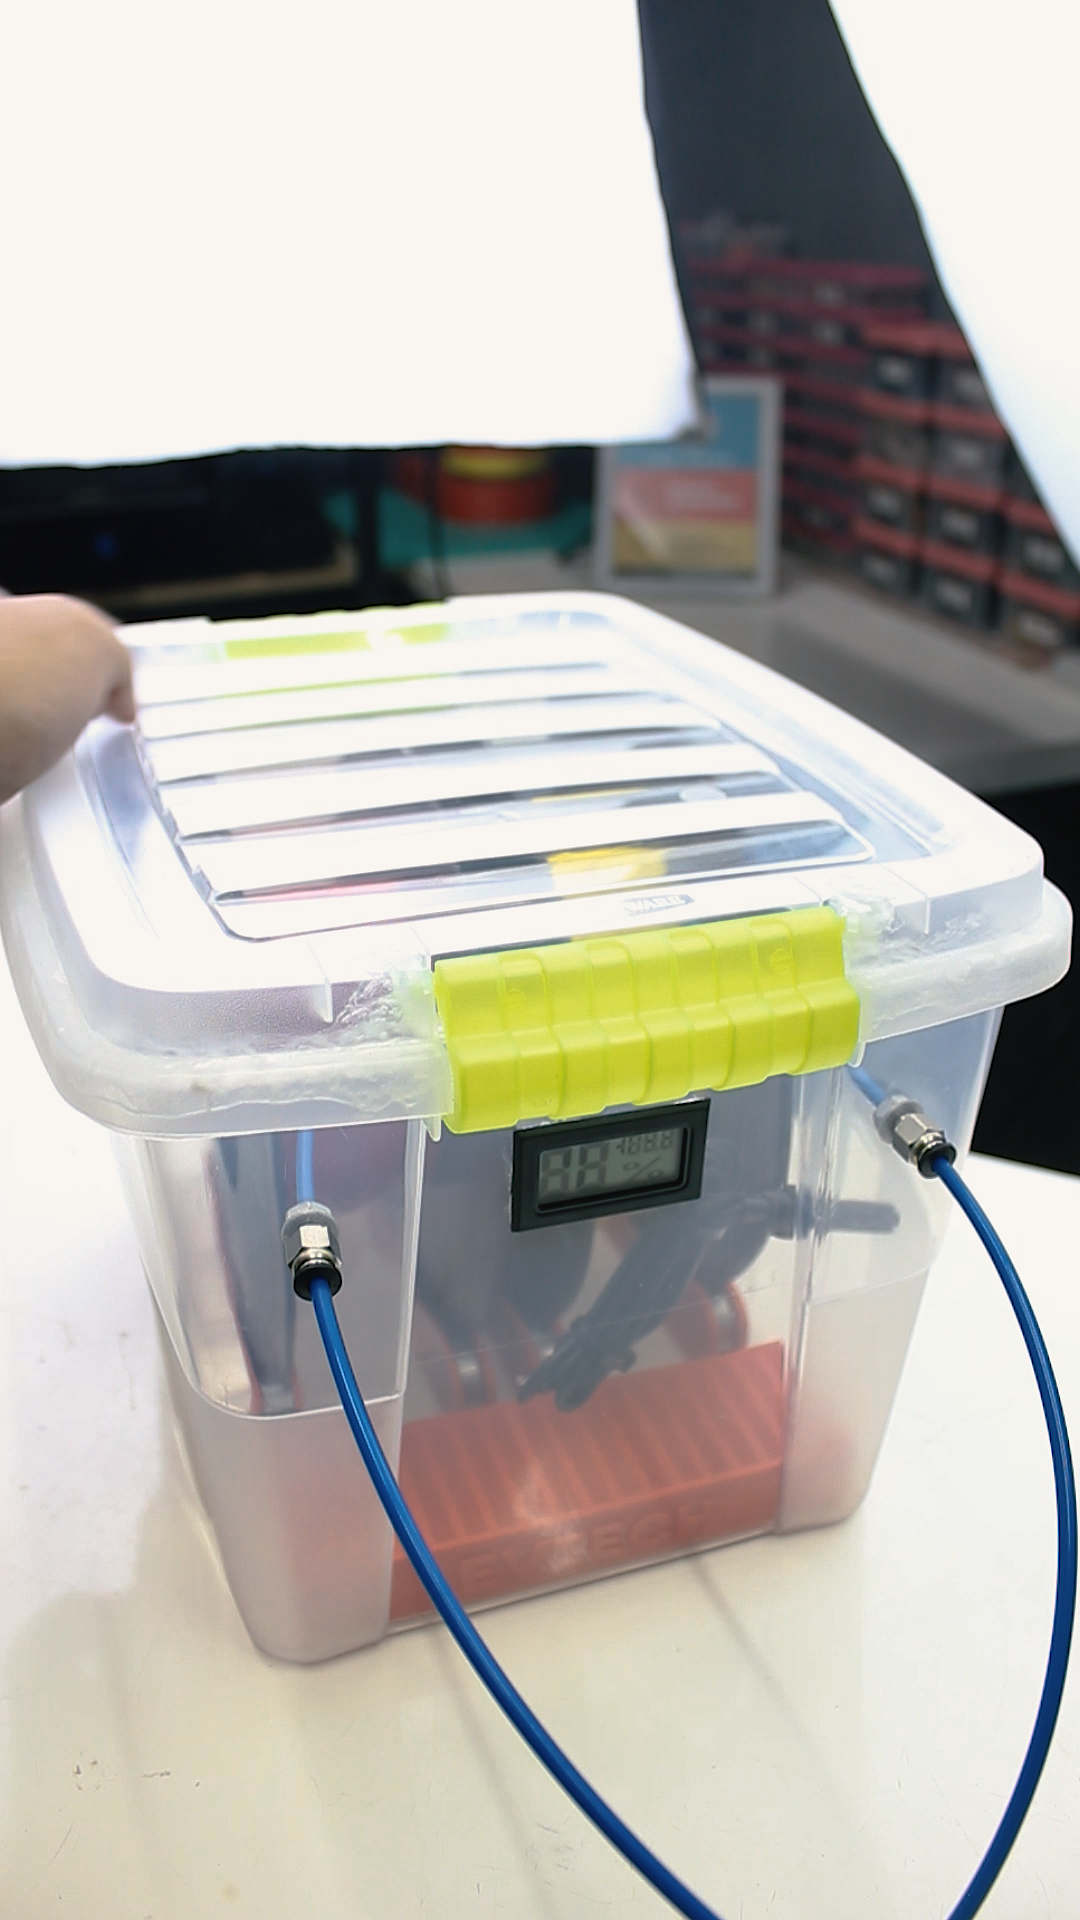
Now, it's time to place the pneumatic fittings into the hole. I make sure that it is tight by securing it with a nut, followed by placing the LCD in its respective place.
Air Tightening
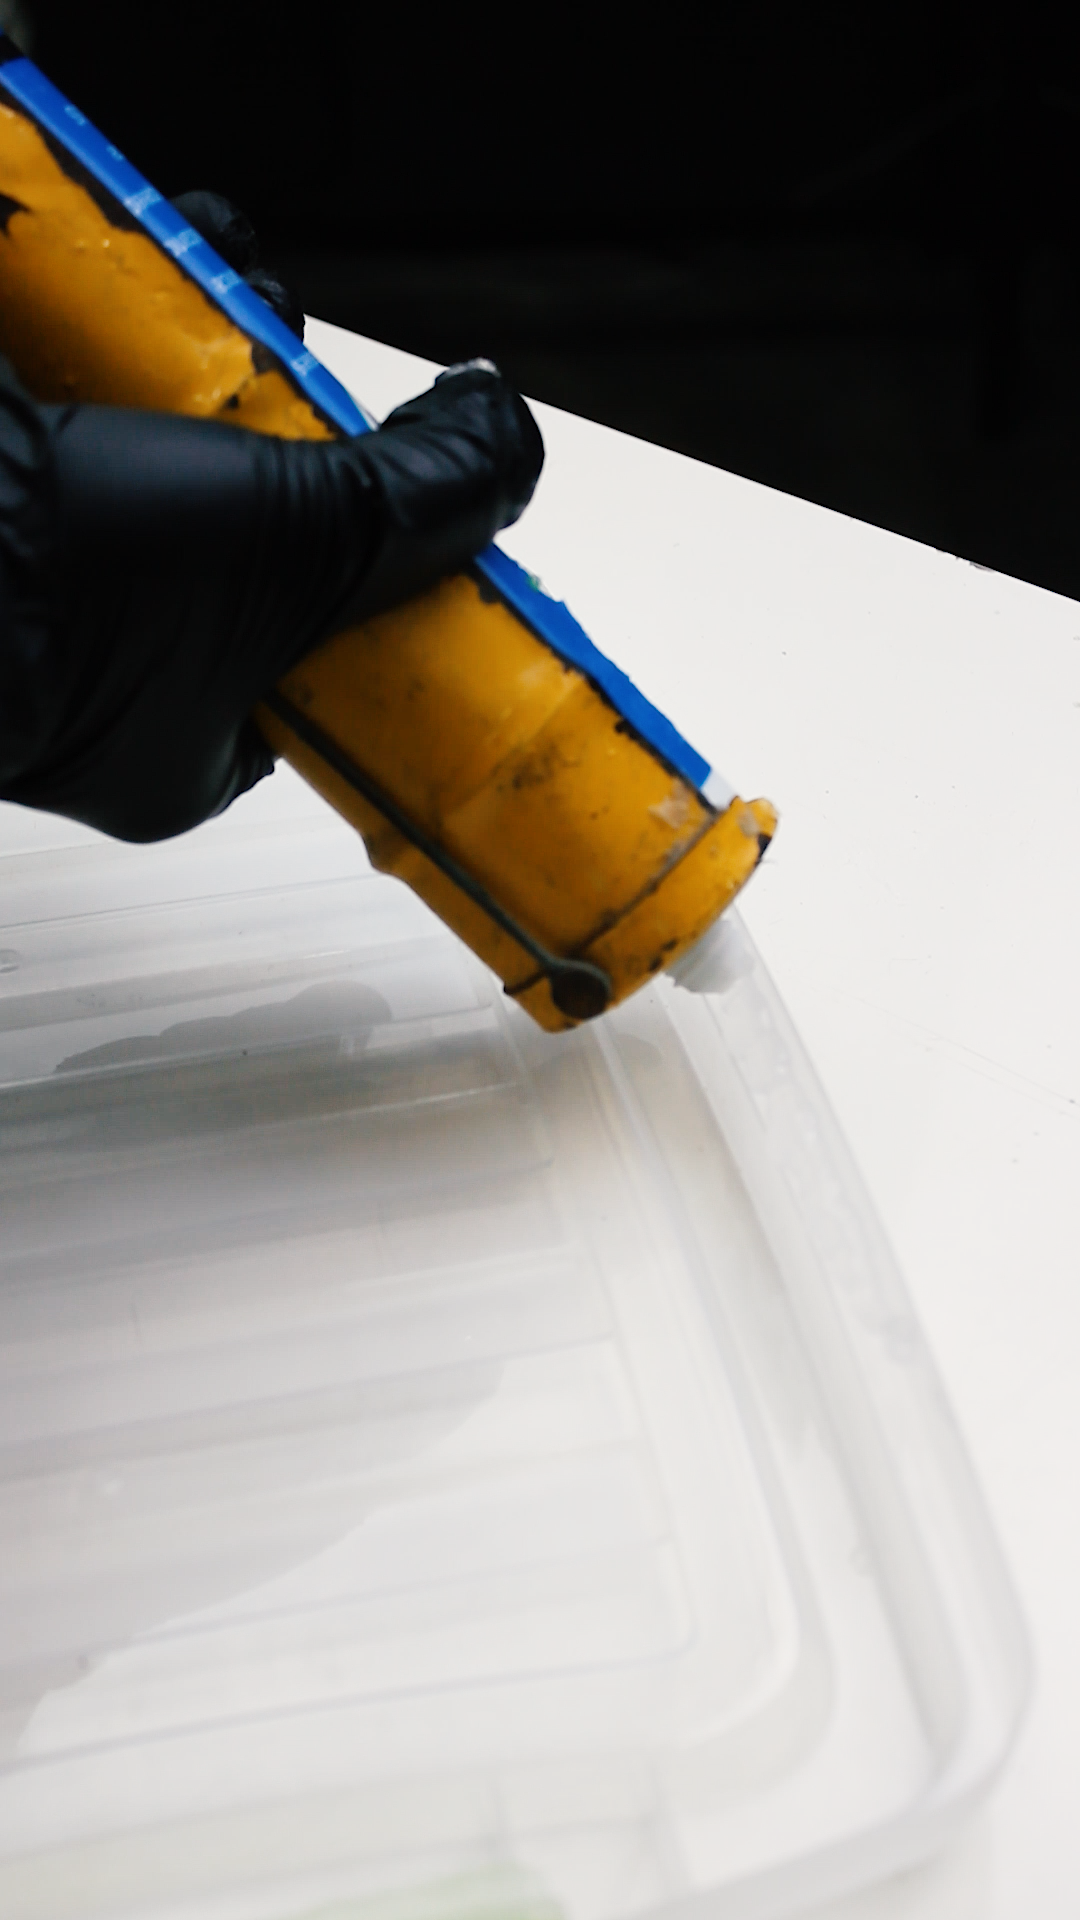
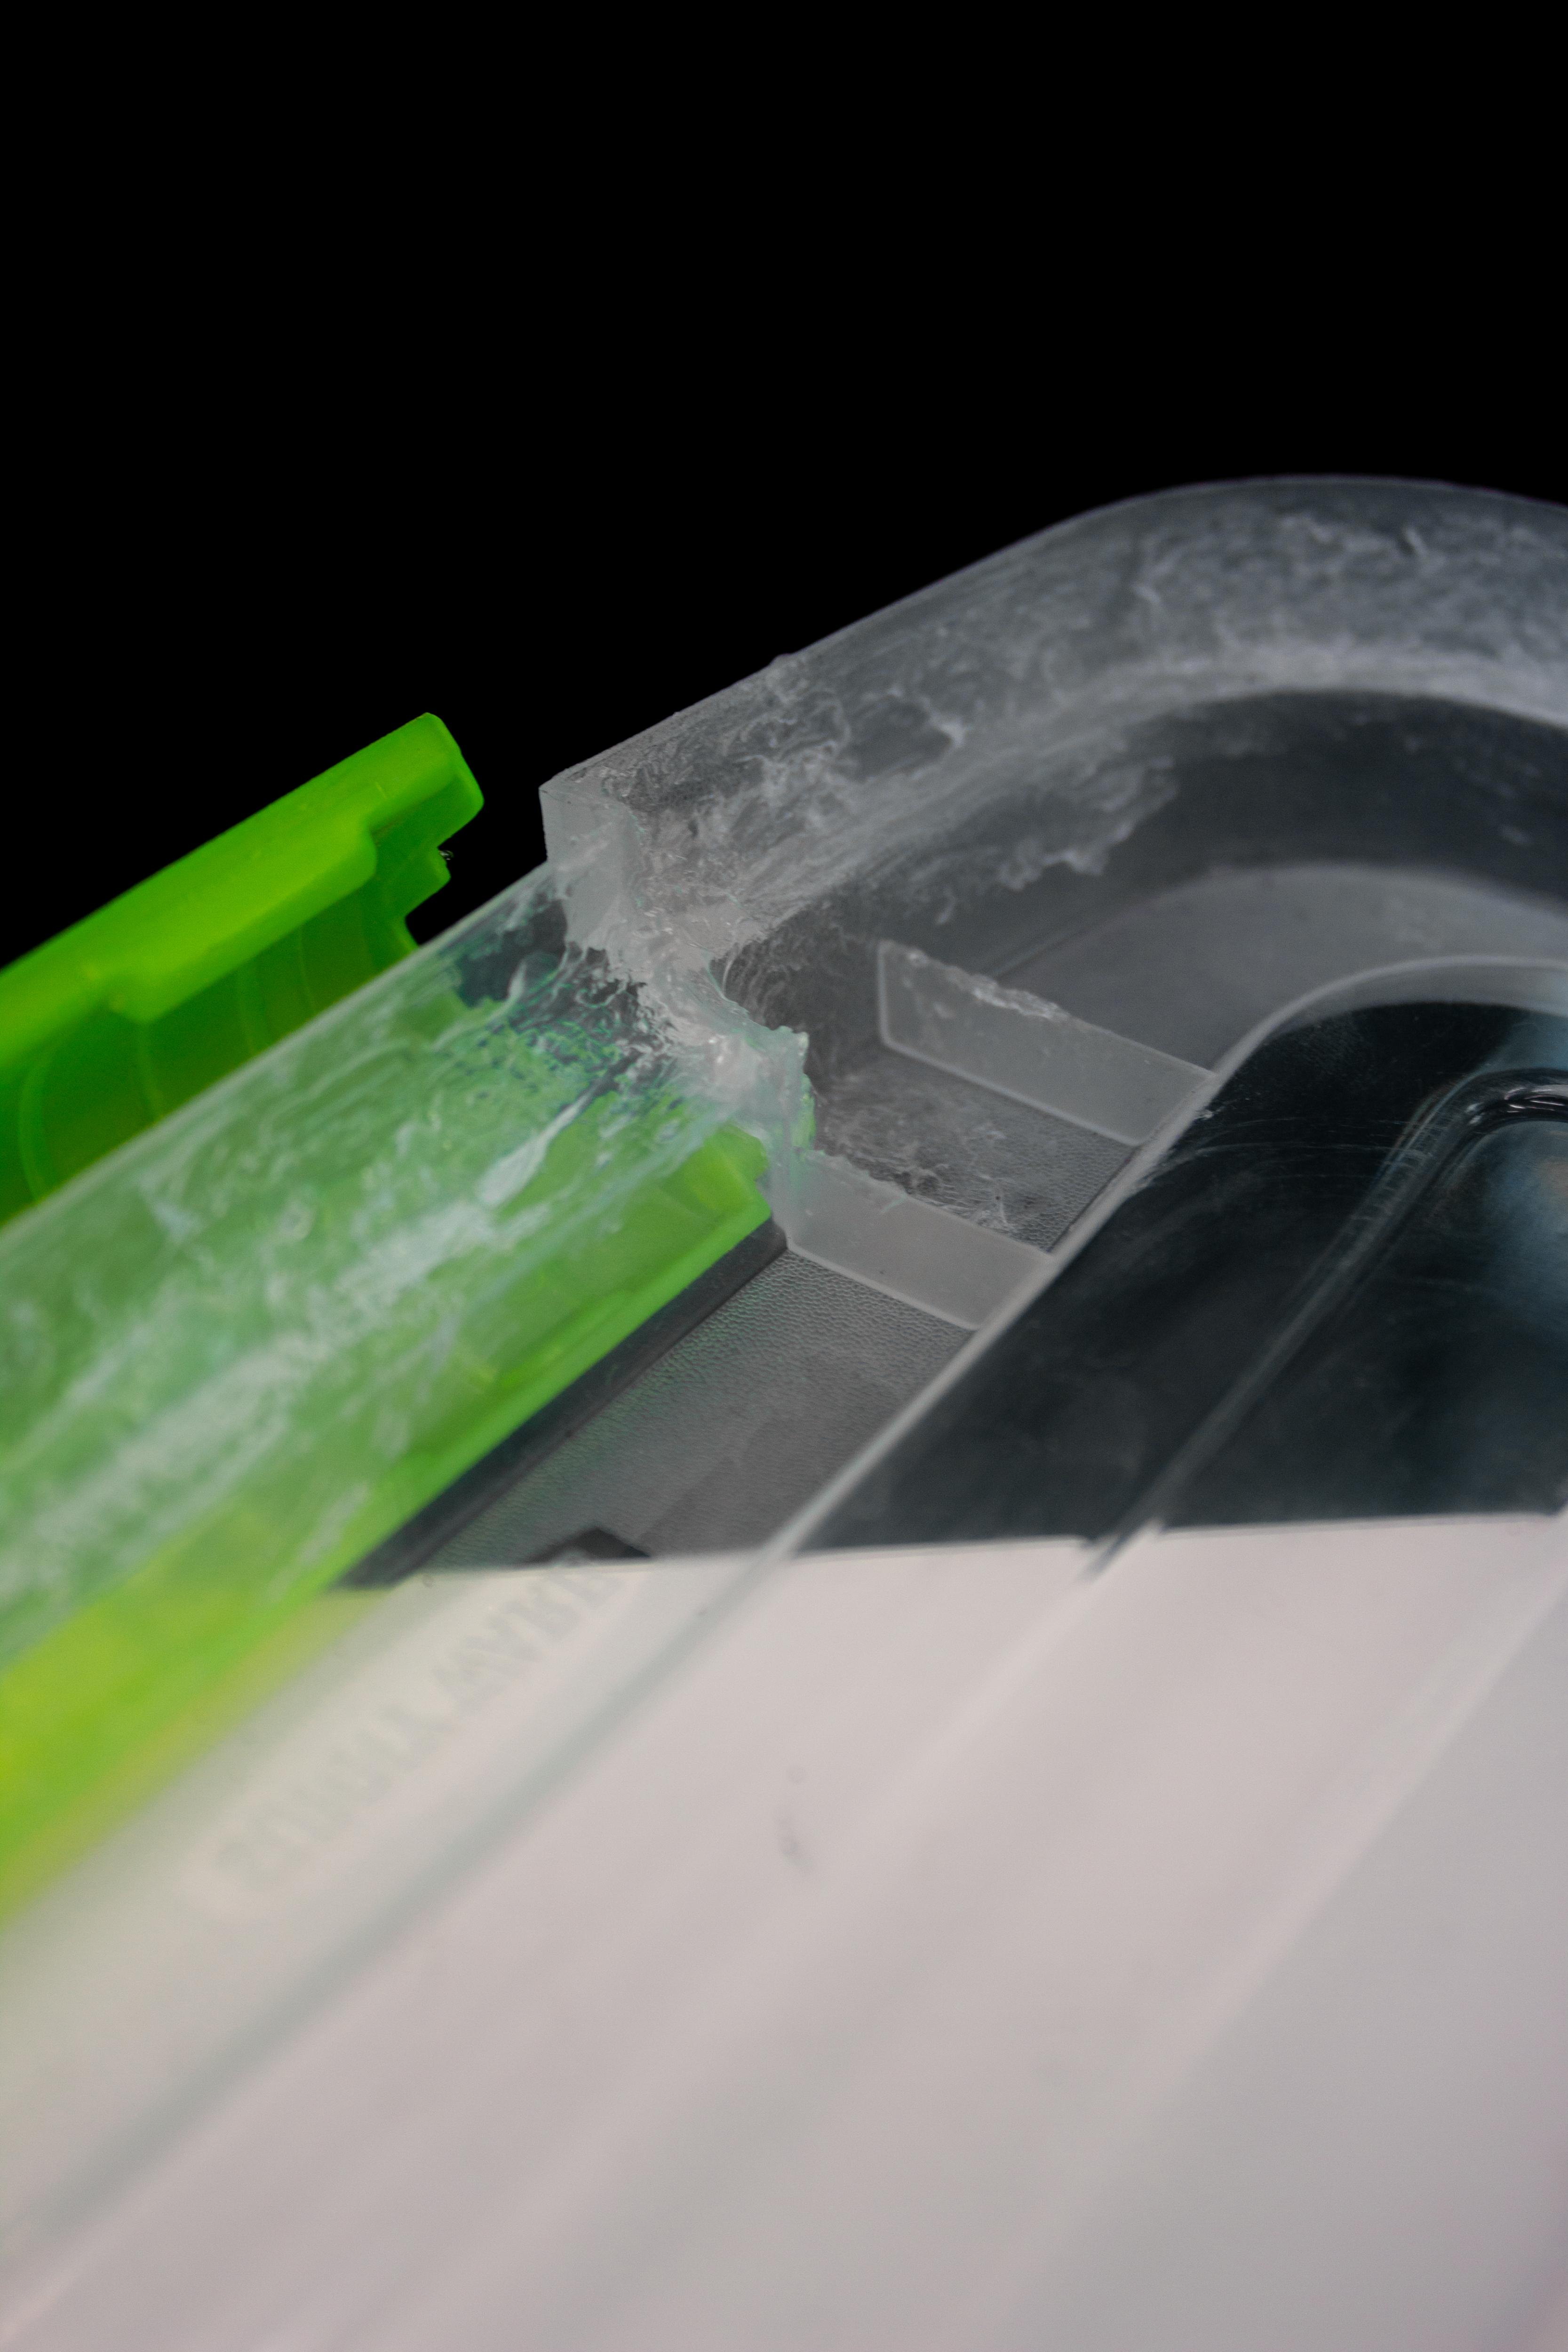
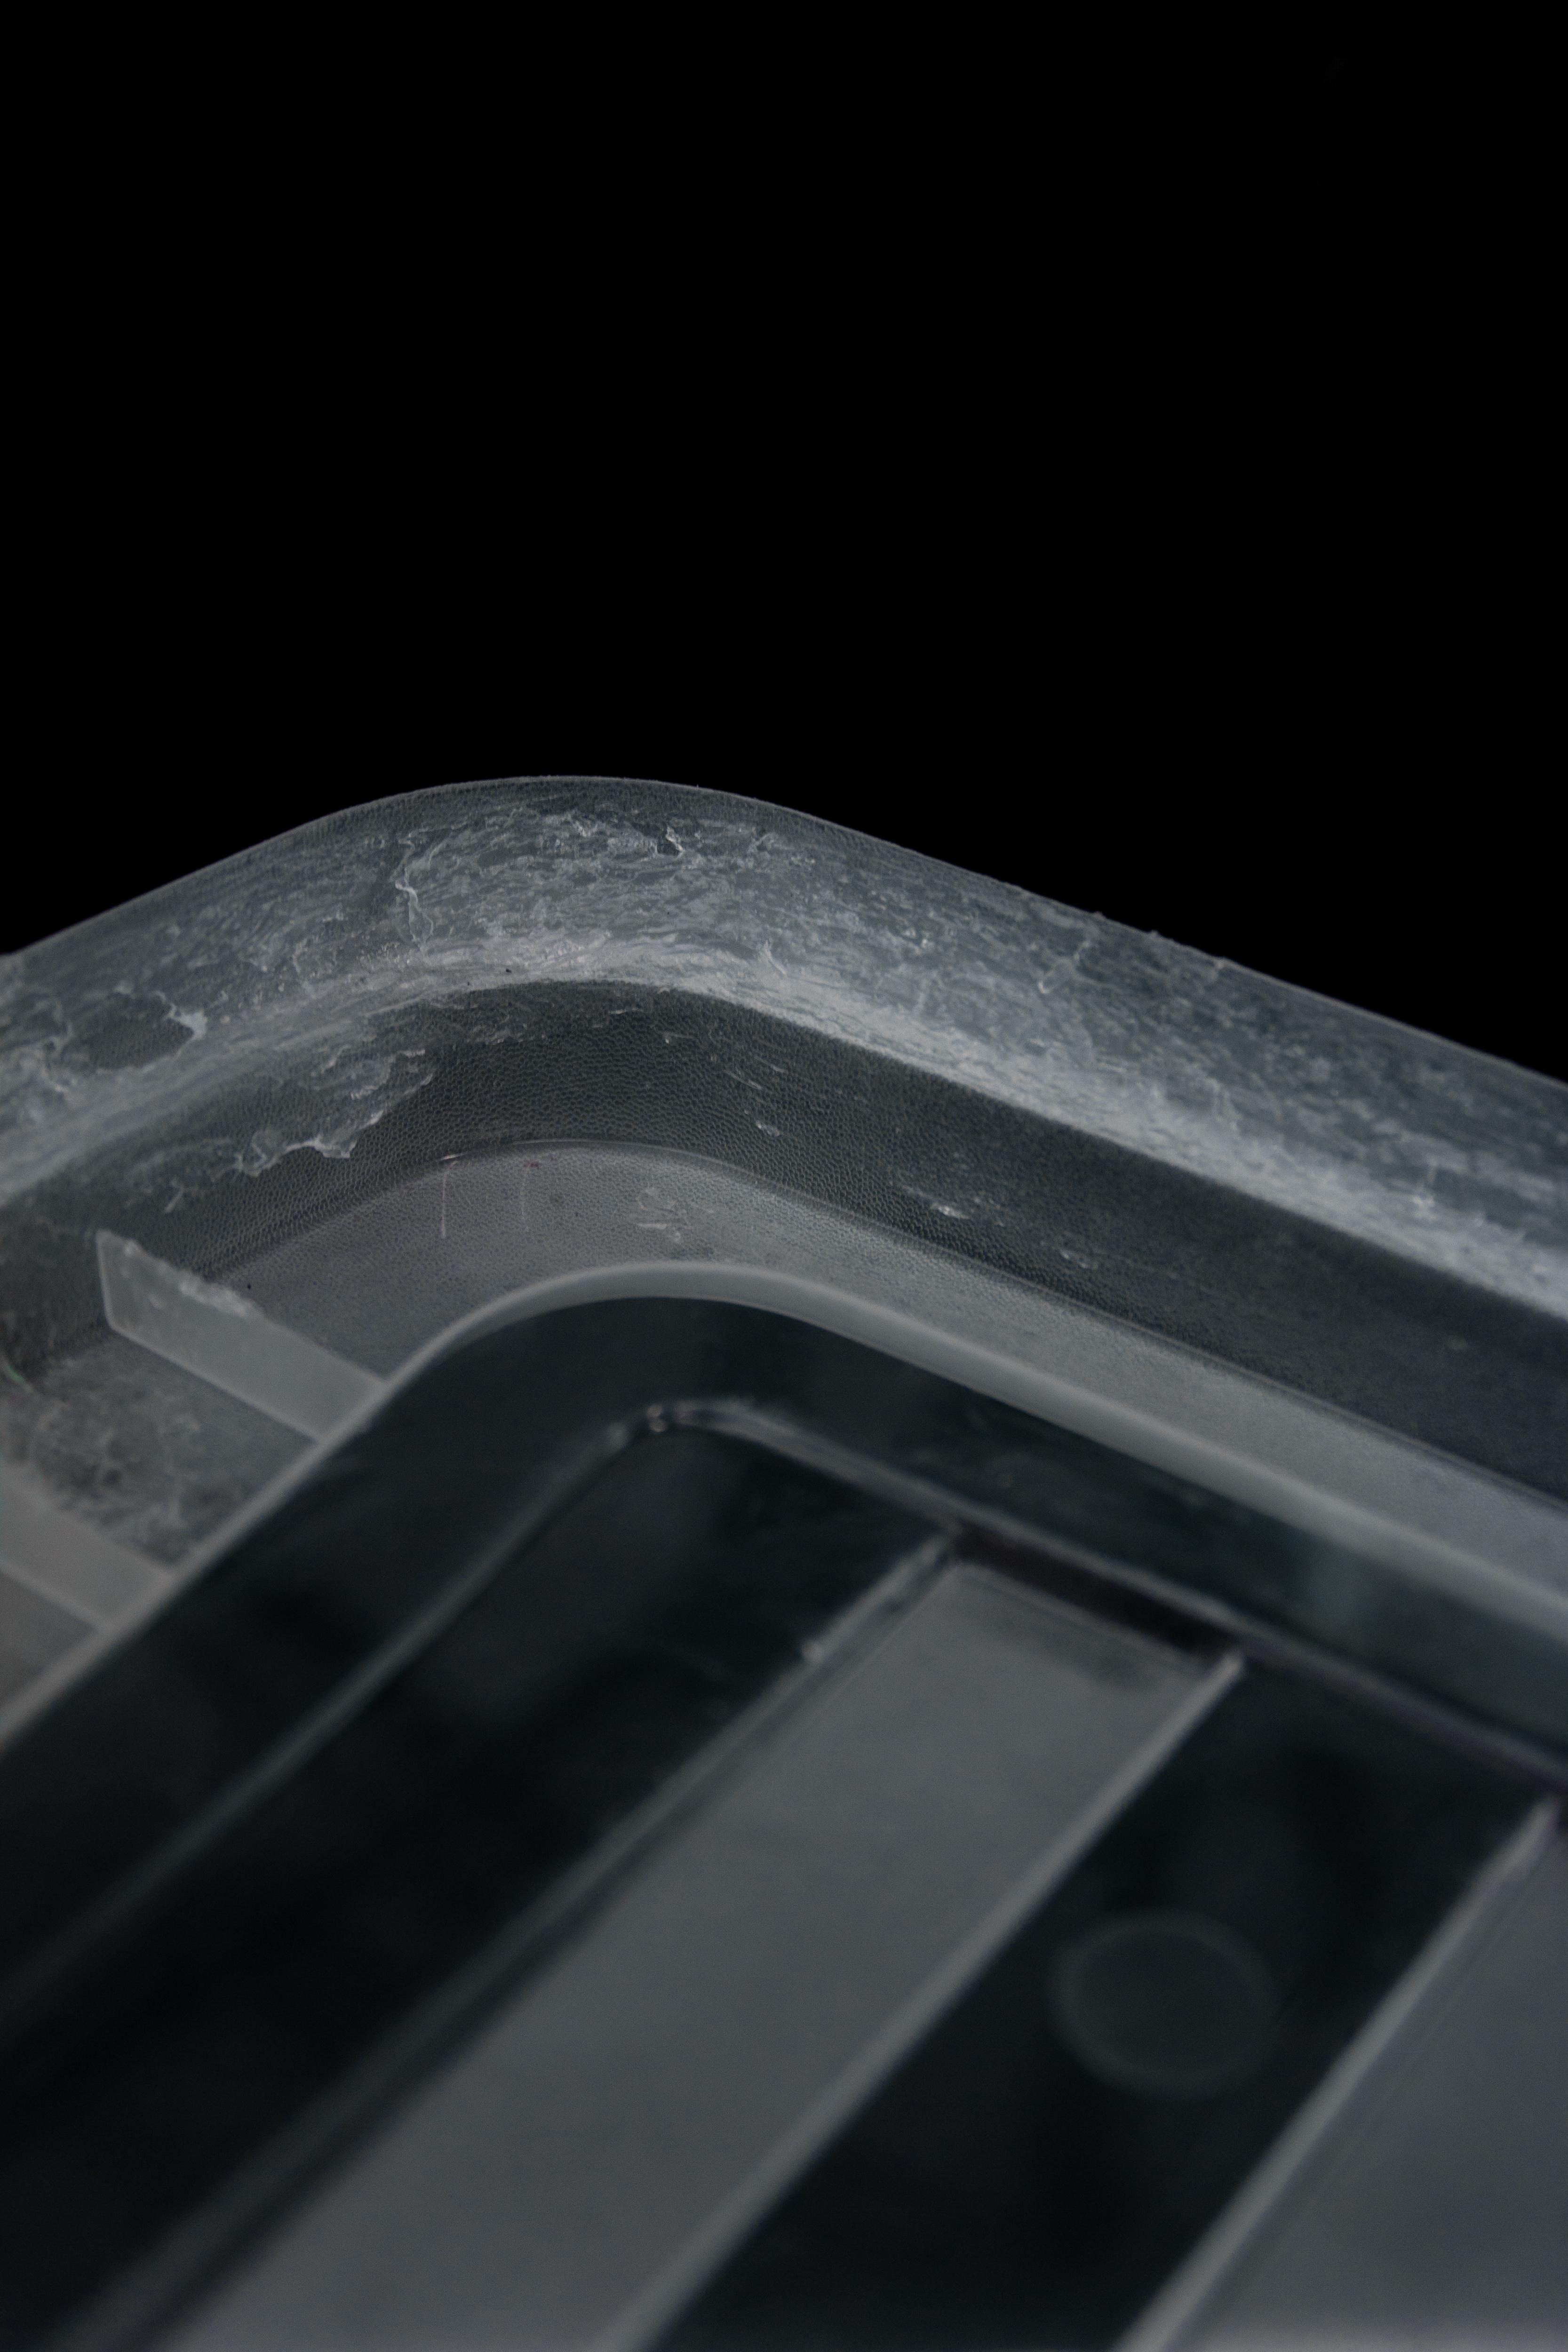
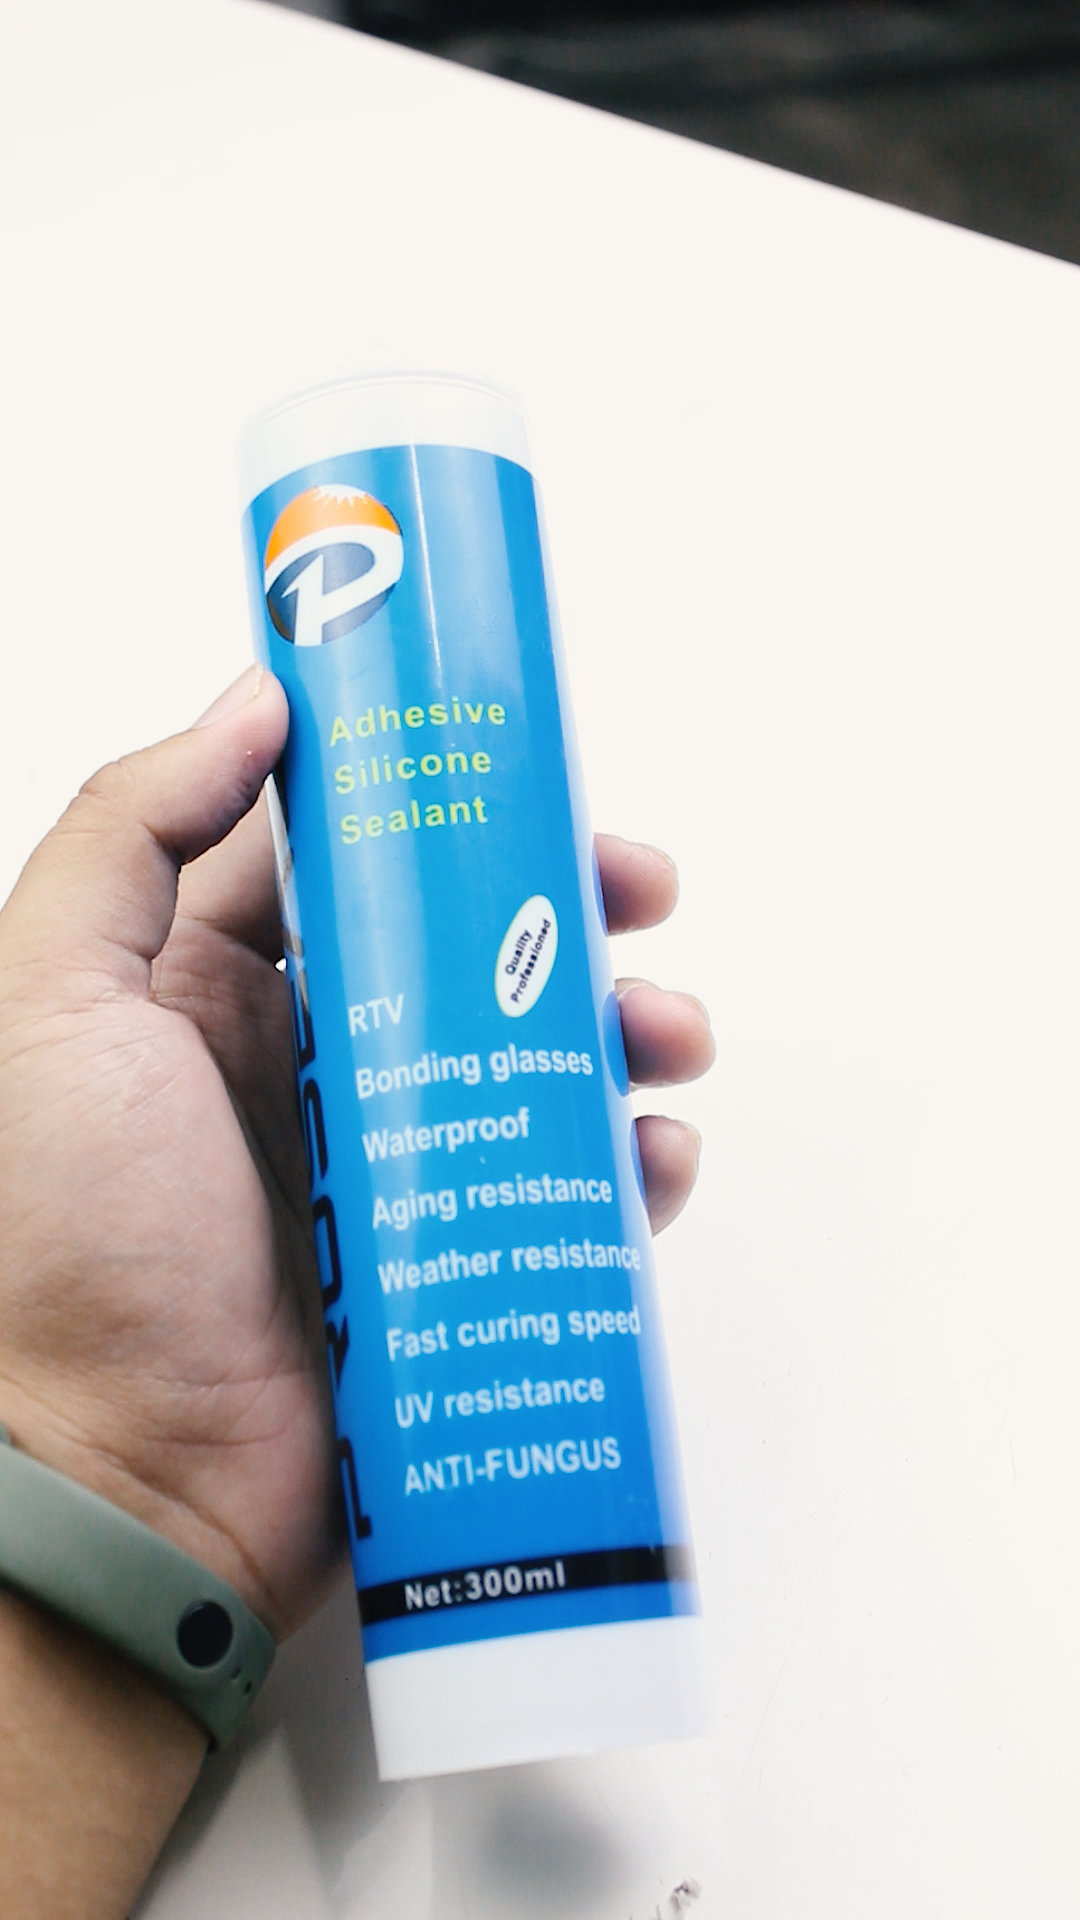
Since the container I have is not airtight, it means air can get in or out of the container box, and we don't want that to happen. Therefore, I used silicone sealant to make the container as airtight as possible.
Installing Spool Holder
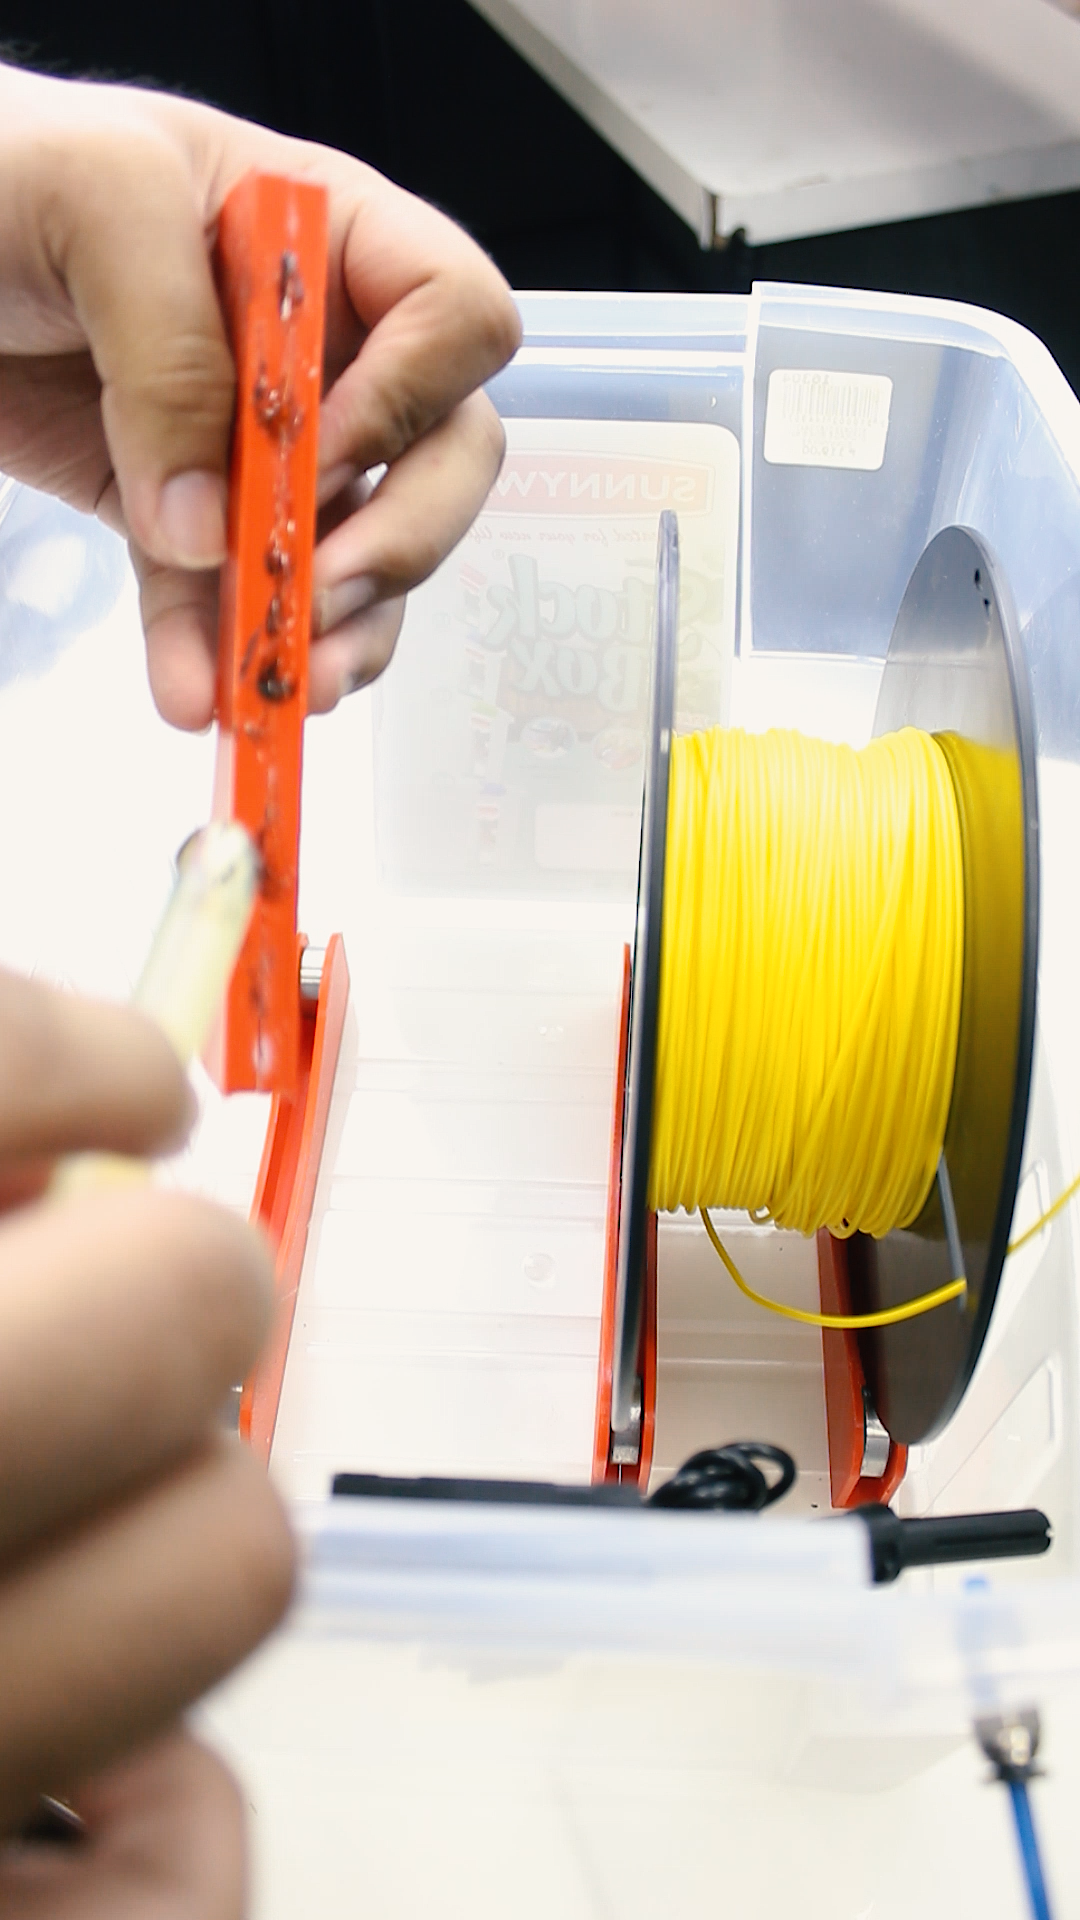
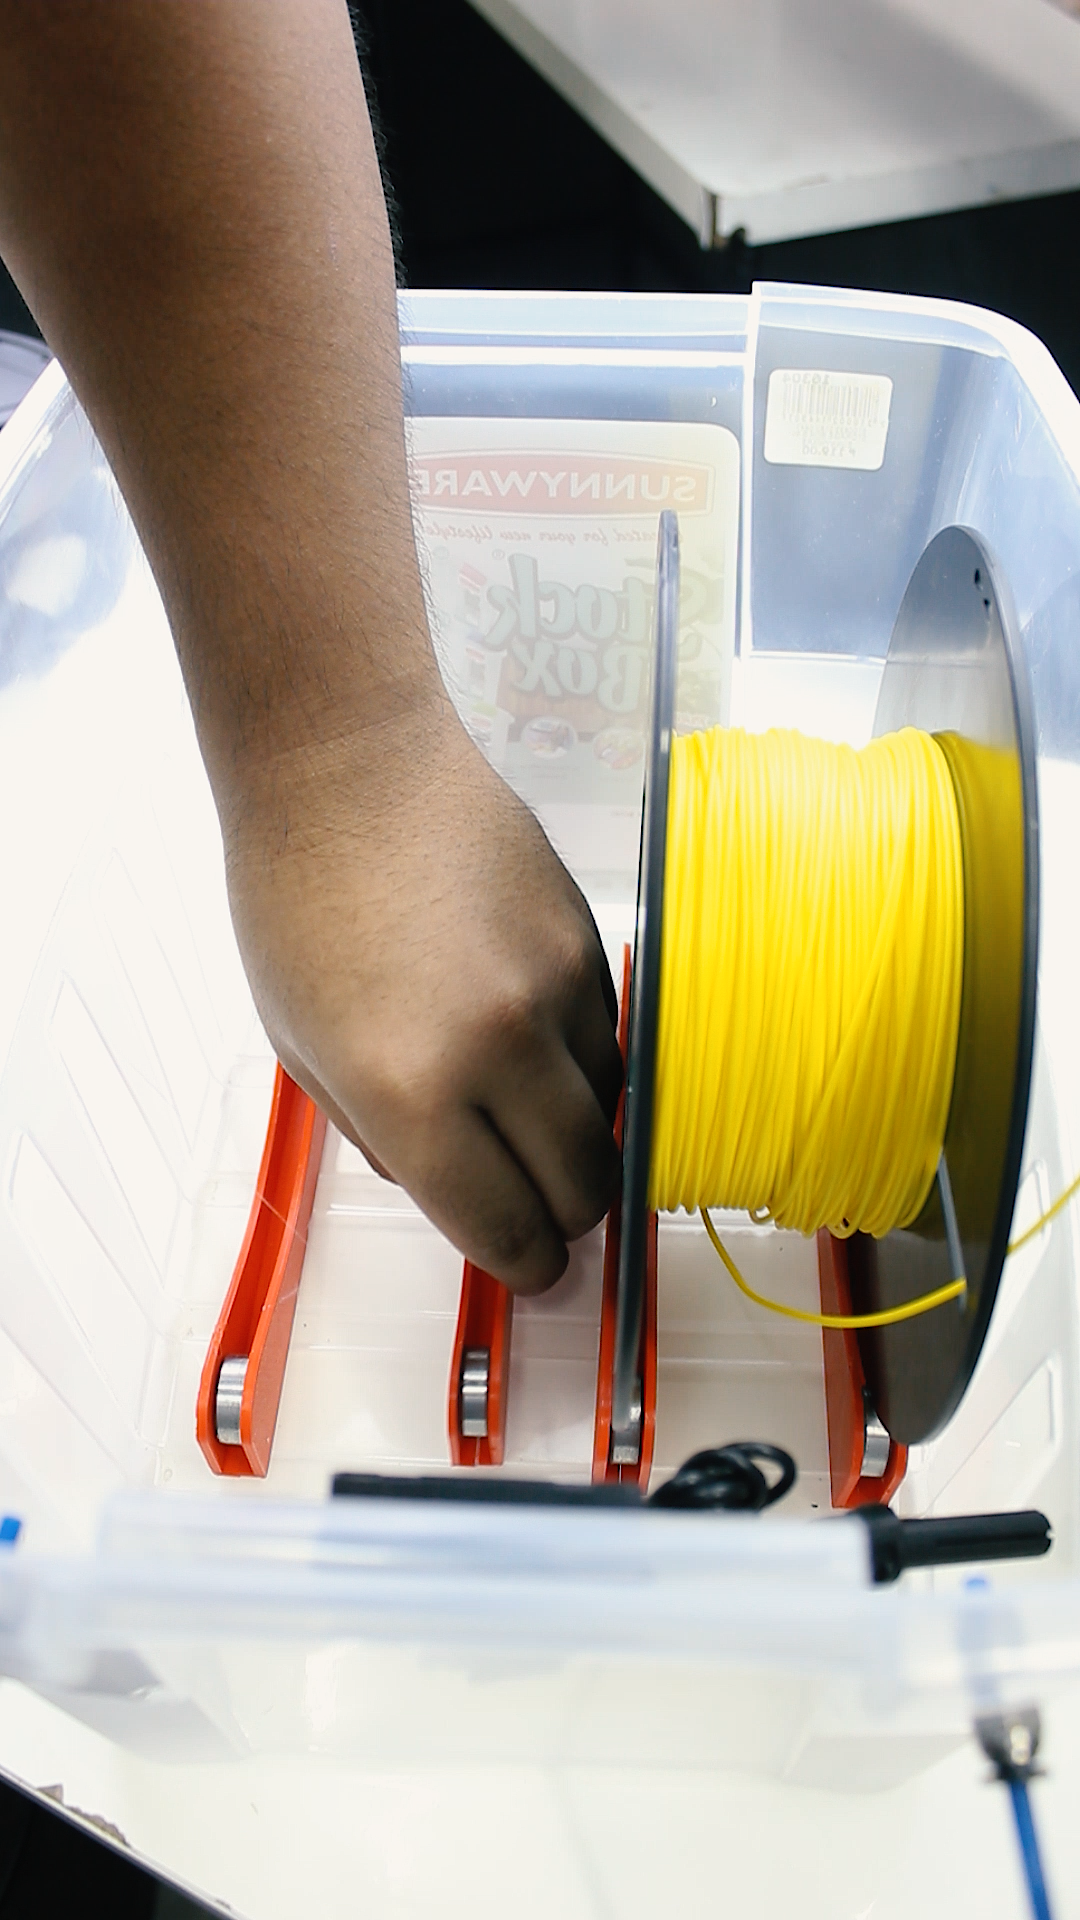
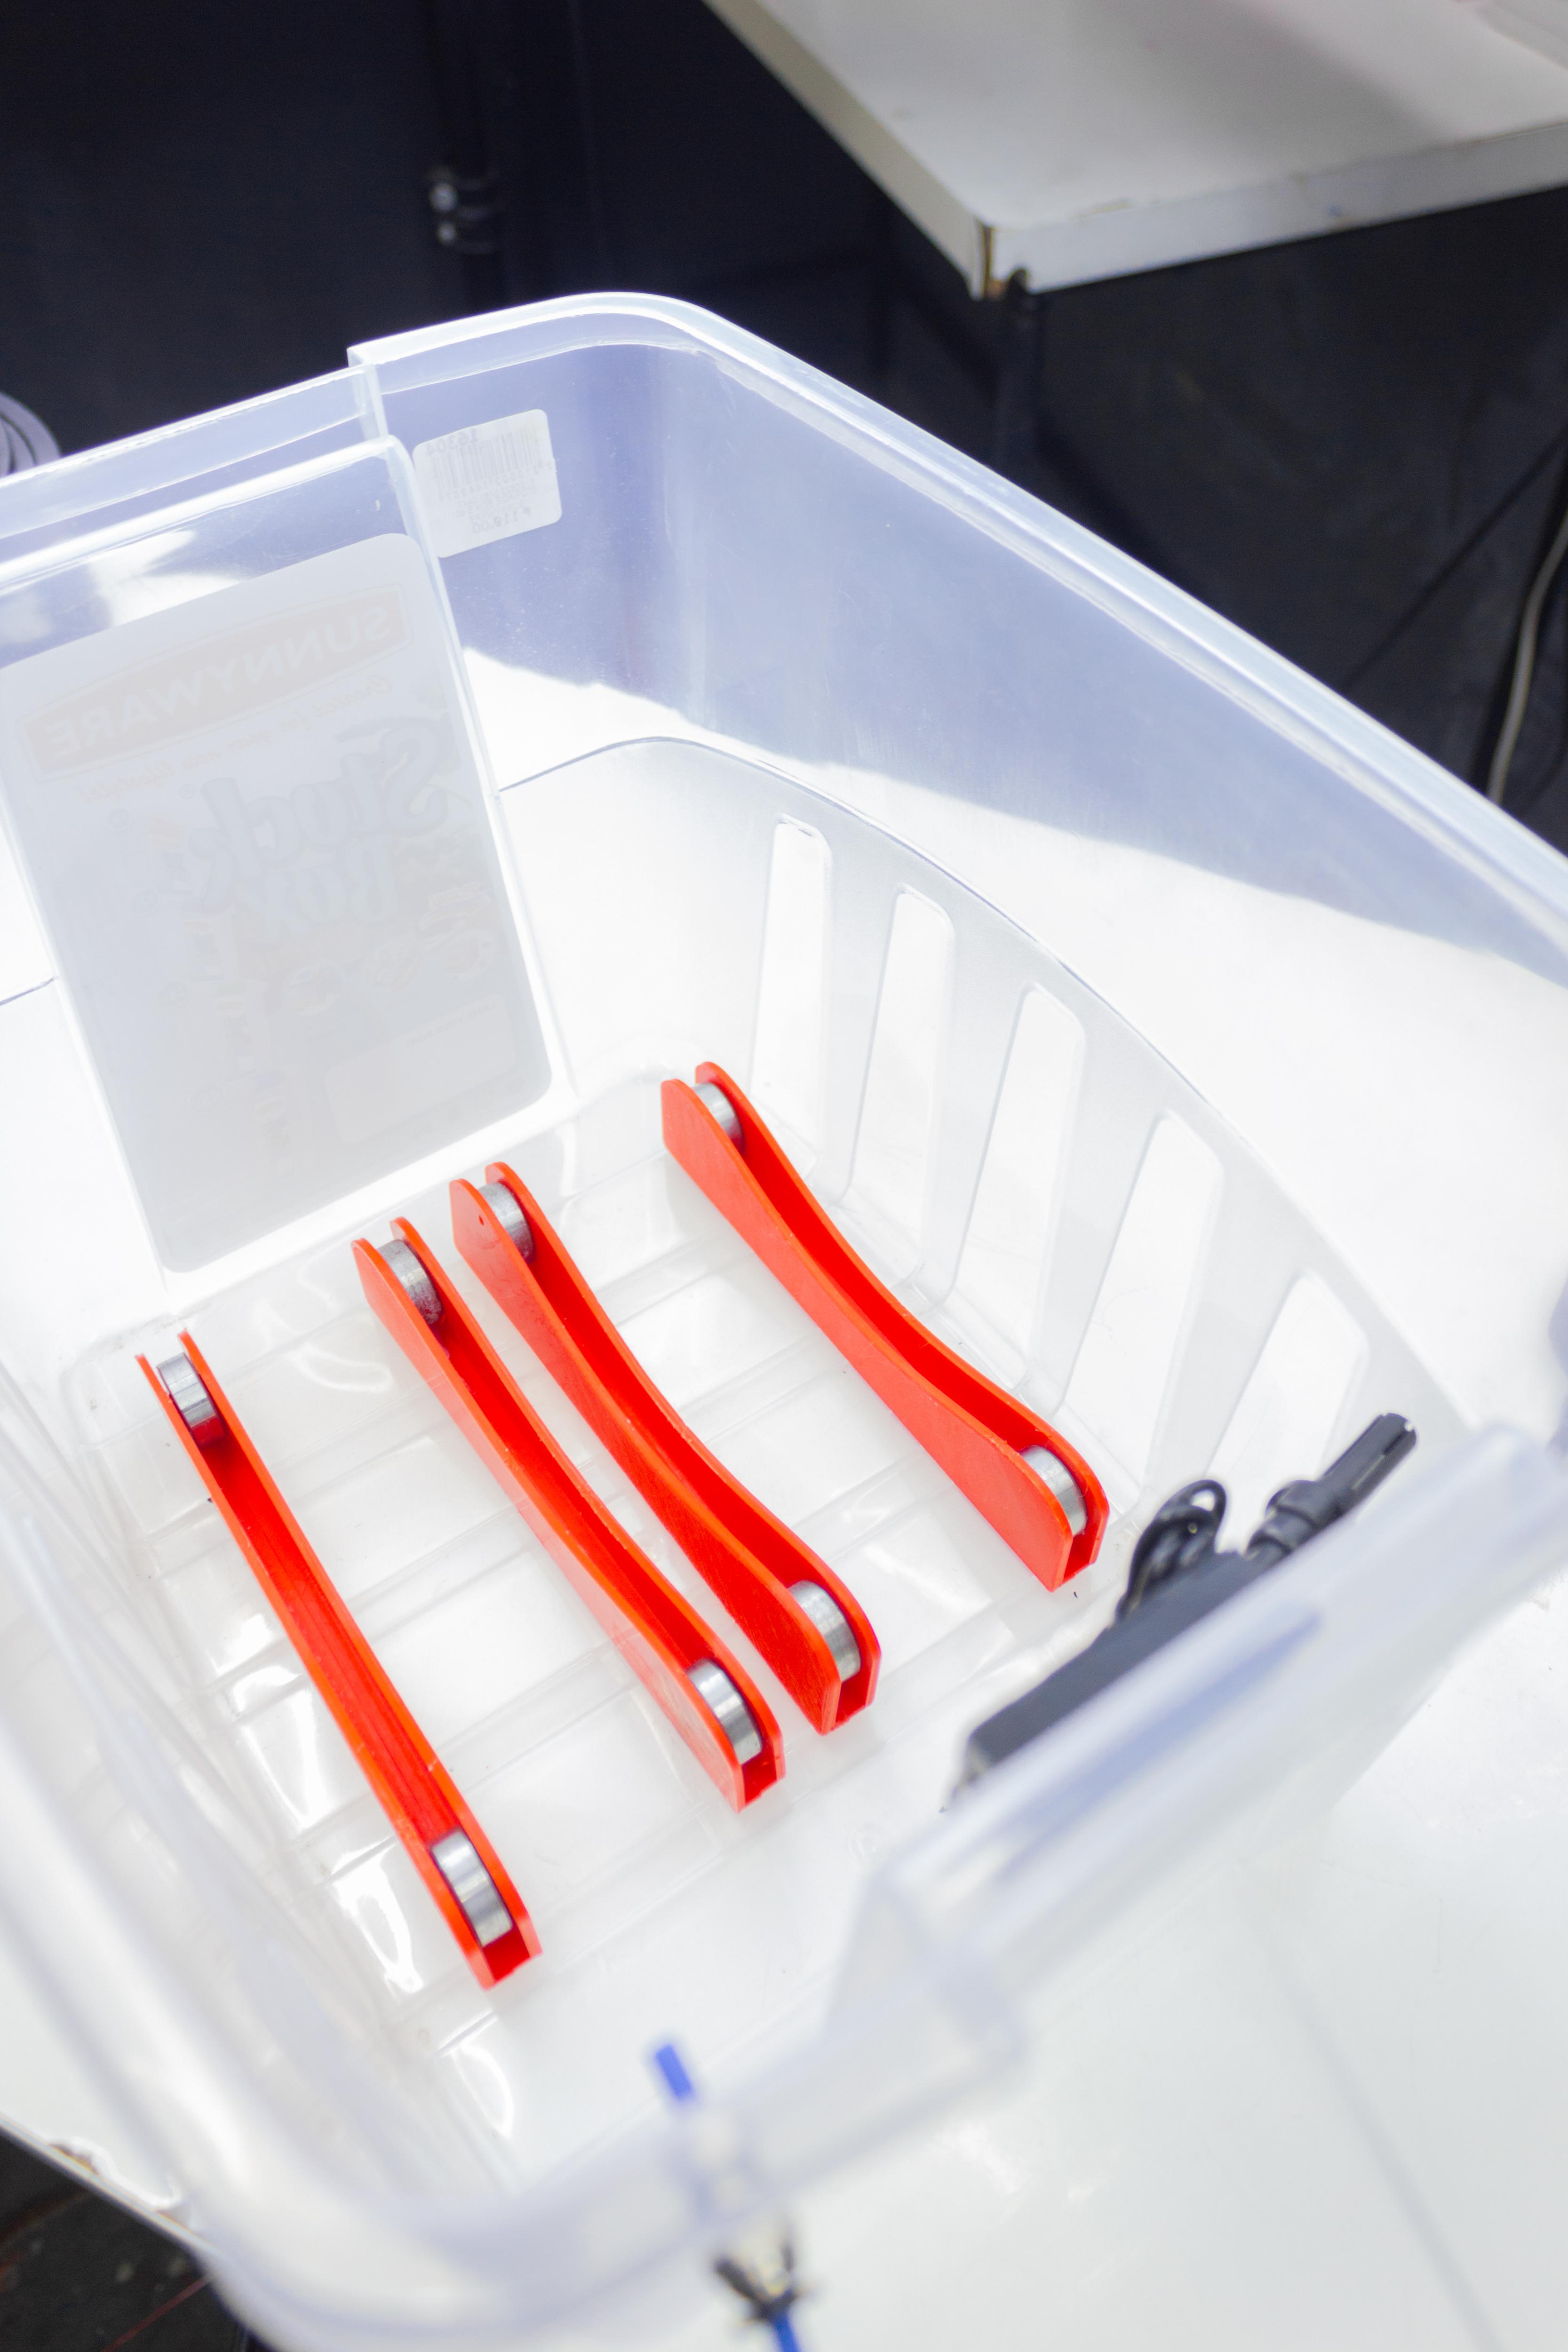
After that, I used a stick of glue to attach the four pairs of spool holders inside the container box
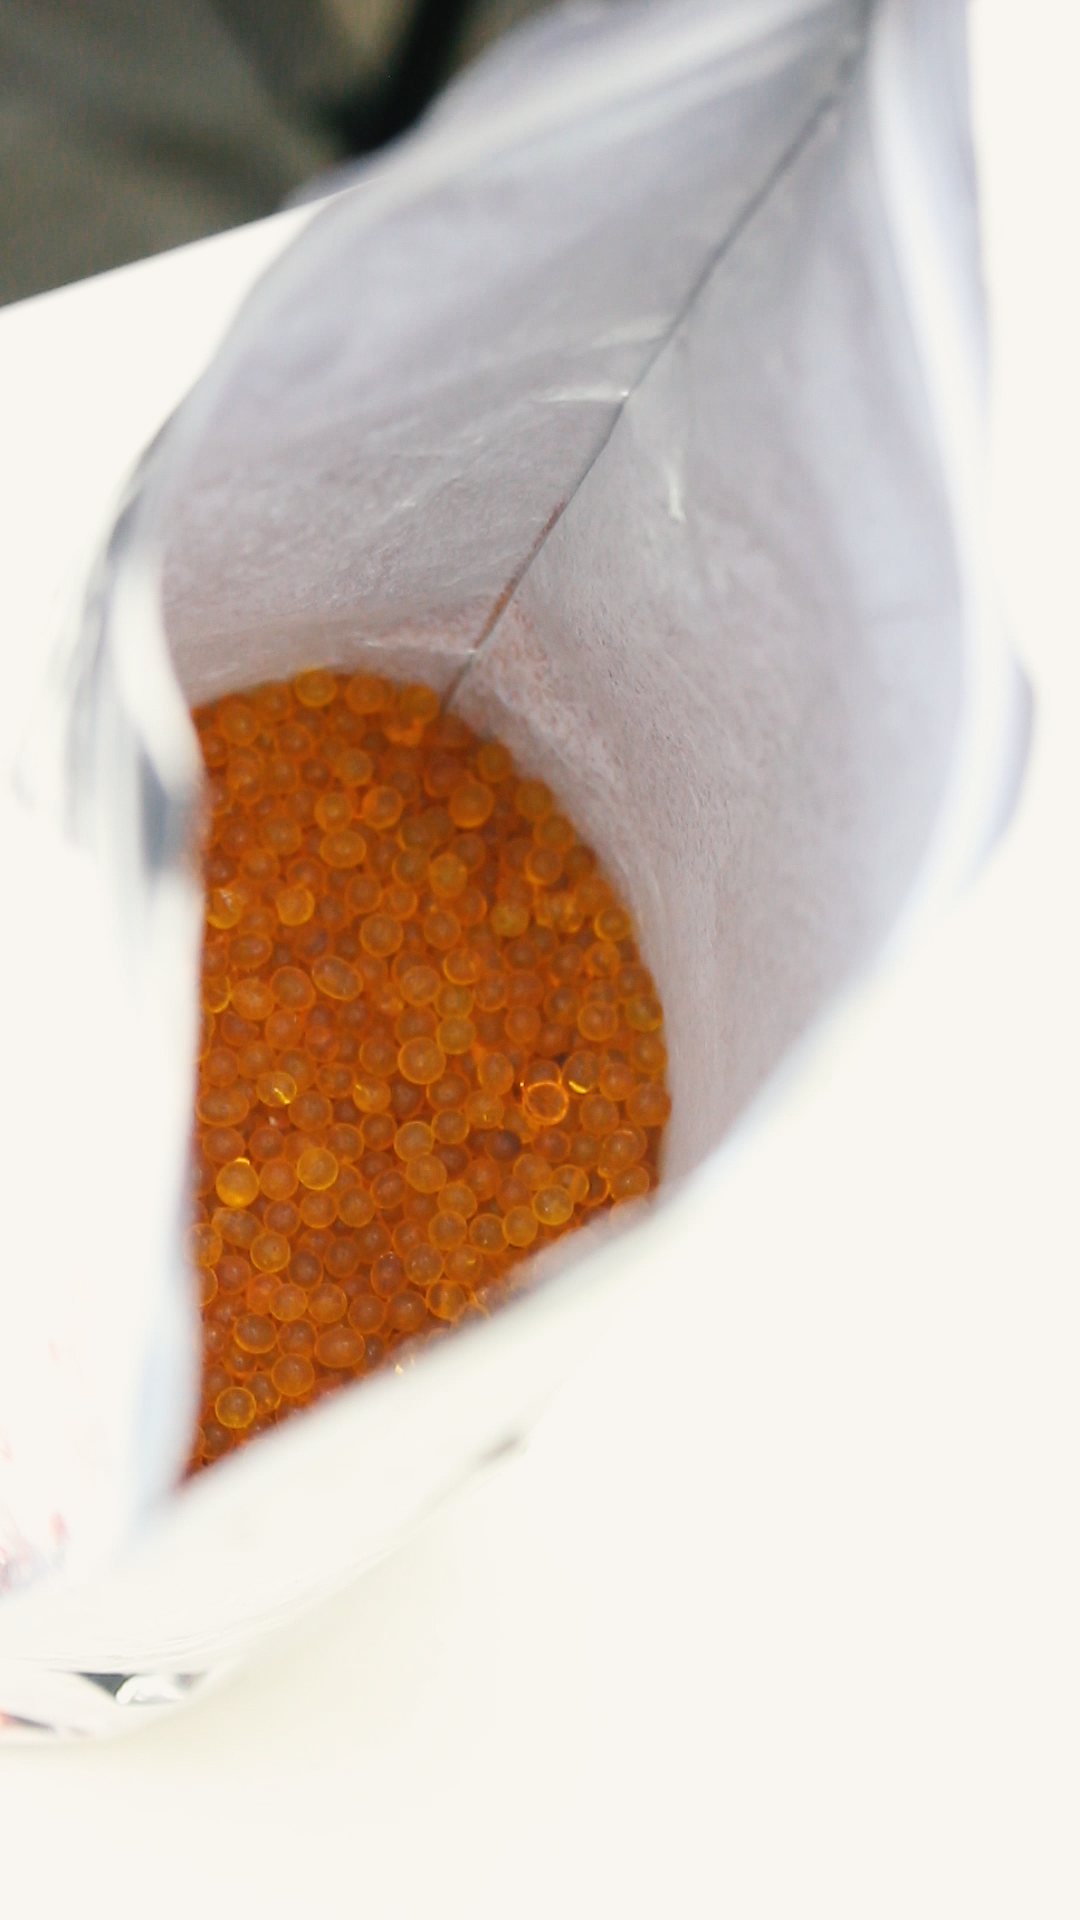
Silica Gel As a Dehumidifier
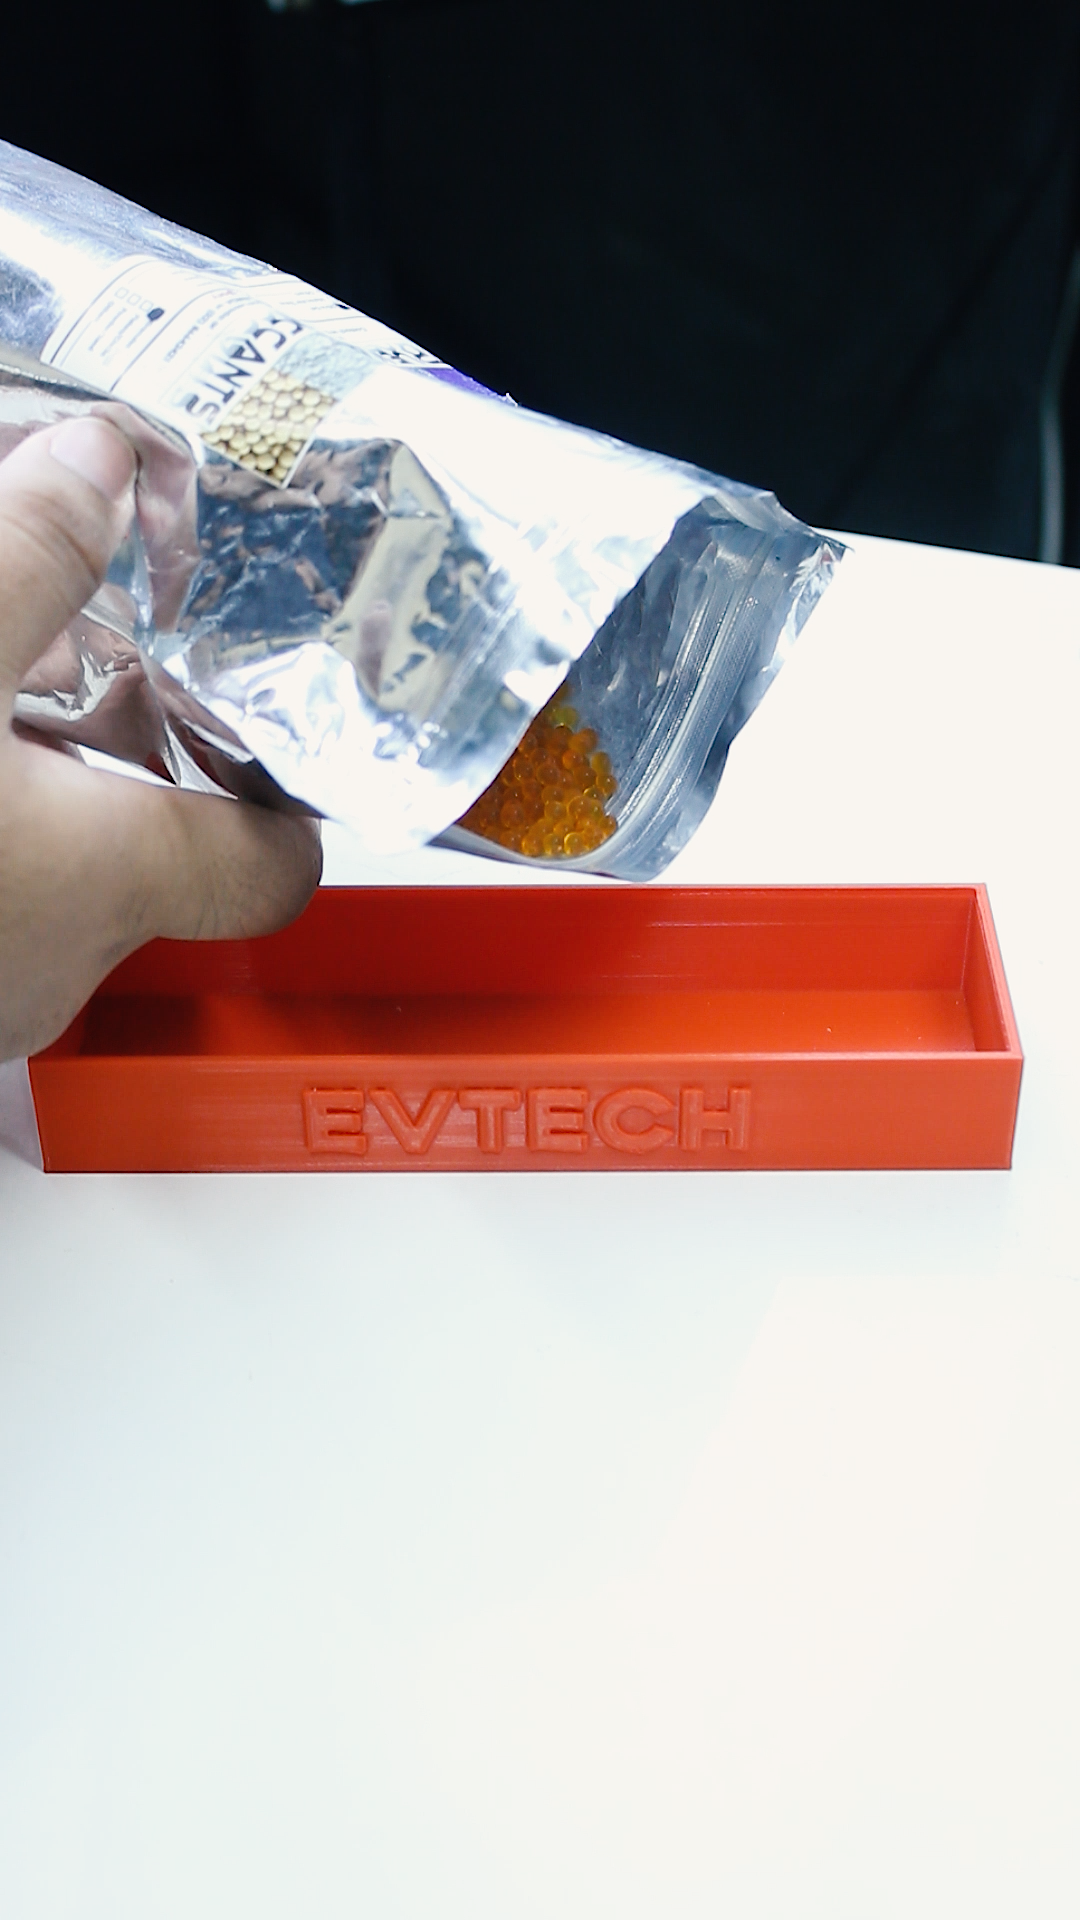
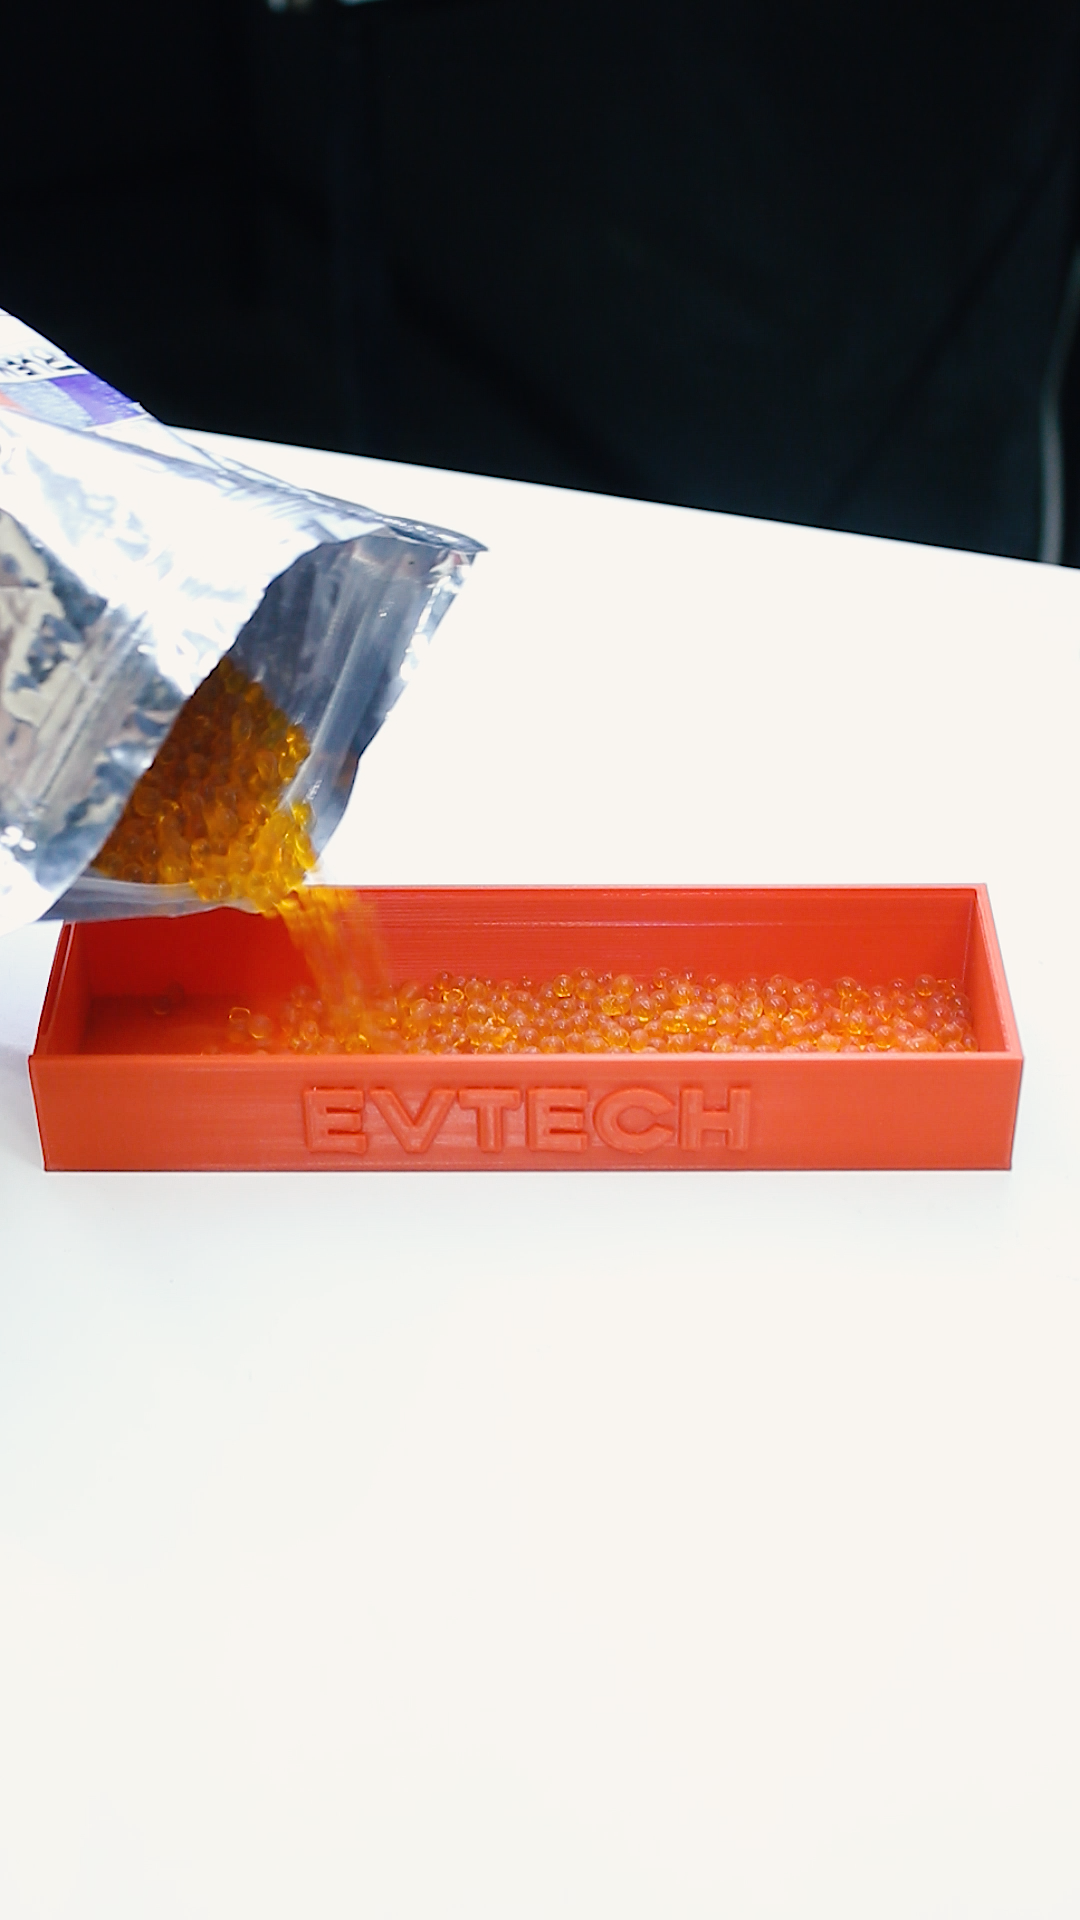
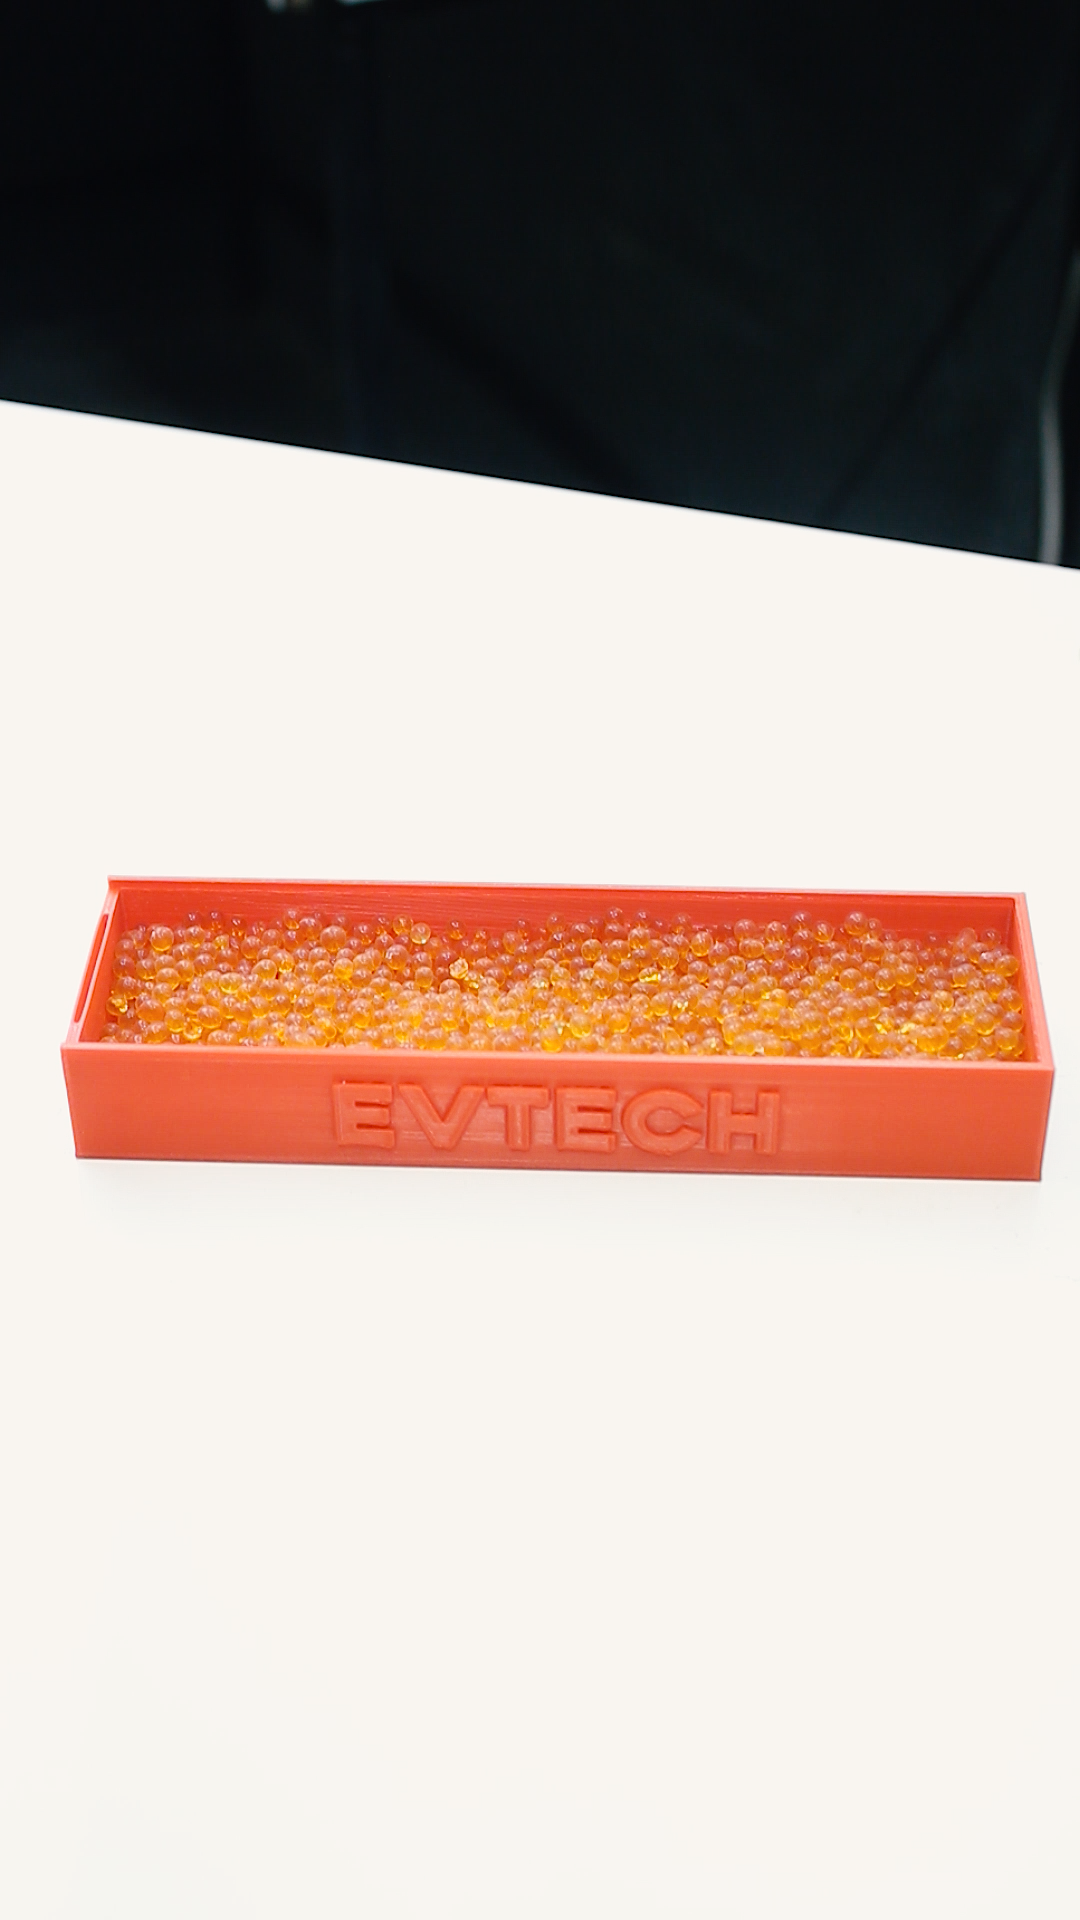
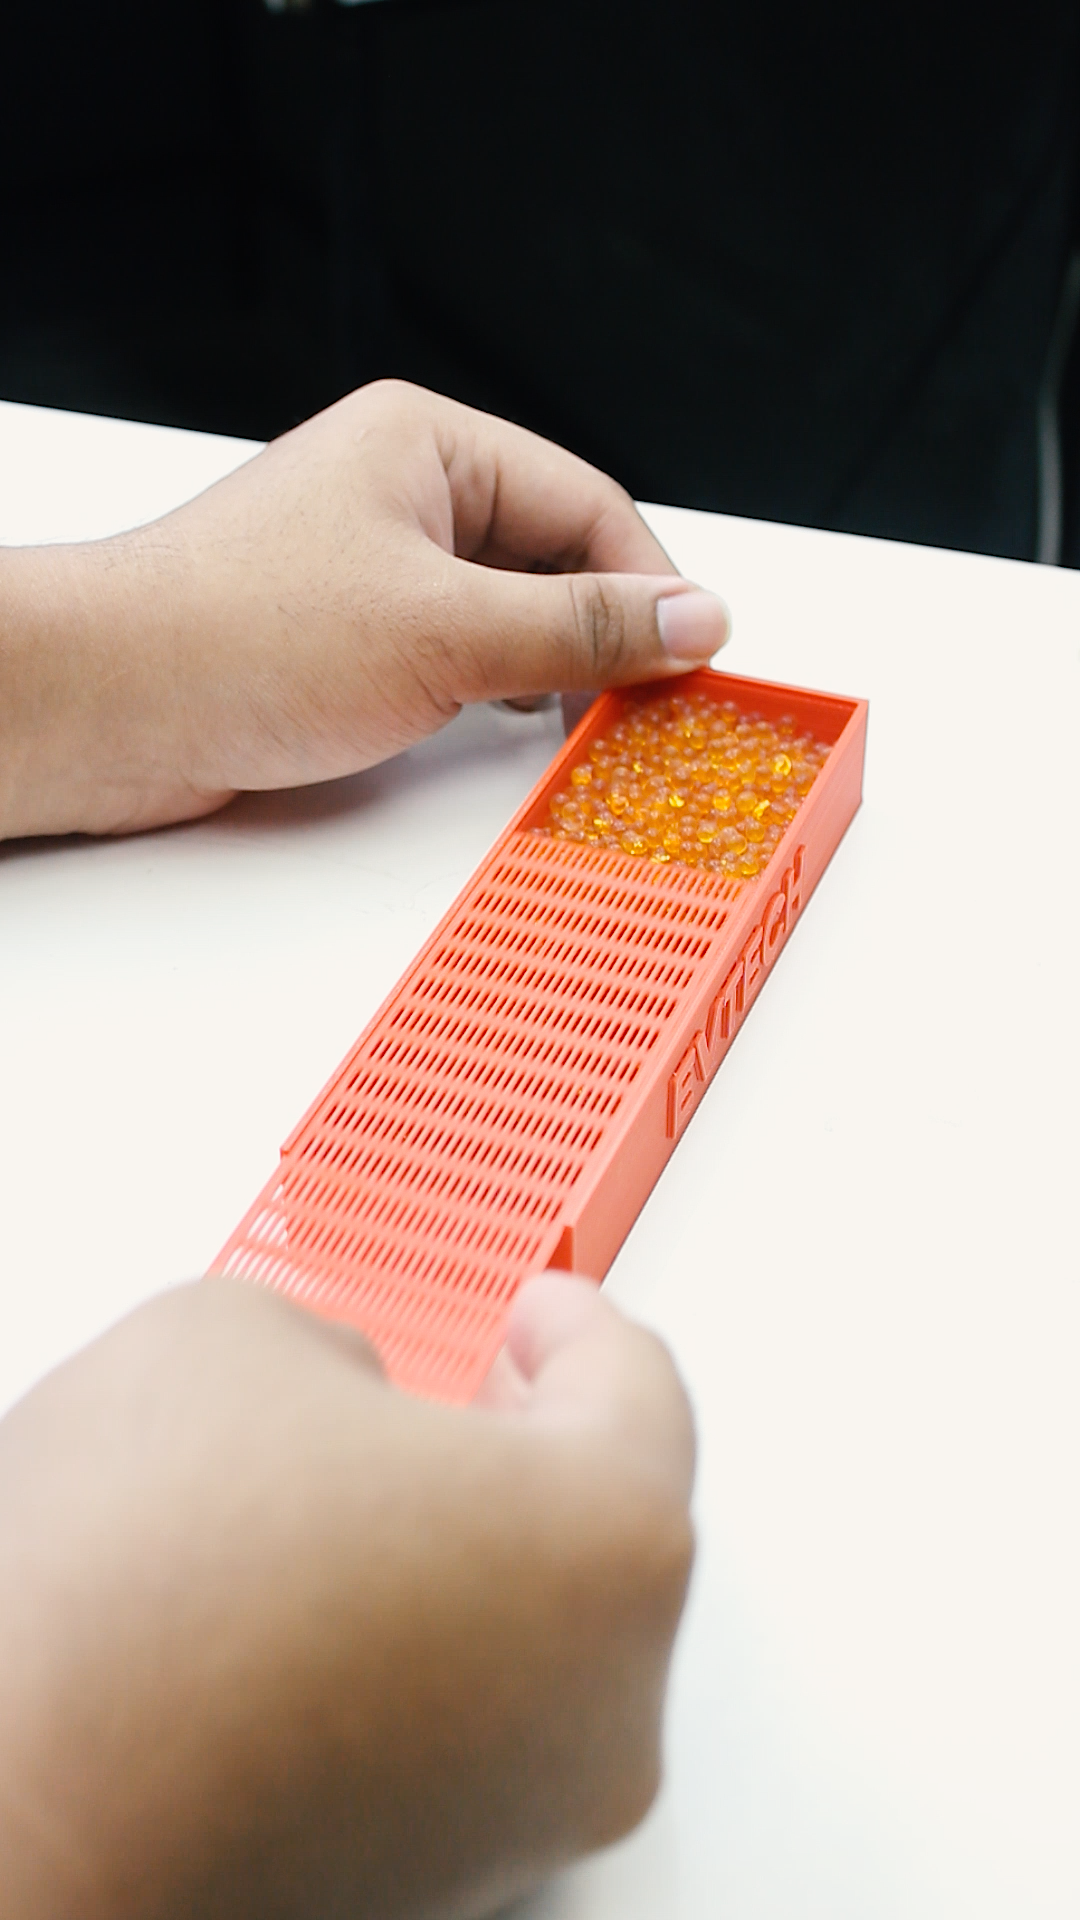
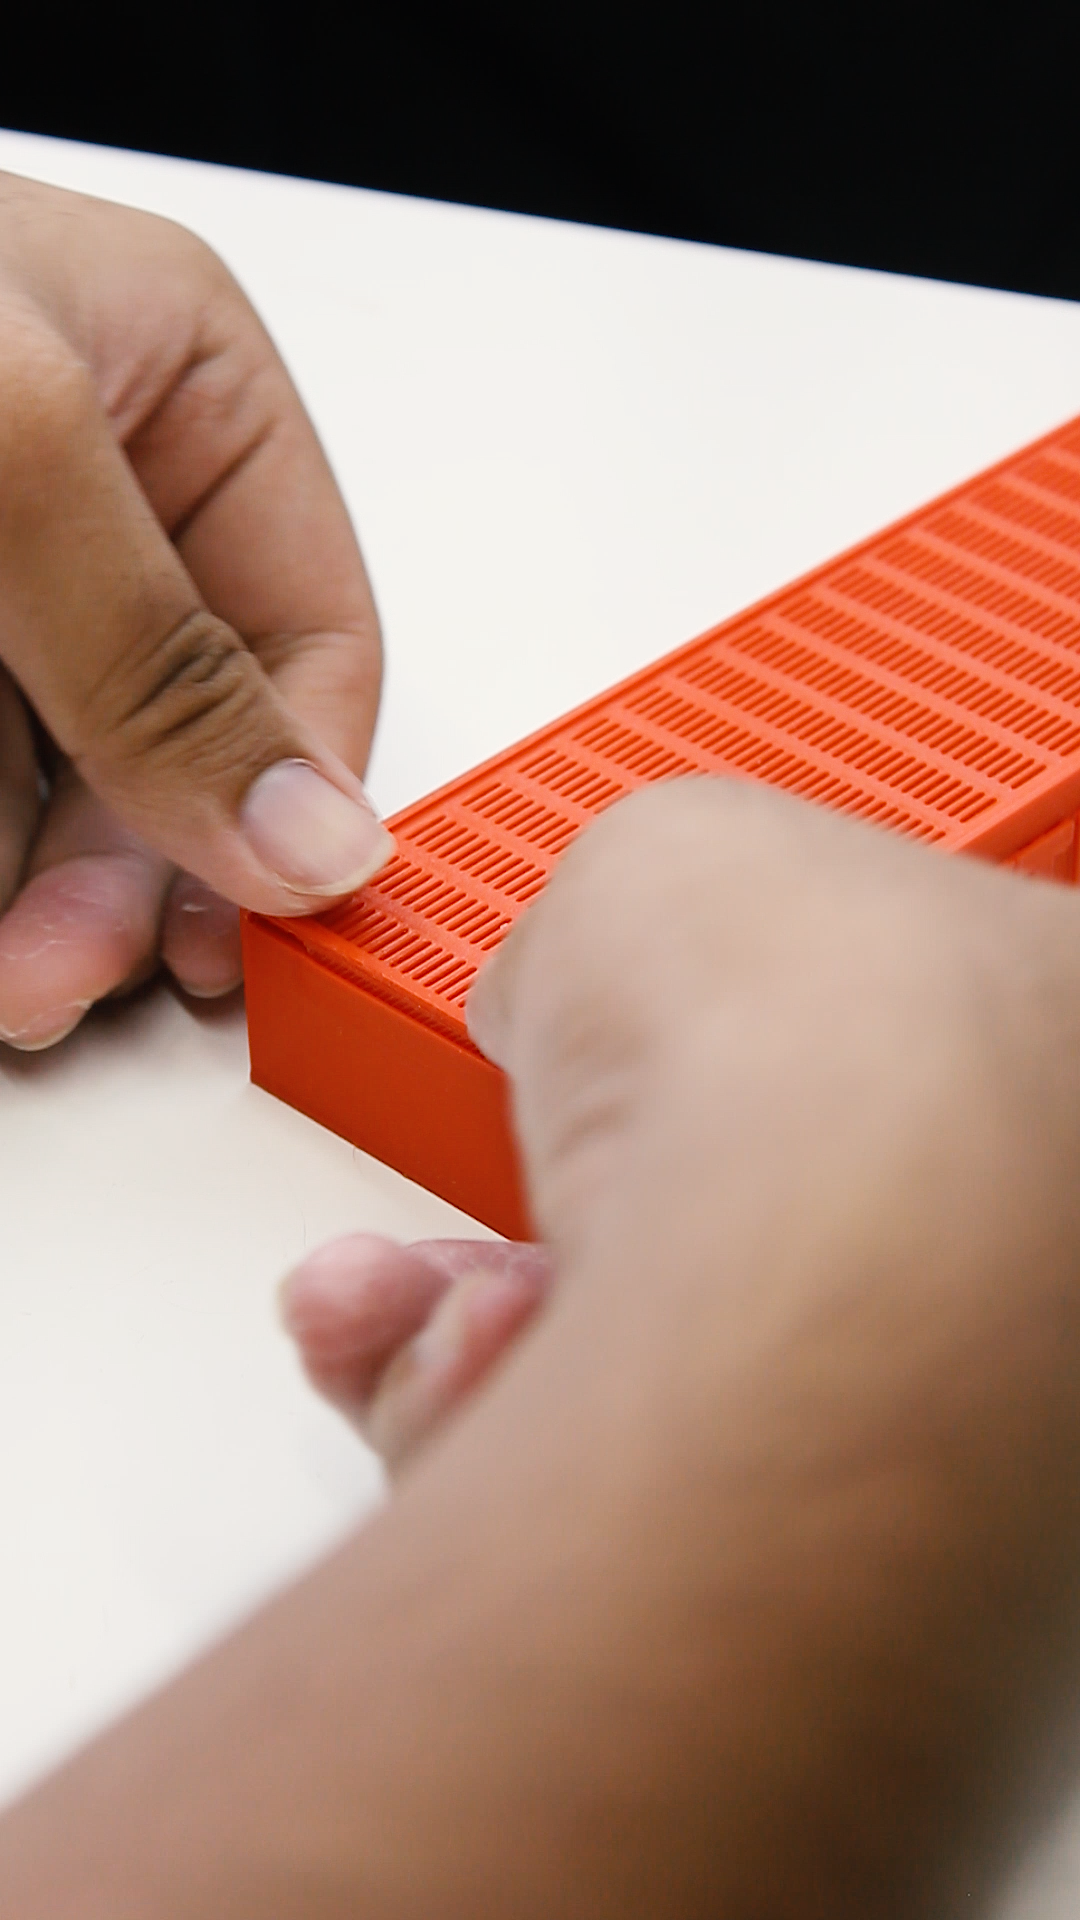
Next, it's time to fill up the 3D printed silica gel enclosure with silica gel. Silica gel is the same substance you find in small bags that usually come with shoes or 3D filament to keep them dry. It absorbs moisture, and when heated, it becomes dry again—allowing you to reuse the same beads again and again.
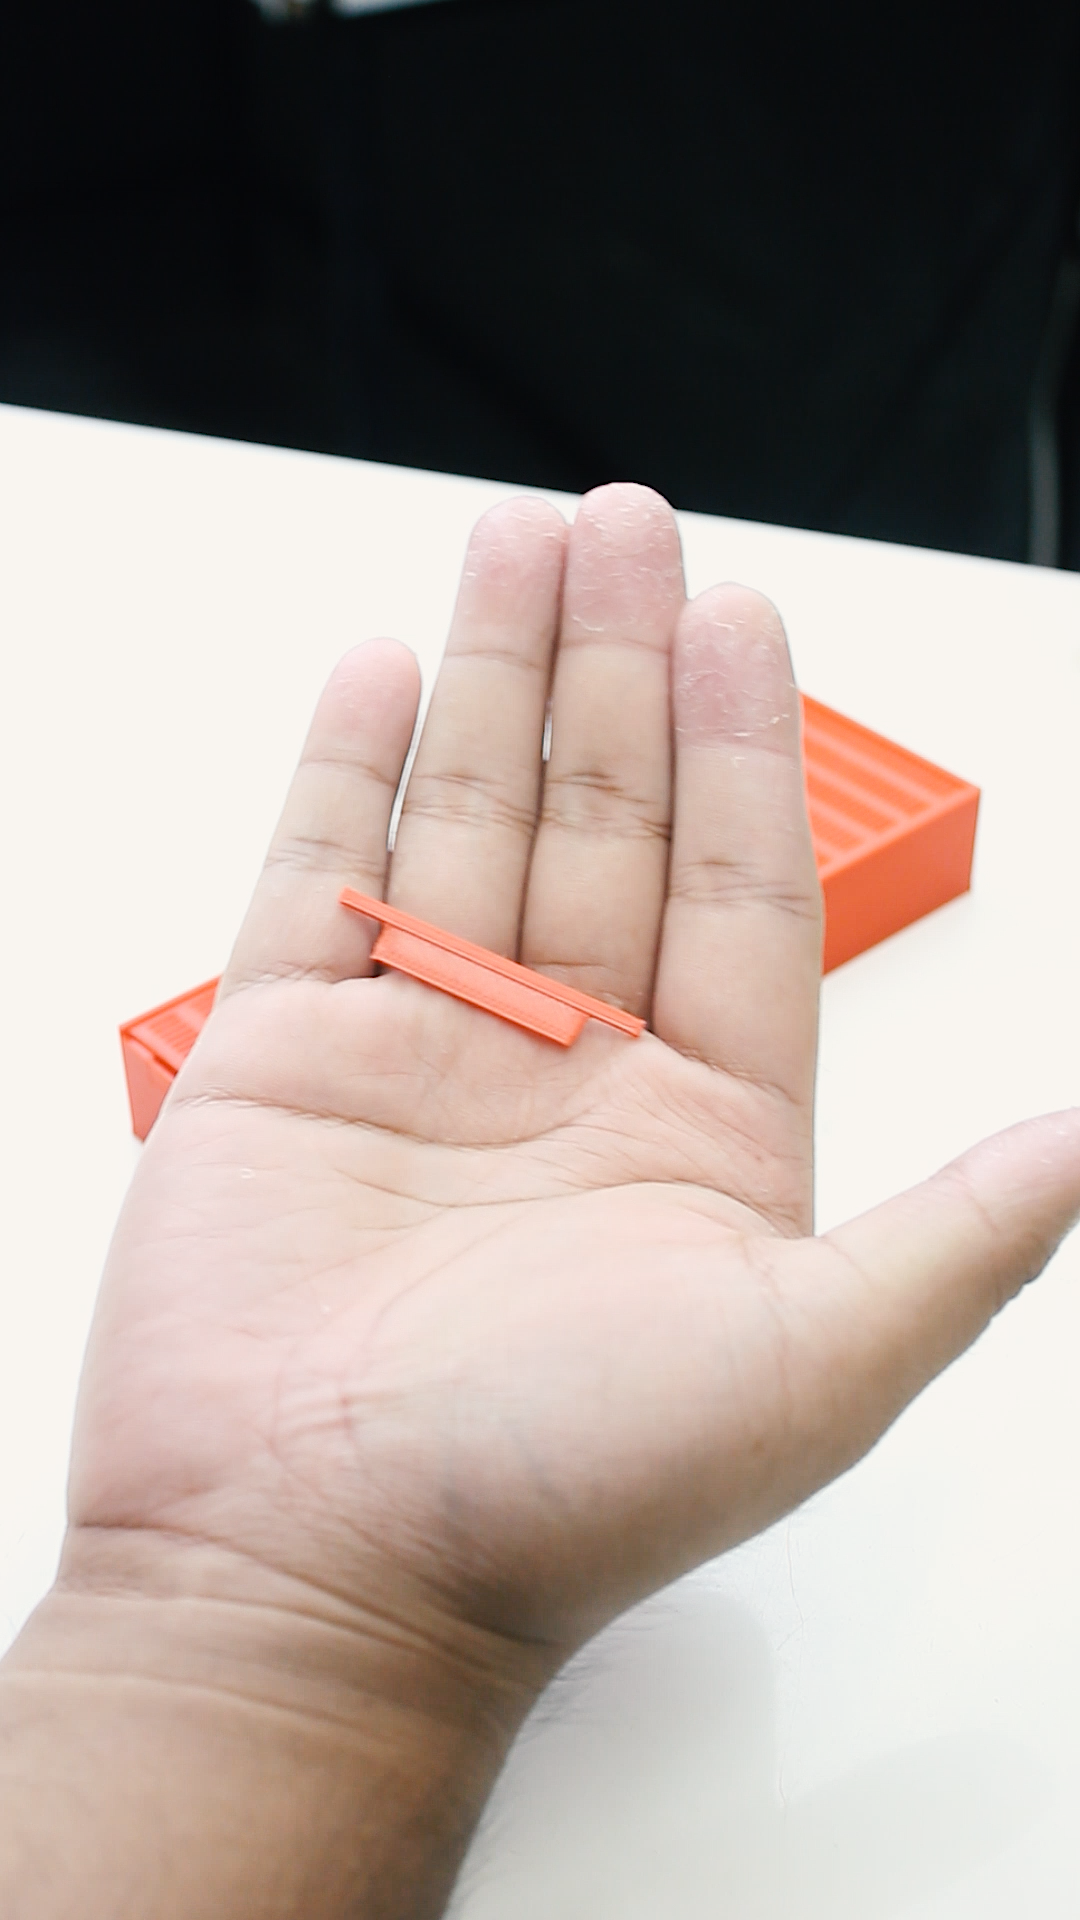
After filling it up, close the enclosure with its cover, and make sure it is locked with these clips. Once done, place it inside the container box, and ensure it is attached to the base of the container so that it doesn't move around.
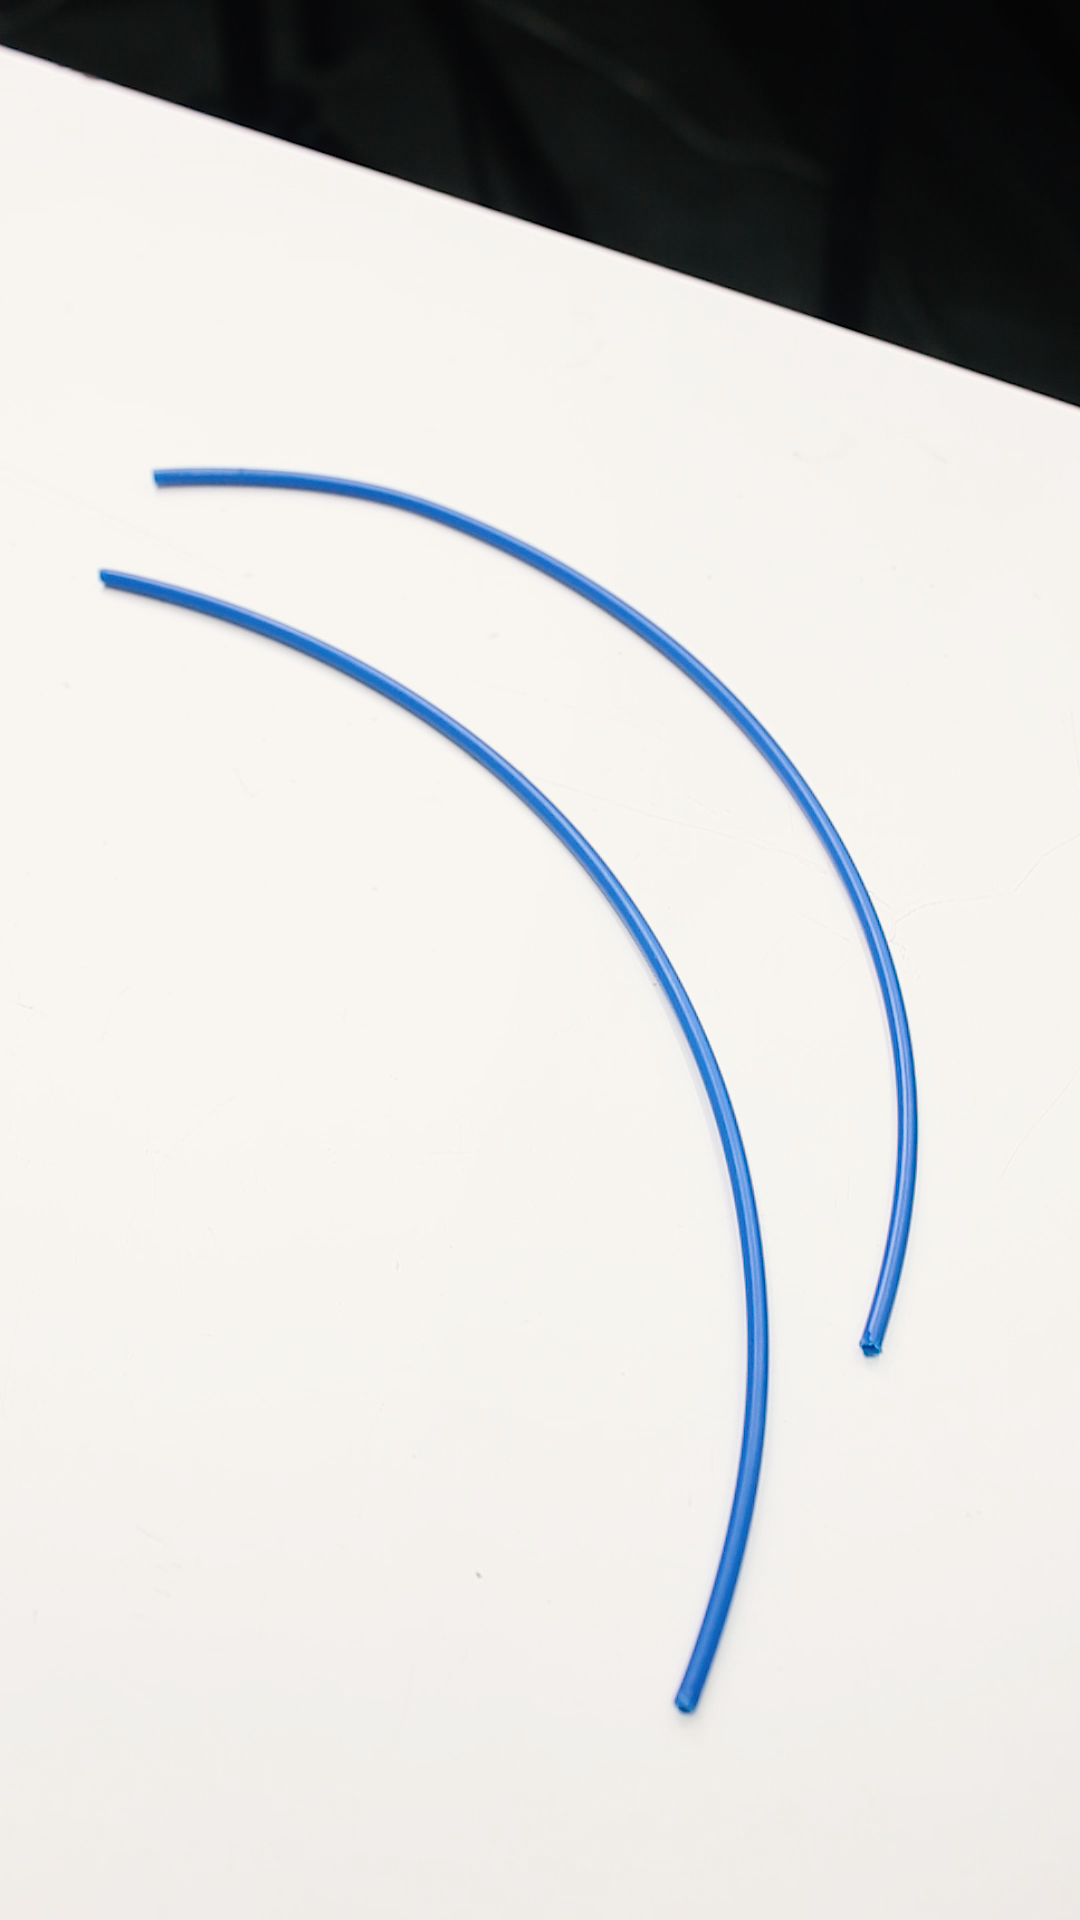
Installing PTFE Tube in the Pneumatic Fittings
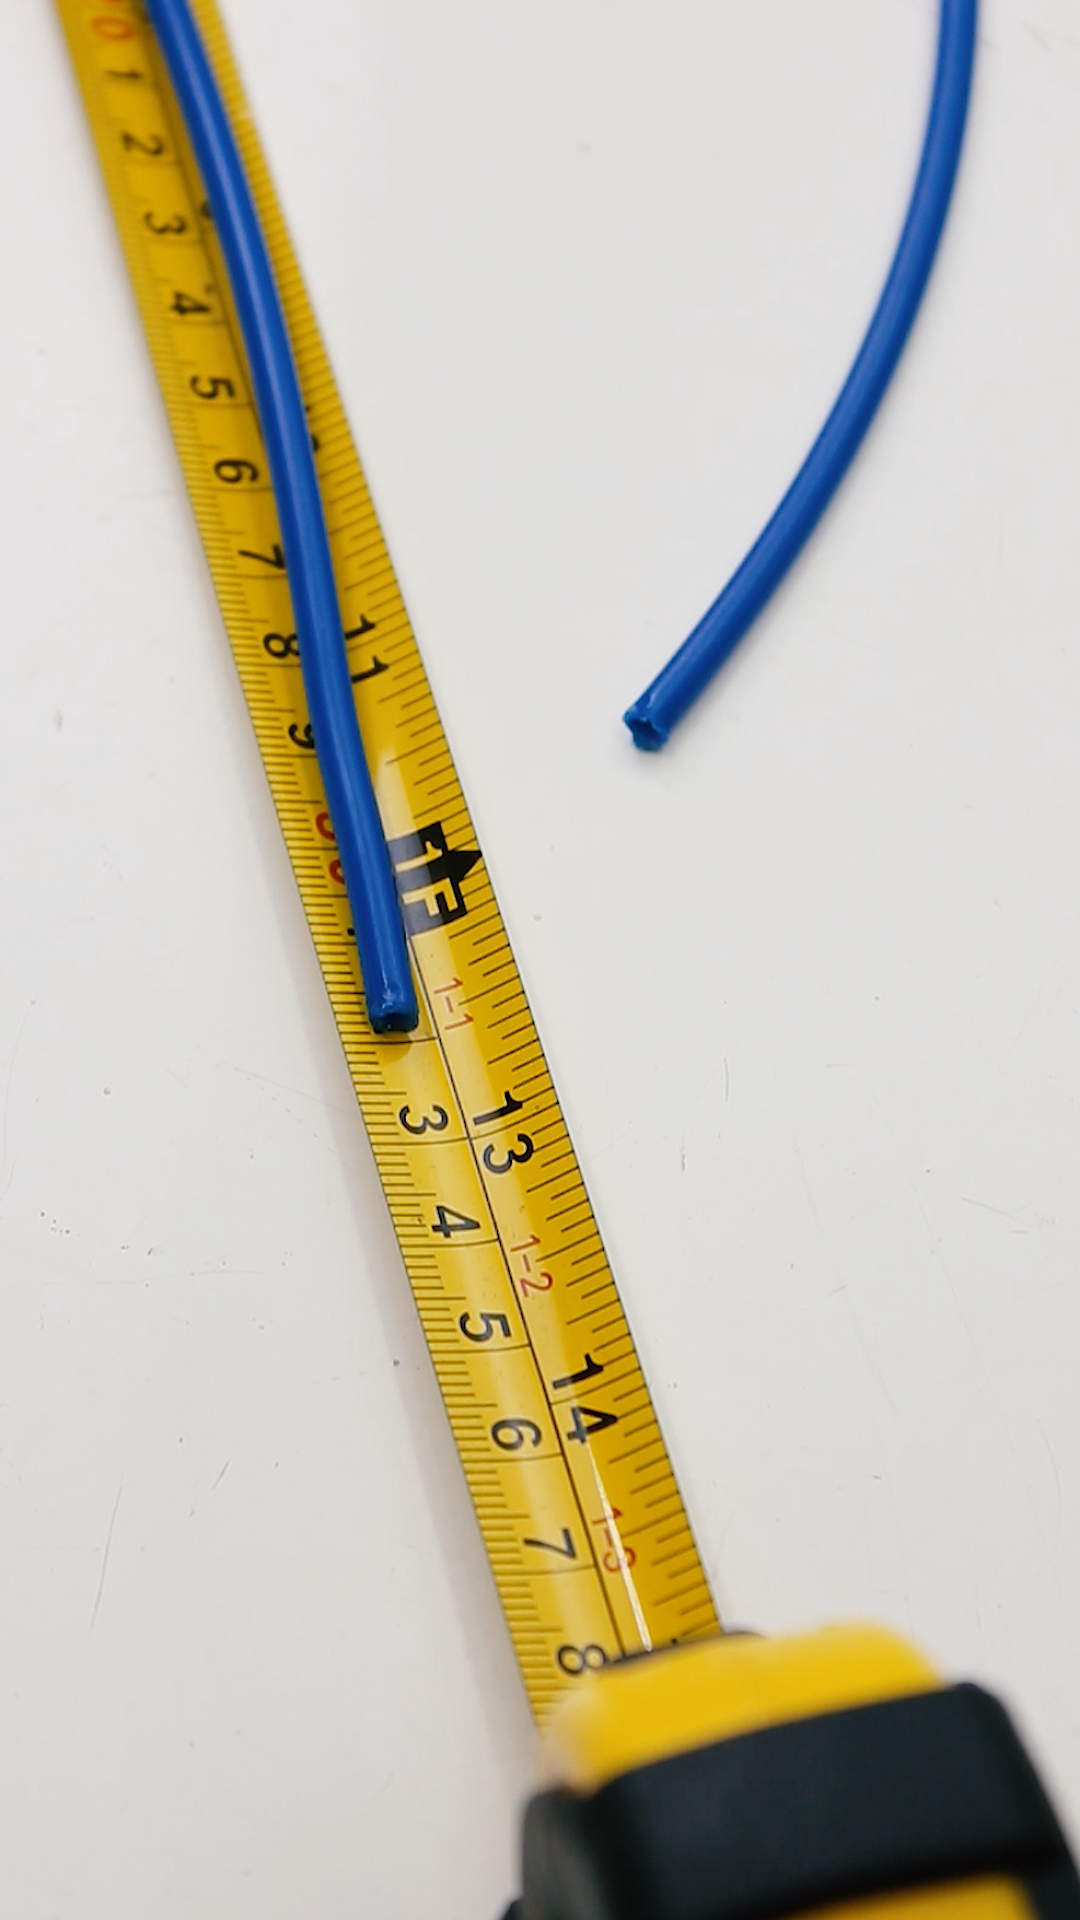
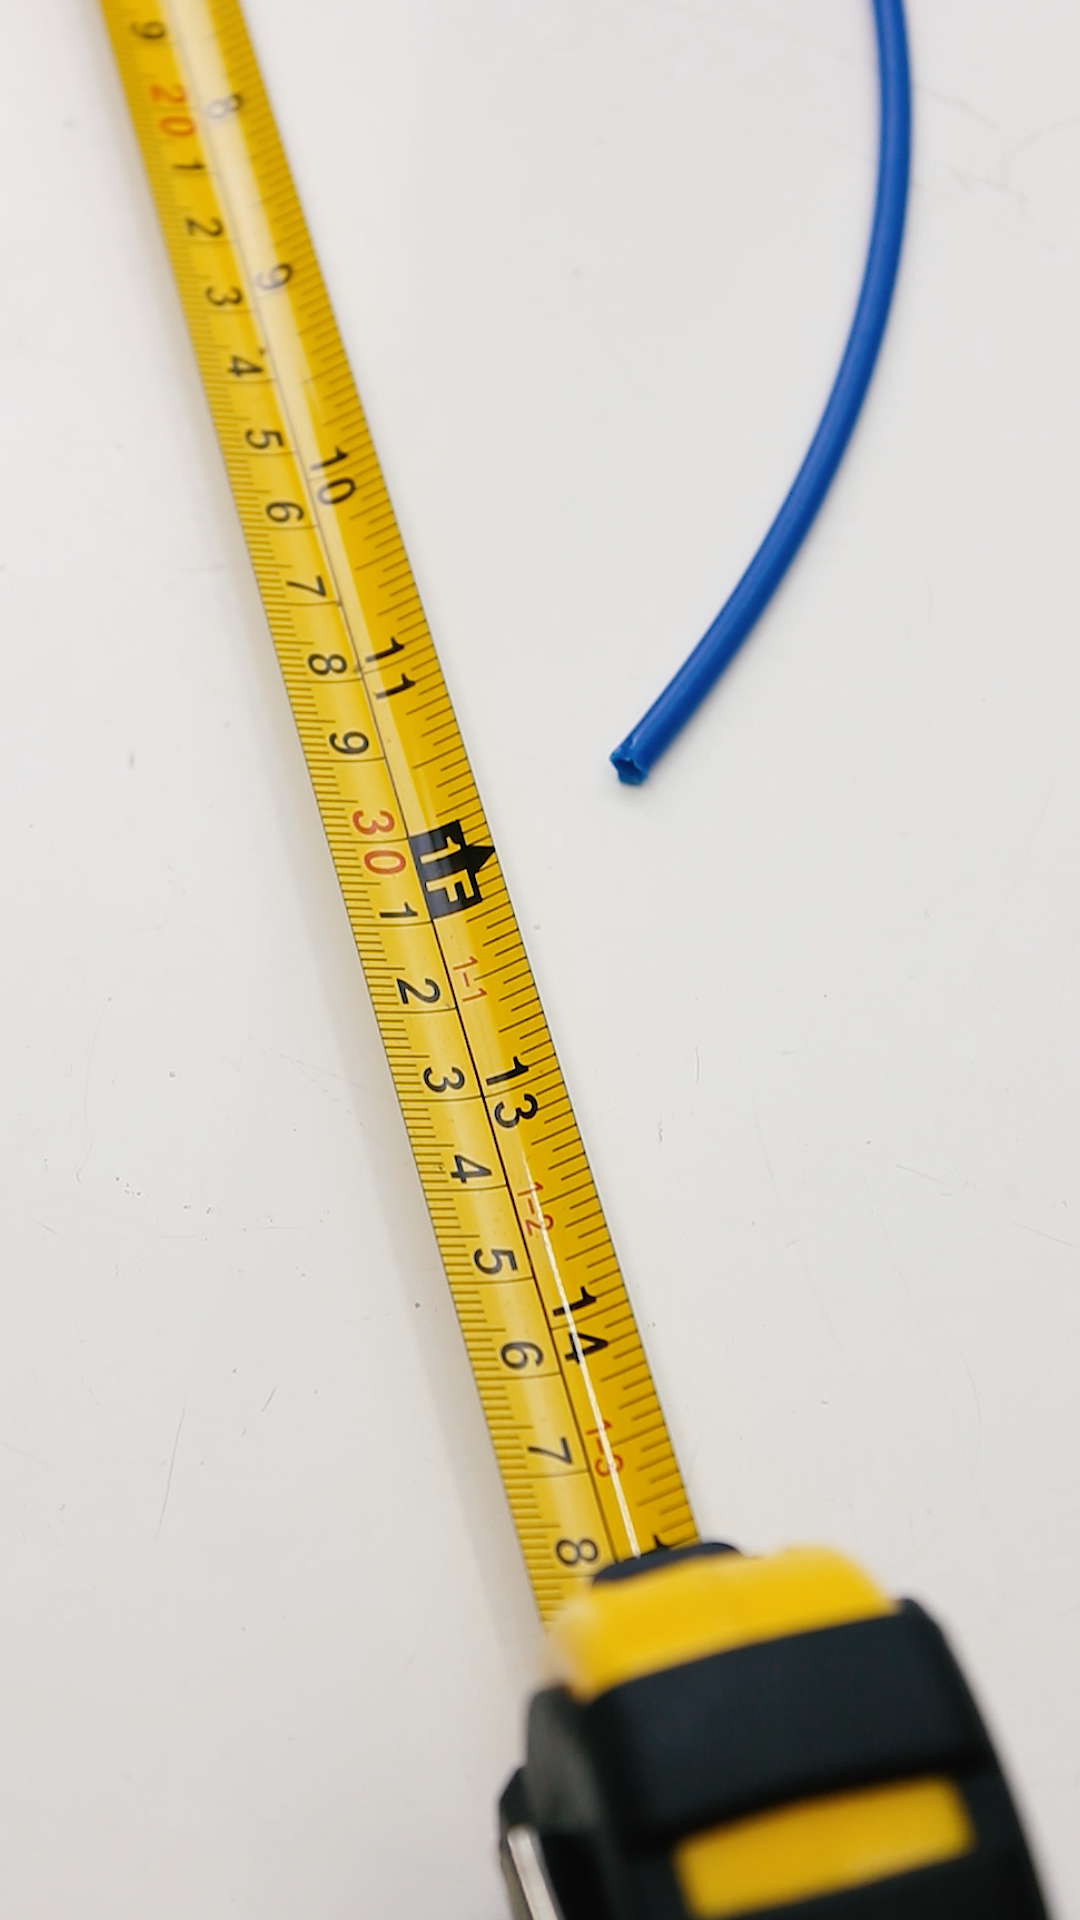
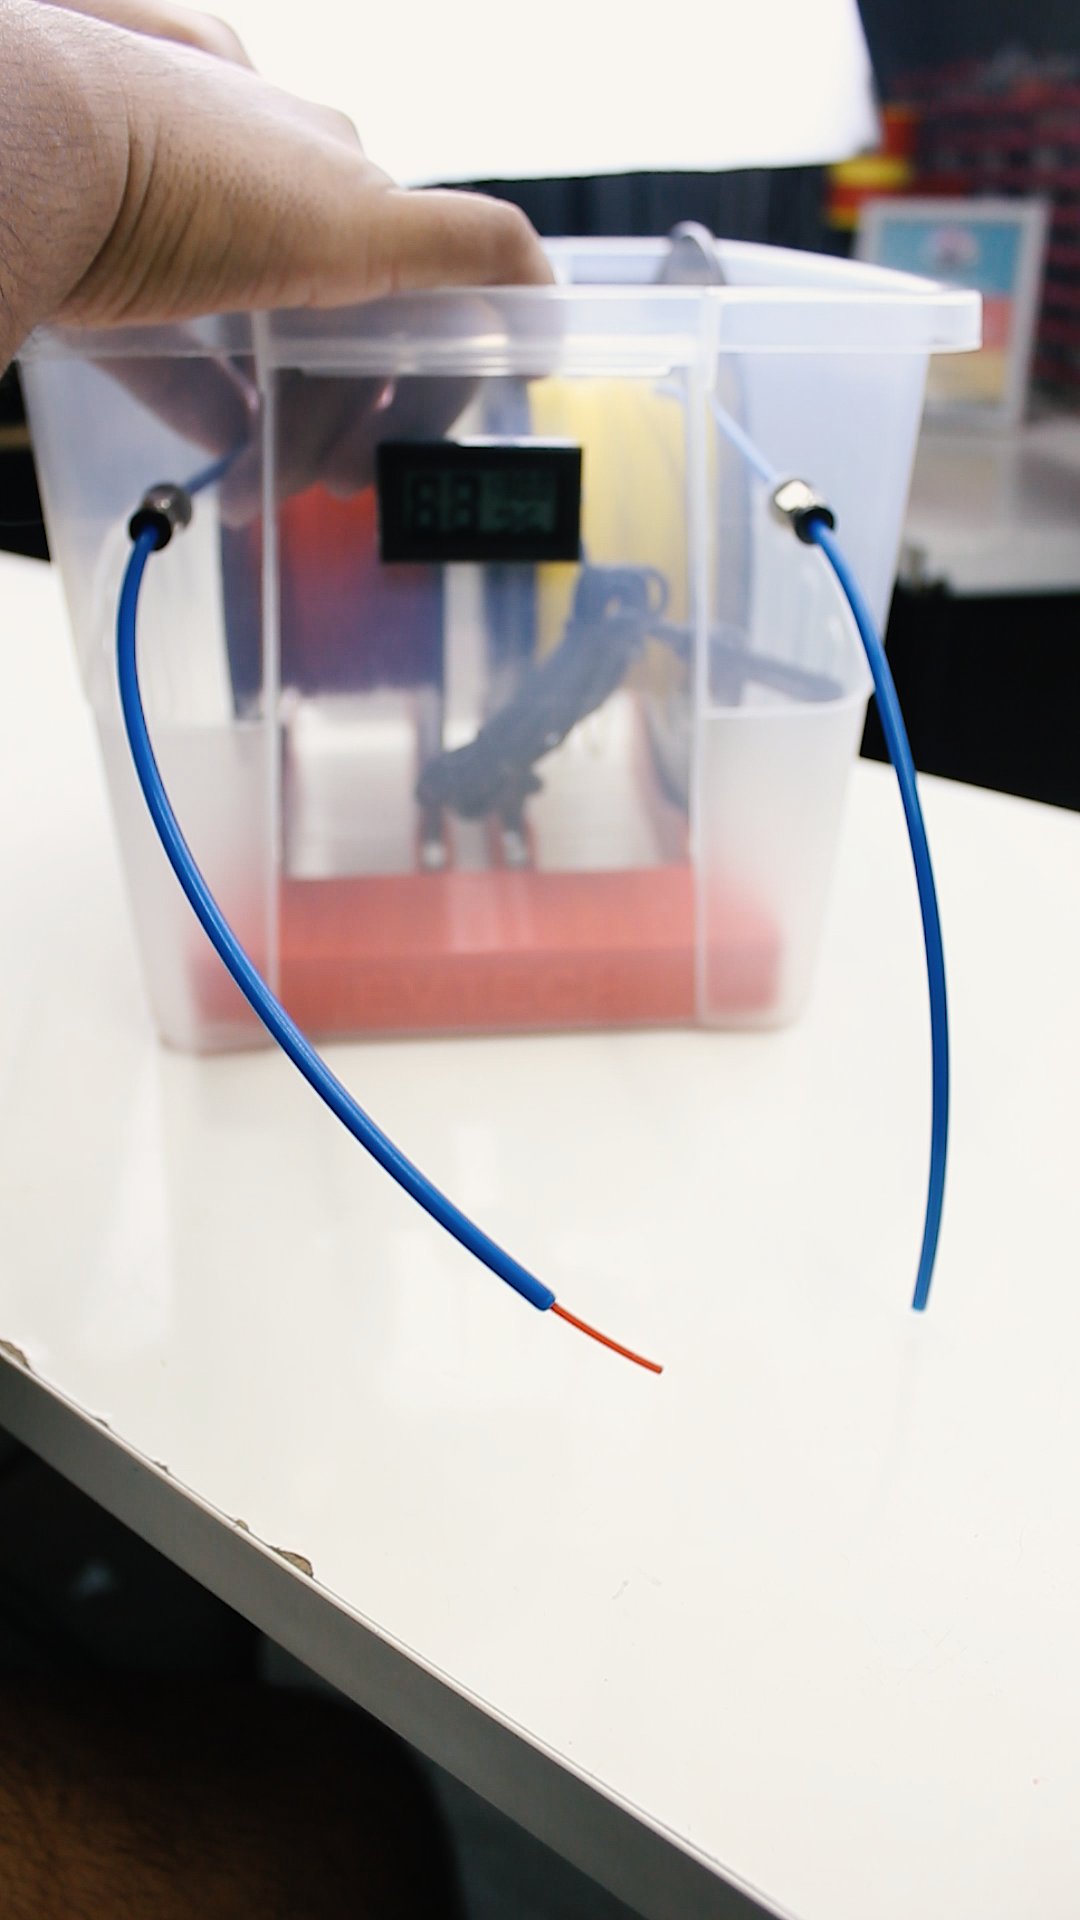
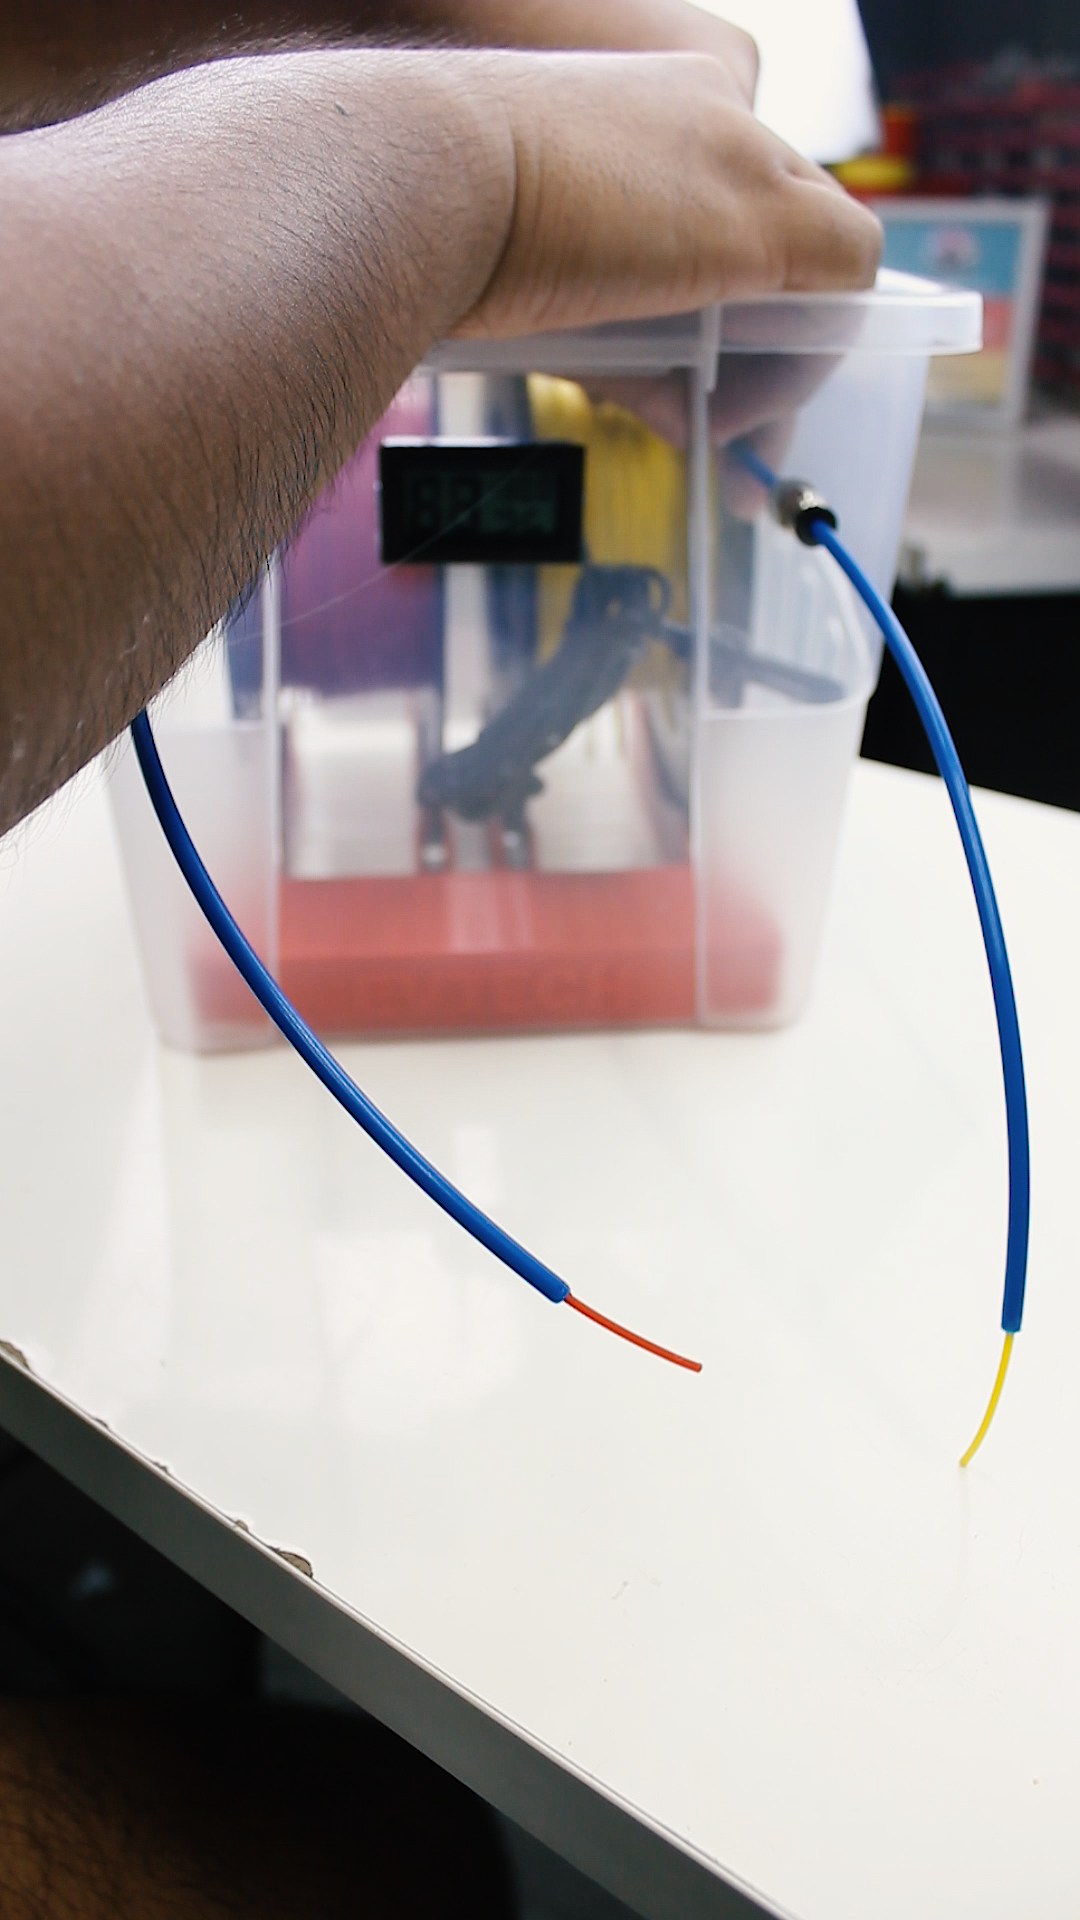
Next, we need two pieces of 32 cm PTFE tube to prevent dust and air from reaching the filament on its way to the 3D printer. With that said, it's time to insert the tube into the pneumatic fittings all the way to the filament. Also, don't forget to push the filament out of the tube before closing the cover of the container box.
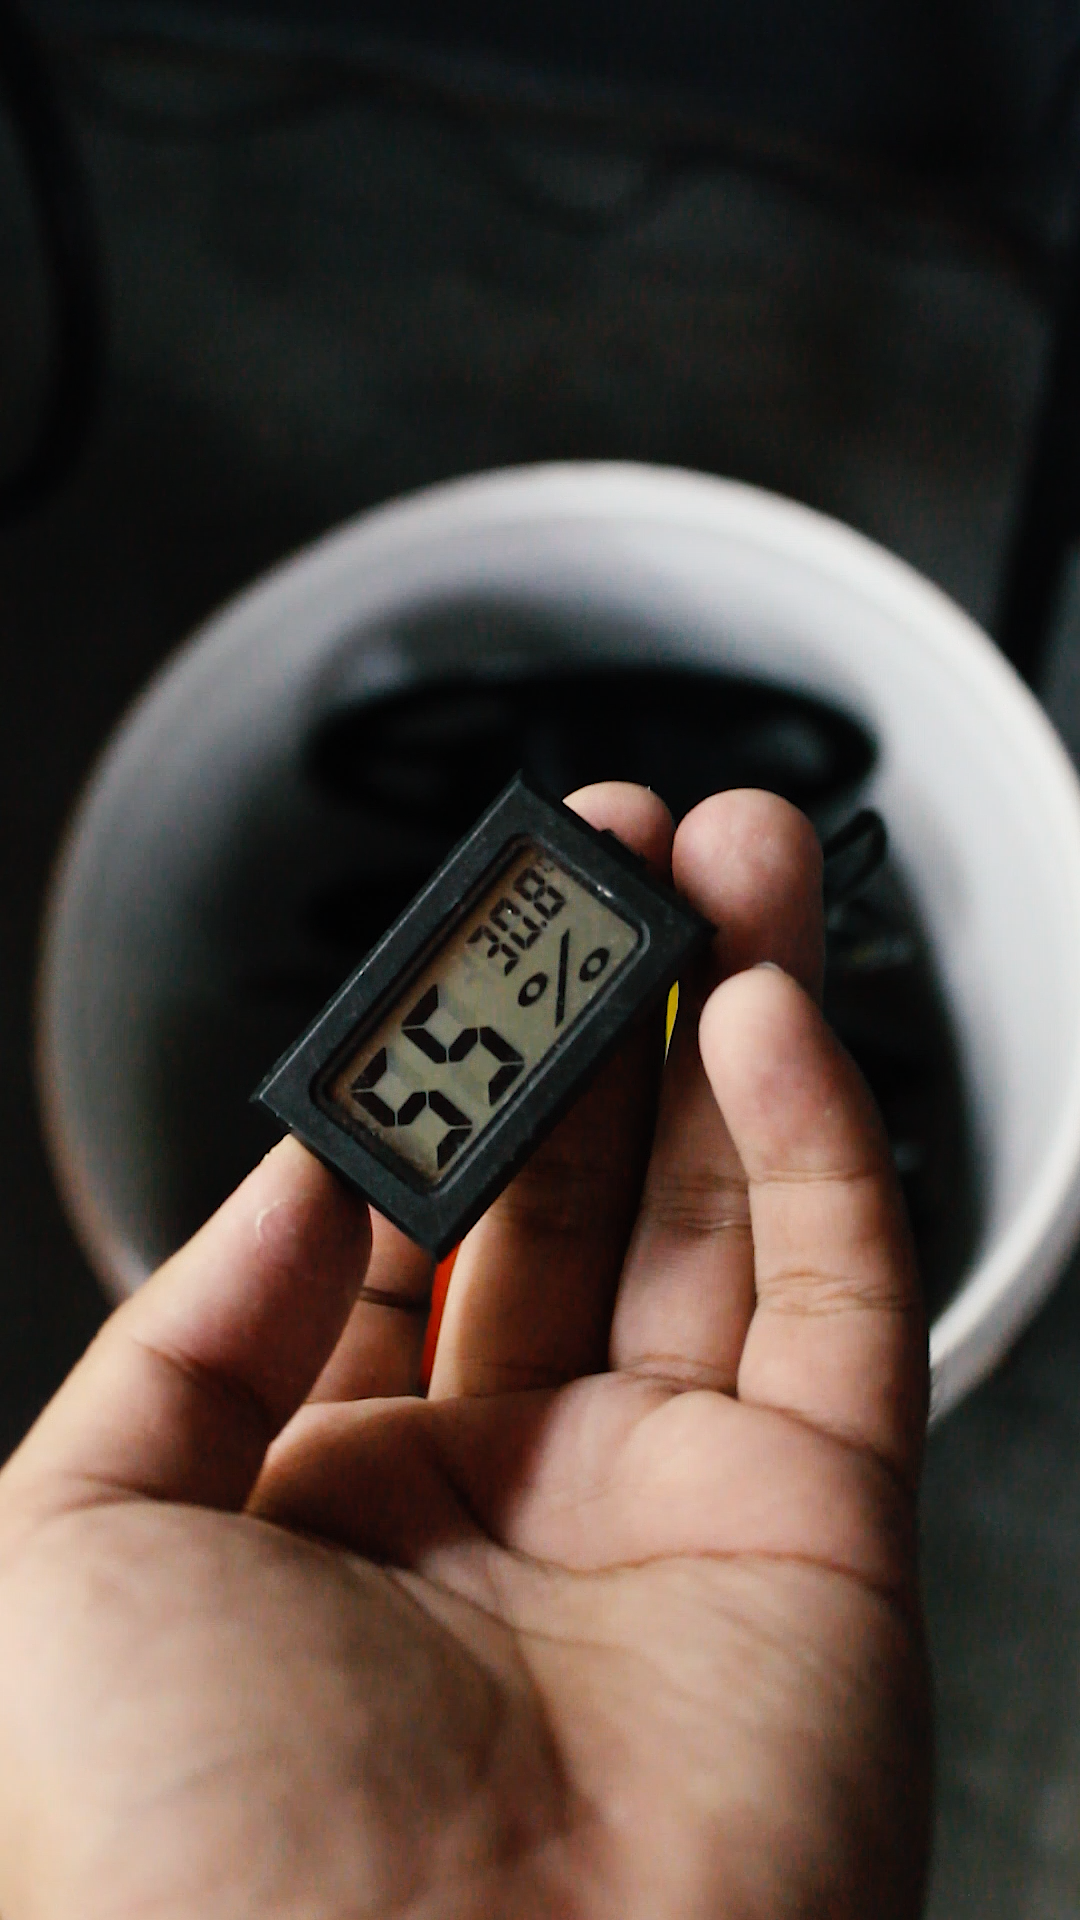
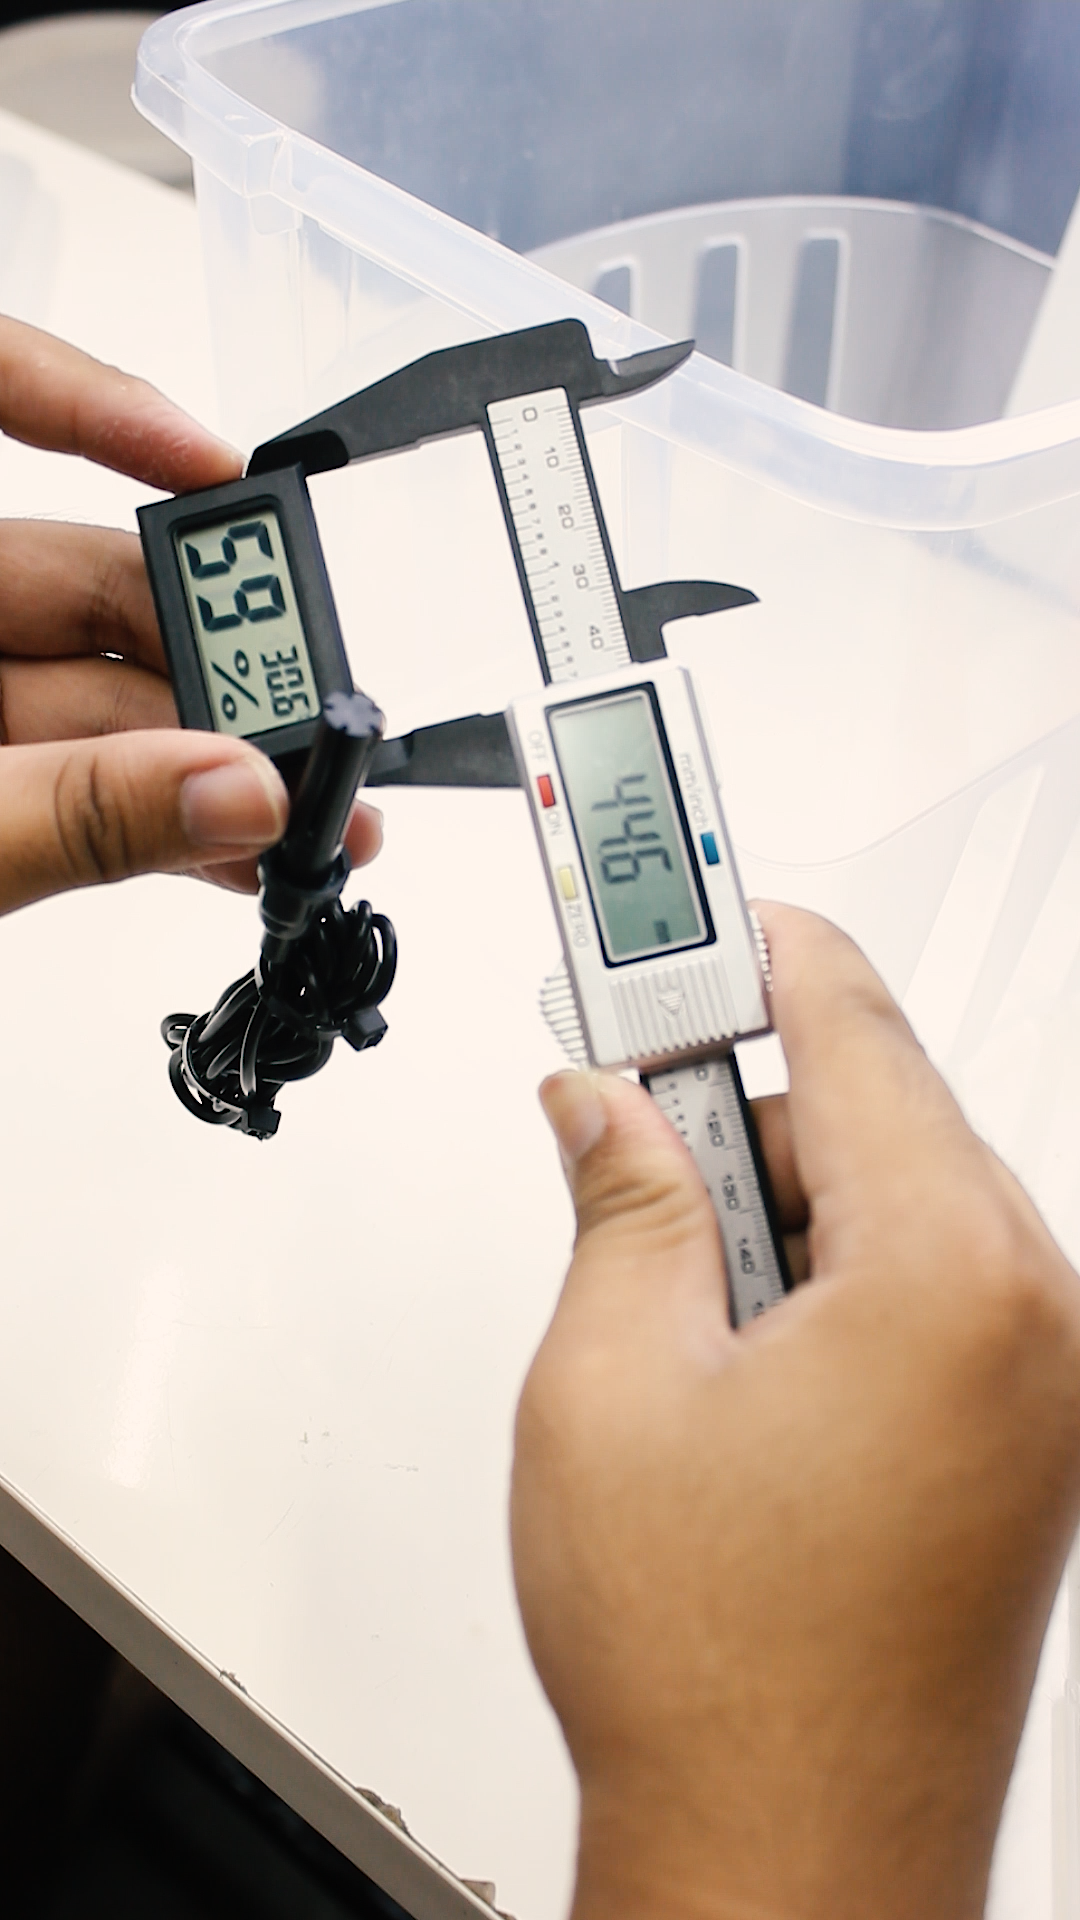
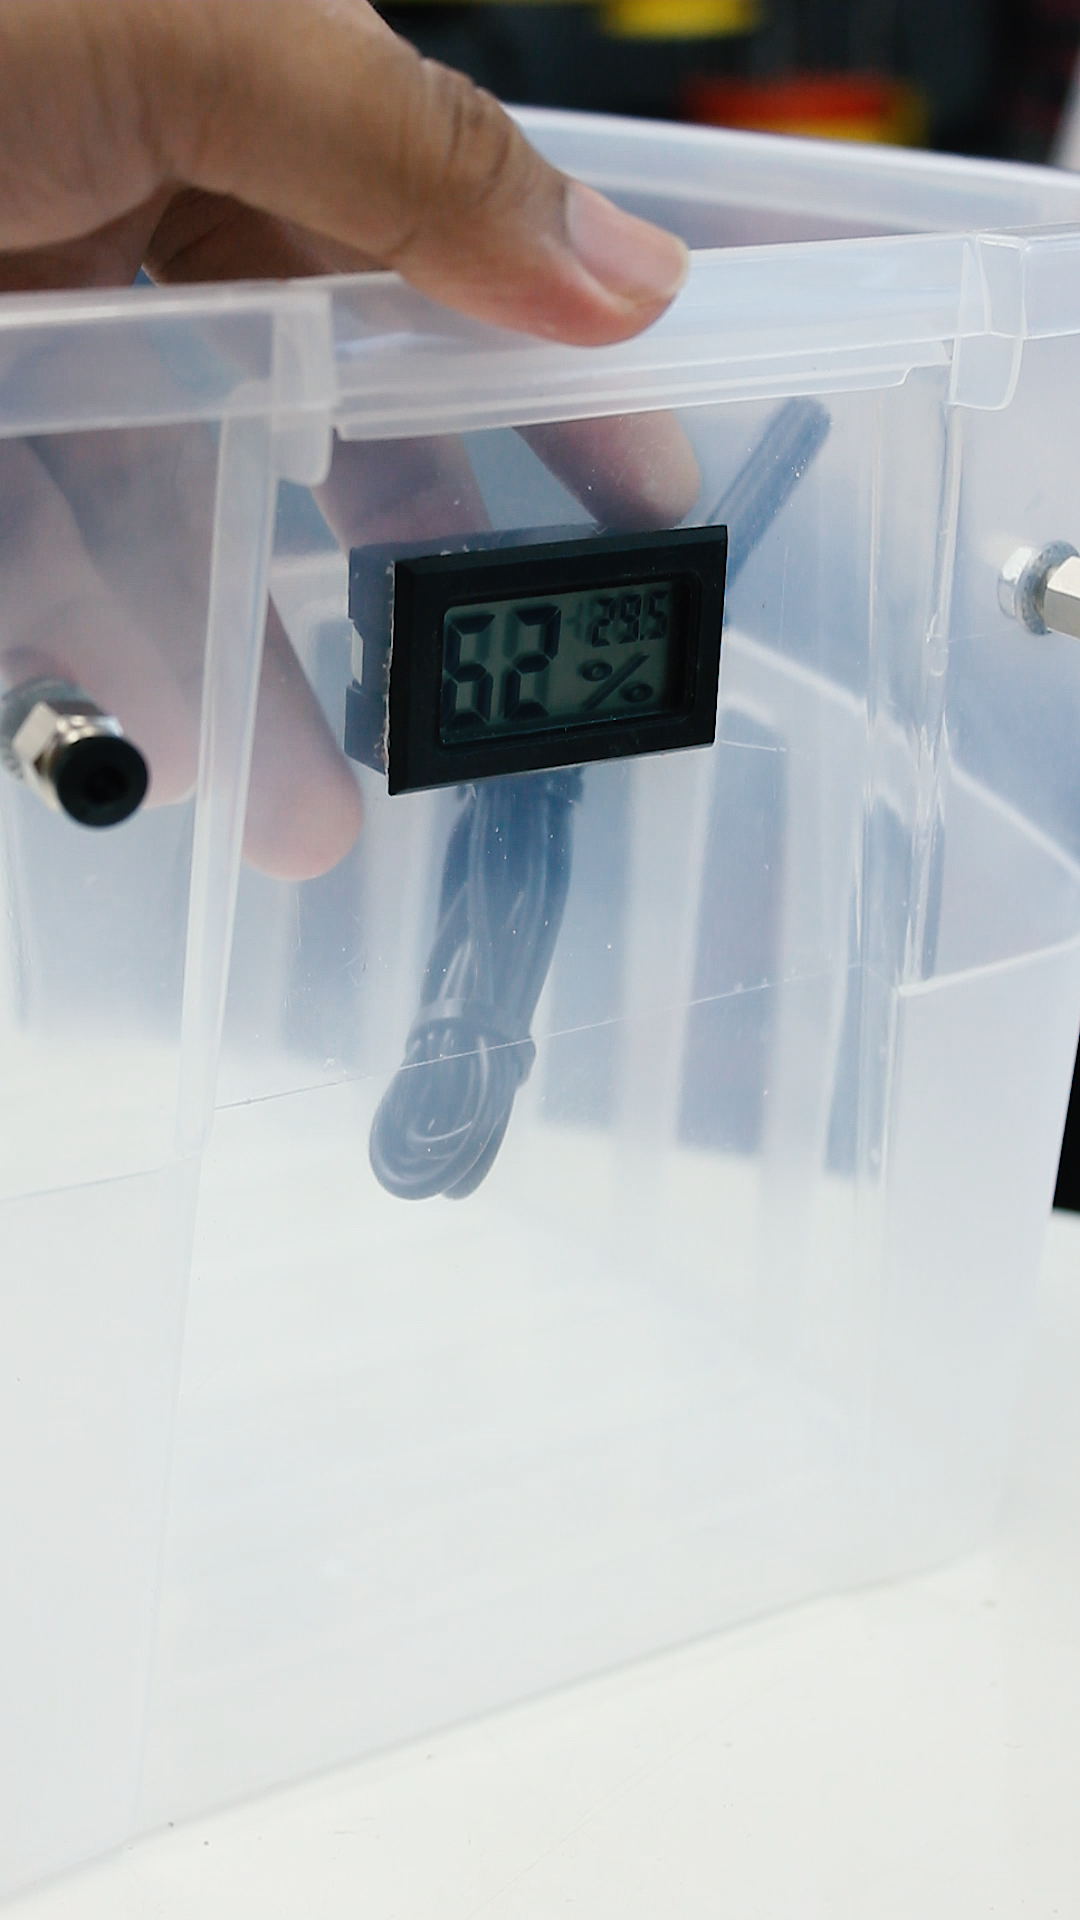
Data Matters!
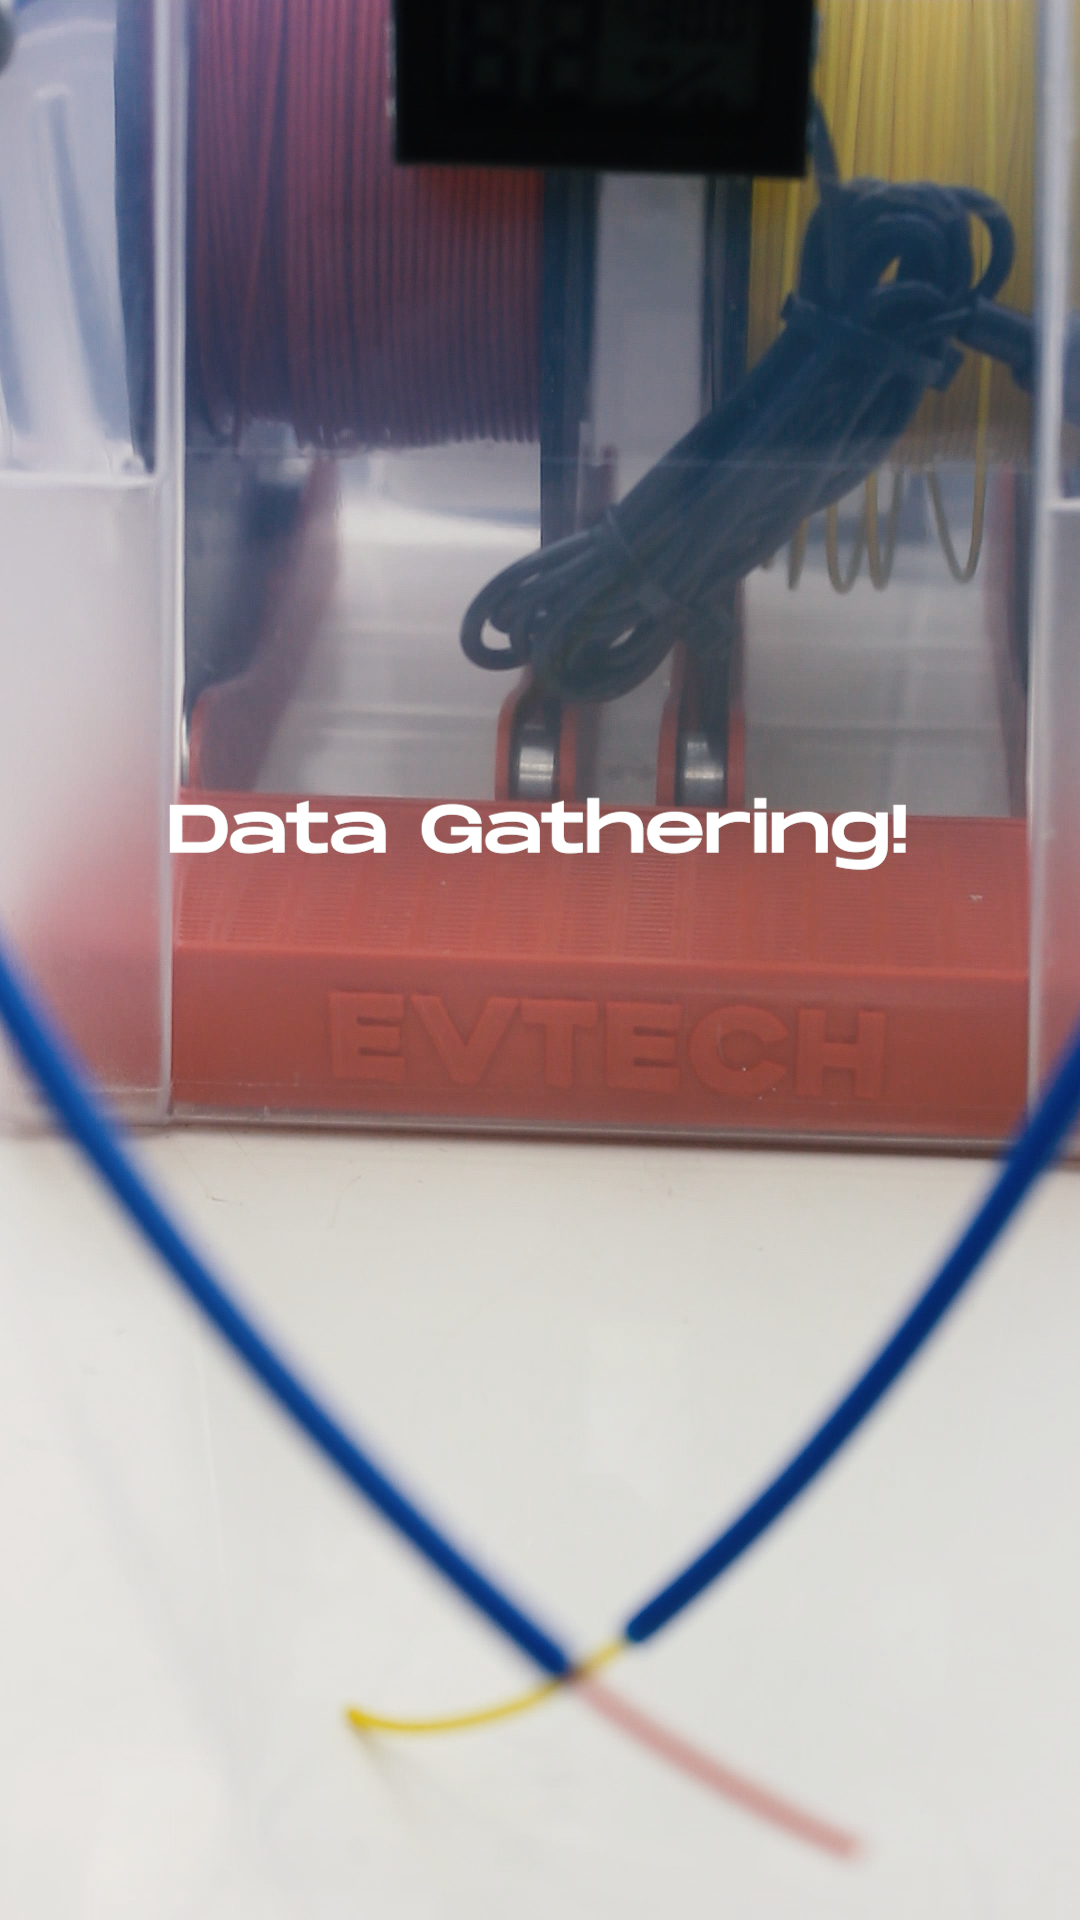
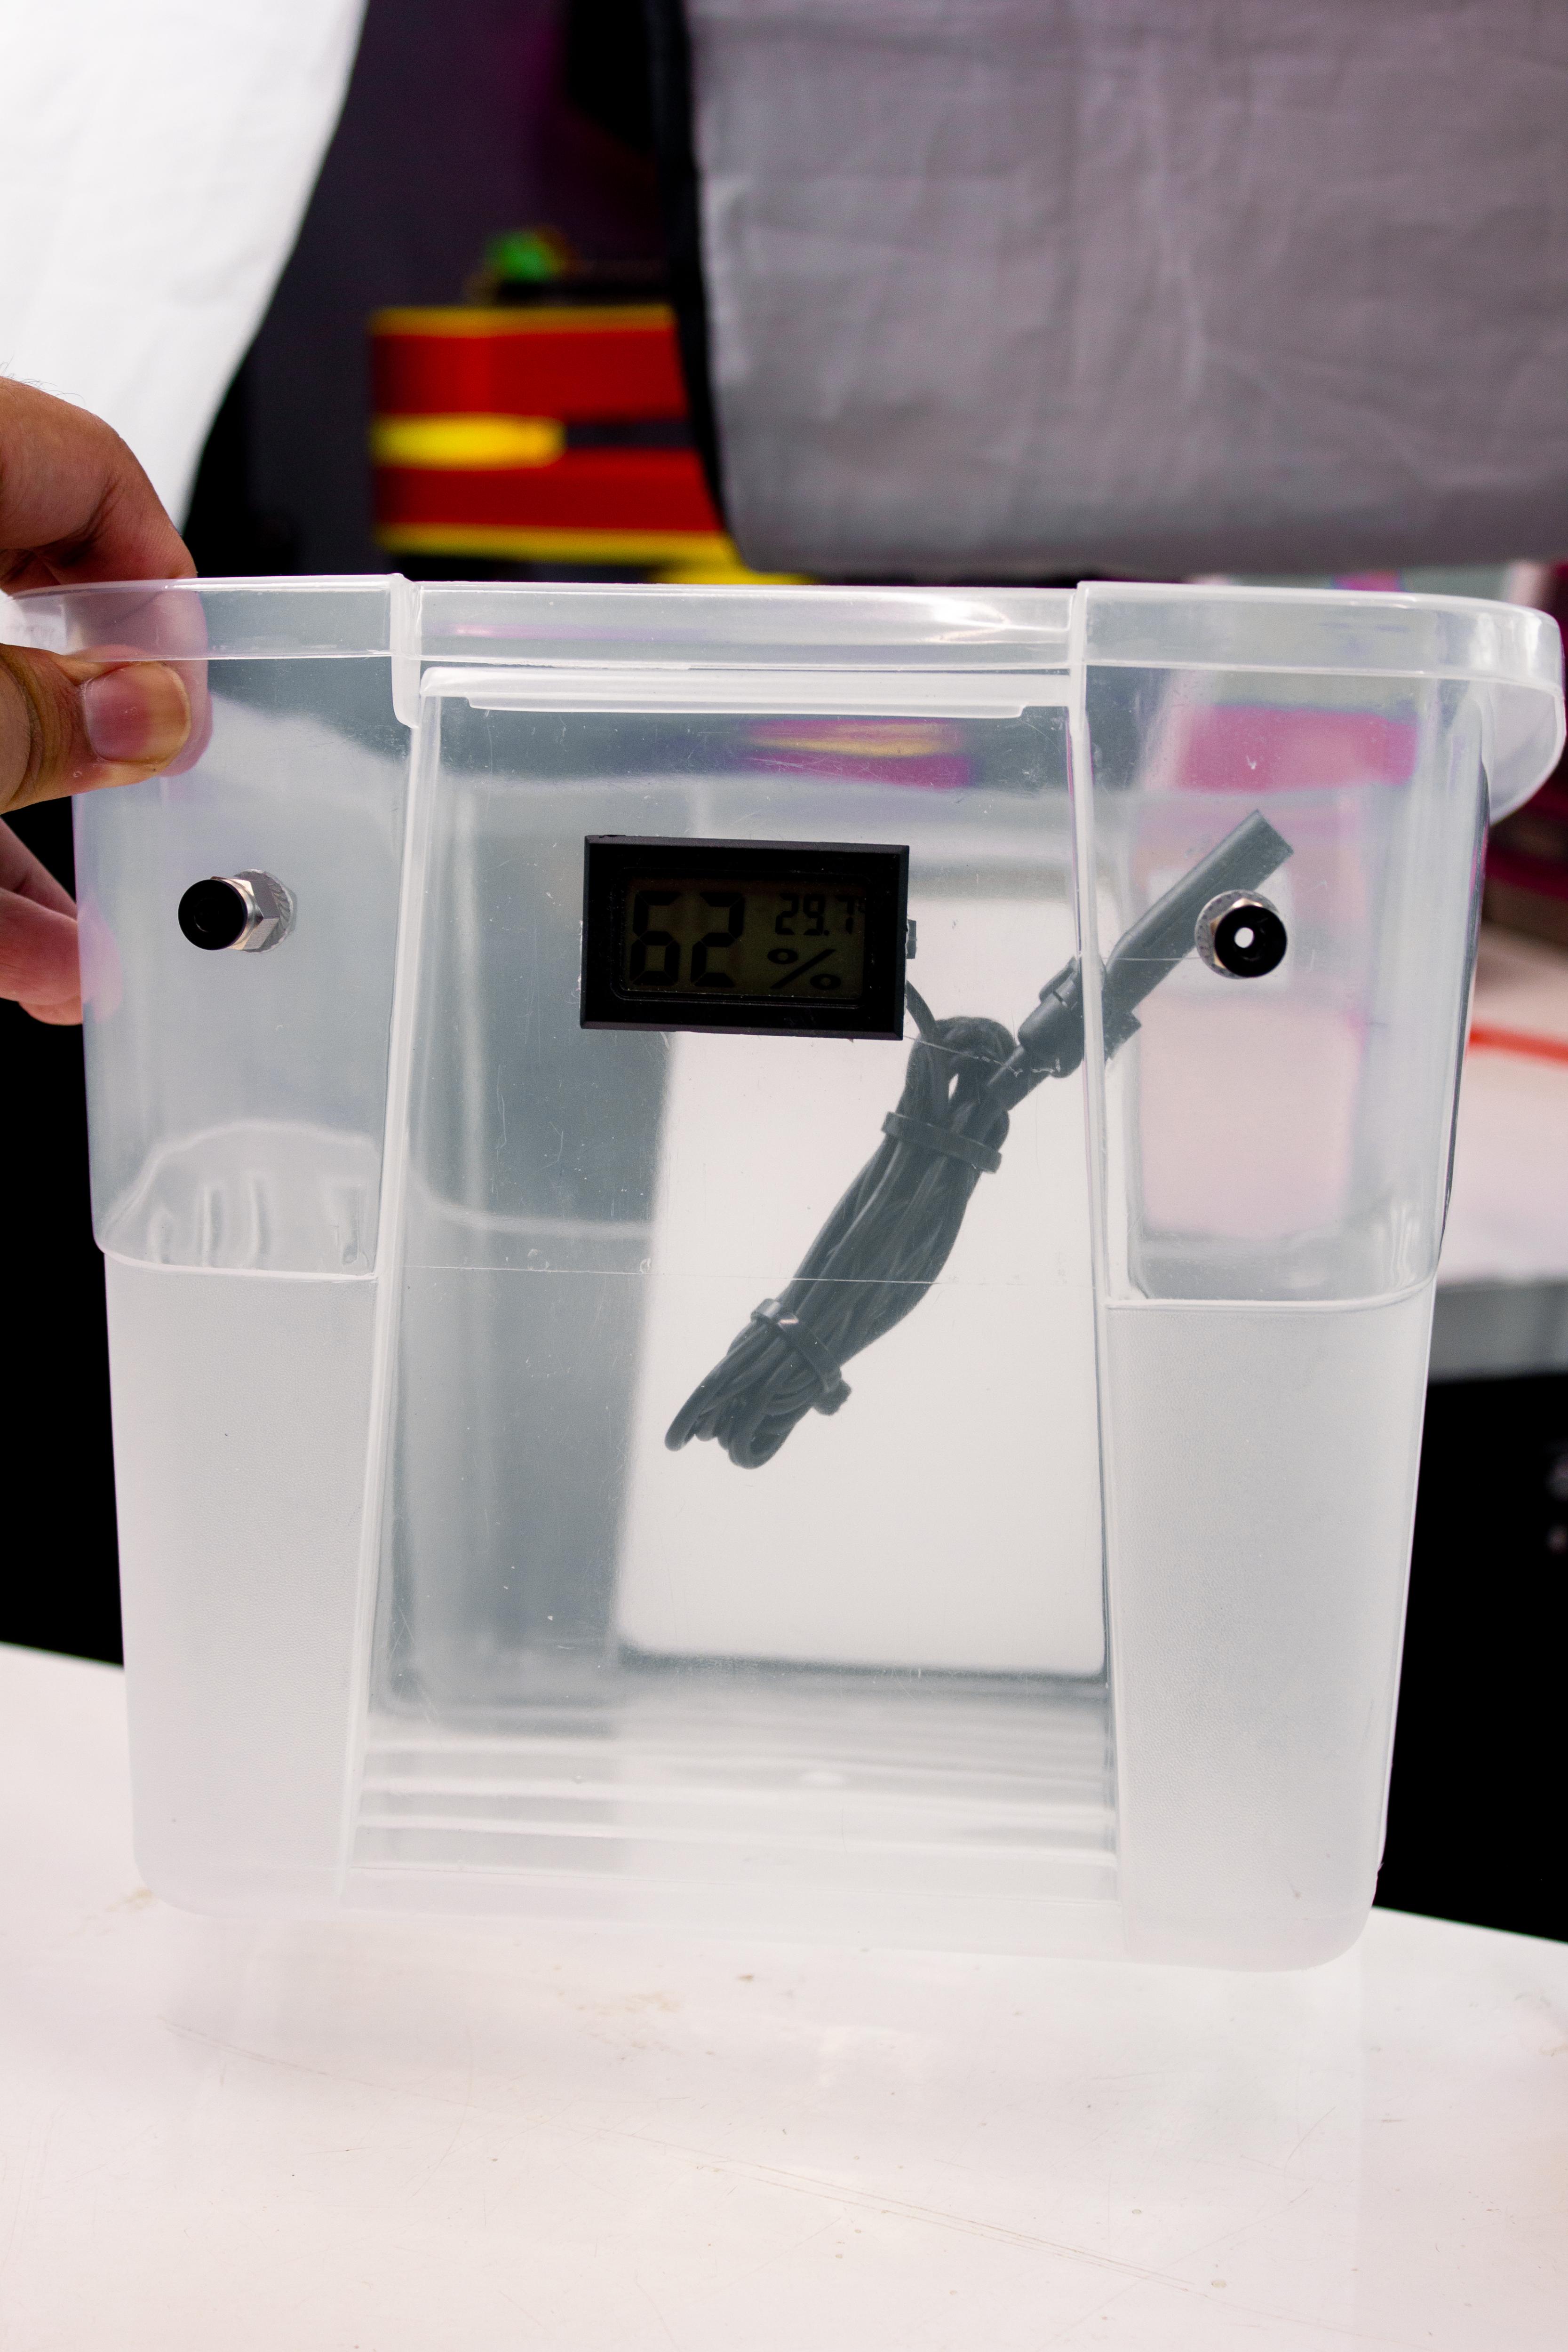
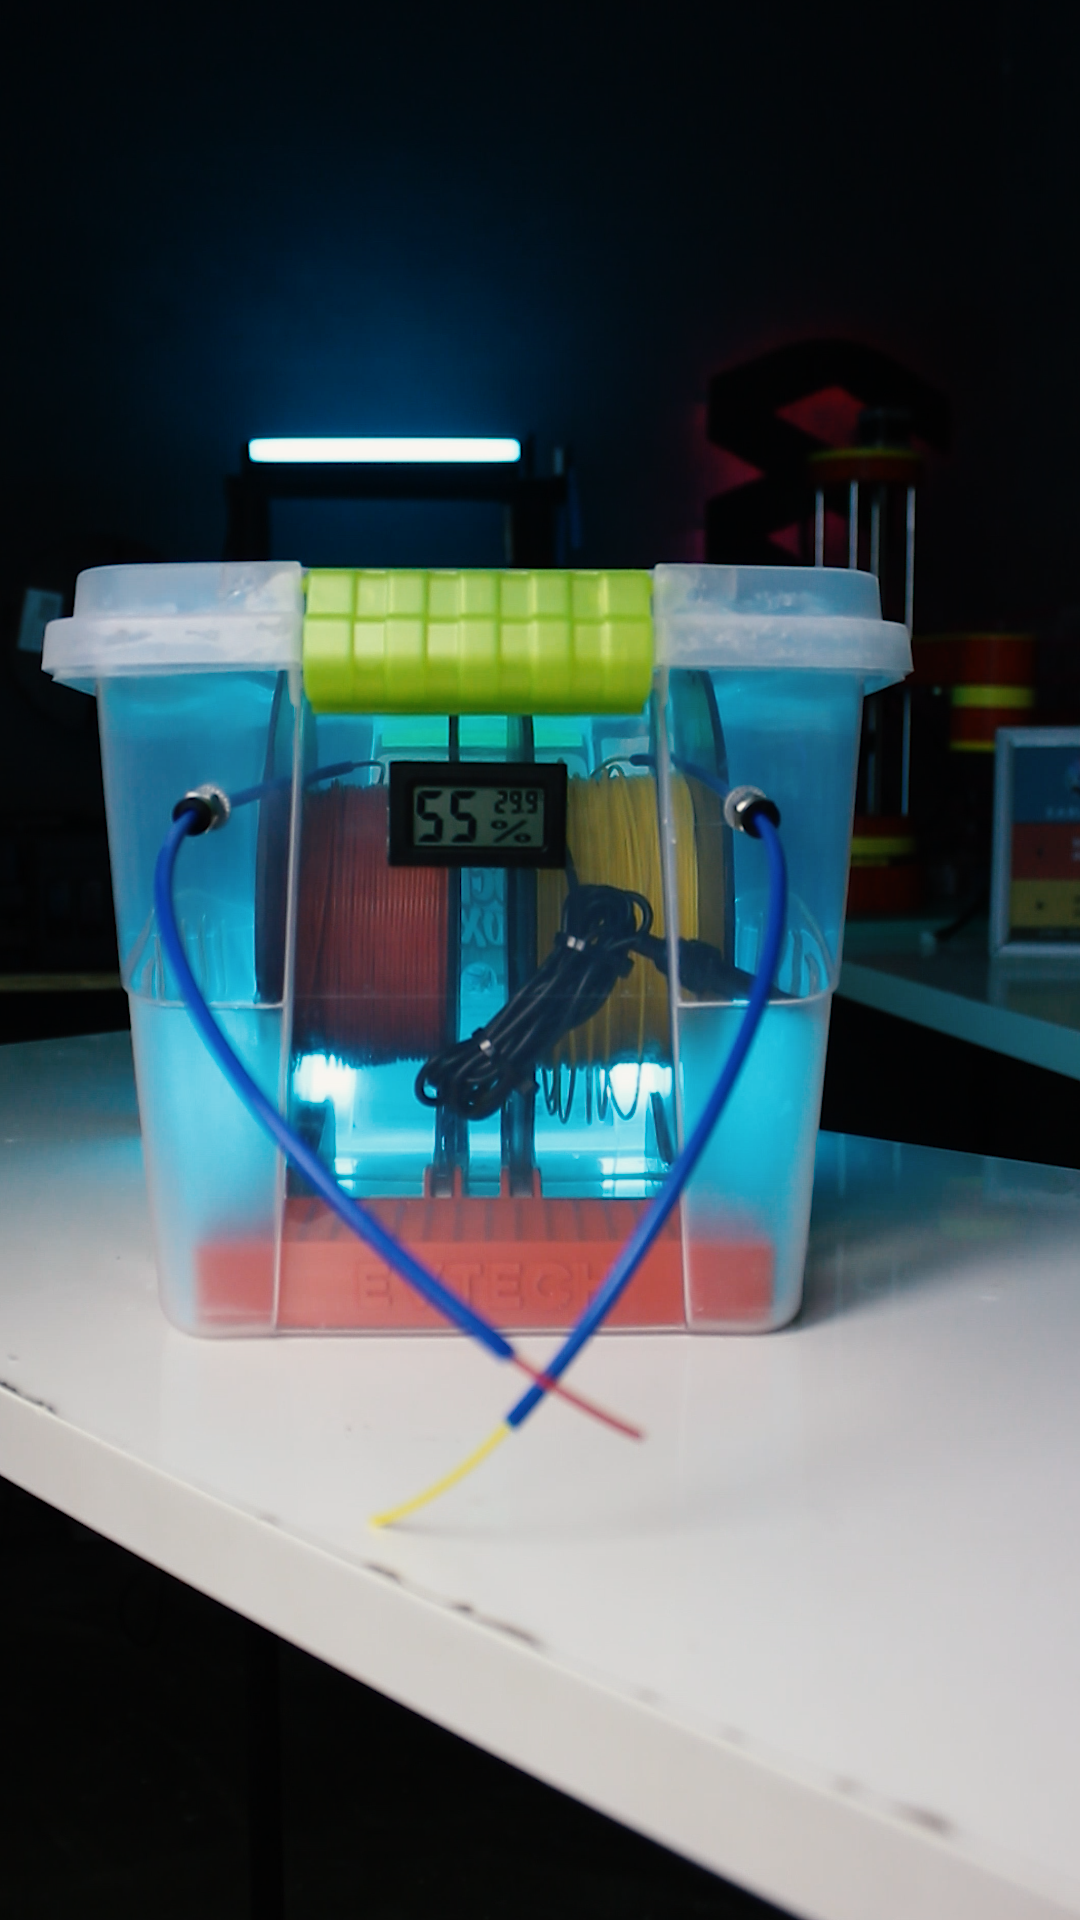
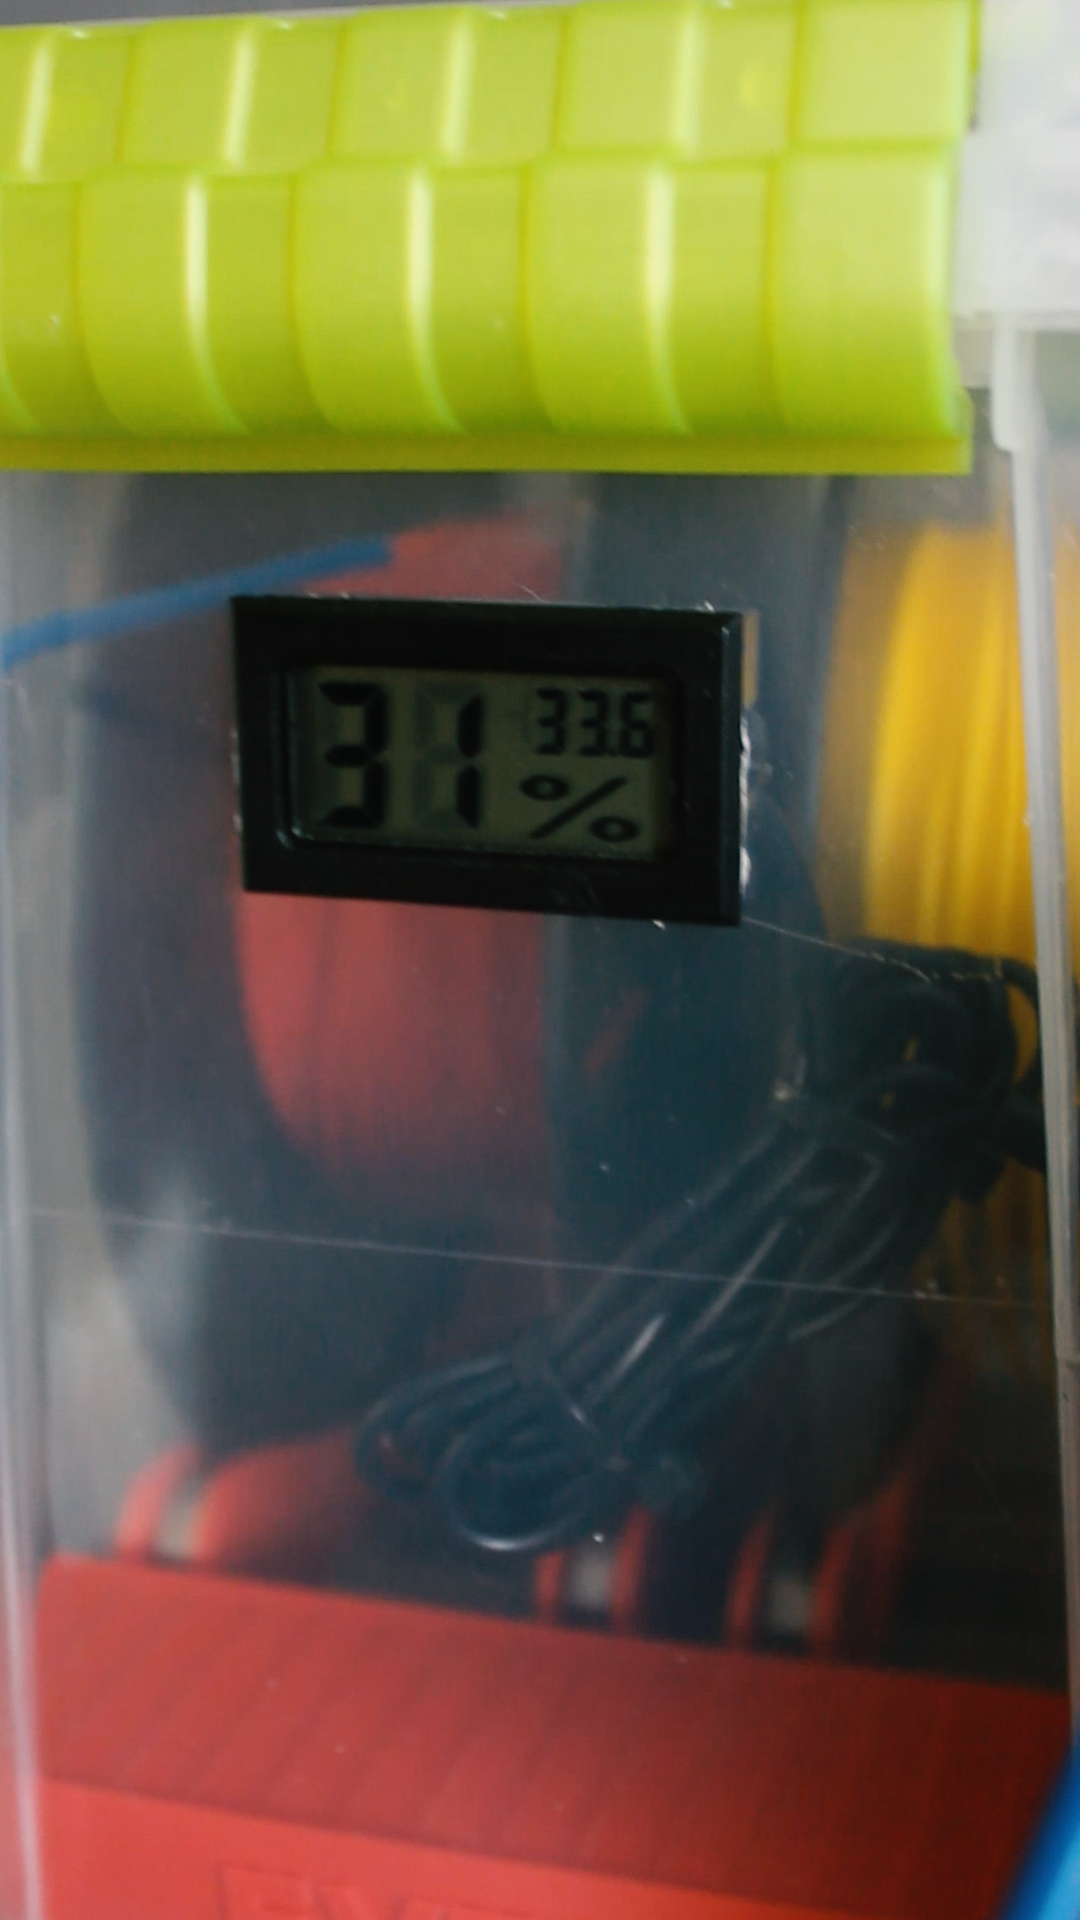
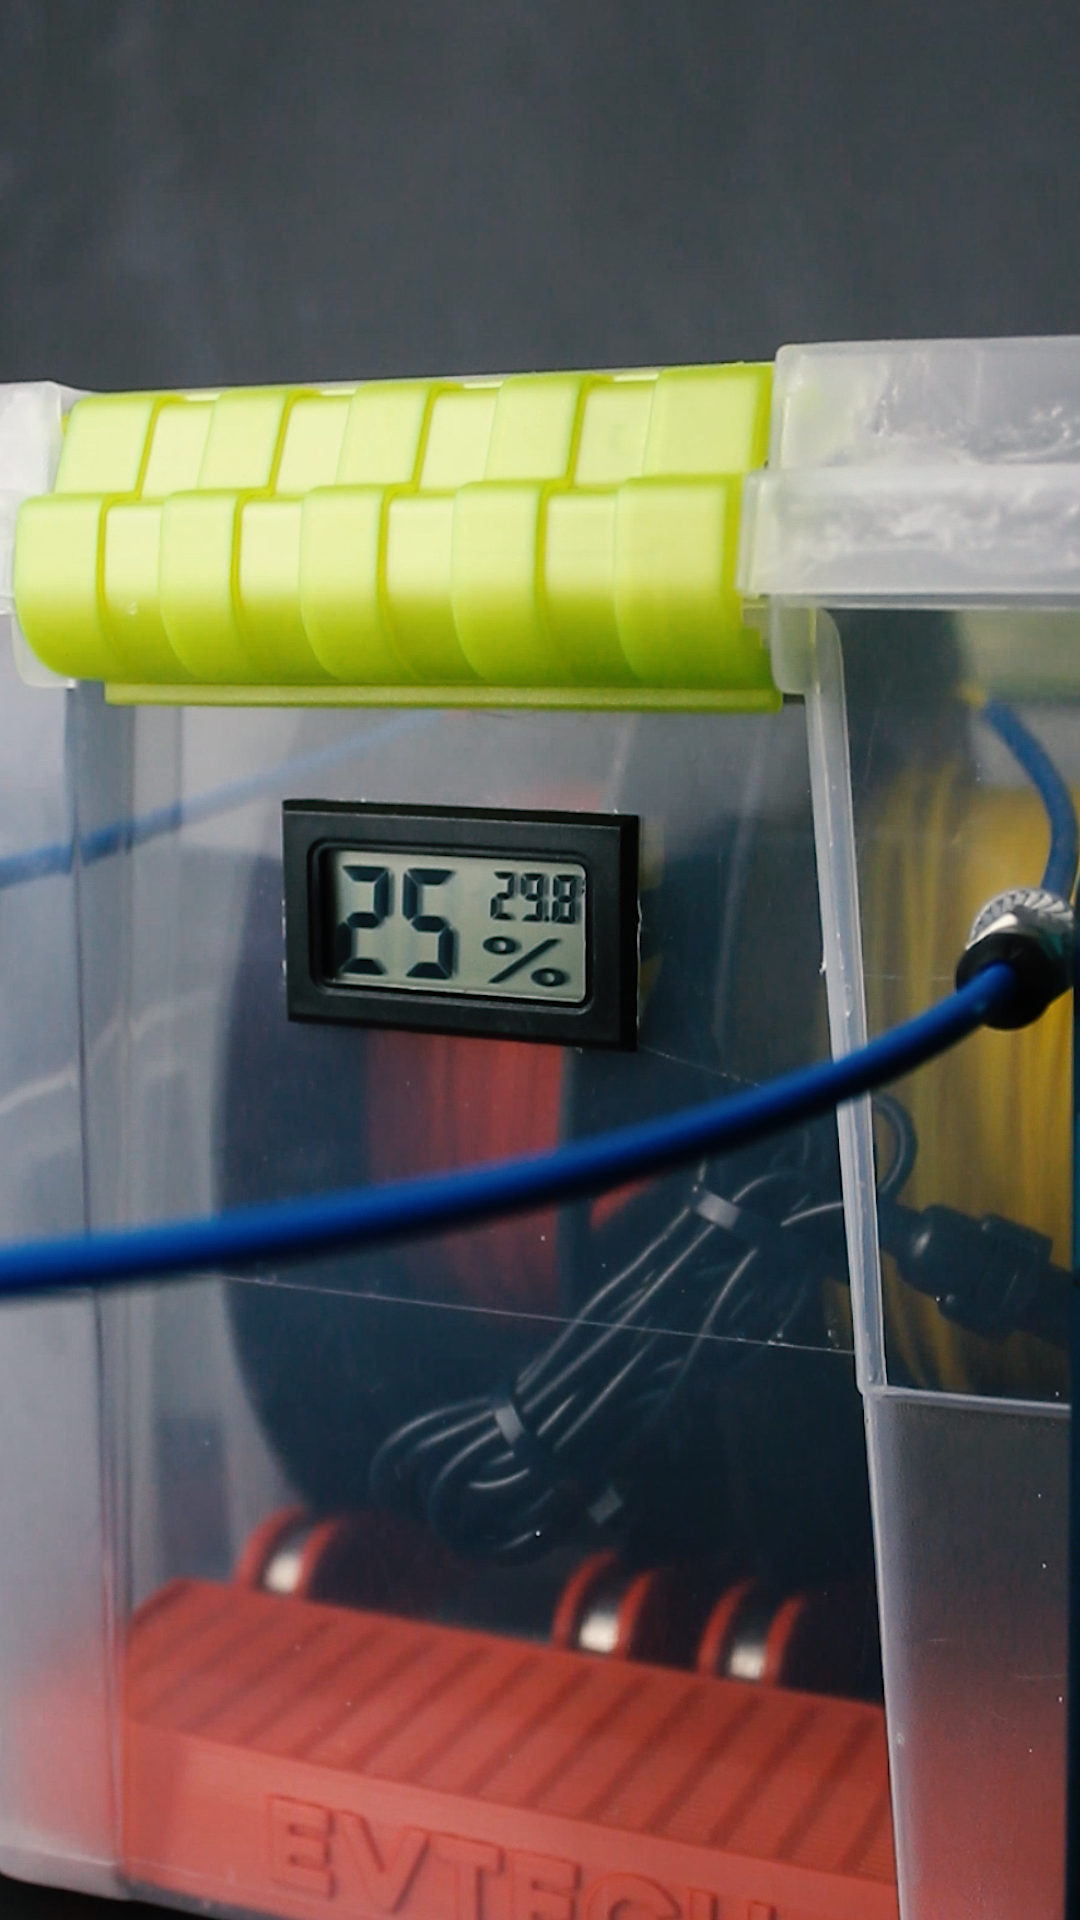
Of course, we need to gather data to ensure that this project is effective and not in vain.
As you can see, while the box is open and there's nothing inside, there's 62% moisture in the air. Now, after the box is closed for almost 5 minutes with all the materials inside, the humidity goes down to 55%. After 7 hours, the humidity further decreases to 31%. After almost 16 hours, the humidity reaches 25%.
With all the data that we have gathered, we can conclude that this project is successful!
Enjoy!
There you have it—the project is completed! It's time to sit back and enjoy the fruits of your labor. That print looks so nice!
And as always, keep learning and have fun! Bye!