DIY Electric Badminton Stringers


The project is about upgrading a hammer stringing machine to an electrical badminton stringer, using Raspberry Pico and force sensor.
Supplies
Materials Preparation
I bought a simple badminton stringer from taobao, made of 2020 aluminum extrusions and brackets. Before I started the project, I bought several materials online. I recommend buying some spare components in case you need replacing wear parts. You can see the materials I bought here.
And then, we can start the building process!
Extend the Stringer Platform


The Picture above was the badminton Stringer I bought on Taobao website. You can buy the similar one from Taobao or Amazon, which I believed that it was the same seller.
The platform of the stringer is made of 500mm 2060 extrusion, but the size is not large enough to install all the parts for the project.
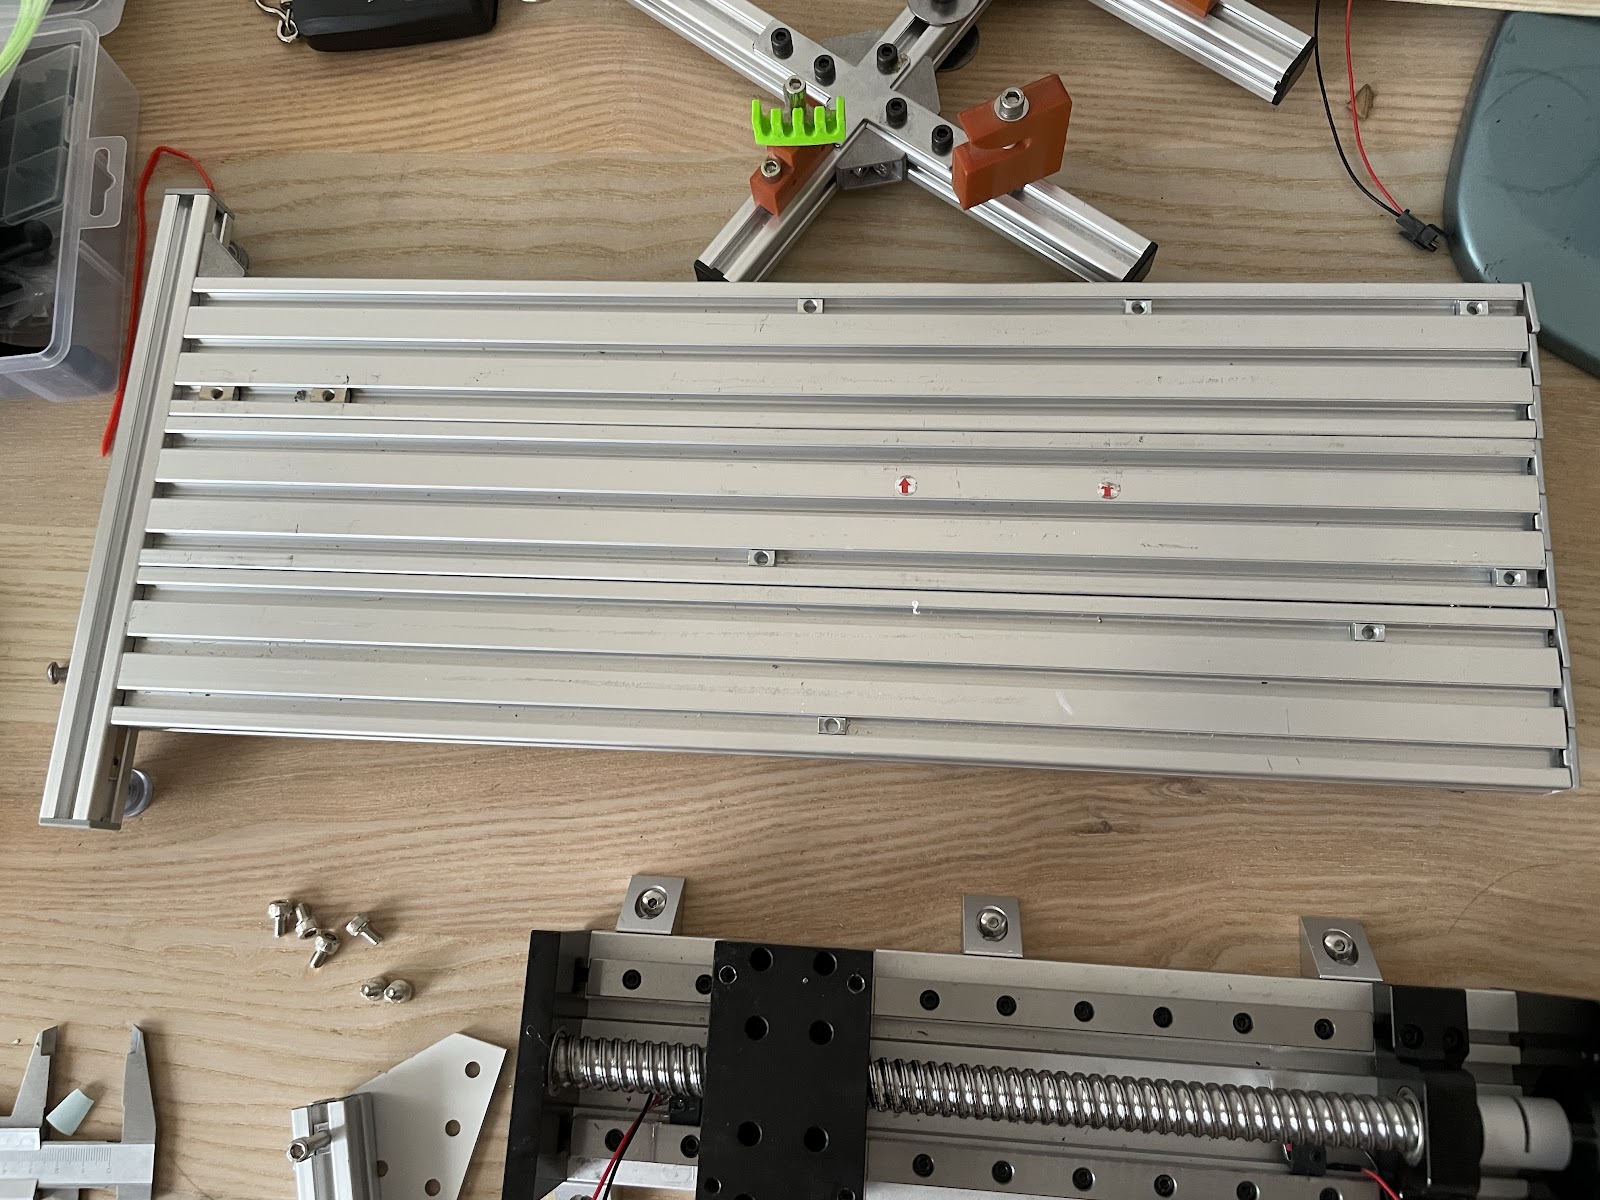
I assembled two 2060 500mm extrusions with the original one into a larger 20 series platform. Several 2x2 flat joining plates are applied in the back of the platform to provide enough strength and stability. After modification, the platform was able to mount the 1610 double-guided linear guideway and electronic parts of the project.
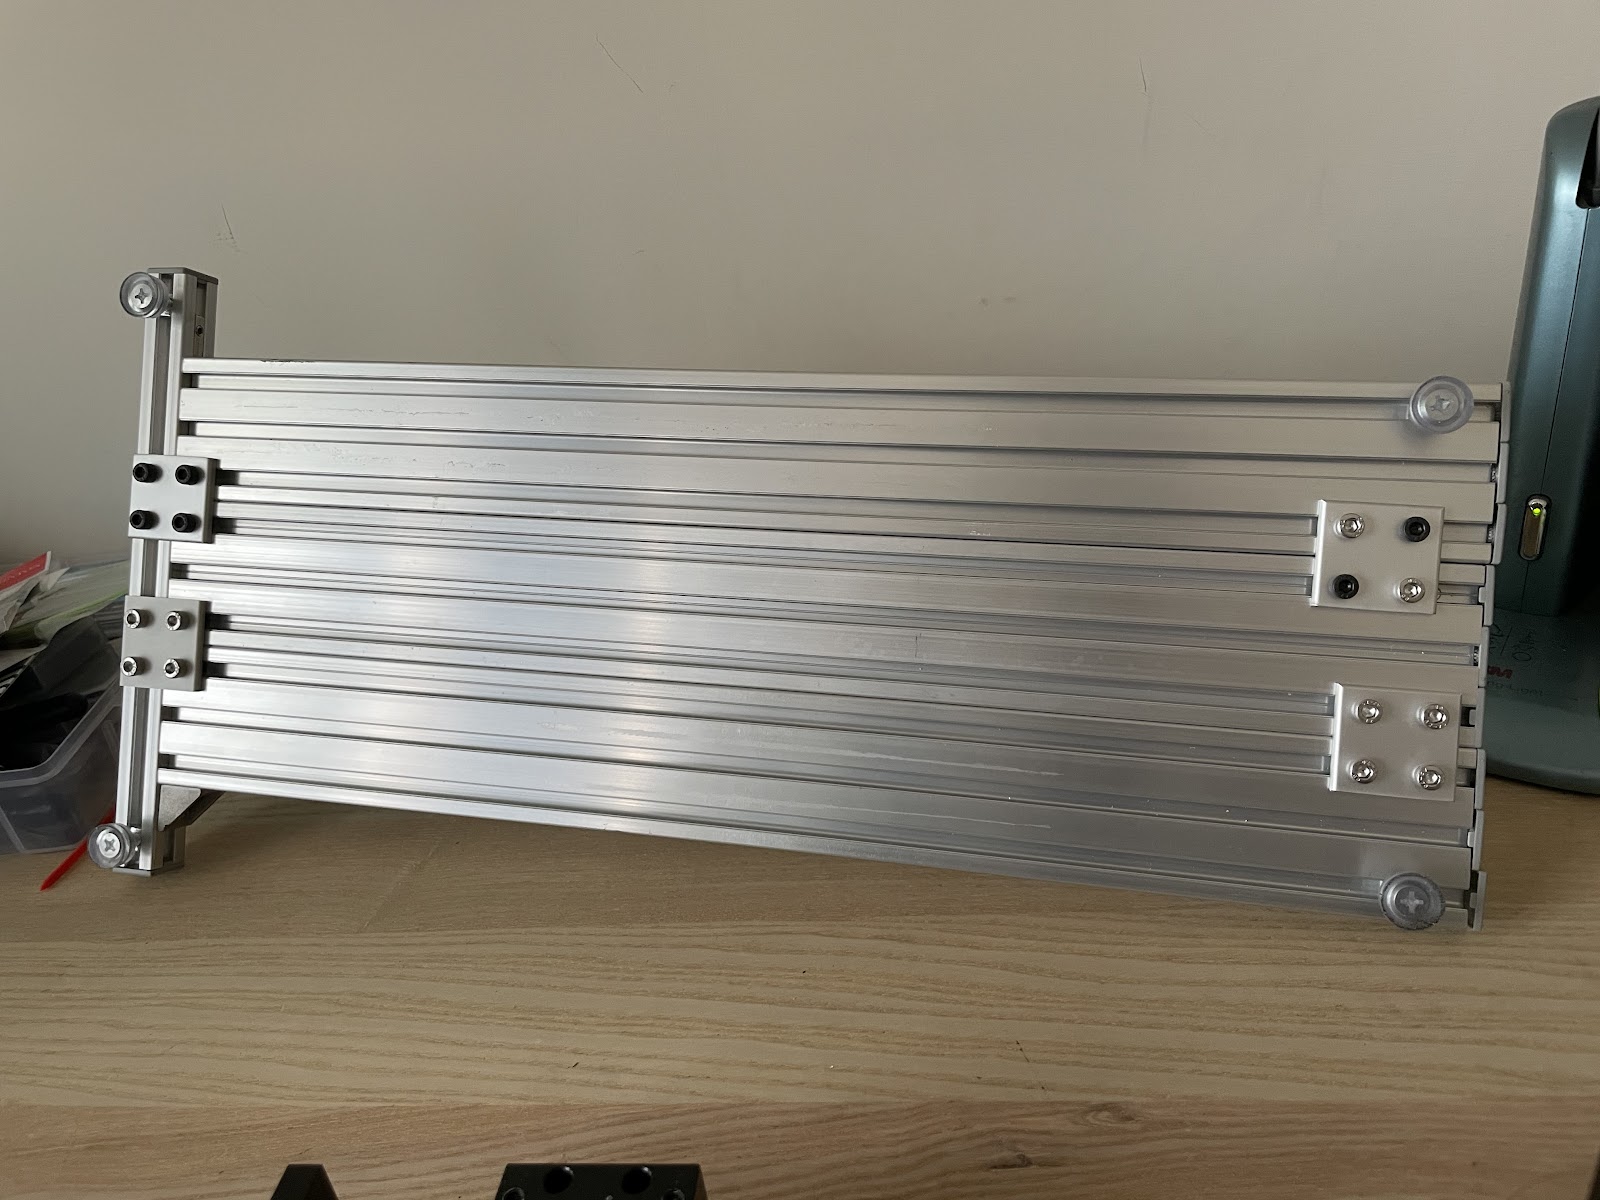

From this angle, you could see that two extra 2060 extrusions were a little bit longer then the original one. End cap is added to prevent the sharp edges from hurting myself.
Strengthen the 6-point Mounting System


After using the original stringing machine for a while, I found out that the original design might not be able to endure enough tensions. Few weeks ago I was stringing my racket with 28LB tension force, a inside-corner connector was broken, which caused the fracture of my badminton racket.
To protect my badminton racket when stringing, I bought some connectors and flat plates to strengthen the 6-point mounting system before I start this electrical stringing project.
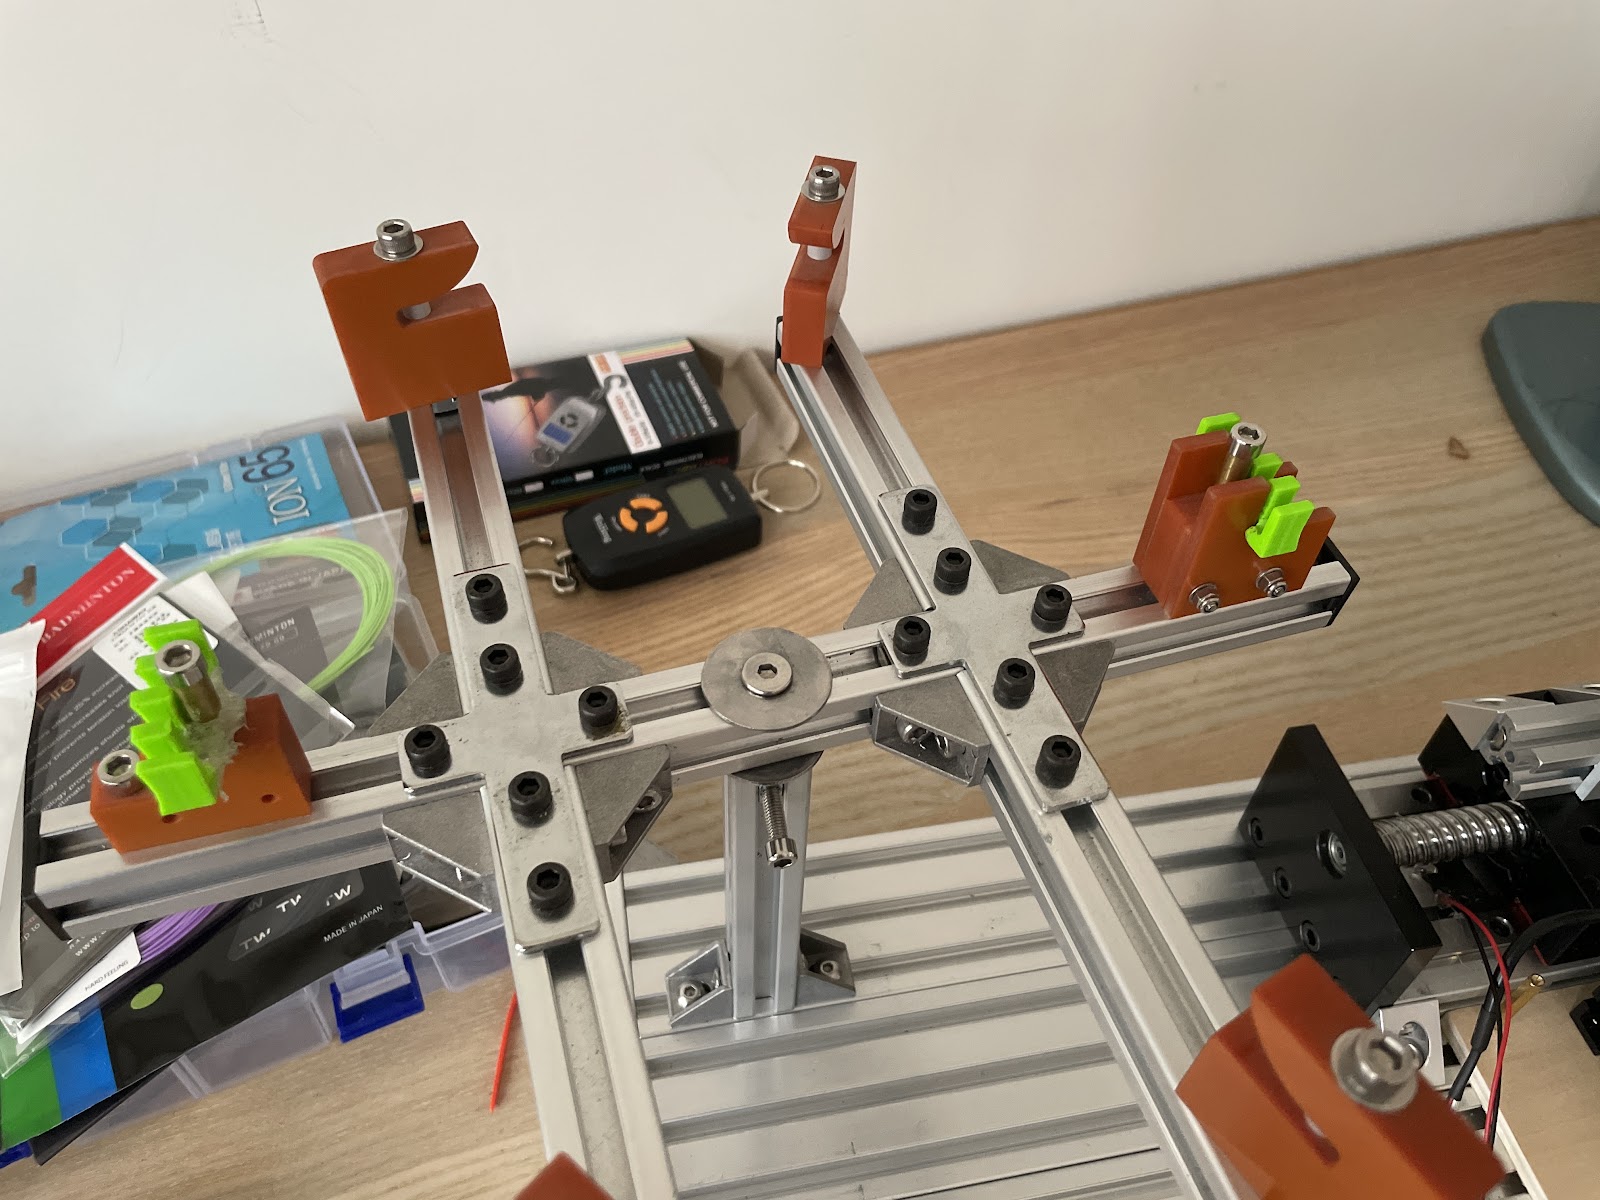
- Inside 90-degree corner connectors were replaced by corner brackets to provide extra supports.
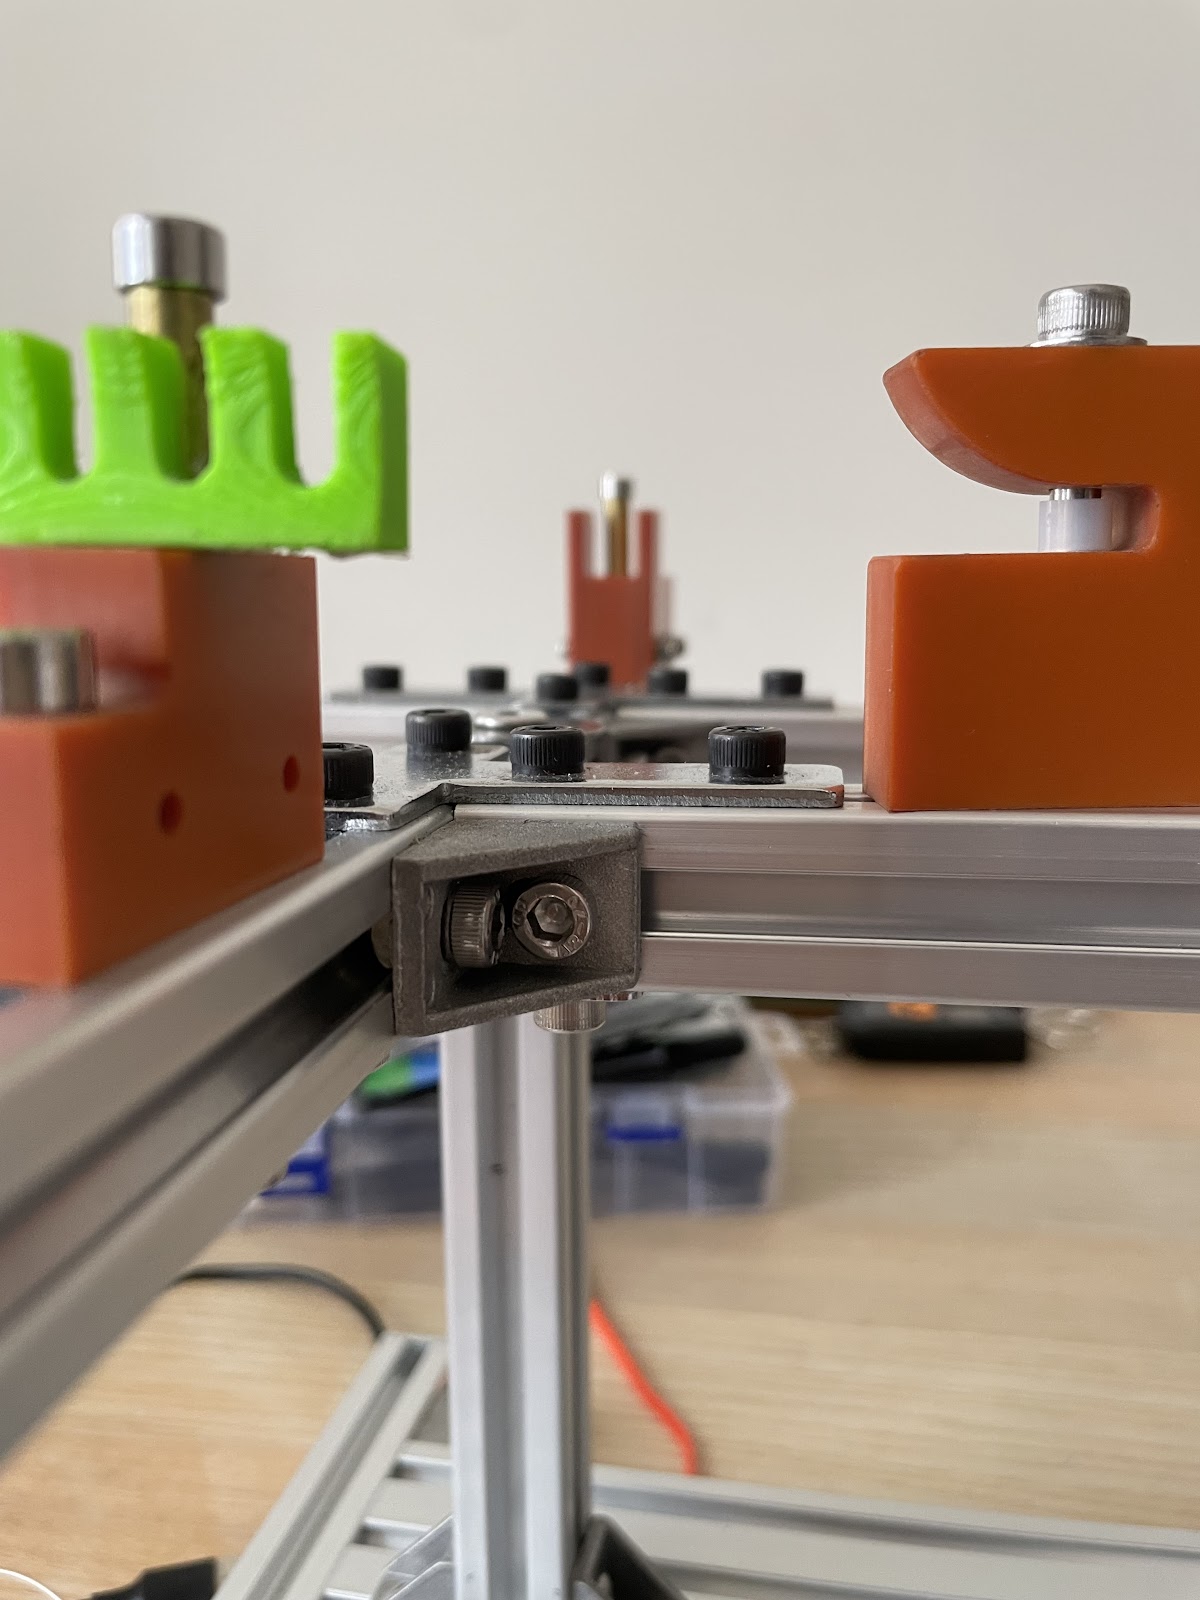
- 7-hole Cross flat plates were installed both upside and downsides to prevent deformation of the platform during the stringing process.
- Two 5-teeth high-tension protectors were installed on the mounting systems. the protectors I bought was 3d-printed, which I could easily cut it into the shape I wanted.
Install 2086 Tensioner Head and the NJ5 20kg Force Sensor on Linear Guideway


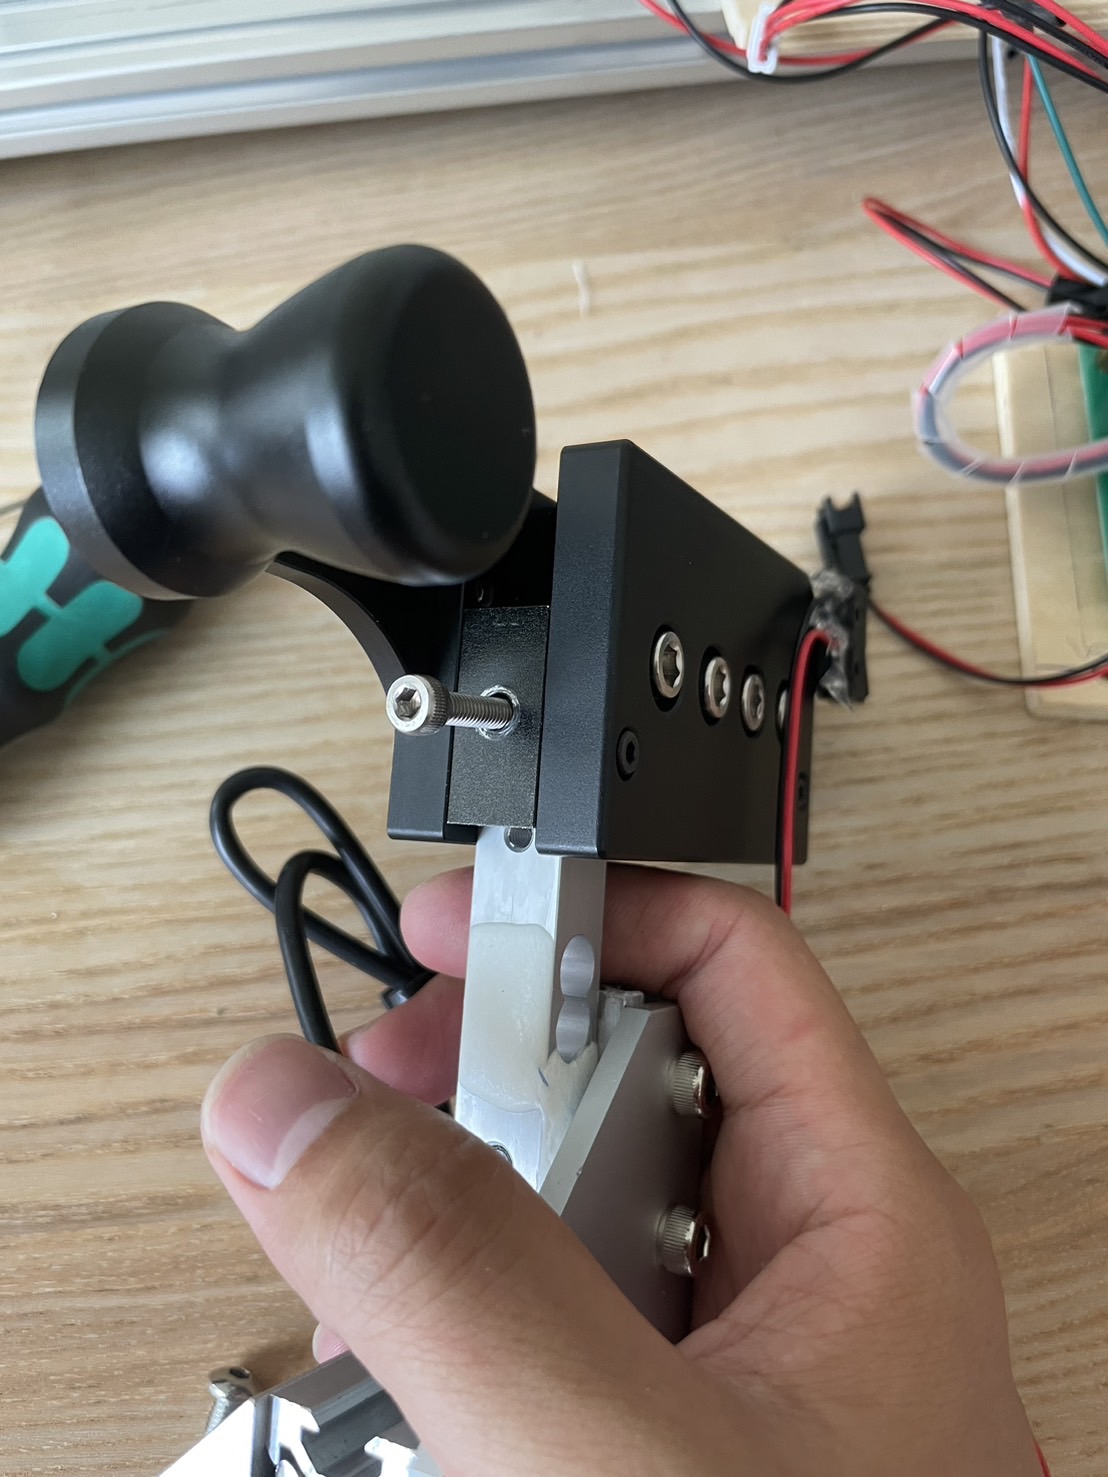
The first prototype I applied is not strong enough. The 2086 tension head was simply fastened with two M5 screws and a 3mm-thick aluminum 90-degree bracket. When Force was applied, The bracket would be bended.
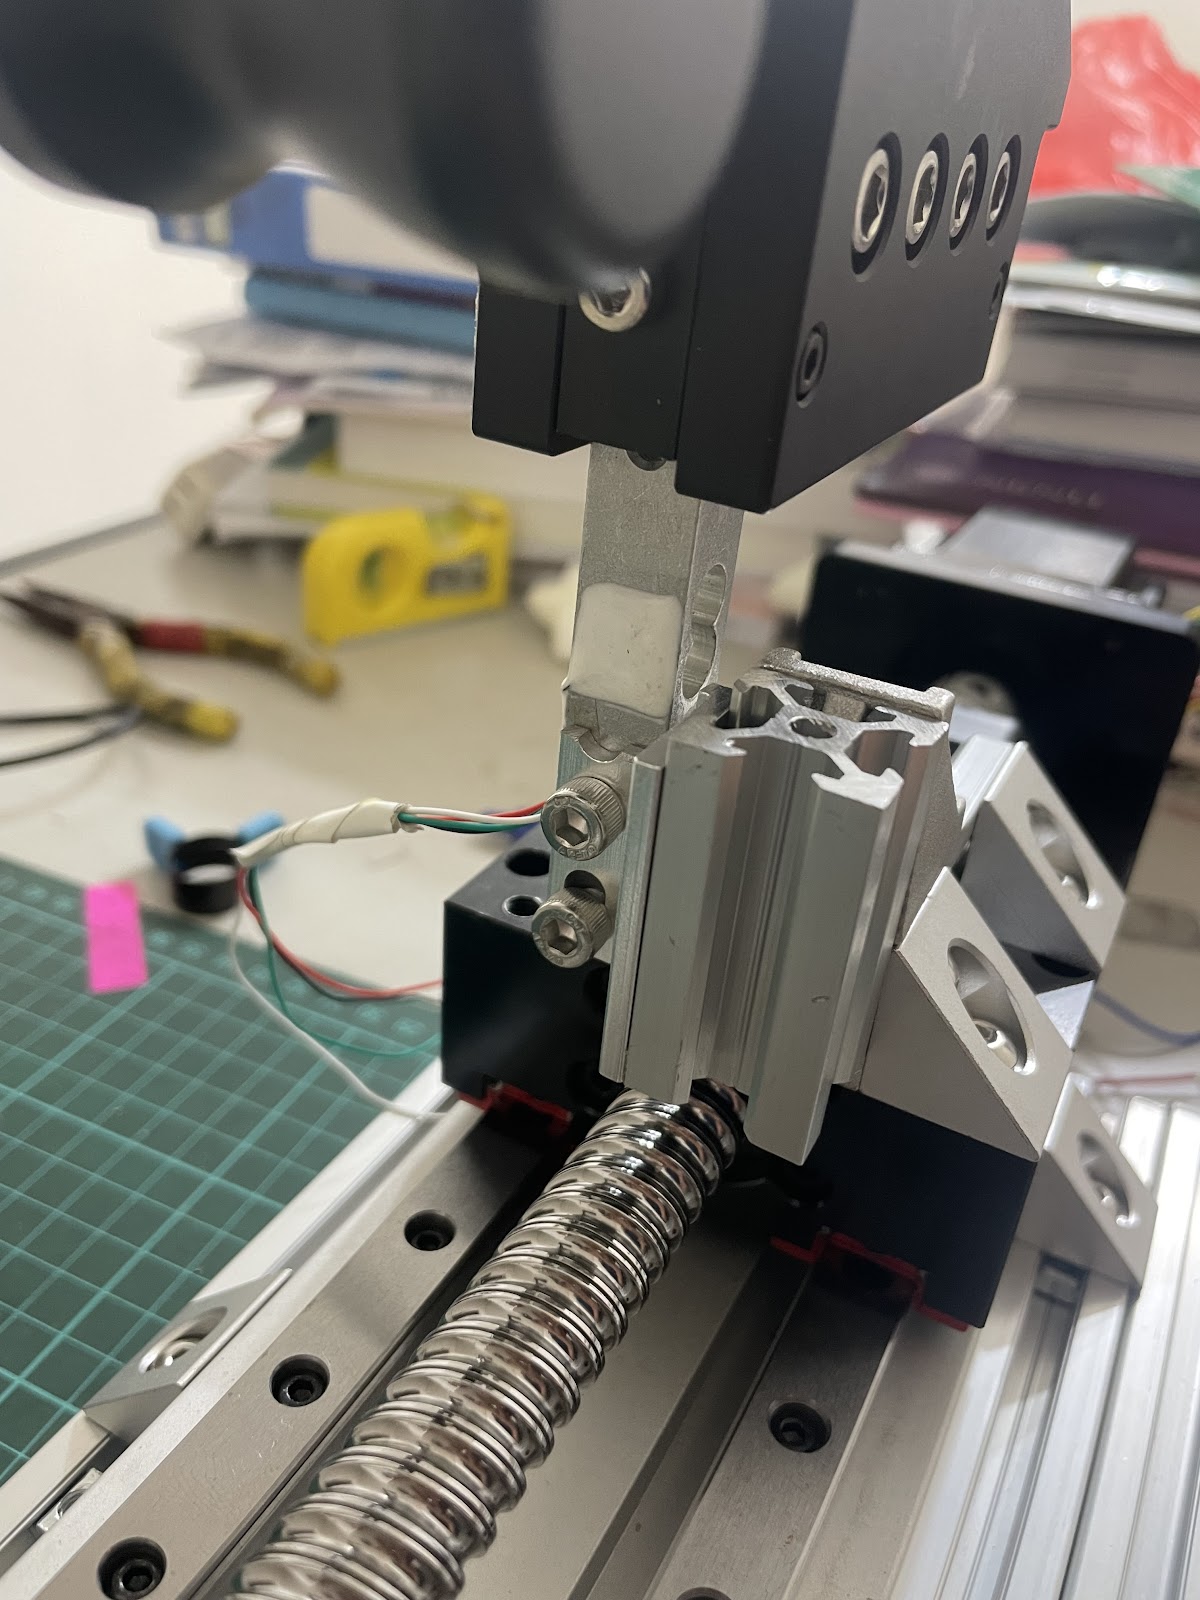
For the second prototype, I cutted down a 2020 extrusion into half and assembled it with a 7-hole 90 degree flat plate, which was shown below. I also applied two triangle-shape 2-dimensional aluminum brackets to secure the extrusion on the linear guideway platform.

The NJ5 could be perfectly fitted inside the space of the 2086 tensioner head. The NJ5 I bought has four M4 threaded holes on it, and I drilled a φ4.2 hole in front of the tensioner to lock them together. There are several ways to combine a 2086 tensioner and a NJ5 force sensor together. My method might not be the best way, but you can consider it to be a guideline, and use your creativity to come up with a better idea.
Besides finding a way to mount the 2086 tensioner head, It was also important to adjust the height distance between the head and the 6-point mounting system.
2024.05.18 update:
The author of PicoBETH project has uploaded a series of videos on youtube here. You can check out how he mounted NJ5 tension sensor and 2086 tension head together.
It is also important to keep the distance between the tension head and the racket, showed below.
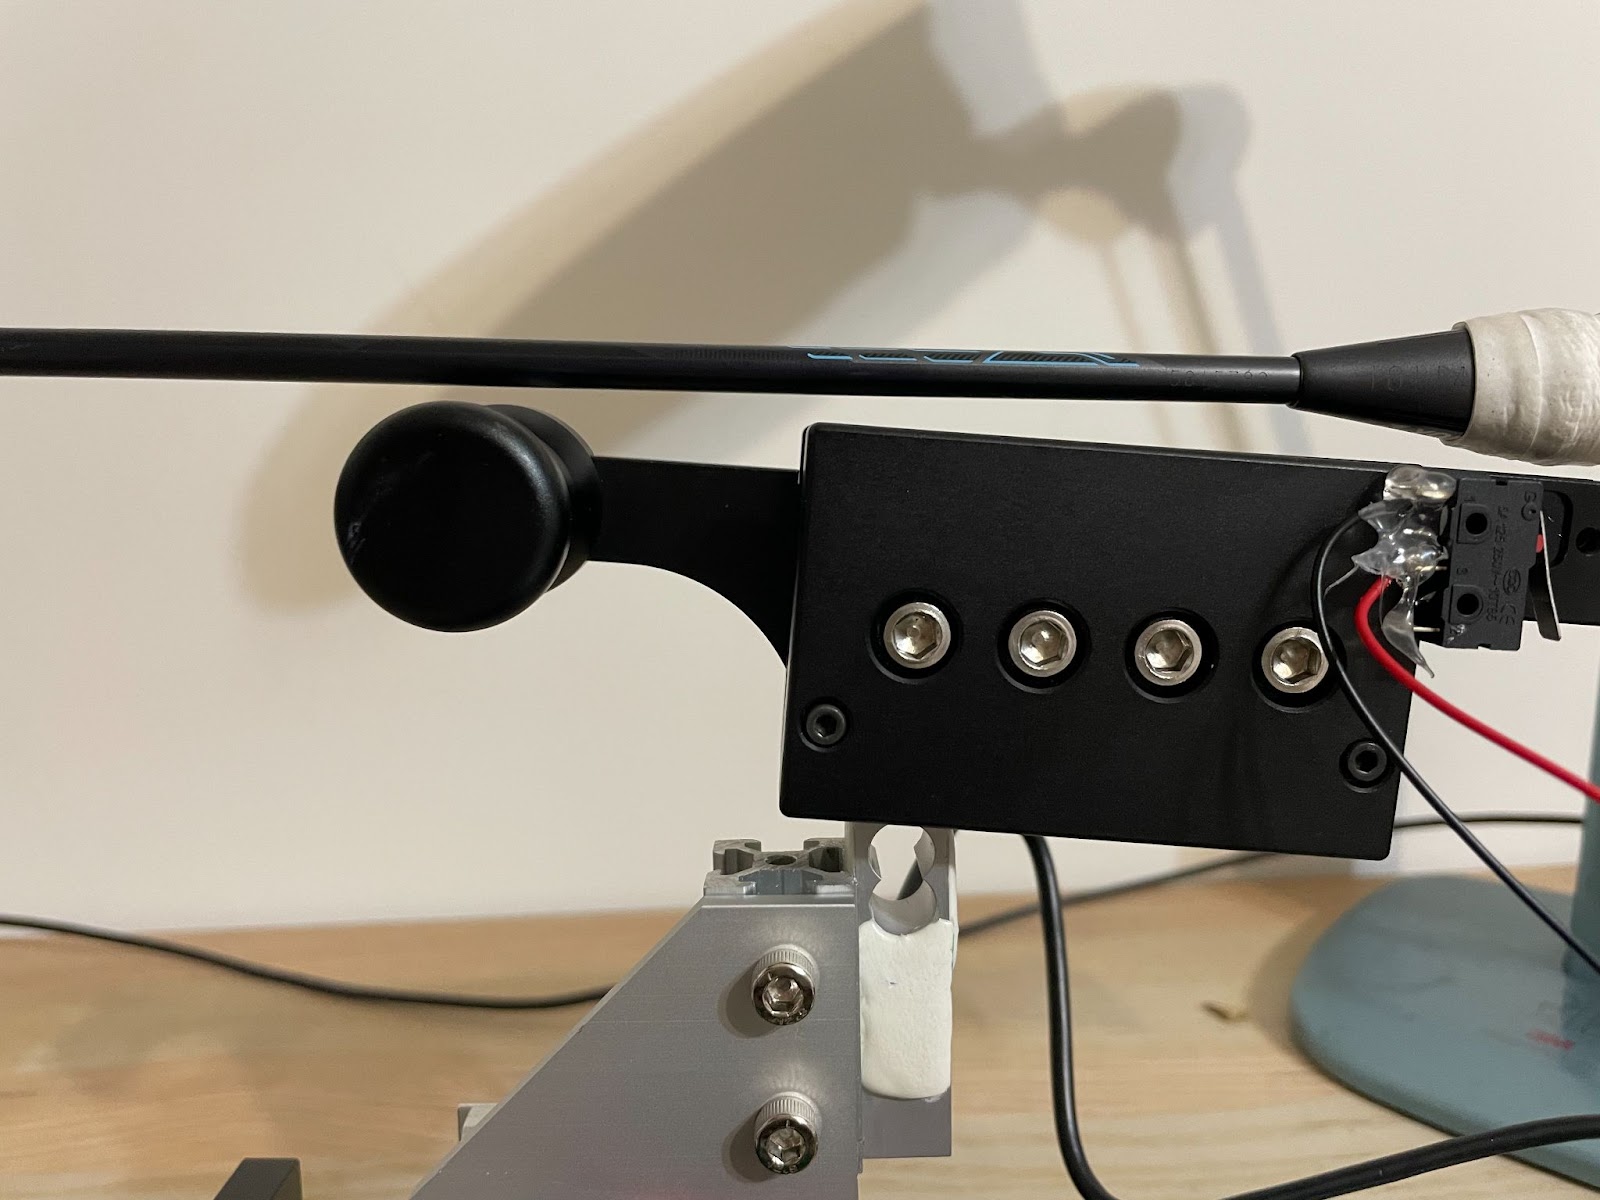
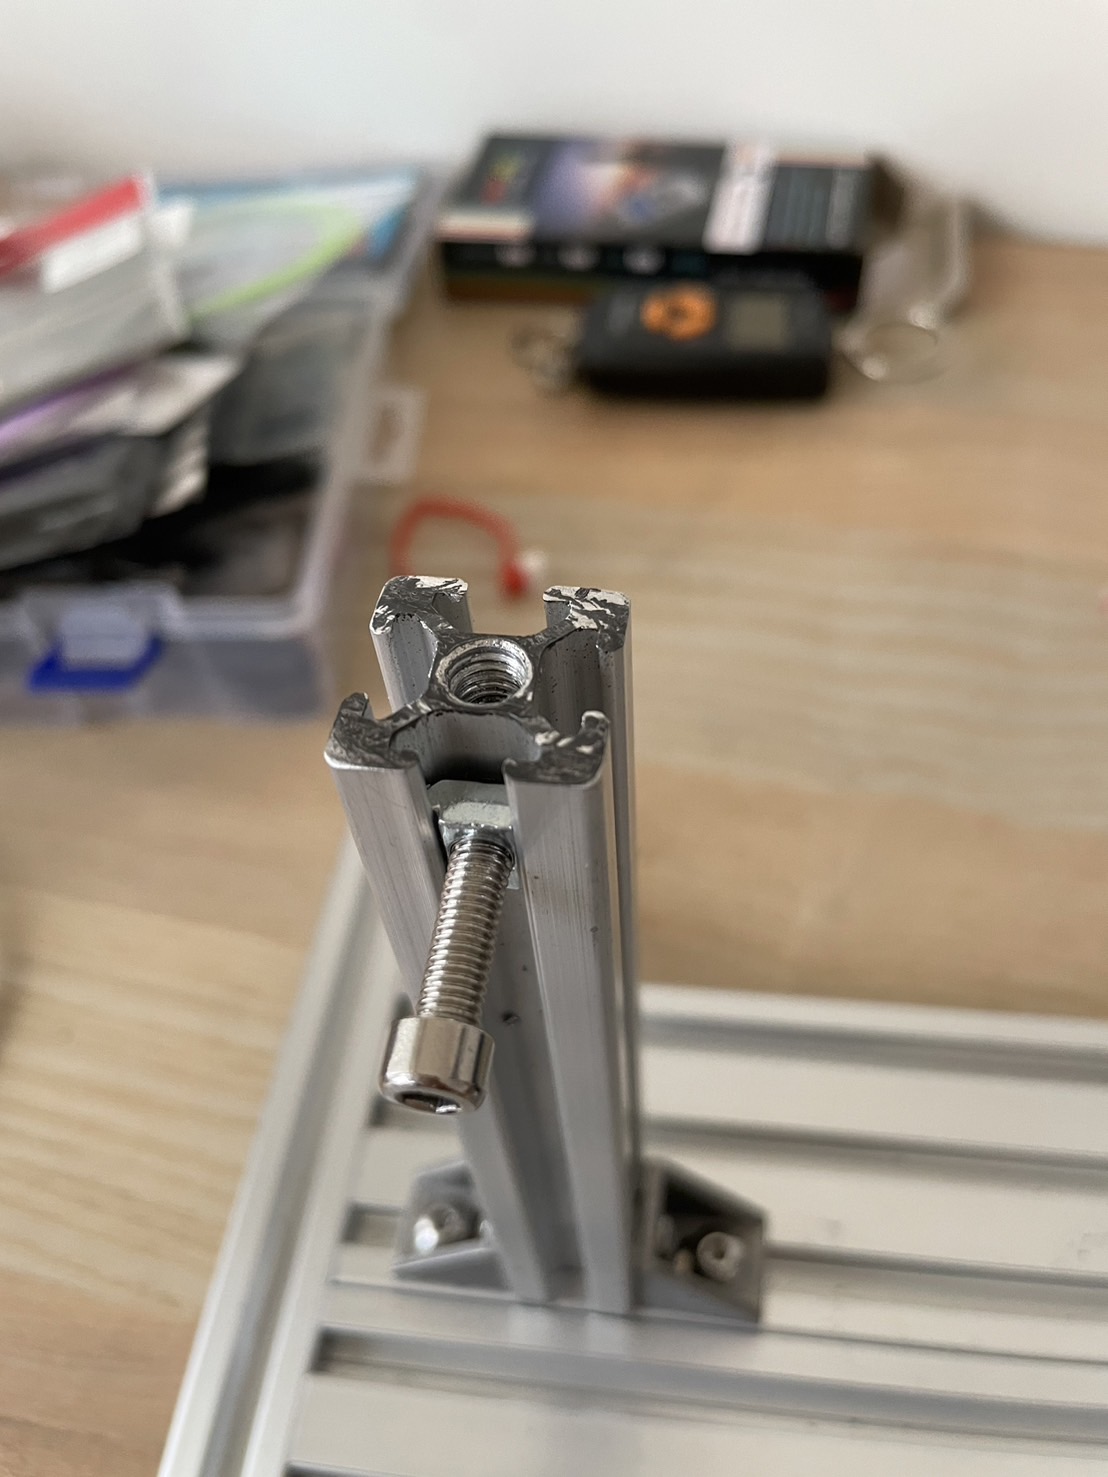
The original I ordered an extra 160mm 2020 extrusions and replace the original 100mm one. I tapped one side of the extrusions in order to fit the M6 screws, which is used for mounting the 6-point system. I also drilled a 5.0mm holes on the side of the extrusion. The hole is big enough for a M5 screw to pass through and bite on the M6 screw, to make sure the M6 screw wouldn’t be unscrewed during the stringing process. The M6 screw should be tight enough to secure the 6-point mounting system, but not too tight for the system to spin.
Upload Software to Raspberry Pico
I used Thonny to save the following code files to the Raspberry Pico. The code files can be found here:
- main.py
- src\hx711.py
- src\lcd_api.py
- src\pico_i2c_lcd.py
The src folder contains libraries for hx711 and 2004 LCD.
Thanks to PicoBETH for providing the main code files and introduce the concept to build this project. Also thanks to https://github.com/endail/hx711-pico-mpy and https://github.com/T-622/RPI-PICO-I2C-LCD for providing the pico hx711 library and pico 2004 LCD library.
Soldering PCB Board
I designed a PCB board, which integrated most of the components the project needed, named Pico Stringer v1.0. Some features about the board:
- AMS1117-5.0 is added to provide 5V power for the board
- A zener diode is added on Pico power pin( you can look for the detail on pico guide book)
- a 10K pullup resistor is added on all the microswitch
- hx711 and the surrounding circuits is added for detection stability
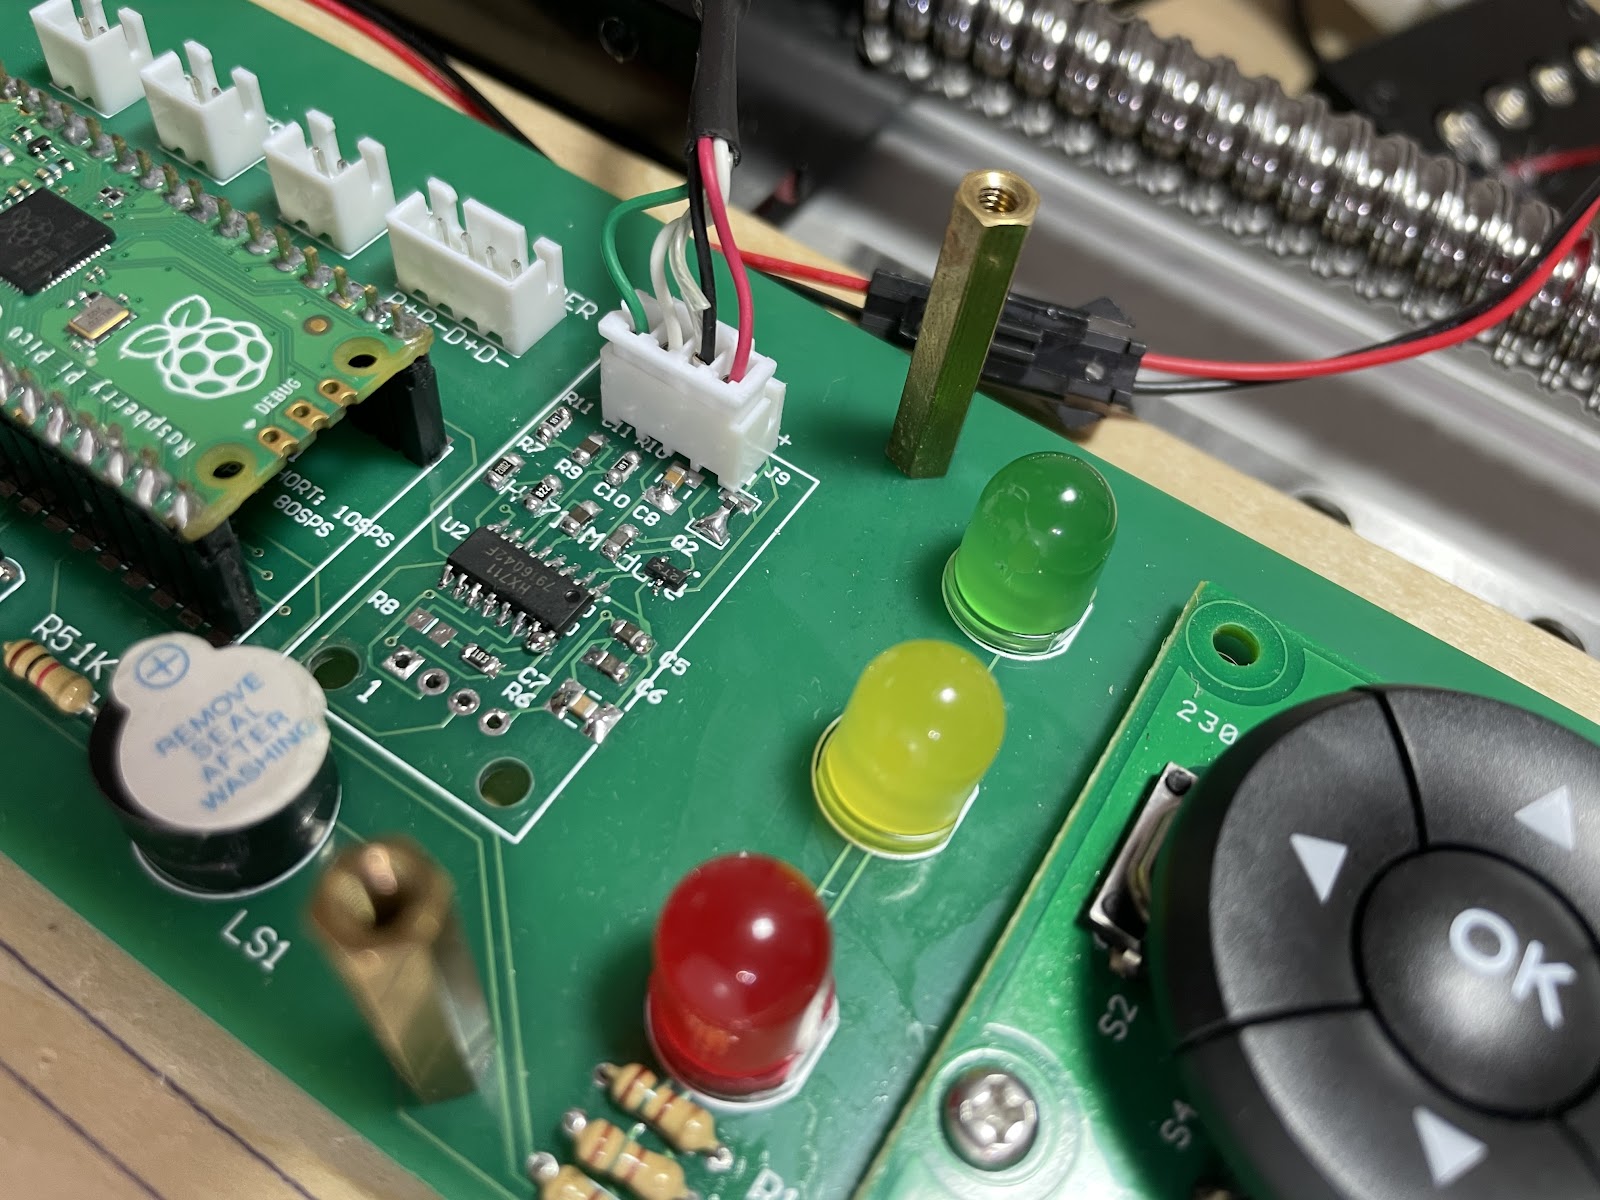
Notes: You can choose ready-made hx711 modules or custom-designed hx711, which was layouted on the PCB board. Make sure the hx711 was tuned to 80Hz. I specially recommended sparkfun hx711 module because of its stability.
Assemble All the Electronic Parts Together

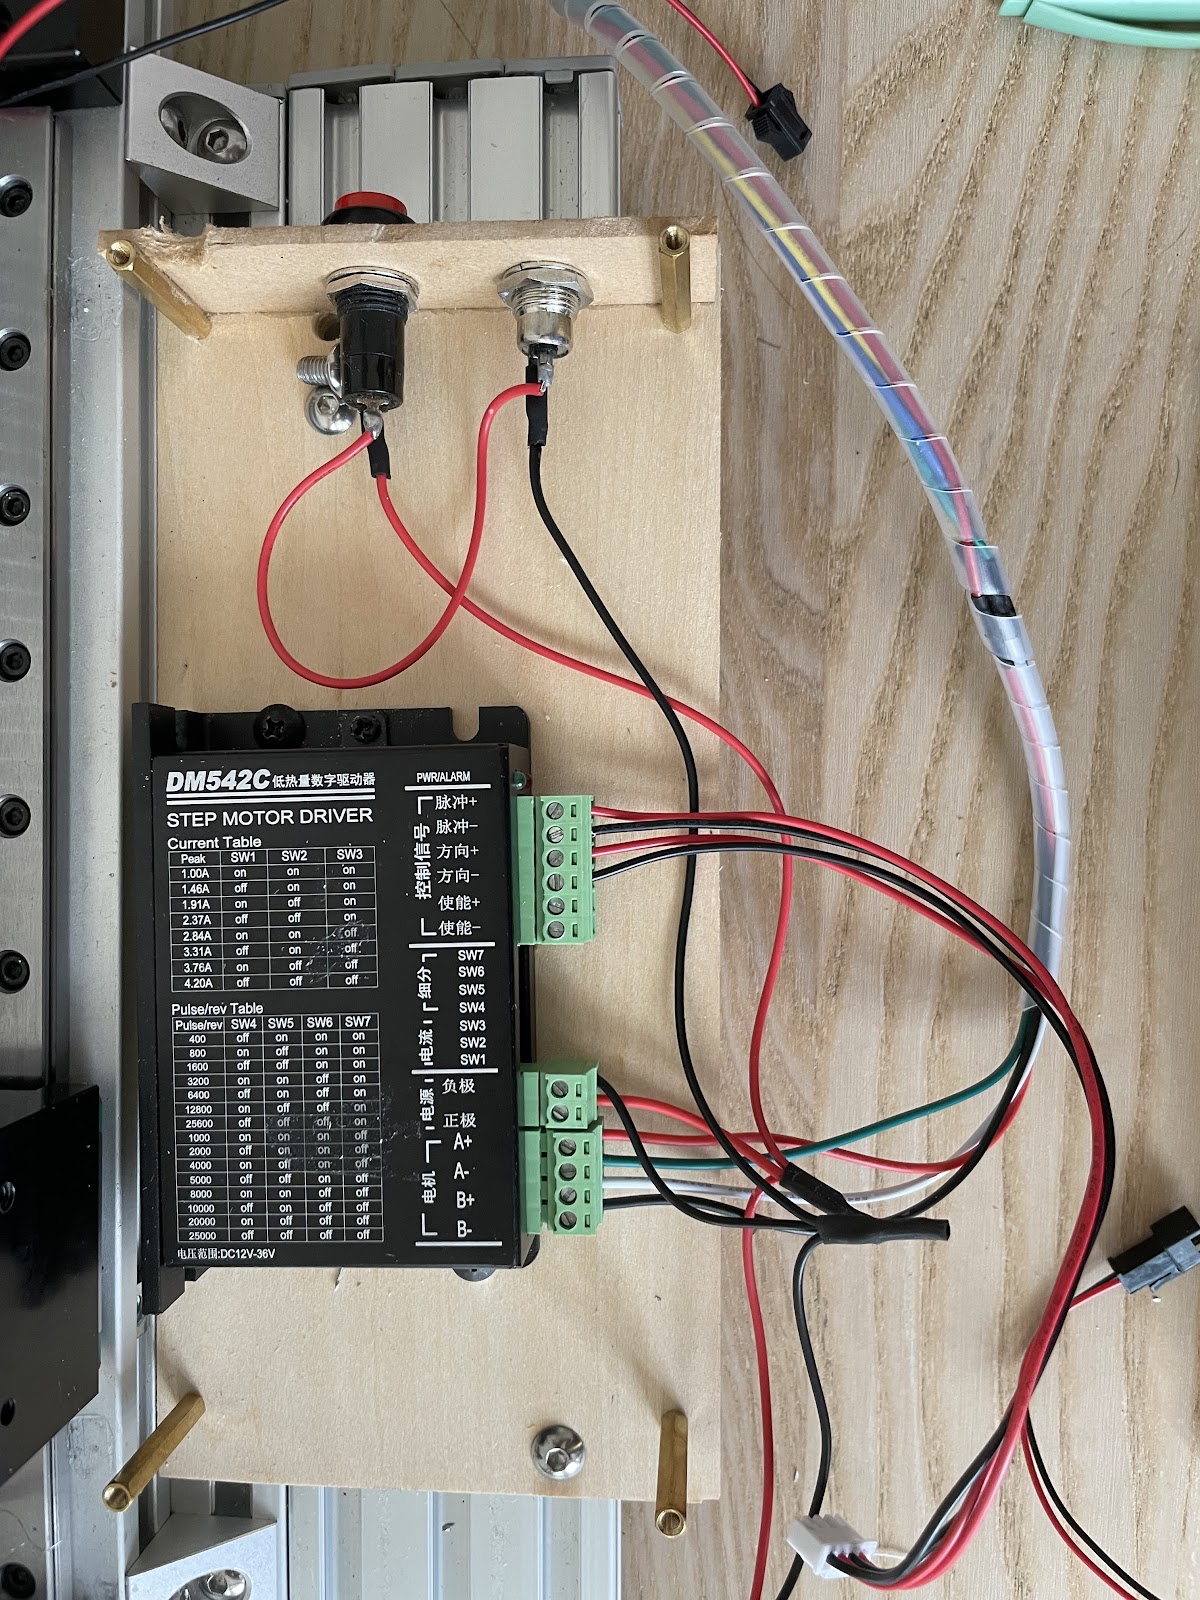
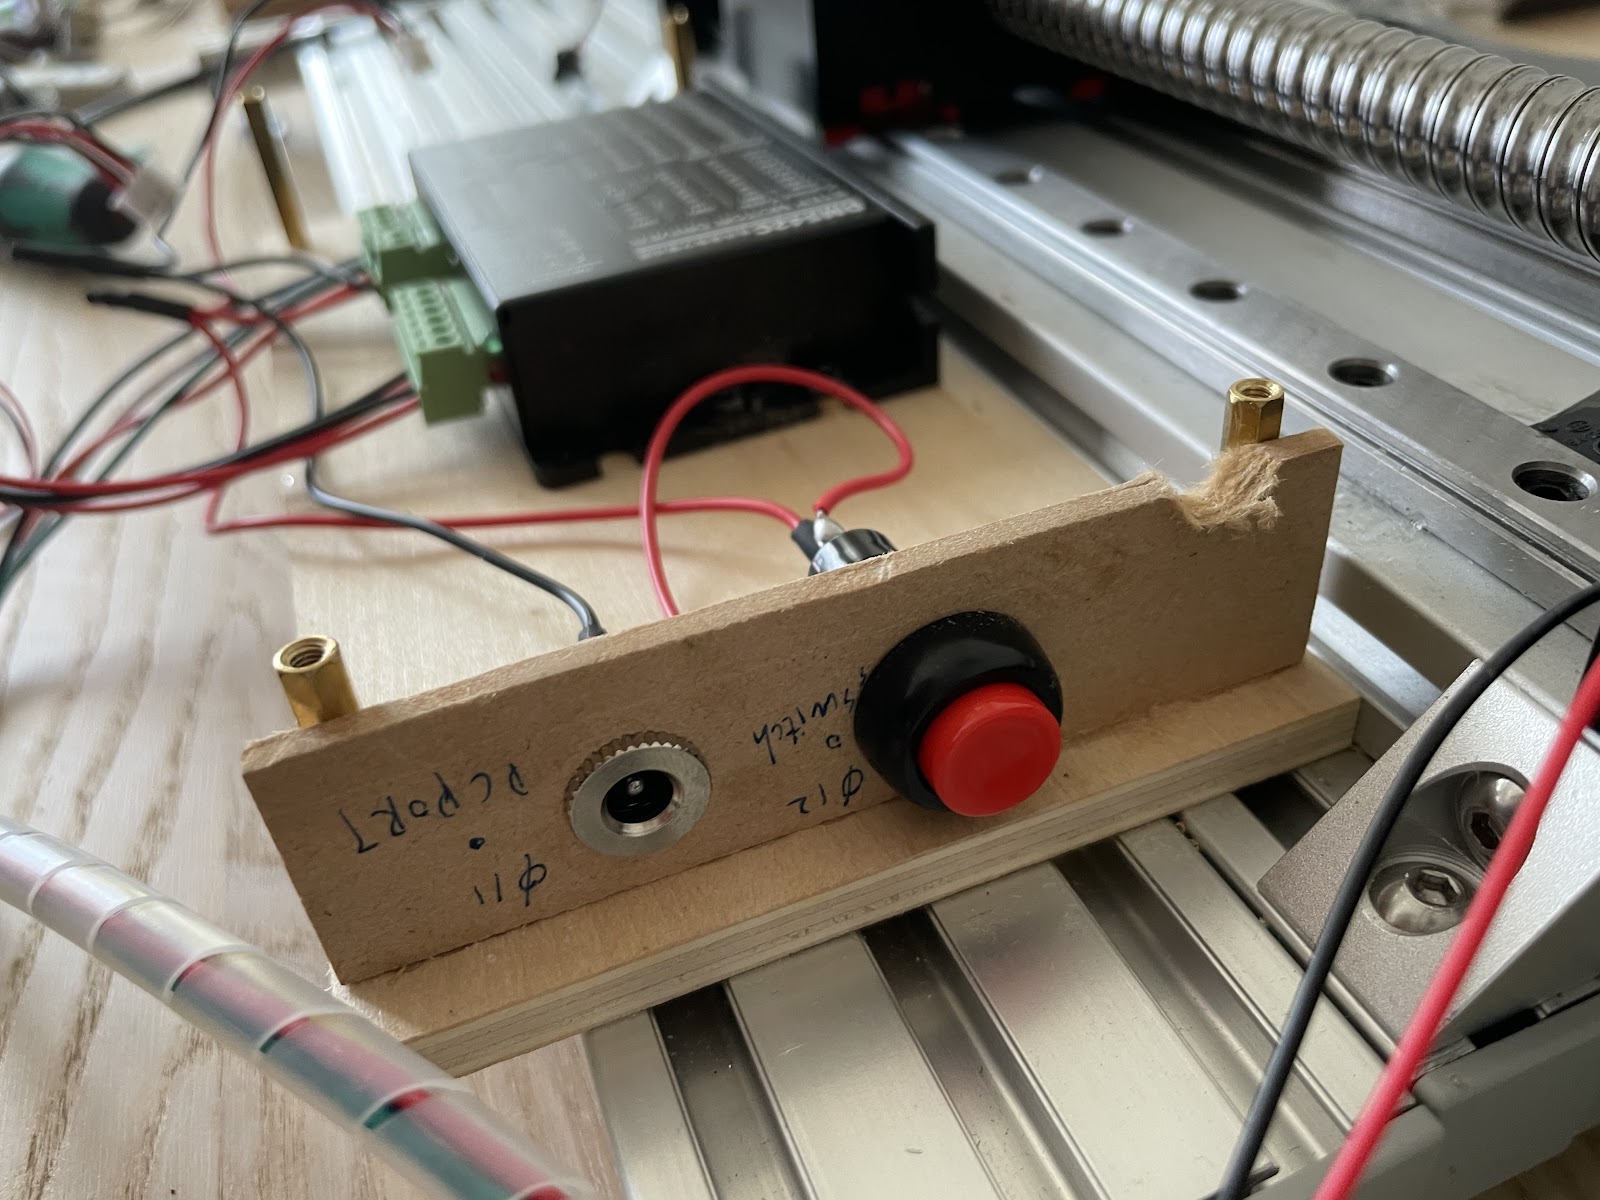
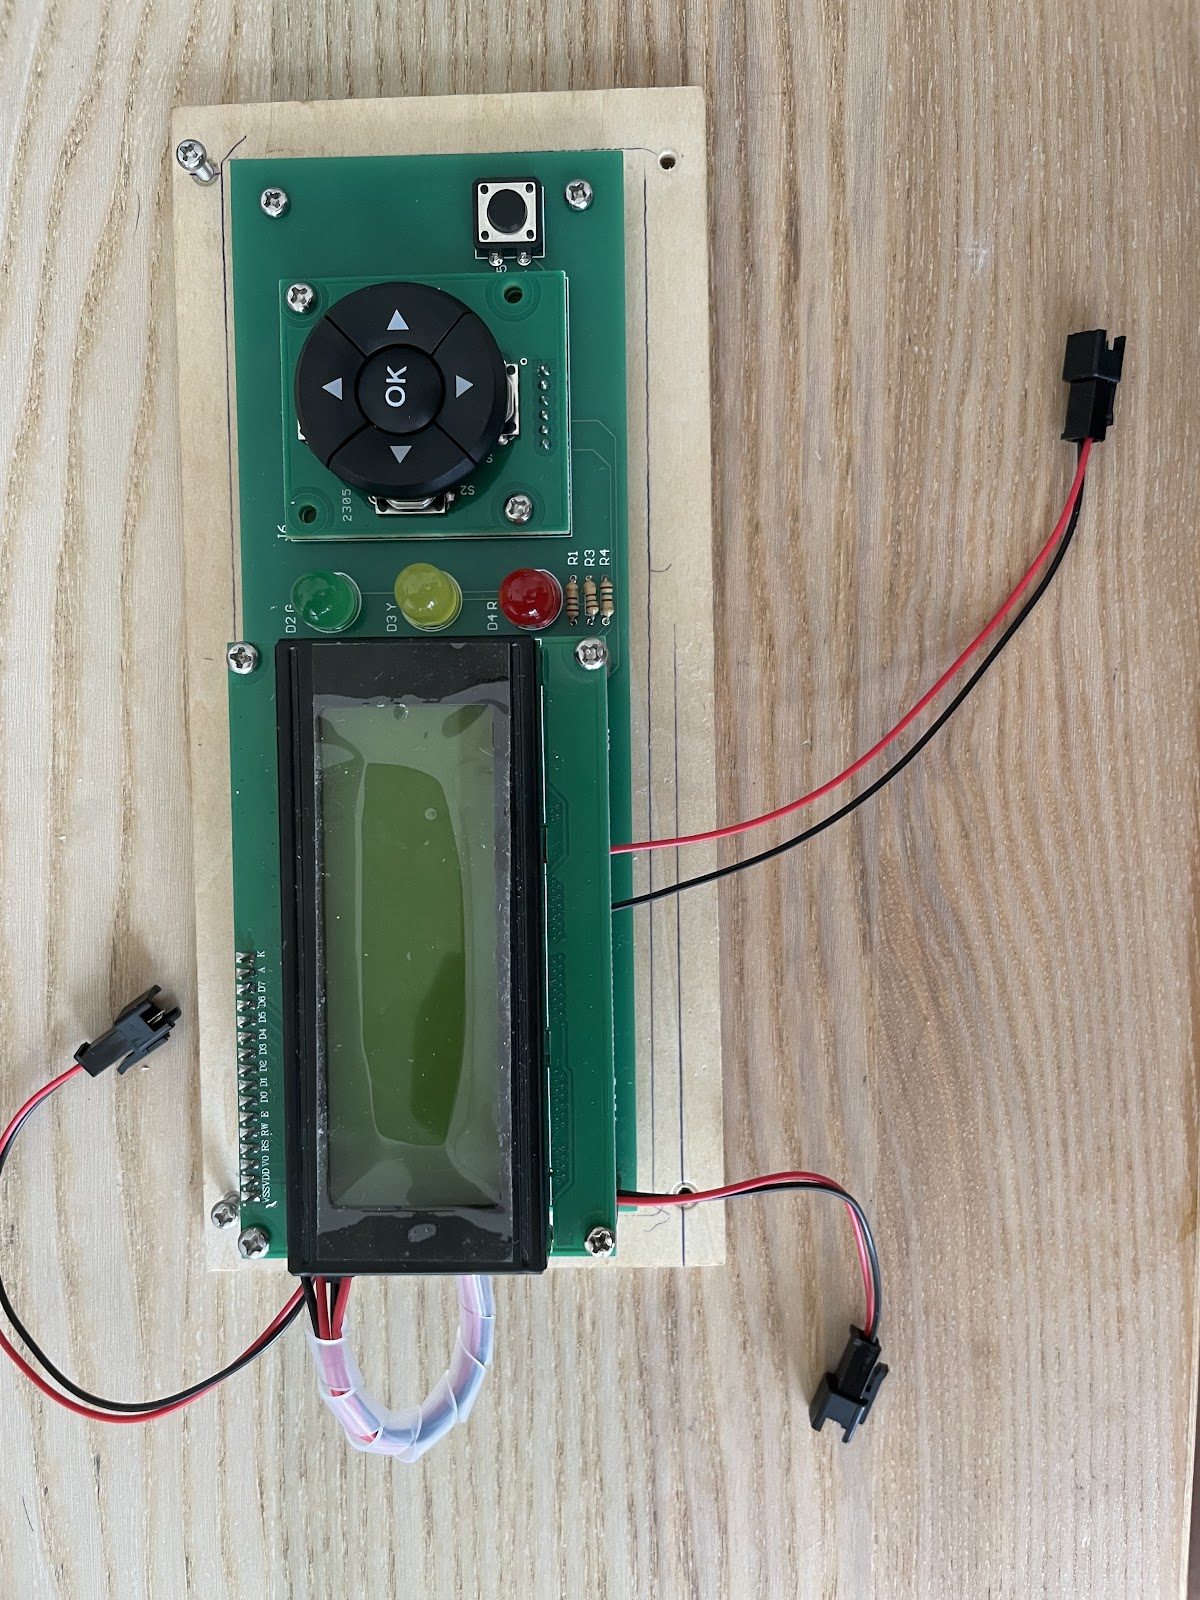
I got some wood plates and a 12V DC adaptor from my brother for free, which I could use as the platform. My design was composed of two layers. First layer contained the DC 5.1 jack, the main switch, and the DM542C stepper motor driver. I soldered a switch and a DC 5.1 jack and installed them on the right side of the base plates.
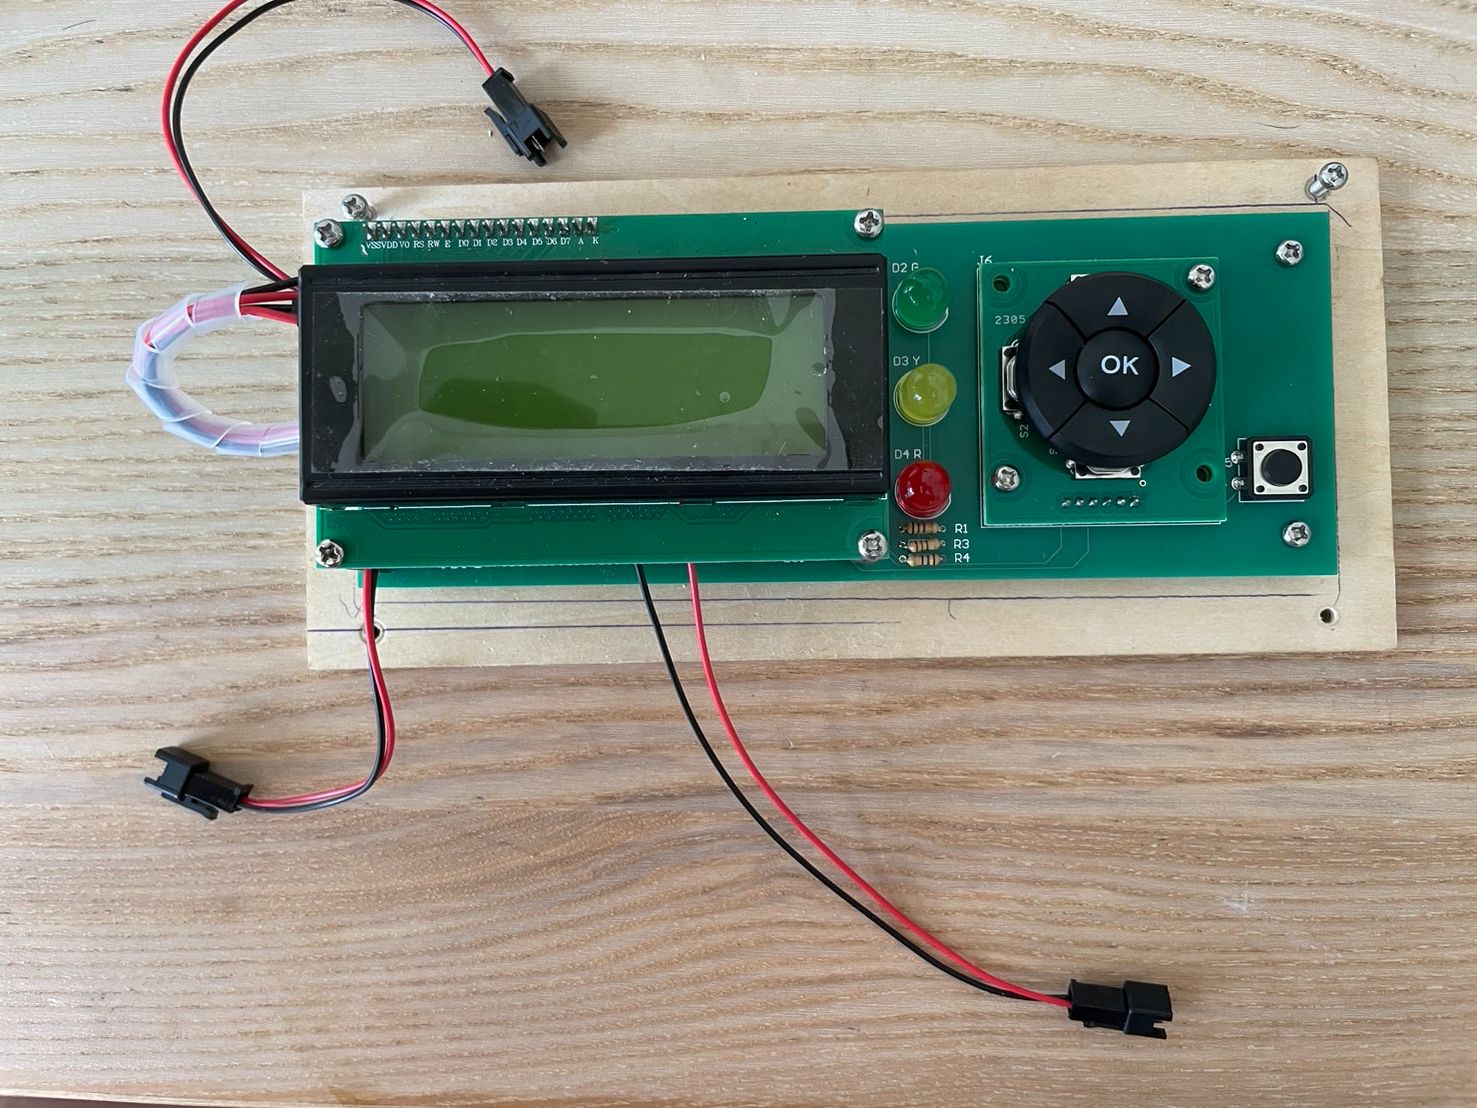
Second layer contained a customed PCB board, stack up with a 2004 LCD on the top.
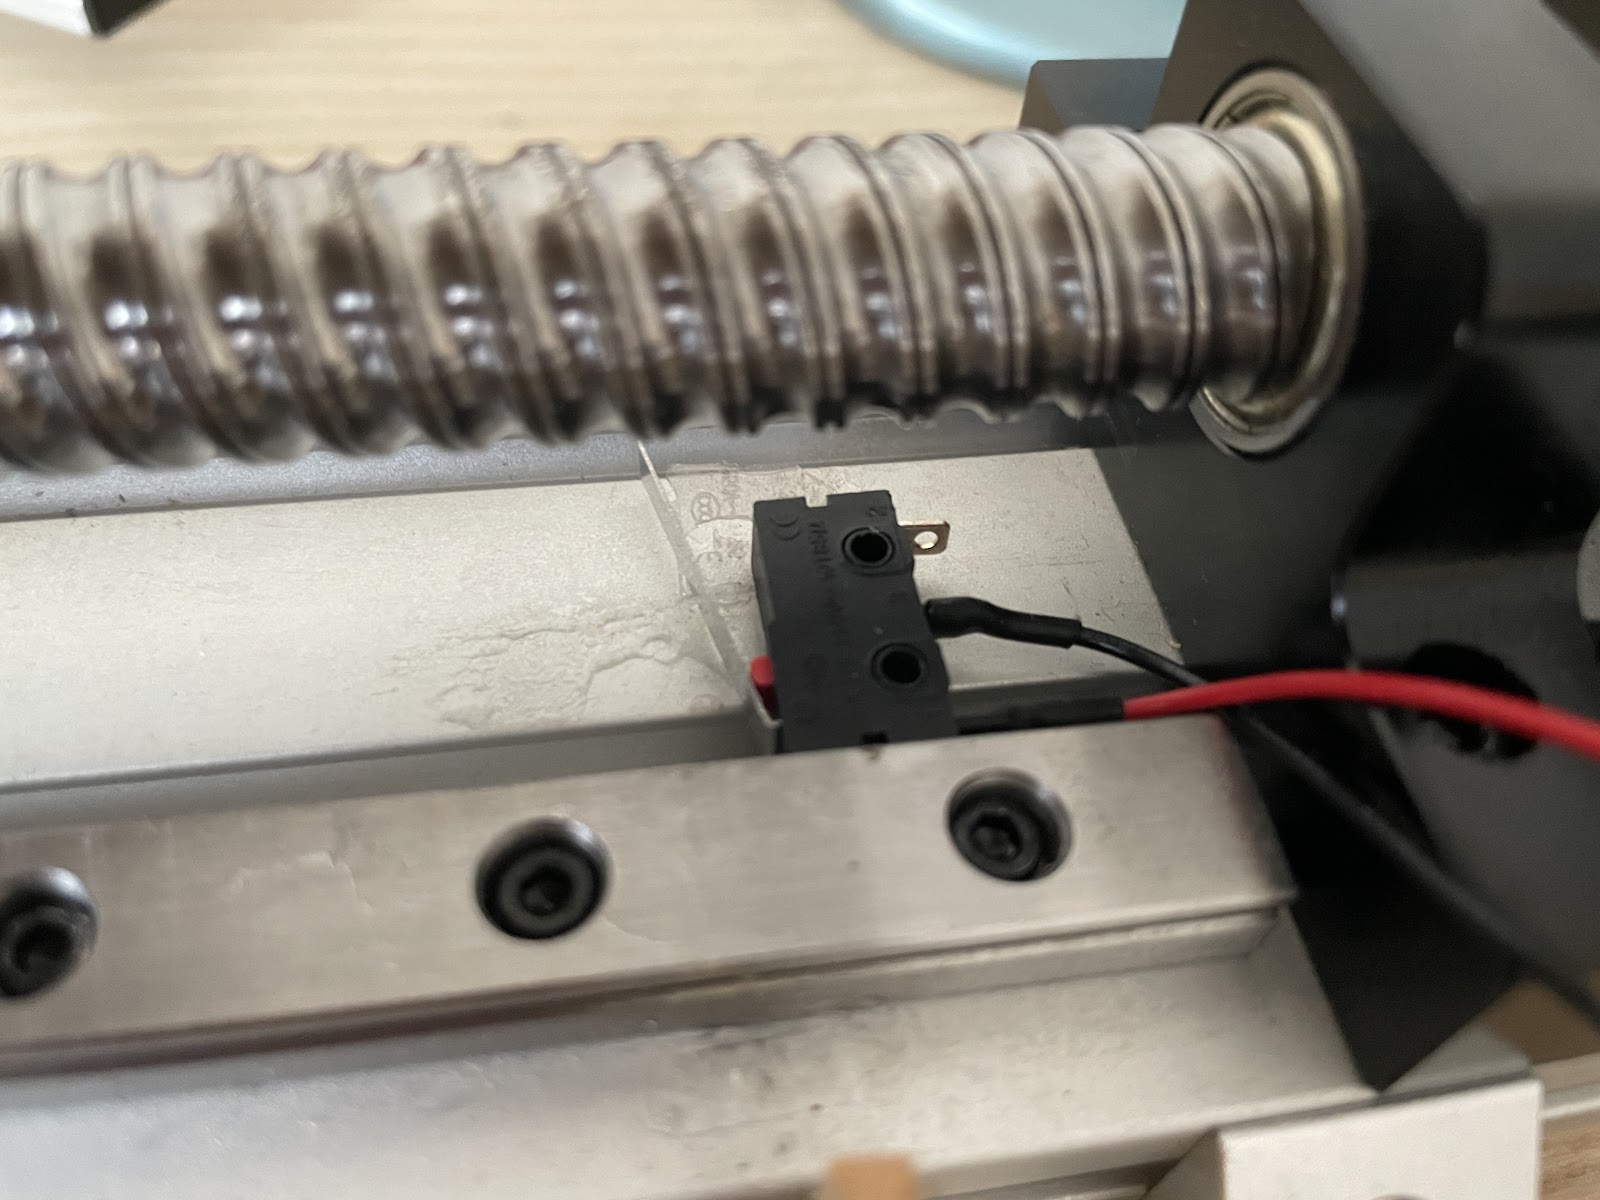
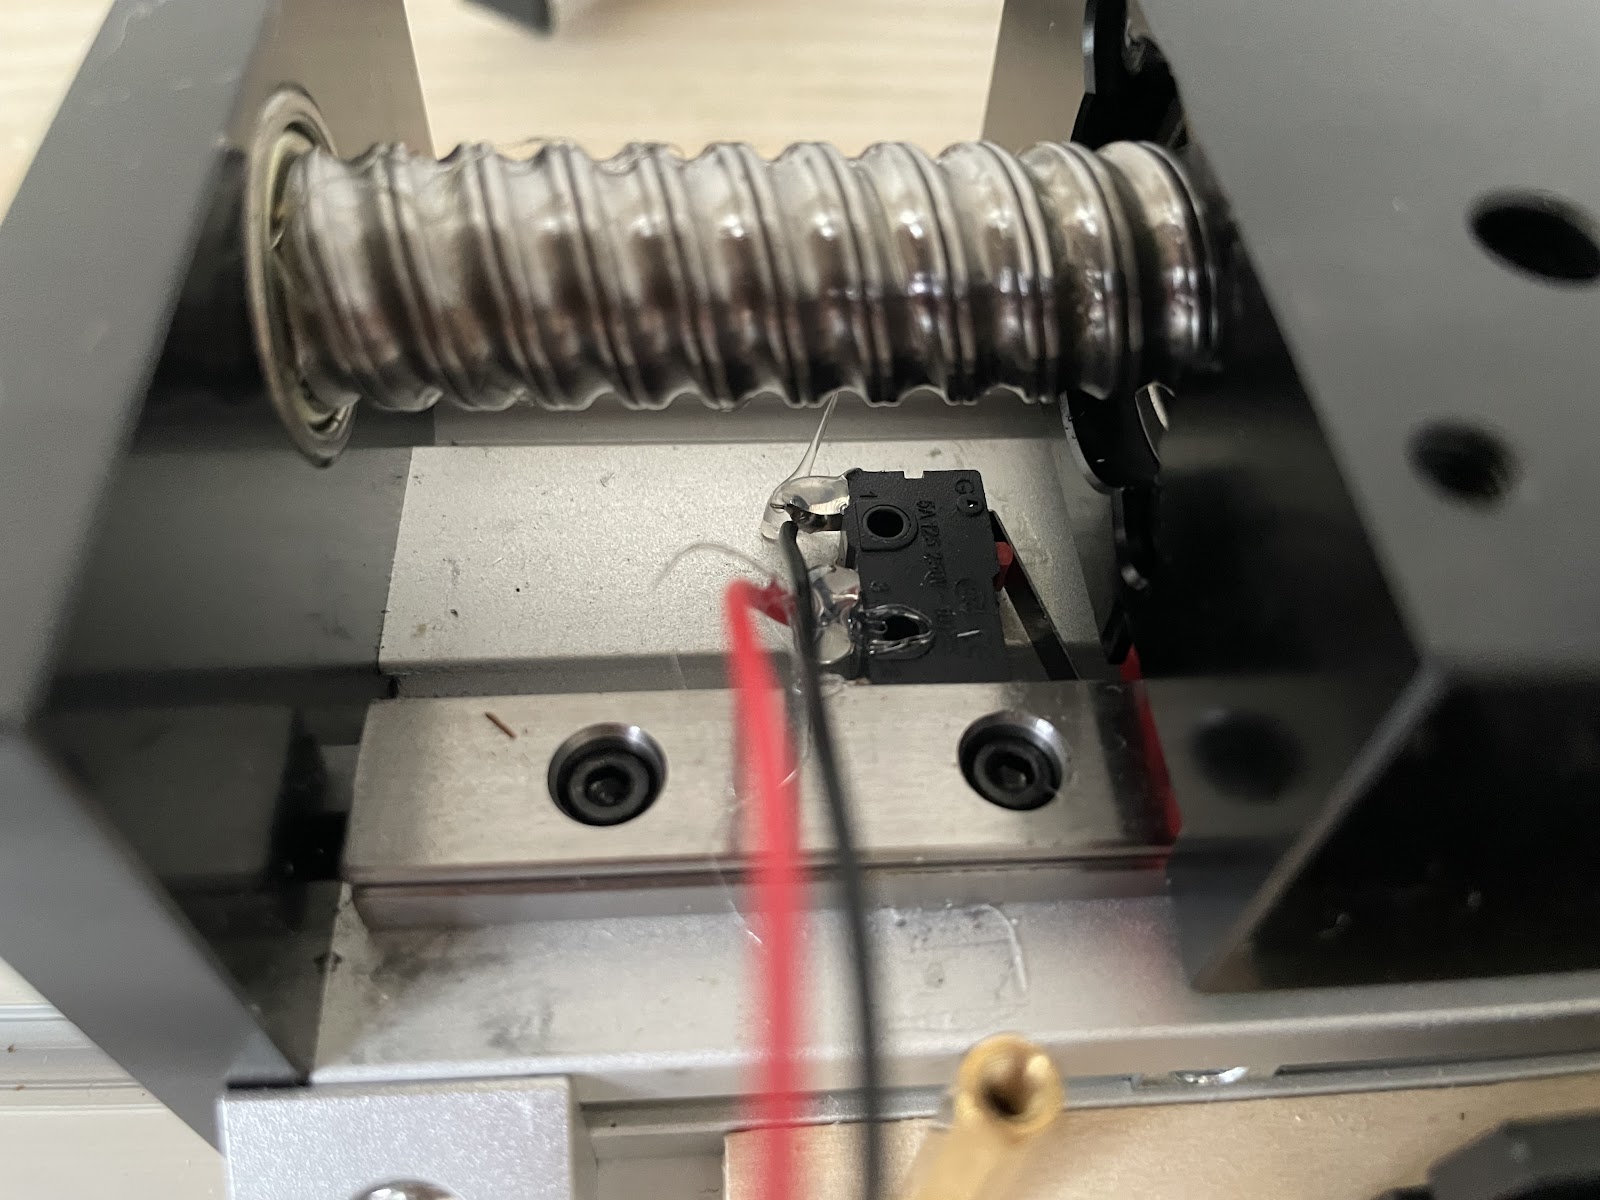
Two limit switches, a front switch and a rear switch, were installed on the linear guideway. I first soldered it with a pair of wires, came with an SM2.54 2-pin male connector, and further glued the switches with epoxy resin.
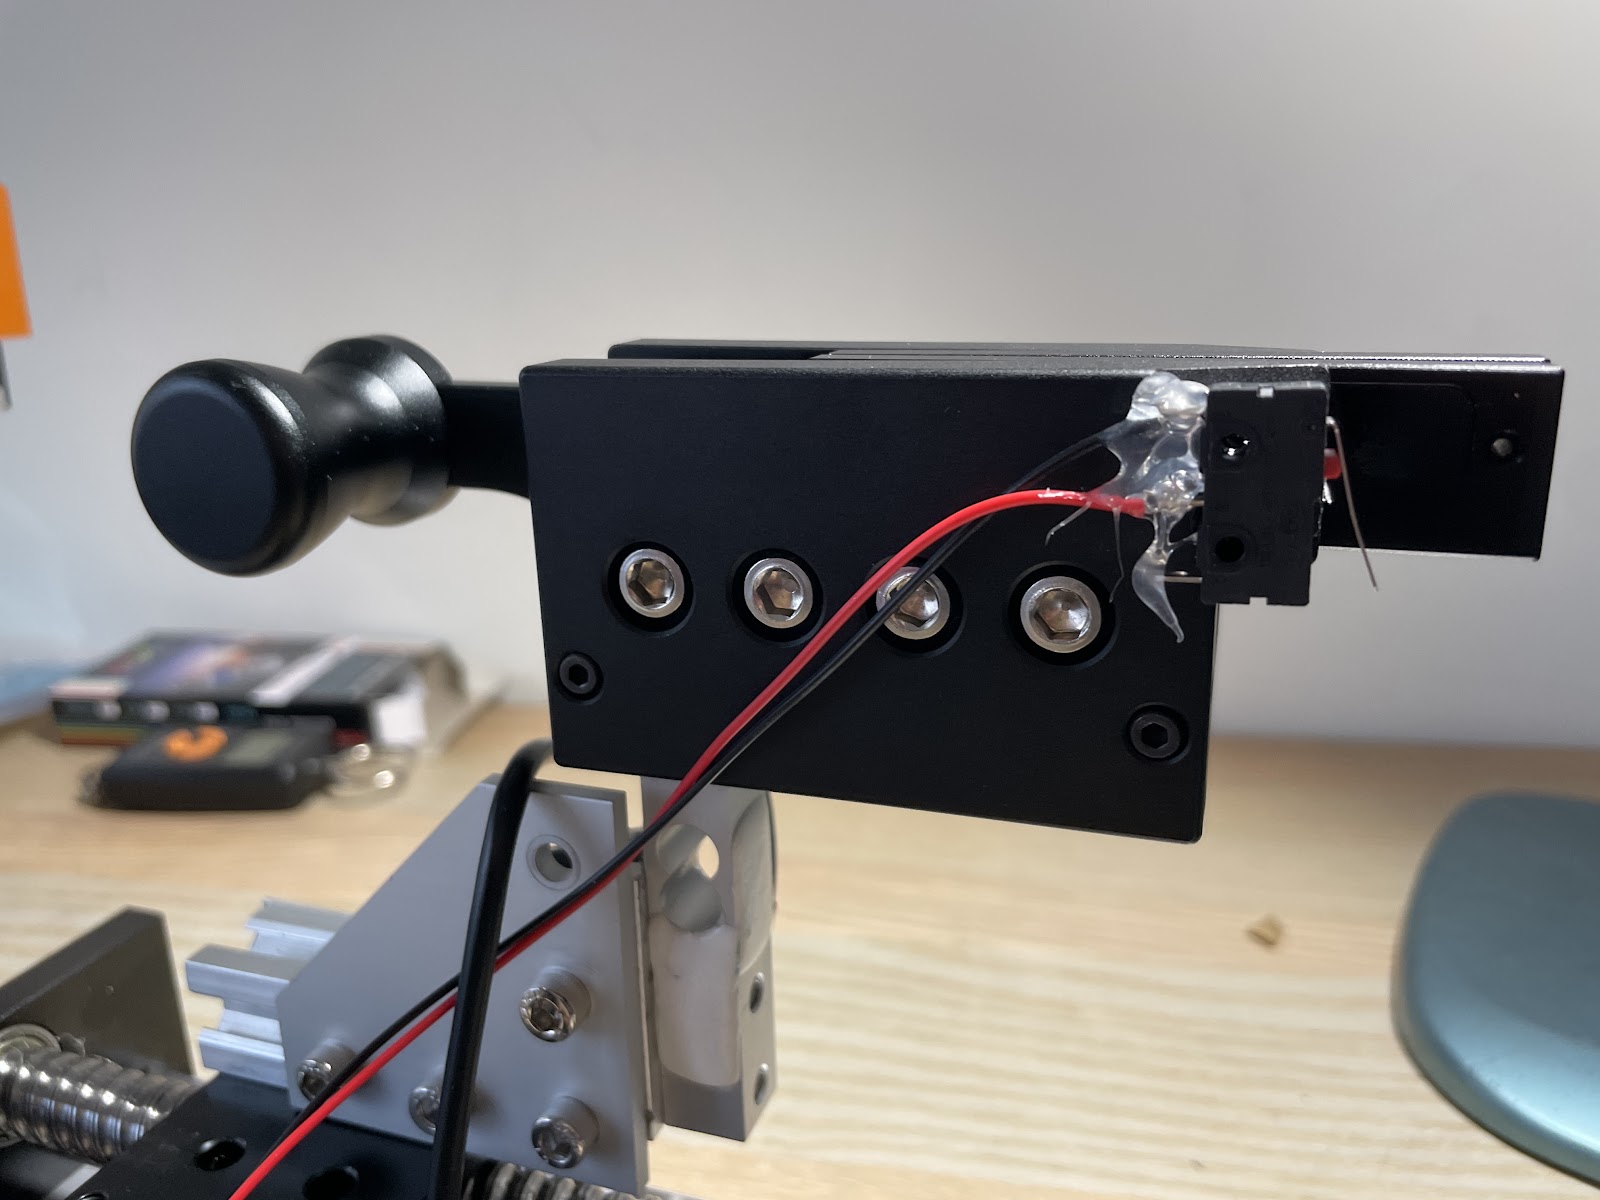
Another limit switch was installed on the 2086 tension head, witch acted as the start and stop button when tensioning.
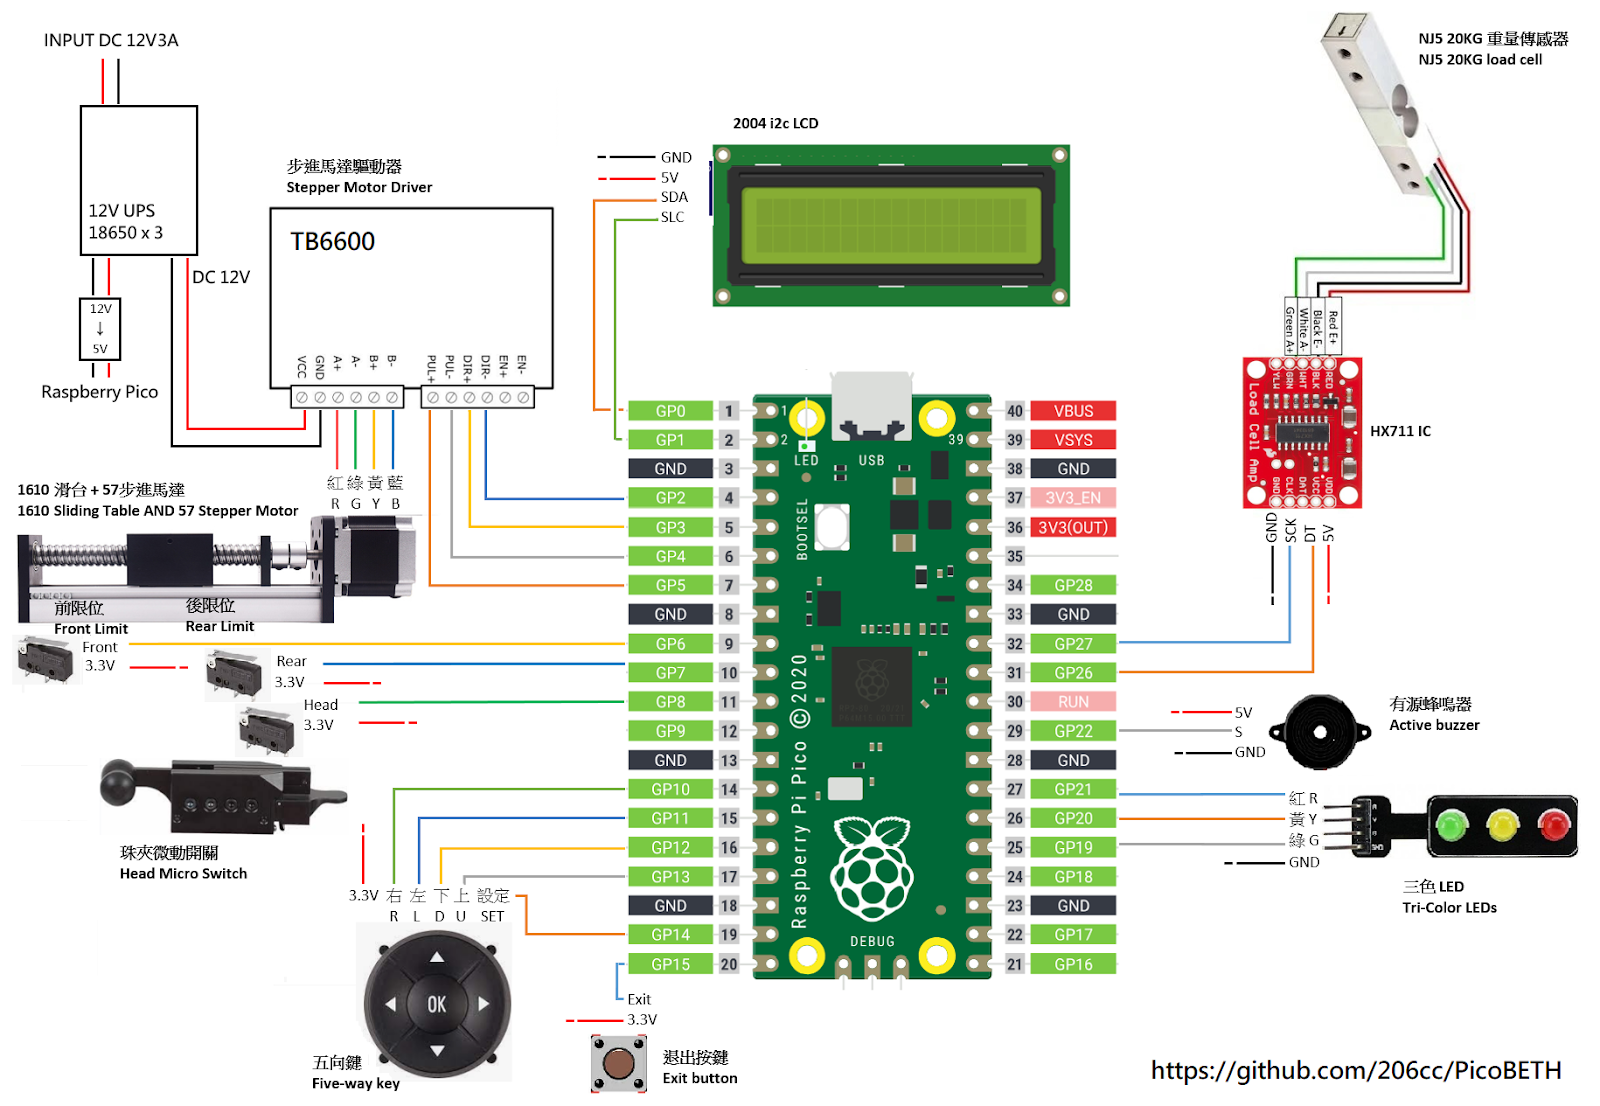
The Schematic diagram of the project can also be found on the github here.
If everything is installed properly, then we can try powering it for the first time!
Funtion Test
Before we start to string our badminton racket, Several things should be done first, which included:
- HX711 Stability Test
- Motion and Electrical Components Test
- Tension Calibration
- Parameter Fine-Tuning
The following steps of the function test can be found here: PicoBETH. Thanks to PicoBETH for providing usage guidelines.
Notes: The latest software, ver 1.9.9, contained hx711 examination and funtioning test when powering for the first time.
Enjoy DIY Stringing!
If everything is installed and worked properly, then we can try your DIY badmintion stringing for the first time!