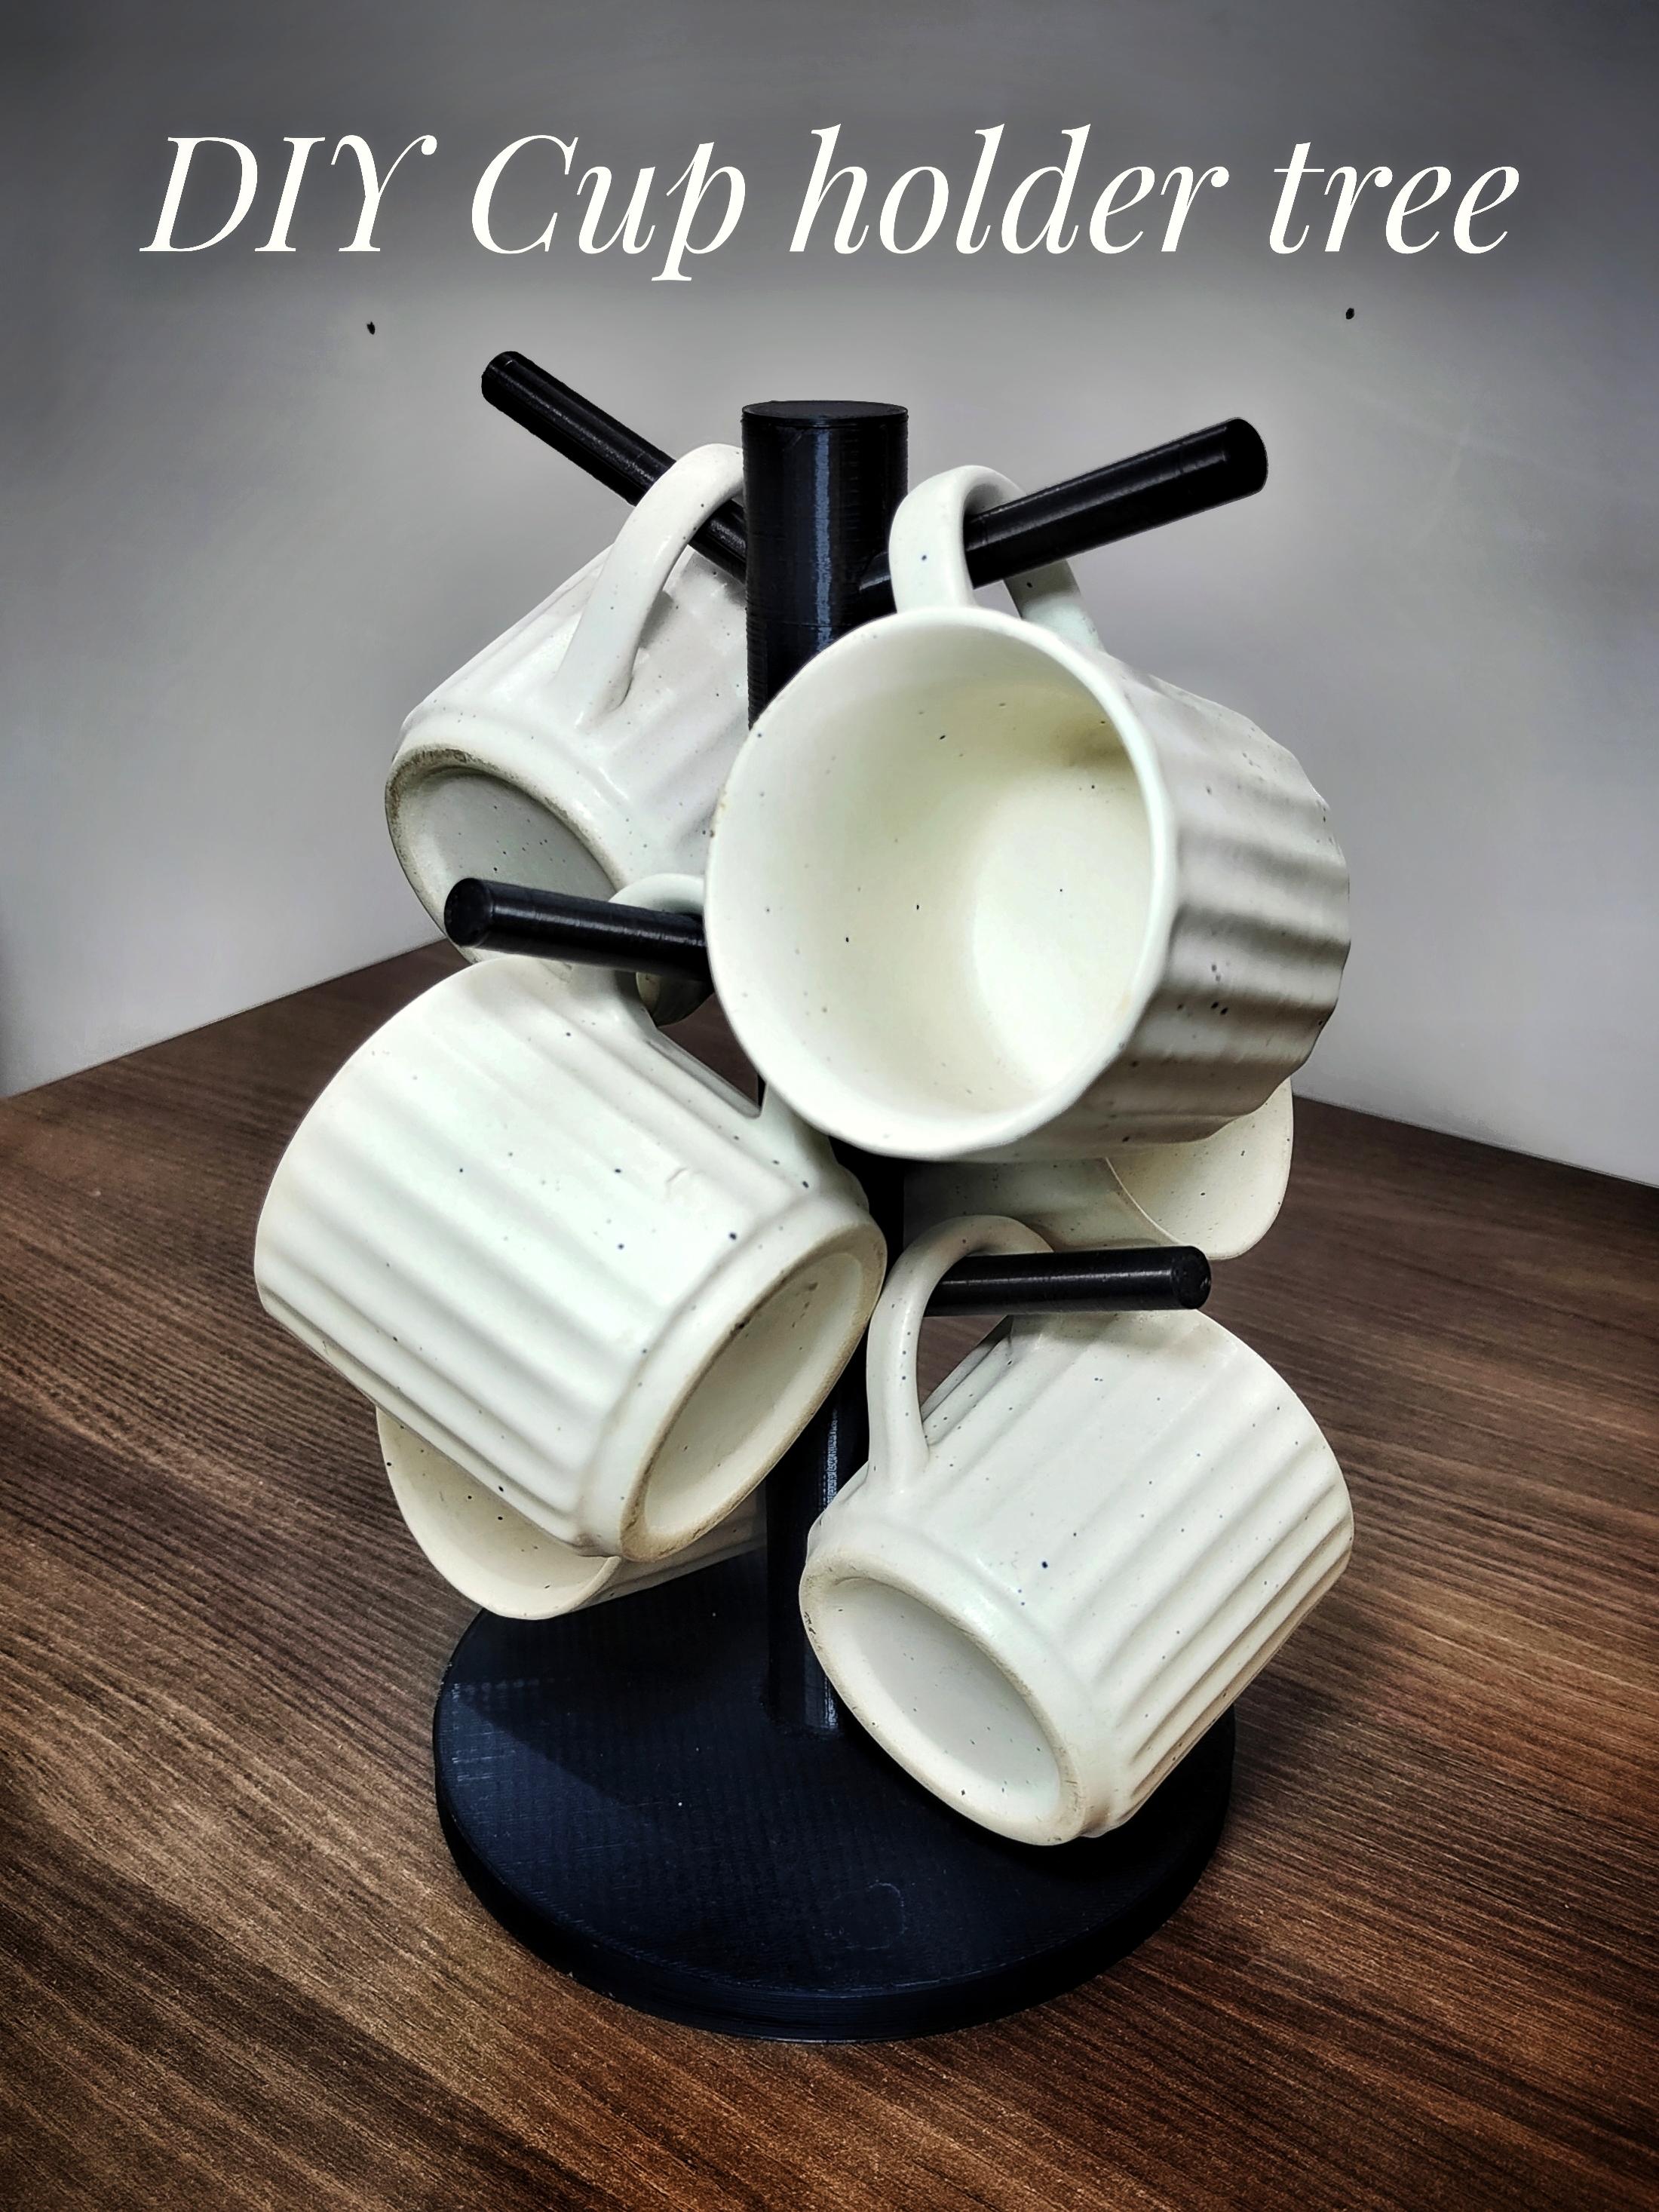
DIY Cup Holder Tree for Your Kitchen
by PROJECT_X in Workshop > 3D Printing
1286 Views, 21 Favorites, 0 Comments
DIY Cup Holder Tree for Your Kitchen
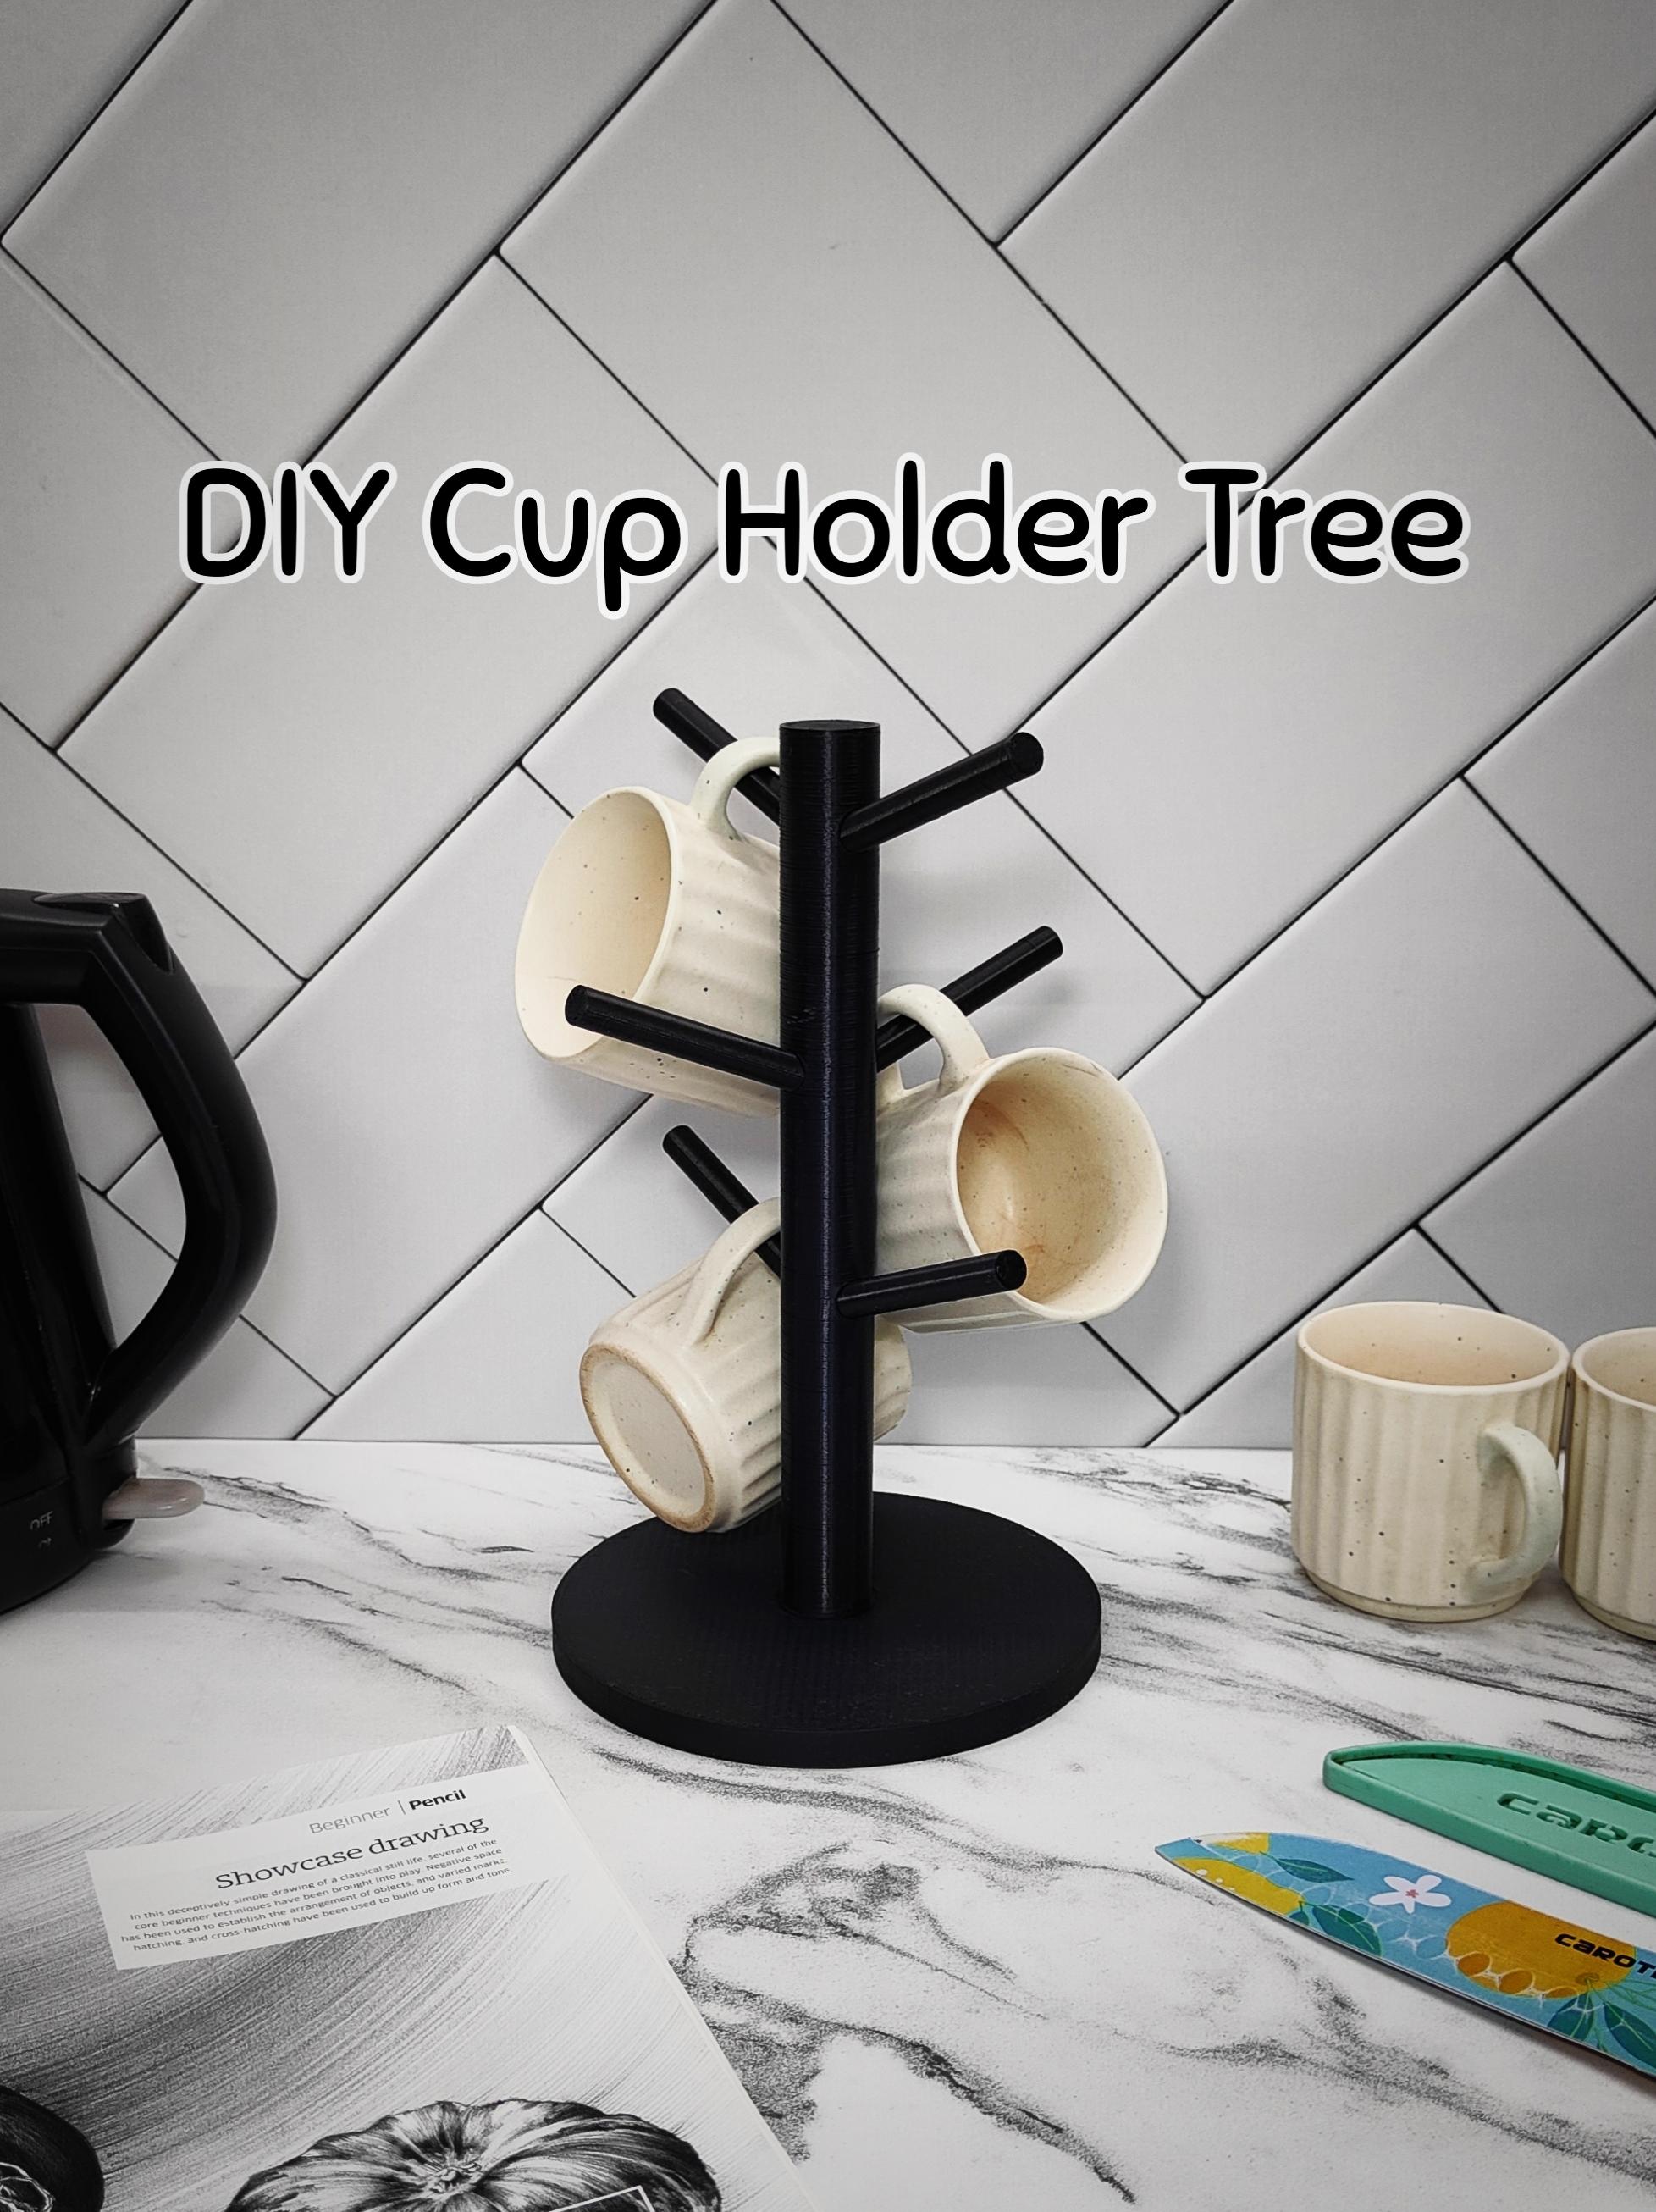
This Instructable will guide you through creating a stylish and functional cup holder tree for your kitchen. This project involves designing the 3D parts in Autodesk Fusion 360, printing them using a 3D printer, removing support pads, and assembling the cup holder tree.
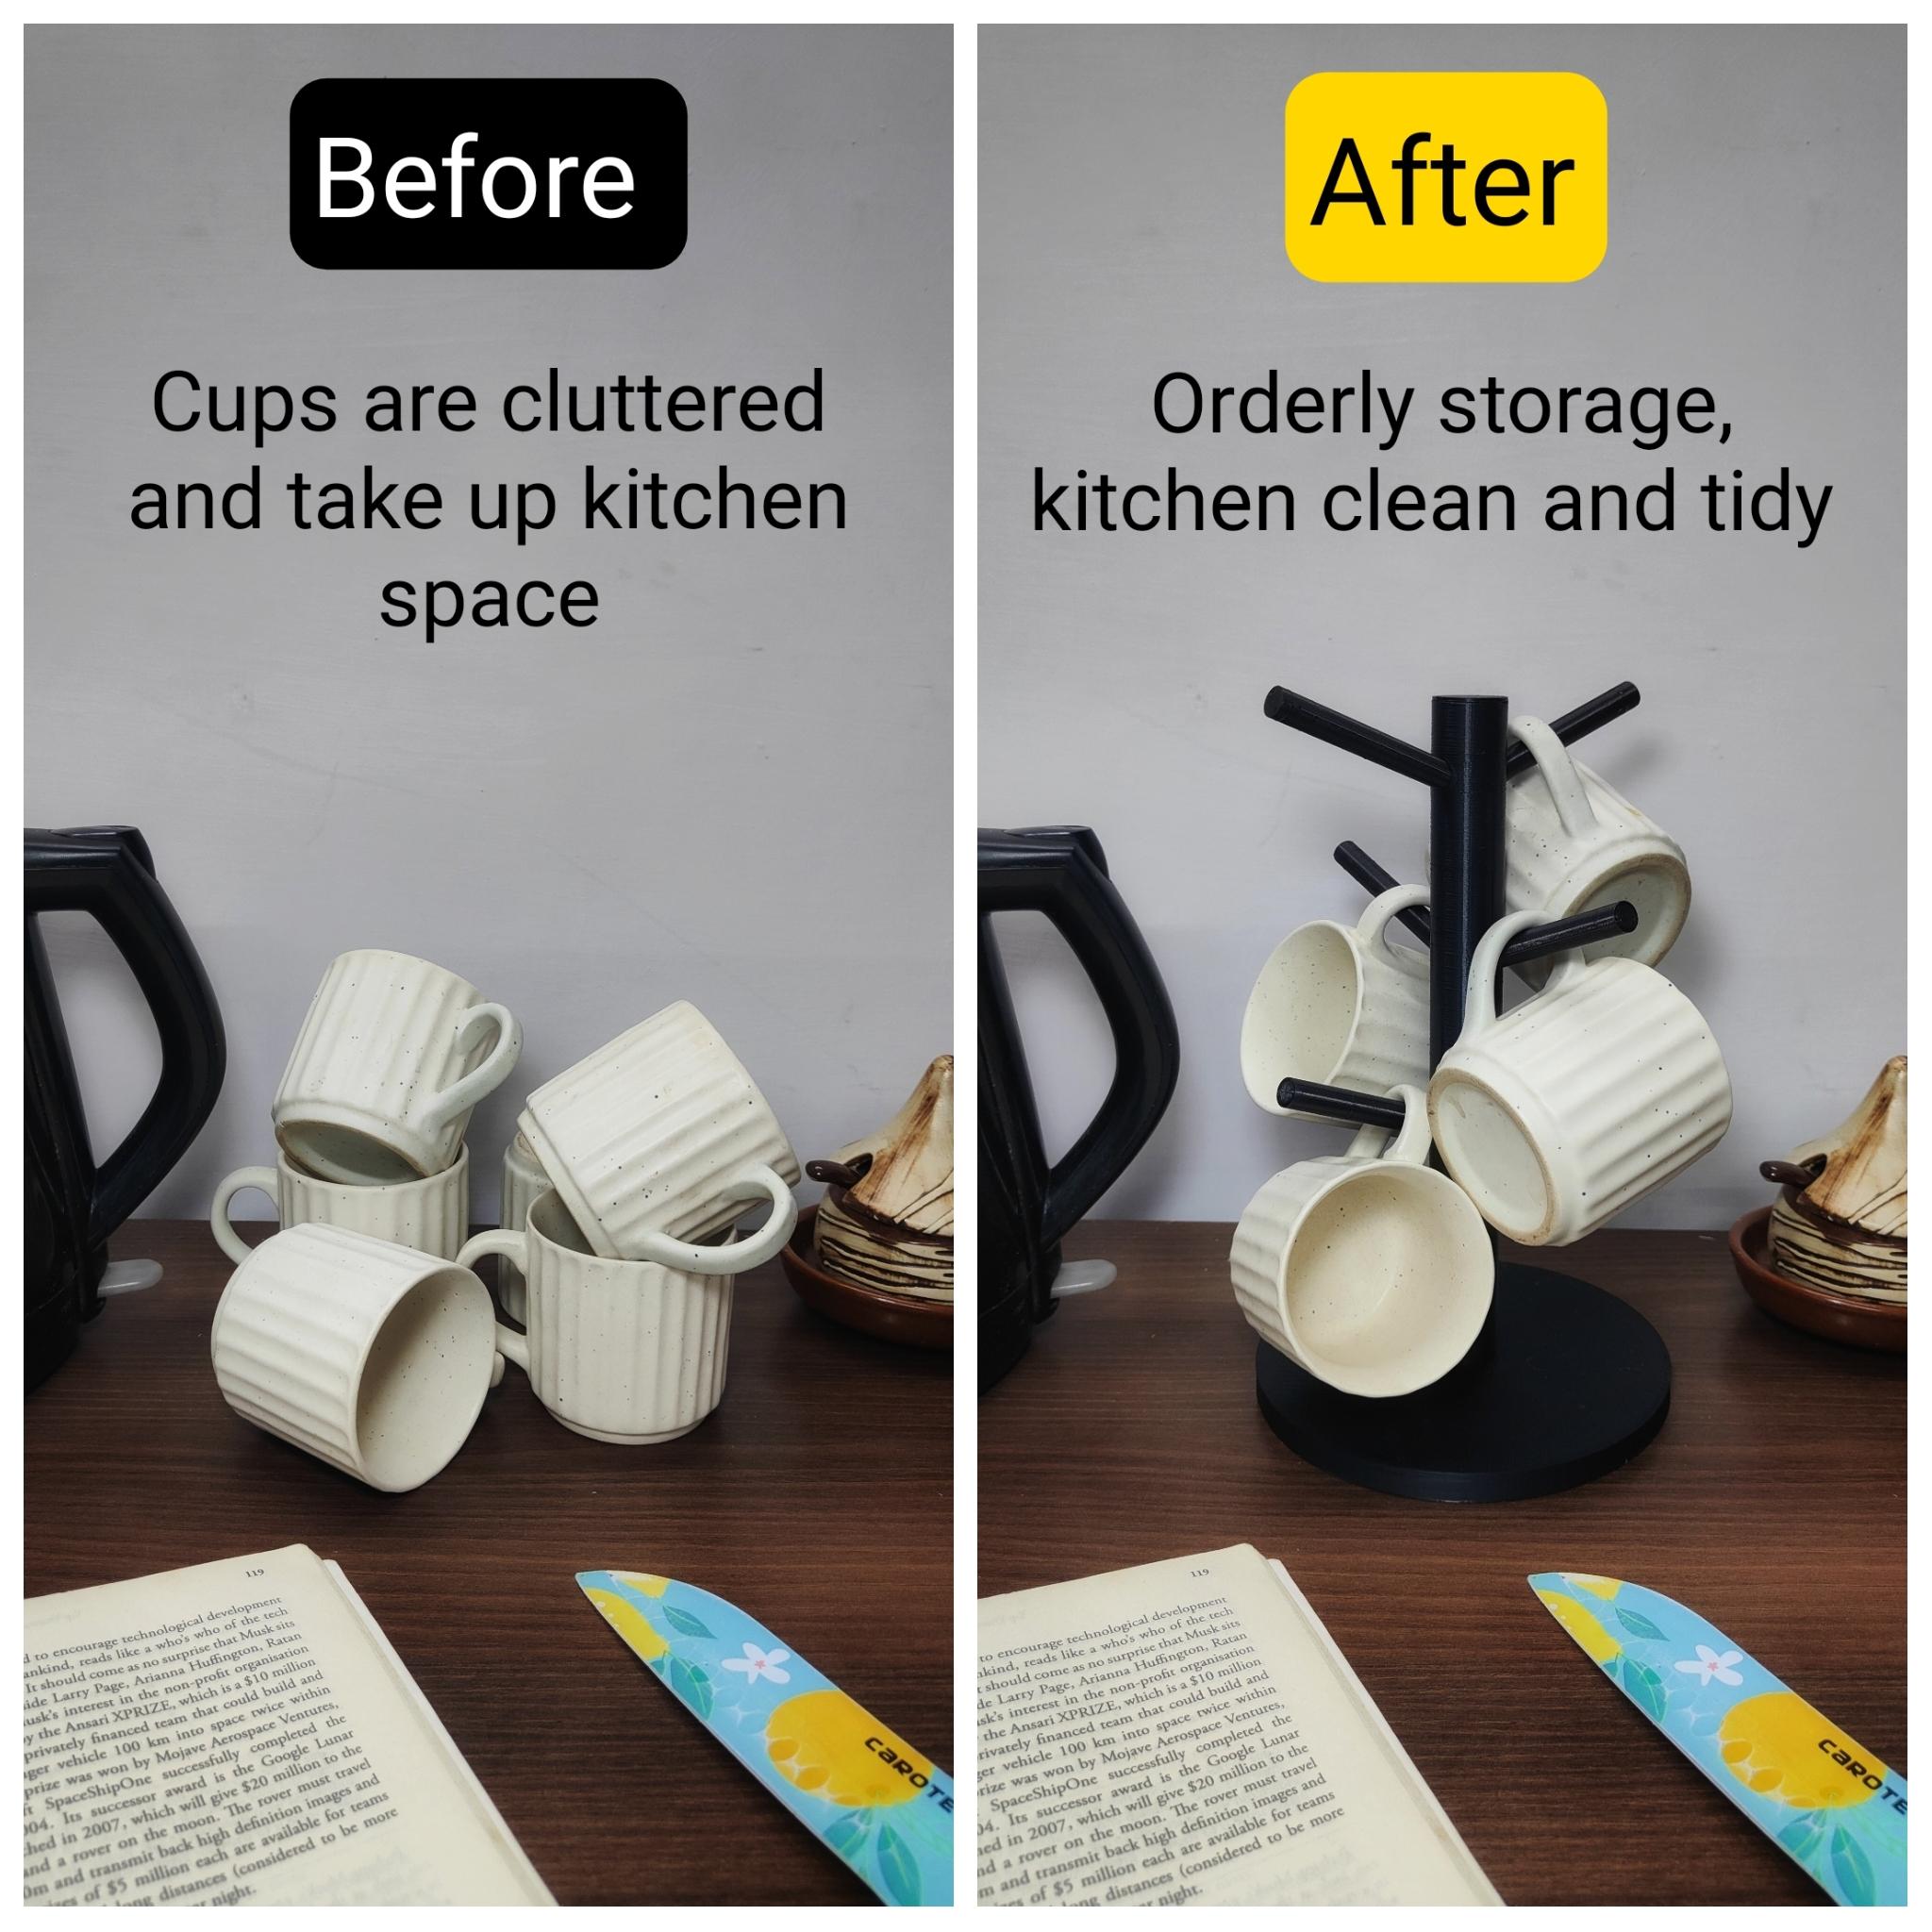
I've had my fair share of broken cups and a cluttered kitchen. Countless times, I found my cups scattered and damaged due to the lack of a proper holder. Frustrated by this recurring issue, I decided to design a beautiful stand that not only organizes my cups but also adds a touch of elegance to my kitchen. This contest provided me with the perfect opportunity to share my solution with others.
Supplies

- Autodesk Fusion 360 (or any 3D modeling software)
- 3D printer
- Filament for 3D printing (Any color that you want)
- Super glue
- Cutter
- Sand Paper (Optional)
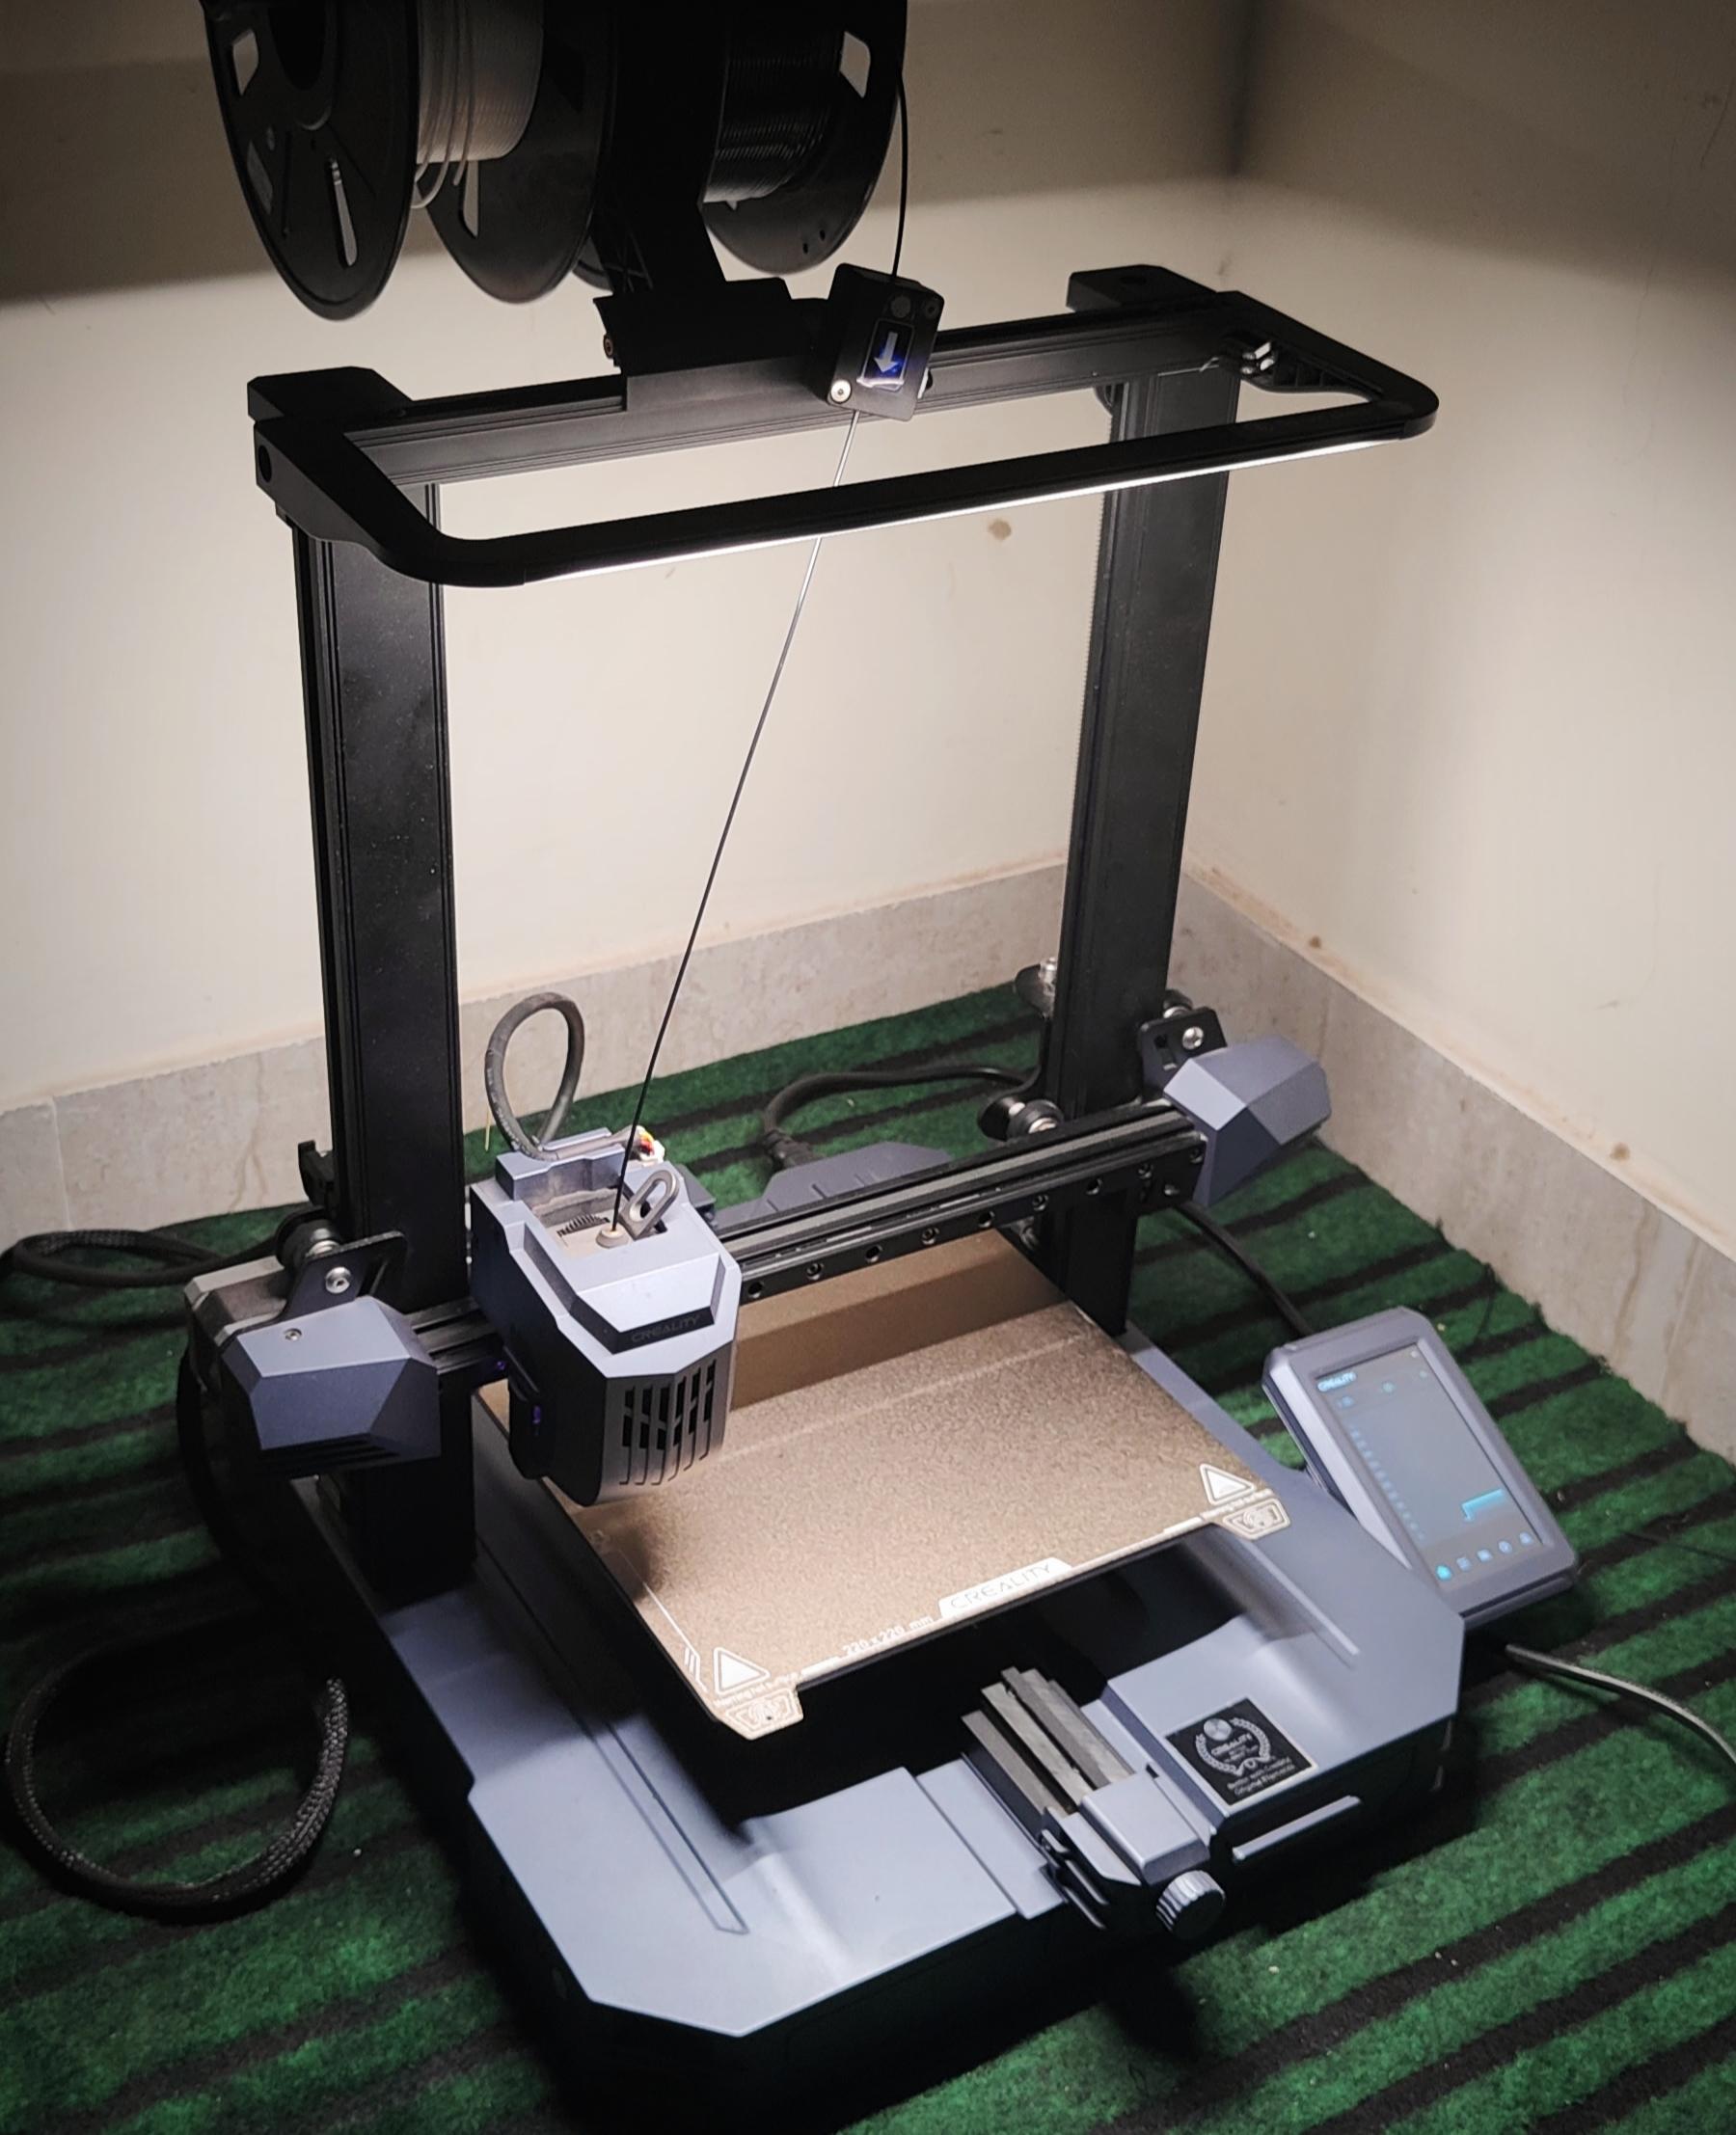
: Designing in Autodesk Fusion 360
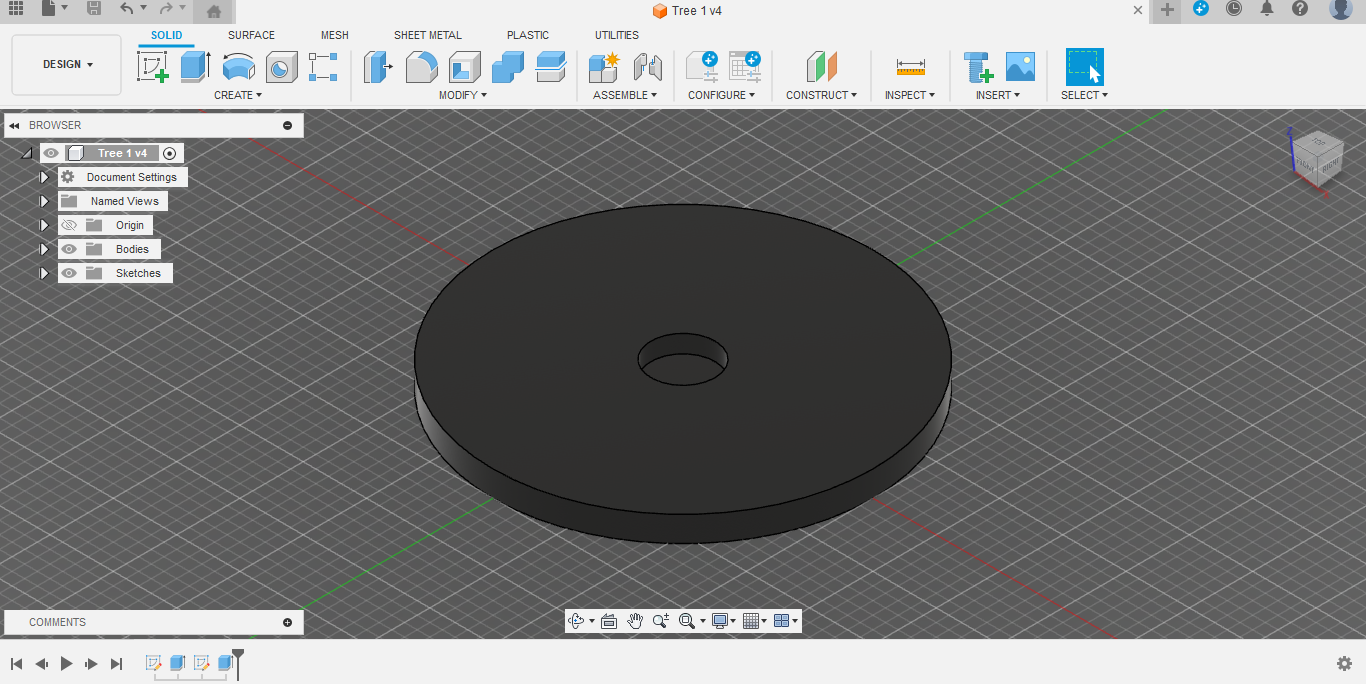
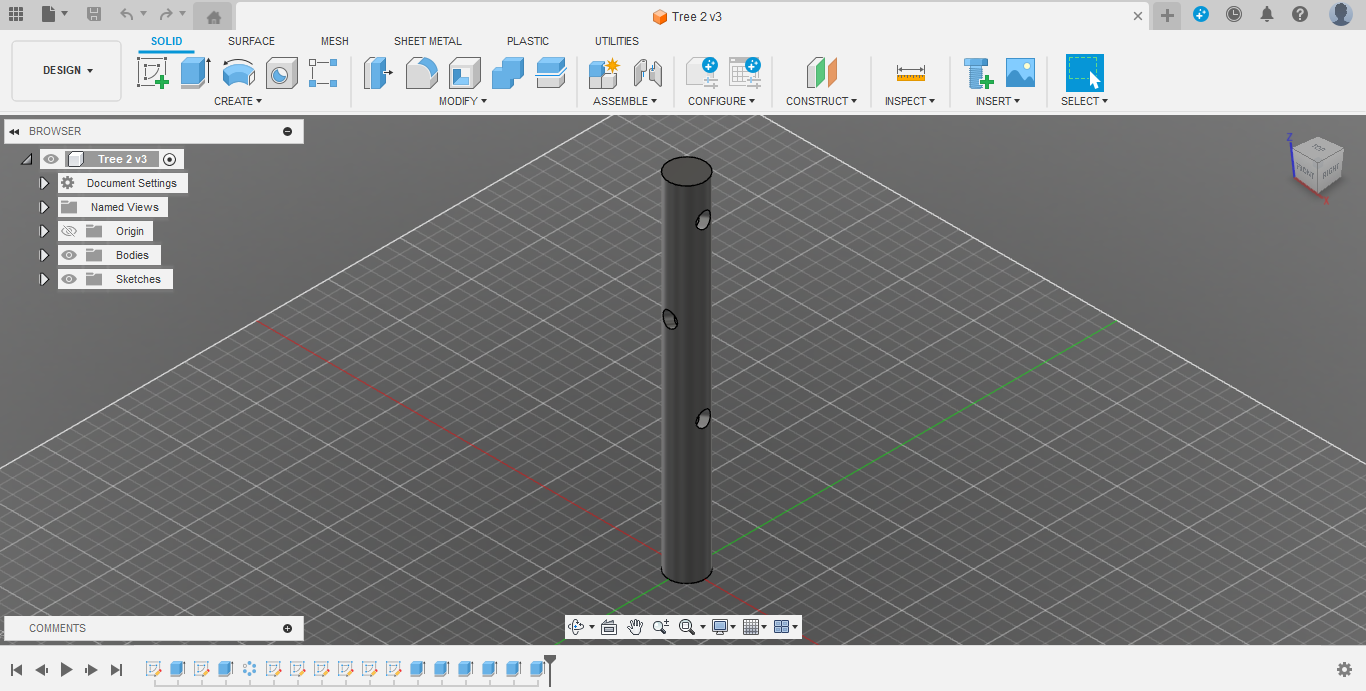
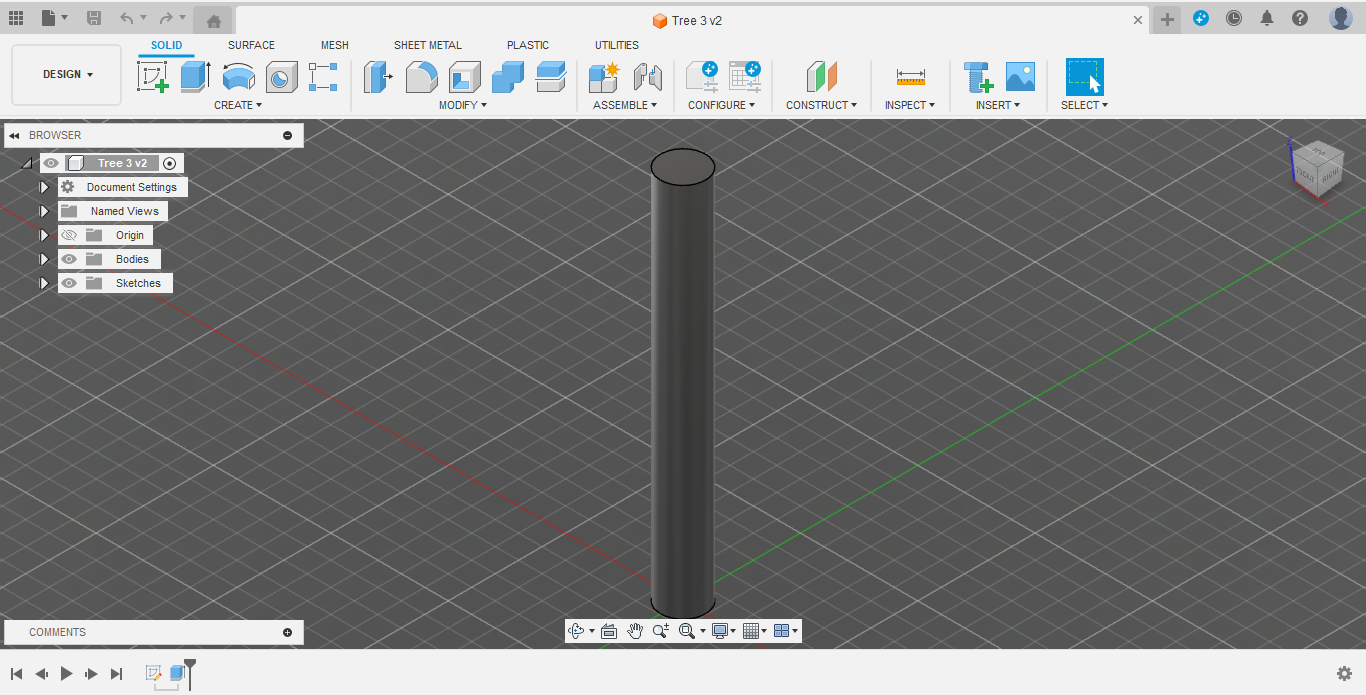
Using Autodesk Fusion 360, design the main pipe, base pad, and branch pipes for the cup holder tree. Make sure to keep the tolerances at 0.2 mm for tight attachment.
Configuration : (for reference)
- Layer height - 0.2 mm
- Infill density - 20%
- Print speed - 50mm/s
- Printing temperature - 230 C
- Printing material - PLA
Access the provided STL files for the cup holder tree and slice it accordingly for a stable print.
Slicing and 3D Printing the Parts
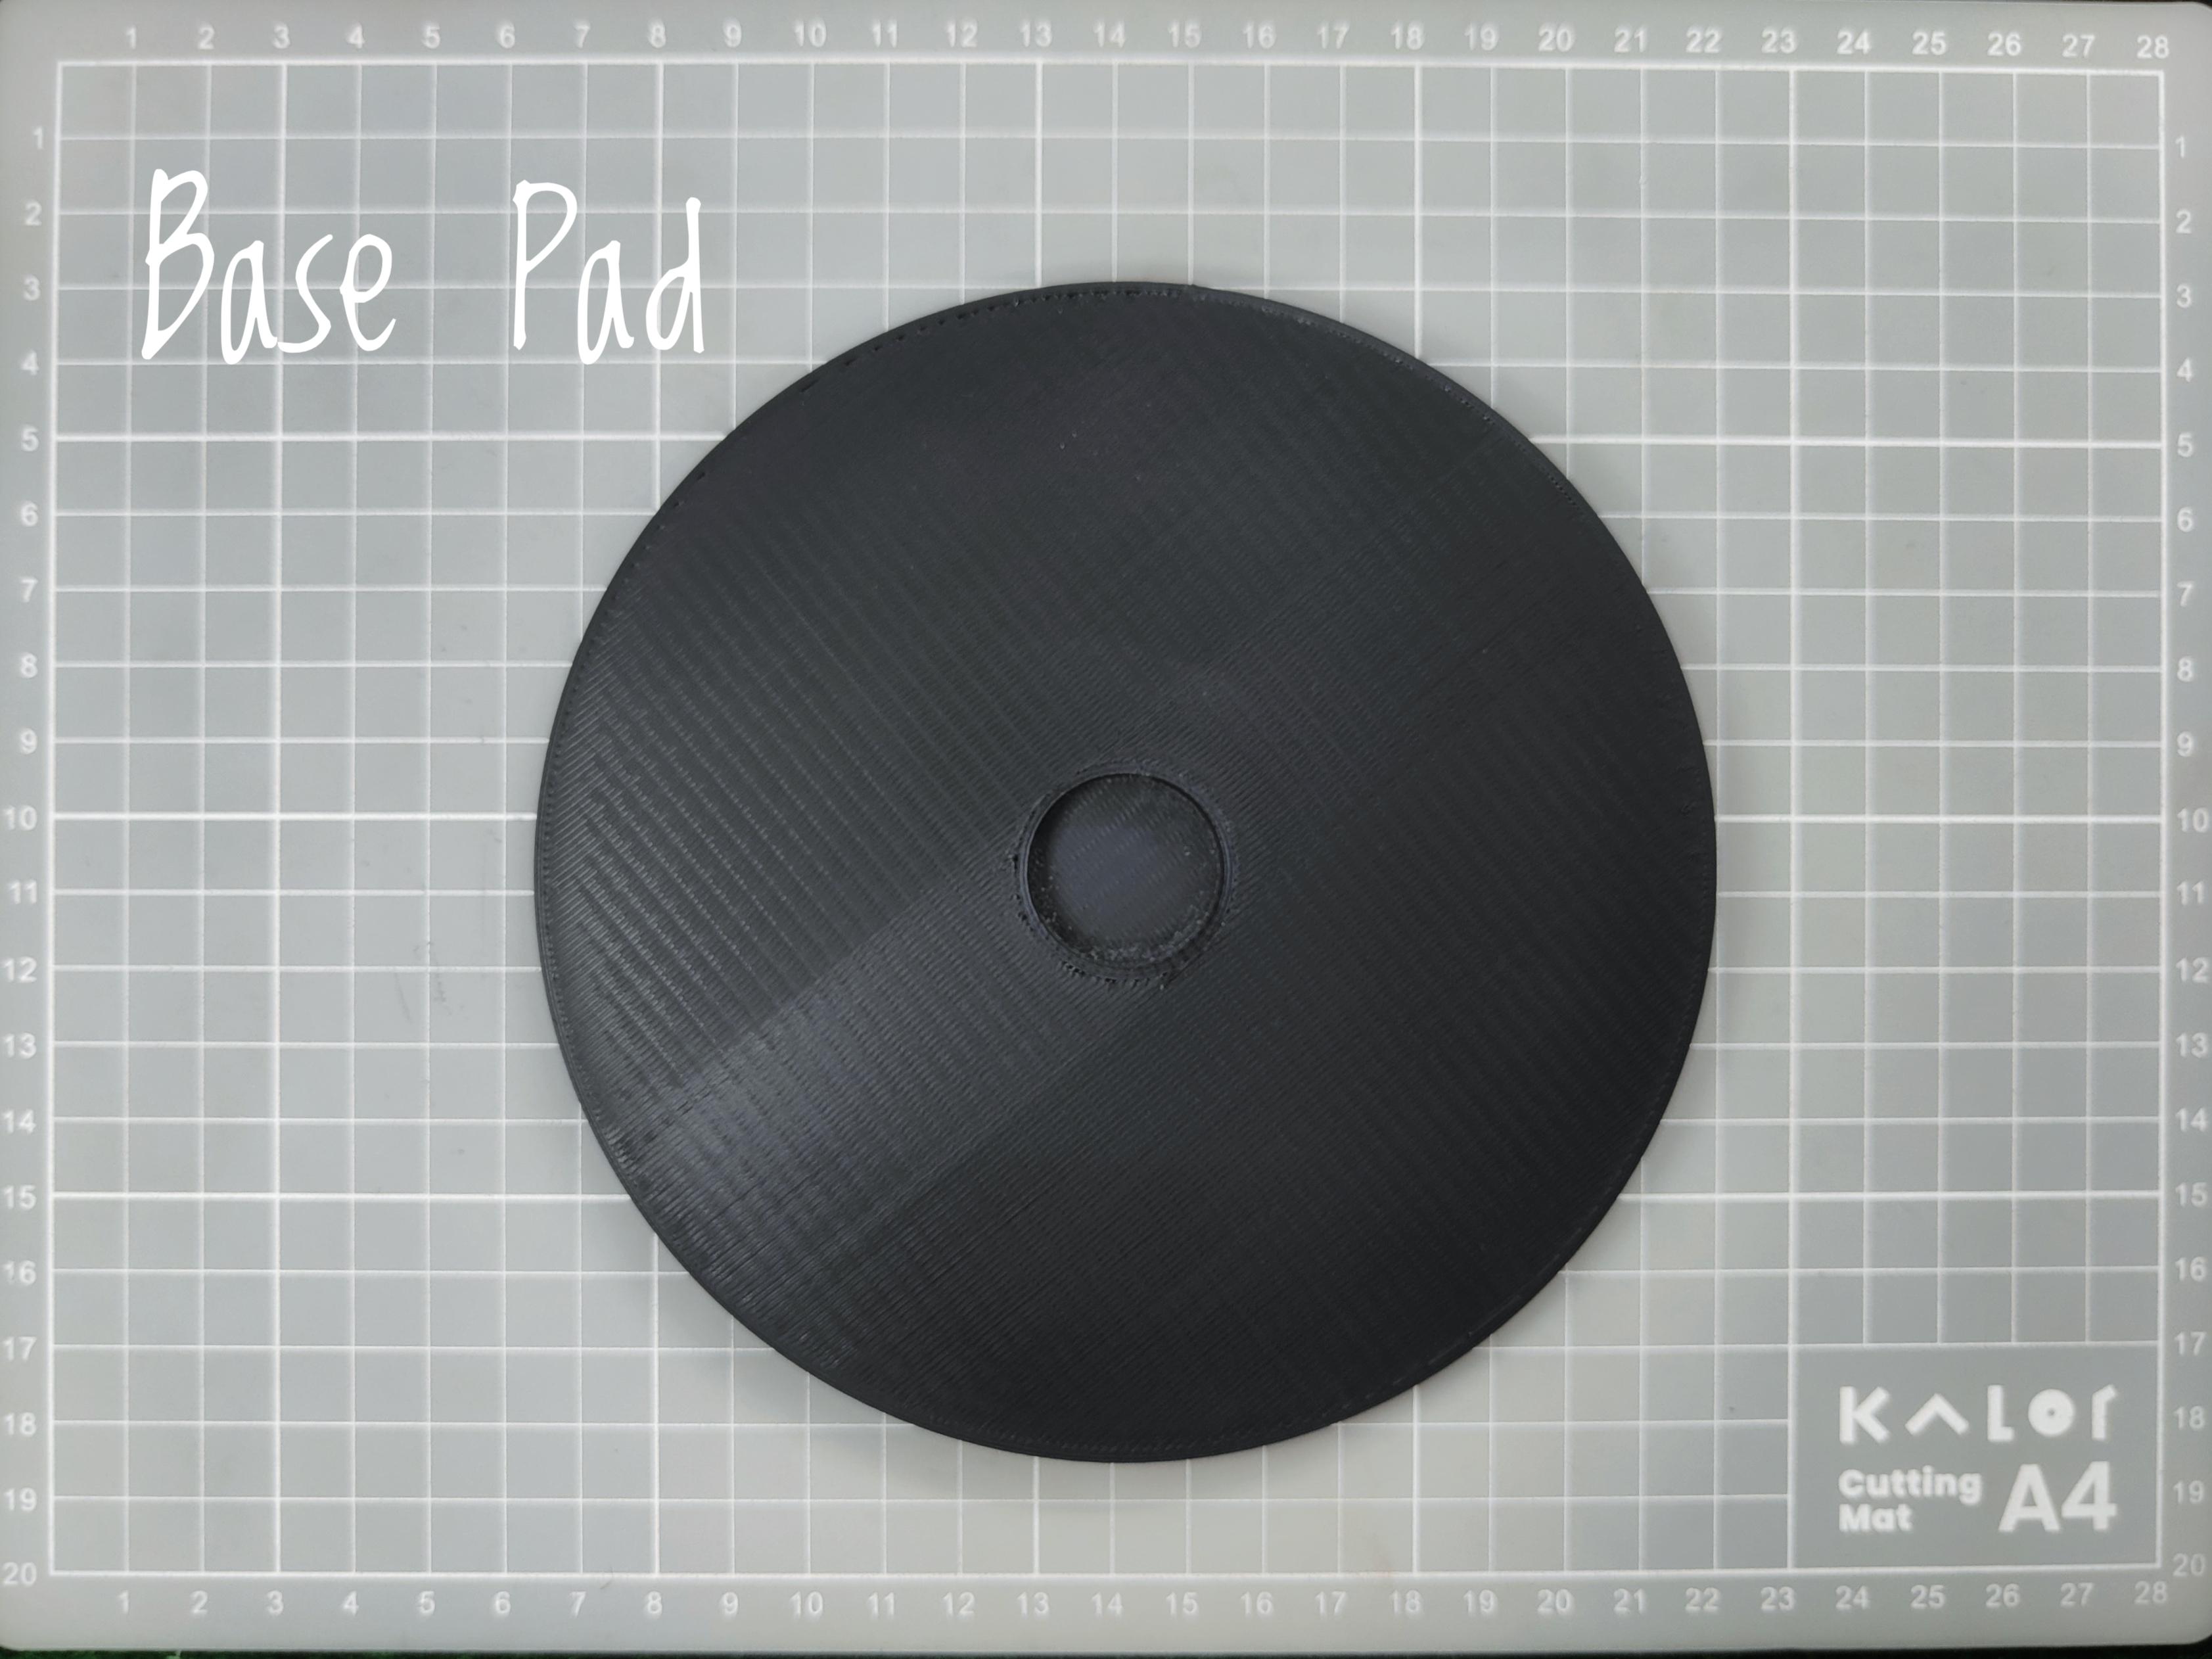
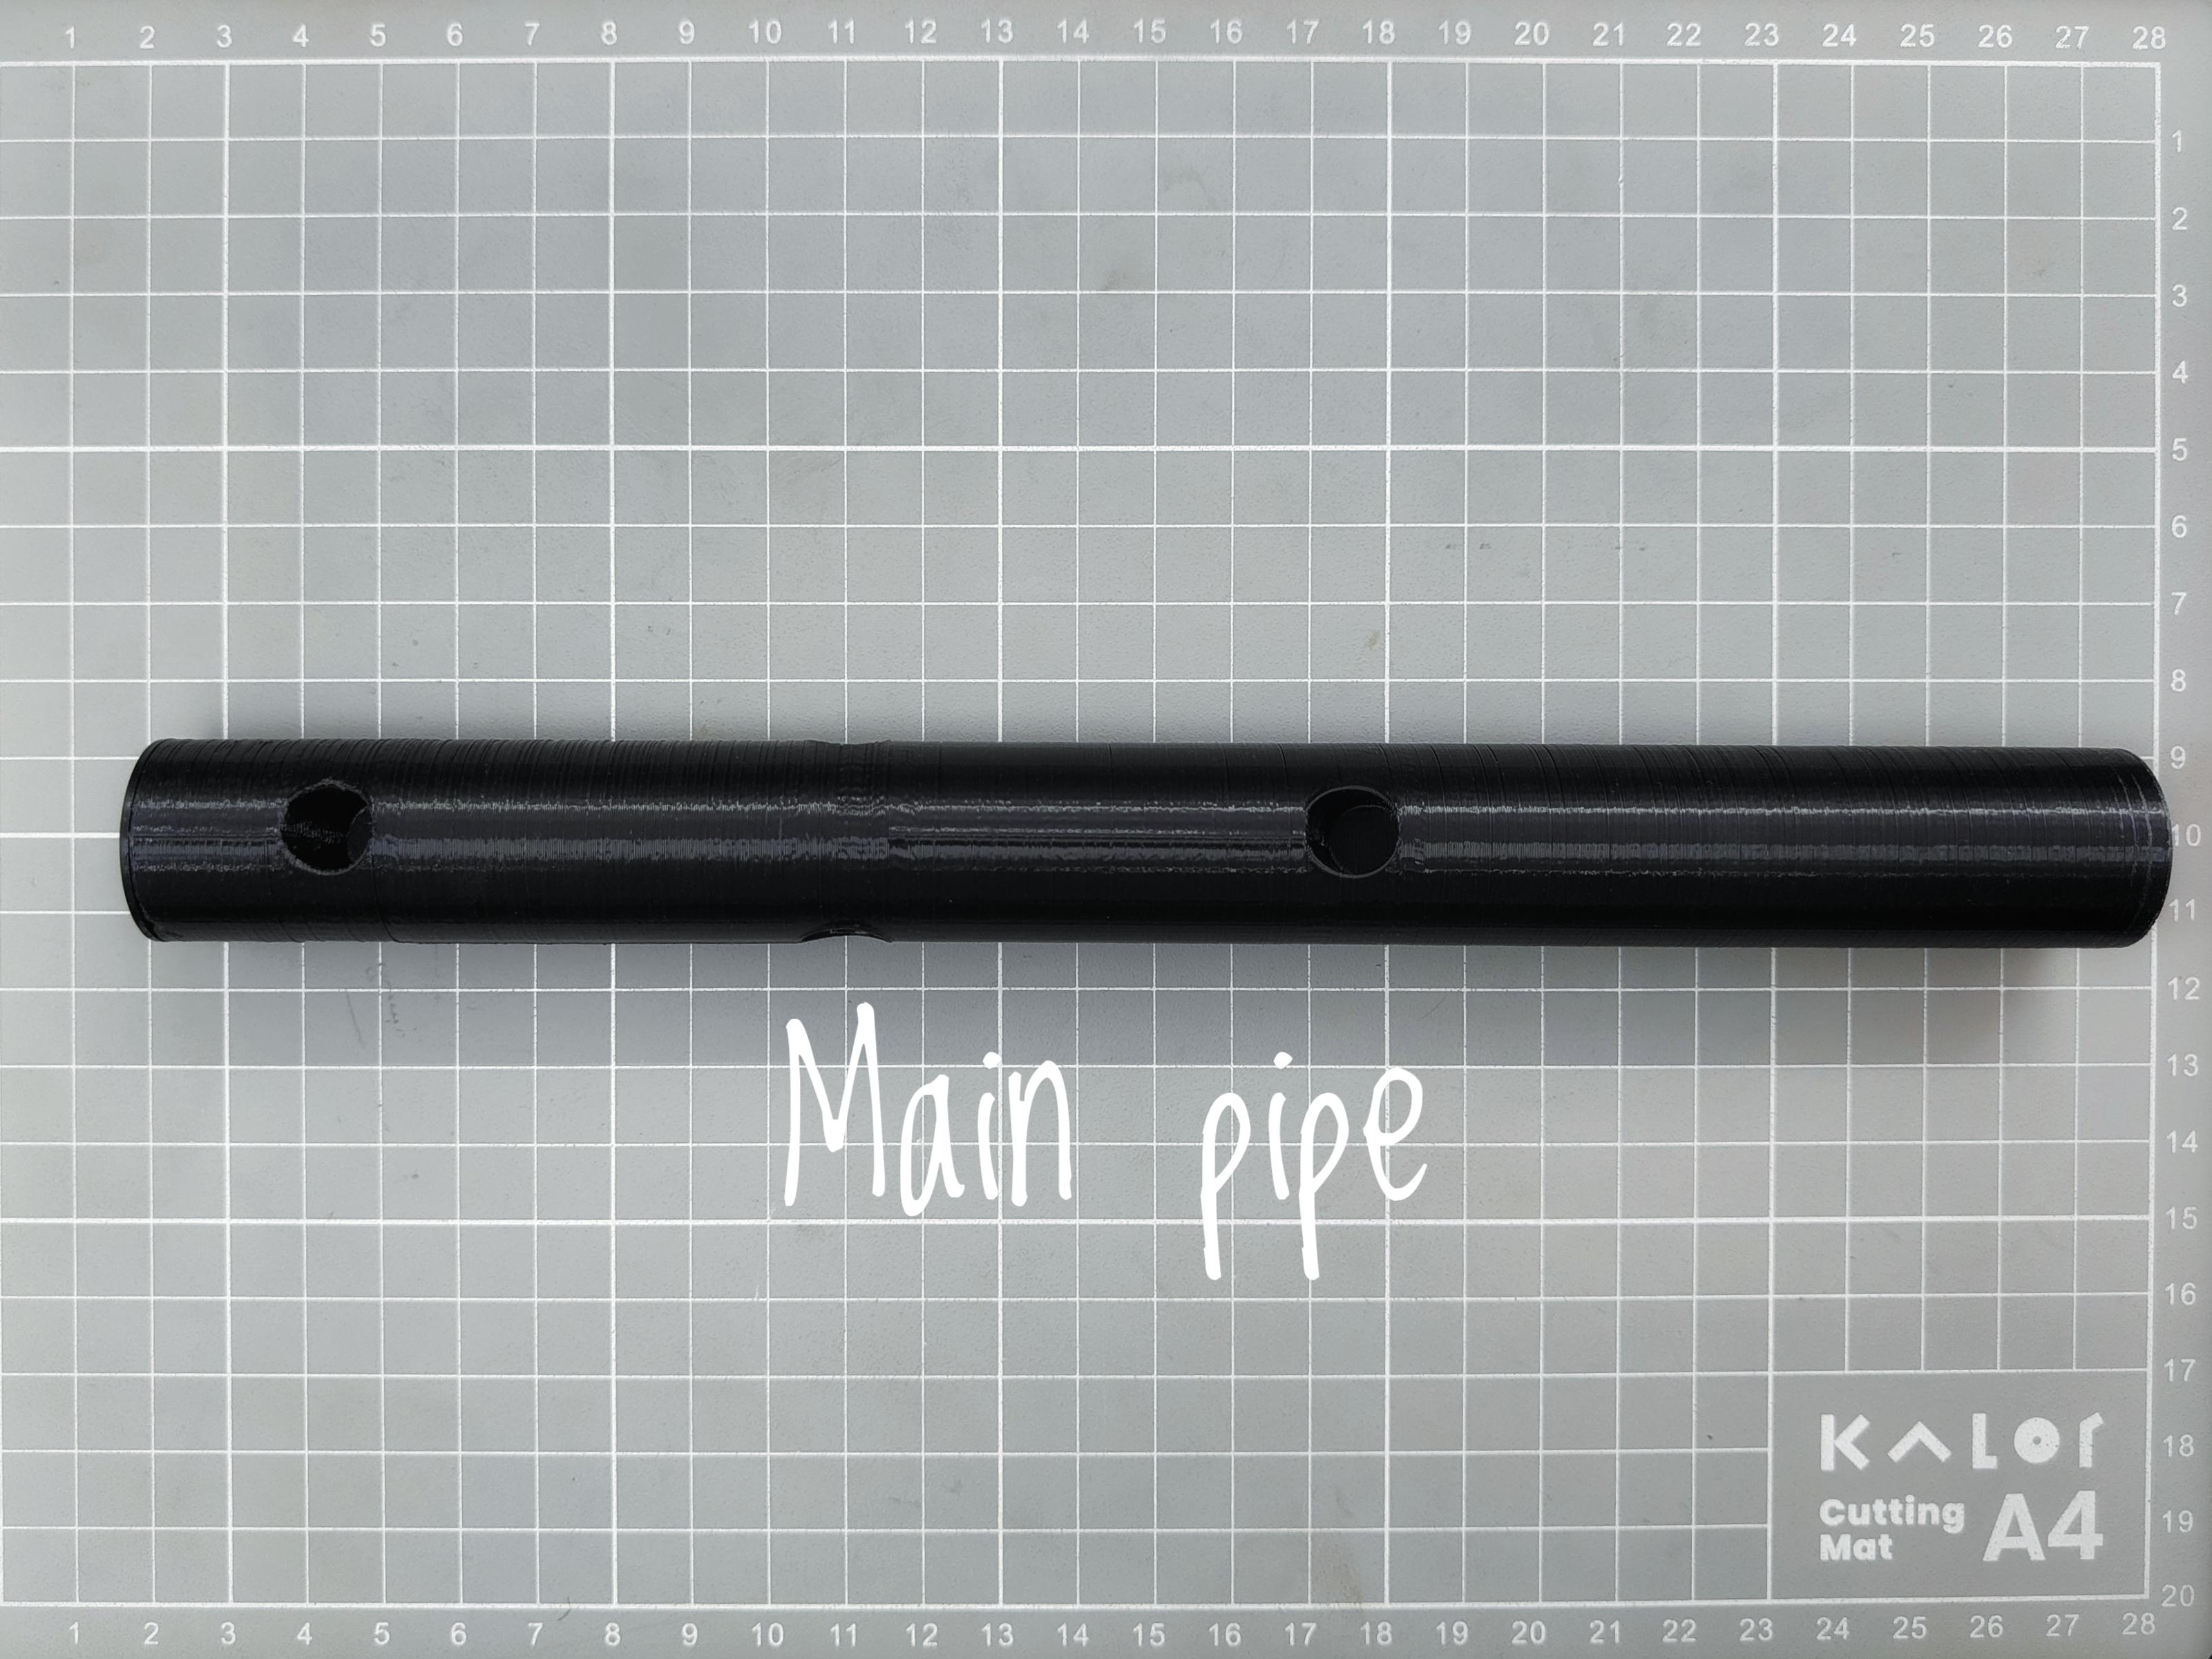
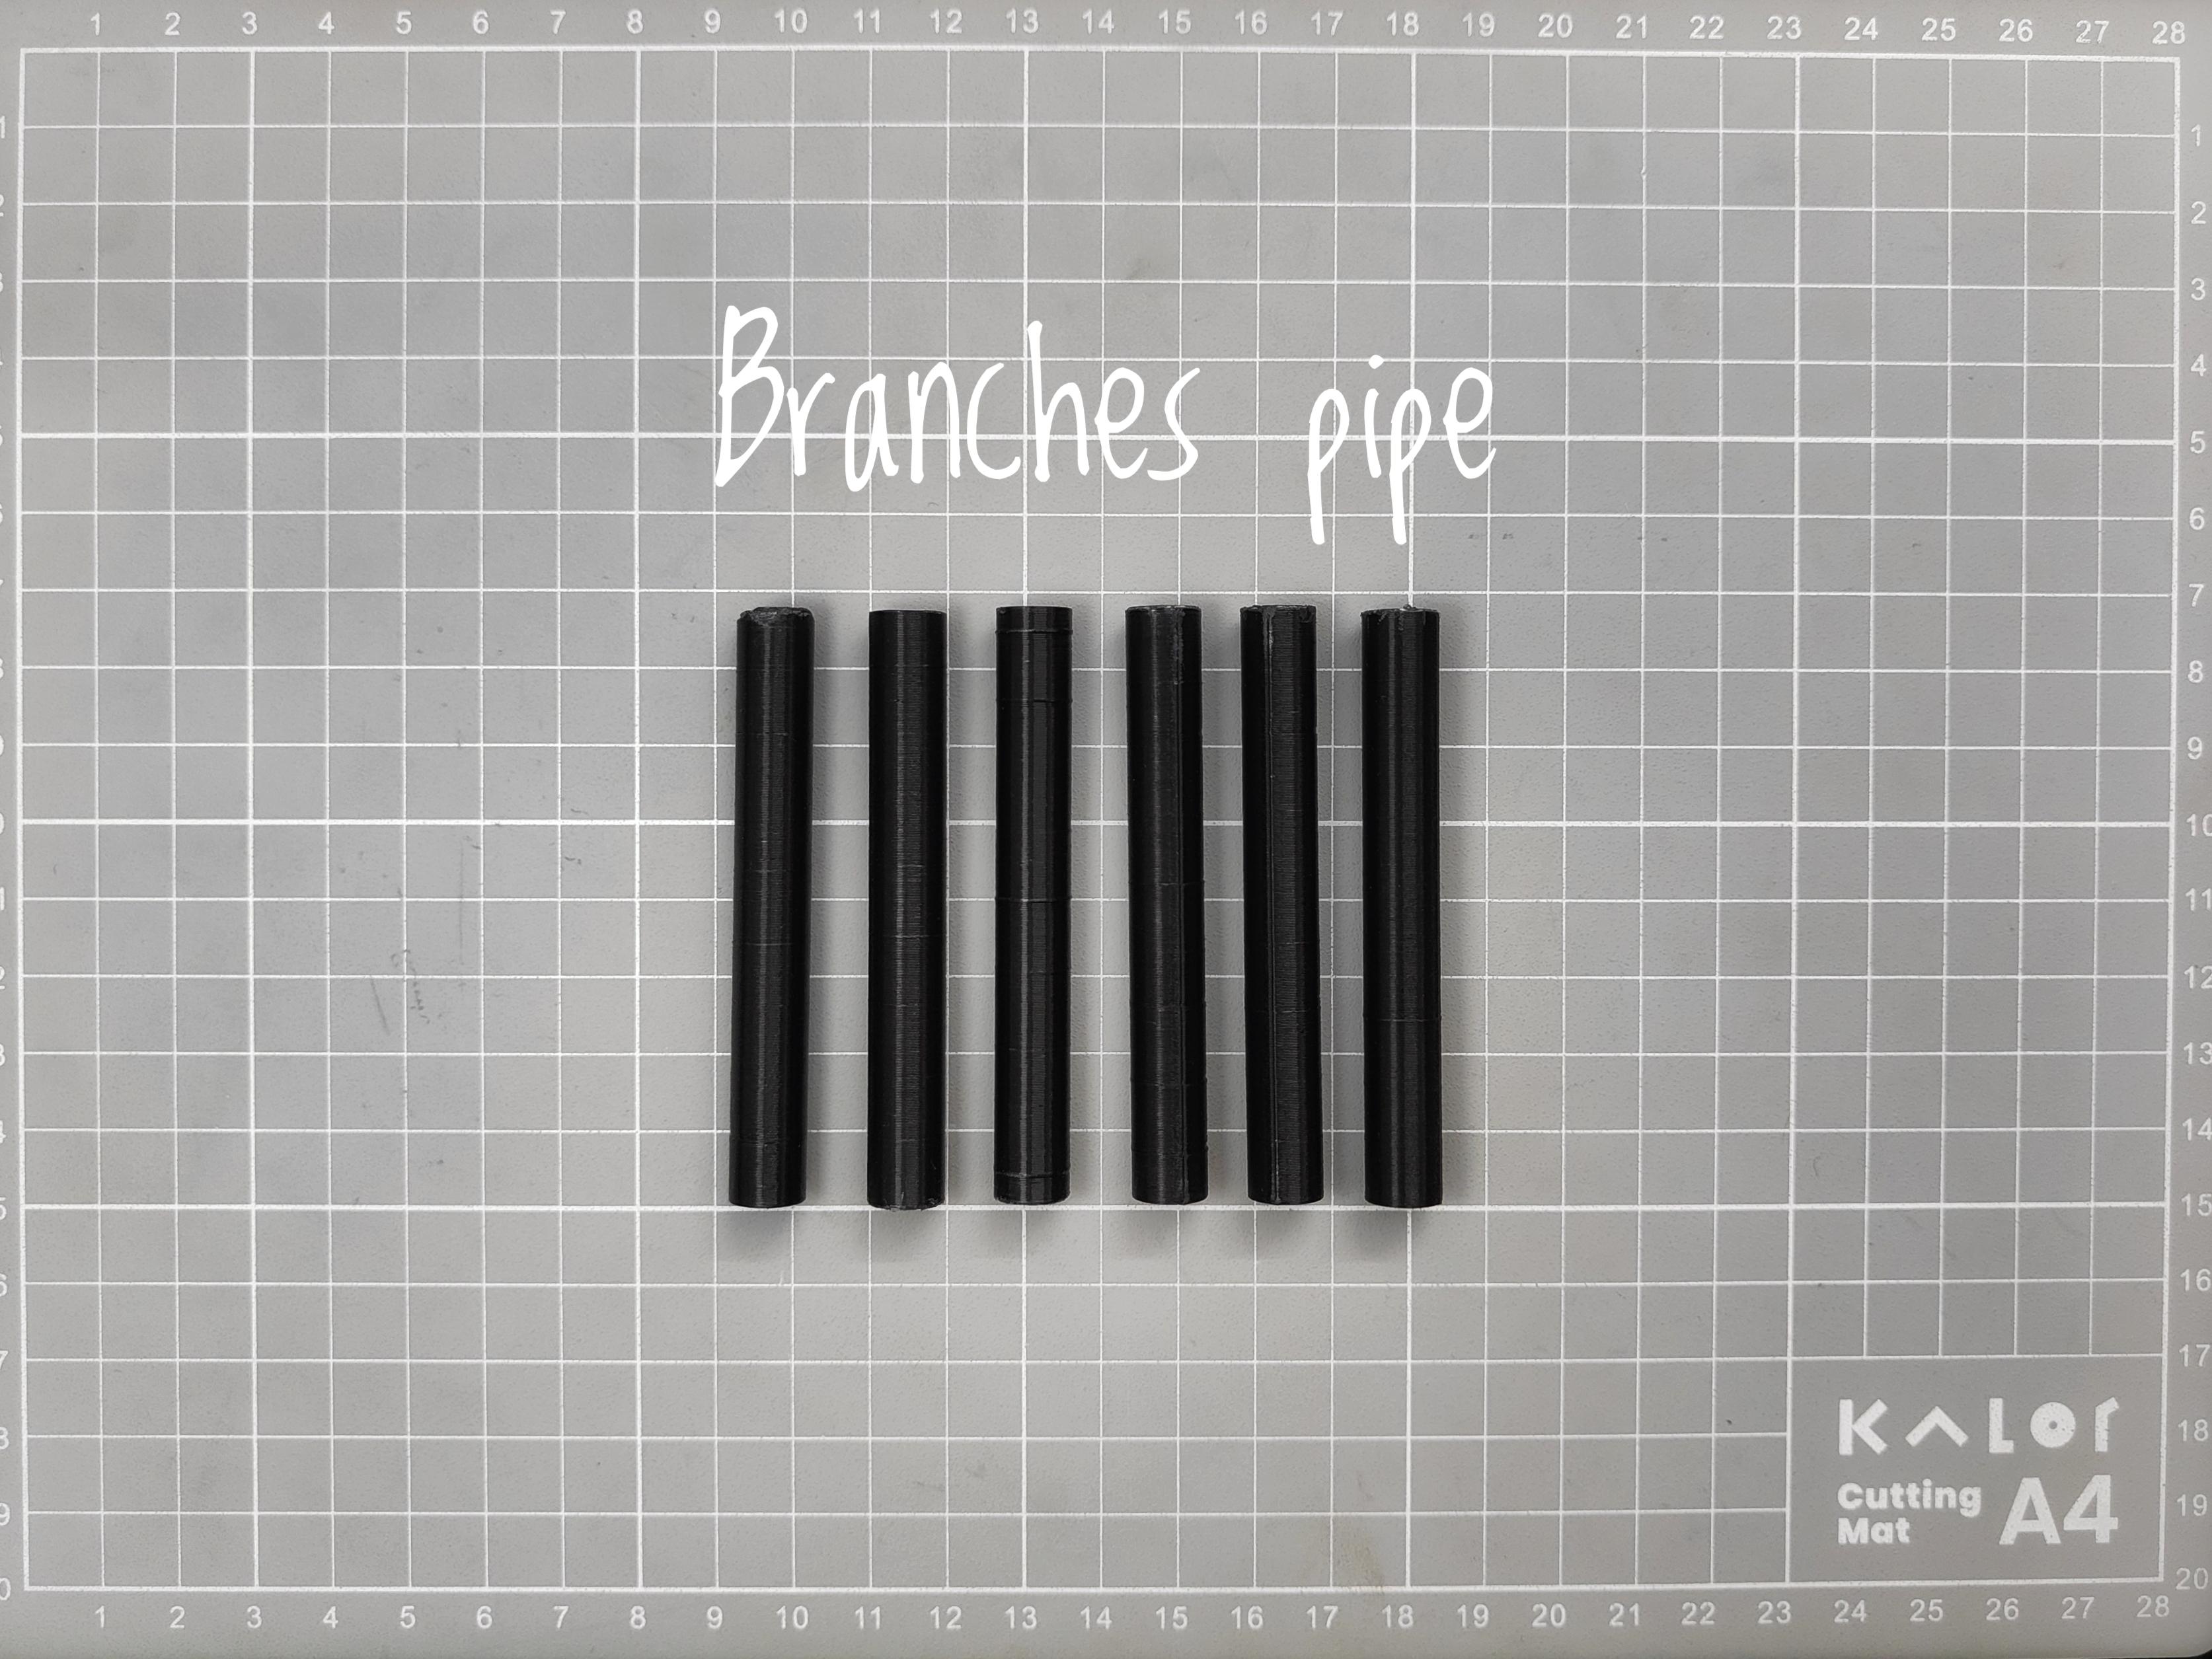
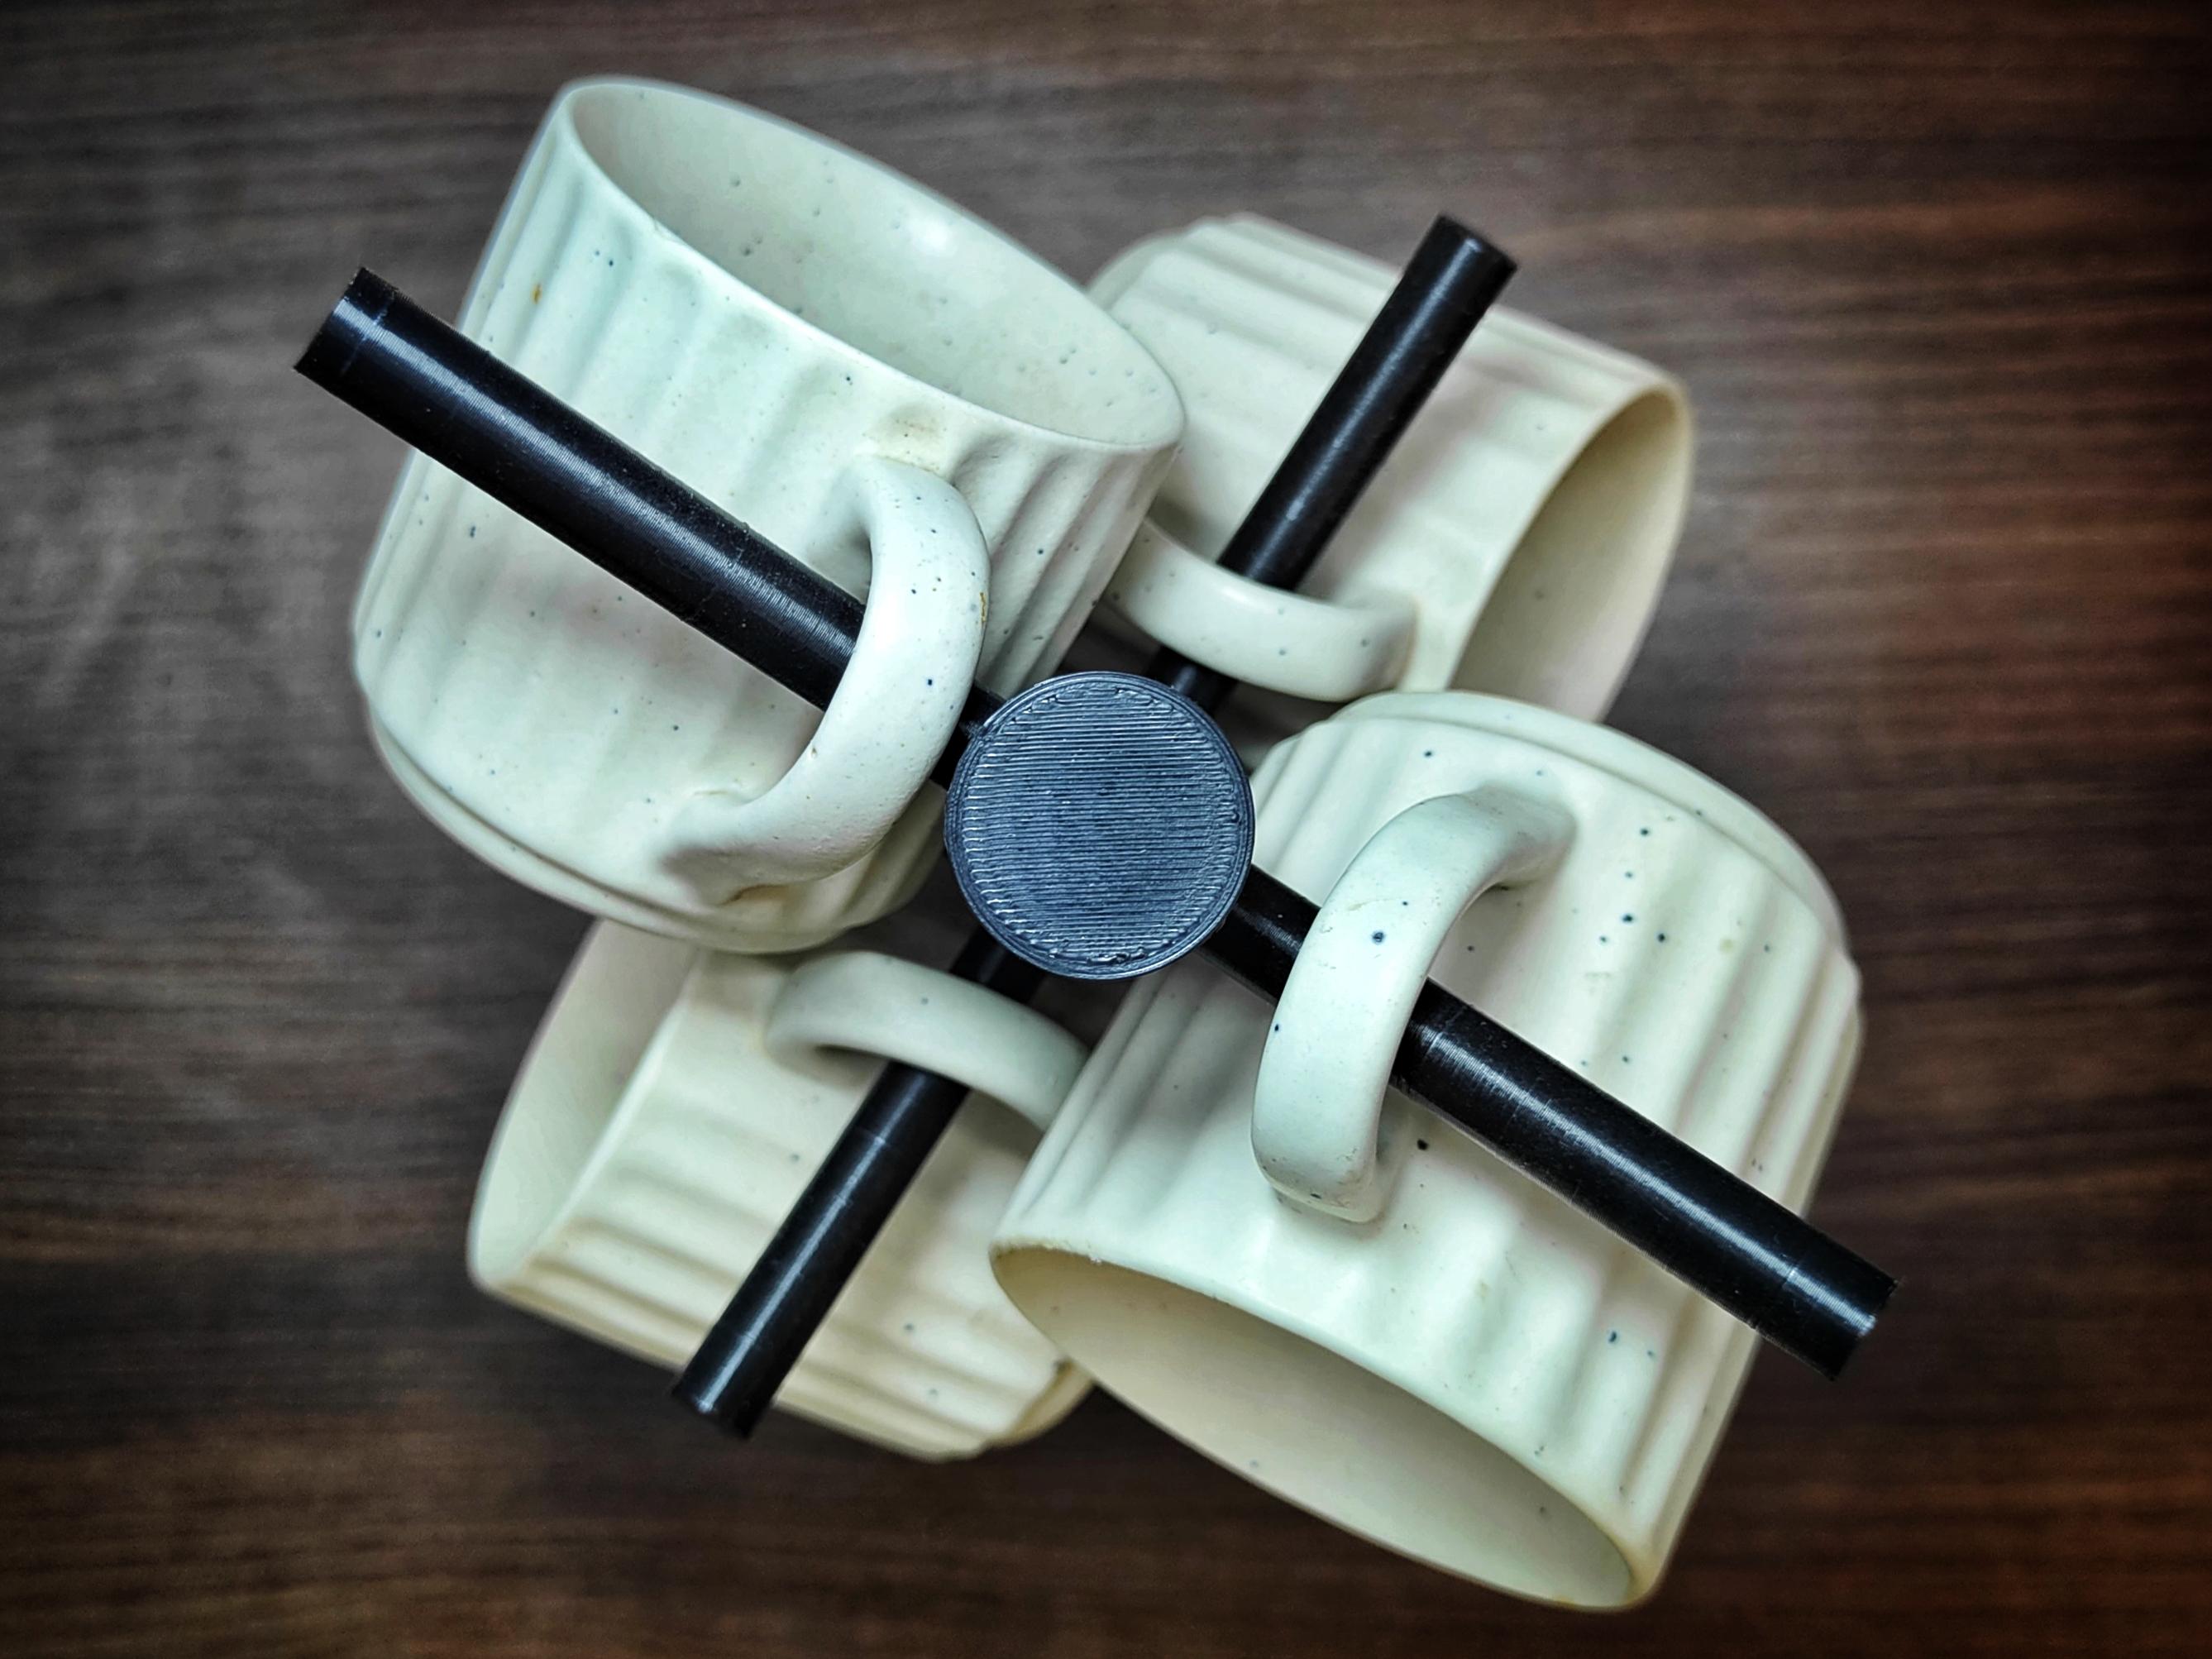
Print (1*) base pad, (1*) main pipe, and (6*) branch pipes using provided STL files. Ensure that the holes are accurately printed for tight attachment.
You can choose any color for the filament according to your cup or kitchen theme. Select a color that complements your cups or matches your kitchen decor for a personalized touch.
I used black filament, coz my cups are white, so it looks very aesthetic in my kitchen.
Removing Support Pads and Sanding
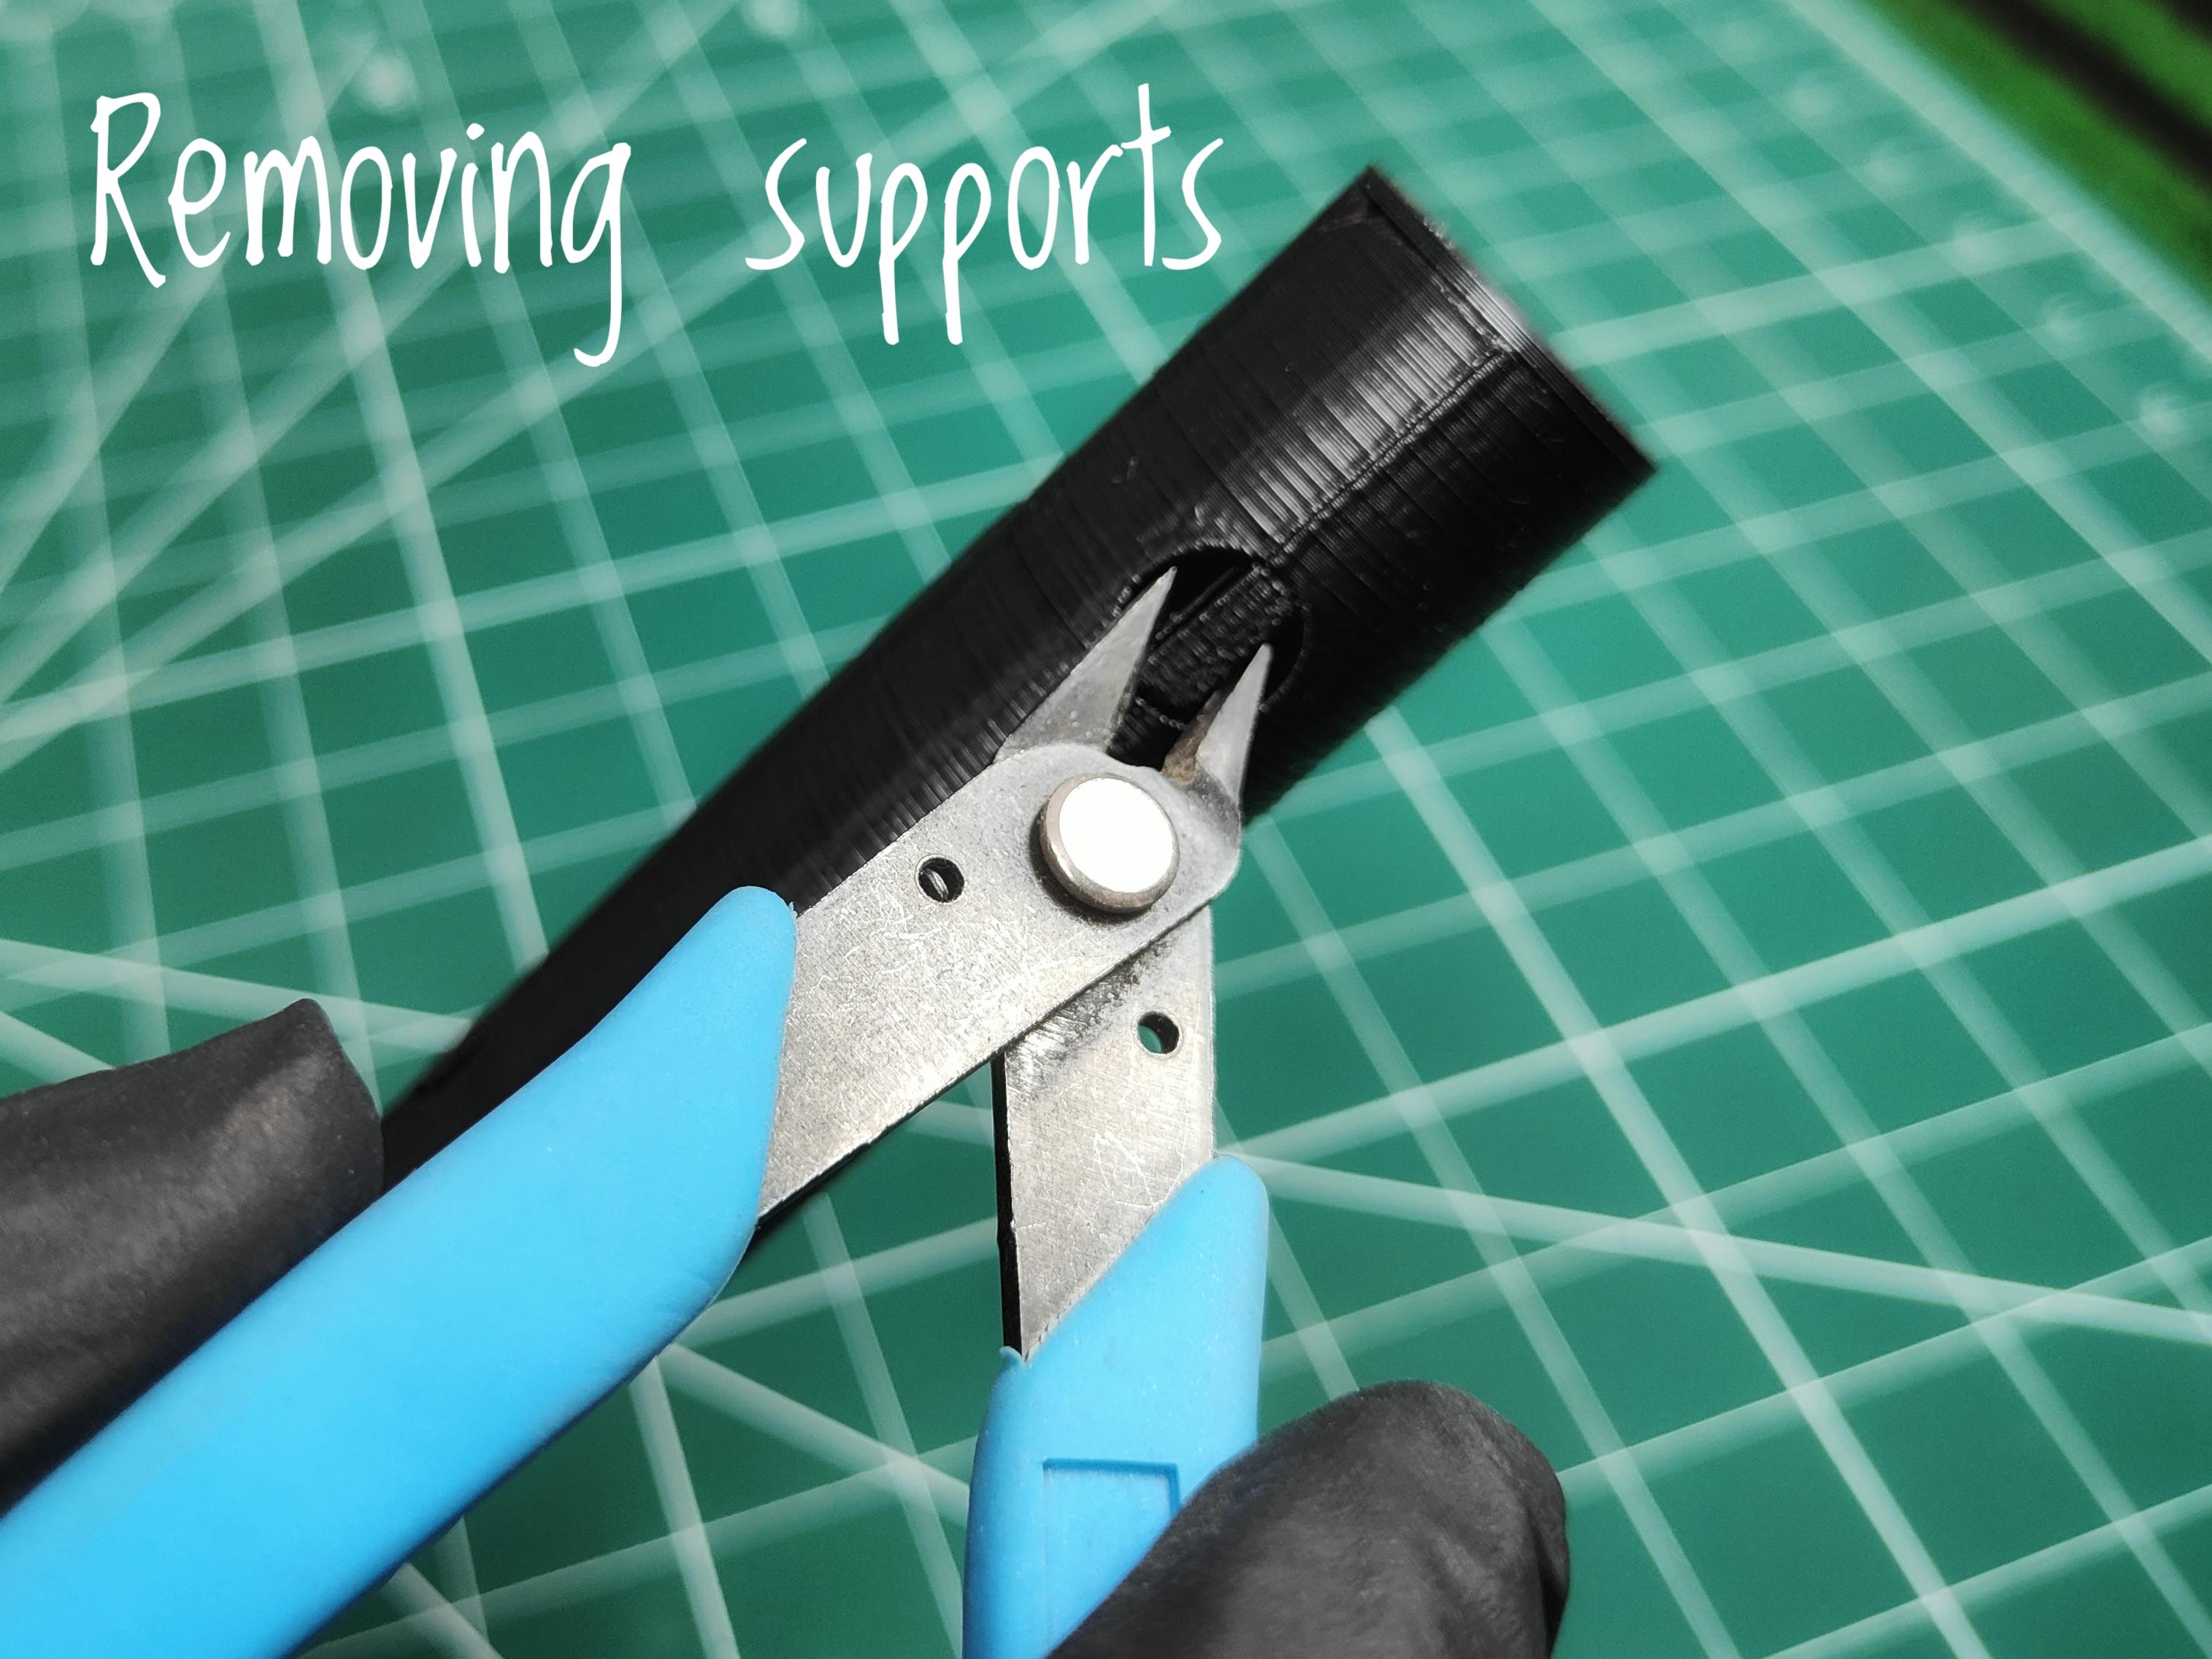
After 3D printing, carefully remove any supports from the parts to ensure proper parts fitting.
Optionally, you can use sandpaper to achieve an extra smooth and refined finish on the surfaces of the printed parts. This step can enhance the overall appearance of your cup holder tree.
And yeah you can use other techniques too like polishing with acetone to get even more shiny appearance.
Gathering the Parts
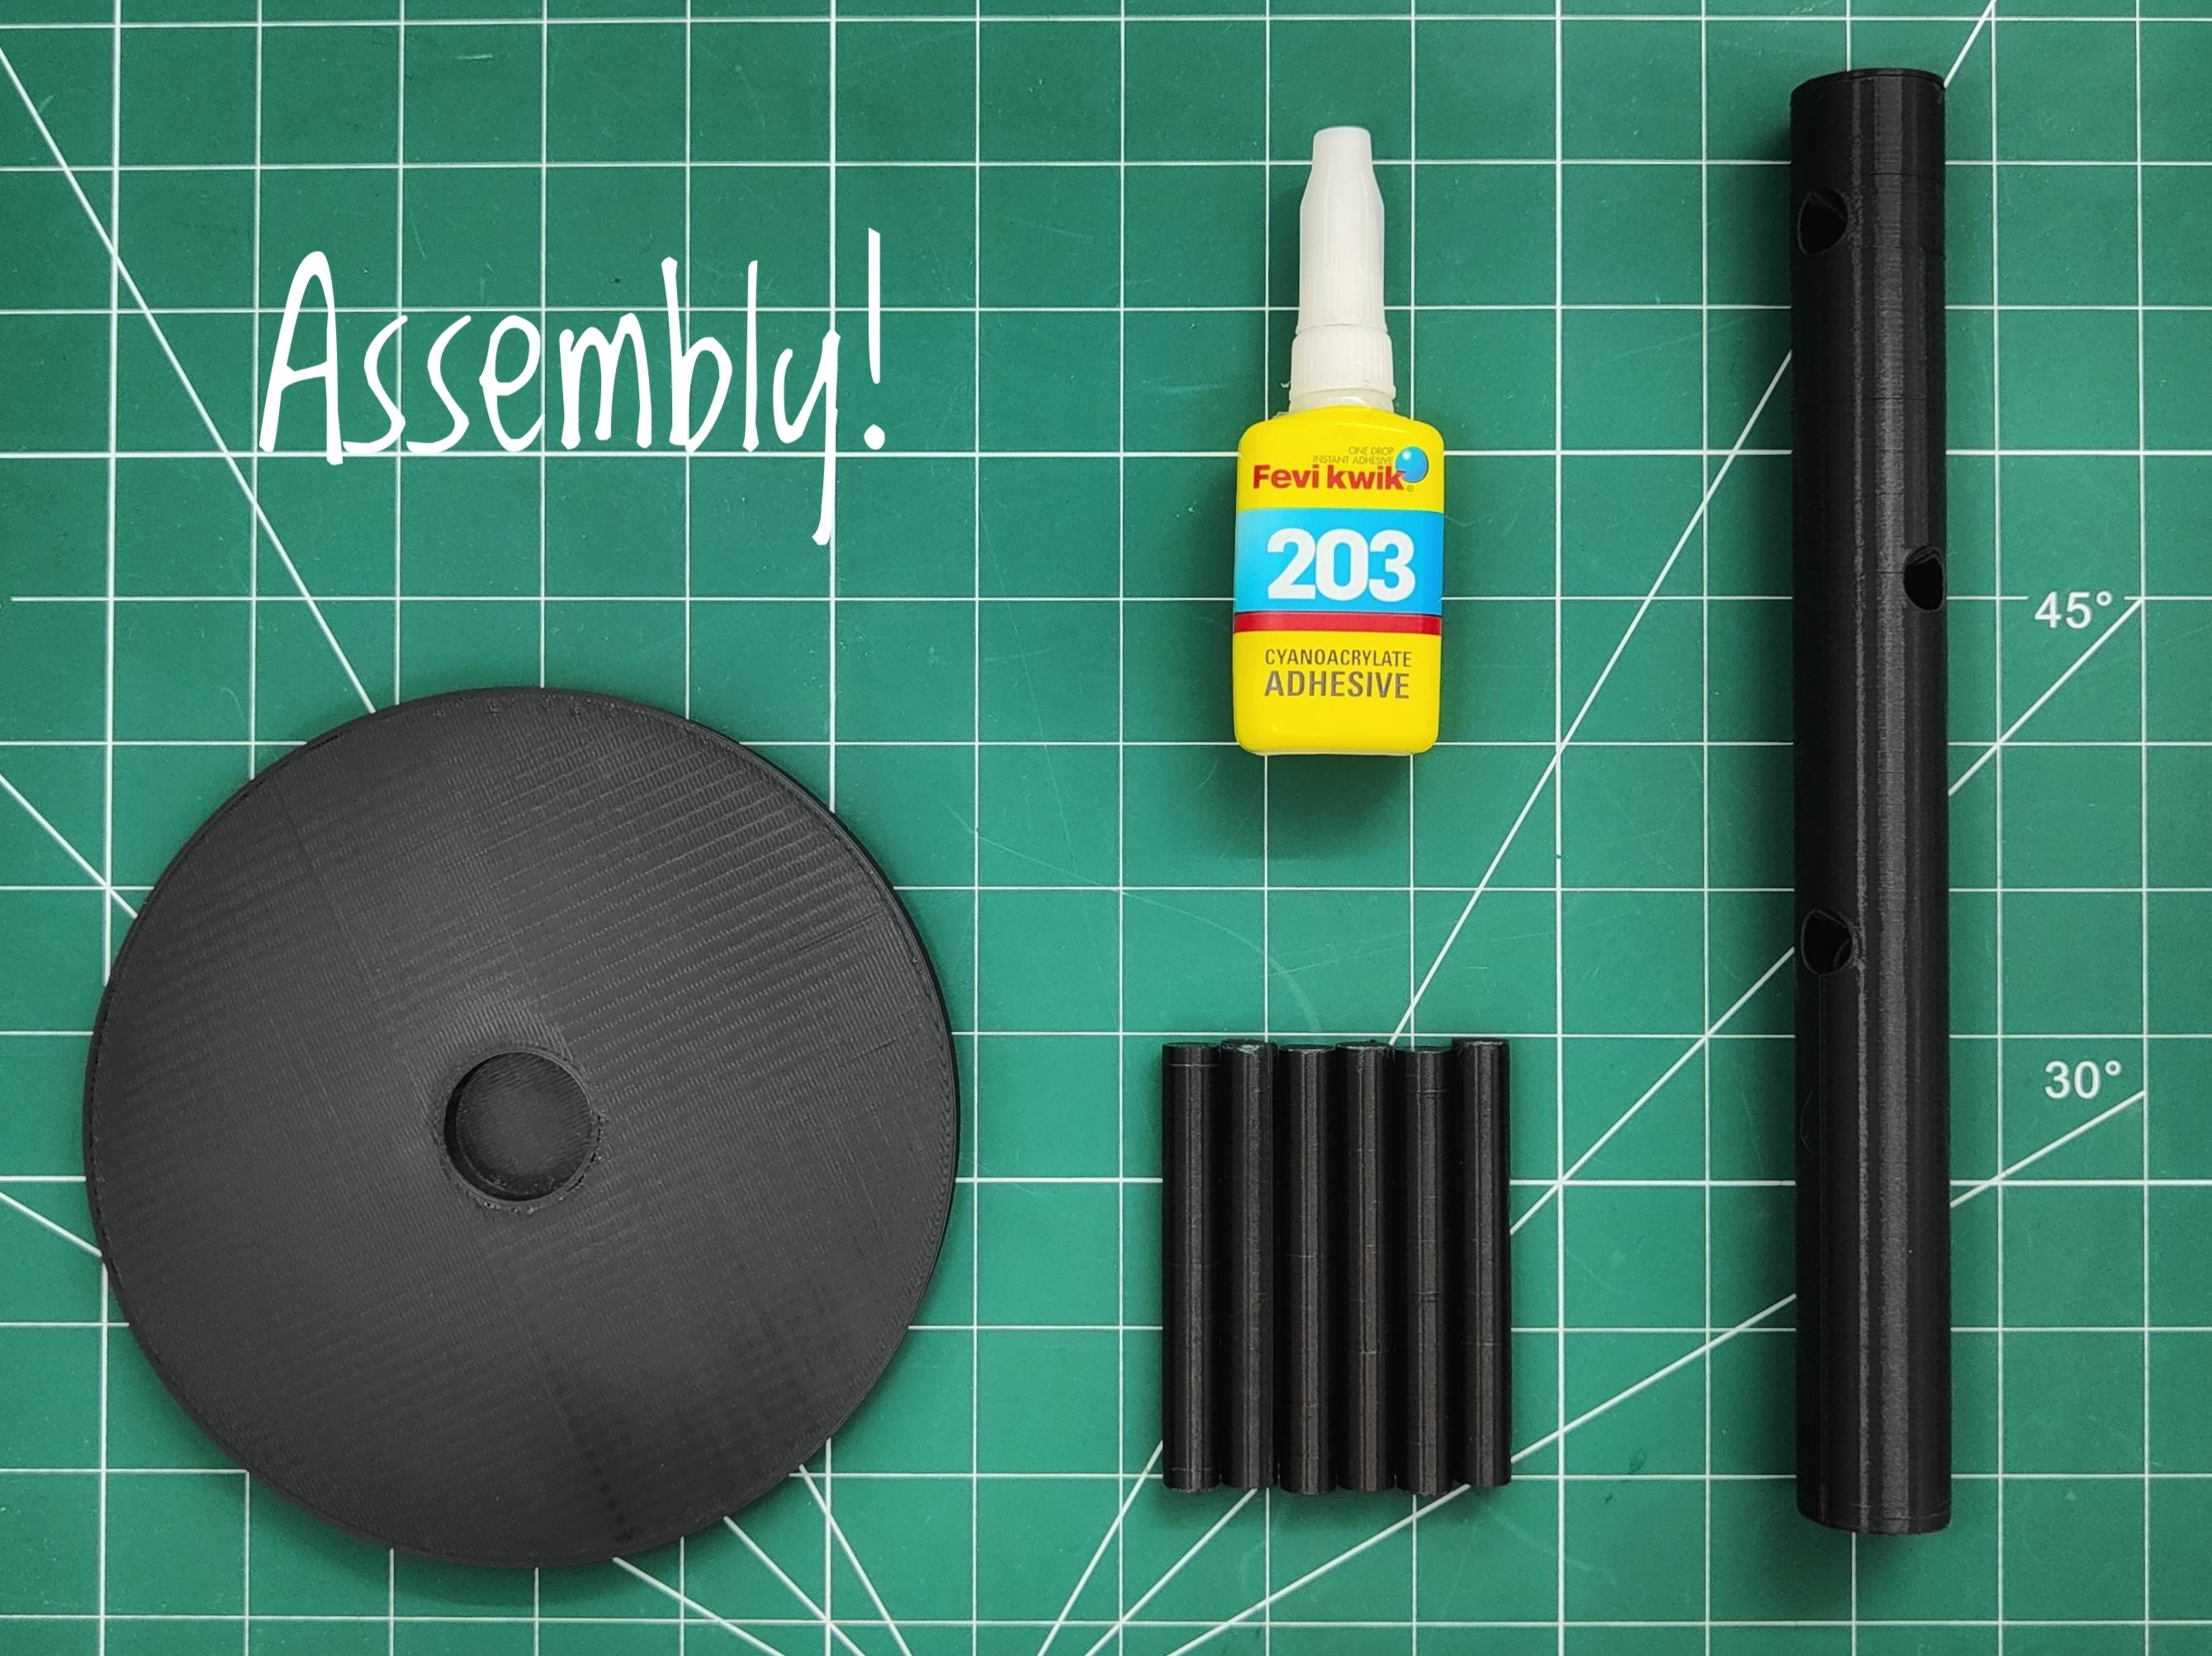
Now Gather all the printed parts: (1*) base pad, (1*) main pipe, and (6*) branch pipes. Additionally, prepare super glue for combining them. Follow the below steps showing how to assemble it.
Attaching the Main Pipe to the Base Pad
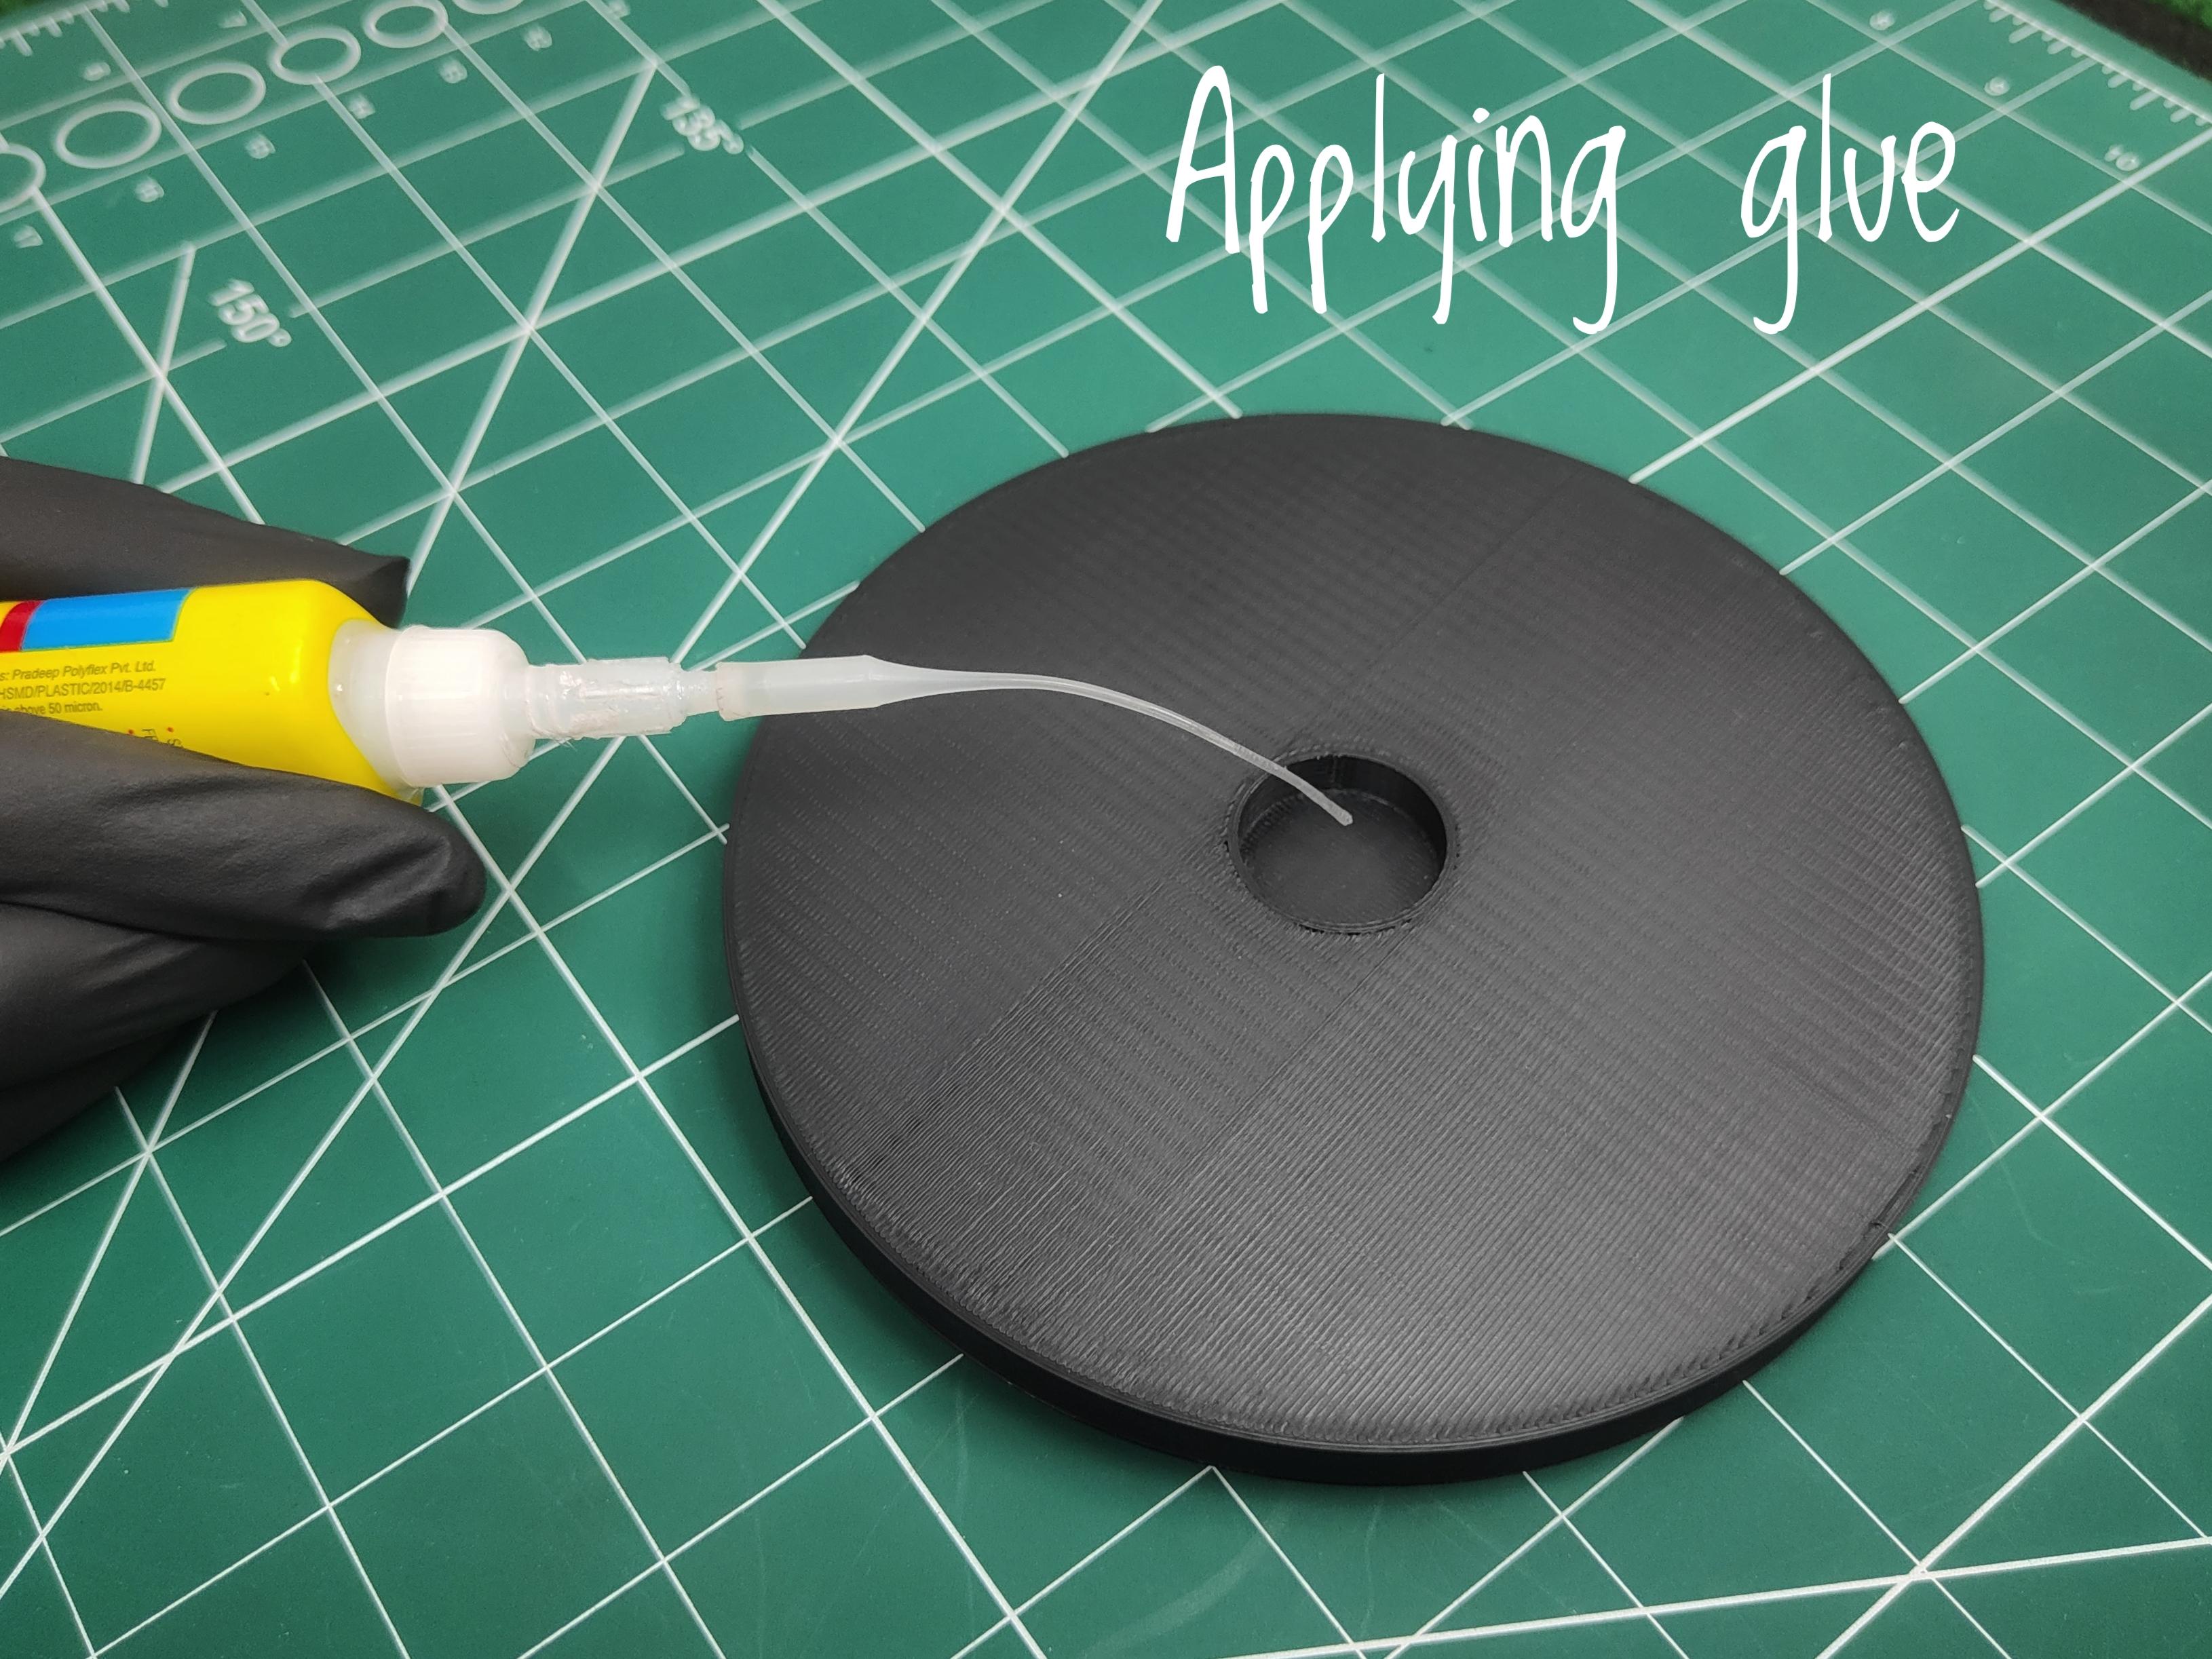
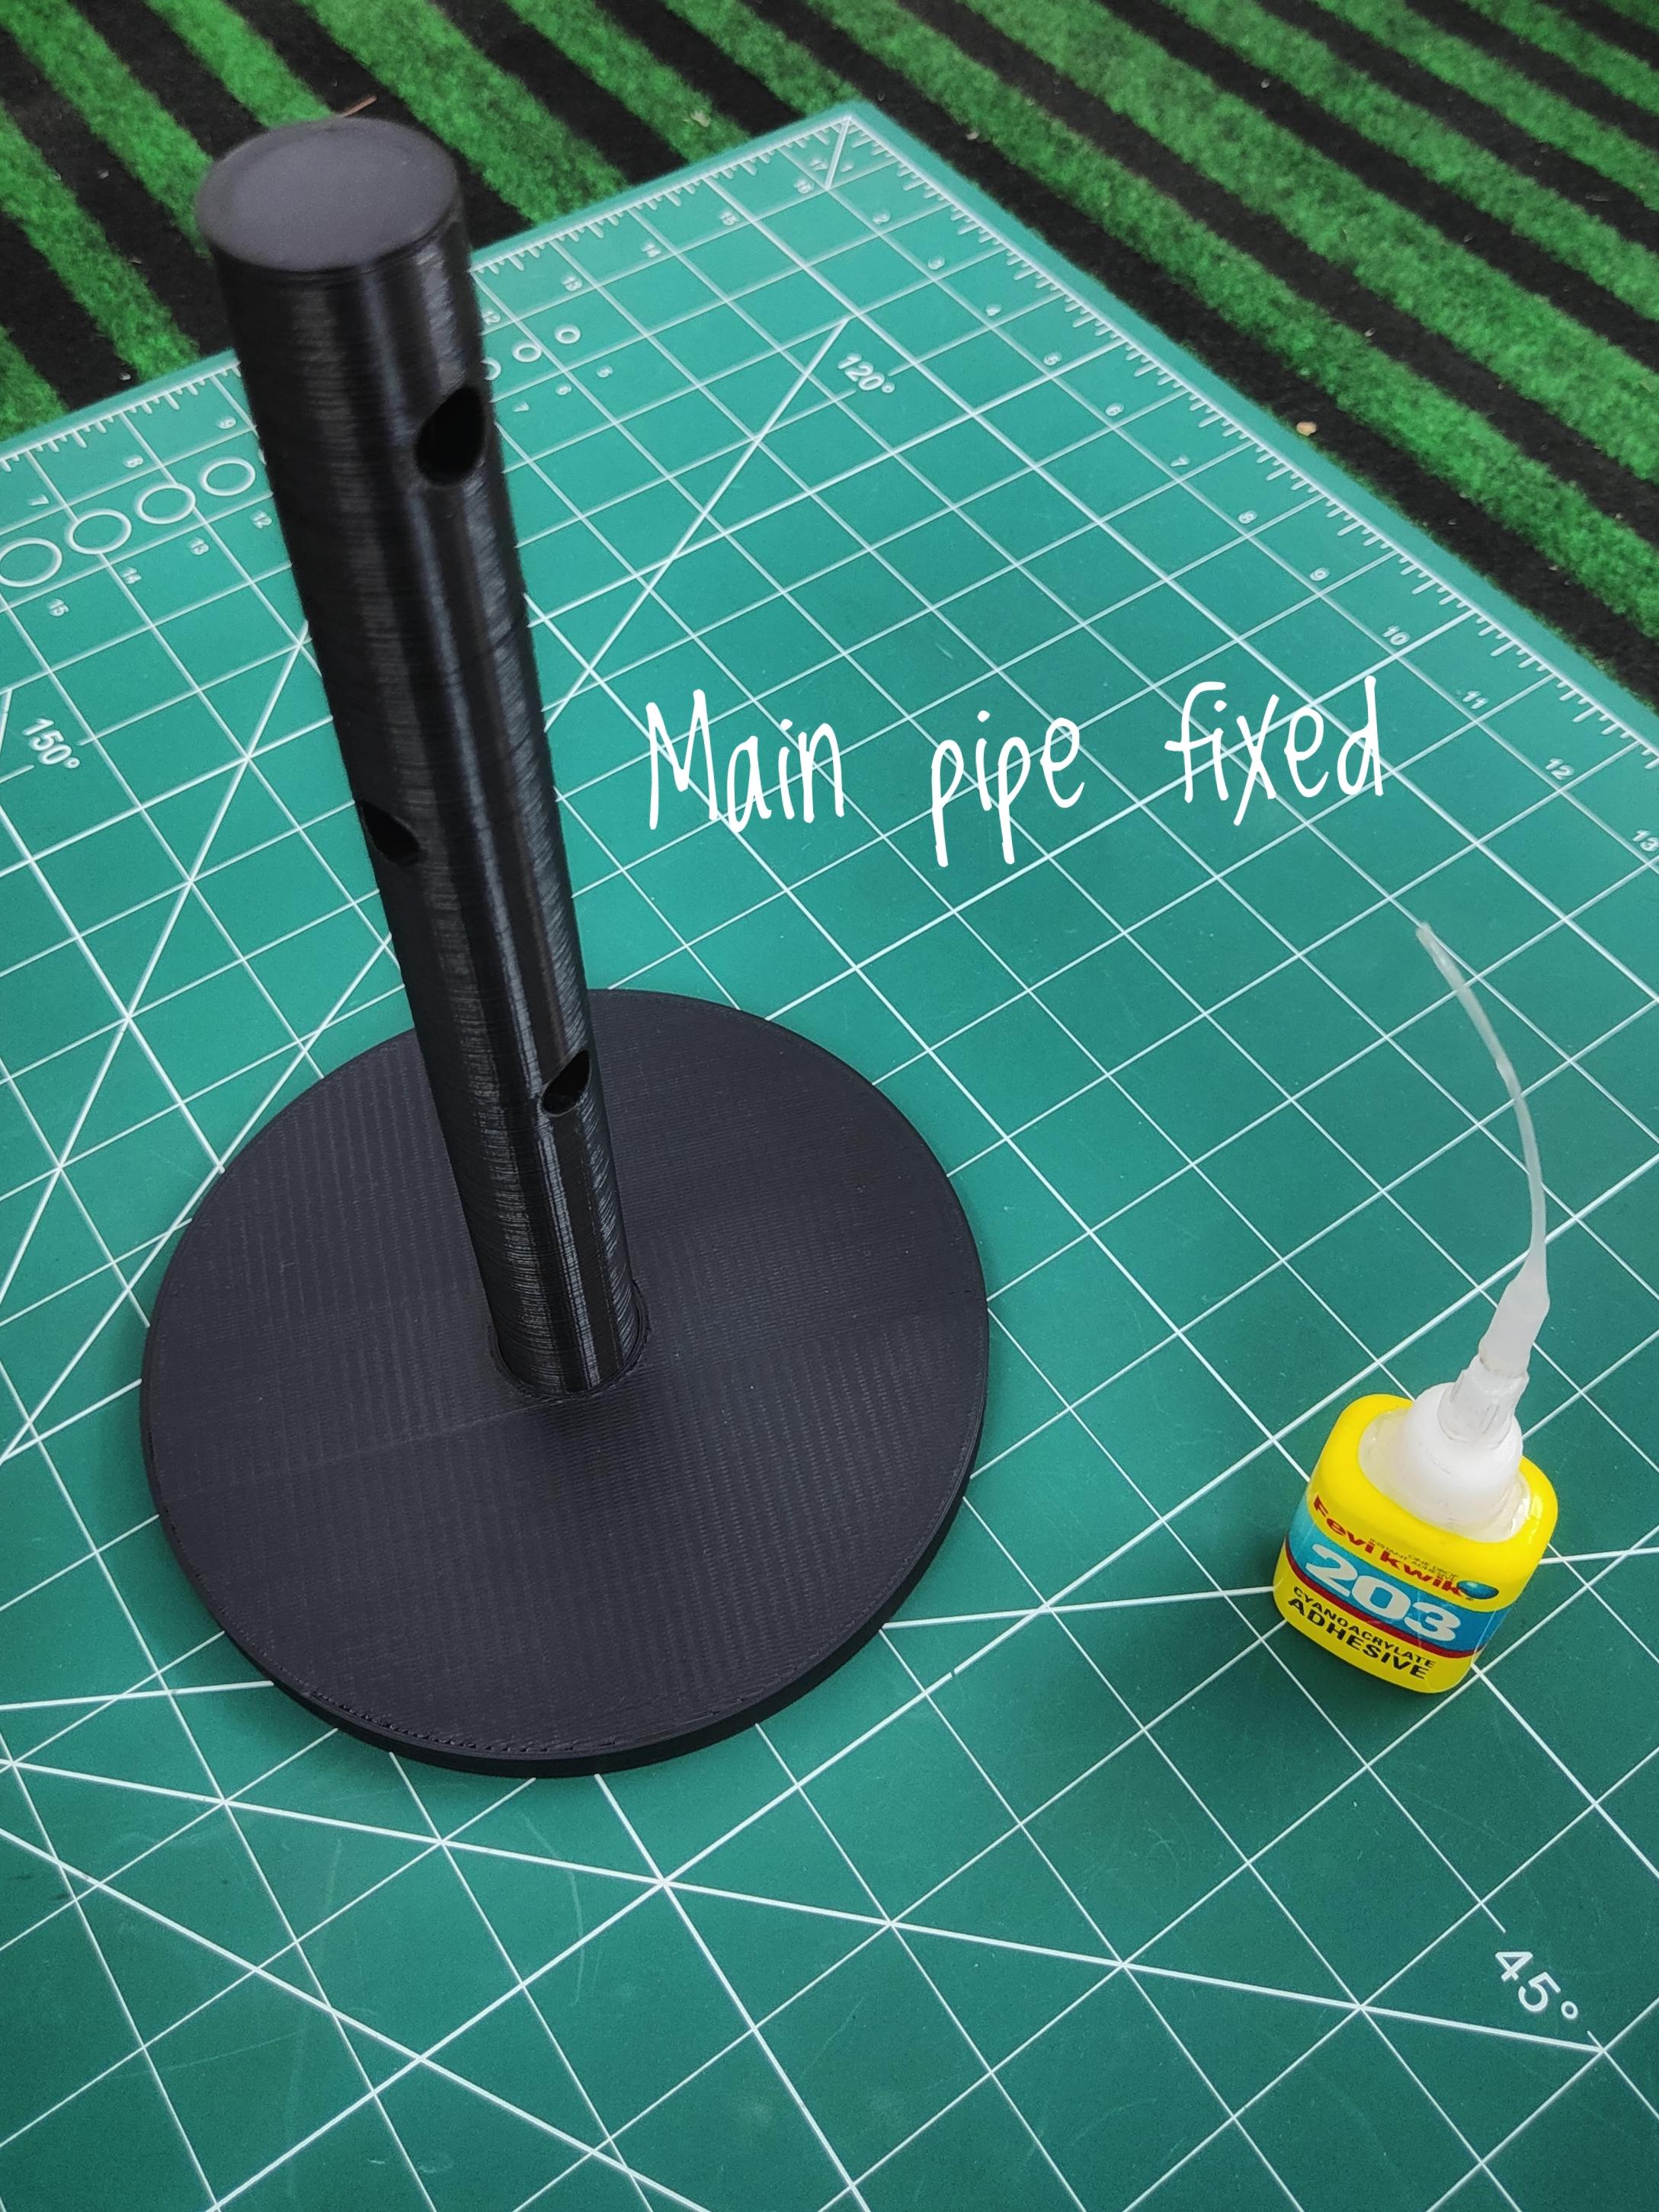
Begin by attaching the main pipe to the base pad using super glue. Ensure a strong bond between the parts for stability.
Attaching Branch Pipes
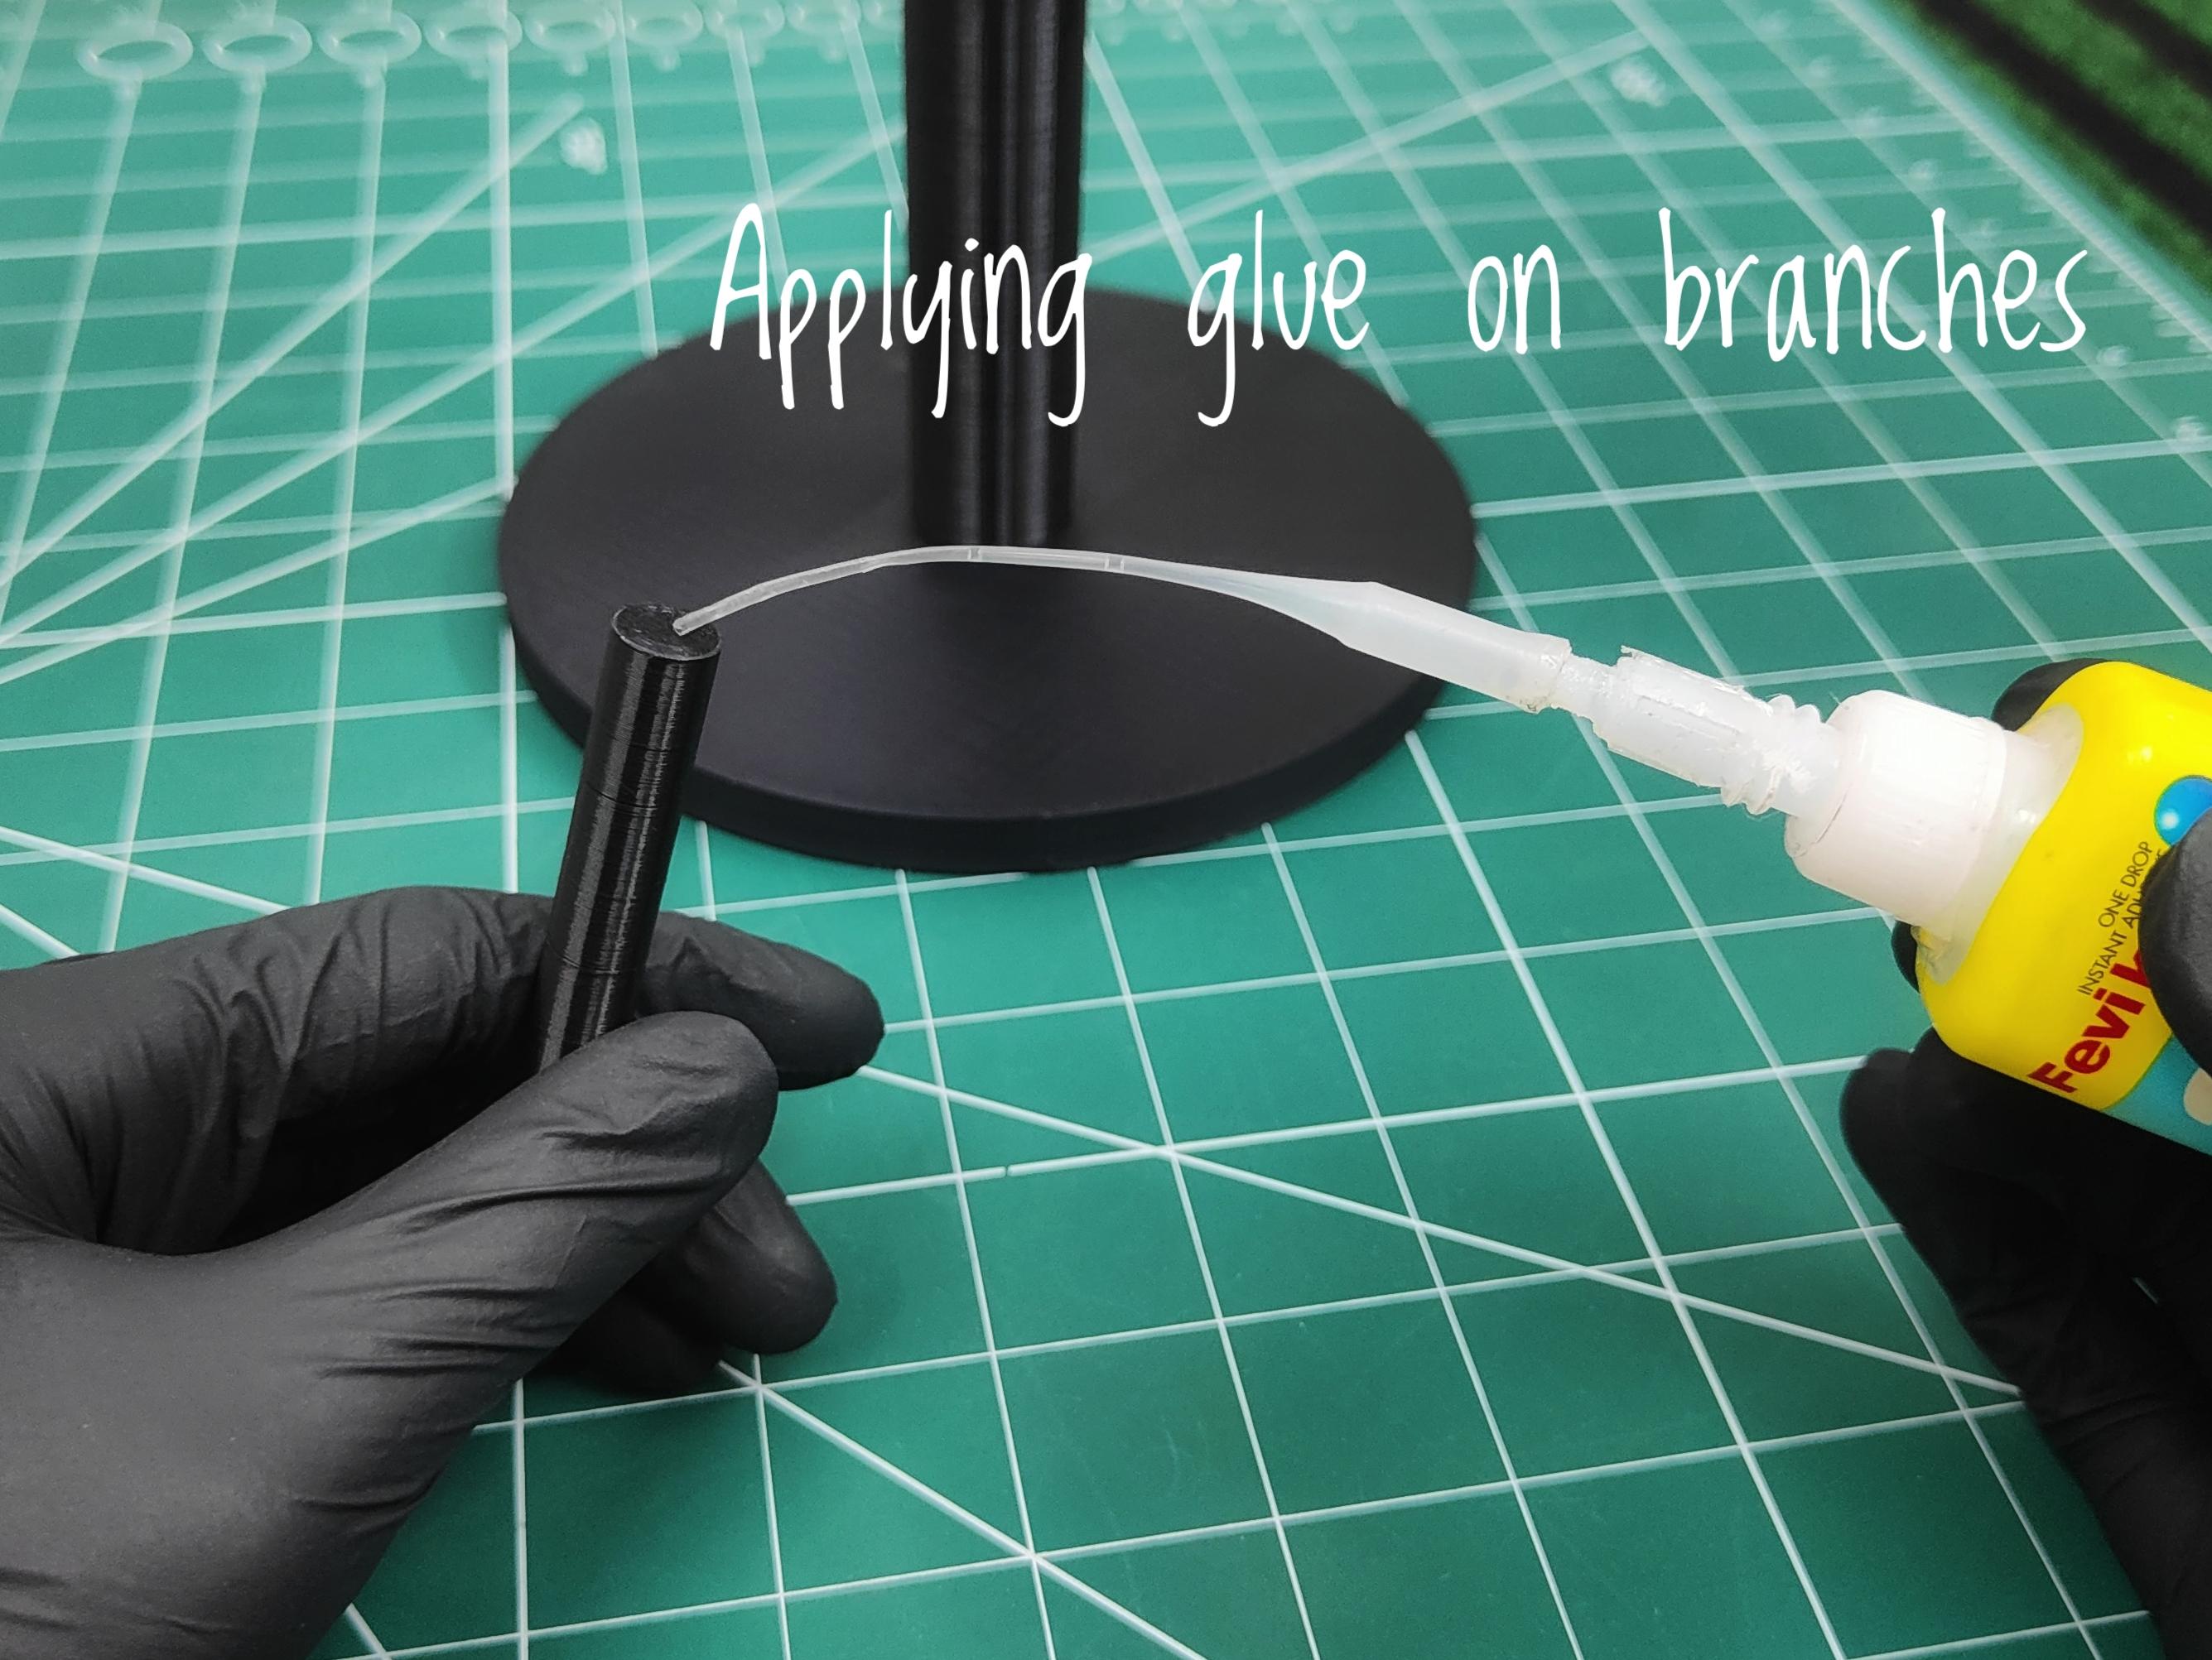
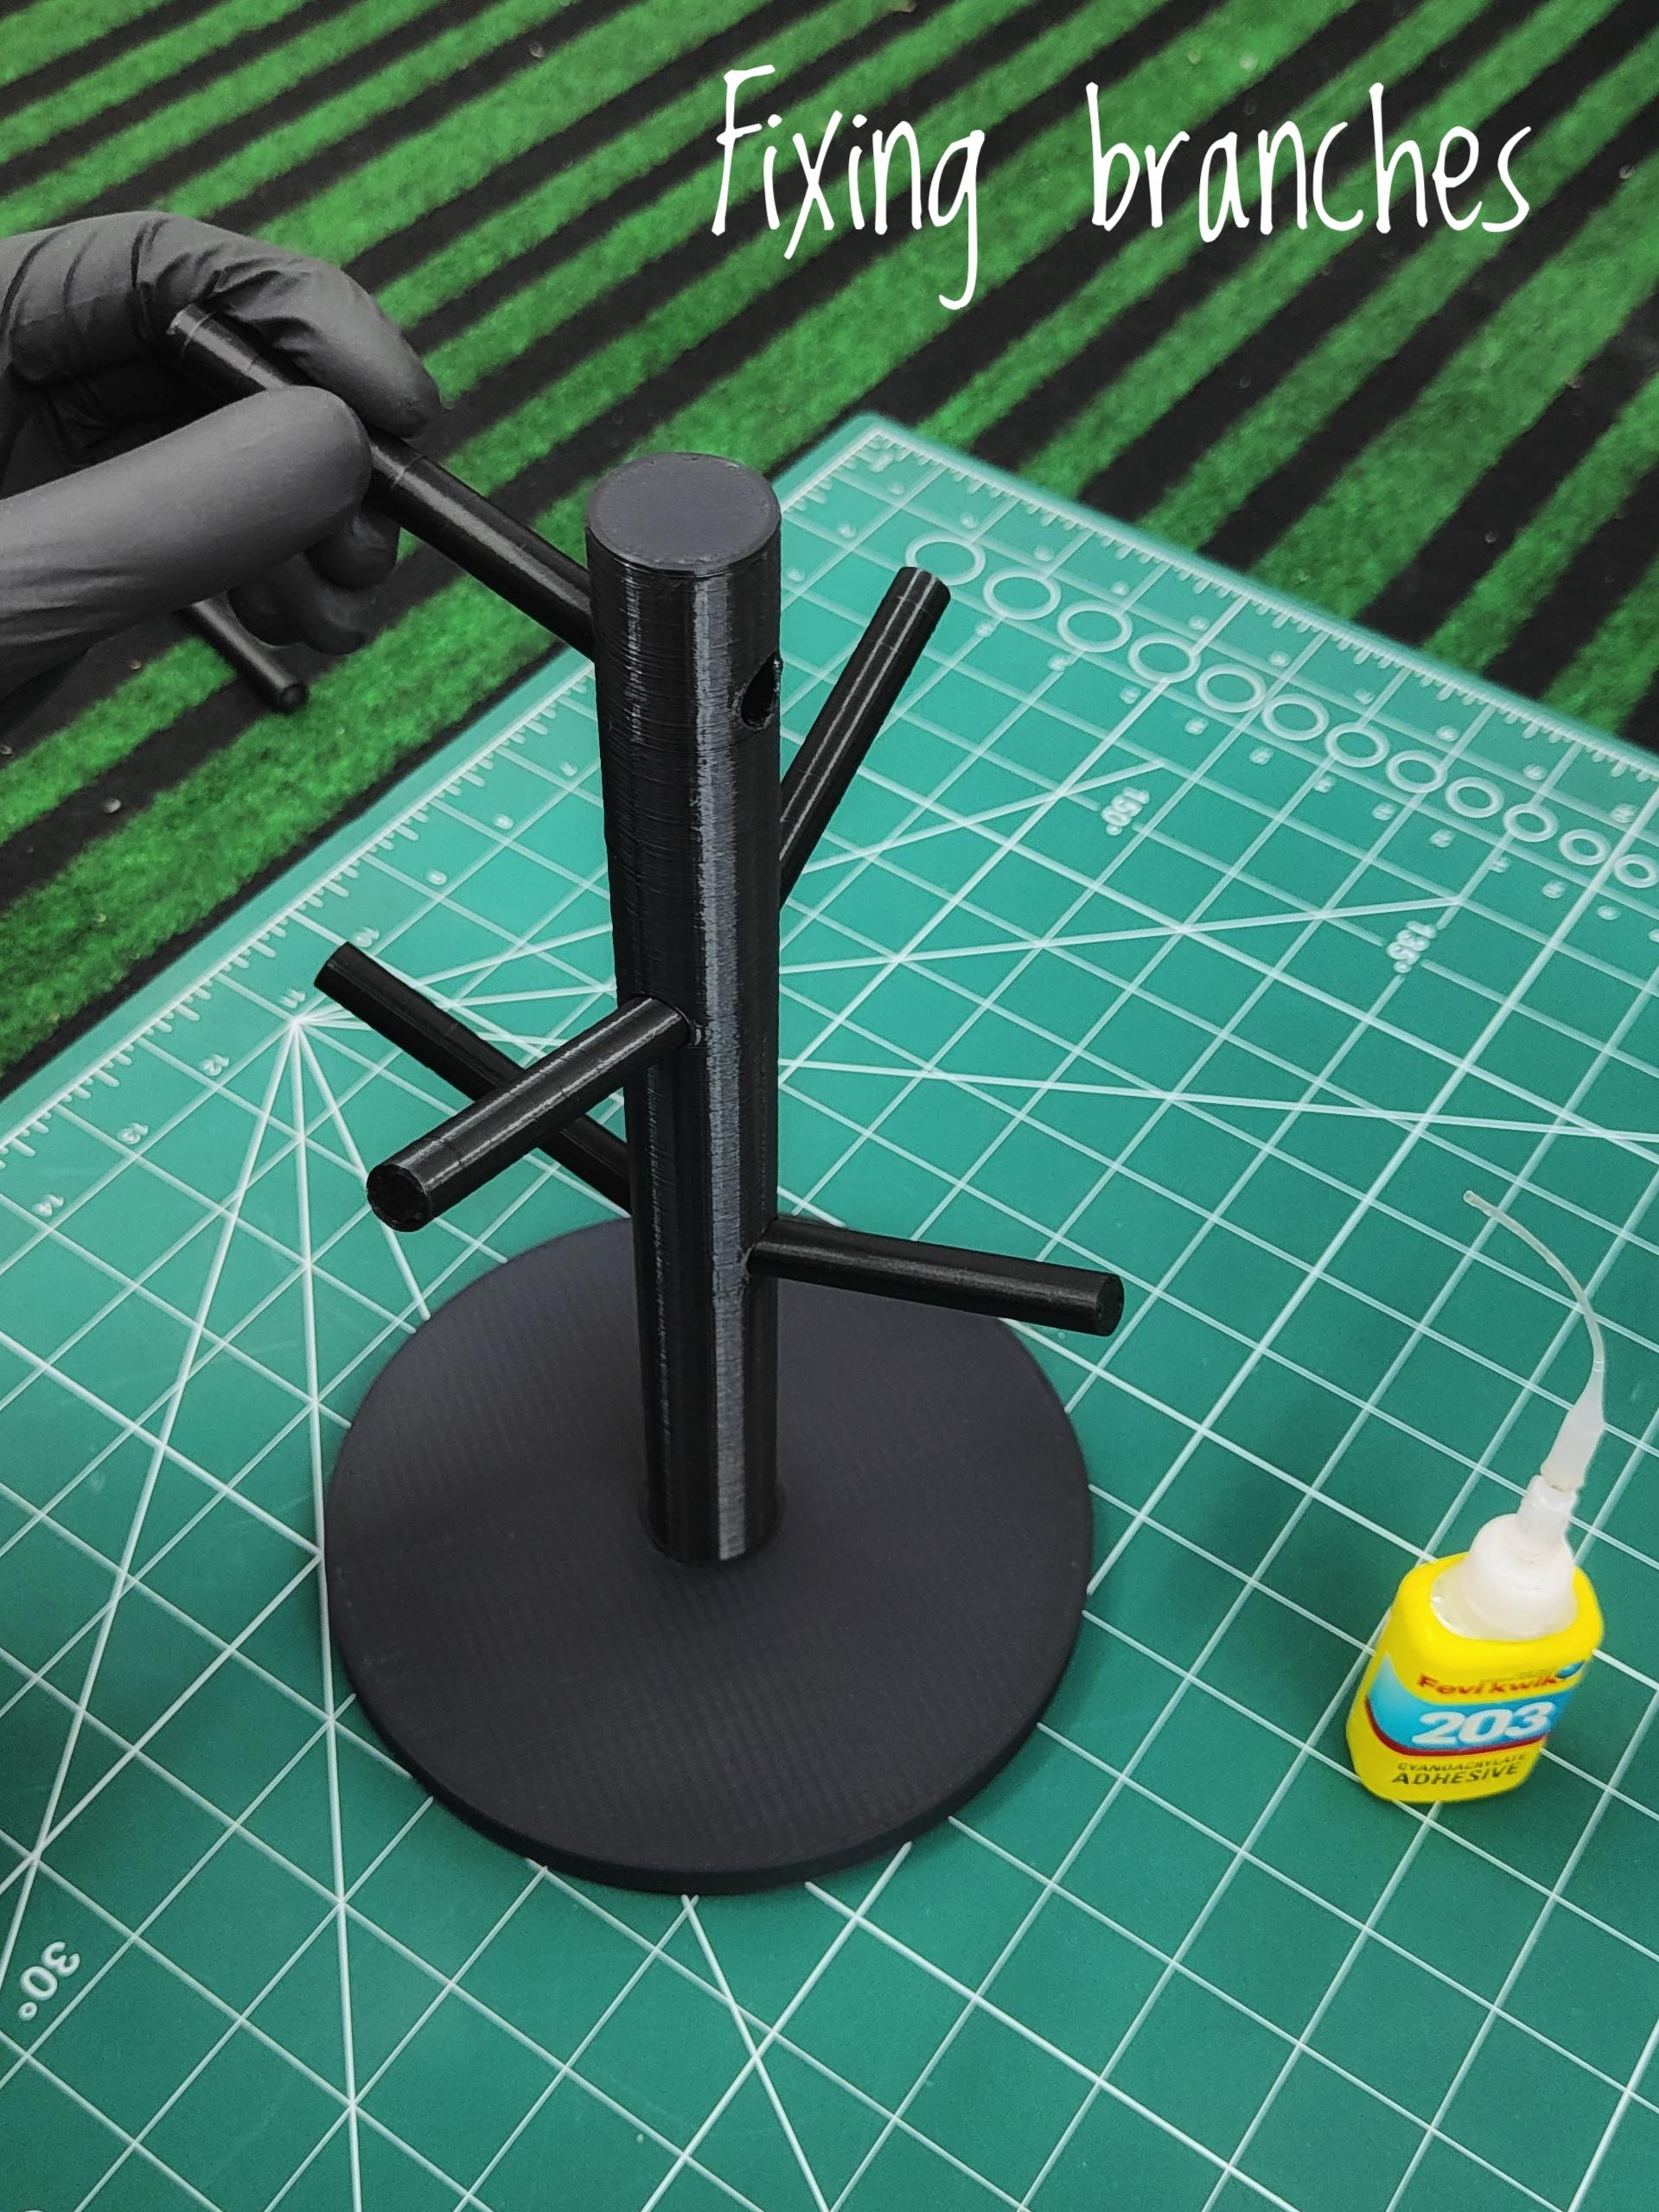
Next, attach the six branch pipes to the main pipe using super glue. Position them evenly around the main pipe to create a symmetrical and functional cup holder tree.
Final Touches
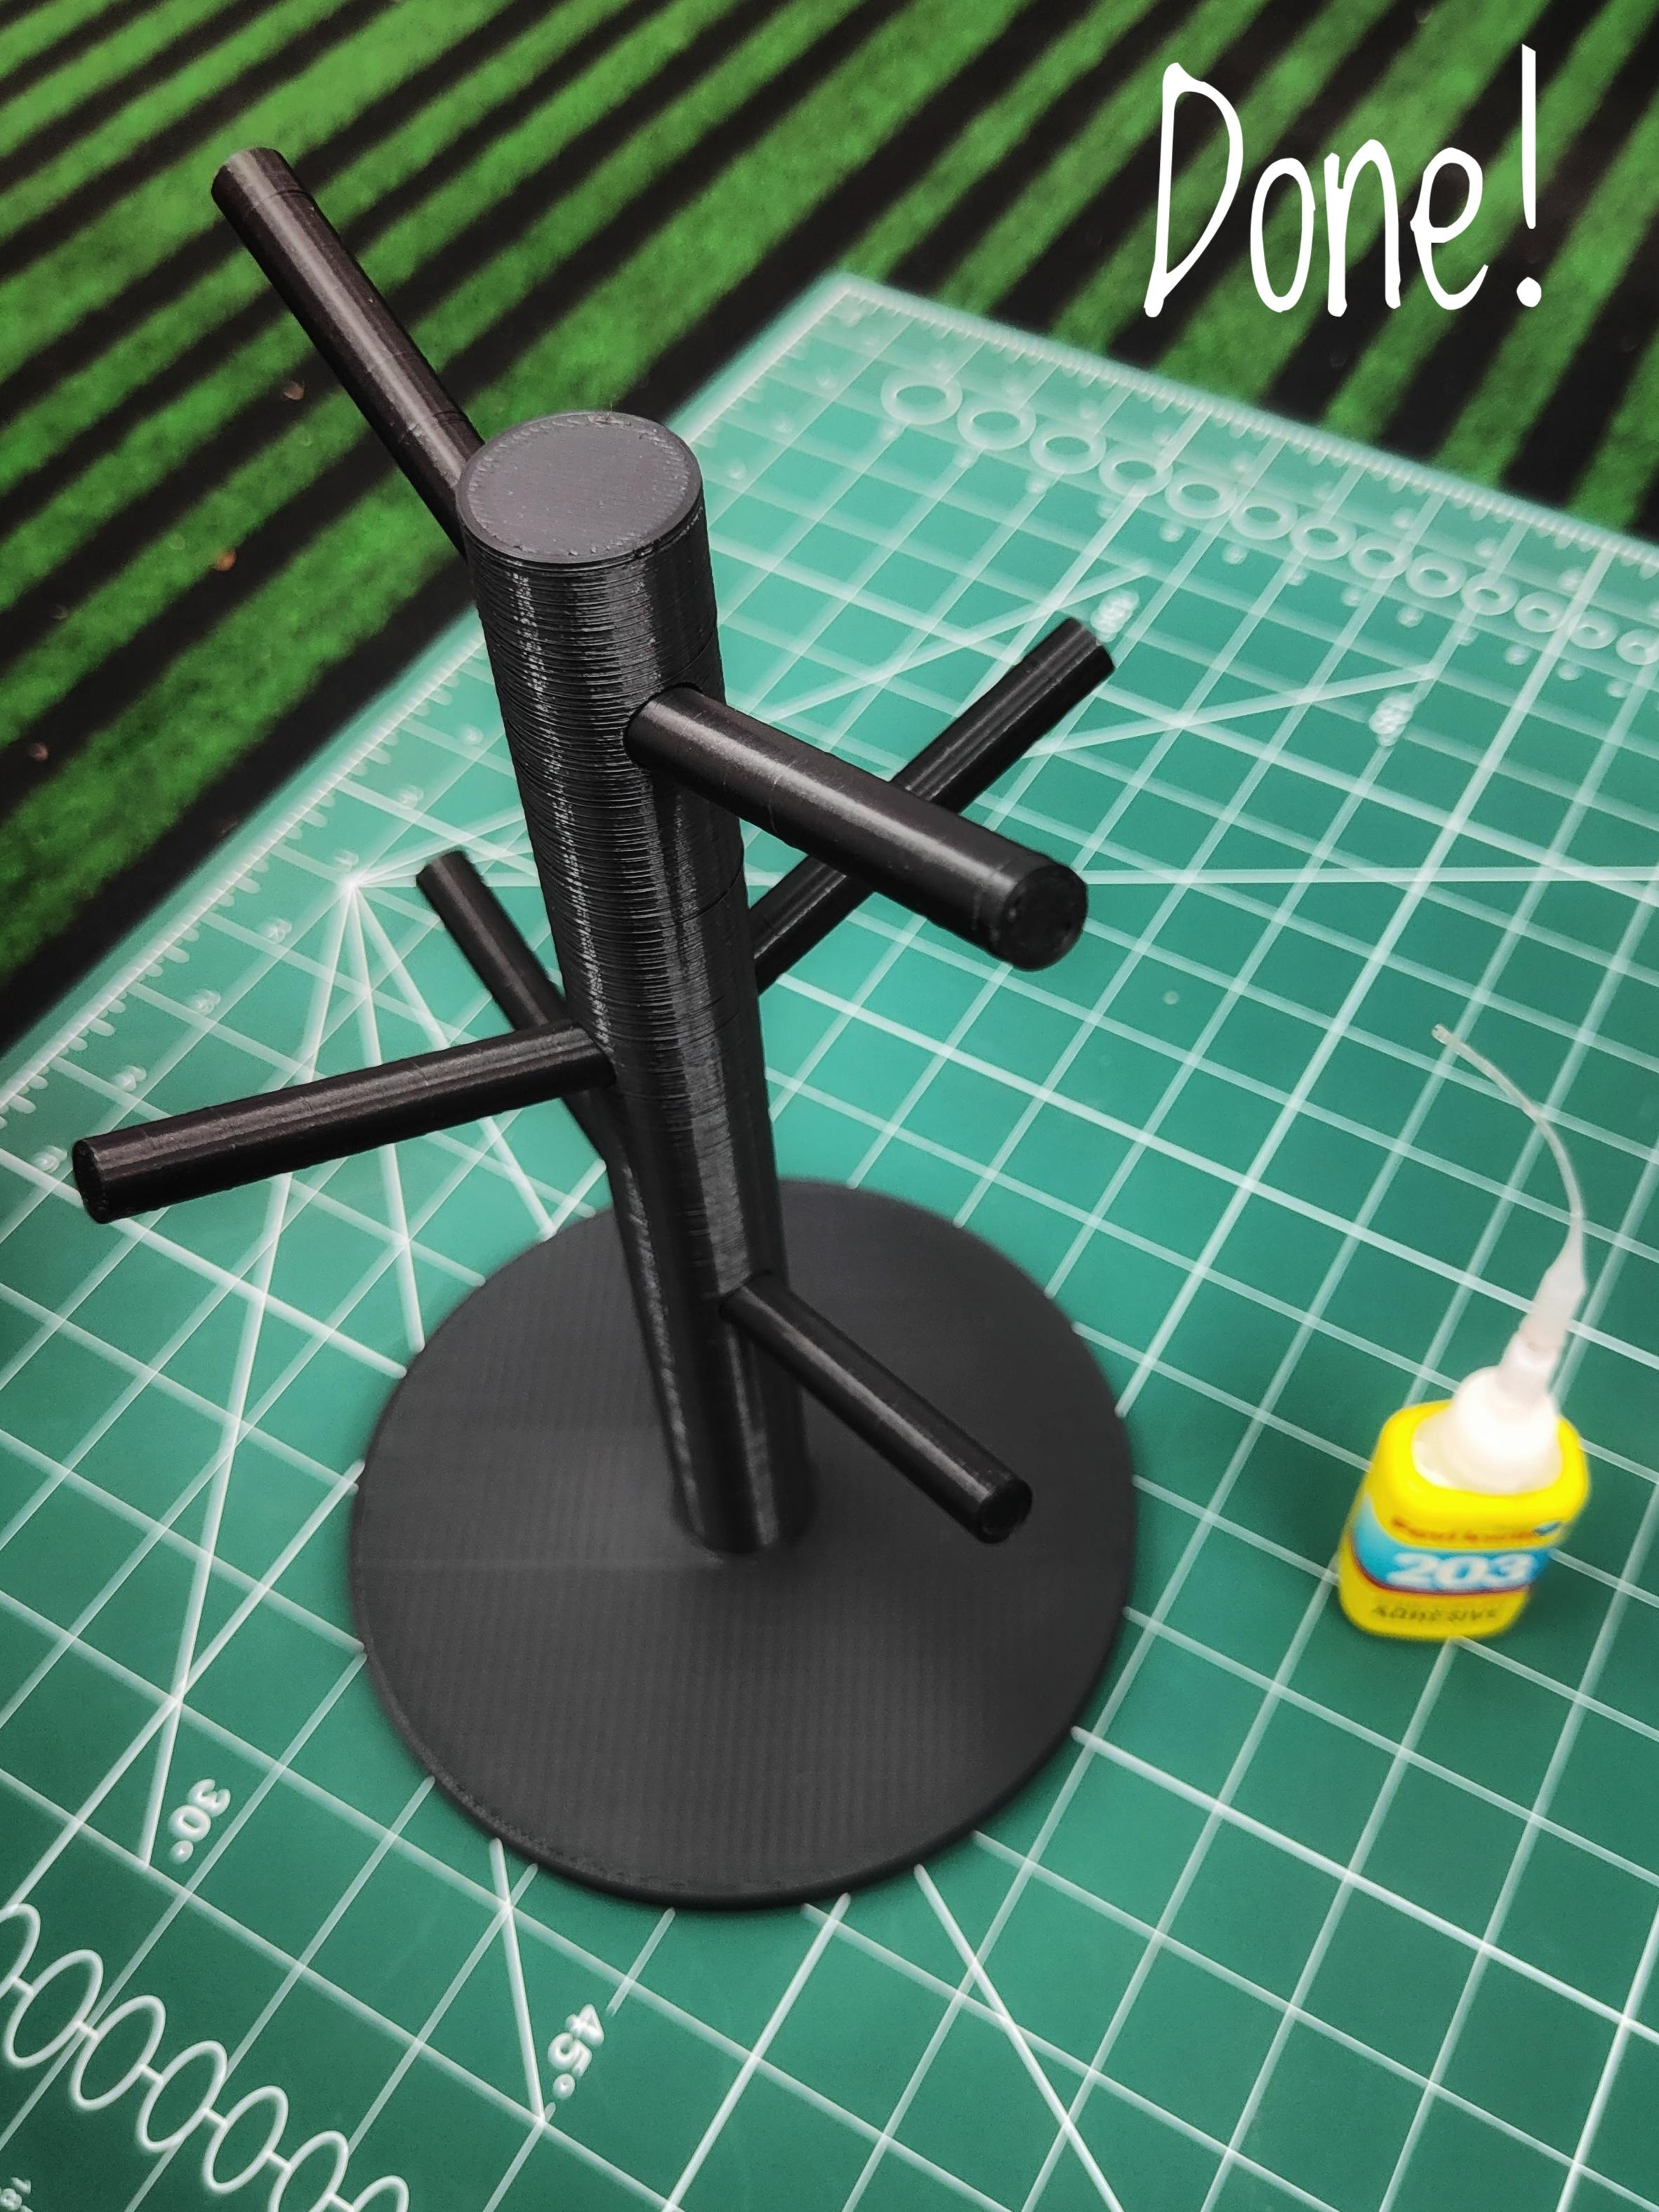
Once all the parts are securely attached, inspect the cup holder tree for any loose connections or imperfections. Make any necessary adjustments and let the glue dry completely.
Conclusion:
Conclusion
Creating your cup holder stand is not only practical but also adds a personal touch to your kitchen. With just a few steps using Fusion 360 and a 3D printer, you can organize your cups in style. Customize the design to suit your preferences and enjoy the functionality of your DIY cup holder stand. Cheers to a well-organized and charming kitchen space.