DIY Creating a Raspberry Pi Powered Mouse Mover With a Servo
by Kacey Meier in Circuits > Raspberry Pi
786 Views, 4 Favorites, 0 Comments
DIY Creating a Raspberry Pi Powered Mouse Mover With a Servo

Have you ever been working from home and needed to step out for a moment? Maybe it was to clear your head, grab lunch, answer the door...and you get in trouble because it showed you as offline?
This tutorial will show you how to build a mouse mover using Viam, a Raspberry Pi, a servo, and an optical mouse. This robot will turn the continuous servo that’s secured inside the box, which will turn the circle under the optical mouse. This will keep your computer from falling asleep.
This project is a good place to begin if you’re new to robotics and would like to learn how to use a servo component with the Viam app and Viam’s Python SDK.
This instructable is adopted from the "How to Create a Mouse Mover Using a Servo" tutorial in Viam's tutorials.
Supplies


Hardware:
- Raspberry Pi with microSD card: with viam-server installed per our installation guide.
- microSD card reader
- Continuous Rotation Servo: We used the FS90R servo.
- Wheel or arm for the servo: This comes in some of the FS90R packages.
- Jumper wires
- Optical mouse: Corded or wireless.
Tools and Consumables:
- Suitable sized box: Box should allow servo with wheel/arm with circle cut out on top of wheel/arm to sit flush with the top of the box.
- Double sided tape
- Tape to seal the box: We used black gaffers tape, but any tape will do.
- Box cutters
- Marker
Software:
Install Viam Software

First, install viam-server according to our installation guide.
Next, run this command in your Raspberry Pi terminal to install the pip package manager. Select “yes” when asked if you want to continue.
sudo apt-get install pip
The command above installs the latest version of python3 and pip3 on your Raspberry Pi. To verify and get the version of the package, you can run the command:
pip3 --version
The Viam Python SDK (Software Development Kit) allows you to write programs in the Python programming language to operate robots using Viam. To get the Python SDK working on the Raspberry Pi, run the following command in your Raspberry Pi terminal:
pip3 install viam-sdk
Test the SDK With Your Robot

On the Viam app, select the Code sample tab, then confirm that Python is set as the default language.

Since we already installed the Python SDK, we can skip the first step.
Copy the boilerplate Python code under the second step.

The copied code needs to go in a Python file on the Raspberry Pi.
You can do so by creating a file on the Raspberry Pi and editing the file with nano.
Inside the Raspberry Pi Terminal, run the following command to create a folder to put our files in (name this folder whatever name you want).
mkdir mousefolder
Go into your folder.
cd mousefolder
Create a file using nano with .py (which is the python file extension), name this file whatever you want.
nano anyname.py
Paste the code you retrieved from the Code Sample tab in the Viam app.
Press CTRL+O, then CTRL+M, then CTRL+X to save the code and exit.
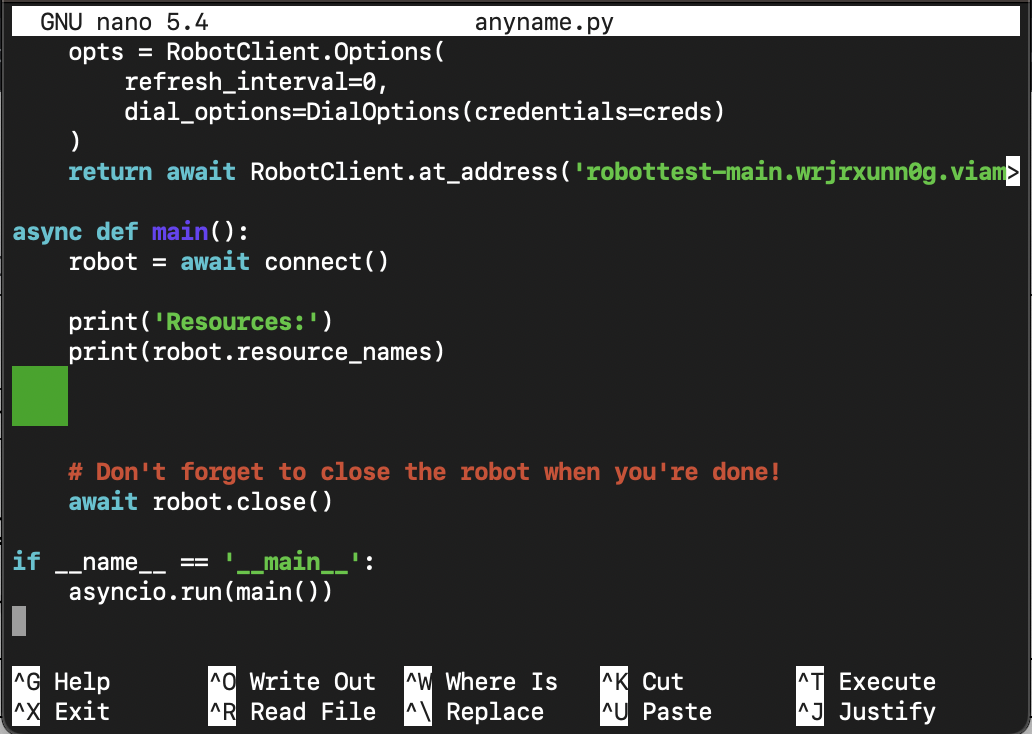
Now, run the code using python3 (name of your file.py) to get the resource information that lets us know if the connection is good or if there are any errors.
python3 anyname.py
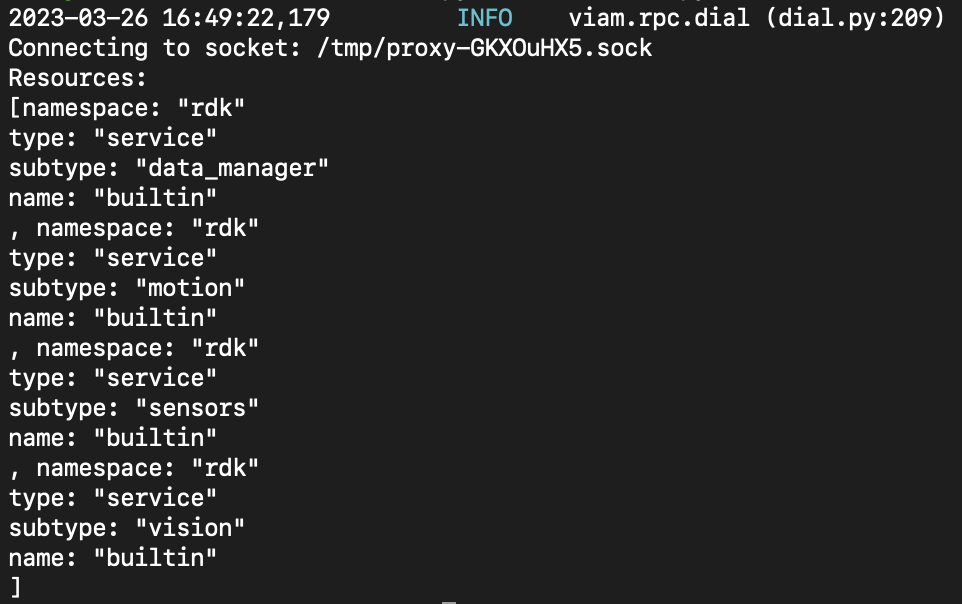
There are no errors in the resources above, so we have confirmed a good software connection between the Python SDK and Viam are good. You can proceed to the next step.
Connect the Servo
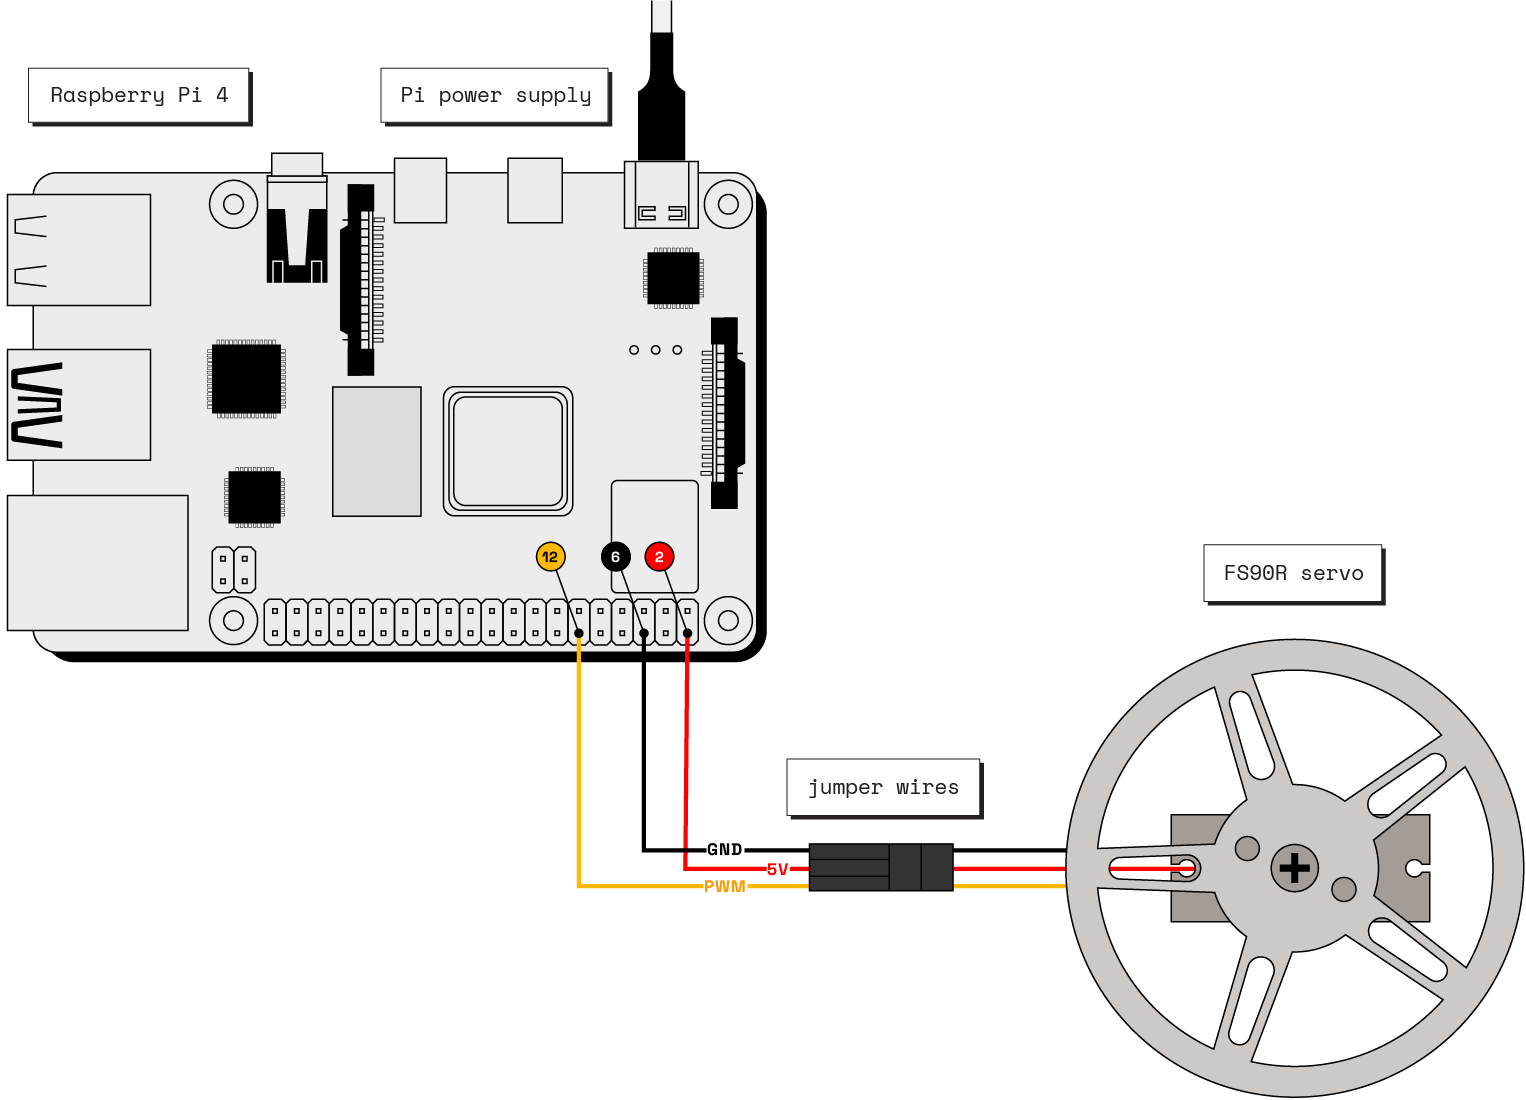
First, turn off your Raspberry Pi. This will help prevent any accidents when connecting the hardware.
Now, follow this schematic diagram to attach jumper wires to the servo and Raspberry Pi.
- GND on servo attached to pin 6 on Pi
- 5V on servo attached to pin 2 on Pi
- PWM on servo attached to pin 12 on Pi
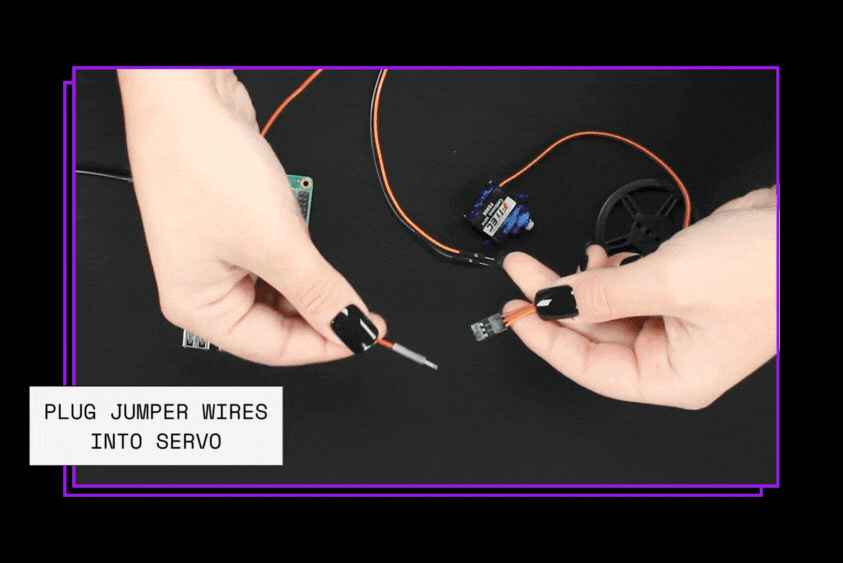
Once you have the wires connected, attach the wheel/arm to servo and turn on the Raspberry Pi
Configure Your Robot

The servo is now physically connected to the Raspberry Pi, but the Viam app hasn’t been told the details of which components/services it’s using yet, so it’s not able to control the servo.
Go to the Viam app, and navigate to the Config tab.
Board component
To create a board component:
Navigate to the Components subtab of your robot’s Config tab.
Click Create component in the lower-left corner.
Select board for type and pi for model.
Enter local as the name for your board, then click Create.
You can name the board whatever you want. You will reference it later.
Servo component
To create a servo component:
Click Create component in the lower-left corner.
Select servo for type and pi for model.
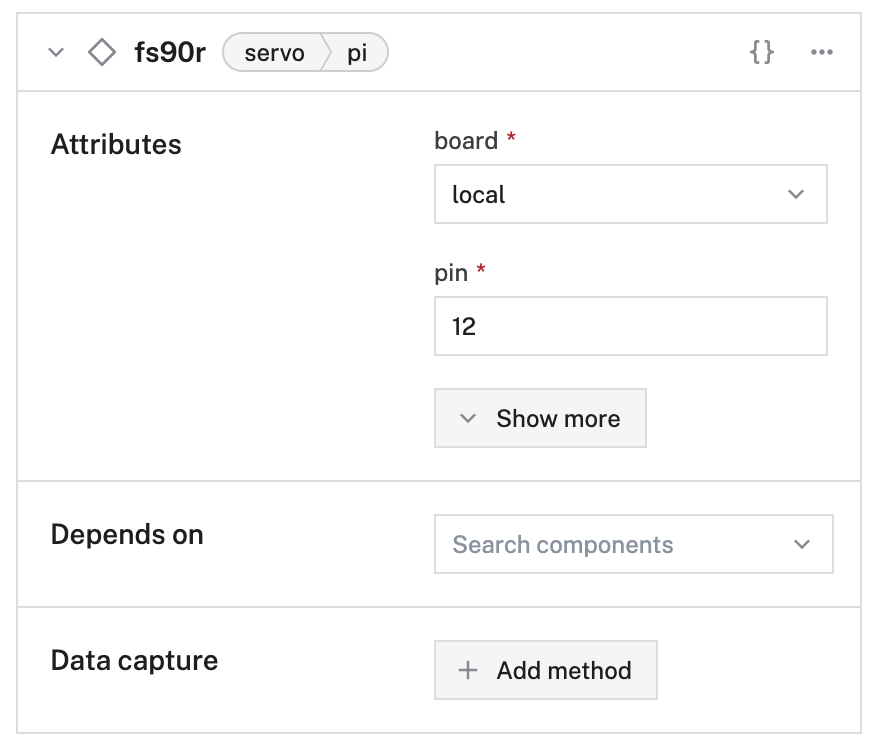
Enter fs90r as the name for your servo, then click Create.
After clicking Create you will see where you can put in attributes for the servo. This is where you tell Viam which hardware pin to use to control the servo.
- For "pin" use 12 - this is the pin you attached the PWM (Pulse Width Modulation) jumper wire to.
- For "board" use "local".
The attribute section will look like this:
Click the Save Config button.
Control the Servo in the Viam App

If everything went well, the servo started to move.
Navigate to the Control tab and press the STOP button on the servo card (matching what you named the servo) to stop the servo.
Click on the top of the servo card to open the servo controls.
Angle will determine what speed your servo goes and in what direction. 90 degrees is the midway point and is the stopping point. Try changing the angle to a few different settings.
Assembling the Mouse Mover
Now that you’ve confirmed that the software and hardware are connected and working correctly with Viam, let’s assemble the mouse mover.
Cut Holes in the Box for the Pi

Place the Raspberry Pi back in the box and mark where the USB-C plug is so that you know where it is on the outside of the box. Take out the Raspberry Pi. Grab a box cutter and cut out a power hole.
Be sure to tape the jumper wires out of the way of the servo.
Cut the Mouse Mover Circle Out of the Box and Tape to Servo

The technique we used to find the center of the circle was to mark the screw on the servo. Gently push on the box to get a mark on the inside of the box, then create a cut we could see from the other side.
Tape the Box Shut, Add “baby Gates”, and Plug in the Raspberry Pi

When taping the box shut be sure the servo with the circle cut out sits fairly flush to the top of the box. Add “baby gates” or rails to keep the mouse from wandering off if it catches some friction.
Control Your Robot With Code
Copy the code from the mousemover GitHub repository into your nano file, replace the secret with your own (found on the Code Sample tab) save it, then run it.
The code uses the Python SDK to securely connect to your robot through Viam app. Then, it enters a for loop in which position tells us the servo to move to positions (angles) between 80 and 93 degrees as specified in the sequence list. The code uses pause_time to wait for a random amount of time between 5 and 20 seconds to stay at that position.
You can adjust the range (or speed/direction) by changing the two numbers in the position statement. (Currently set at 80 and 93). You can also change the time that the servo is allowed to spin in any direction by changing the two numbers in the pause_time statement. (Currently set at 5 and 20).
Experiment and have fun!