DIY 3D Printed Pill Dispenser
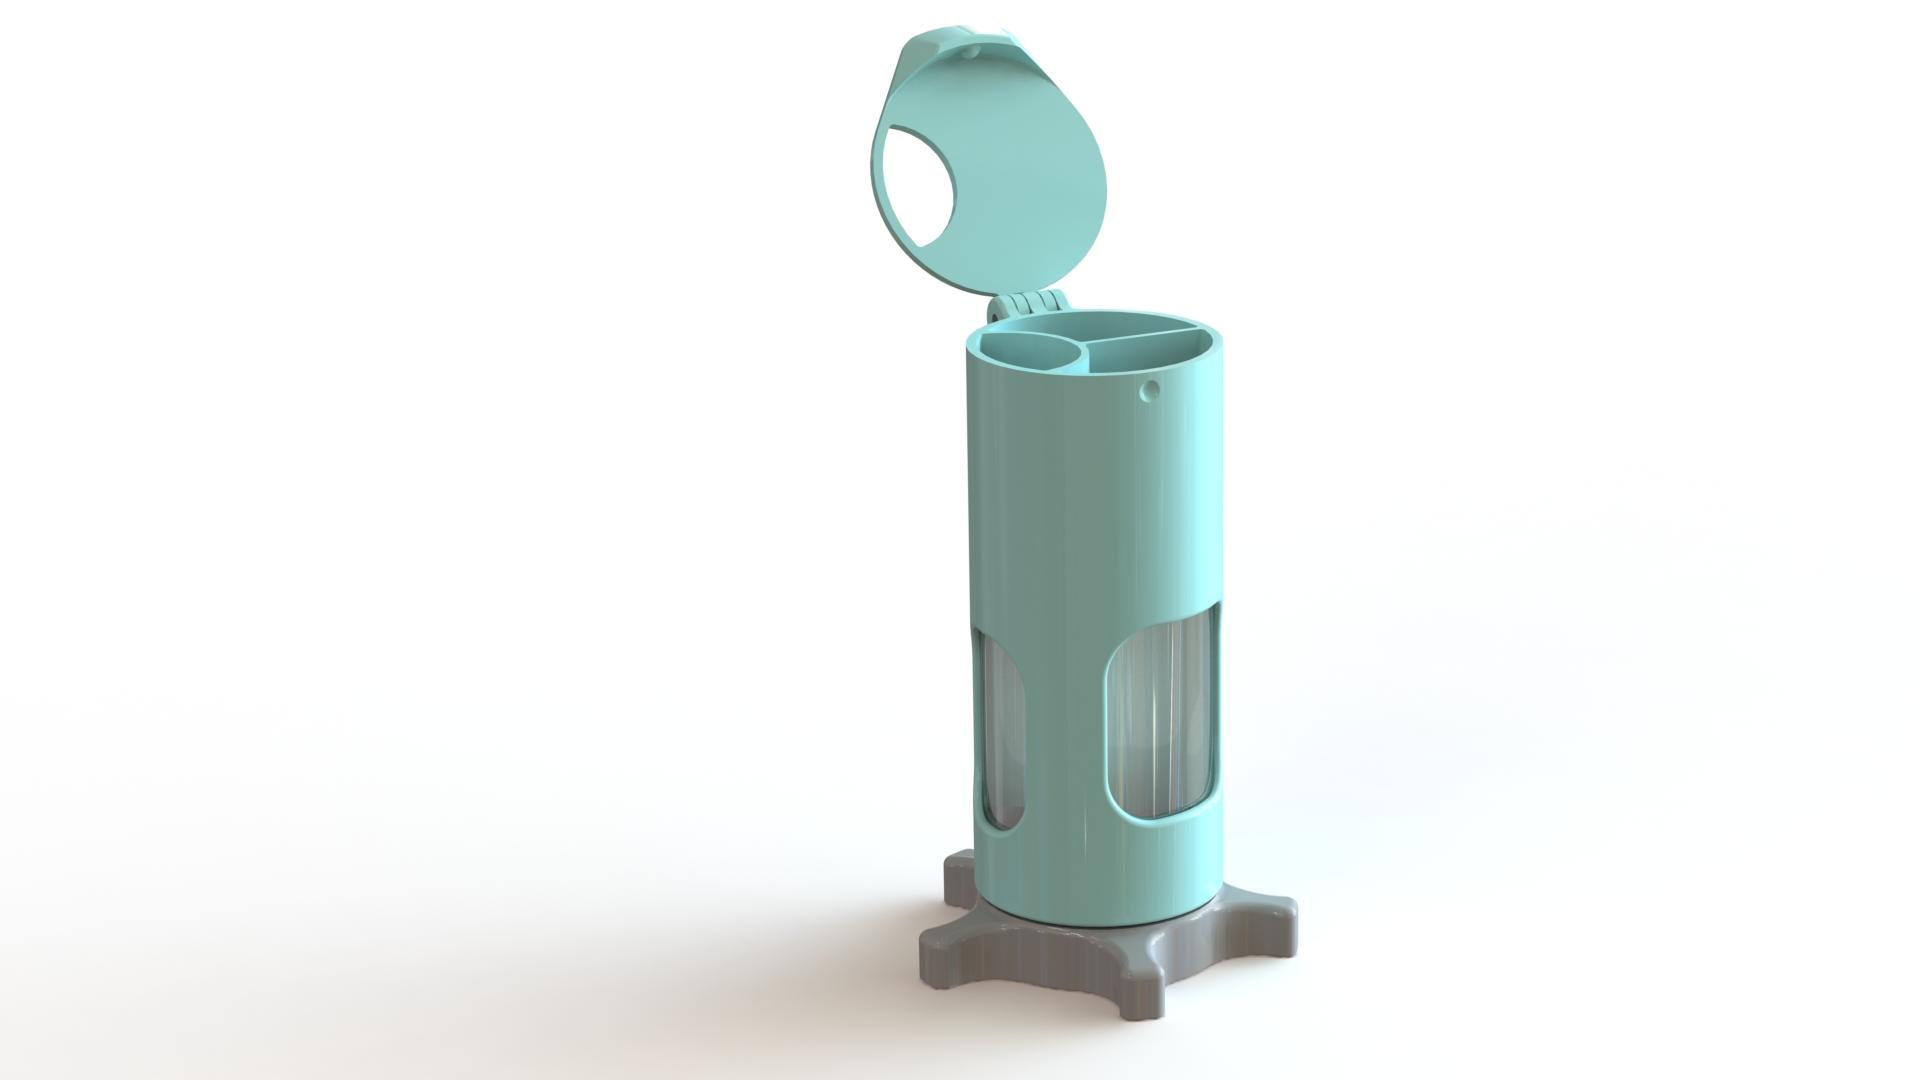
A low-tech device that enables users with non-progressive hand or arm disabilities to retrieve their medications and maneuver them to their mouths with fewer steps, time and effort for a greater sense of independence
Our Sponsor: The Shepherd Center – Rehabilitation Hospital specializing in Neuromuscular Injuries
Supplies
You will need:
- Access to a 3D Printer
- Access to a Regular Printer (Not required)
- Clear Flexible Plastic Sheet
- Hobby Stick Glue
- A Hobby Knife
- Sandpaper
- Wire, paperclip, etc (Will be used for securing the hinge)
- Food Safe Filament
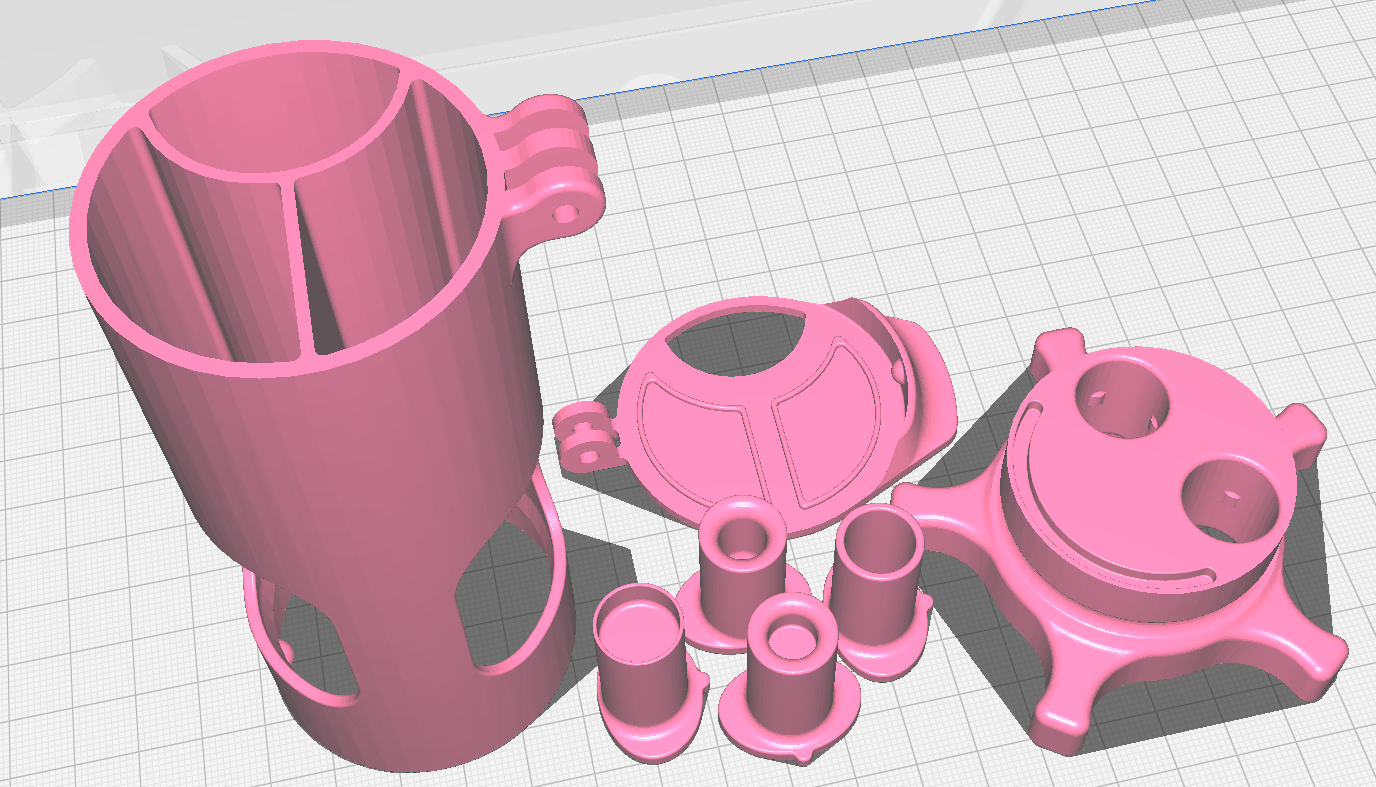
Identify the Files and Parts Needed
- 1 x Lid
- 1 x Cylindrical Body
- 1 x Bottom Twist Part
- 4 x Pill Size Inserts
3D Printing Software
The printer used was an Ultimaker S5 and the slicing software was Ultimaker Cura 4.13.0 for demonstration purposes. Any 3D slicing software will work as long as it is compatible with the printer being used
Choosing the Correct Filament
*Please be aware that not properly cleaning and flushing non-food safe filament from the 3-D printer beforehand can cause parts of the model to not be food safe. Seeing as this is for medical use, it is pertinent that you clear all non-food safe filament from the printer and the nozzle before making this product*
PETG is recommended as the filament for this product
Setting Up the 3D Printer
- Optional: Add glue to the glass build plate to help the model stick and removal easier
- Select the correct printer and filament
- Insert the files into the workspace and place them accordingly (an optional orientation is pictured above)
- Make sure the button to add supports is checked
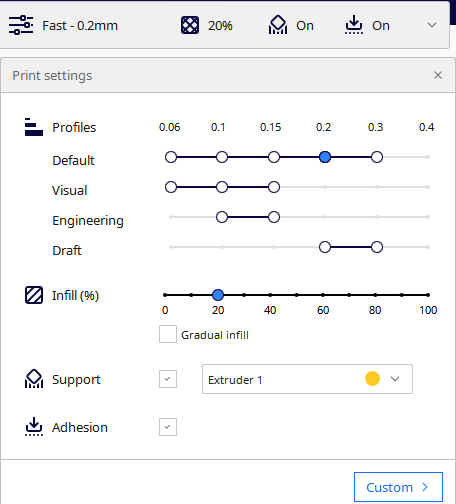
- Pictures of the recommended settings has been included
- changing the tolerance could result in a cleaner print with a longer print time
- we found that leaving it at 0.2 was sufficient
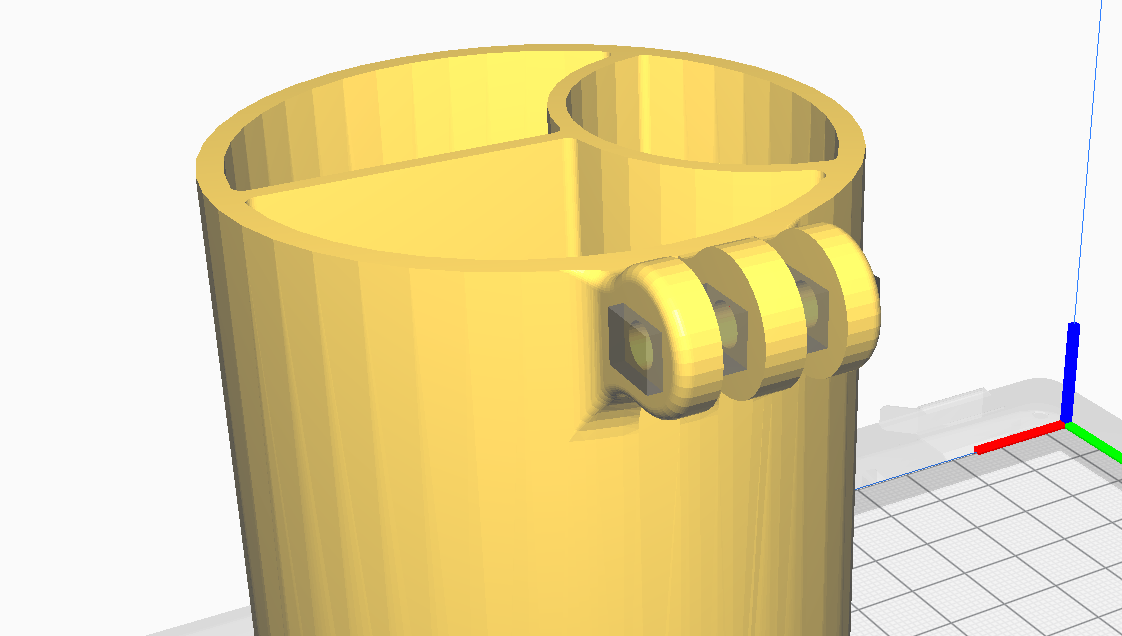
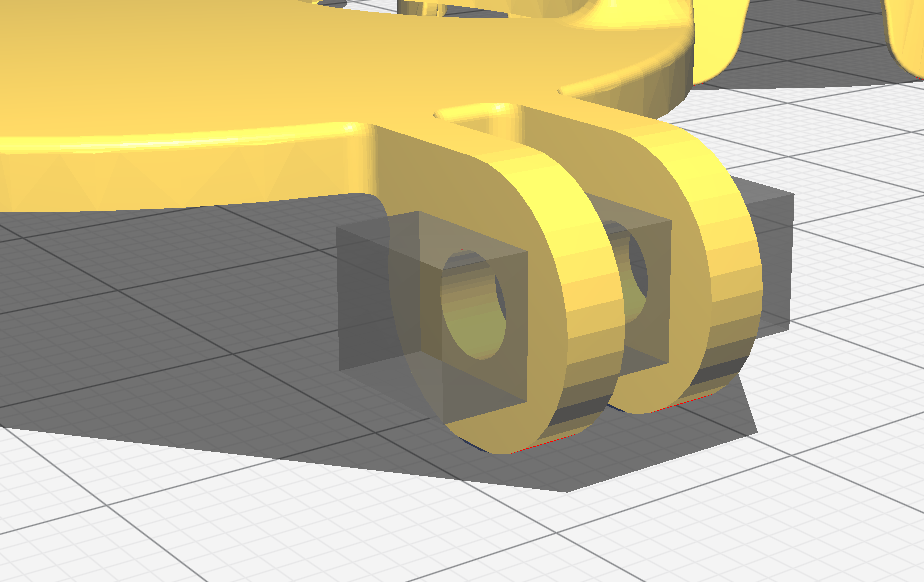
- We found that it would be beneficial to add support blockers in two places, the hinge on the lid and on the main body. (Dimensions used were 5mm x 5mm x 20mm) Make sure that all holes are covered
- Once everything is as you would like it, slice the models and print
RECOMMENDATIONS: We recommend printing the lid separately with a lower tolerance (.1) to have a cleaner print. We also recommend using water soluble filament for the supports to make for a quicker and easier cleanup.
Cut Out the Window Inserts
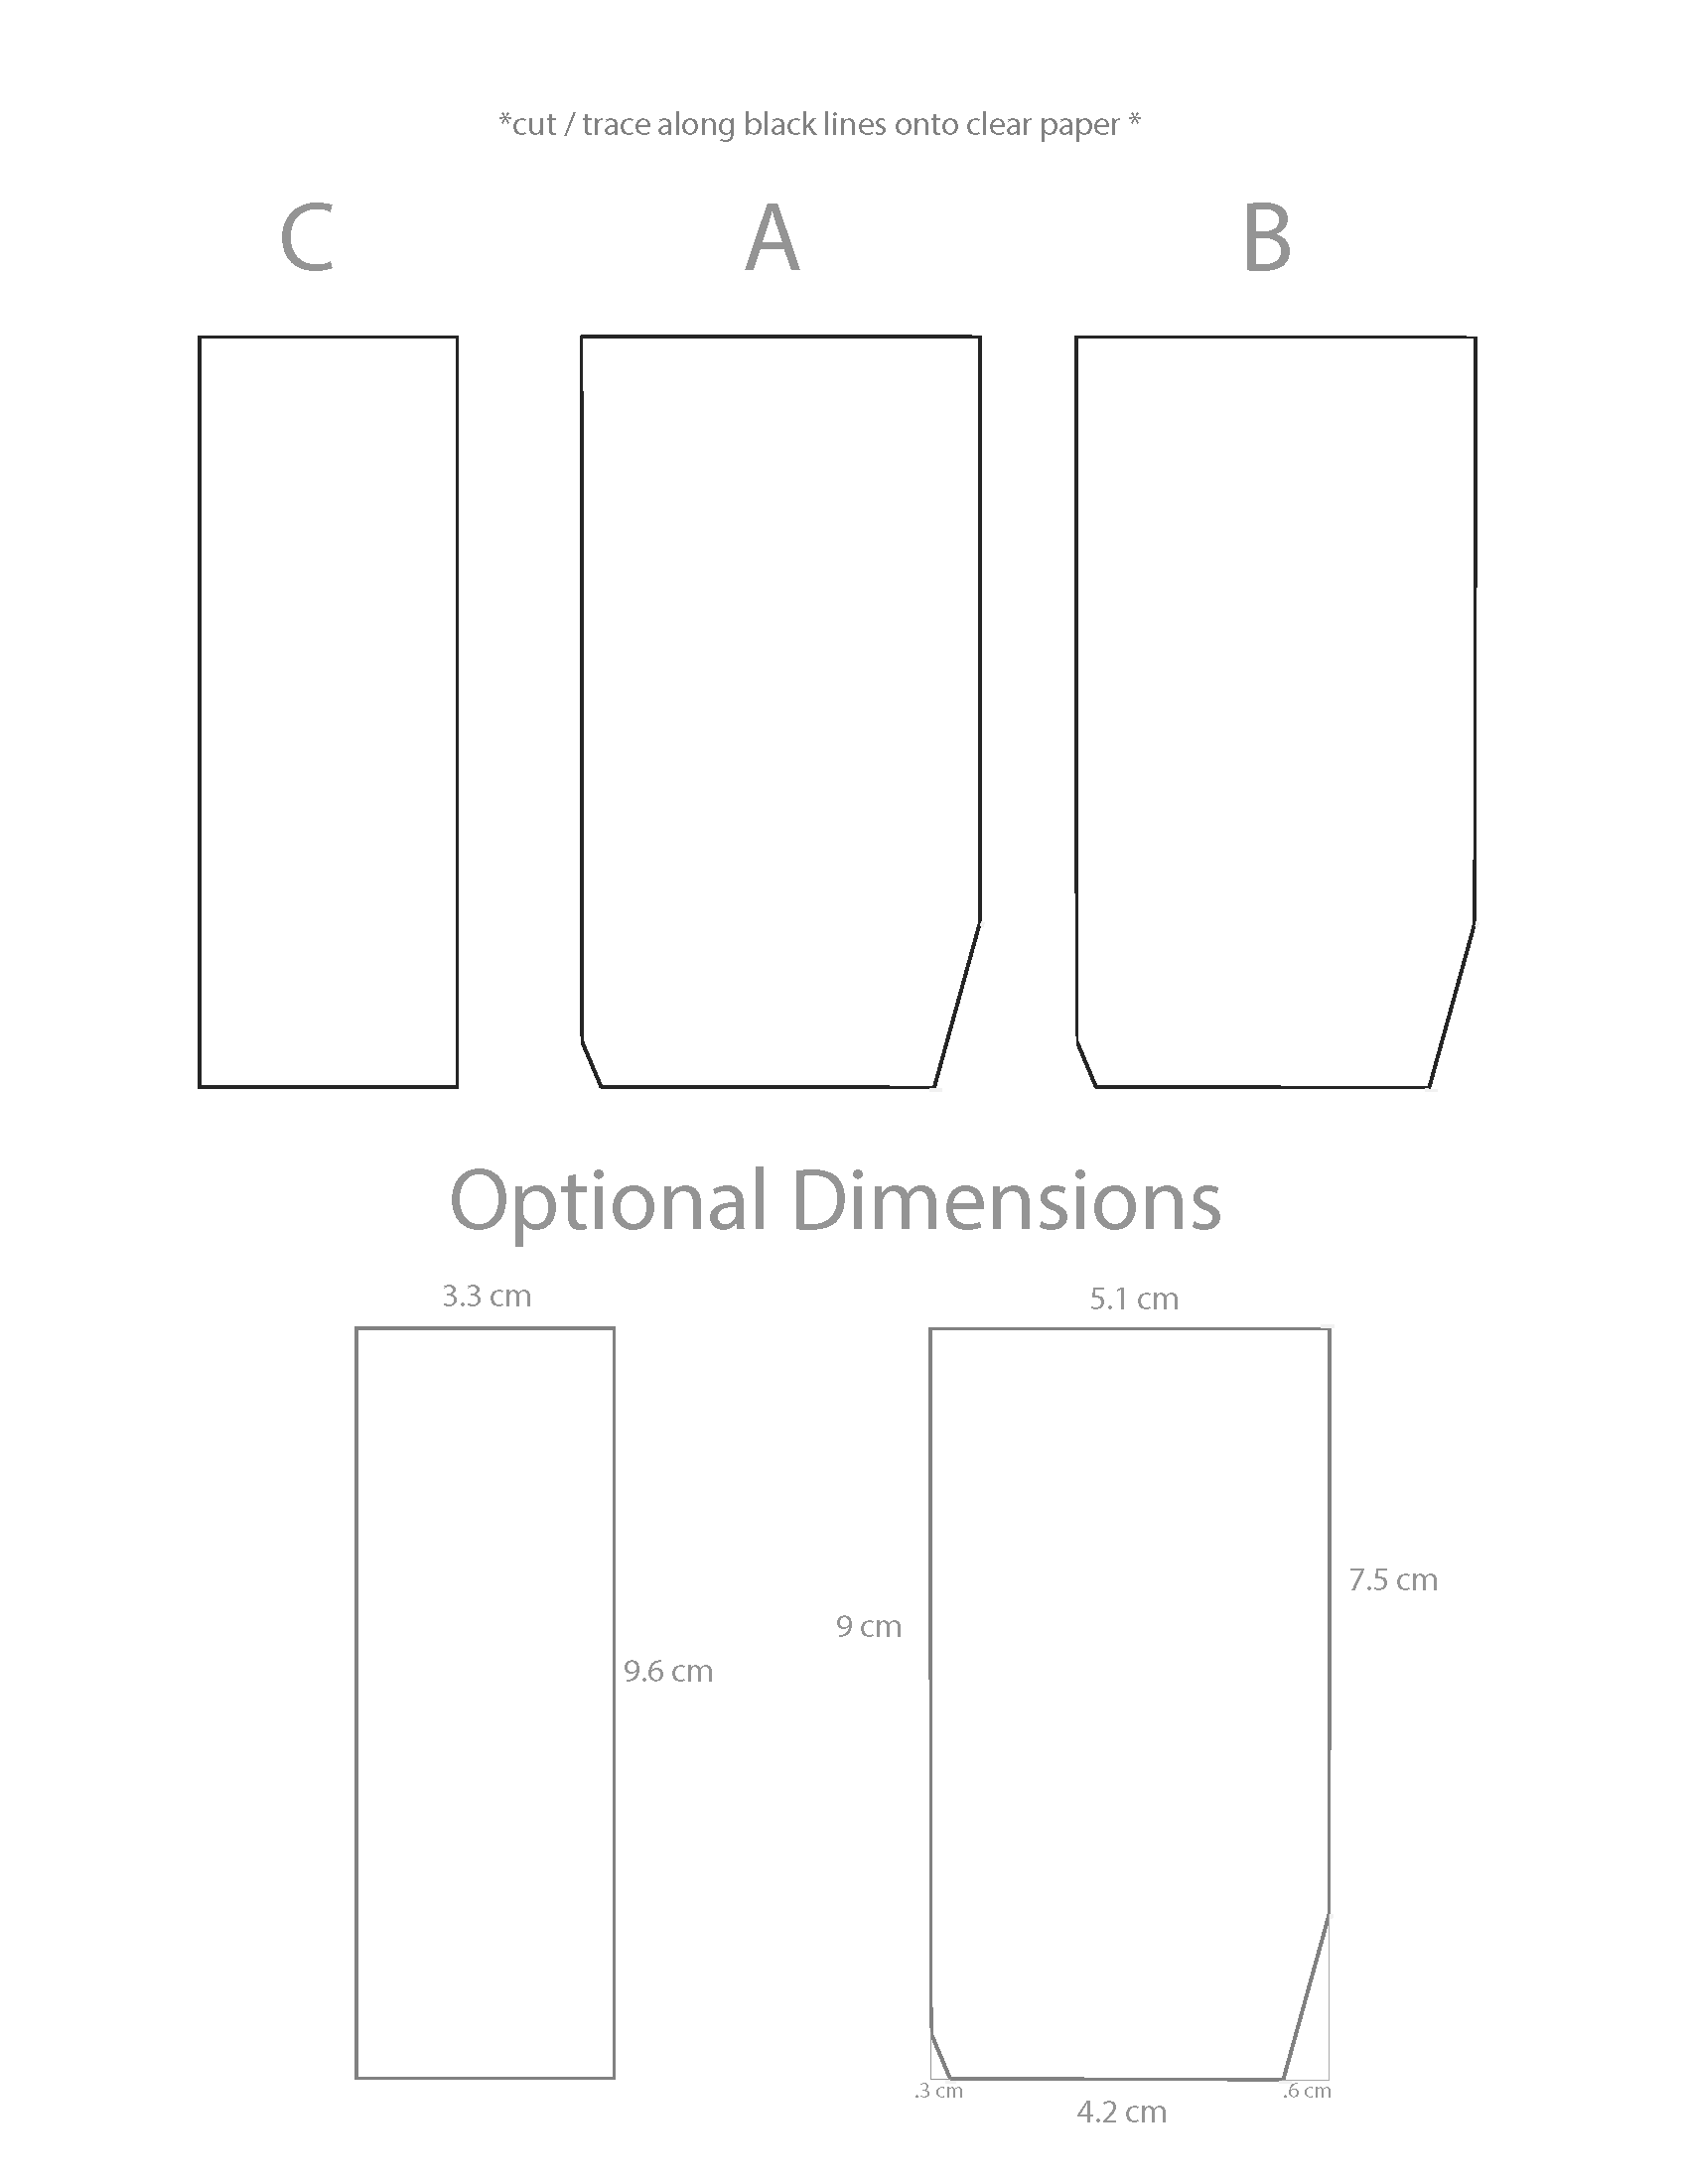
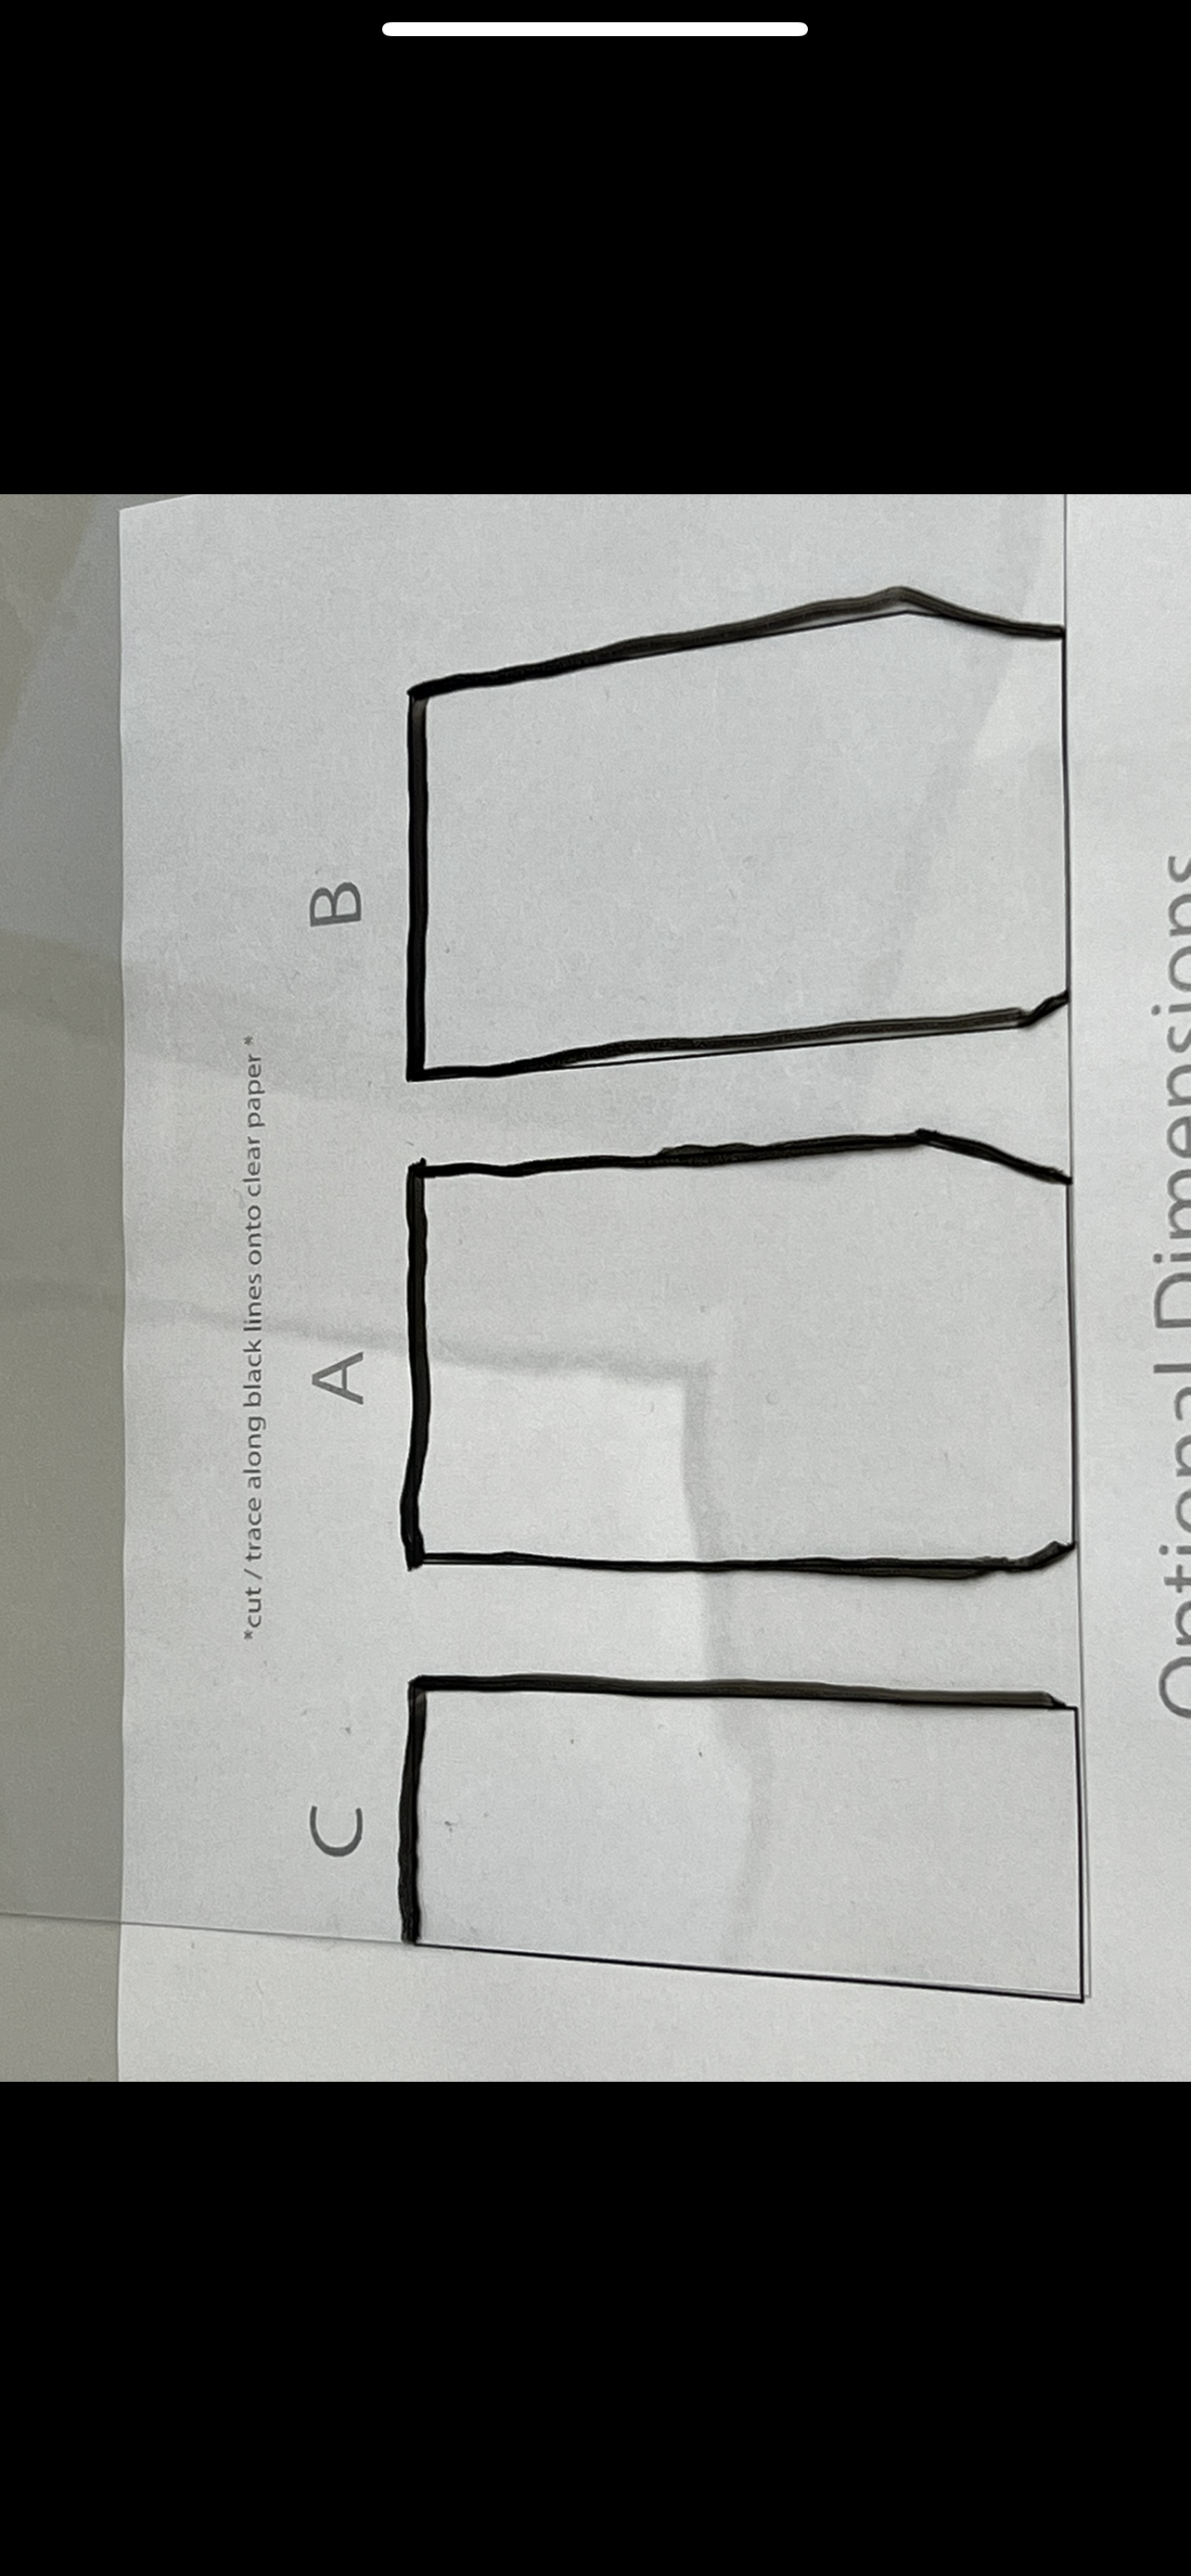
- Using a regular printer, print out the template to use it as a stencil
- Use the stencil to trace along the clear flexible plastic sheet (dry erase marker works best)
- Cut out along the black edges
Downloads
Assembly

- Retrieve all of your parts from the 3D printer. Depending on the quality of the print and the material used there could be more or less clean up needed before assembly can begin
- Use the hobby knife to disconnect the supports from the model, be very careful as to not break some of the more fragile pieces such as the hinge connections and lid
- Next use the sandpaper to clean up the edges of the print wherever needed to create a smooth surface for use and connection
- Next you will determine which pill sizes you would like to use (a choice of 2) and you will choose the accompanying inserts and insert them into the base piece until no pieces are sticking out and it is smooth along the surface of the base. (You will be able to switch these out later if needed)
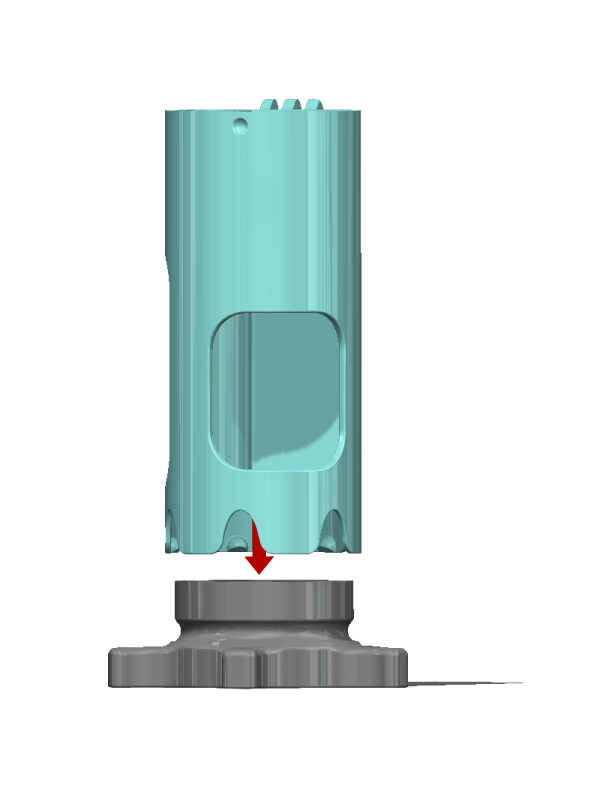
- Attach the cylinder to the base
- Insert the window inserts into each channel (A&B will go into the larger inserts, C will go into the smaller insert)
- Take the middle cylinder piece and attach the lid by inserting the hinge joints between each other. Then take the paper clip or wire to secure that connection
- Once you have done that, assembly is complete
Using the Pill Dispenser
- Fill the channels with the size pills that match the inserts you chose
- Close the lid and turn the bottom (It only rotates less that 180 degrees to not mix the pills)
- Dump the singular pill into your hand through the valve on the lid
Acknowledgements
We thank the Craig H. Neilsen Foundation for providing support for this project.